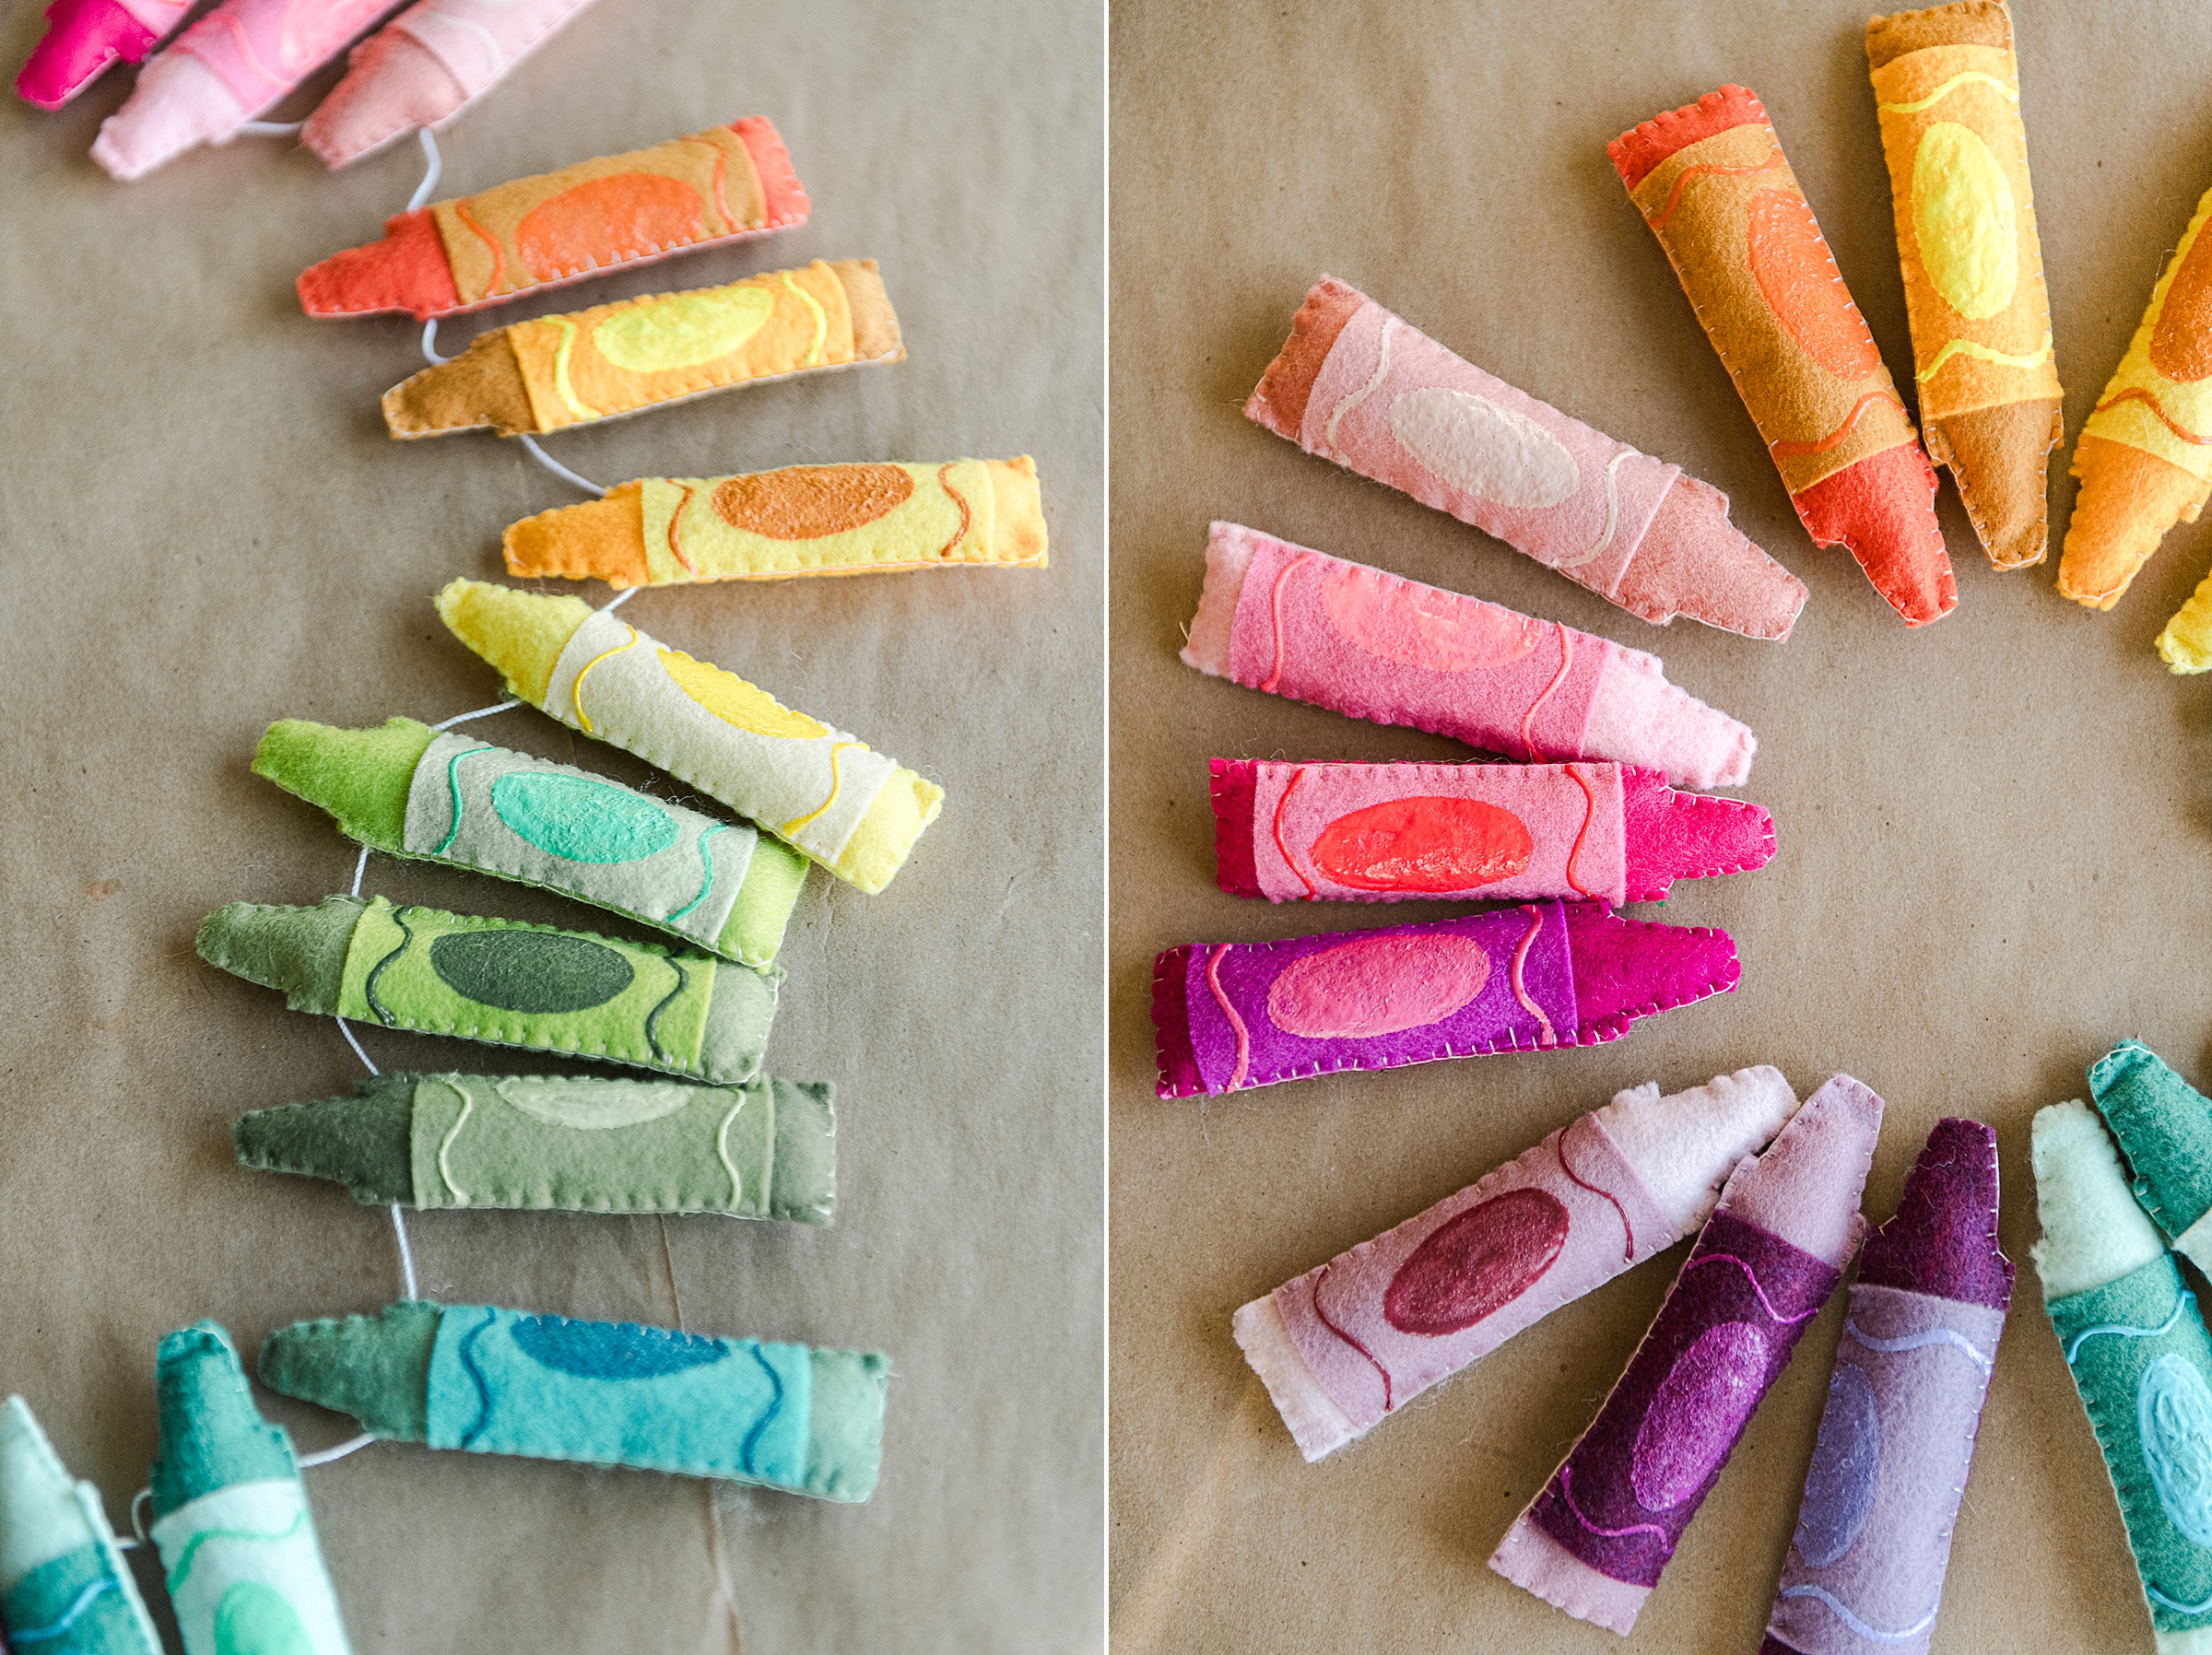
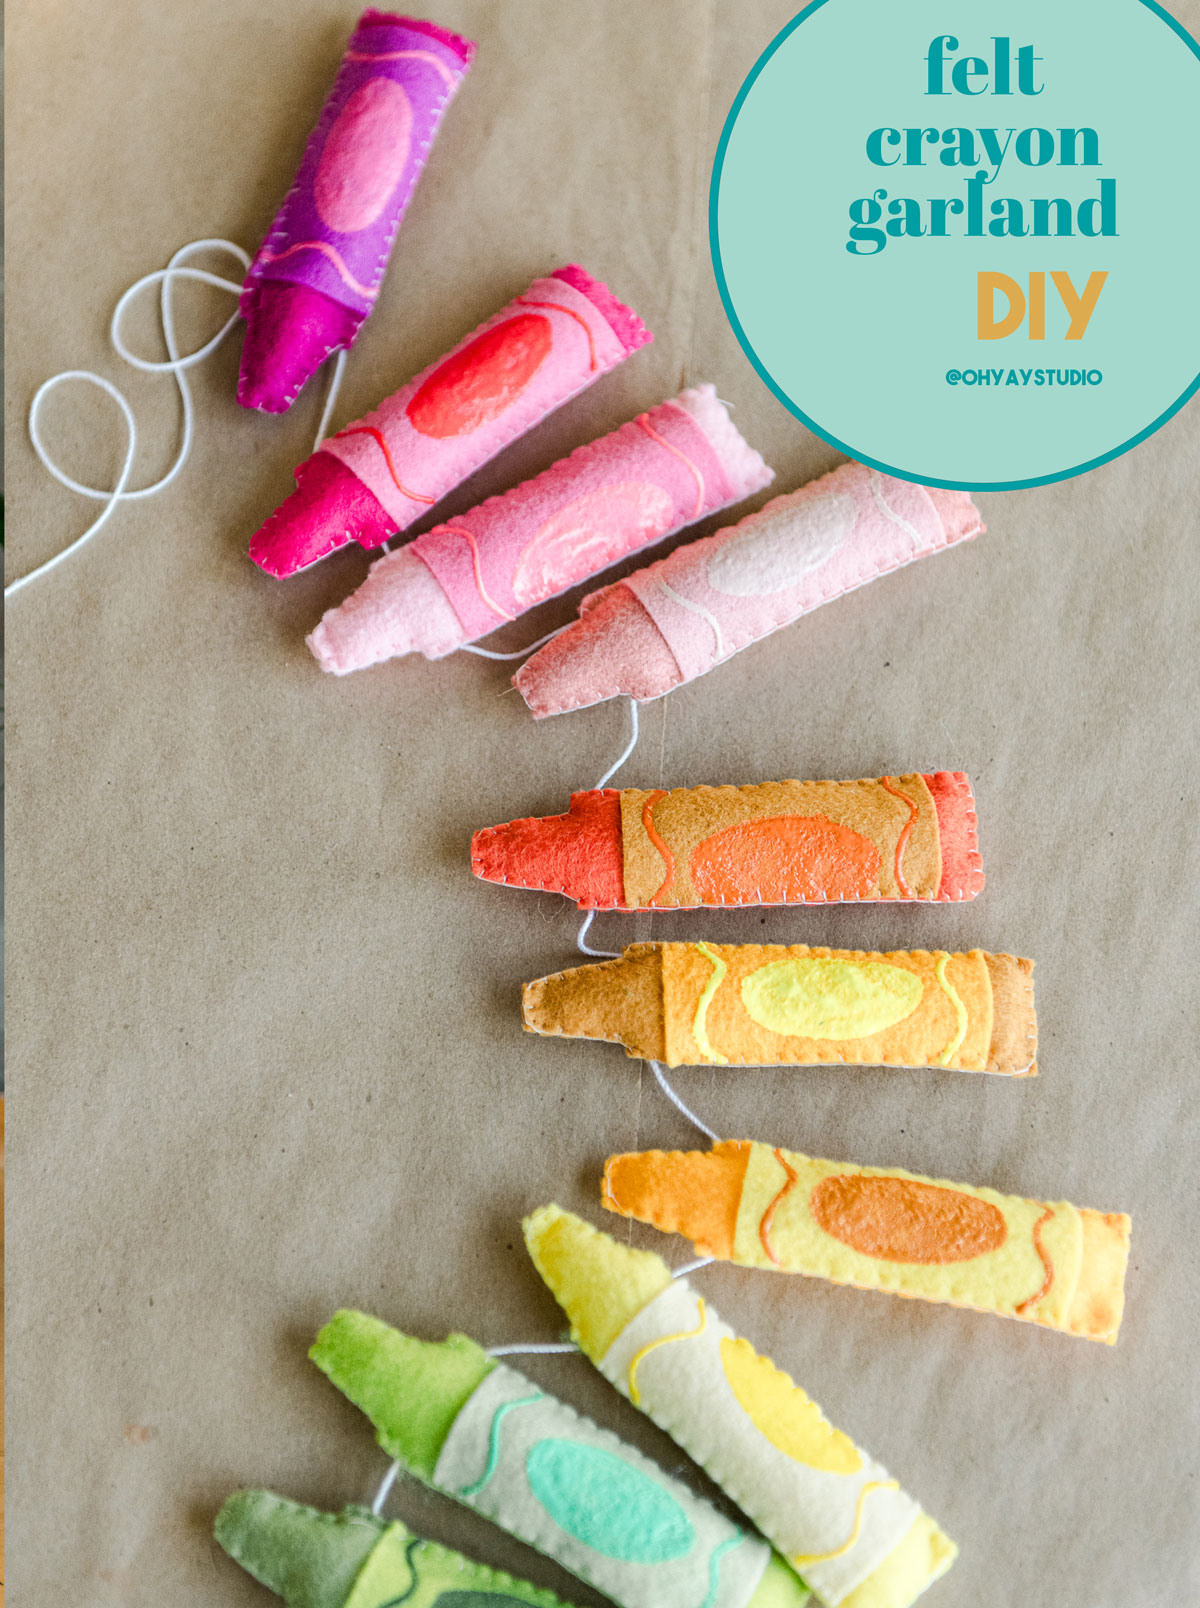
Colorful crayon felt garland DIY
I had a goal to make a felt project with EVERY SINGLE color of felt that was at Michaels! SO I DID! Ha!
A colorful crayon SOMETHING just *had* to be made so of course a garland AND a crayon crown were in order! DUH! 🙂 So grab the PDF, along with instructions below, and have some colorful fun stitching up some CRAYONS! 🙂
MATERIALS:
- Felt in your fave colors (look for the squares or rectangles at your local Michaels for some amazing colors)
- Sharp scissors
- PDF pattern (download HERE)
- An array of your favorite Tulip fabric paints (I had a stash that was PERFECT for this project)
- optional bottle of Aleene’s Felt Tacky Glue
- Some stuffing or Poly-fil
- A needle and thread for stitching
- A string for your garland
- And to make the crayon crown, I used a plastic headband form and a bit of fabric to cover the headband along with some hot glue

INSTRUCTIONS:
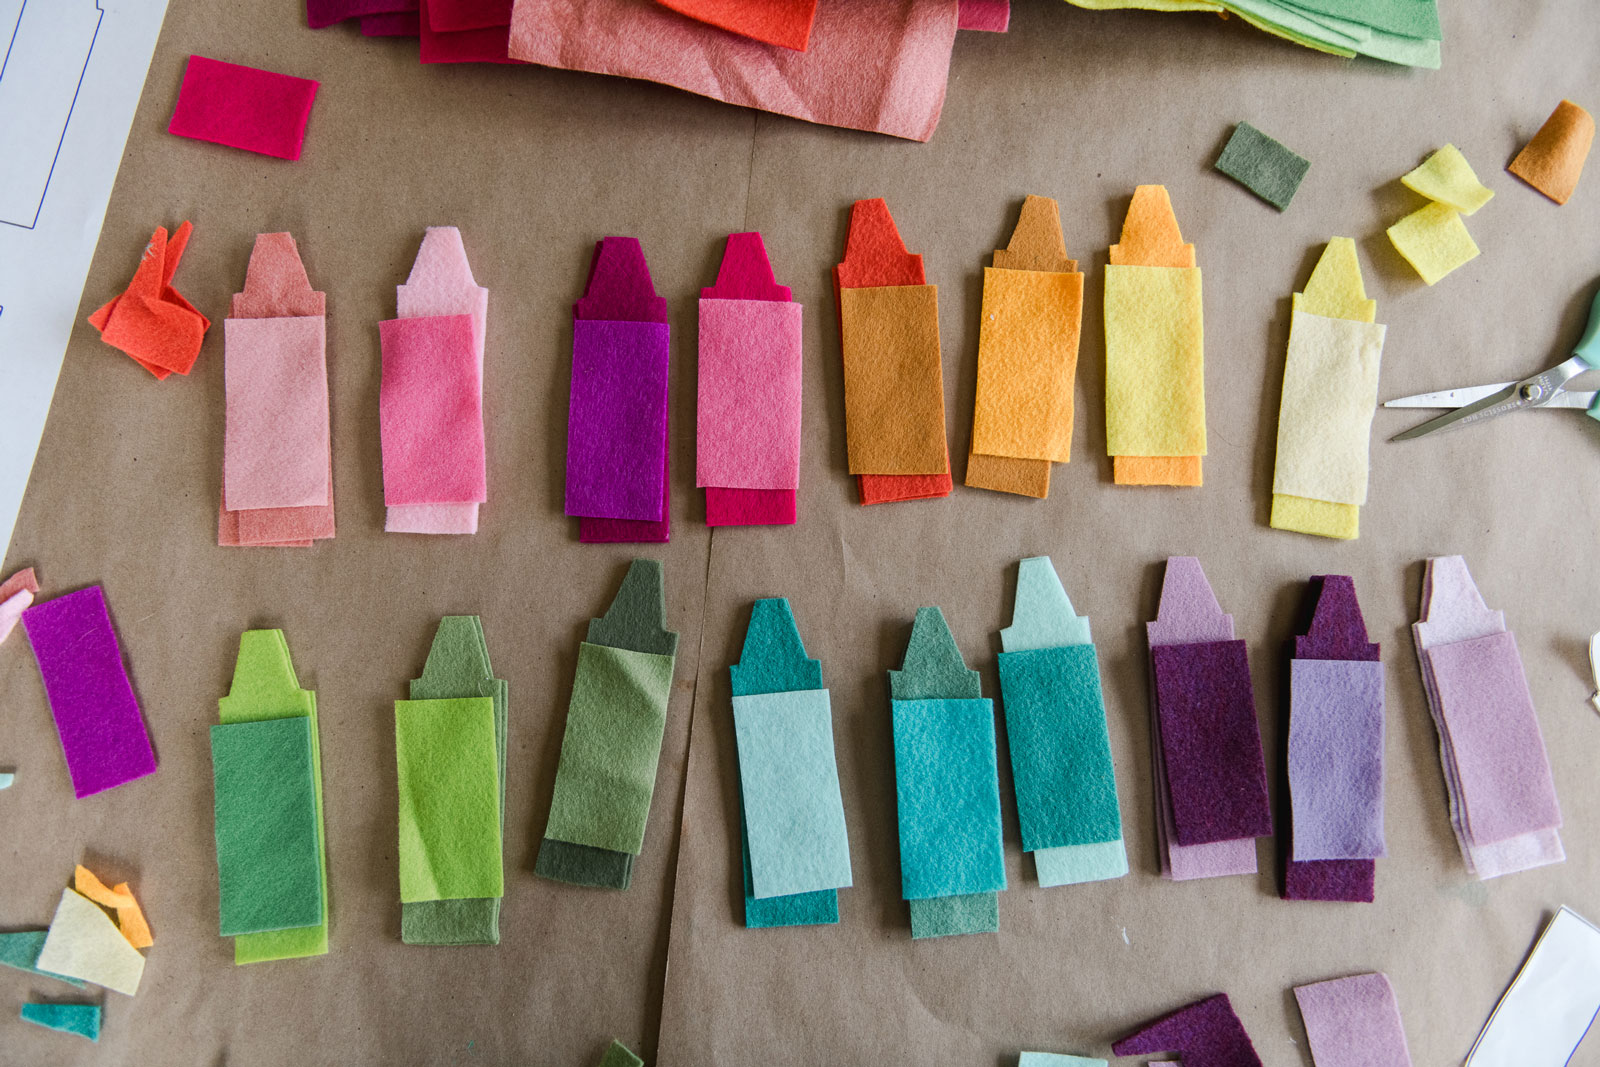
1. Take a happy trip to the store or your craft room (a yummy beverage is always encouraged for this part) and shop for your colors of felt 🙂 I always raid my stash first (because, ahem…..I have MUCHO) and then head to the store for additional colors that I wanted to fill some spots! 🙂
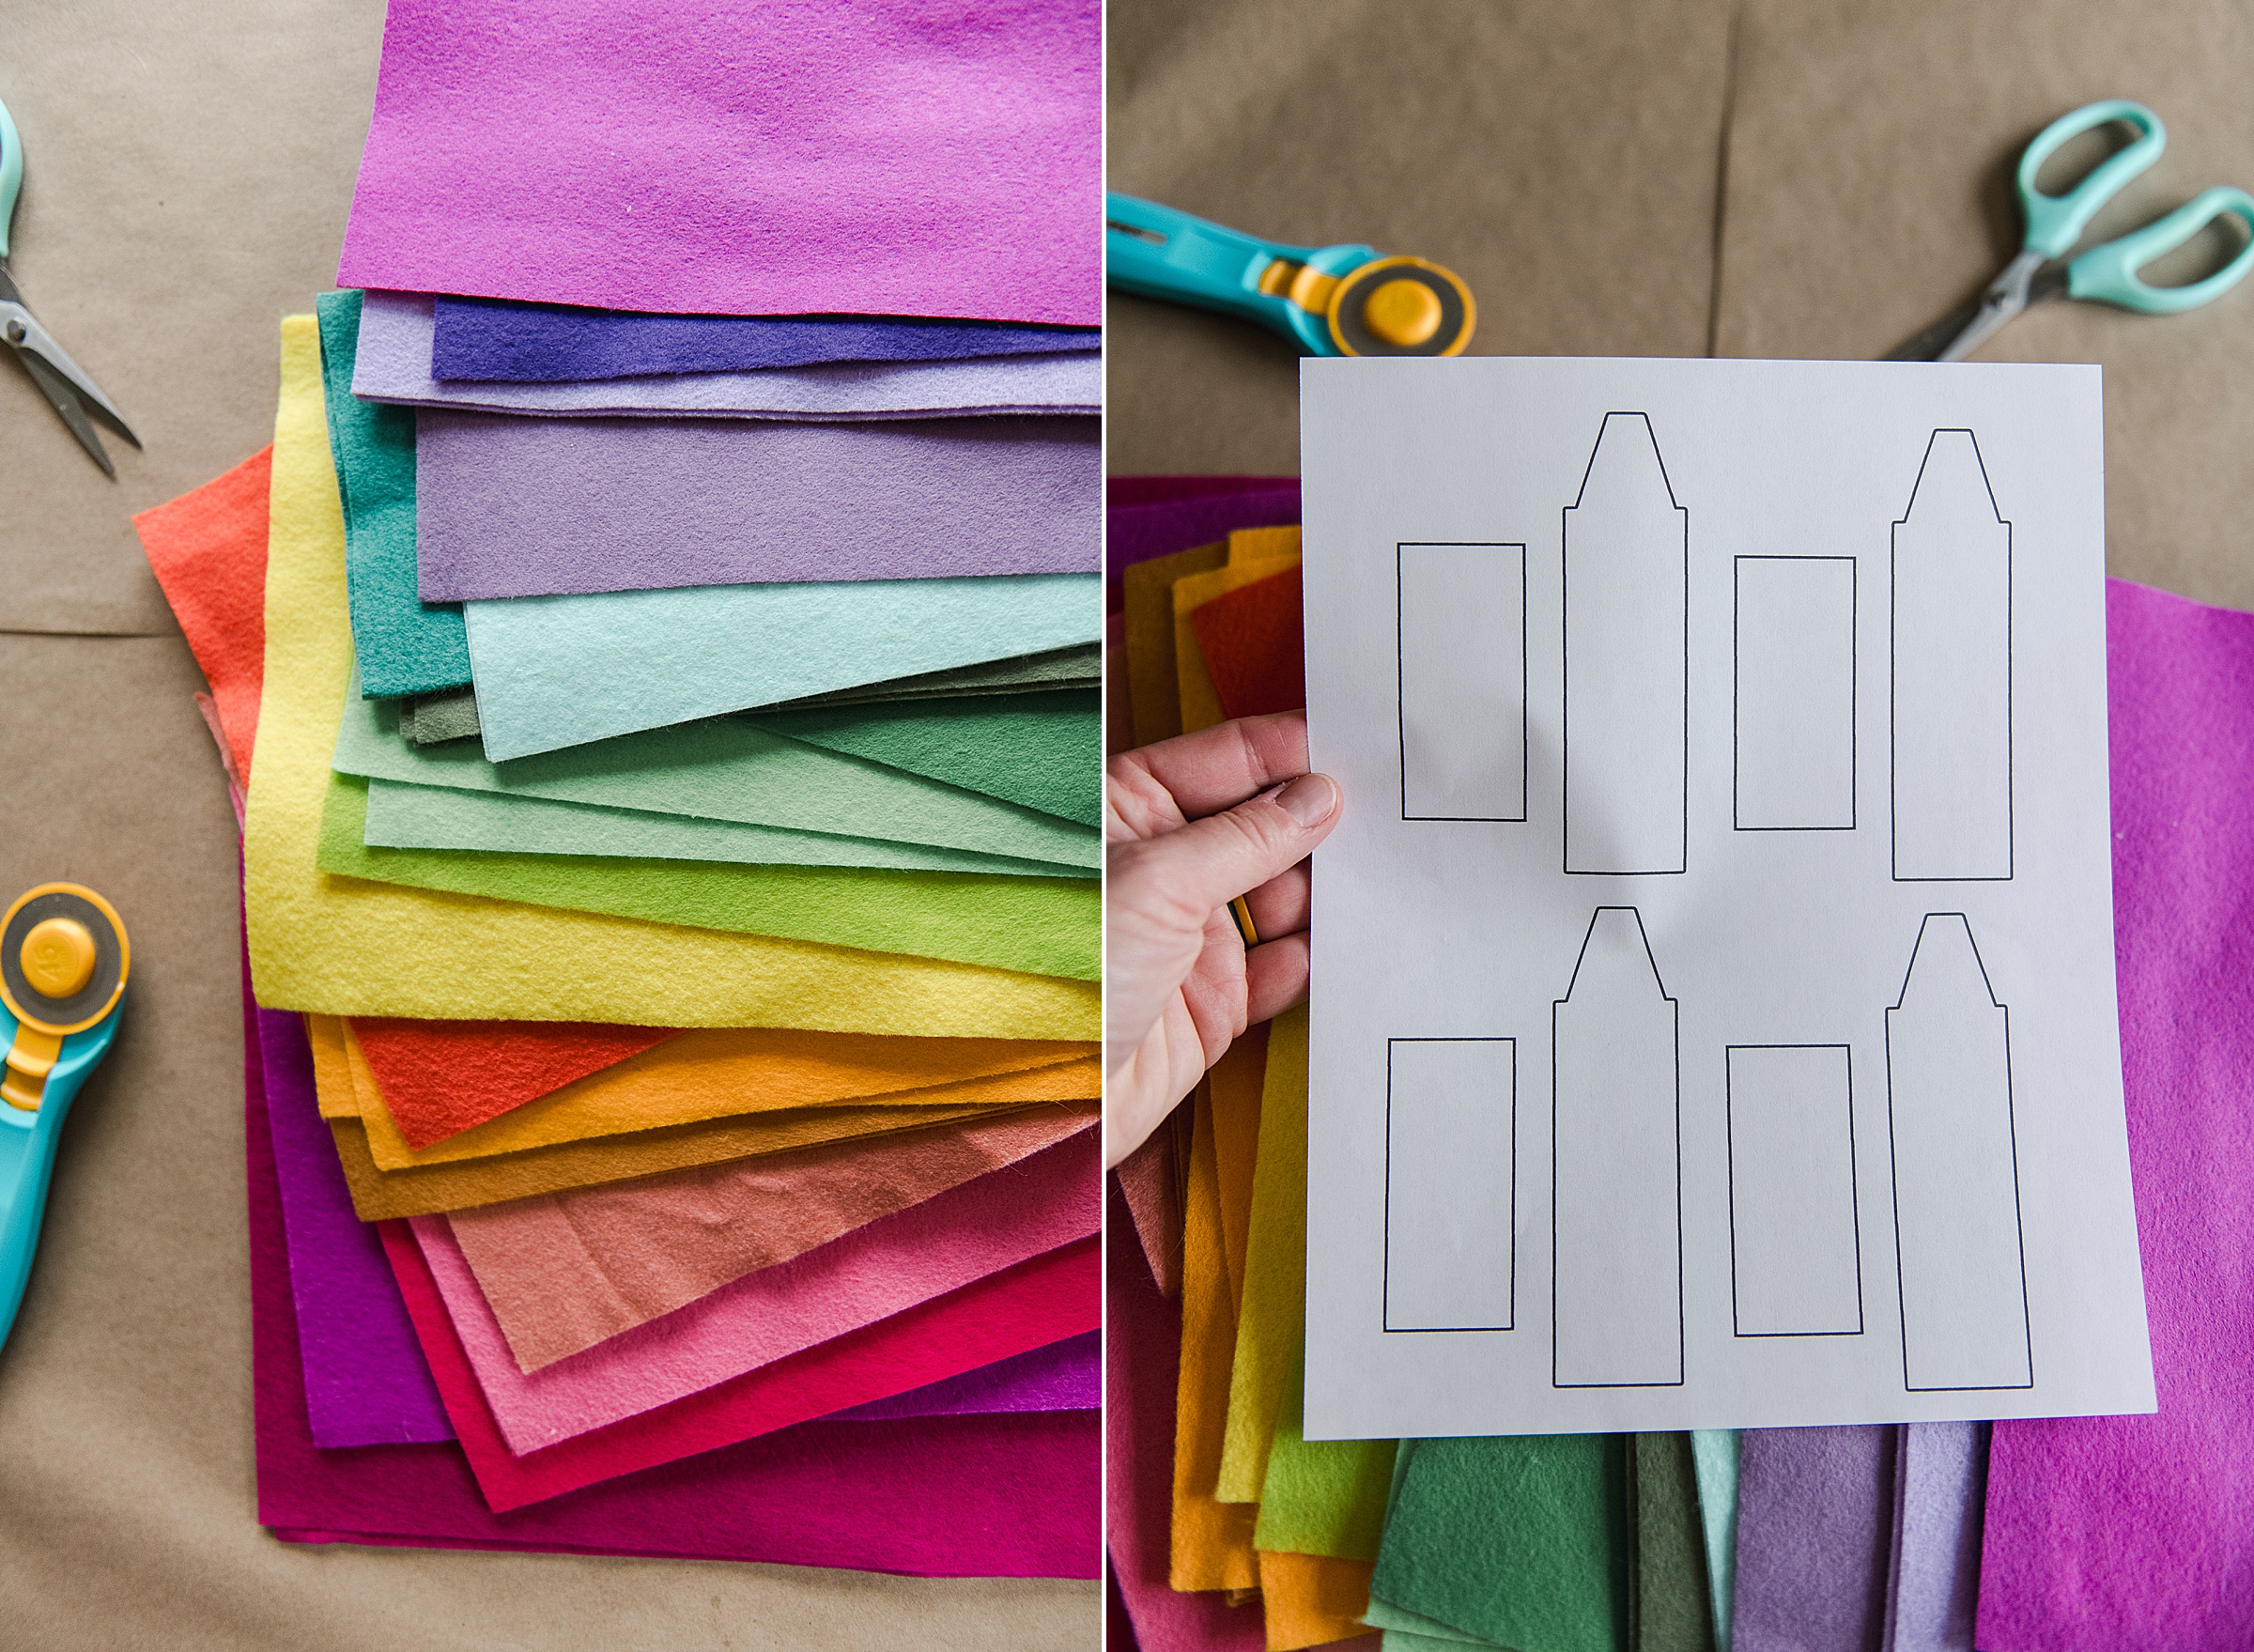
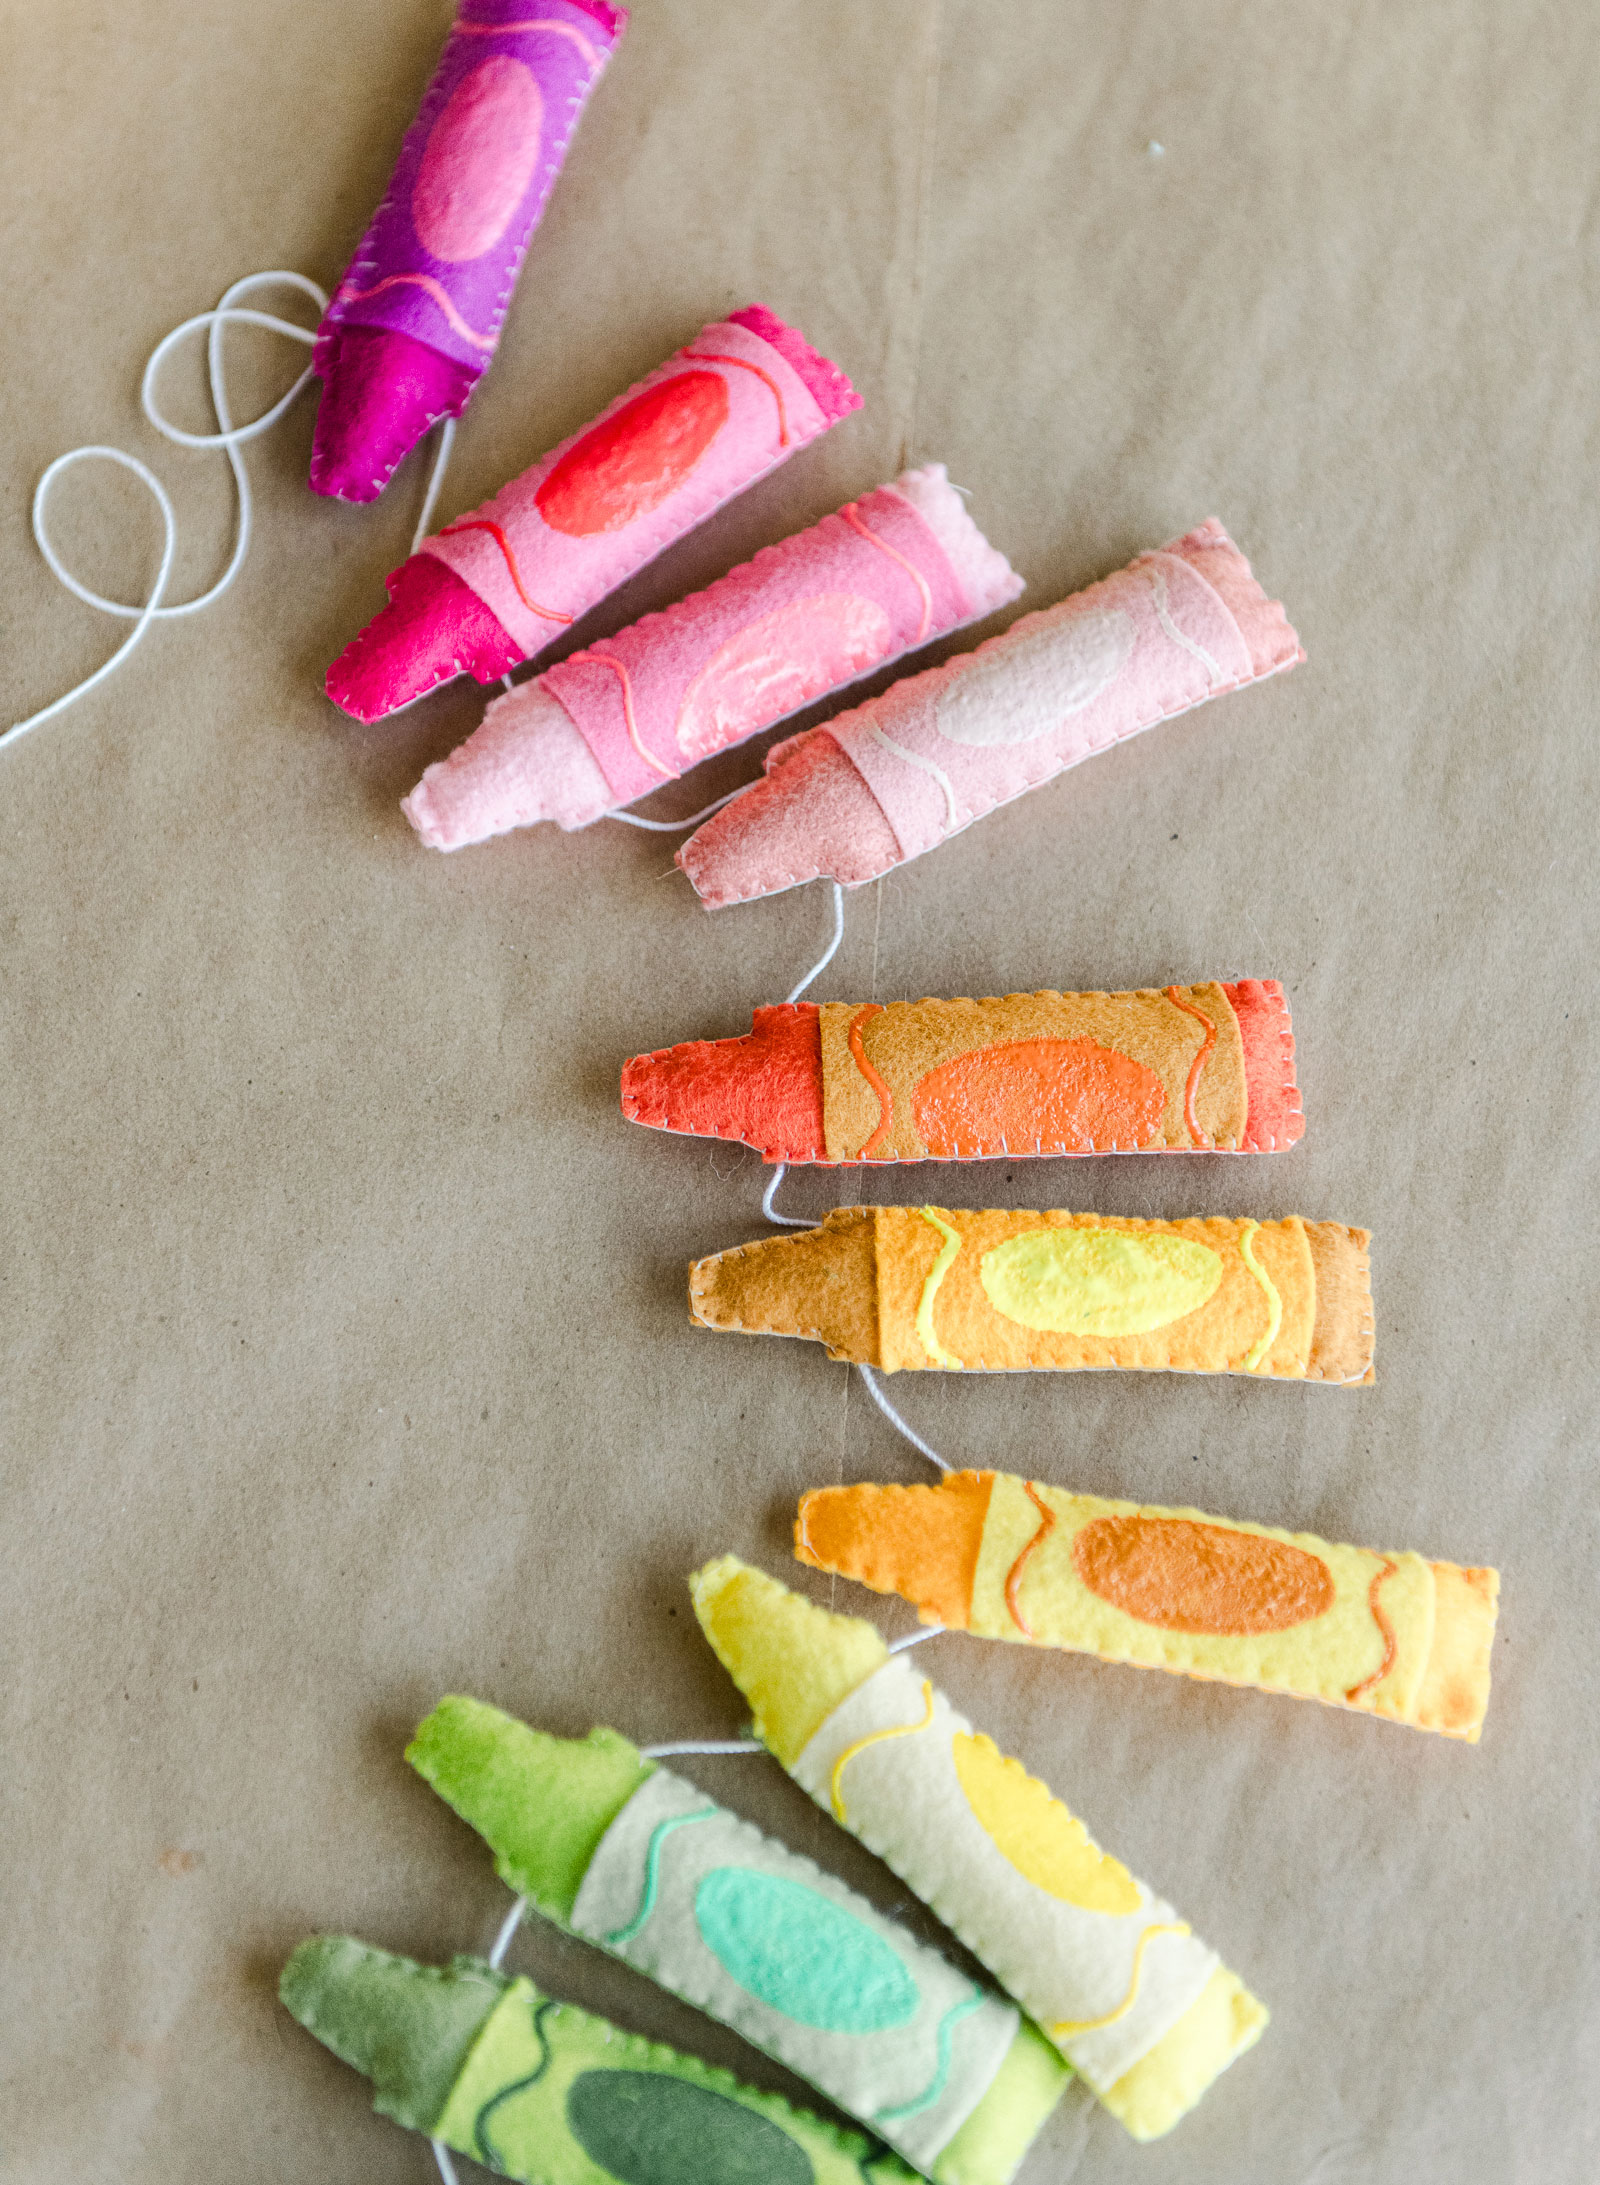
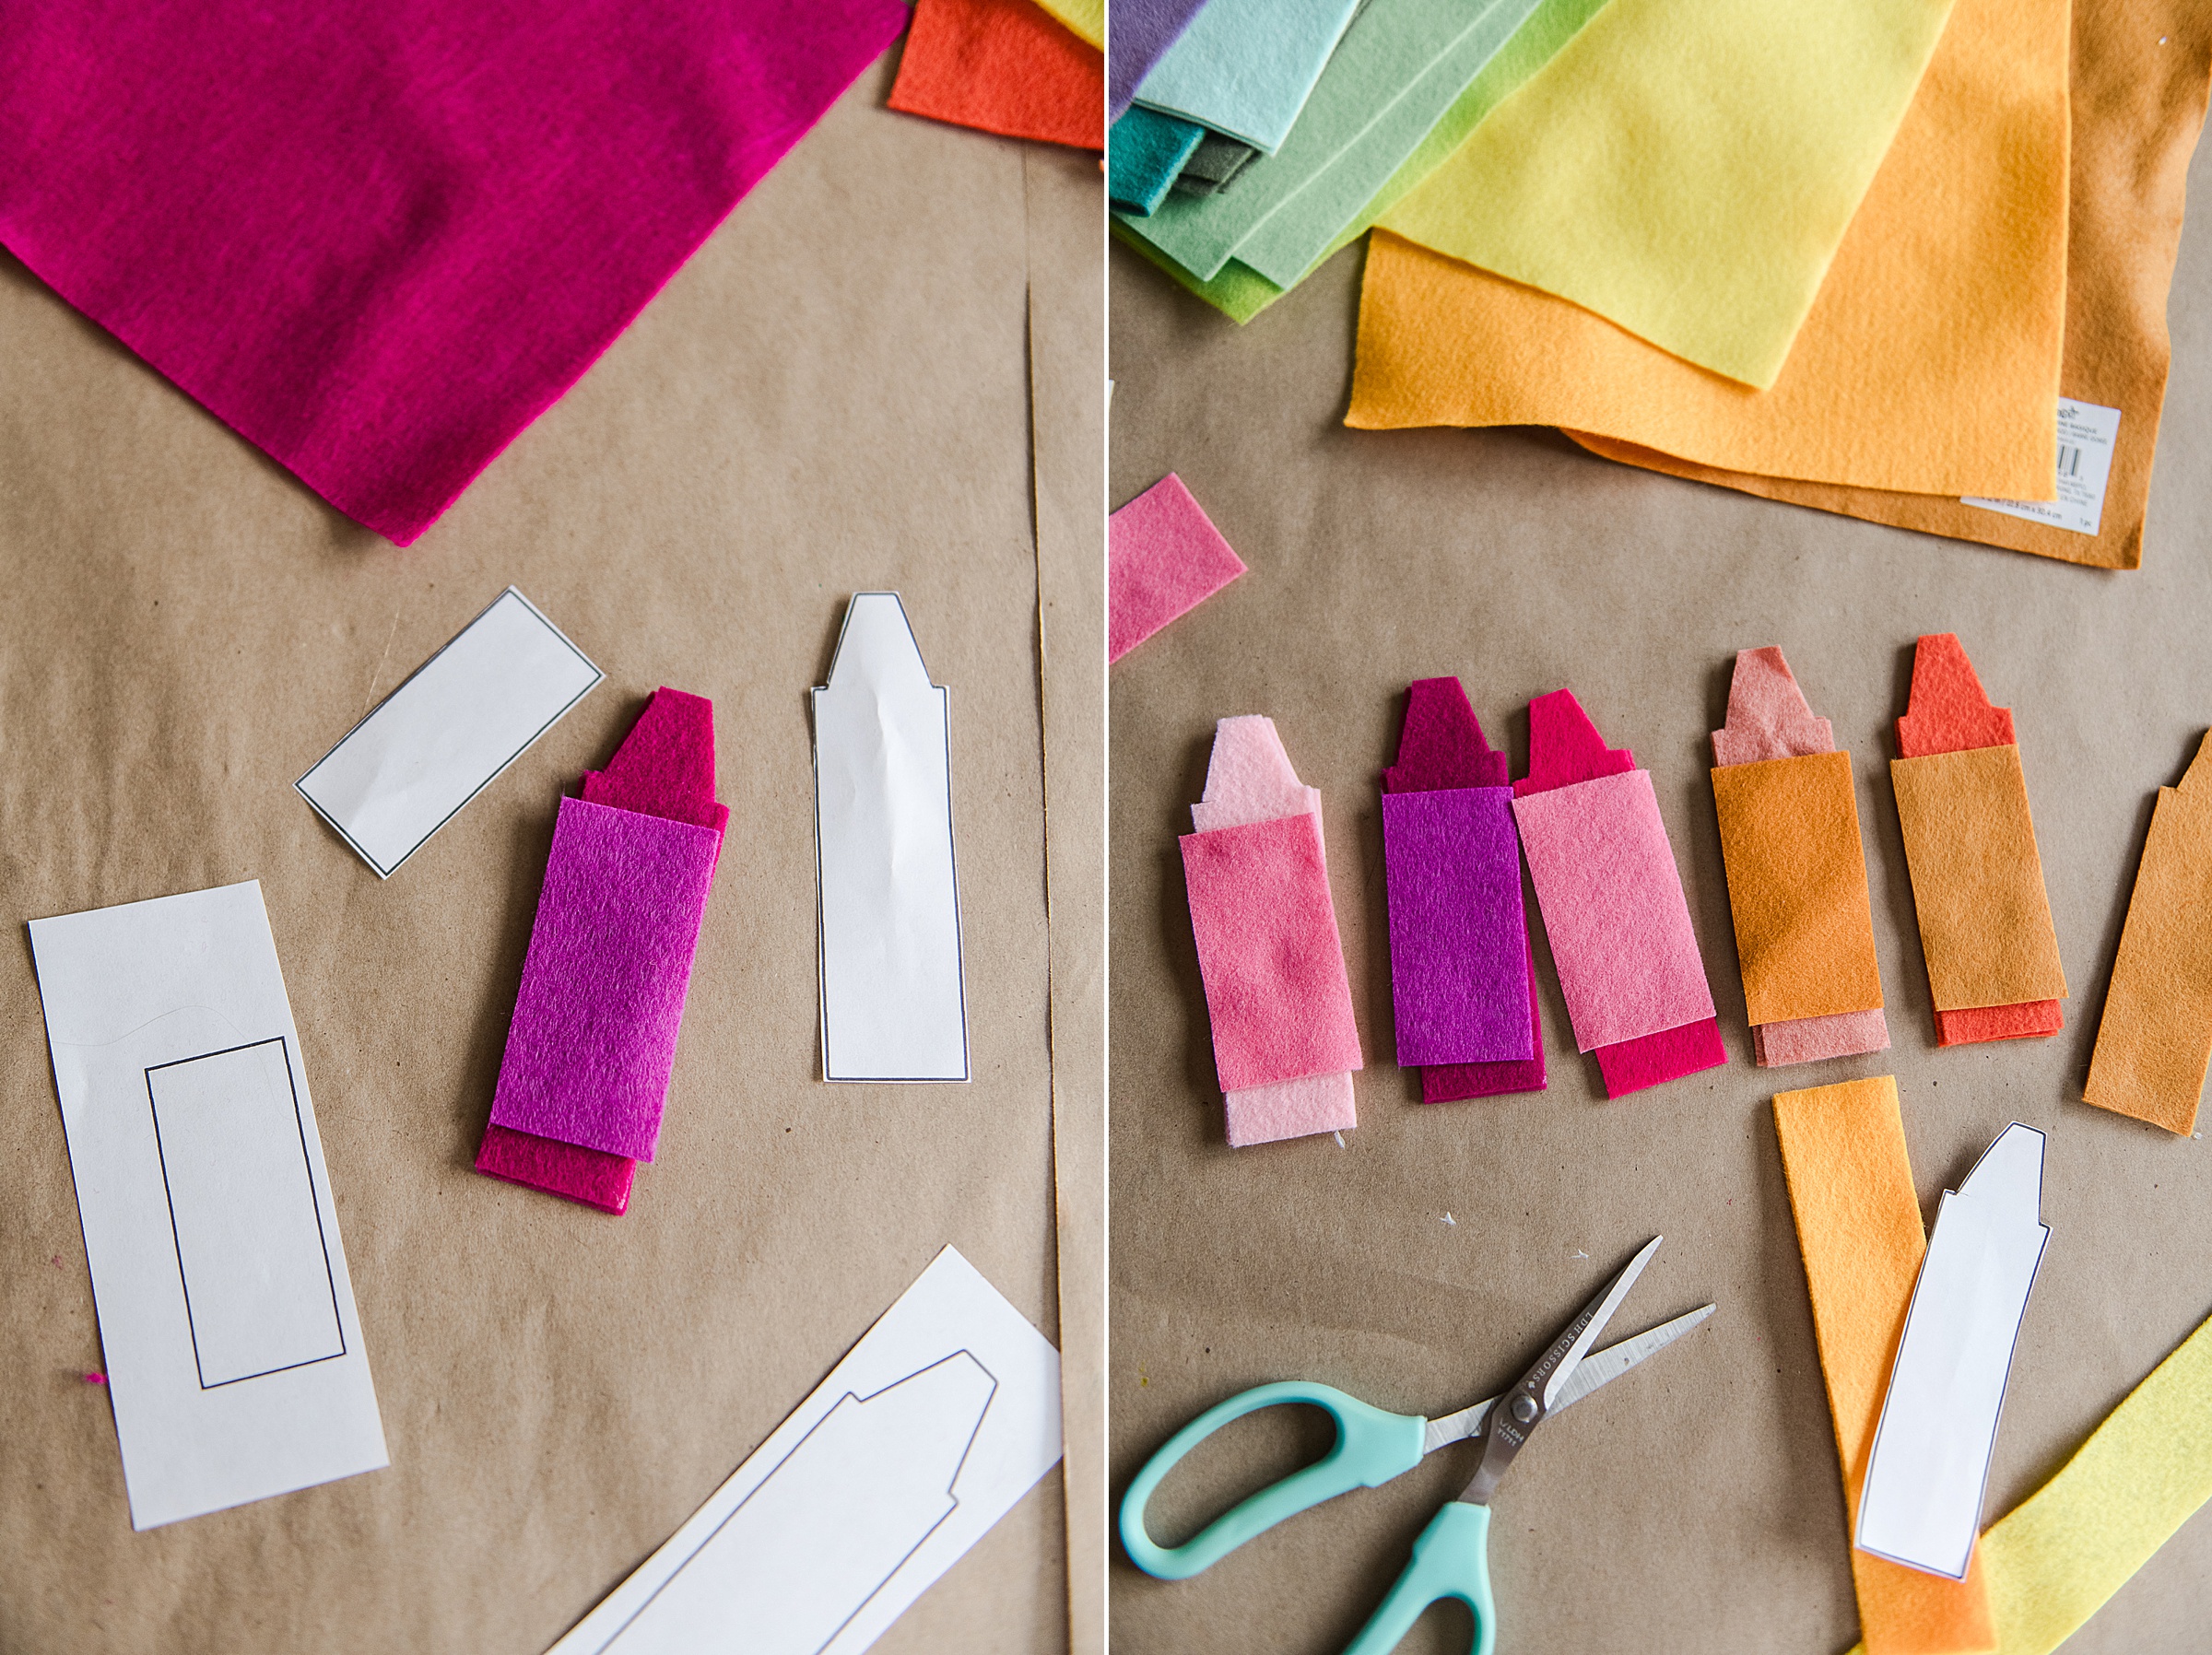
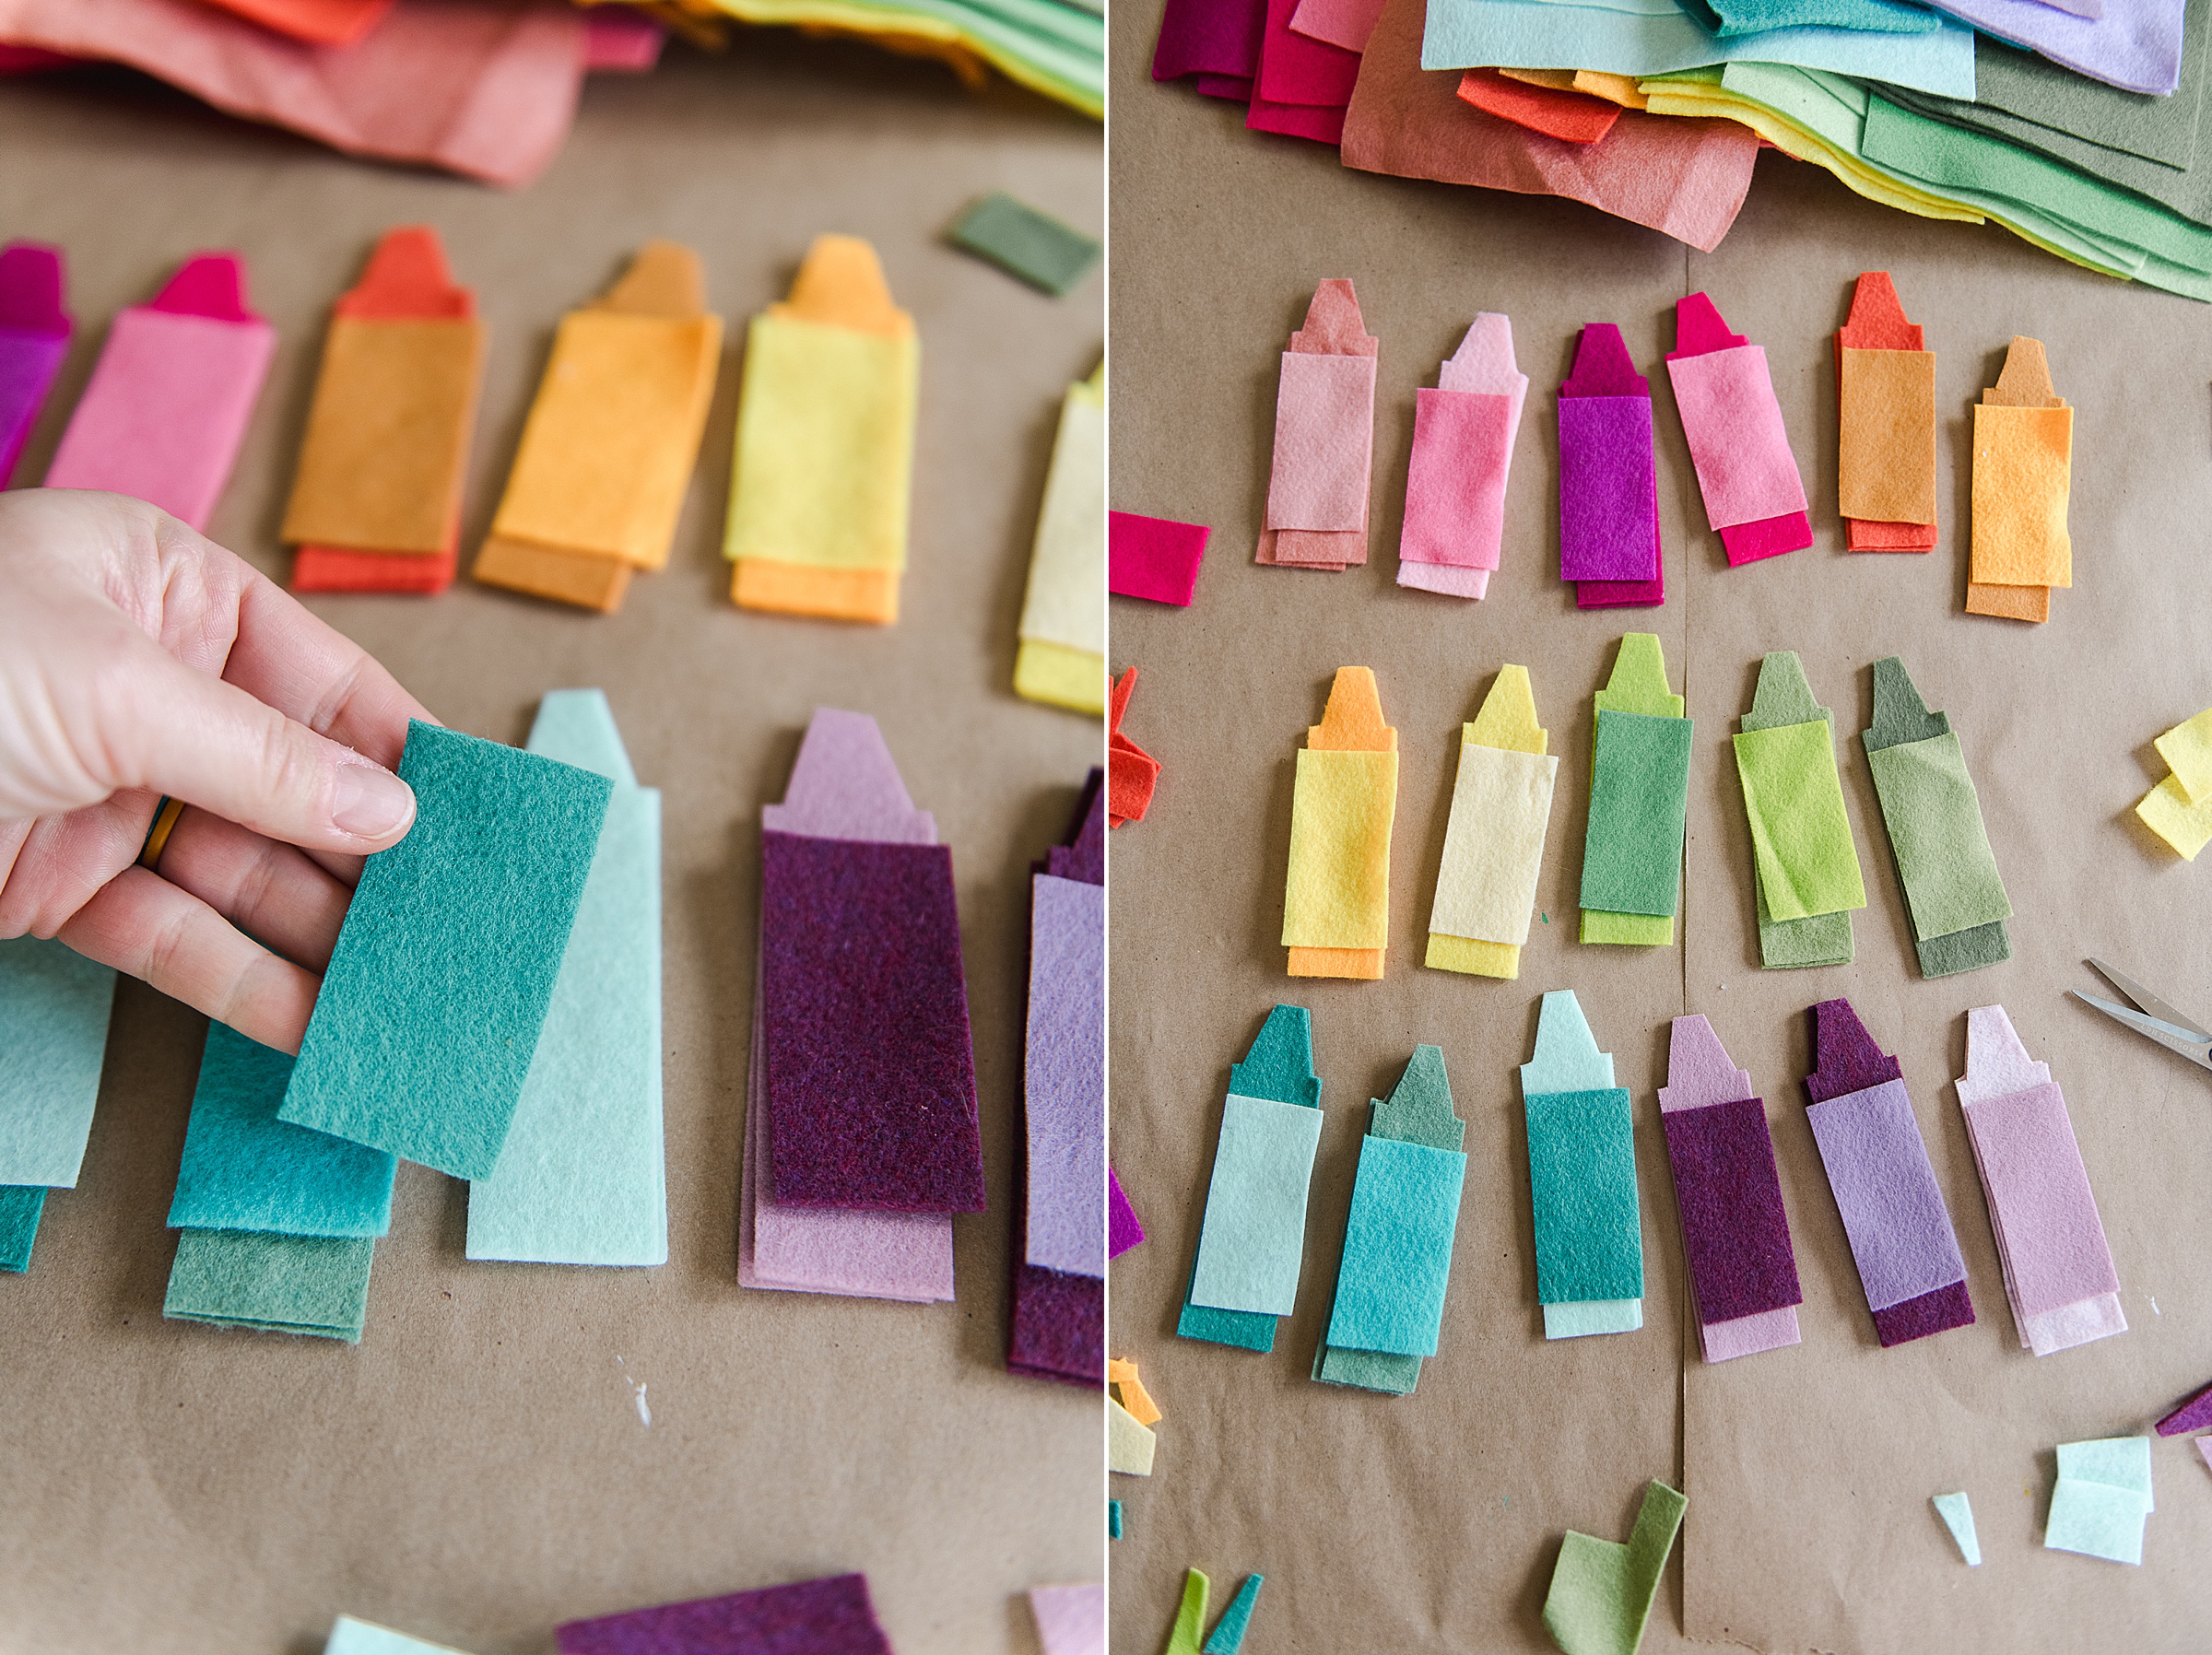
2. DOWNLOAD the Crayon PDF HERE and then begin cutting out your crayon parts. Be sure to cut out TWO of the actual crayon part (the part with the top that is longer) and then only ONE alternating color of the paper wrapping (the rectangle).
TIP: play around with the colors of these – sometimes it’s cool to put a different shade of your crayon color as the paper and sometimes it ends up being a completely different color all-together. You can reference a real box of crayons for inspo if you want 🙂
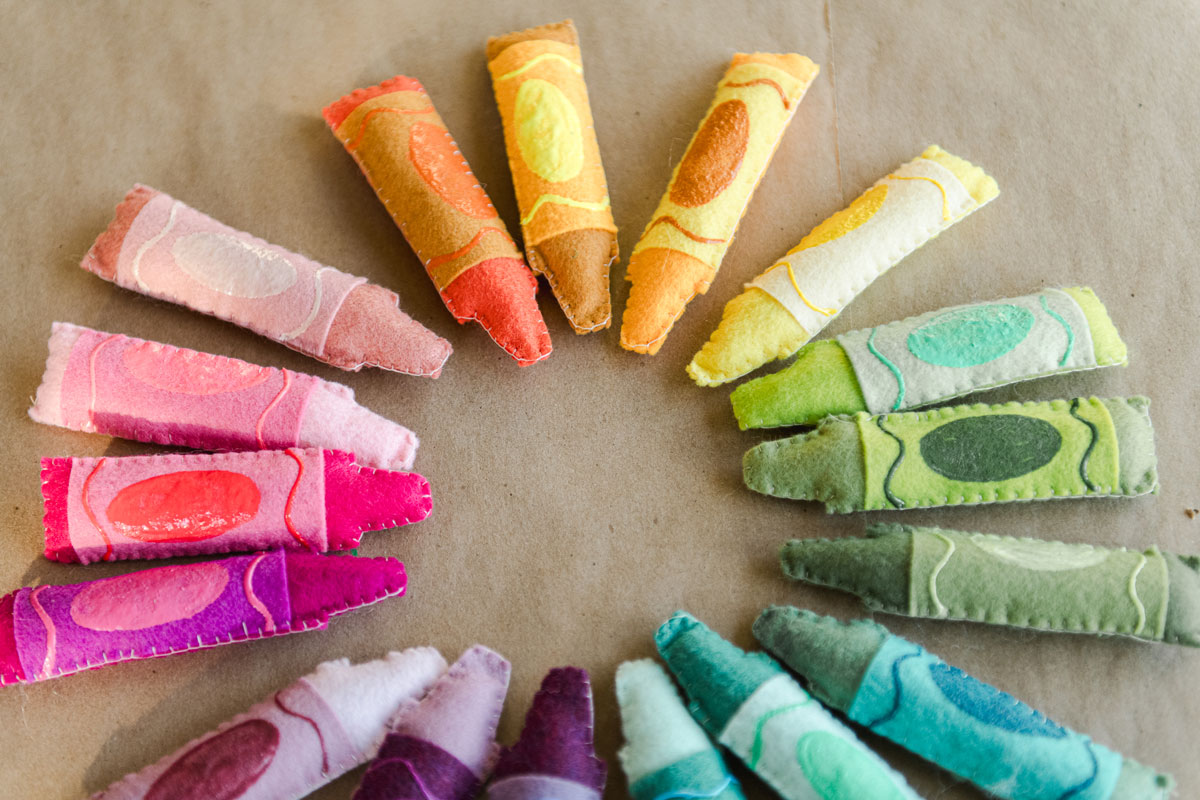
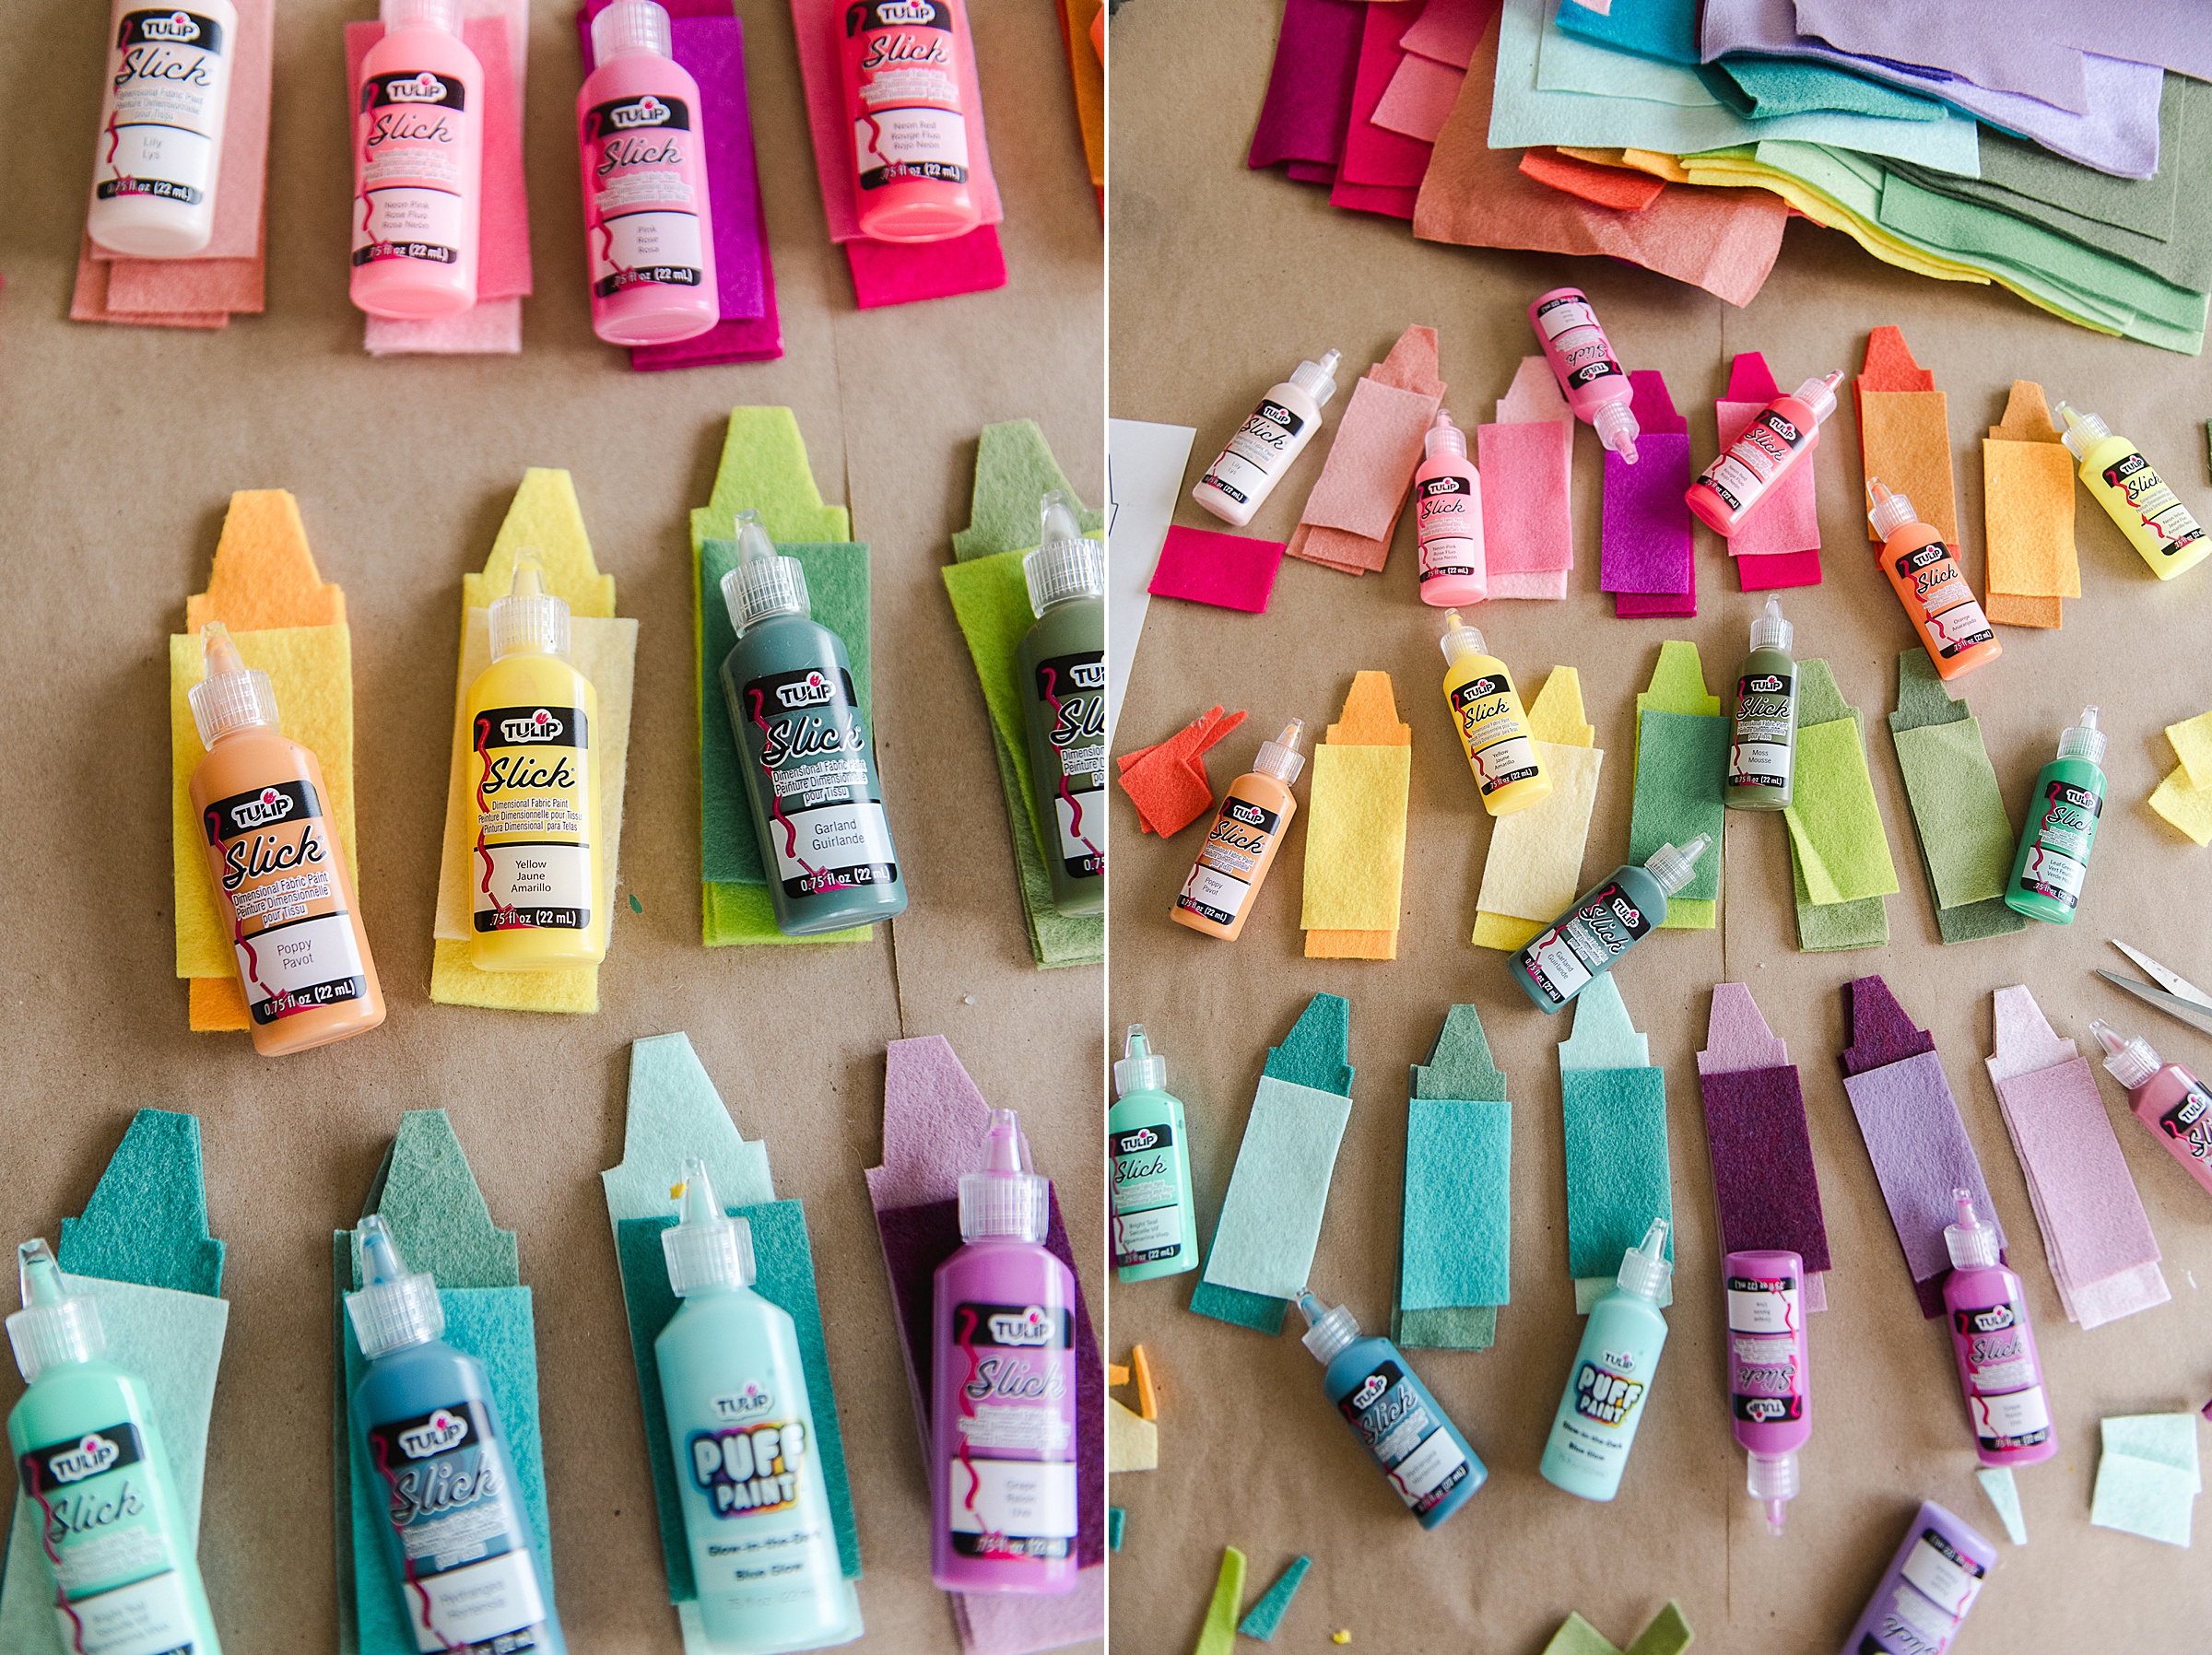
3. Time to paint! 🙂
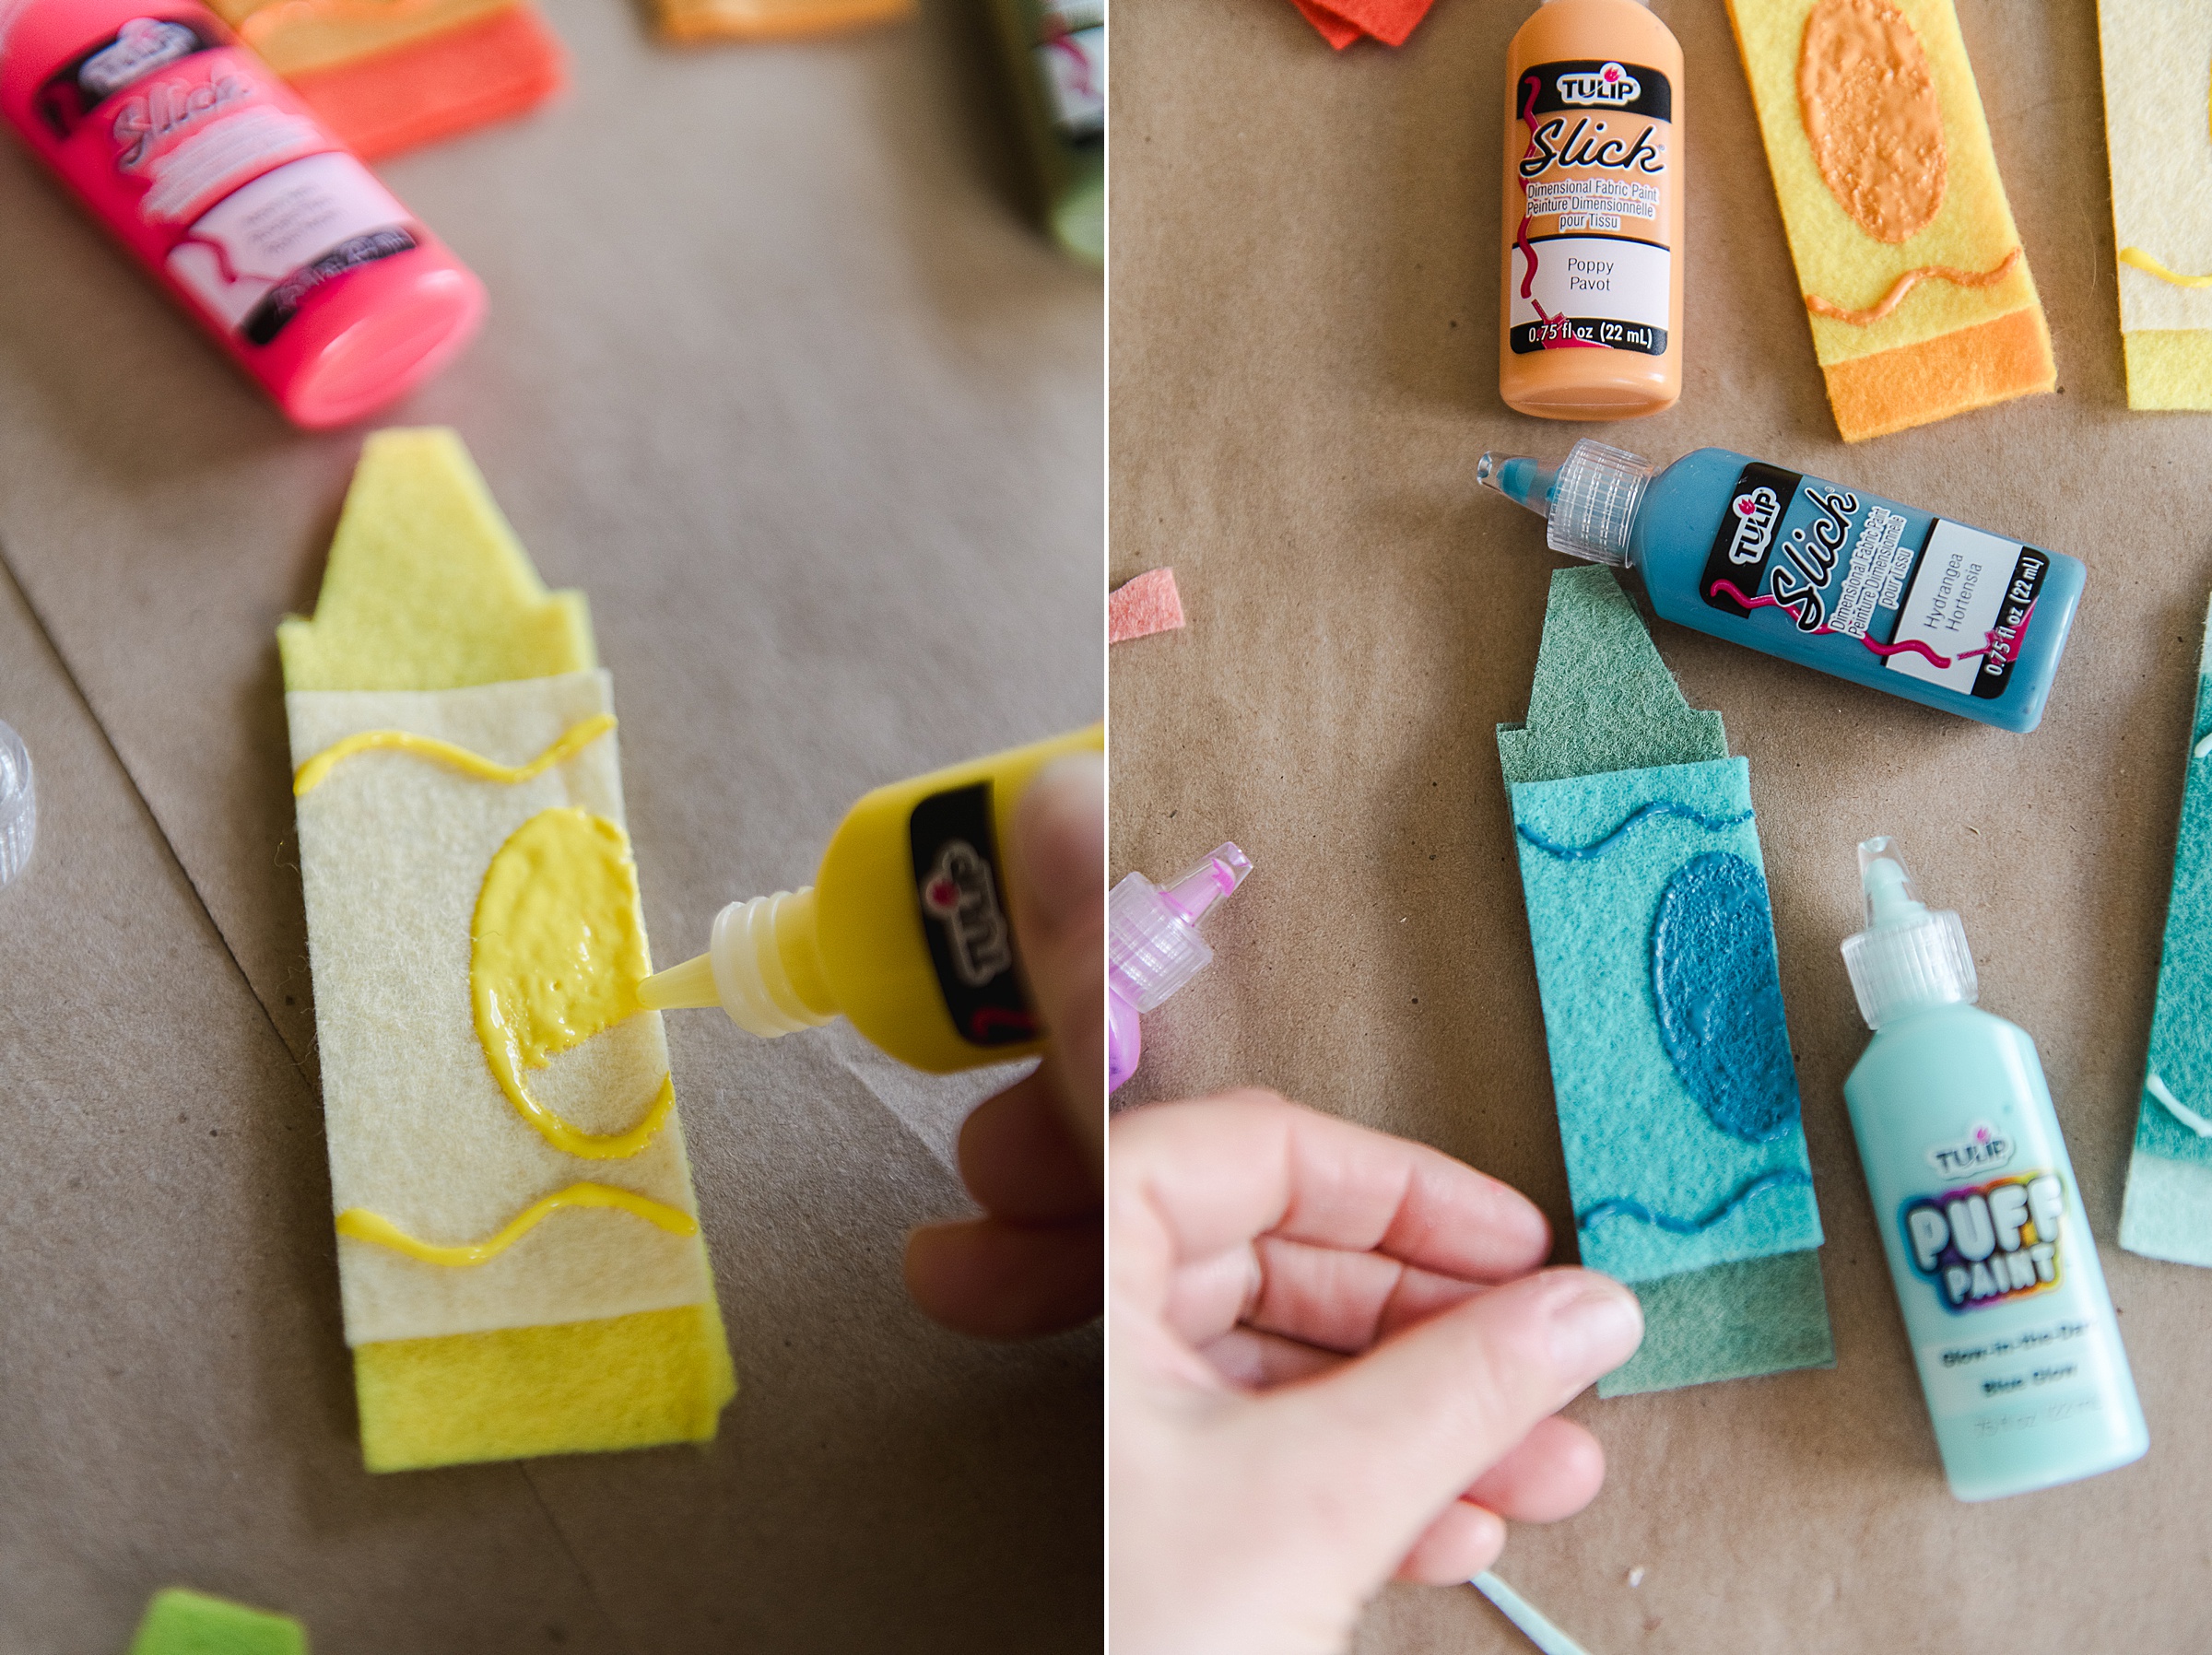
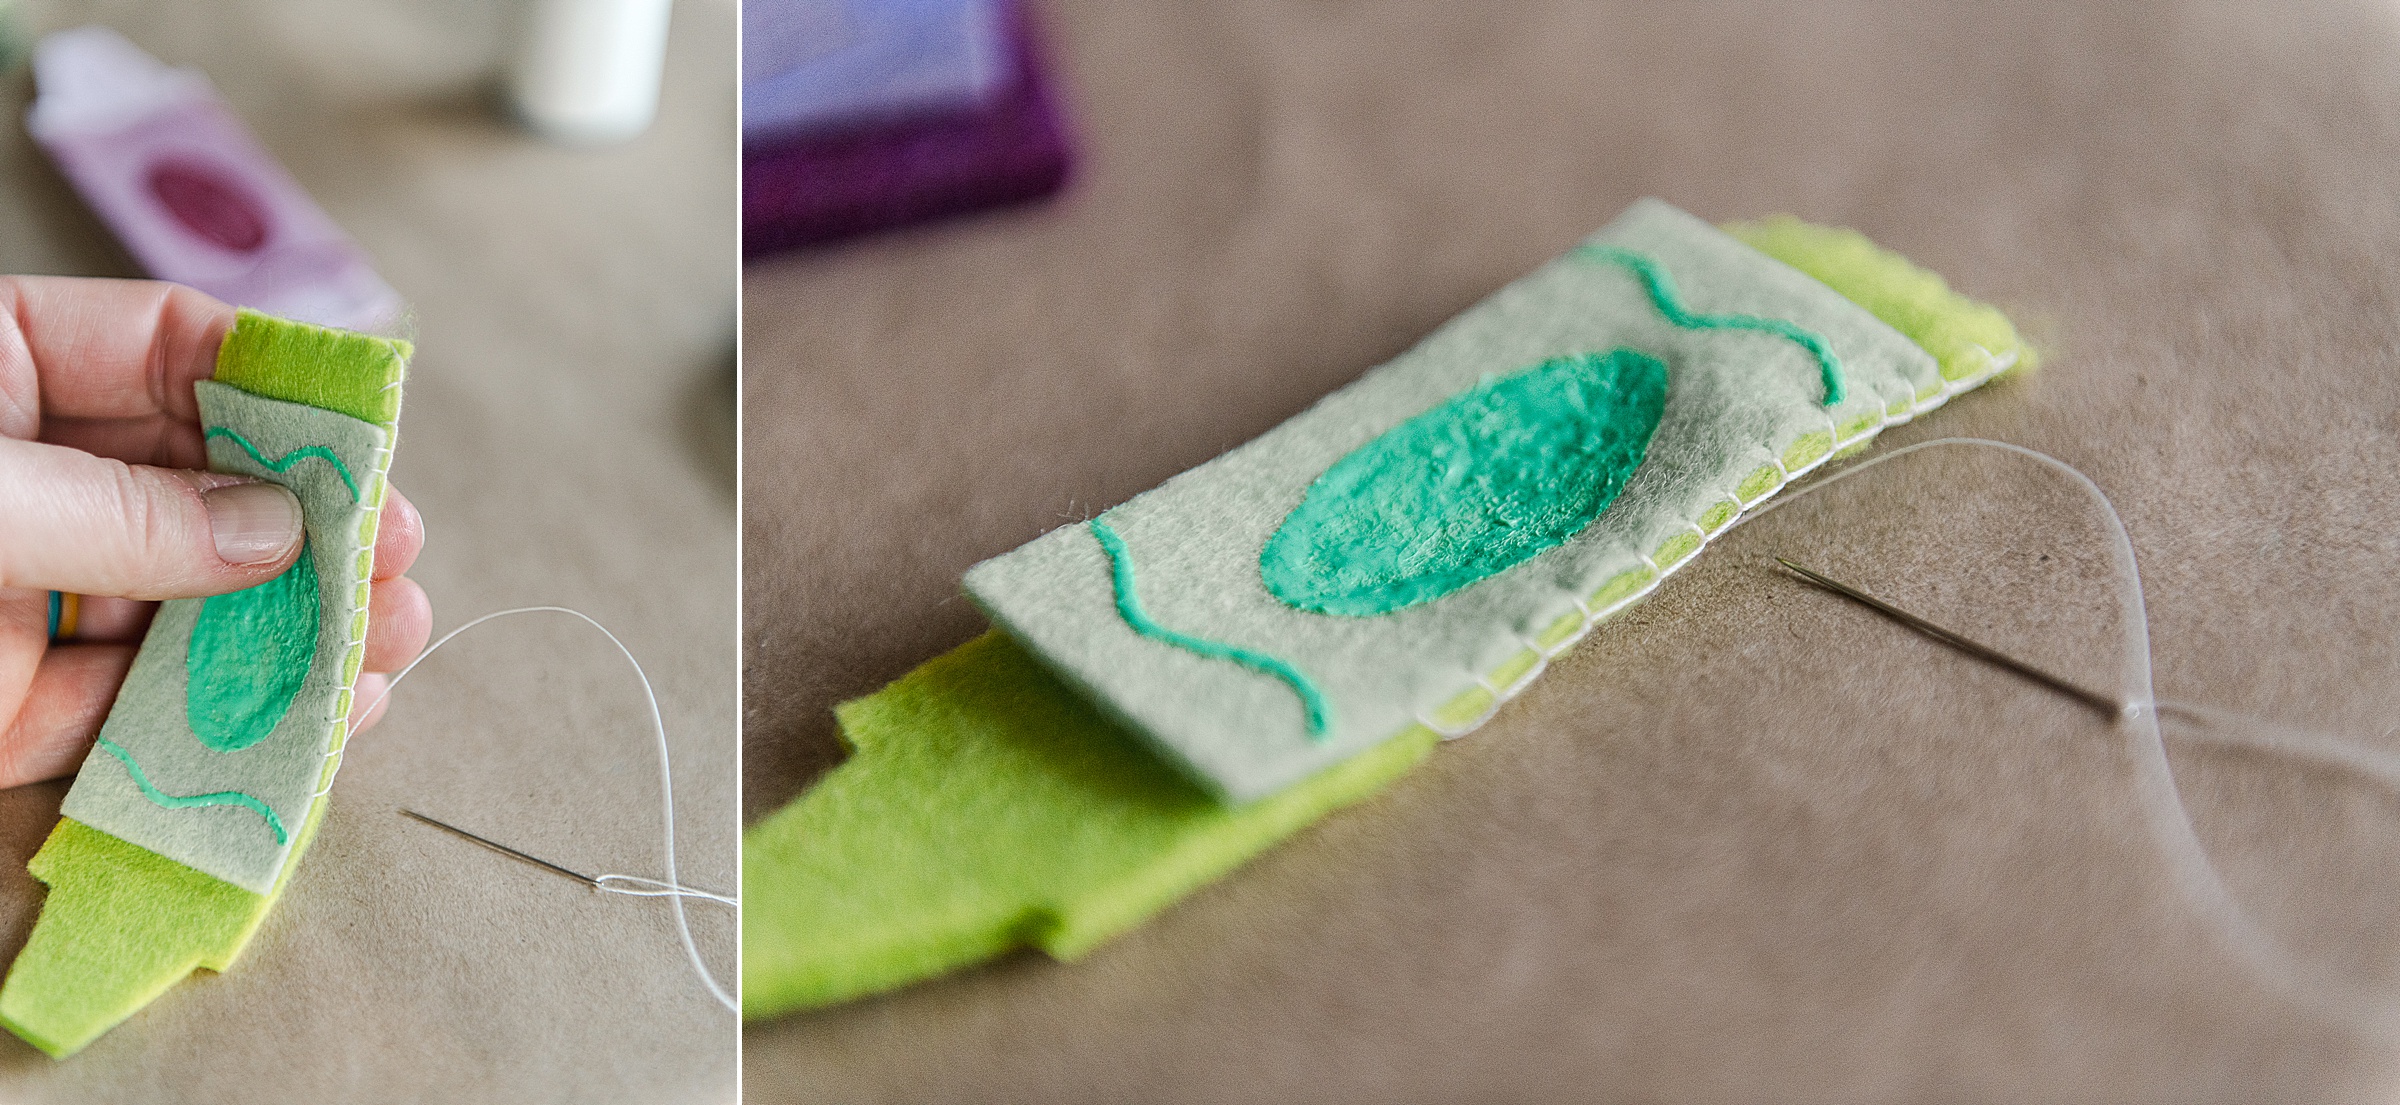
When all of your crayons are cut out, it’s time to paint your squiggles and the center oval on the crayon – NOW, traditionally I realize that these are just painted black (so please by all means, if you want to do that, PLEASE DO)! But I wanted to add the most color possible and have fun with the painted part to make them more of a colorful gradient and “less traditional”….so I raided my stash of Tulip fabric and dimensional paints to pair with each crayon. I had a mix of rainbow colors, neon, and bold jewel tones to add in the crayon mix! It was fun to see what paired well (as always picking out colors is my fave)!
A few tips when painting the crayons:
- Have a napkin or paper towel or extra piece of paper handy to test out your paint before going right to your felt crayon. Sometimes there is air bubbles, etc
- GO SLOW and try to apply even pressure as you press….that will get a consistent line and “squeeze”
- I started out with my squiggle and then moved to the oval part. Always outline first, then fill in (for the oval)
- I chose to have some crayons “turned” which meant that my oval sometimes went off to the side of the felt crayon
- Set aside to fully dry (about 4-6 hours depending on how thick your paint is) before going onto the next step
4. OPTIONAL STEP: Use your Aleene’s felt glue to apply the crayon paper (with the painted portion from step 3) to each crayon, you can do that now. I chose to skip this, but I realize that for some people this step might be easier to make sure that everyone is laying flat when stitching together in step 5 🙂 If you choose to do this, apply a generous amount, but be careful not to glob too much on so that you can’t get your needle through the glued portion when stitching.
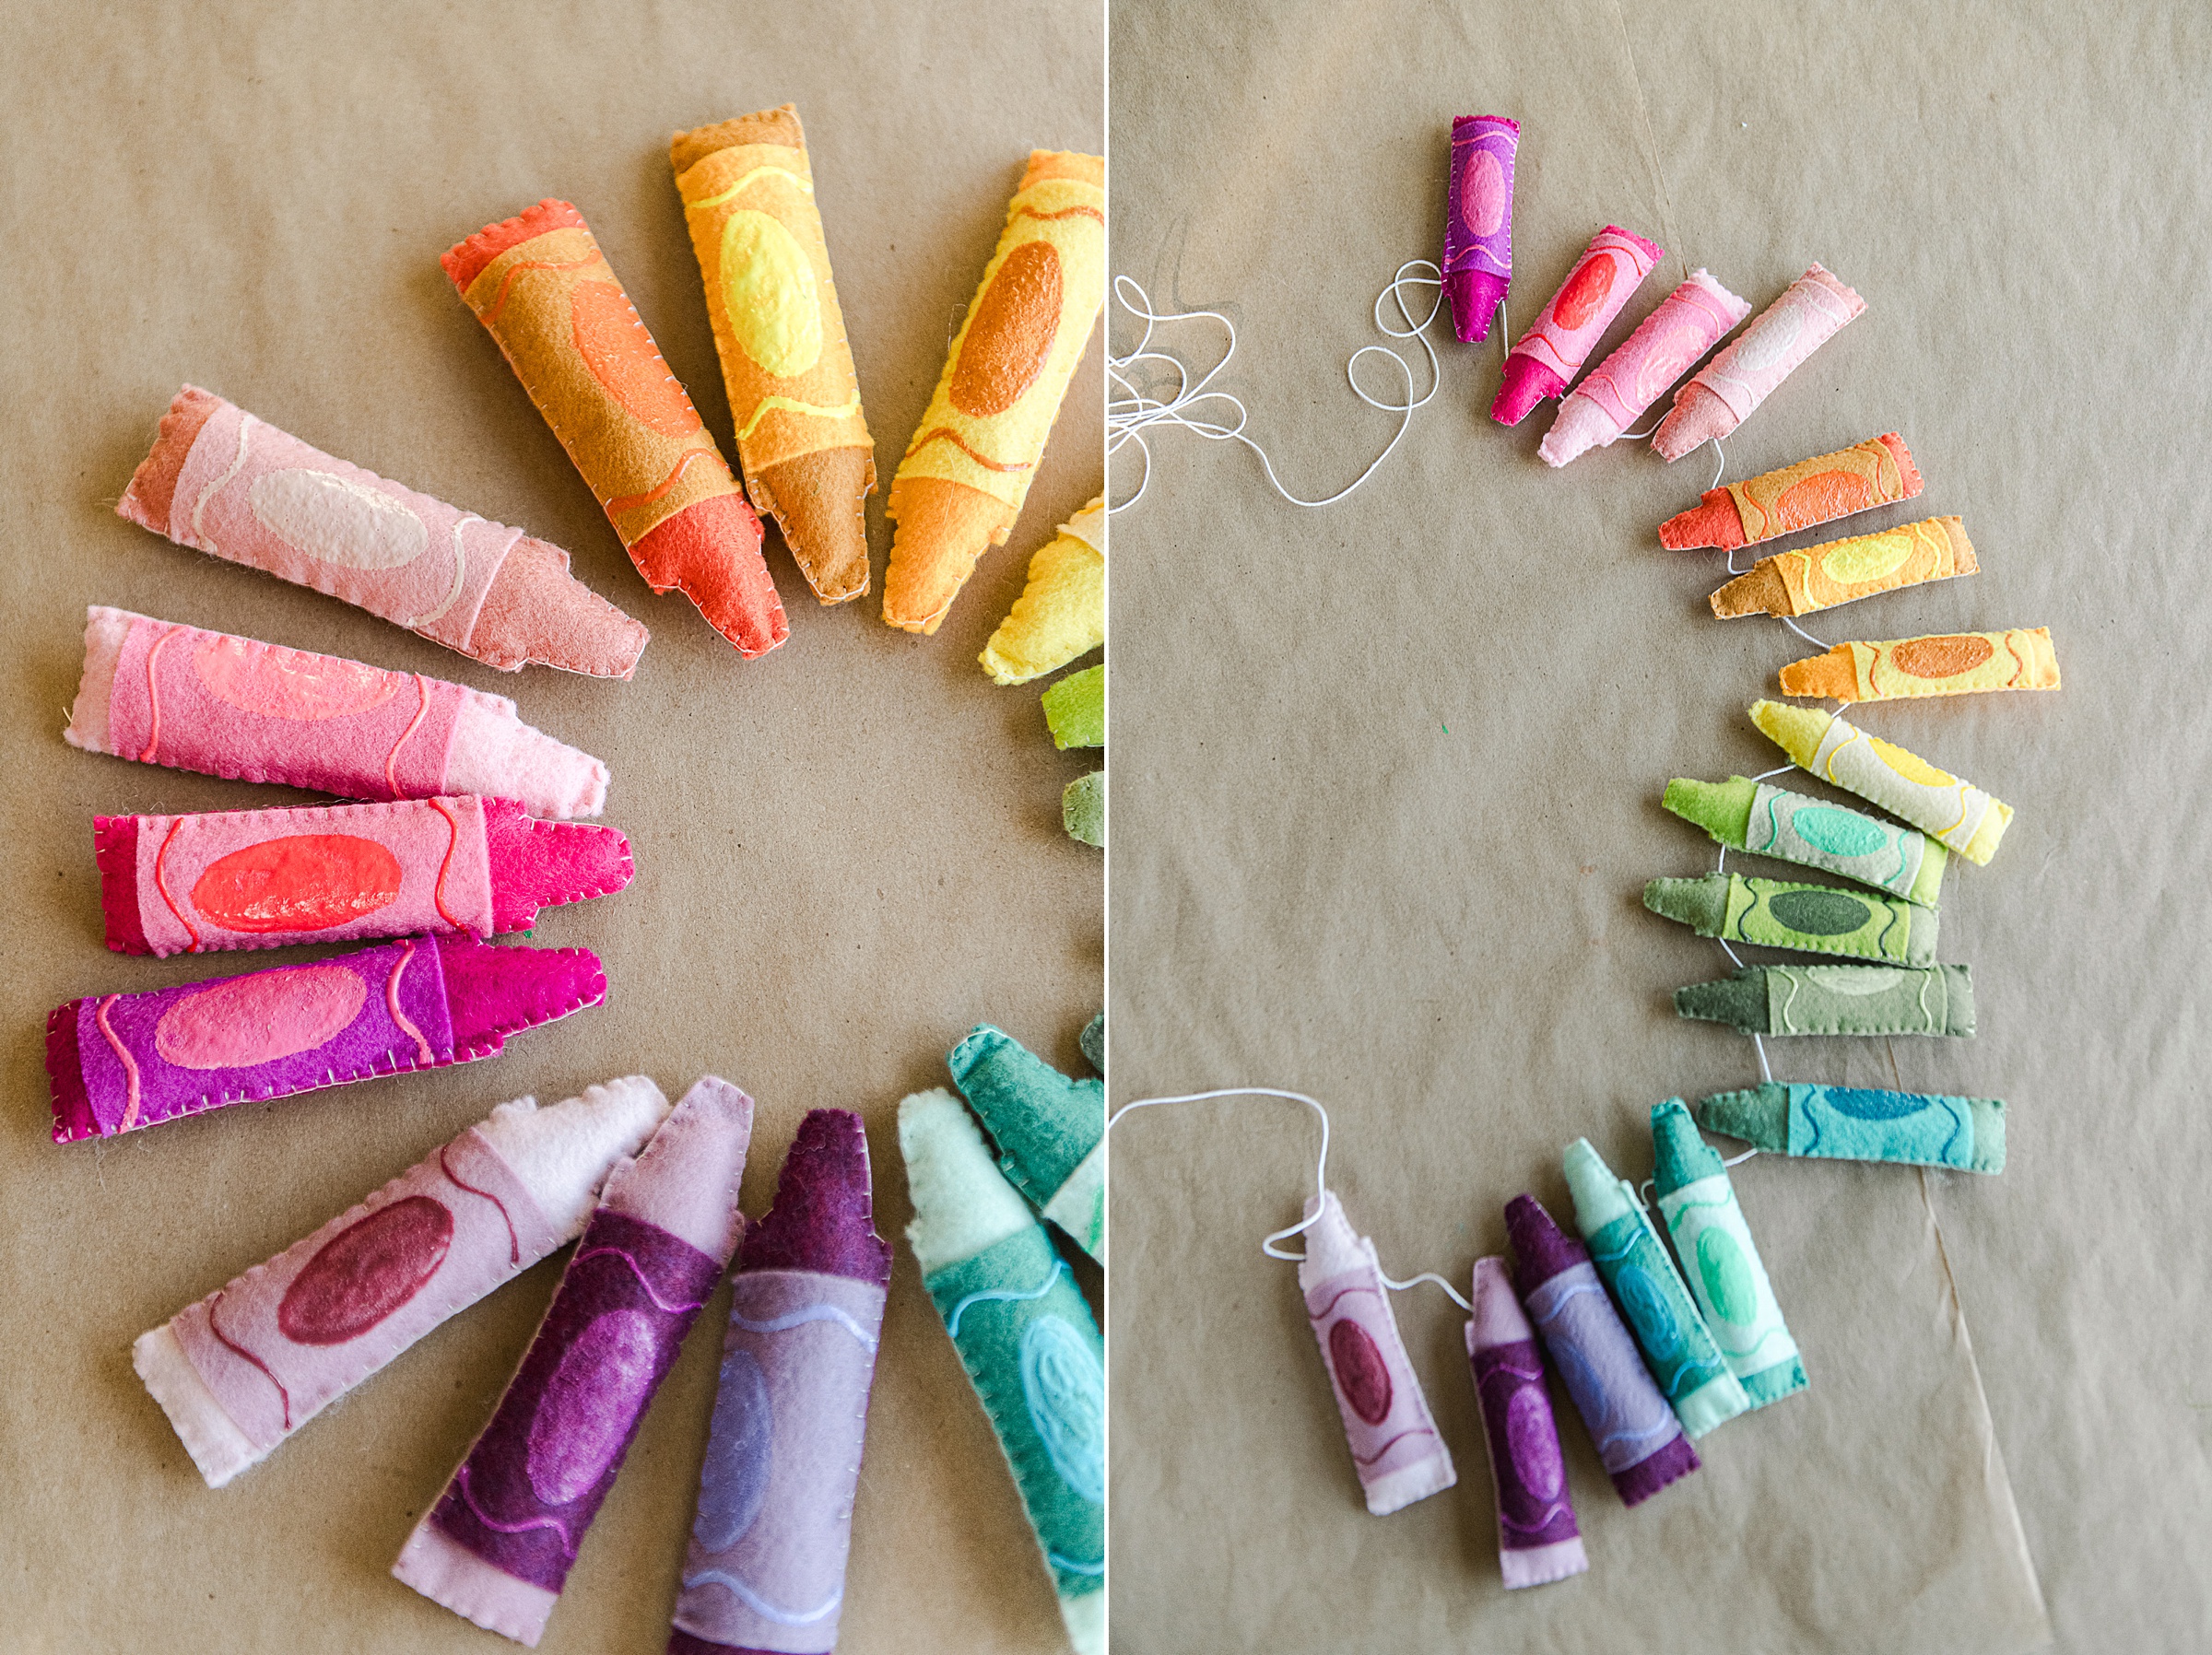
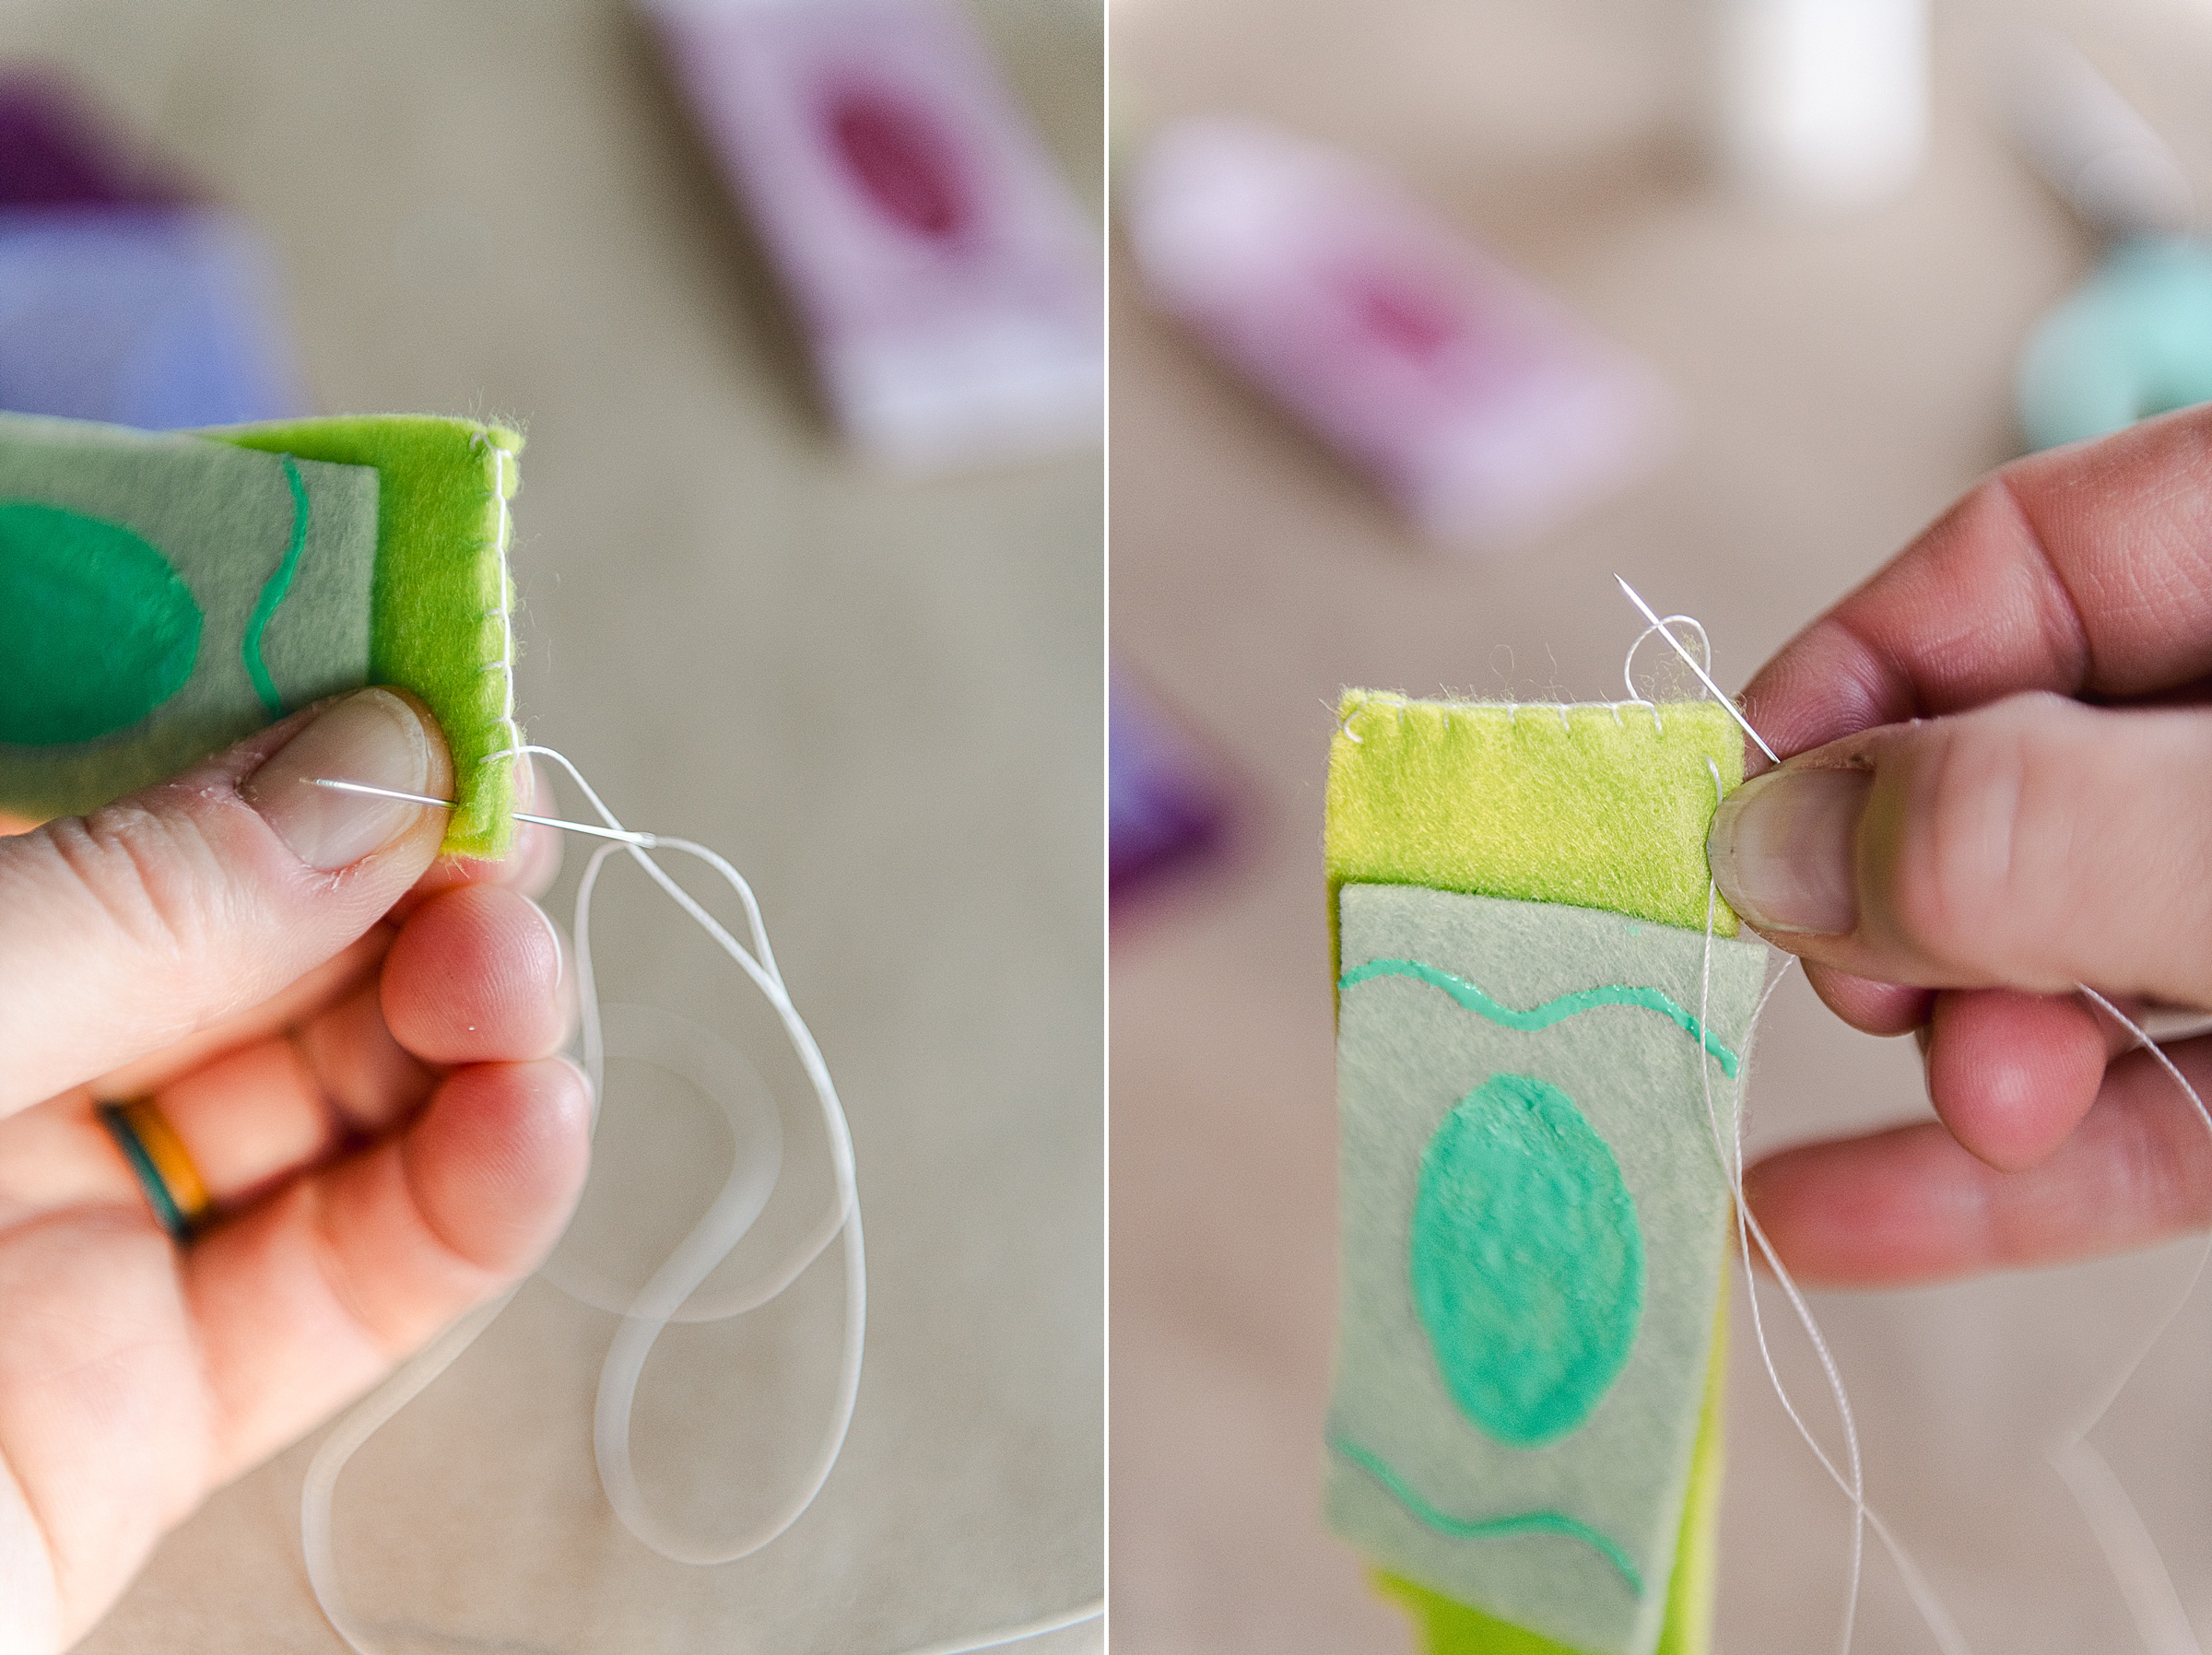
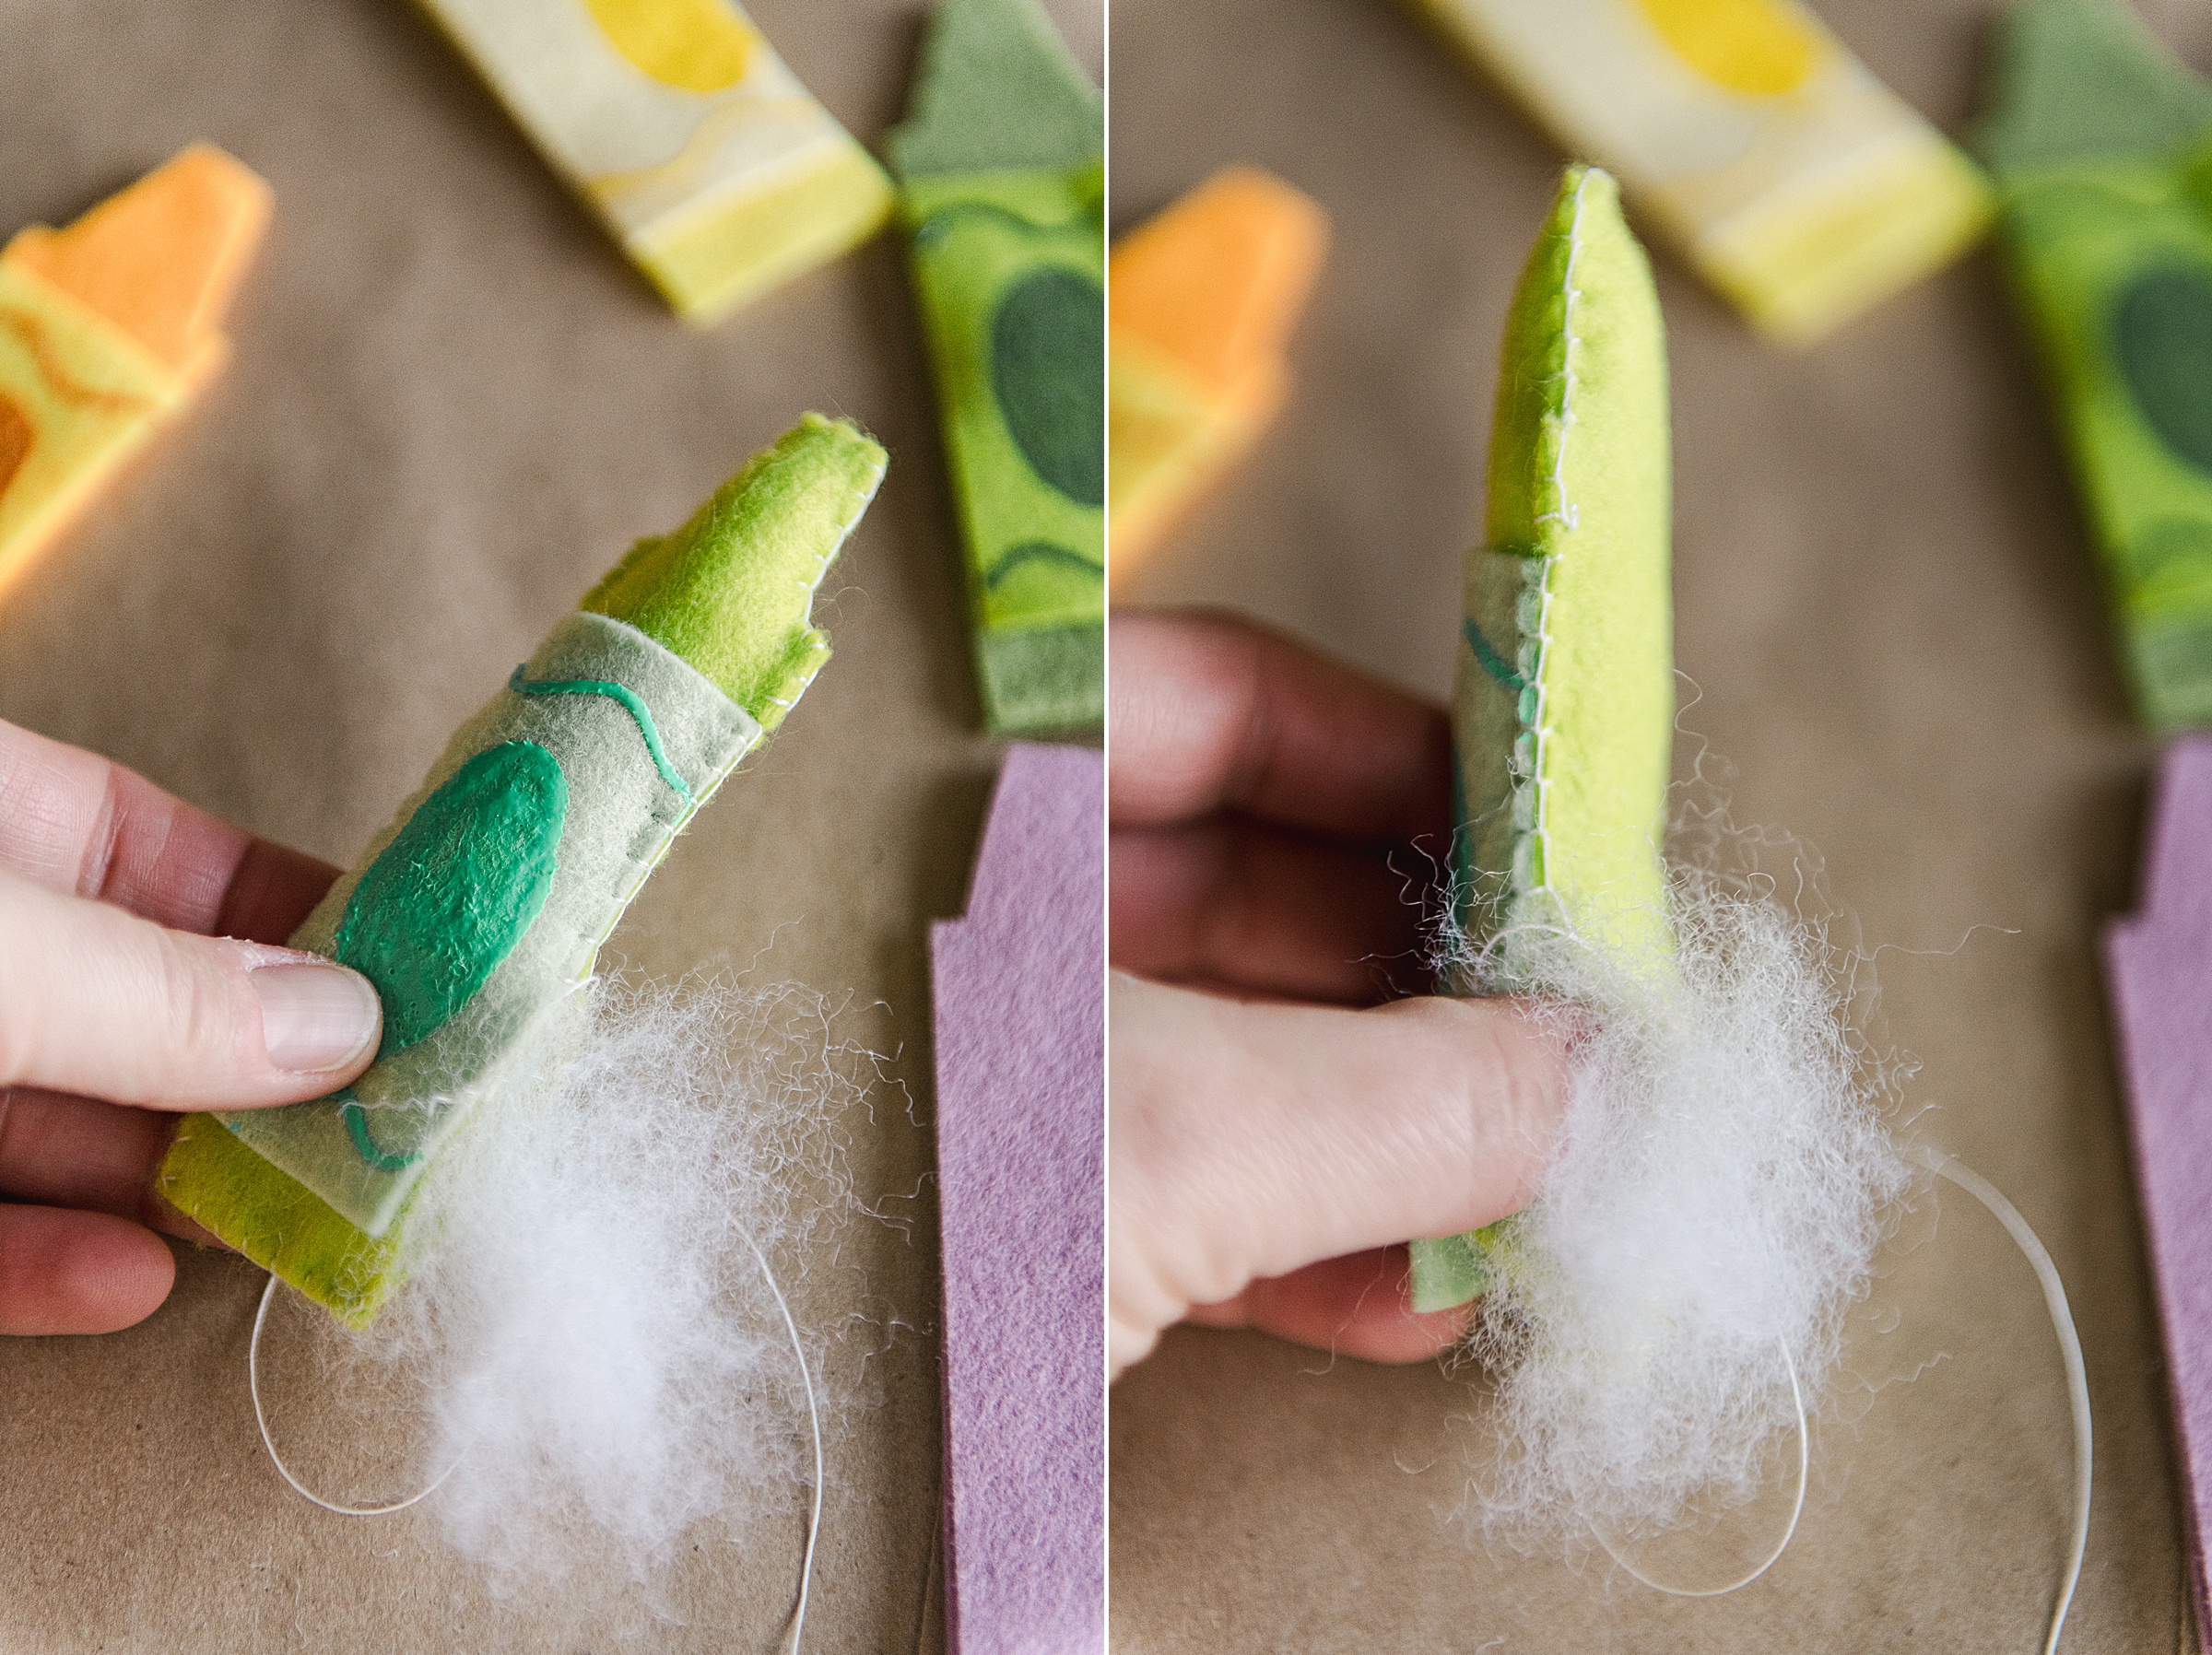
5. It’s time to stitch and put together!
I used a blanket stitch to attach everything tougher. Simply thread your needle with your desired thread and anchor your stitch, stitch all the way around to almost close, then stuff with some poly-fil before completely sitting closed and tying off.
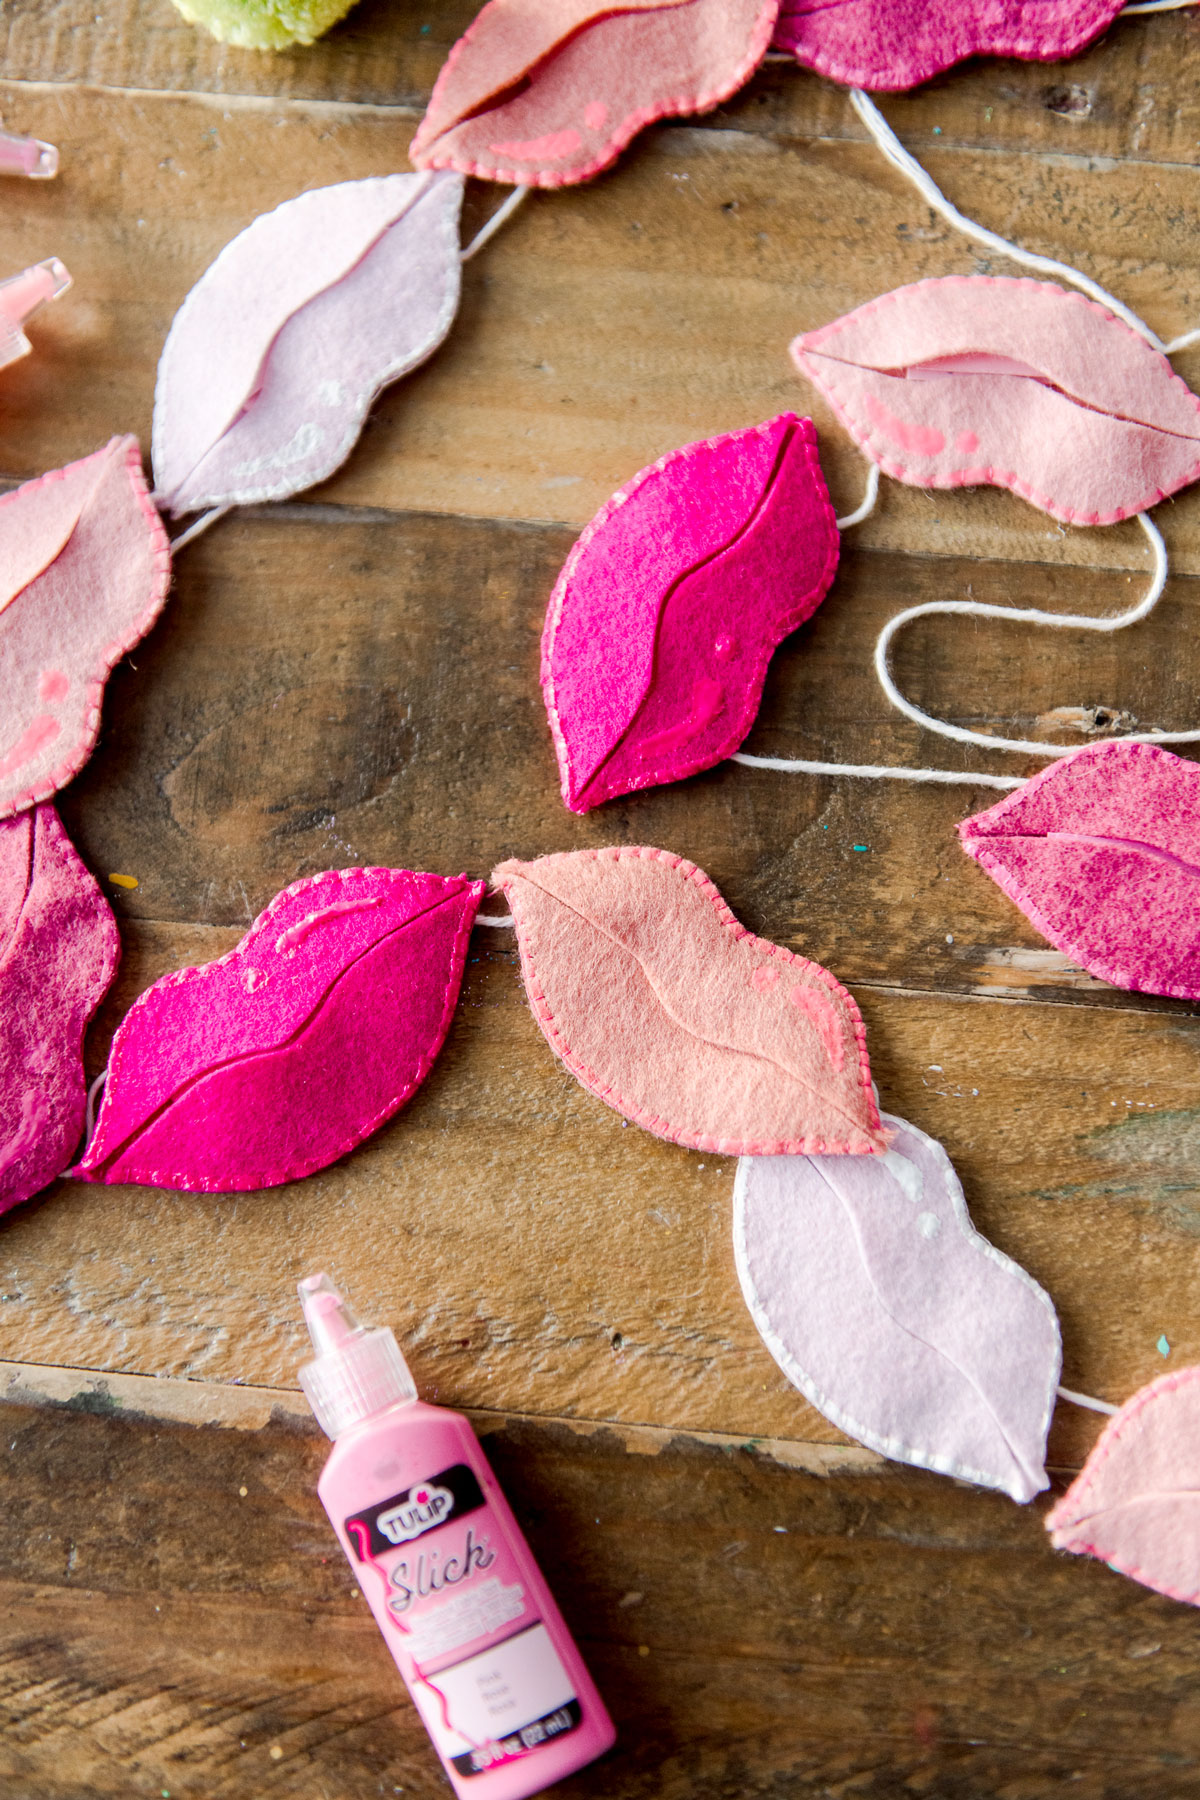
Below are the steps to do a blanket stitch (I also used this stitch in my ghost garland, lip garland and colorful candy cane garland! 🙂
STEP 1: Anchor your stitch, then start by bringing your needle and thread up through both layers of fabric about 1/4” away from the outside edge.
STEP 2: Poke your needle up from the back again so that the needle comes up through the SAME SPOT you started. This creates a loop around the edge.

STEP 3: Send your needle under the loop stitch that you just made. (Ie, poke your needle under your stitch sideways going from right to left. This isn’t technically your first blanket stitch, but gets your stitch “ready” and kinda begins the pattern.
STEP 4: *this begins your blanket stitch pattern repeat*
STEP 5: Before you pull your stitch tight from step 5, you will thread your needle through the “loop” along the edge and pull until flush with the thread makes a “u” shape along the edge of your felt.
Repeat steps 4 – 5 until you’ve worked mostly the way around your ghost! 🙂 You will want to stuff your ghosts with some stuffing or poly-fil before closing your ghost completely!
Then anchor (or knot) your thread and clip your extra thread!
6. Time to string your garland or make your felt crayons into a headband crown! Finish your amazingly colorful crayons however you see fit and they will be amazing to display!!!! YAY! 🙂