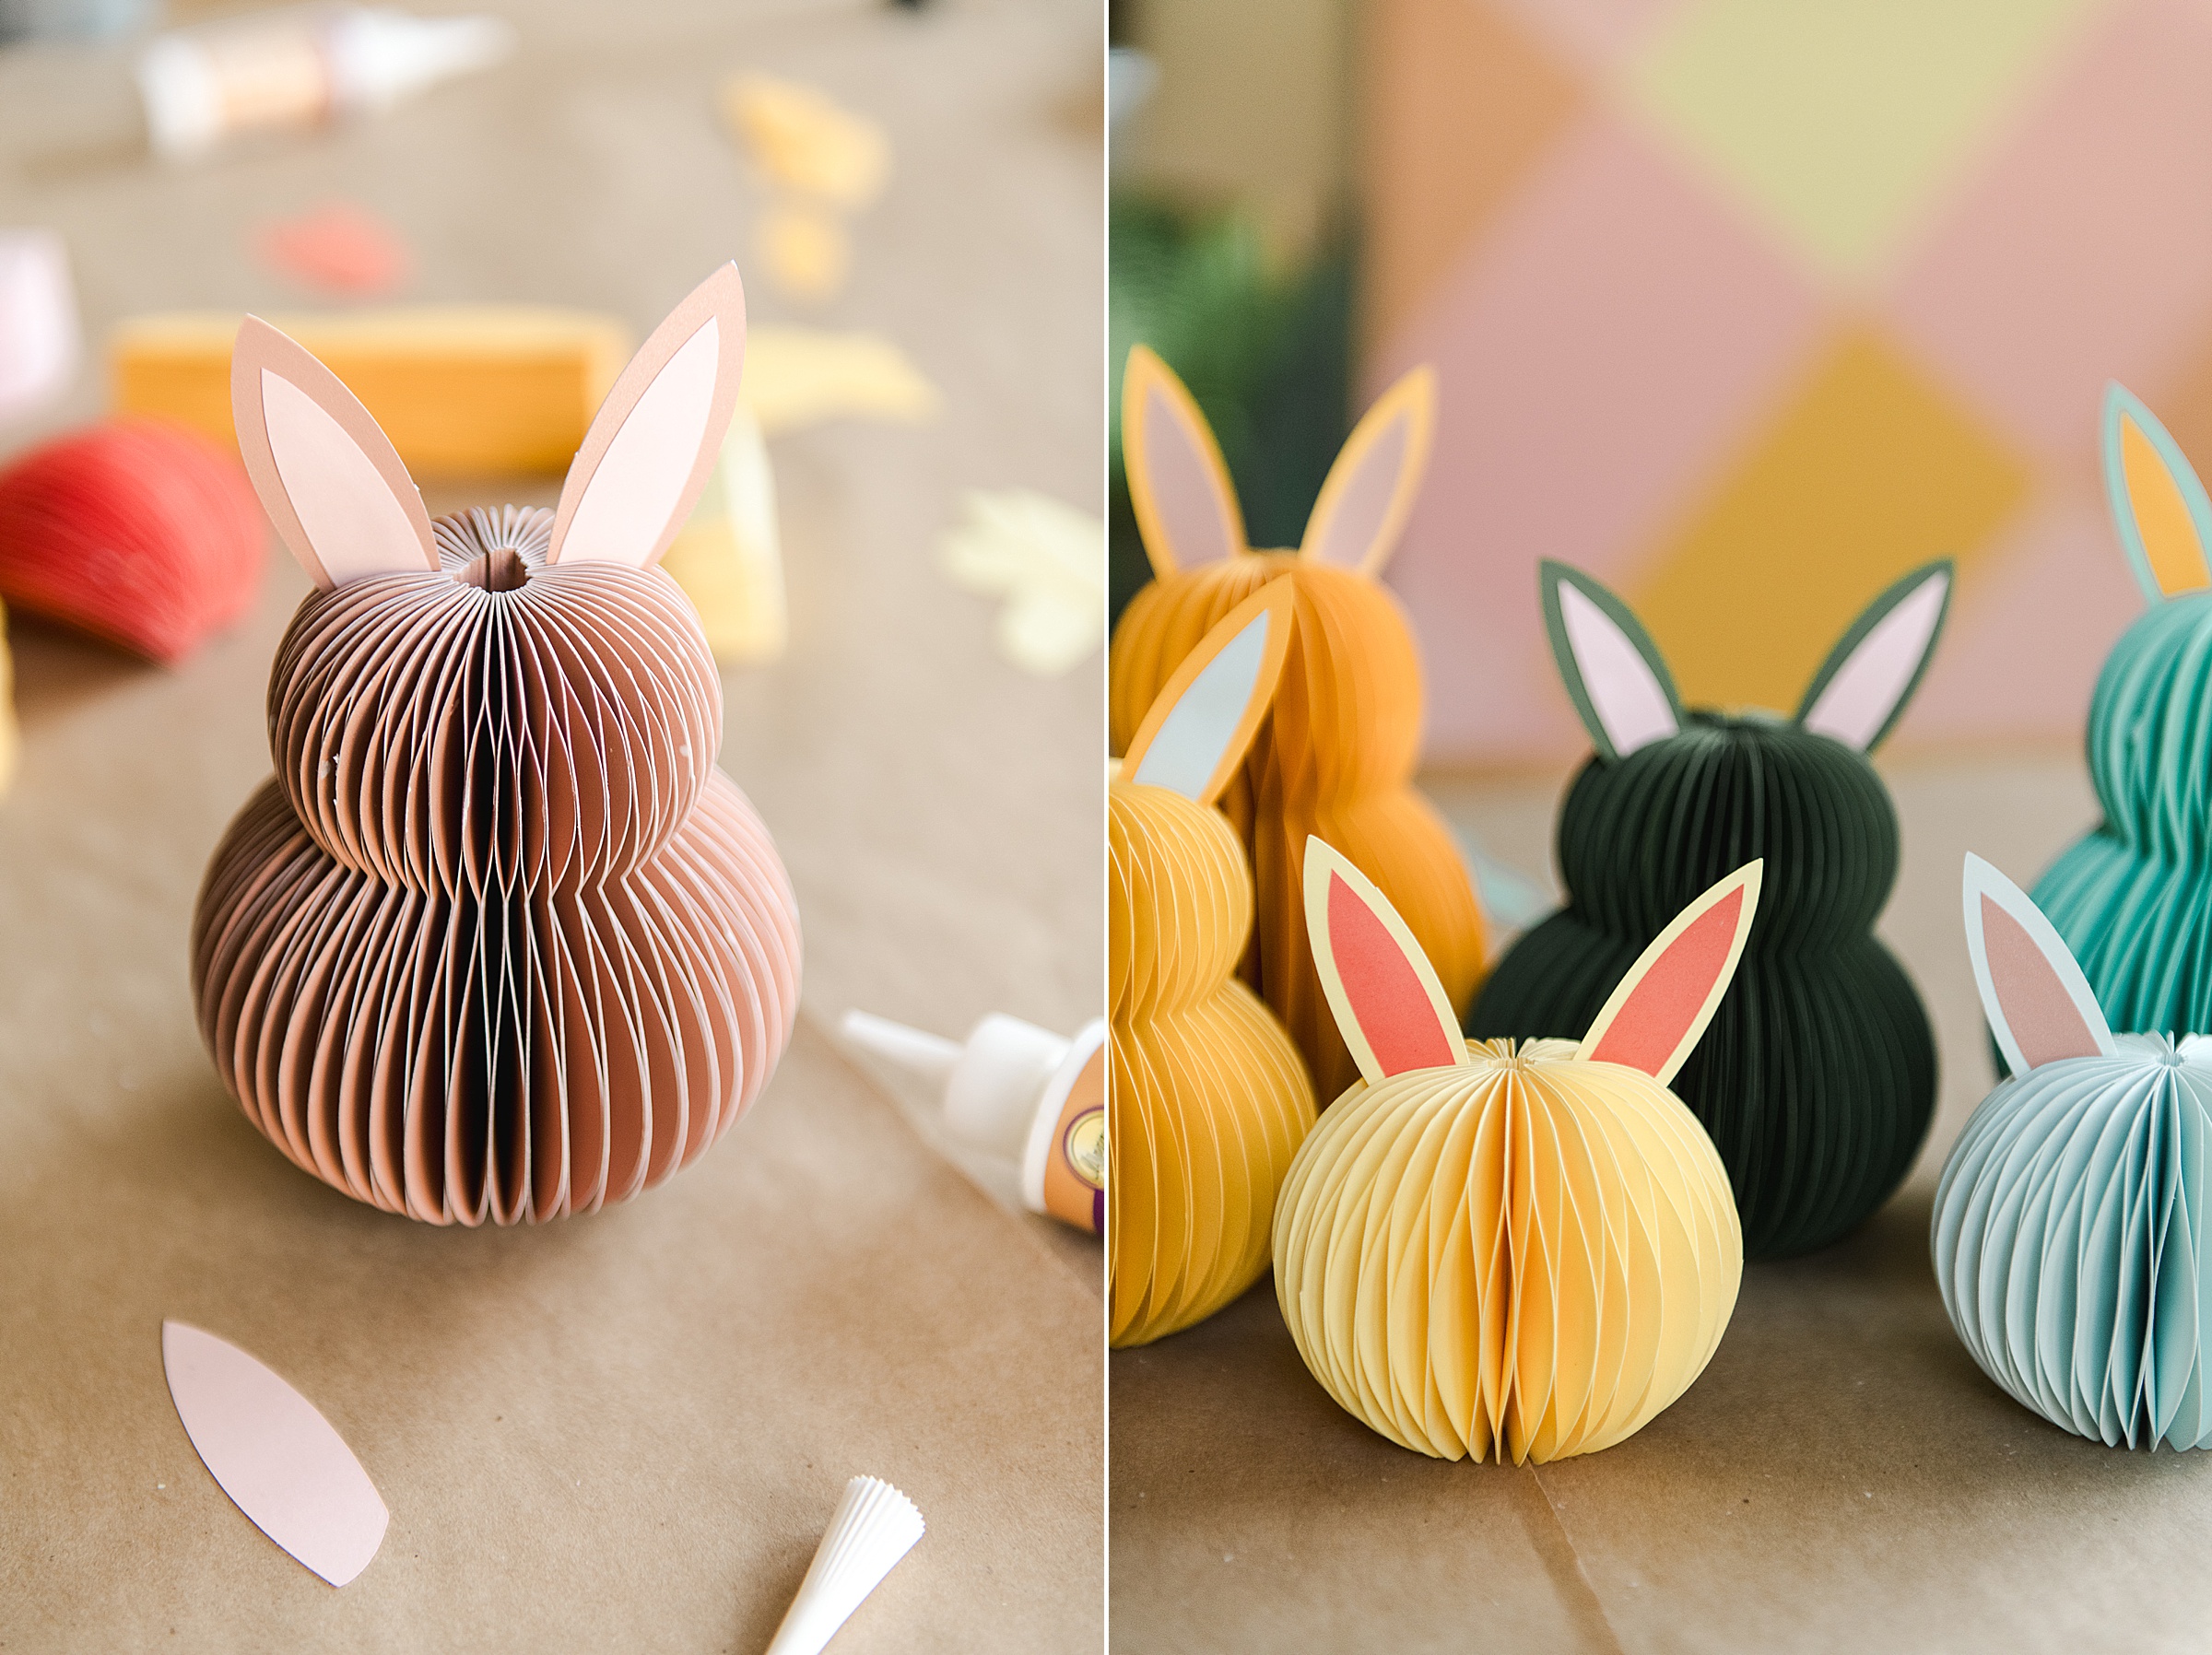
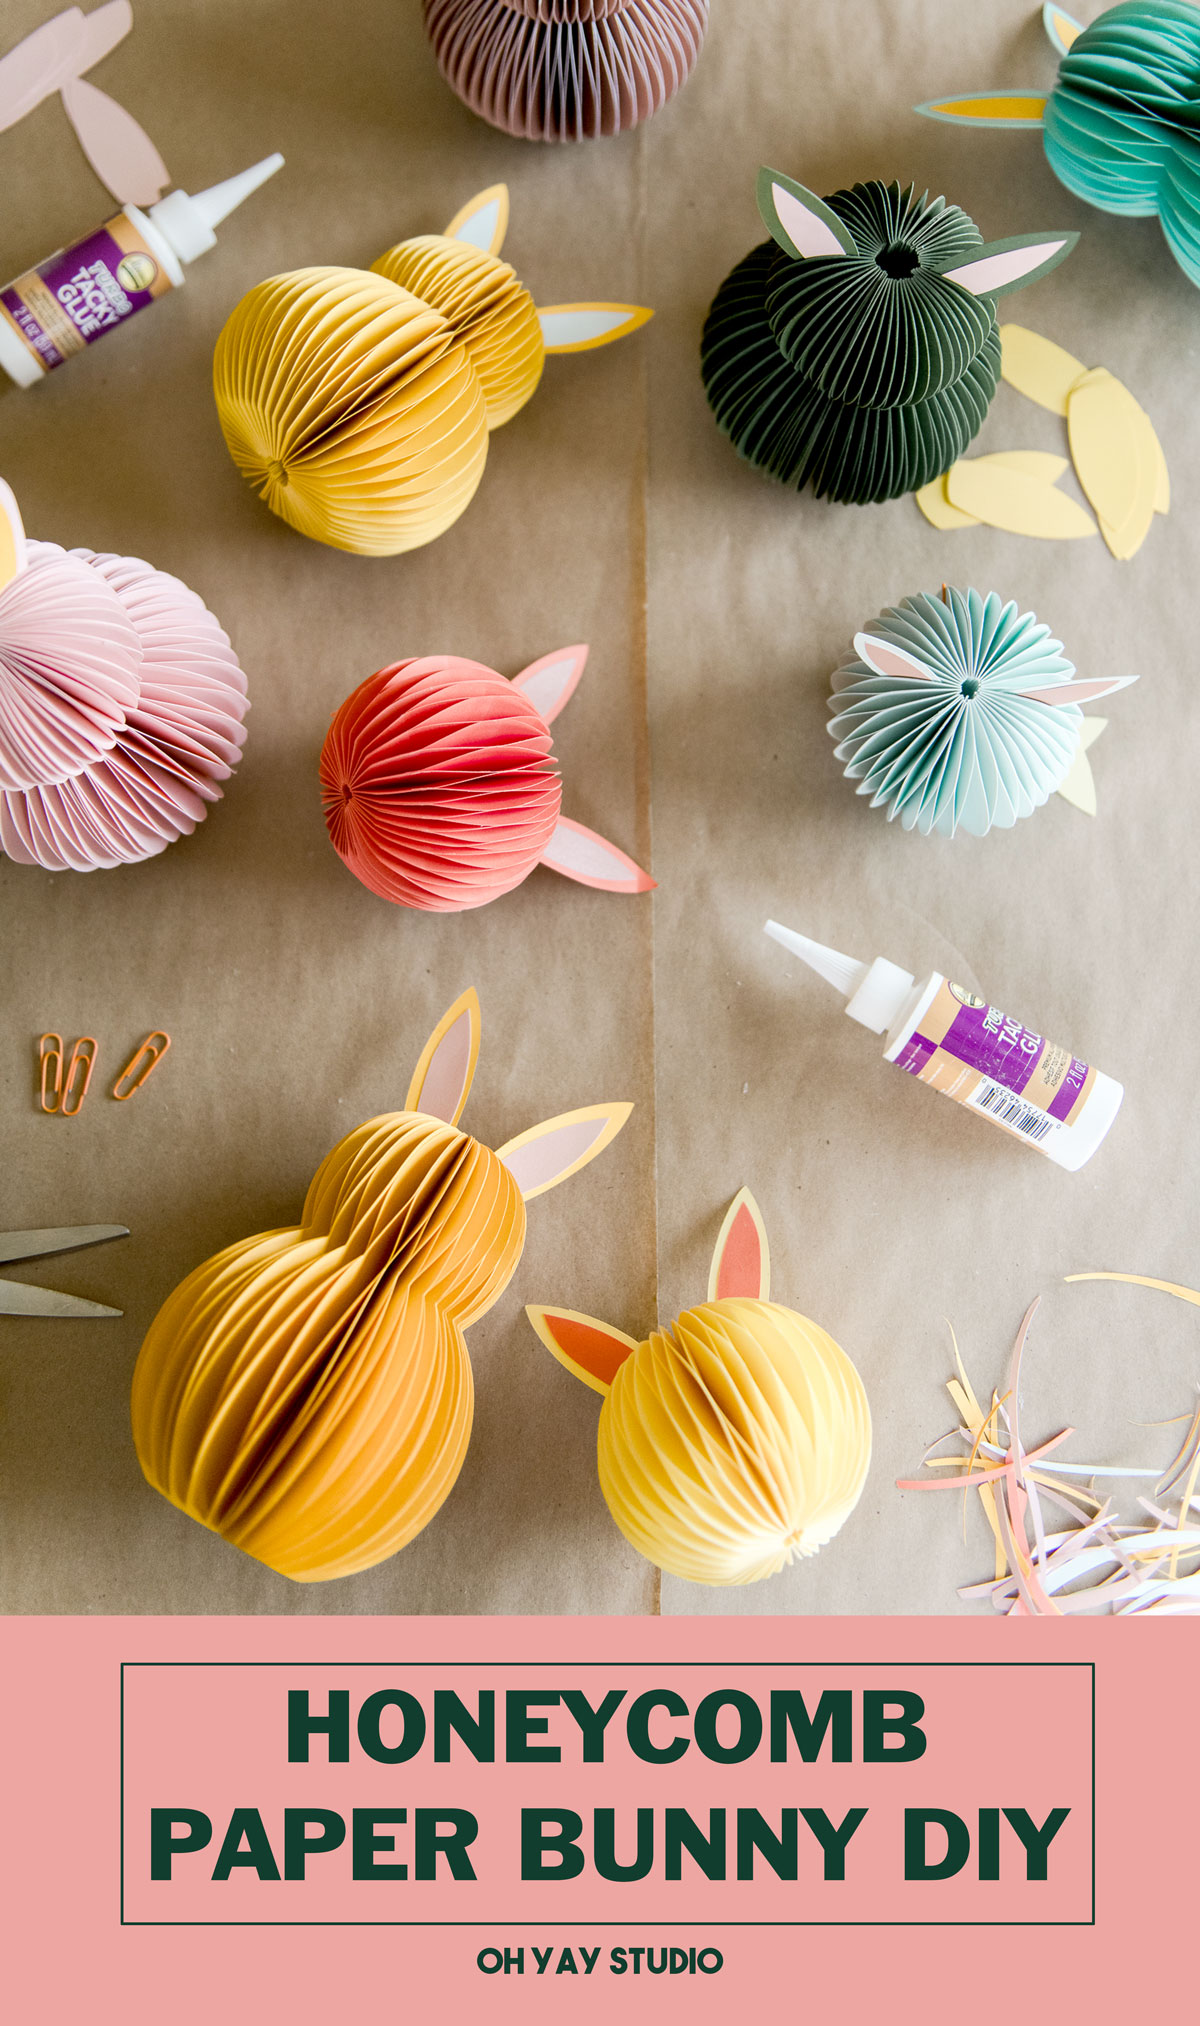
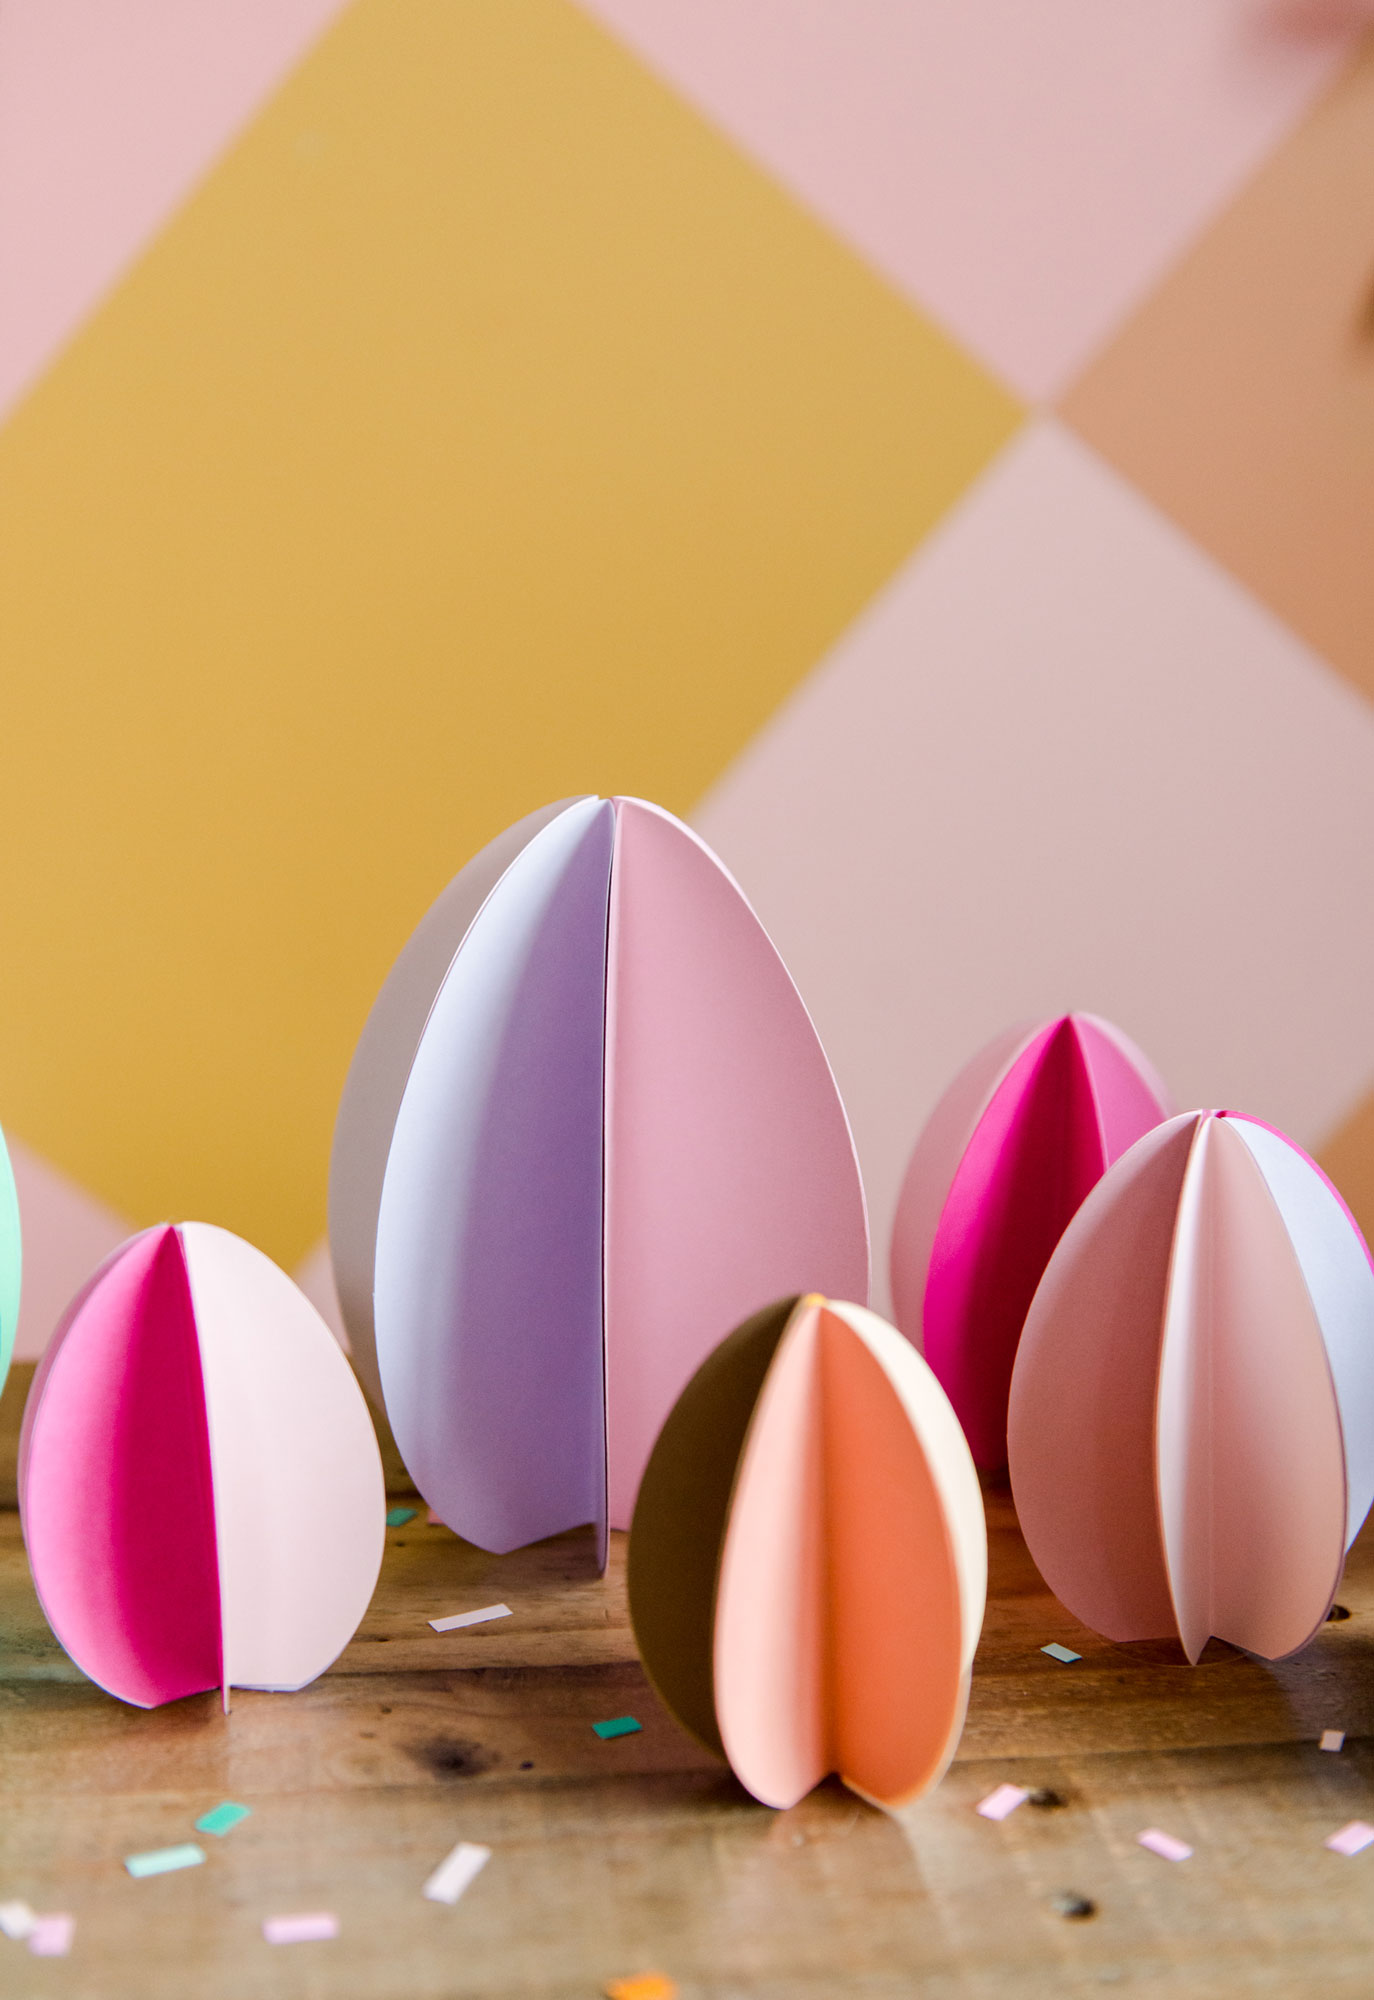
Honeycomb bunny DIY
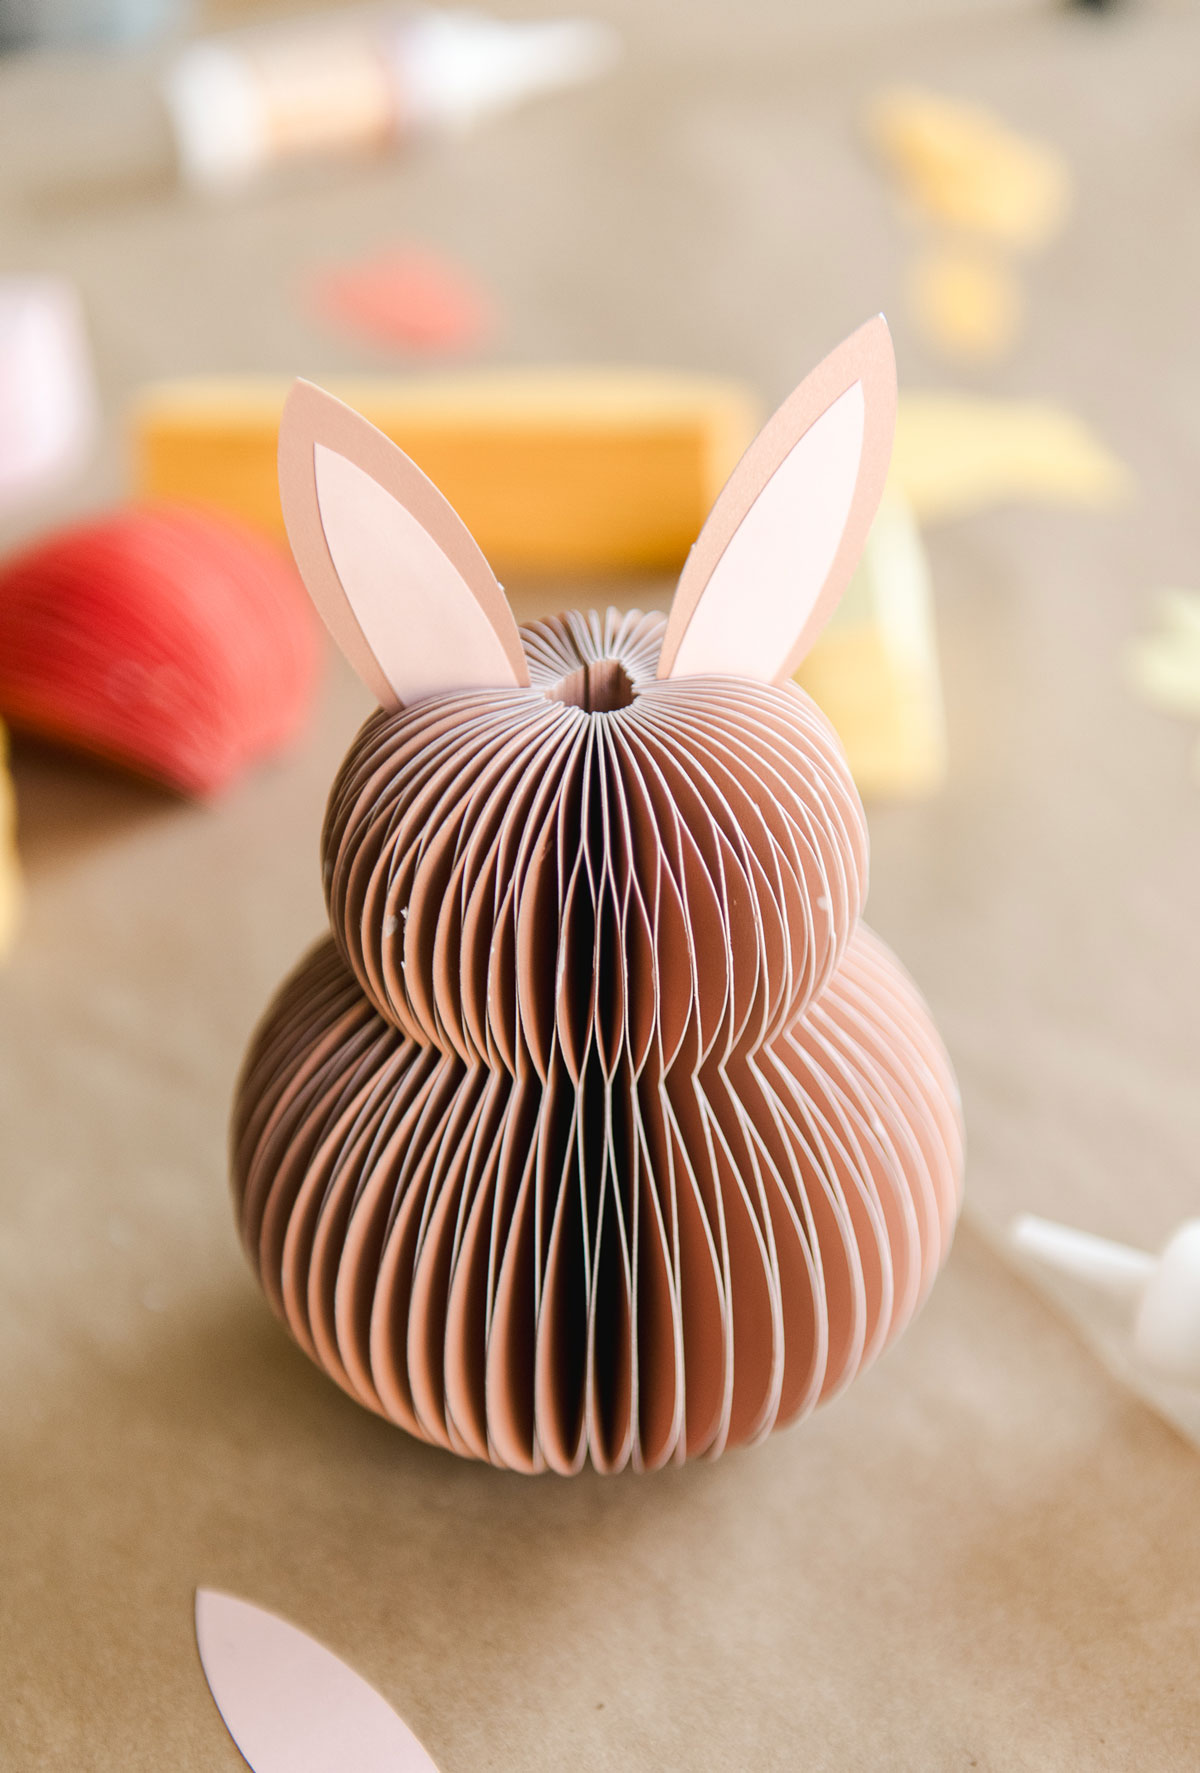
OKKKAYYY! This Christmas season I fell in LOVE with making honeycomb ornaments….sooooo I decided that we needed some more spring and Easter decor, so ENTER: HONEYCOMB bunnies! Aren’t they just adorable? 🙂 And they are made with some simple materials: paper and glue 🙂

If you have a cutting machine, like a Cricut, then this project will be SO much faster and easier (because you can just pop in your fave movie while the machine does the work, HA)! 🙂 But please don’t be swayed from making these if you don’t have one….they are TOTALLY doable without.
MATERIALS:
- Cardstock in your fave colors
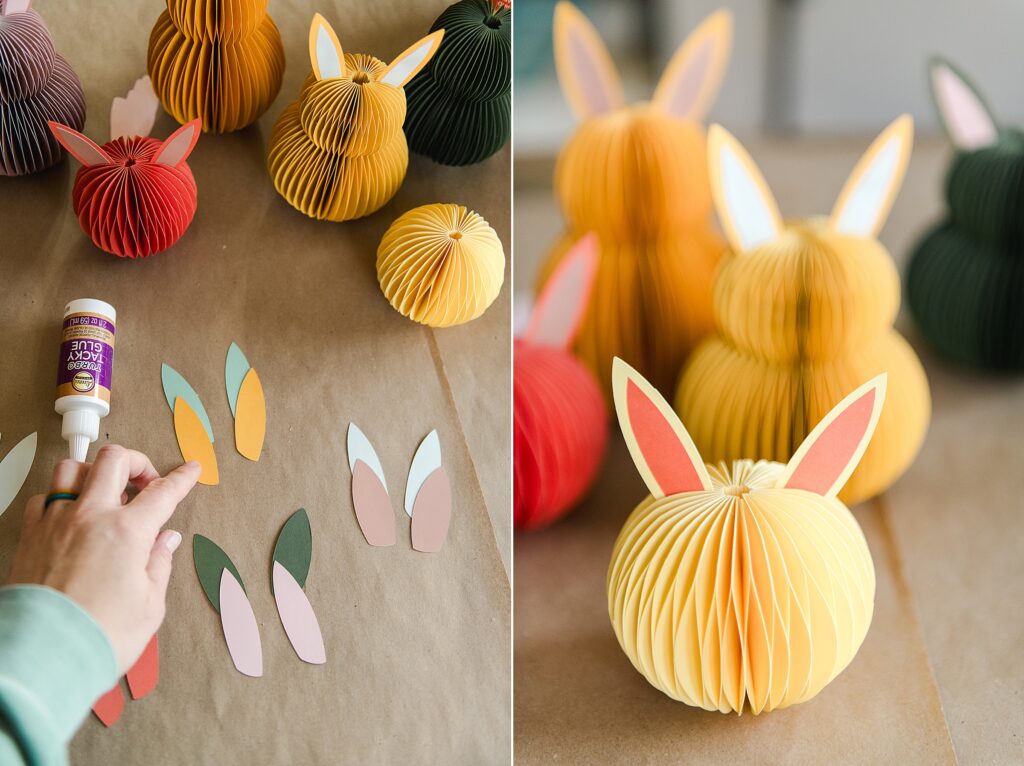
- A bottle of the pointed tip nozzle Aleene’s Turbo Tacky Glue
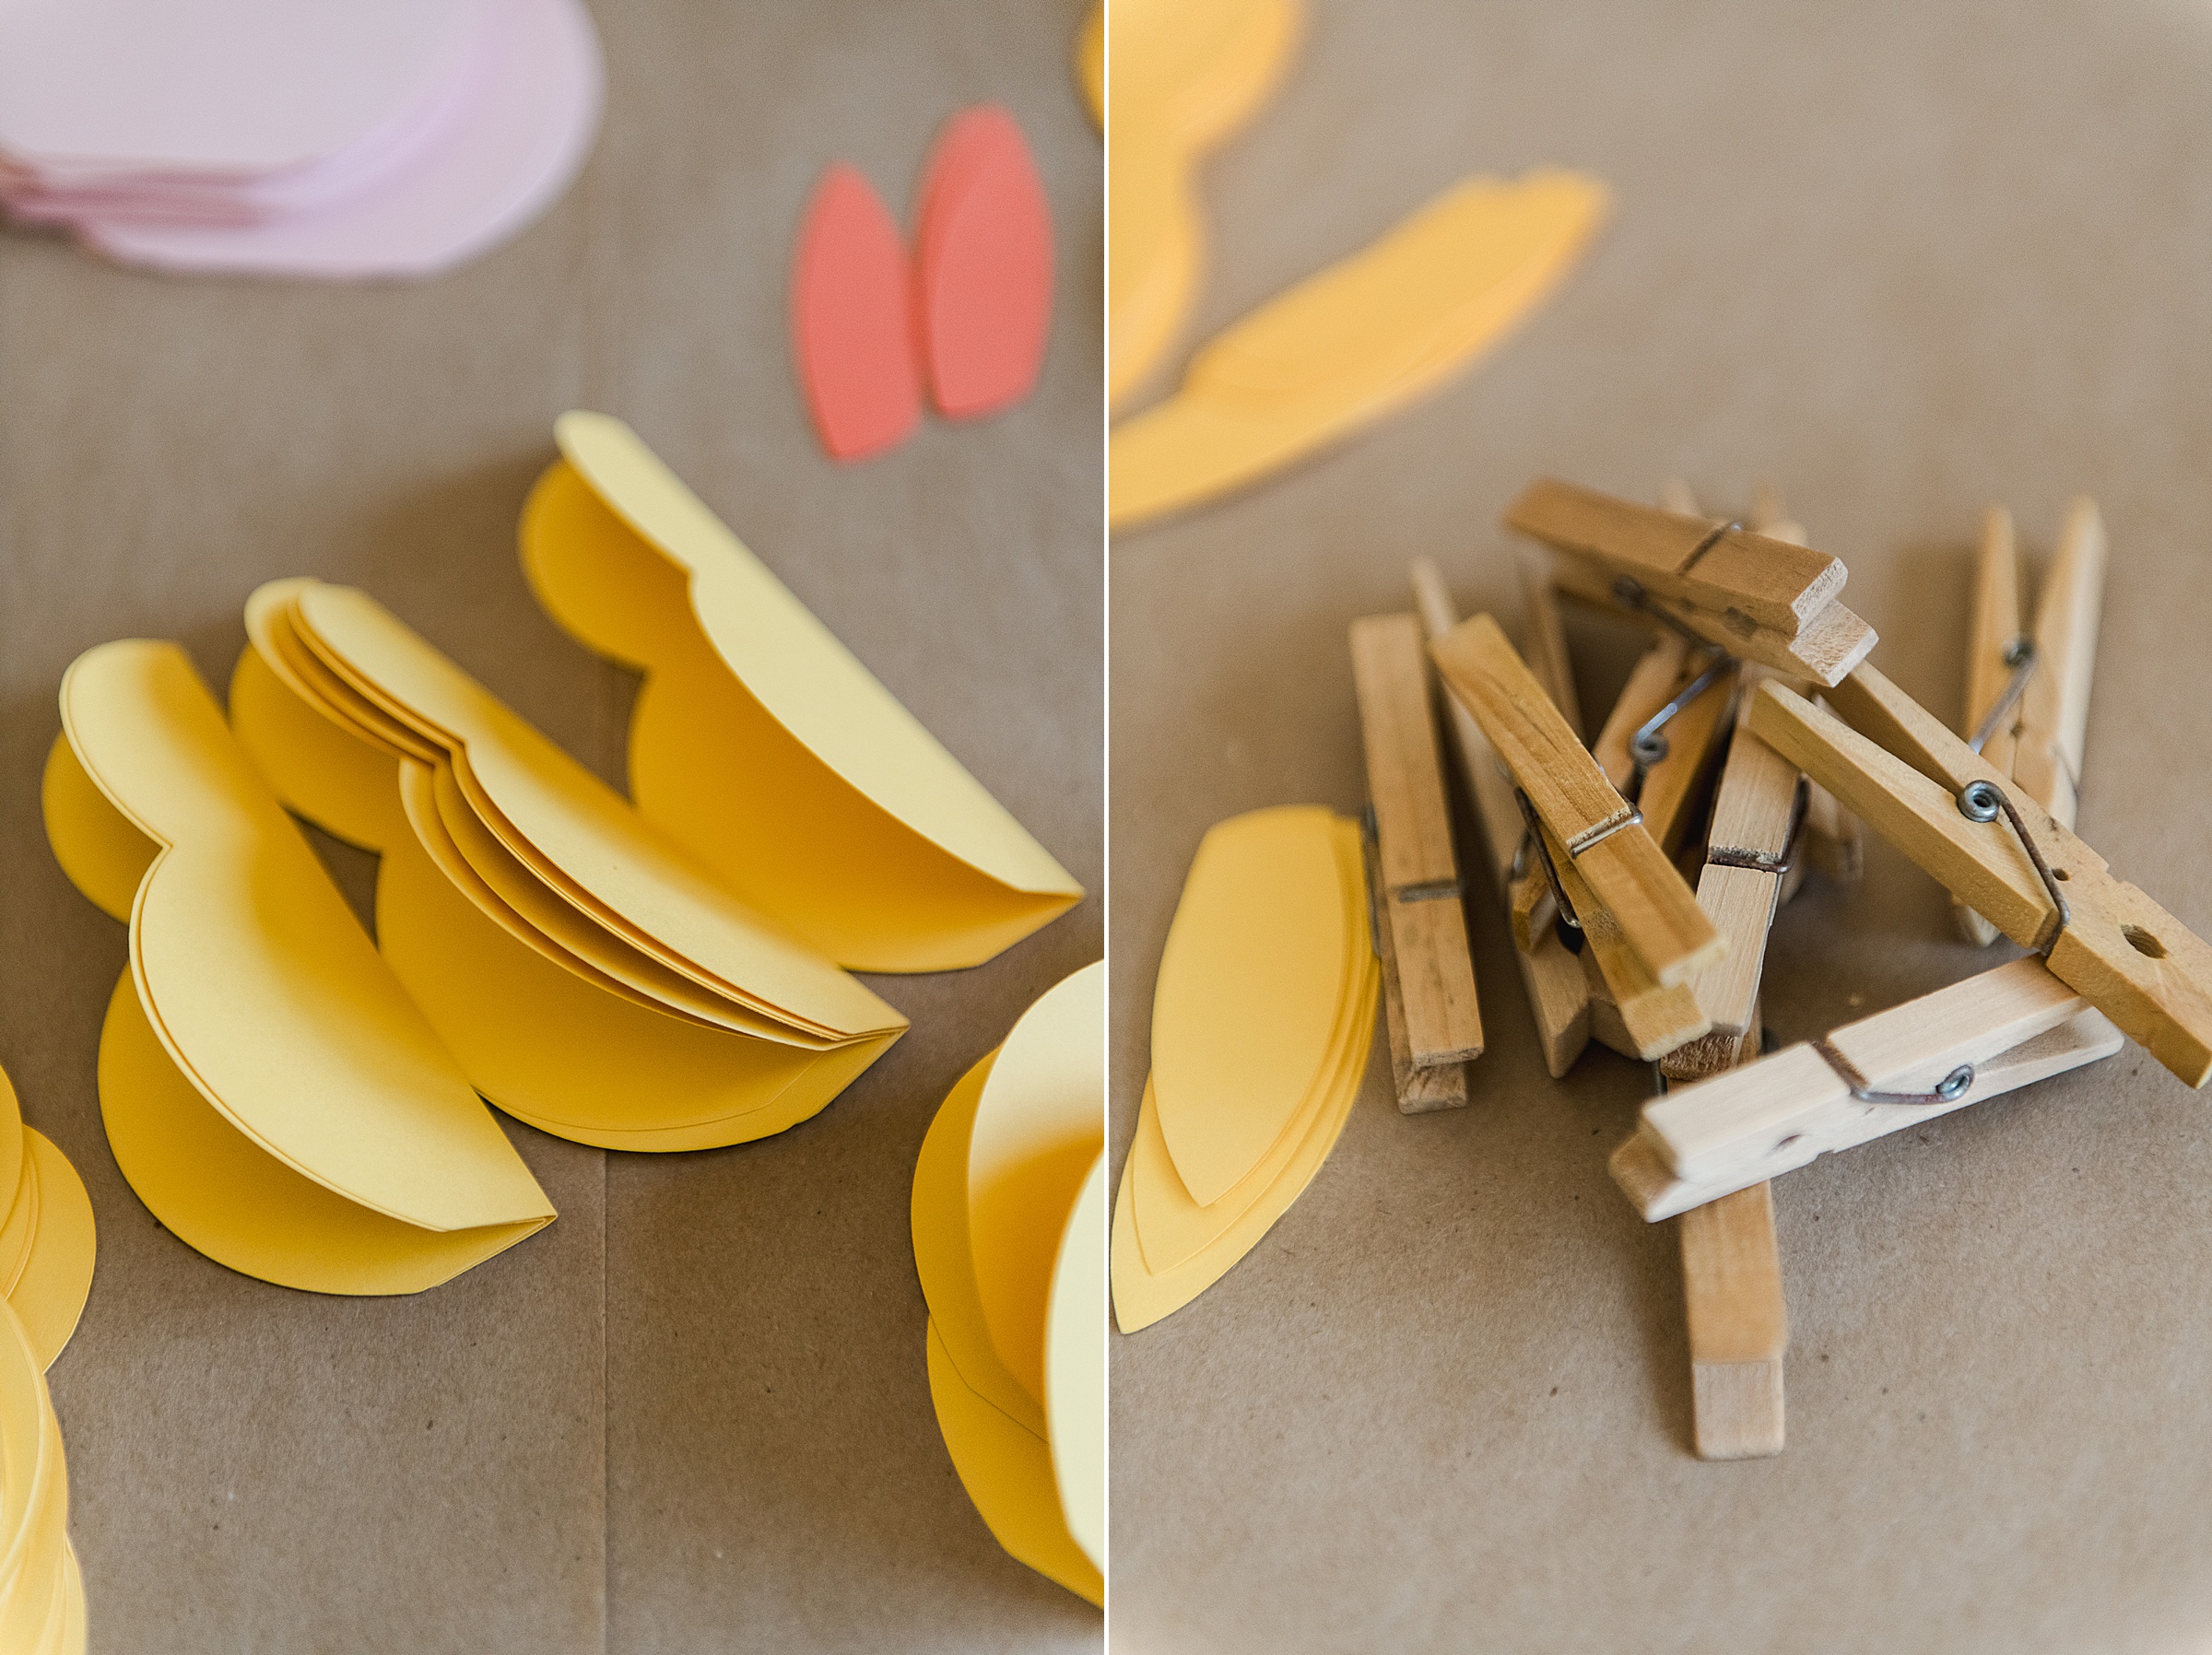
- Some clotheslines for precision holding while drying or some books to put the drying bunnies under
- Sharp scissors, pencil , ruler and pen cap (pen cap for scoring) ORRRRR Your fave cutting machine with cutting blade and scoring tool
- SVG cut files (download HERE)
INSTRUCTIONS:
1. Cut out your bunnies from paper!
You can either download the SVG file HERE (for your cutting machine) ORRRR the PDF’s that I’ve provided to either print off or trace and cut (choose your method….and truthfully I tried them all and all work wonderfully)! 🙂
note: With any of the methods that you choose, you will want 25-35ish shapes for each bunny to make them look full and happy so just keep that in mind when you size accordingly

Download the SVG files for all 3 bunnies HERE!
**If you are using a cutting machine, like a Cricut be sure to follow these steps with the SVG that I’ve provided:
- 1. Upload your image into your Cricut design space
- 2. Size your bunnies if you want them bigger or smaller
- 3. On the side bar (to the right) be sure to highlight the straight line for each bunny and one by one go up to the top menu bar (upper left) and be sure to select “score” instead of cut….this will put the easily foldable score line down the exact middle of each ornament shape
- 4. Then highlight the score line and the shape of the bunny together on the right side bar and “attach” them together at the bottom of the sidebar. This makes sure that the score line and the shape are “together” instead of being cut/scored separately 🙂
- 5. You can copy and paste as many bunny shapes as you’d like for each size of paper (I found that tI could do the larger and medium size about 6 per 12×12 paper, and about 9 of the smaller circle shape per 12×12 paper….but size accordingly)

2. Fold your bunnies in half along the score line!
If you hand-cut your bunnies, you will want to use a ruler and a pen cap (something pointy, that won’t pierce, rip or tear the paper) to make a score line along the exact center of the ornament from top to bottom.
3. Being glueing together
(you can reference my Christmas ornaments if you want to hear more about my glue choice for these honeycomb projects 🙂
How to glue the smaller circle bunnies:
Make sure all of your circles/small bunnies of one color are folded in half along the score line.
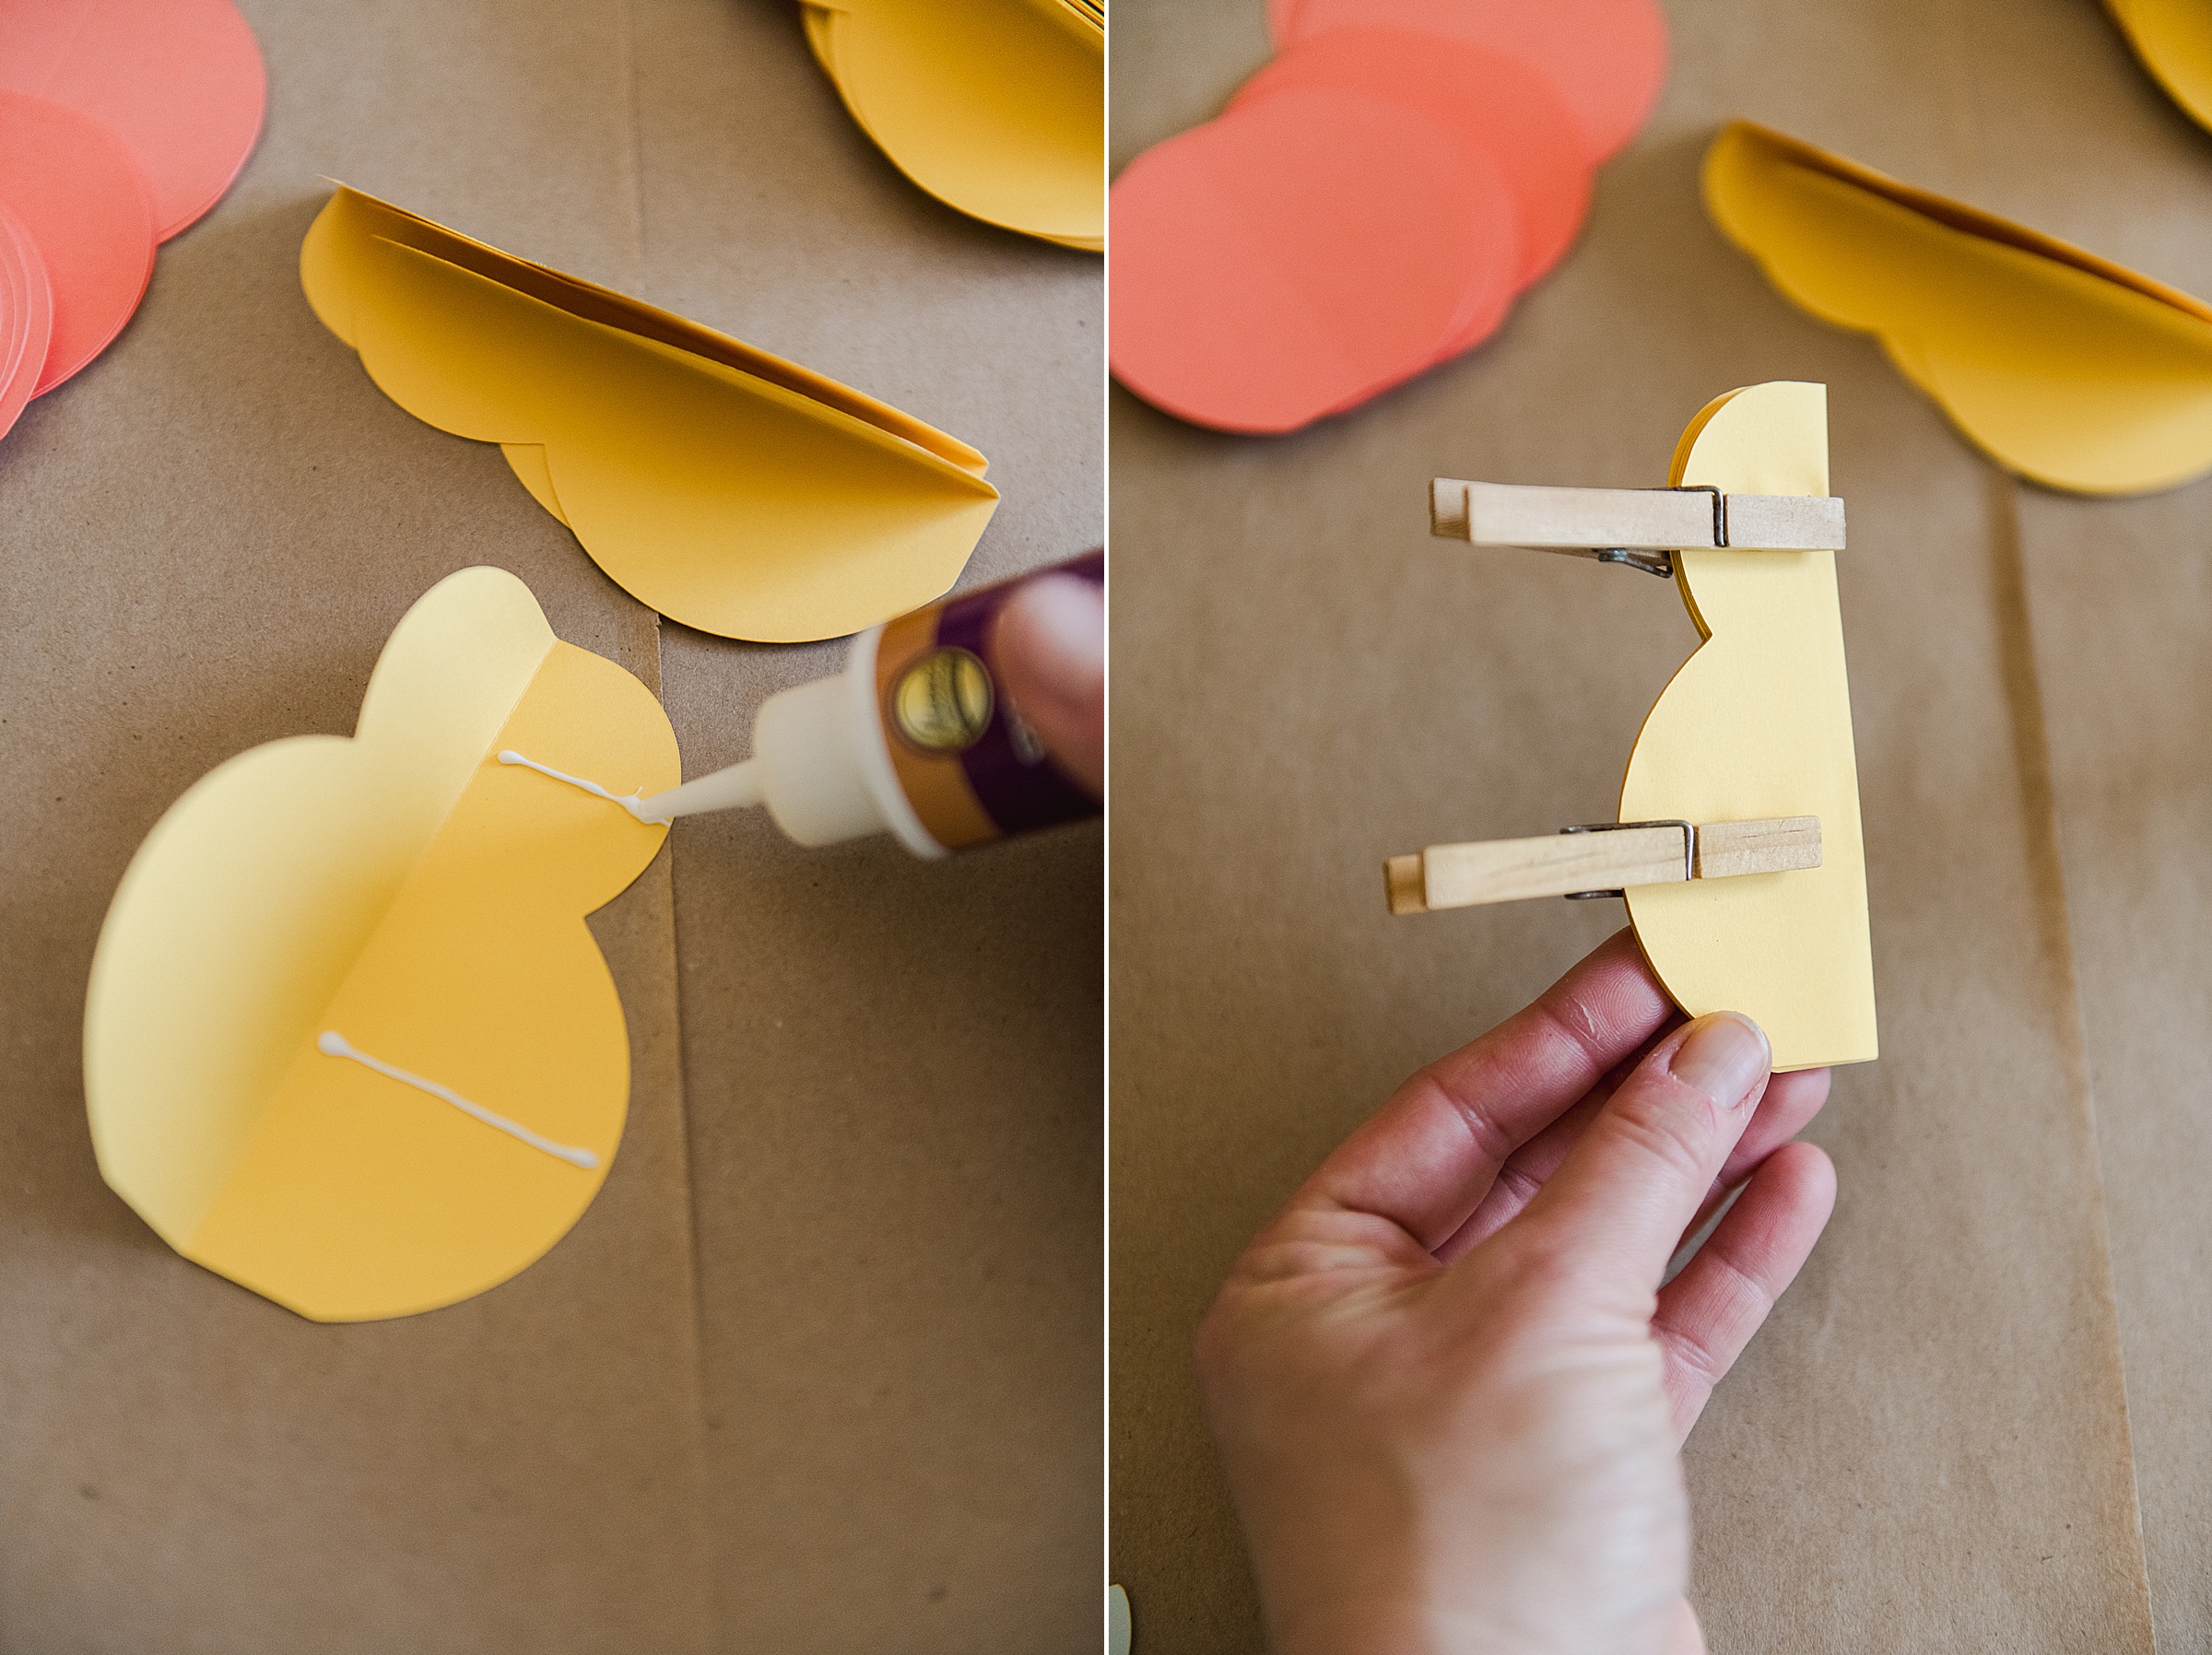
Then run a bead of glue from the middle score line towards the outside edge on ONE side of the folded circle. Be sure not to put the bead of glue close to the edge of the paper so that it doesn’t squirt out the sides (although if that does happen it’s not that big of a deal).
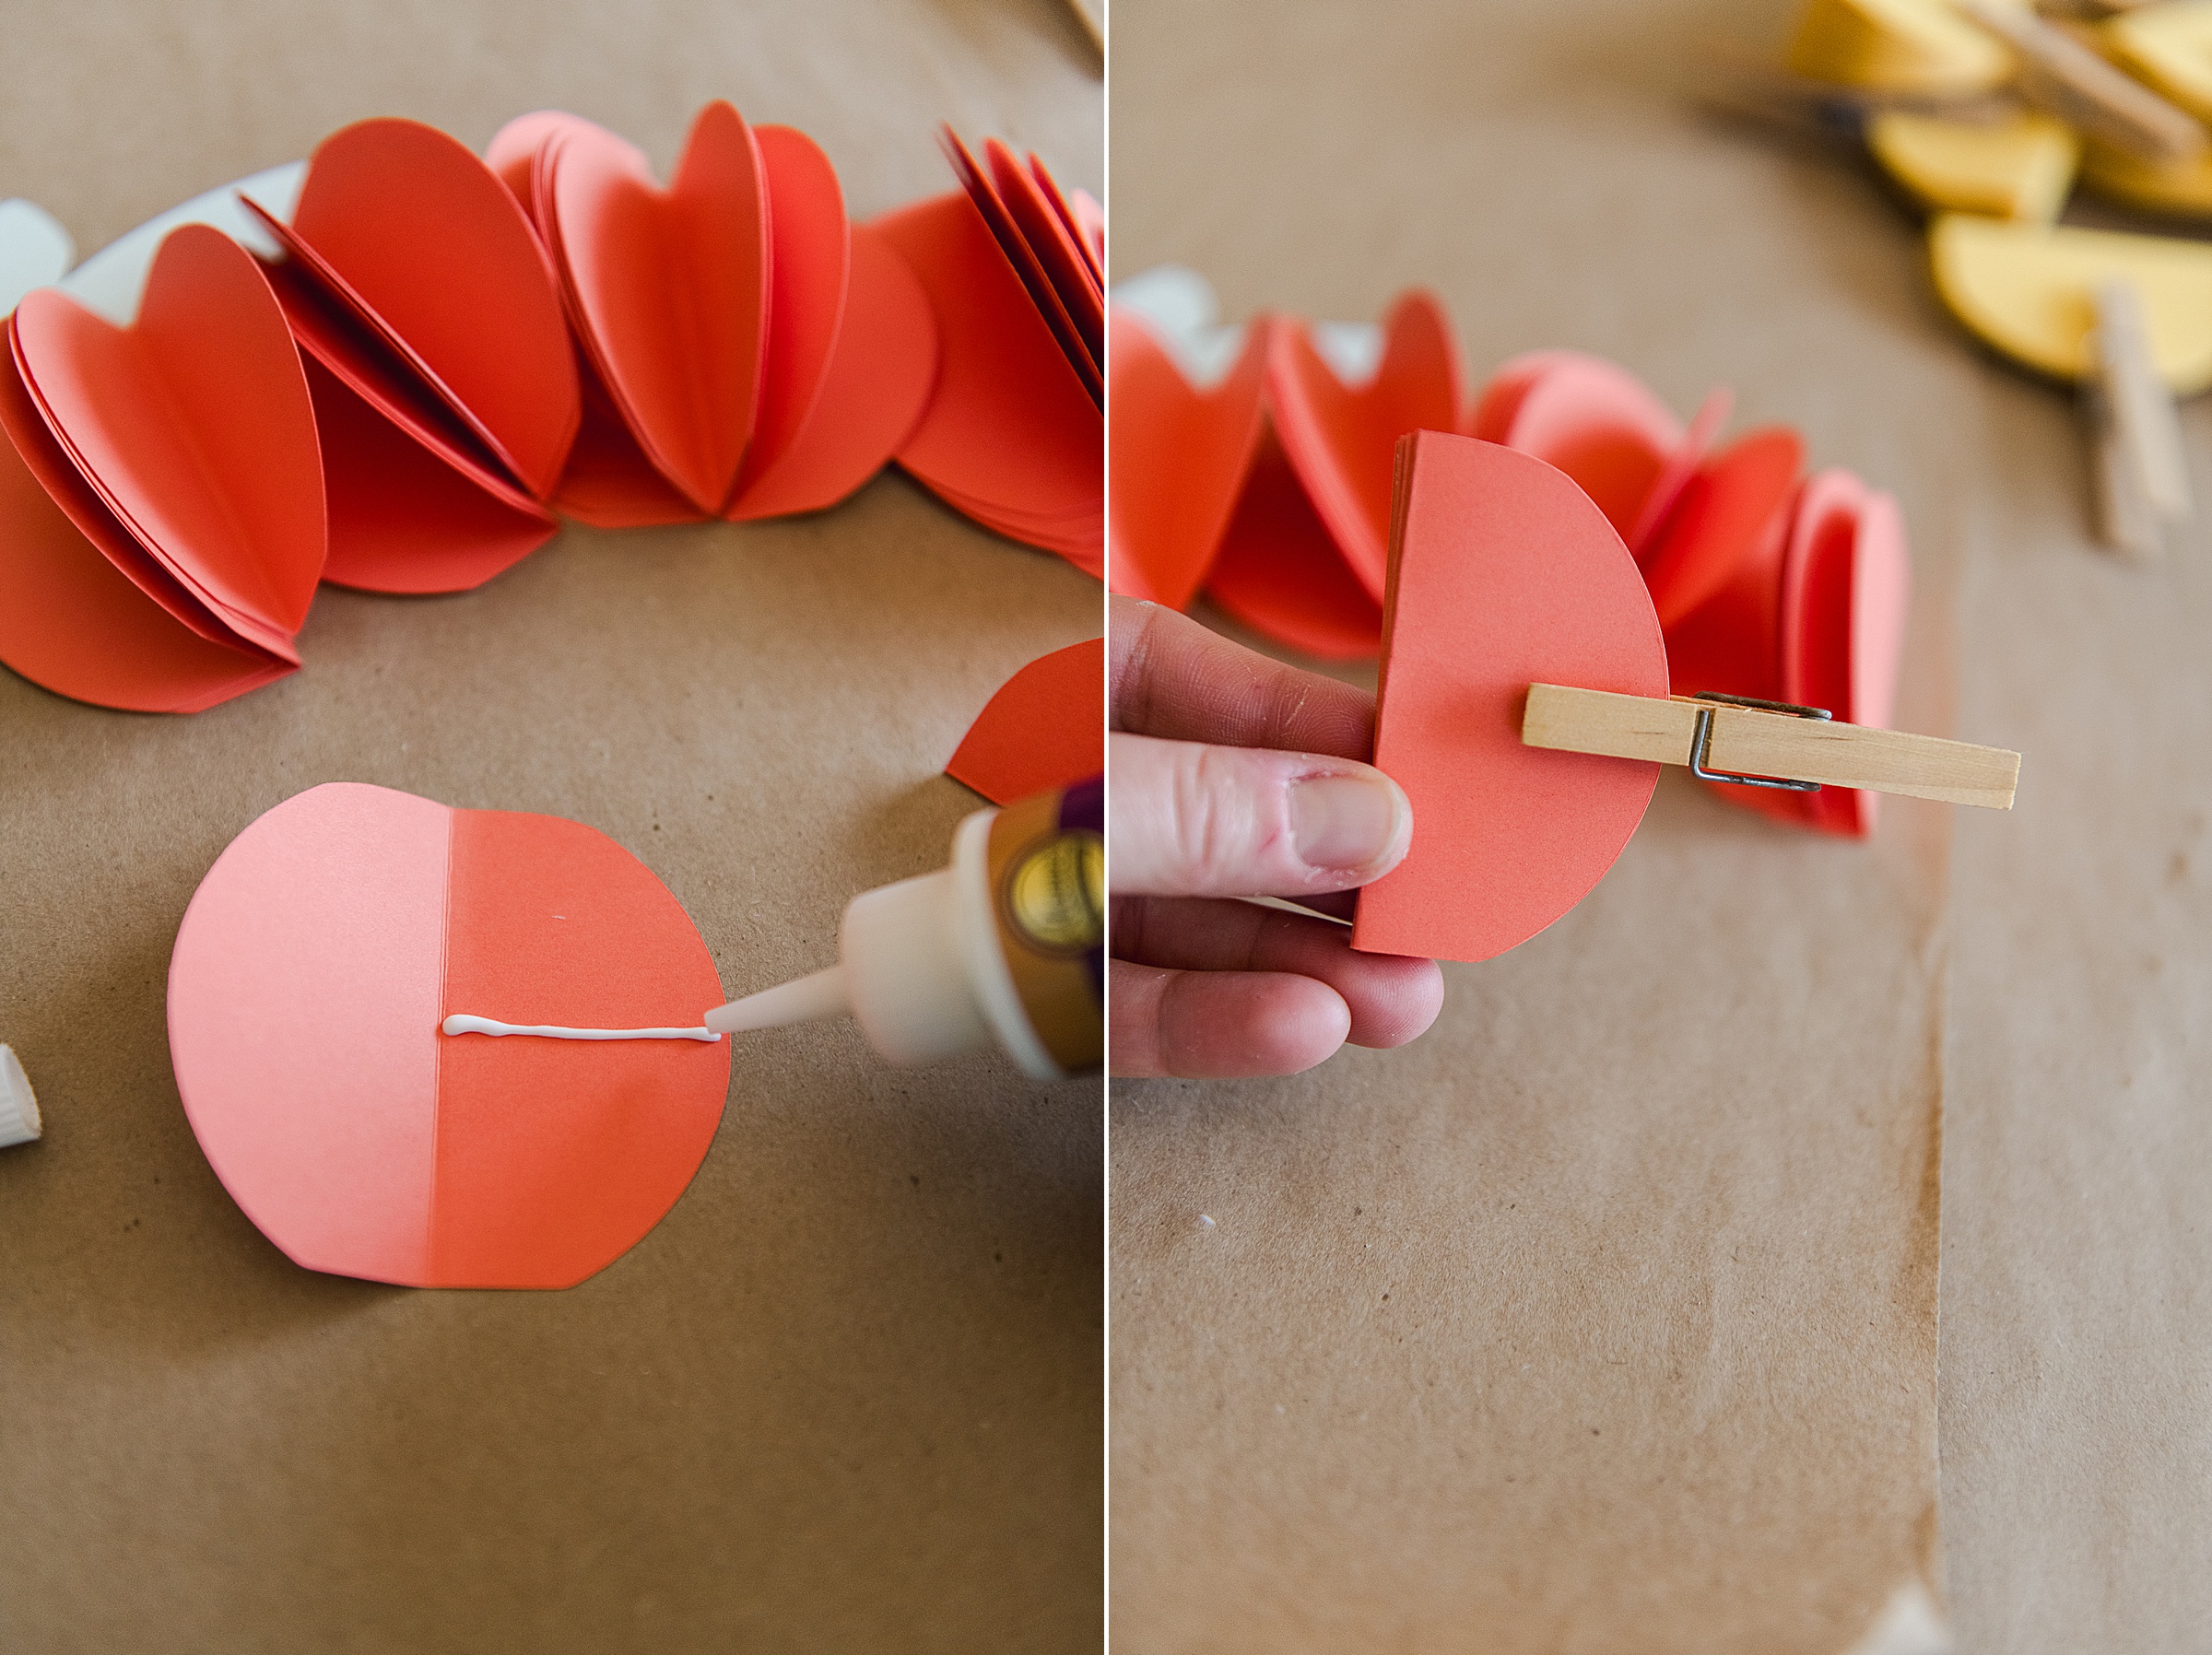
Fold the circles in 1/2 along the score line and repeat this bead of glue with ALL of your cut circles of one color.
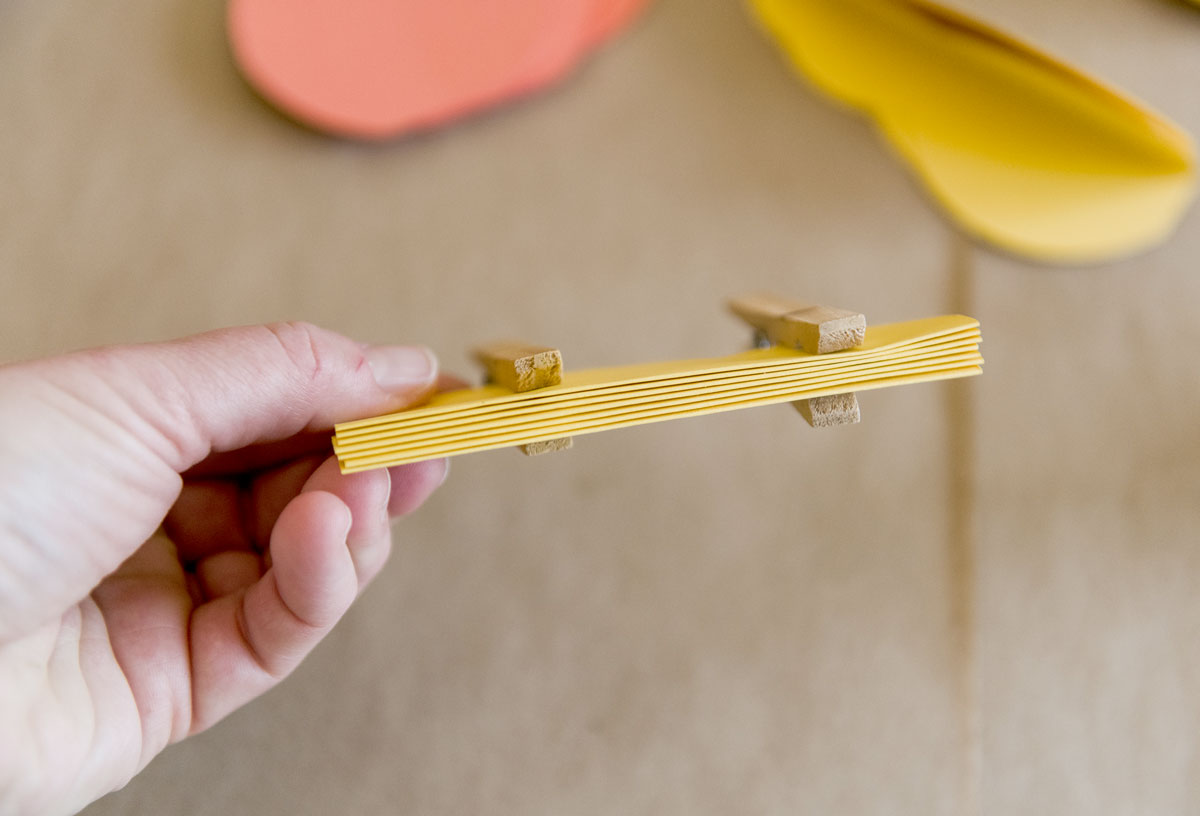
Set these aside to dry with your clothespins holding folded as you go. (They really only need about 10 minutes and they are PERFECTLY dry…..so fast and amazing)!
Once they are dry, remove the clothes pins and you will begin glueing them ALL together. With the circles still folded (don’t open them), you will run 2 beads of glue along the top and bottom of the folded circle about 1/4″ or less away from the top and bottom edge. Then layer another folded circle on top and repeat until all of the circles are glued together (BE SURE that that slight straght edge is all lined up across the bottom of the stack so that the bunny sits nice and flat).
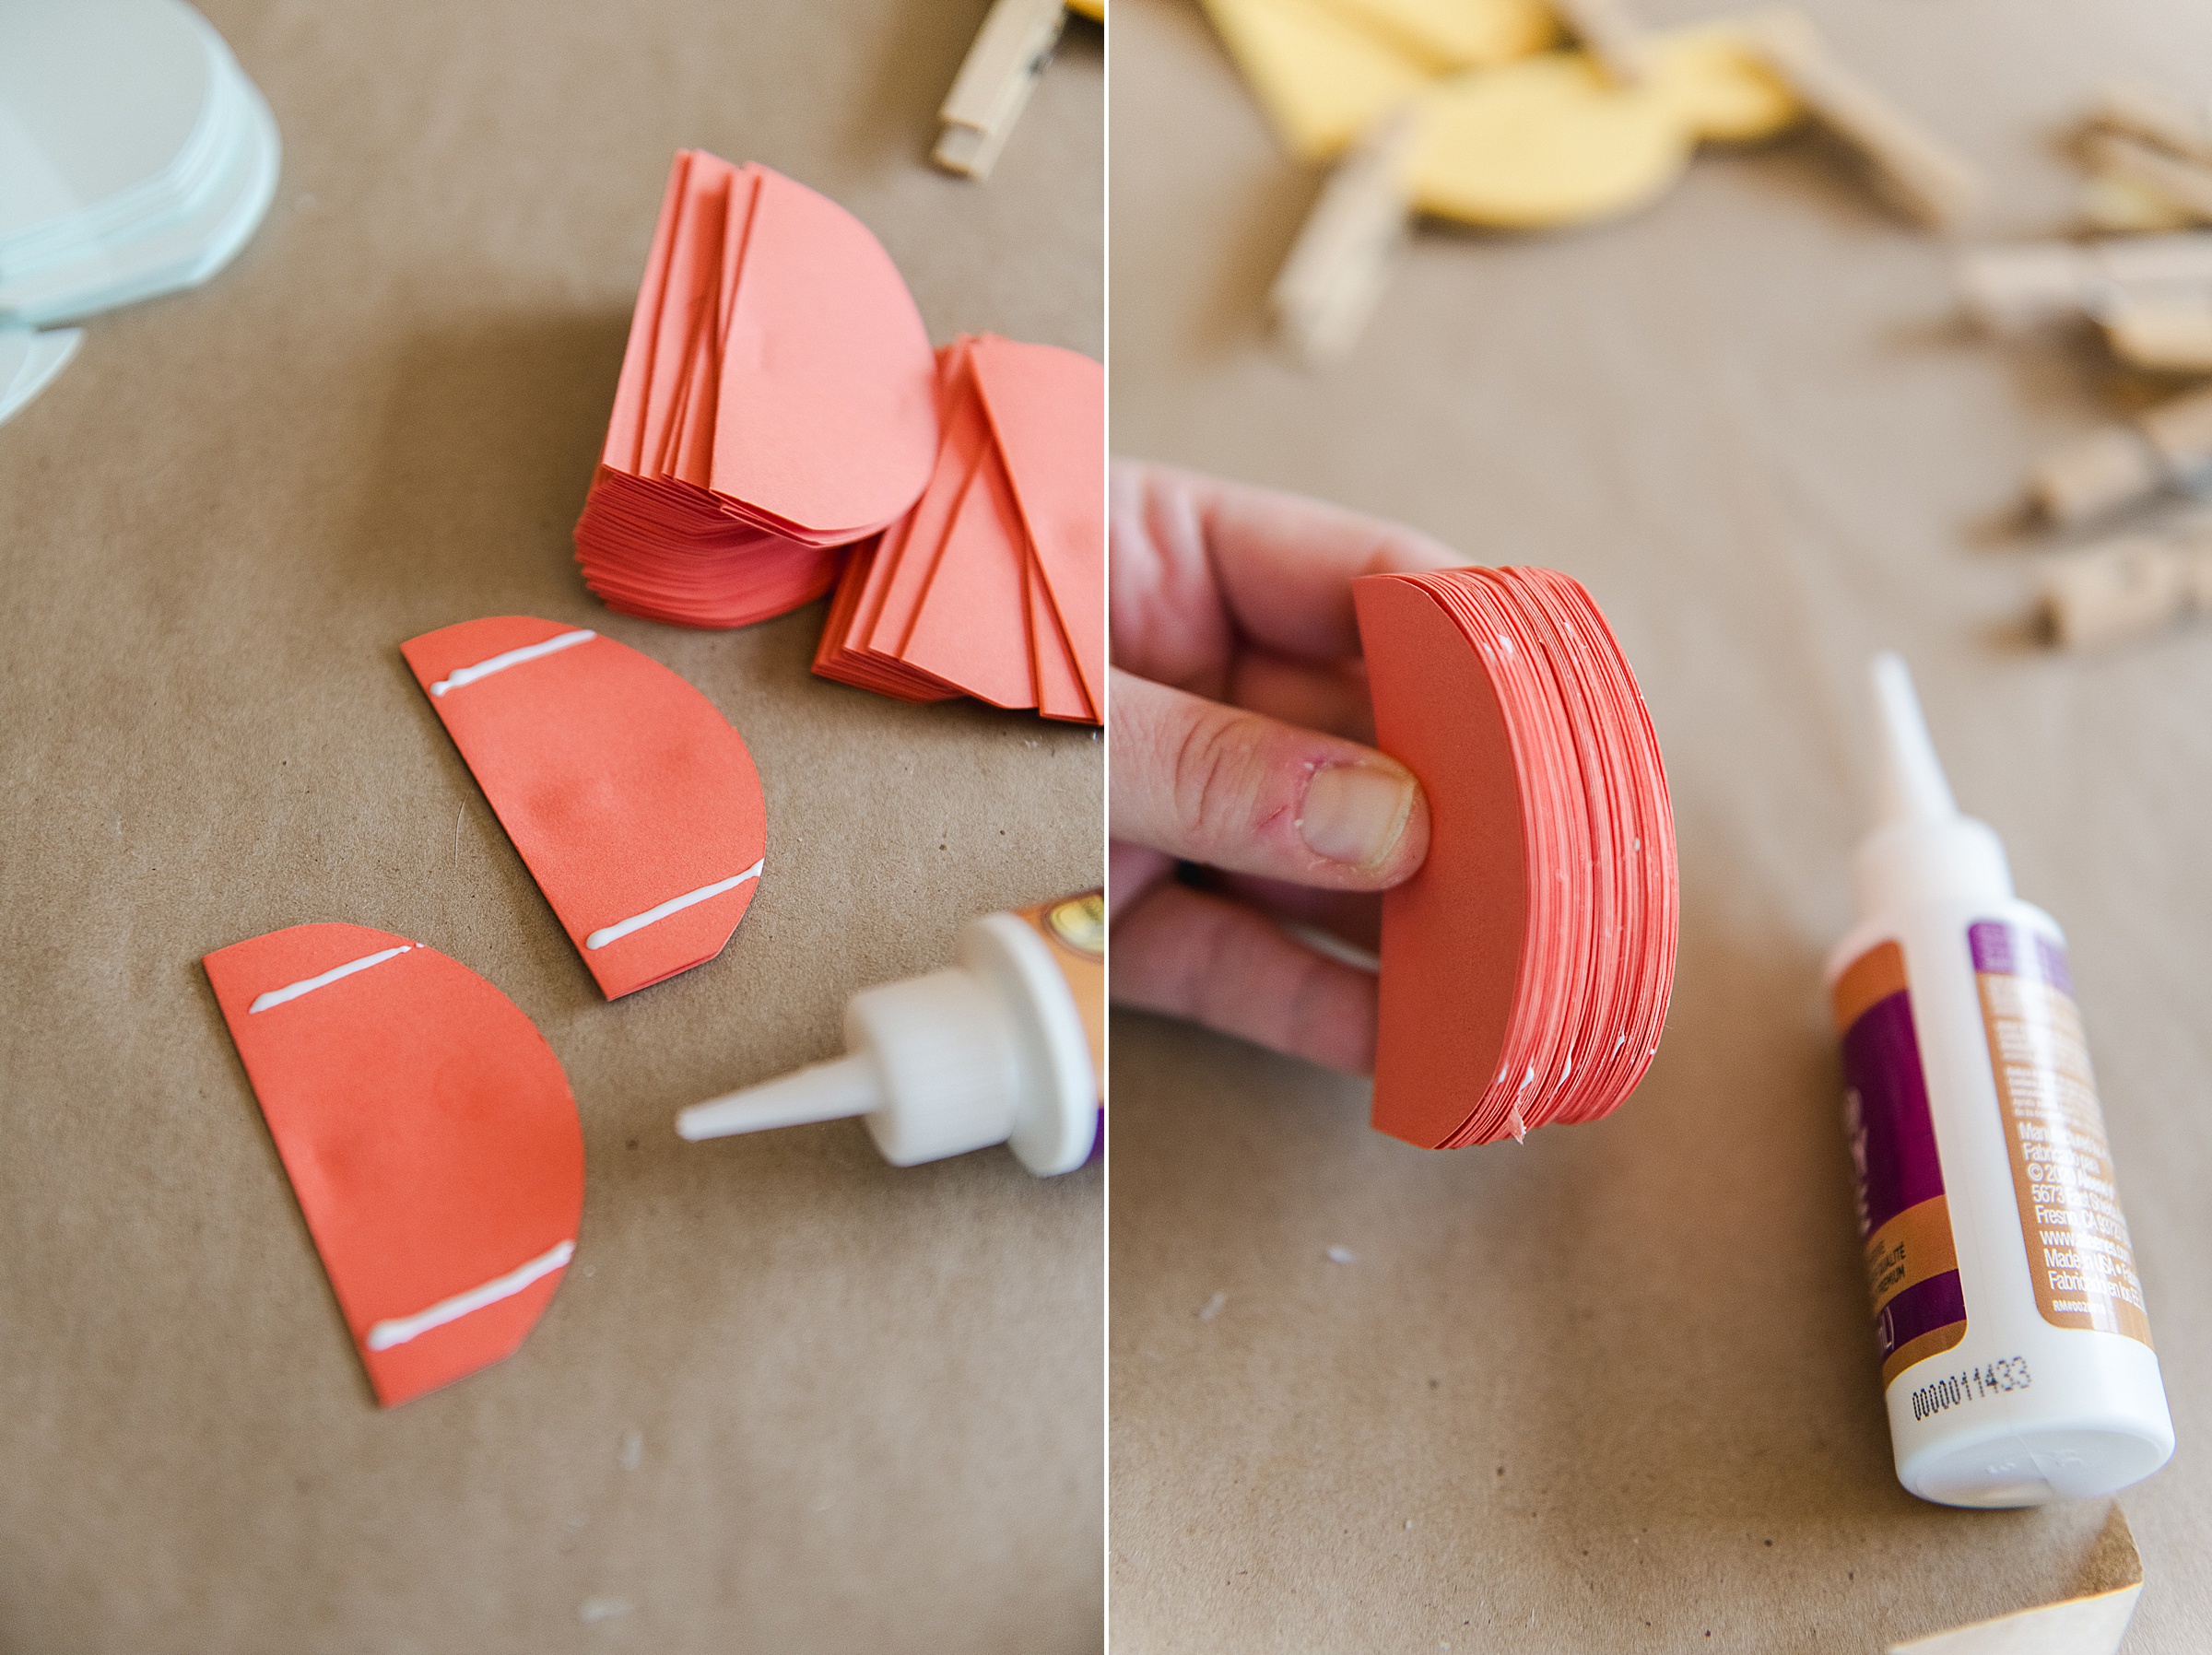
Place the big stack under a book or something heavier for 10-15 minutes or until they are all dry and ready to finish with steps 4 and 5 below!
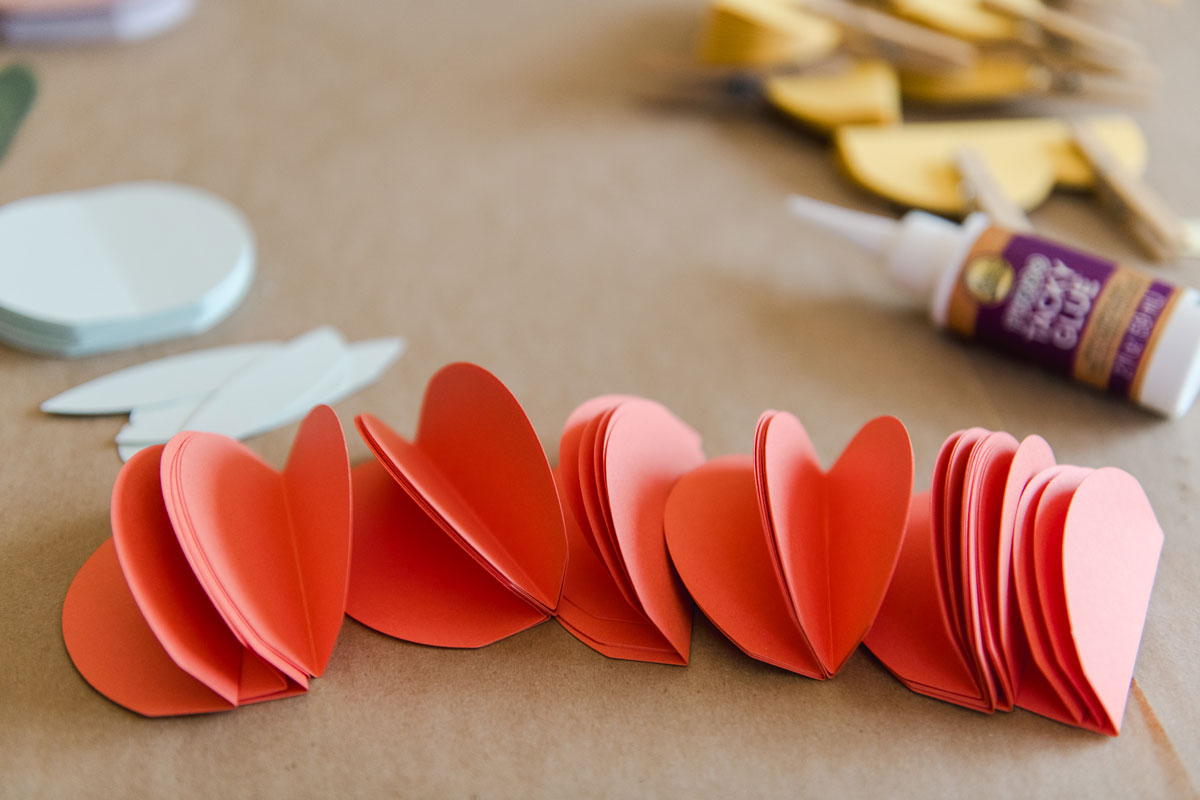
How to glue the Medium and Large bunnies together:
Make sure all of your bunny shapes of one color are folded in half along the score line.
Then run a bead of glue from the middle of the top “head” circle from the folded edge towards the outside edge AND another bead of glue in the bottom circle from the folded edge towards the outside edge. Be sure not to put the bead of glue too close to the edge of the paper so that it doesn’t squirt out on the sides.
Fold the bunny shapes in half along the score line and set them aside while making stacks of them to clothes pin together to hold as they dry. I made about 2-3 stacks per color and set them aside to dry.
Once they are dry, remove the clothes pins and begin gluing them ALL together. Do this by grabbing one of the folded bunny shapes and adding 3 beads of glue from the folded edge, outward – one bead about 1/2” from the top, one at the center “neck” of the bunny, and the other about 1/2” from the bottom. Then layer another folded bunnies on top and repeat this until all of the bunnies of one color are glued together – clothespin them together OR put them under a heavy book to fully dry for about 10-15 minutes until you are ready to finish with steps 4 and 5 below!
4. Cut out bunny ears
If you cut your bunnies from the SVG files, then you likely have a handful of bunny ears already cut out – I used these to make the ears for ALL of them. I matched the bunny color for the outside of the ear and then used a coordinating cut out for the inside of the ear! 🙂
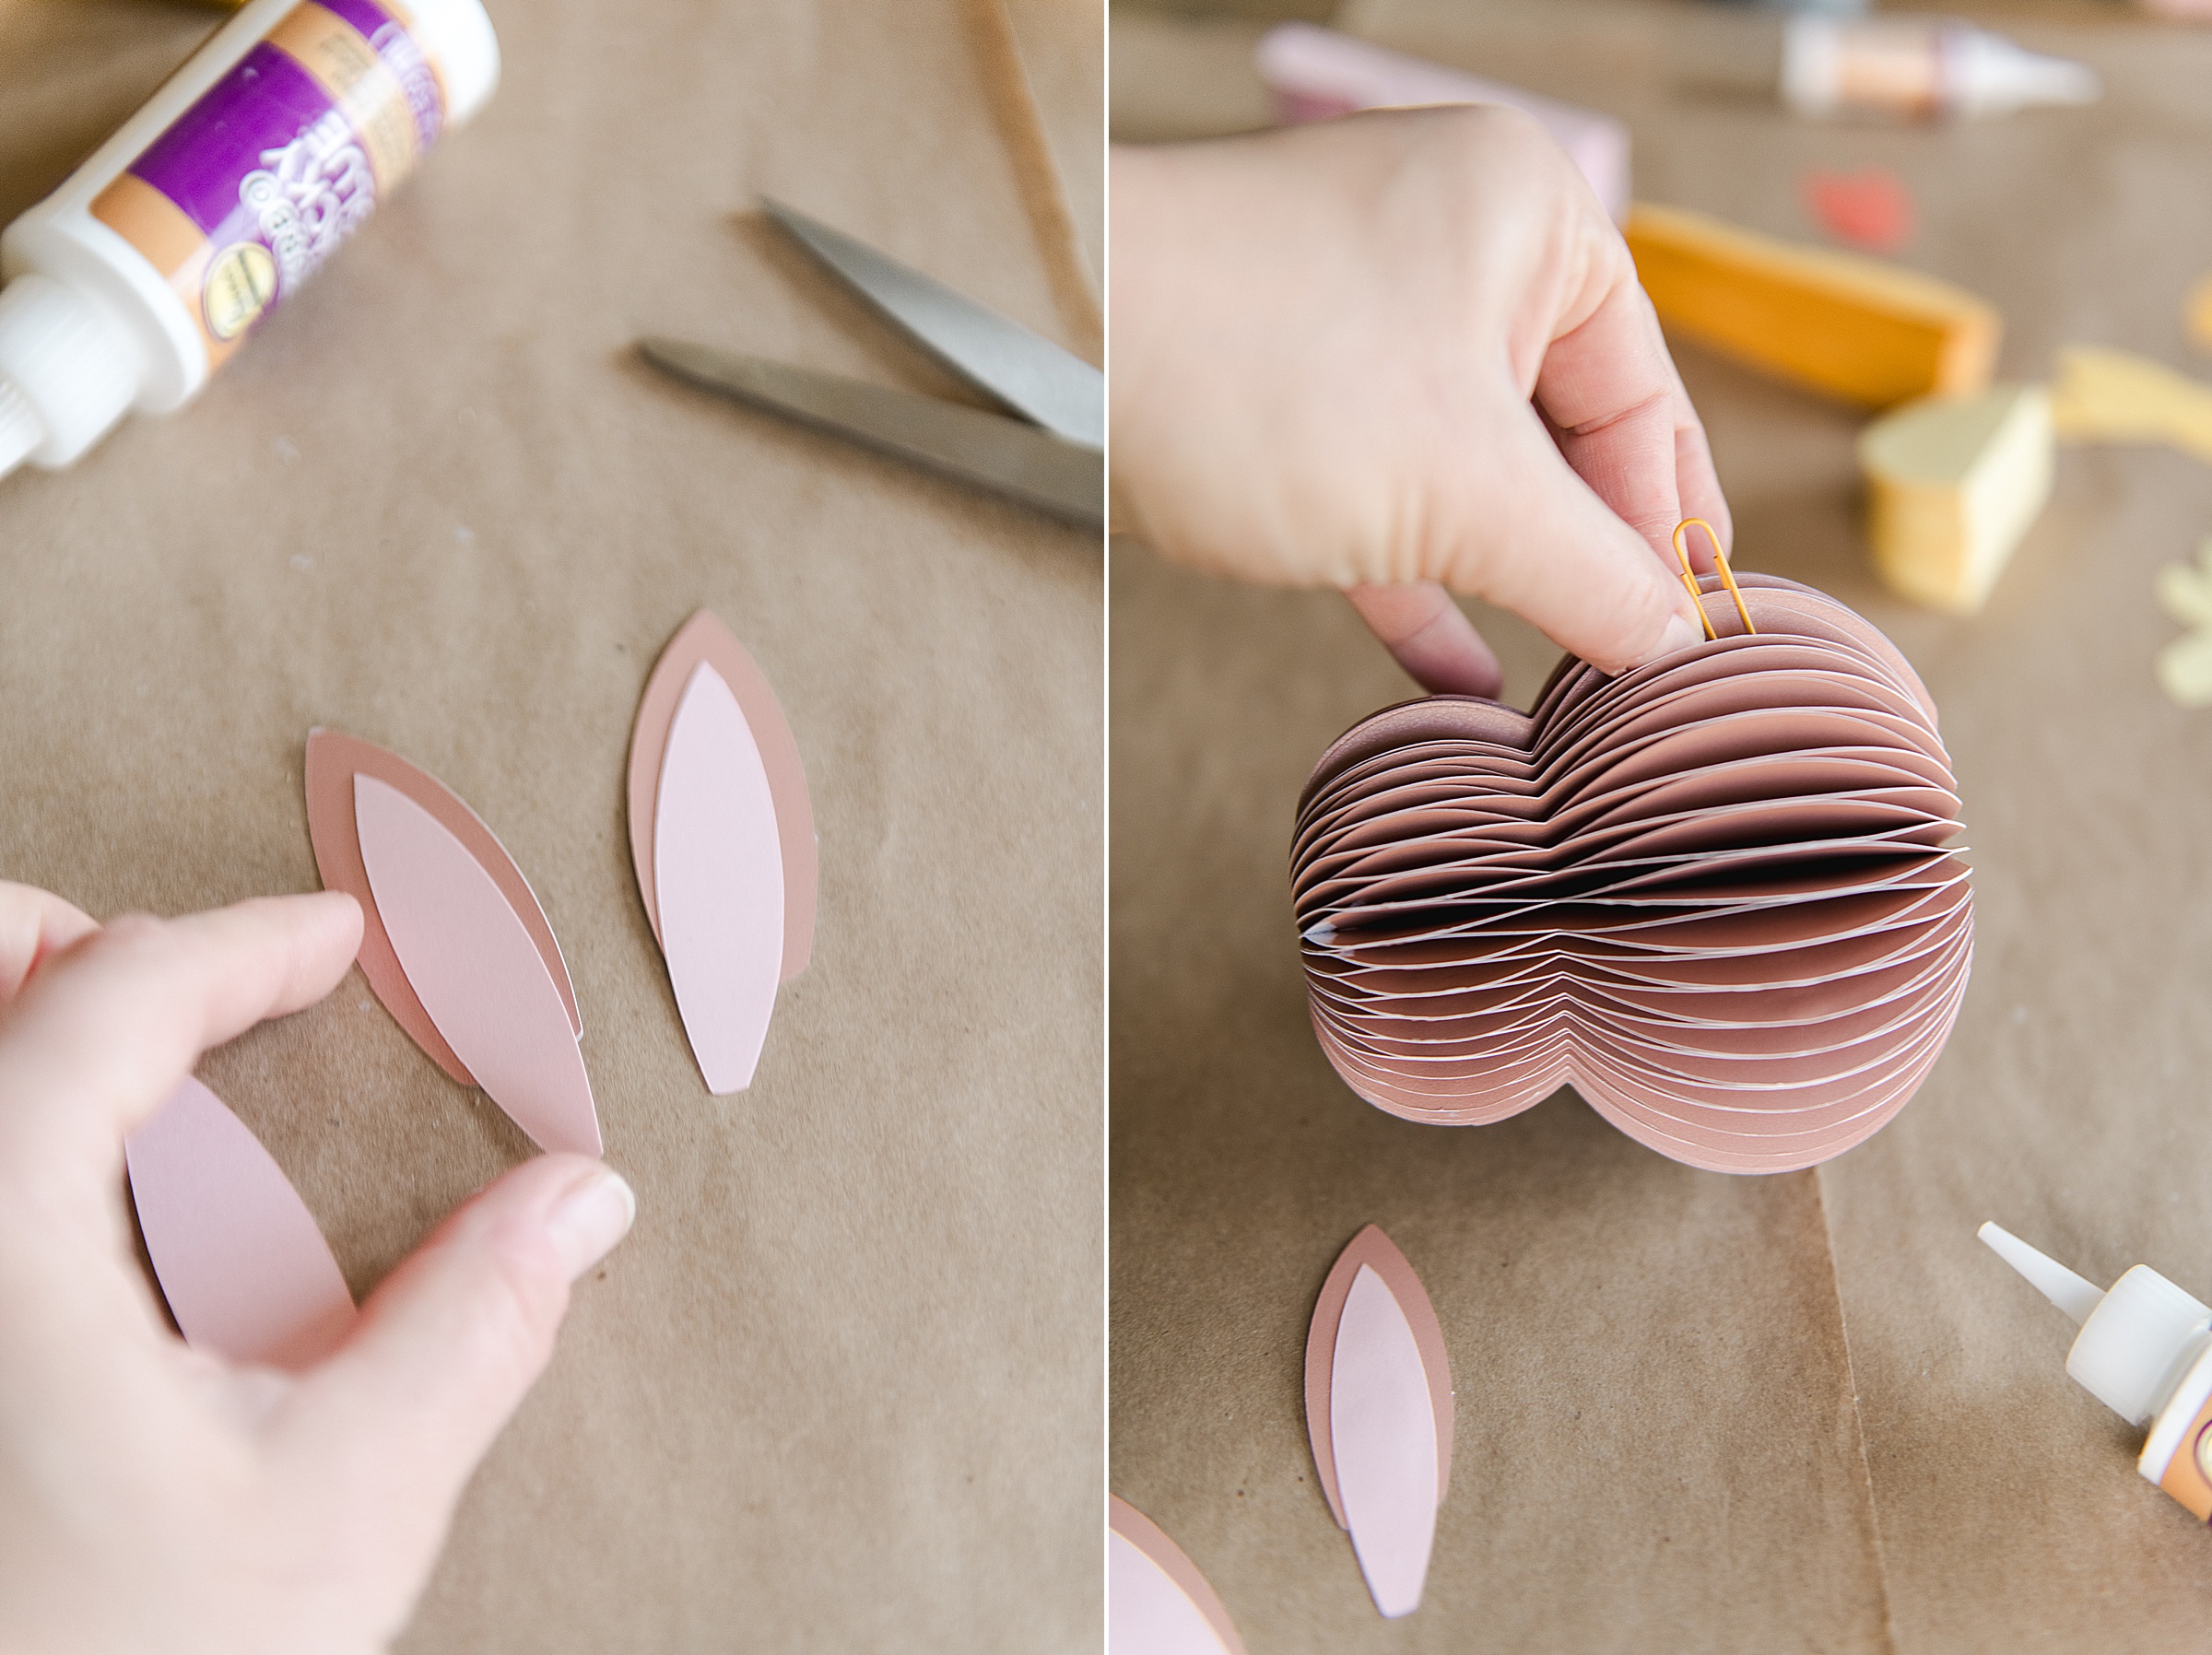
5. Open your bunnies and glue ears to complete!
Grab your bunny shapes and open them carefully a few times to allow them to get “unfolded” and “worked” a bit – sometimes the glue sticks a bit but be careful not to tear or rip.
I chose to use a paper clip to keep the bunnies open for easier storage (so they weren’t permanently open). You could also just use a dab of glue to complete the honeycomb!
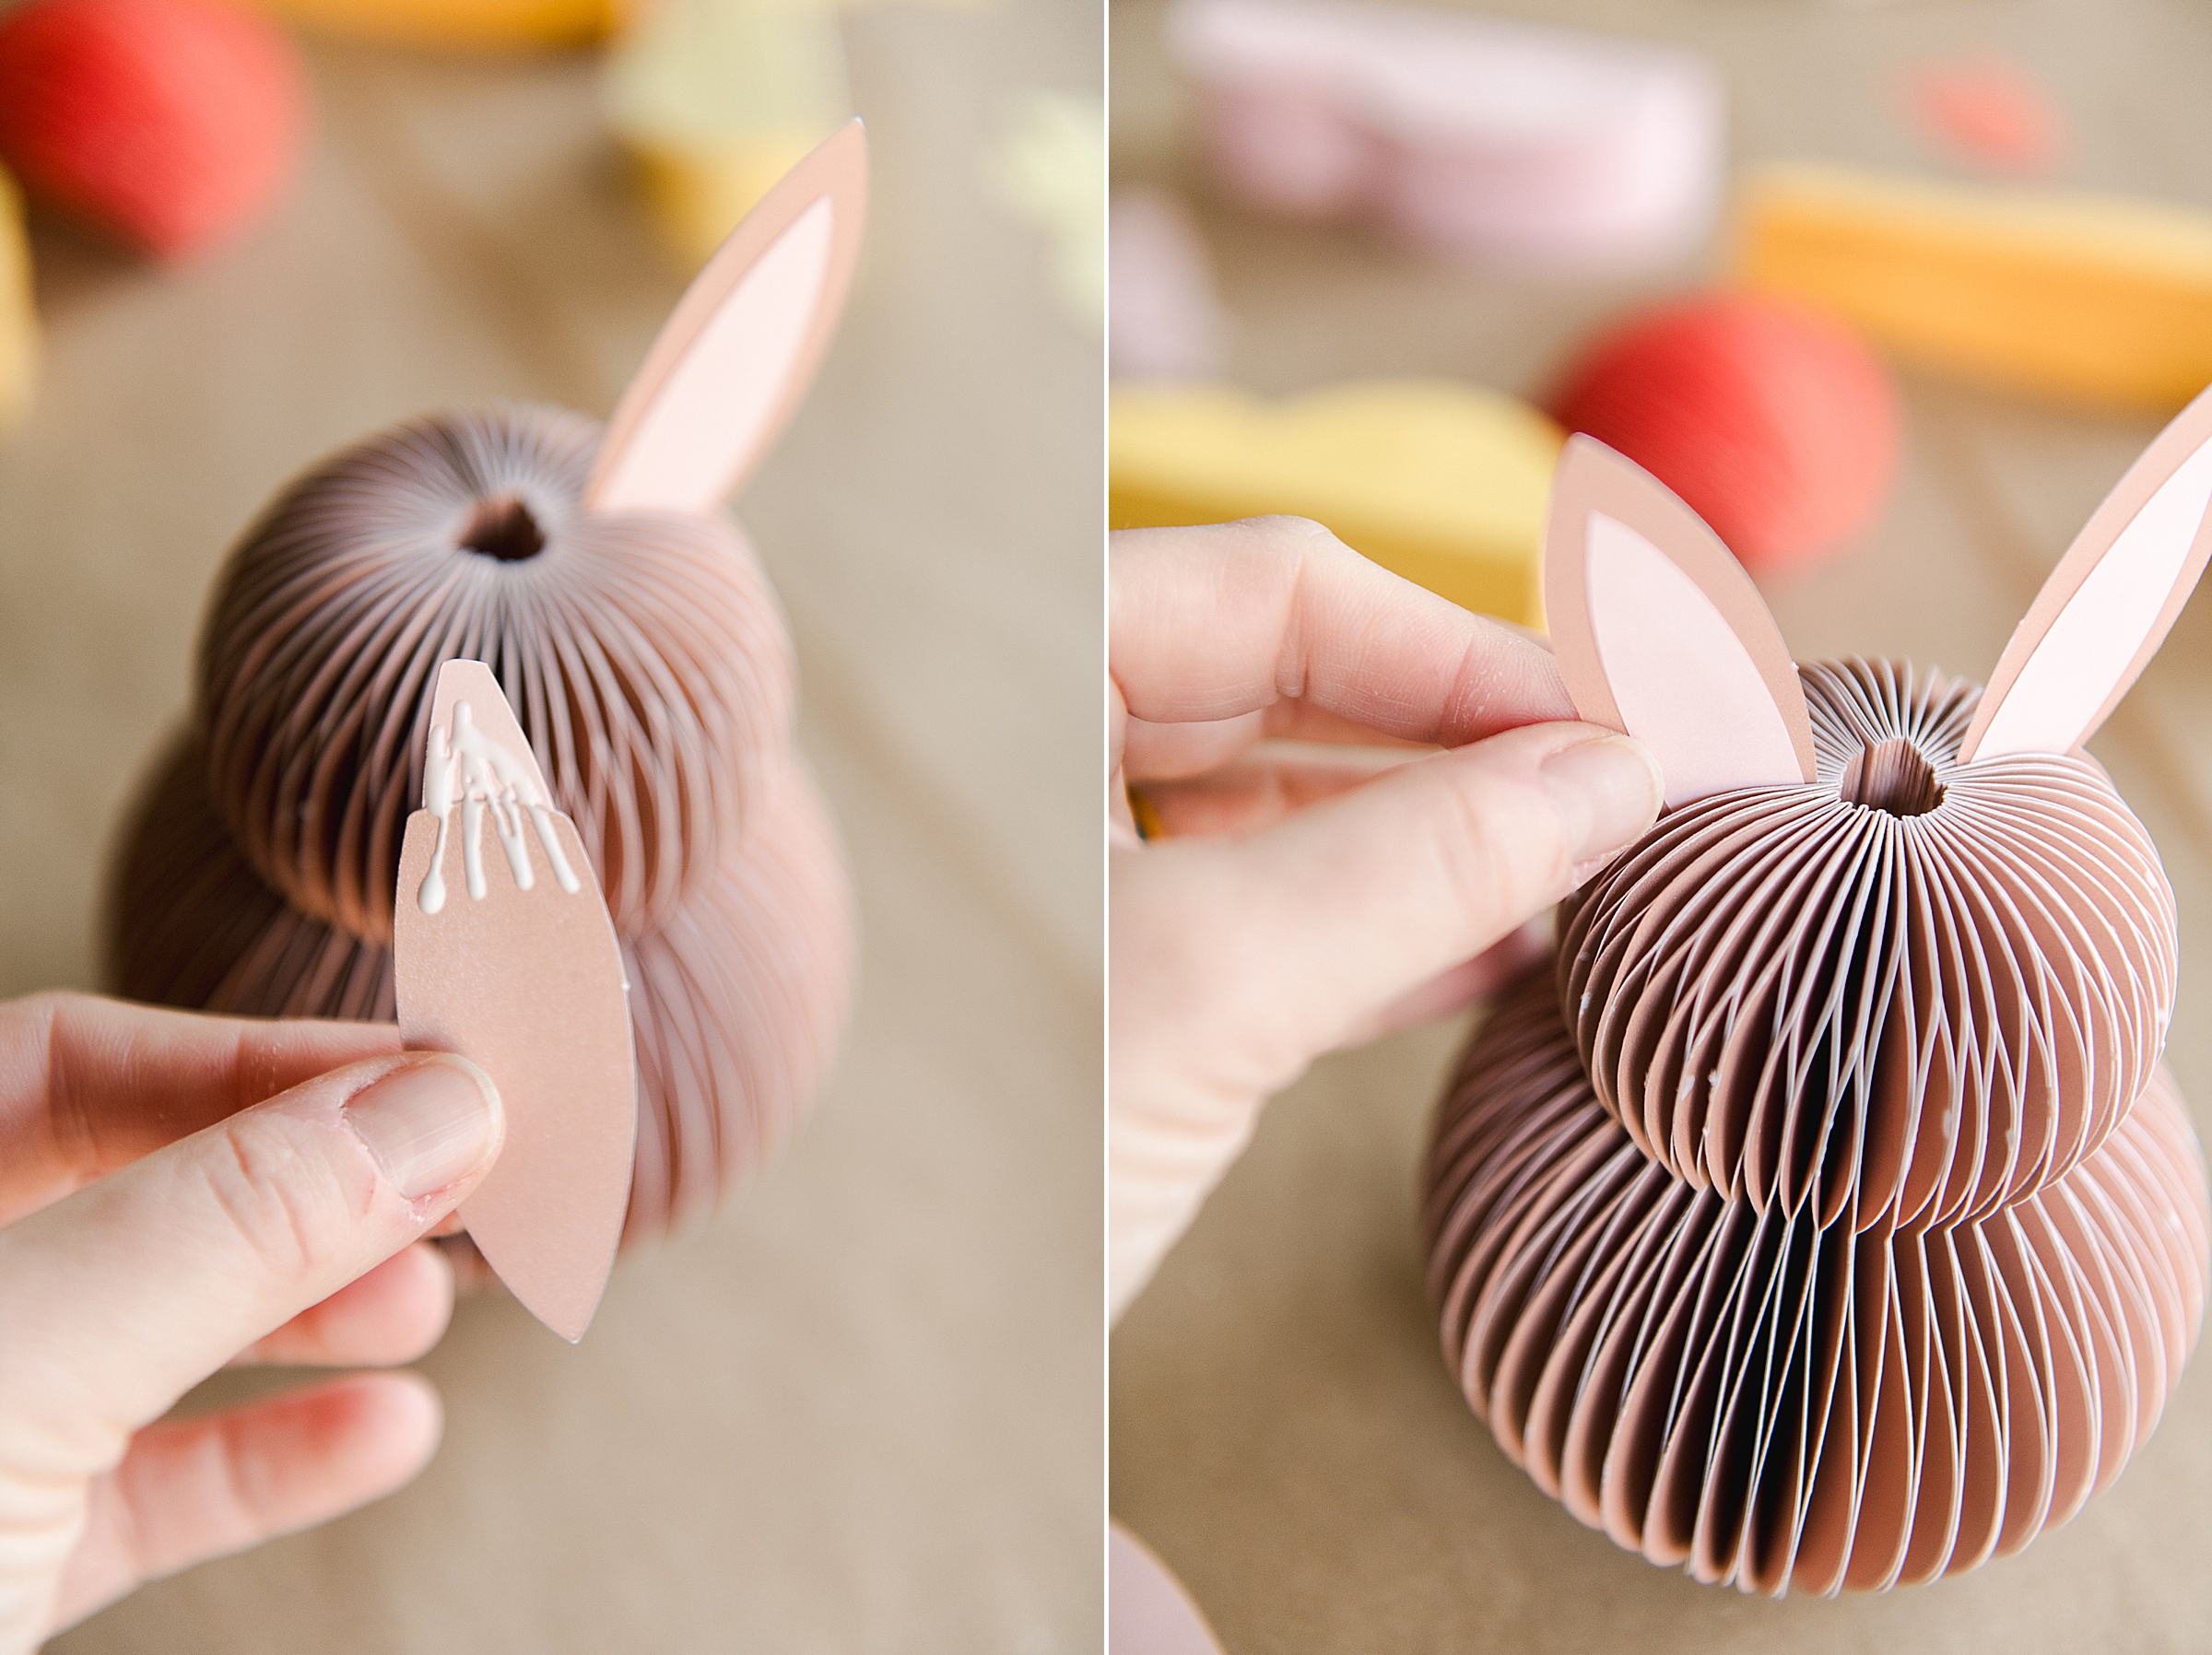
Once the bunnies are open, you can choose where to place and glue the ears – Be sure they are adhered nice and tight to the bunny body – set aside to dry for a bit and VOILA! 🙂