How to punch needle + my first mini-rainbow pillow project!
OKKKAAAYYYY! You know one of those techniques or projects that just turns the world of making on it’s head, WELLLL…..THIS! This punch needle (or rug hooking as some people call it) is one of the most fun and amazing skills I have learned in a long time! It requires little materials, is quite fast, REALLY forgiving AND has *legit* endless possibilities for how big, small, intricate, simple or just plain colorful you make your project! 🙂
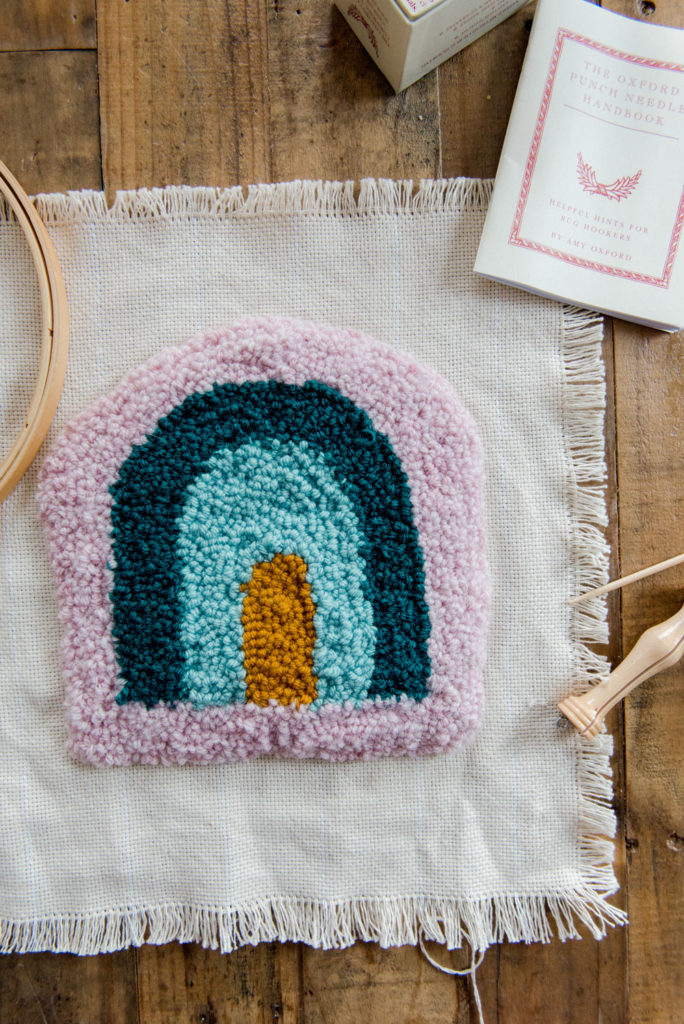
SO! Today I am sharing with you the basic, beginners tips and steps for getting started in punch needle. AND I am sharing the steps for my first completed project: a mini-rainbow pillow!

The materials list is minimal, which I love. There’s nothing like being able to pick up and put down a project (that’s also portable…..hellllooooo car rides) to make me fall in LOVE with something.
I want to touch base on the needle itself. There are no less than 9 bajillion needles out there and I have been and always will be a proponent of “whatever you have, make it work for you”. BUUUUUT with that said, I tried out a handful of different punch needles: plastic, wood, adjustable, fixed, expensive, cheap…….and I have landed on the Oxford Punch Needle as my FAVE! It has a wooden handle (love the look), it’s easy to thread (win), the “length of loop” is determined by the number punch you choose which makes it easy to get consistent punches (yay) AND it come with a step-by-step troubleshooting guide with tips, tricks and other ideas! Yes, this Oxford Punch Needle is more expensive that some others but, in my opinion, it is 739% worth it (ANNNNND I have other sizes on my birthday list this year)!
TIP: I ordered the number 10, fine
The “fine” or “regular” refer to the weight of yarn you plan to use. The “regular” is a more tradition needle that is used for thicker yarn or fabric scraps for making rugs or heftier projects. The “fine” is used with yarns that I’d have lying around: DK, worsted, sock, etc. For the projects I’ve done so far, I have just used random balls or scraps of yarn that are leftover from other various knitting projects so the “fine” has been wonderful so far
And cloth. I prefer Monks cloth because it’s supppppper strong, has great, even “hole” width which makes it simple to punch. BUT you could use other fabric (as long as it’s strong) and even use burlap if you wanted to…..just make sure it’s strong and won’t rip or make “holes” through the fabric to cause tears.
Materials to punch needle:
- Oxford Punch Needle
- Monks Cloth (I found some at JoAnns AND used a coupon, so it was about $9/yard)
- Embroidery hoop or frame
- Yarn
- Thin knitting needle (for finishing)
- Scissors
- Iron preferably with steam setting
Additional supplies for the mini-rainbow pillow:
- Sewing machine
- Zipper Foot for sewing machine
- Pinking sheers
- Baking fabric (I used a piece of wool)
- Straight pins
- Stuffing or poly-fil
- Needle and thread for closing
- Yarn + pom/tassel maker for optional clouds
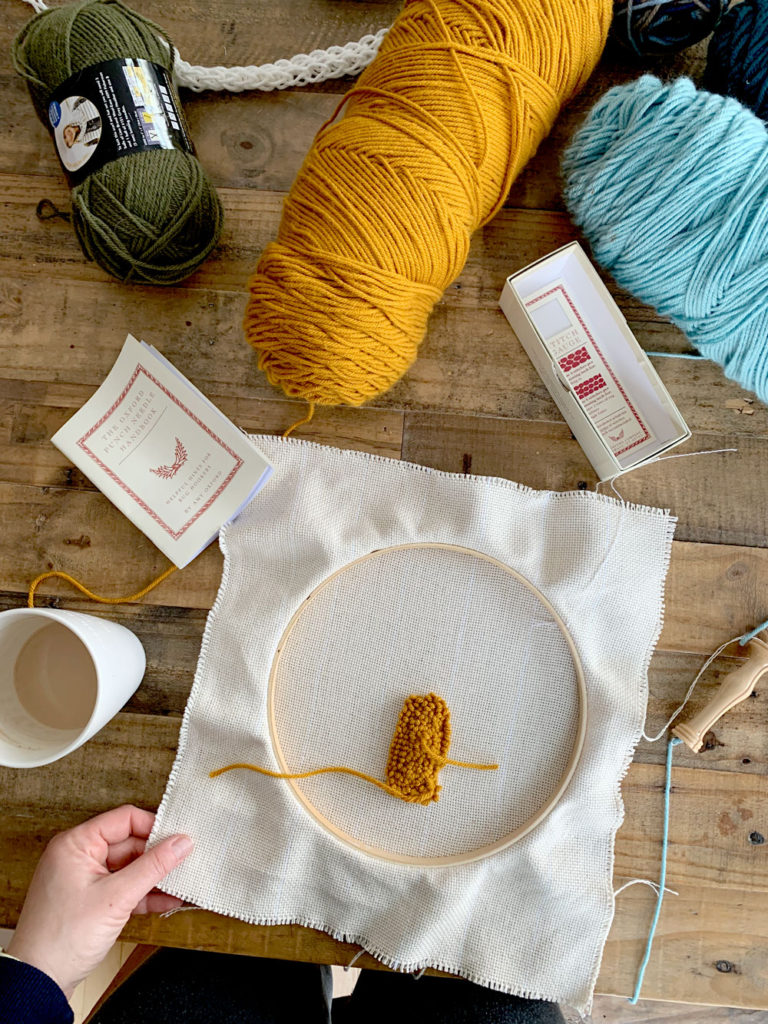
- Draw your design onto the monks cloth with a pen or marker. Cut a generous amount around the design (giving yourself an extra 2”-4”) so that your design can fit into the embroidery hoop.
TIP: I traced the inside of my embroidery hoop first and then drew my design on the inside of my traced marks to make sure I didn’t have to reposition the design mid-punch.
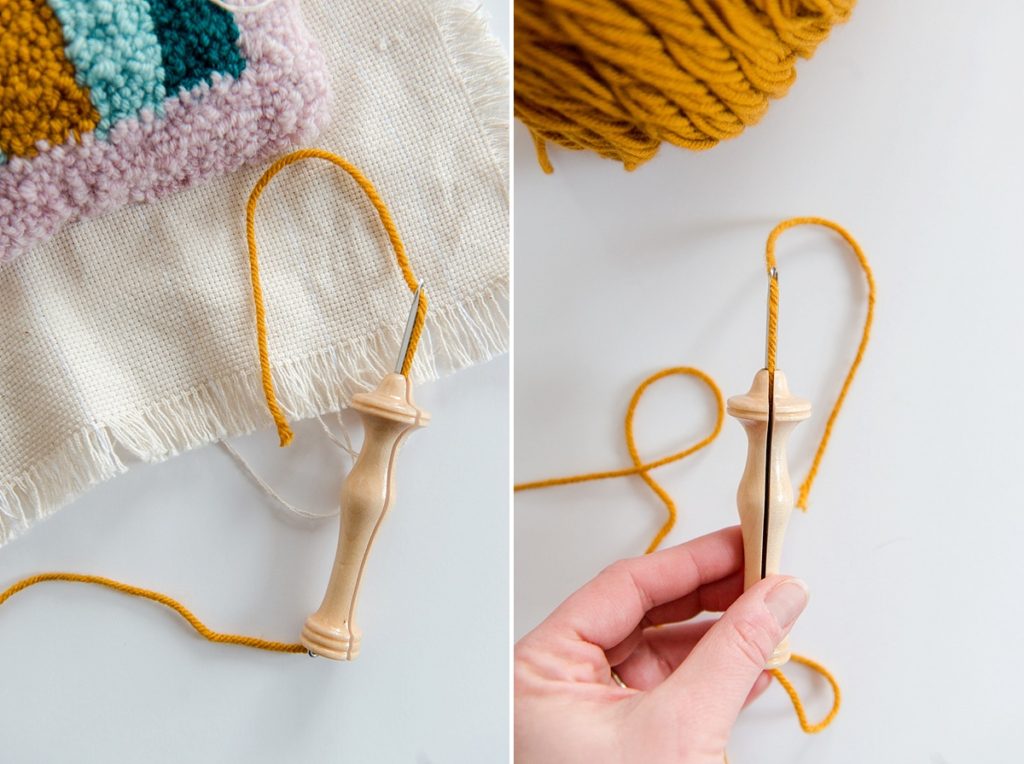
2. Thread your needle
Bring your yarn through the eye at the top, through the opening across the needle and through the punch at the bottom, going from the front (the larger opening) to the back (the smaller opening). Then pull a bit of yarn out to have a “tail” about 2” long
Punching tips:
- Position your needle with the “larger” opening of the needle towards the direction you are punching.
- Punch your needle through the cloth ALL THE WAY to the handle (at least for the Oxford Punch Needle)
- Don’t pull your needle too far out from the fabric when pulling up with the yarn. Simply graze the fabric with the tip of the needle to the next punch. This will keep the stitches even and the loops the same. It will also make sure the loops are tight and stay into the holes.
- Outline your shapes with your color and then start filling them in. You can fill them in by going around the shape until it’s all filled, you can go back and forth, or you can make any pattern you would like WITHOUT jumping over stitches. 🙂
- If you get stuck, don’t love the color you used, or just want to start over, simply tug on your yarn and watch it start to unravel. Bring your yarn and needle taught to the fabric and begin punching again! (seeeeeeee, so forgiving, eh?!?! 🙂
- Remember the side you are punching is actually the backside of the work, the frontside is the side with the loops! 🙂 I think that both sides are quite cool!!! 🙂
- To change colors (or if you get to a dead end and need to start again), gently pull a bit of yarn out and cut a tail. Then, with your knitting needle, push your tail through to the front (or loop side) of the work. When you are ALL done, you can trim your tails even with the loops on the front.
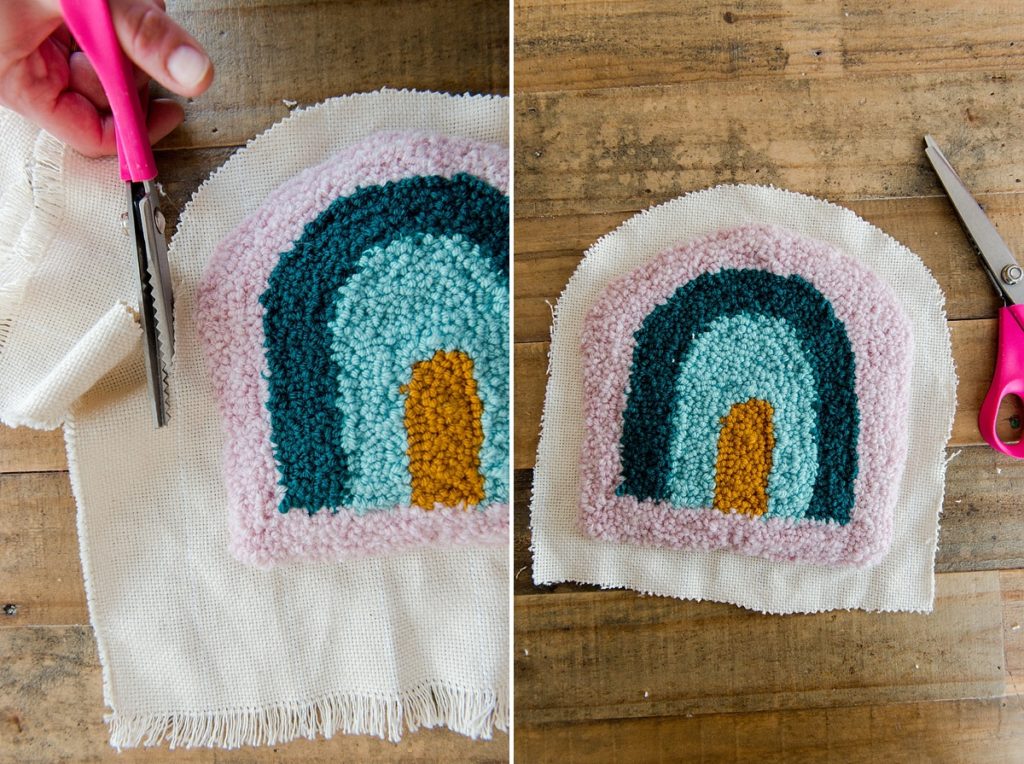
3. Trim + Iron
After your design is complete, and your yarn tails are all trimmed, trim your monks cloth with a pinking sheers, leaving about 1” of monks cloth beyond your last rainbow stripe. Then with a hot steam iron, gently press the backside of the work so that it “sets” the loops (essentially the water and steam will fuse together the wool a bit and “felt” it so that it can stay in place better. I have also heard of people using Elmers school glue to paint onto the backside to give it extra stability. I didn’t feel the glue was necessary for this project and would obviously add extra dry time).
TIP: Why pinking sheers?
Pinking sheers will help the monks cloth “shed” less. You maybe noticed your cloth loosing some of the weave and shedding on the edges as you were punching. The zig zag of the pinking sheers will help prevent this and keep the monks cloth as “together” as possible! 🙂
5. Sew, Turn, Stuff, Sew
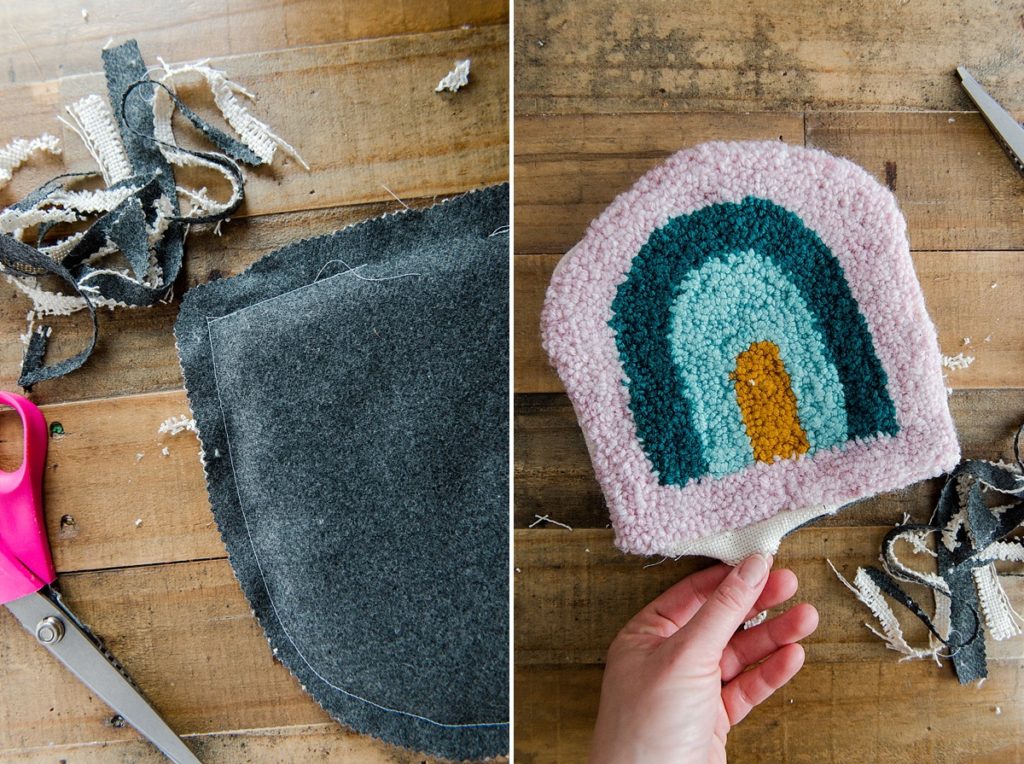
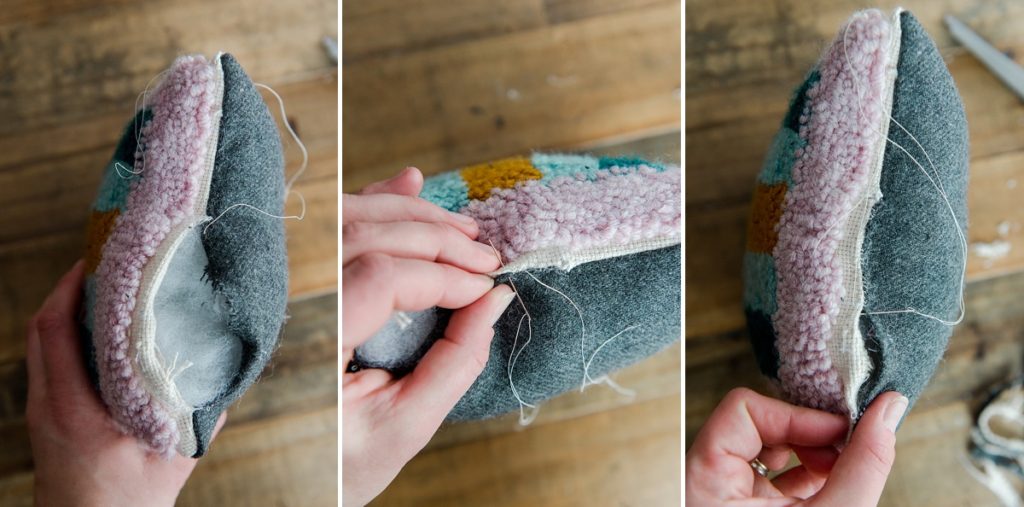
Using a zipper foot on your sewing machine, sew along the outside of the rainbow leaving a 3-4” opening un-sewn to turn (it is easiest to leave this opening at the bottom, straight edge of the rainbow). Using your pinking sheers, trim the excess fabric around the edge of the rainbow shape, clipping your 2 square corners to get rid of bulk. Turn your rainbow right side out and stuff with your stuffing or poly-fil. With your hands, finger press your opening together and begin to hand stitch it shut. I used a whip stitch to close the opening because it gave the best durability to be able to push the needle through the wool backing and then 2 layers of the monks cloth (because it was folded to the inside).
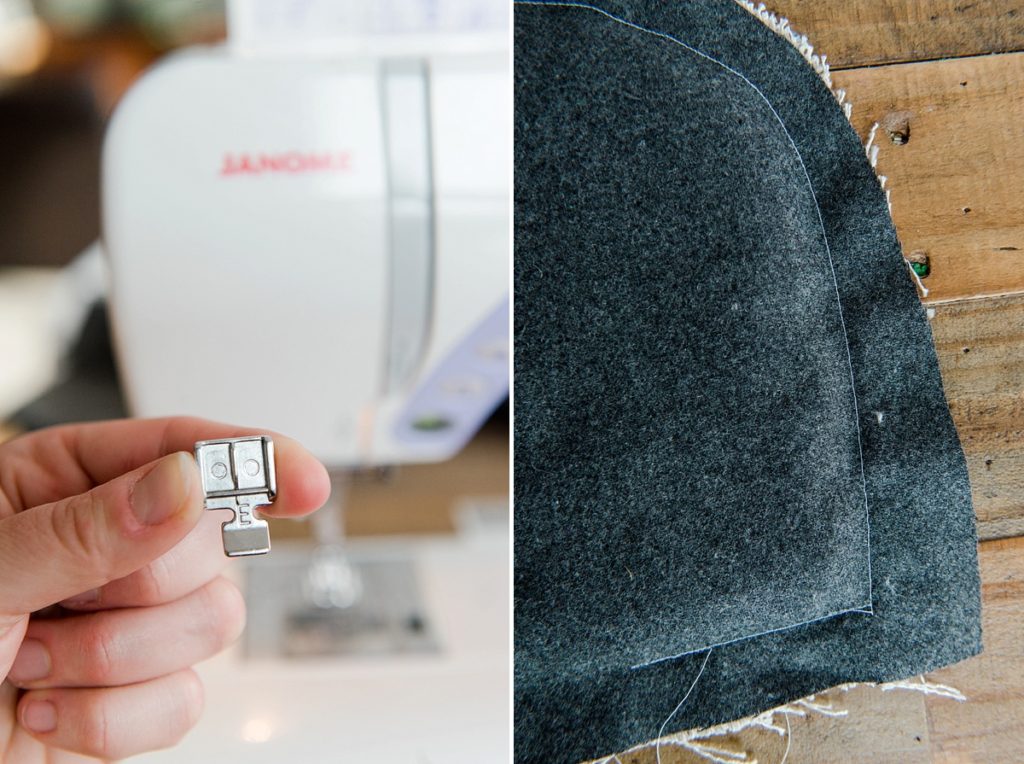
TIP: Why a zipper foot?
Wellllllll, a zipper foot allows you to get as close to an “edge” without the bulk of another sewing foot getting in the way. If you put your rainbow into the machine, you should be able to “feel” where the bulk of the yarn loops begin and you can use that as a guide to sew around the edges. You don’t HAVVVVVE to use a zipper foot, but I promise, it will give you less of a “gap” between your yarn loops and backing fabric.
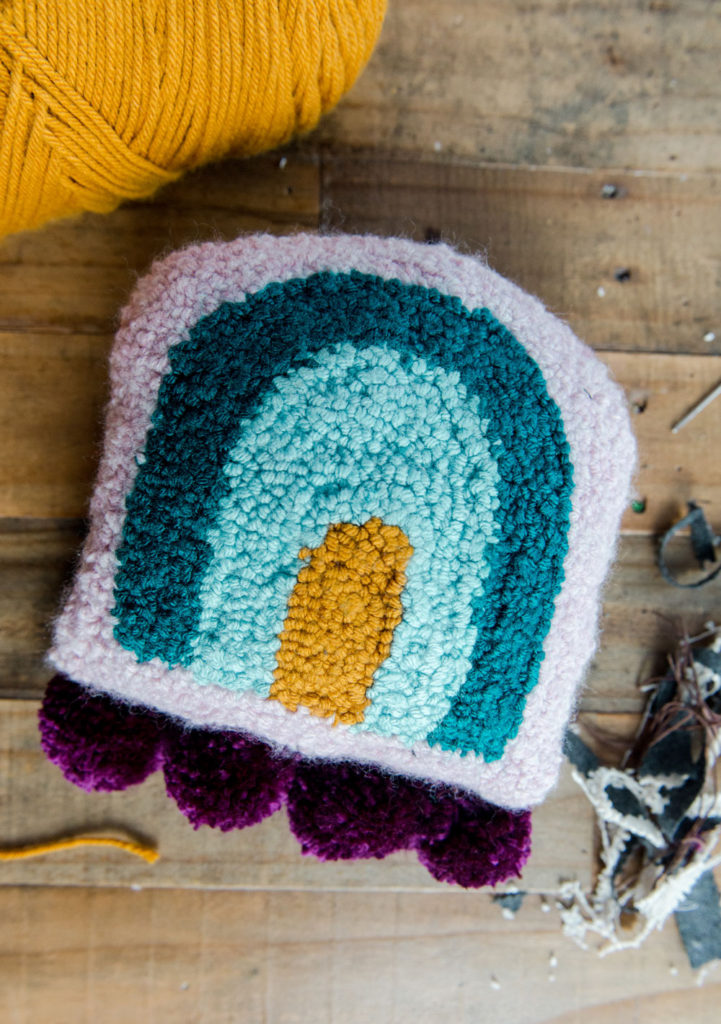
6. Add Poms or Tassels
With your pom or tassel maker, make 4 in any color of your choice. Then with a darning needle and thread, attach them (securely) to the bottom of the rainbow! 🙂
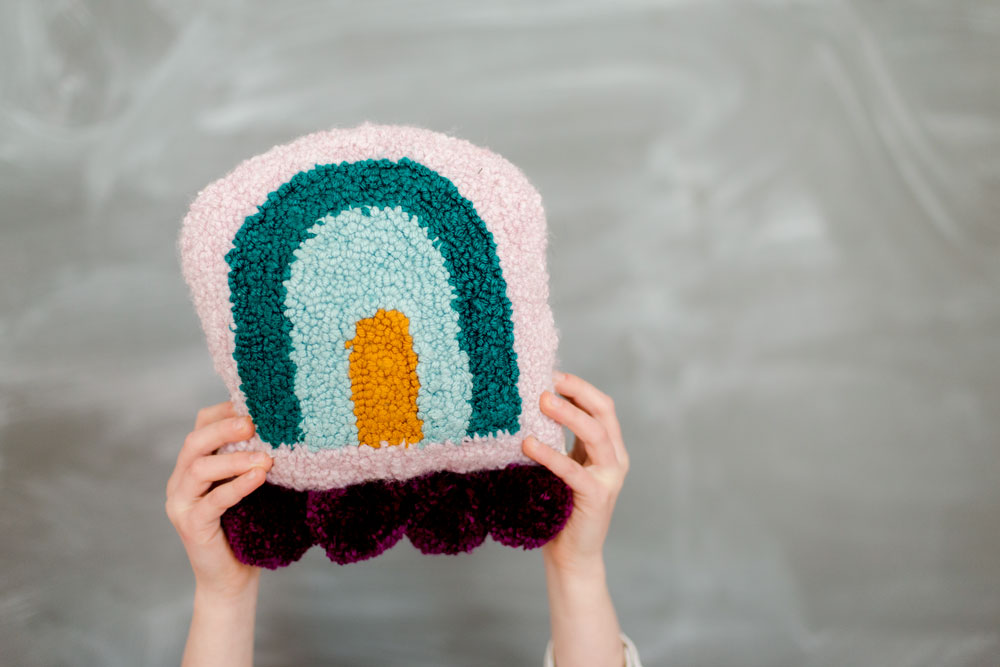
This mini-rainbow pillow is just the start of my punch needle journey! And while this may just be a beginner punch needle project, I have officially fallen in love with the method and texture and ease and color choices and basically everything that has to do with this brand new craft for me! 🙂
And please, if you have ANY questions about YOUR new punch needle journey, run into any issues or need some other beginner tips, please don’t hesitate to comment below or send me a message!
HAPPY PUNCH NEEDLING everyone! I can’t wait to see all of your rainbows and other colorful, loopy, yarn-filled projects! 🙂

Hi,
I really love your projects. I have made tried my hands on Oxford Punch Needle and the sample turned out to be really cute beautiful.
I would like to make a pillow cover and have a question regarding the same.
How do I close the ends and how do I start the punching so that the thread doesn’t come out from the pillow. Had I been making a normal embroidered pillow, I would close the ends of the thread by knots which will not let the thread run out.
Moreover, is the punch needle pillow washable?
Looking forward to your advice.
Thanks in advance!
Regards
Pooja
POOJA! I absolutely love that you are tackling this and falling in love with the punch needle craft! 🙂 YAY!
So, for beginning, I usually pull the end through to the back side and then you can kind of hold it with your finger until you get punching enough so that it’s secure. You also want to make sure that your yarn that you are punching is not taught and is loose enough with slack, otherwise it will pull out! 🙂
As far as washable, I would say that it depends on the yarn that you’re using! 🙂 Either way, with most yarns hand washing is preferred! 🙂 I have typically just spot cleaned the yarn and that’s worked great for us! 🙂 Hope this helps, always reach out with anything else you need!!!!