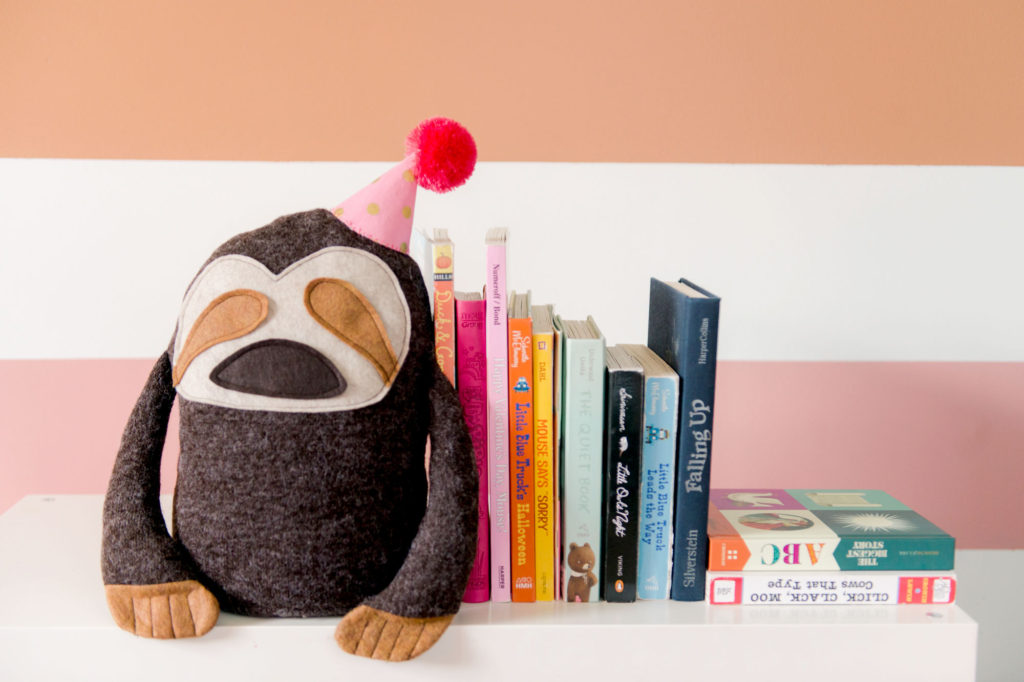
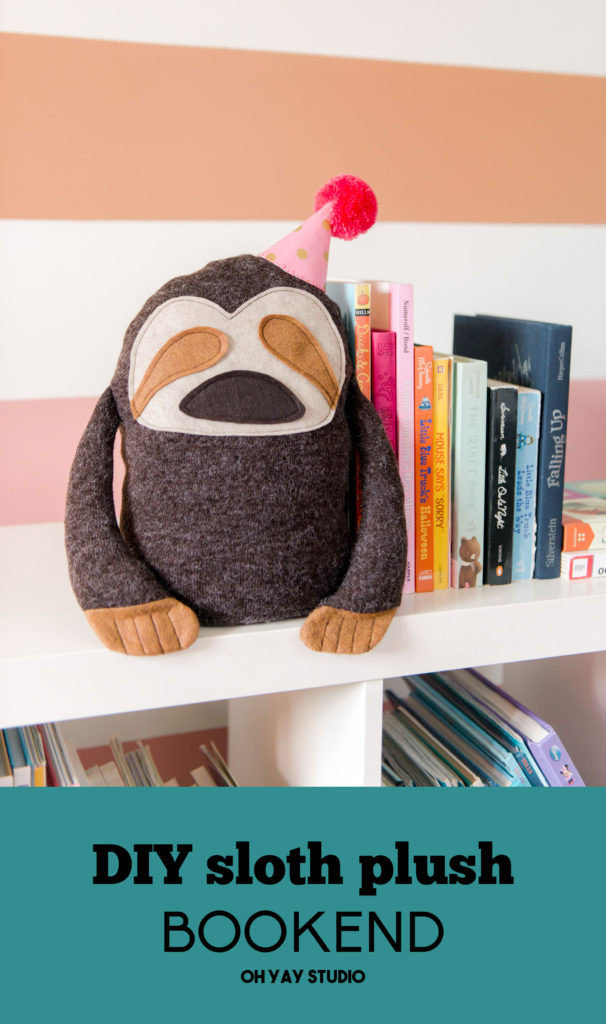
How to make the cutest sloth plush bookend or doorstop!
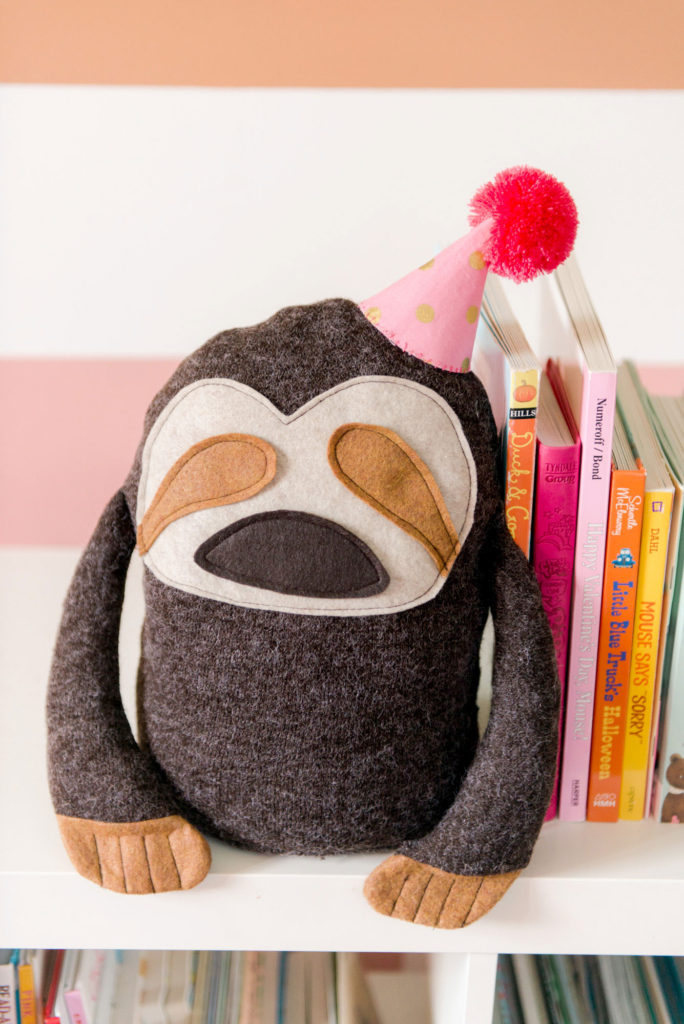
Sloths are slow with droopy eyes and seem to have an introverted and interesting personality that is just plain adorable! And today, I am sharing *the cutest* little DIY for a sloth plushie that is weighted to be used as a bookend or doorstop; perfect for a kids room! ANNNND this pattern is the perfect thing to sew right along side your kiddos (andddd Silvie the sloth happens to be in the 2019 kids summer camp projects for Janome! YAY! Check out the rest of the free projects here)
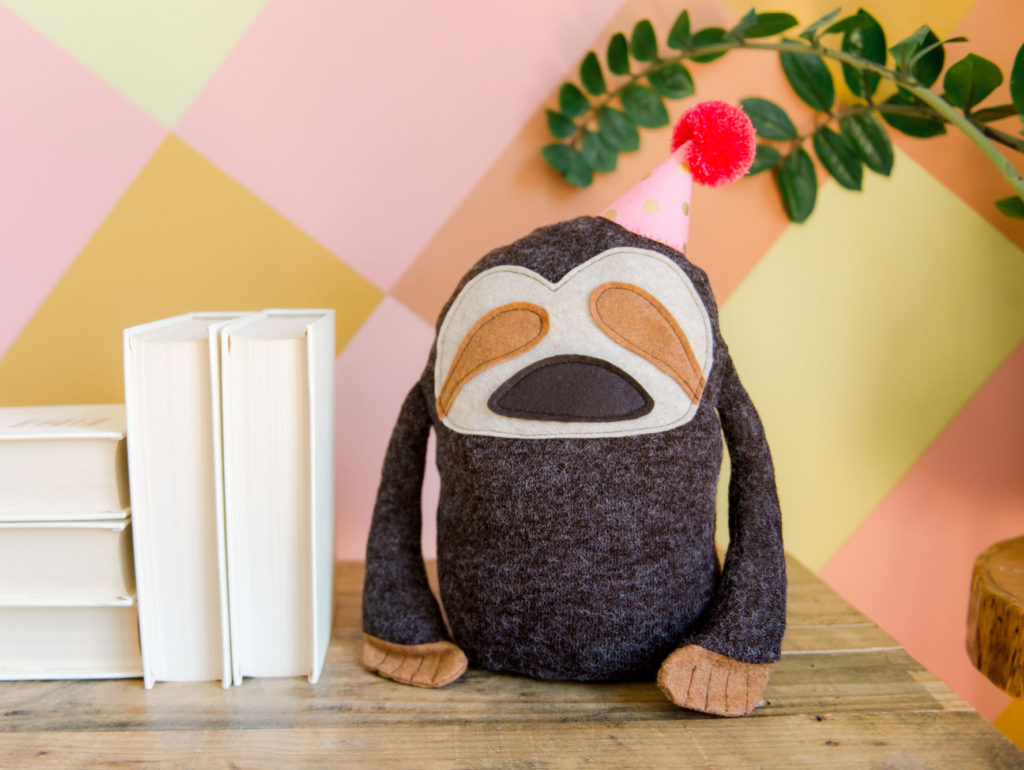
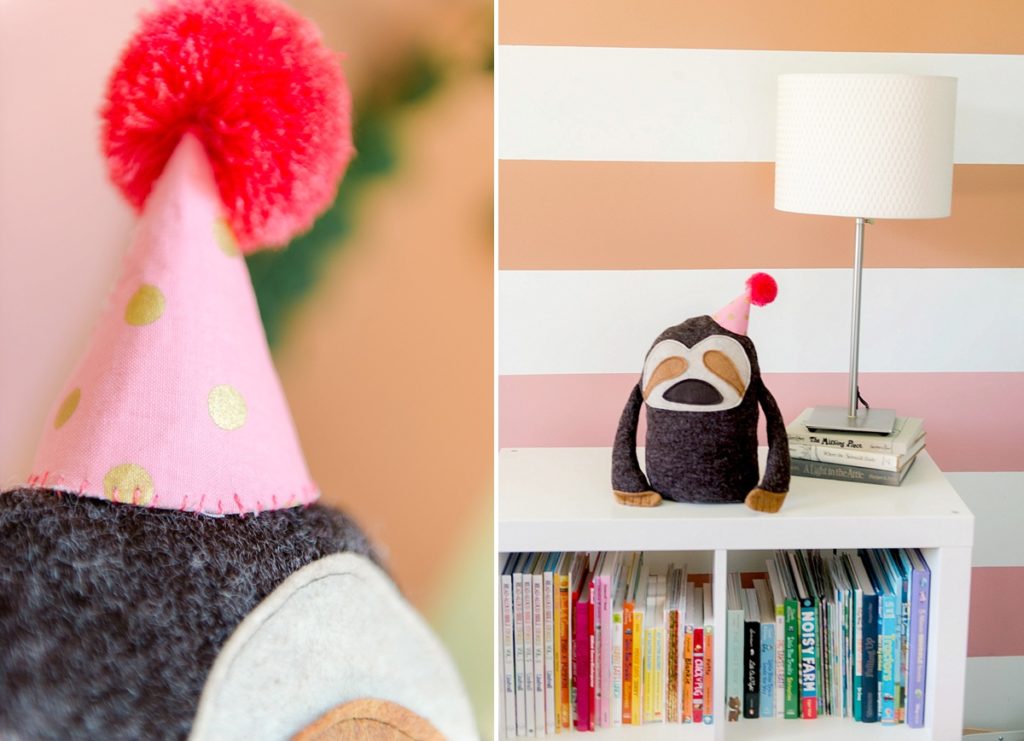
Use Silvie the sloth plushie as a doorstop on those breezy summer days when the wind is rushing through the open windows to slam all the doors and wake up the sleeping toddler (ACK)! ORRRRR Use Silvie the sloth plushie as a stylish and cute bookend in a kids room or playroom shelf! 🙂 This project is a double whammy of an outcome! 🙂
Materials:
- 1/2 yard of main fabric in brown
- remnants of coordinating felt or wool for sloth face (fabric that does not fray, large piece being about 5” x 7”)
- remnants of coordinating fabric for sloth hands
- bag of poly-fil
- needle and thread for hand stitching sloth closed
- yarn + pom pom maker (or store bough pom)
- 5″ x 7″ piece of coordinating fabric for hat
- 5″ x 7″ piece of fusible interfacing
- bag of rice or beans for weight
- ziplock baggie for beans/rice
- clear packing tape
INSTRUCTIONS:
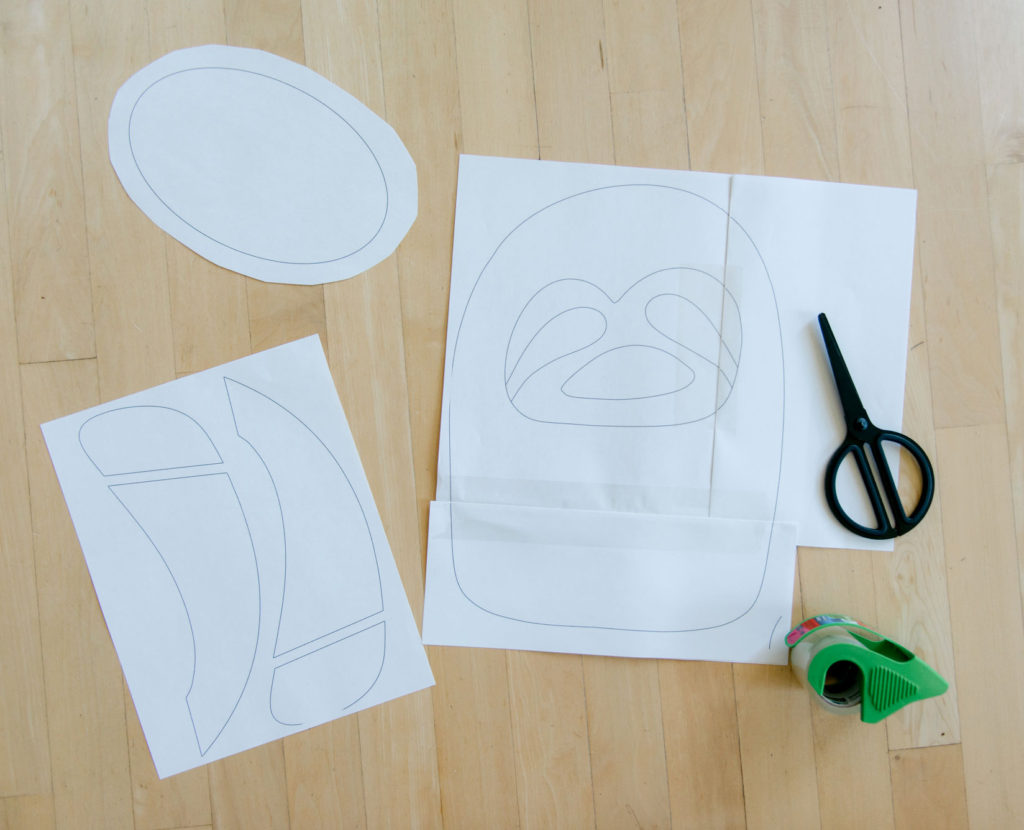
- Cut out pieces
Download the pattern HERE! Then, from main brown fabric, cut out 2 body shapes, 1 gusset, 4 arms (2 of each facing arm). Then from coordinating fabric, cut the face pieces and the 4 hand pieces.
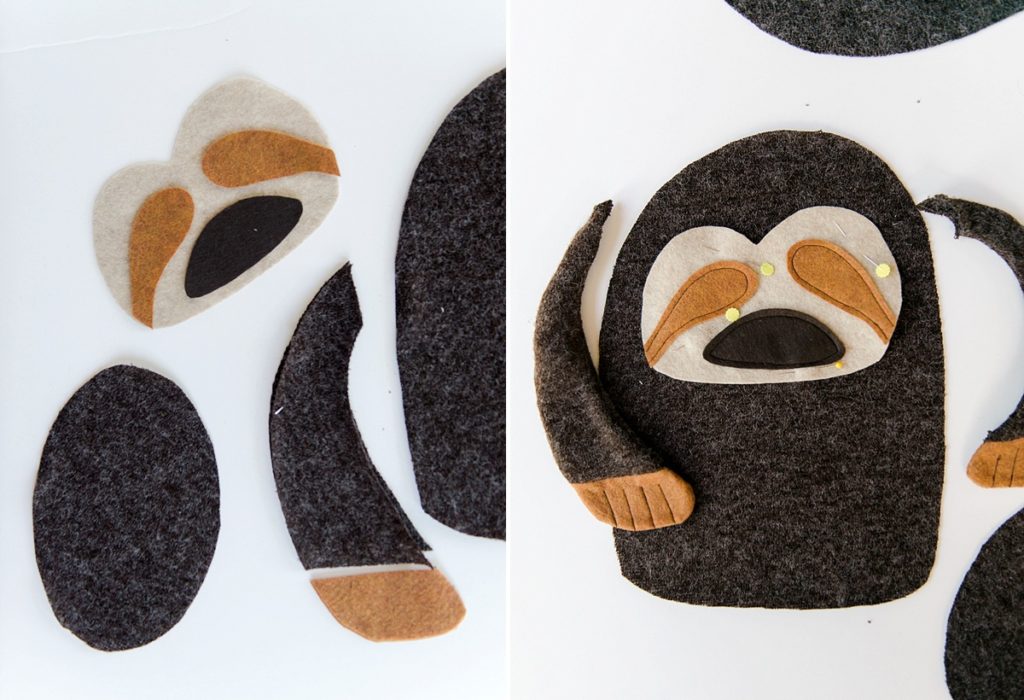
2. Sew face onto body
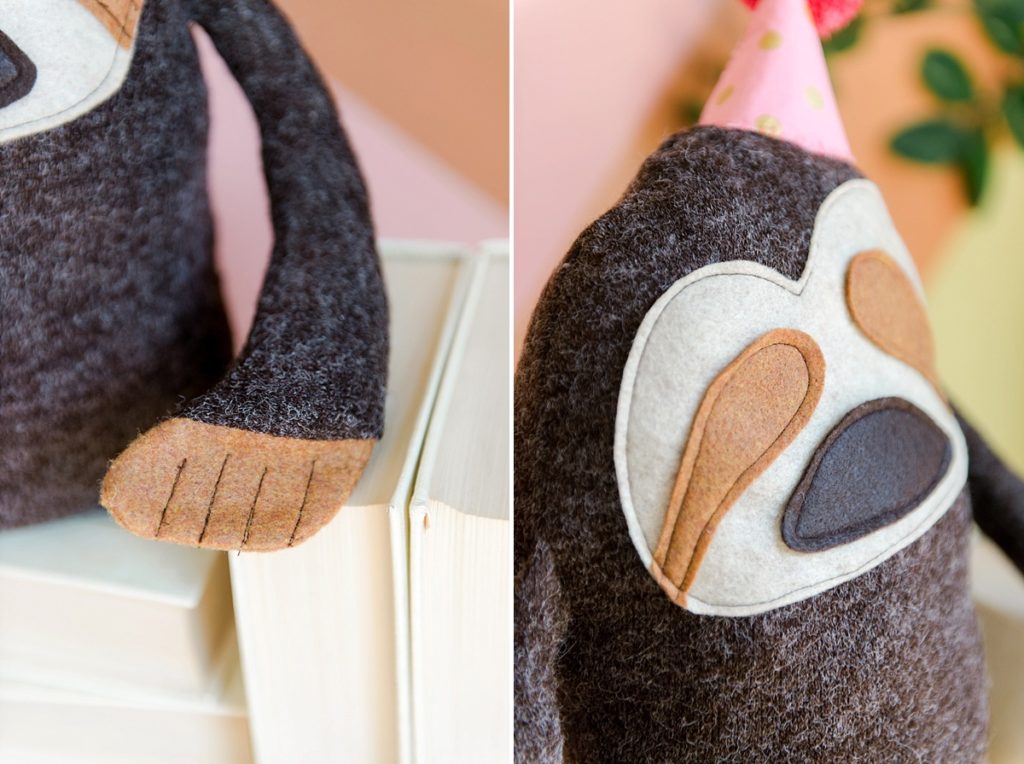
Lay out the face pieces (face, eyes, nose) onto one of the body pieces according to the layout on the pattern. Pin in place and slowly stitch around each feature.
Note: I found it easier to stitch the eyes and nose to the face first and then stitch the whole face onto the body.
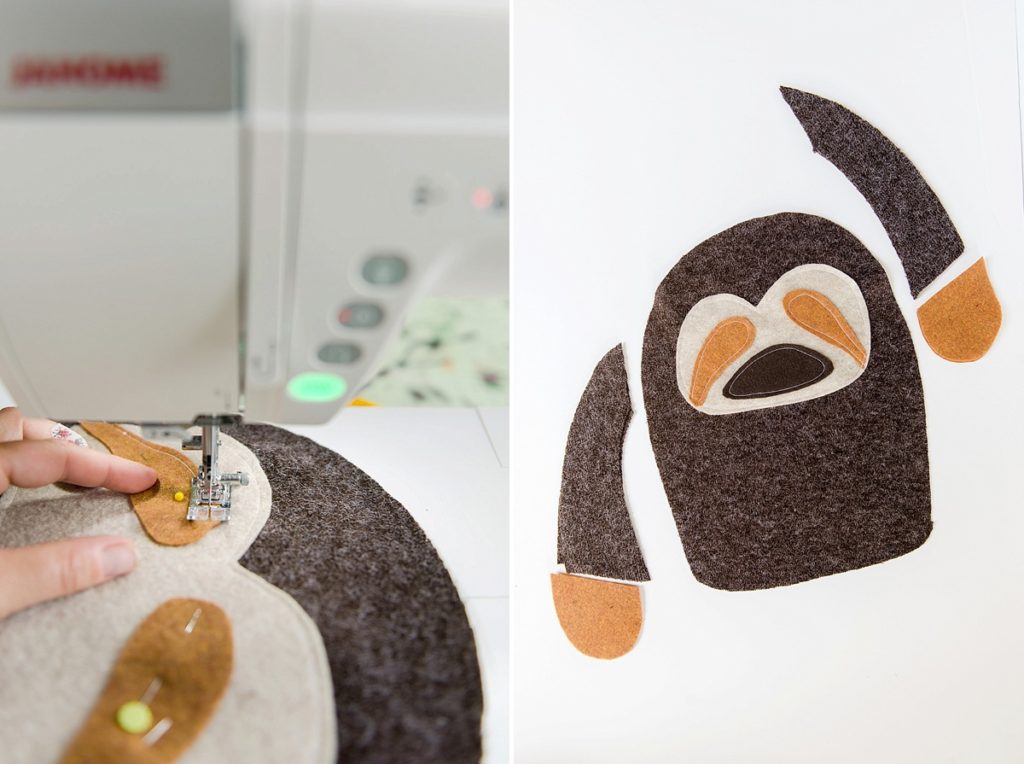
3. Sew Arms
With right sides together stitch the hand piece onto each of the arm pieces (4 total). Then, with right sides together, stitch 2 arms together. Then stitch up the hands to make fingers; do this by lowering the foot on your sewing machine, sewing about 1 inch up, raising your foot (leaving your needle in the fabric), spinning your fabric, and stitching back towards the top of the fingers. Then stuff the arm with poly-fil, leaving about 1/2” at the top unstuffed. Repeat this for both arms.
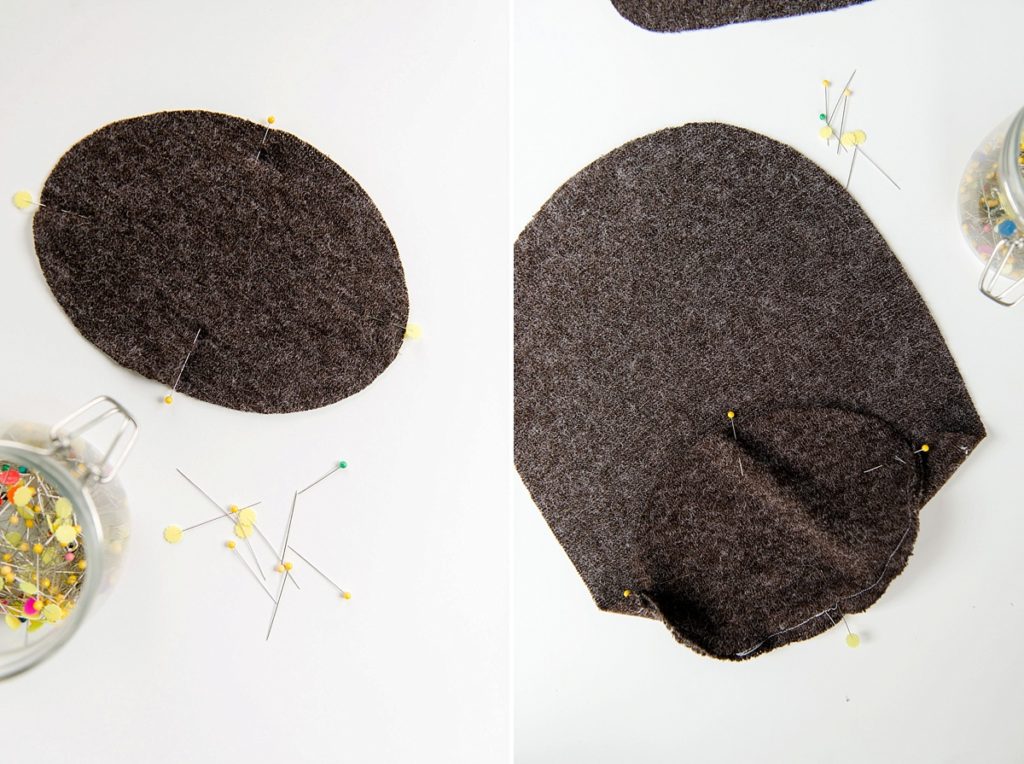
4. Sew half of gusset
Start by folding the gusset in 1/2 lengthwise and mark the center on each side with 2 pins. Repeat this widthwise and mark with 2 pins. This will give you the center, each direction, of the gusset to make sure that you are lining it up to the body properly.
Then, fold the back body piece in 1/2 (top to bottom) and mark with a pin in the center. With right sides together, line up the gusset along the bottom side and position so that the center marks line up with both the gusset and the body. Then pin the rest of the half of the gusset in place along the back body panel and stitch together, starting and stopping at each pinned side of the gusset.
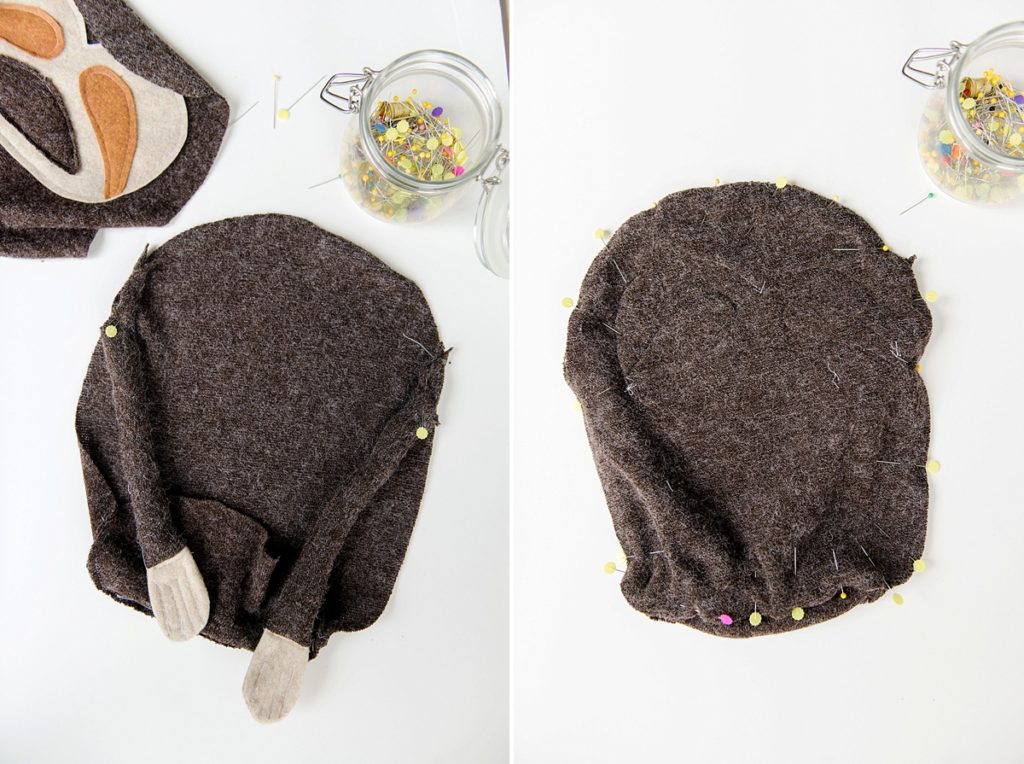

5. Assemble together
With right sides together, begin by lining up the body of the sloth, making sure all edges are flush with each other. Pin in place as you work along the body, and make sure to add in the arms; to do this, place the arms inside the body and line up along the edge of the sloth. When you reach the gusset, bring the front body along the unsewn side of the gusset and keep pinning. Leave an opening, about the size of your hand, unstitched along one side of the body for poly-fil. Then with your sewing machine, slowing work around the body stitching it together. Be sure to pivot the body of the sloth when you reach the gusset so that you don’t accidentally sew the back body to the front.
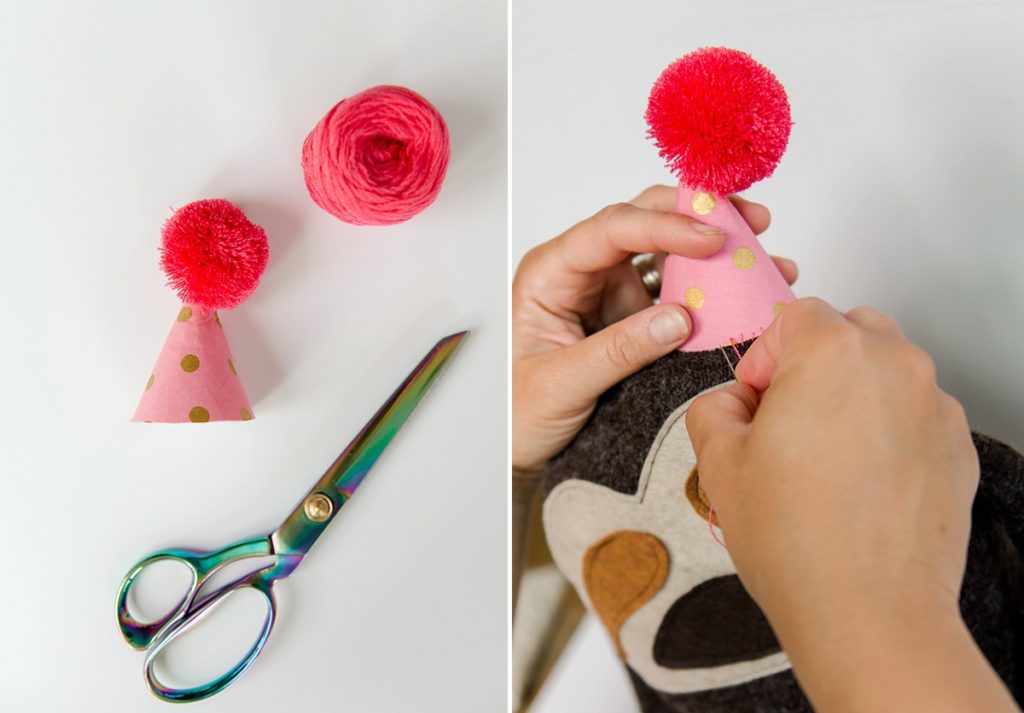
6. Make hat
Iron the fusible interfacing to the backside of your coordinating hat fabric, then cut out the shape from the pattern. Line up the long edges of the hat, and stitch together with a zig zag stitch on your sewing machine or hot glue together. Hand stitch or hot glue a store-bought or homemade pom pom to the top of the party hat.
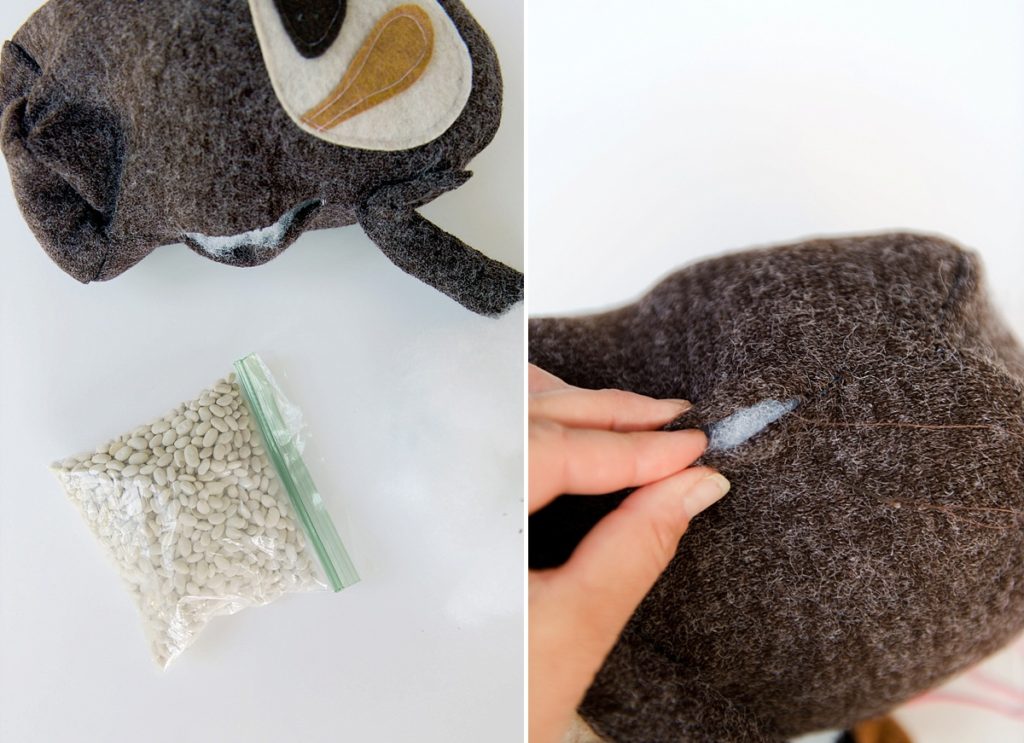
7. Stuff, stitch closed + finish
Stuff your sloth body as full as you want it (I tend to stuff mine with a lot, so that it’s stable and sturdy, after all this is a bookend or door stop, you don’t want it to be flimsy). Before filing it completely, fill your ziplock baggie with rice or beans, close up and then tape shut a few times so that the contents don’t come loose inside. Then put the filled ziplock into the sloth and position it towards the bottom to weight it down; fill around with poly-fil until it’s desired firmness! 🙂 Stitch the opening closed with a needle and thread. To attach your part hat, either hand stitch around the bottom edge where desired or hot clue in place! 🙂

I absolutely love this! Who doesn’t love a sloth?
Too cute! Very clear instructions. I could follow along with ease. I might try this one for a new nephew’s room!
What a cute and fun project! Thank you for the instructions to make this!
What a fun project, so cute!
Soooooo cuuuuuute!!!!!!!!!
My sister loves sloths! Definitely going to send to her!
OMG, that is adorable! My biggest fear though would be my cats trying to use it as a scratching toy. 😅
so SEW cute!
Sharing with a friend that would be amazed to sew this – she makes great sock monkeys and this sloth is super cute!
ADORABLE! I love these!!!
I love your enthusiasm for what you’re creating! This is so cute!
SO ADORABLE!!! Love it!!
That is adorable. My kids used to love sloths, reminds me of when they were little. Very cute project!
Super cute! My daughter will love this.
Great job with the tutorial…love the sloth 🙂
So cute and a great craft to do together with older kiddos. Love it!
This is so cute! We literally just got to hold a sloth on our cruise excursion in Roatan, Honduras and making this would be such a cute reminder of our trip.
I love sloths! I mean, like, I want to have one, kind of love! Lol. Very cute idea!
Love it! This will be a fun addition to the bookshelf for sure.
That is adorable! Great instructions!
Great post! thank you for sharing! my 3yo will love this!
That is adorable! I’m trying to decide if my daughter’s sewing skills are far enough along to try this.
This is soooo cute! Now, if only I could sew! I may have to get my MIL to make some for me to give as gifts.
This is adorable! I wish I was creative and talented!
This sloth is so adorable! Thanks for sharing!
This is so adorable! Love it!
This is so adorable!!! I love that it is cute and useful, and that the directions seem doable!