A birthday necklace pattern + a little girl that turned THREE!

It is no surprise that my little Esther is a “spirited” one. She has her opinions and ideas and they NEVER go unnoticed if you are in a room with her (whether it be a food choice or a clothing choice, she knows what she wants). I keep saying that this will turn to passion someday so I am not about to squash it (within reason of course…..DUH, I do go off the rails sometimes when we are already late to getting out the door, but I know I’m not alone, right Moms?!? 🙂
Last year I had this *amazing idea* to make her a birthday crown. I’ve seen them ALL OVER Pinterest and some even at my favorite kids stores; some sewn, some knit, some paper-mache….but I knew that I could make one that suited her just perfectly. Her favorite colors and some of my favorite fabric combined into a yearly tradition that we could ALL smile about as she put it on year after year. Heck, we could even take a yearly photo of her in it on her big day so that we could compare her growth and yearly memories.
My plans came to a crashing halt. Long story short, I spent a few hours coming up with a pattern, cutting and sewing ideas which all ended in a screaming fit (by her, not me), a crunched up fabric birthday crown full of cake and my dream of this beautiful, yearly tradition out the window! WELP!
WELLLLLL! Enter this year! *THIS YEAR*, I thought, I know her “toddler-ness” better and can figure out some way to harness this idea but make it “Esther!” And I DIDDDD! I DID IT! I came up with a birthday necklace. A beautiful, fun, happy BIRTHDAY NECKLACE full of her favorite colors and my favorite felts. And and and, every year we can add a new candle to the necklace just as we add a new candle on her cake! *win-win*
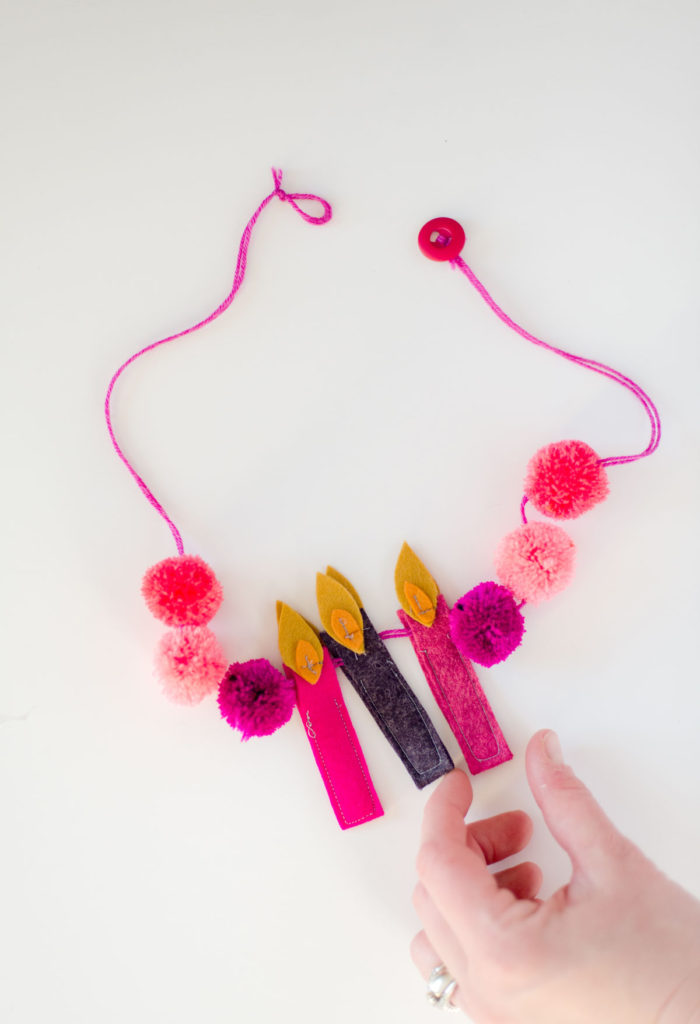
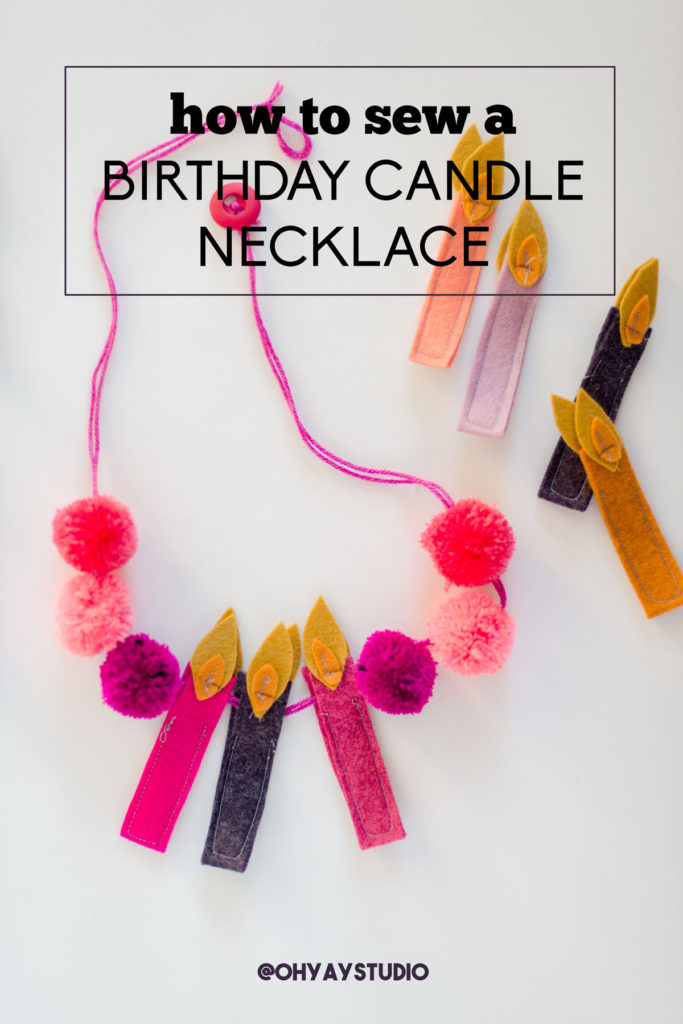
SOOOOOO! Today I am sharing the tutorial and pattern for this super cute (and very versatile) Birthday Candle Necklace pattern!
(YAY)
Supplies:
Felt in various colors
Yarn for poms (I had 3 colors of pink)
Pom maker OR piece of cardboard
Yarn for stringing
Button for necklace “closure”
Darning needle for stringing on objects
Coordinating thread for sewing
Instructions:
- Download the PDF pattern HERE!
- With your choice of colored felt, cut out as many candle “bodies” as needed. Remember to cut the bottom edge of the pattern piece on the folded felt. Also, cut out 2 flame pieces and 1 flame inside piece
3. Starting about 1/4″ below the top of the candle, begin stitching along edge of the candle. Sew down the long edge, across the bottom and up the other long edge, stopping (again) about 1/4″ inch from the top edge.
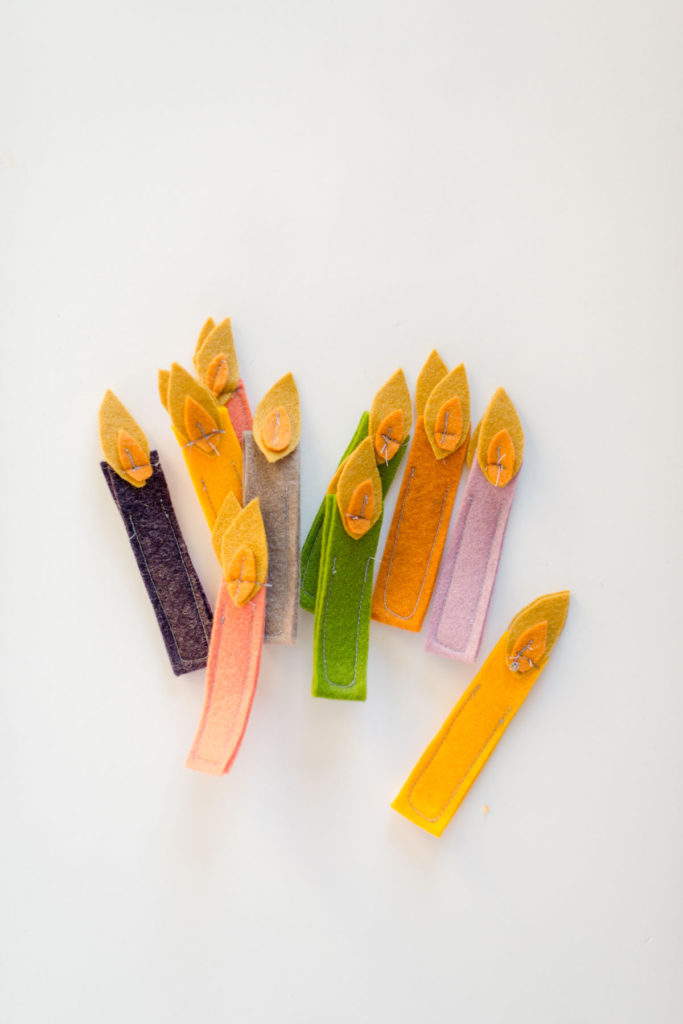
4. Going slow as you stitch on your sewing machine, tack down the flame inside piece to one of the flame pieces. (I sewed over the the flame inside 2 times; a forward and then backward motion to tack it down).
5. Sandwich the top of the candle between the 2 flame pieces. Make sure that the flame pieces are aligned and are overlapping the candle top by at least 1/4″ so that there is enough fabric to tack them all together. Then tack all 3 pieces (flame-candle-flame) together on your sewing machine with the same backward, forward motion as with the flame. This will also give a “gap” between where you tacked down the flame and where you sewed the outer edges of the candle.

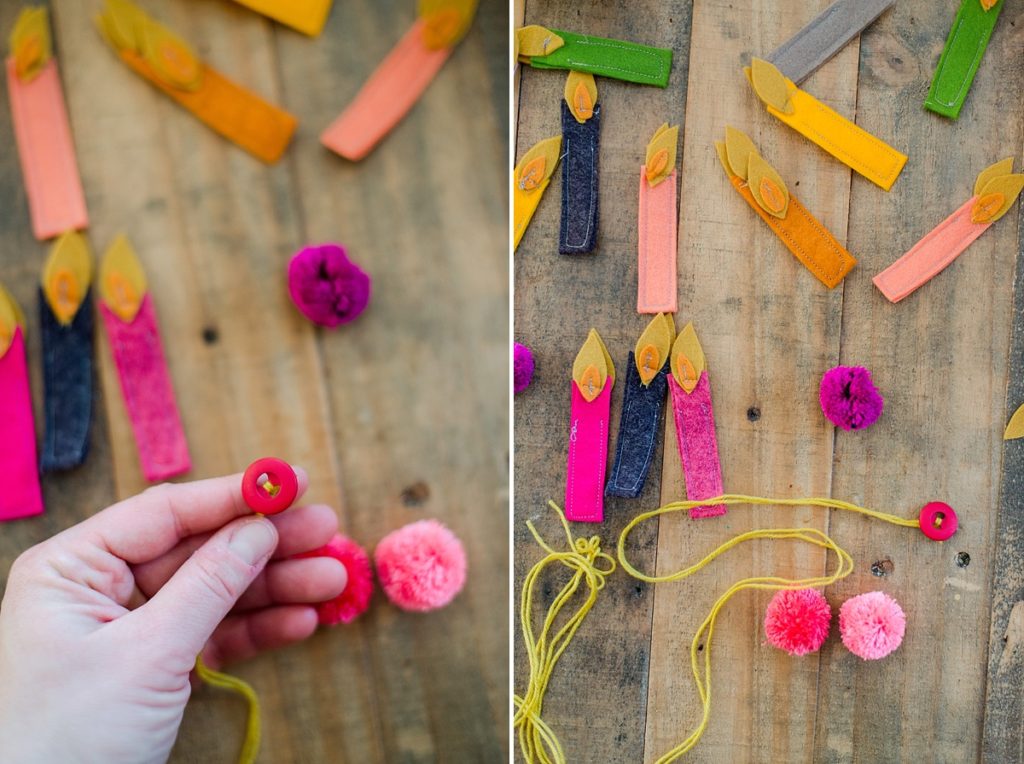
6. Optional: Make 4-6 poms for adorning the necklace. Either use a pom maker OR use a piece of cardboard to wrap your colored yarn. Follow instructions for making poms according to the manufacturer.
7. Cut a long piece of yarn to make your necklace; fold in half and string your button all the way to the end of the folded yarn (or string). Tie a knot near the bottom of the button to keep the button in place as the “clasp”. Then, with a darning needle, begin stringing on the poms or the candles in any order you choose. When stringing the candles, be sure to put the needle through the “opening” or gap that is between where the flame got tacked down and the edges of the candle were sewn. Cut the string to length, then tie a loop knot at the other end that is loose enough to fit around the button but tight enough that it doesn’t fall off.
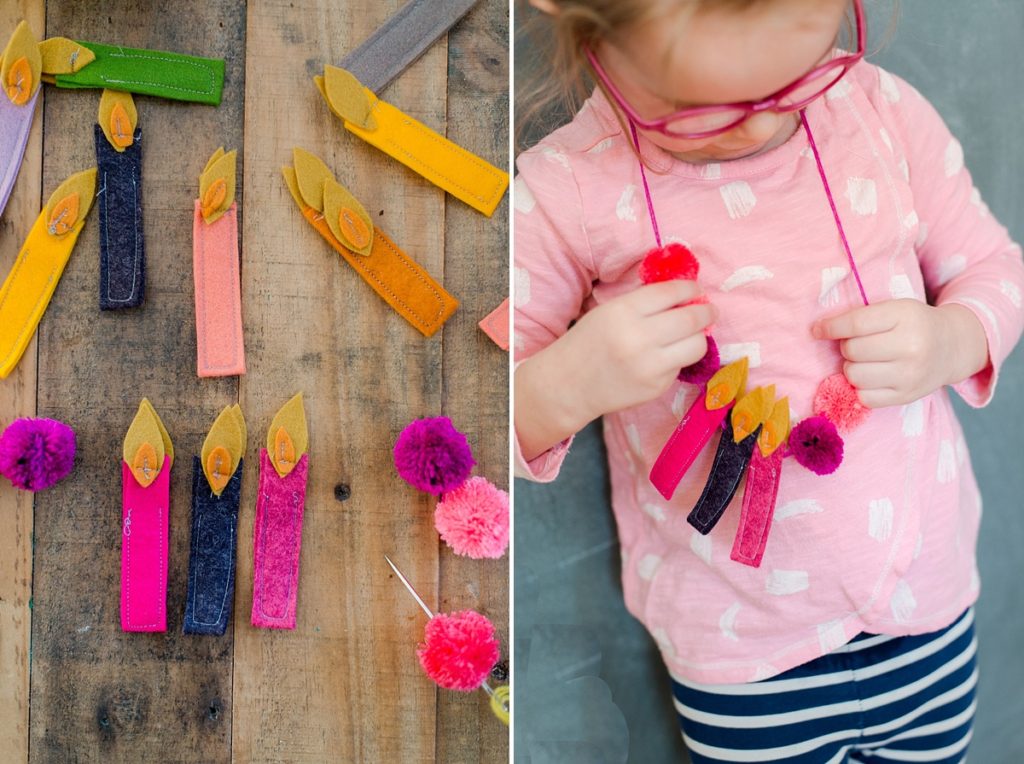
I have to admit that I have high hopes and expectations about her wearing this necklace EVERY year forever (ok, maybe not at age 18). I cut out and sewed skads of extra candles, since I was already in the rhythm of it, so that each year she can pick another candle and to her yearly tradition!
HAPPY MAKING FRIENDS! And Happy Birthday little Esther!
This is so cute. I might have to make them for a cousin’s twin girls when they turn 3 in October. They’re also Autistic so it might be prefect.