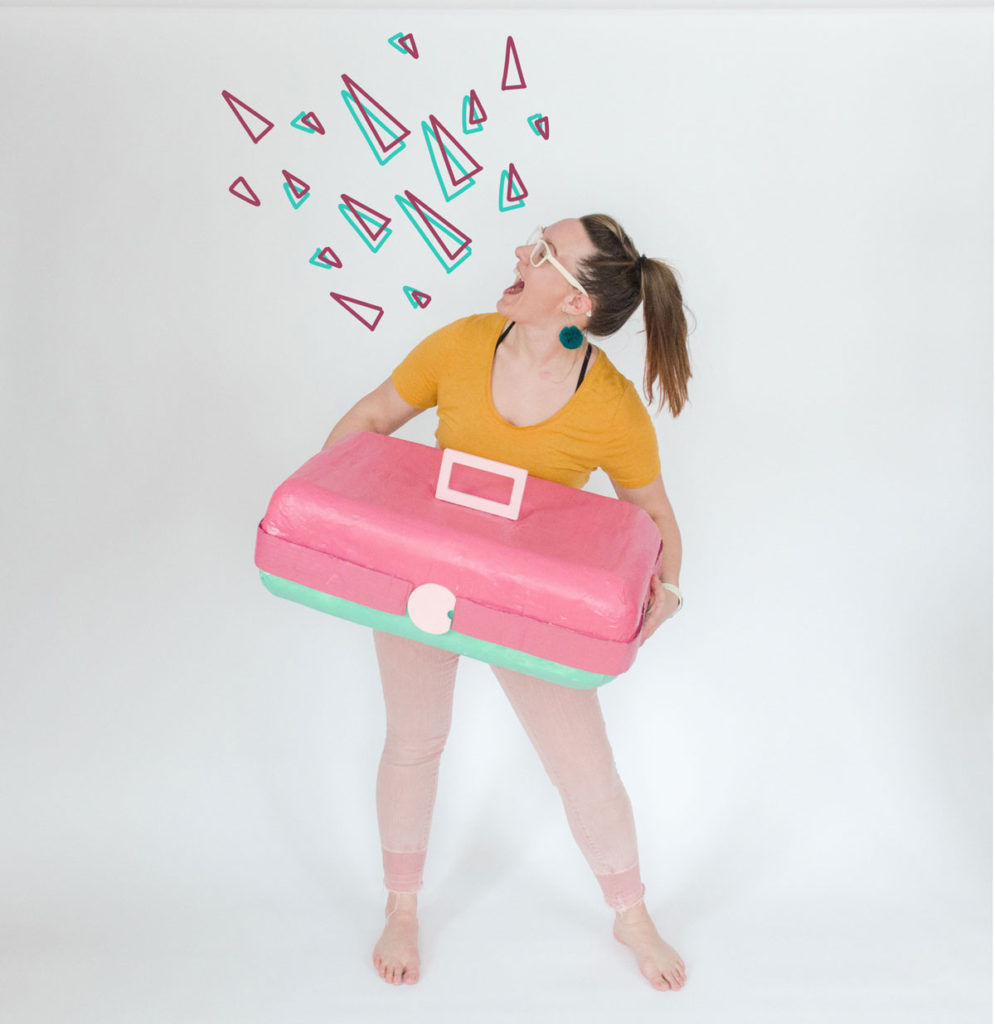
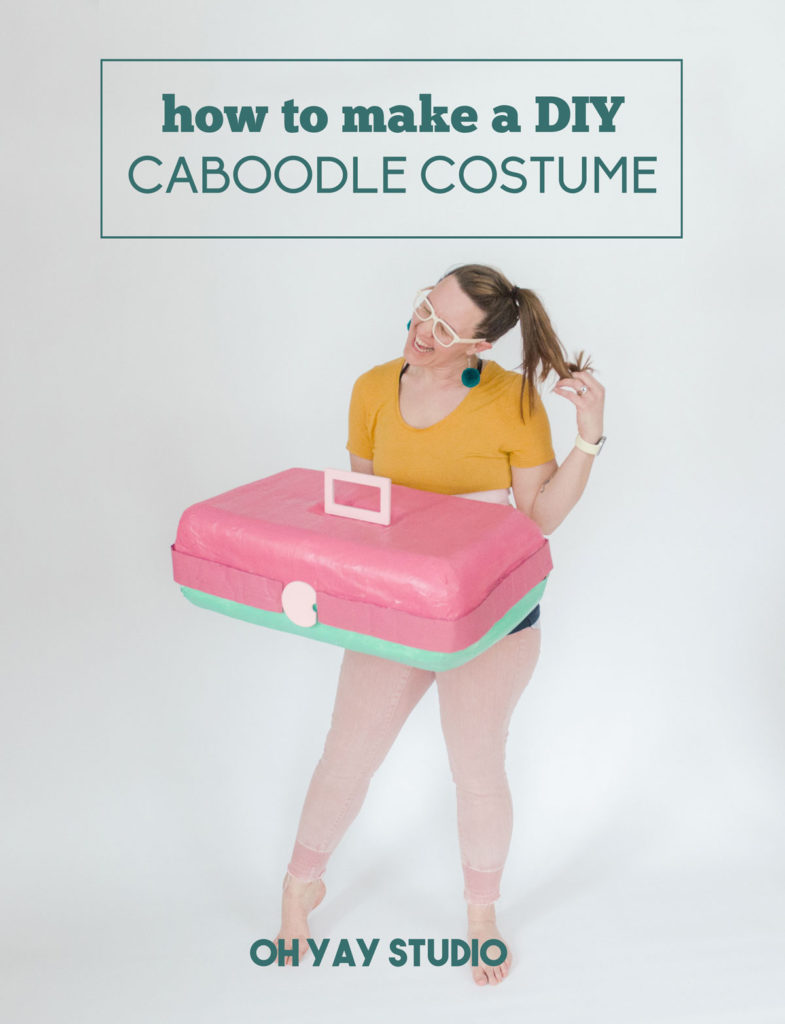
A 90’s inspired Caboodle costume
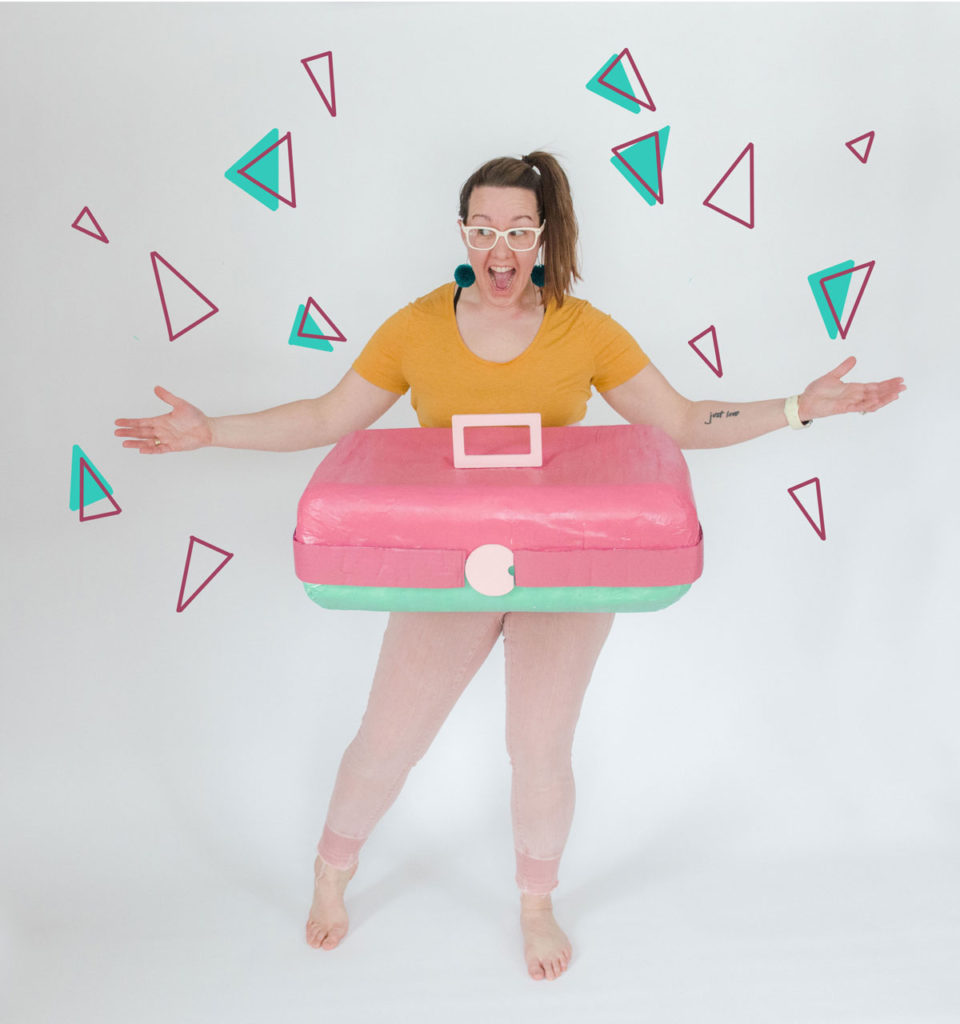
First of all, I am a child of the 90’s and I remember carrying around my Lisa Frank folders, Mr. Sketch scented markers and Caboodle filled with jewelry supplies on the daily. So, OF COURSE, with my Birthday in March I wanted a nod to one of my most favorite things as a child for this months’s costume challenge: A CABOODLE! Did you have one and love yours as much as I did mine? Annndddddd, they are for sure making a come back (have you seen them in Target?? orrrrr have you seen the super amazing doodle caboodle yet? I want to snag one of those)! 🙂
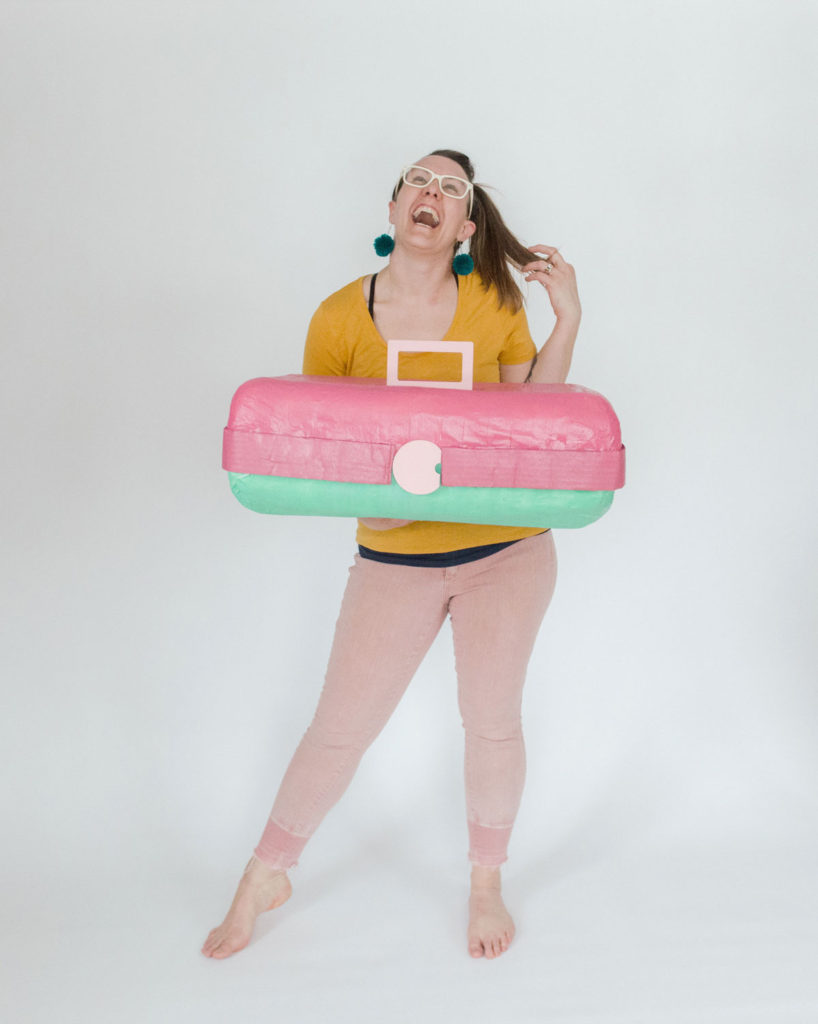
My caboodle costume, of course, comes with my favorite old school color combination, pink and teal, and I am SO excited to share it with you! 🙂
I set out on this costume challenge knowing that one of my main goals was to challenge myself with materials and shapes. I wanted to make bigger things, experiment with new materials and techniques and, more than anything, just learn and try. And this month fit the bill just perfectly for those goals and a little bit of frustration.
The shape of this costume was tricky. I knew it needed to be bigger than my body in width with smooth, round edges. I also knew that fabric wouldn’t get the shape quite right and I needed it light enough (weight wise) to make it into something I could wear. I also would have LOVED to make the caboodle open, but that’s maybe for another project….this one was hard enough to get “right” before the end of the month! 🙂
But a challenge isn’t a challenge unless it’s a challenge, amiright?! 🙂
PLAN A:
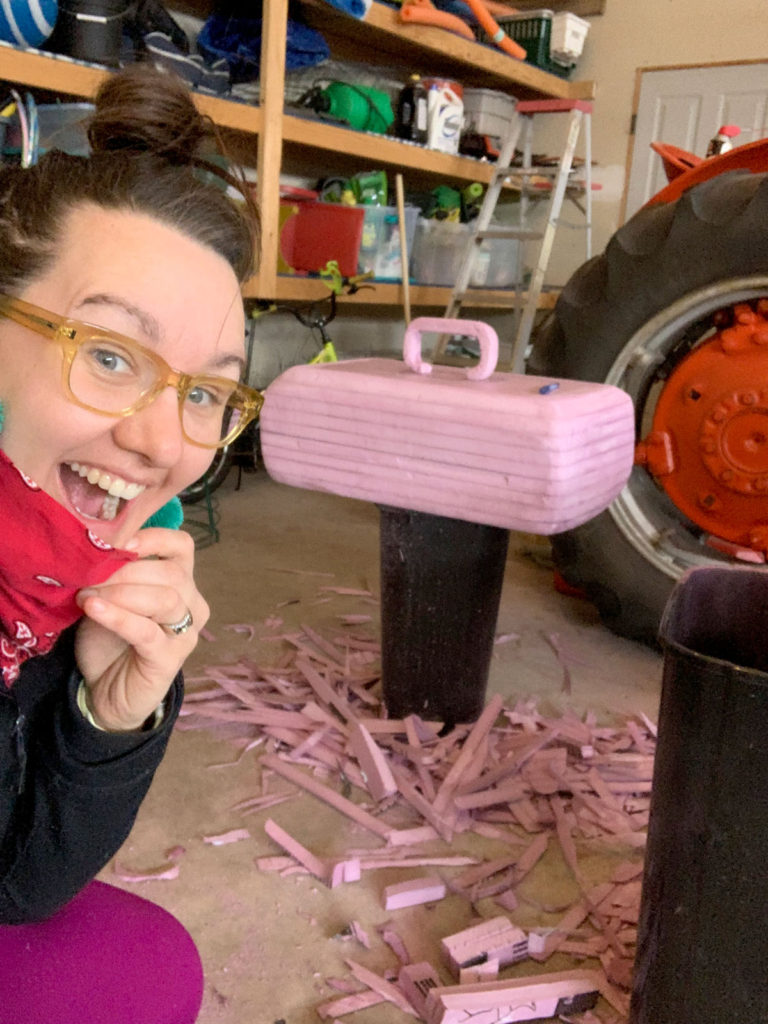
I had been inspired by a new Instagram friend that makes *incredible* things out of foam (like full on Halloween displays with incredible texture and movement). So I set out with foam. I glued some together, got a hot knife (which is SO fun to carve and sculpt with) and started sculpting the shape of the essential shape of the caboodle as a long rectangle with smooth, rounded corners. SUCCESS! It was awesome and smooth and I even used some sand paper to perfect the shape just *so*! Theeennnnnn I used something called “foam coat” to cover the foam with (essentially) a layer of plaster; this allows the foam to be painted and embellished (because foam disintegrates or bubbles with most adhesives and sprays).
WELP! Enter problem. I have never worked with foam coat before and I think I mixed the powder too thick. I used a brush (like the instructions gave as an option) to coat the caboodle shape. It looked lumpy but I thought I could sand it. Wellllll I sanded and sanded and sanded and sanded AND SANNNDDDDDED off and on for like a week. The shape wasn’t great, the texture was ULTRA lumpy and I wasn’t able to get the edges what I wanted them to be.
PLAN B:
The good ol’ tried-and-true middle school paper mâché recipe came out. YUP! We’ve all made a giant mess making paper mâché projects in our days and this was no exception. In a moment of frustration in our garage while sanding for the 837th hour, I decided to just use the foam shape as the “shape” for some paper mâché! VOILLAAAAA! 🙂
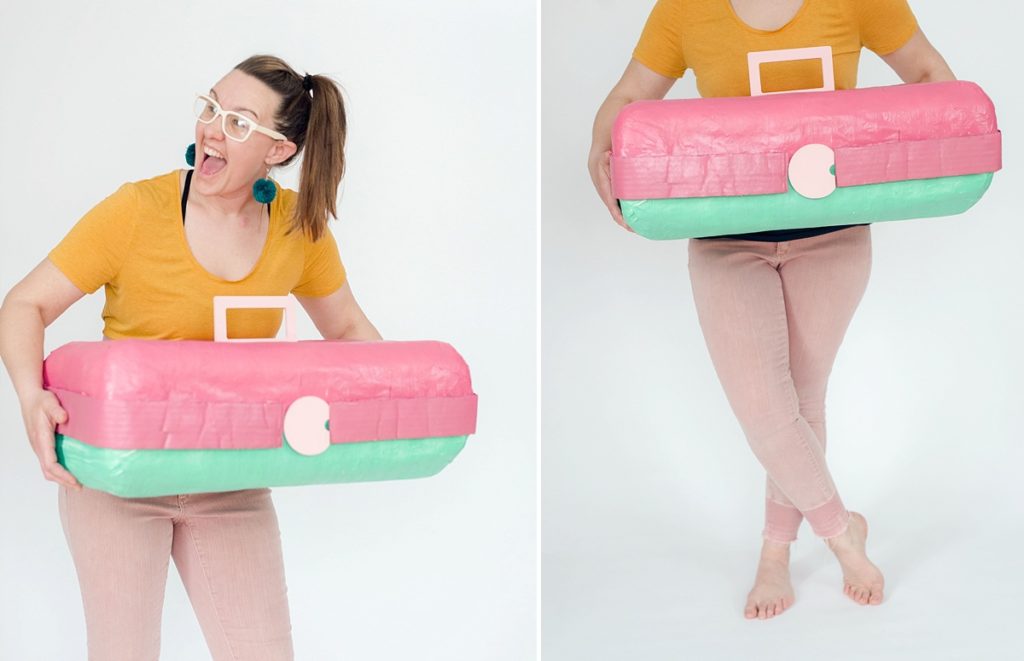
I essentially covered half of the foam caboodle with cling wrap and then put the paper mâché over top, let it dry and then did the same with the other half!
I then assembled the 2 pieces together with hot glue (and some cardboard internal structuring. I painted it 1/2 pink and half aqua (ya know, like my tried-and-true Caboodle from middle school). I embellished it with the “c” clasp in front and matching pink handle. The Caboodle was attached to me with a big piece of ribbon that ran from the inside structure, through a hole in the back and then around my waist.
Note: I could have *FOR SURE* worn this for a few hours at a party, BUT if I really were to be running through neighborhoods trick-or-treating, I would have needed extra reinforcements.
All in all, I am proud of this costume. Because, DUH, it’s a Caboodle. But more than anything, this is EXACTLY what I wanted this challenge to be. I am very good at being flexible (about most everything in life) but I am NOT good at finishing things. This is like the theme of my life……I start out many things SUPER eager (my day, a good book, a project, a recipe that I’m testing, an outing with my kiddos, the list goes on and on) but I am not always good at finishing. Sometimes I blame it my lack of plan, but sometimes it’s just plain time to carve out to solve ALLLLLL the problems without jumping to the next thing that excites me. I am an easily excitable person, so the fact that this Caboodle sat unfinished in our garage for days on end AND I kept coming back to it over the course of 3 weeks is what makes me happy! 🙂
ANNNNNND who doesn’t want to channel their inner 80’s self to wear all the neon and celebrate one of my prize possessions as a child!
HAPPY MARCH EVERYONE!
and yay caboodles! 🙂
- 1 part flour
- 1 part water
- 2 tbs salt (so that your project doesn’t get moldy)
-
Multiply recipe as quantity needed
-
Before laying down your pieces of coated paper, run the paper between your two fingers multiple times to get as much excess off as possible before laying it down. You don’t want lumpy or over saturated paper. The idea is to coat the strips of paper with juuuuuust enough to make it “gluey” but not too much that it doesn’t dry well.
-
Think about the “movement” or lines of your project when you tear your strips of paper. I tore the newspaper the long way because I knew that I wanted to make the outside as smooth and in one long line across the top as possible.
-
Lay the strips of paper with the movement of the shape. Don’t just “willy nilly” place the strips of paper on, but instead follow the lines of the shape and lay them down in one sold coating (ie, don’t just place random paper here and there if you want a smooth finish).
-
Don’t forget to overlap your pieces by at least 1/4” with each strip.
-
Smooth out your paper as much as necessary when coating. Be careful not to be too rough with your touch as to tear the paper, but I ran my hands and fingers over each piece multiple times
-
My recommendation is to only do up to 2 coatings of paper at a time before letting it fully dry. You can add as many coatings are you want total; the more layers, the more sturdy the piece! 🙂
This is so cute!! Takes me back to childhood.
I’m dying over this. SUCH a fun post- you’re energy and images are incredible. LOVE!
How fun! I love paper mache!
This is great. I still have one that may or may not look like your costume. So – you have great taste!
Love your quirky sense of humor!
Haha this is so cute! I love it!
How cute. I have no crafty bones in my body and no matter how easy I would mess it up! Great job by the way!
Looks like a great project!
How fun! It’s a cute and nostalgic costume. Good for you, for finishing this complicated project!
I love this! Super cute and creative.
This is awesome!!! I love your qirkiness and talent!!!
Talk about being creative! LOL!! Took me back to when I was a teenager.
Oh my gosh your so much fun, I love this and remember the caboodle lol I was a child of the 80s and it was a wild and wooly time too 🙂 Thanks so much for the smile, you’re super creative!