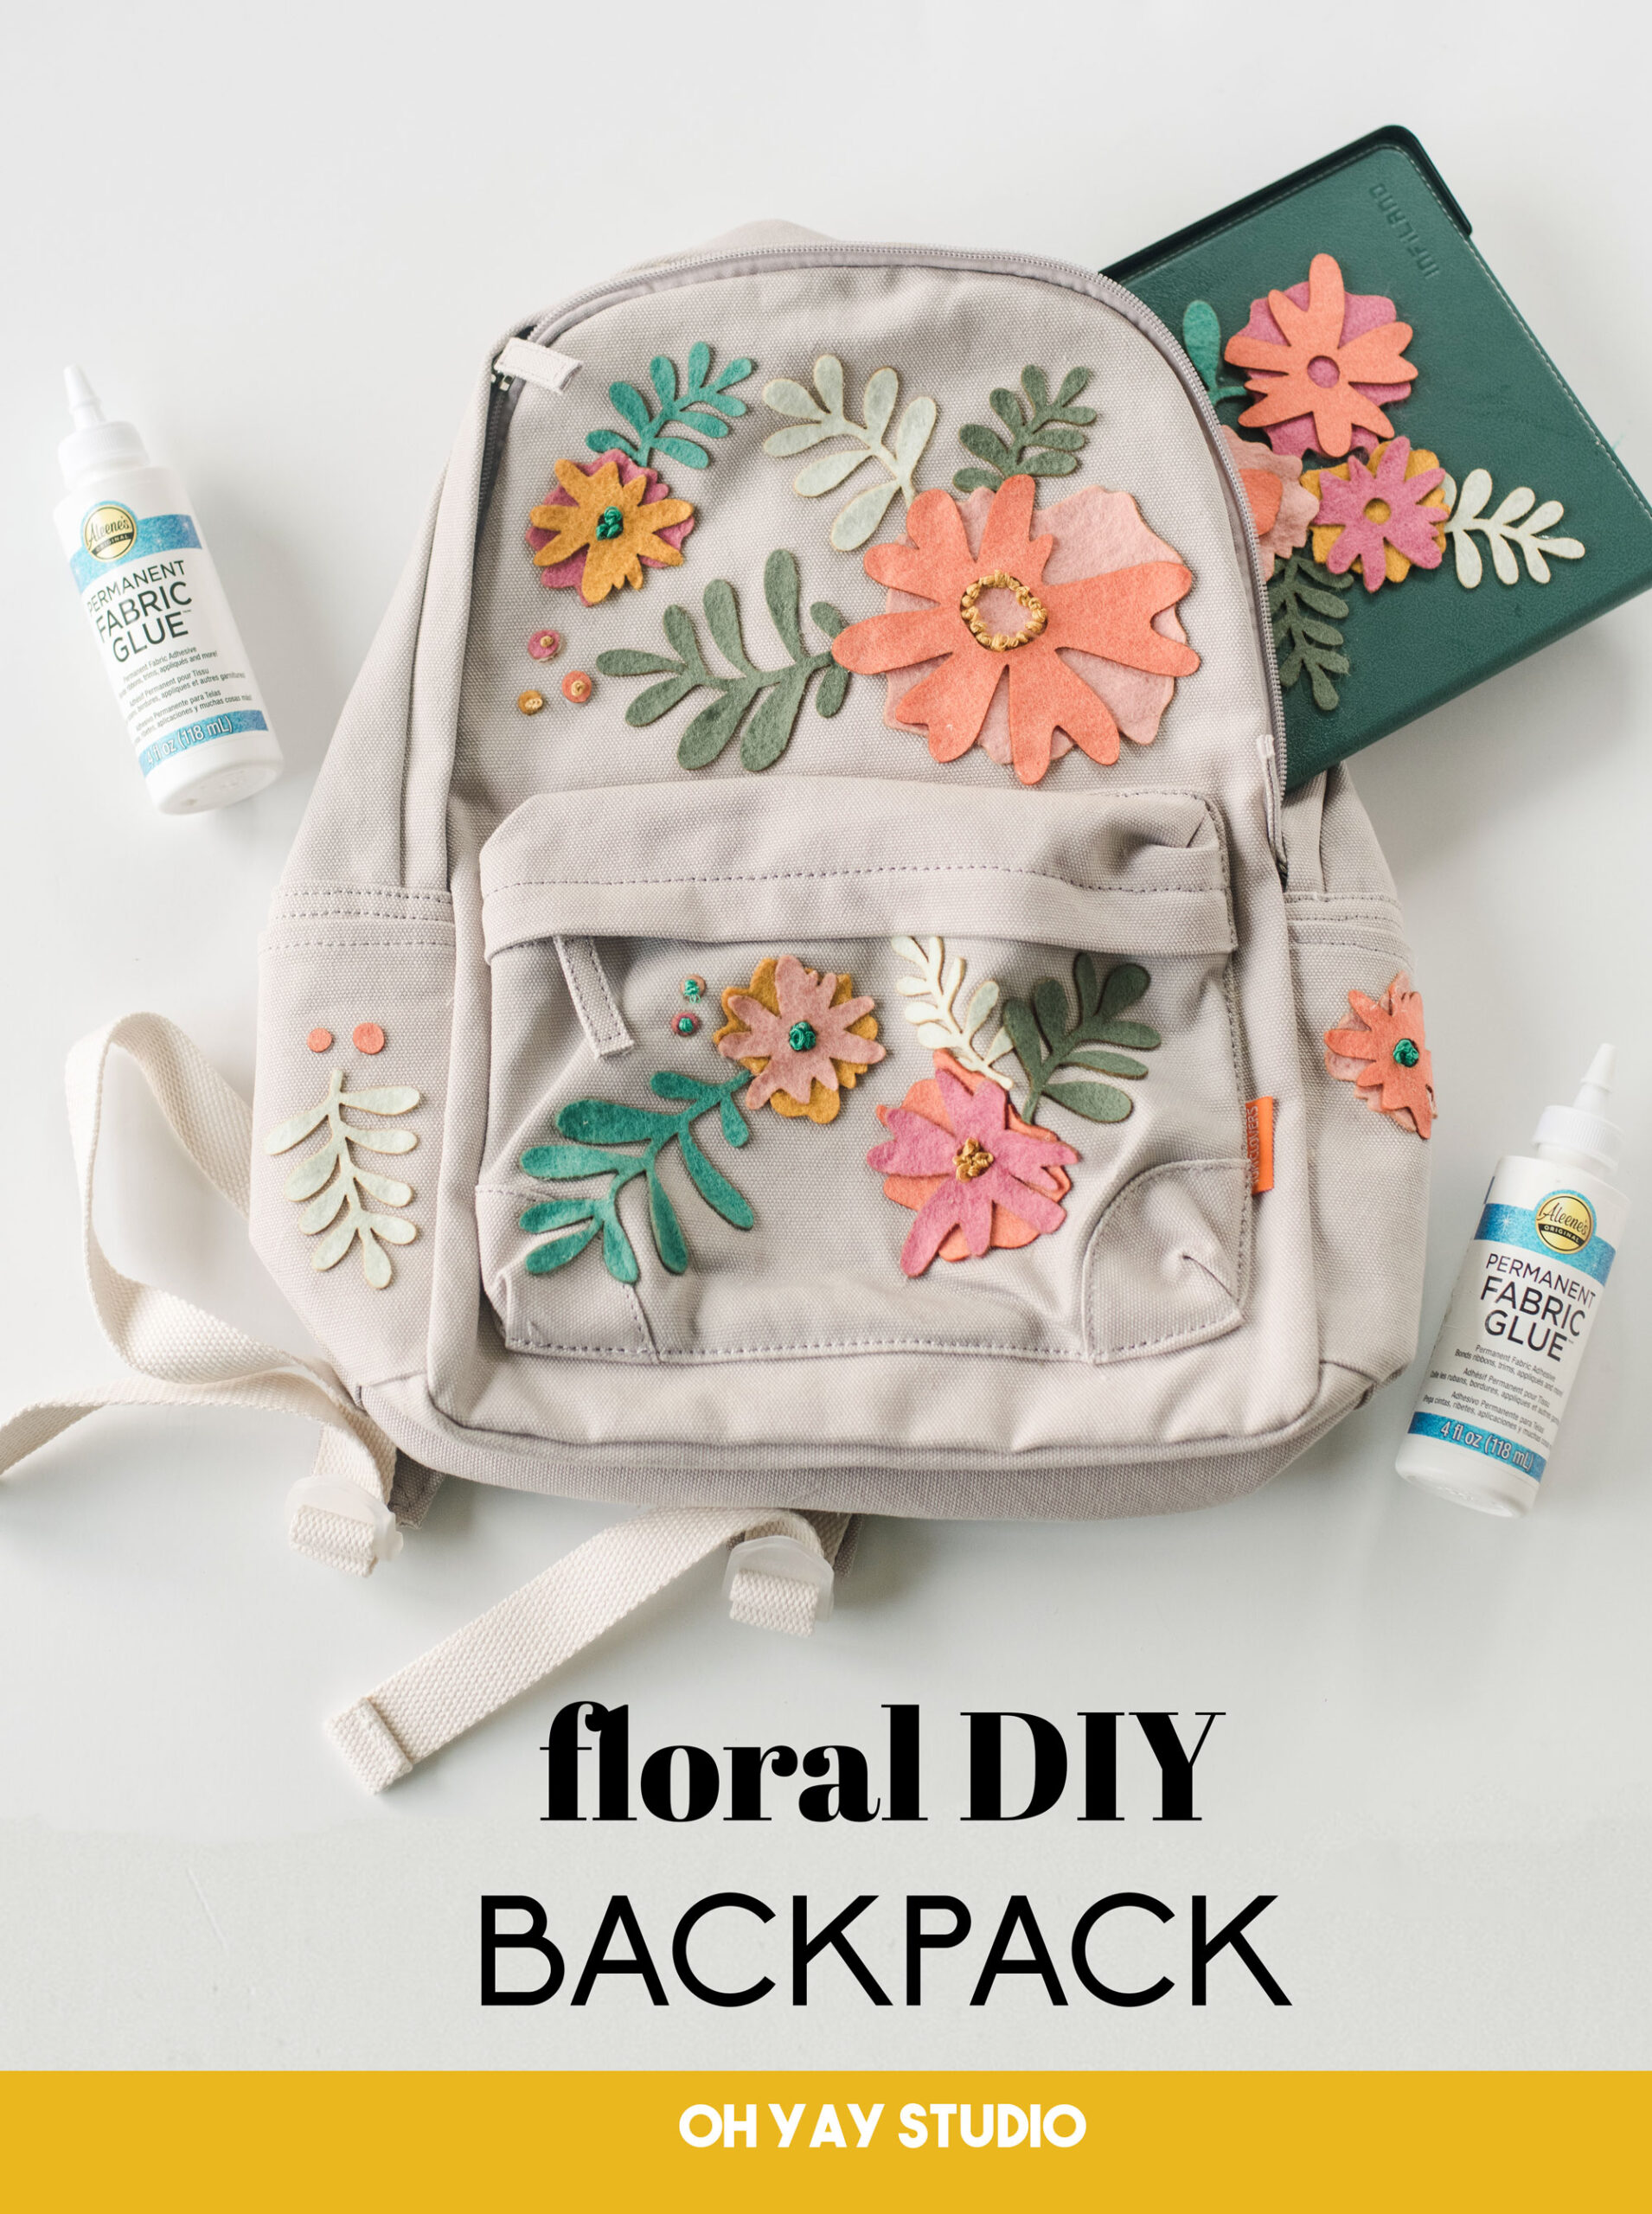
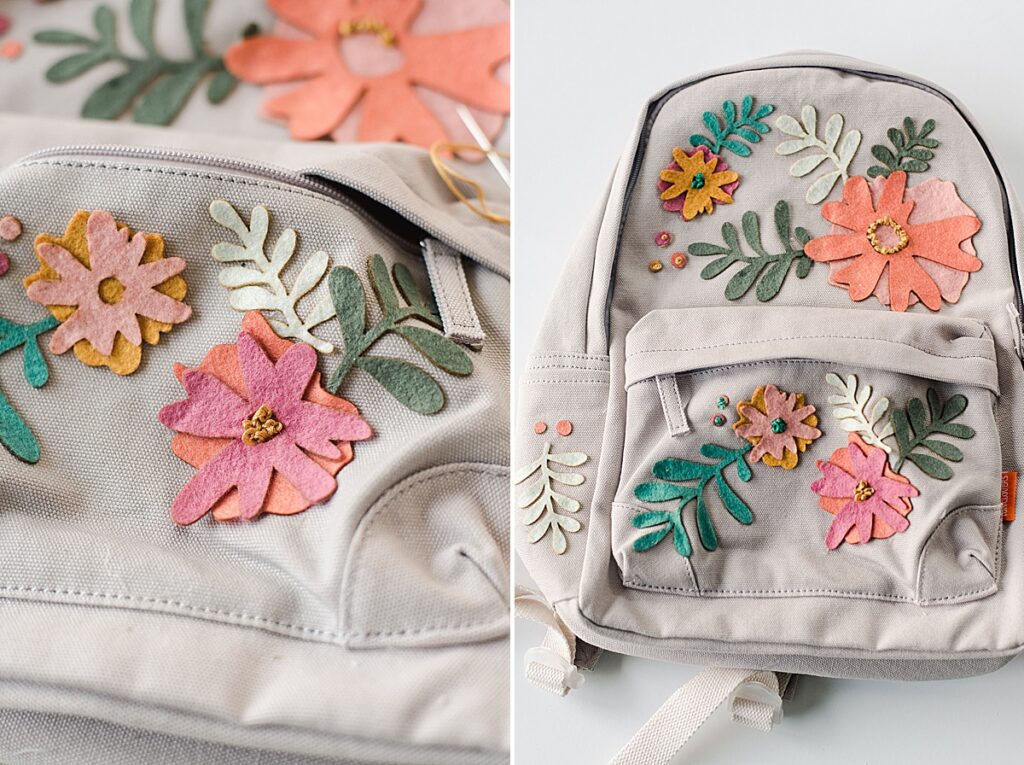
Floral Fabric Backack DIY + matching iPad case!
This post is sponosored by Aleene’s Glue
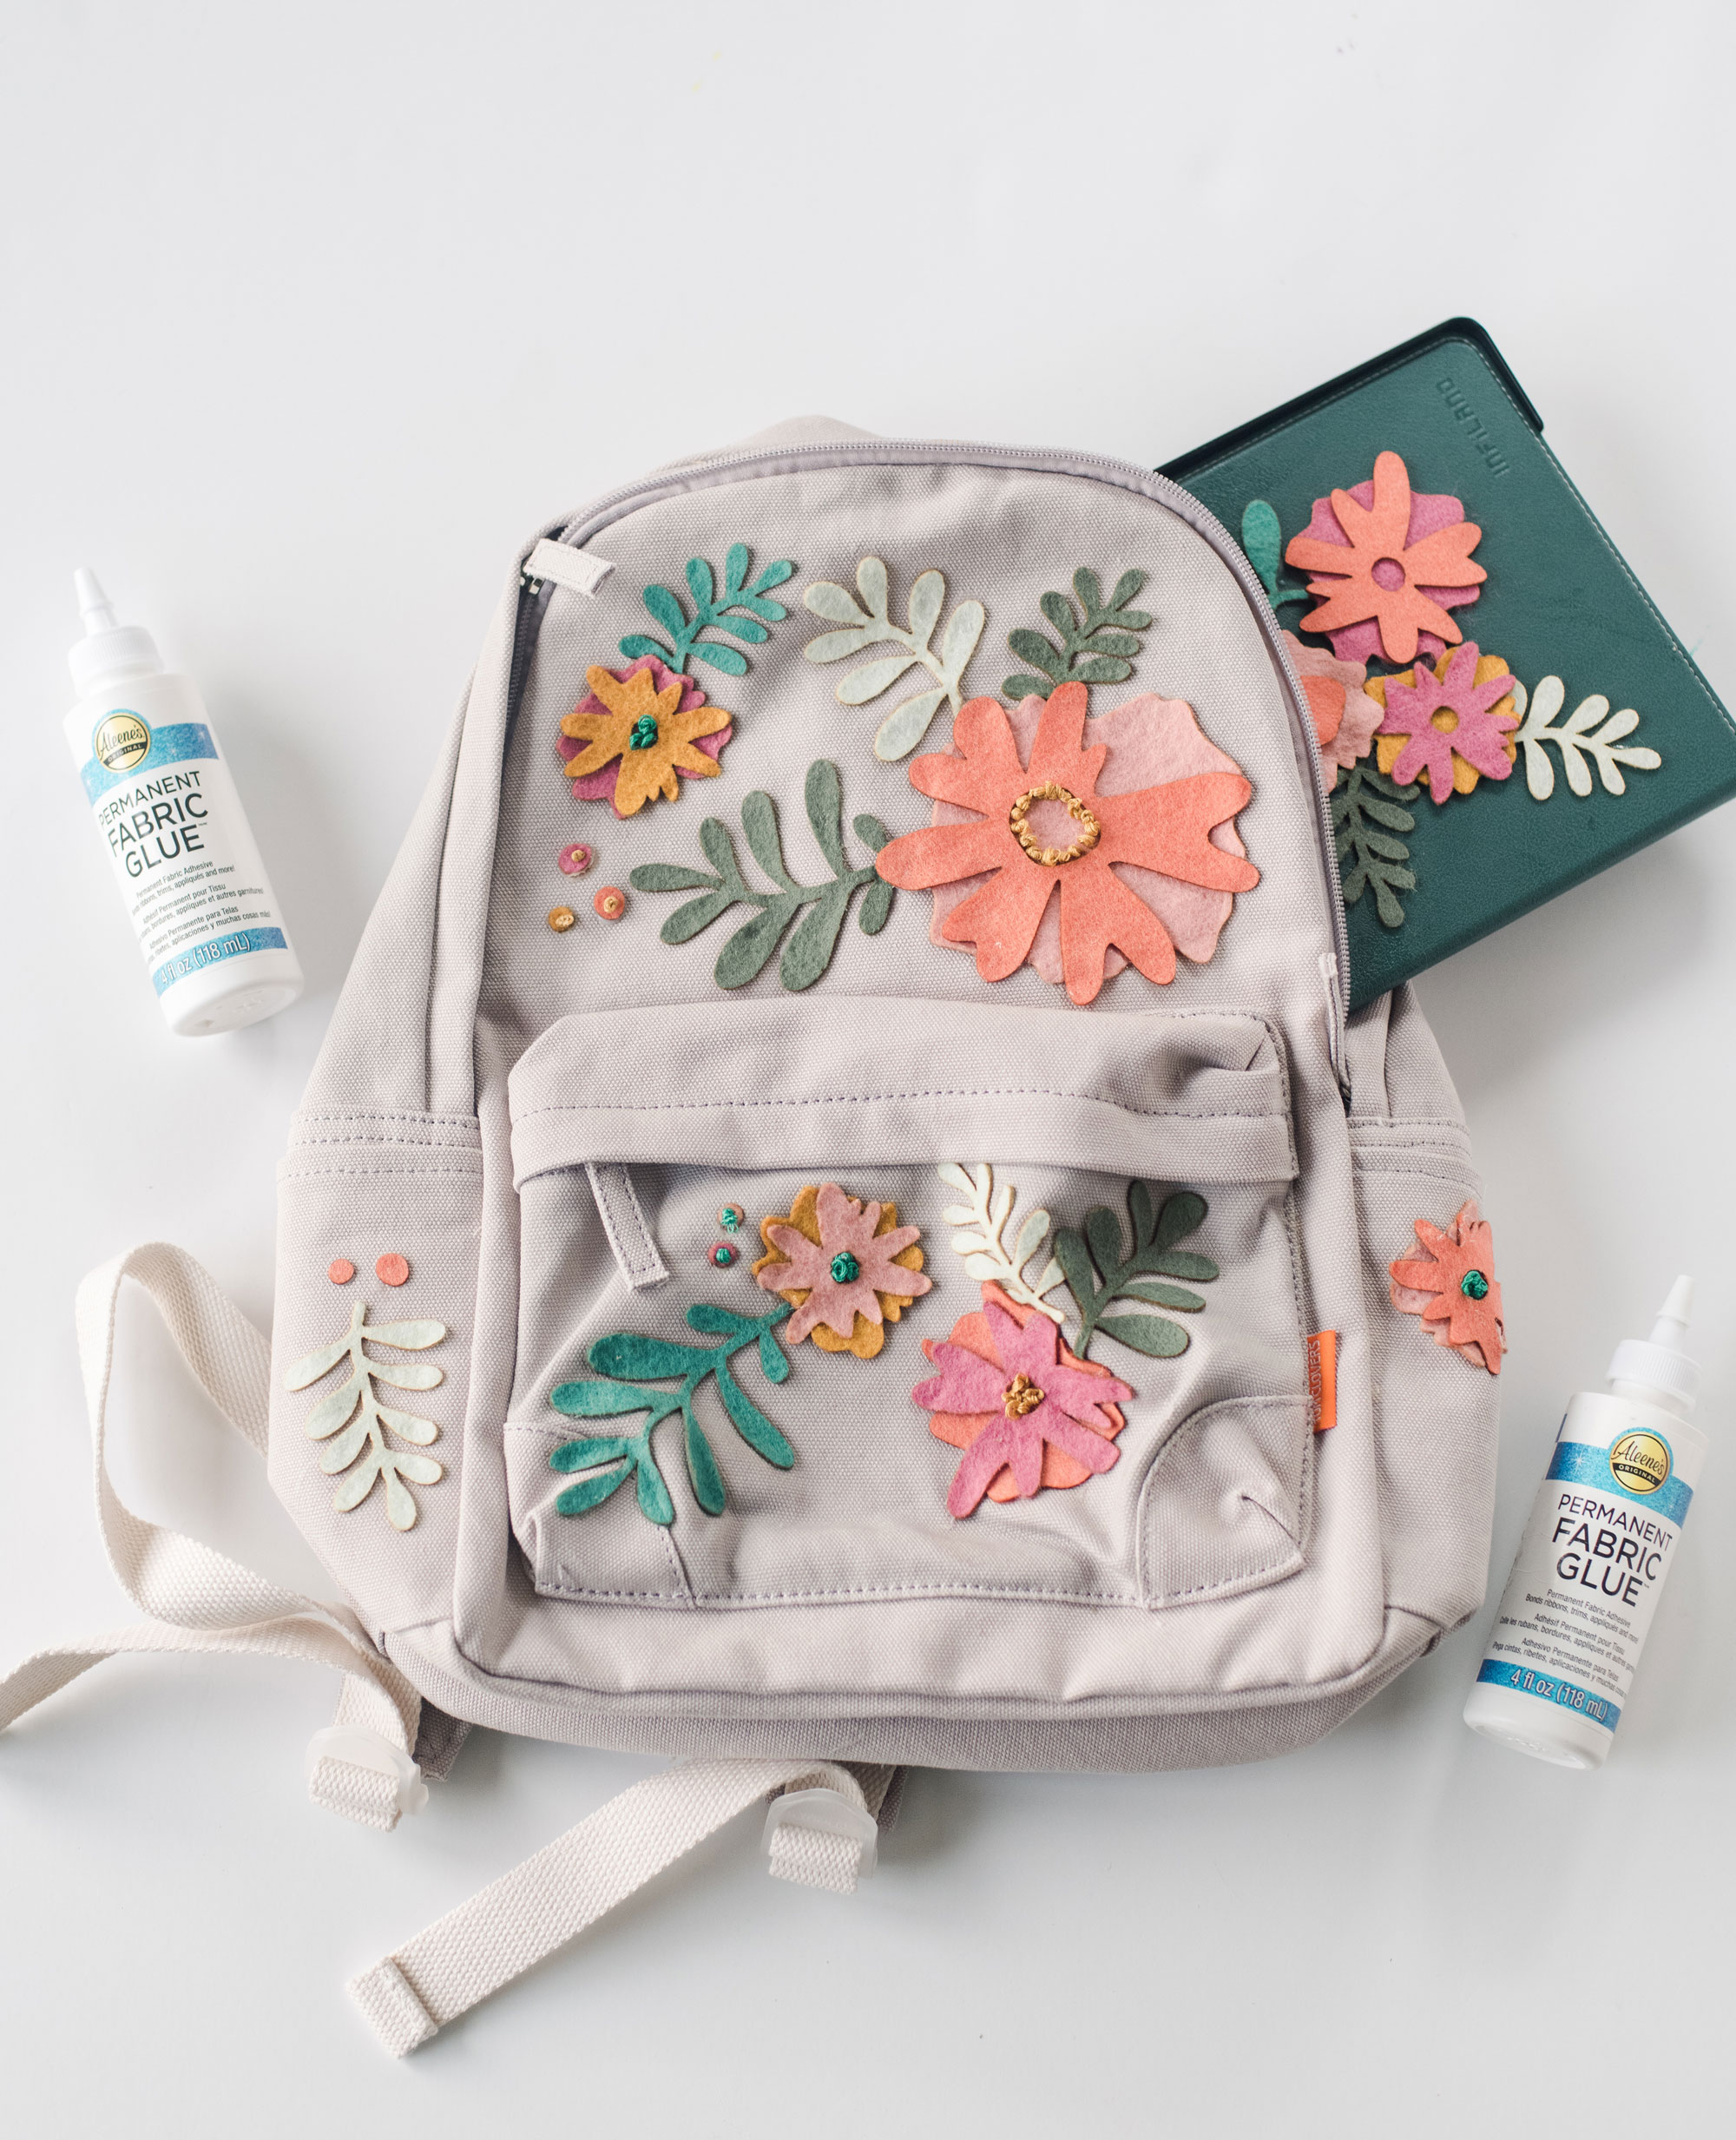
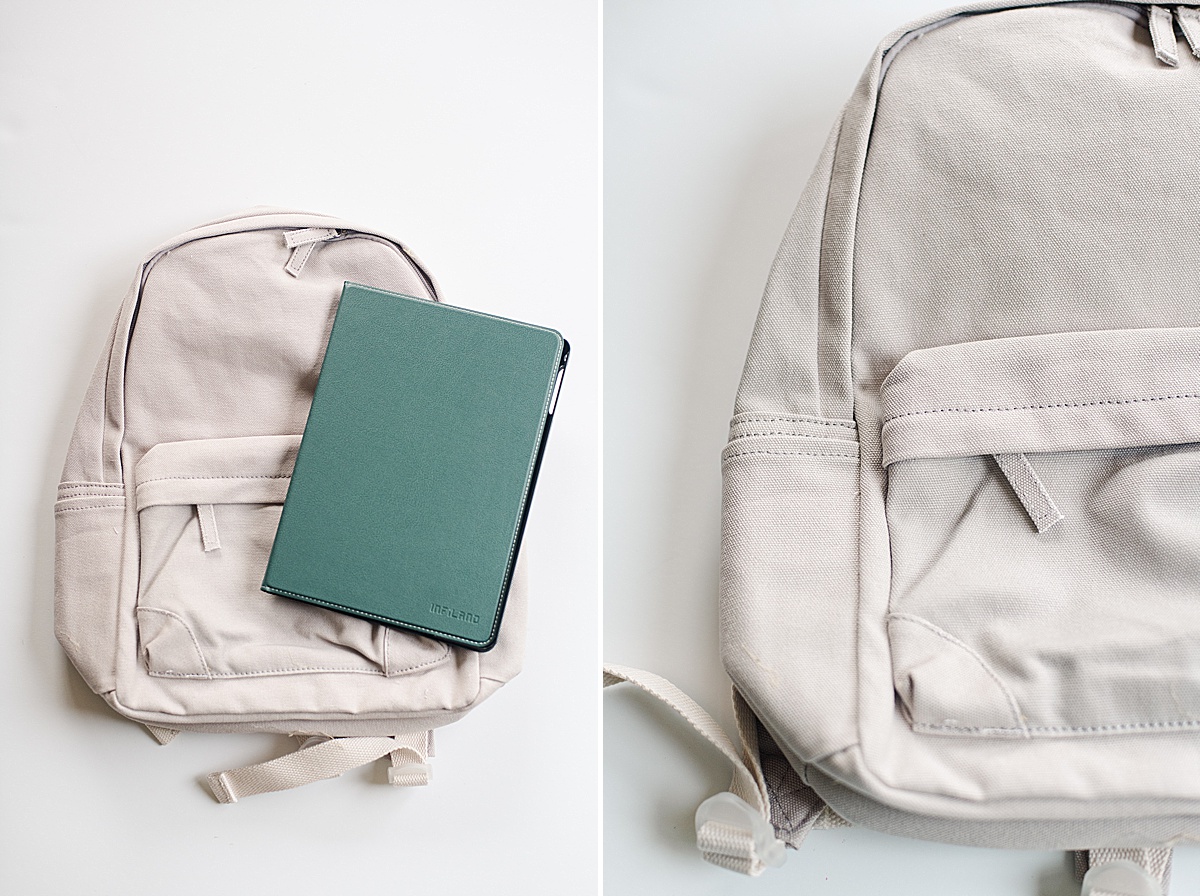
It’s back to school seasonnnnnnnnnn! SOOO today I am sharing with you one of the *MOST FUN*, most customizable, colorful and quite awesome DIYs to enhance your new (or already used) backpack for the school year AND we will make a matching iPad (or chromebook) case to go along with it! I mean, for obvious reasons this is a *must do* before classes start this fall! 🙂
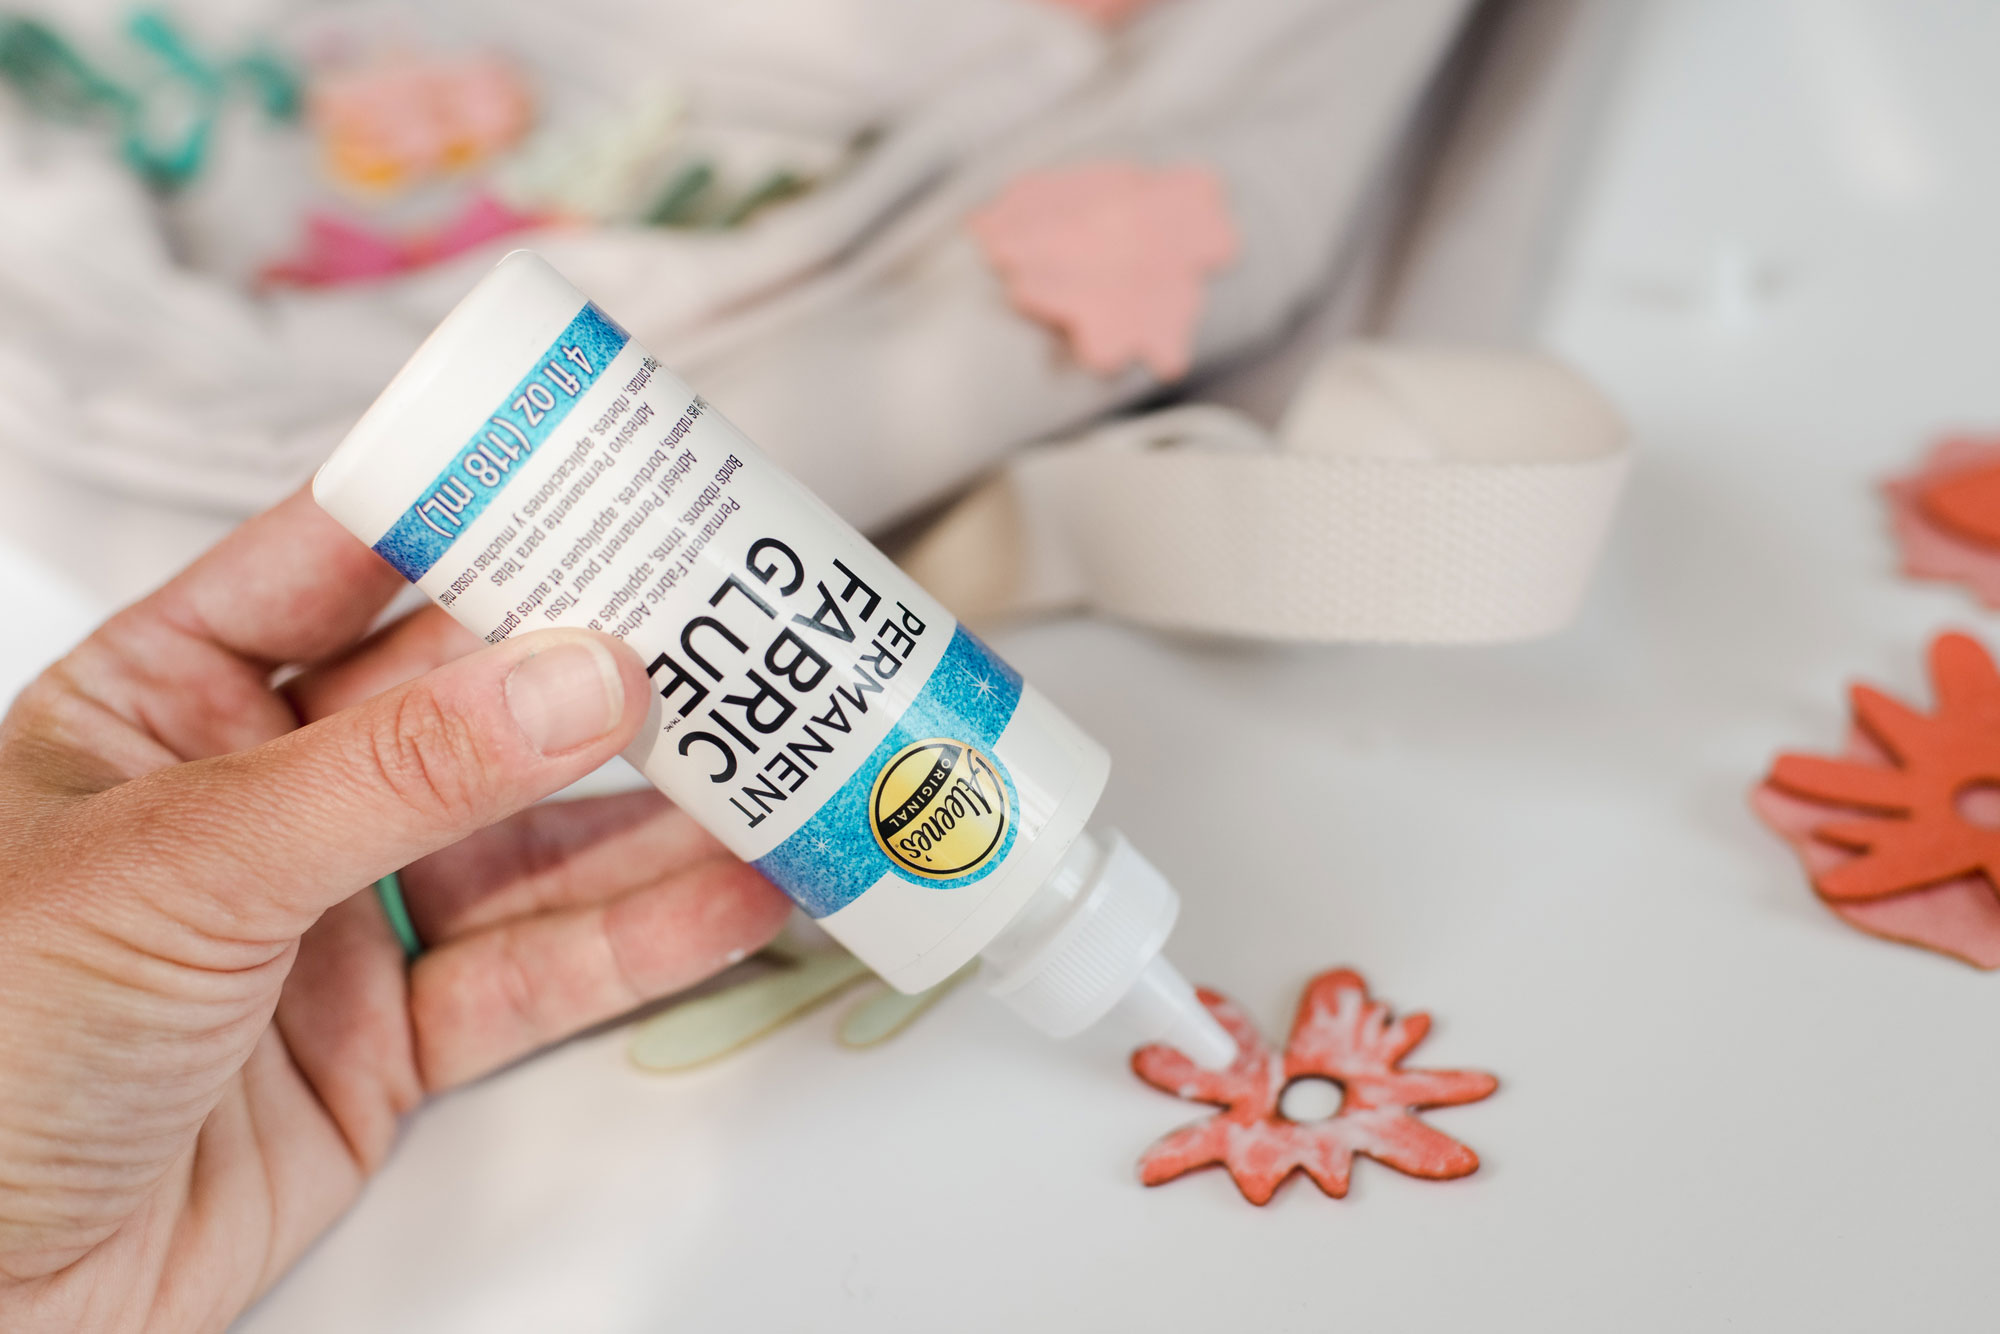
I am using the amazing new permanent fabric glue from Aleene’s for this project! AND OKKKKK! Lemme tell you why this glue is awesome!
- First of all, t’s FLEXIBLE. Like the stuff you glue down will move and stay with the fabric! WOAH! I found that the thicker the fabric the better (ie, things stuck and “moved” so well with this 100% cotton canvas backpack)! 🙂
- It’s also SO easy to use….I know, it’s glue. But hear me out. It doesn’t matter how much you use, this stuff dries clear (like really clear, not just kinda clear) AND it’s “thin” enough to spread without being sticky. (You know what I’m talking about if you’ve ever had gooey fingers after a project like this….and gooey fingers means gooey fabric pieces that end up on your finish product). Not the case with this stuff! 🙂
MATERIALS:
- A new or gently used backpack (for real, recycle your old backpack from last year if it didn’t get too much use) – cotton, canvas or any other “natural” material works the best for this project
- An iPad case (note: be sure you get one or have one that has a canvas or fabric outside, the glue works best adhering your design to any sort of fabric)
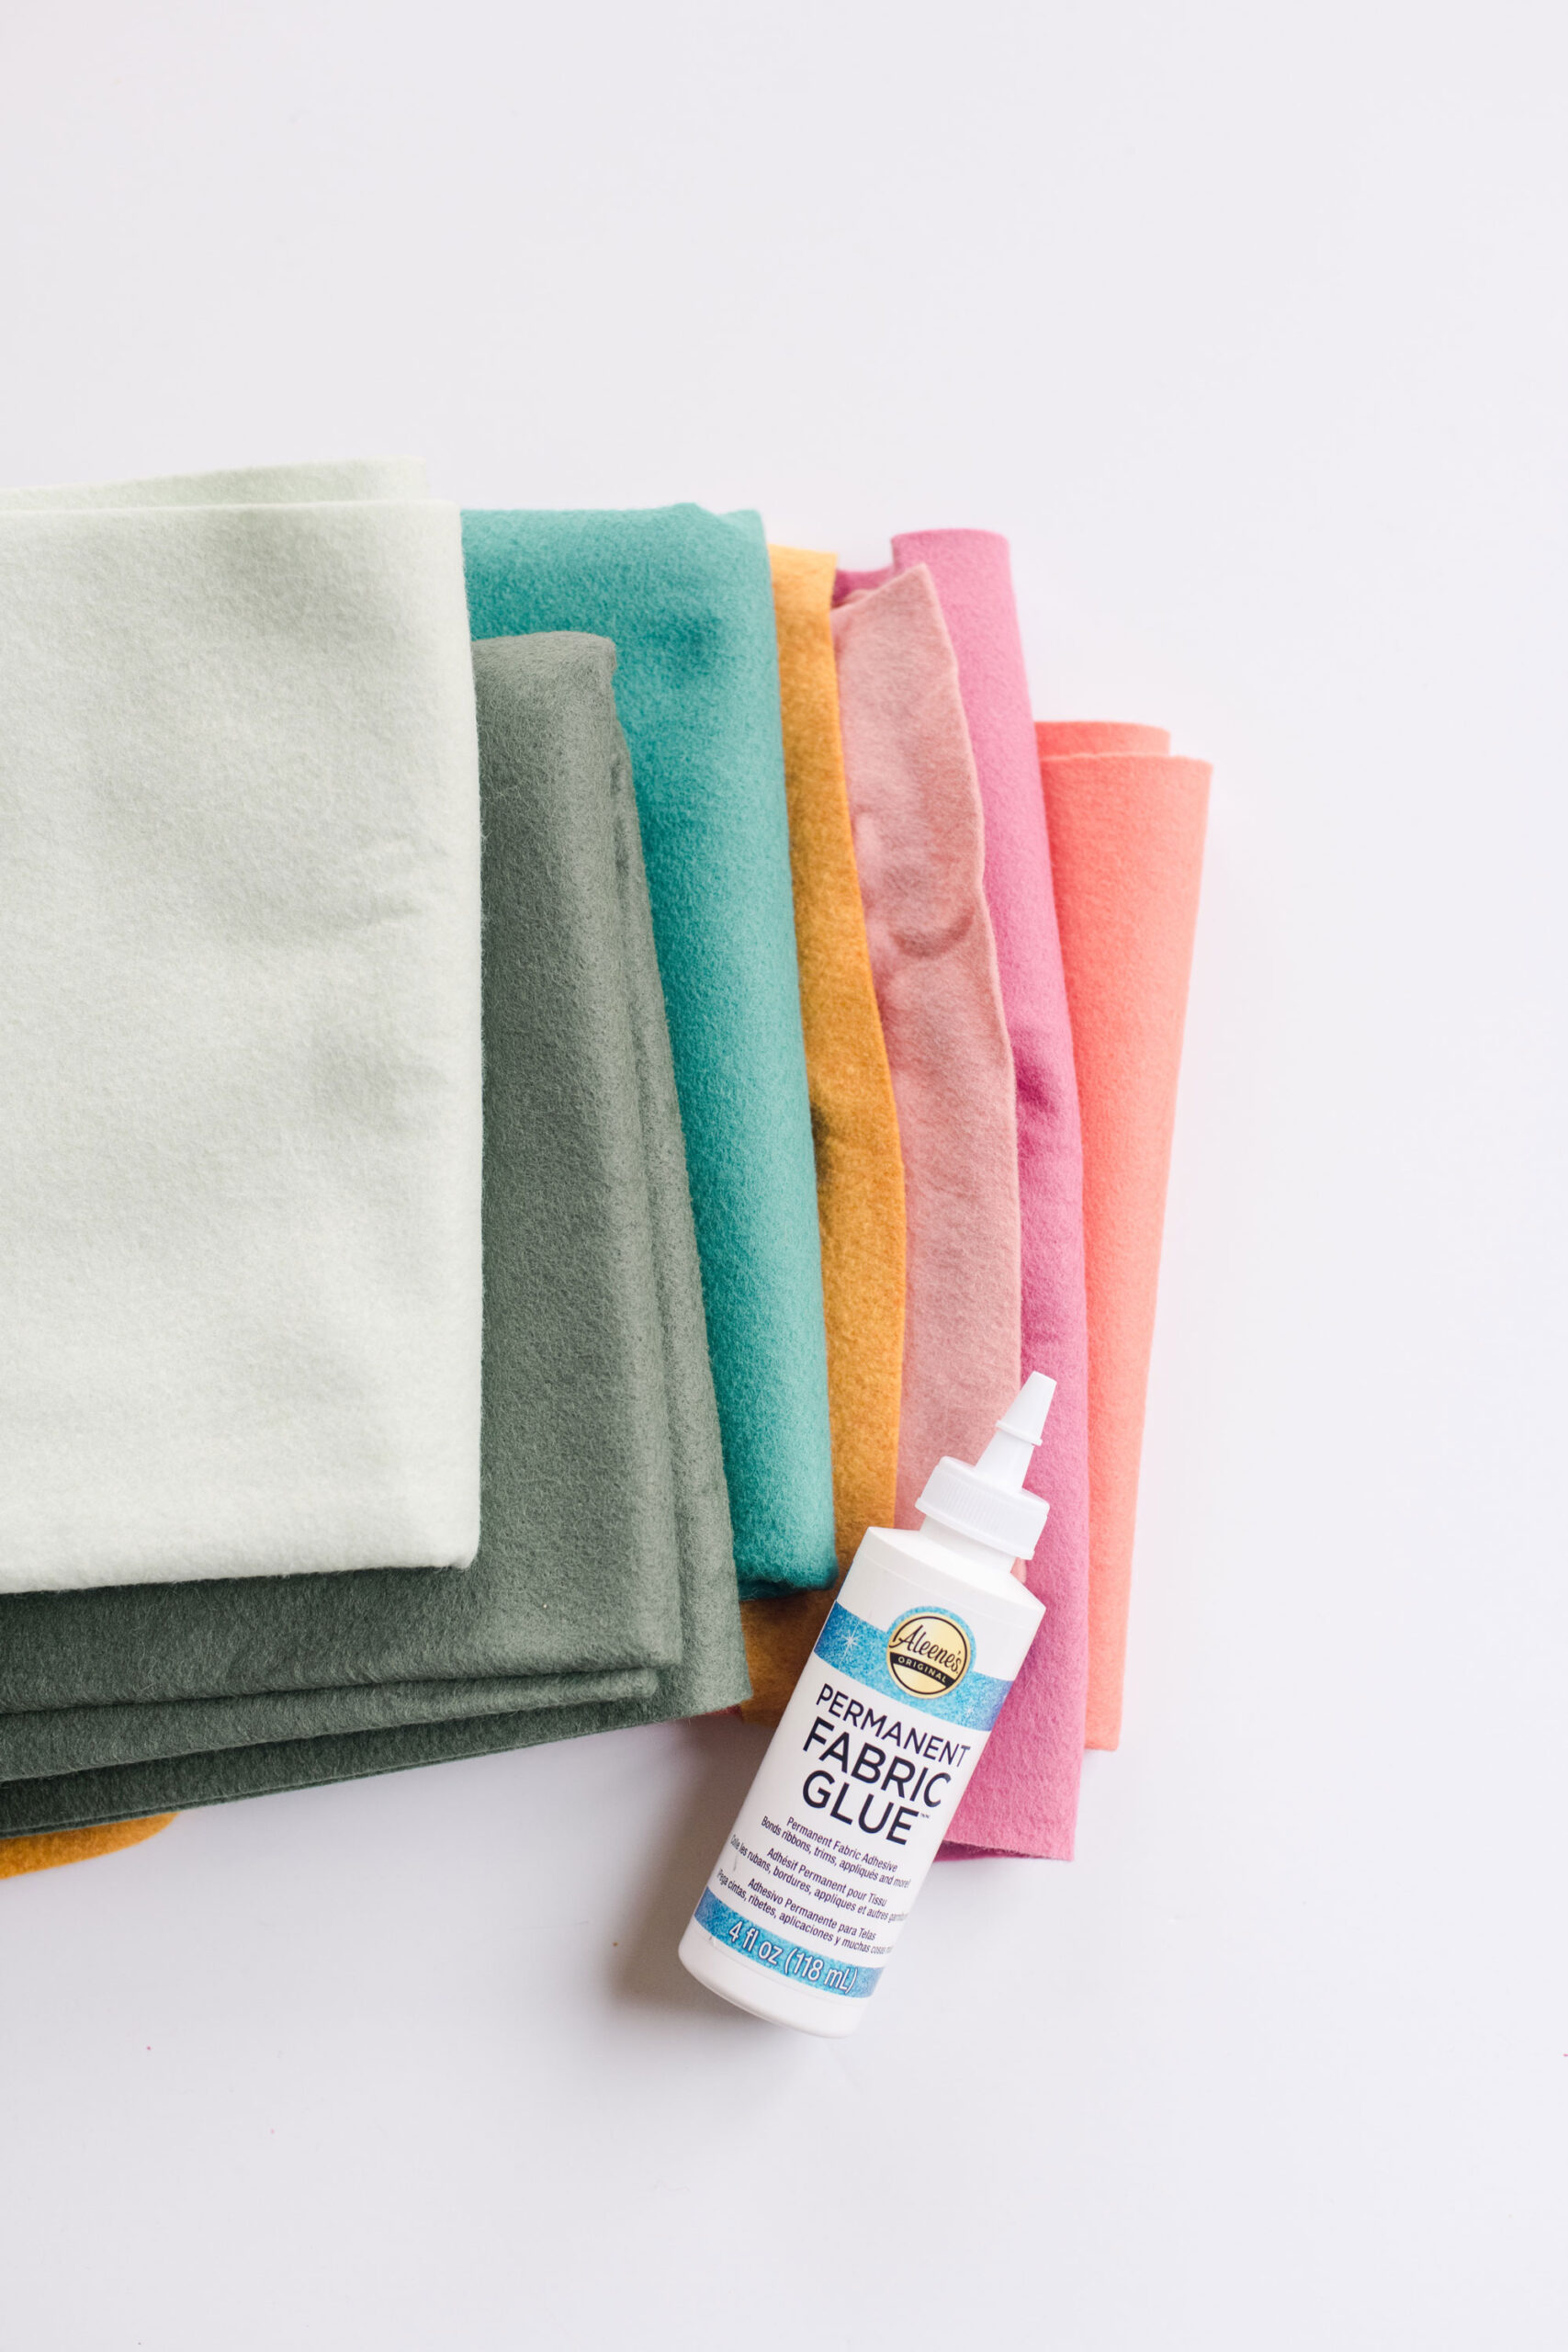
- Some fabric scraps or felt pieces
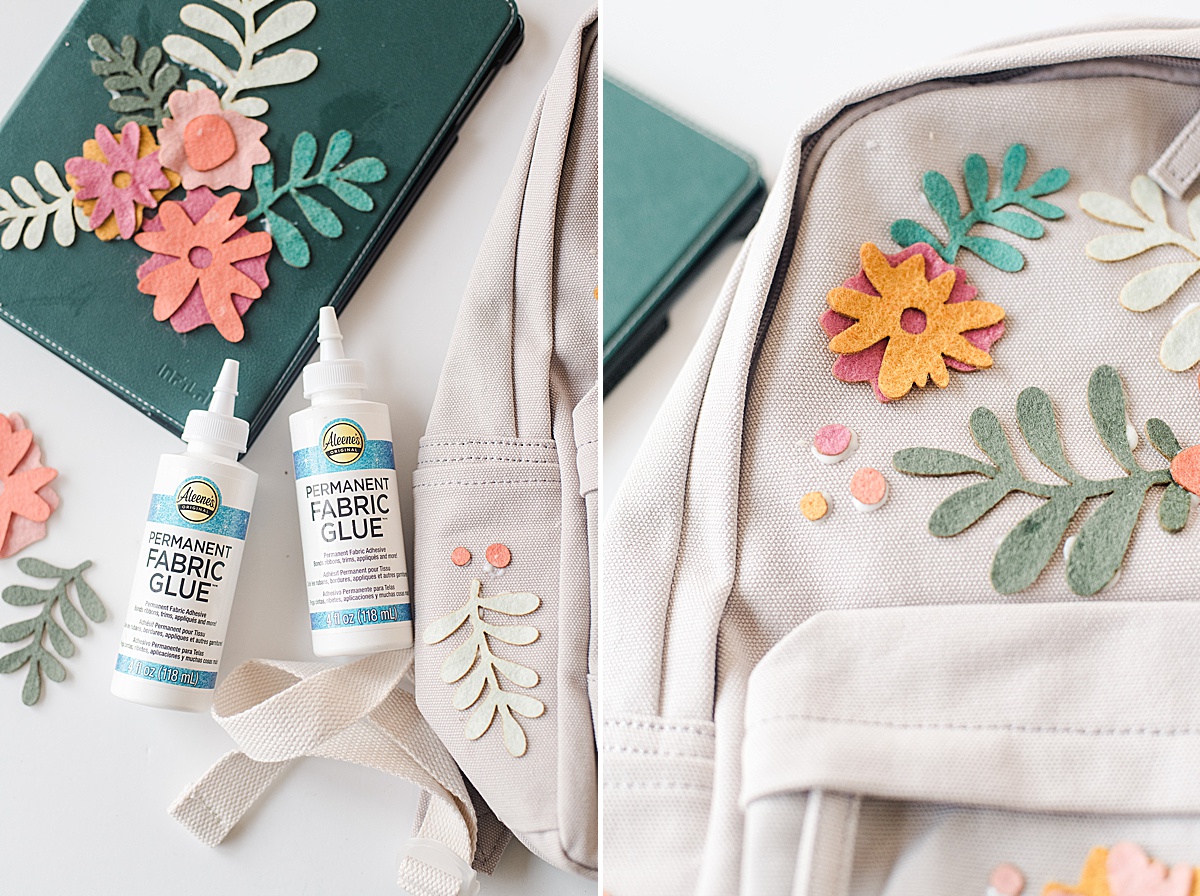
- A bottle of the best fabric glue – Aleene’s Permanent Fabric Glue (this stuff is awesome)
- Sharp scissors
- Optional embroidery floss or thread for making everything have pizzaz
- Optional floral pattern if you want to make this exact design (download below)
INSTRUCTIONS:
1. Download the SVG files here if you wish to make the exact design that I did:
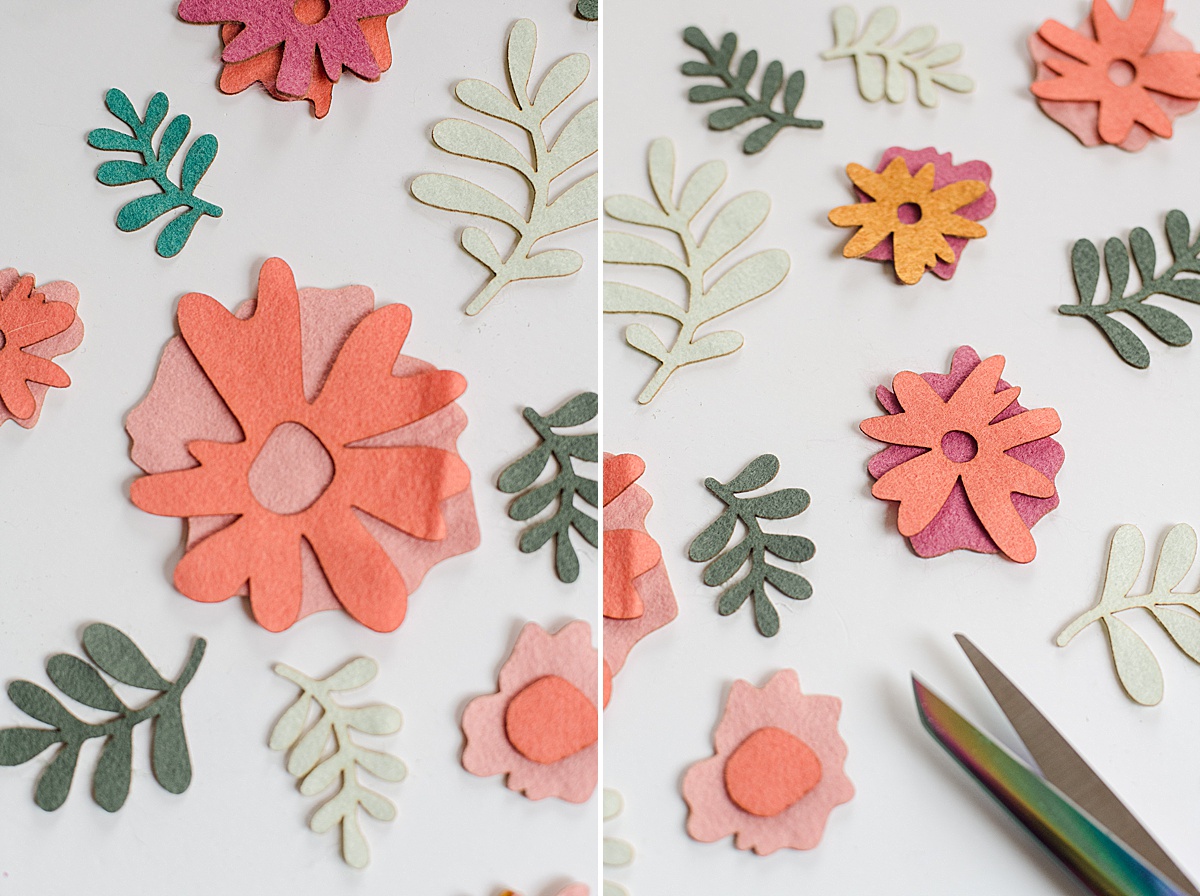
Then gather up your fabrics and begin cutting out your shapes! 🙂 Felt or wool works amazing for this project because the edges of your fabric won’t frey (since it would be essentially a raw edge).
And remember, the MORE COLOR THE BETTER! 🙂
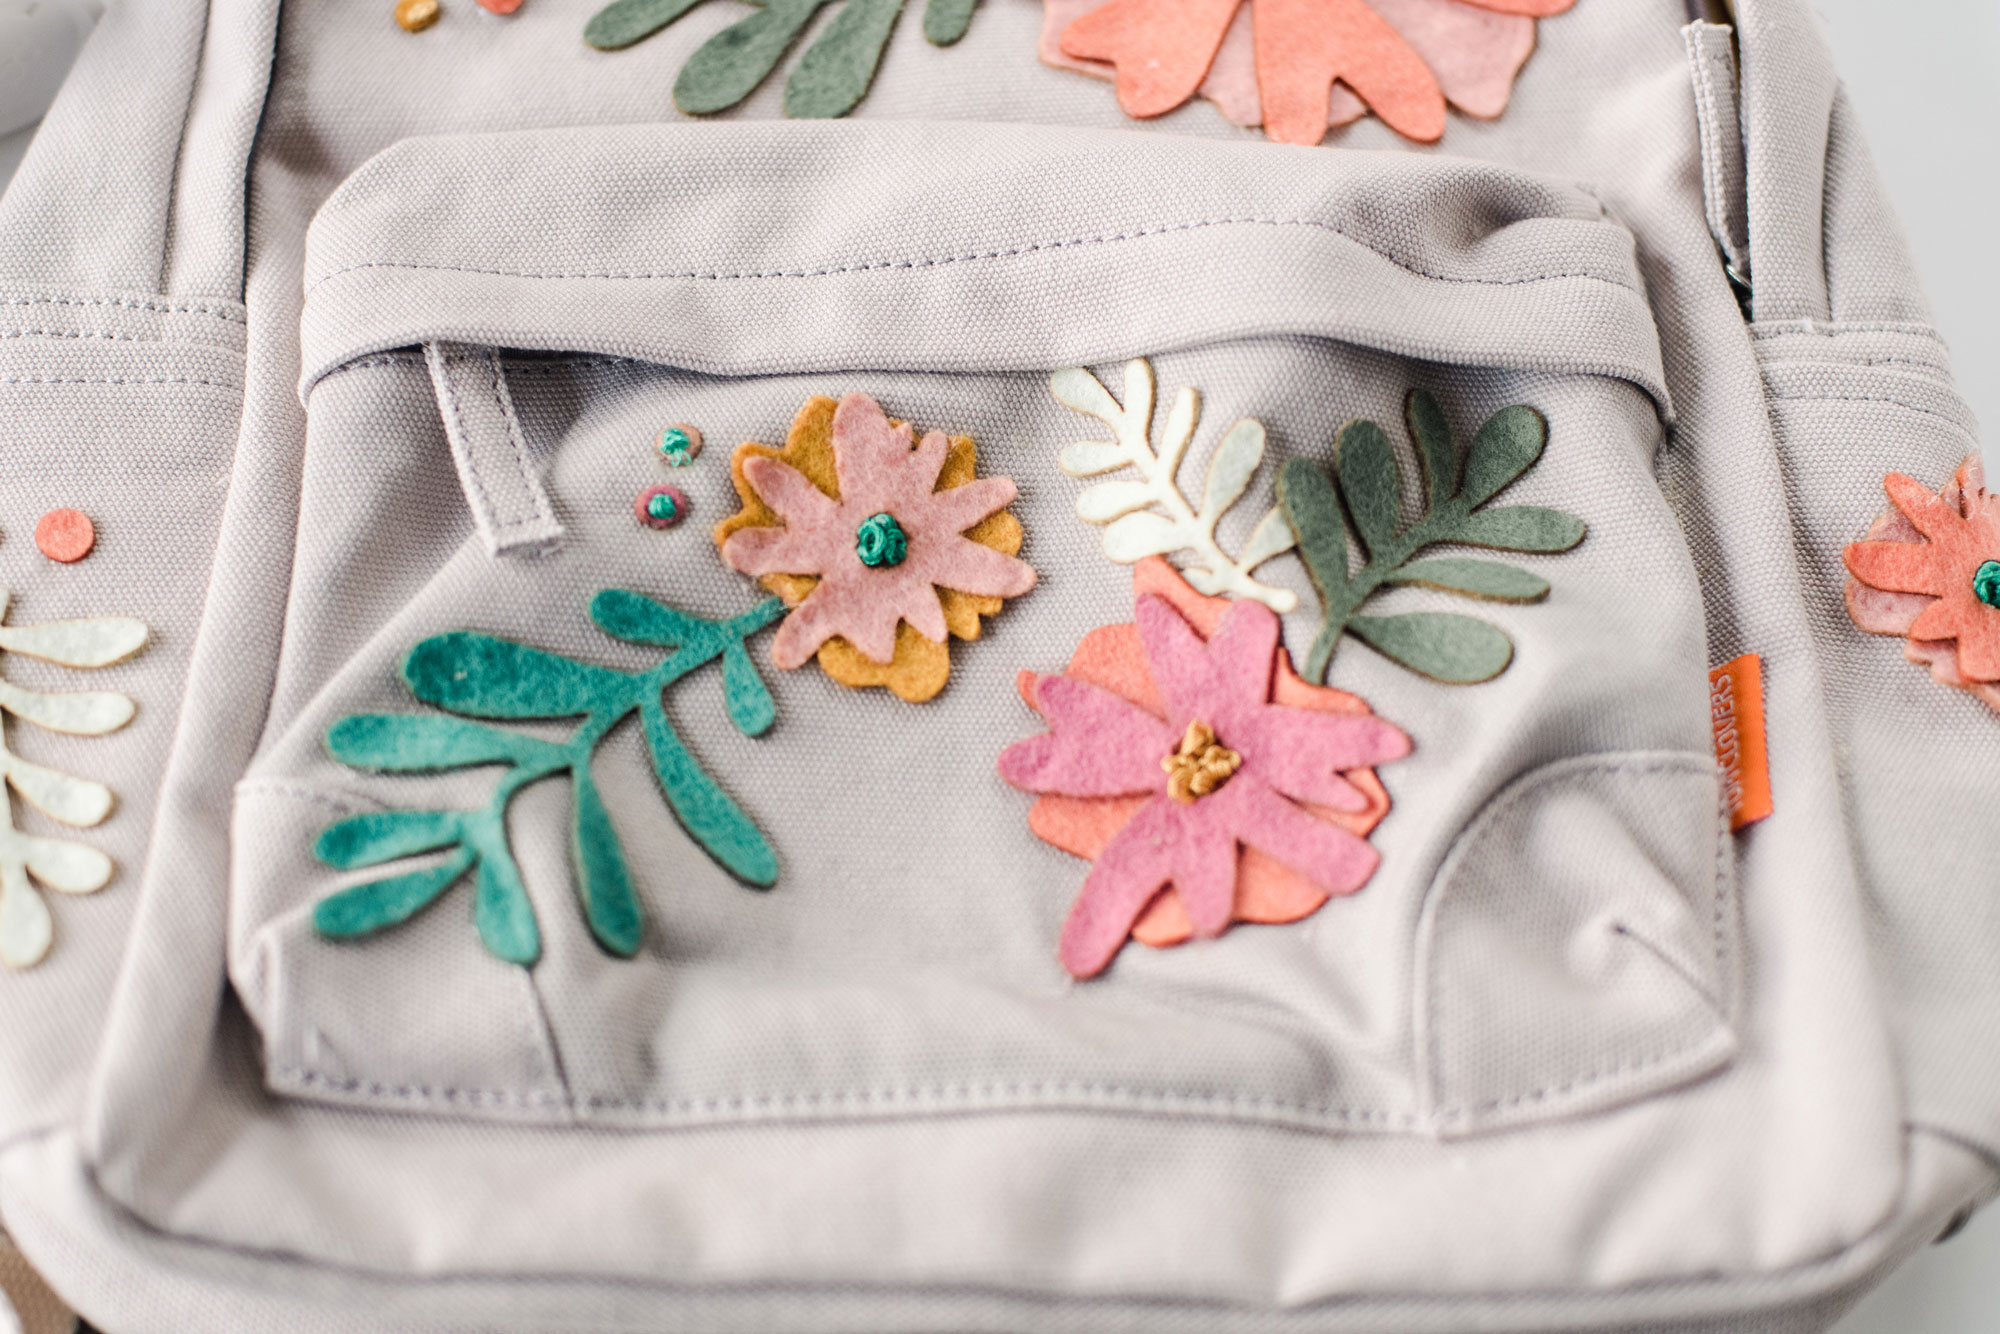
2. Begin to lay out your design or pattern on your backpack or iPad case. I like to play with moving things around before I bring out the glue. Make sure when you lay things out, they don’t interfere with zippers or pouches, but feel free to lay things over creases and folds. The coolest thing about this glue is that it’s flexible so it will “move with” your fabric 🙂
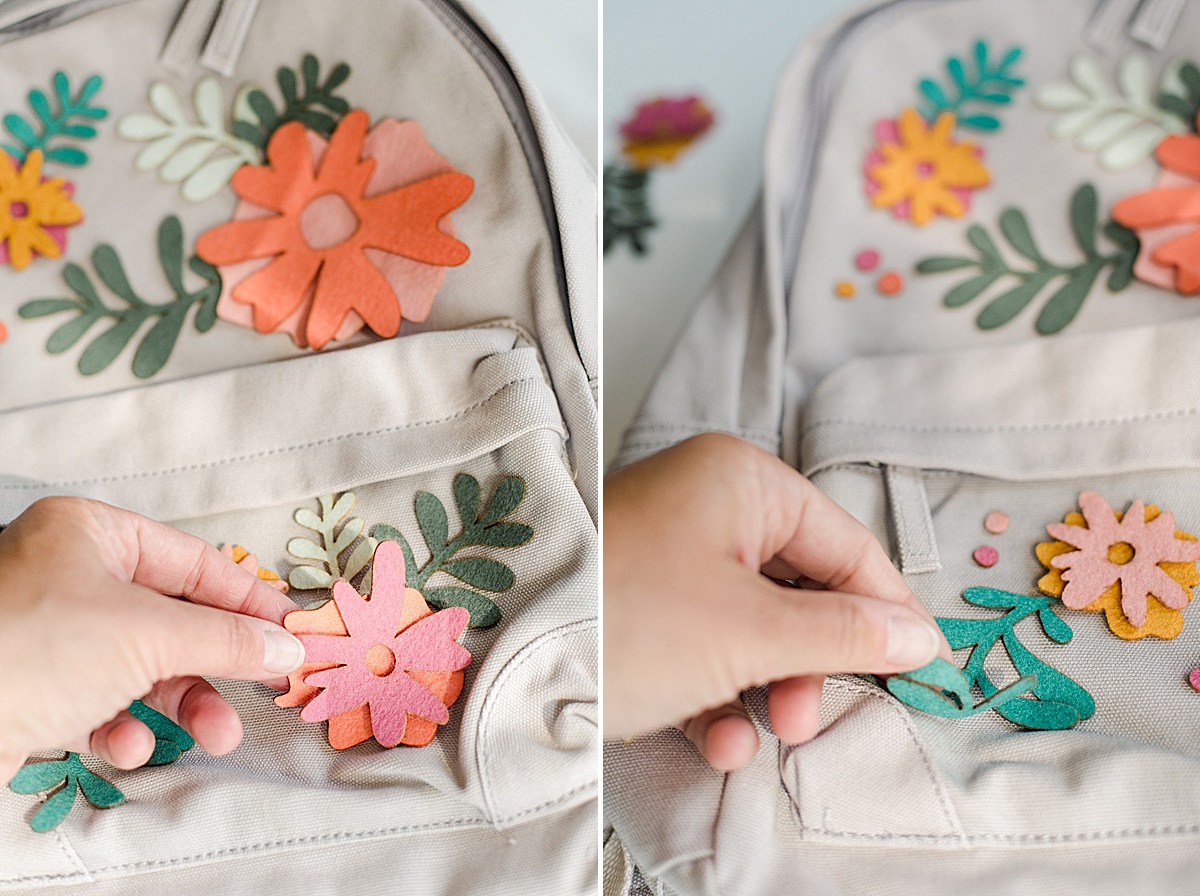
3. Once you have everything where you want it, begin to lift things up and tack them into place with the glue. Here are a few tips with using Aleene’s fabric glue:
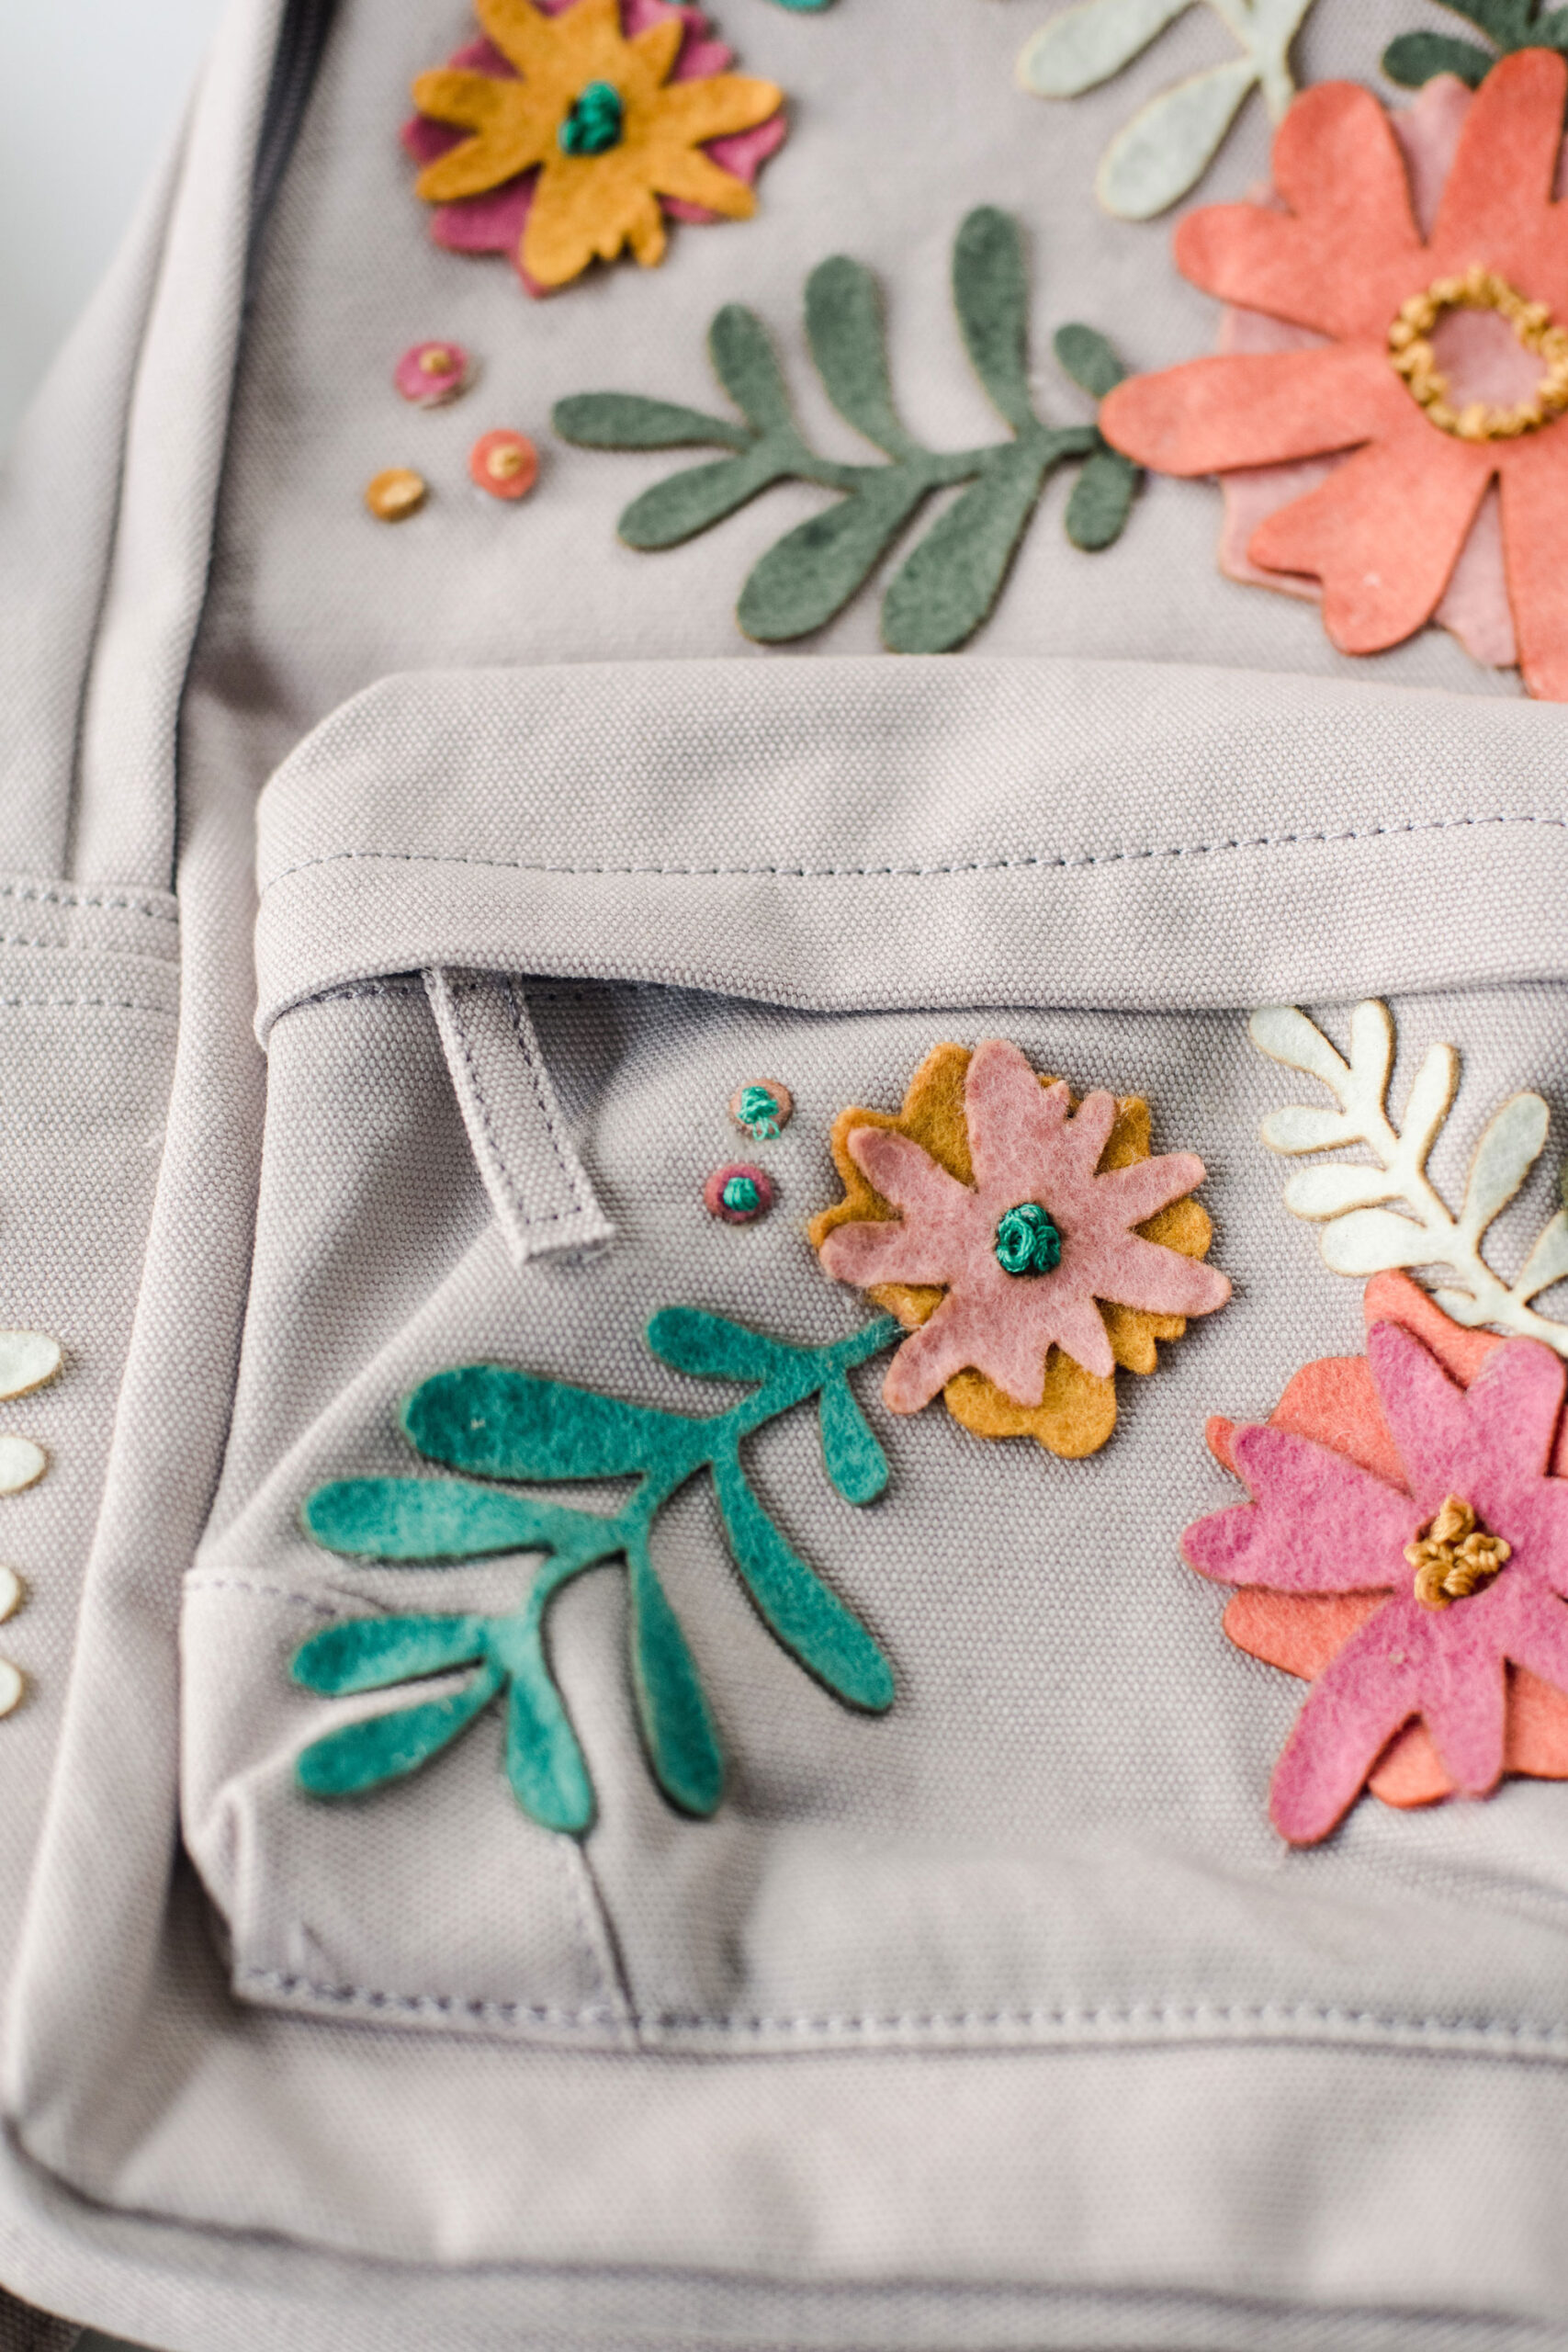
- Be generous with coverage! 🙂 If you are using felt like I am, the felt will absorb some of the glue so don’t be too worried about putting on too much. The glue dries clear, and as you can see in my photos, I had some spots that the glue came out the sides. And lemme tell you that you don’t even notice it when it’s dry 🙂
- Start with the top parts of the flower and glue them to the under parts before gluing the role thing to the backpack 🙂 This helps with arranging so that you can turn the flower the way you want before completely tacking it down.
- If you are gluing over creases or sides, fold the fabric or felt along the area that will be creased to mimic the final spot. Then add glue and pinch as you are pressing it down.
- And that brings me to the next point, pressssss down when applying (don’t be gentle)! 🙂 If glue comes out the “top” or the fabric seems “wet” when you’re applying it, 100% OK! It will dry and still remain flexible when it’s done! 🙂
4. Allow the backpack and iPad case to fully dry 🙂
Before packing up for the first day of school, you can make sure that you have all edges tacked down (sometimes in the hurry, not all pedals get fully glued down, so be sure before using the backpack that all edges are tacked down and ready to roll) 🙂
5. Optional step: With embroidery floss or yarn, add some lines and detailing to the flowers! 🙂
And just like that you are ready for your first day of school or work or even just ready to show of your brand new backpack and matching iPad case to the planet! 🙂