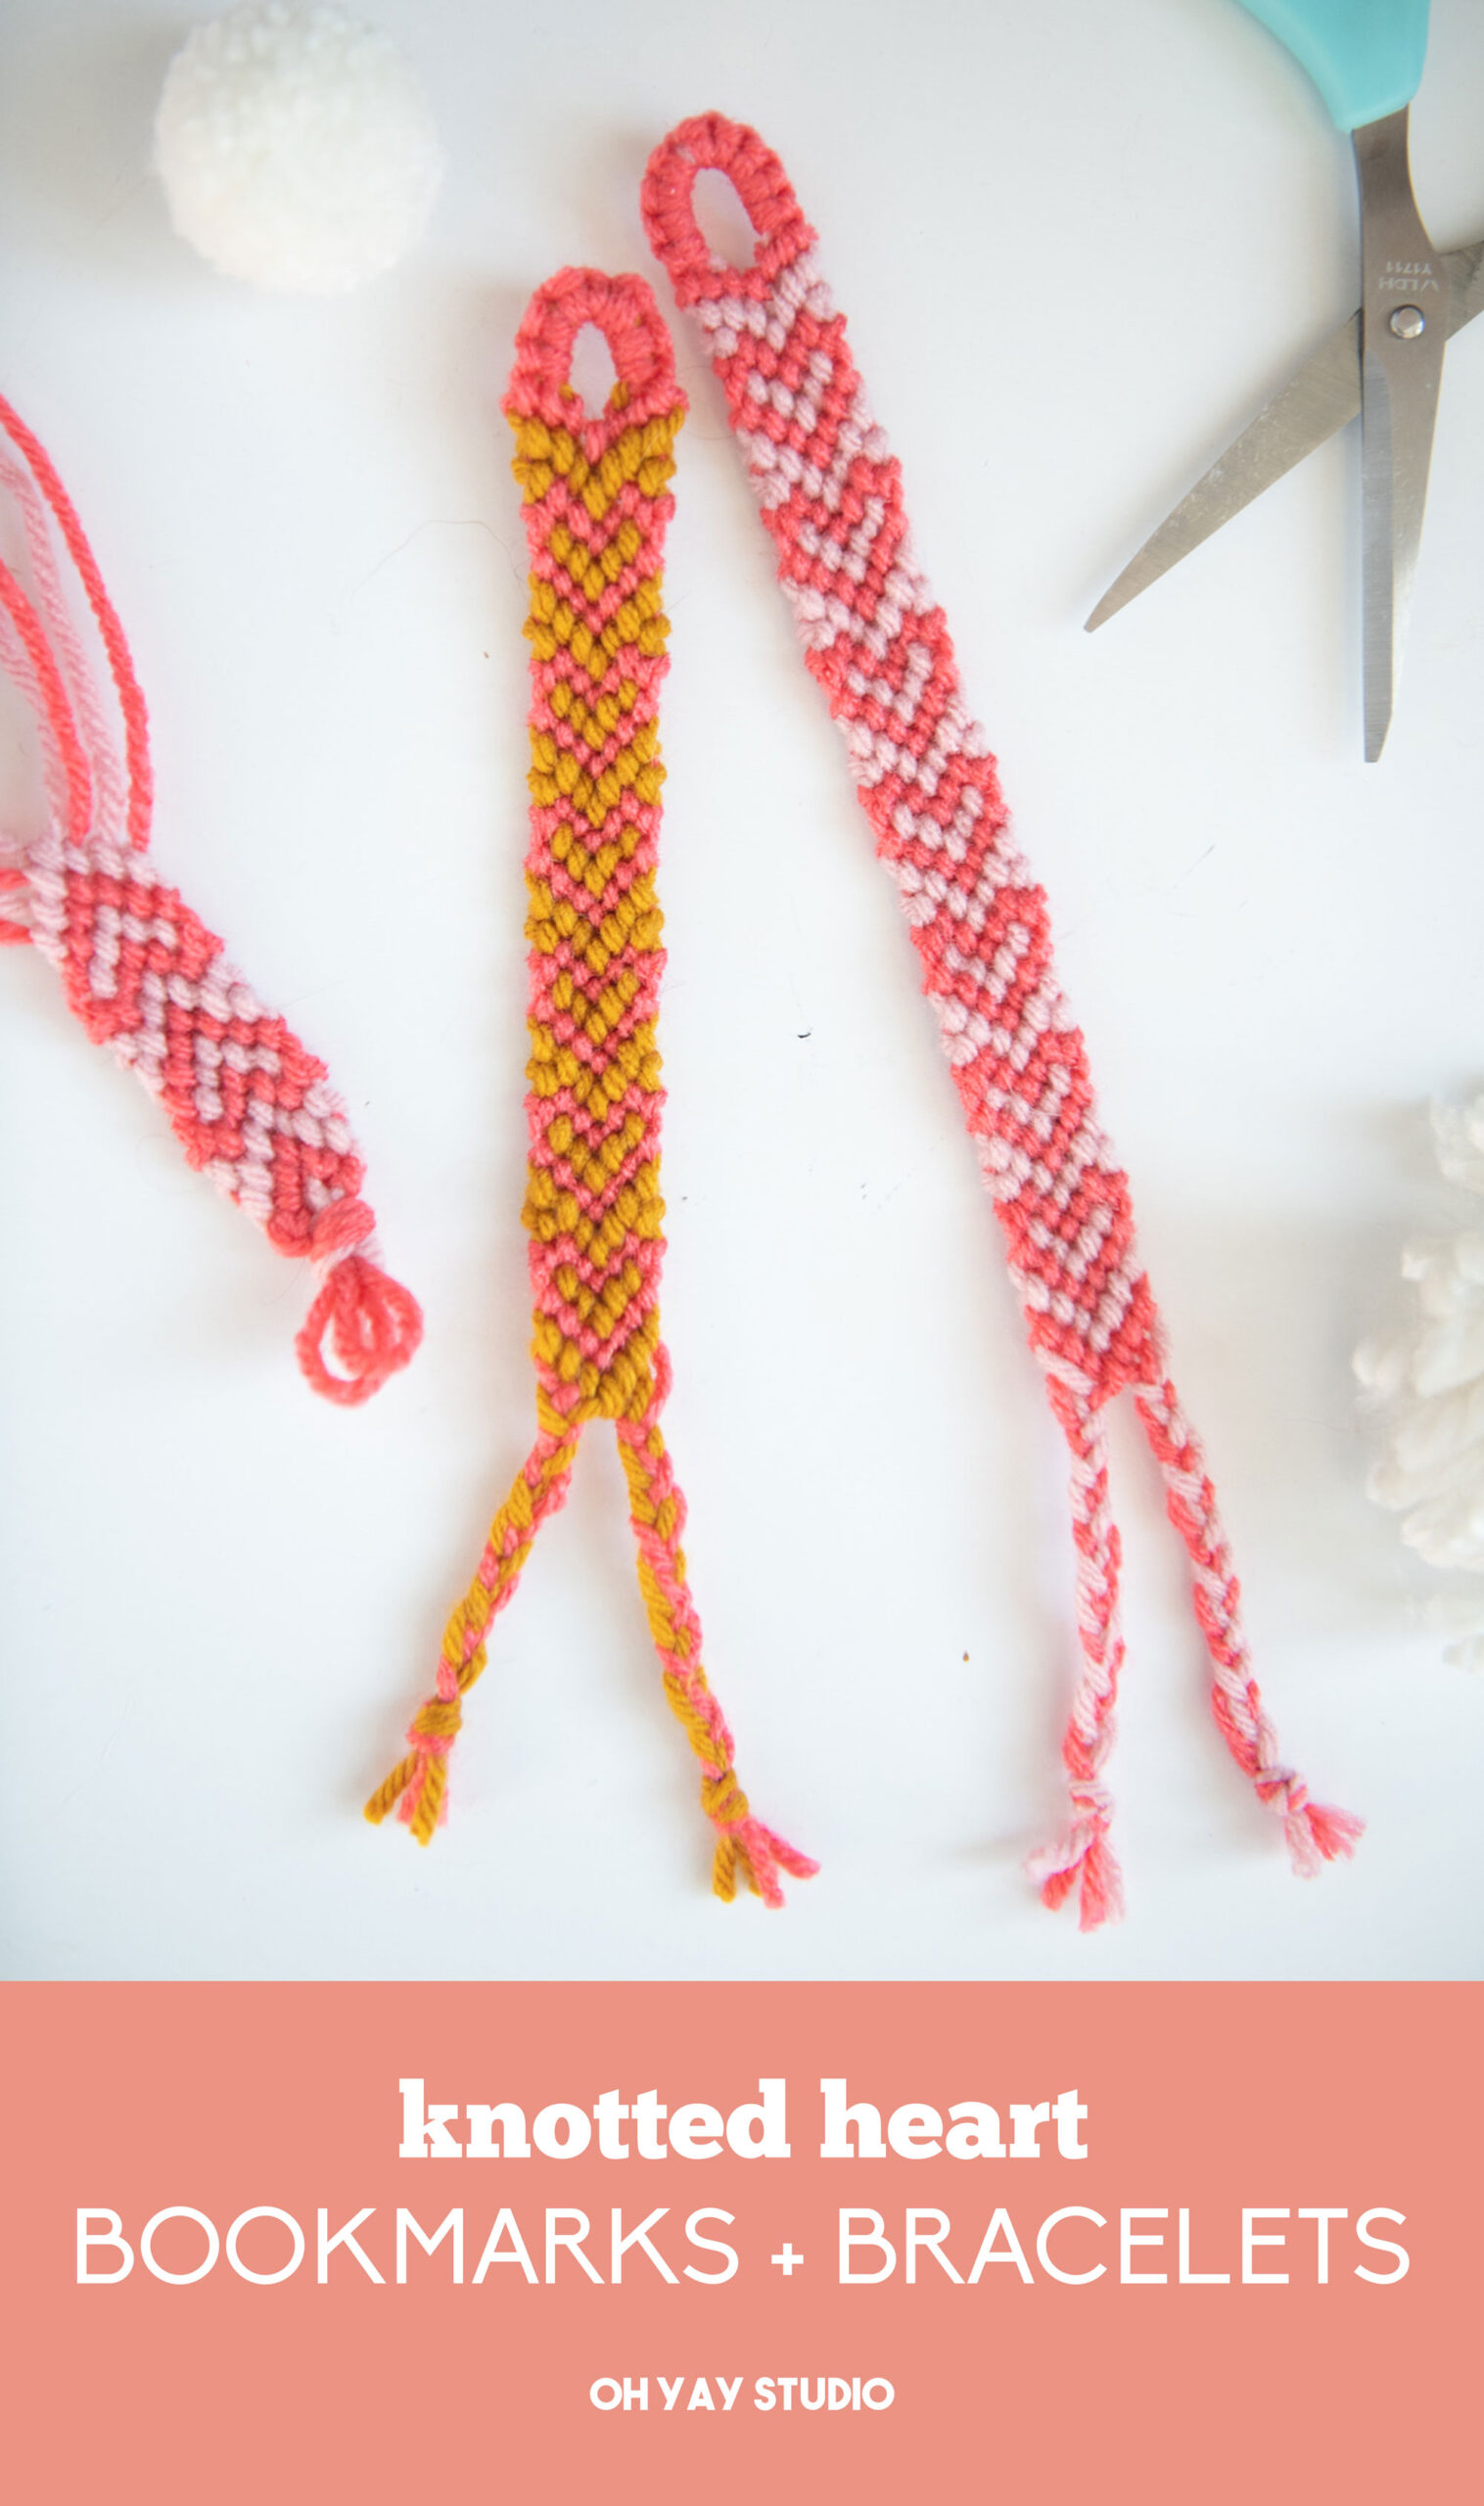
Heart bookmark or friendship bracelet
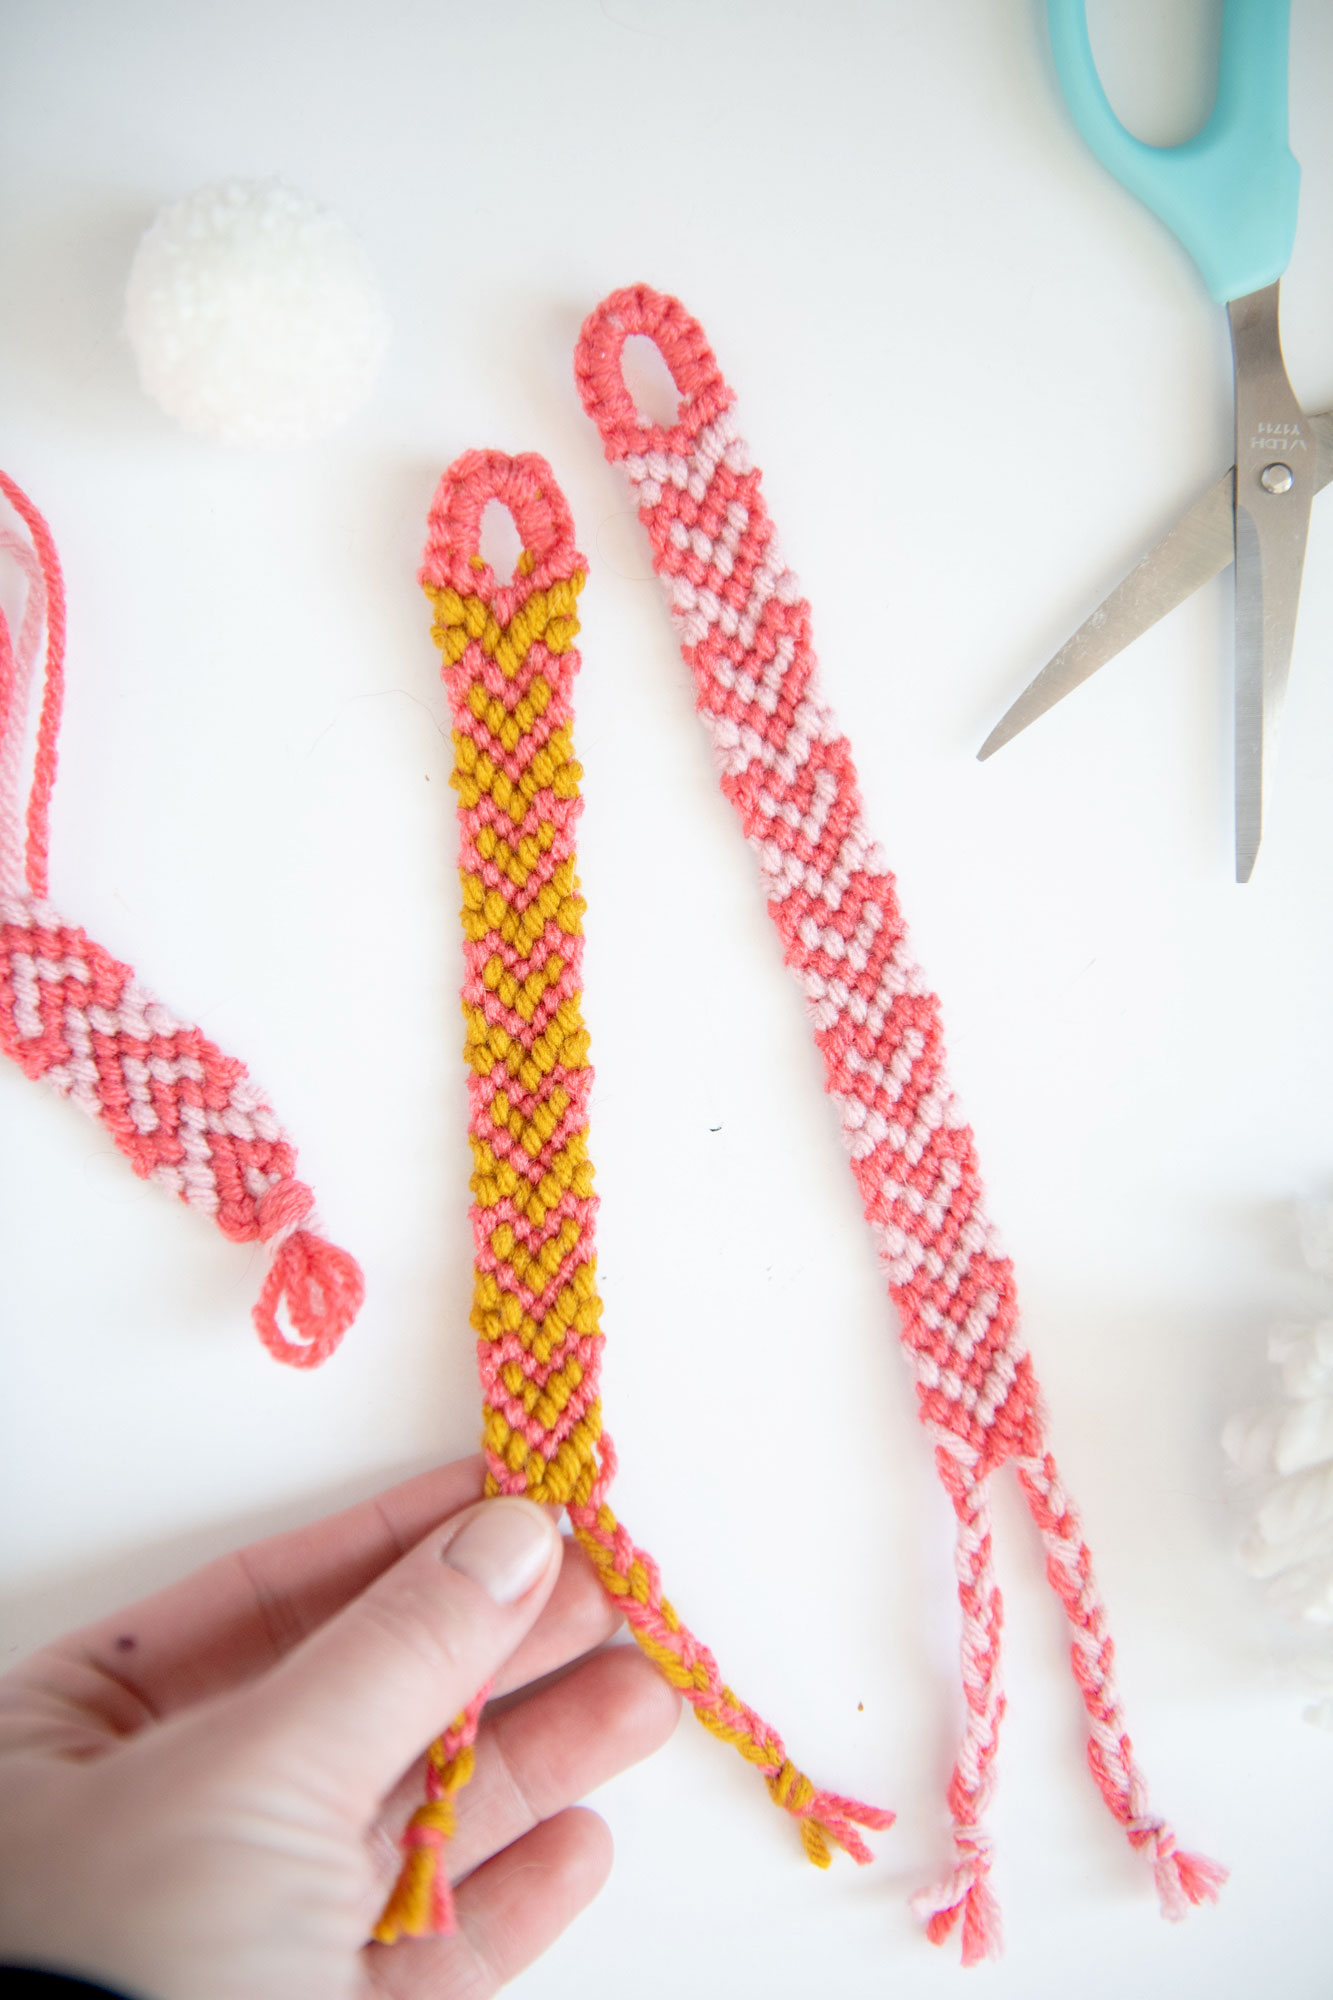
If you know me, you know that I love ALLLLLL the old school crafts….like friendship bracelets! The days of walking around with a whole LOAD of them tied to my Nalgene bottle were my fave! SOOO today I am showing you how to use your knotting skills to make a thicker, heart bookmark (that can also be translated to a bracelet too)! So gather your gal pals for an afternoon and let the crafting begin!
MATERIALS:
- 2 colors of yarn or floss or any kind of string that is “thick” enough to knot 🙂
- A pair of scissors
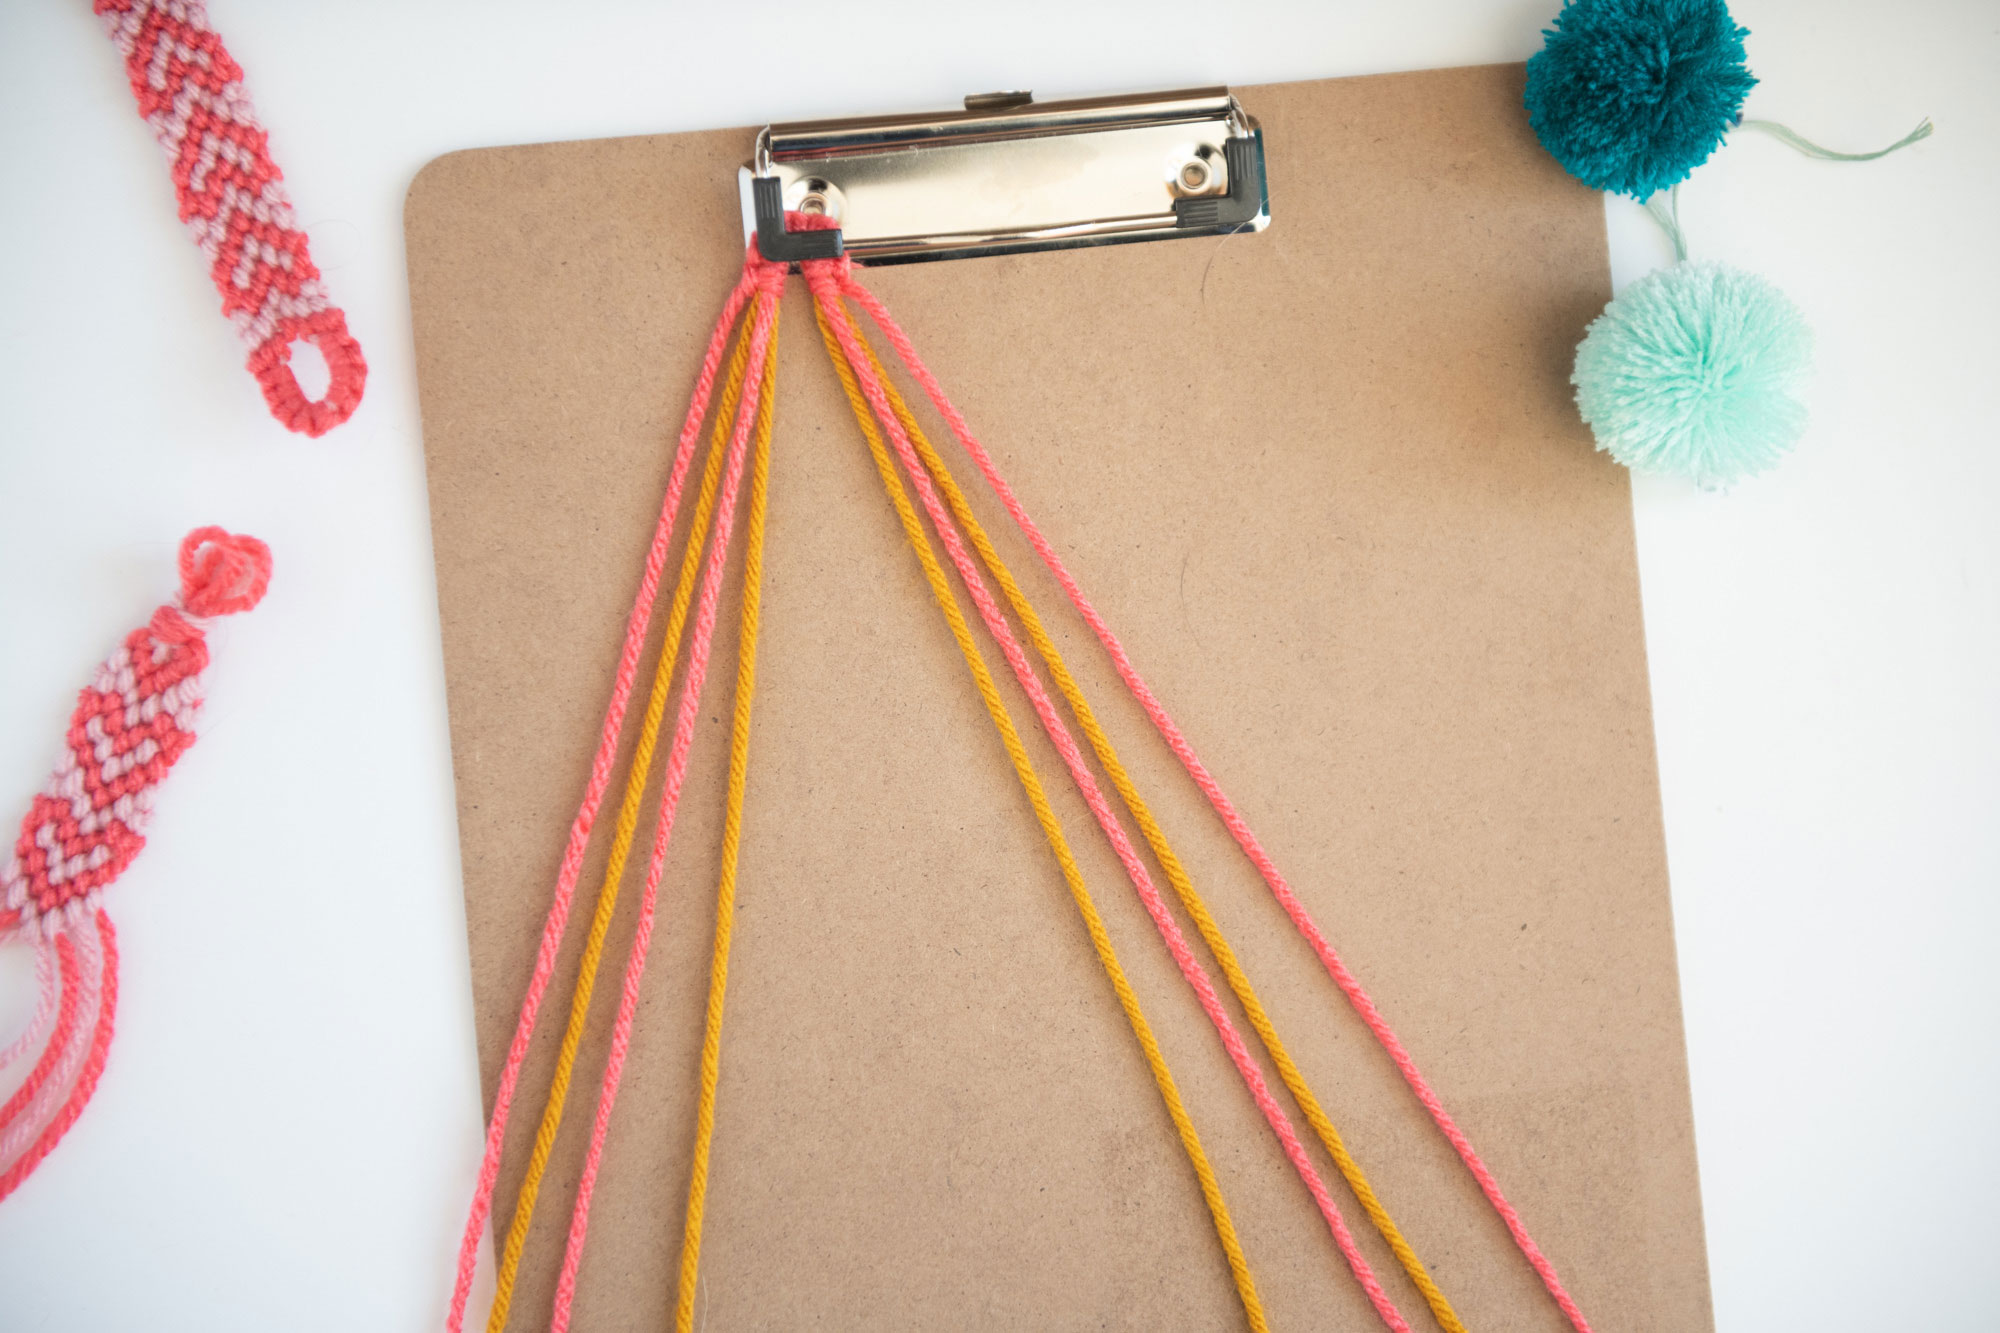
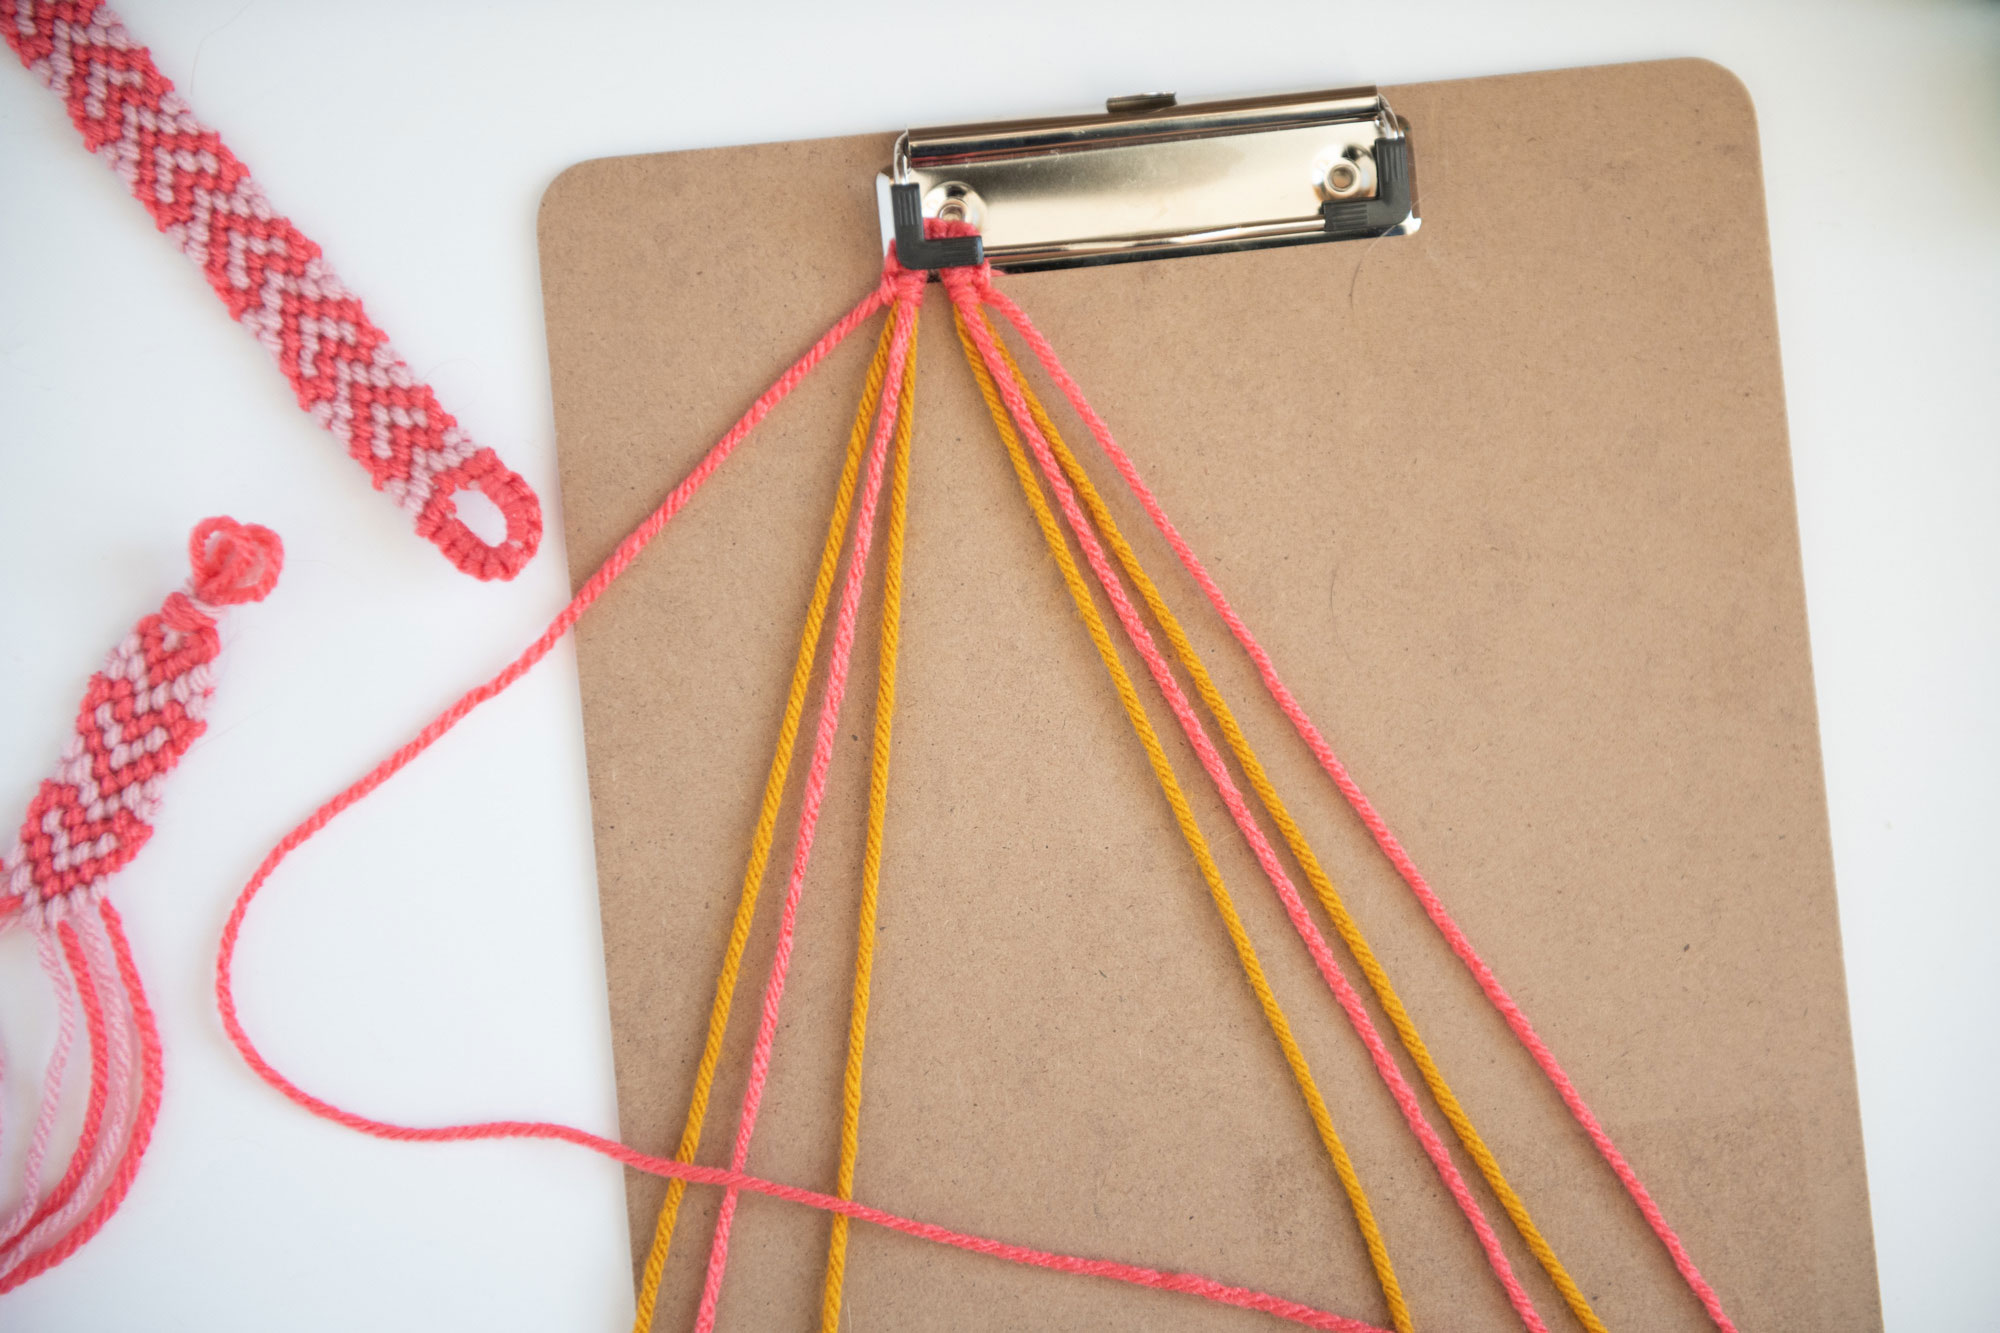
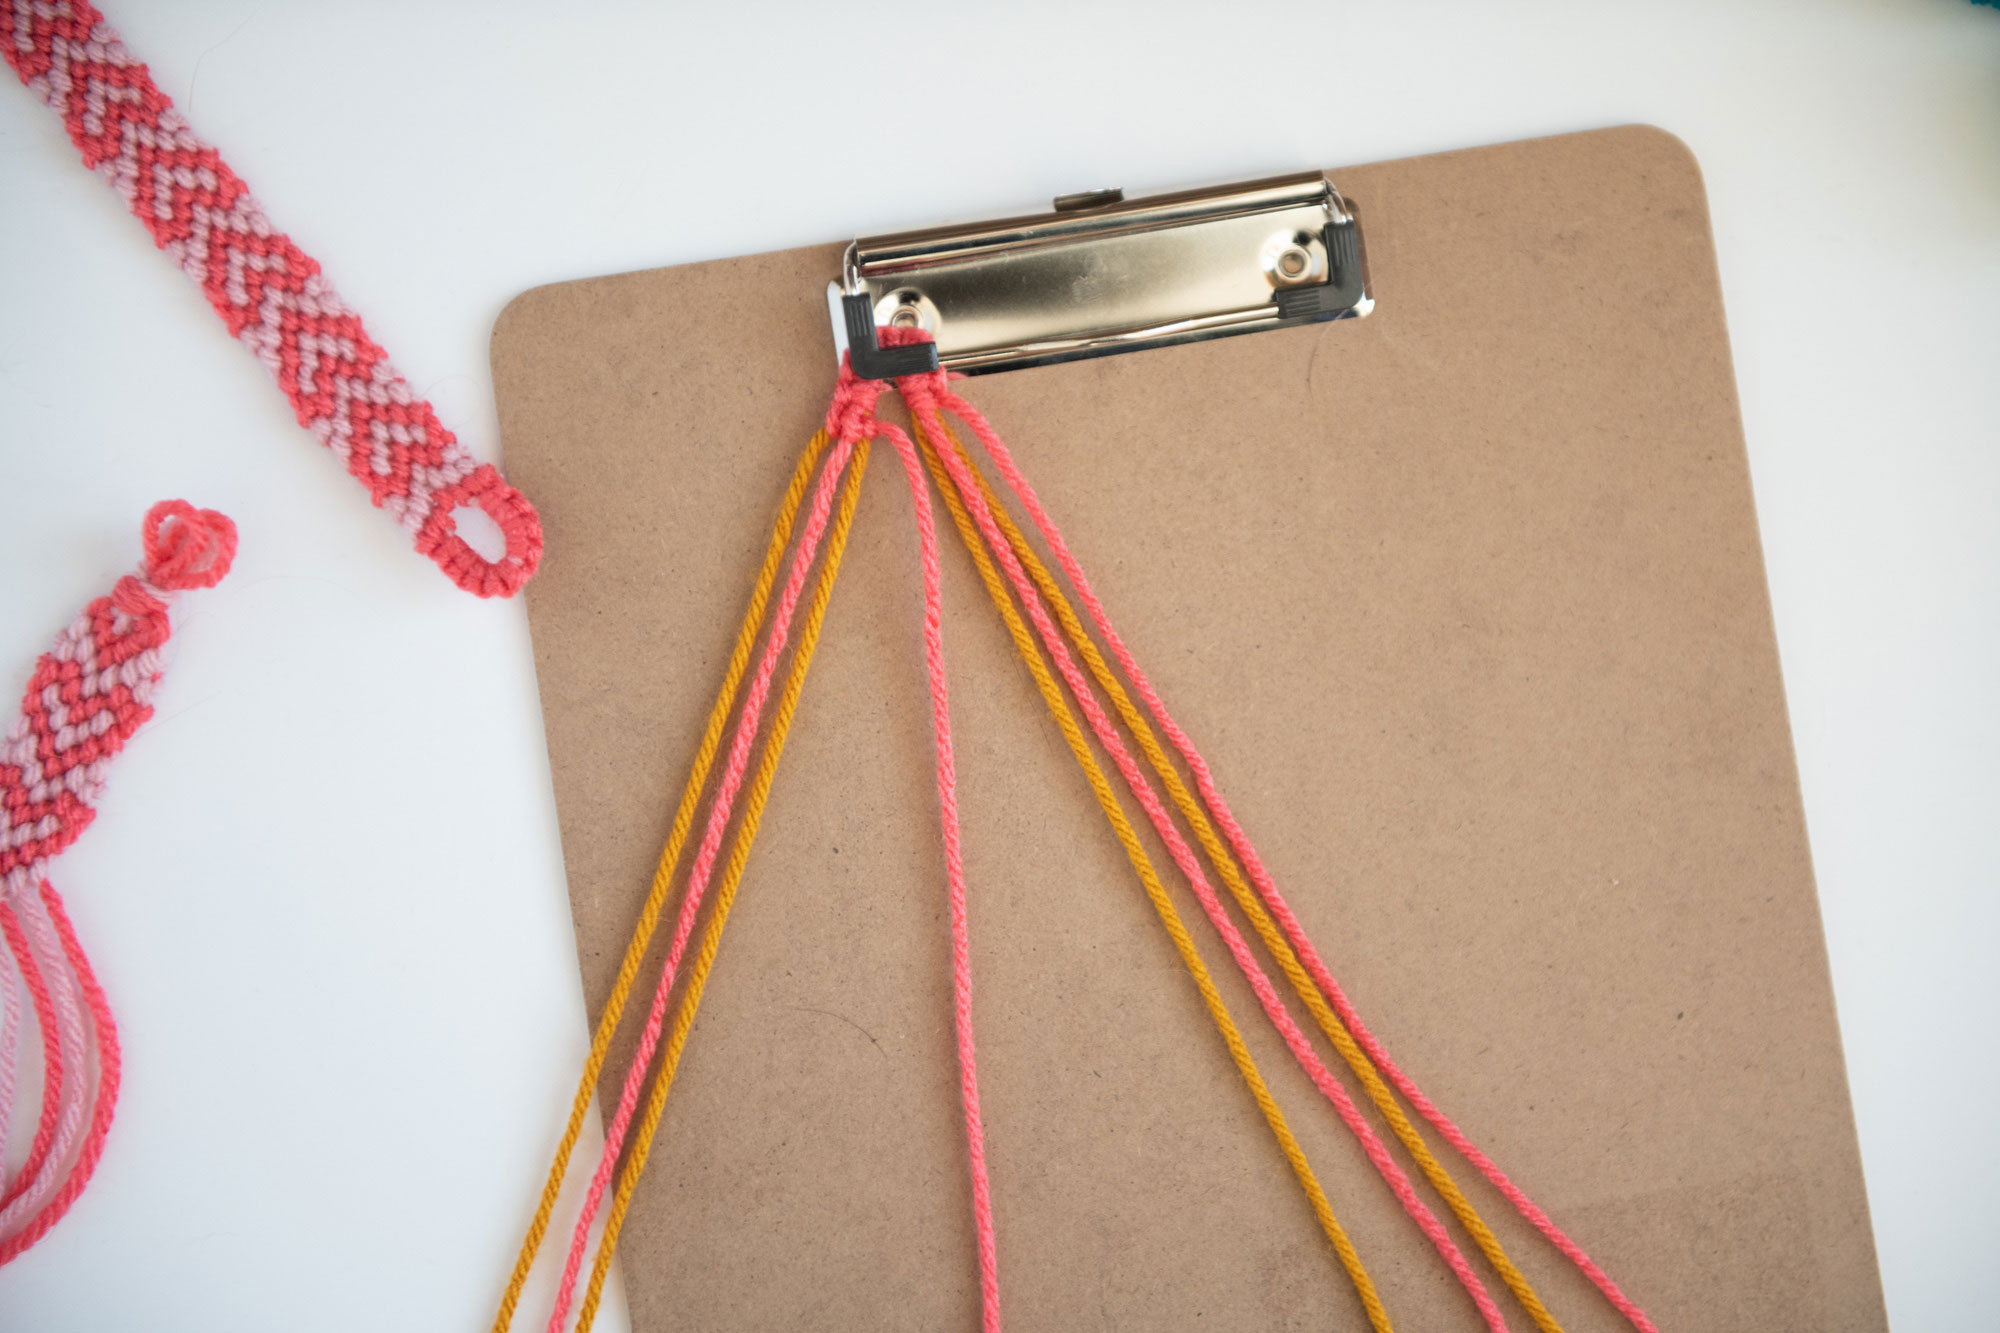
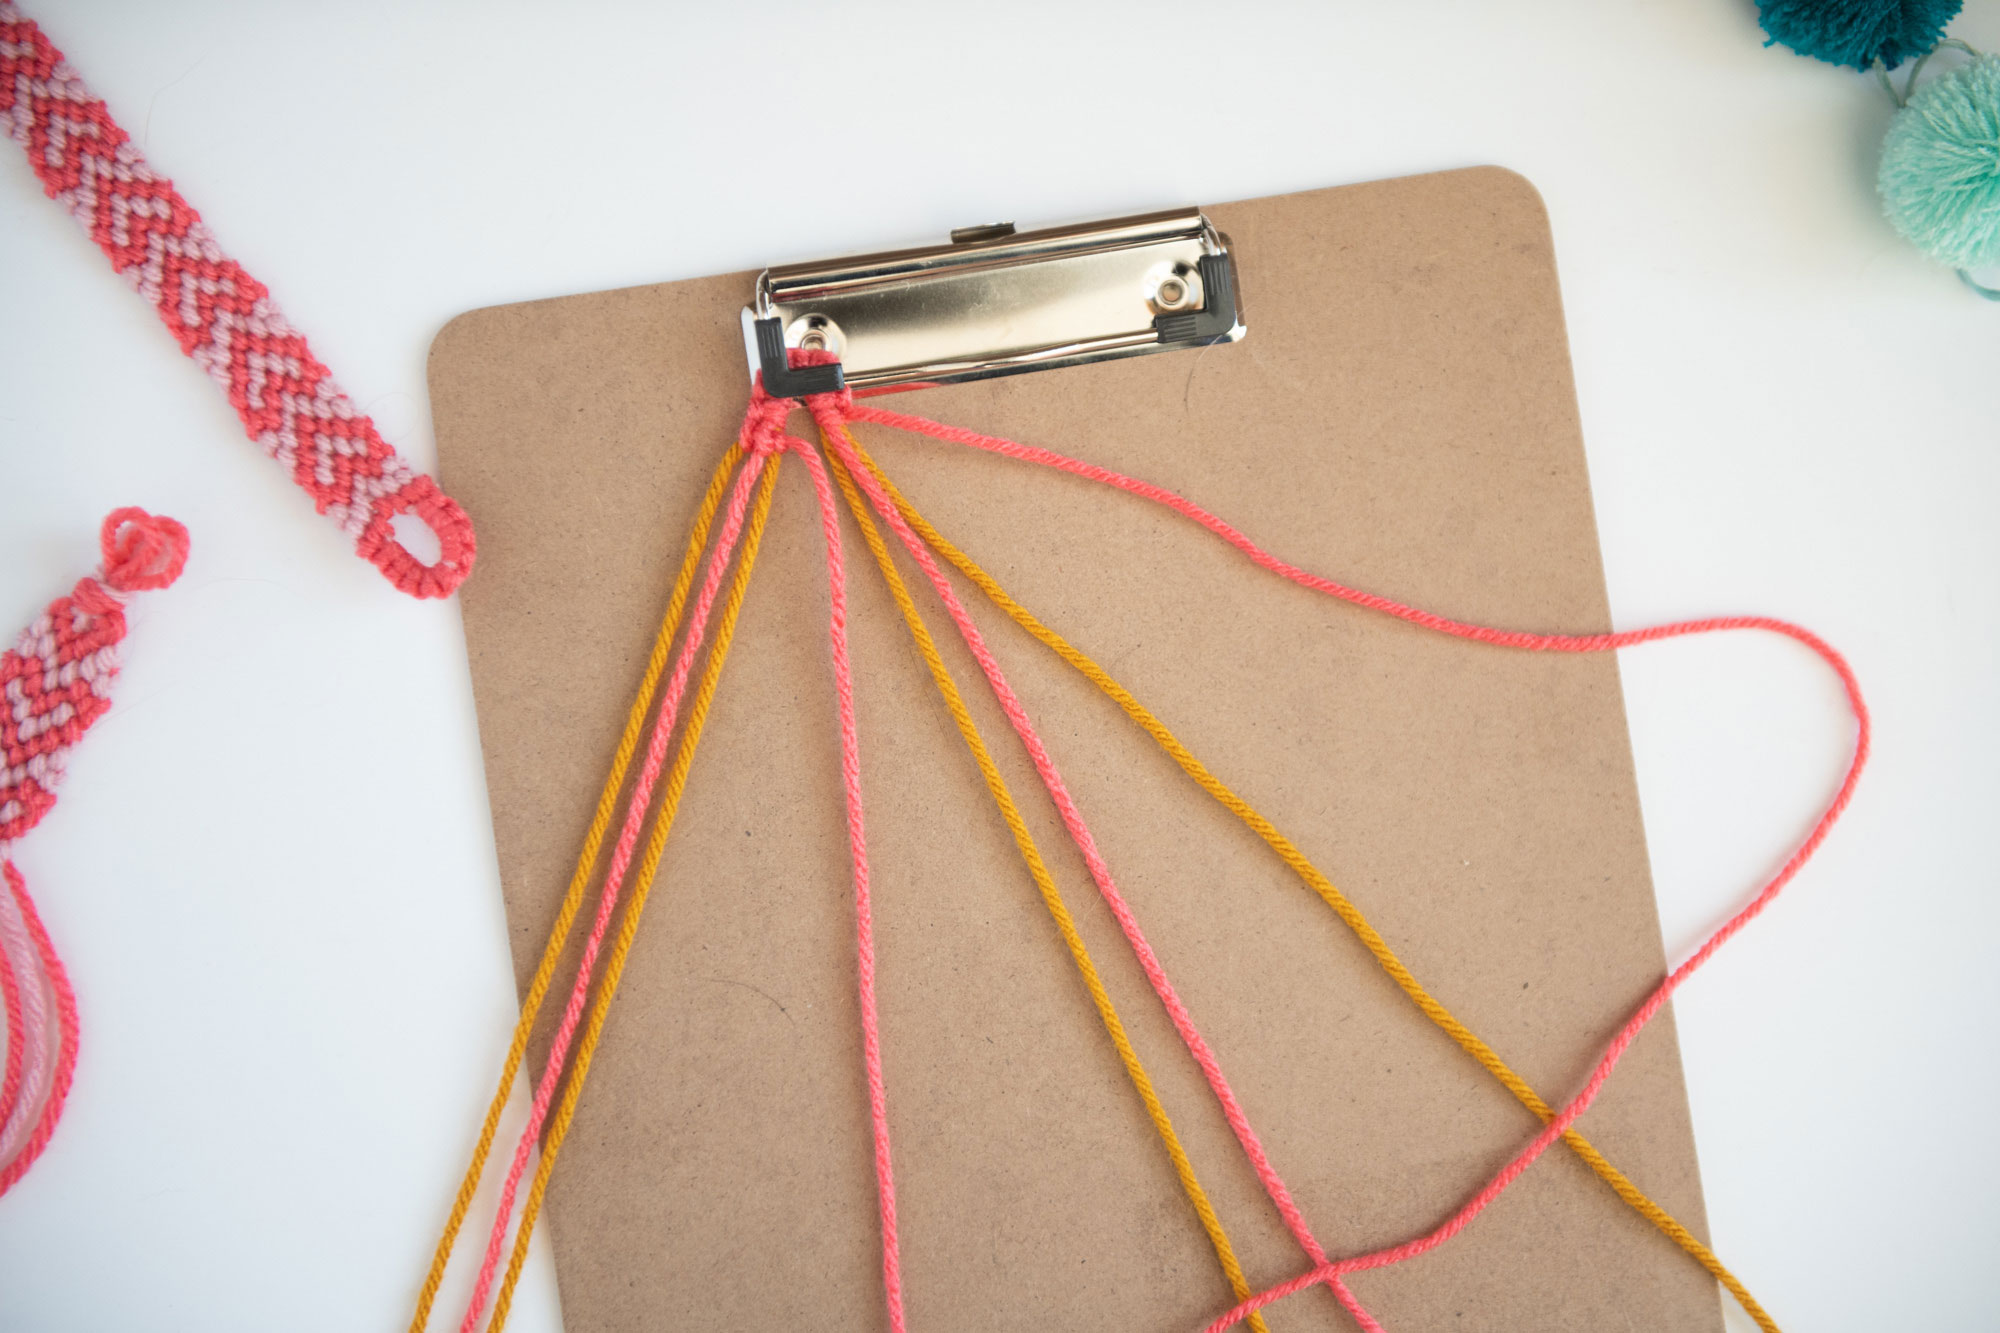
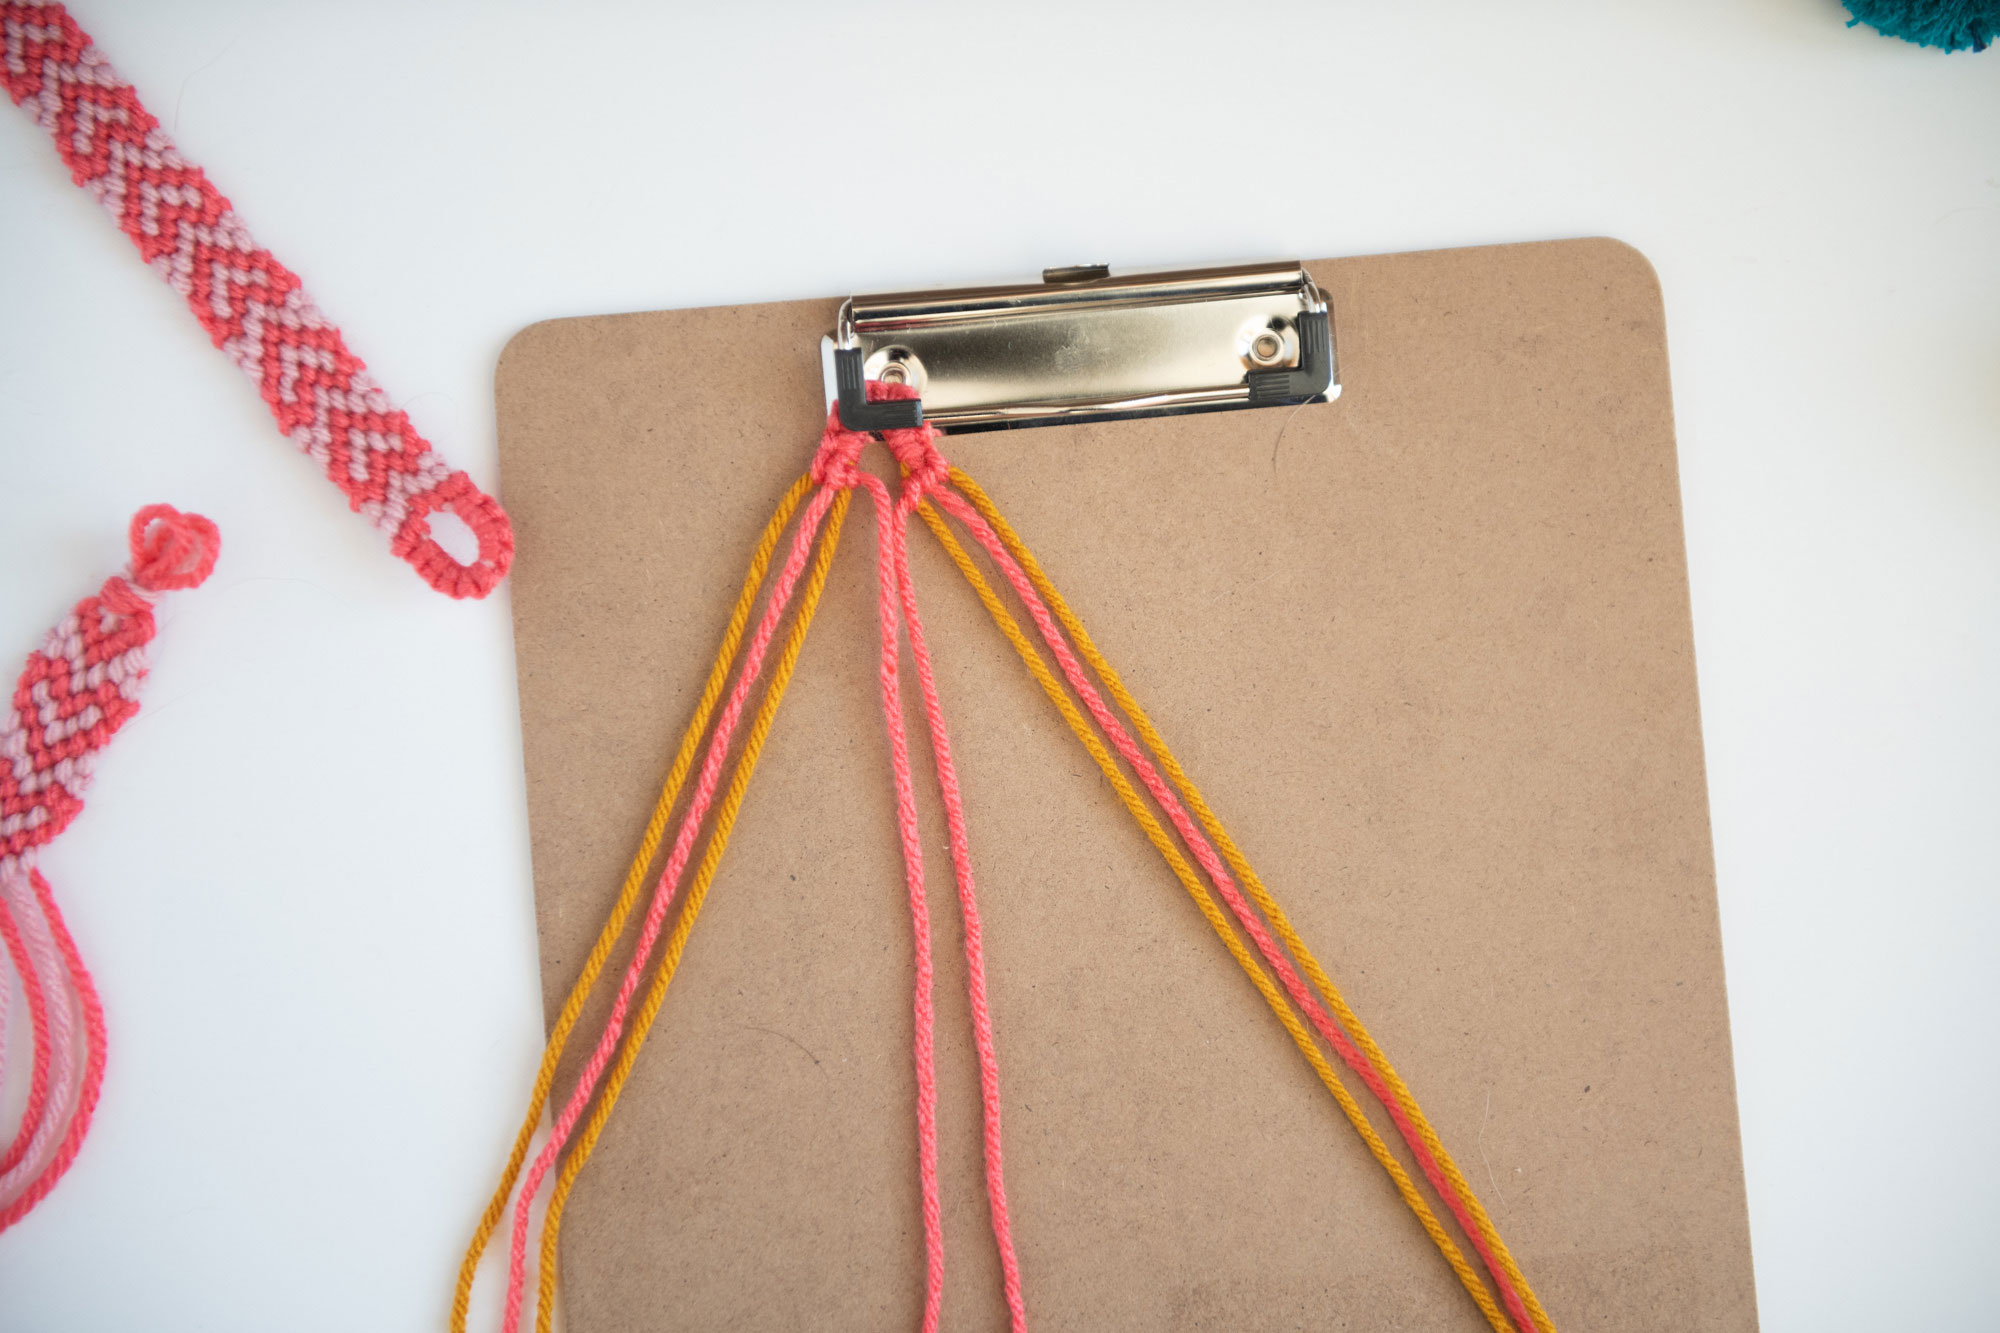
- A clipboard or tape
- Any embellishments – like pompoms, wooden beads, or a tassel 🙂
INSTRUCTIONS:
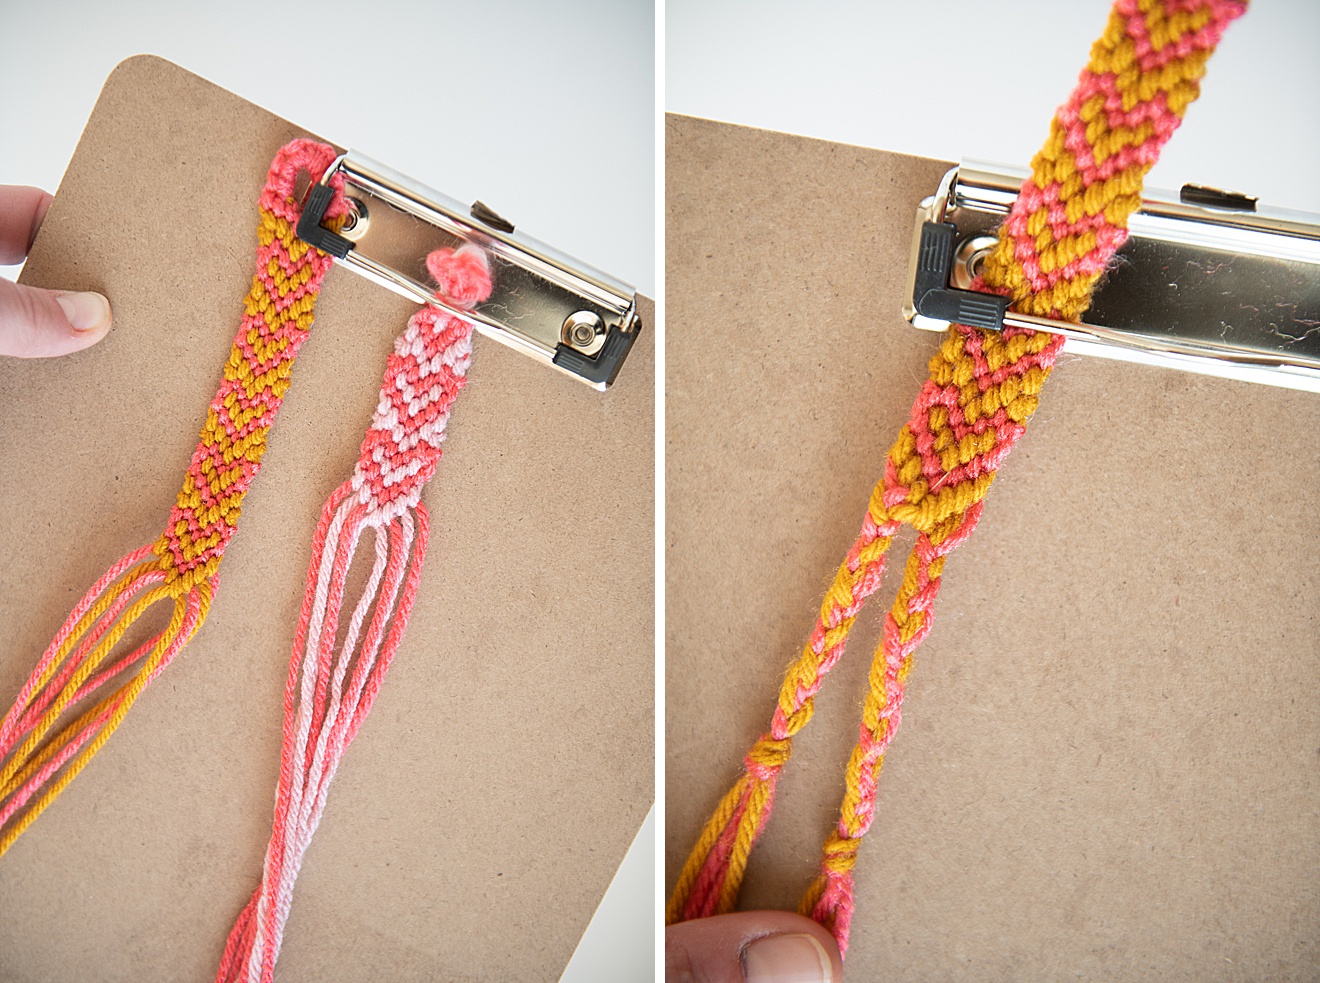
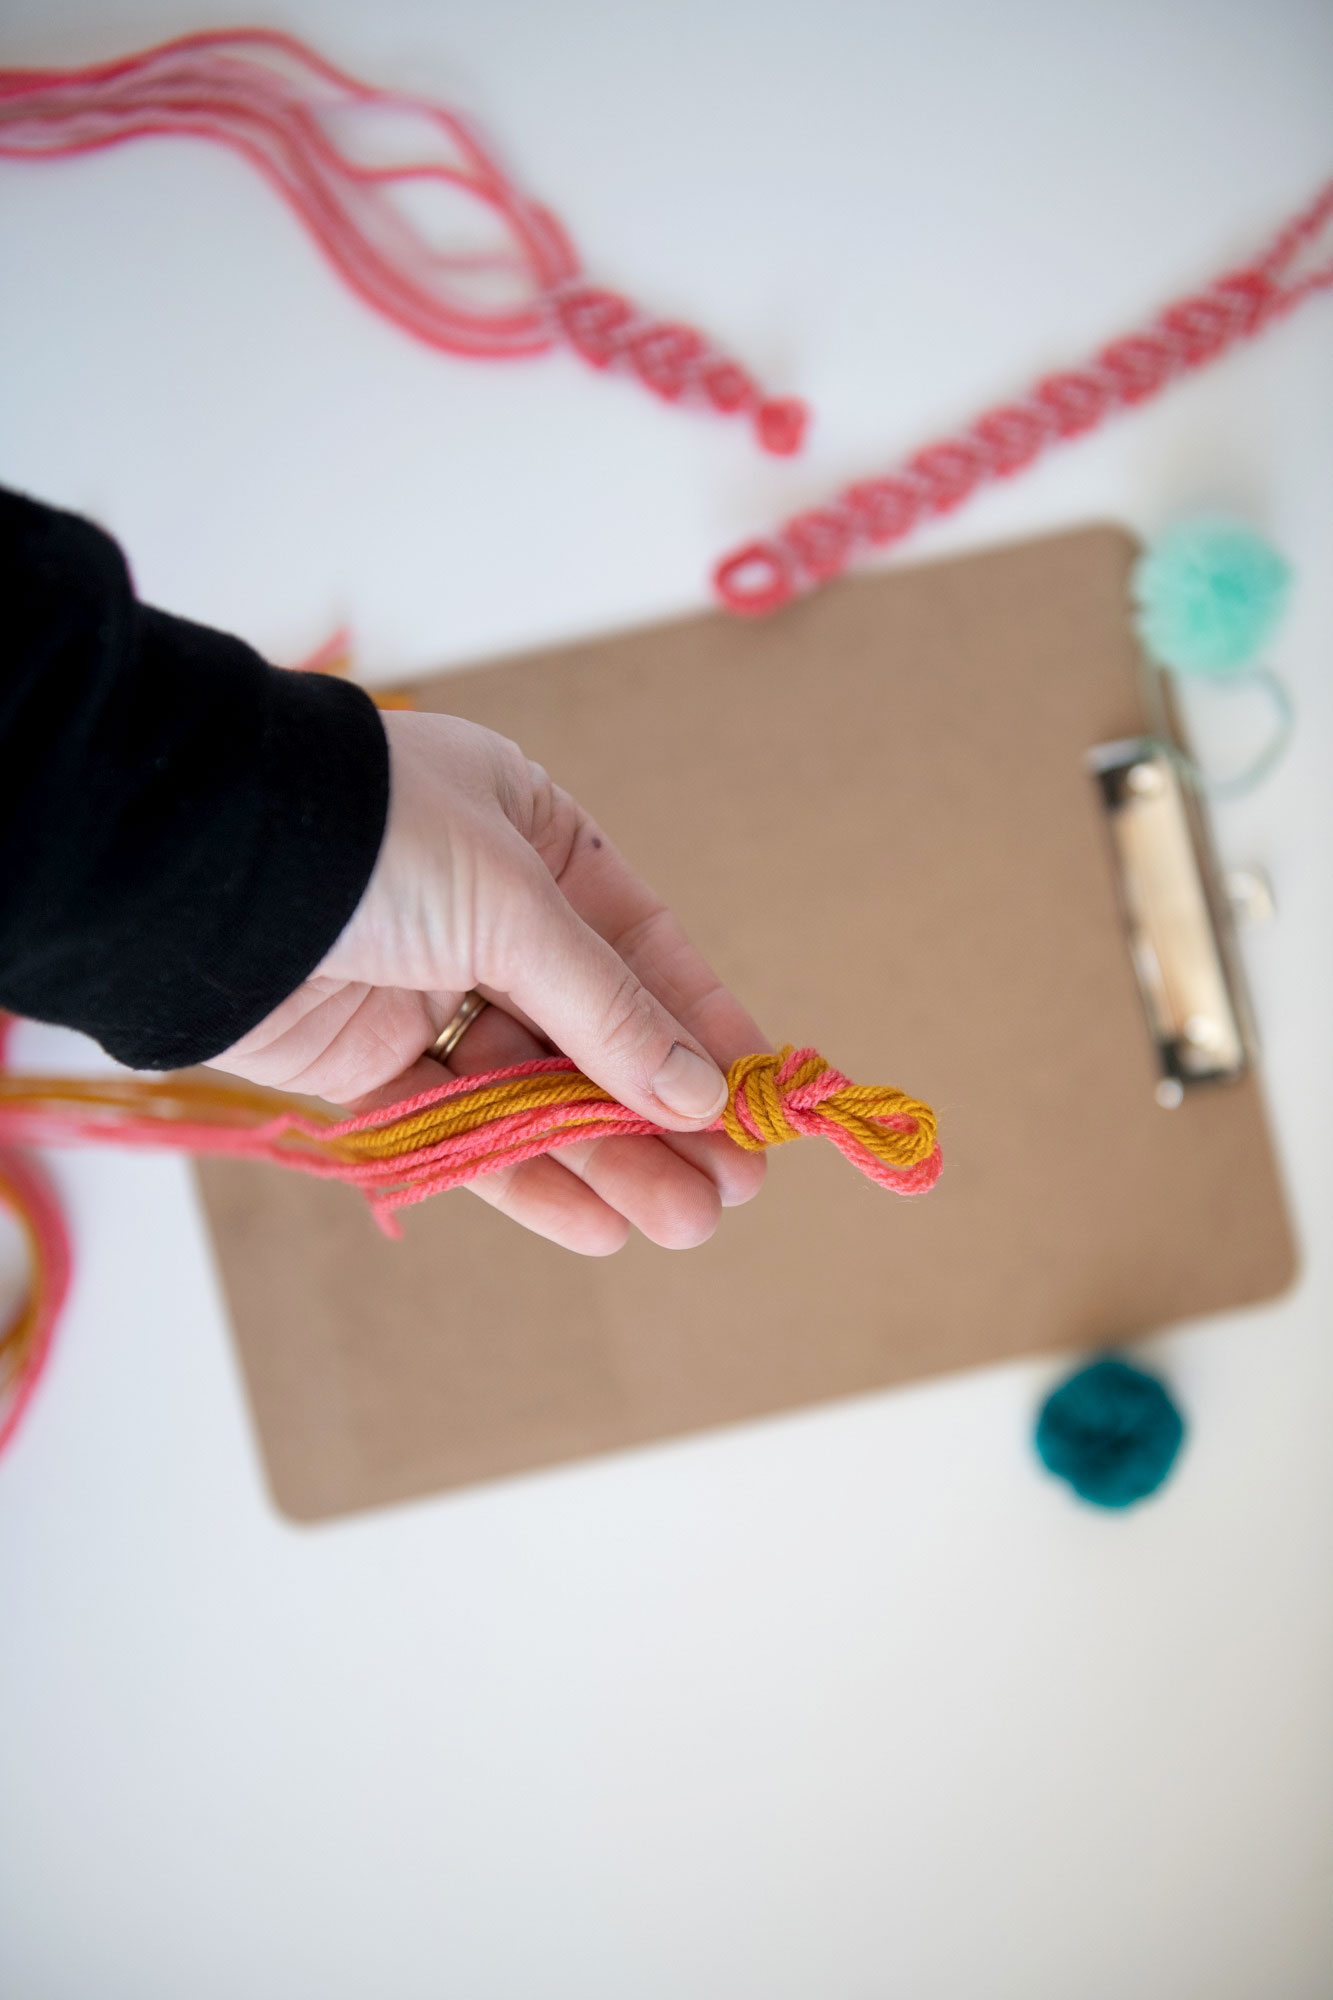
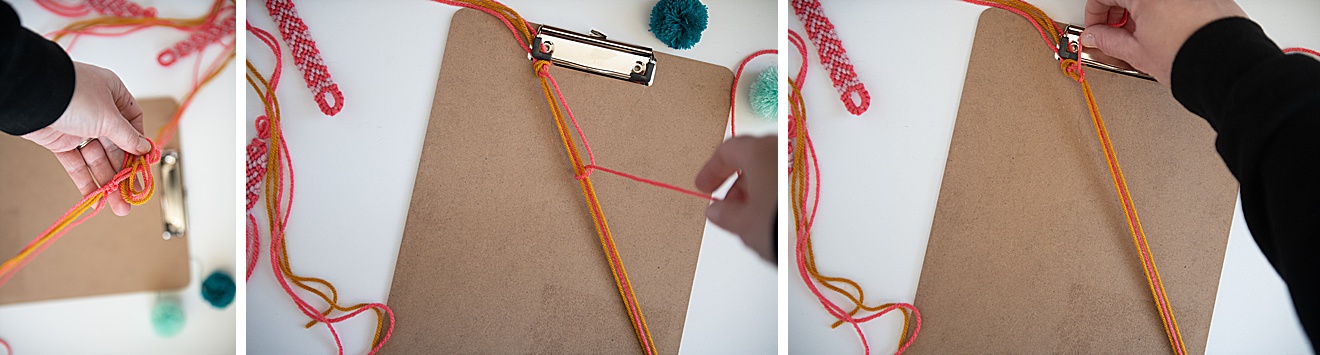
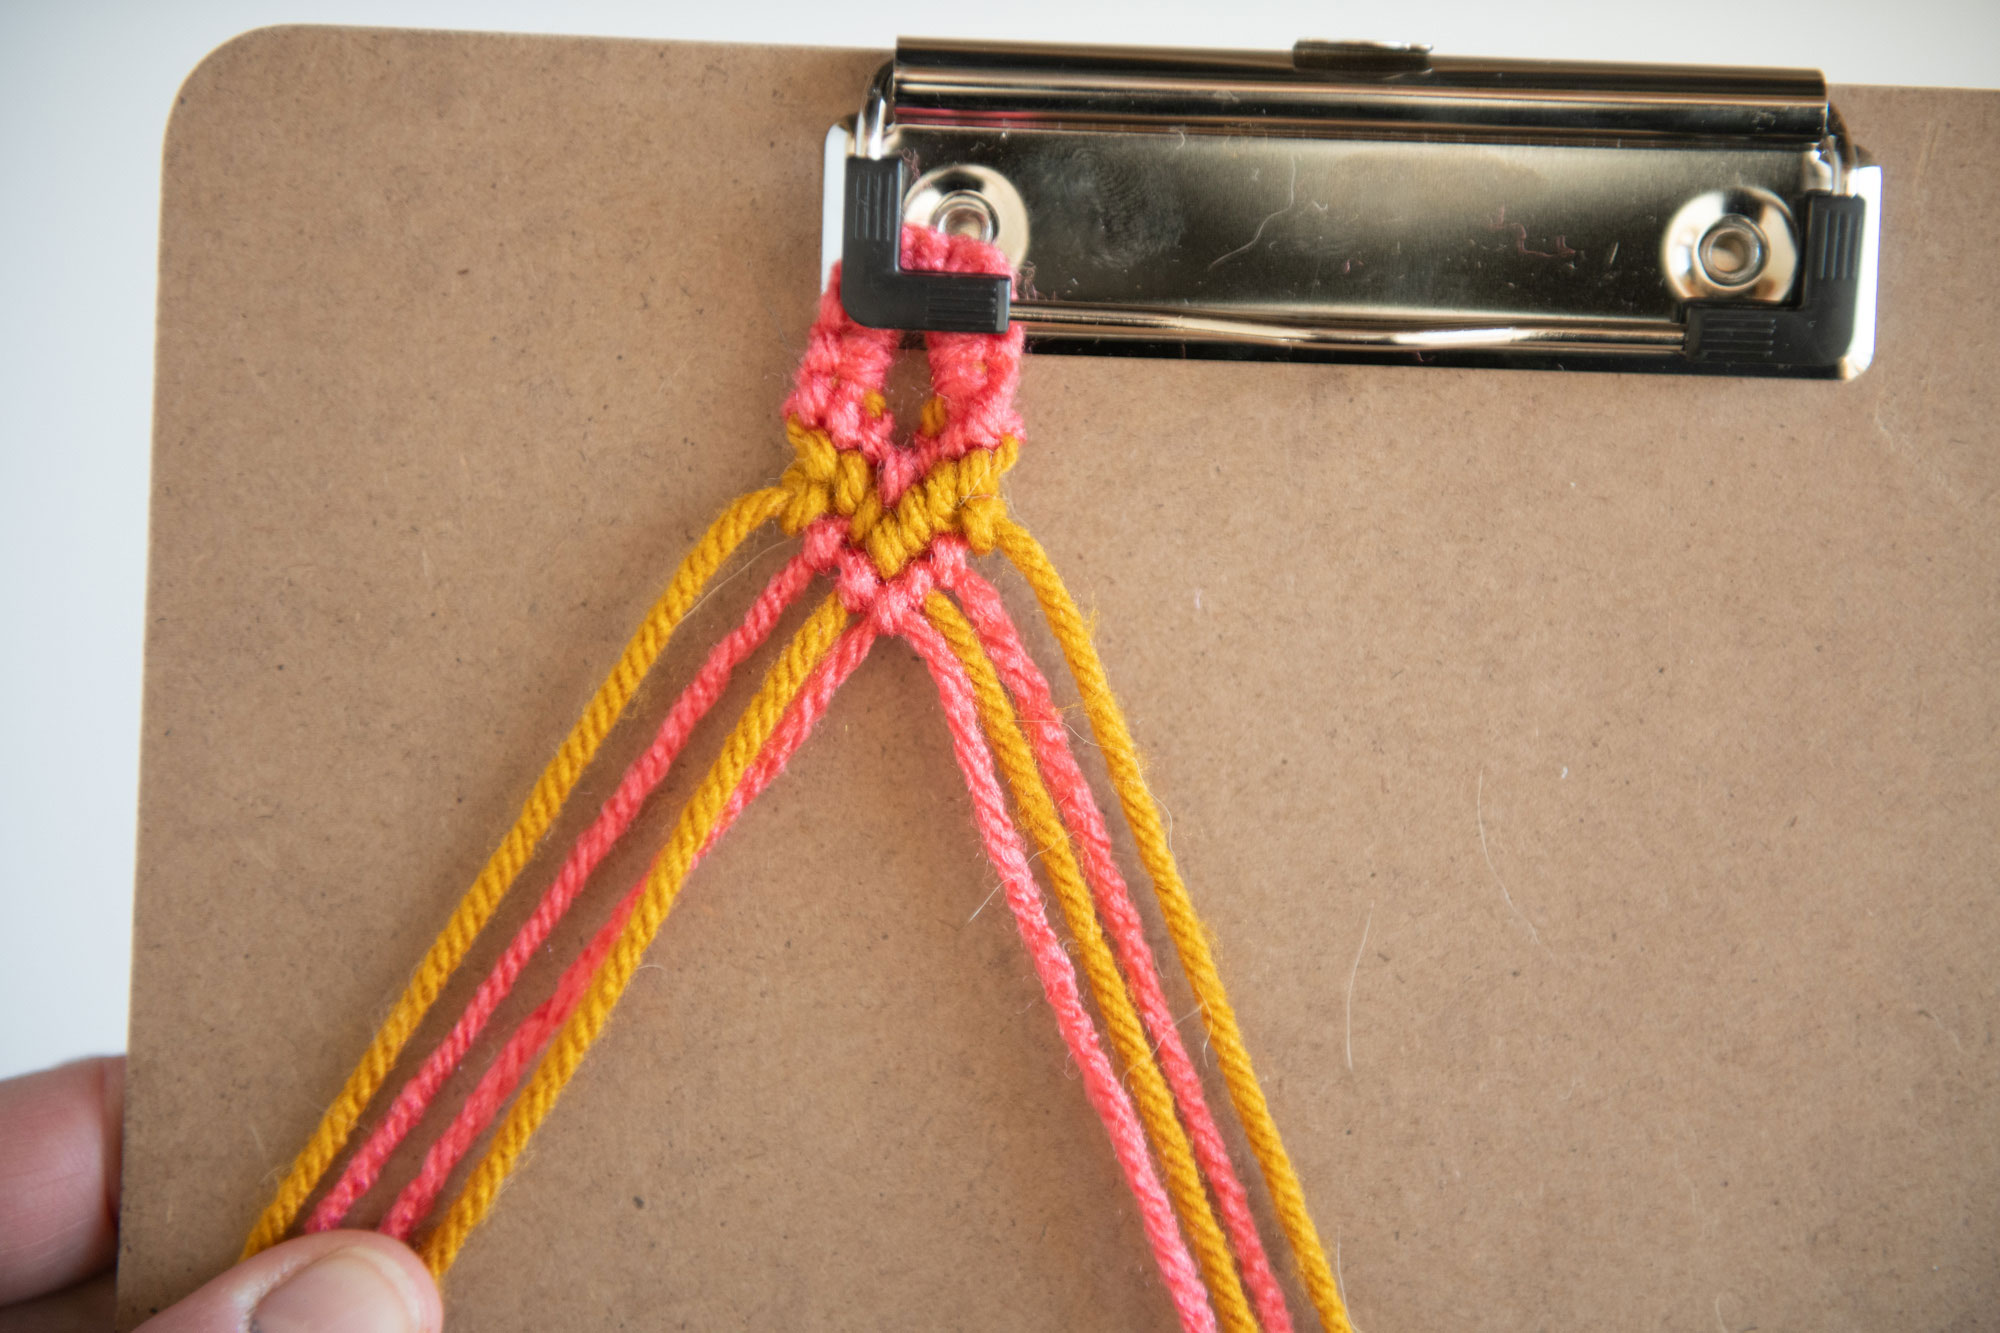
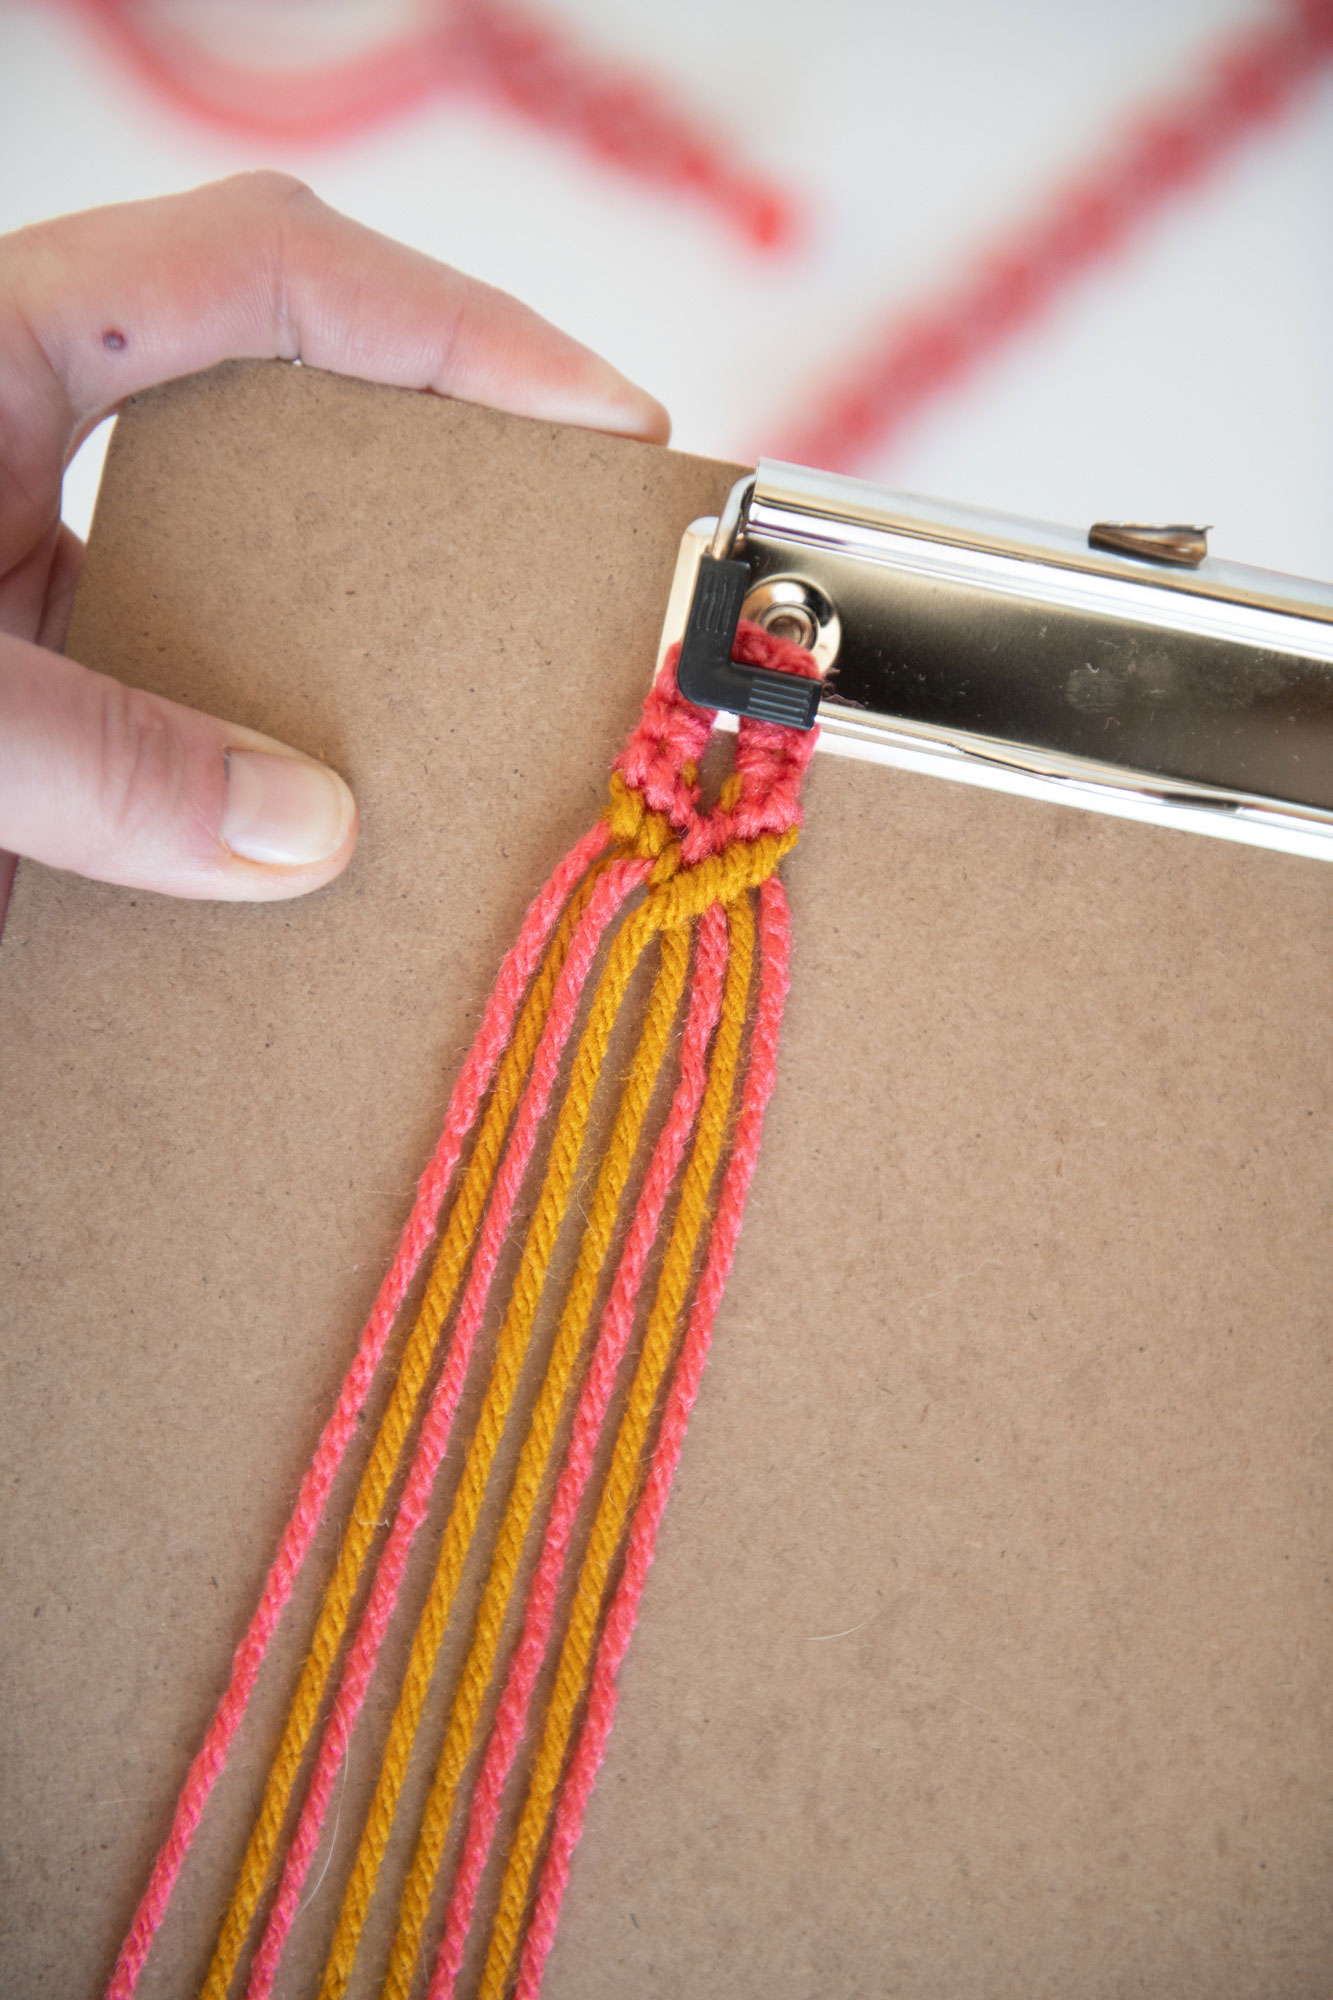
1. Cut 2 2-yard pieces of string from each color. Then all together, fold them in 1/2 and find the “middle” of the string.
You can either just tie an overhand knot (so all 8 strings are coming out the bottom)
ORRRRR
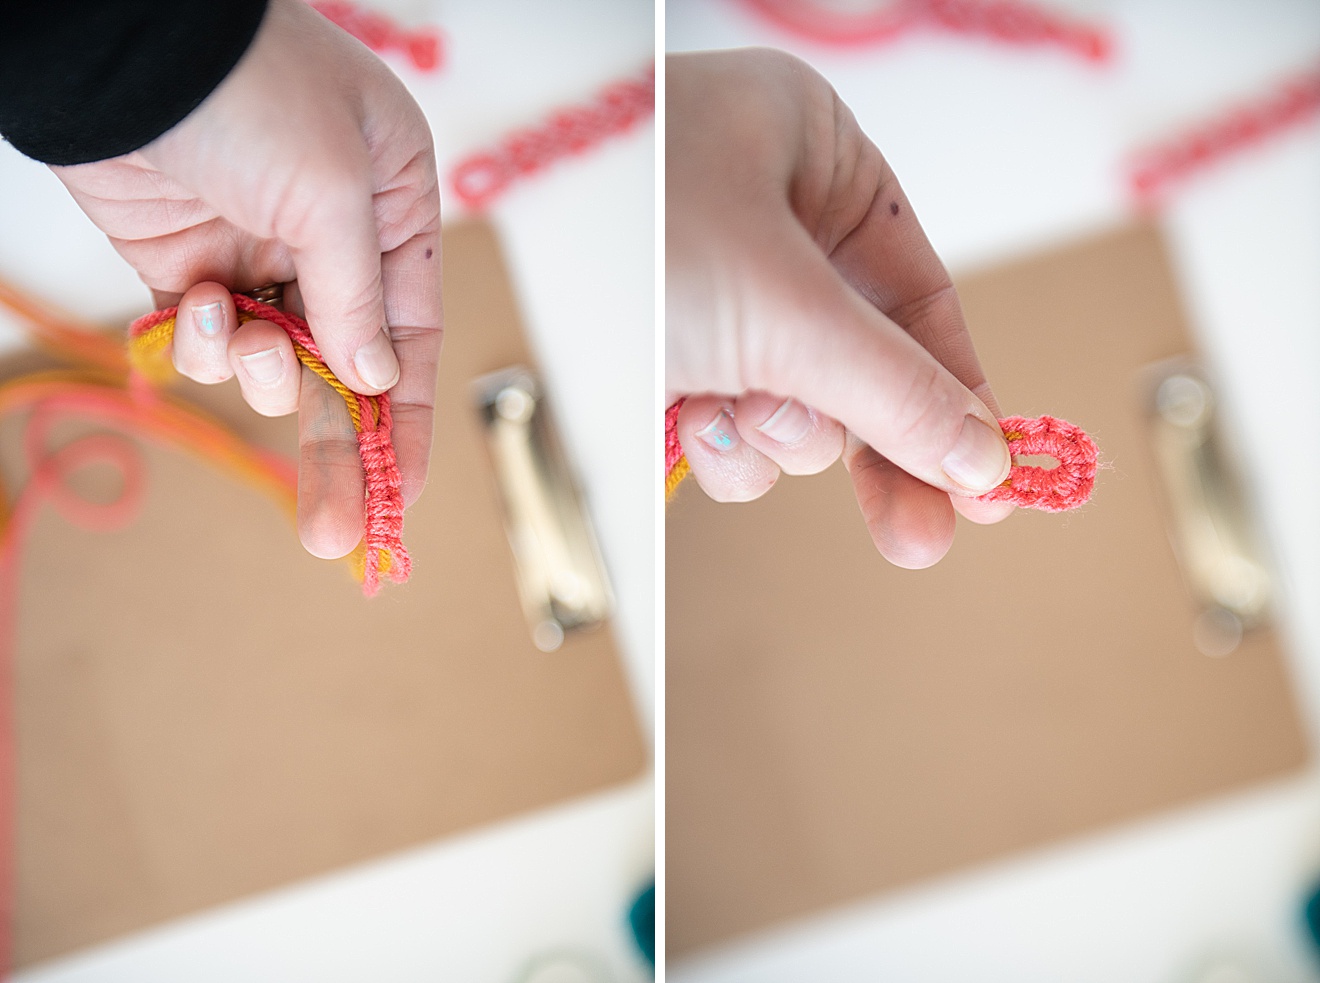
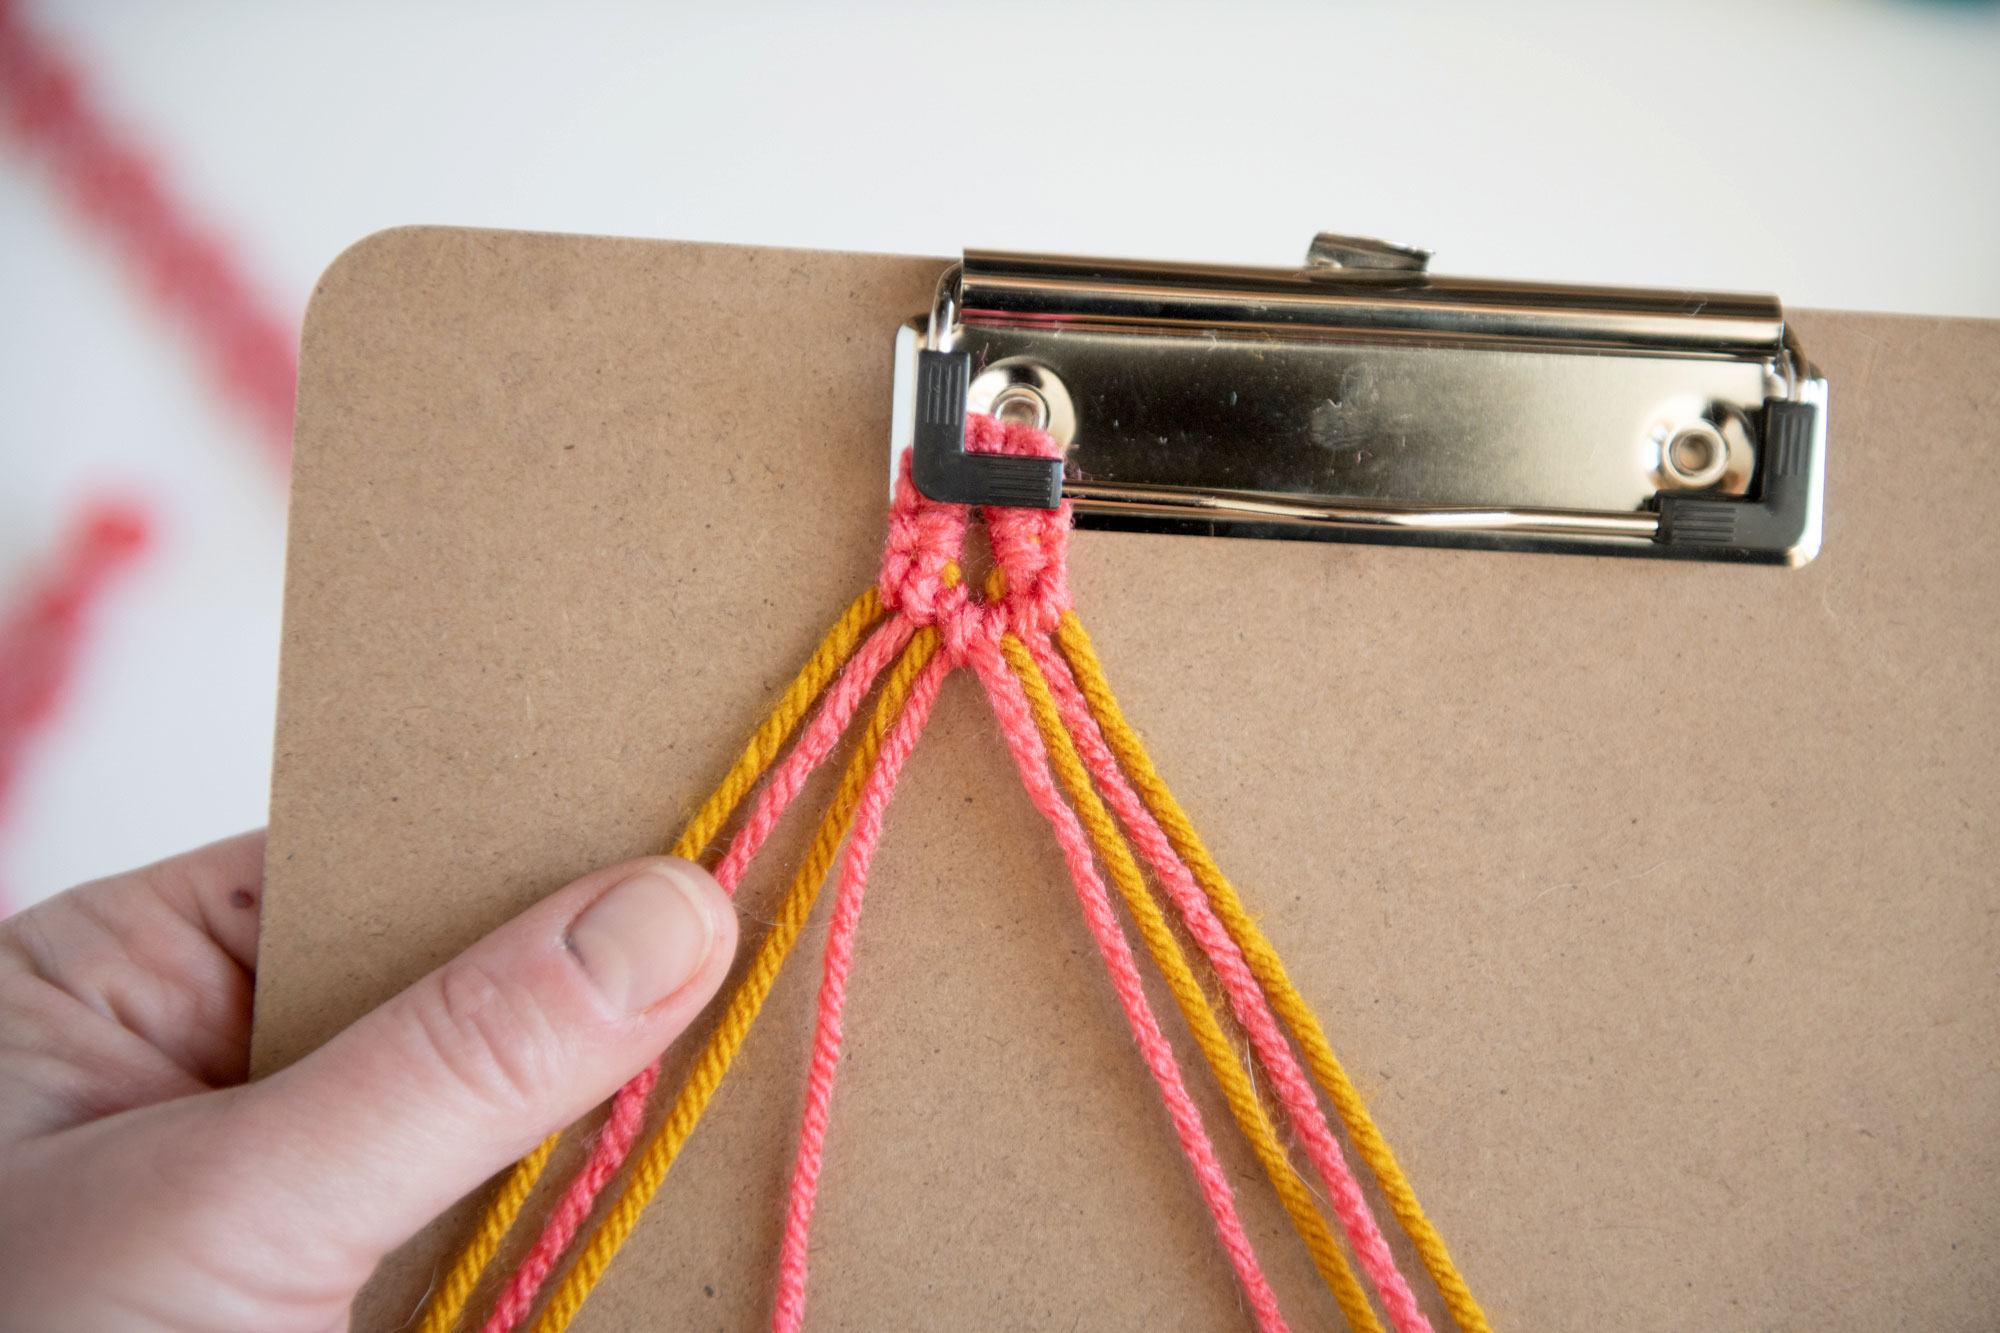
You can do a teardrop shape to begin. You will find the middle of all 4 strands of yarn, and then do a loose knot in the middle (to mark the middle). Then place the knot on your clipboard to hold in place and then with one piece of string, do a forward knot, backward knot, forward knot, backward knot (repeat until you’ve completed 5 knots on that side). Then remove from the clip, untie the middle knot (the first one) and then repeat those forward, backward 5 ore times on the opposite side. You will end up with a nice “flat” surface to begin your heart knotting pattern 🙂
2. Terms to know before beginning the pattern
FORWARD KNOT (FK): Make a figure 4 with your strand going over top of the other strand. Then pull the string through the center of the figure 4 and pull snugly (be sure to hold the other strand super straight during this process) This knot will bring your strand from left to right in the process of knotting.
BACKWARD KNOT (BK(: Make a BACKWARDS figure 4 with your strand going over top of the other strand. Then pull the string through the center of the figure 4 and pull snugly (be sure to hold the other strand super straight during this process). This knot will bring your strand from right to left in the process of knotting.
*A few tips:
- Alway hold the strands that you are not “actively knotting” tight…this will help your tension and keep things looking similar as they repeat 🙂
- You will ALWAYS want to knot TWICE onto each strand! ALWAYS
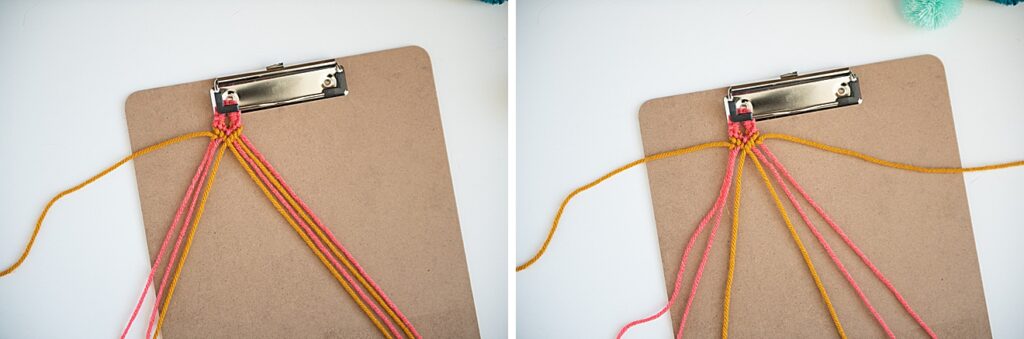
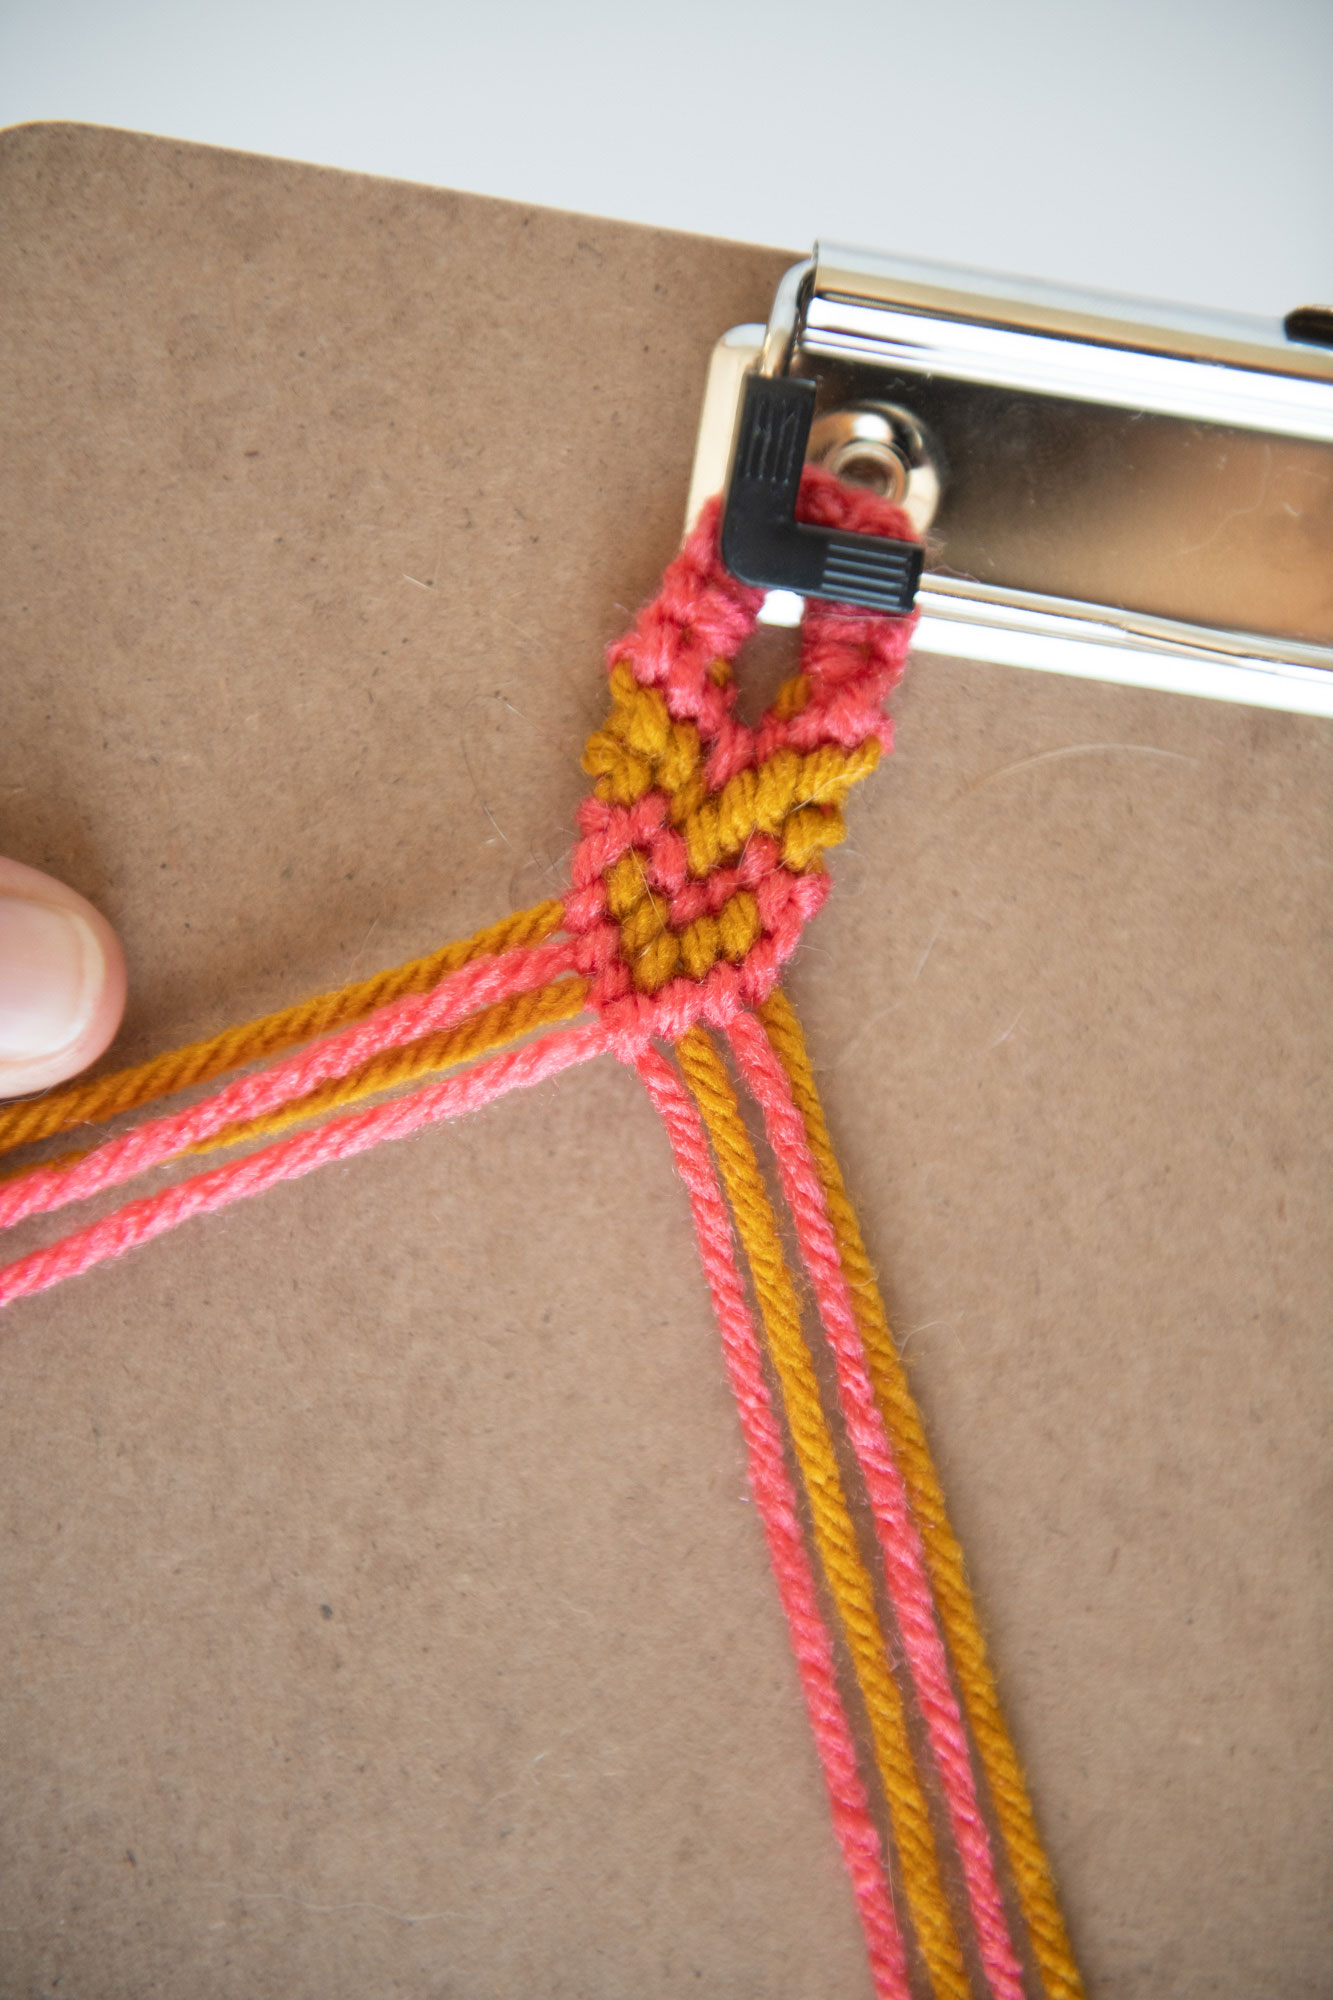
3. Begin heart pattern
The heart pattern is made up of 2 chevron rows and 2 short chevron rows. This 4 row completes the heart pattern and keeps repeating until you’ve made the amount of hearts you want! 🙂
To start: Separate your strands so that you have (from left to right) color 1, color 2, color 1, color 2, (middle) color 2, color 1, color 2, color 1
Row 1 (Chevron row) :
a. With your far left strand being forward knotting (FK) onto each of the next 3 strands (going right) until you’ve reached the middle. Put strand down.
b. Then grab your far right strand and begin backward knotting (BK) onto the next 3 strands (going left) until you’ve reached the middle.
c. Then grab the strand you just put down and knot those 2 together to make the middle “point”
*remember to knot twice on each strand
Row 2 (Chevron row) : Repeat row 1 🙂
Row 3 (short Chevron row) :
a. With the strand 2nd in from the left, do a backwards knot (BK) onto the strand to the left (this will bring it to the outside of the bracelet on the left). Put down.
b. With strand 2nd in from the right, do a forwards knot (FK) onto the strand to the right (this will bring it to the outside of the bracelet on the right). Put down.
c. Complete the chevron pattern with the strings you haven’t touched (the “inside” strings). You will do this by grabbing the string that is now 2nd from the left and doing a FK on the next 2 strands (going left) . Put down. Then grab the strand that is now 2nd from the right and do BK on the next 2 strands (going right). Put down. Grab both strands you just put down and knot them together for the “center” of the chevron to be complete.
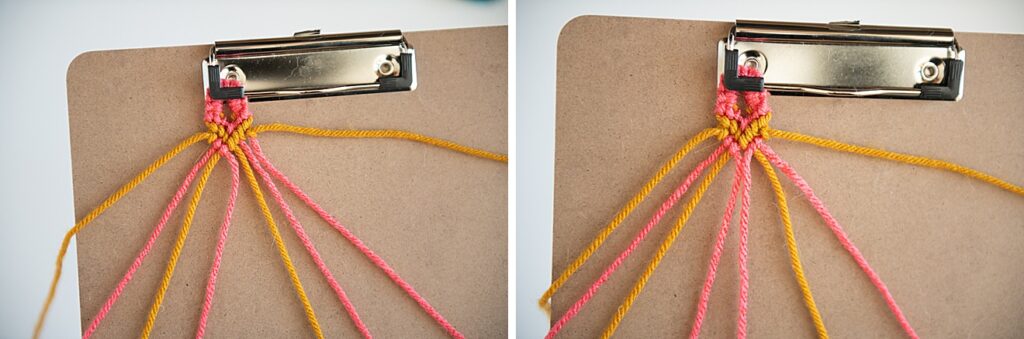
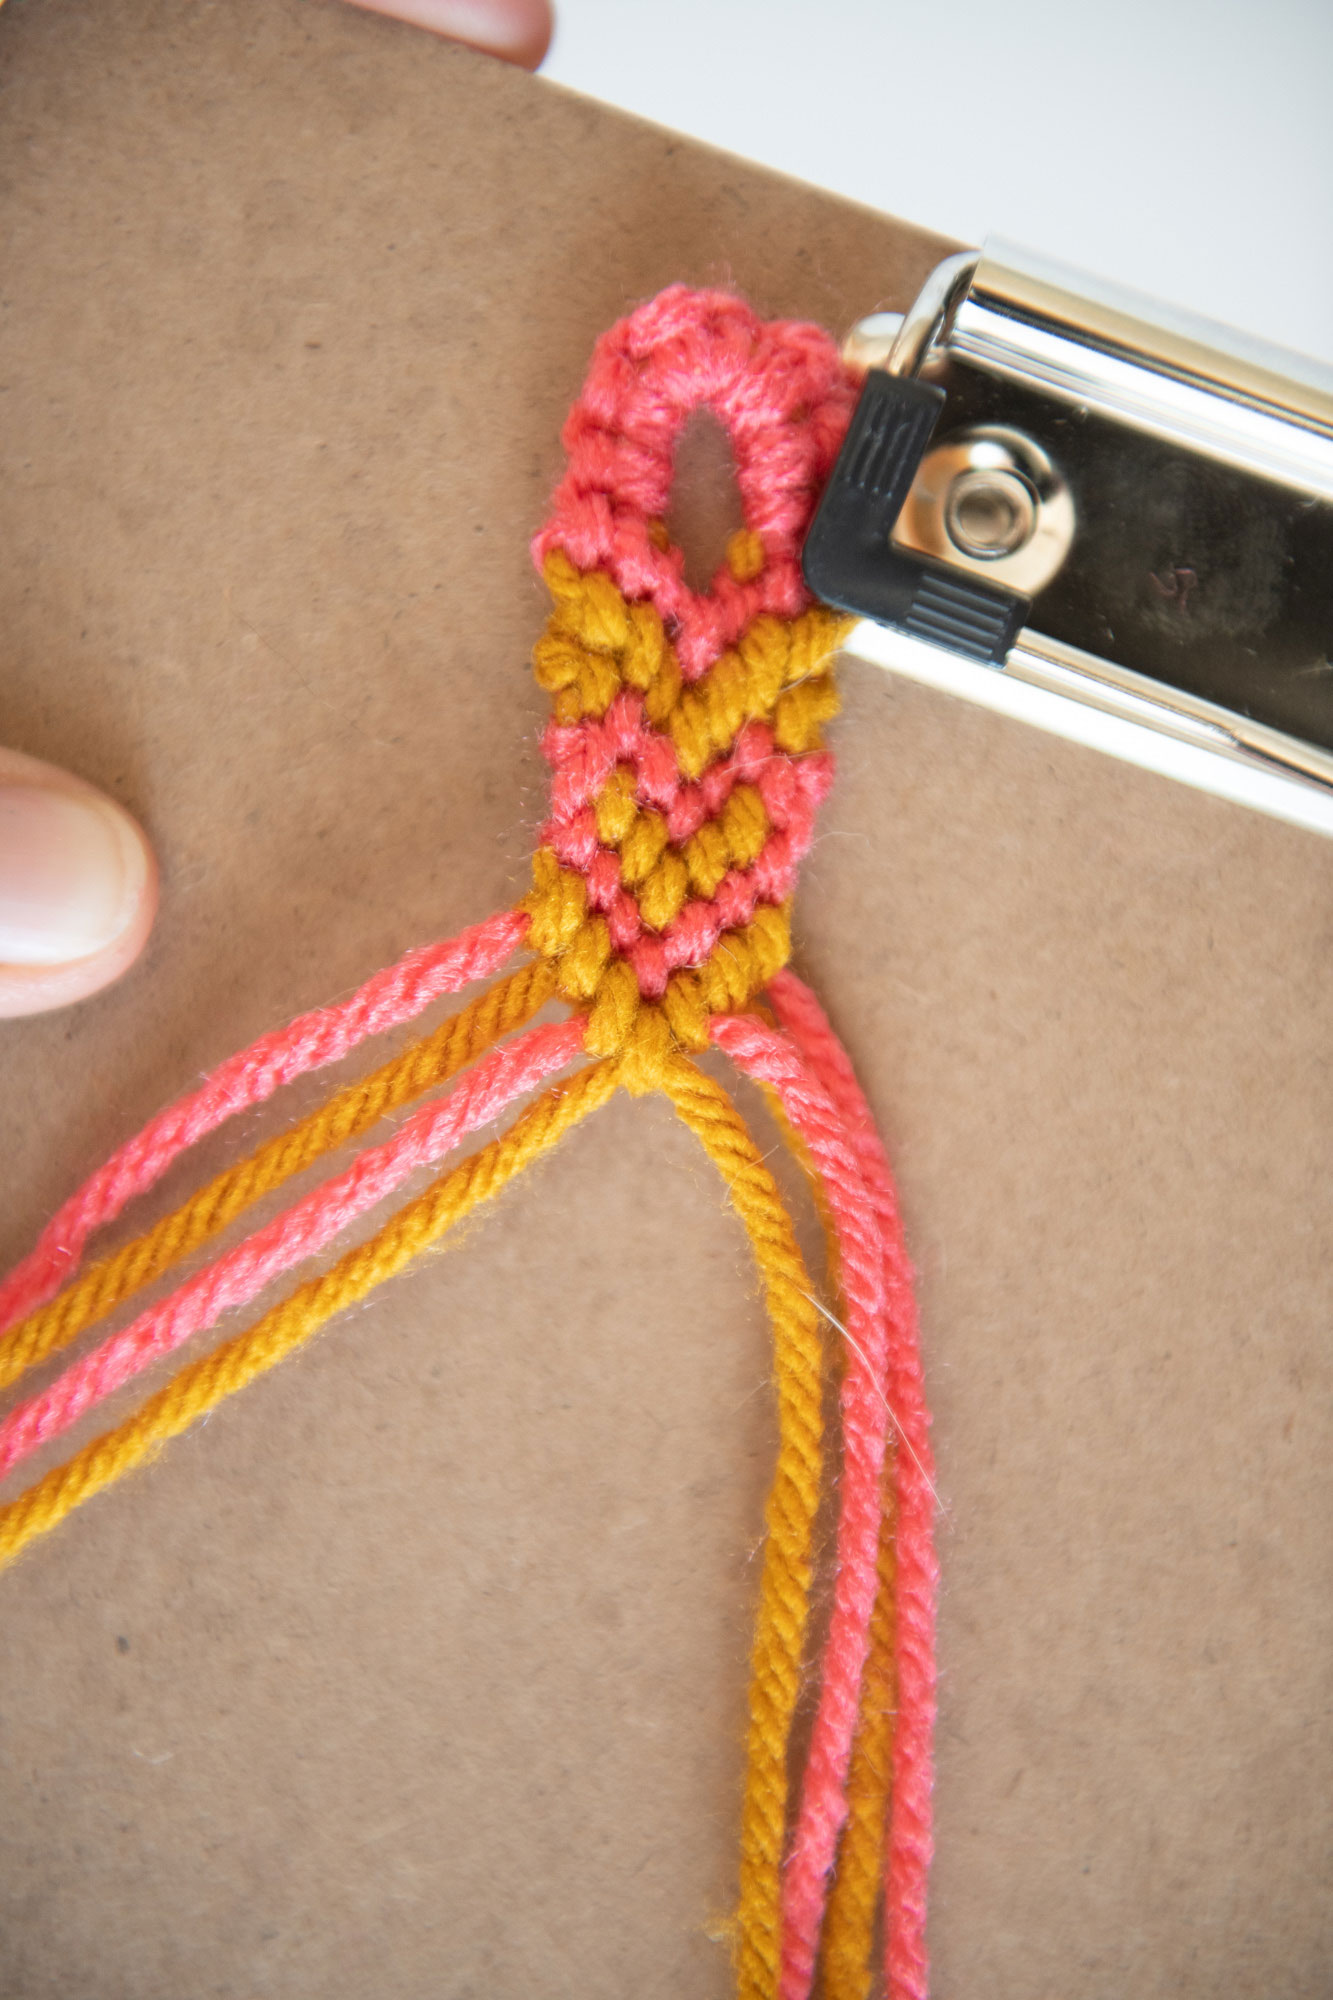
**note: after this row you will now see that your every-other strand pattern is back 🙂
Row 4 (short Chevron row) :
NOW, repeat Rows 1-4 over and over for each heart that you want completed 🙂
4. When your bracelet is as long as you want to make it you can either just overhand knot tie the ends off (and trim) ORRRR you can split the extra strands into 2 sections and braid each section, then tie and trim! 🙂