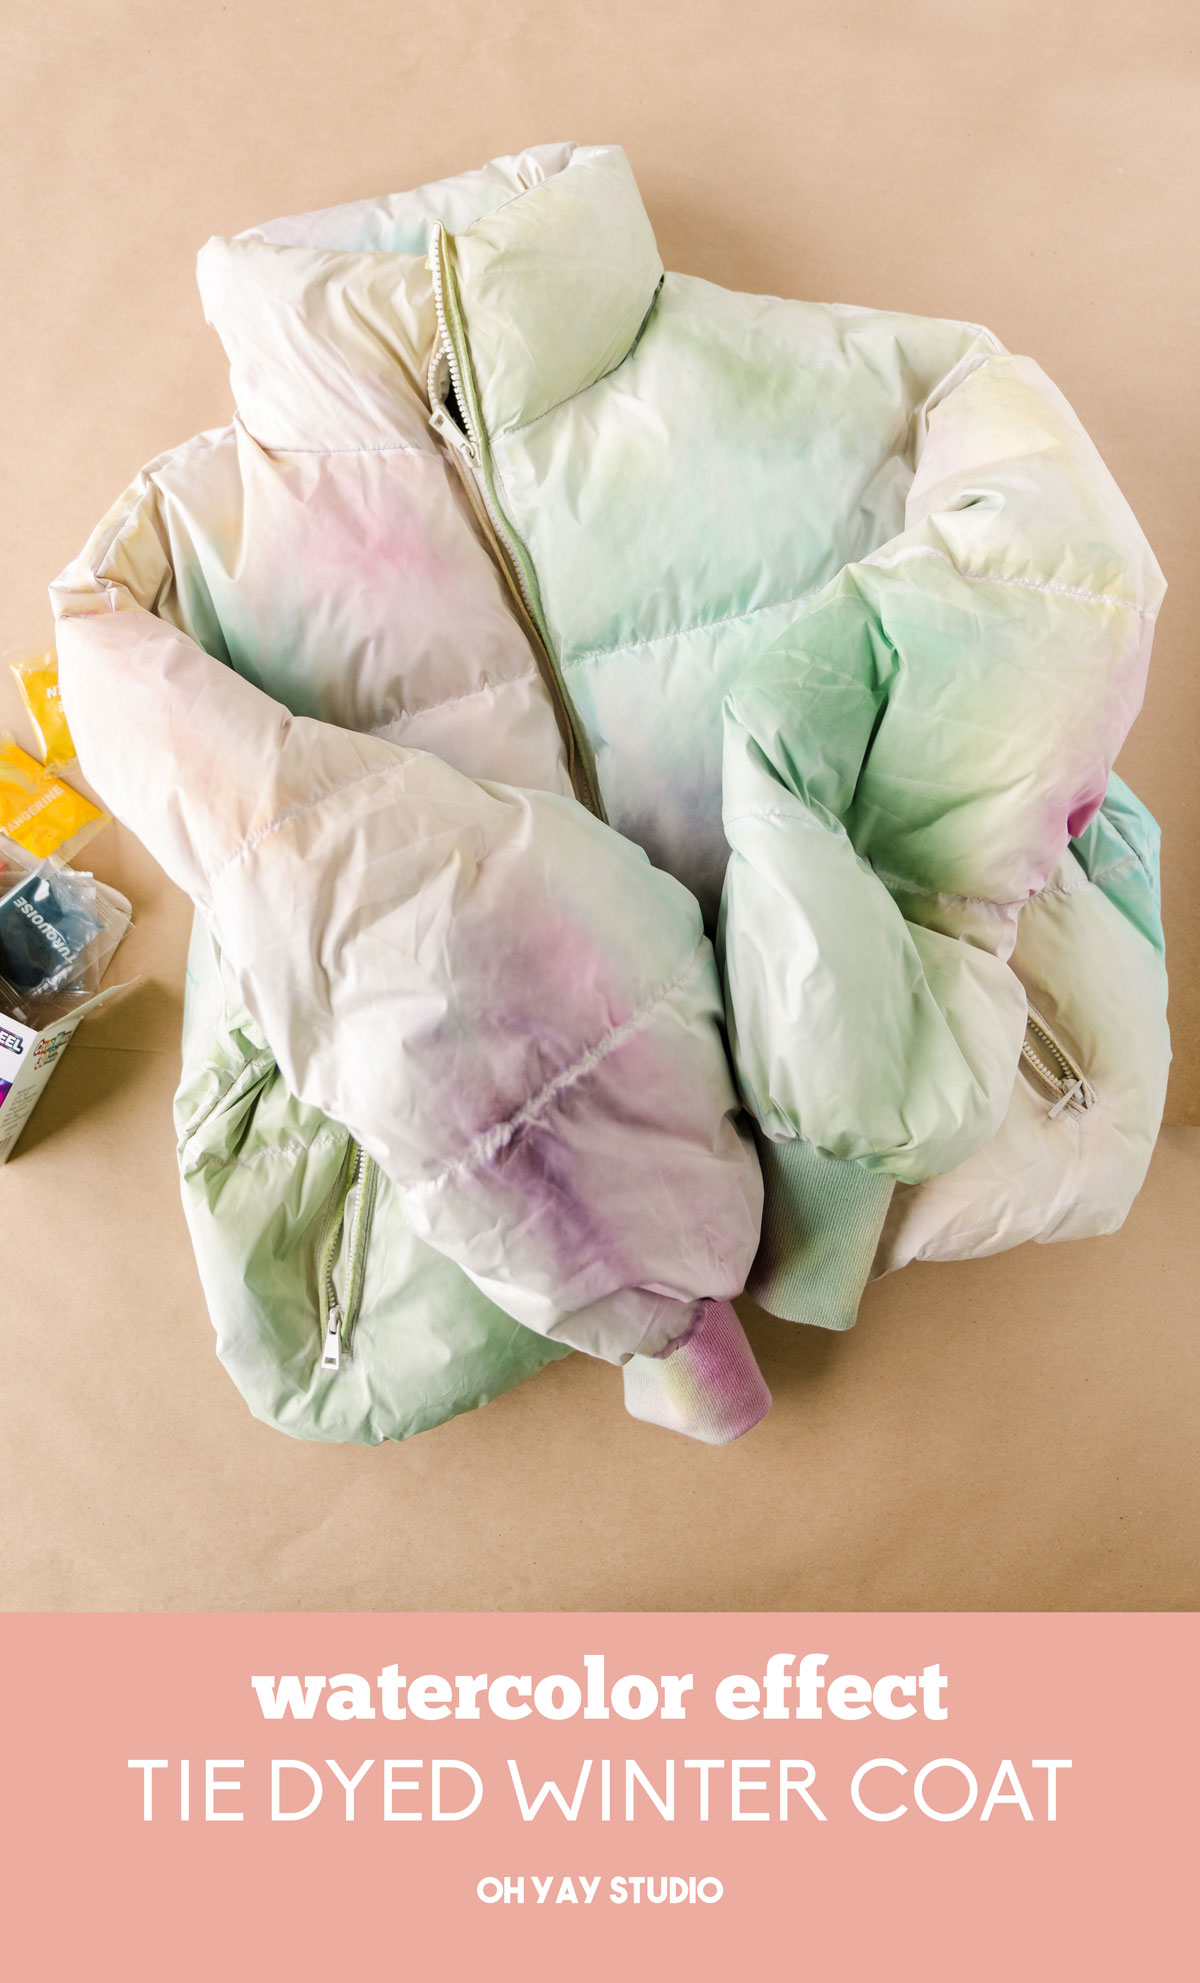
Watercolor effect tie dye winter coat!
*this project is in partnership with Tulip and their incredible tie dye kits 🙂
I live in Wisconsin where cold weather is about 6 months out of the year so the NEEEEEDDD to be stylish in these cold months is imperative to fun and winter joy (IMO anyway)! 🙂 So of course when the idea of tie dying a winter coat crossed my mind, I just HAD to give it a try and figure it out! 🙂
I have 2 rules to to successfully tie dying:
RULE #1: A garment or material that is natural fibers (cotton, linen or knit)
RULE #2: TIE DYE one step dyes! (because they are vibrant and SOOOOO easy)! 🙂
OK! so in this case I am kinda cheating on the 1st “rule” because winter jacket tend to NEVER be cotton for the warmth and ease of wicking sweat away from your bodies in the cold (essential when it’s below zero temps around here)! SOOOOO instead I found a jacket that is nylon. Nylon is technically a synthetic fabric (and synthetic fabrics, like polyester, are notorious for never holding dye well) BUT nylon is made just a bit differently which means that I find it successful to holding the Tulip tie dyes! 🙂
MATERIALS:
- A white natural fiber jacket – again, mine was Nylon – just stay away from 100% polyester
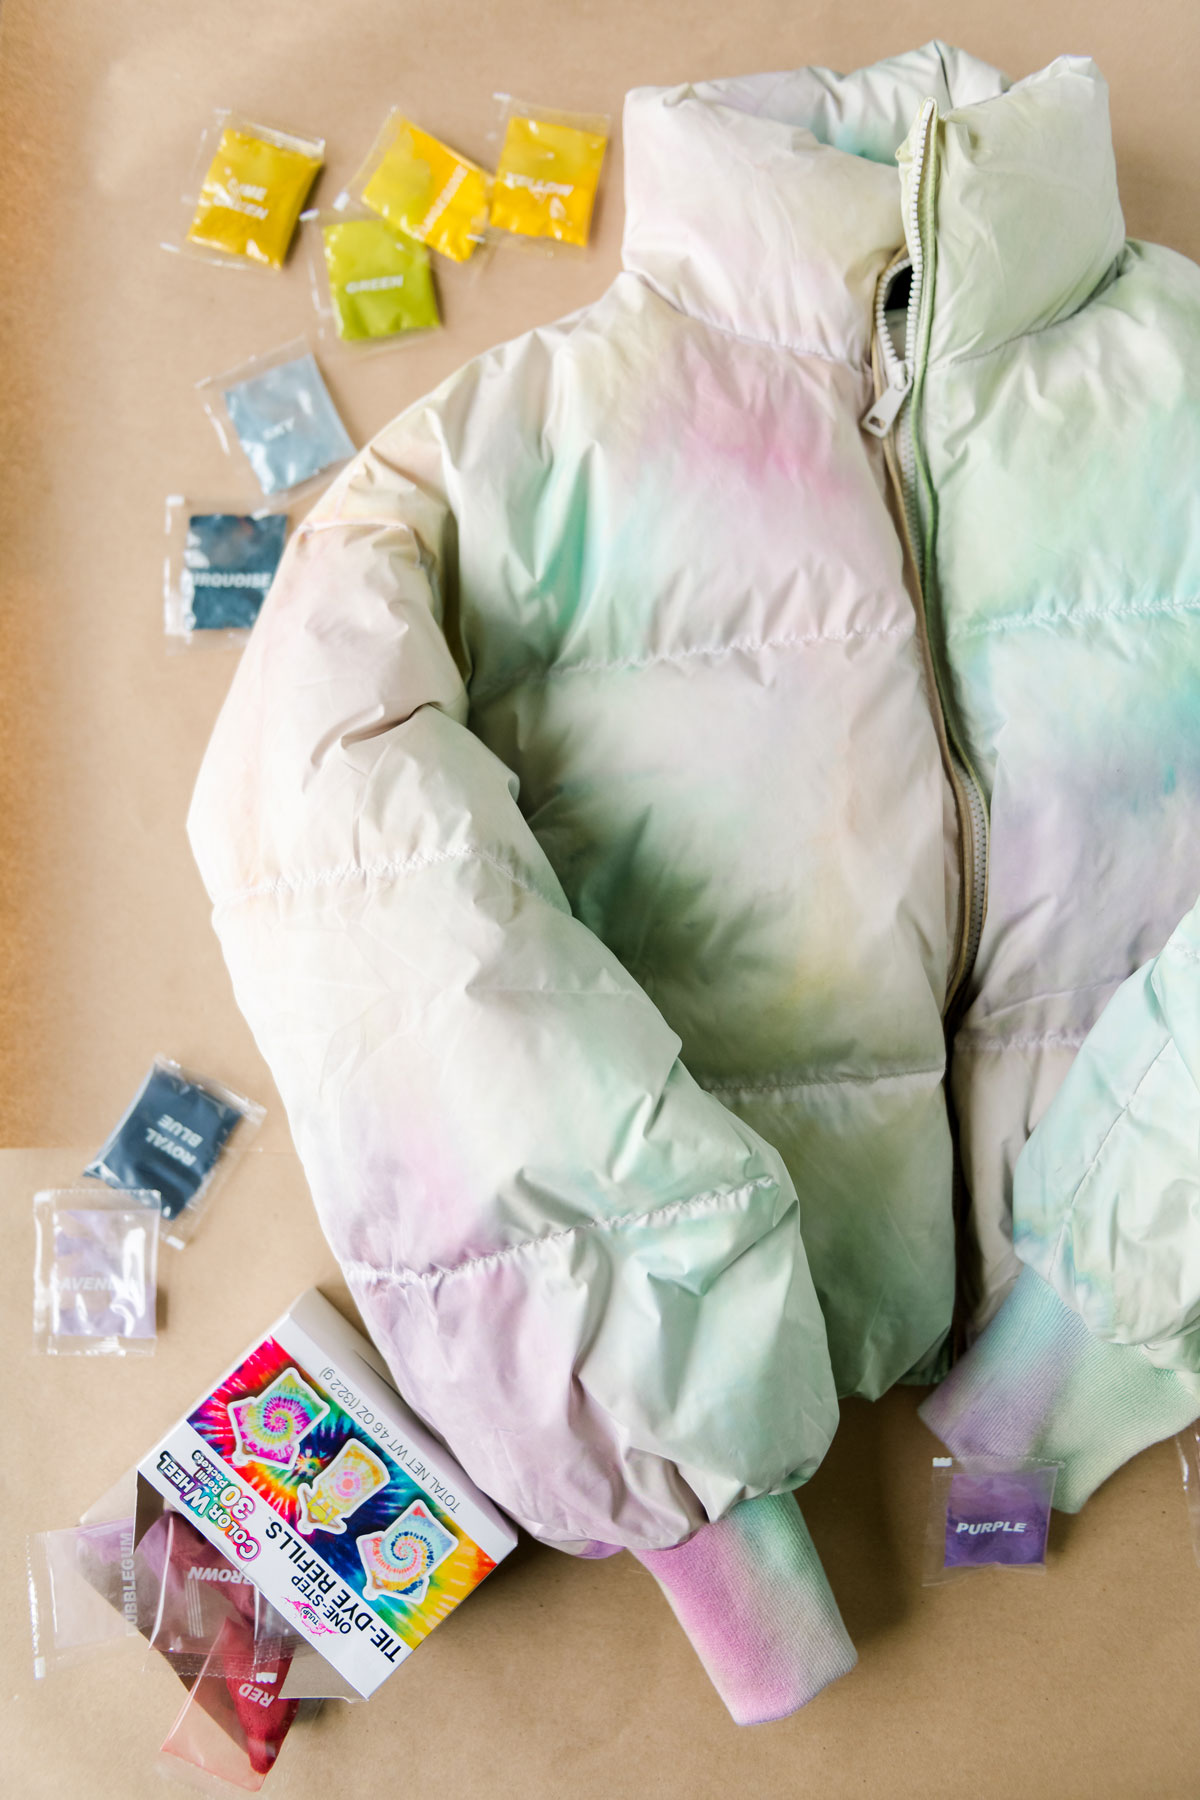
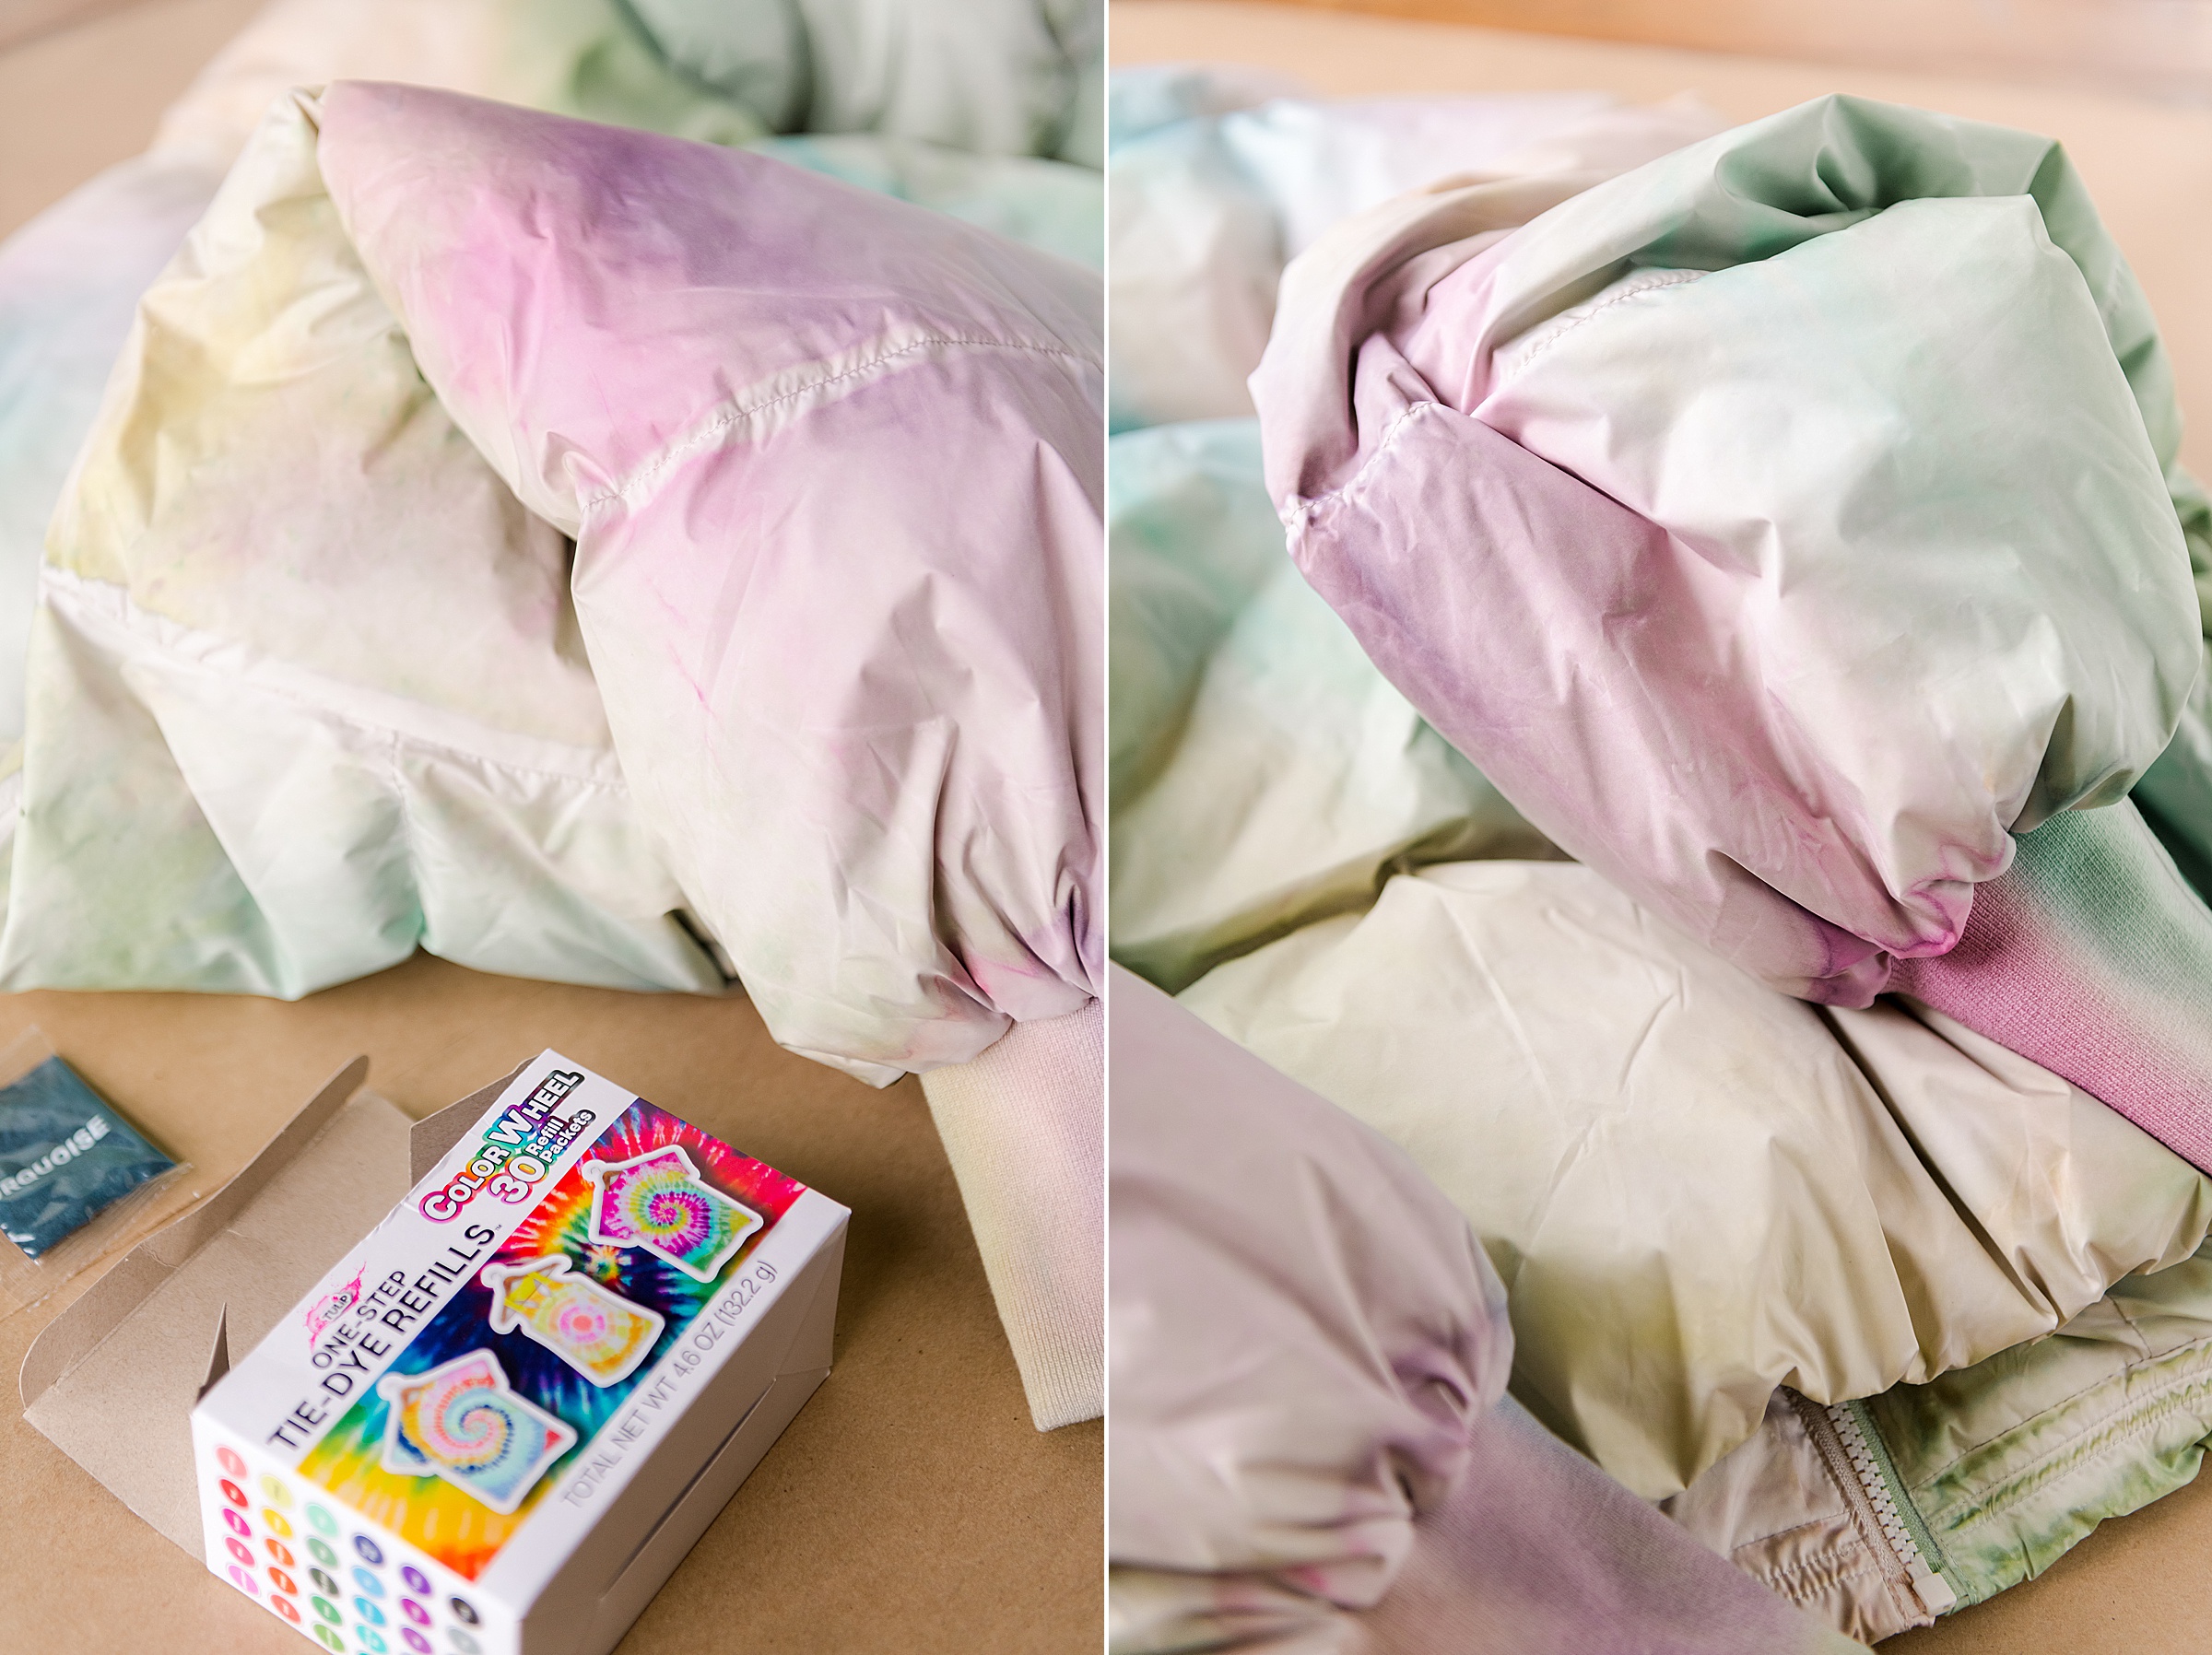
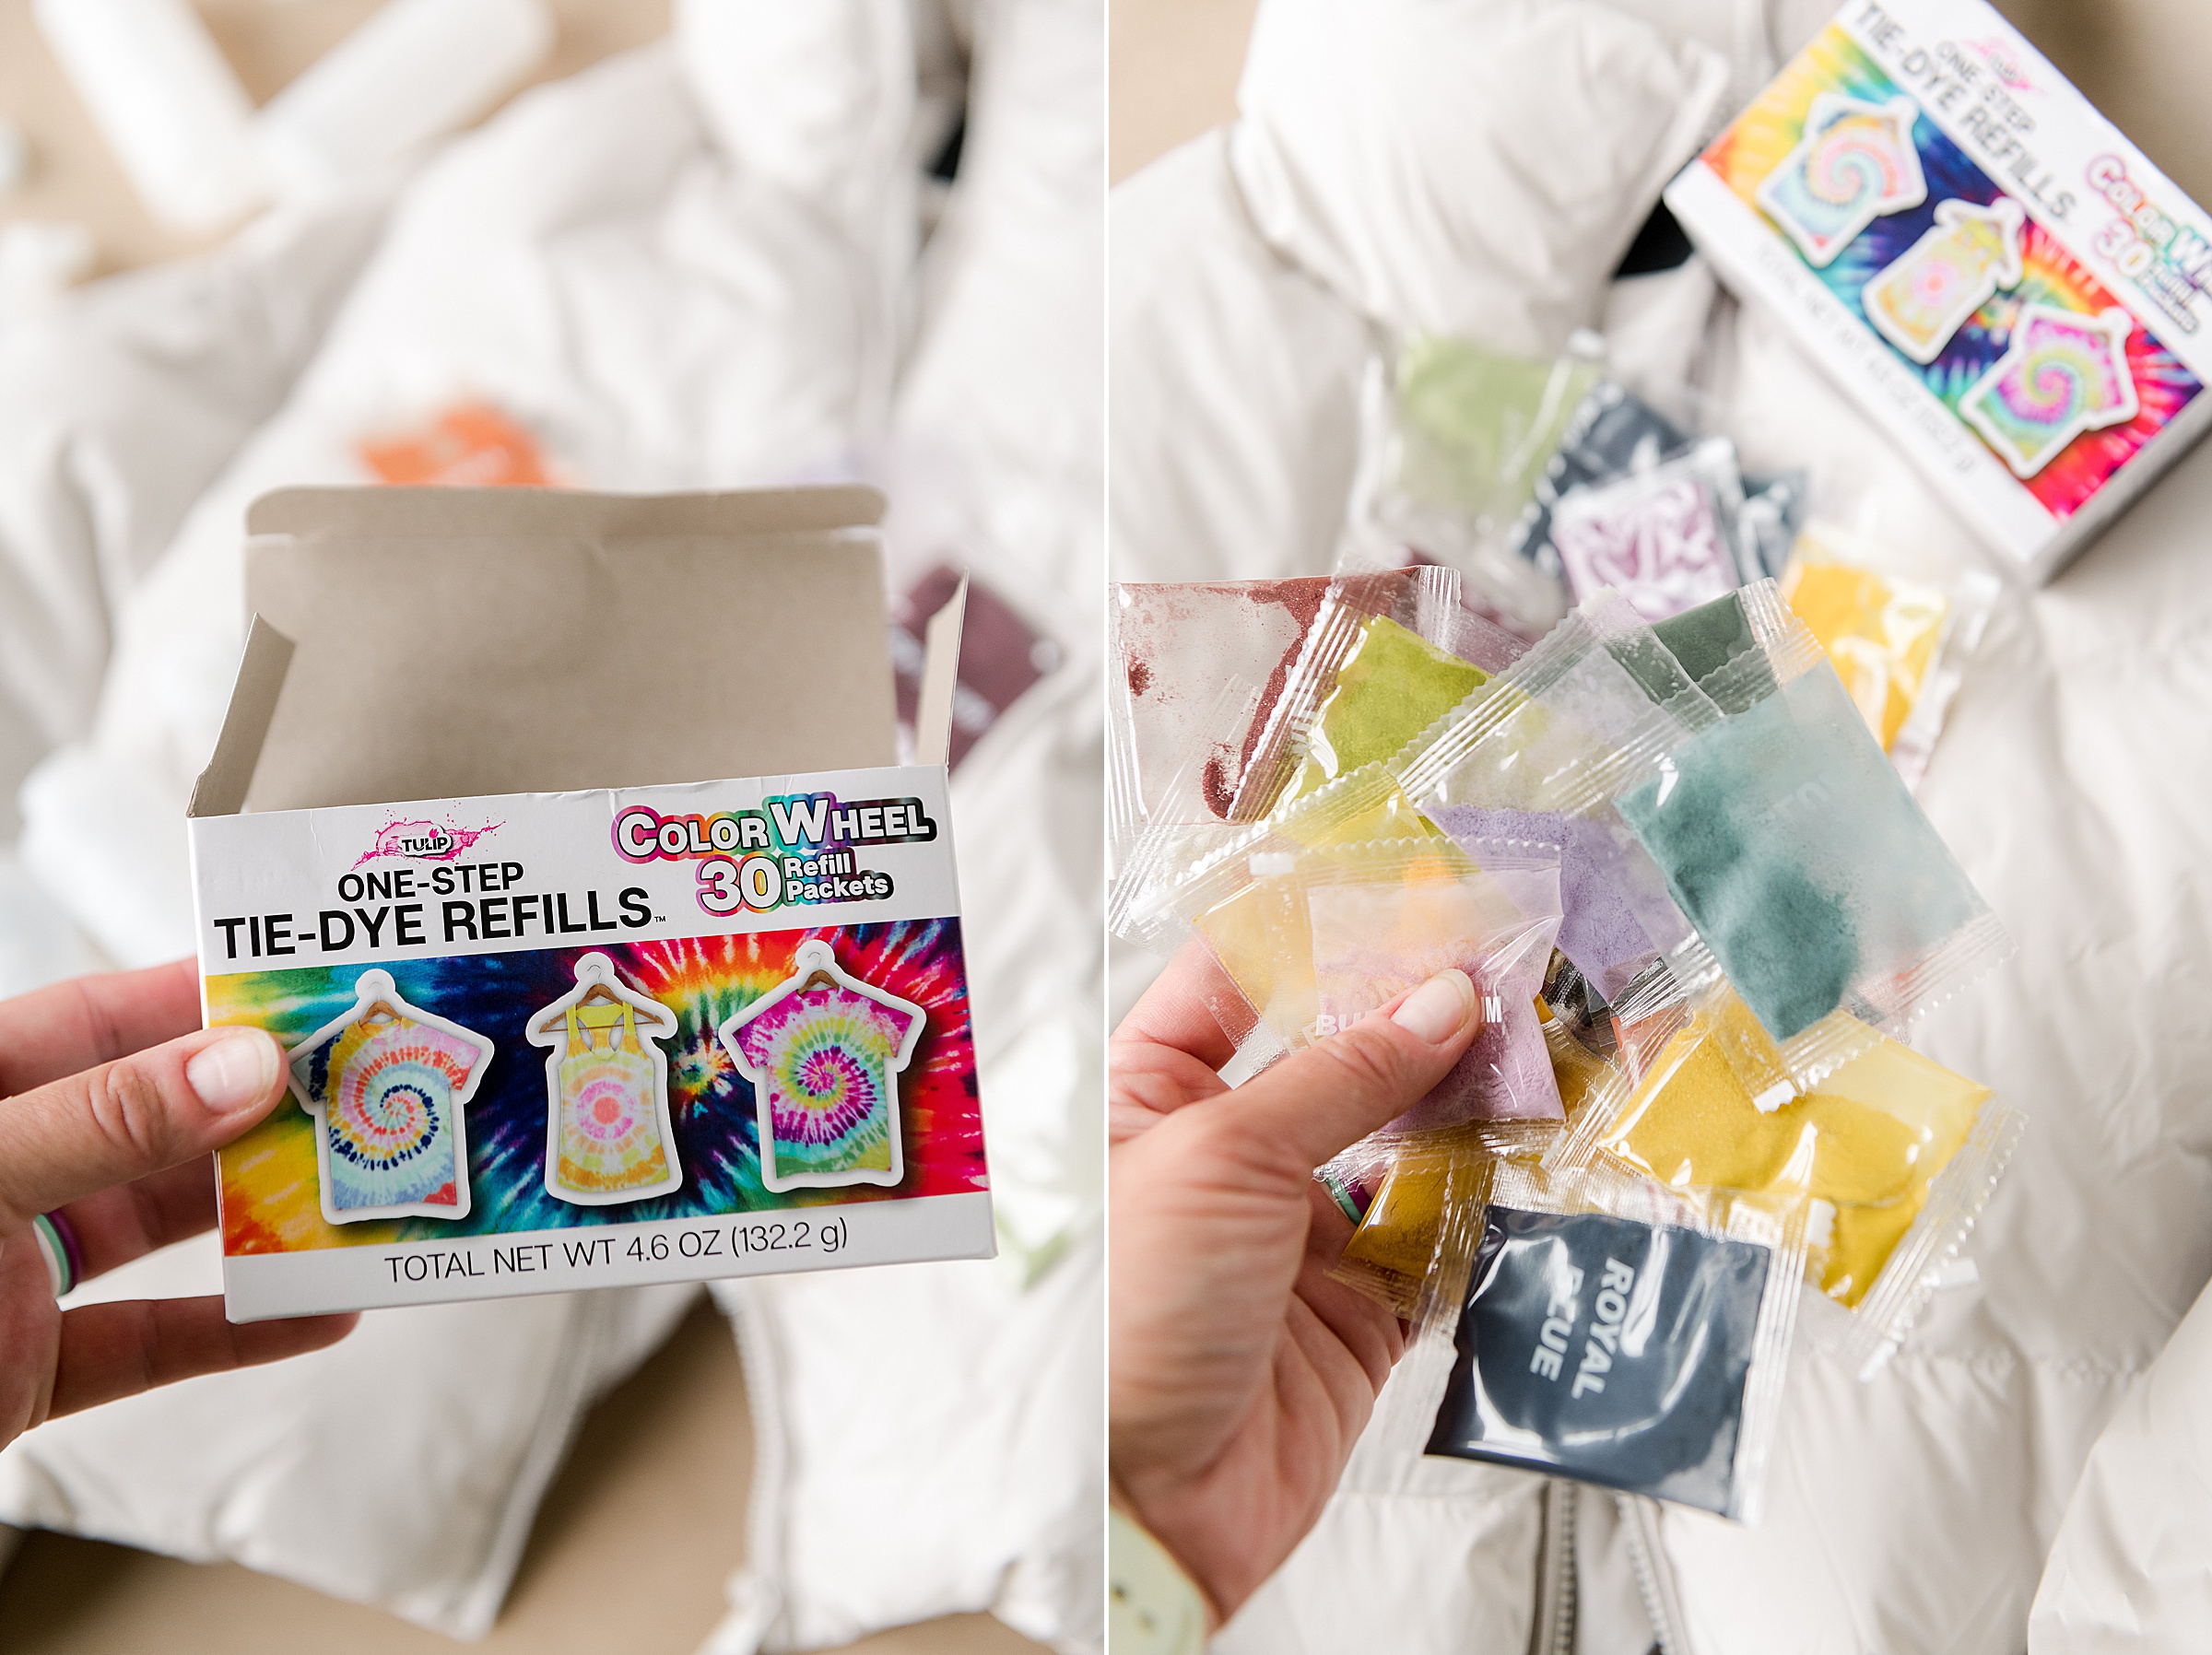
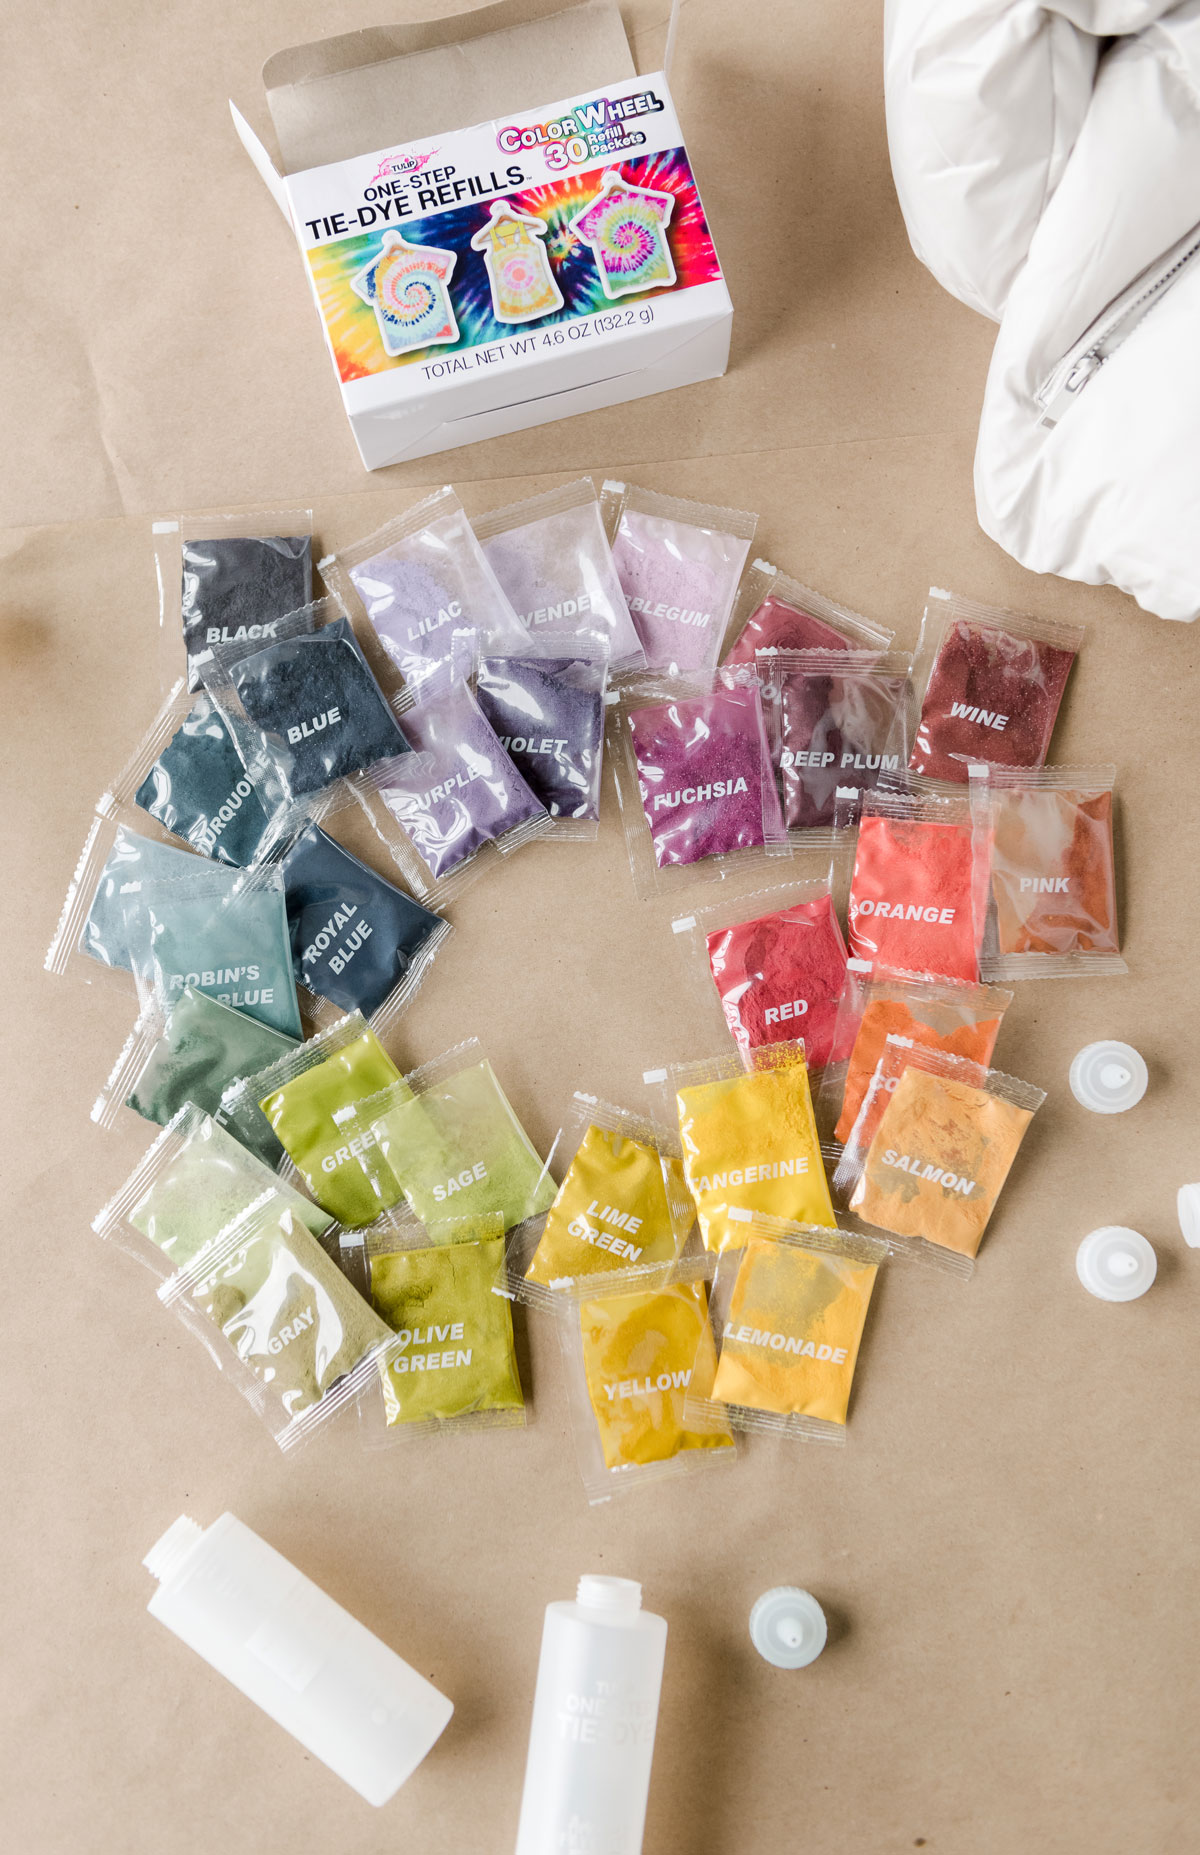
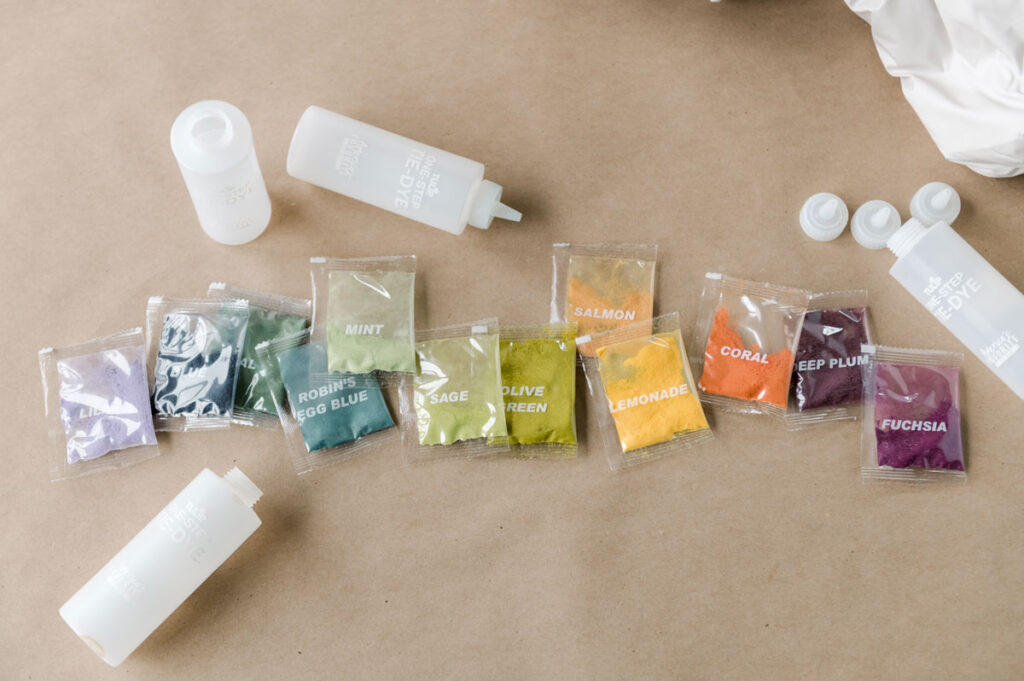
- A box of the Tulip Color Wheel Refill Packs (30 colors people, THIRTY)!
- A tub and a rack for you to dye on (or outdoors is ok too)! 🙂
- Some paper towels
- A plastic bag or plastic wrap to let dyed jacket sit in overnight while curing
INSTRUCTIONS:
1. Prep your space with your tub and make sure your work station is covered. ALSO, prep your bottles of dye (loooots of colors IMO) by removing the bottles from the Color Wheel Tulip refill kit and filling each bottle to the fill line! Carefully shake the bottles to make sure all of the dye is mixed (and remember to cover the bottles as you shake with a paper towel….don’t pre-dye your clothing as you shake, HA)! 🙂
I also put a handful of paper towels in the bottom of my big tub, under my rack, to be sure that any excess dye got soaked up into the towels and not transferred back to another part of the jacket as I moved it around, etc! 🙂
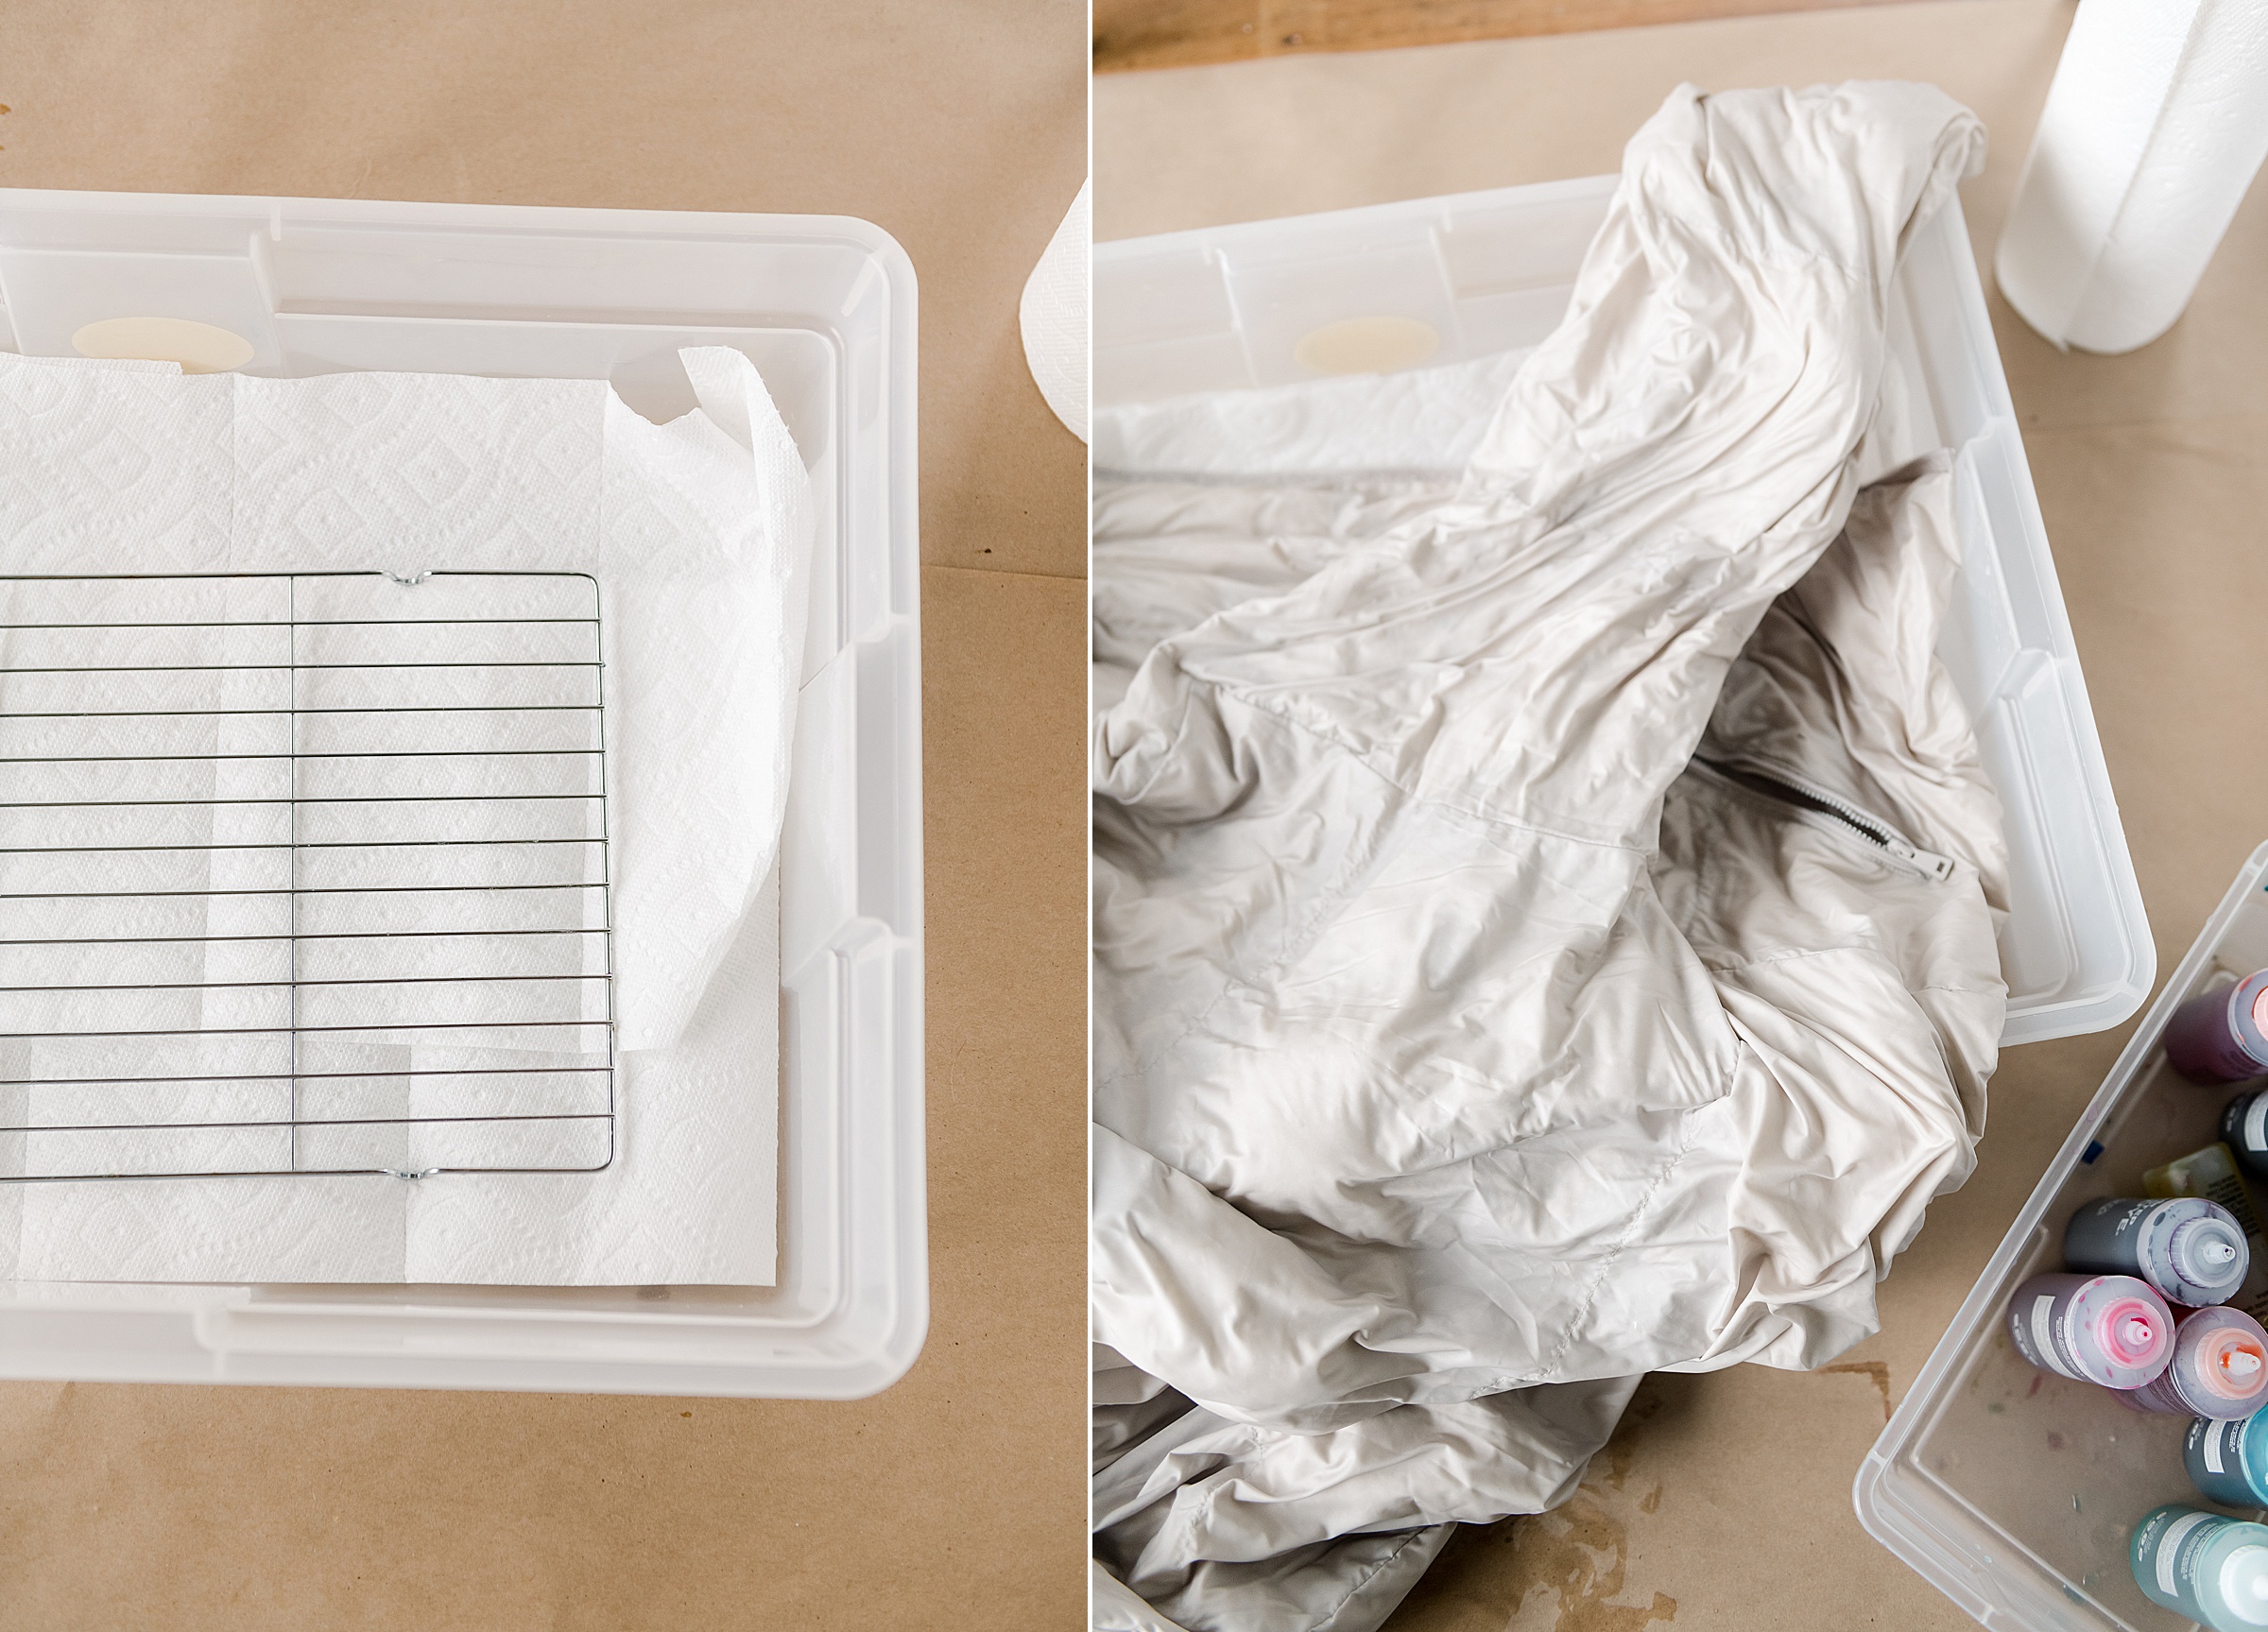
2. While you are mixing your dye, pop your jacket into a hot water cycle on your washing machine – this will both clean the jacket (to get it prepped for dye) and get the jacket wet with HOT water which helps the dye soak in better! 🙂
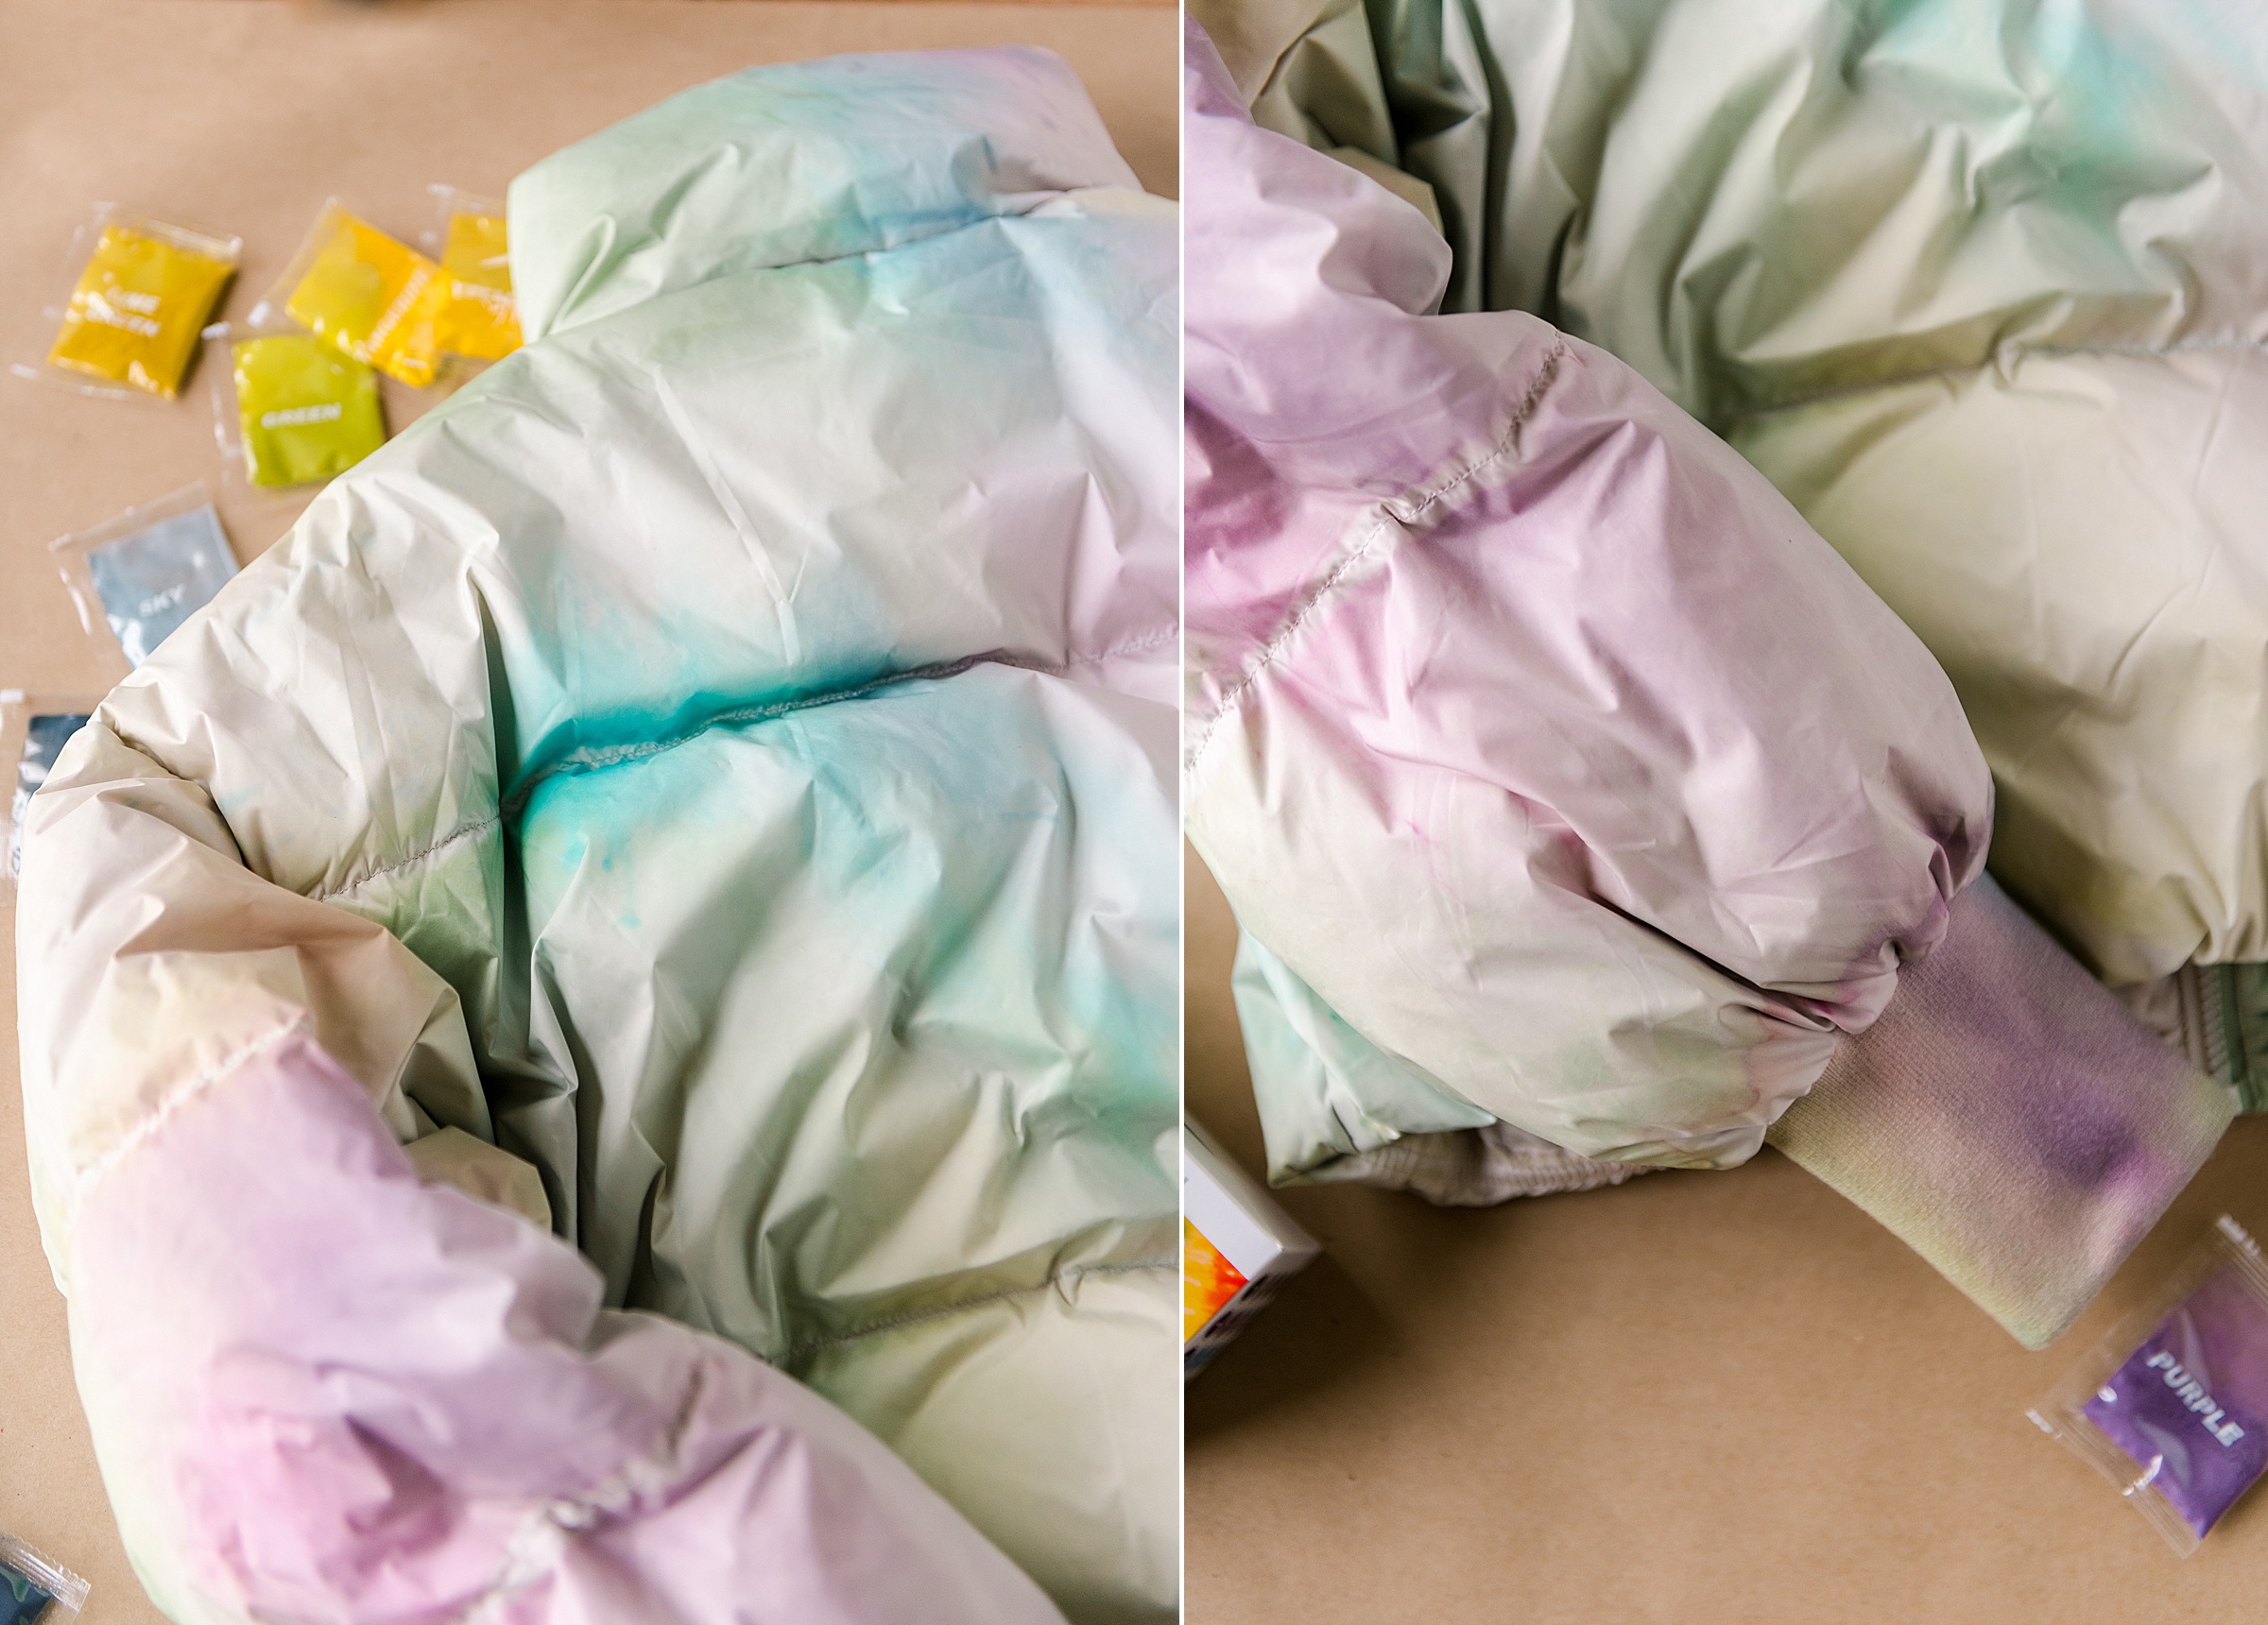
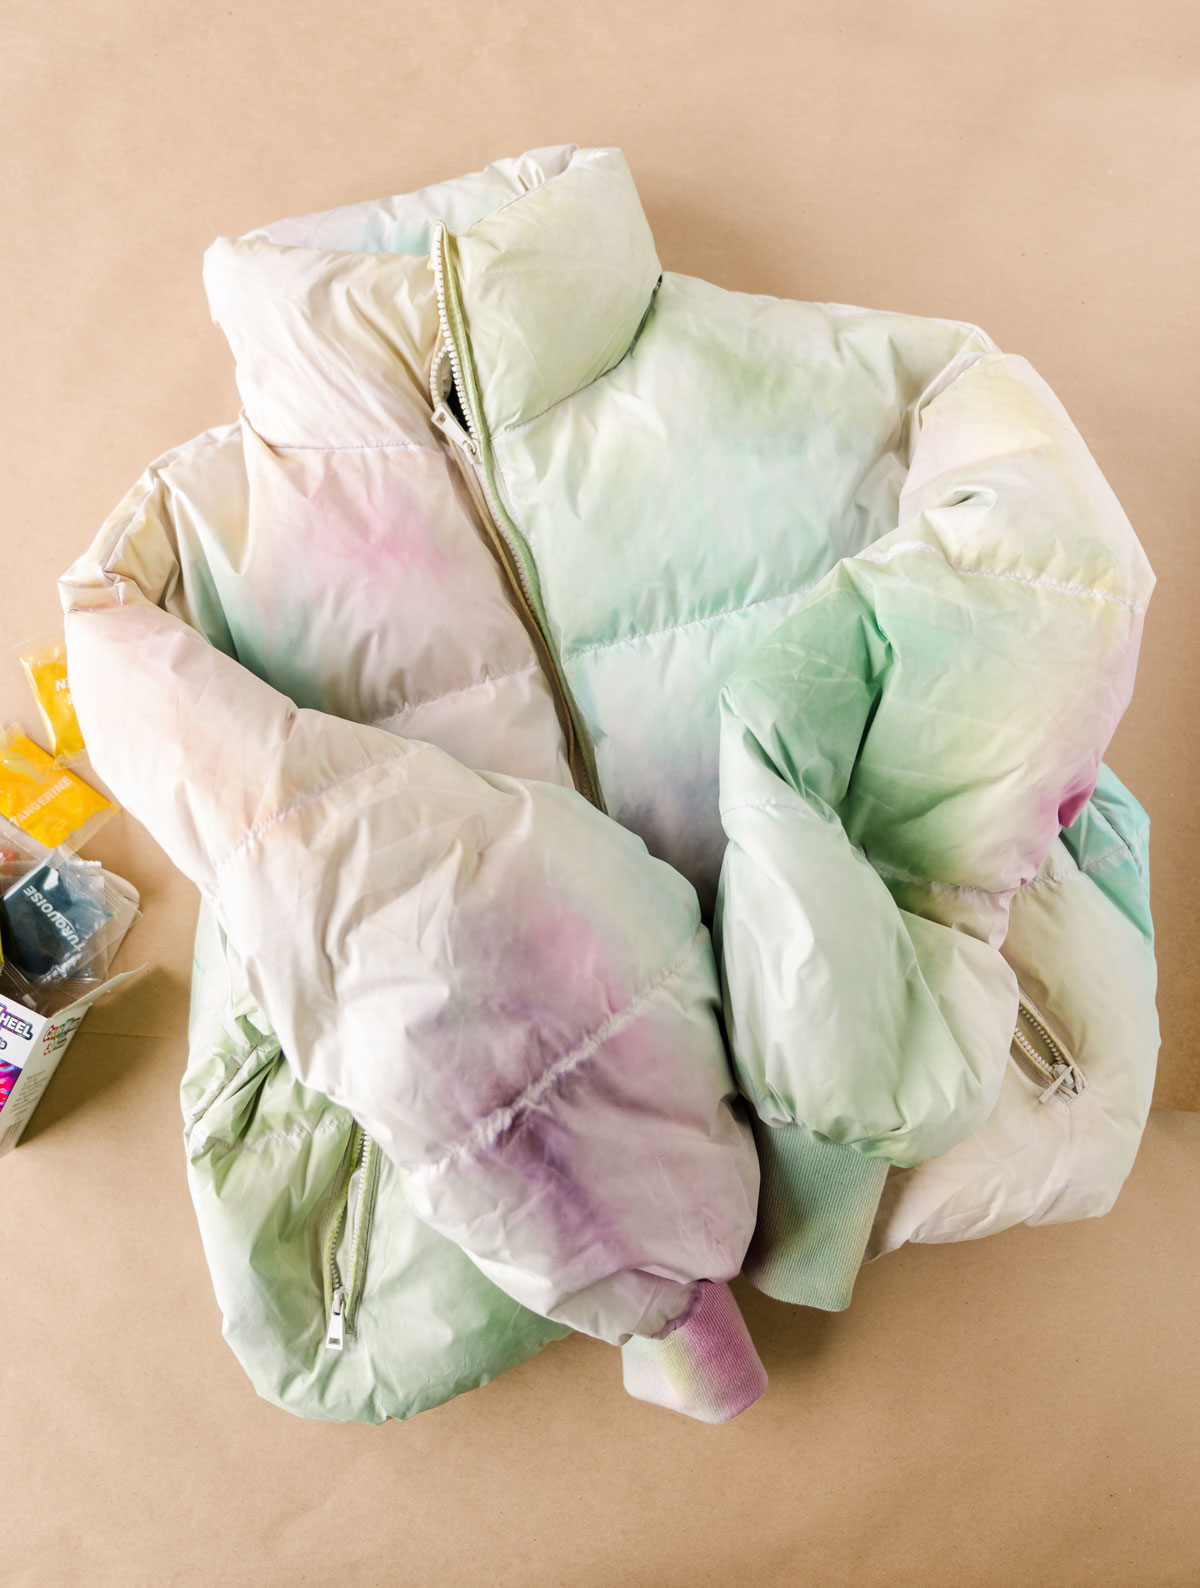
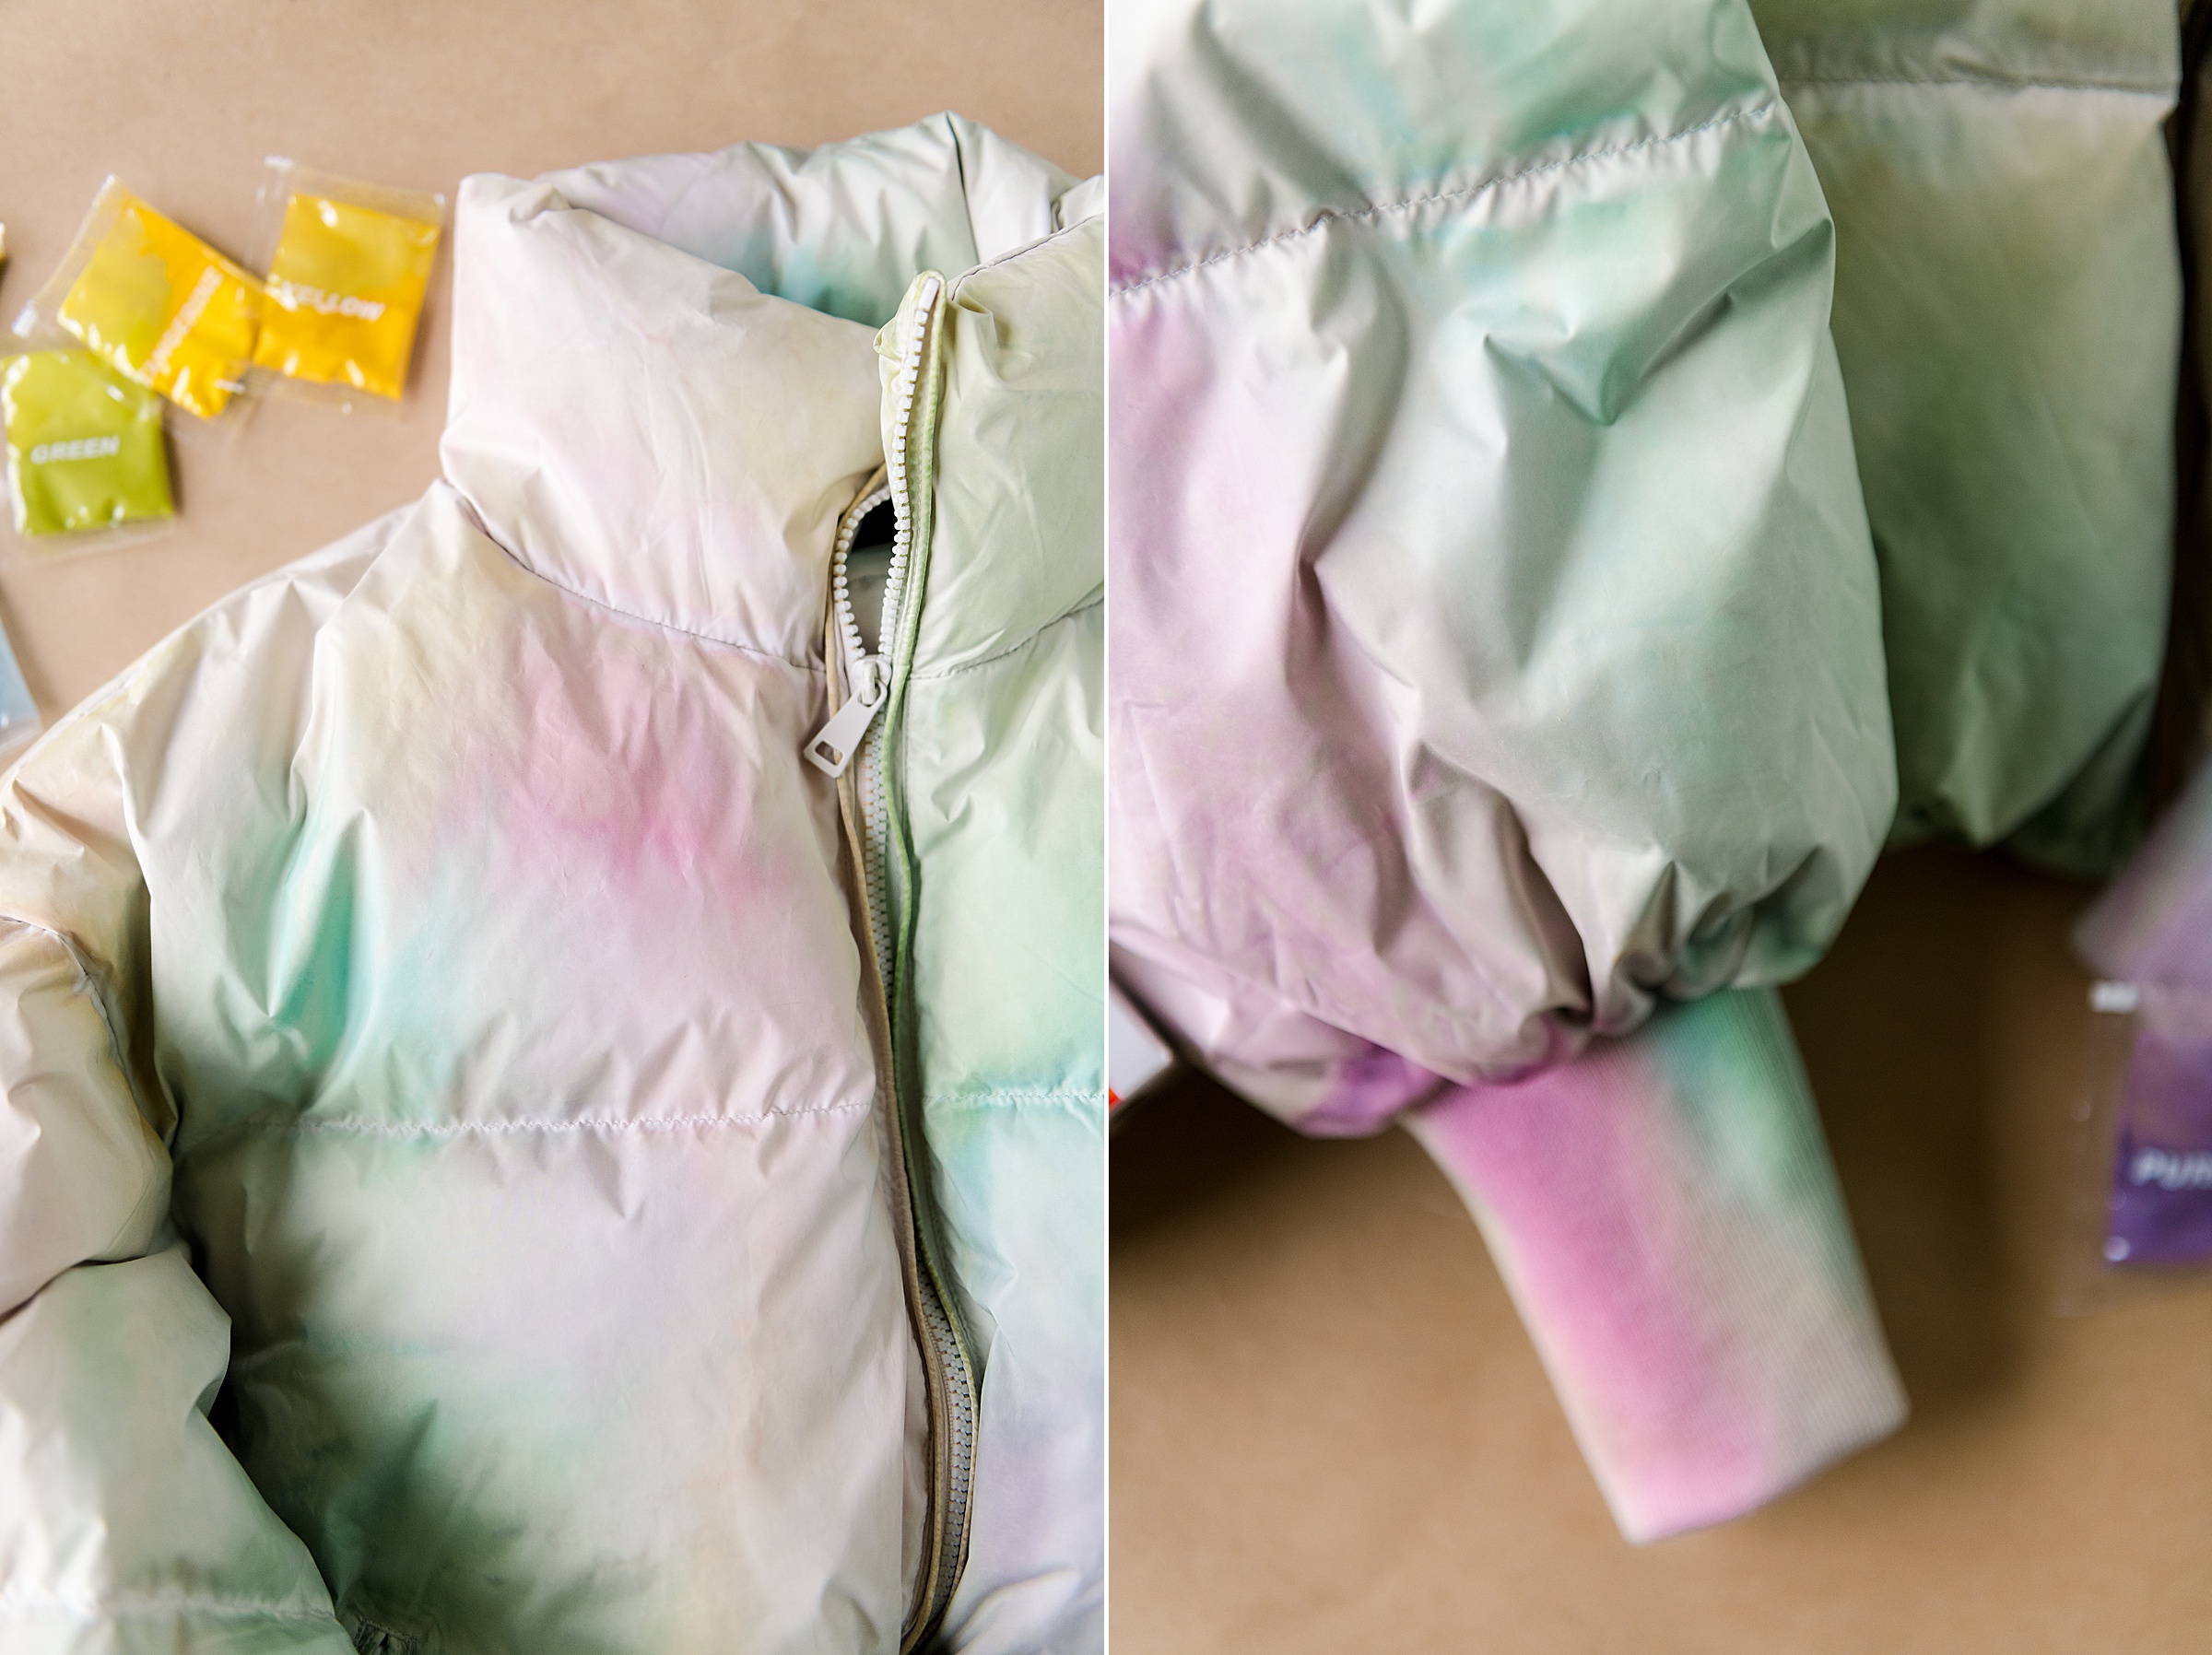
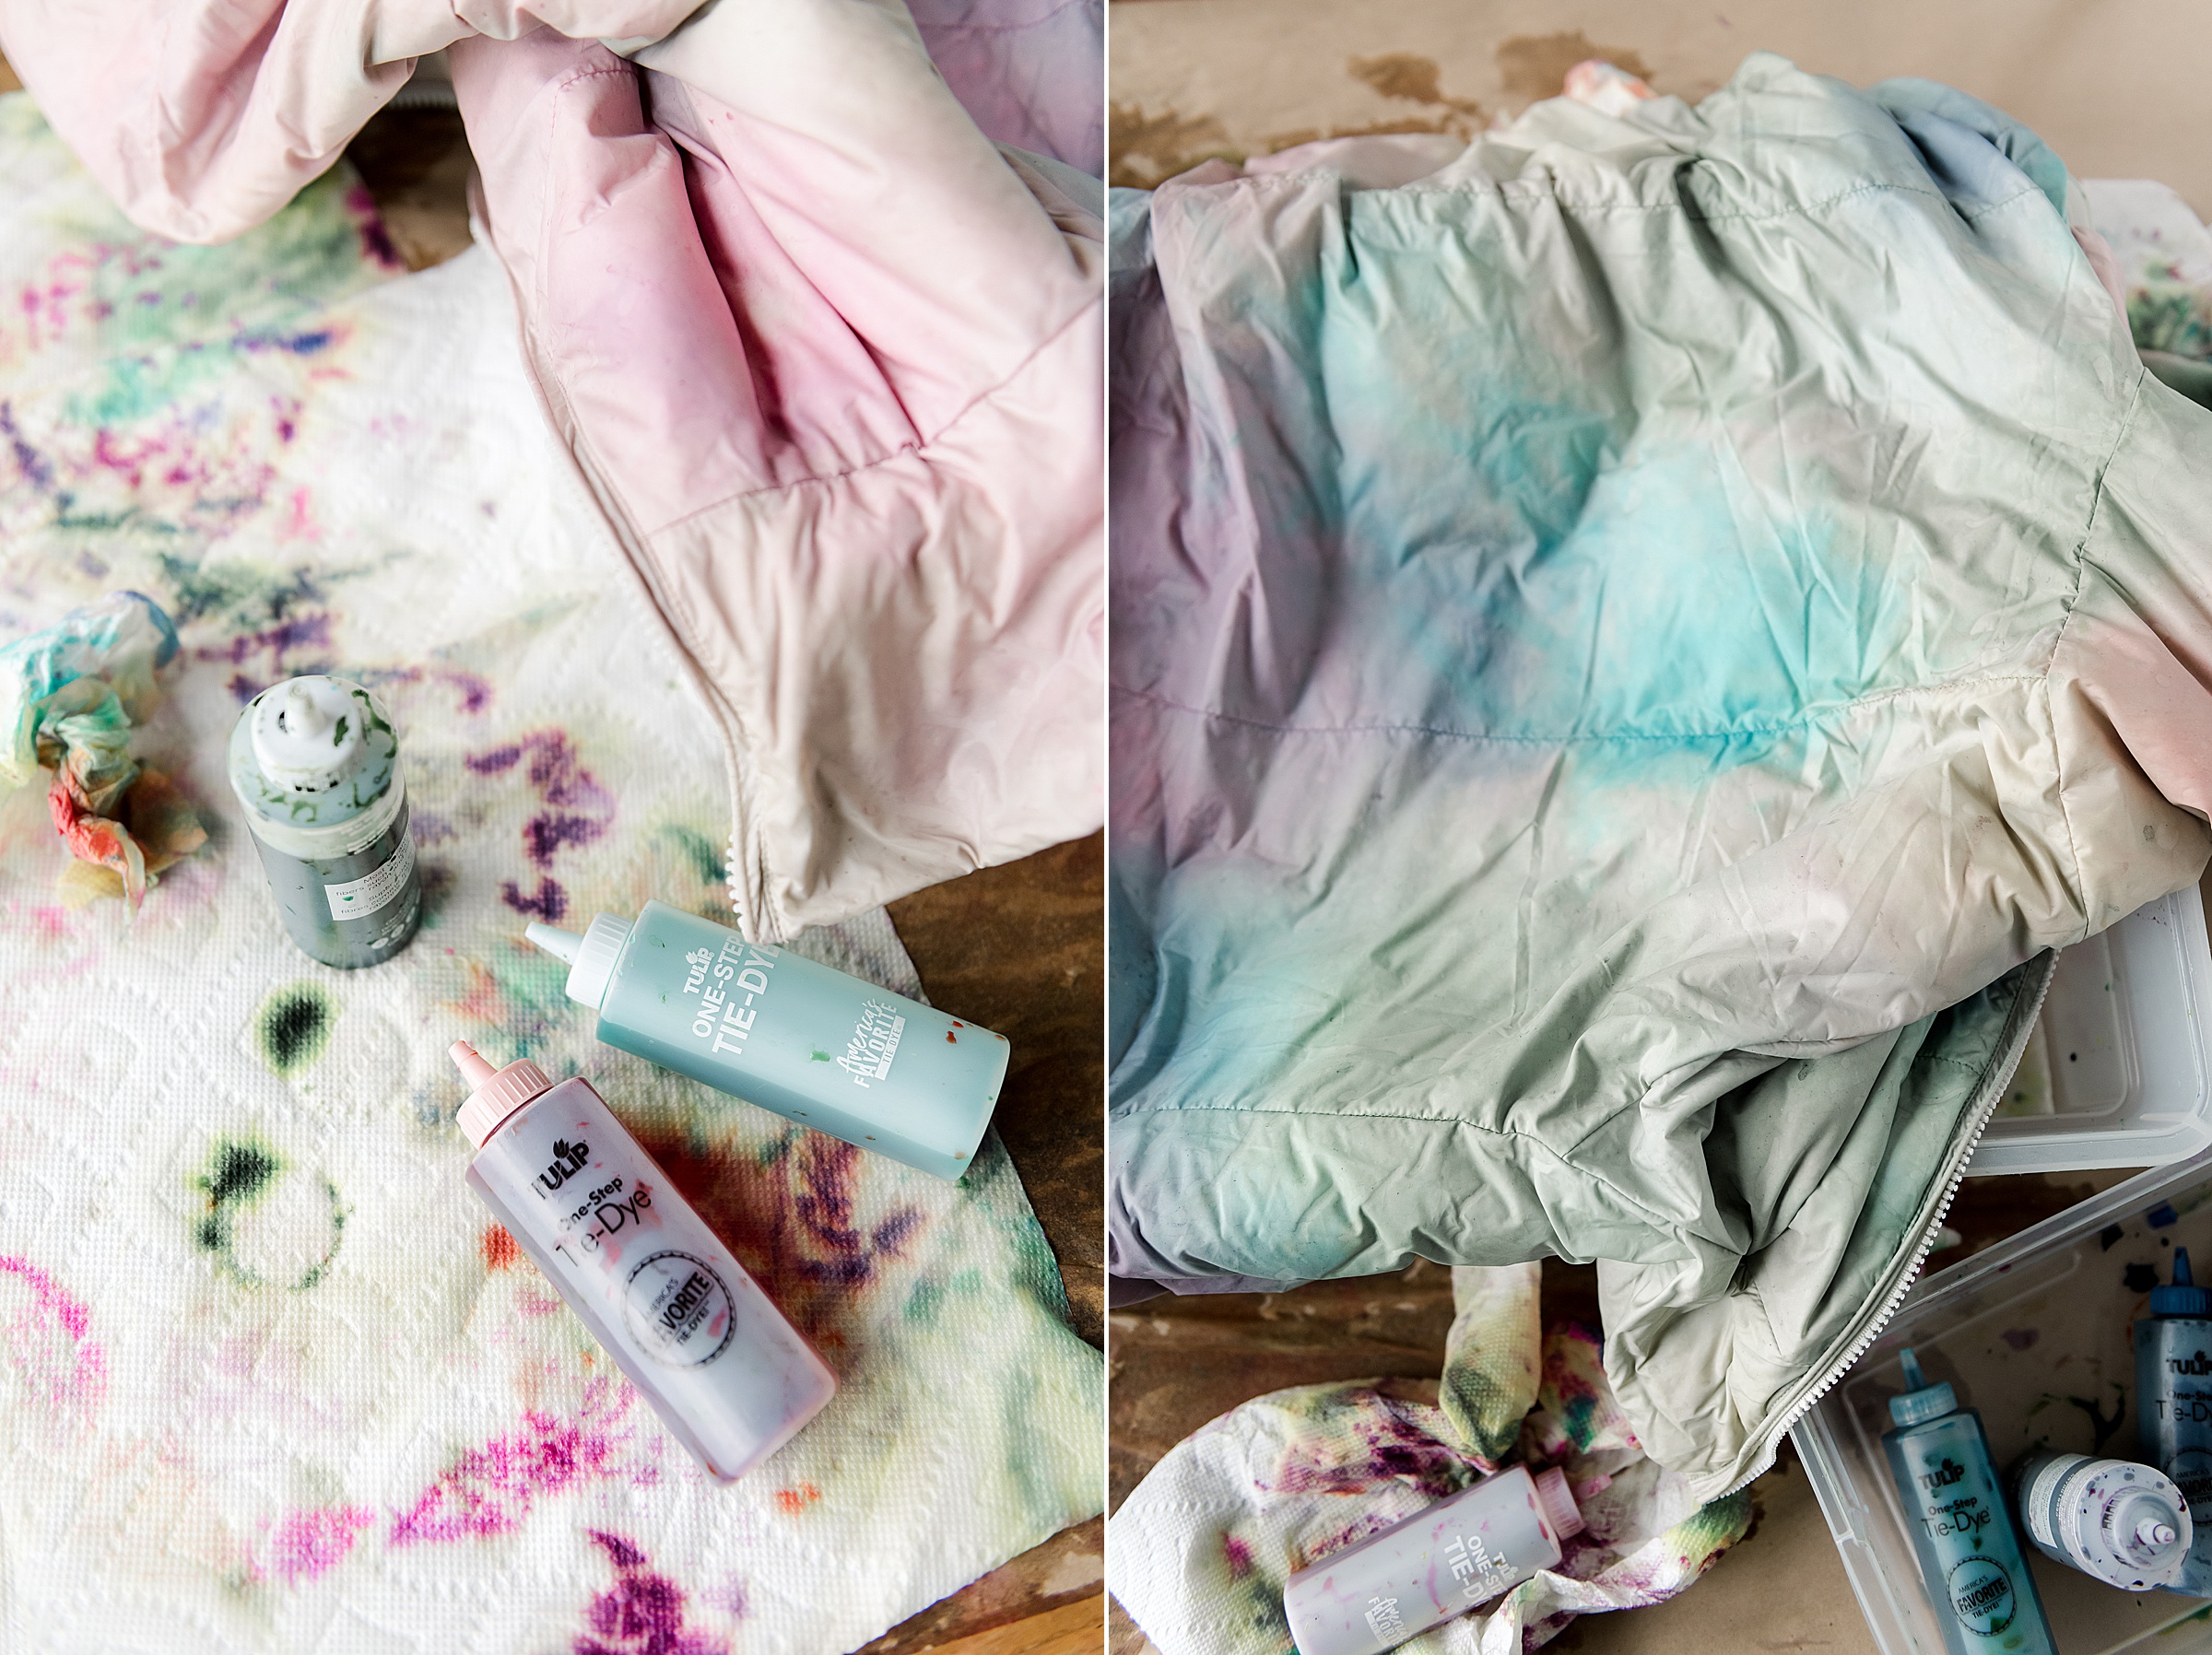
3. I decided NOT to tie up or bind my jacket – the goal I was going for here was a watercolor effect so I wanted to “manually” mix the colors together as I put them on the jacket without the scrunching or folding or binding together for a pattern 🙂
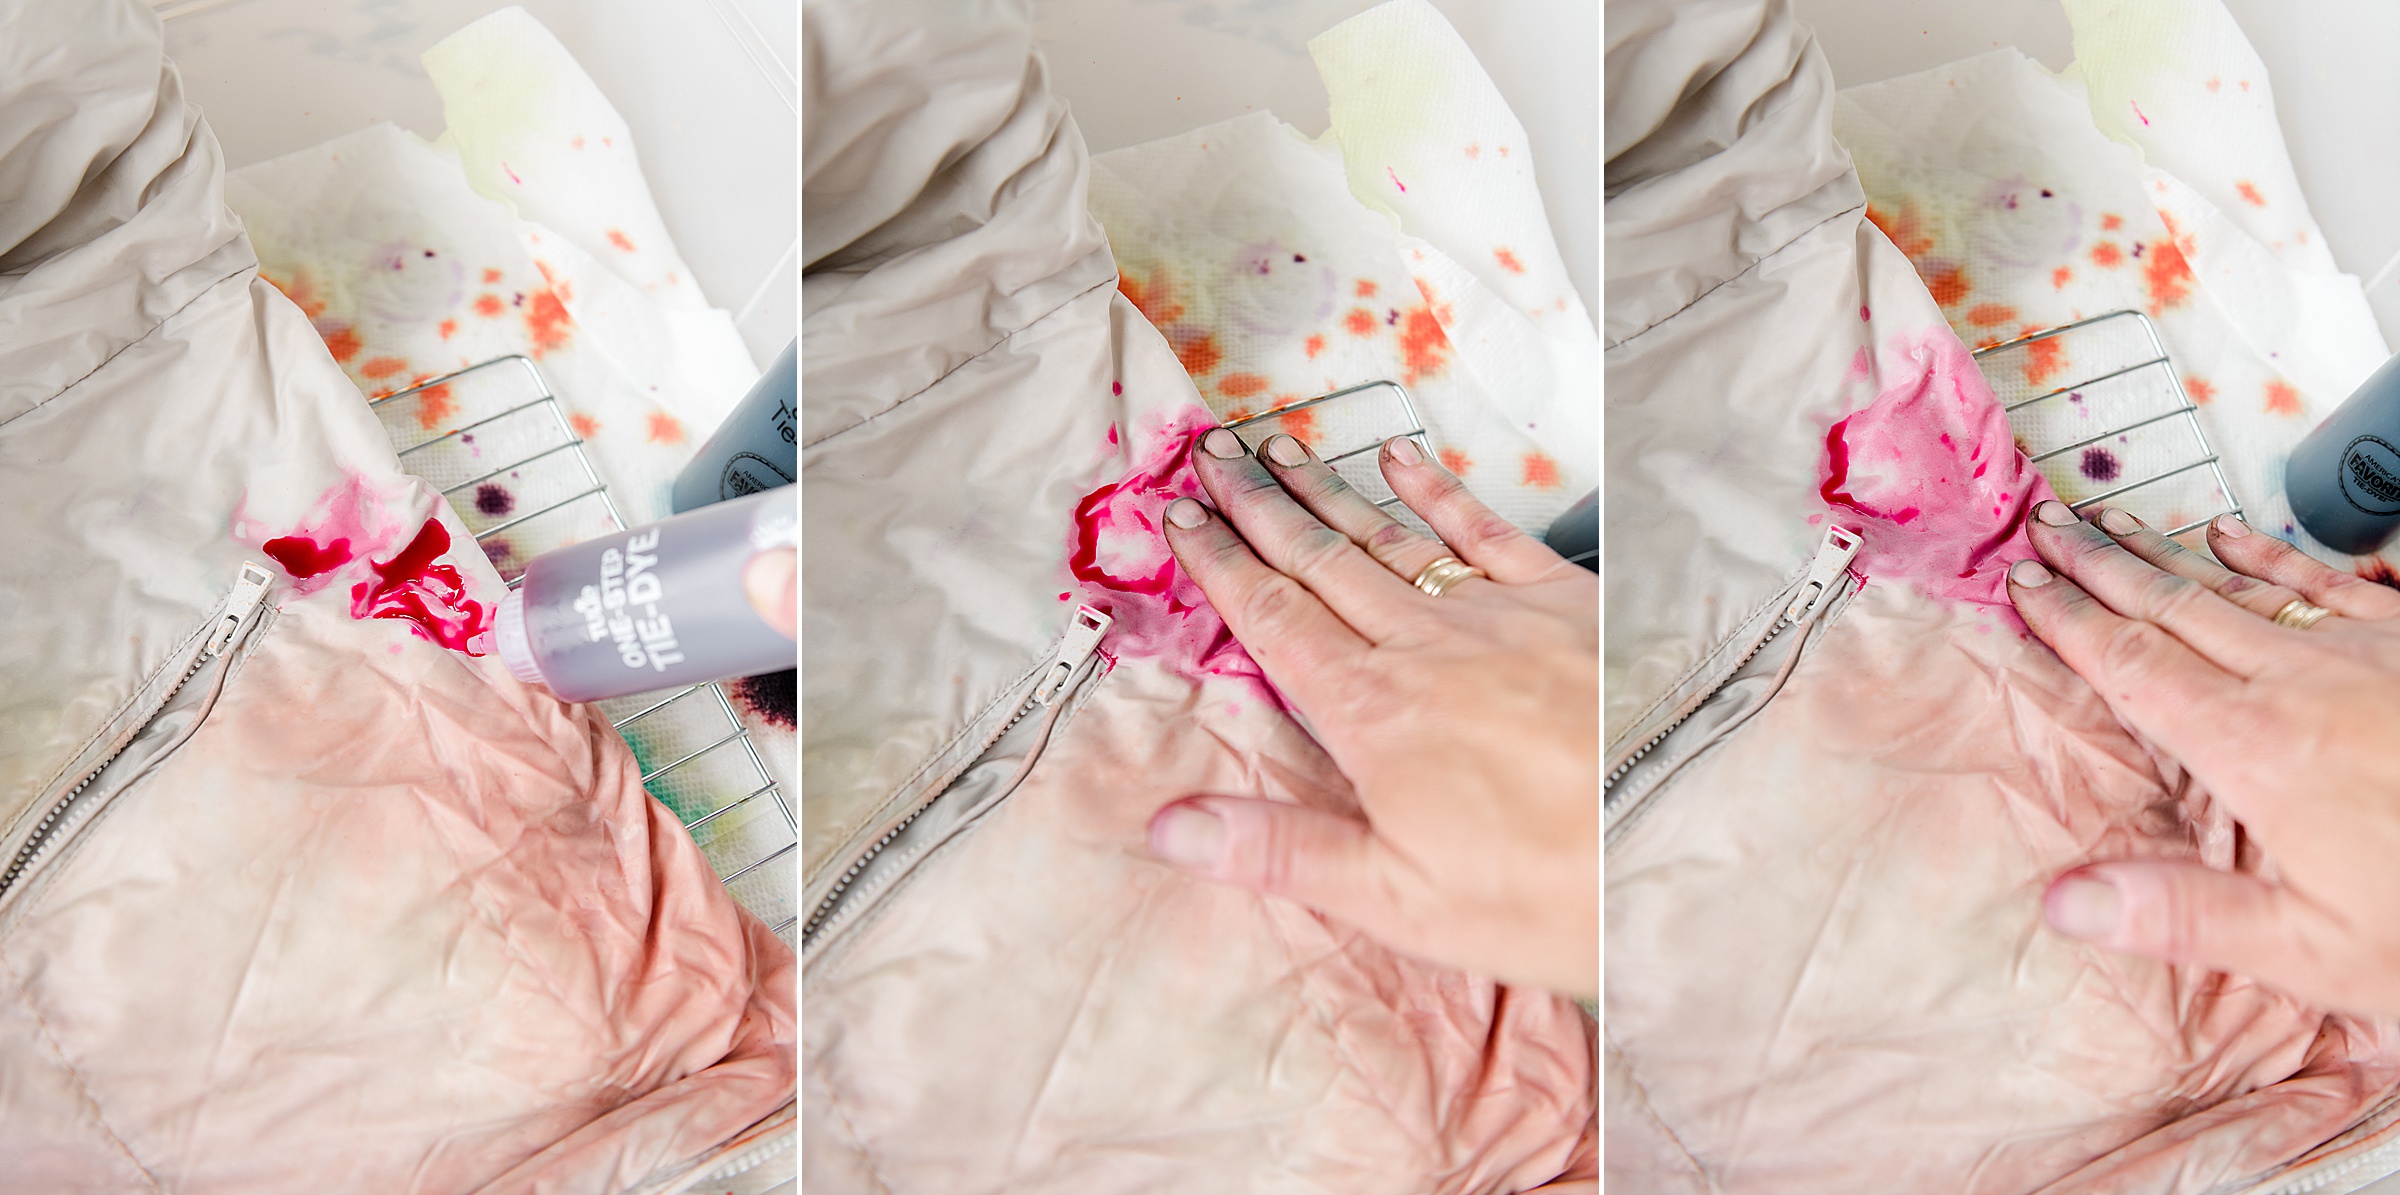
4. Begin to dye your jacket – the suppppper fun part! Here are some tips when dying this beast (and it feels like a beast because essentially there are 2 sleeves, 2 front sides and a back)! 🙂
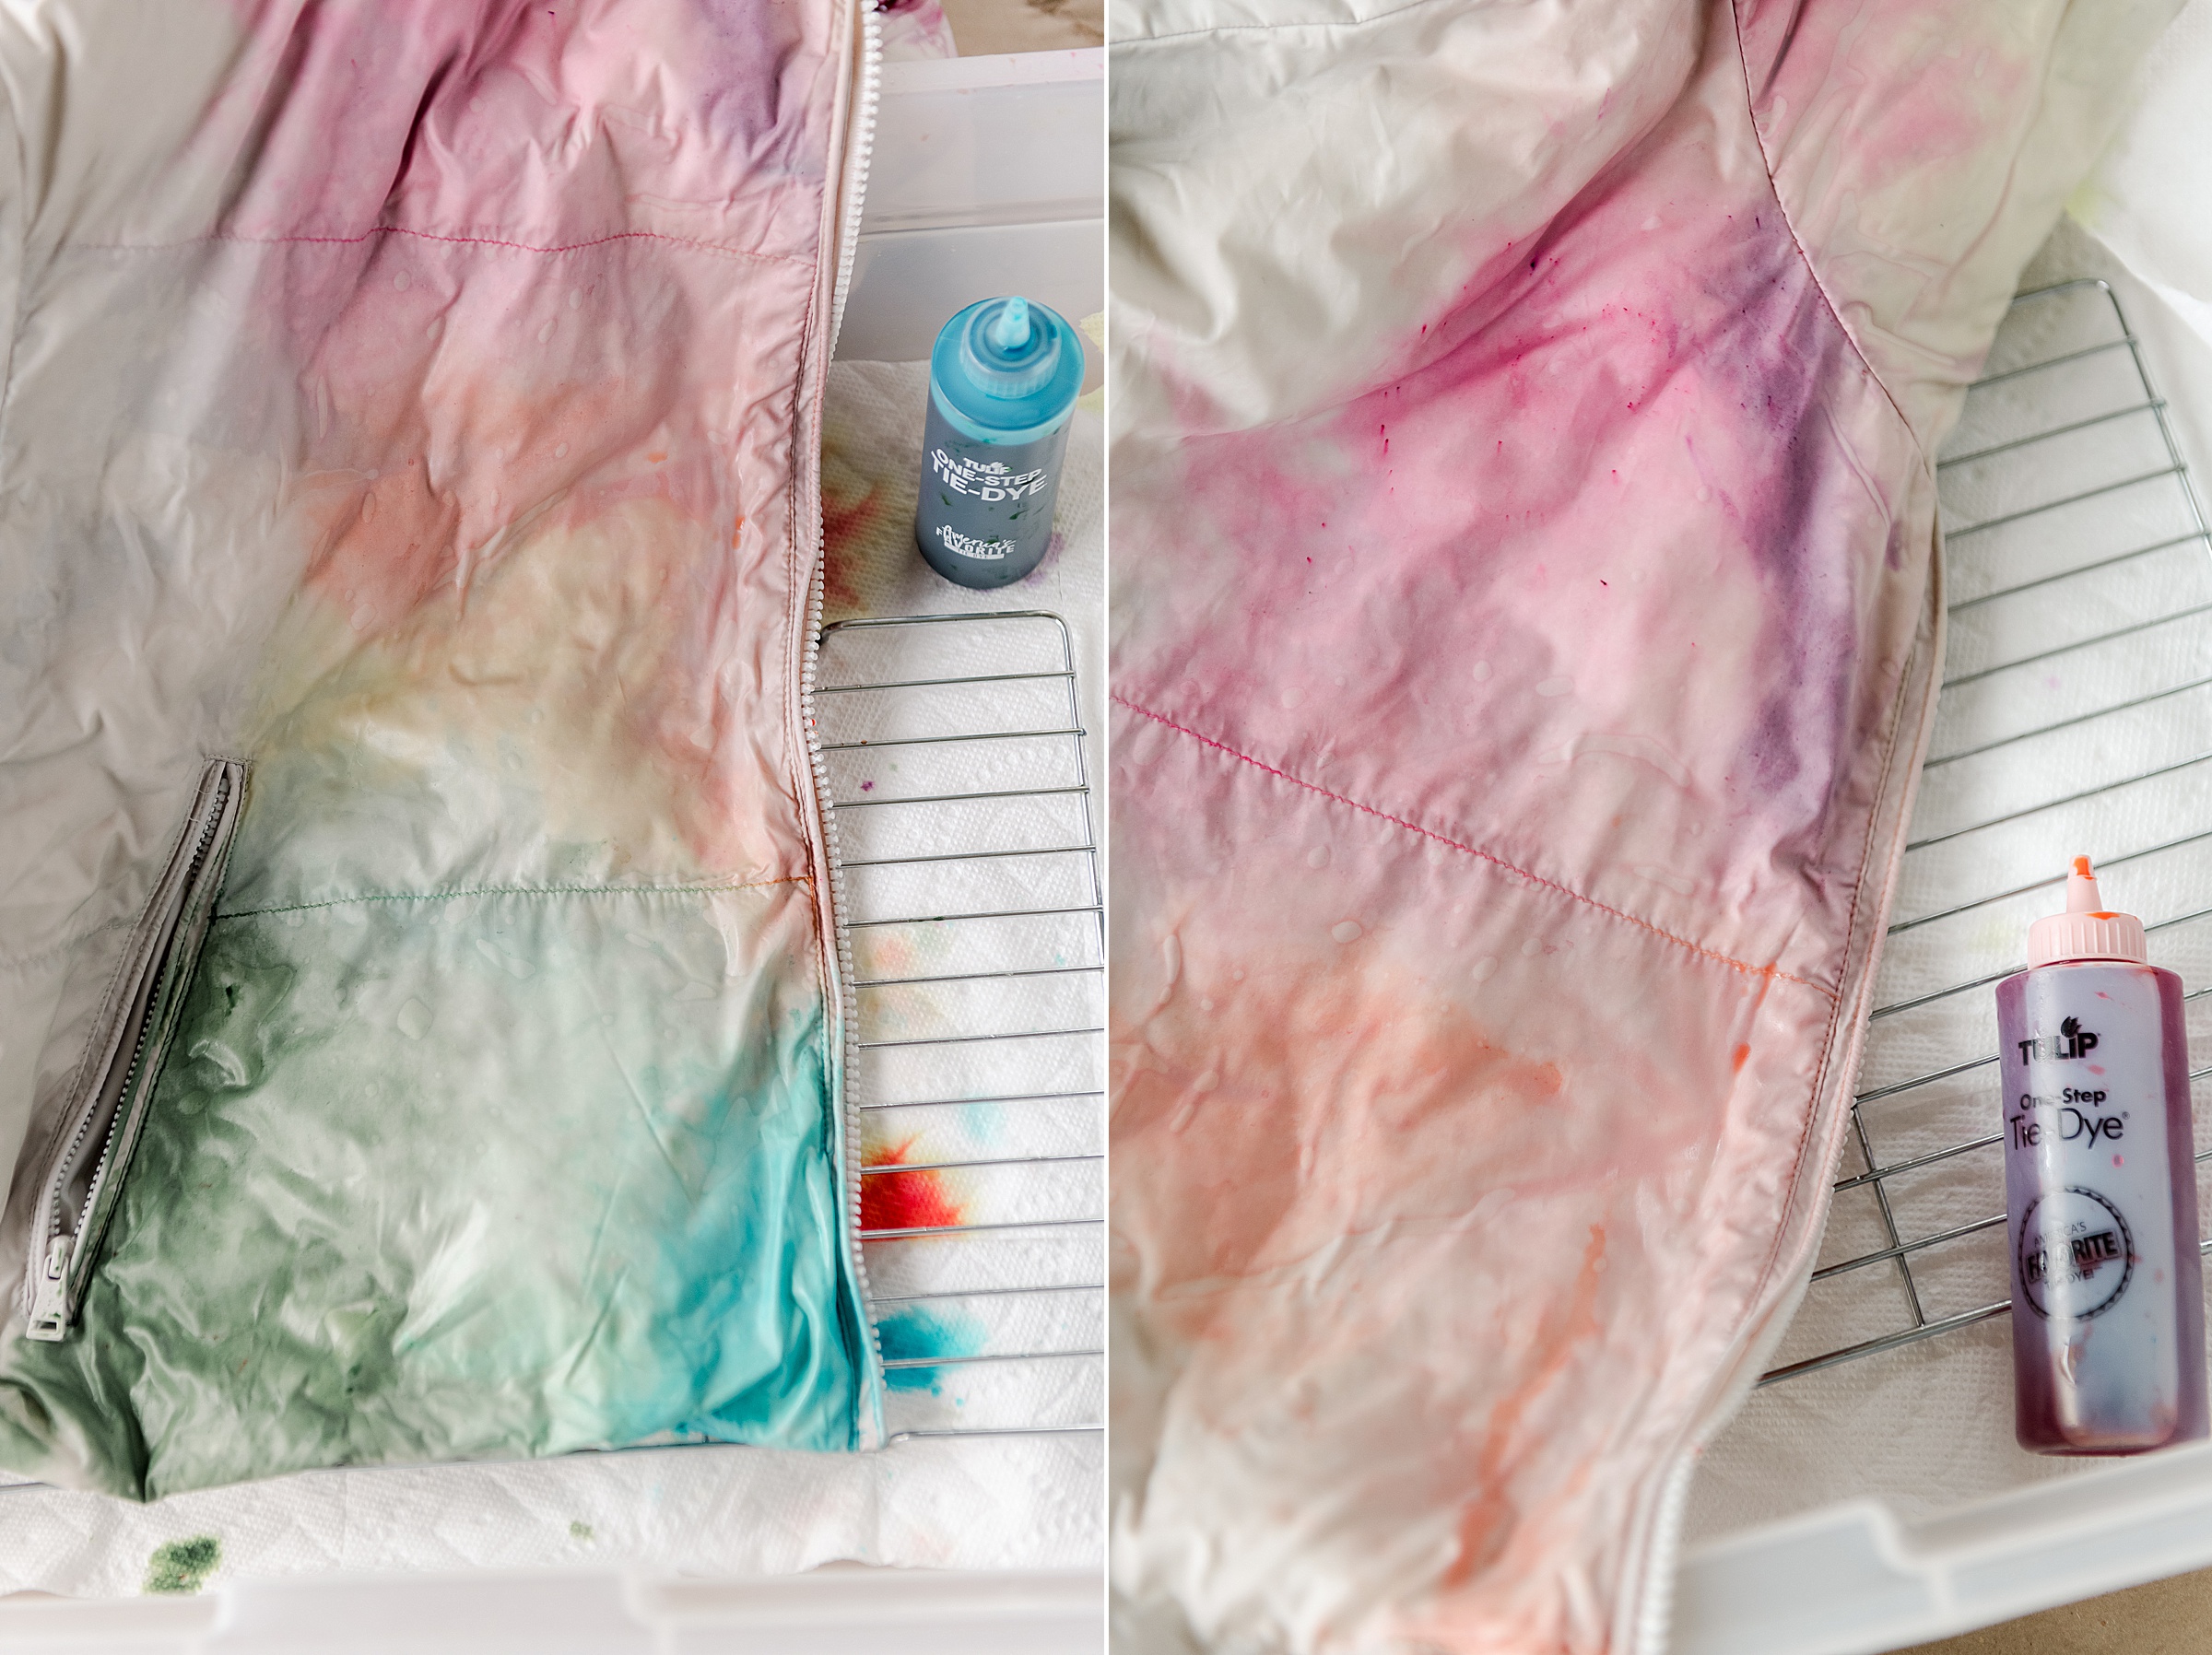
- Before you get dying, remember that the key to making this watercolor effect work is to know your color wheel (hence the color wheel refill kit that I got)! – Know that pink goes next to orange and orange goes next to yellow, etc. If you get too many colors next to one another that aren’t similar the colors will mix into a dirty brown effect….so just pull up a pic of the color wheel or have it in your head for reference as you’re dying
- I feel like the dye works best if you go slow and touch the tip of the dye bottle to the jacket. Squeeze gently as you dye and rub in with your hands or a towel to get it soaked into the feathers/layers of the jacket with each color and you will see it start to saturate — if you squeeze too much too fast, the it just squirts everywhere and leaves streaks of color.
- Start in one area of your jacket and just begin dying, then grab another color (overlap just a bit with the previous color) and squeeze, rub, squeeze, rub, etc.
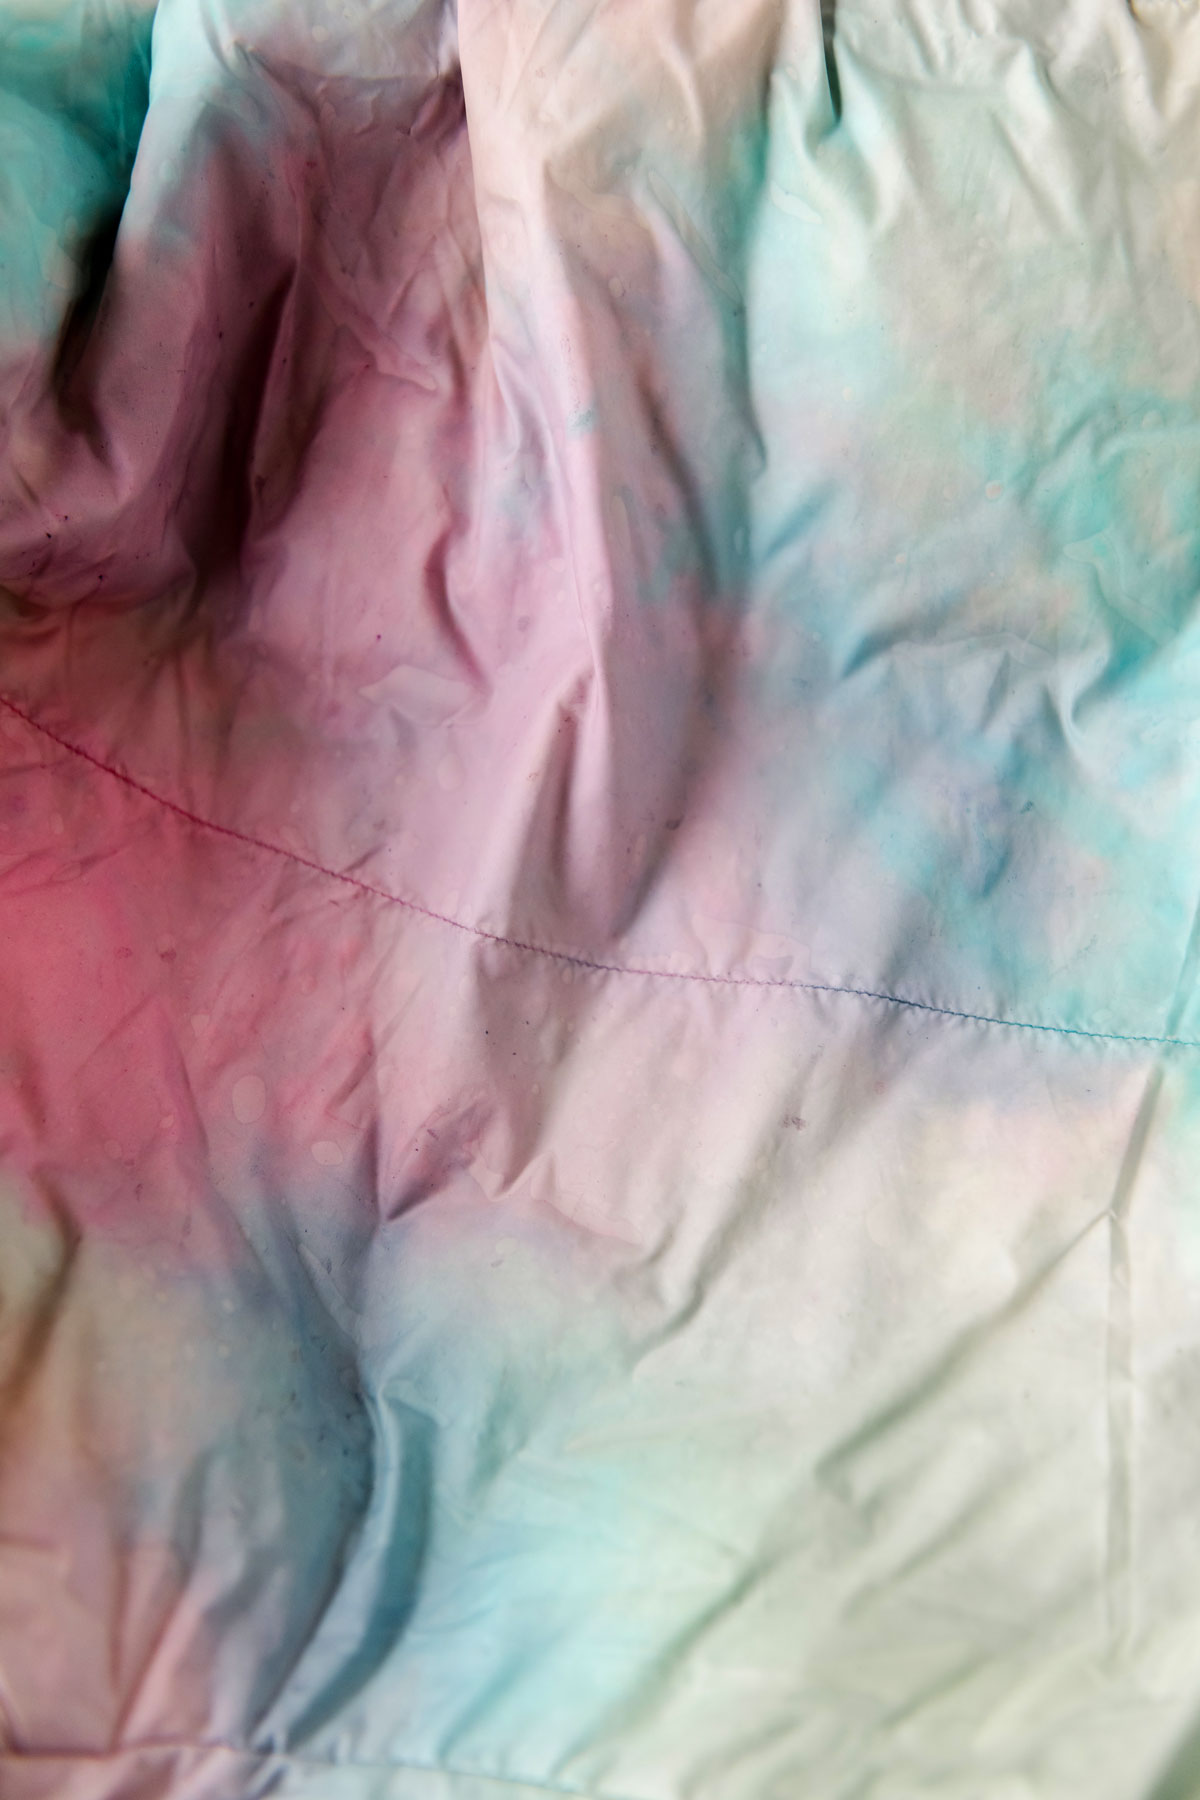
- You will see that because we are using NYLON (and not a 100% natural fabric) that the colors tend to be more watercolor or less intense, and I LOVE this! Keep going and know that even if the color isn’t INTENSE, that the dye is still working and you will get beautiful results! 🙂
- Be sure to get ALLLL sides – the front left, front right, back and each sleeve (uuhhhf)! 🙂
- Be careful not to overlap too many parts of your jacket as you’re dying so that the dye doesn’t “sit” onto a part that isn’t dyed yet to transfer color 🙂
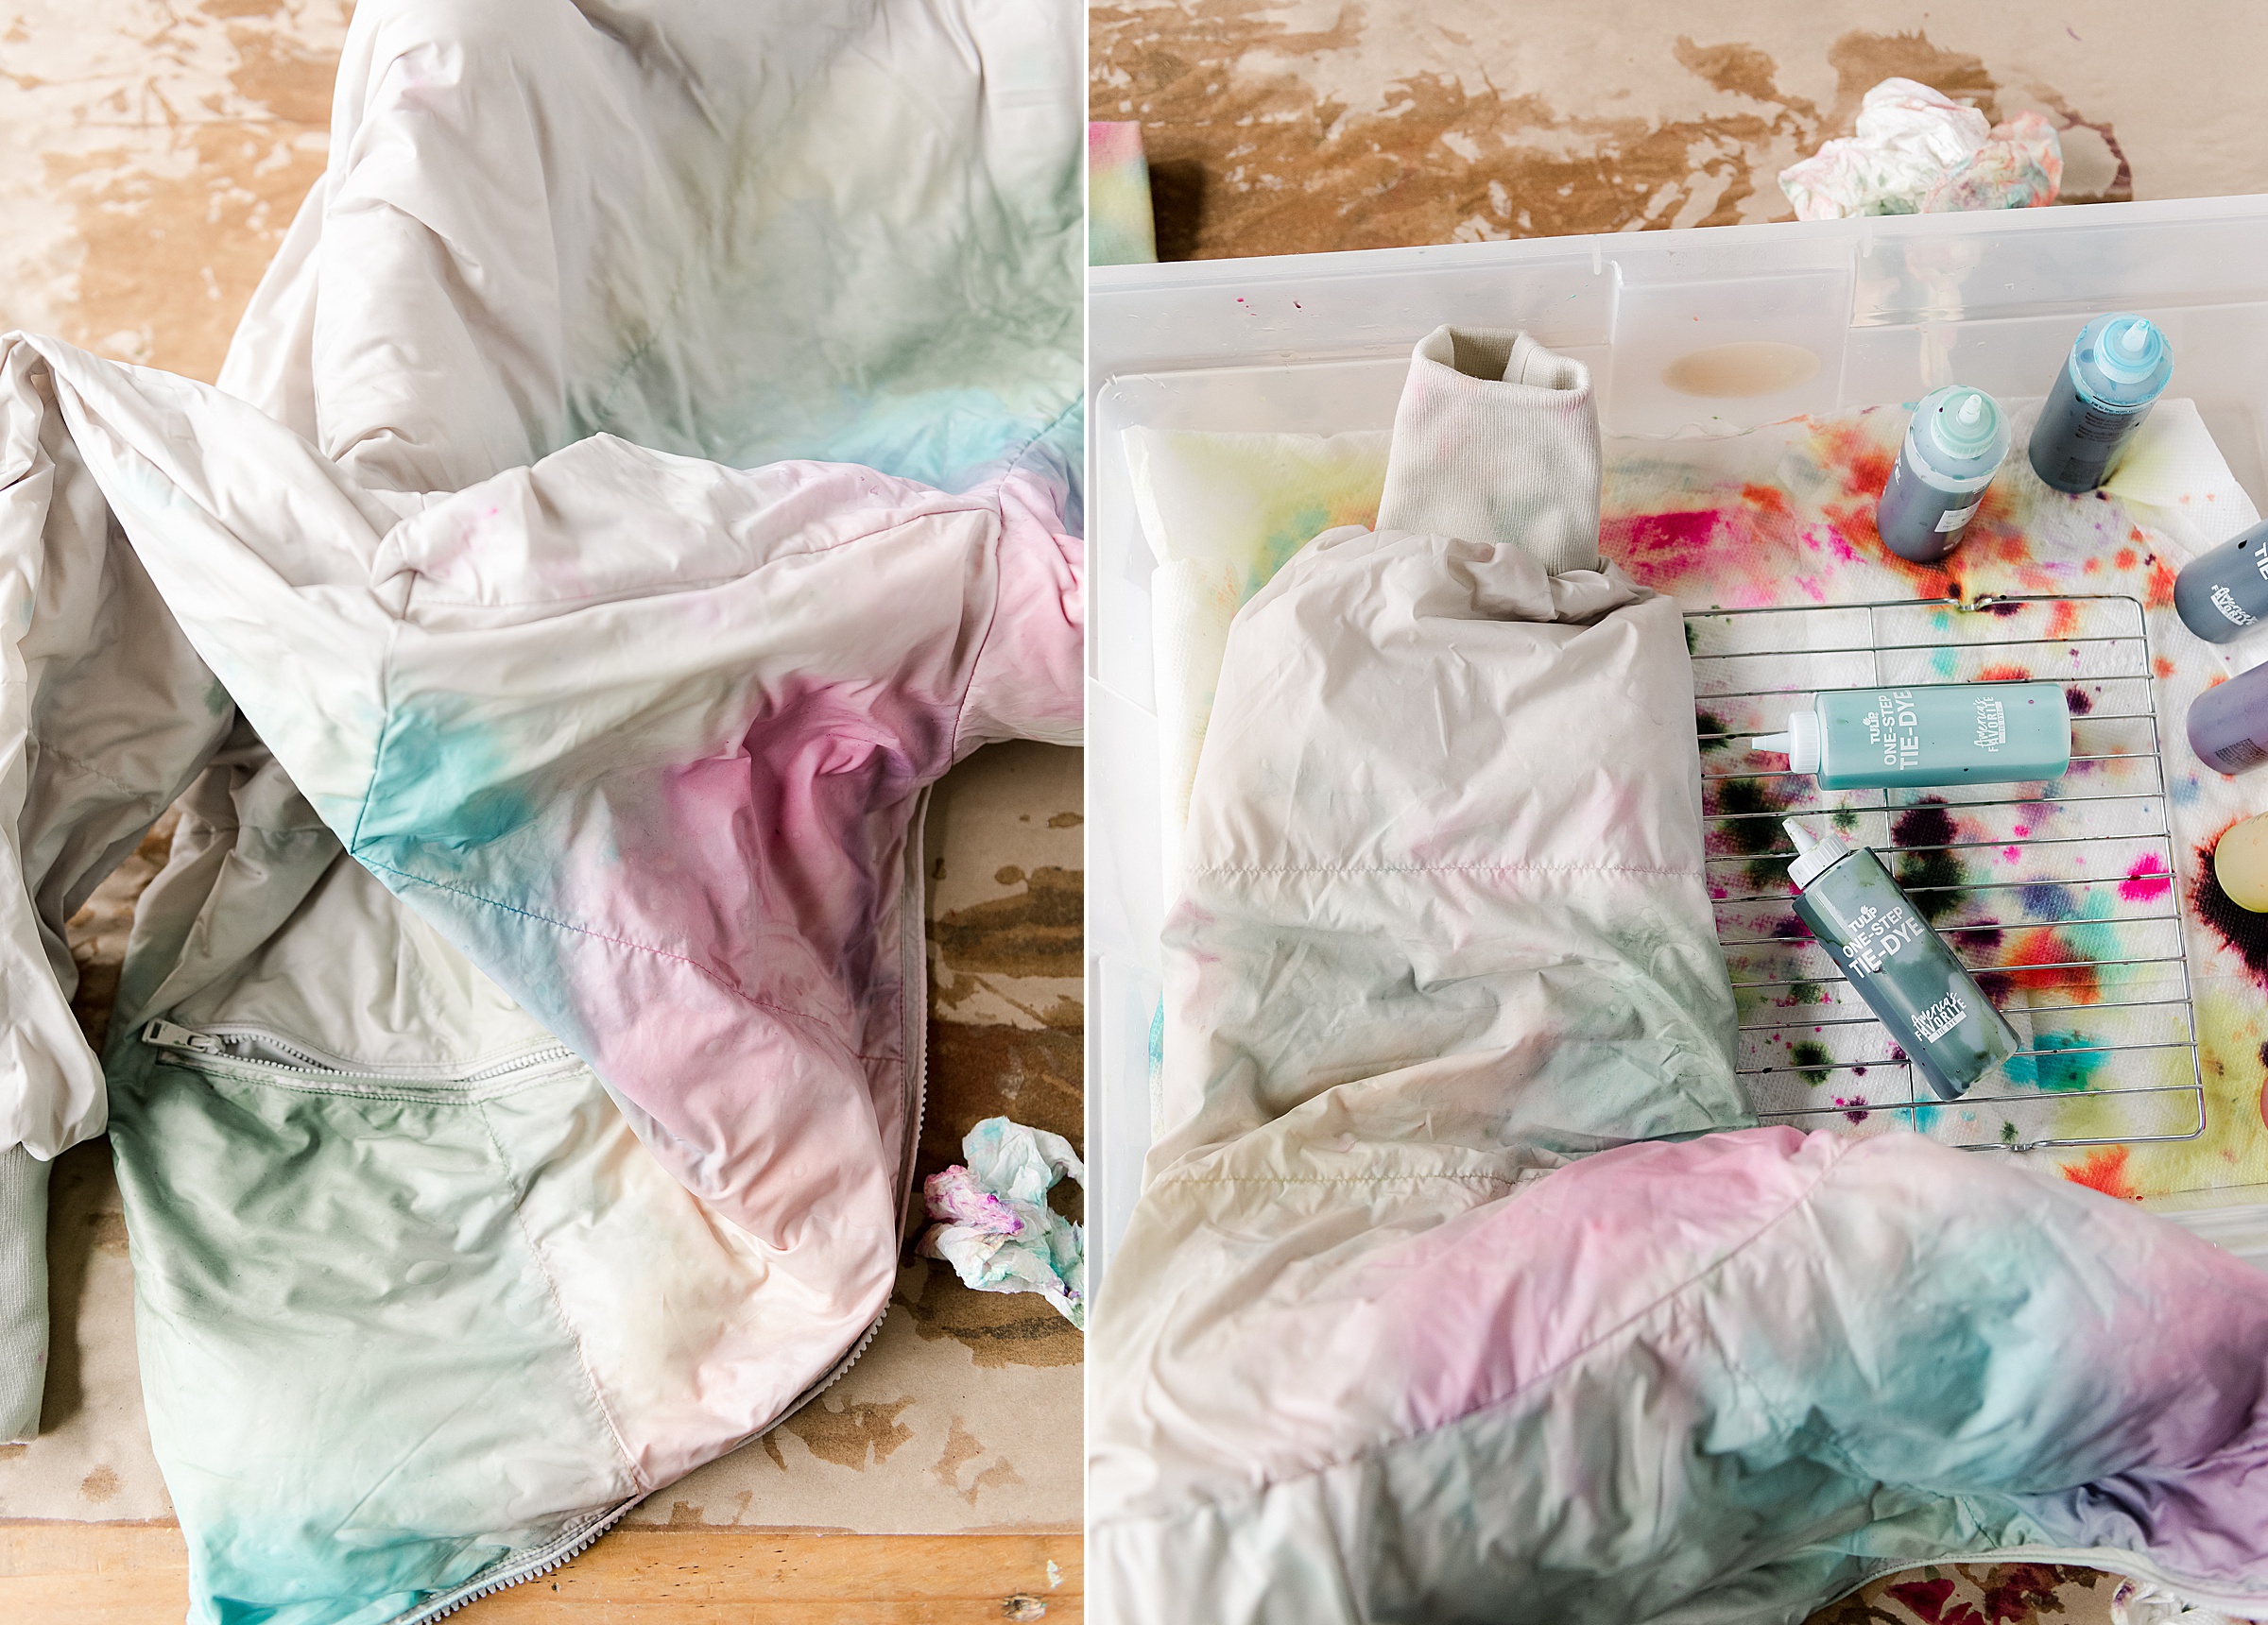
5. Once every area of your jacket are covered it’s time to let it sit. Either cover the tray with plastic wrap or remove the jacket and place it gently into a garbage bag or container. Allow to sit overnight (at least 6 hours)……the longer you let it sit, the more vibrant the colors 🙂 The key here is to seal the jacket so that it doesn’t t dry but that the dye permeates the fabric 🙂
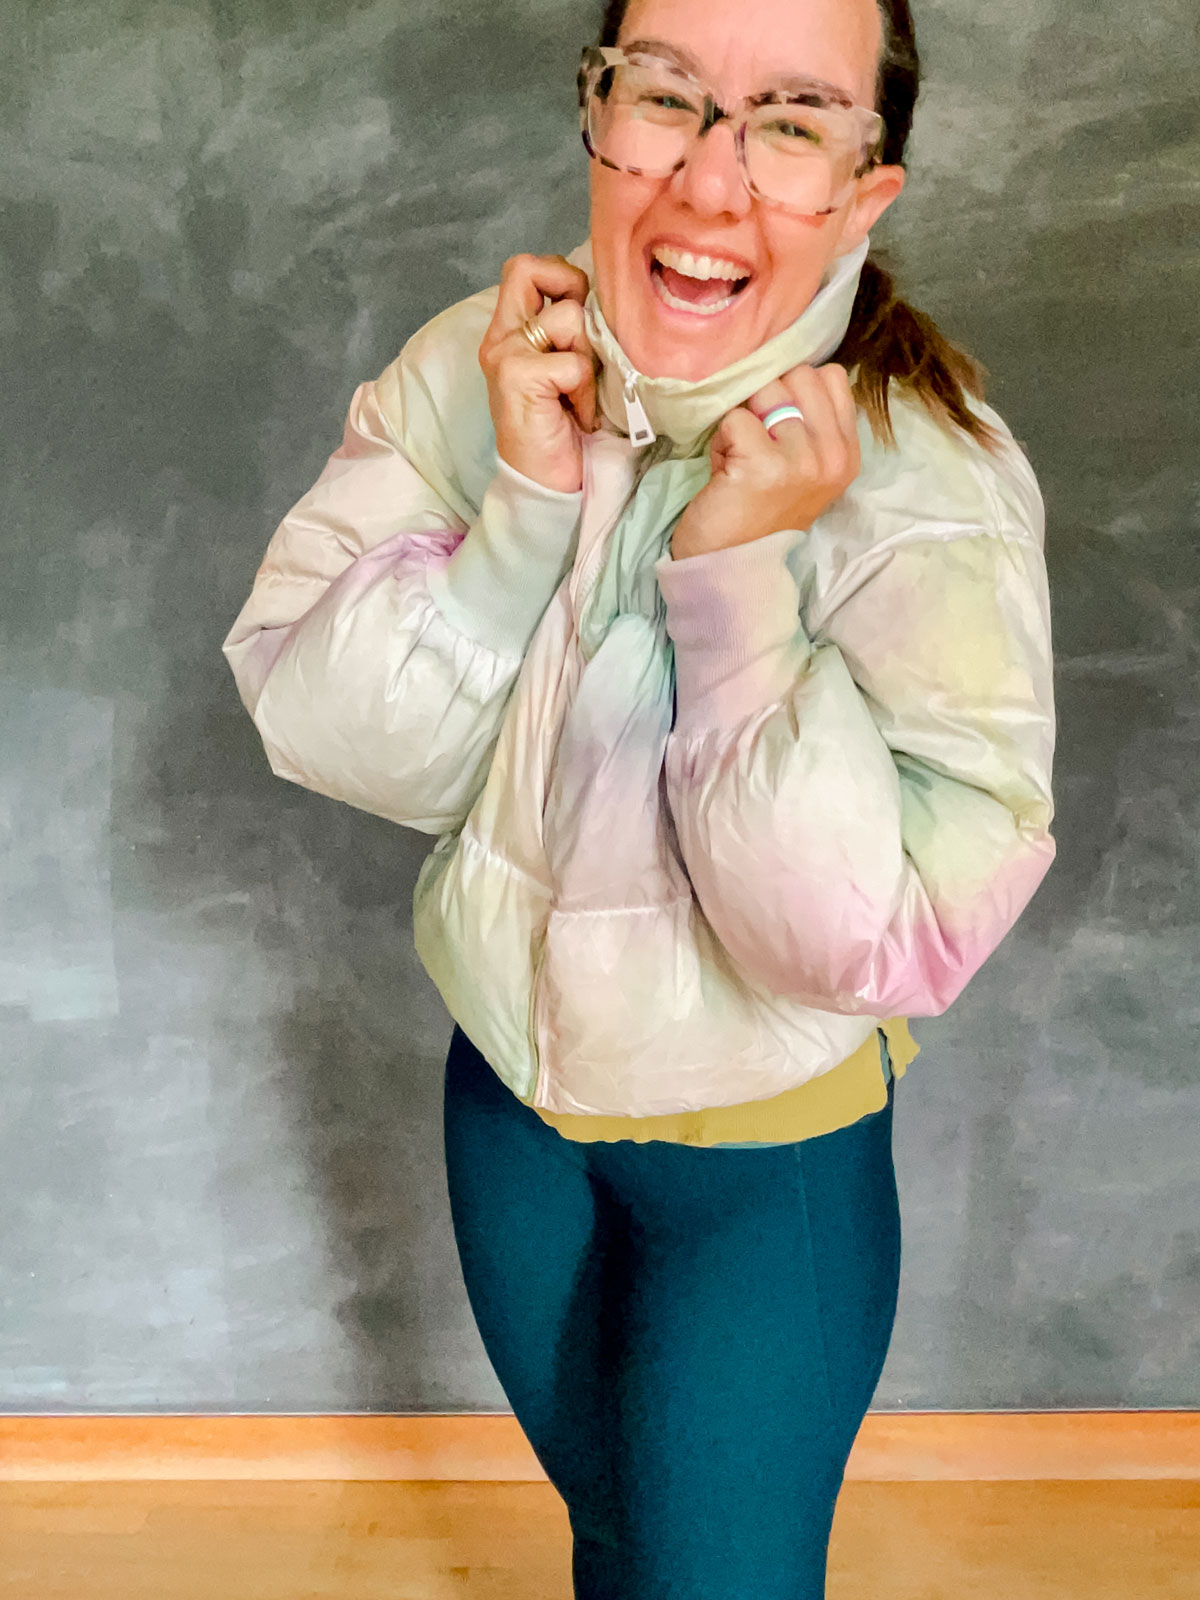
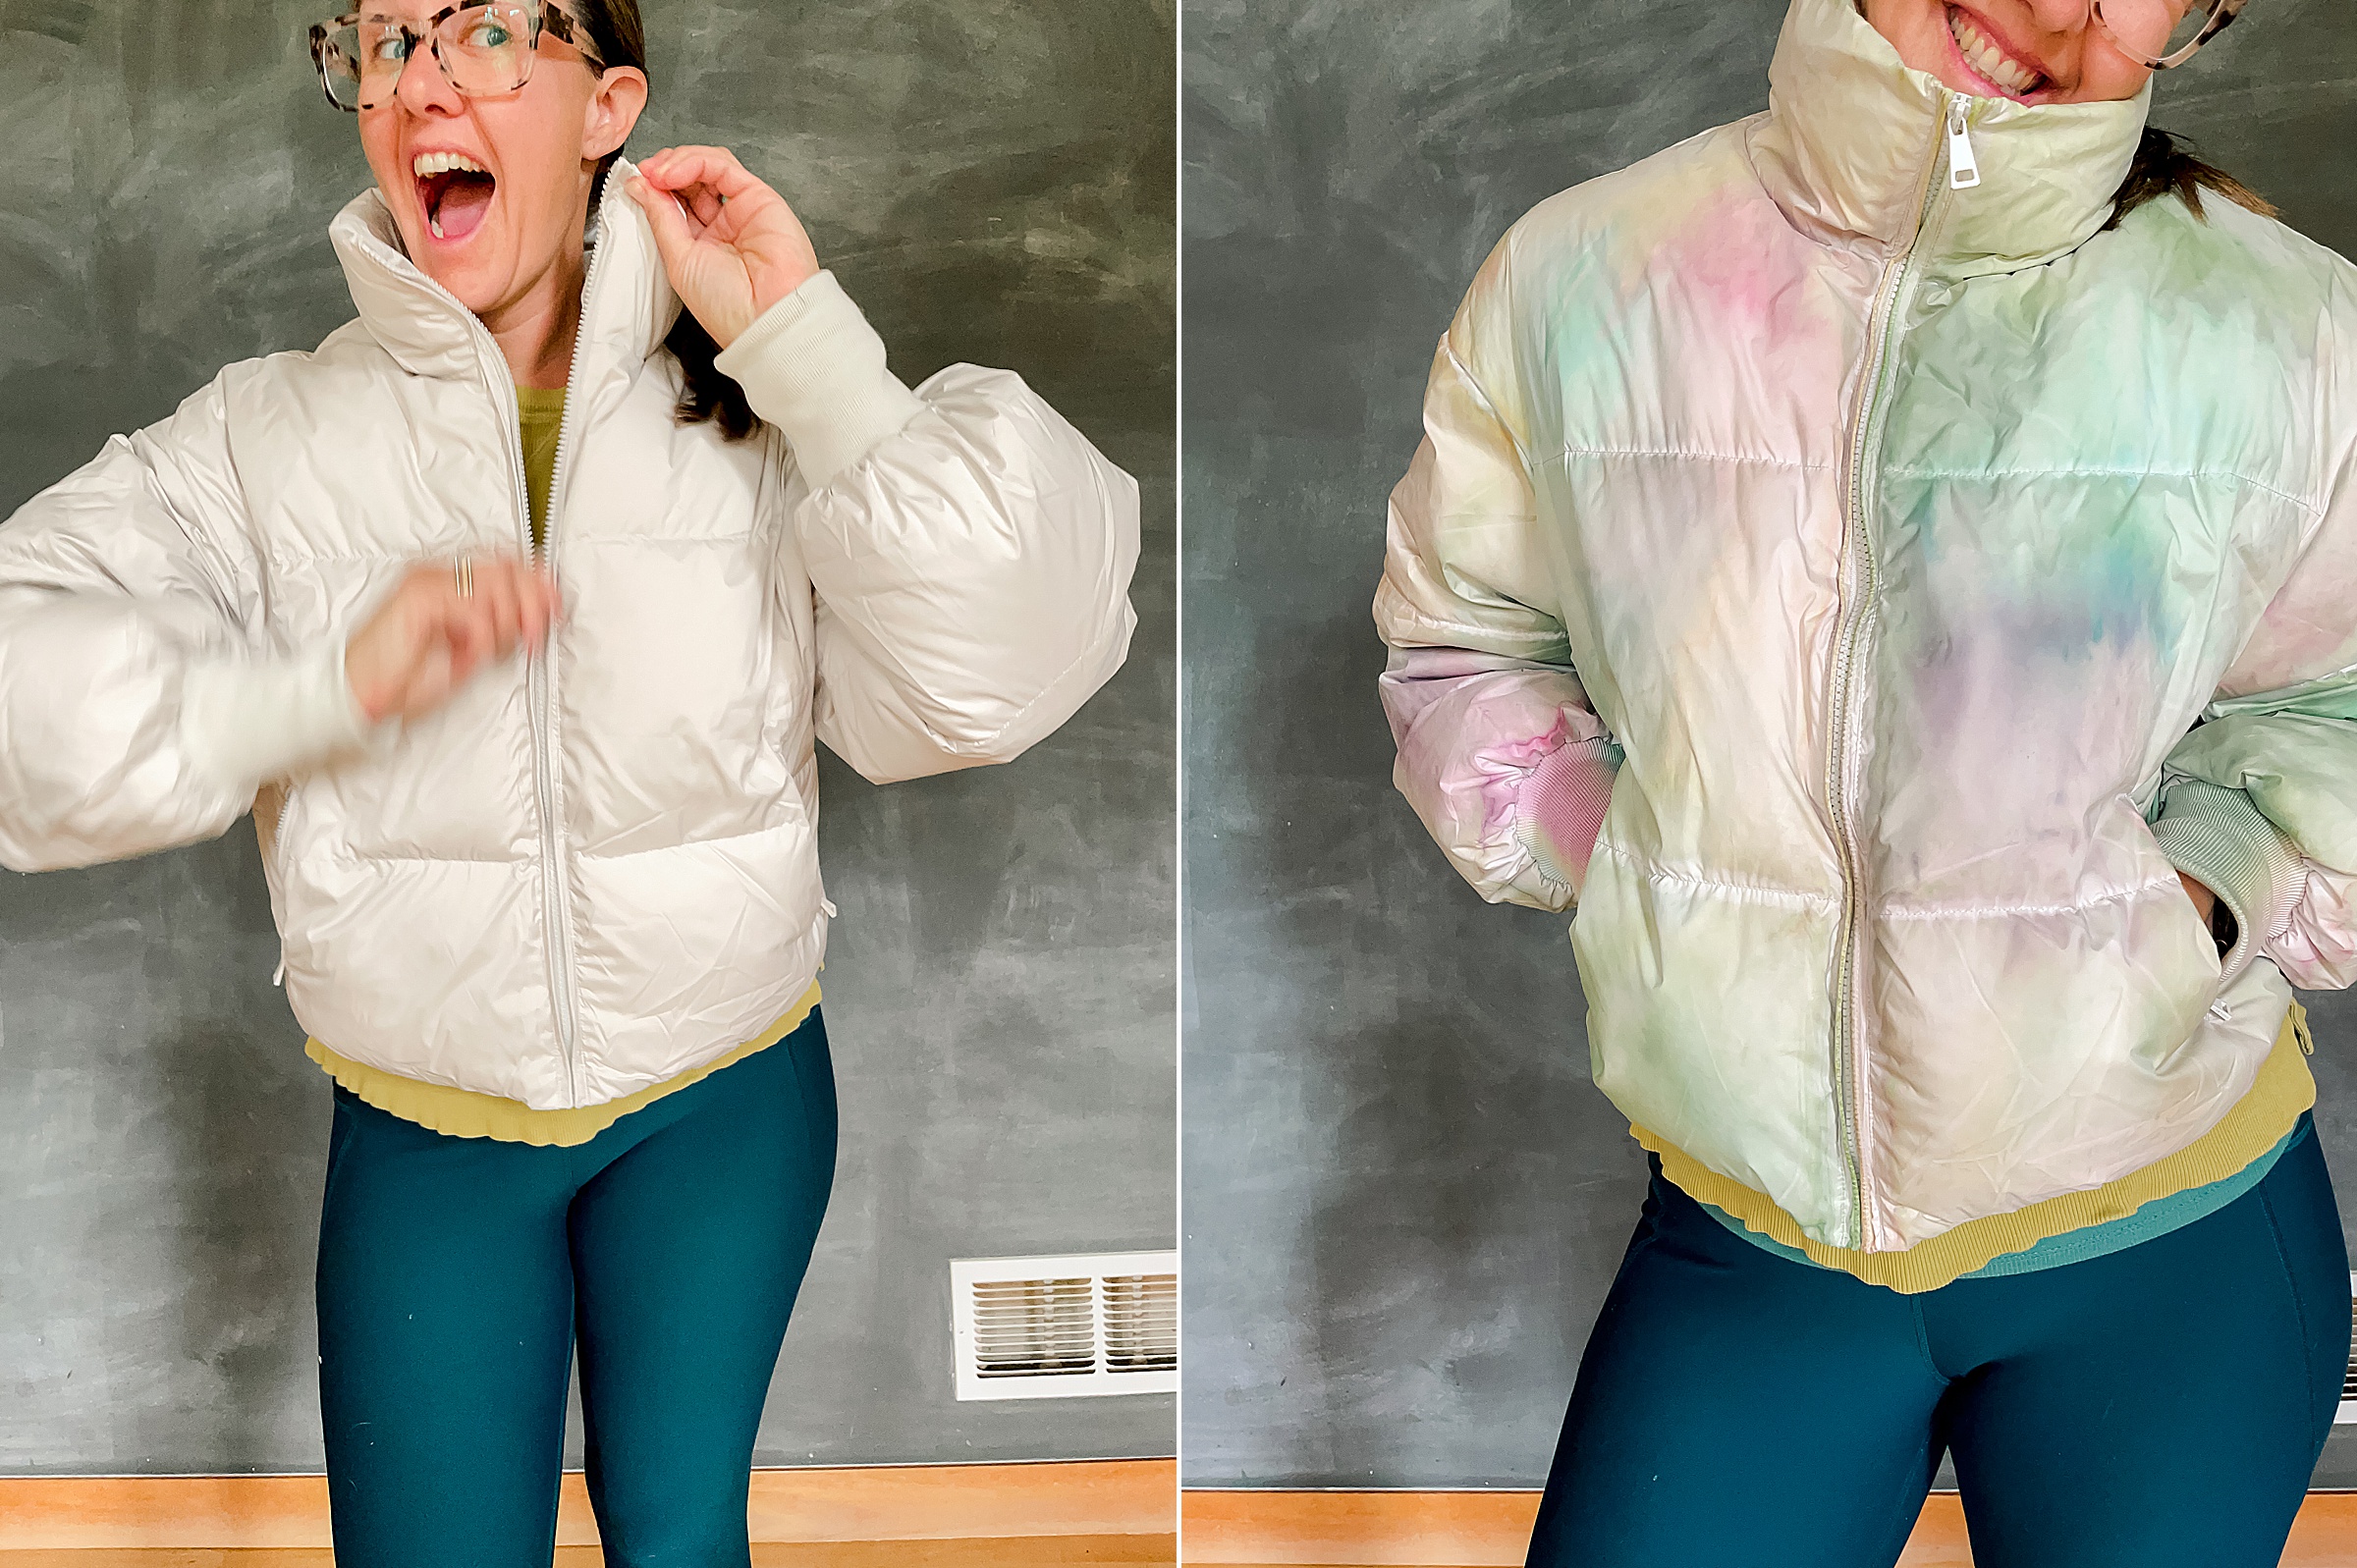
6. THE FUNNN PART!
Now it’s time to reveal your amazing dye job! Carefully take the jacket out of the bag or container or unwrap your plastic and rinse the excess dye (in cold water)! Then run the jacket through a quick cycle in the wash and dry it and go show off your beautiful jacket to the WHOLE WORLLLLLLD because I’m sure you will be beaming at how amazing your tie dye skills are! 🙂