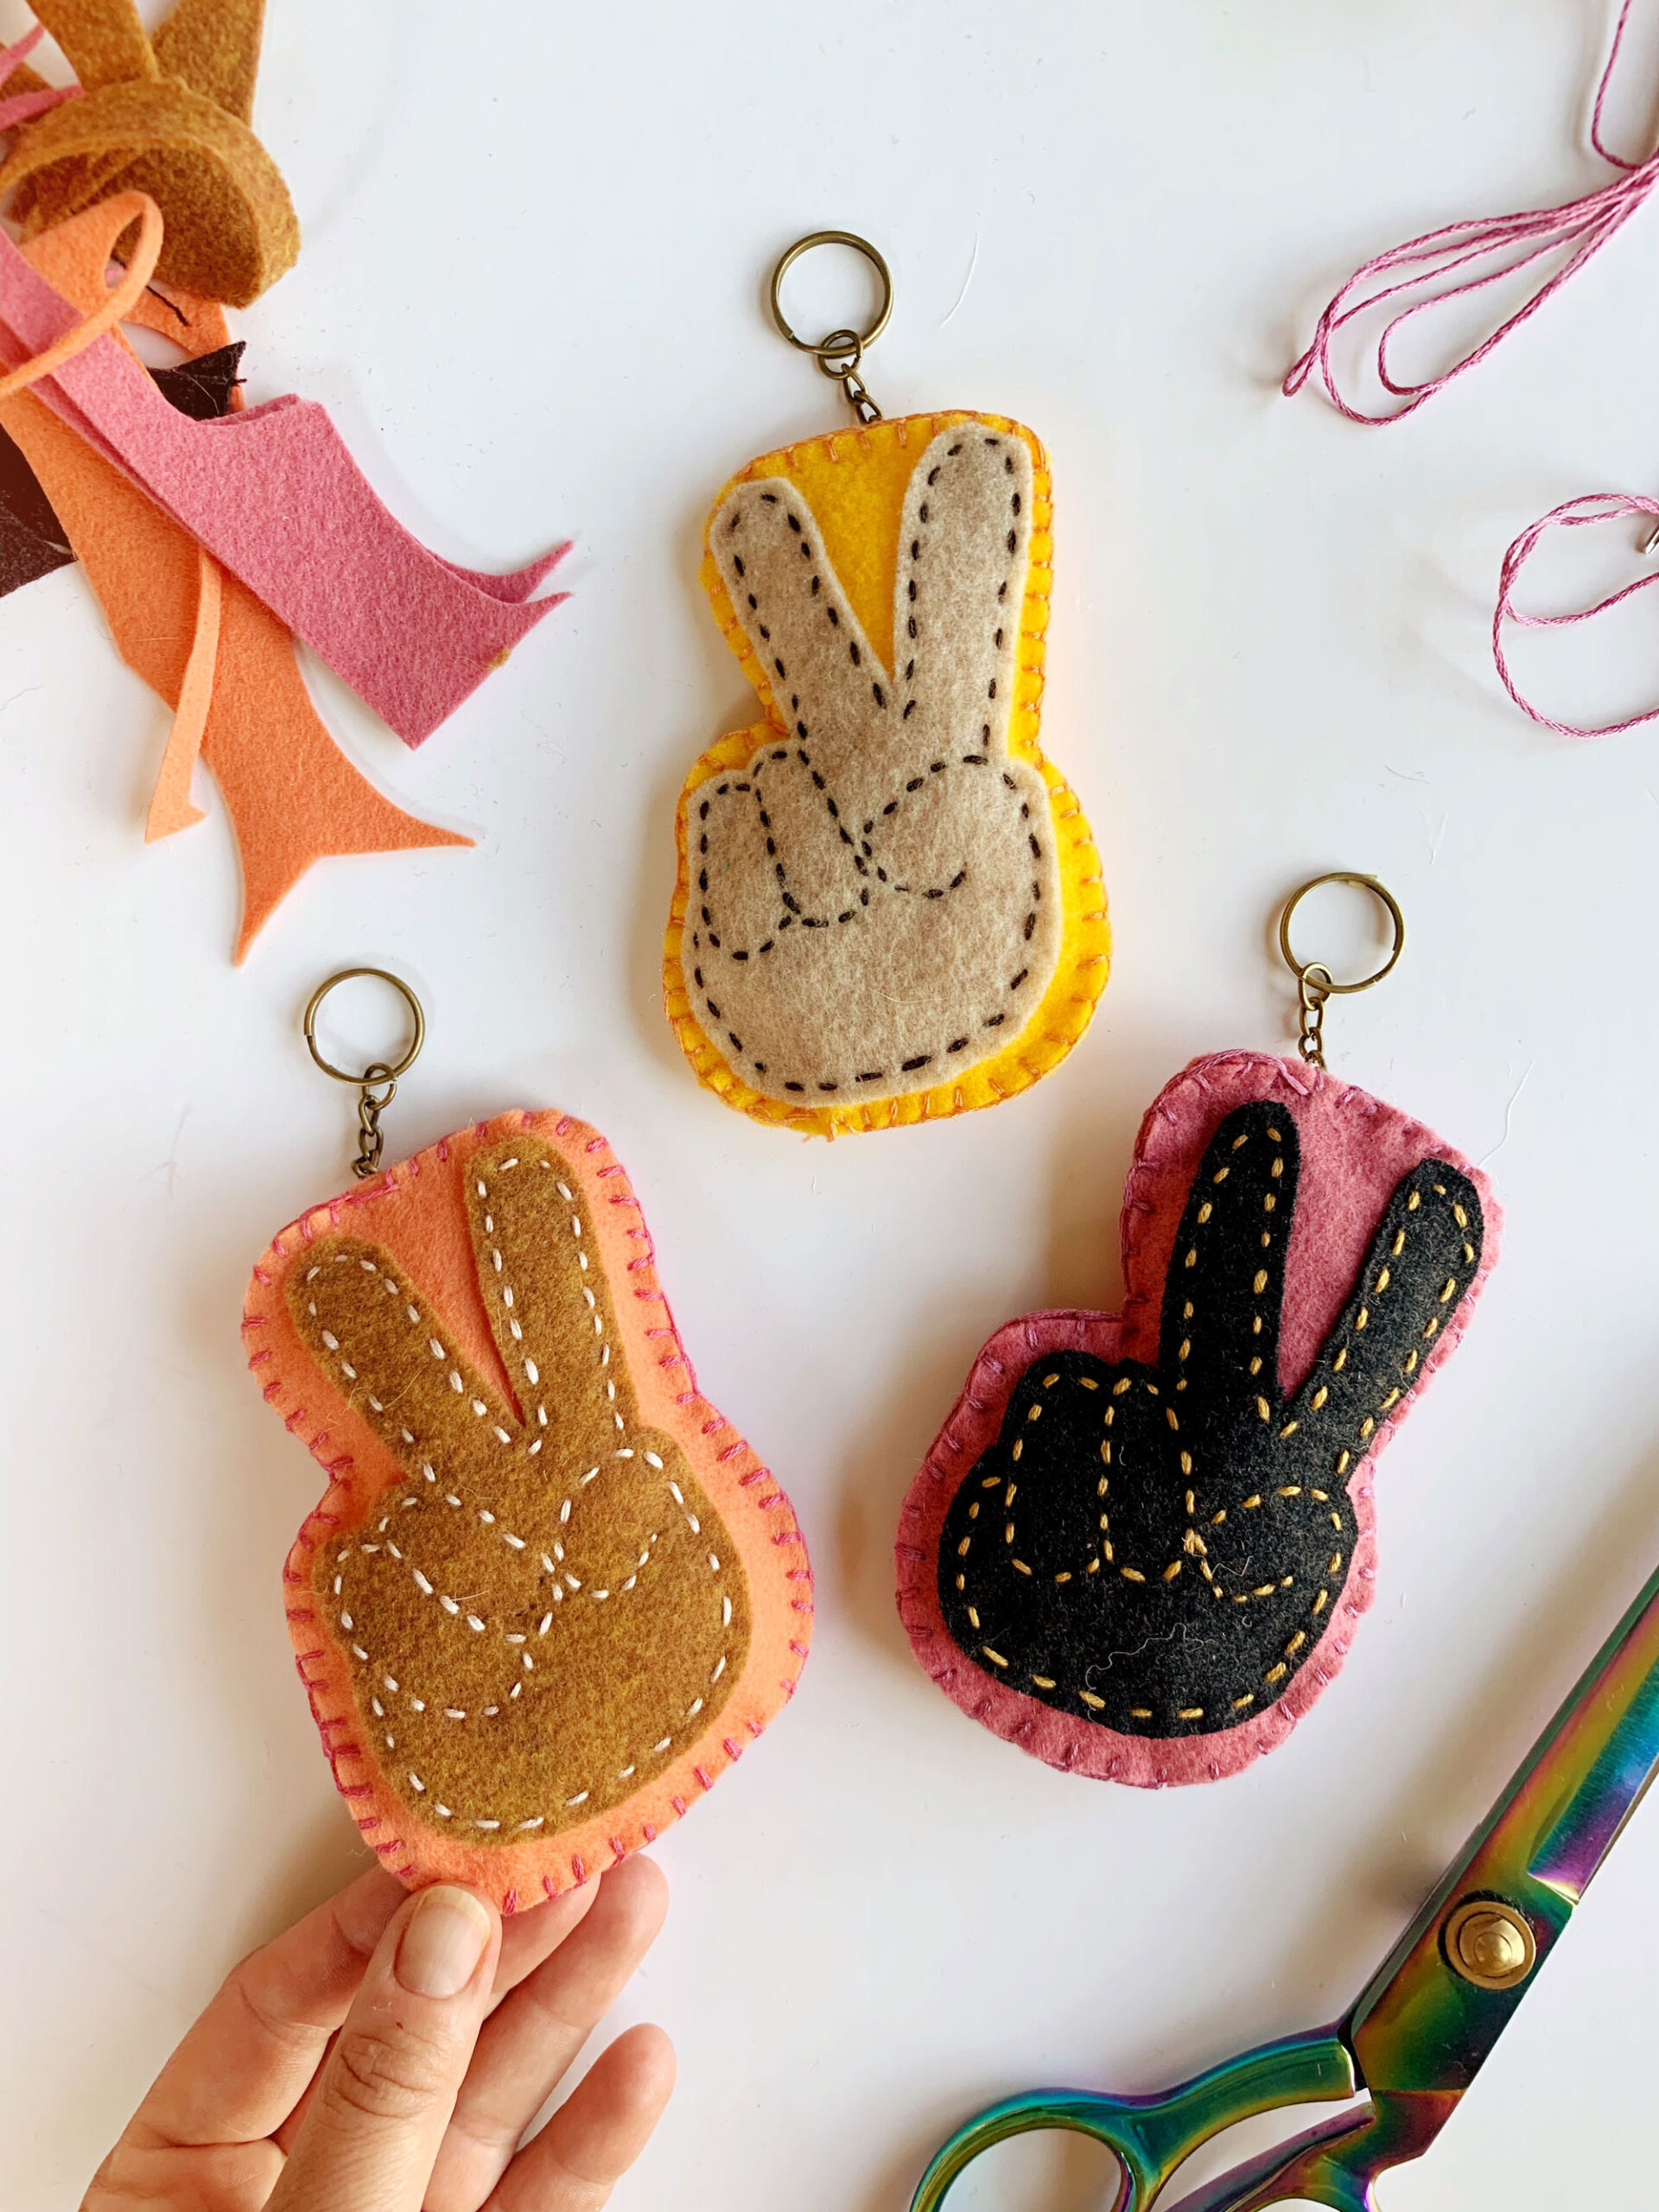
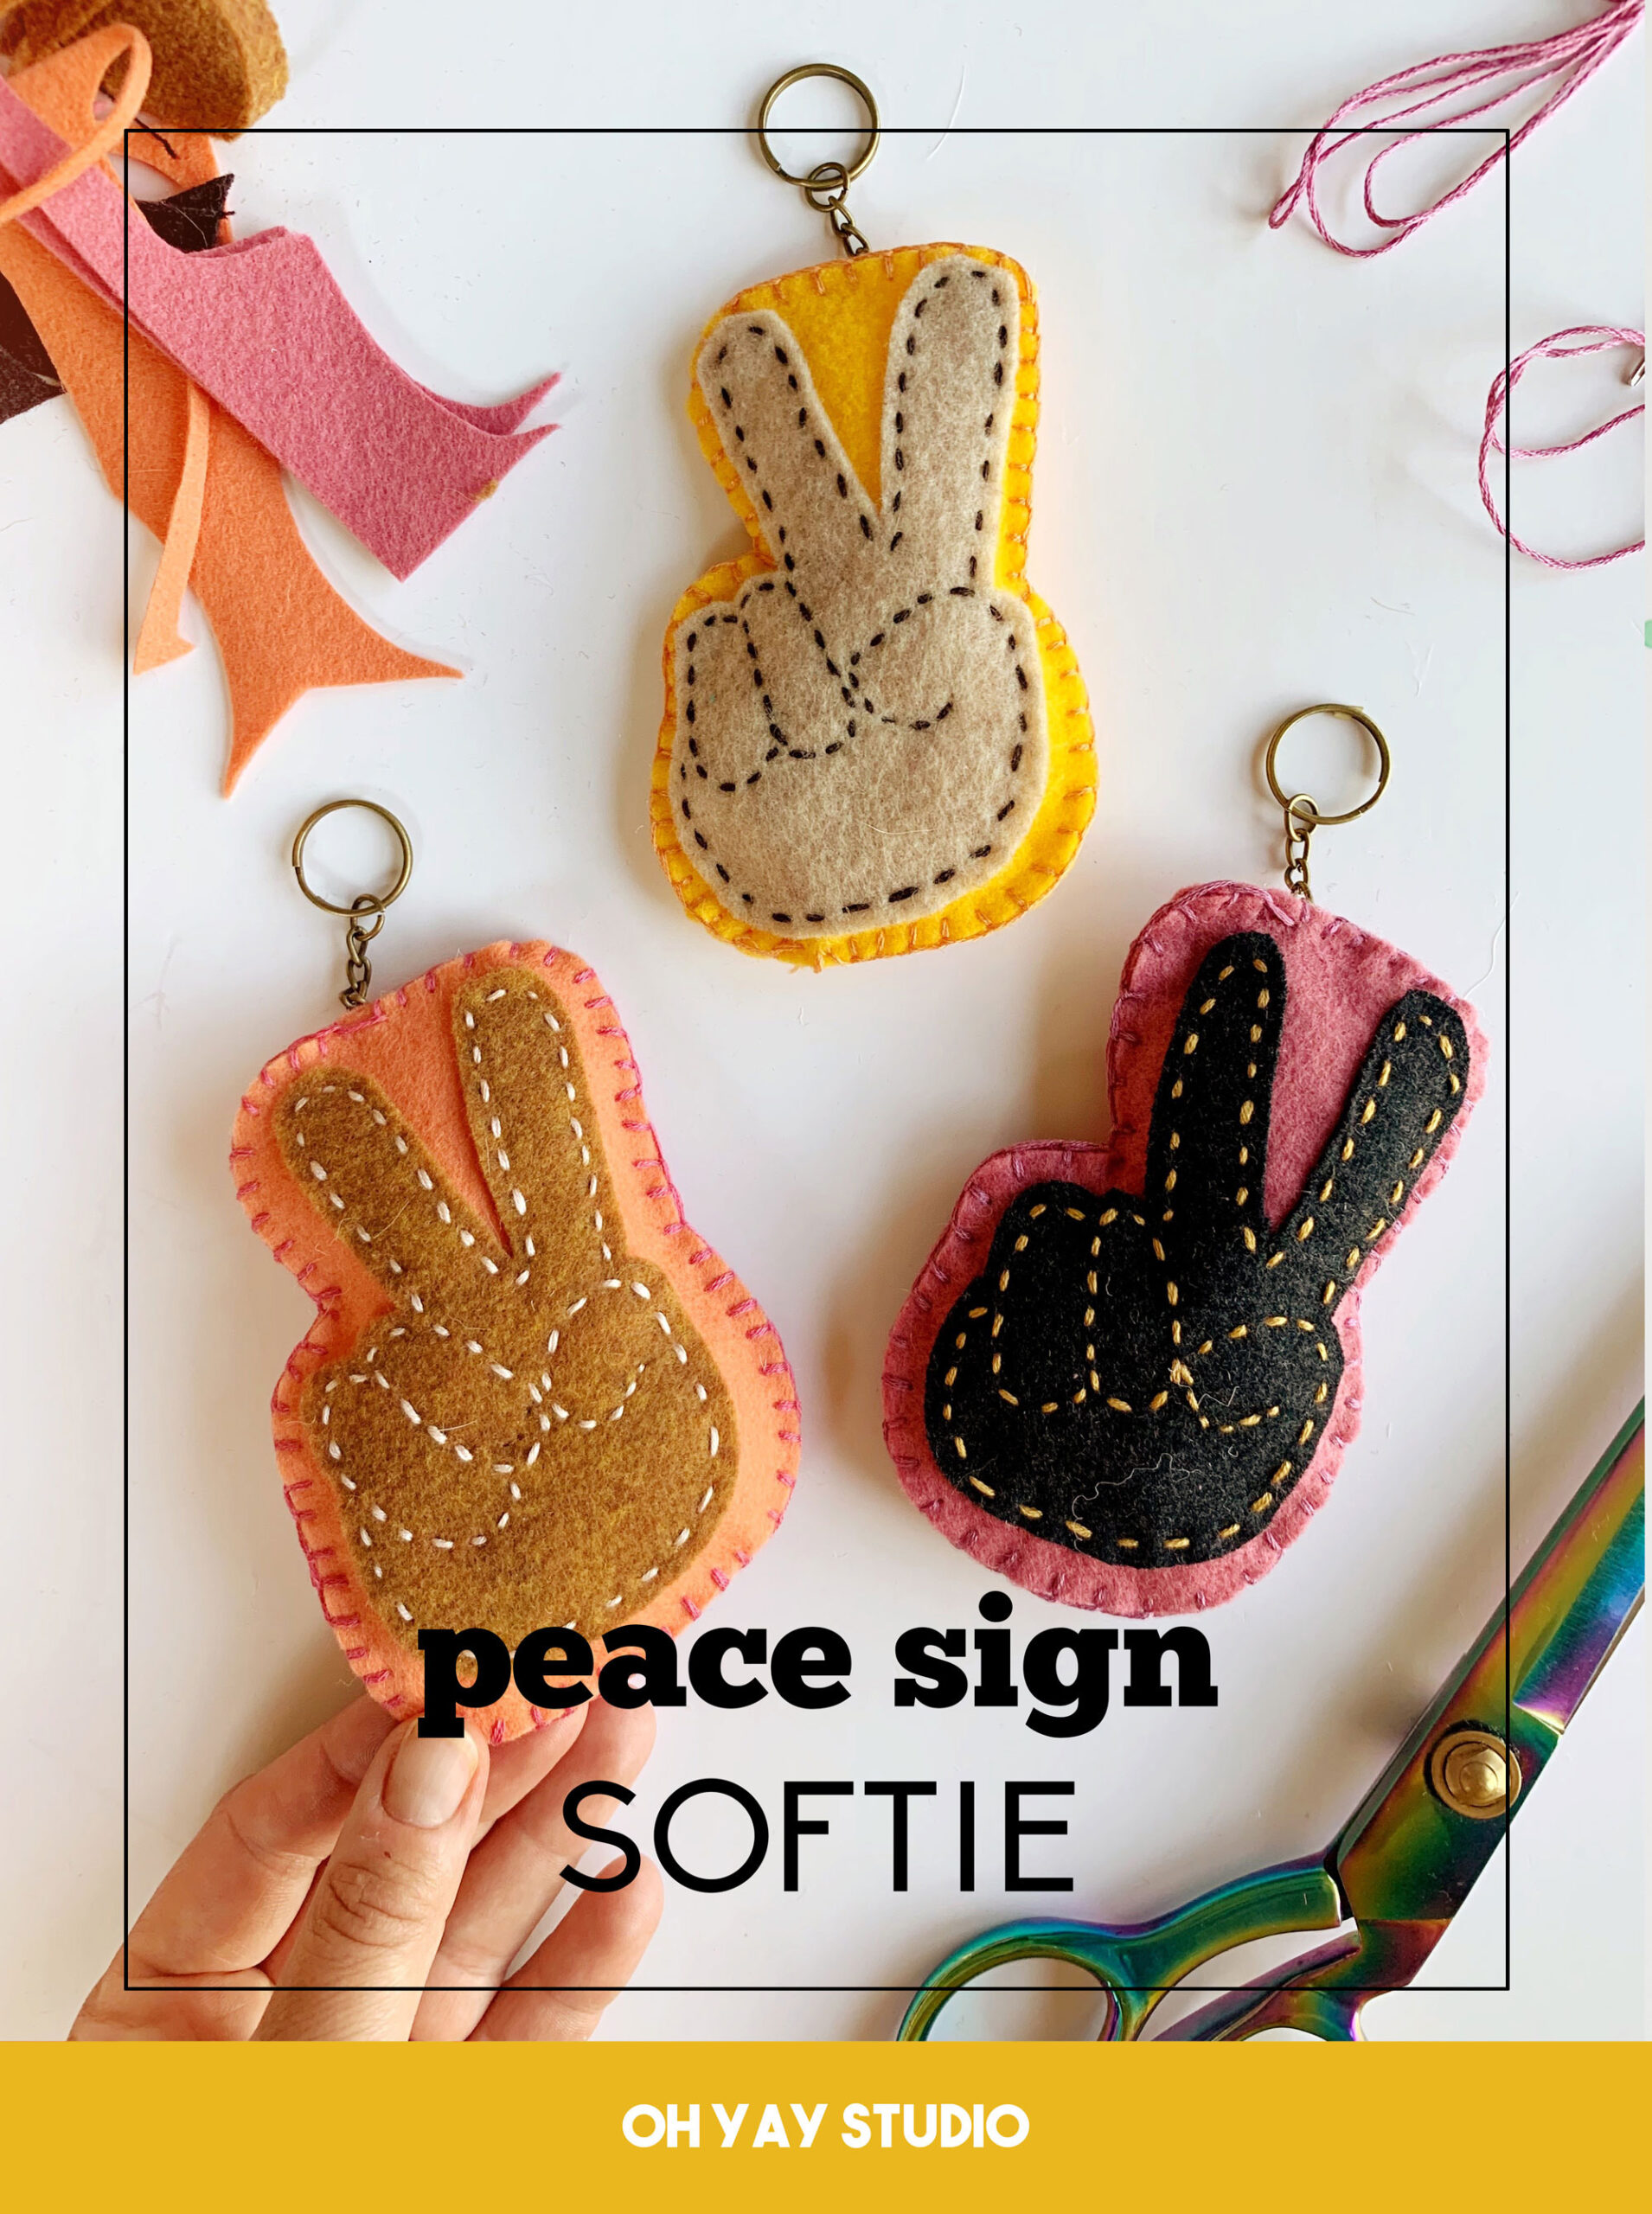
Peace hand softie DIY
This year I am *SO* excited to be participating in the Sew a Softie tutorial hop again (remember, last year? I made those rainbow pompom backpack pulls!) The coolest thing about this hop is that it is encouraging kids and adults all over the WORLD to sew!
This year I am taking my queue from my project from last year and making another backpack pull!! Our family has them on almost every backpack and bag zipper around the house, so why not add more?! This year’s keychain or pull is a PEACE HAND! 🙂
This project can be adjusted in size (for smaller bags or even zippers on a sweatshirt) AND it can be an AWESOME gift to give a friend. We have been doing MANY porch drops for friends, neighbors and family members these days so I say YES to anything that can share love, hope and peace during anxious, fearful or hurting times like now. This project is a perfect way to share your love!
MATERIALS:
- Felt for hand + felt for background
- Embroidery floss in coordinating colors
- Sharp embroidery needle
- scissors
- Pol-fil or stuffing (or you could use fabric scraps or cotton balls if you are limited on supplies)
- Keychain
INSTRUCTIONS:
- Cut out felt
Cut out the outside line on your hand piece from the pattern HERE.
Then fold your background felt in 1/2 (to create 2 layers) and cut around your peace hand. This can be as large or small as you’d like (I like to give a good 1/4″ around the hand just to give me space to blanket stitch the edges without stitching into the hand, but I don’t want it too large).
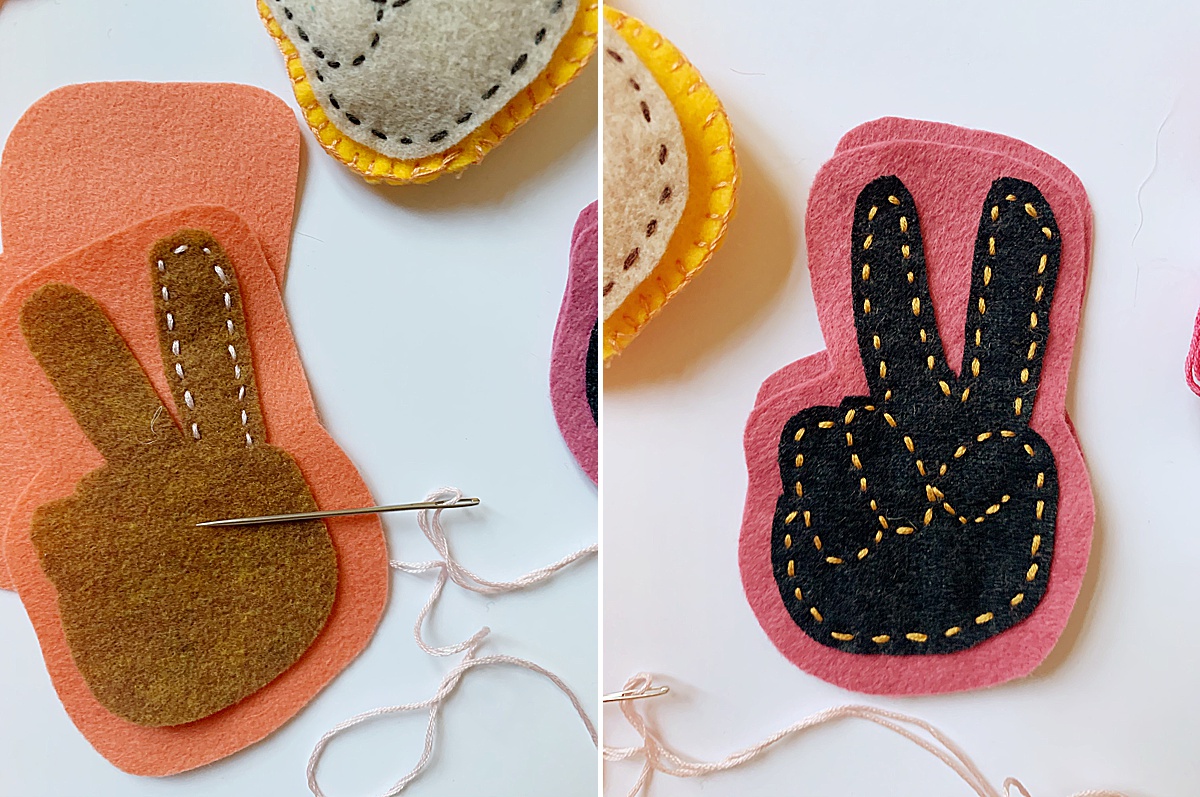
2. Attach hand
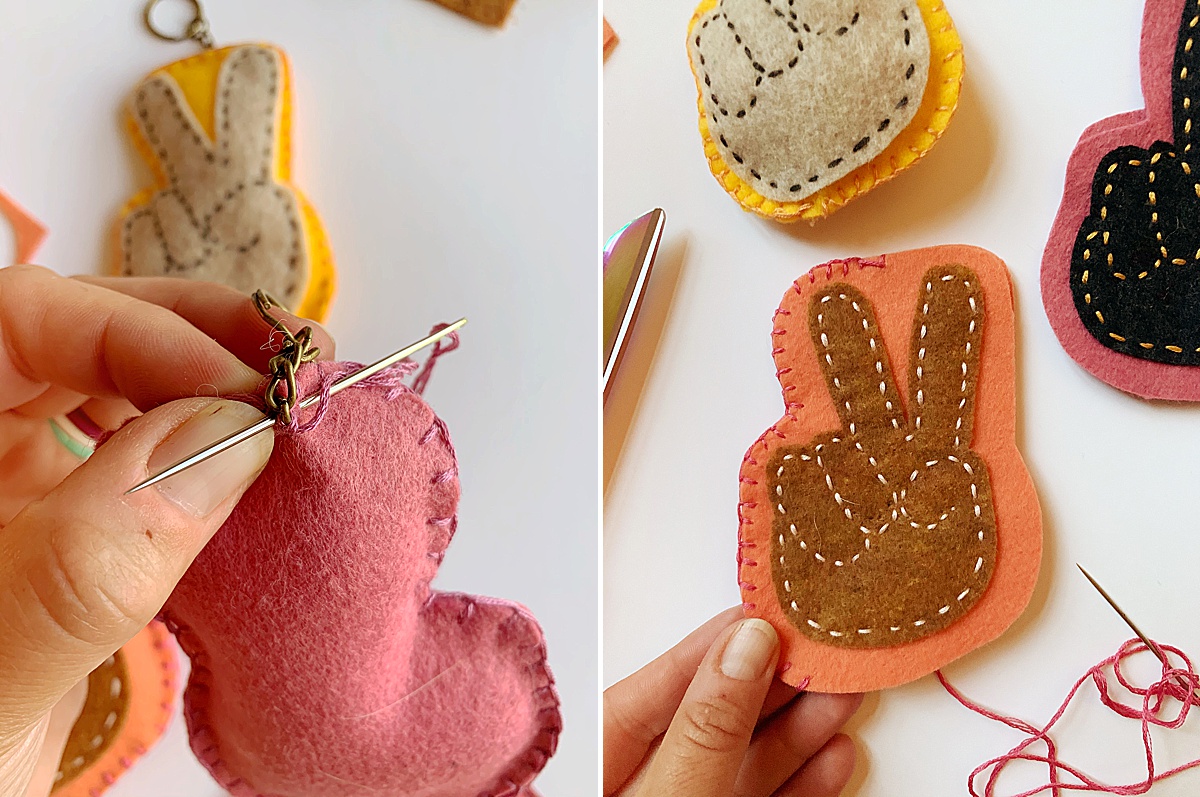
With your embroidery floss, being attaching your hand to one of the background pieces with a running stitch by outlining the palm, fingers, and thumb. Use your pattern as a reference for the outline. You can even use a fabric marker if you wanted to draw the lines to follow.
tip: Keep your stitches close together so that you can easily create the outline of the hand. Stitches that are too far apart make it hard to see the shape of the hand. Also, be sure that you are choosing an embroidery floss color that is easy to see on your hand cut out.
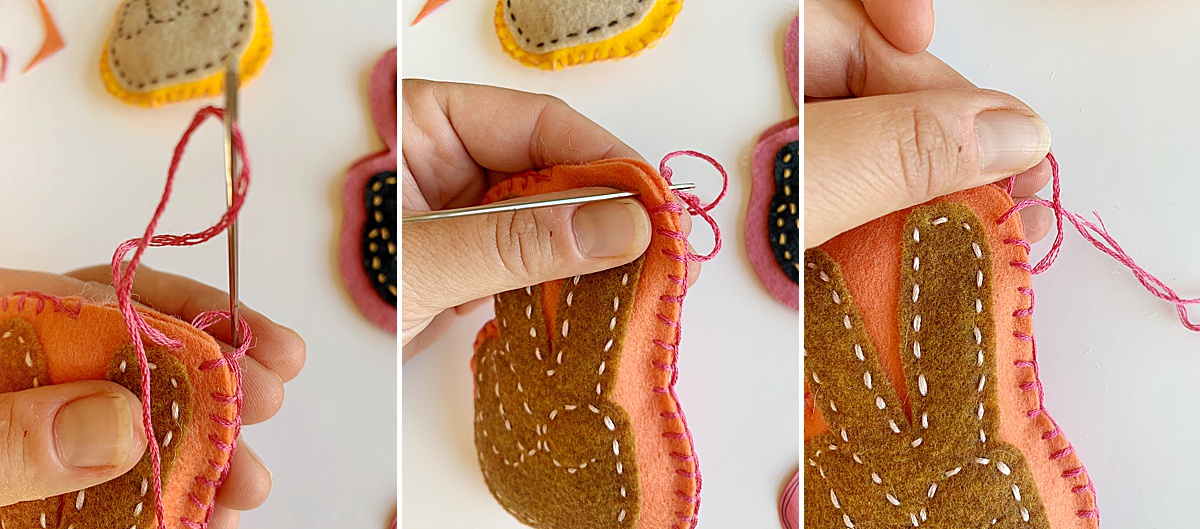
3. Stitch front + back together and stuff
With your embroidery floss (I used a 2nd color), begin using a blanket stitch to attach the front (with the hand already attached) and the back around the outer edges. You will do this by inserting your needle from bottom to top (about 1/4″ inward from the edge and 1/4″ inch away from the previous stitch), then before pulling the thread all the way through taught, insert your needle into the loop that you were making. This will loop your stitches along the outer edge of the softie and create a great finished edge.
Before you finish stitching the outside all the way together, be sure to stuff your softie with your poly-fil or stuffing.
4. Add Keychain
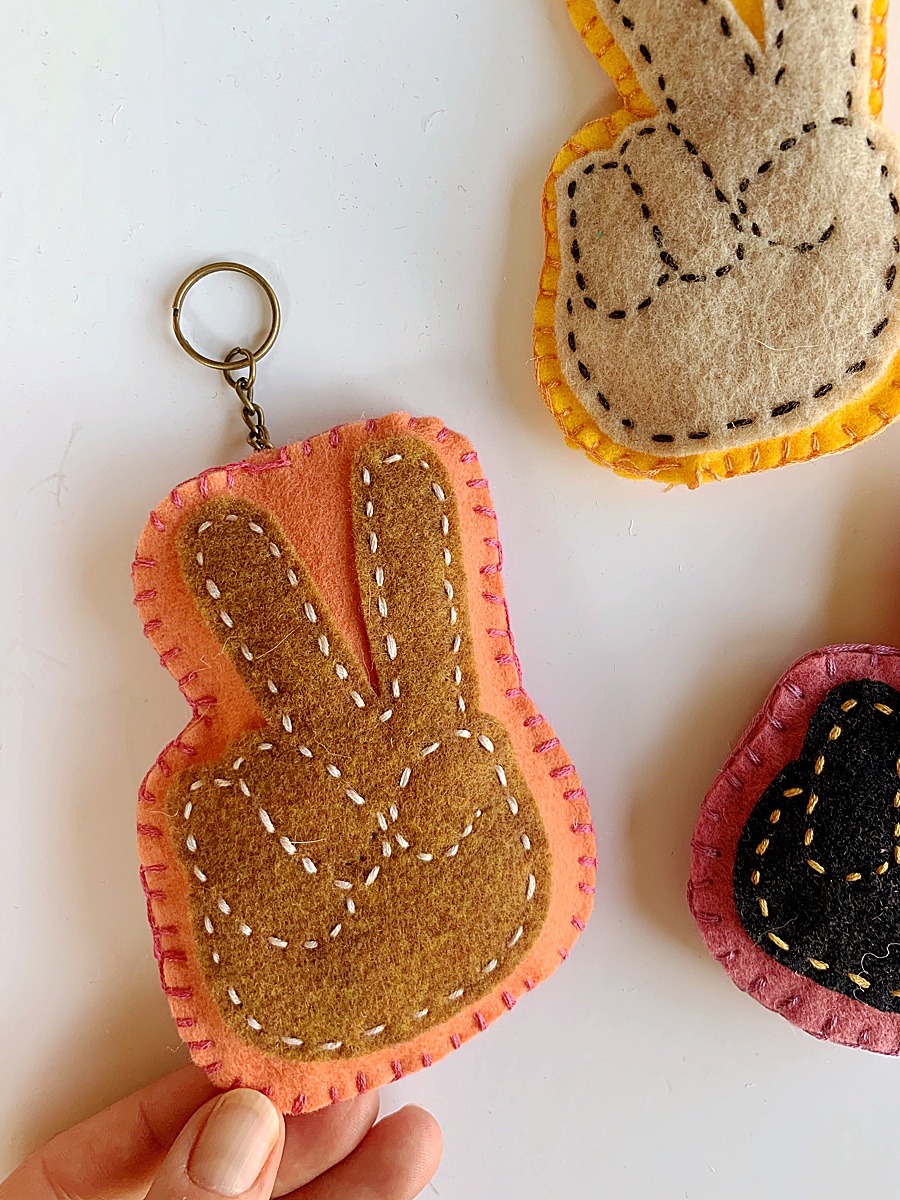
Add your keychain or pull in your desired spot near the top of the softie! Secure with your embroidery thread so that when it pulls, it stays secure! 🙂 Then add the pull to your favorite backpack, pouch, purse or bag! 🙂


One Comment
Comments are closed.