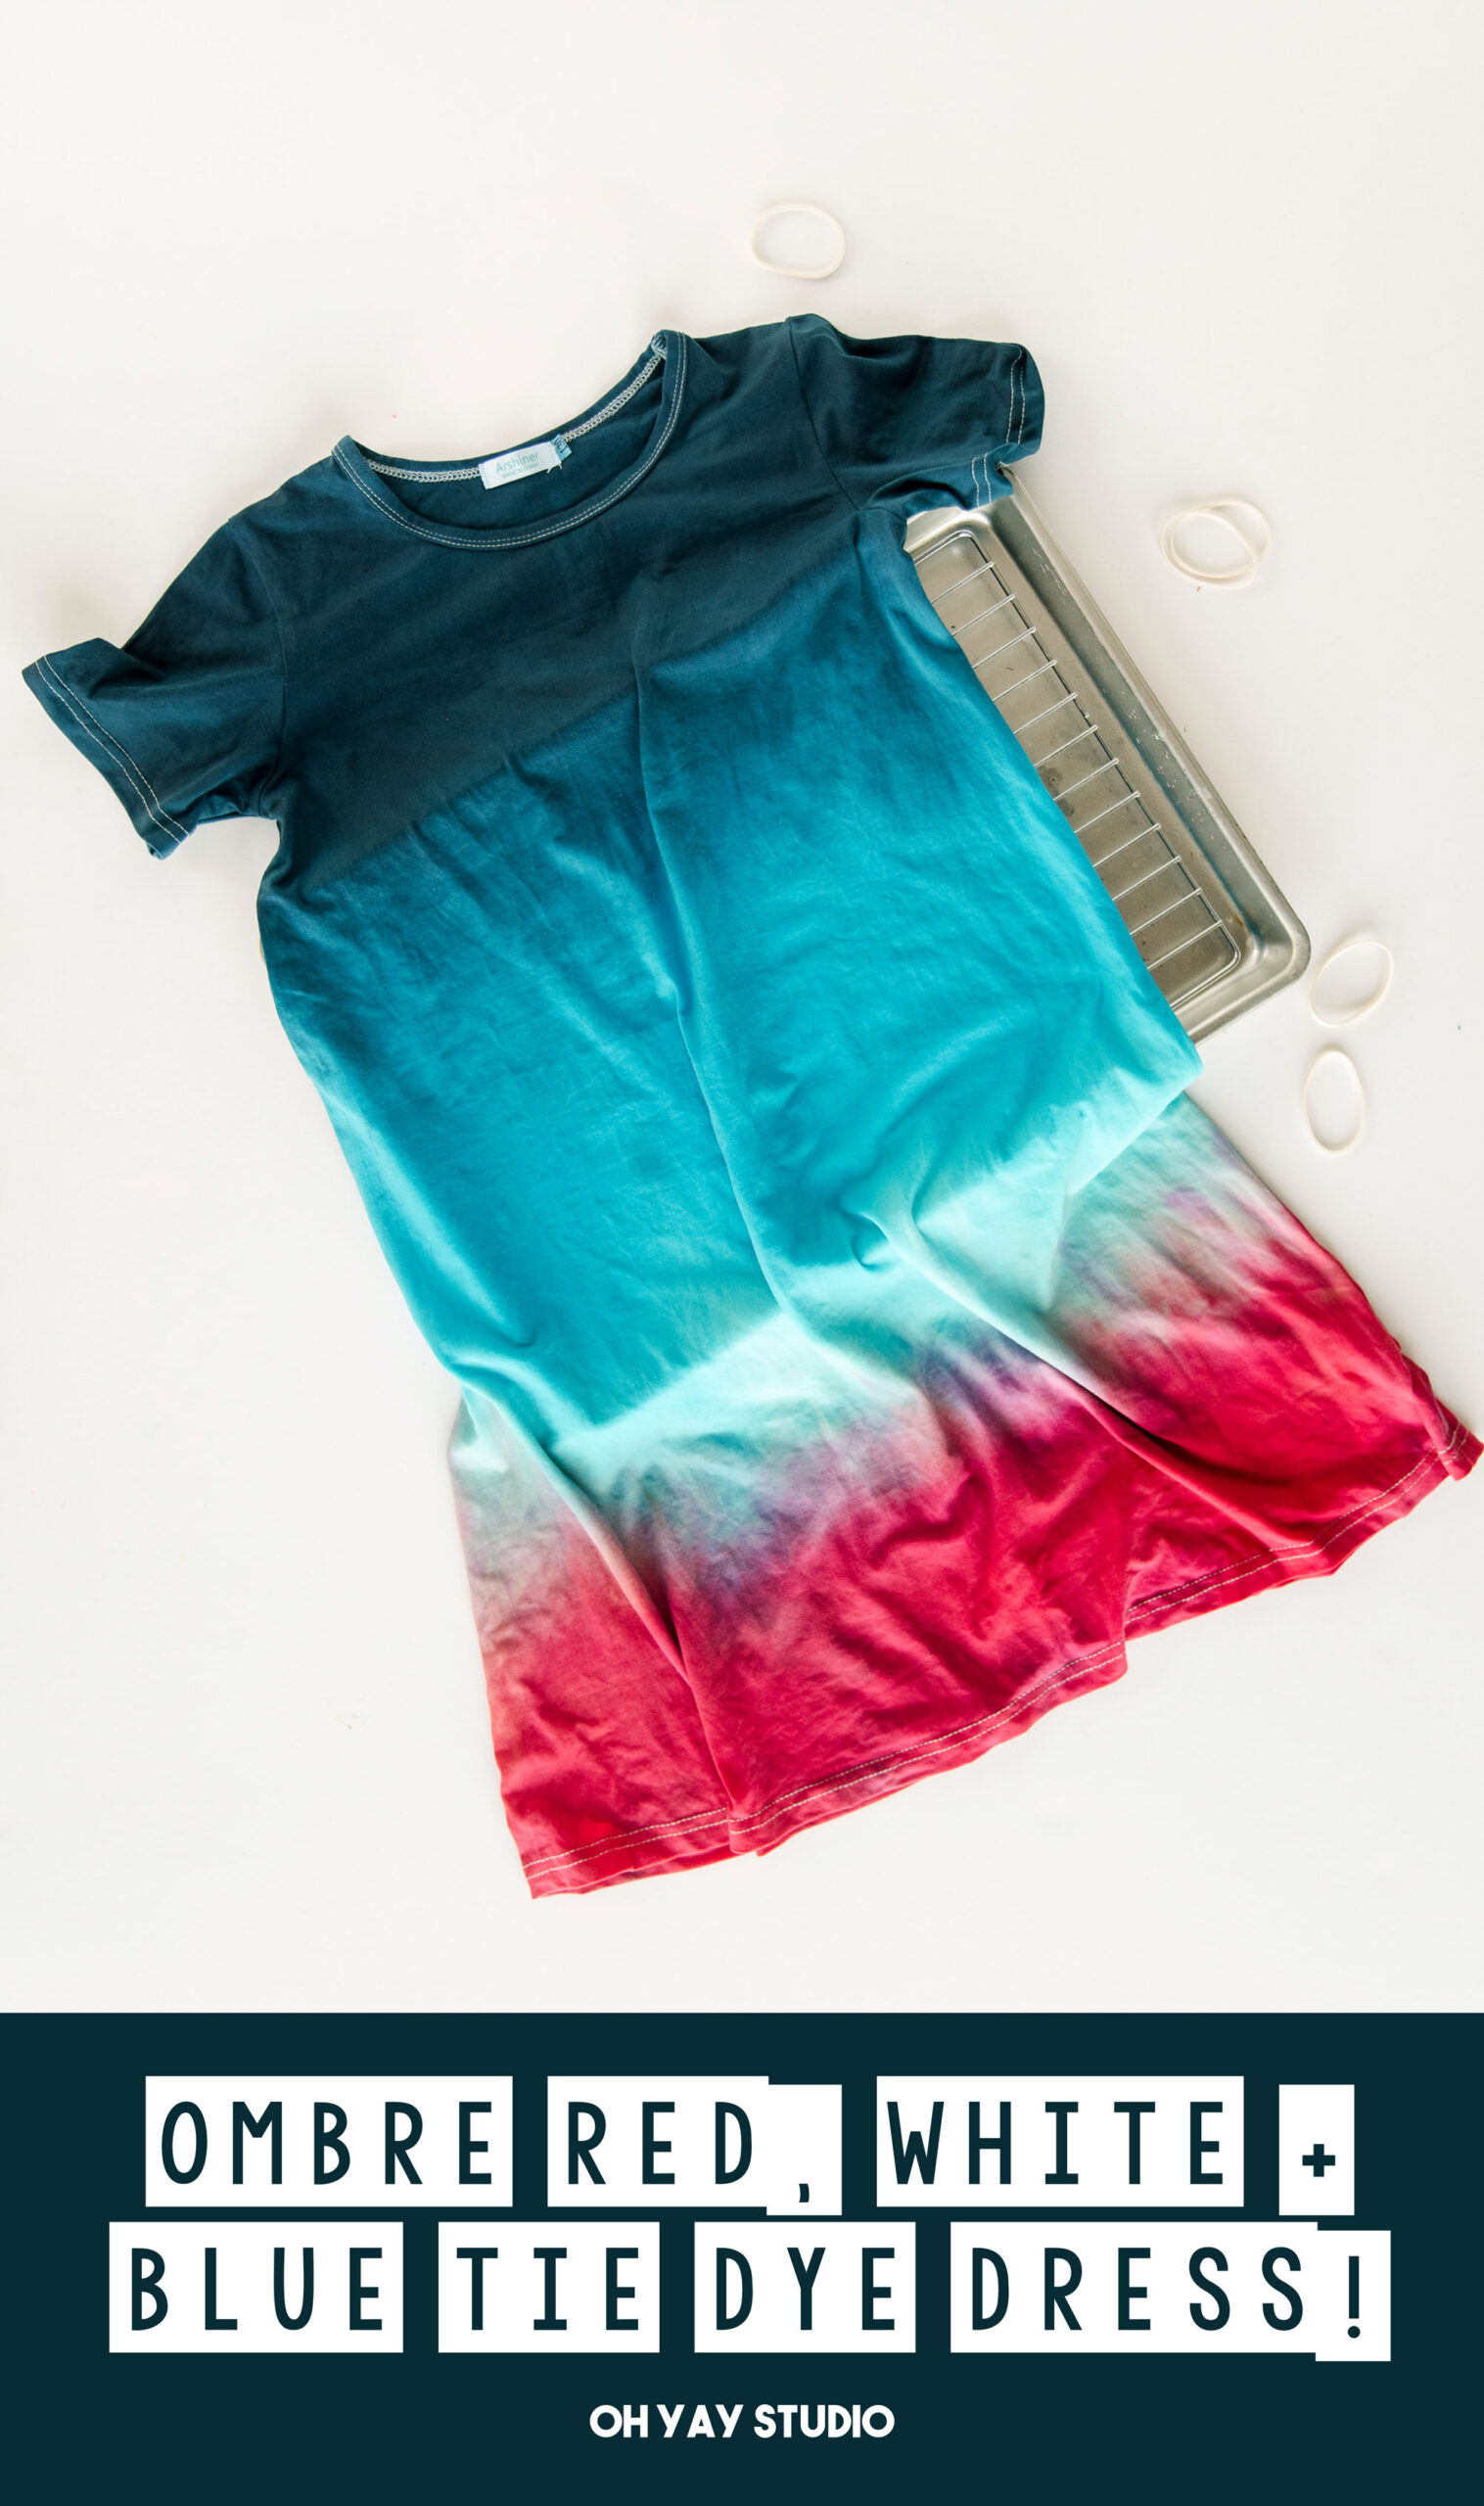
Ombre tie dye dress DIY!
this project is in partnership with Create Basics tie dye + Walmart
A red, white and blue(s) dress….yup, a summer staple around our house (for kids and adults, duh)! 🙂 It totally can be worn for a summer BBQ, the 4th of July, a day at the beach. REALLY ANTIME in the summertime! There’s something about the combo of red, white and blue that is just brings the call of outdoor summer time! 🙂 Add in some tie dye and WEEEEEEEE’VVVEEE got ourselves a little party dress if you ask me! 🙂
I mean, I legit can’t stress enough how much I love tie dye for kids clothing….not only is it SUPPPER festive, but lemme just say that tie dye hides stains and even covers them up! We aren’t the “super careful” family with our clothing, especially in the summer, so tie dye is our not-so-secret answer to looking pulled together! HA! 🙂
And you can even grab your kiddos to help….ask them to forage through their closet to get out any white (or semi-white) articles of clothing to dye as you do this nautical/summer/super fun tee-shirt dress at the same time! 🙂
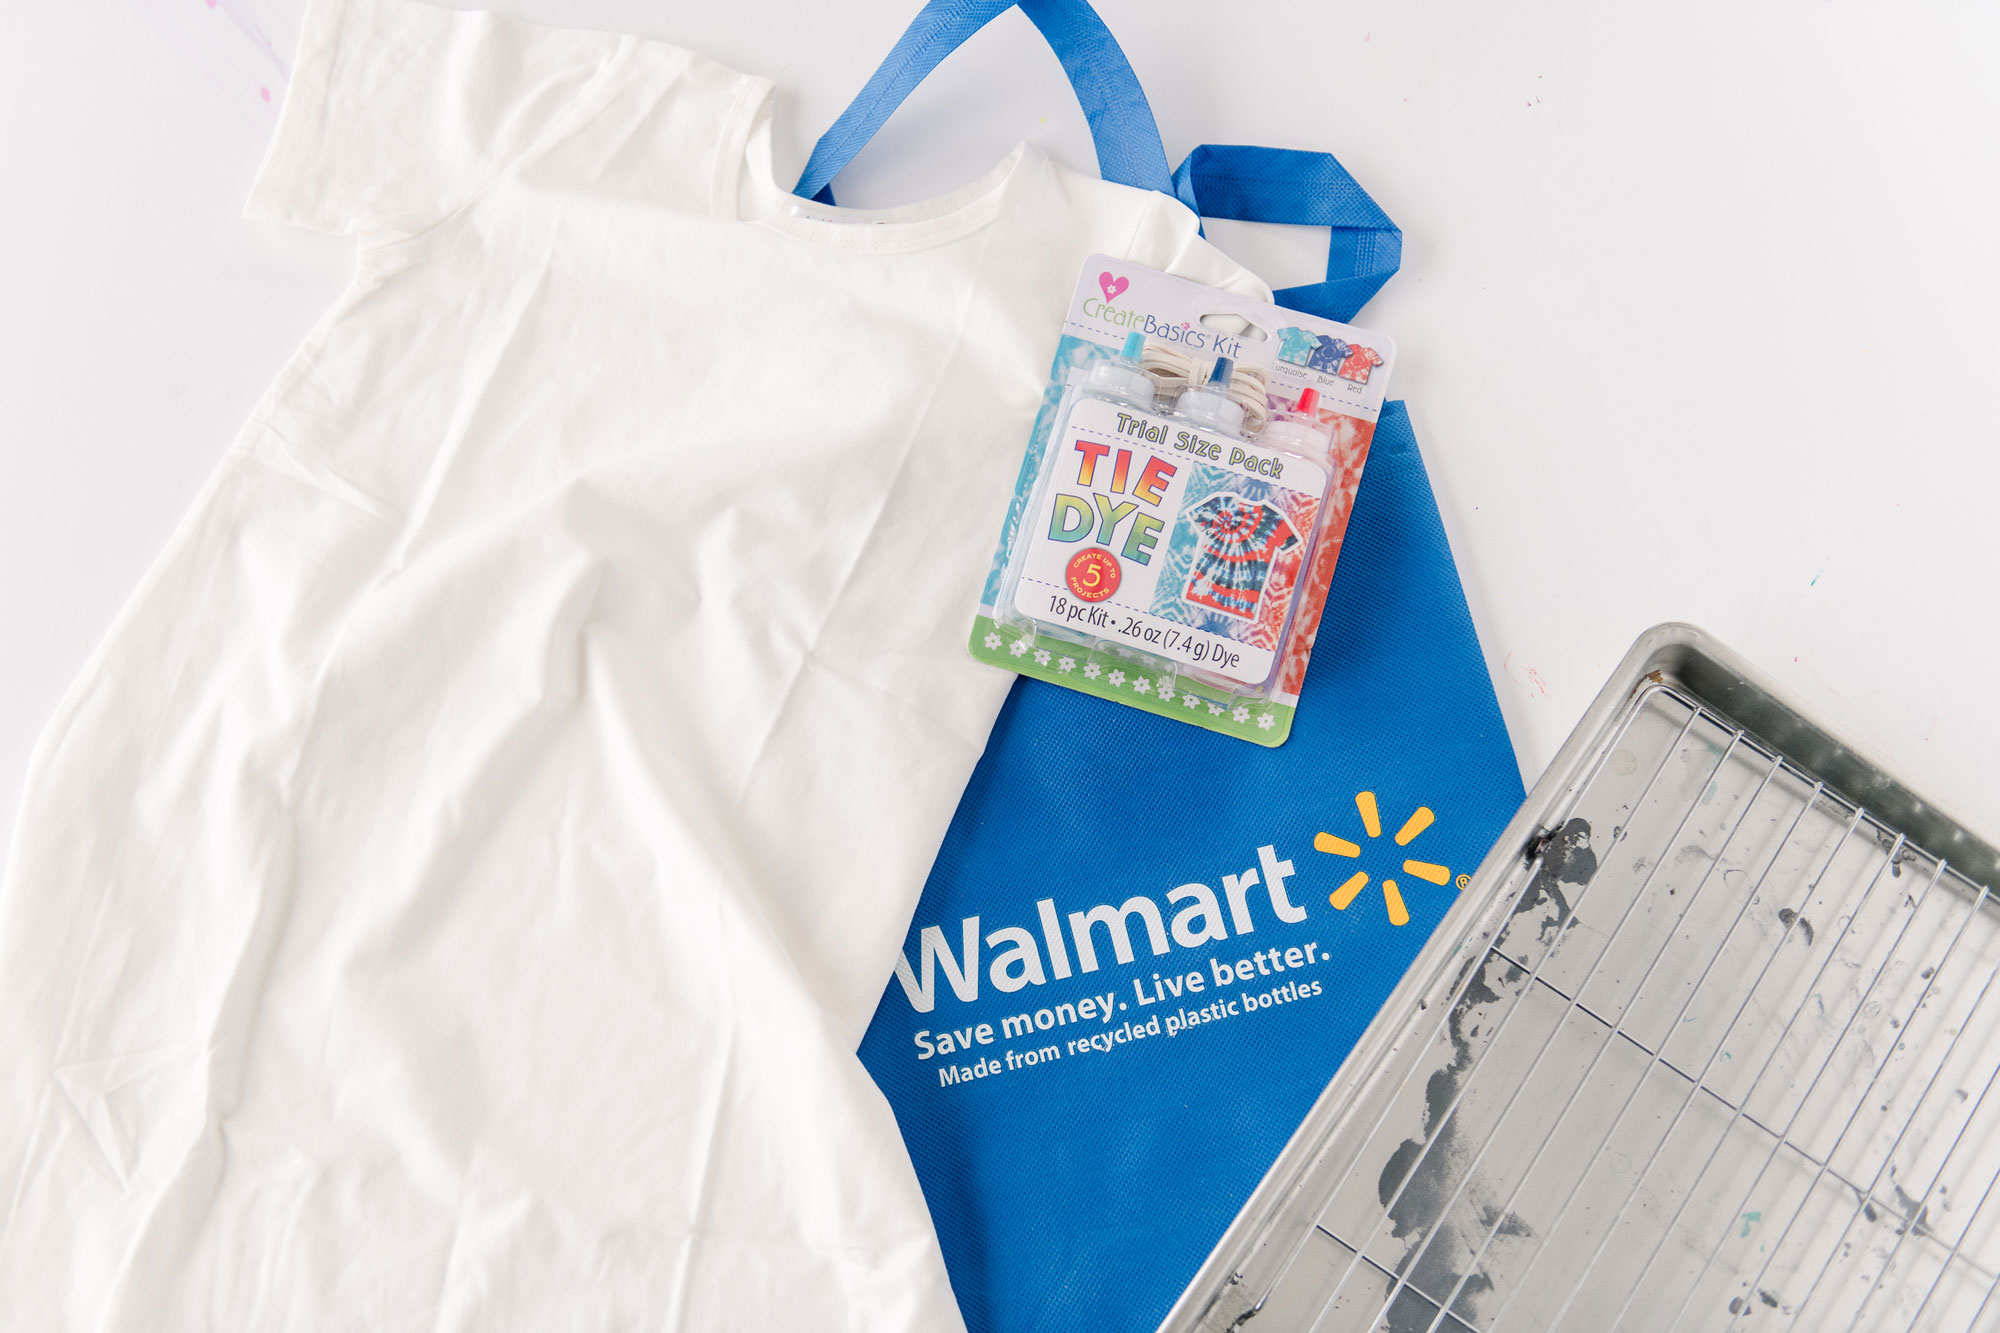
MATERIALS: (all purchased at Walmart – talk about easy)! 🙂
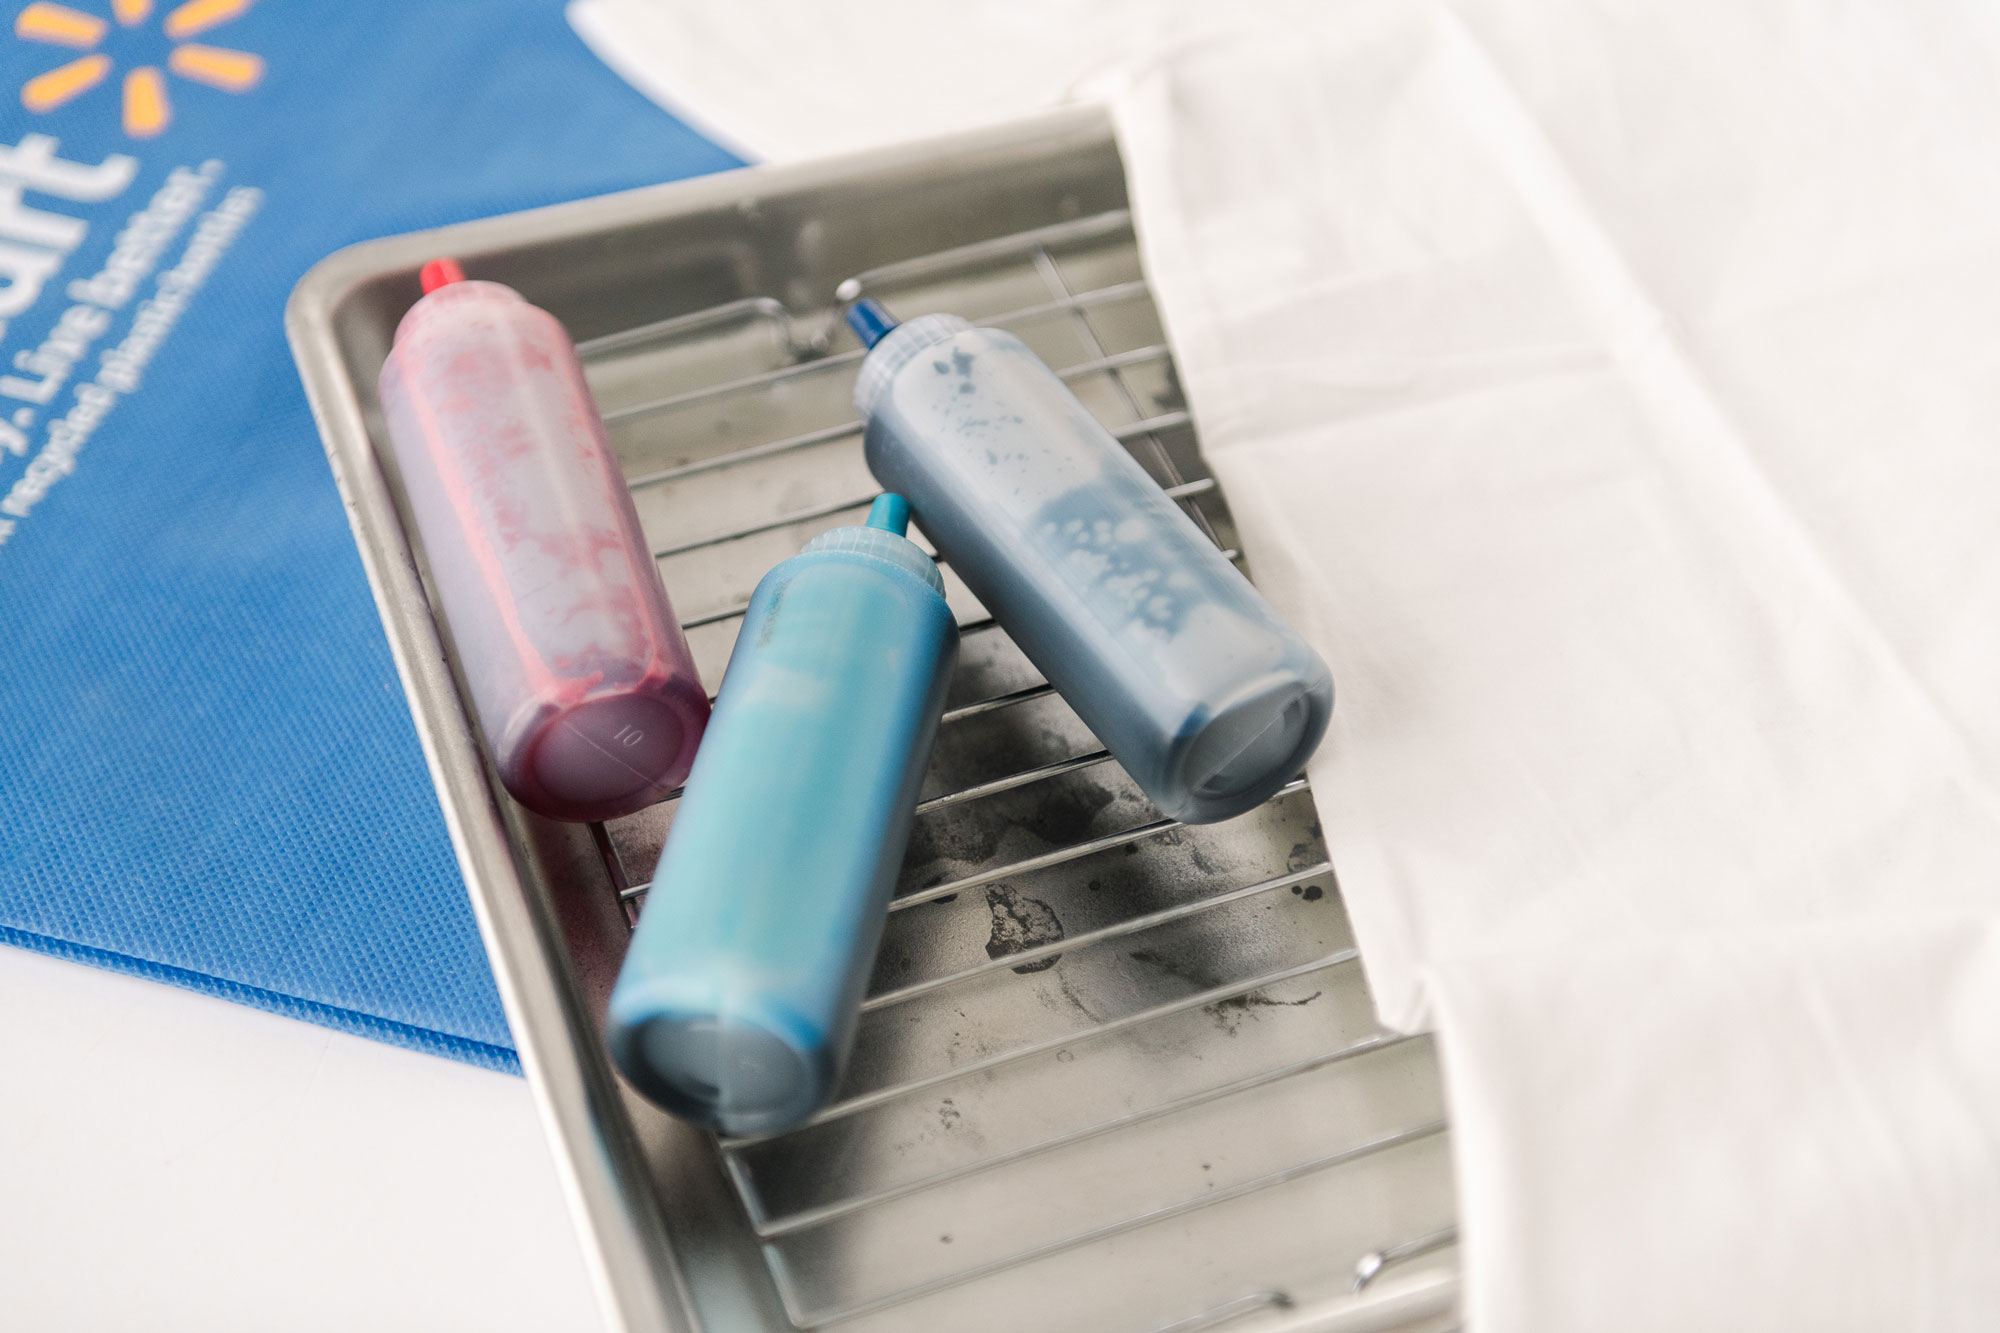
- A package of the Create Basics Nautical dye kit (3 awesome and cute colors)
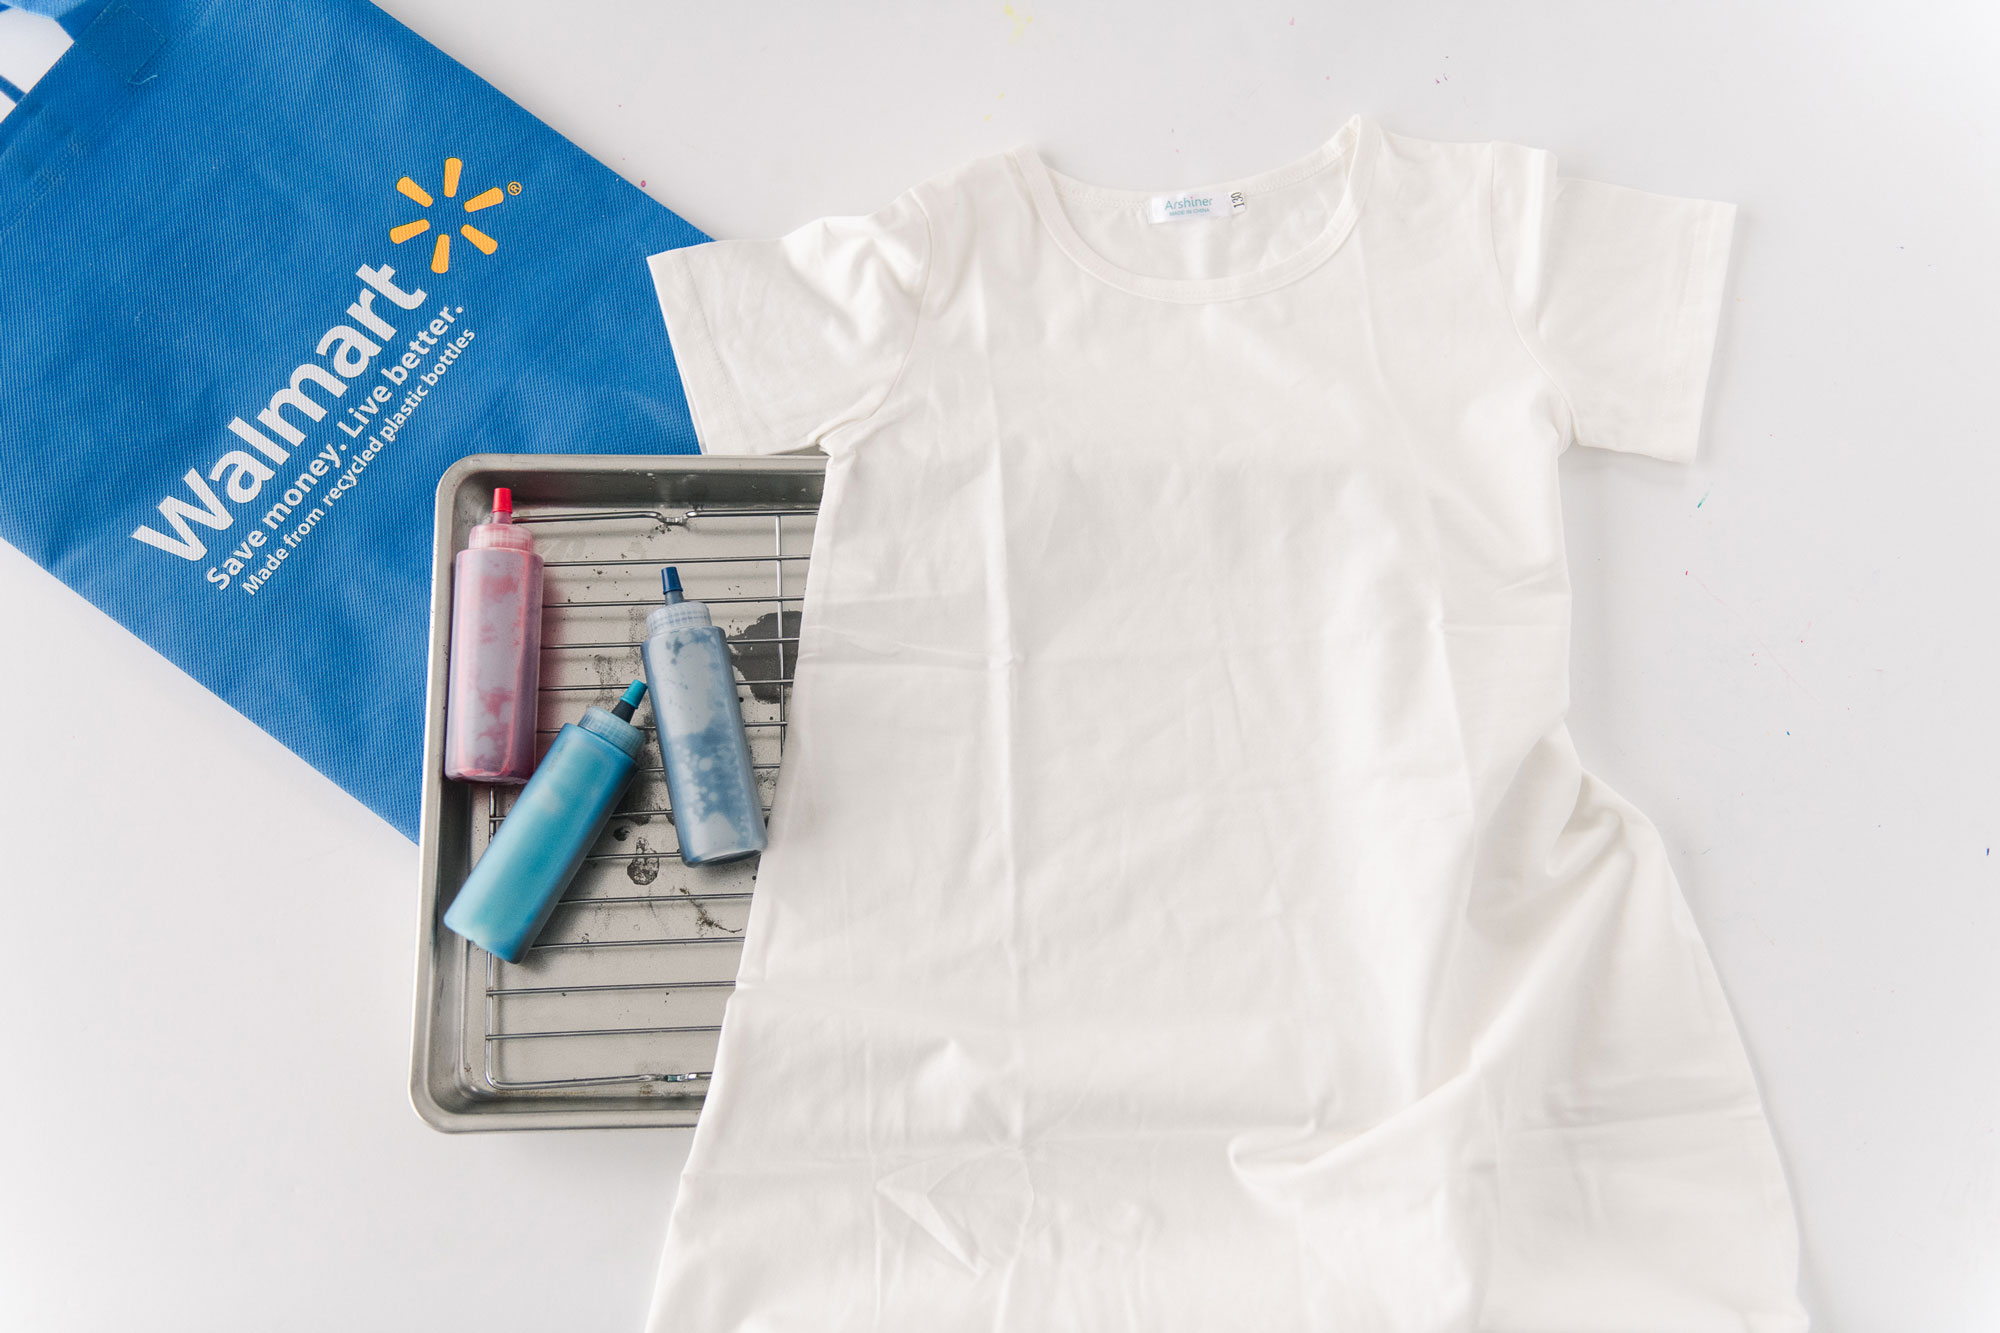
- A white cotton dress of choice 🙂 – new or used or full of stains even (yay #momlife)
- A wire rack or something to lift the dyed dress off of the work surface as you dye
- Some old plastic bags or plastic wrap to keep the dress from drying overnight
INSTRUCTIONS:
1. Wash your dress (new or used) so that we are working with a happy, clean surface to dye! While your dress is washing, prep your area so that you don’t get dye everywhere. We use an old cookie drying rack and a jelly roll pan that was found at a thrift store for every tie dye project.
2. Prep your dye by removing the bottles from the Create Basics dye kit and fill all 3 colors to the fill line instructed on the bottle! Carefully shake the bottles to make sure all of the dye is mixed (hint….cover your bottles with a paper towel while shaking jussssst in case your caps aren’t on all the way….I learned that the hard way, whoops!).
3. There are options to fold or band your dress (even if you want to ombre the colors)….use the included instructions with your Create Basics tie dye kit for reference and inso. Buuuuut we decided to do a more ombre technique….so no scrunching or banding for us.
Here is how we achieved the ombre dye technique + some tips on dying with this awesome Create Basics dye:
- Start with a wet dress…the colors will bleed better and more easily together
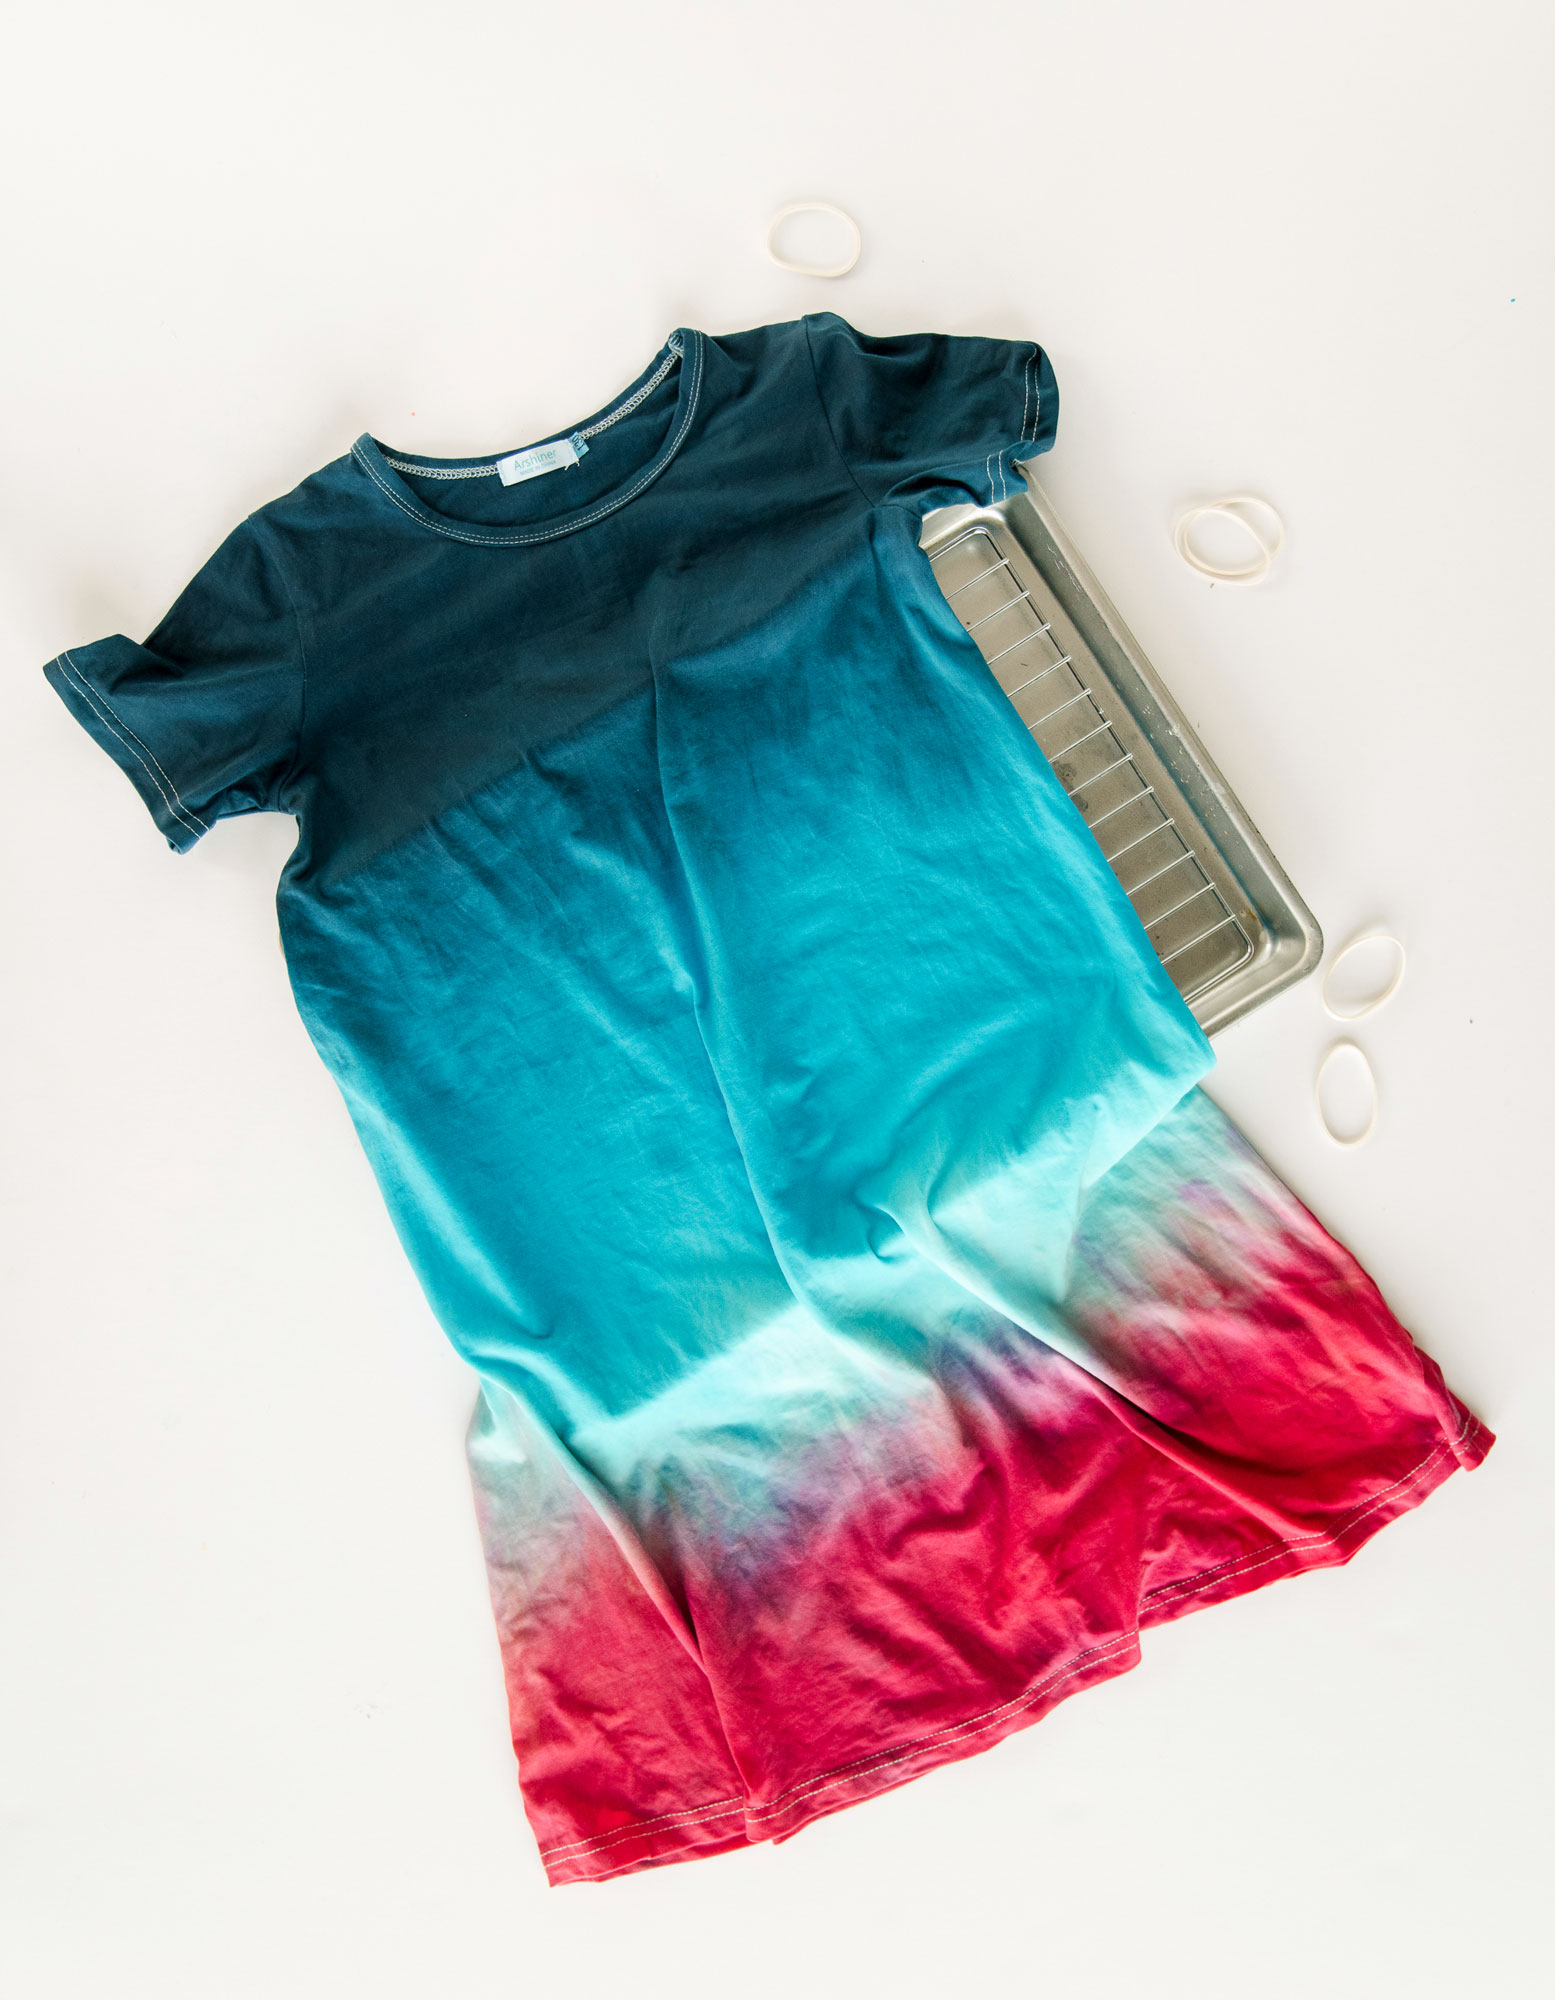
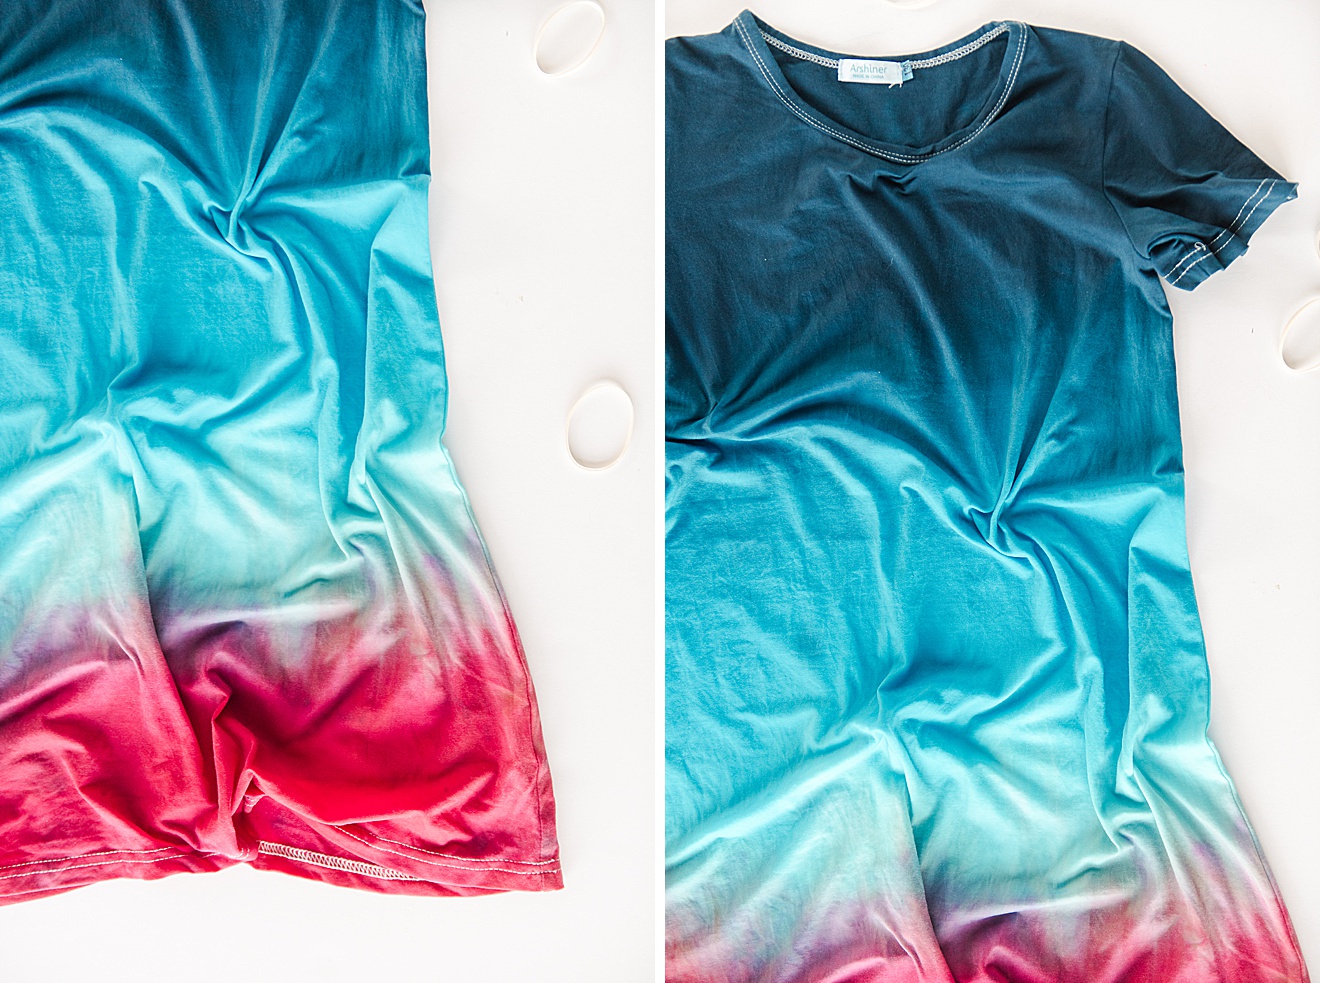
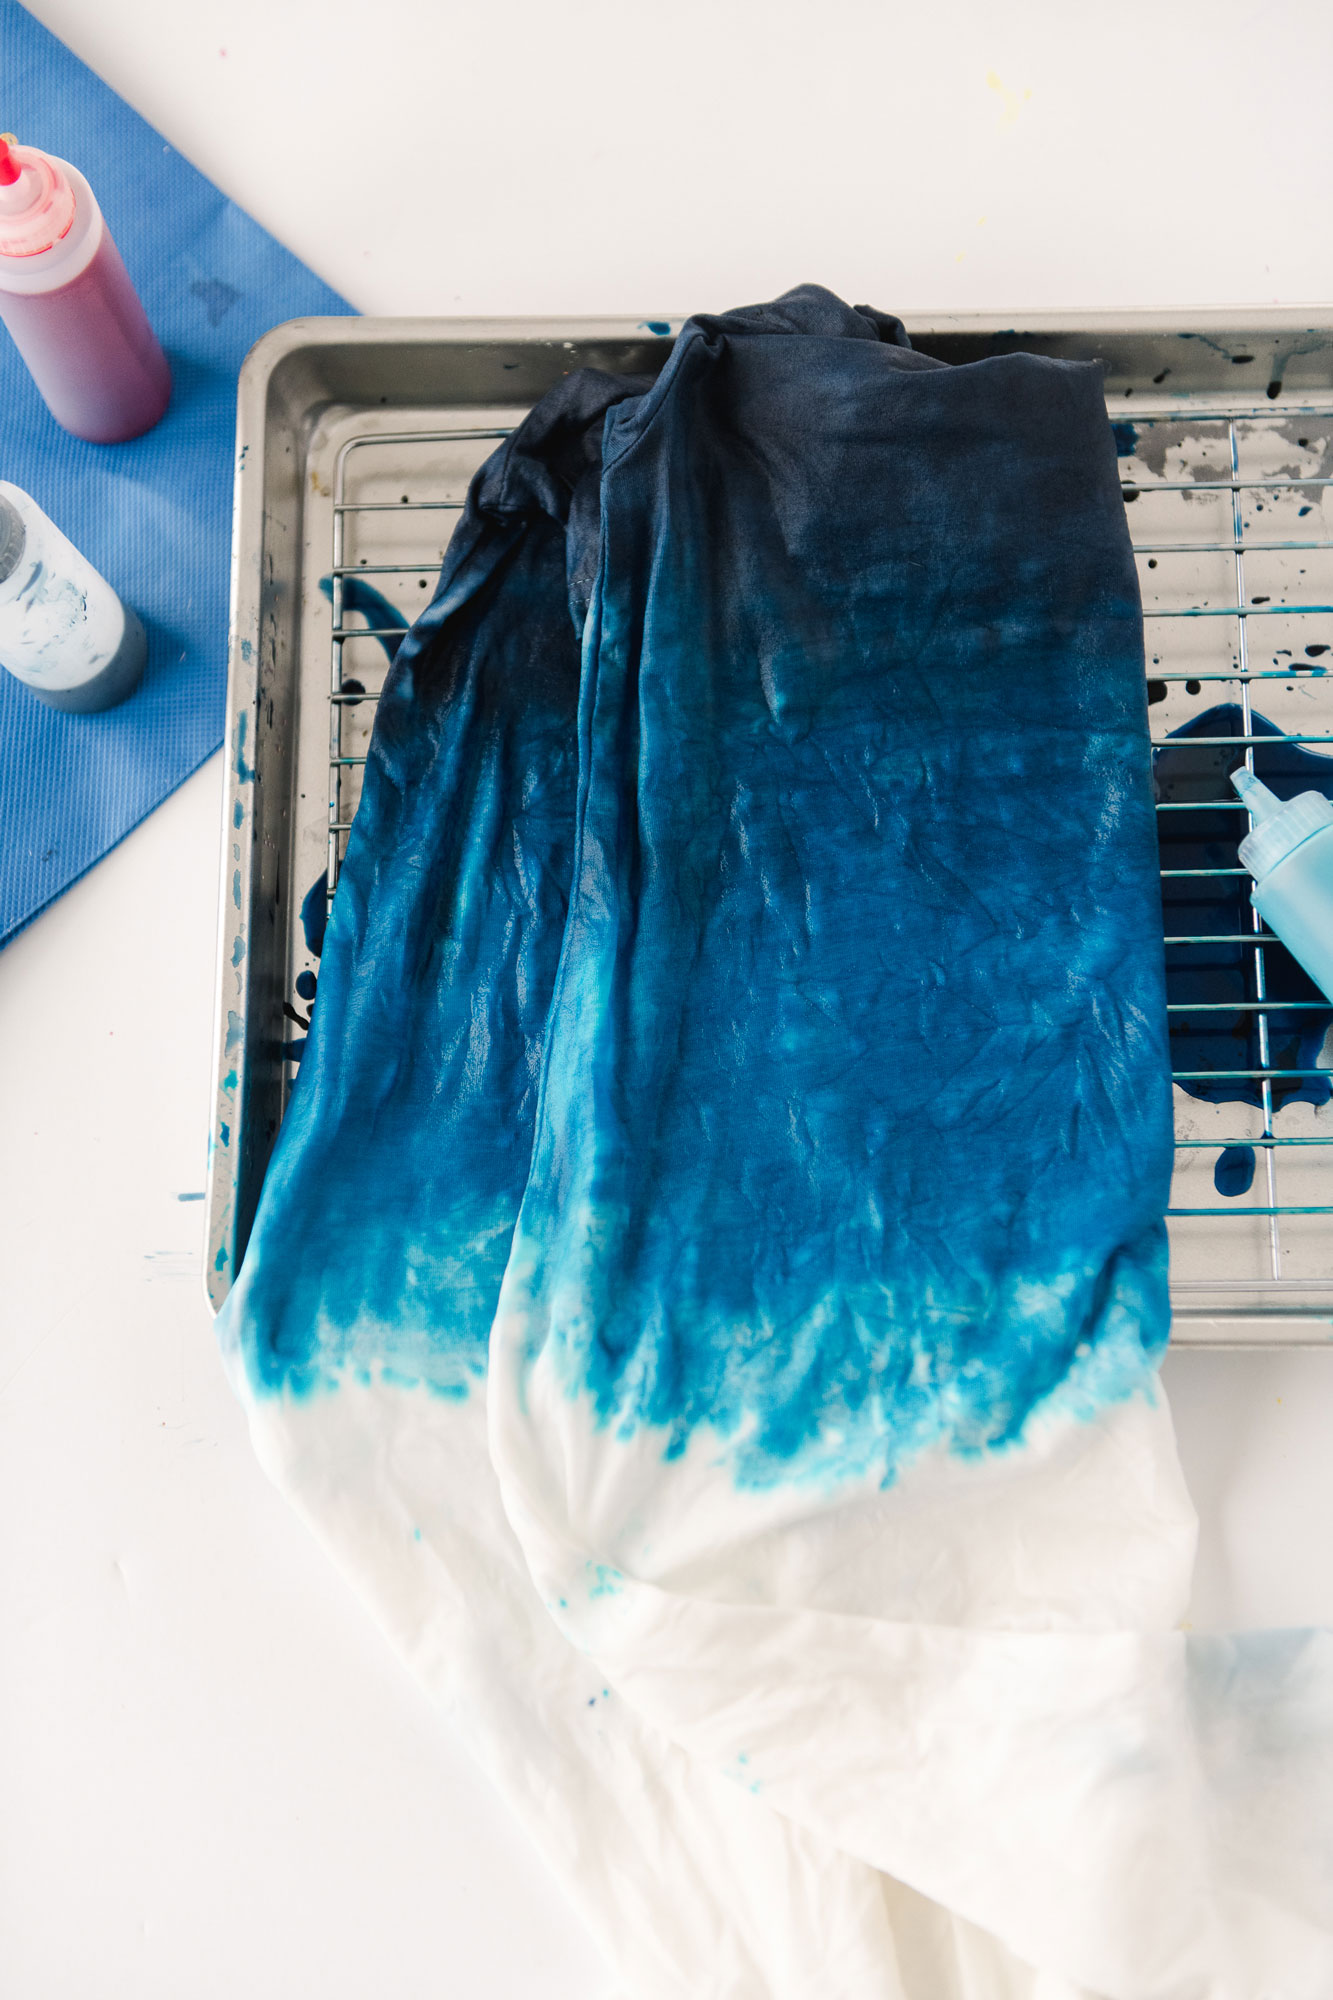
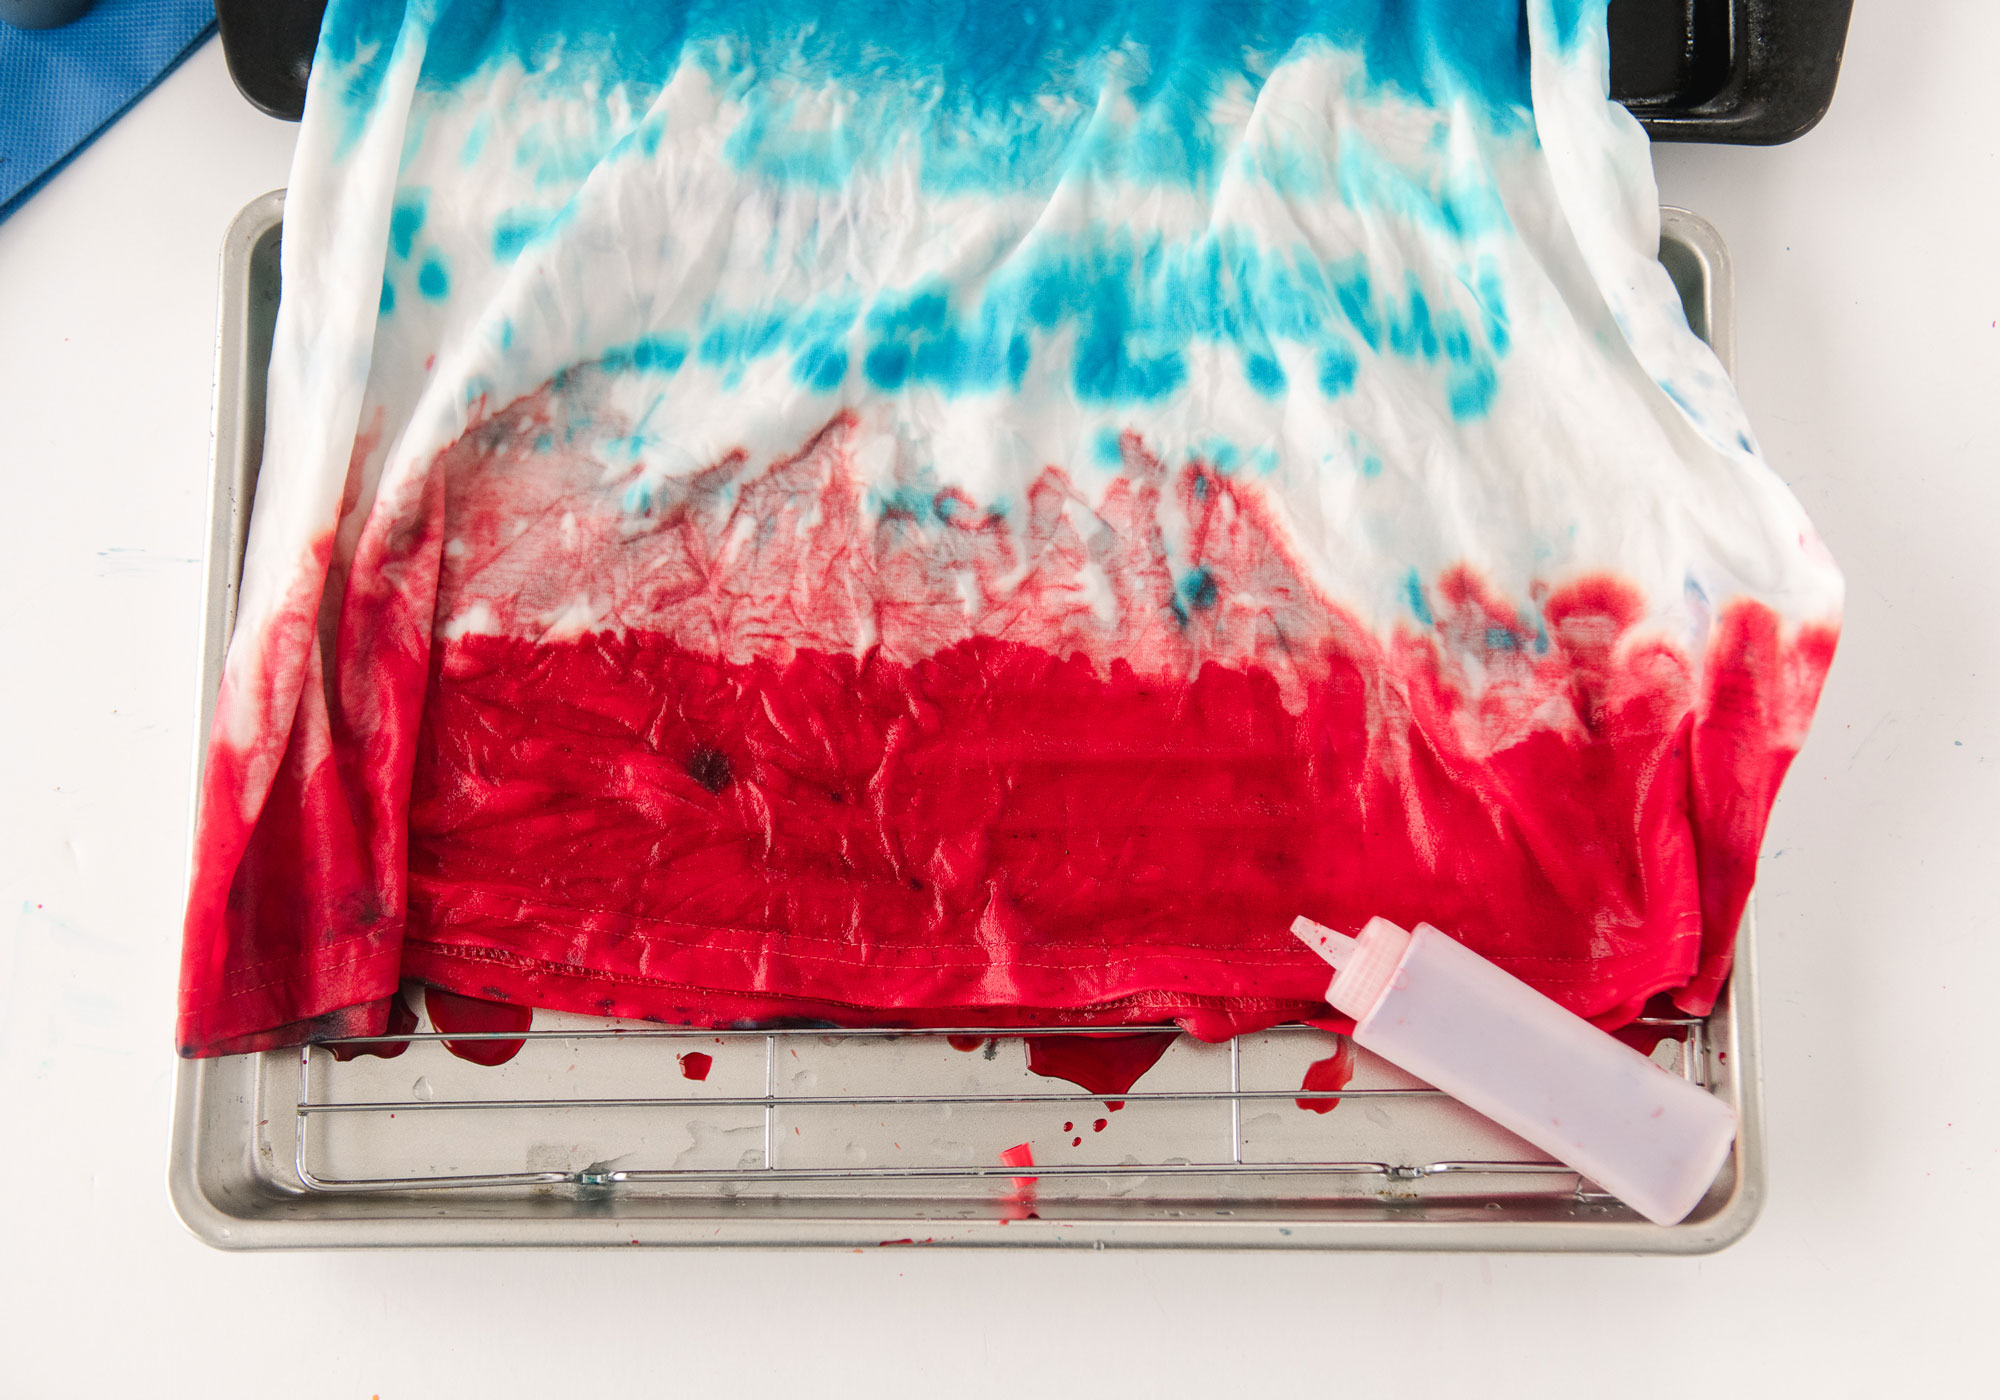
- ”eyeball” where you want the colors to end/begin. You can make marks with a pencil if you’d like to be more exact. I knew I wanted the navy to bleed into the turquoise and then have a white space between the blues and the red at the bottom. I didn’t measure, I just went for it 🙂
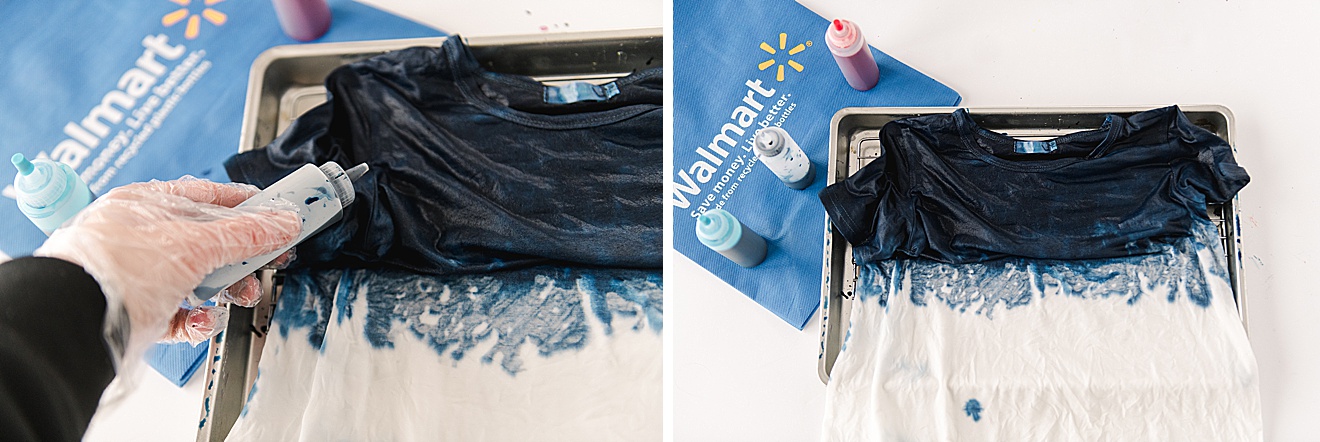
- Begin with darkest color first, the navy. Know that the colors will bleed, so “underestimate” how big you want the area to be and watch the colors bleed and see how much more dye you need to soak into the fabric.
- Make sure the color is soaking to the back side of the dress. With this technique being “flat”, you want to flip portions of your dress over to make sure that it is soaking properly and evenly to the back. I did this by folding vertically (top to bottom) 1/2 of the dress at a time and then soaking and laying flat again. Repeat with the other vertical 1/2 of the dress.
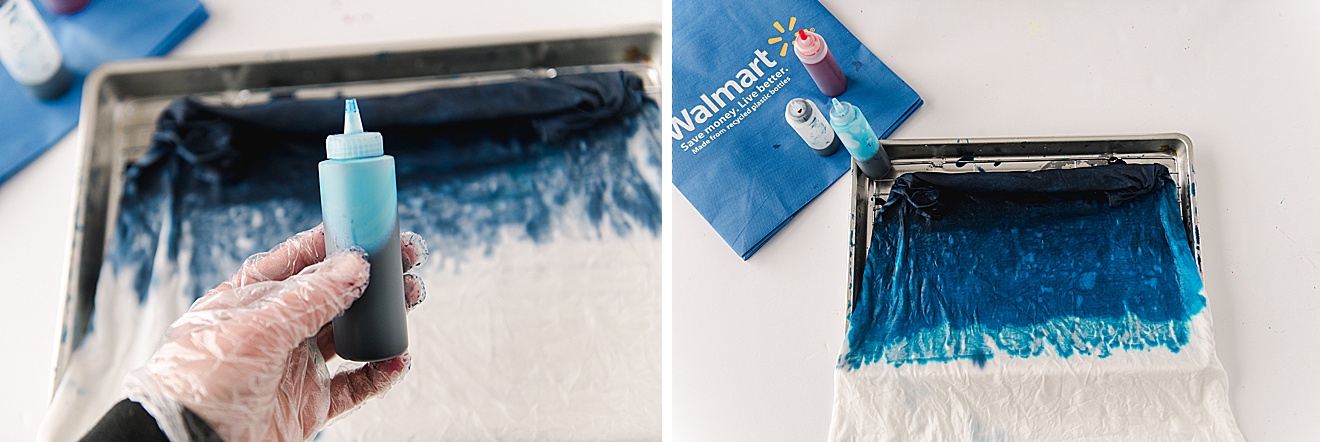
- Overlap the blues….once you have the navy done, begin with the turquoise. Overlap the 2 colors at the top so that they bleed into one another in the most ombre seamless effect ever! 🙂 Again, “underestimate” how big you want the area and don’t overshoot how wide the stripes should be knowing that the turquoise will bleed downward.
- When flipping over to dye the dress or squeezing the dye into any colored band, do your best NOT to bunch your dress so that the dye already on the dress doesn’t accidentally soak or spill to other parts of the dress. You want to try and keep the bands of color in their designated areas as best as possible! 🙂
- Once you have the blues all set. Go to the bottom of the dress and add your red. Again, “underestimate” how big you want the space and watch it spread!
- Go back to other areas of the dress and add more dye where necessary to make sure it’s good and soaked 🙂
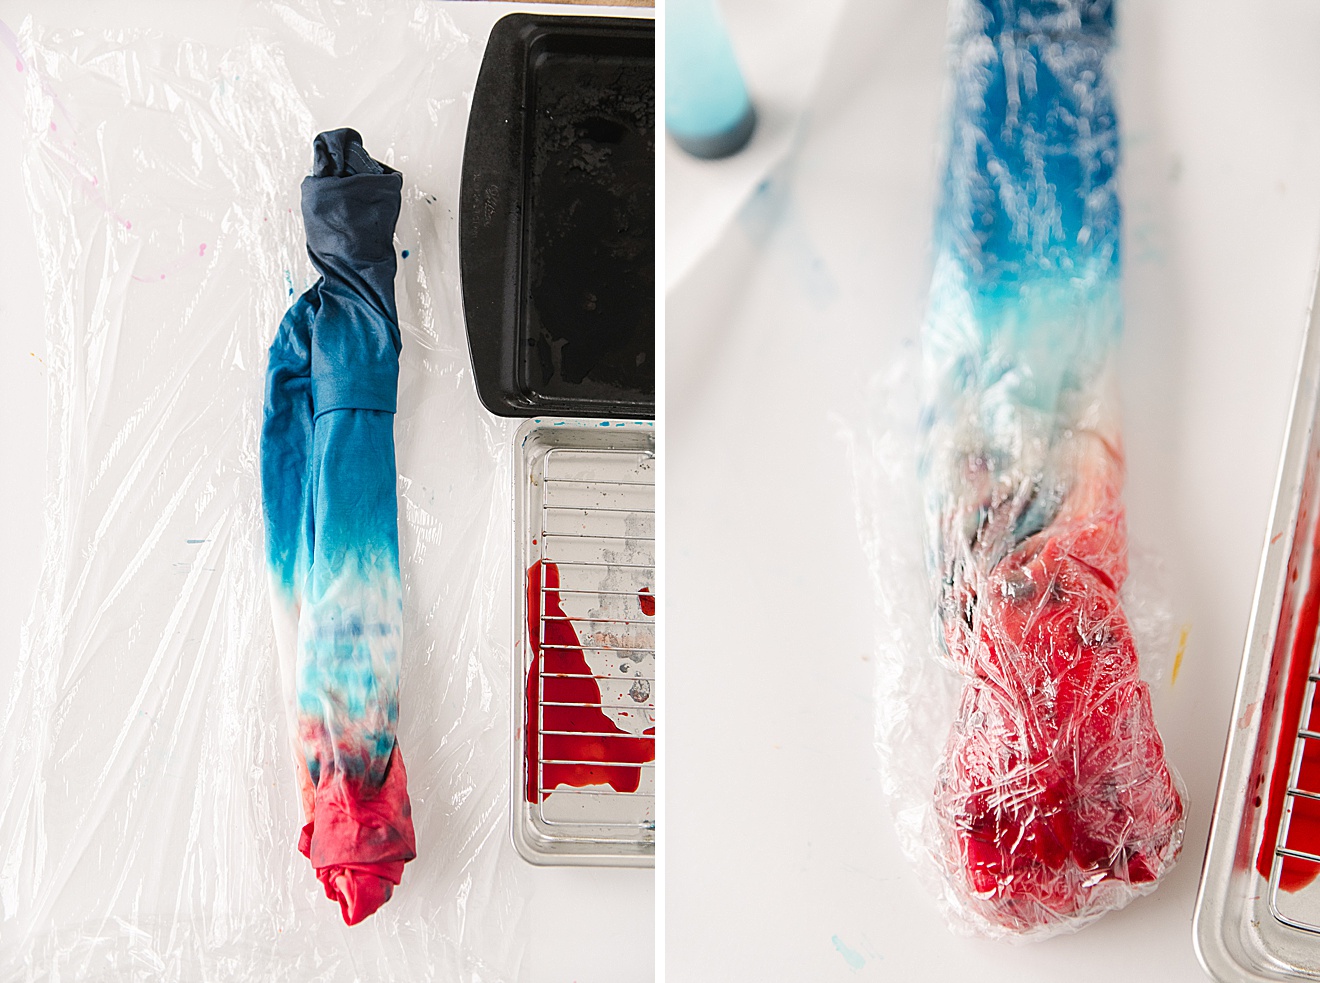
4. When all the dying is done, you will want to cover up the dress and let the dye permeate! 🙂 You can either just choose to cover your dress lying flat on the table OR you can wrap the dress up (which is what I did)!. I chose to fold horizontally the red portion up so that red was touching red. And then do the same with navy by folding the top navy part down so that navy was only touching navy. Then I folded vertically and rolled from left to right across the dress so that the colors in the “band” were only touching those same colors 🙂 It will be a long tie dyed dress burrito, HA! 🙂
Lay out a few rows of plastic wrap (or opened plastic bags) and then lay the rolled dress in those bags to seal tightly and cover. Set aside and set overnight (or at least 8 hours)!

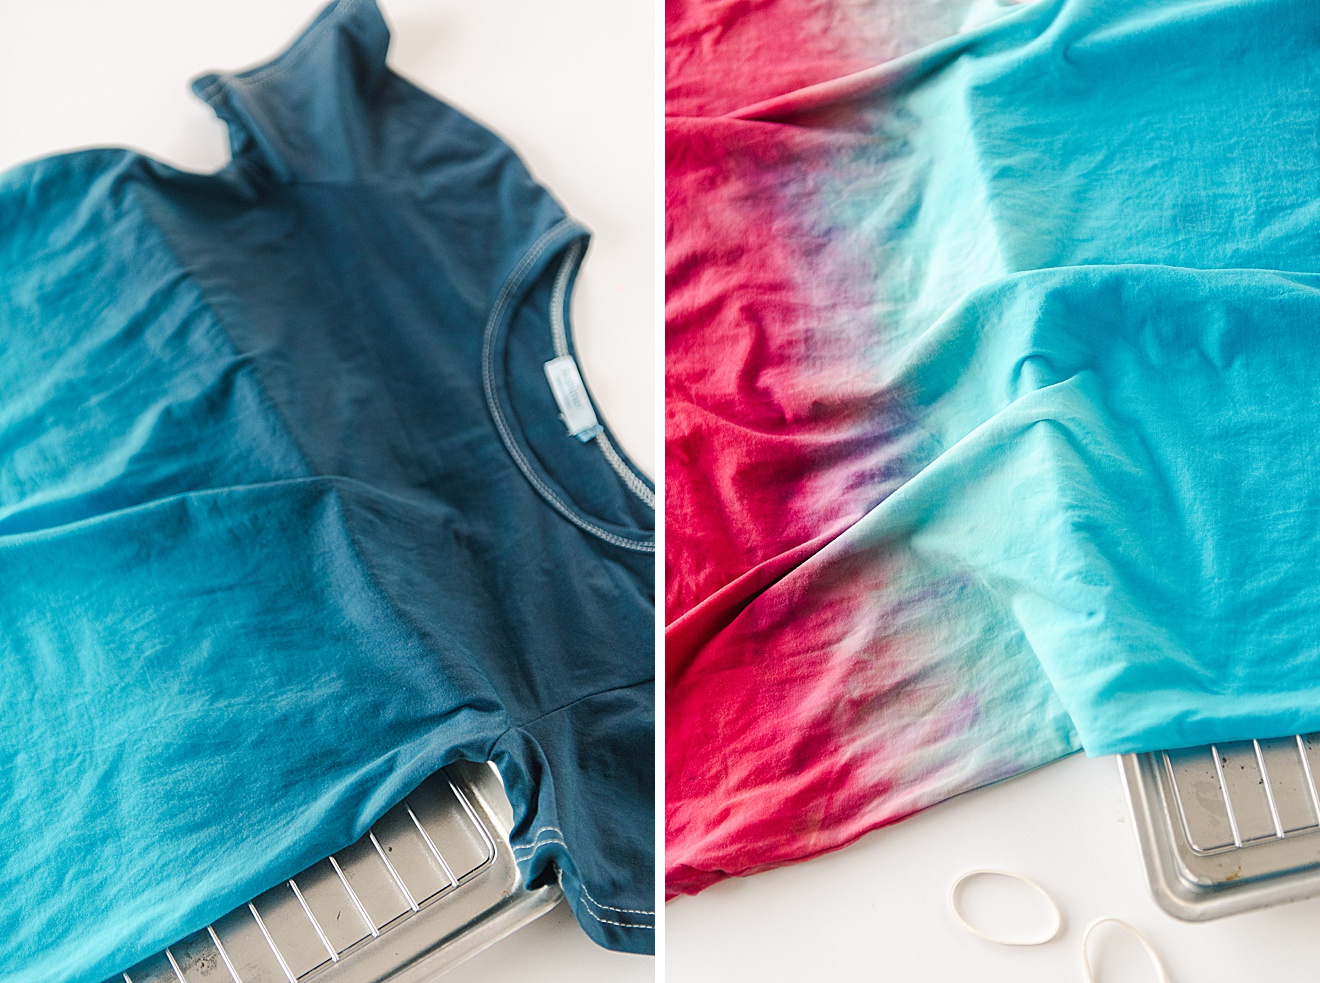
5. THE BEST PART – the reveal 🙂
Unseal the plastic wrap or plastic bags and then uncoil your dress. Rinse in cold water to remove excess until the water runs clear. Then wash and dry in a cold water cycle (wash alone or with other recently dyed items)!


Wear around town, show off at the beach or dazzle everyone with your amazing new dress at the local parade this summer! Because, DUH, it’s the cutest thing for any summer day! 🙂 WEEEEE!