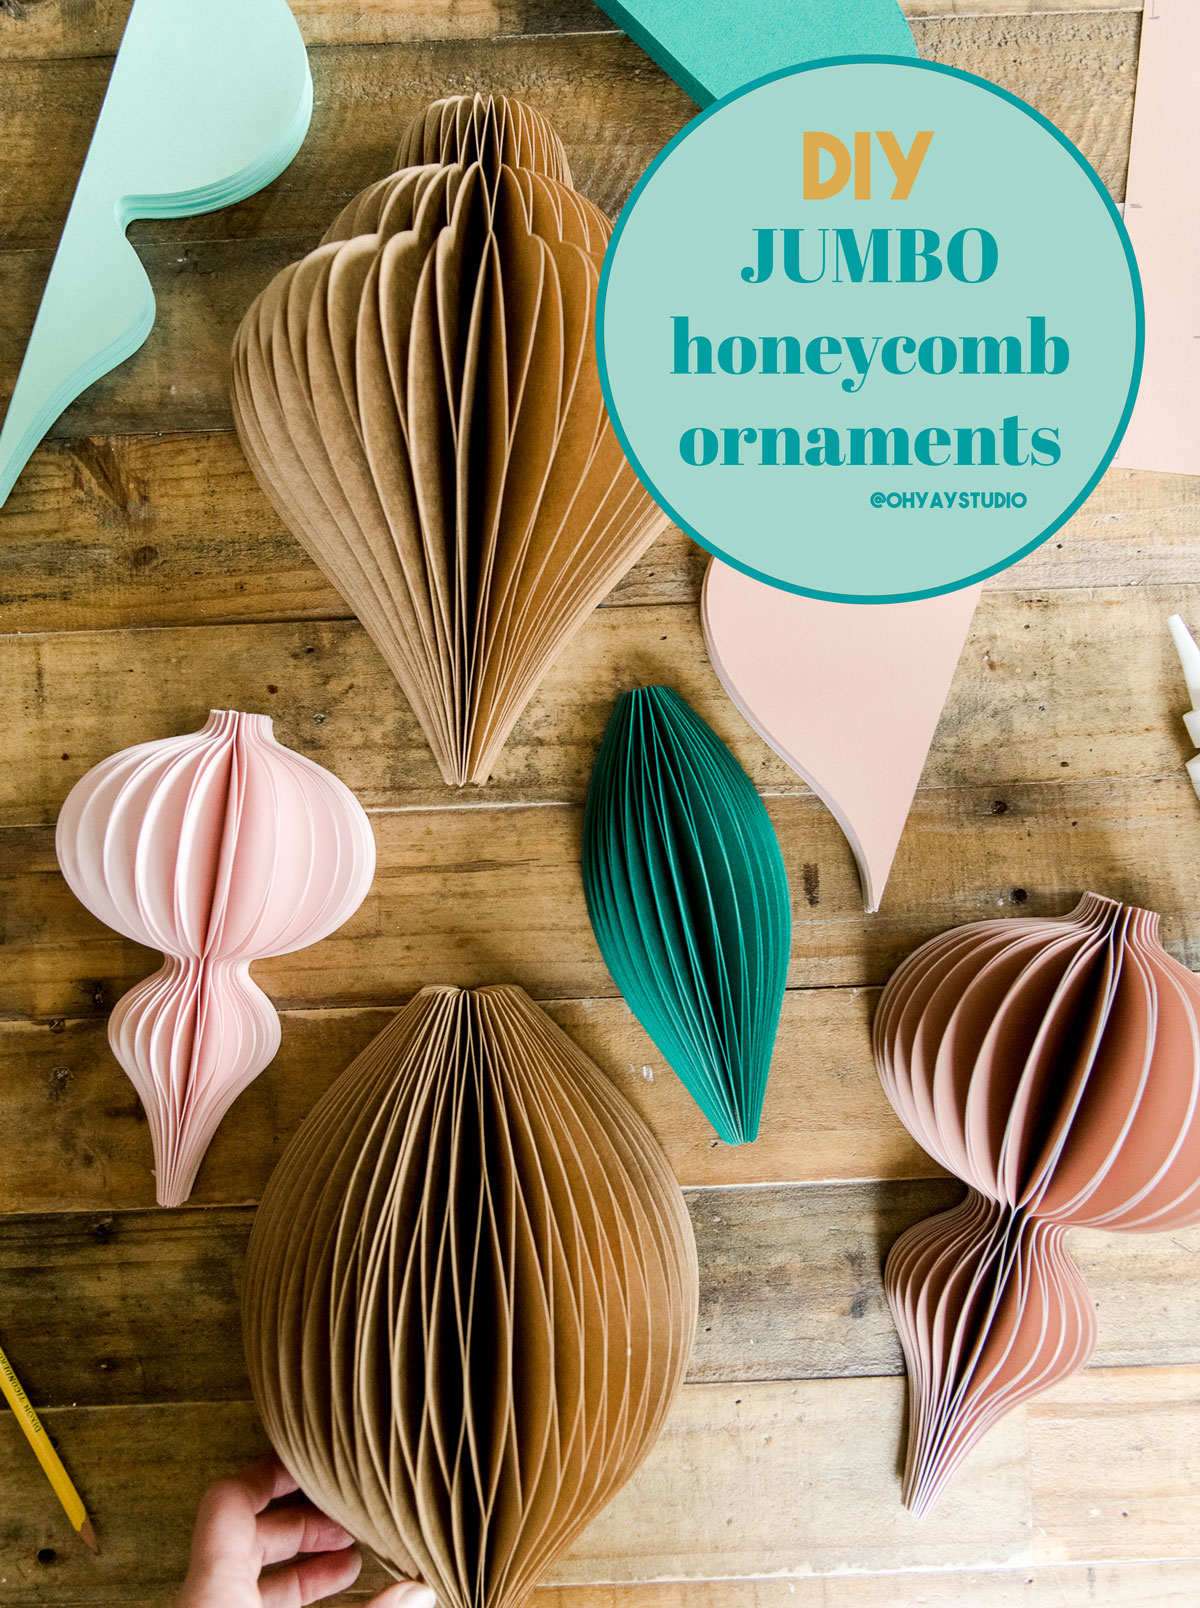
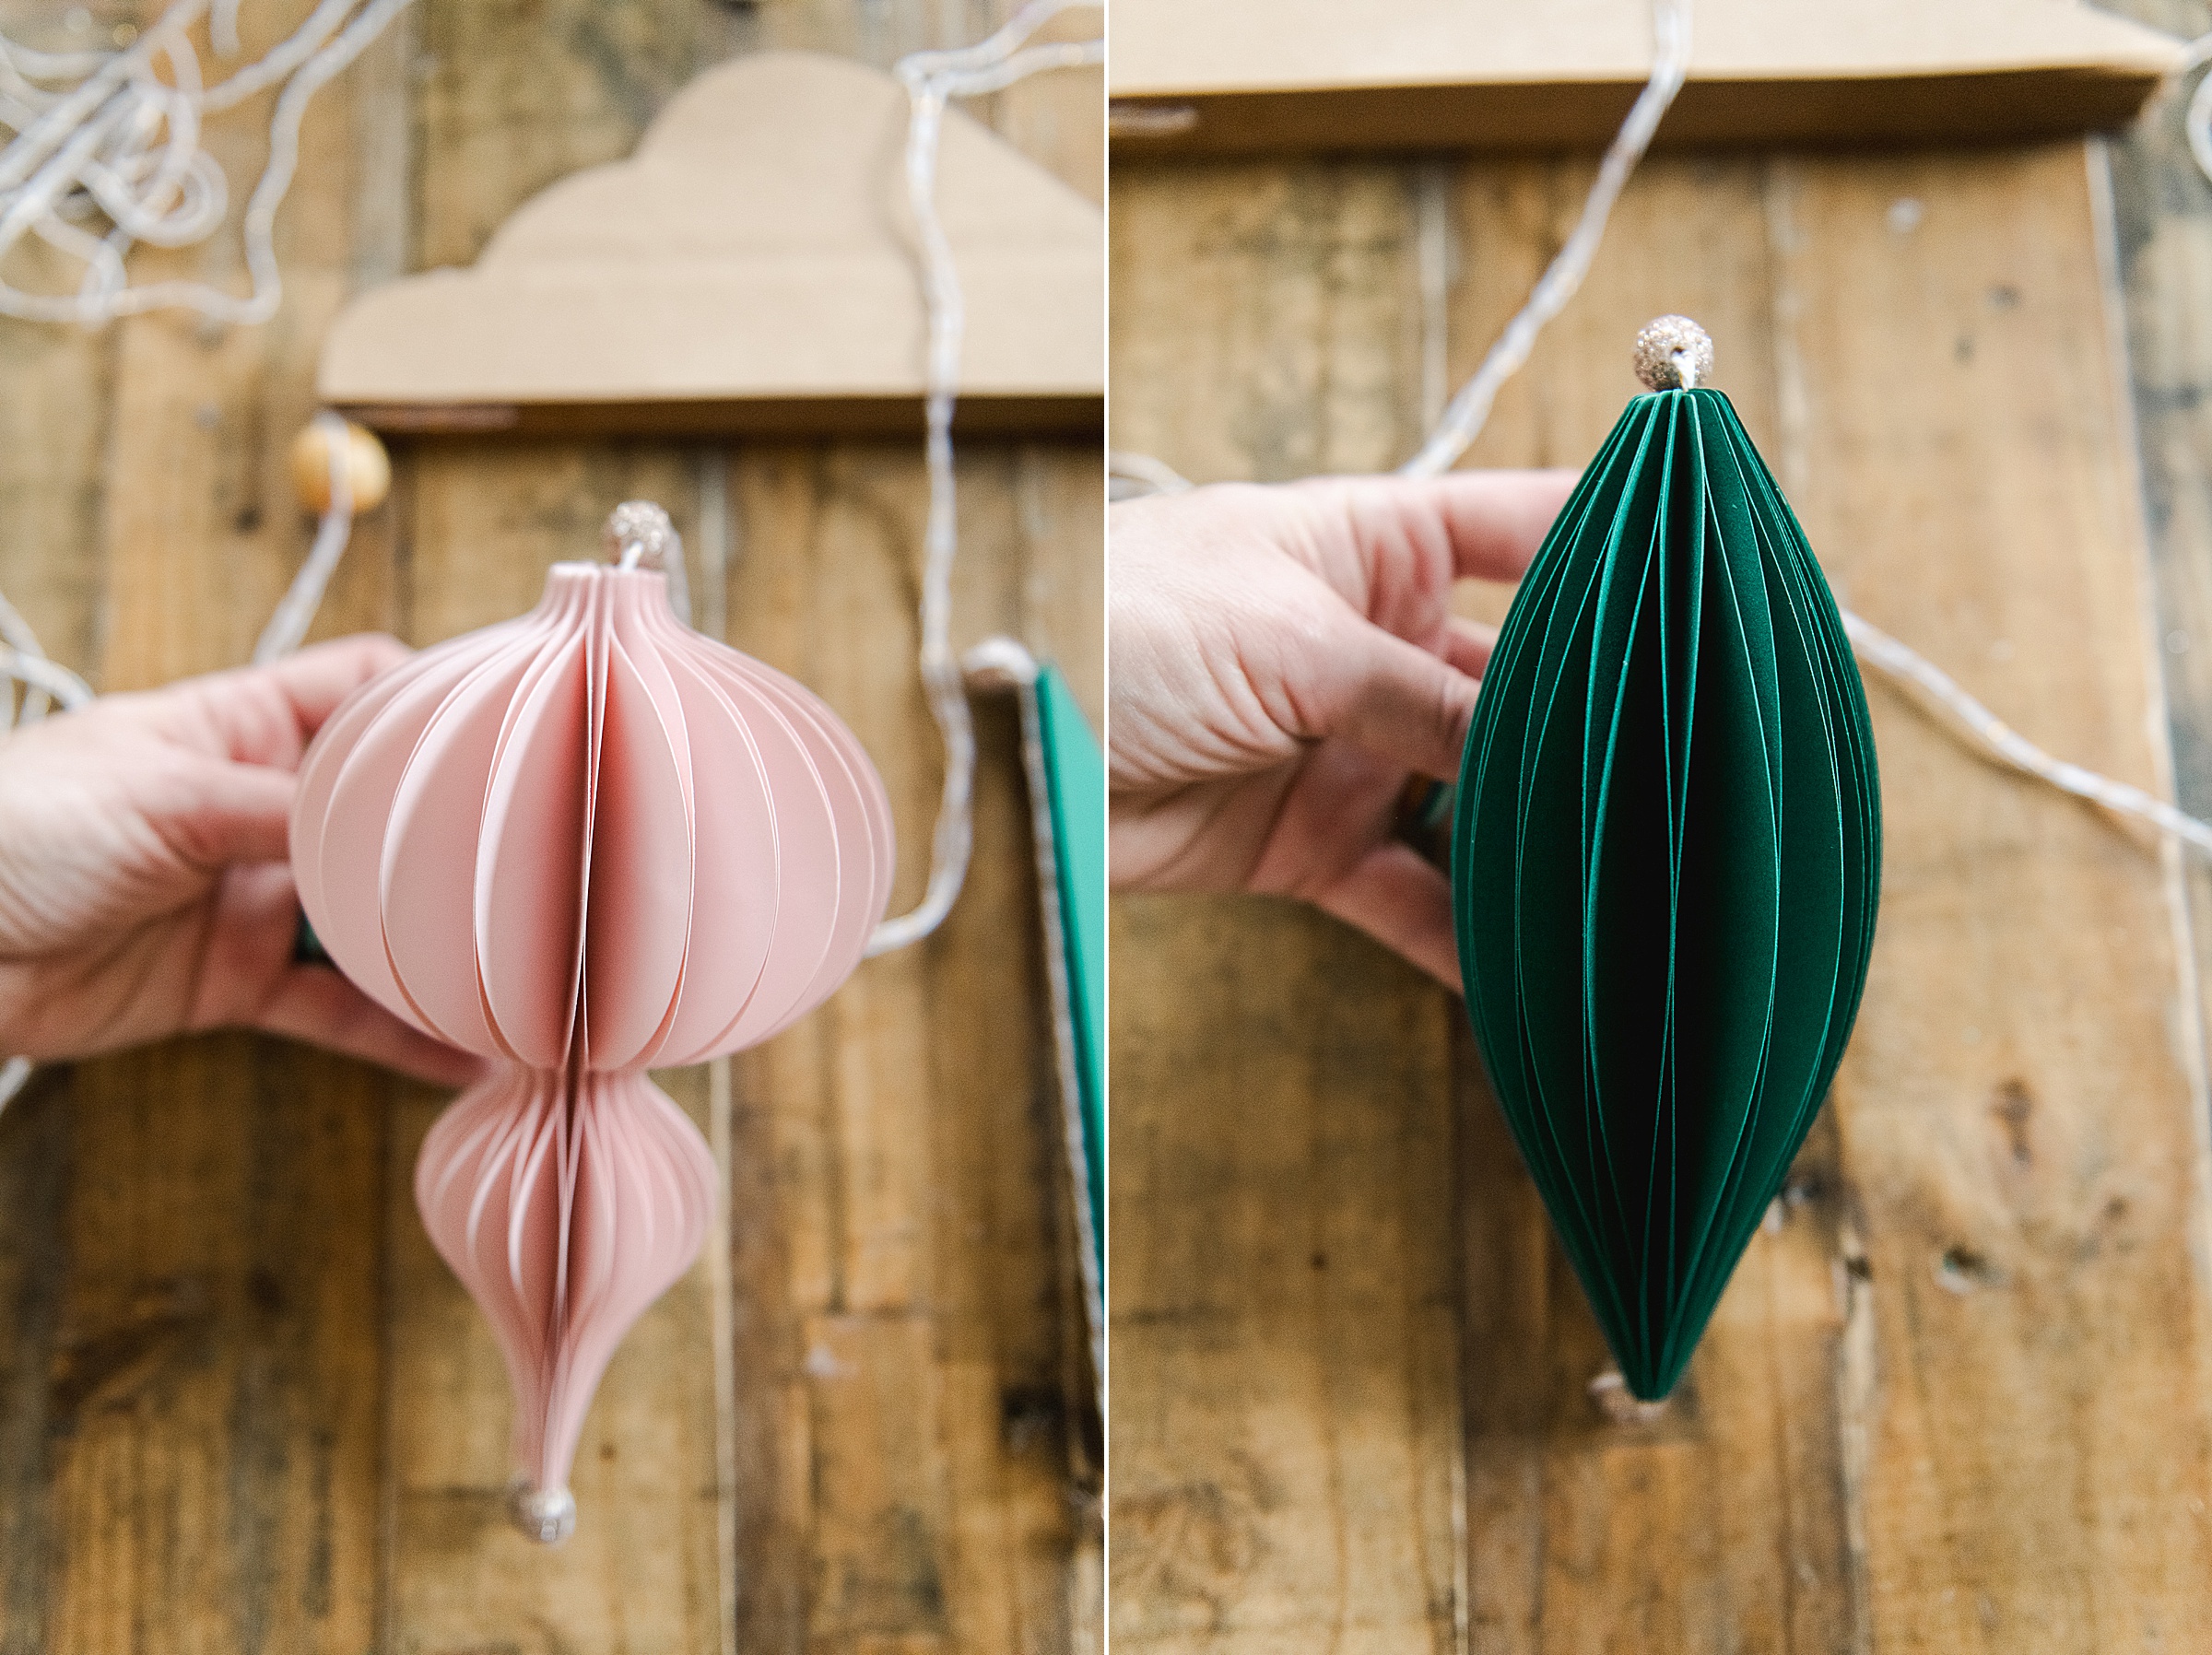
Jumbo honeycomb ornament DIY
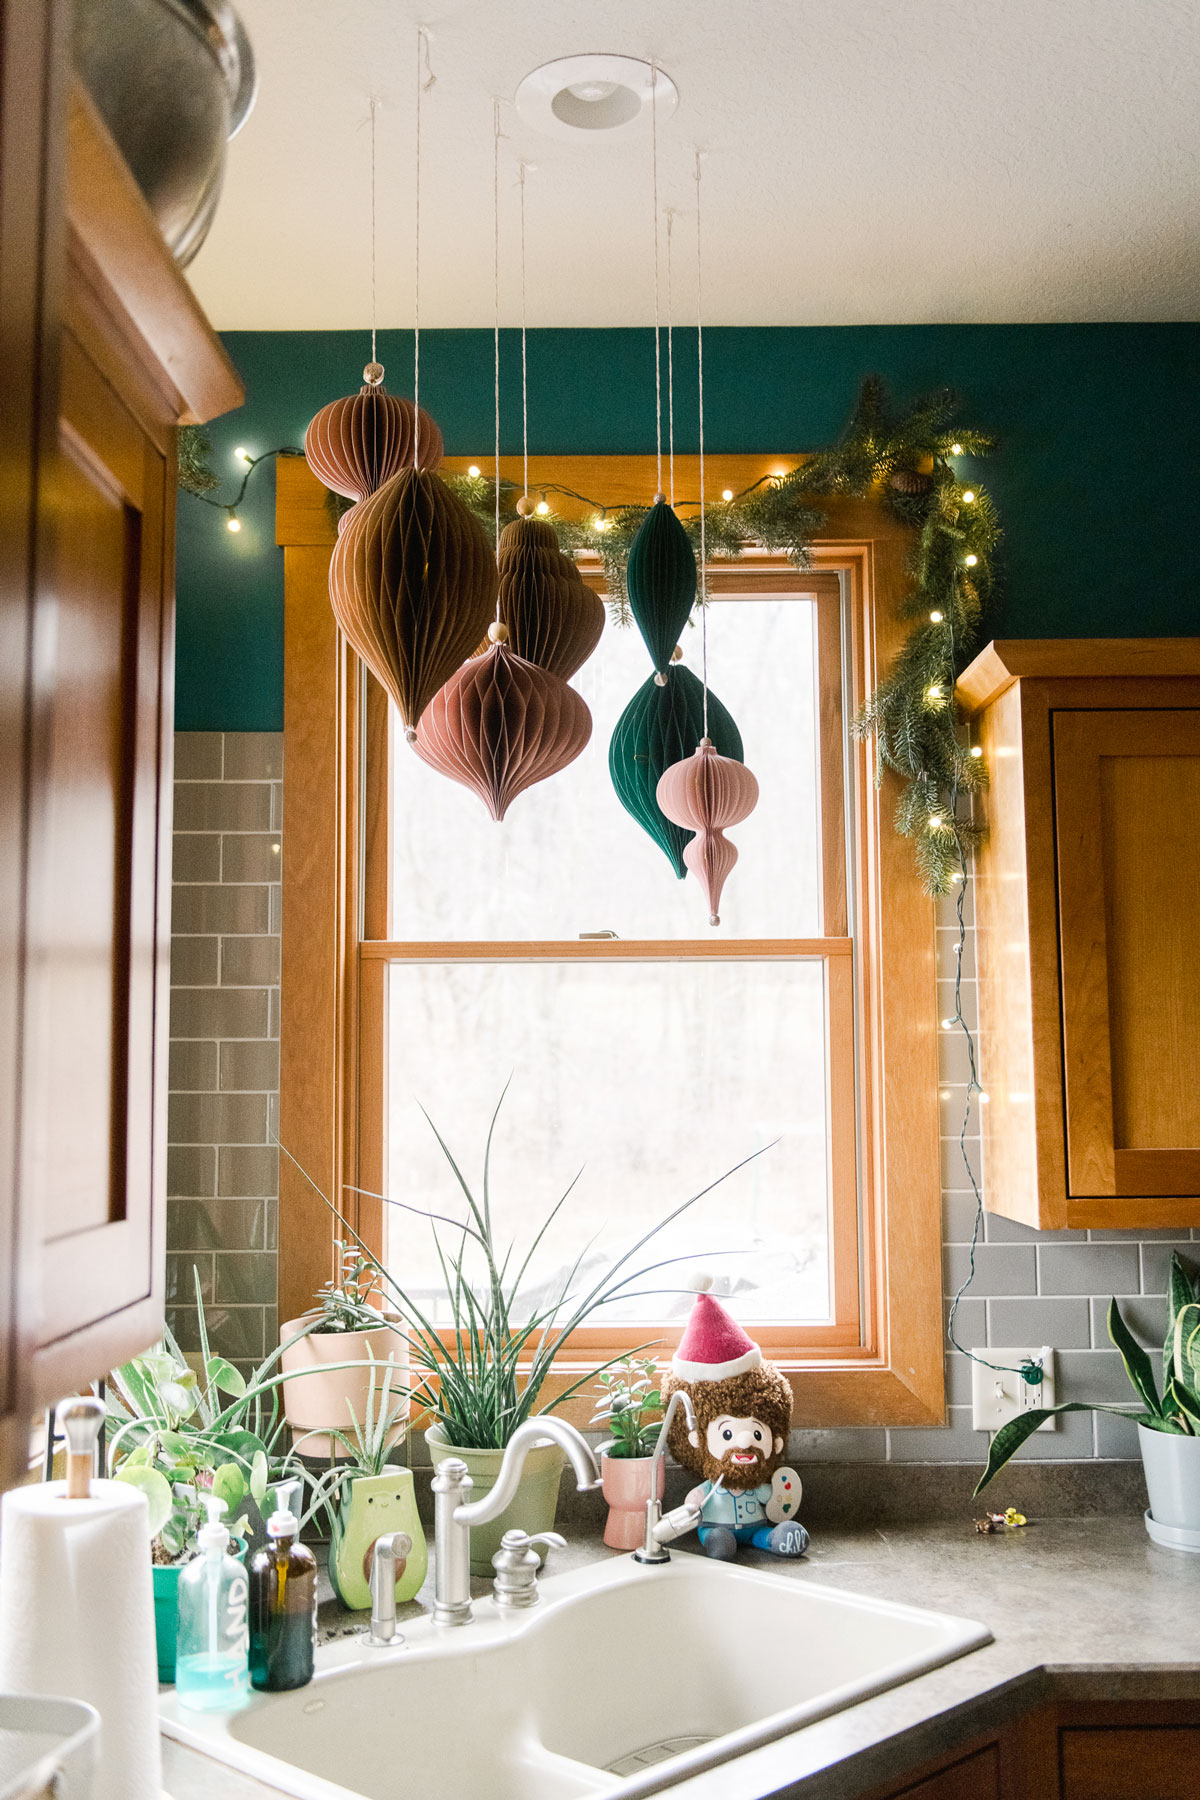
I have recently fallen into the obsession of honeycomb ornaments…..they seem like some sort of beautiful holiday magic when you open them (see my previous tutorial on how to make them HERE)! But ever since I figured this out, I’ve been hankering to make some BIIIIIG ones for above our kitchen sink in our kitchen (because I love having little holiday vignettes all over our house)! 🙂
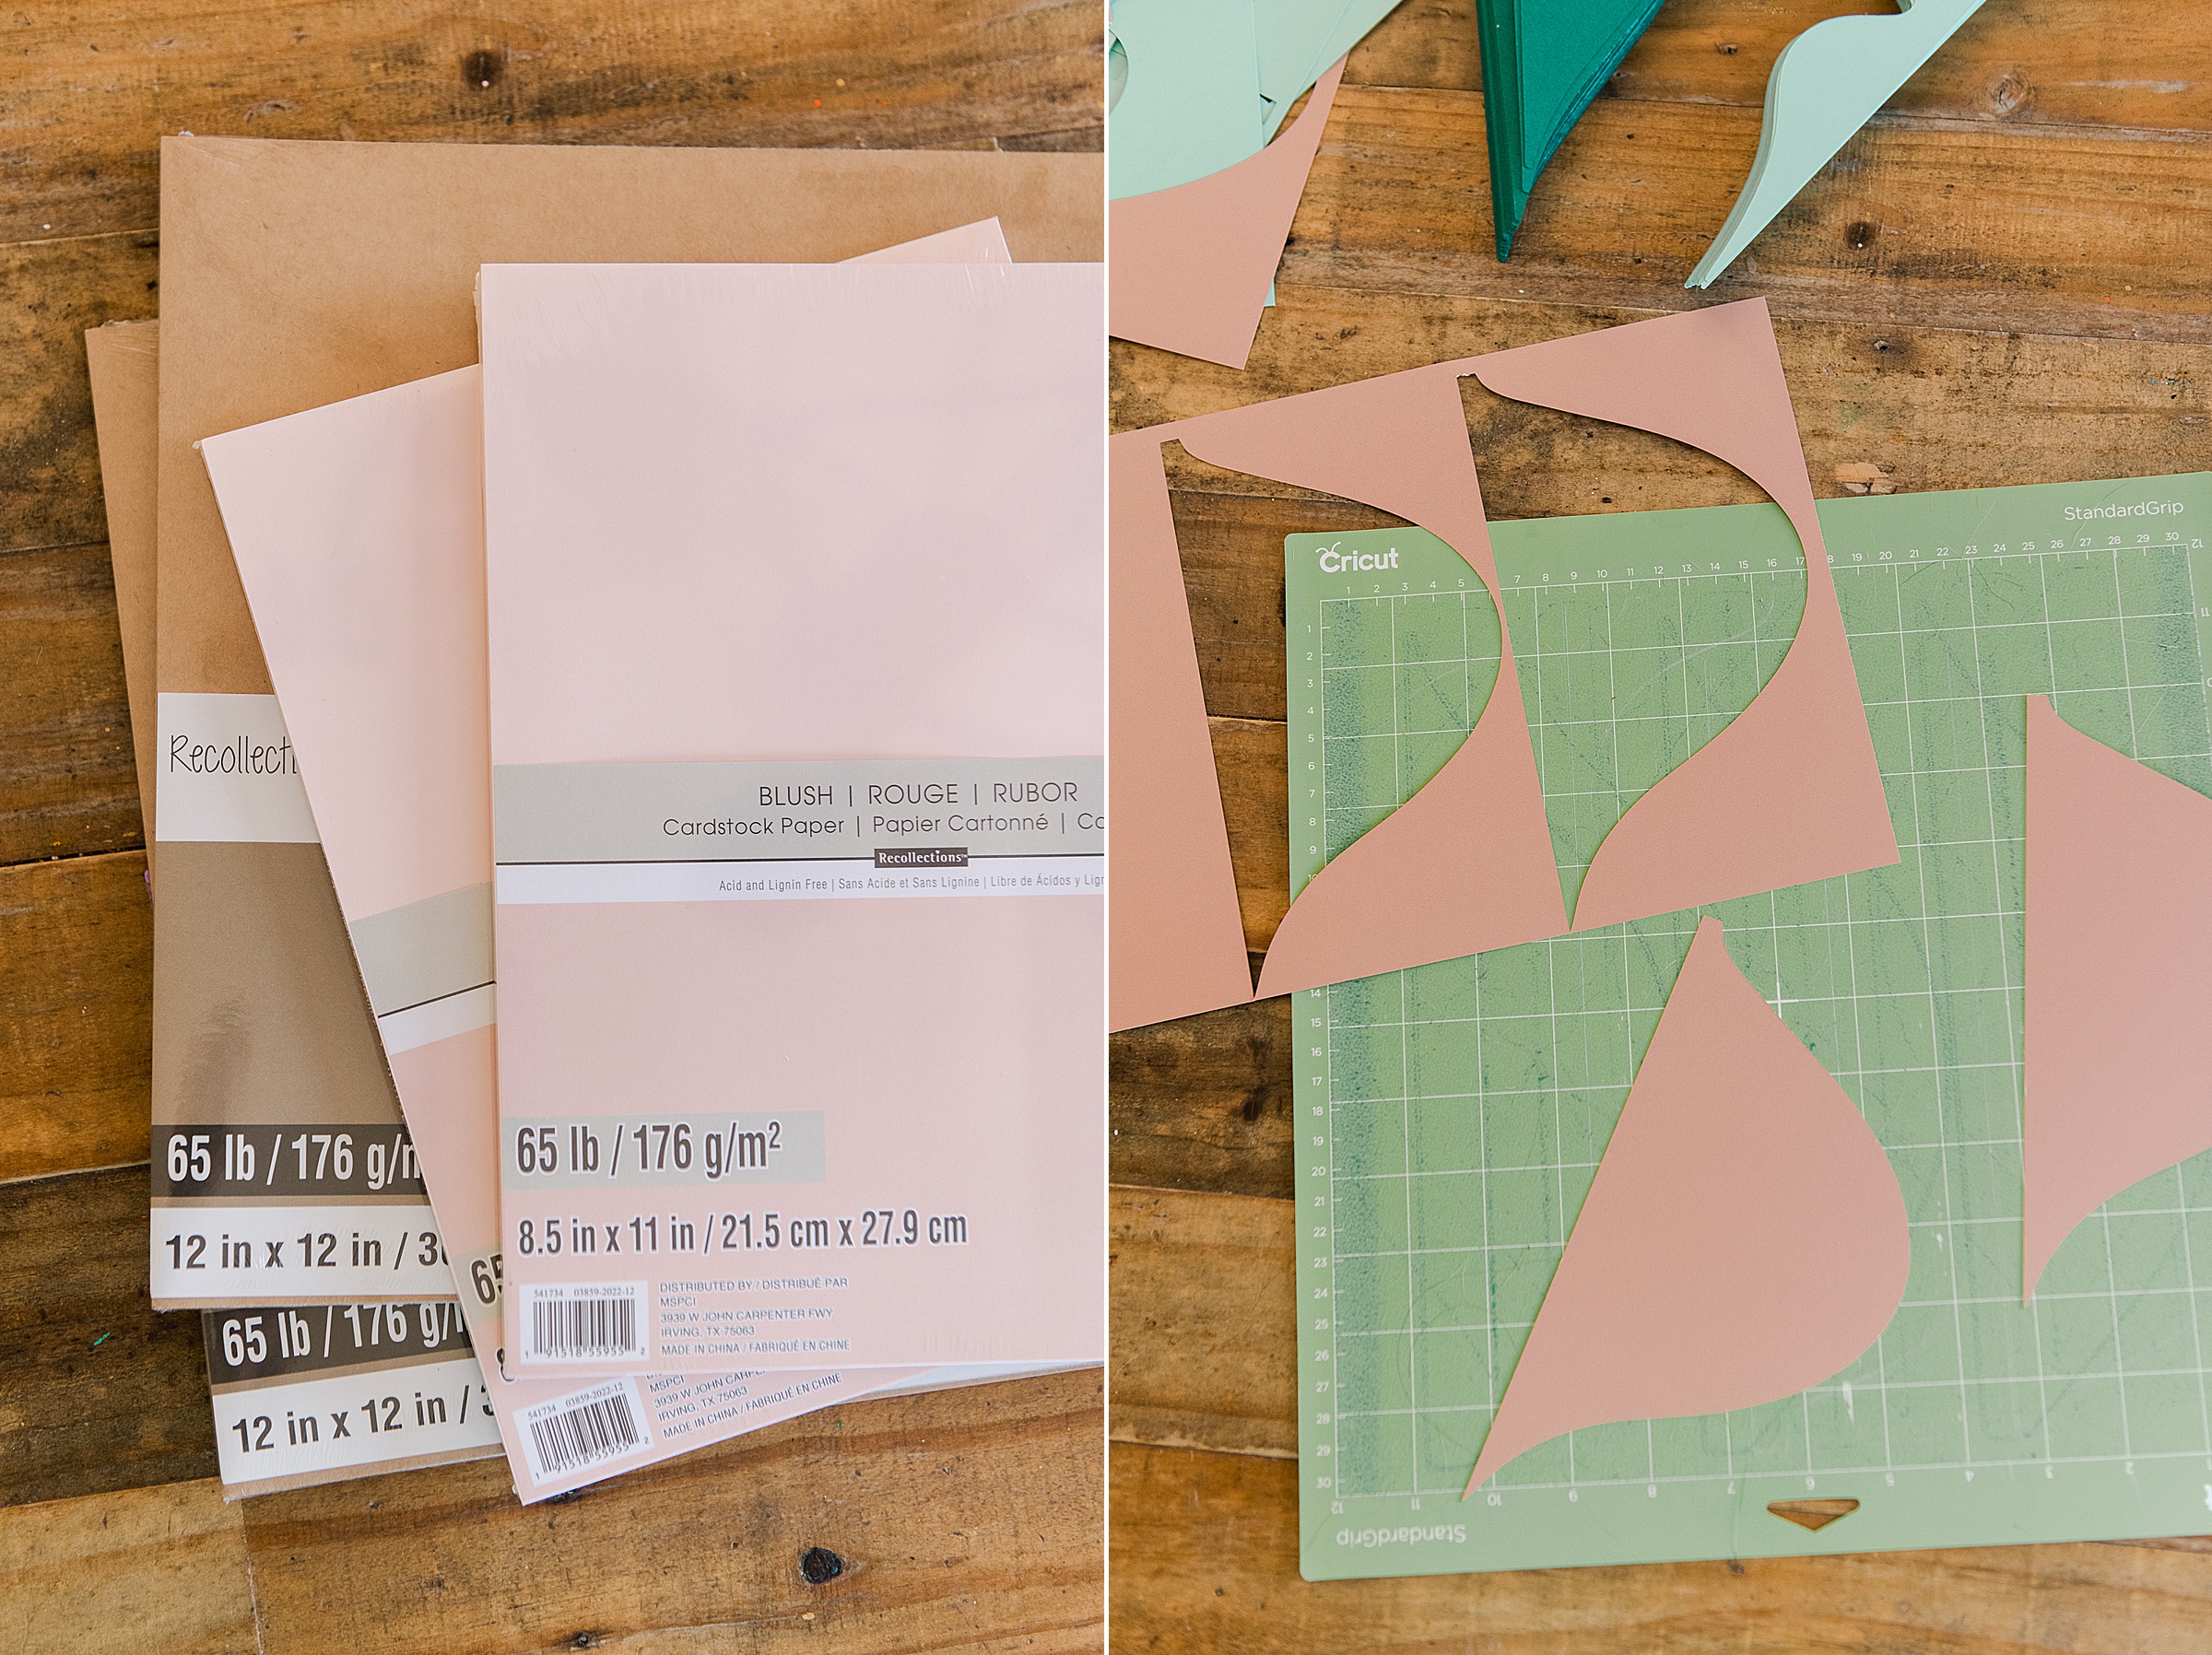
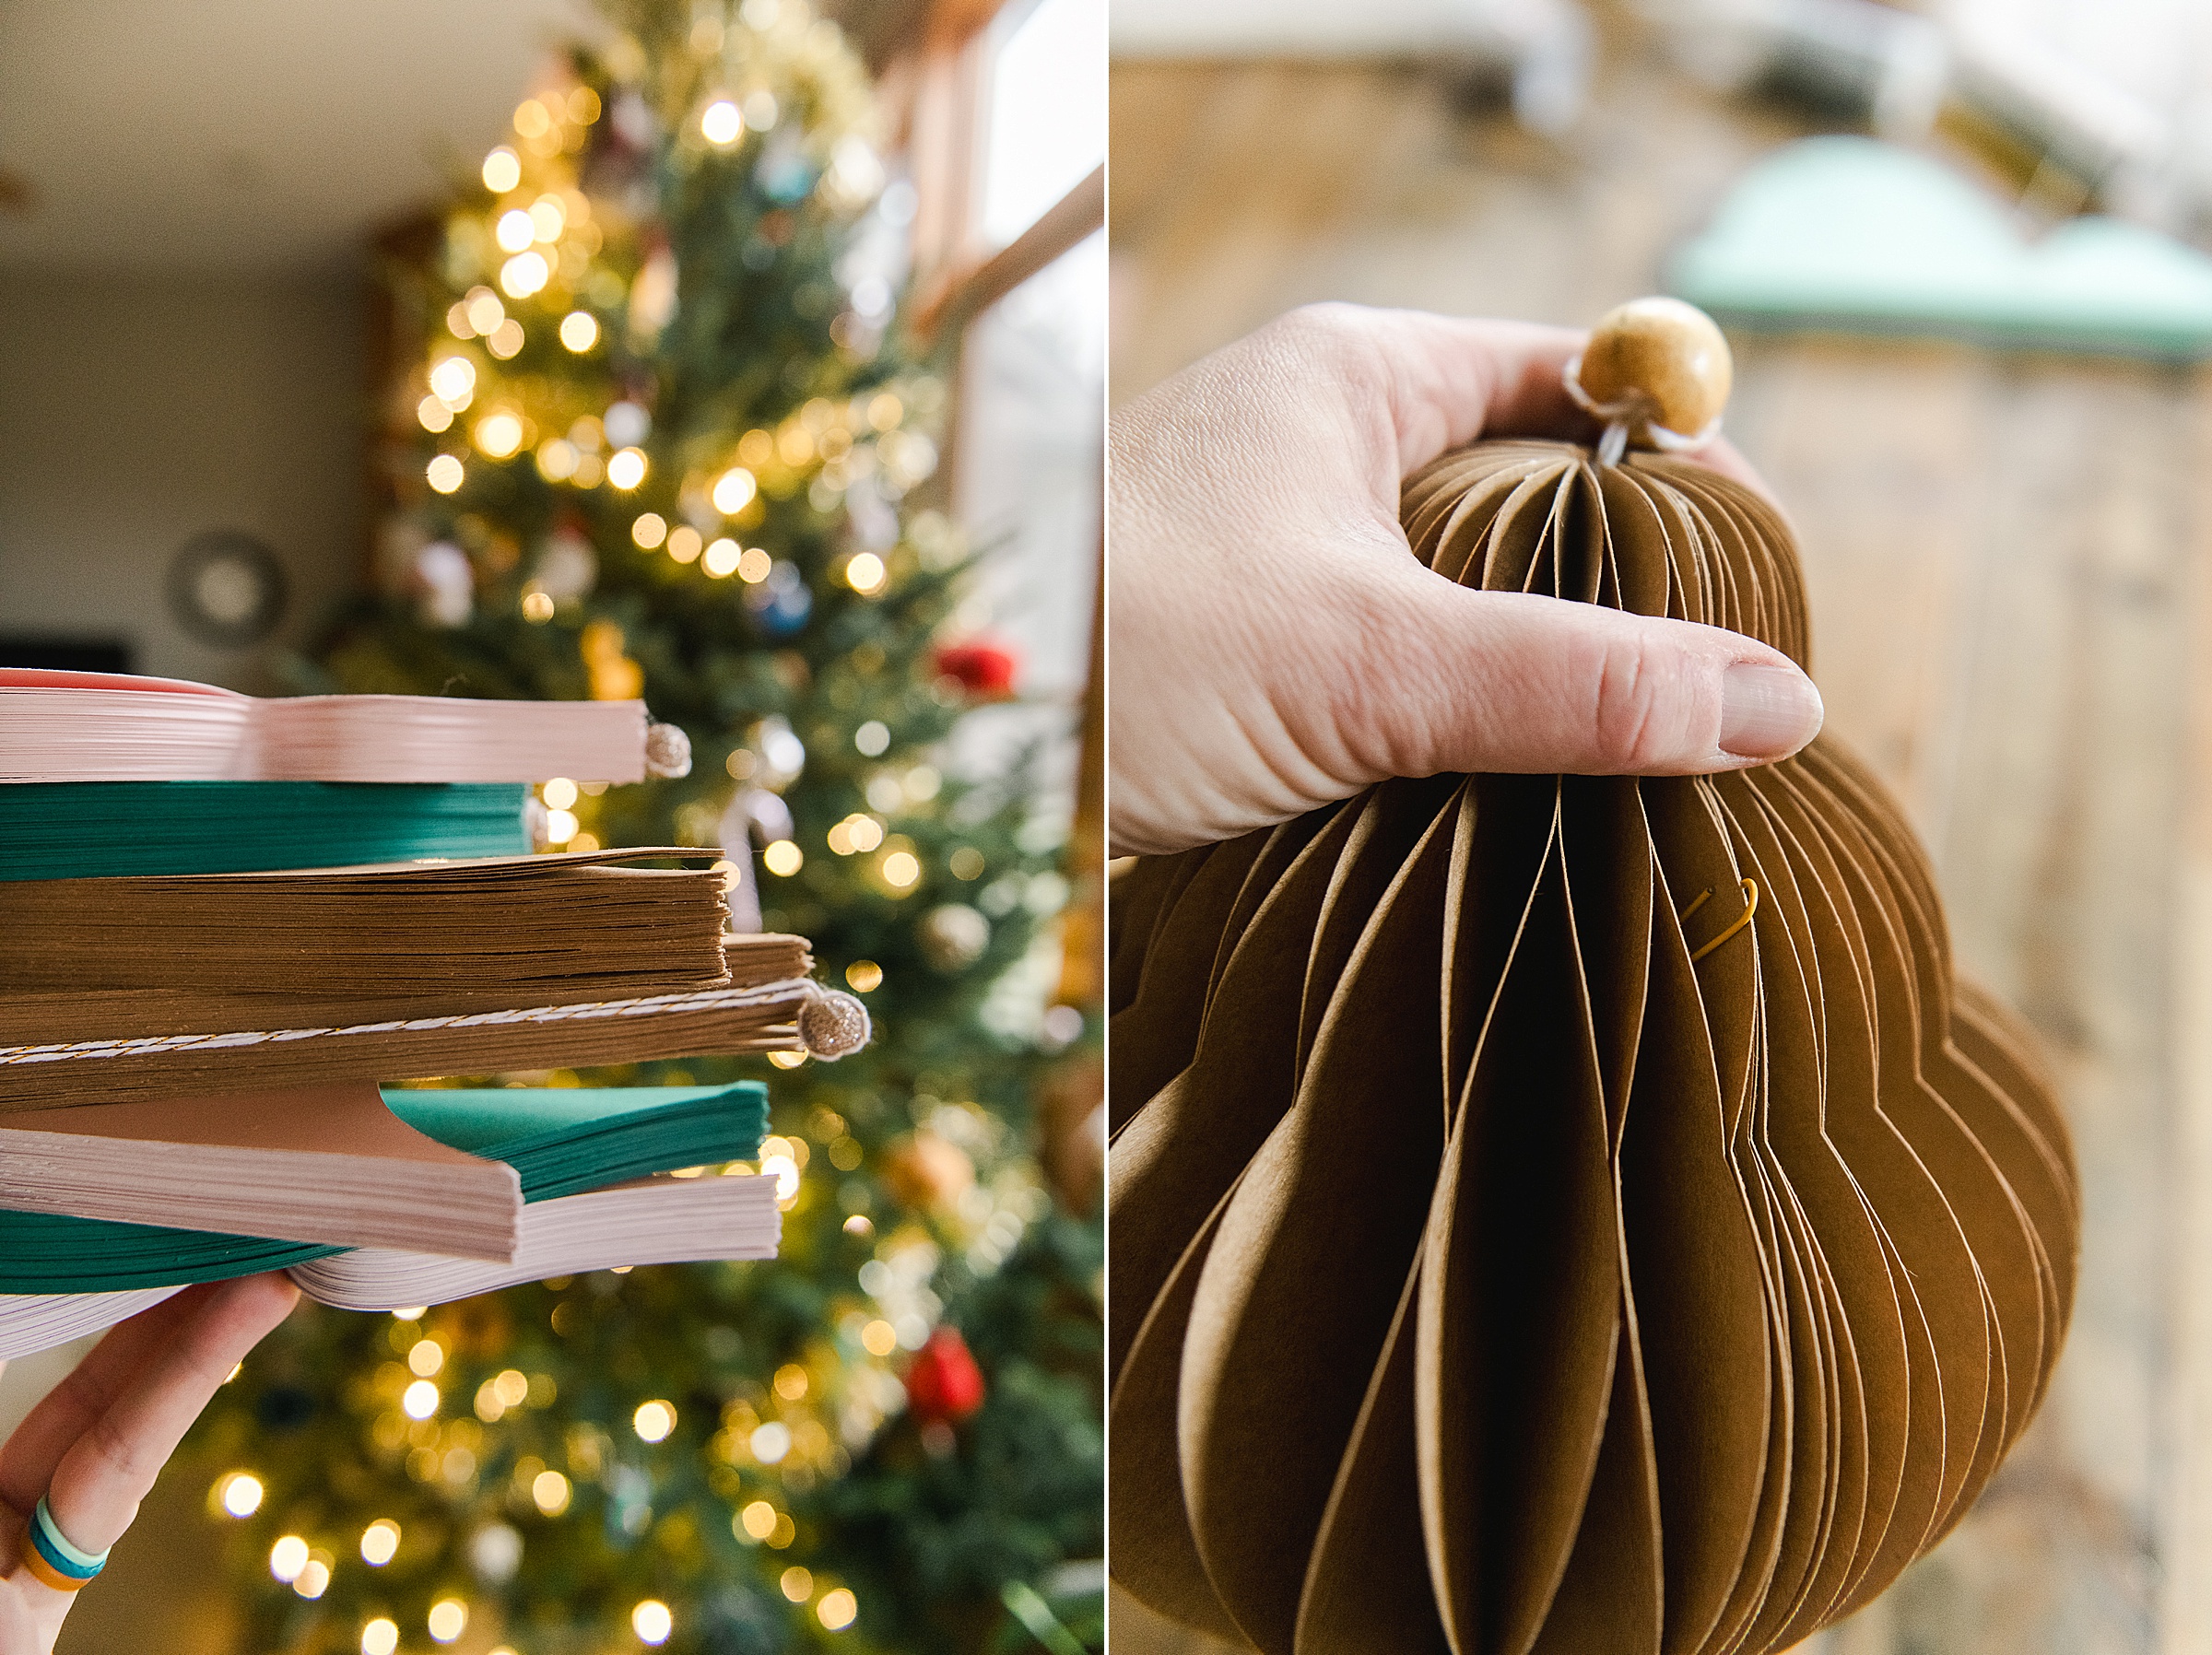
Michaels always has an awesome array of cardstock, so head to your local Michaels or craft store and dream up your color combos in the aisles of the store! 🙂 I used 65lb cardstock for this (I’ve found that anything thicker CANNNN be trickier, not impossible, but trickier simply because it’s thicker and heavier in weight).
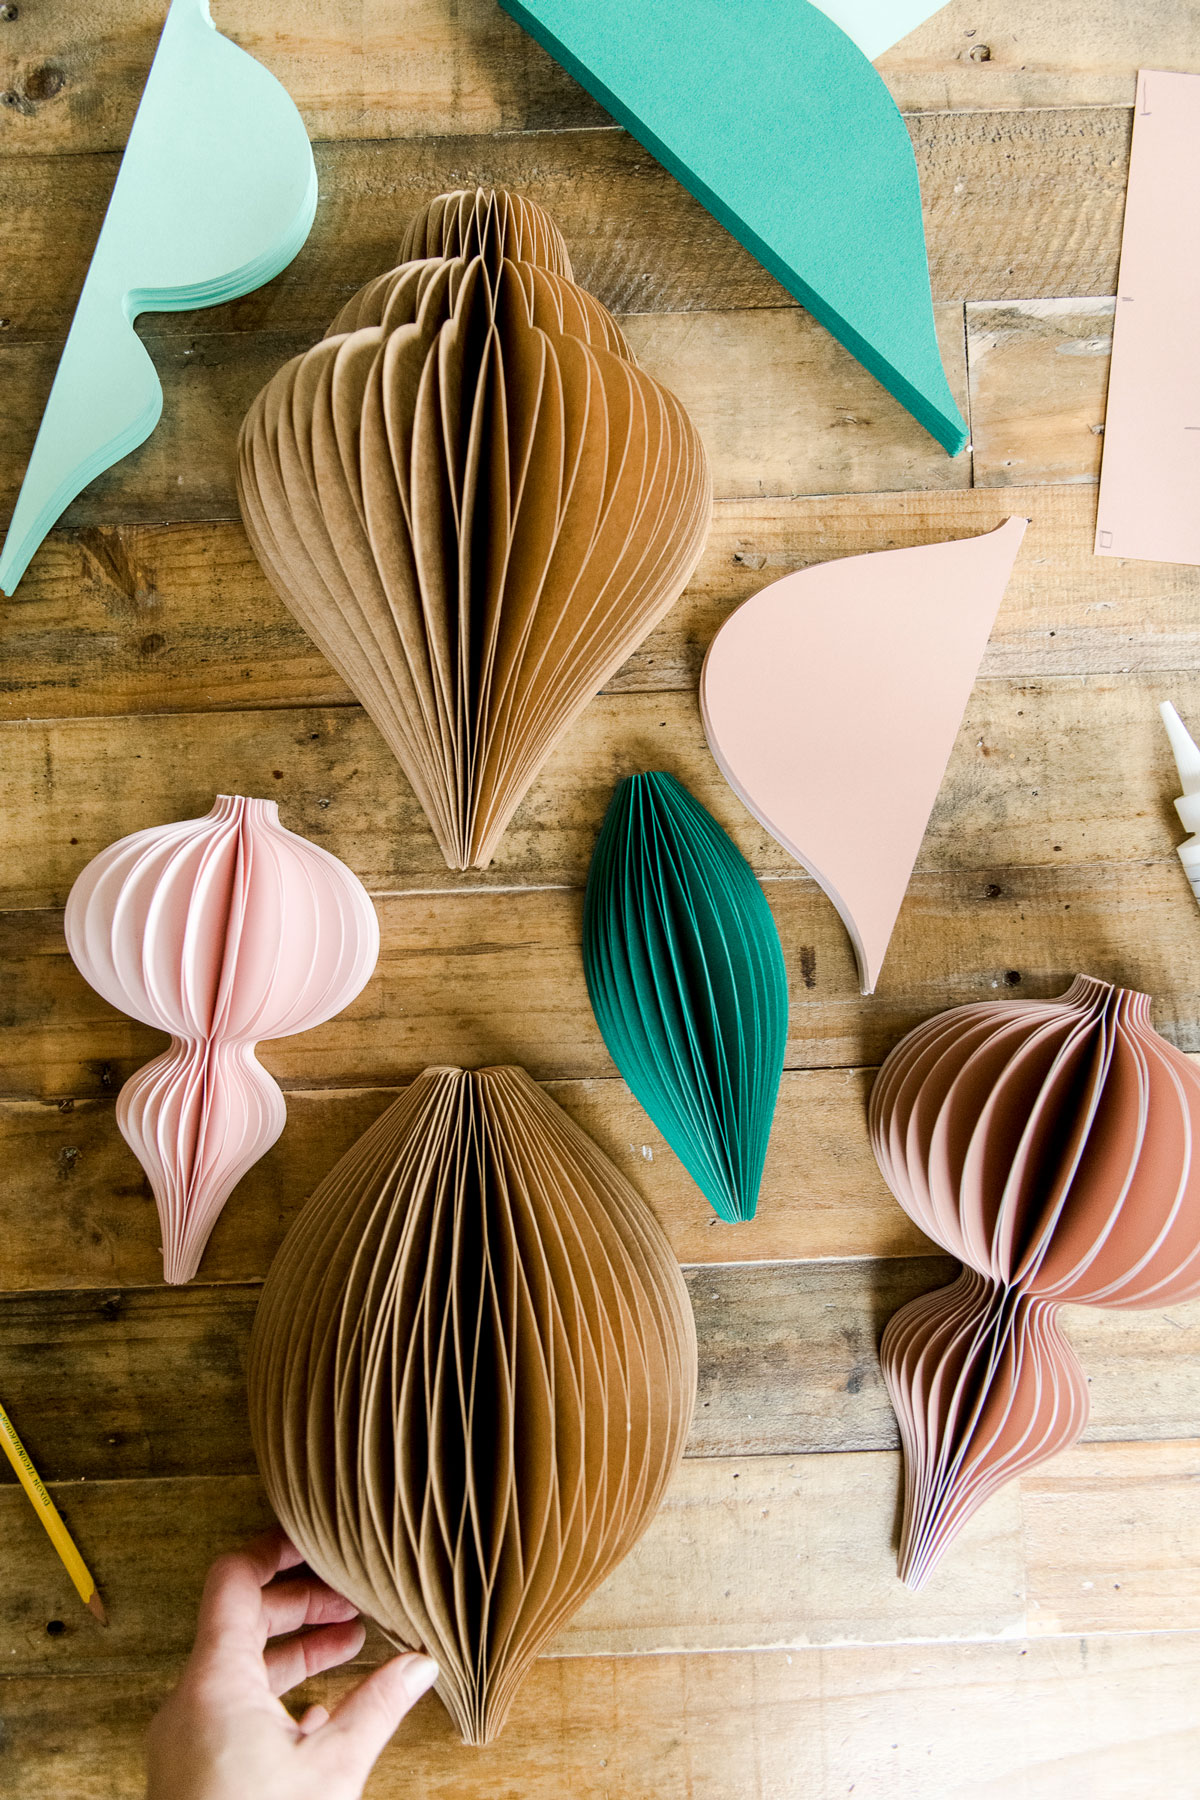
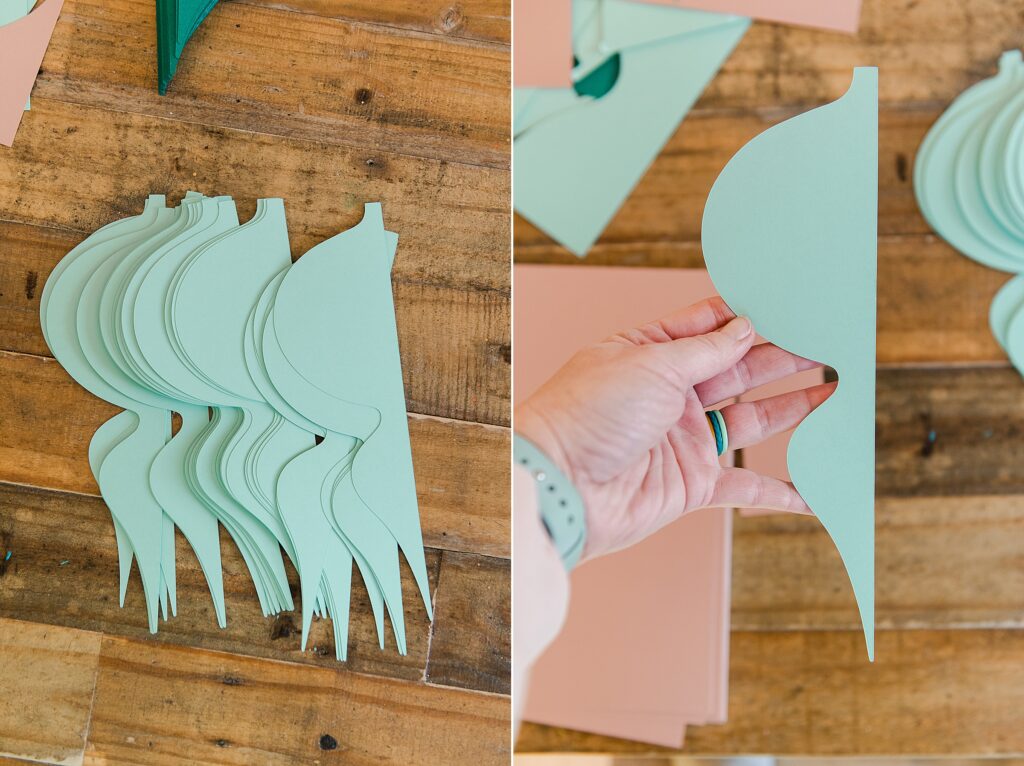
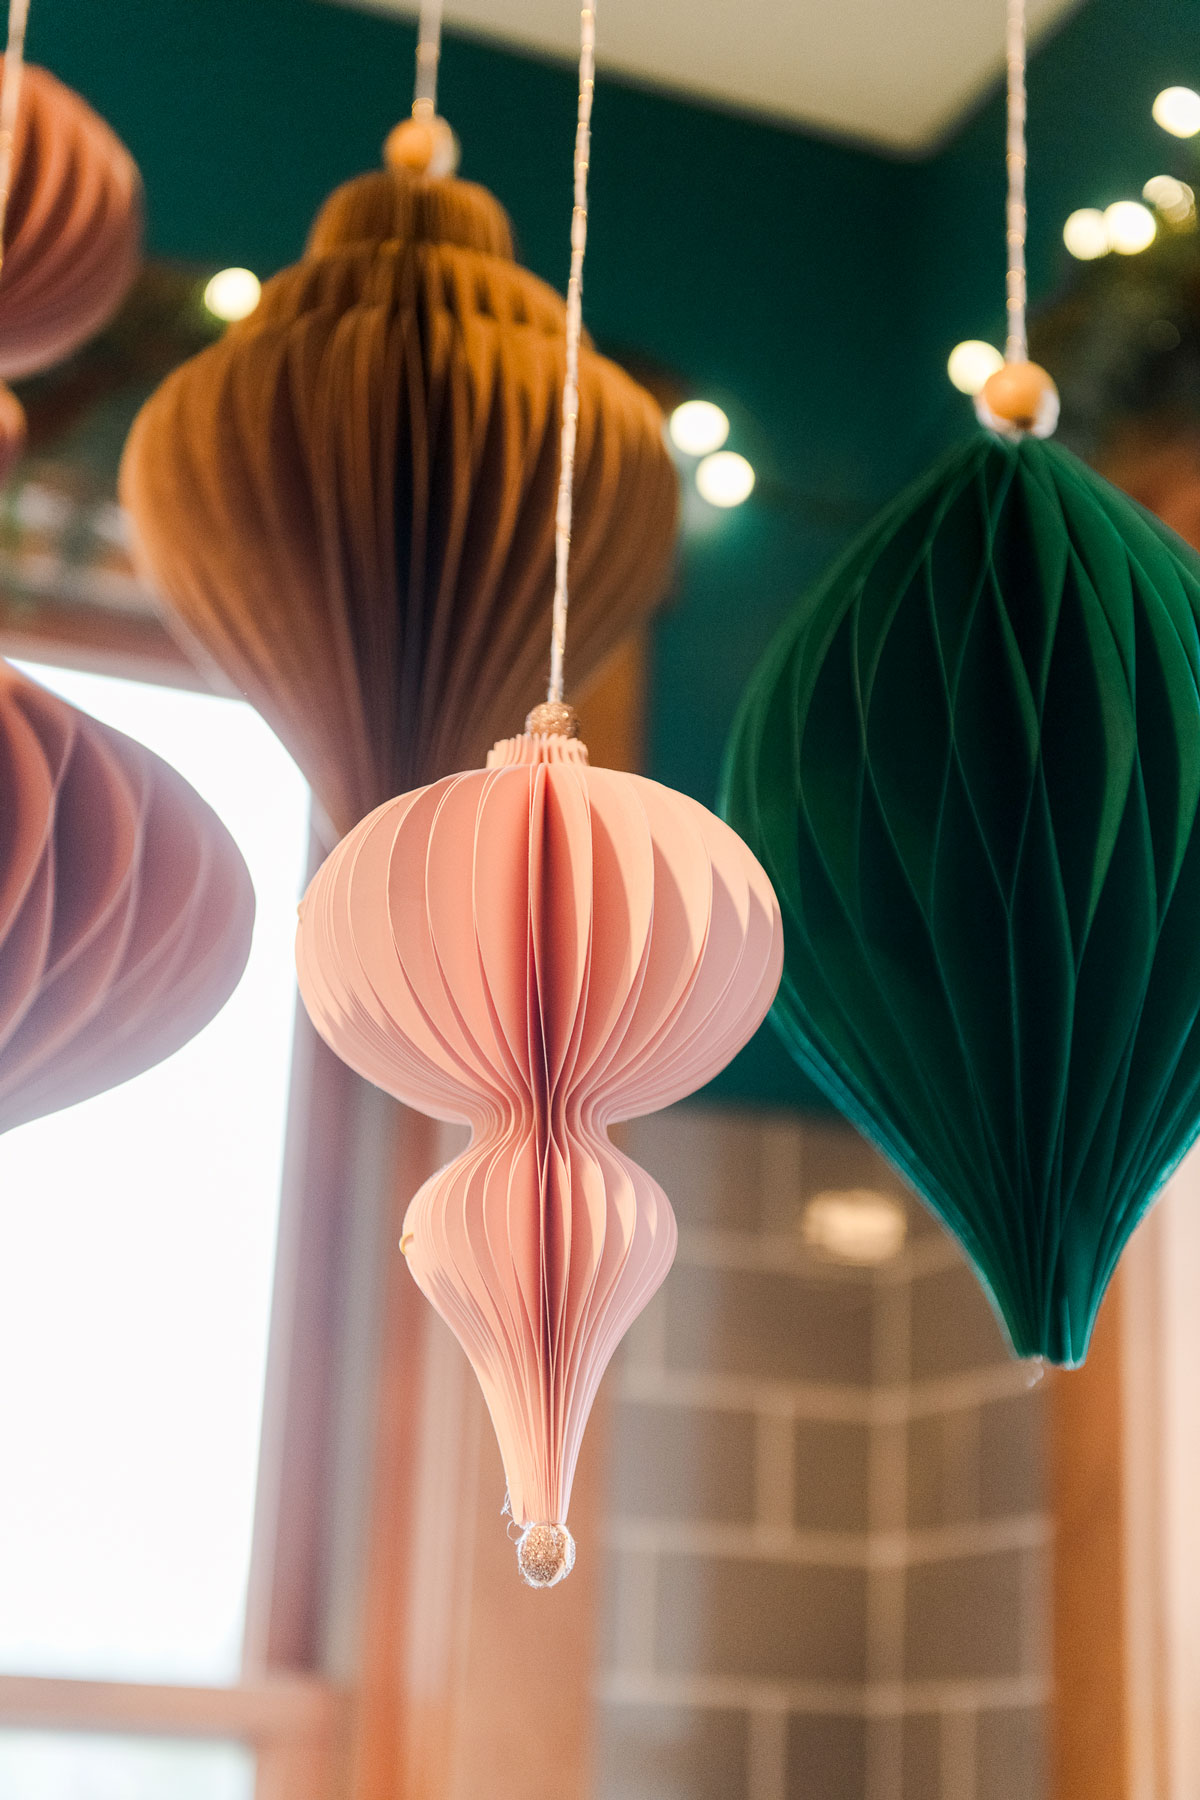
The biggest difference between these JUMBO honeycomb ornaments and the regular size for your tree is that instead of cutting out one symmetrical shape with a crease down the middle, you will instead cut out 1/2 the ornament (or one side) and match them up without a crease. This allows the ornaments to be cut bigger from the Cricut AND helps with the size down the center of the ornament by removing the bulk of the crease.
MATERIALS NEEDED:
- Cardstock in your fave colors (you will need a total of 50ish HALVES of each ornament so depending on the size of your finished ornament, you will likely get 2-4 half ornaments per sheet of paper).
- A bottle of the pointed tip nozzle Aleene’s Turbo Tacky Glue
- Thick books – for stacking ornaments to dry under the weight of the books
- Some string/cord/ribbon of choice
- Some mod podge 🙂
- Optional beads for the top and/or bottom
- An extra sheet of paper for marking off glue lines for each ornament
- Sharp scissors, pencil , ruler and pen cap (pen cap for scoring) ORRRRR Your fave cutting machine with cutting blade (I used my Cricut)
- Paperclips for holding ornaments together
- 3M hooks or any hanging elements needed for display

INSTRUCTIONS:
1. Cut out your ornaments from paper!
You will want to download the SVG files BELOW to cut your ornaments – OR you can cut out any ornament half shape that you want (just use an old piece of cardboard and trace onto your paper).
TEMPLATE DOWNLOADS:
Bumpy SVG file HERE
Teardrop, circle and oval SVG file HERE
2. Glue ornaments together!
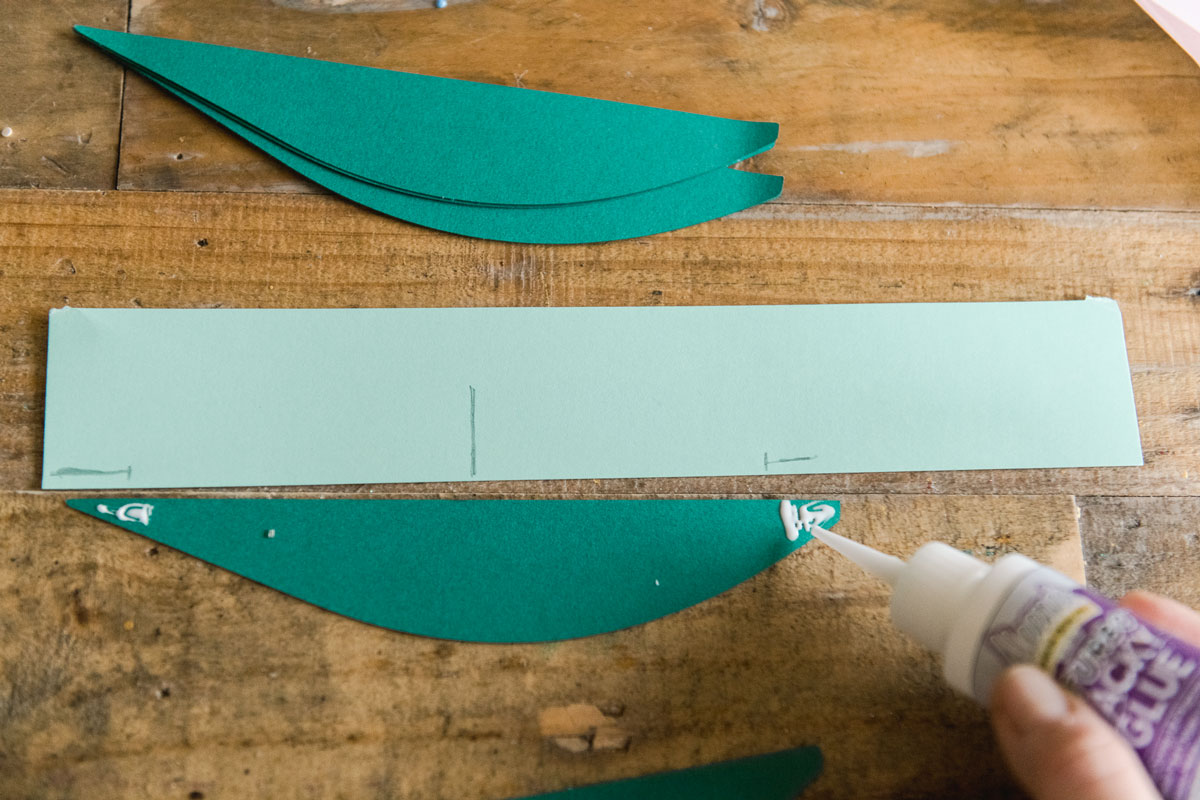
Remember that you are going to follow the basics of the smaller honeycomb ornaments by glueing each ornament into pairs (with one “glue pattern”), allow to dry, and then glue all of those pairs into a big stack (then allow to dry again). Each ornament glue pattern (of how I did it) is below.
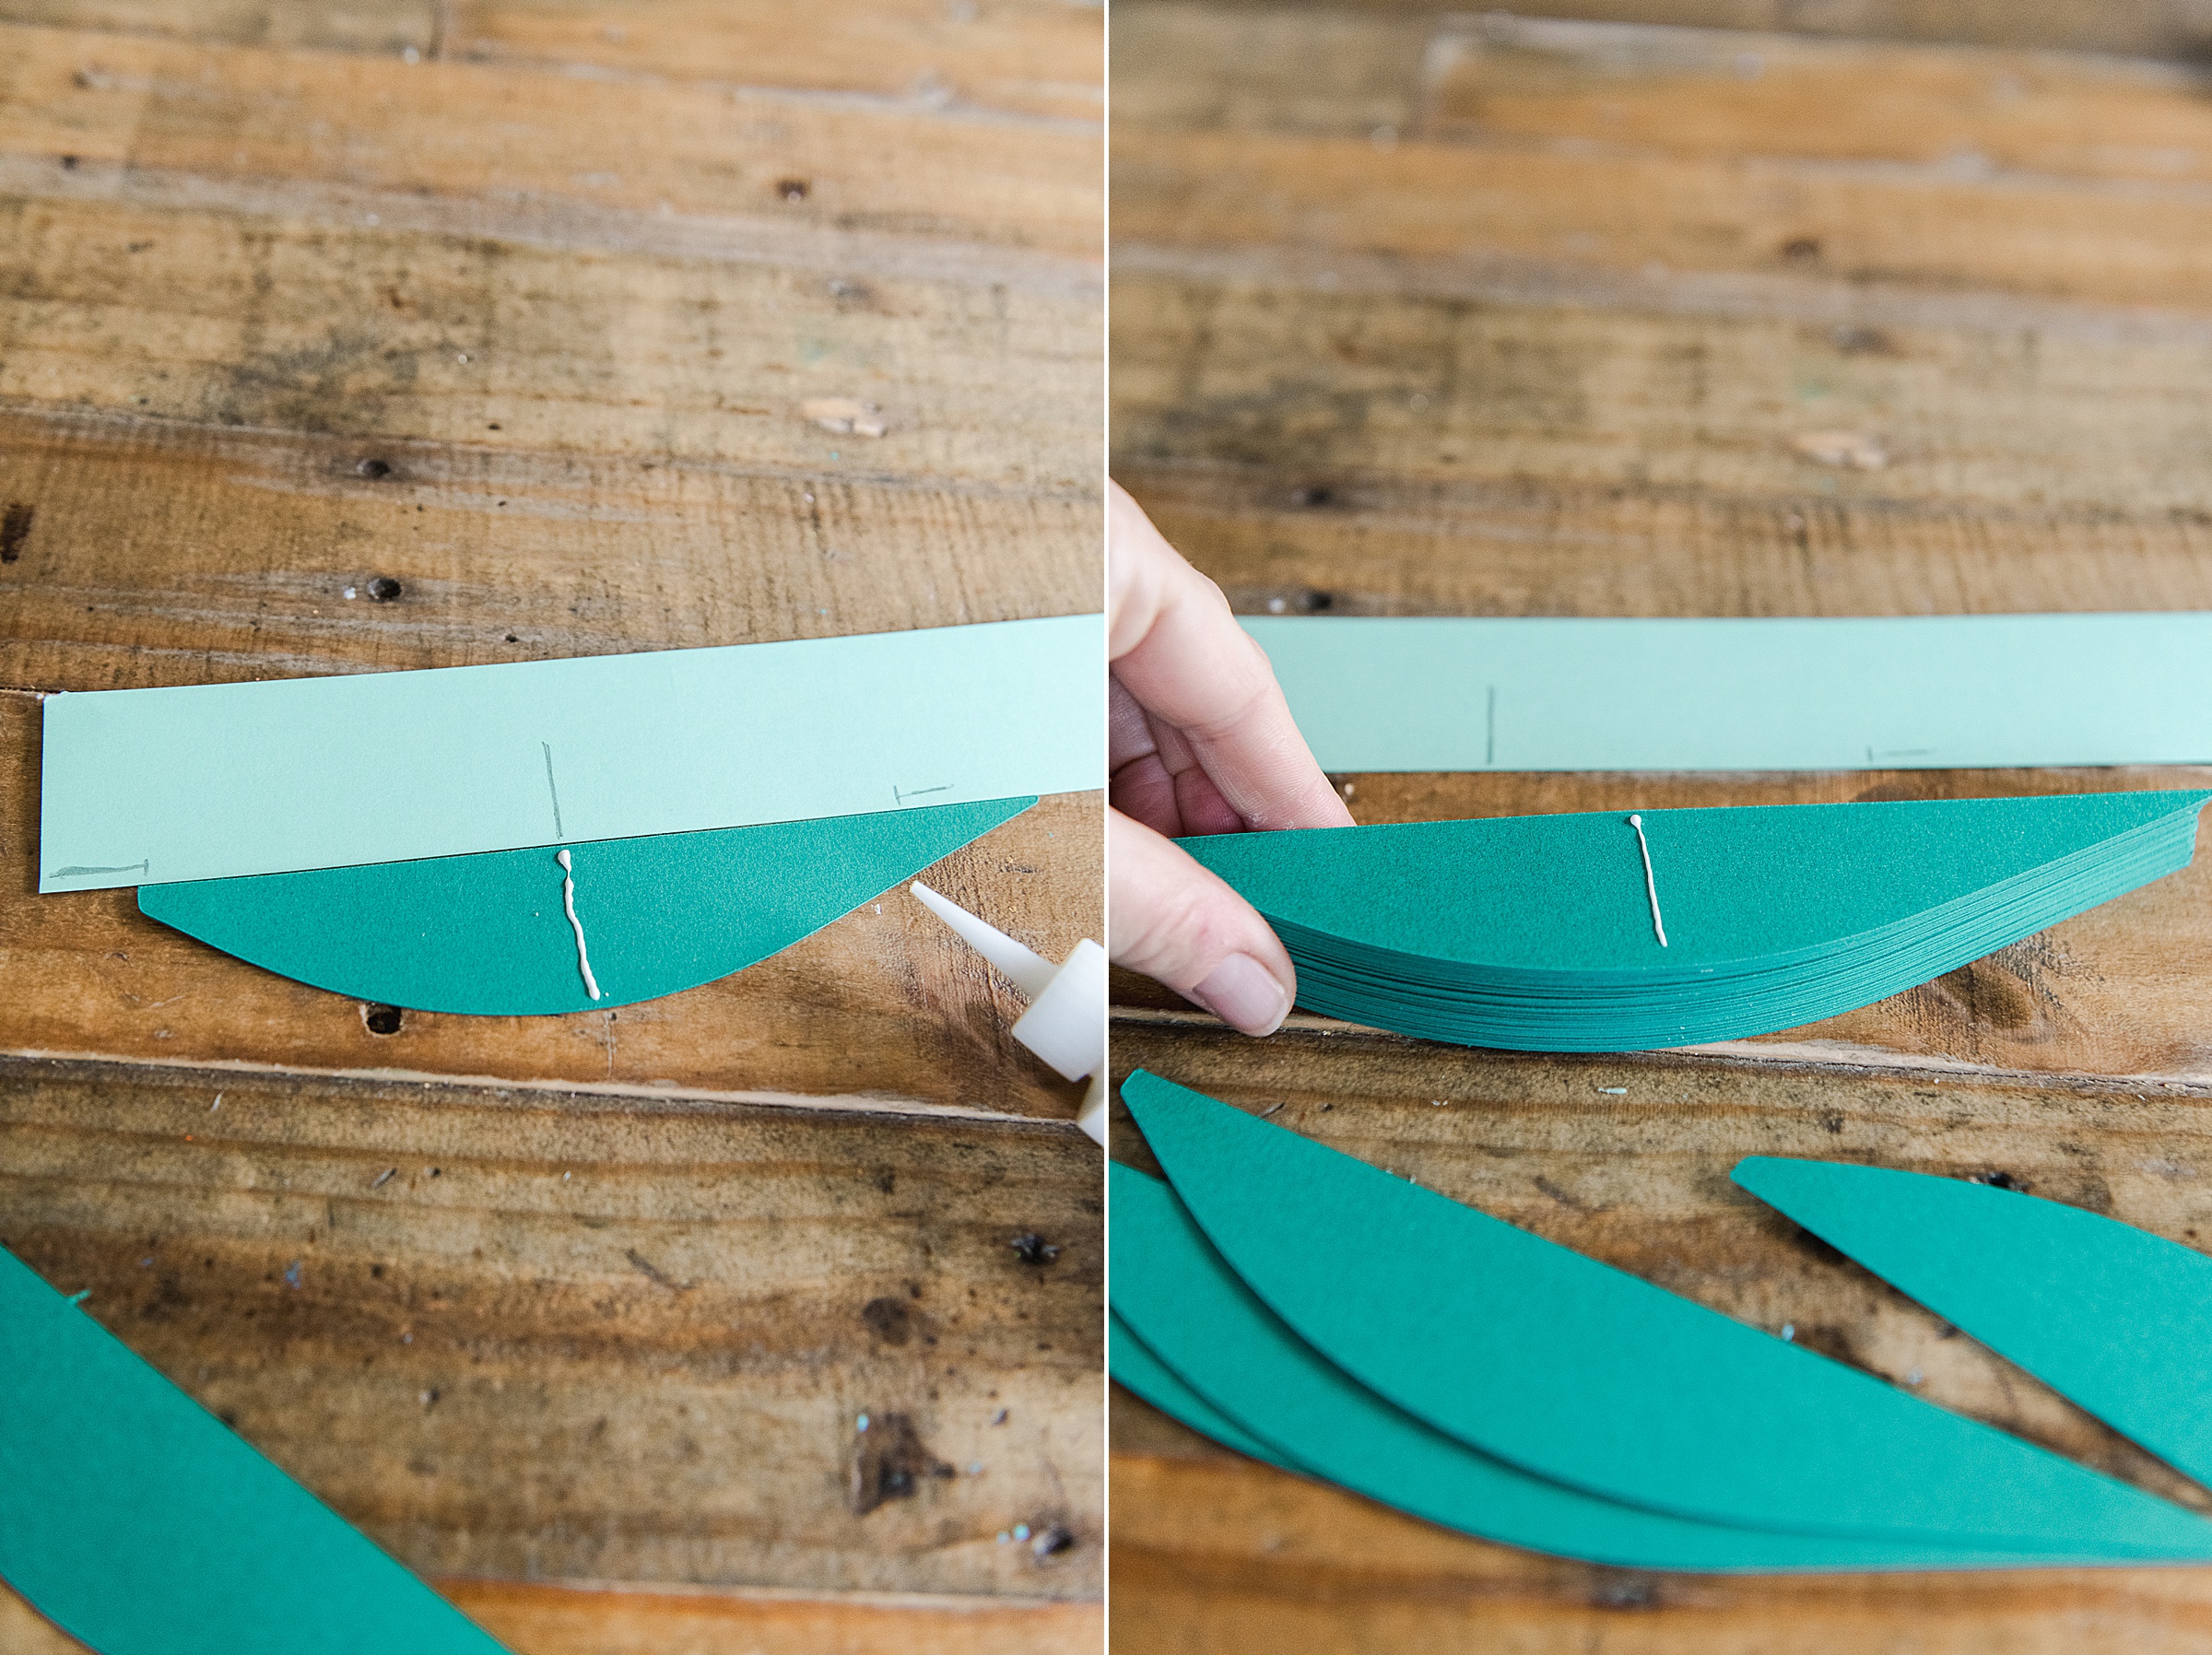
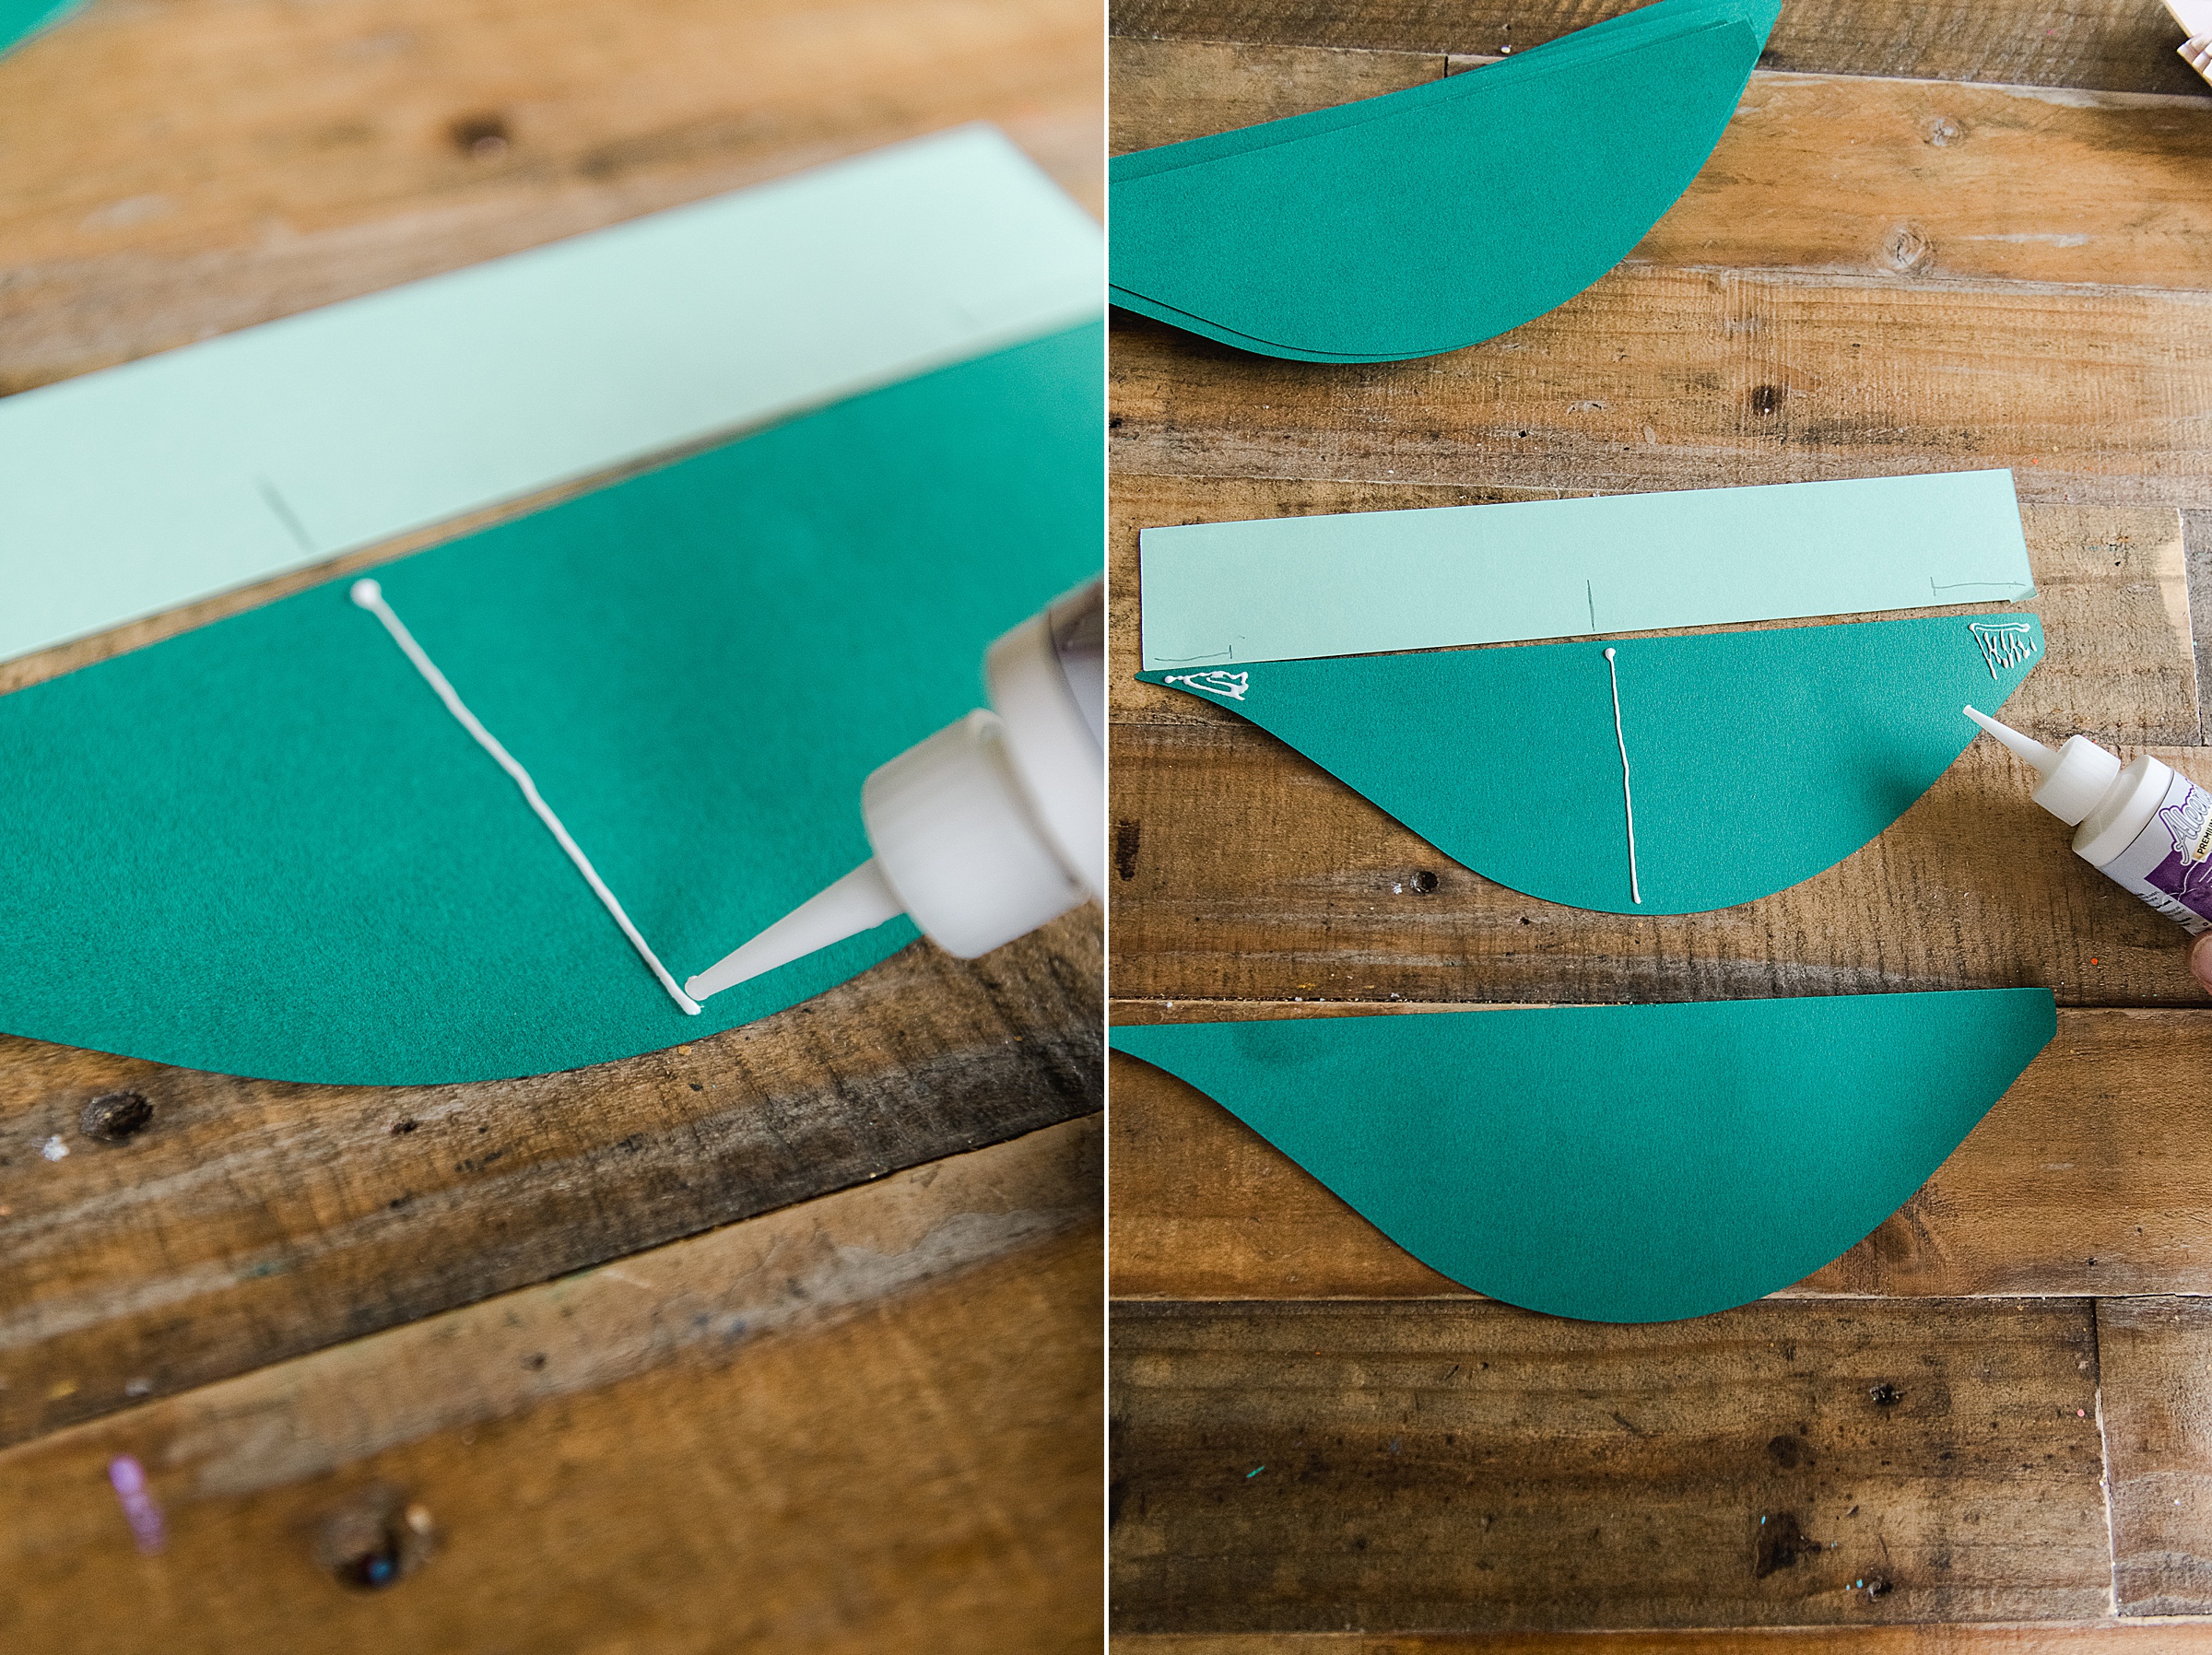
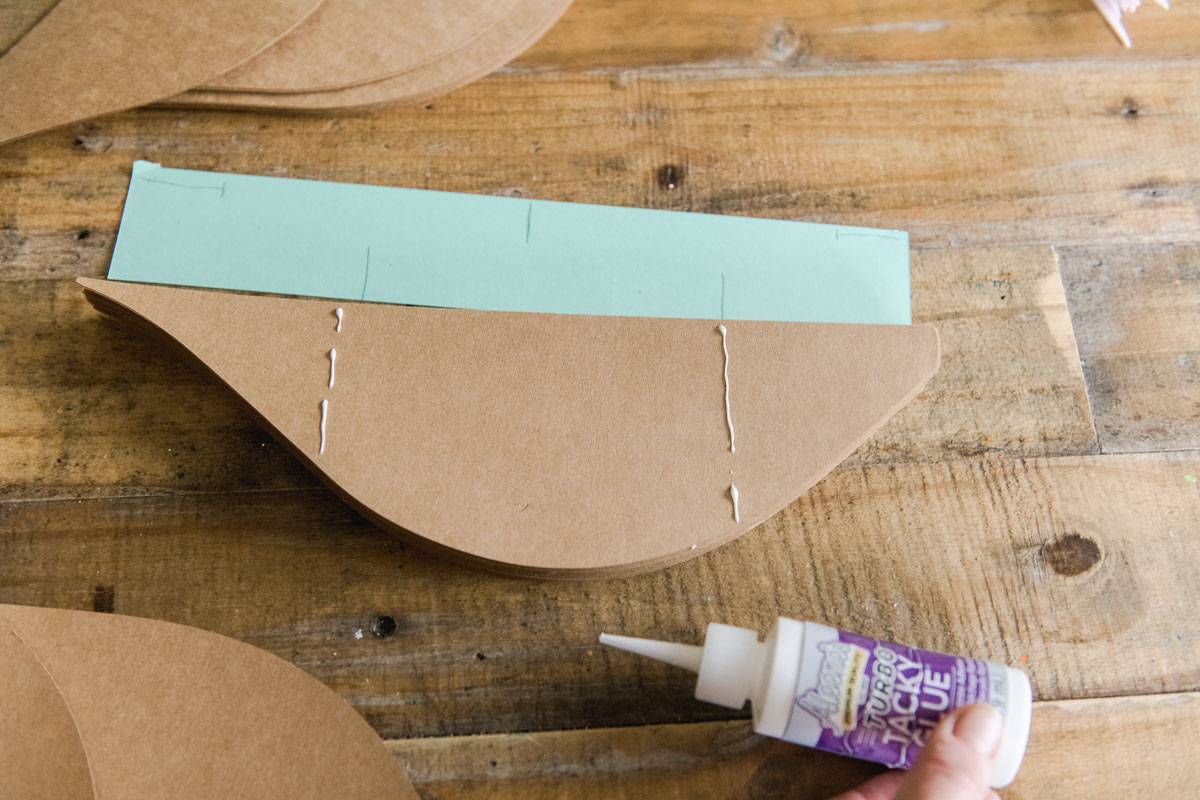
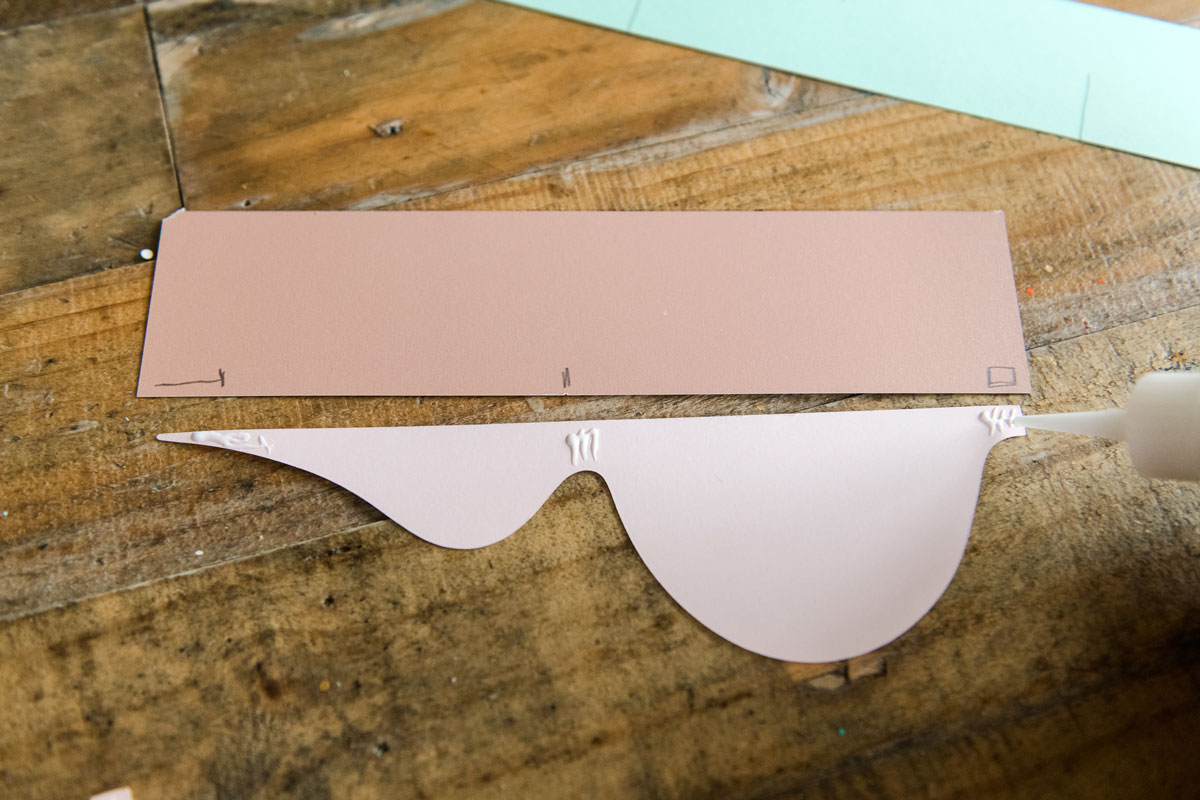
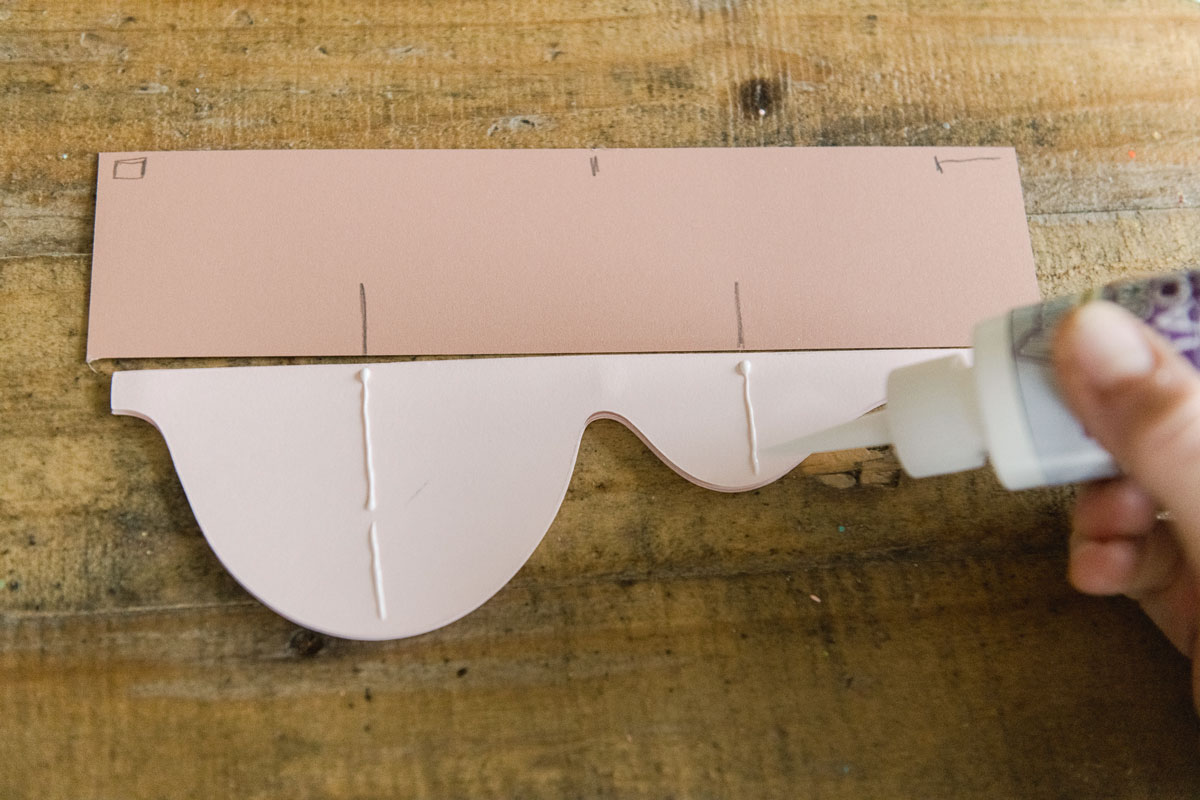
One tip for gluing ALL of the ornaments together: grab a extra or leftover piece of paper and mark off your glue lines so that all are consistent. I did this by laying down the ornament flush to the extra paper and then marked off the lines for the glue to act as a “ruler” or custom guideline to follow so that I wasn’t willy-nilly gluing where I thought the lines should be! 🙂
Glueing your Circle or thinner teardrop ornament together:
- First glue pattern: run a thin bead of glue at the top and bottom of each shape width-wise, then pair up with an unglued ornament, making sure that all of the edges are lined up and flush.
- Set aside to dry (place under a heavy book if needed)
- Then with each pair, you will run a thin bead of glue right down the middle of the ornament shape width-wise. Layer each pair on top of the last to make a giant stack until all pairs are used.
- Set aside to dry (place under a heavy book if needed)
Glueing your thicker teardrop and almost circle ornaments together:
- First glue pattern: run a thin bead of glue at the top, middle and at the bottom of each shape width-wise, then pair up with an unglued ornament, making sure that all of the edges are lined up and flush.
- Set aside to dry (place under a heavy book if needed)
- Then with each pair, you will run a thin bead of glue right “between” the other glue lines just created in step 1, essentially 2 lines – one between the 1st and 2nd glue line and the other between the 2nd and 3rd glue line. Layer each pair on top of the last to make a giant stack until all pairs are used.
- Set aside to dry (place under a heavy book if needed)
Glueing your bumpy teardrop ornaments together:
- First glue pattern: run a thin bead of glue at the top, under the 2nd bump and at the bottom of each shape width-wise, then pair up with an unglued ornament, making sure that all of the edges are lined up and flush.
- Set aside to dry (place under a heavy book if needed)
- Then with each pair, you will run a thin bead of glue right “between” the other glue lines just created in step 1, essentially 2 lines – one between the 1st and 2nd glue line and the other between the 2nd and 3rd glue line. Layer each pair on top of the last to make a giant stack until all pairs are used.
- Set aside to dry (place under a heavy book if needed)
Glueing your ornate teardrop ornaments together (the one that has a more dramatic bump on top and bottom with a pointed bottom):
- First glue pattern: run a thin bead of glue at the top, in the thin “neck” of the middle center, and at the bottom of each shape width-wise, then pair up with an unglued ornament, making sure that all of the edges are lined up and flush.
- Set aside to dry (place under a heavy book if needed)
- Then with each pair, you will run a thin bead of glue right “between” the other glue lines just created in step 1, essentially 2 lines – one between the 1st and 2nd glue line (at the top bump) and the other between the 2nd and 3rd glue line (at the bottom bump). Layer each pair on top of the last to make a giant stack until all pairs are used.
- Set aside to dry (place under a heavy book if needed)
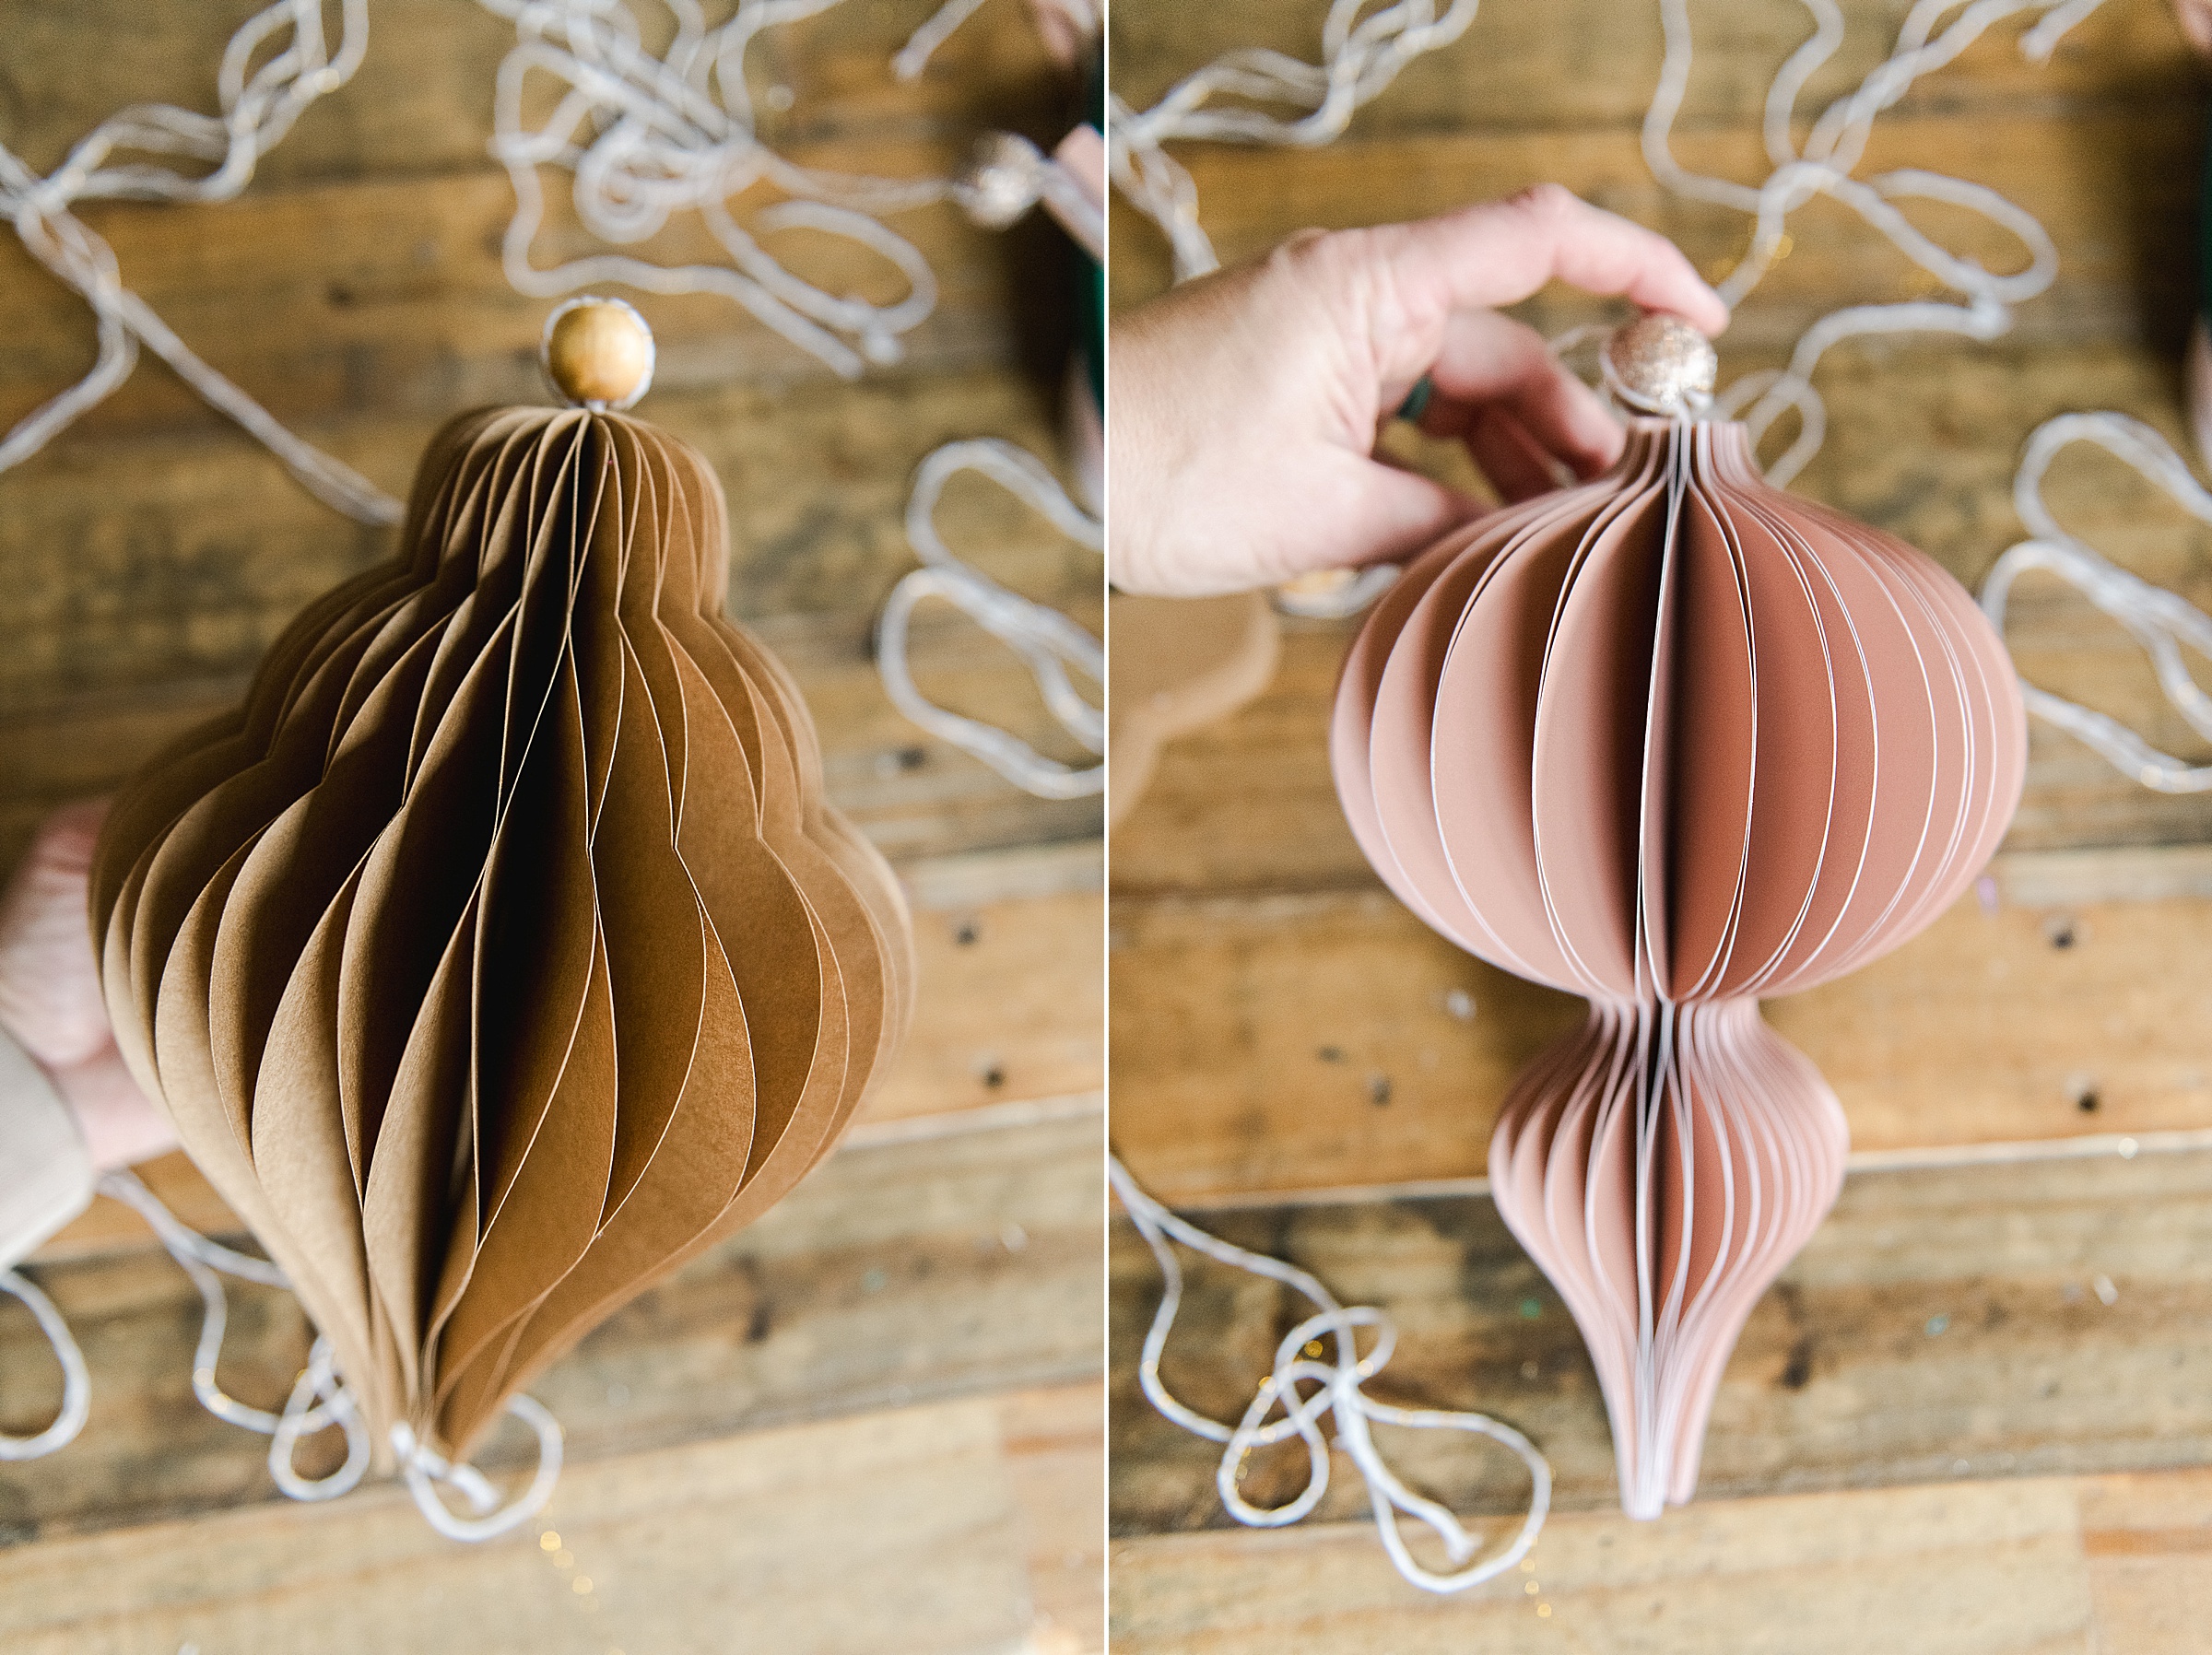
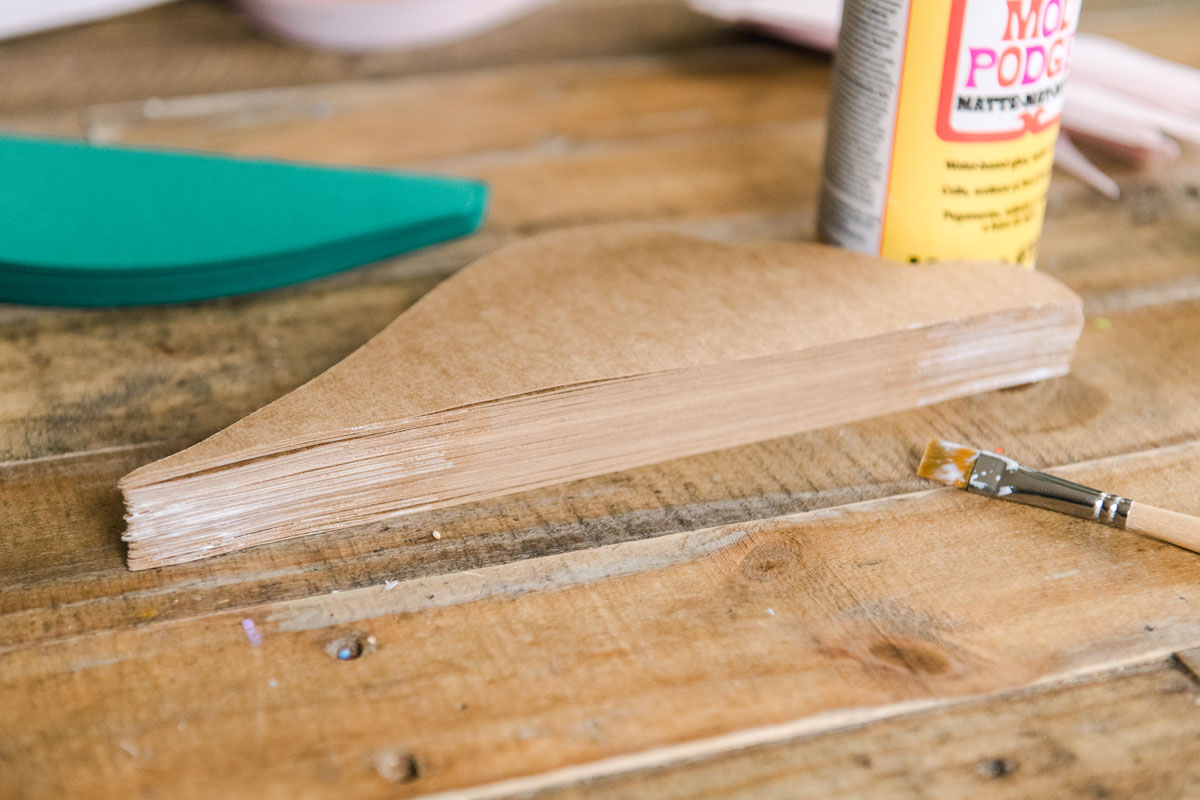
3. Add a layer of Mod Podge to the center spine of the ornaments. This will give some sturdiness to the spine and help keep it all together when you open the ornaments. Set aside to let dry!

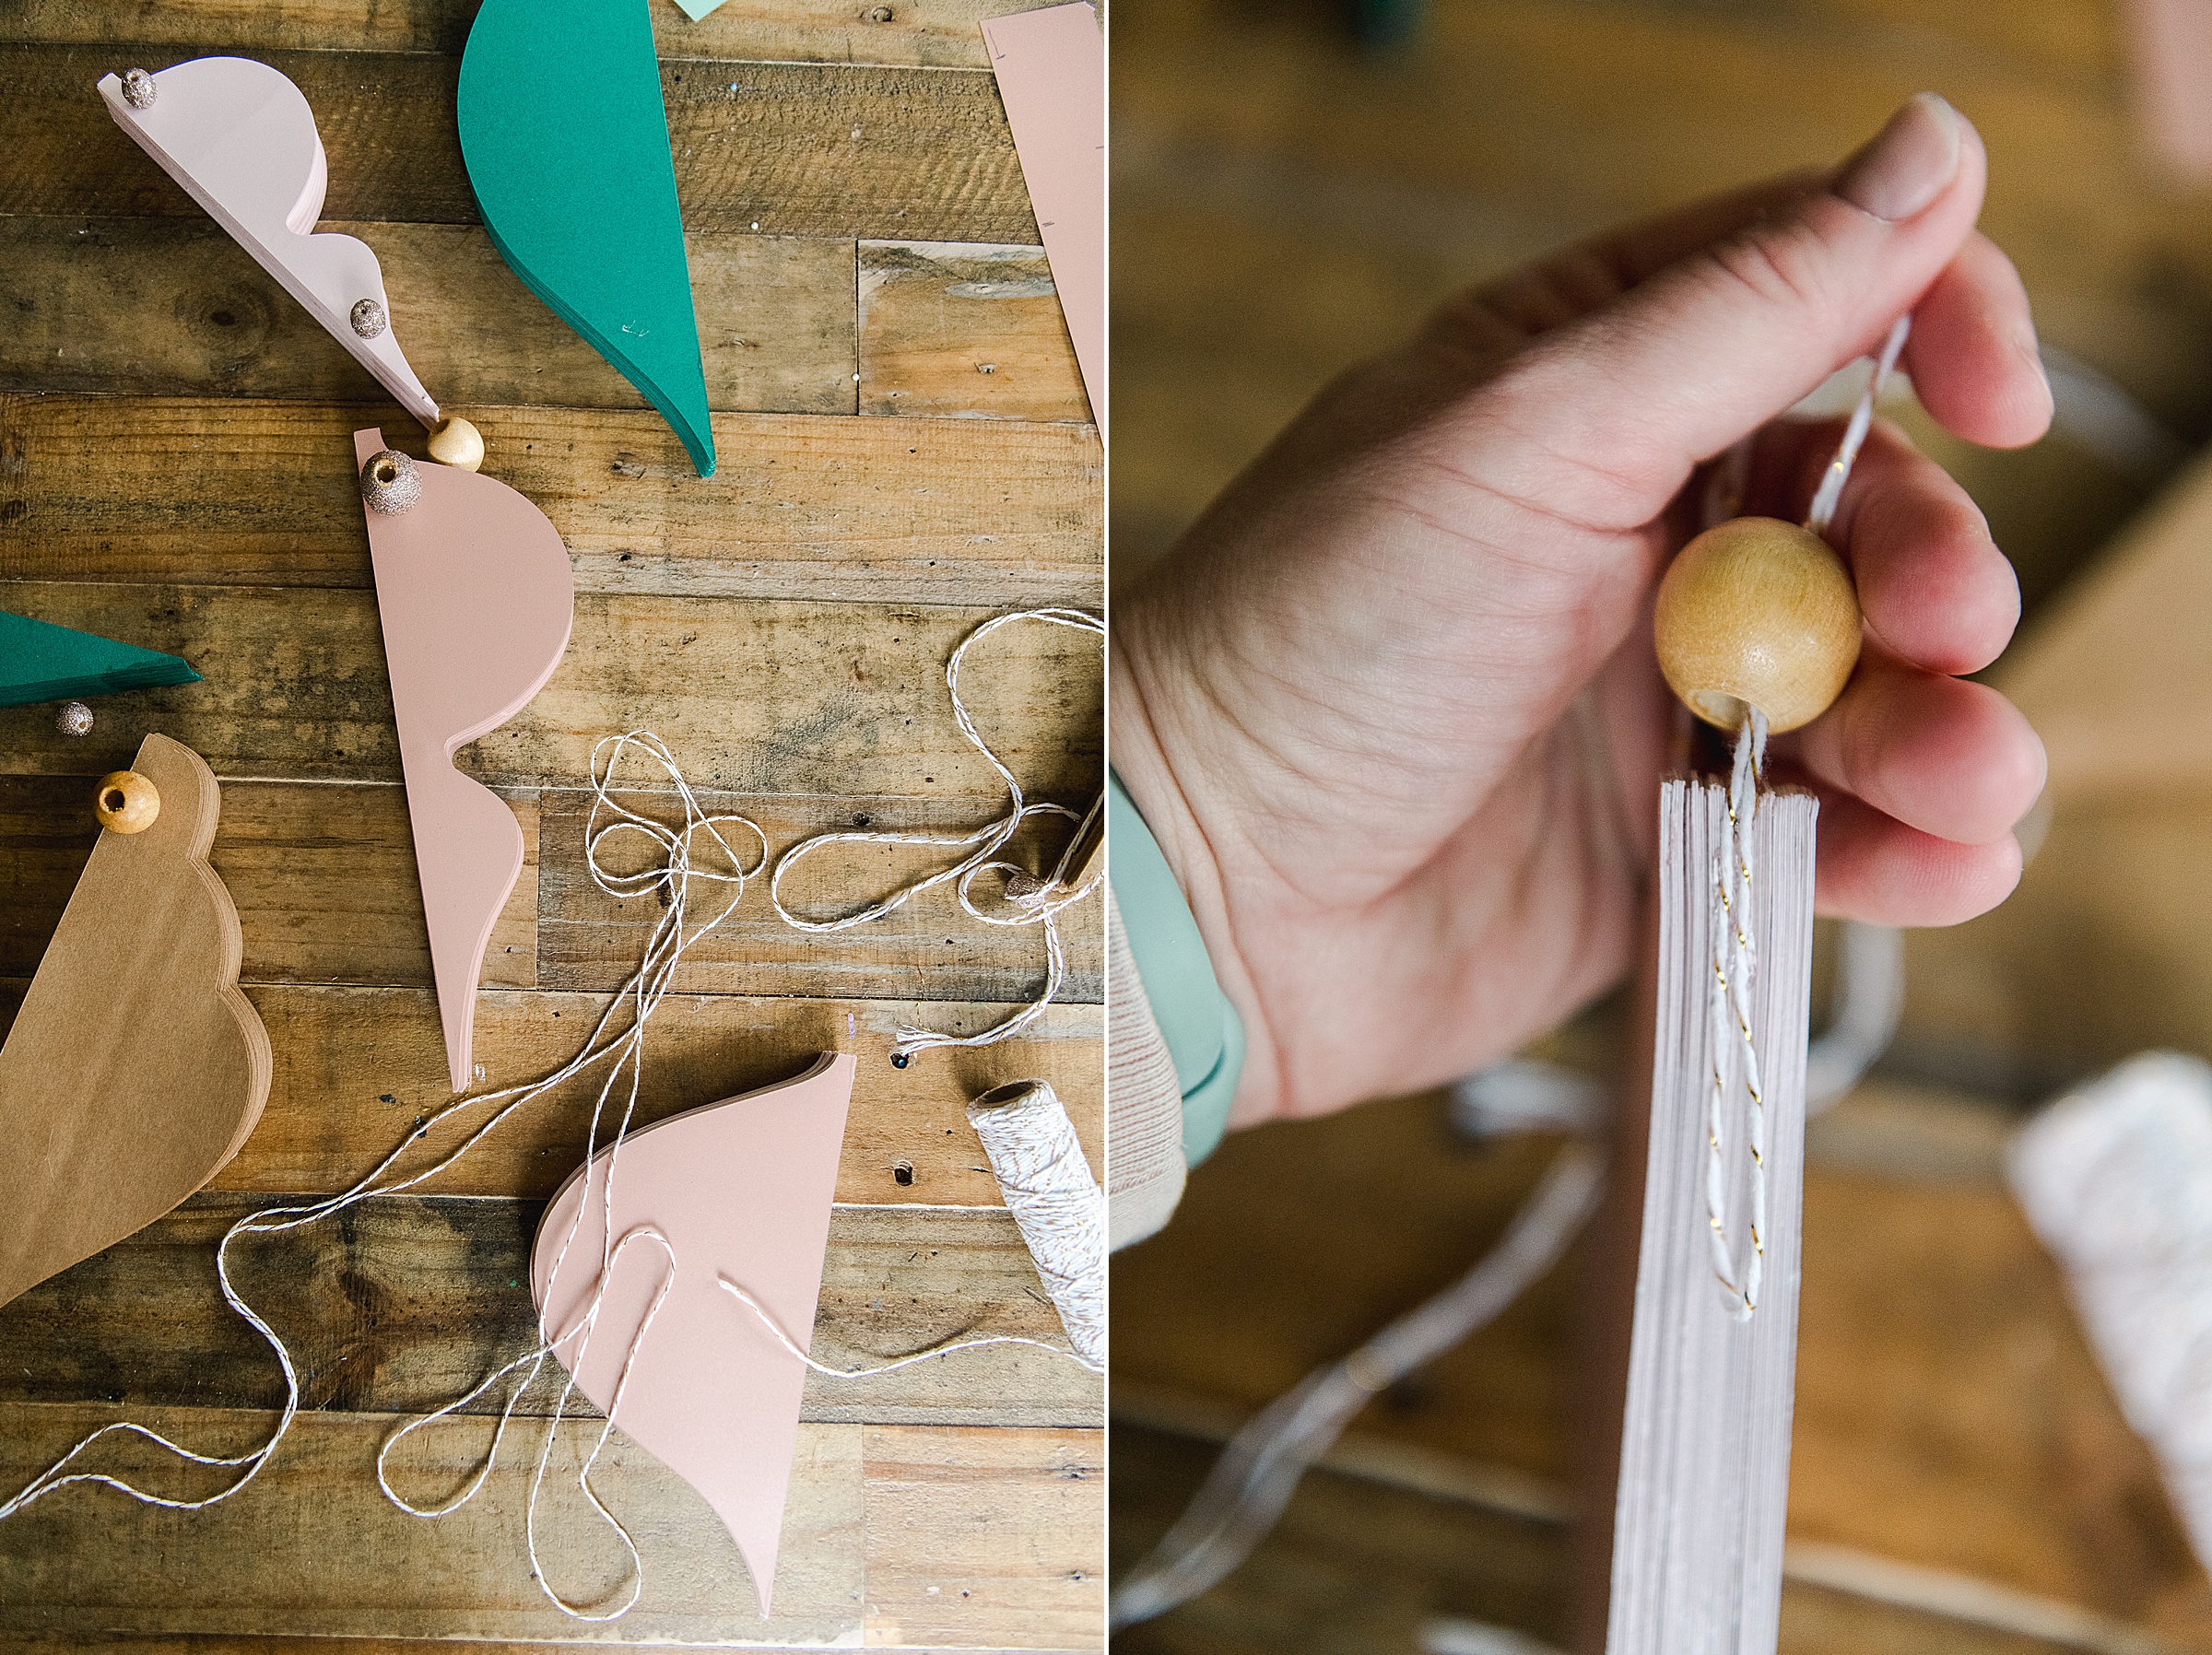
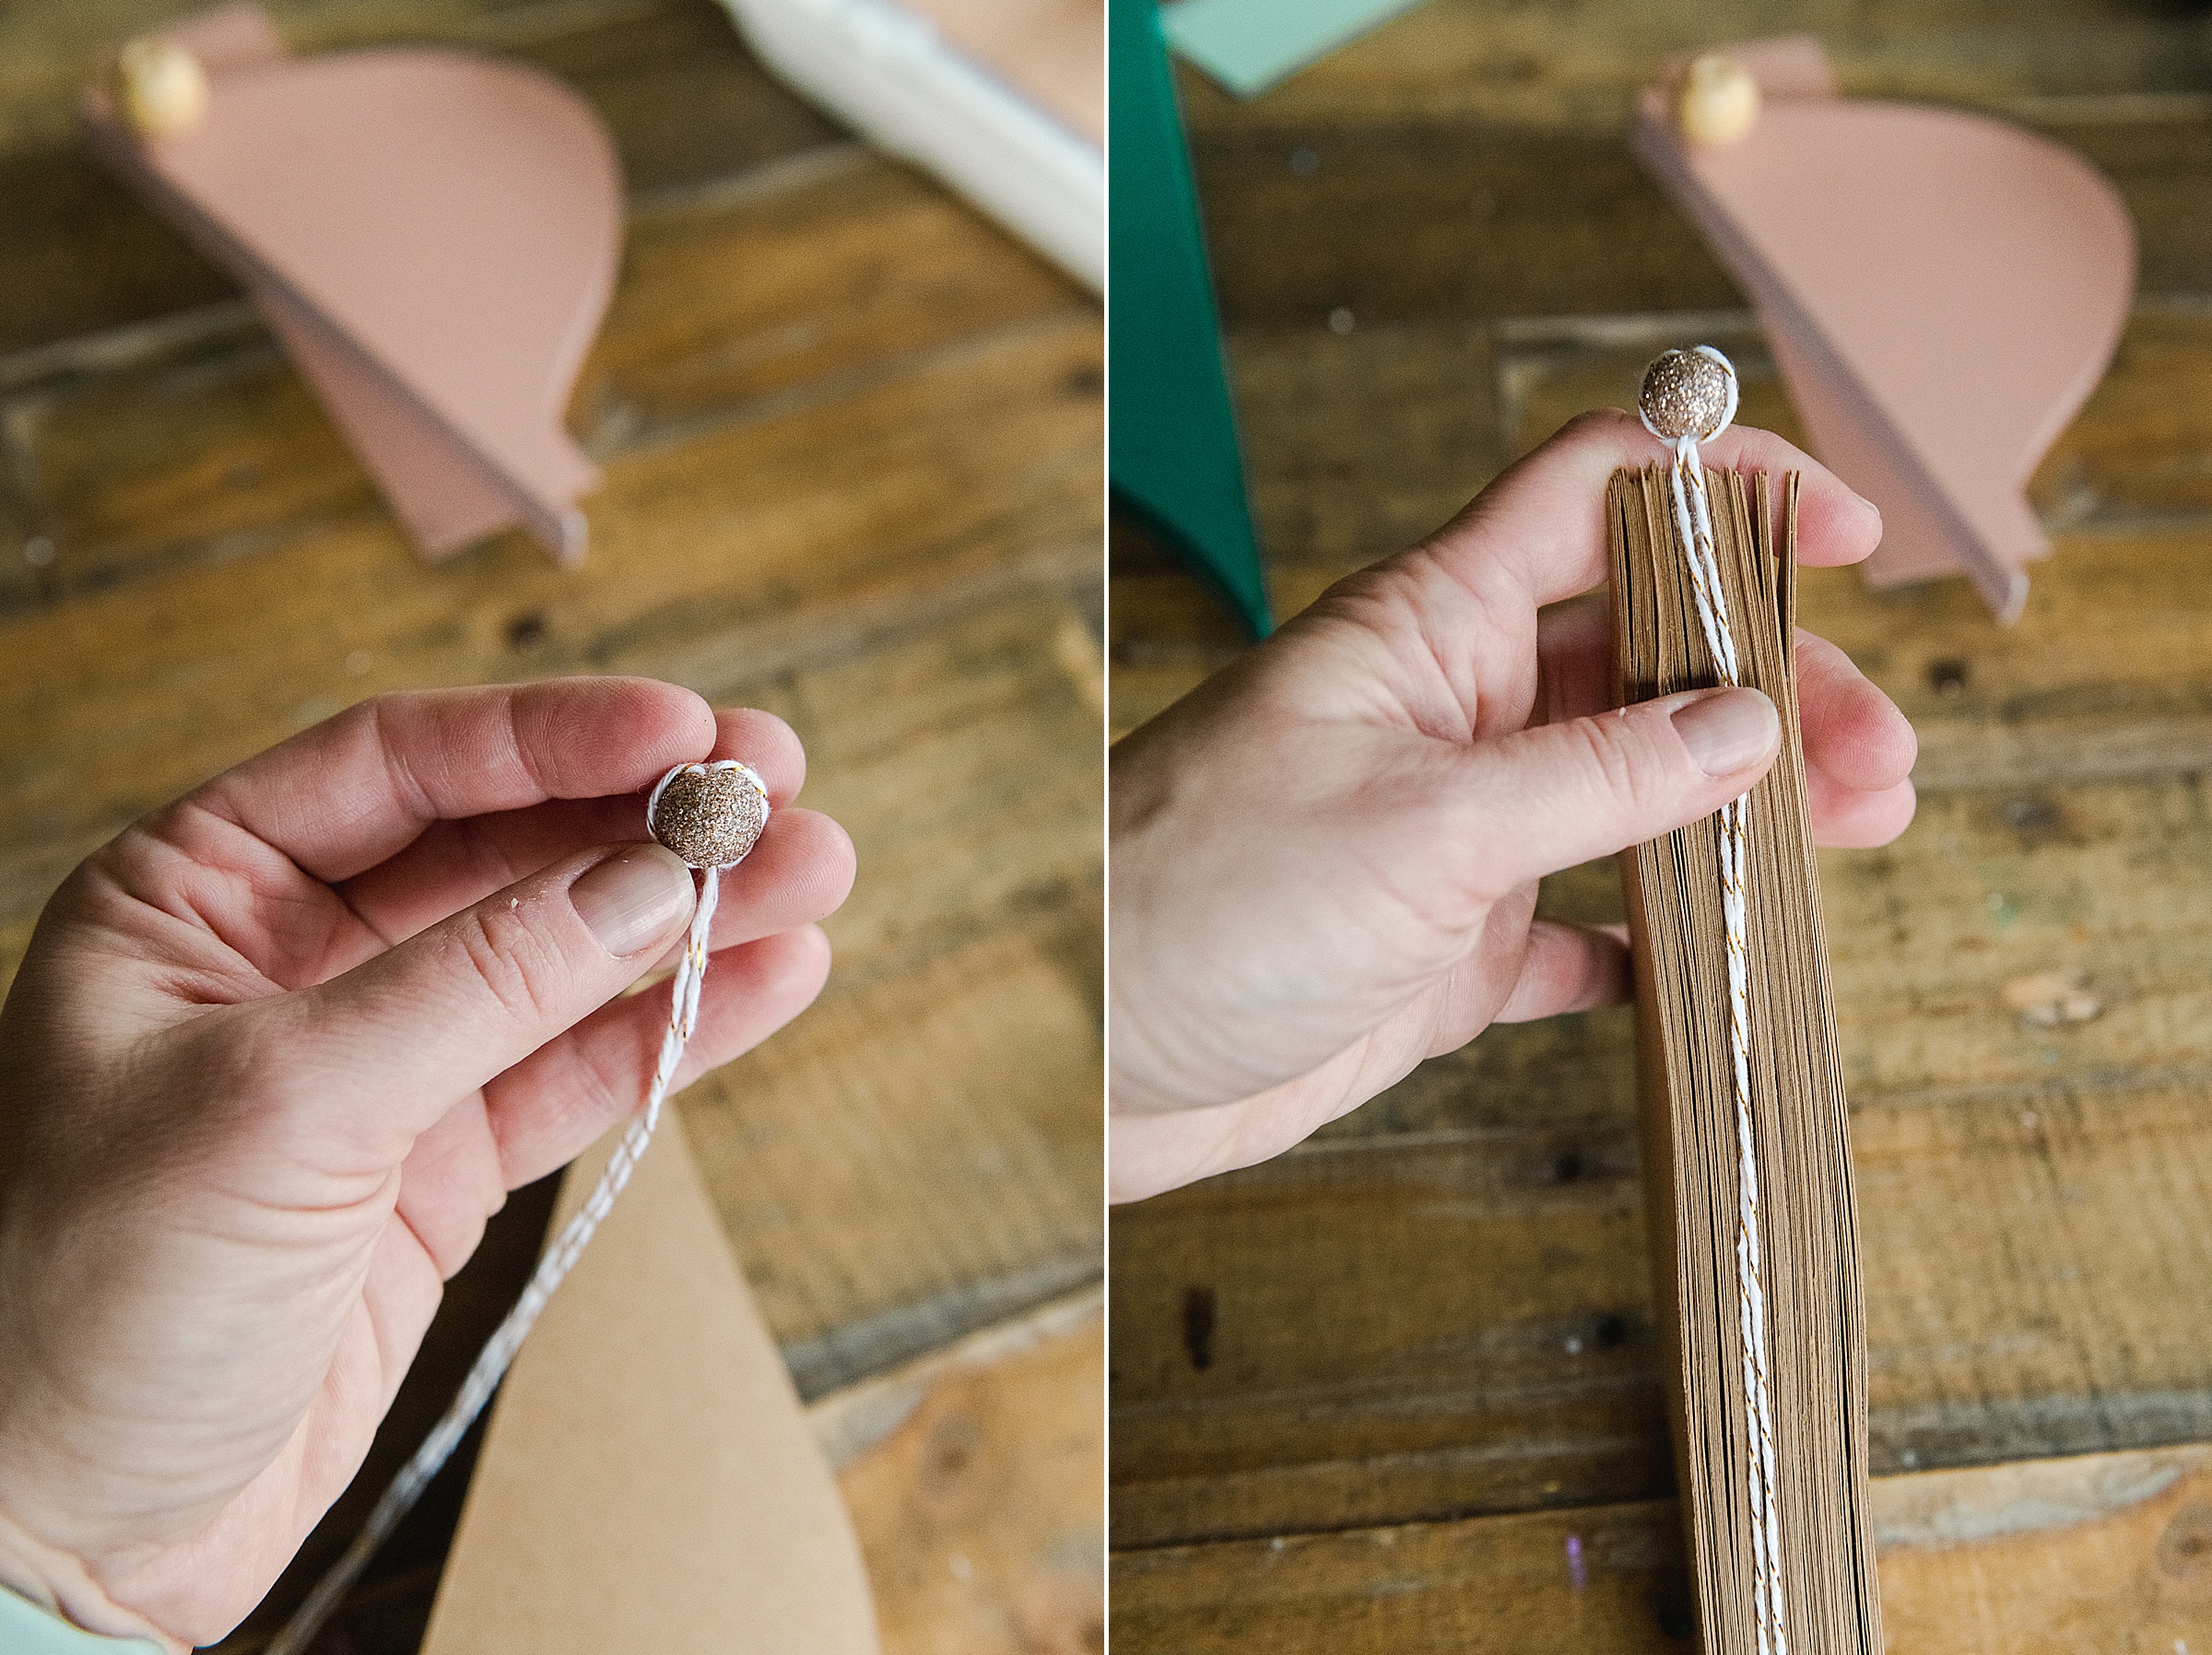
4. Add string and any beads
Use a bead of glue down the spine of the ornament and add some string. You can also add any beads or any other details at this time 🙂
5. Add paperclips to open ornaments
I decided to not glue the ornaments completely closed (for storage reasons) so I simply put a few paperclips on the ornaments to hold them open and truthfully I was pleasantly surprised at how well that worked 🙂 YAY! Of course if you wanted to glue your ornaments all together, feel free to do that as well
6. Hang and display PROUDLY!
I chose to use some 3M hooks on our ceiling (I wanted something that came off cleanly and that was “nearly” invisible to the eye for hanging)! 🙂 Then stand back and LOOOOOOVE your display 🙂
YAY! Let me know if you try these jumbo honeycomb ornaments, I’d love to see pics on social or in my email! 🙂