How to make soft felt flowers using your sewing machine! :)
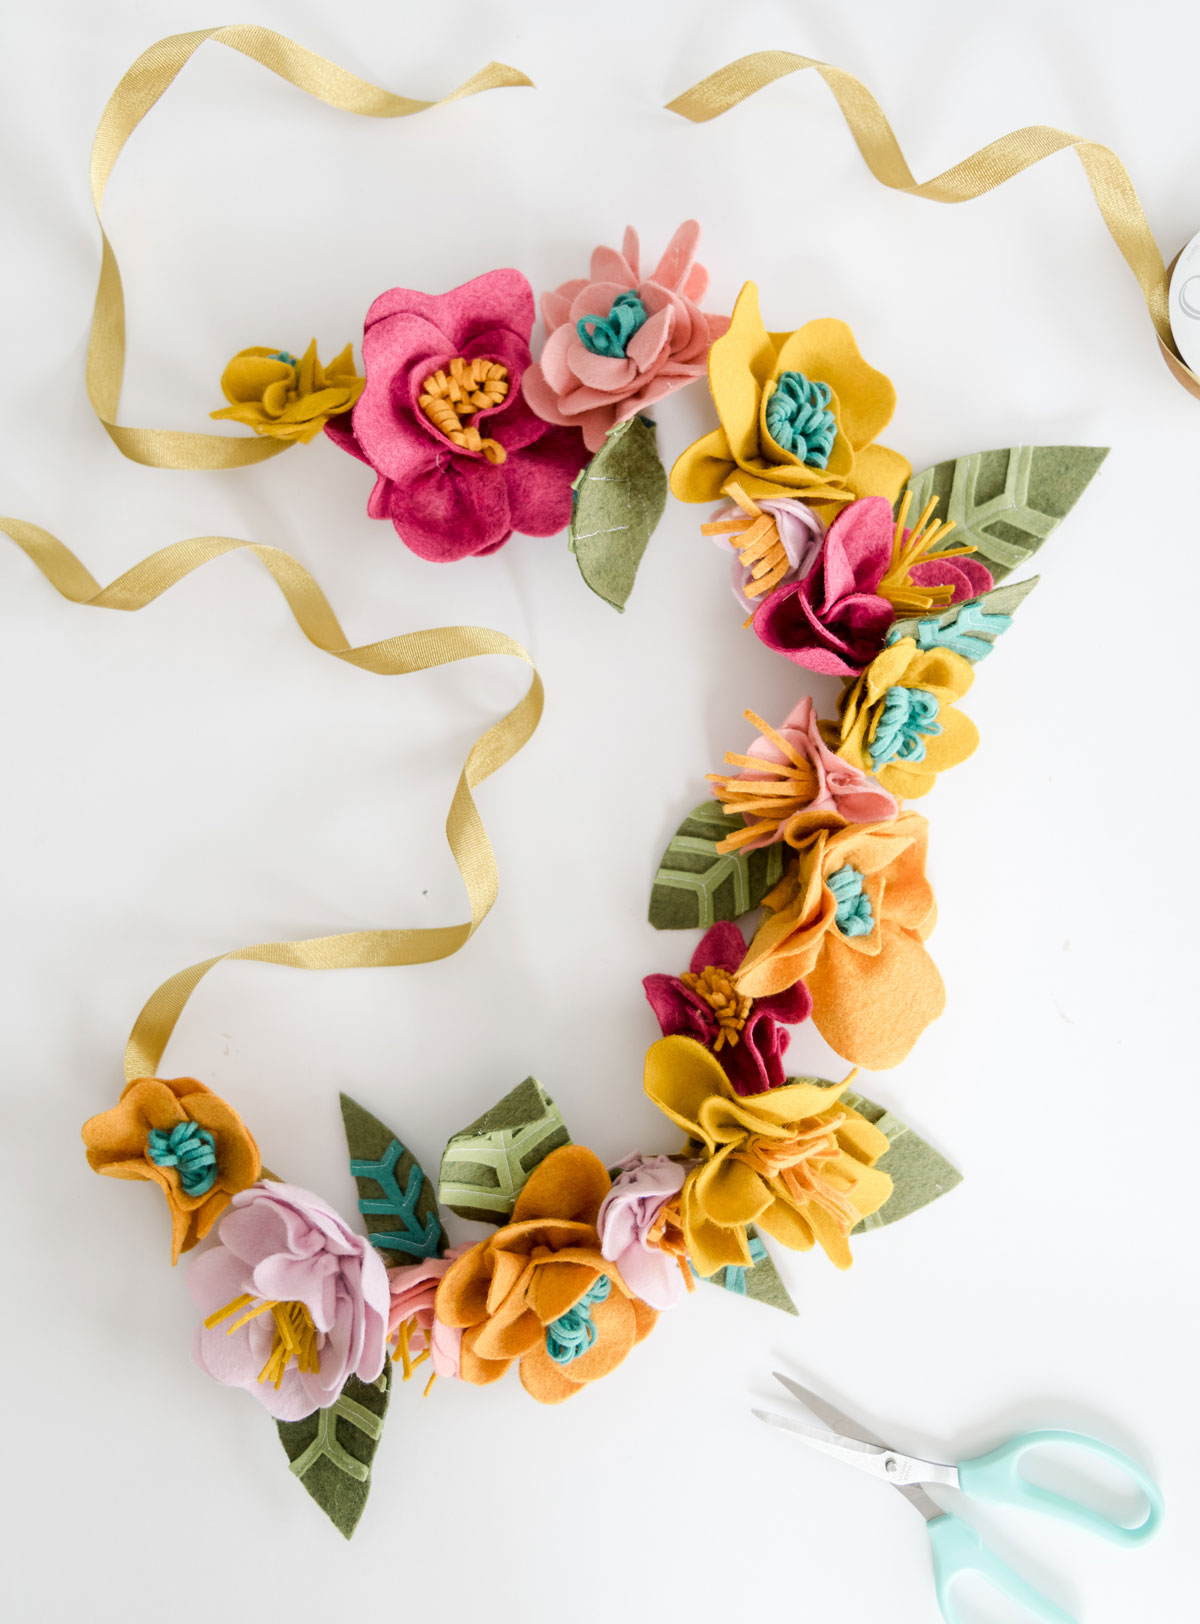
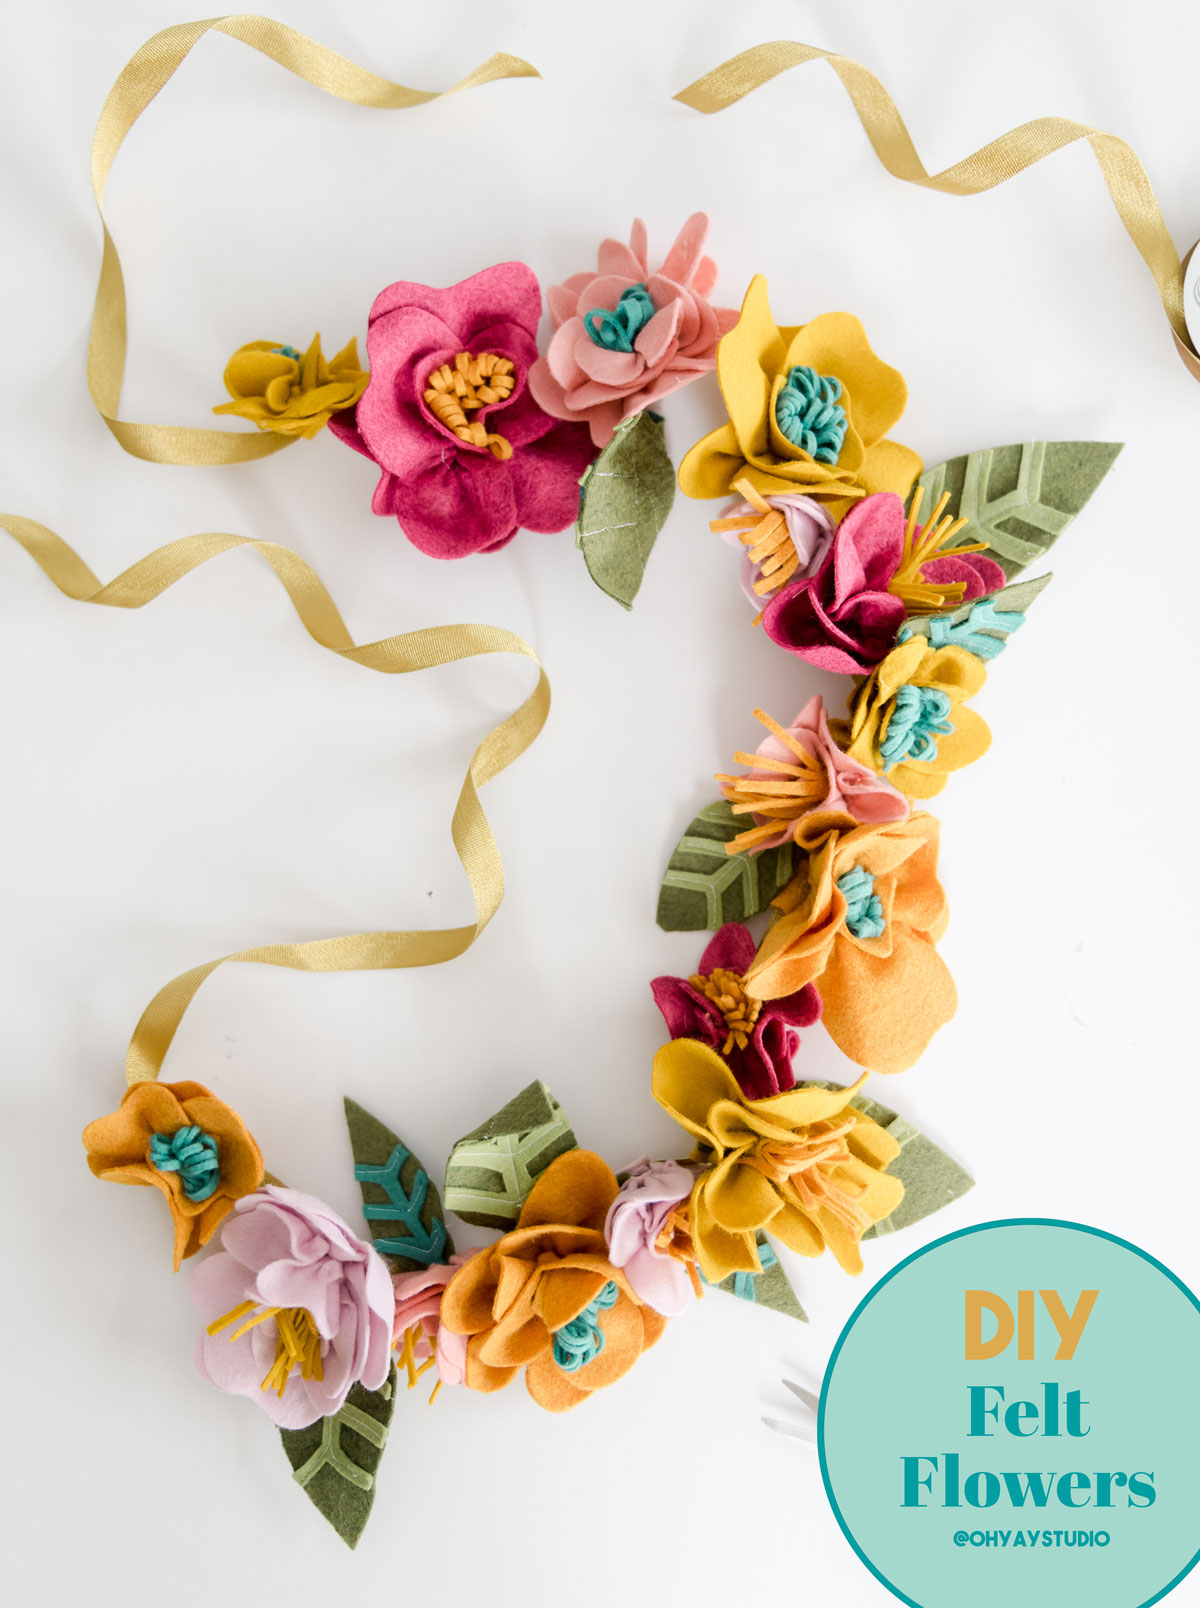
I have made felt flowers before, but THISSSSS technique is everything I have been wanting! Using your sewing machine (and shout-out to my amazing, tried-and-true Janome 9450….holllllaaaaa) helps make the flowers “softer”, more floppy look, which I think is more realistic and lends itself to more ways to use the flowers!!! SOOOOOO grab your fave felt pieces (or heck, even those felt scraps) and let’s get MAKINGGGGG to help usher in spring time!
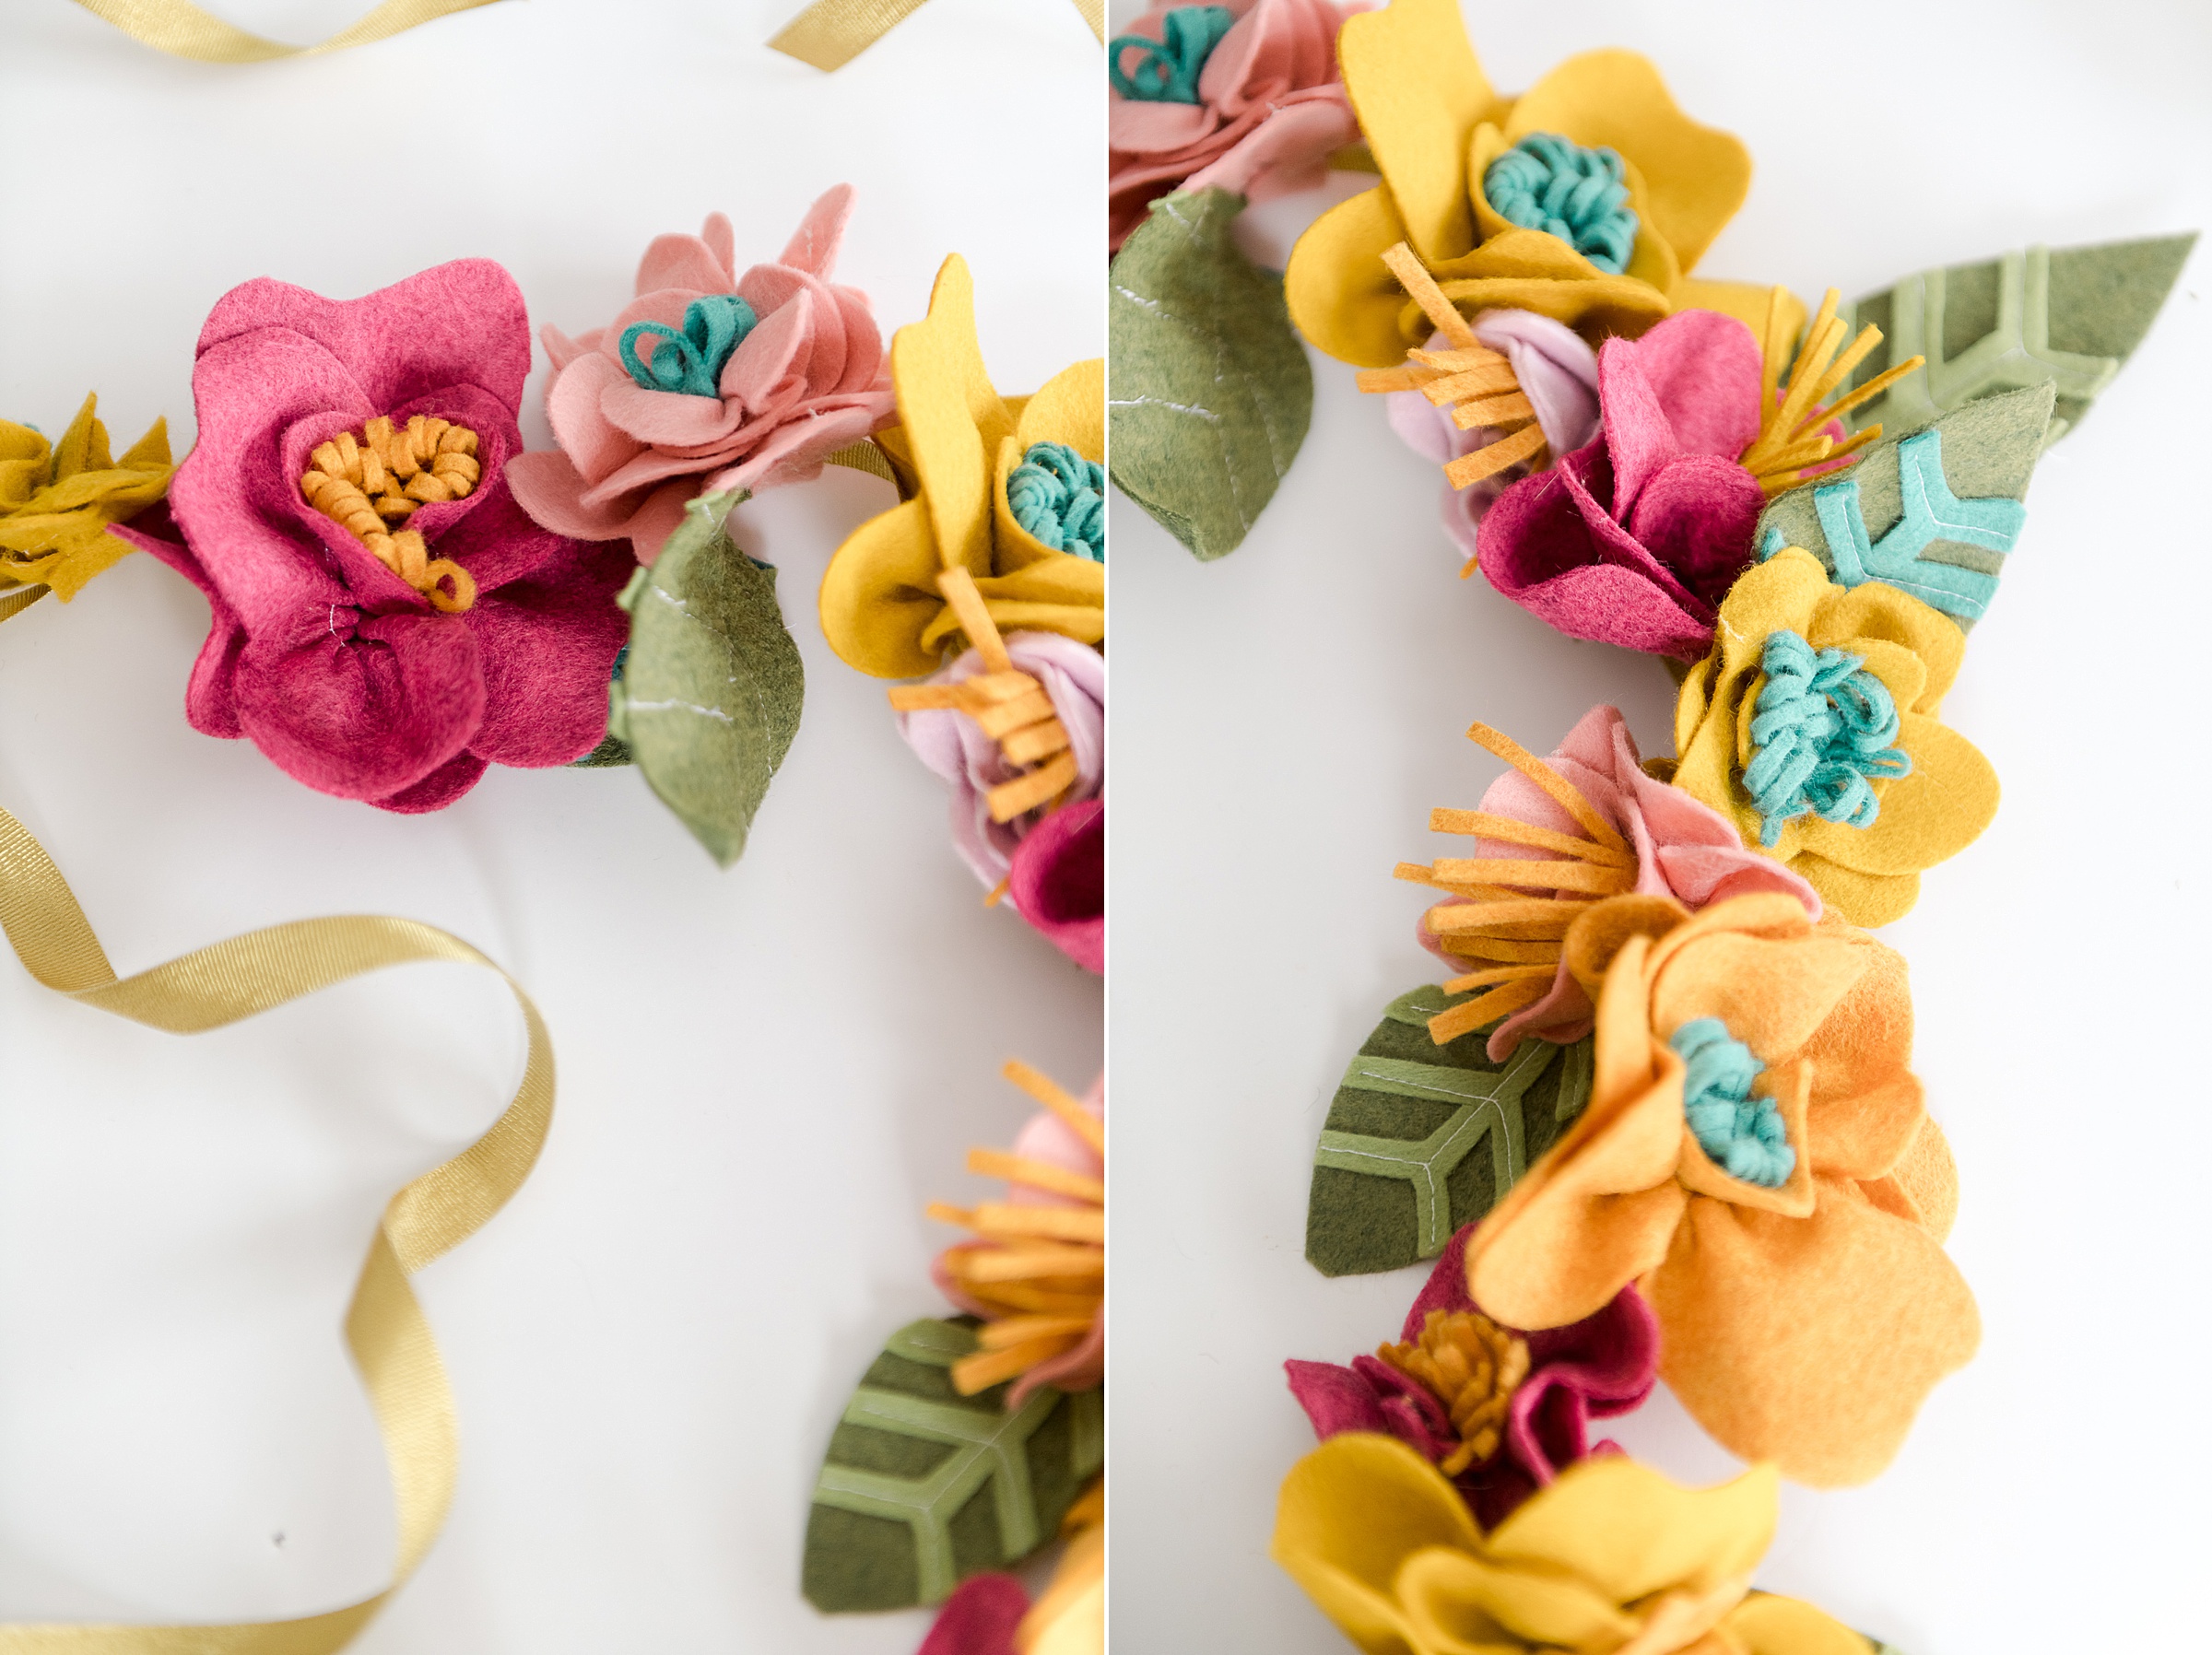
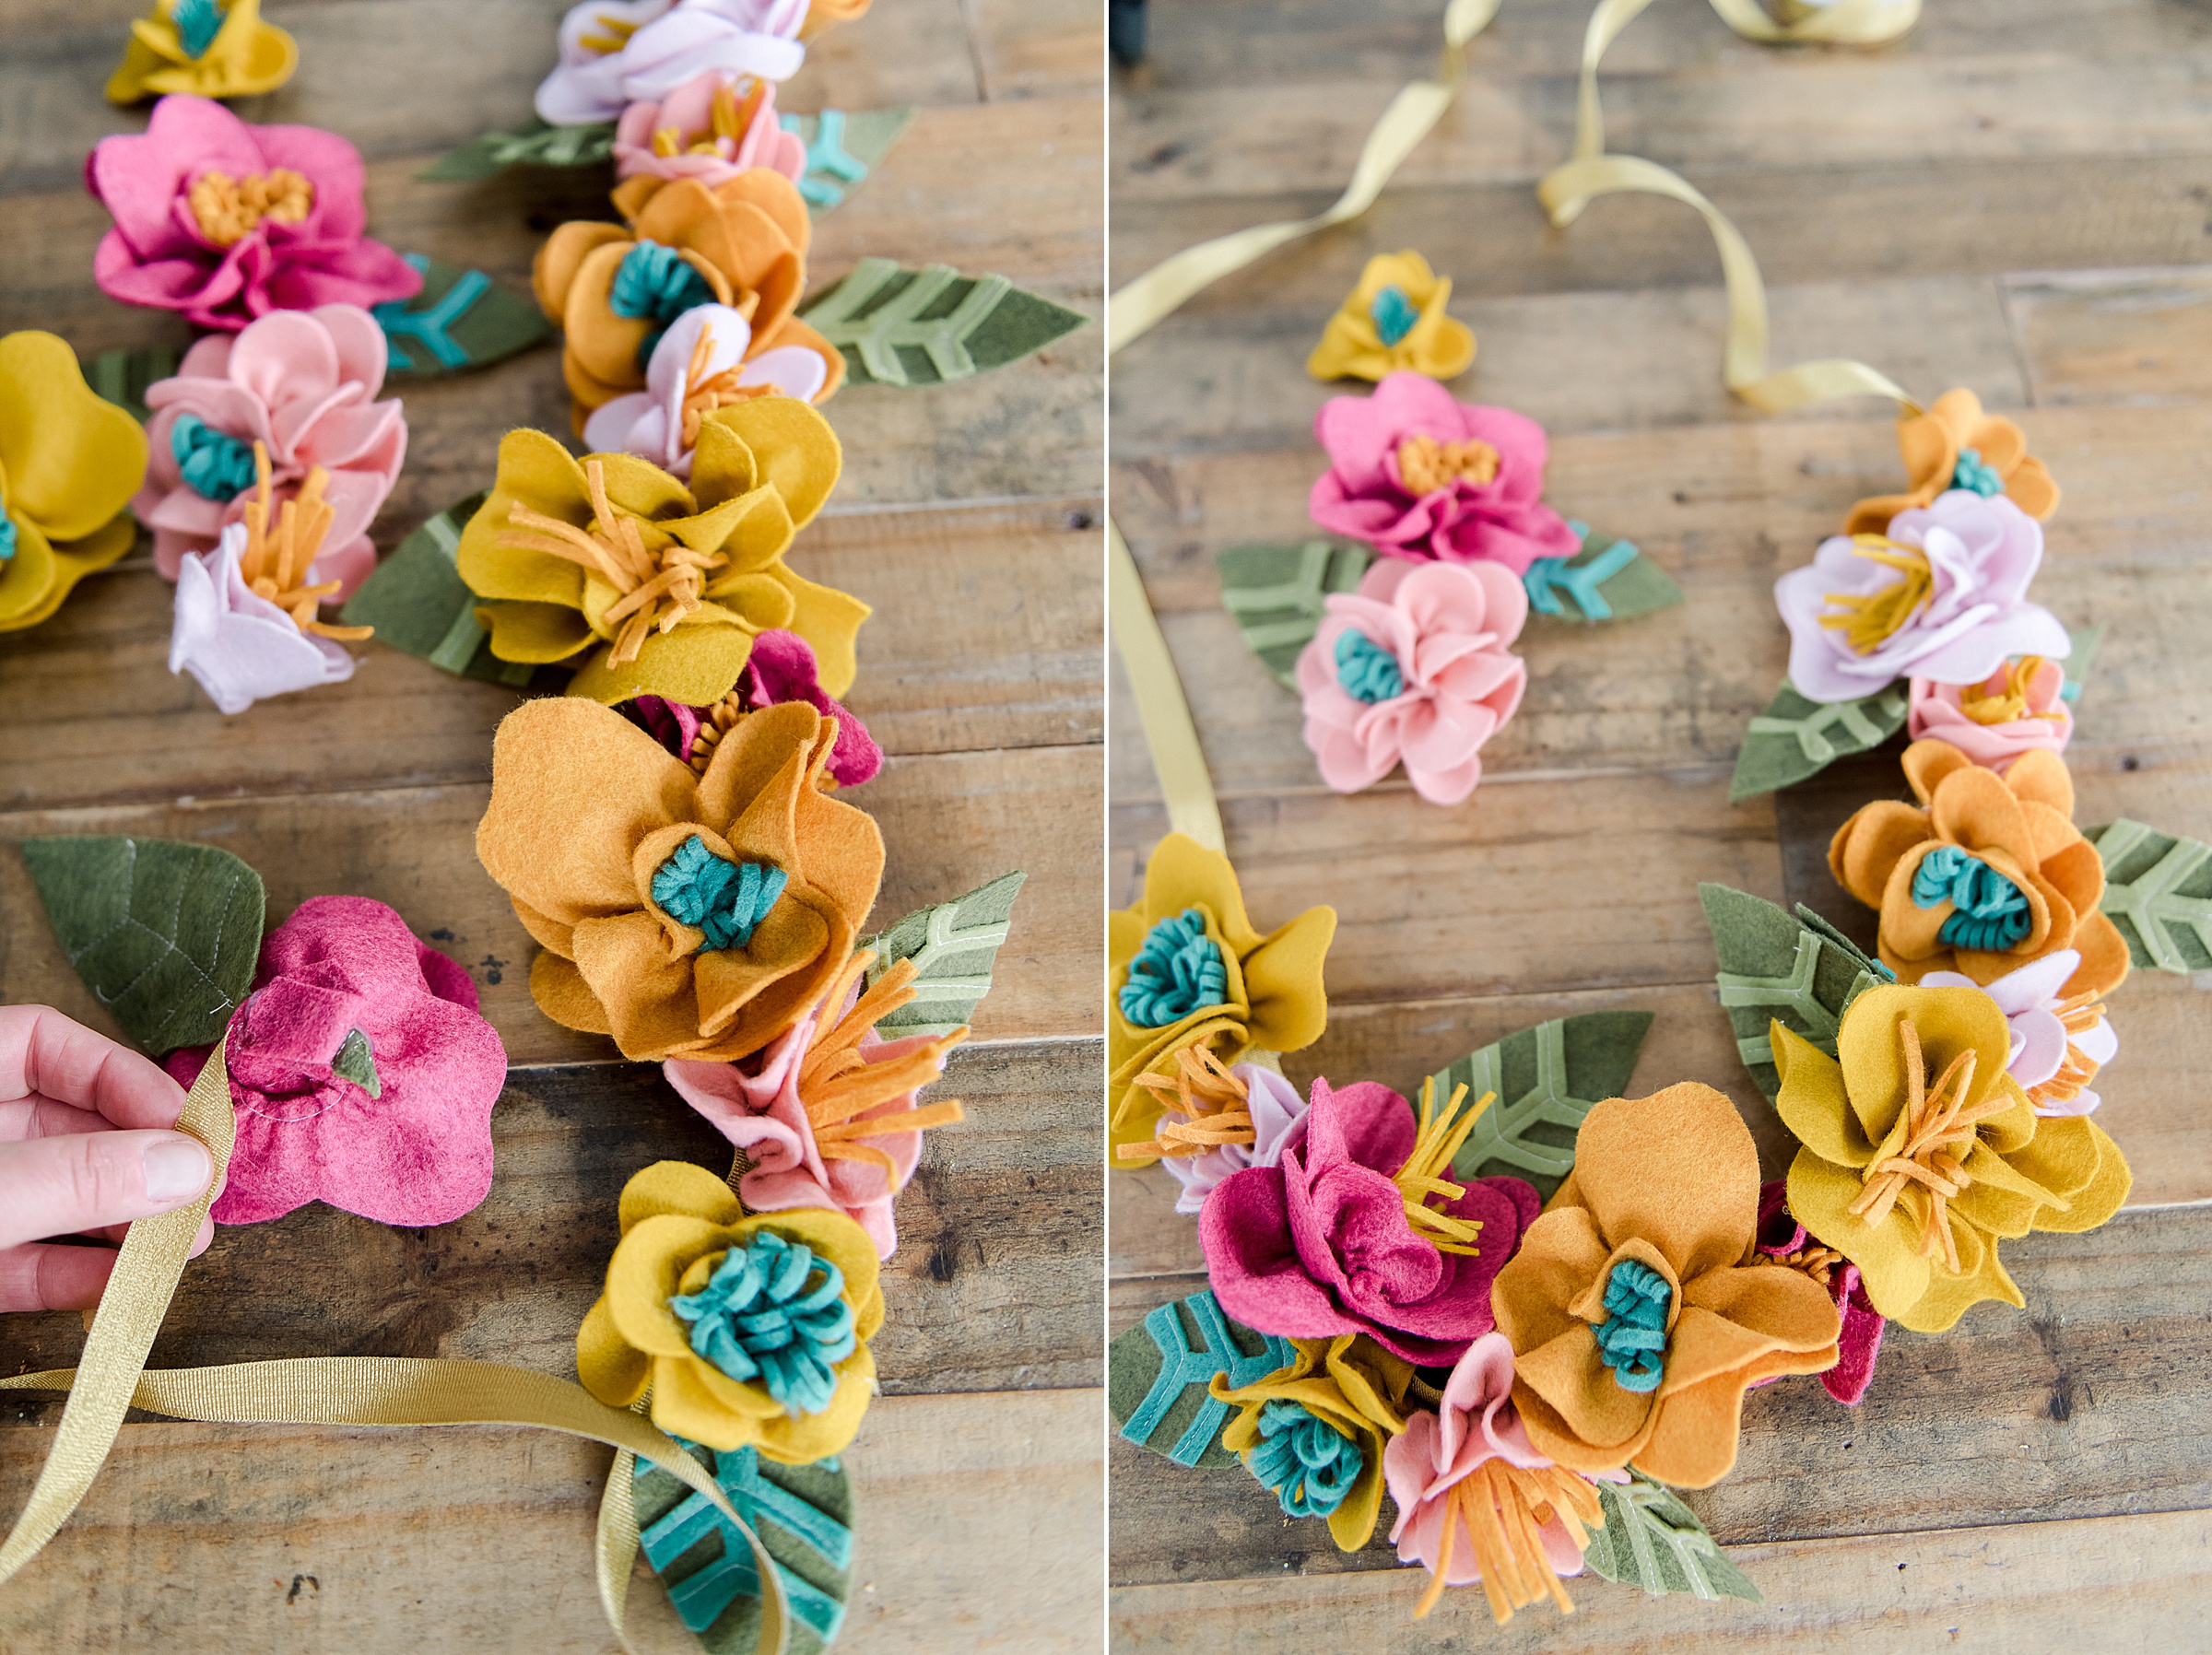
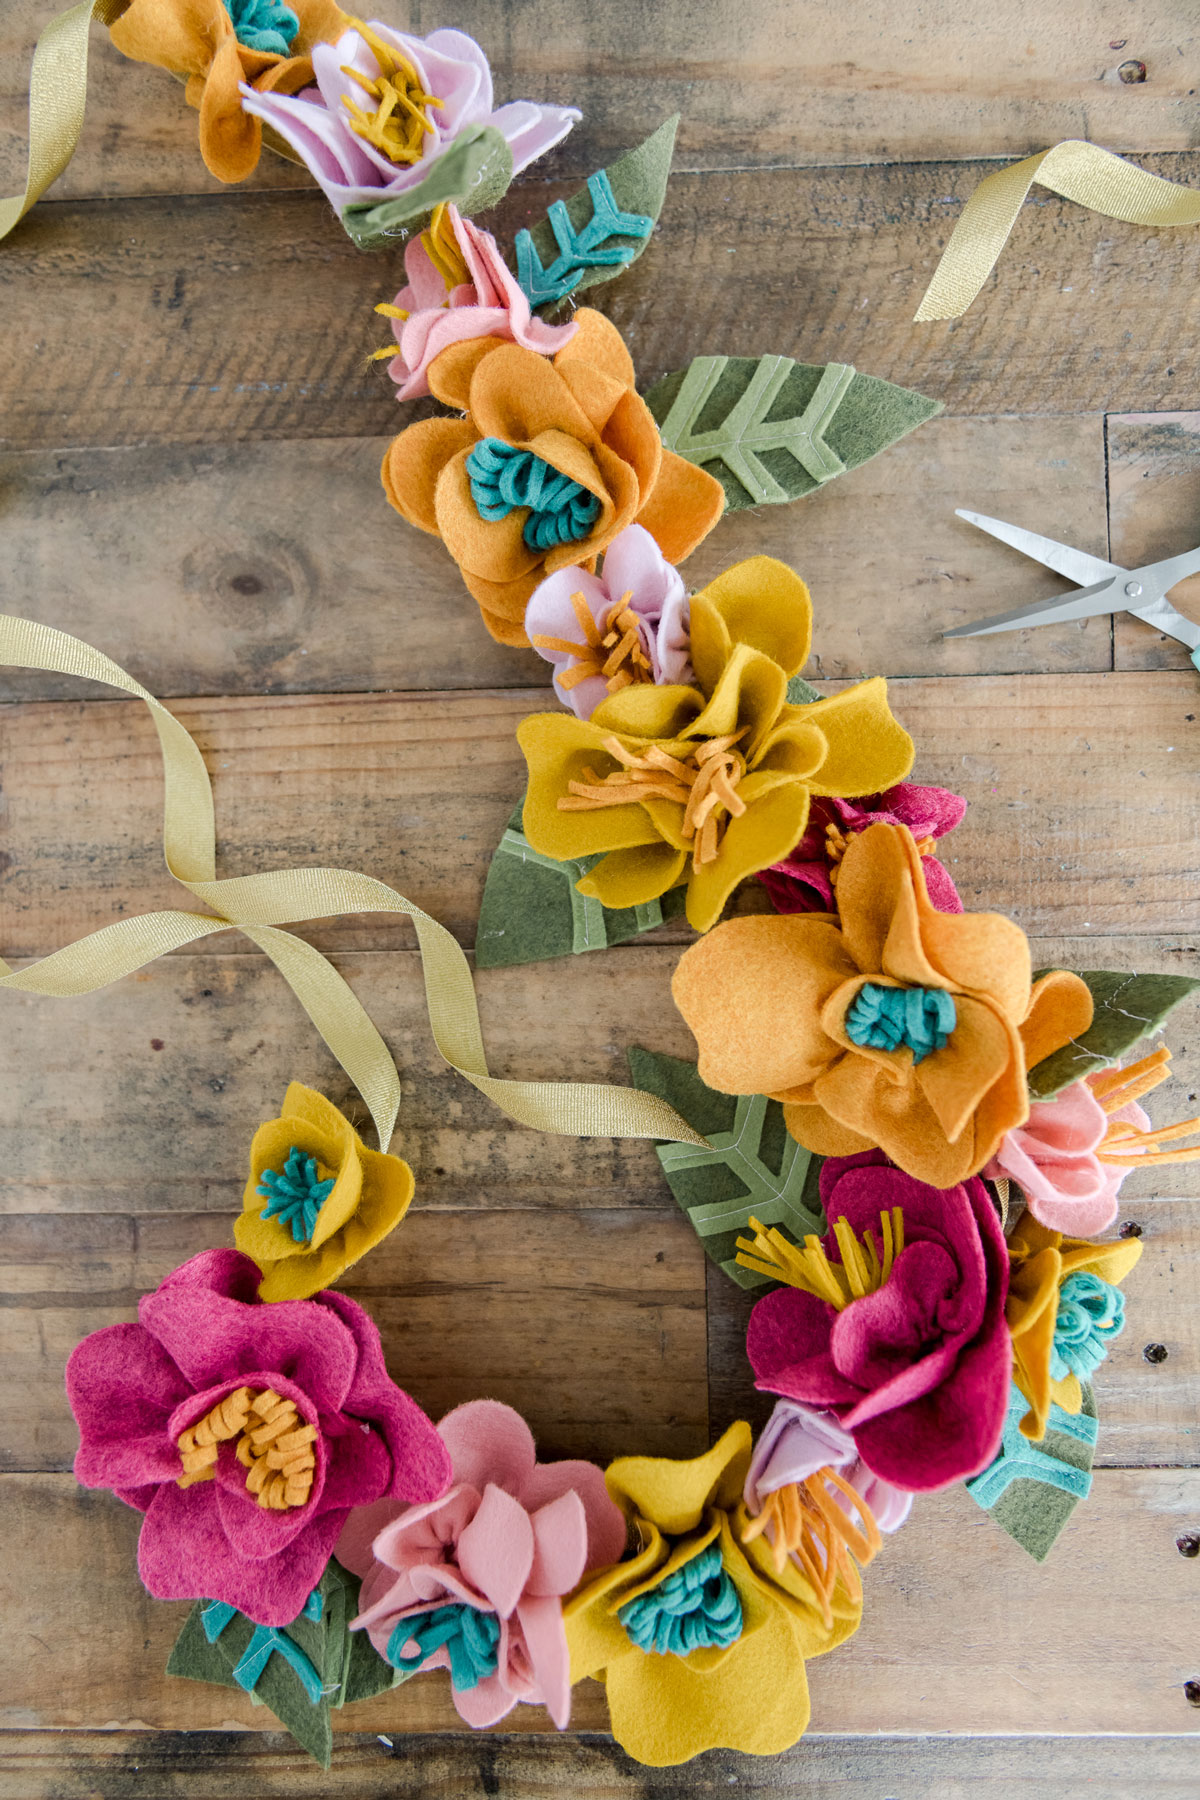
Like I said, if you’ve made felt flowers before, you will likely already know how to do 1/2 this pattern that I have below, BUUUUUUUT the addition of using your sewing machine is what makes the flowers less “stiff” and more soft and loose. And quite frankly, I don’t think I’m every turning back! This one extra step (which kinda isn’t even an extra step…..but more on that later) using a gathering stitch on your sewing machine is what does the trick! ANND AND AND I found that using thread instead of glue makes the flowers A LOT less heavy (in weight and visually) so that you’re able to string these on a garland (like I chose to) or even make them into a head piece, add them to a wedding veil, put them on a wreath, or even make them into a necklace, headband or hair clip!!!!
MATERIALS:
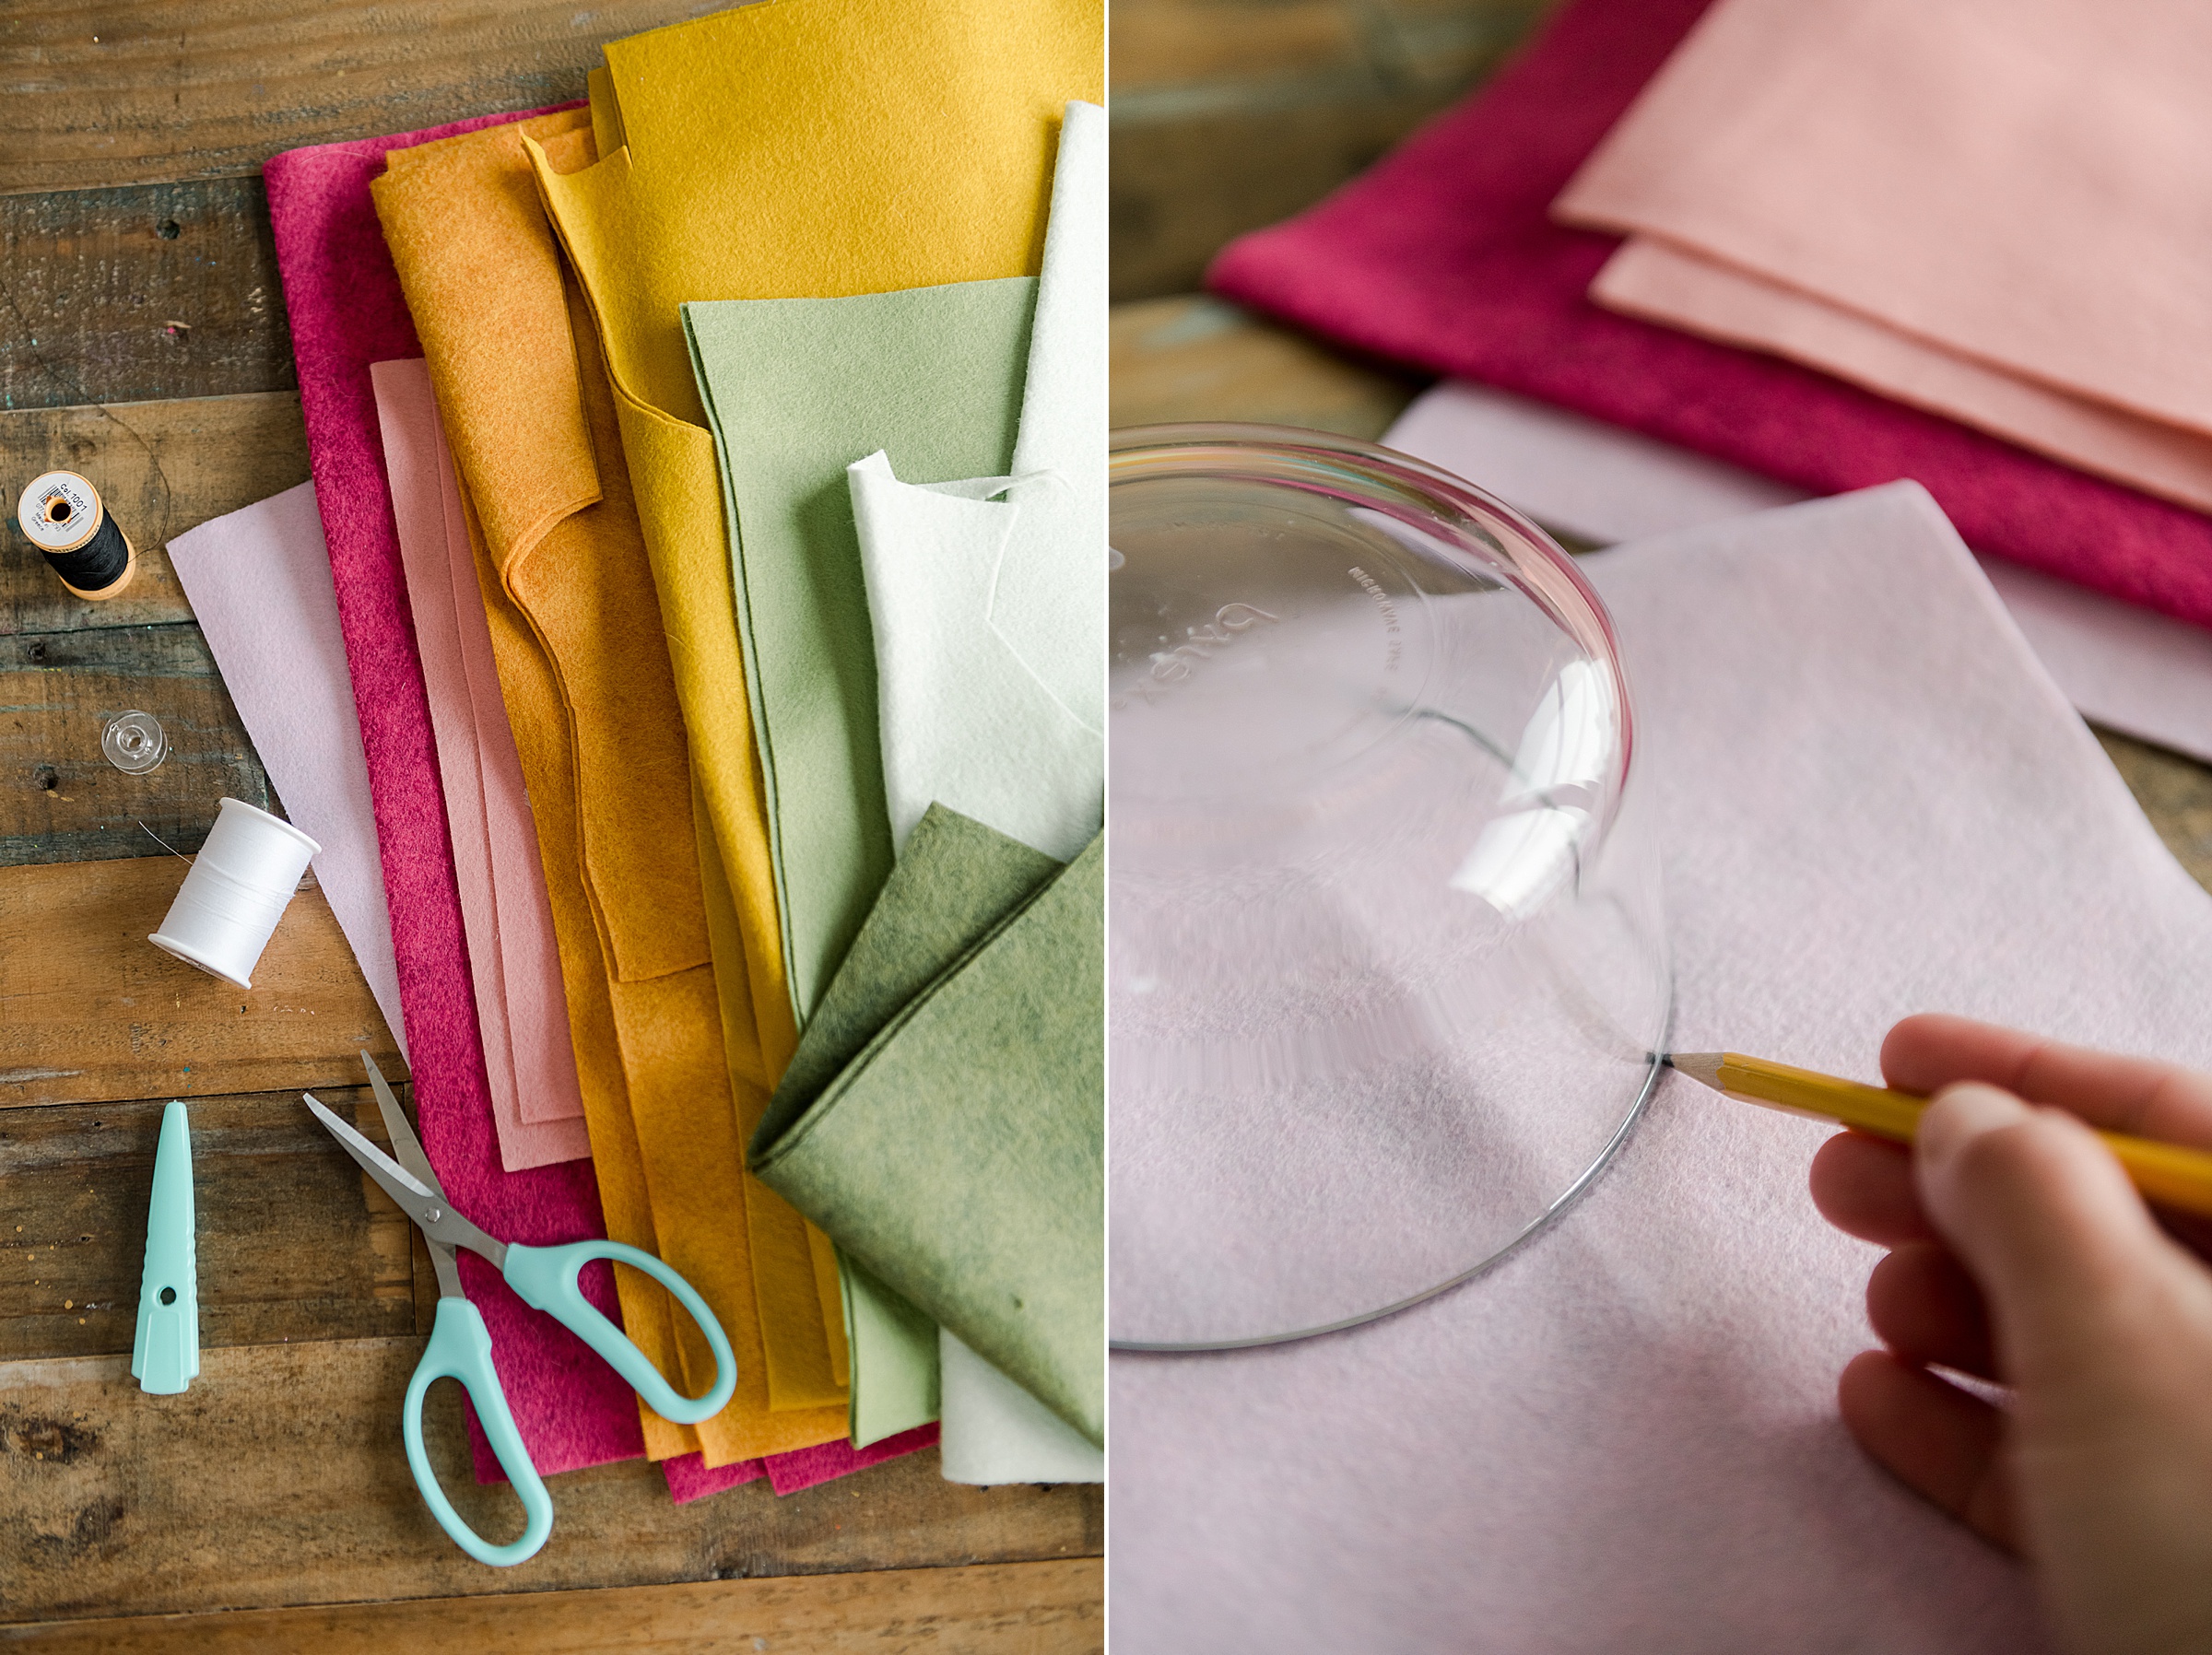
- Felt in your favorite colors
- Your sewing machine – of course I love my JANOME 9450! 🙂
- Sharp scissors
- Pencil for tracing
- A round bowl, tupperwear top or container to make circles
- Some fabric glue or hot glue (I love the Aleene’s felt glue)
- Some ribbon or wreath form or anything you want for displaying your gorgeous flowers 🙂
INSTRUCTIONS:
1. Cut out your flowers and leaves:
Choose your colors and begin to cut your flowers! This is the suppppper fun part!
There are 4 easy steps to cutting these flowers:
- 1. Cut a circle (I traced a circle from tupperwear lid tp make sure my circle was round and in various sizes)
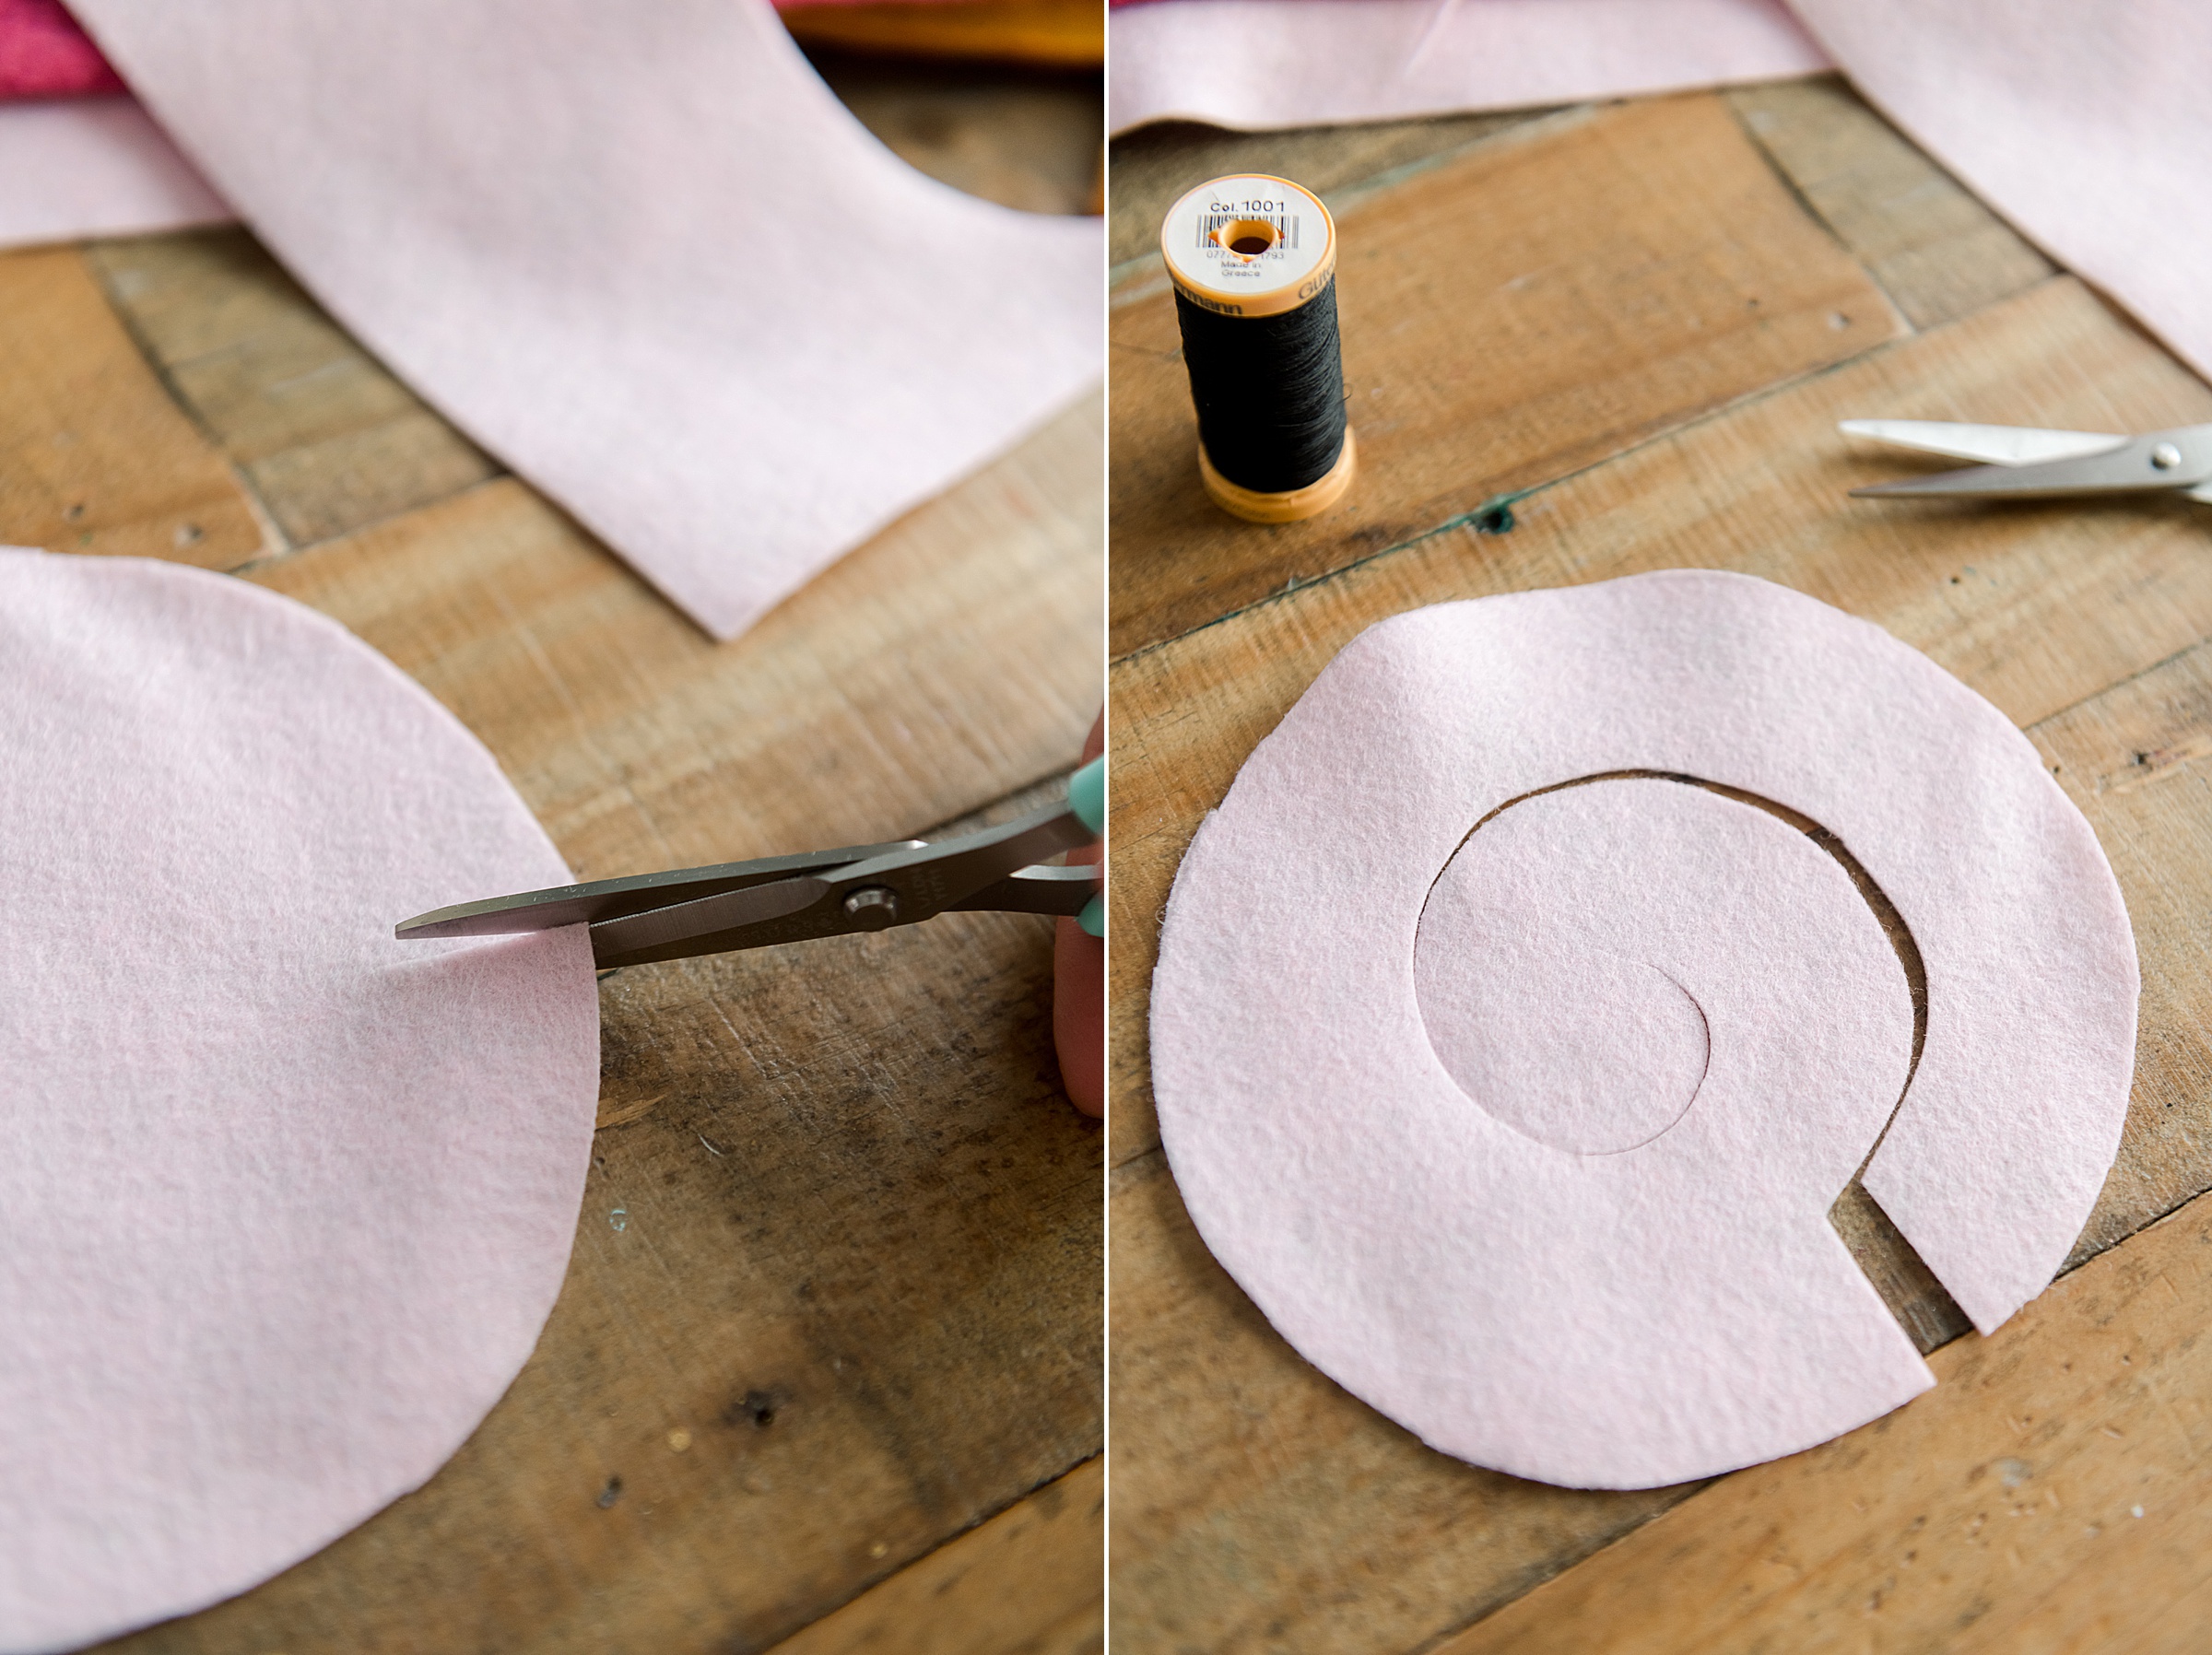
- 2. Cut a slit about 1 inch into the side of the circle and then begin to cut a spiral inward until you get to the middle – leave a little “knob” at the very middle center of the spiral
- 3. Then begin to add “variety” to your leaves. You will cut back from the inside out along the spiral (just one edge of the spiral – the “outer edge”). THIS IS THE STEP THAT MAKES THE FLOWERS HAVE VARIETY! Think about the shapes of pedals – try some with a scalloped edge for a more daisy look, try just a wavy edge for a more garden rose look or even double bumps for some carnation style 🙂 This is fun to see how the lines you cut end up turning into flowers – I did just a BIG variety on all sizes of the circles that I cut.
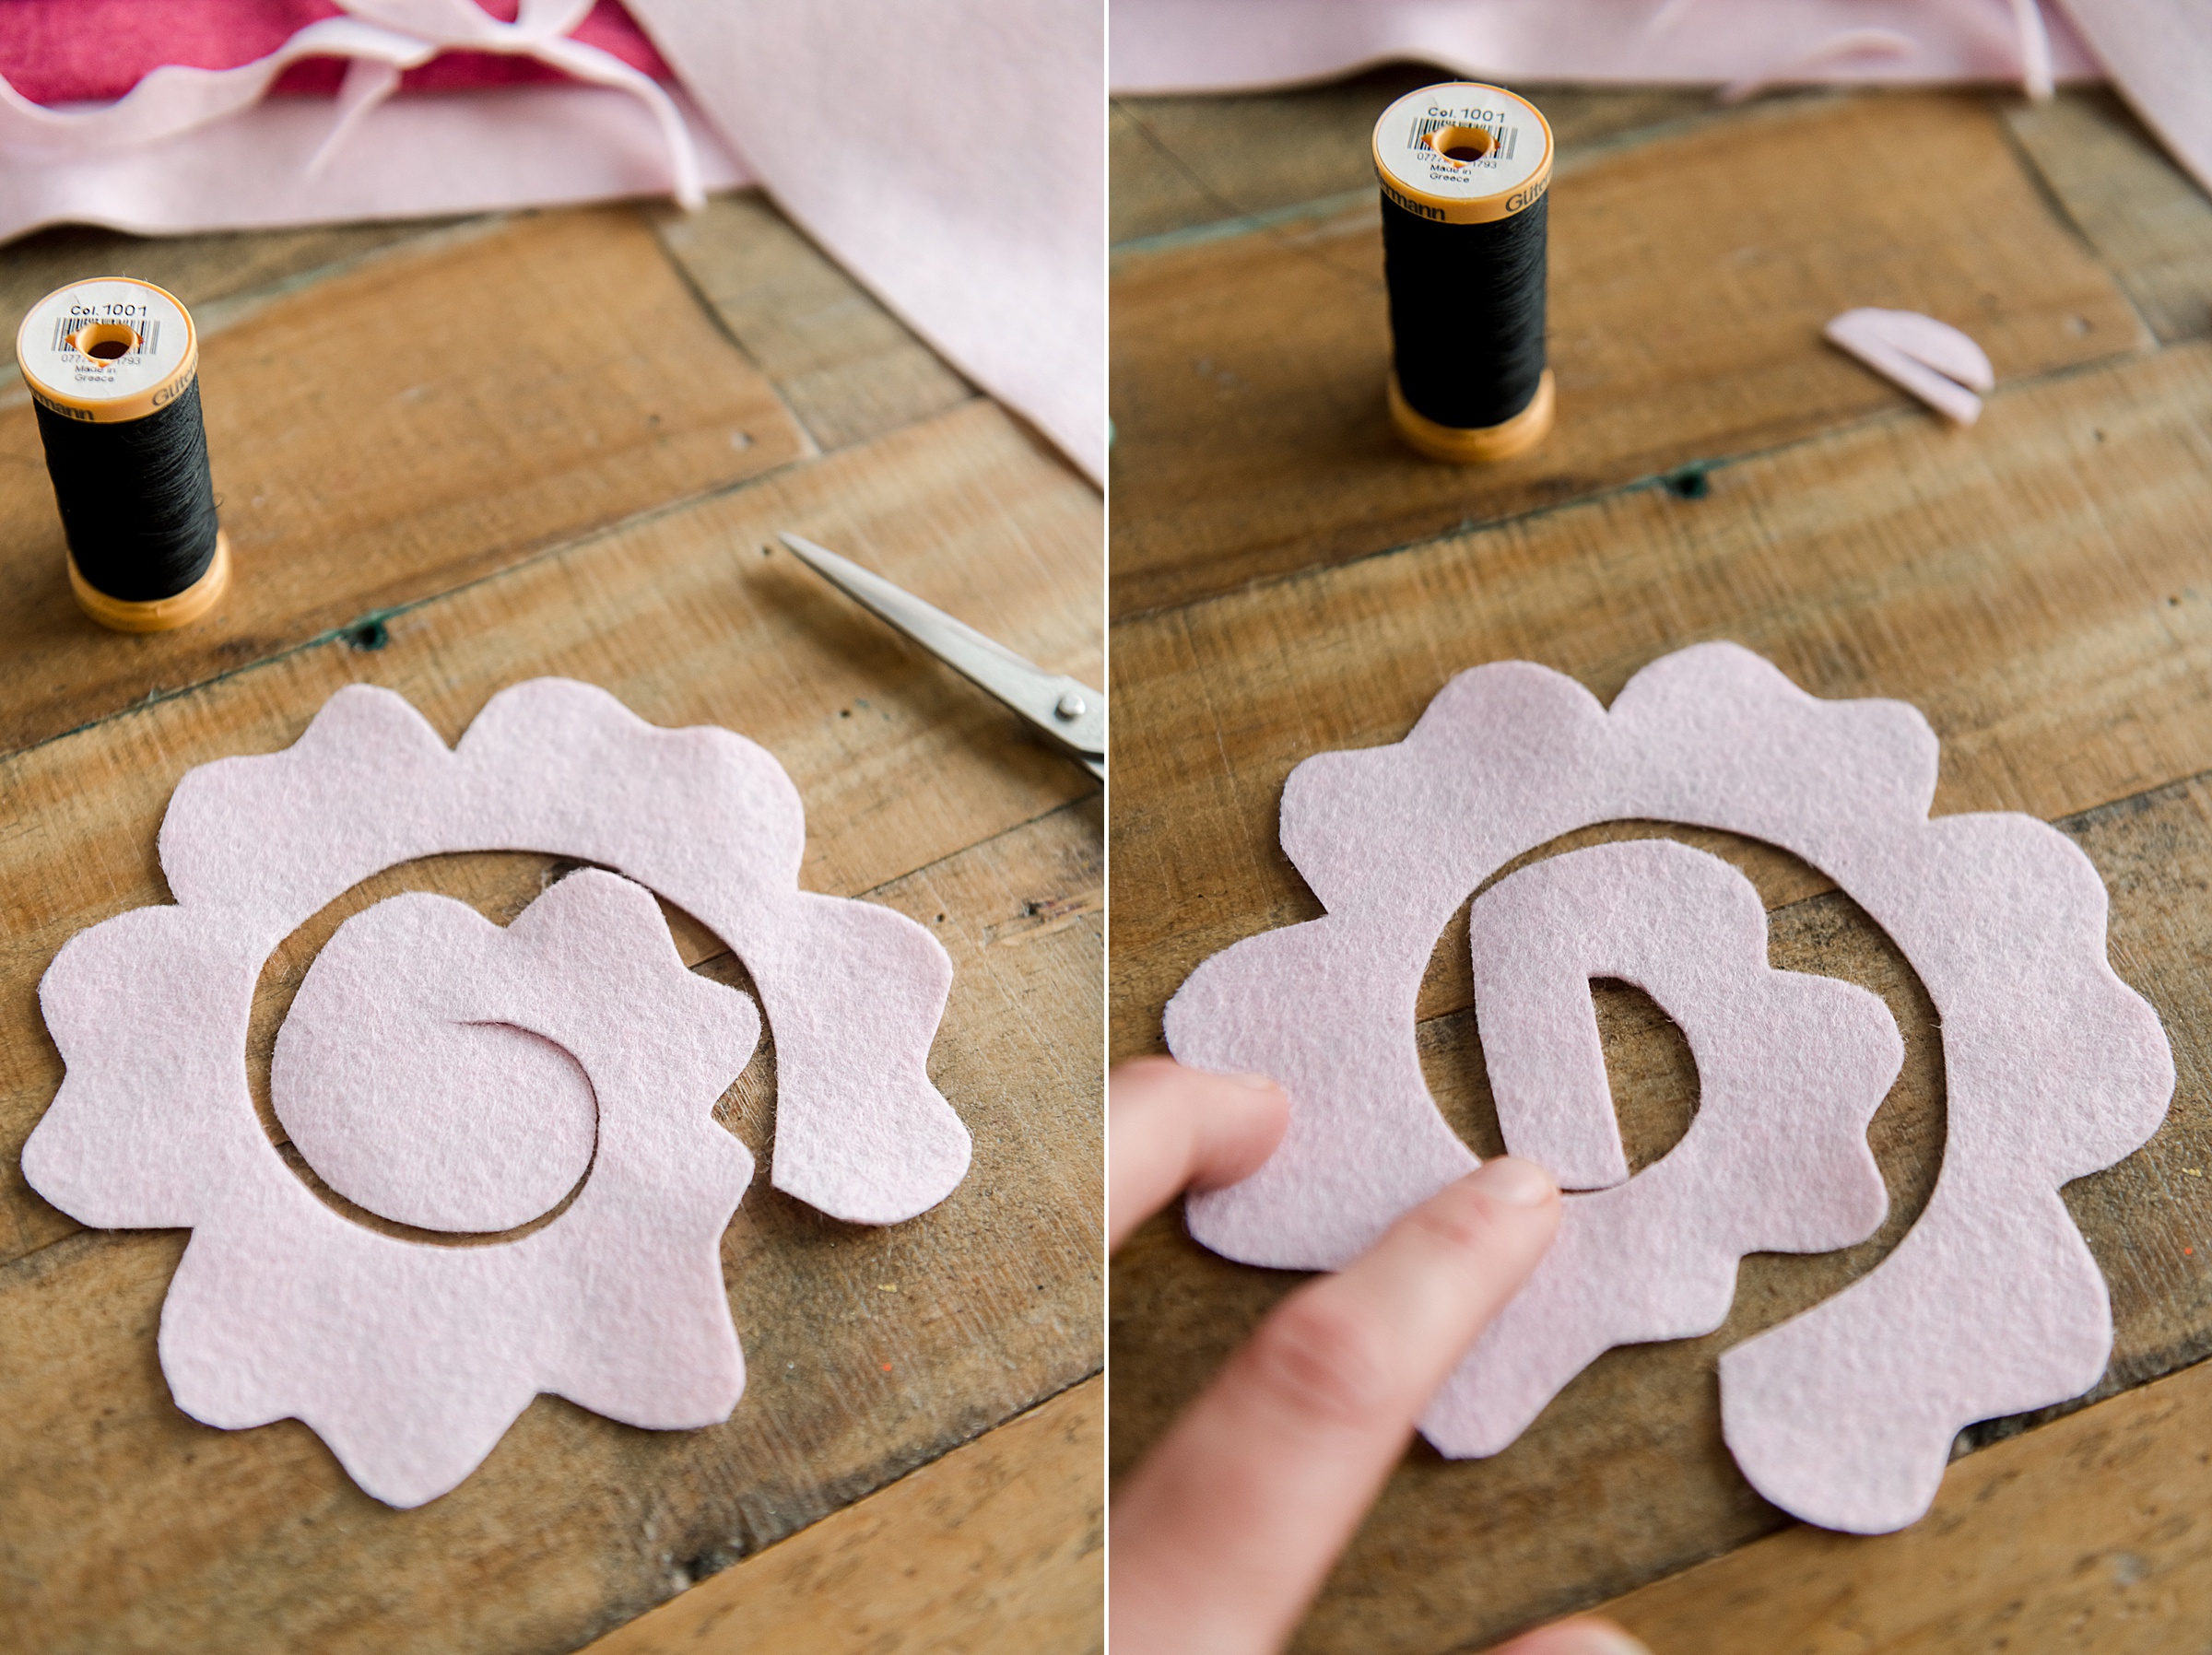
- 4. The last step is to cut that inner “knob” into a tab that can be folded over later on (for threading ribbon or hanging, etc). Basically cut your round knob into a slit by making it more rectangular rather than a circle (see pic for a visual example)! 🙂
I also chose to cut out some “insides” or middle parts to the flowers to add depth and variety (and this also uses MORE scraps….. #winwin)!
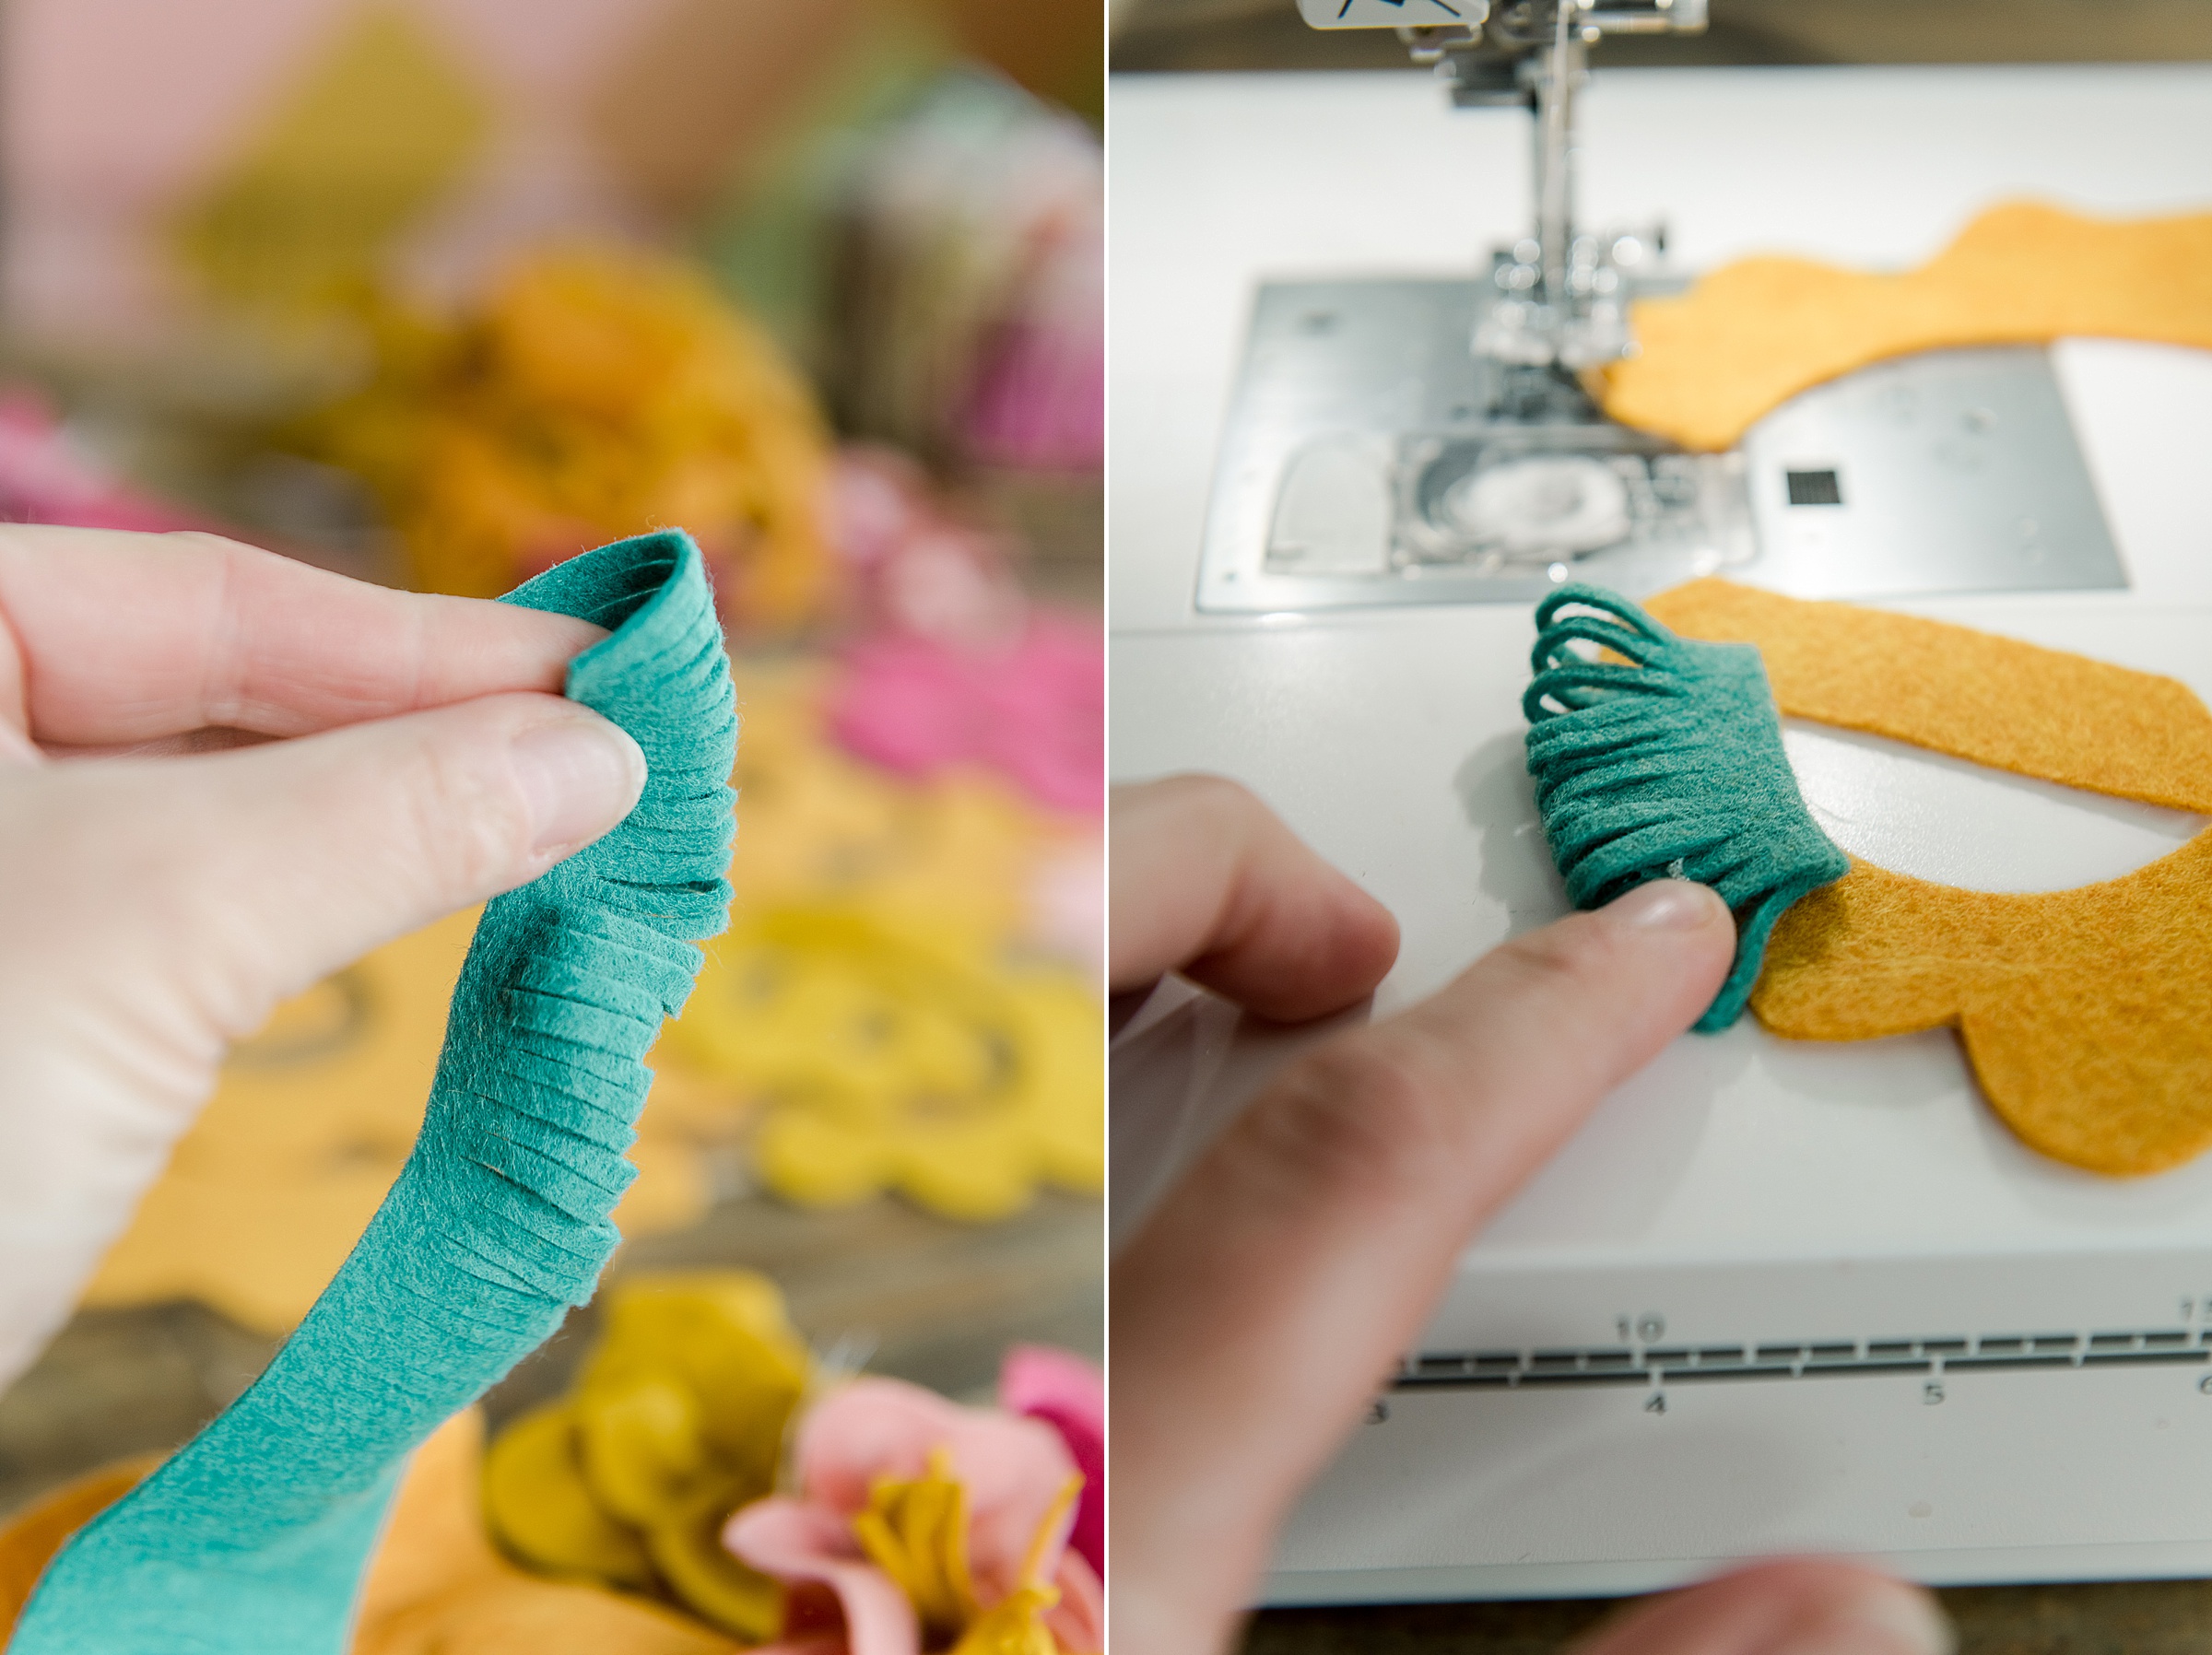
- 1. Cut a strip of felt about 2 inches wide by however long you want (about 2-3 inches will do for the center of each flower)
- 2. You can either cut slits (fringe) along one side (leaving the bottom 1/4” free for stitching down) orrrr you can fold over a felt strip lengthwise and cut fringe along the folded edge (again, leaving the bottom 1/4” free for stitching).
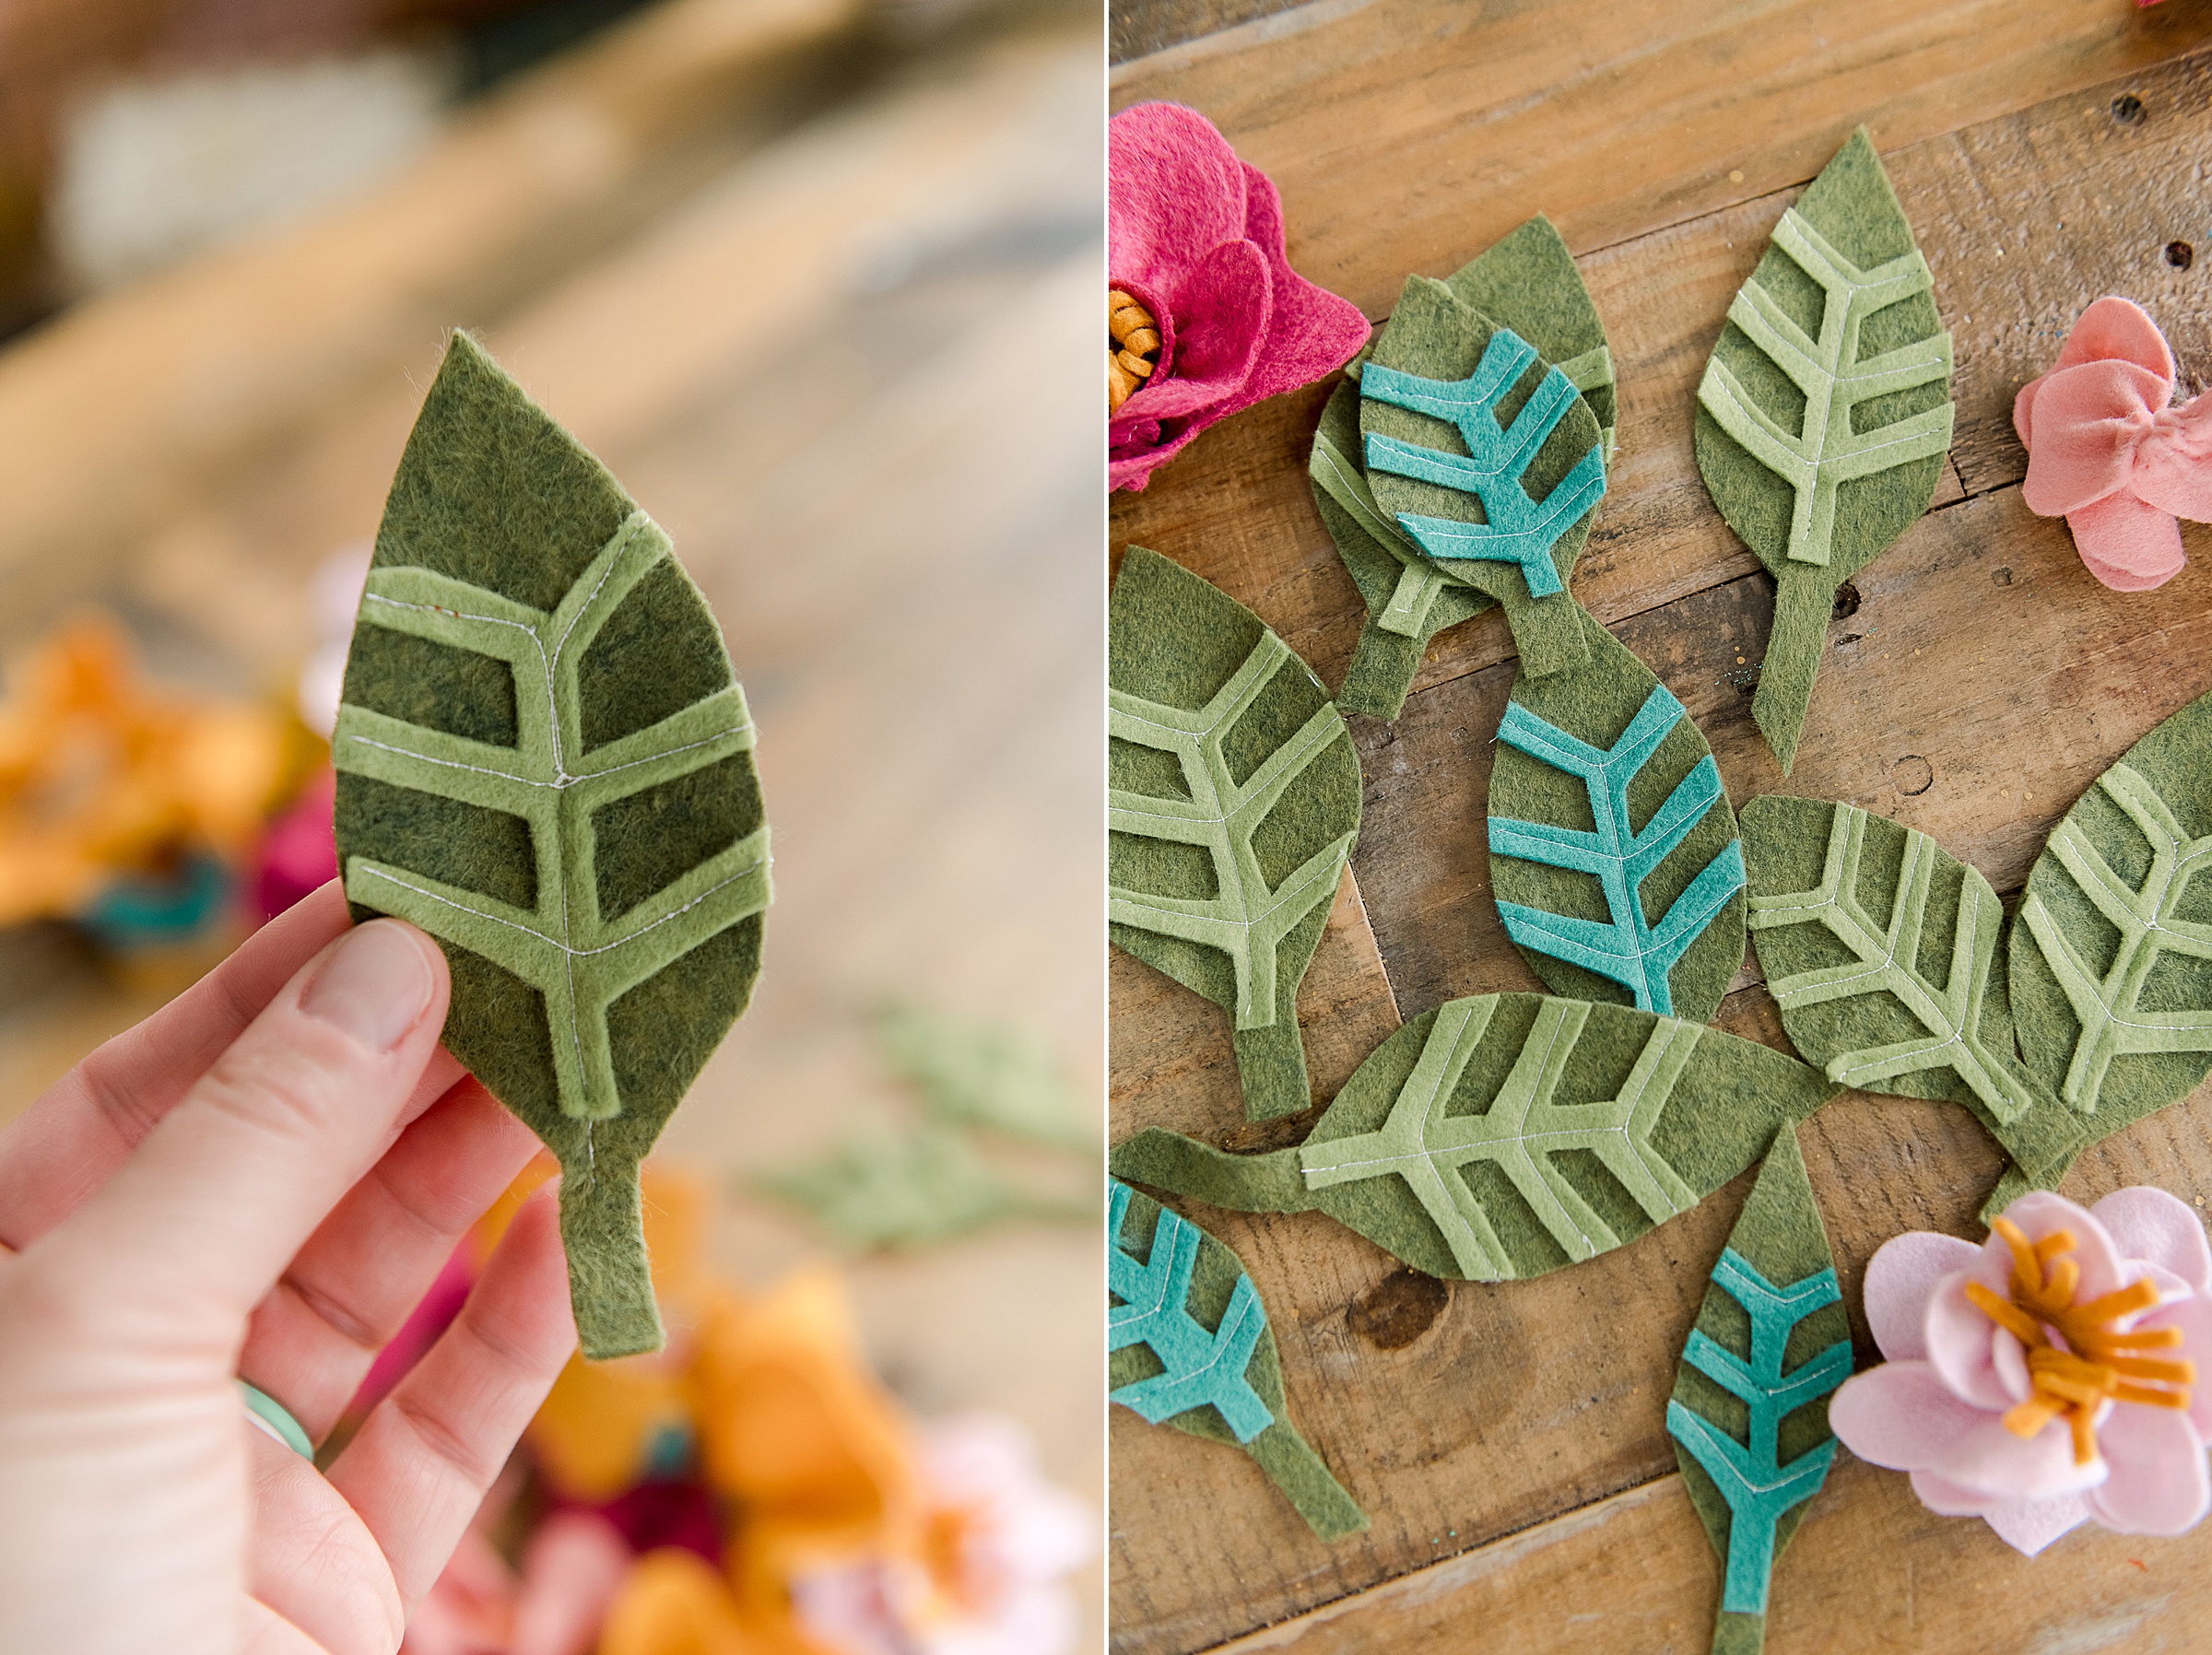
I also cut out some leaf shapes out of green felt and some “veins” or details from the greenish felt scraps that I had from other projects. I LOVED the variety that adding leaves and the veins gave the whole garland when finished! 🙂
2. Gather stitch + tie off 🙂
With your sewing machine, put on your straight stitch foot and choose a straight stitch on your machine (or screen or whatever option you have)! THEN, to get a “gathering stitch” without a gathering foot, you will simply elongate your stitch length……mine is on my LCD screen and I can visually see that the stitch is being elongated as I push the numbers higher! 🙂 I chose to elongate my switch to 4.0 (but you can go as high as you want honestly)! 🙂
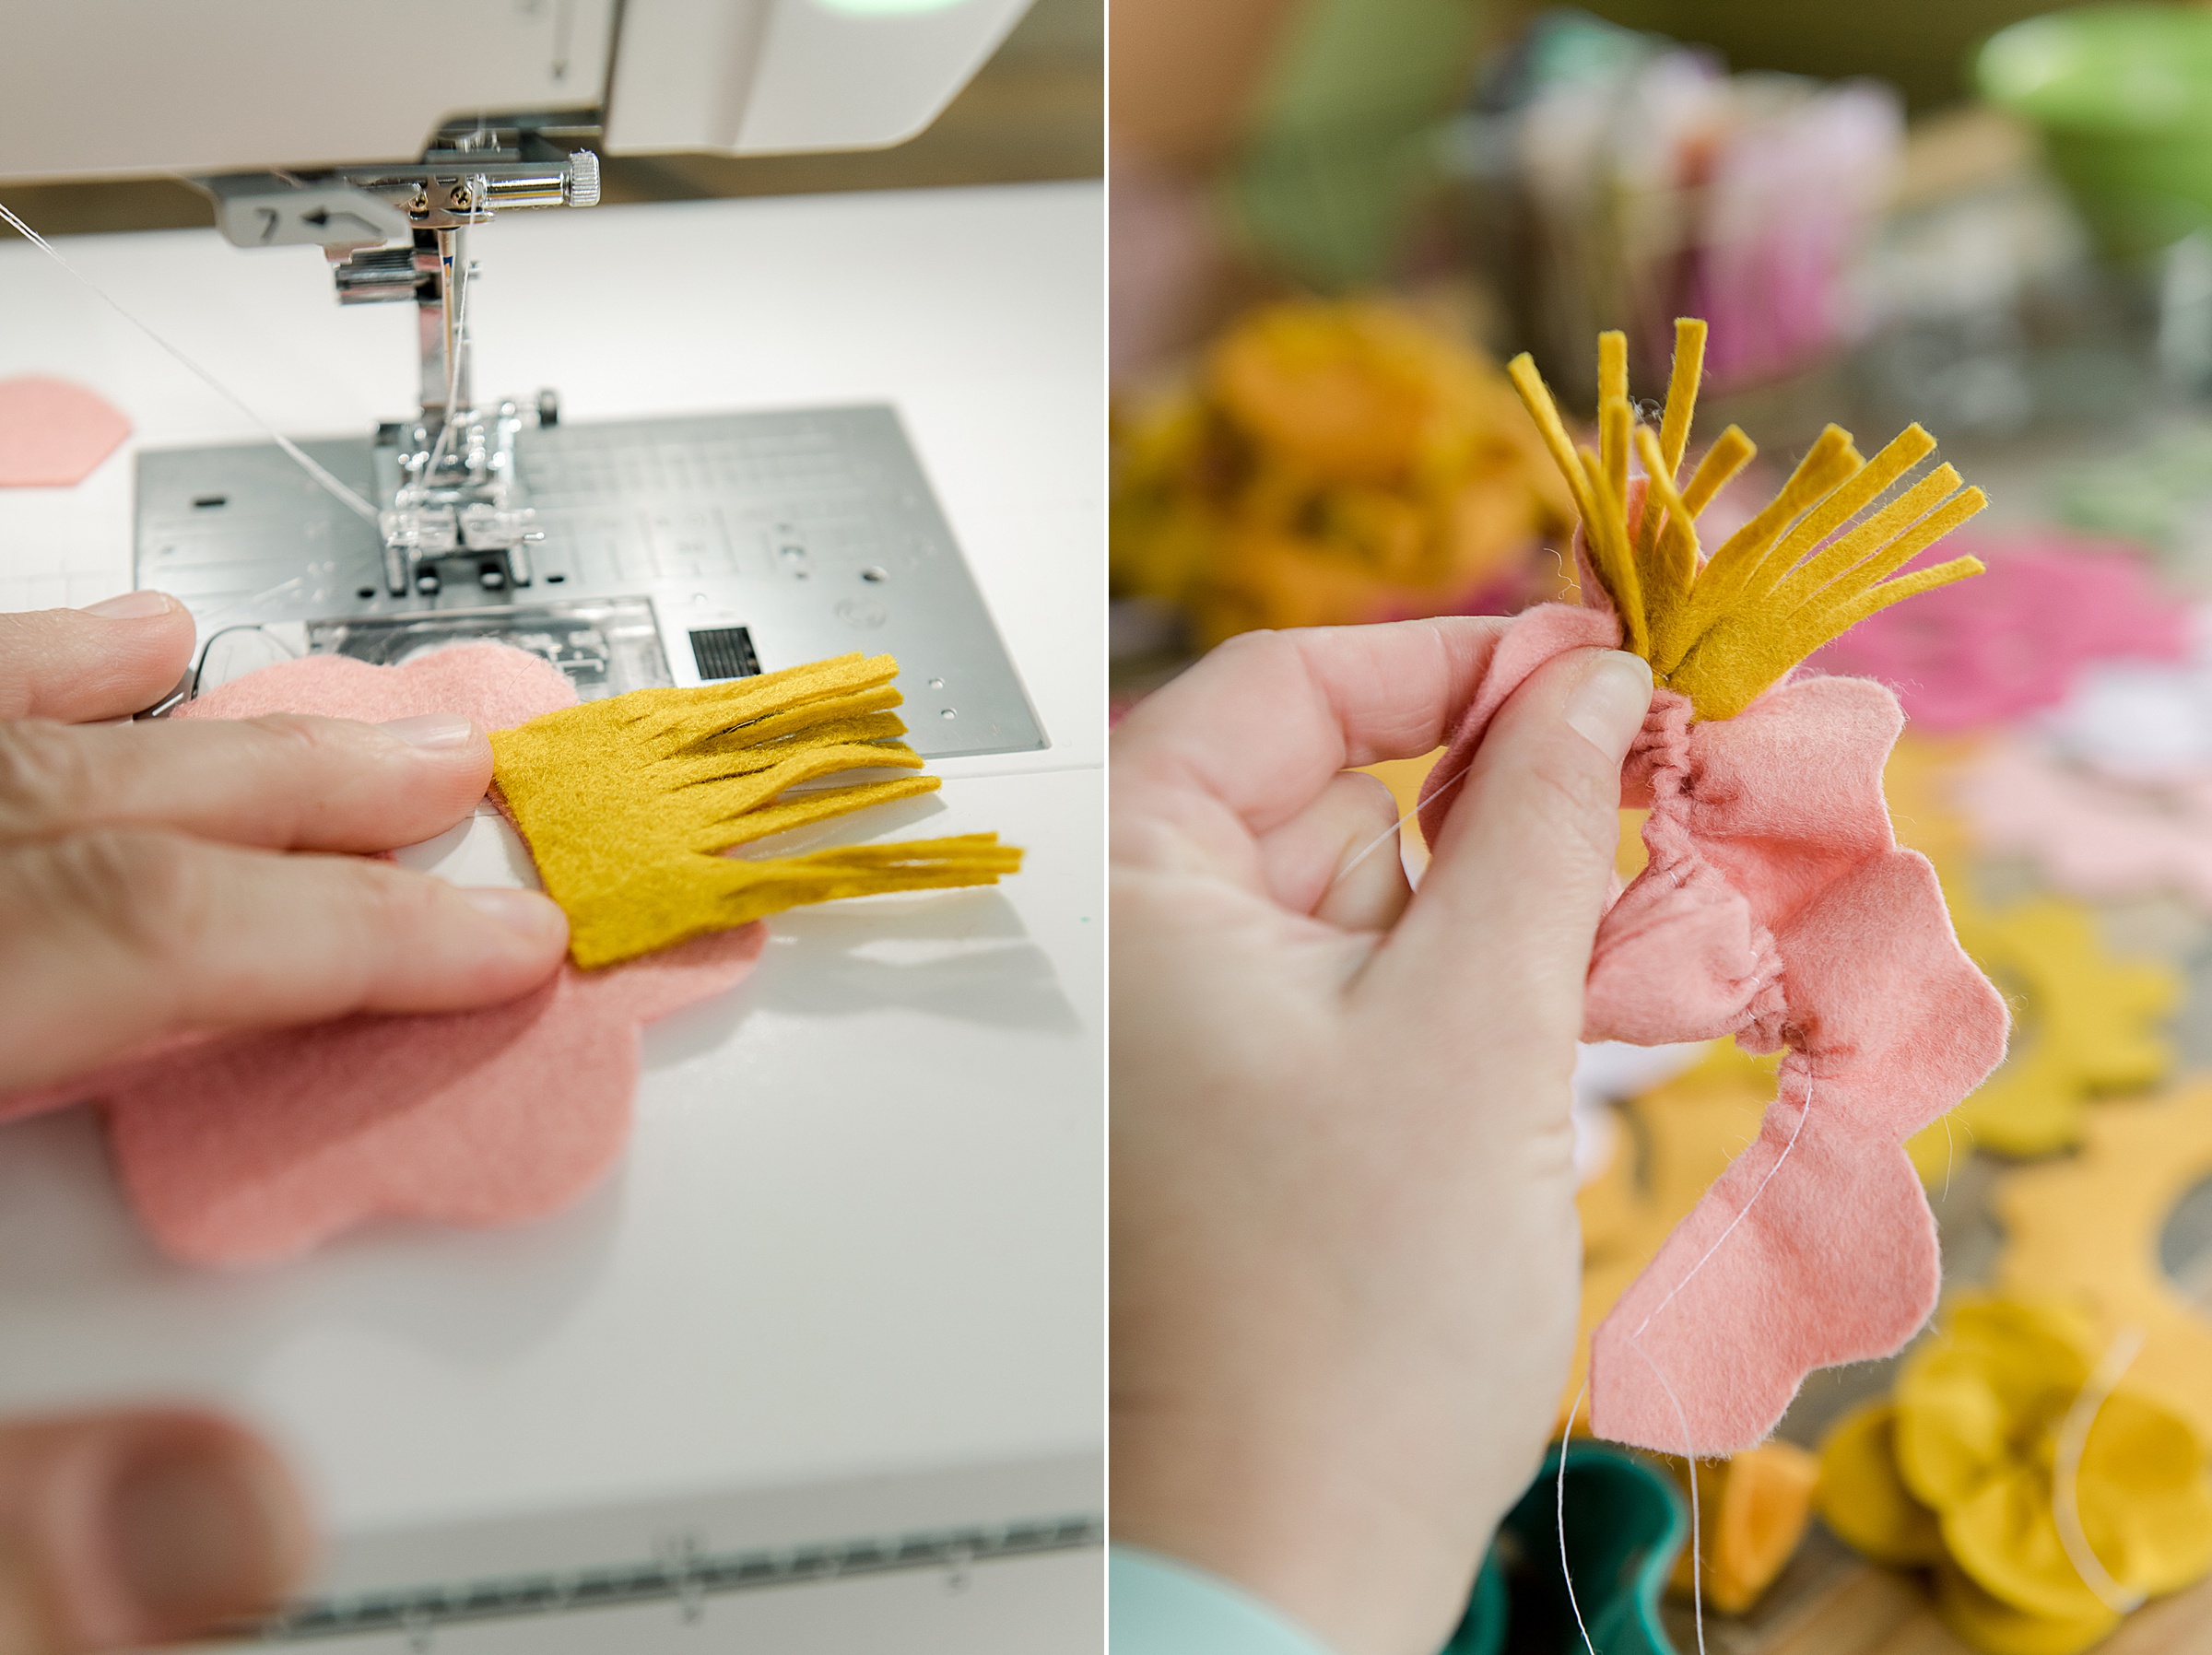
Place your flower under your foot so that you will stitch from the inside center along the straight spiral that you cut in step 1. Be careful to stay about 1/4” away from the edge and just work your way out. When you are done stitching, you will pull out a longer tail to leave thread for gathering.
Now it’s time to gather your flower! You will gently begin to pull the top thread of your stitch that you just stitched on the machine and start to gather your felt. BE SURE NOT TO PULL TOO HARD or you will break your stitch. You will want to pull from BOTH SIDES of the flower (the inside and the outside)…….pull about 1/2 the length of the spiral from the outside top thread and then pull the rest of the spiral from the inside top thread! 🙂
TIP: Think of the gather as less of “pulling the tread” and more of “sliding the felt down the stitch”…..this helped me to pull more gently and help gather the fabric well!
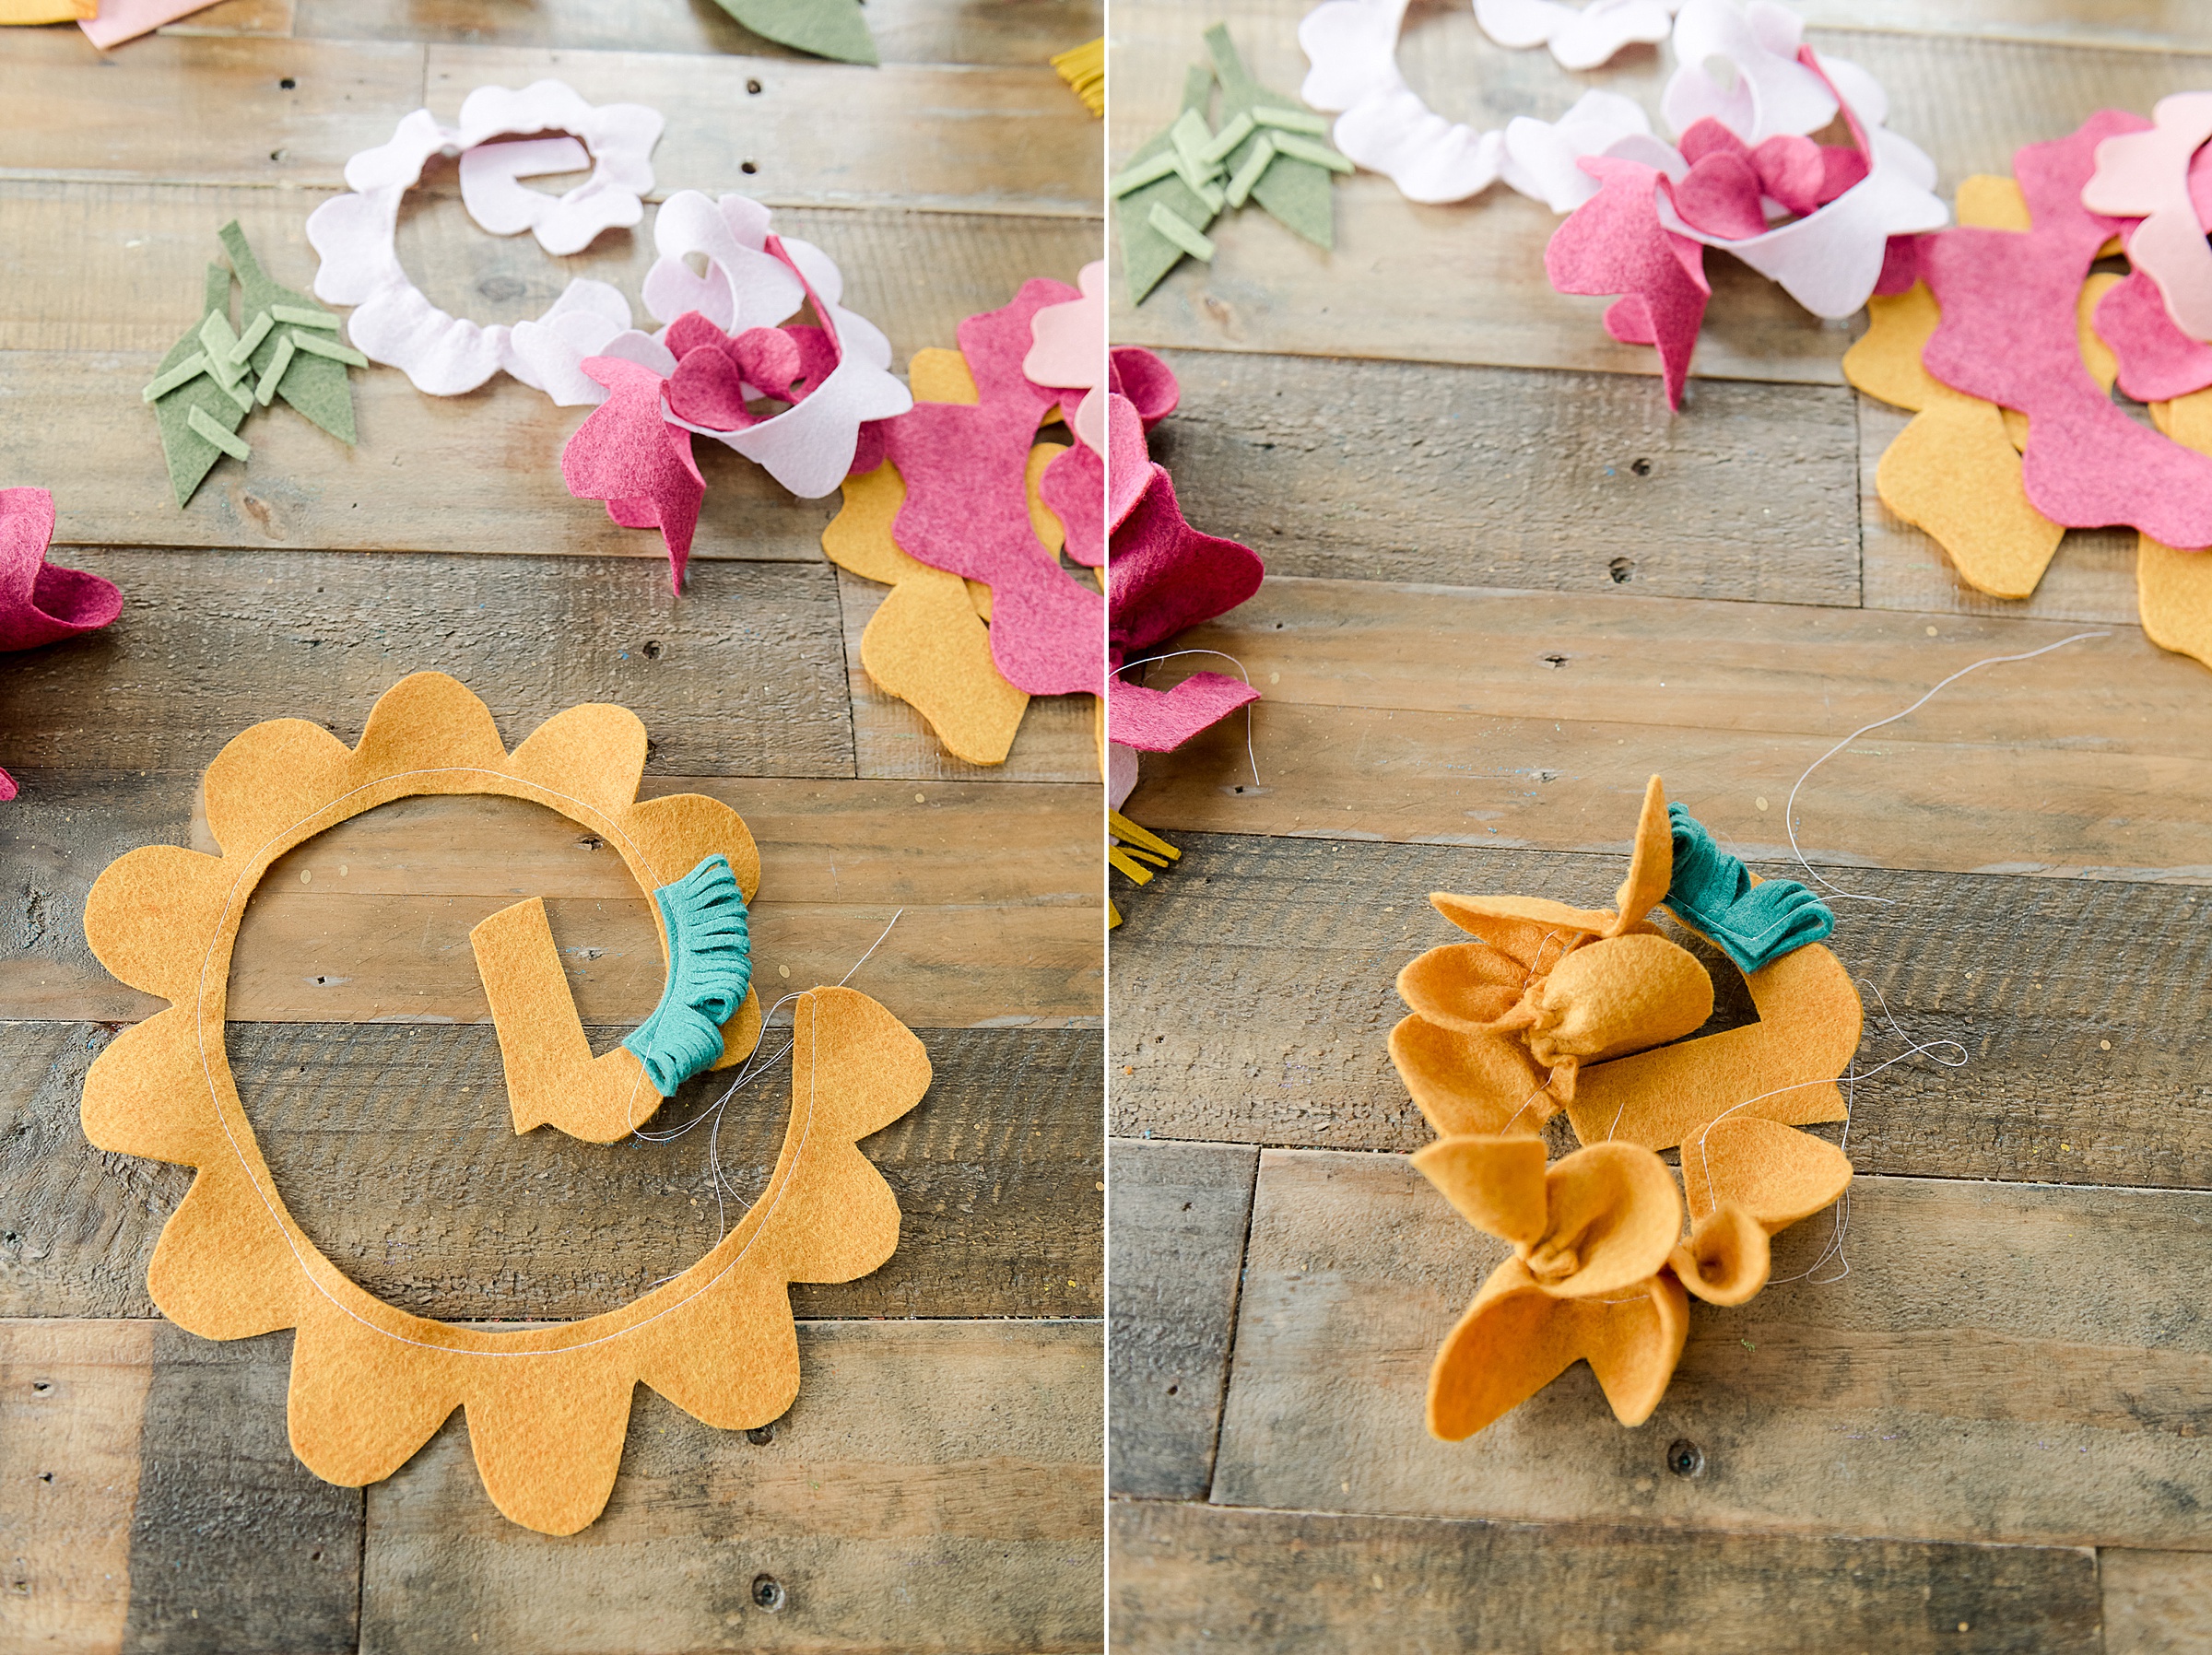
When the spiral is gathered as much as you want (not too tight) then you will want to tie off the gathering by simply tying the top and bottom threads to one another (do this for both the inside of the spiral and the outside of the spiral).
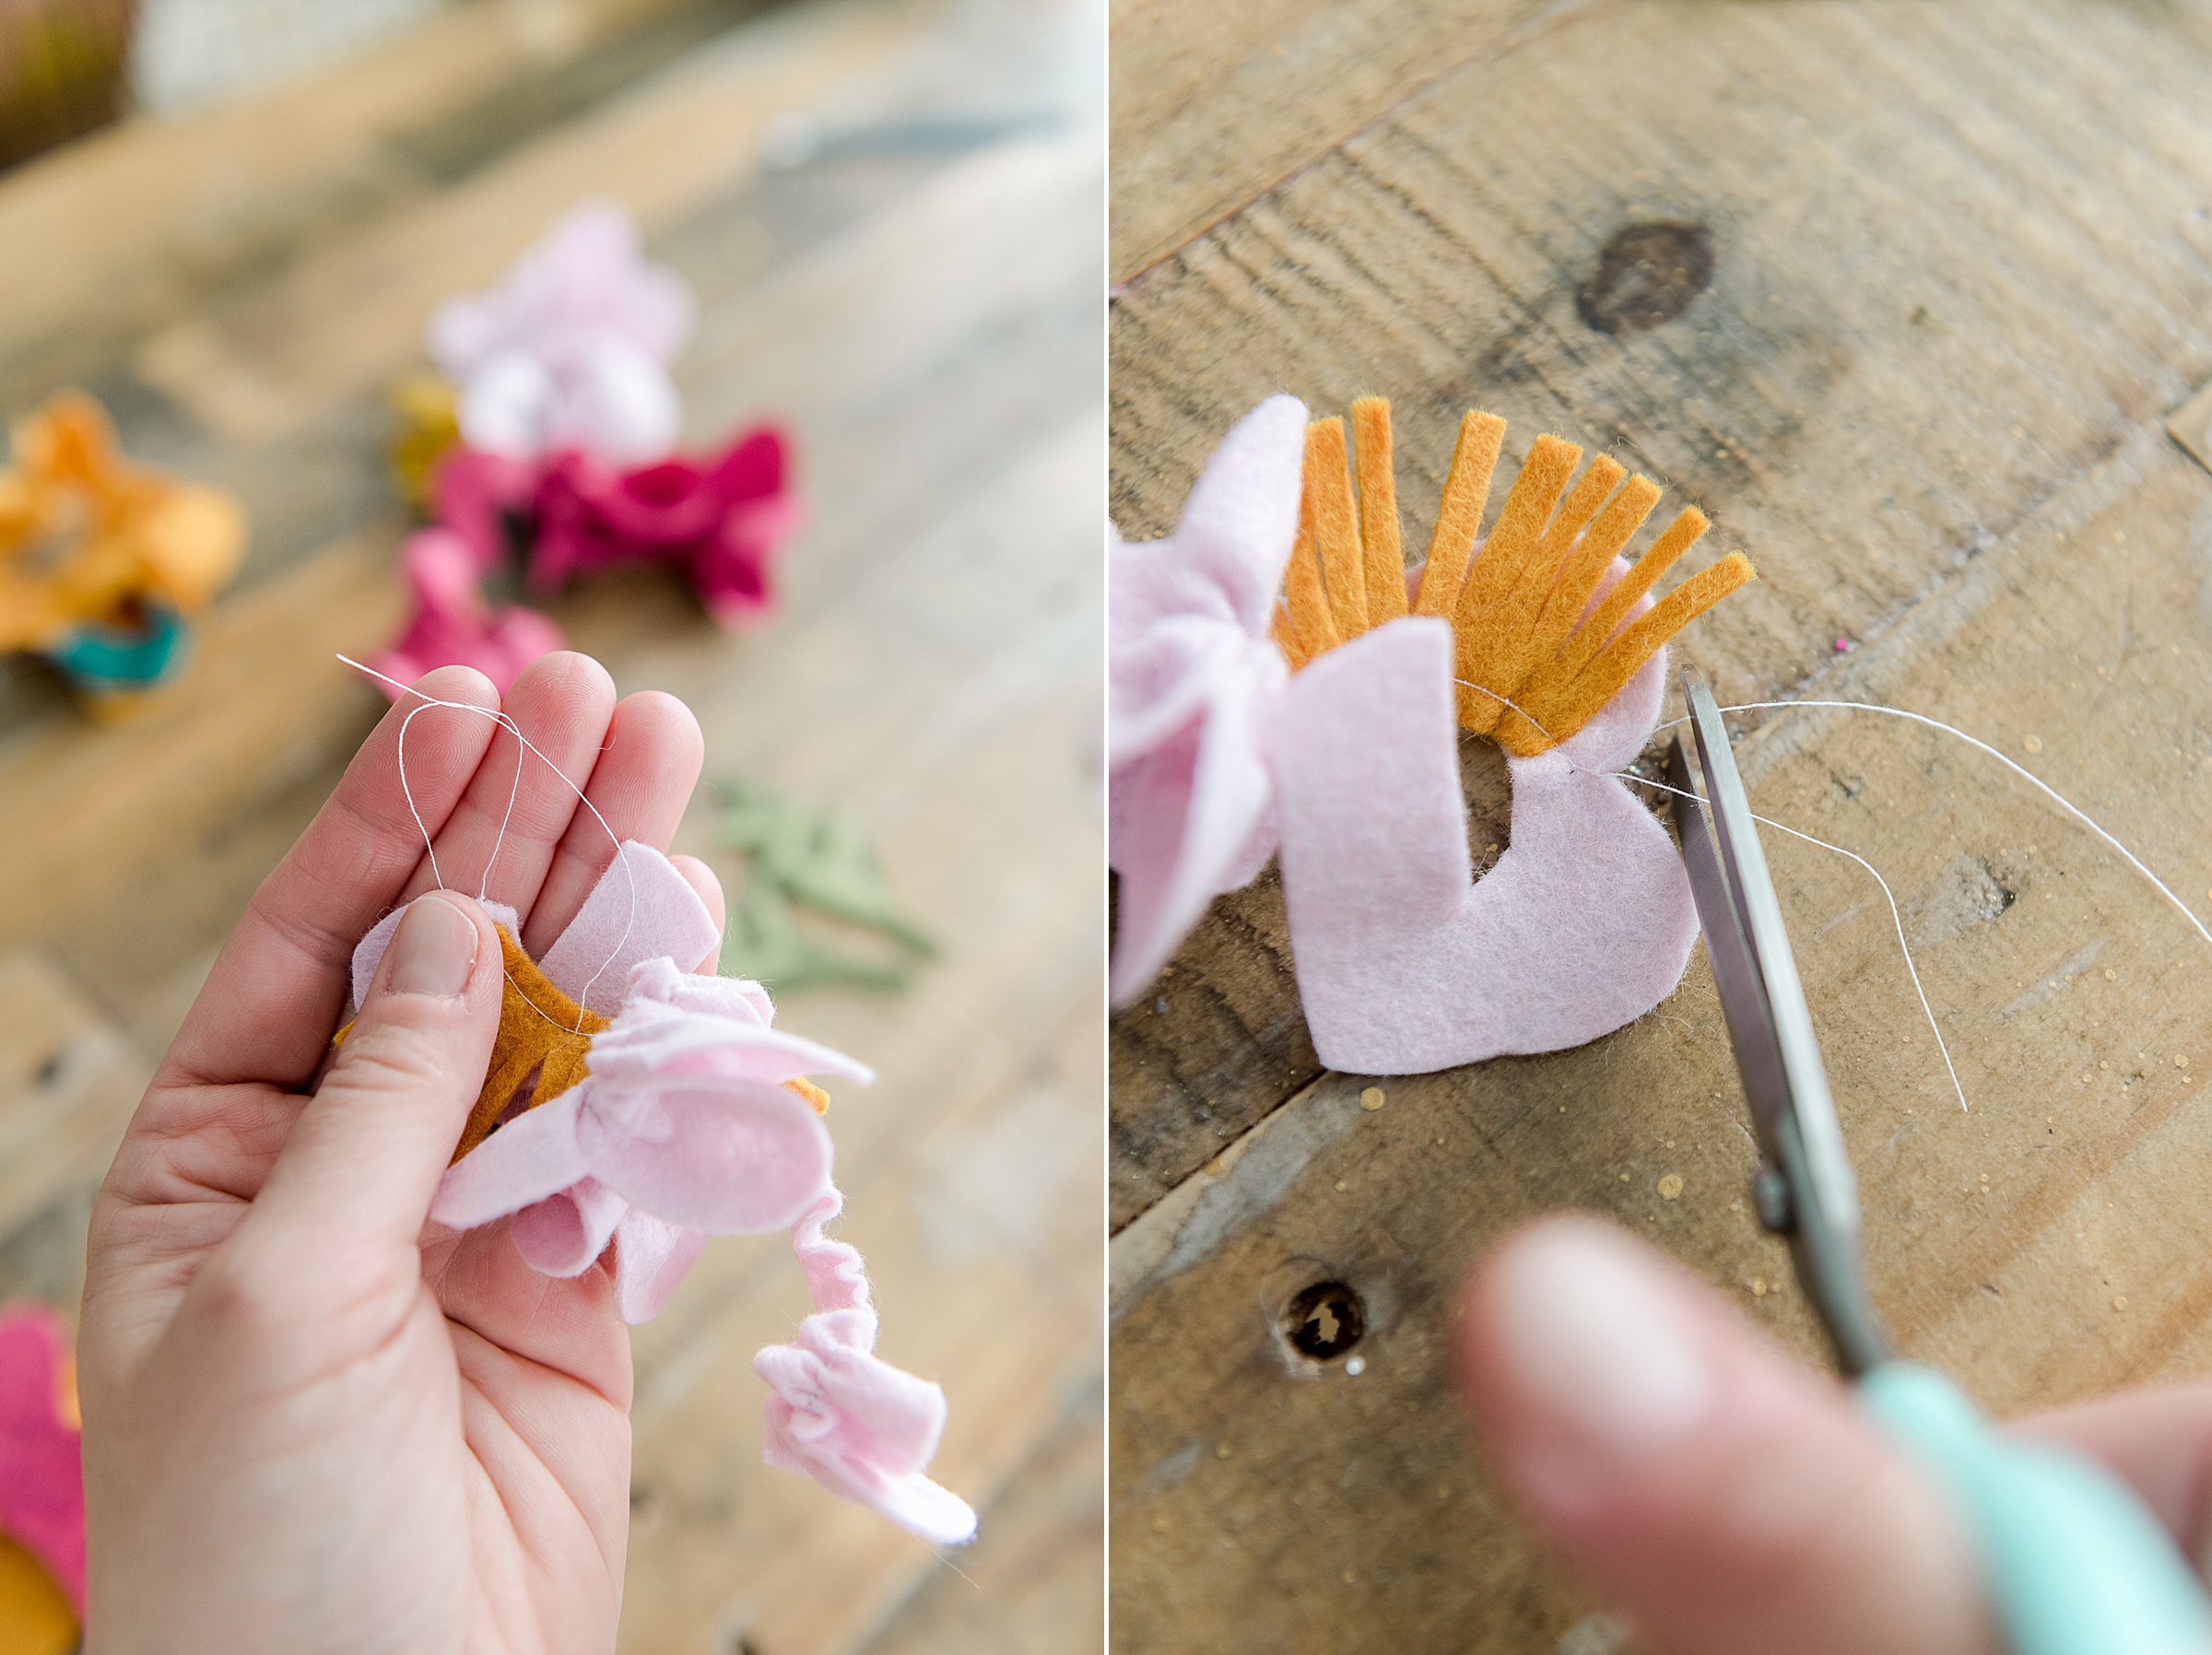
3. Now it’s time to wind your flower! 🙂
Hold onto the tab (the inside of the spiral) and you will begin to wind your flower from the inside out. I held the tab by pinching it between my thumb and pointer finger and then wound the rest of the gathered felt around that point. I used some fabric glue to tack a few spots in place along the bottom straight, gathered edge to be sure that it all stuck together. Then ran a bead of glue on the final outer pedal part to secure the whole flower together!! 🙂
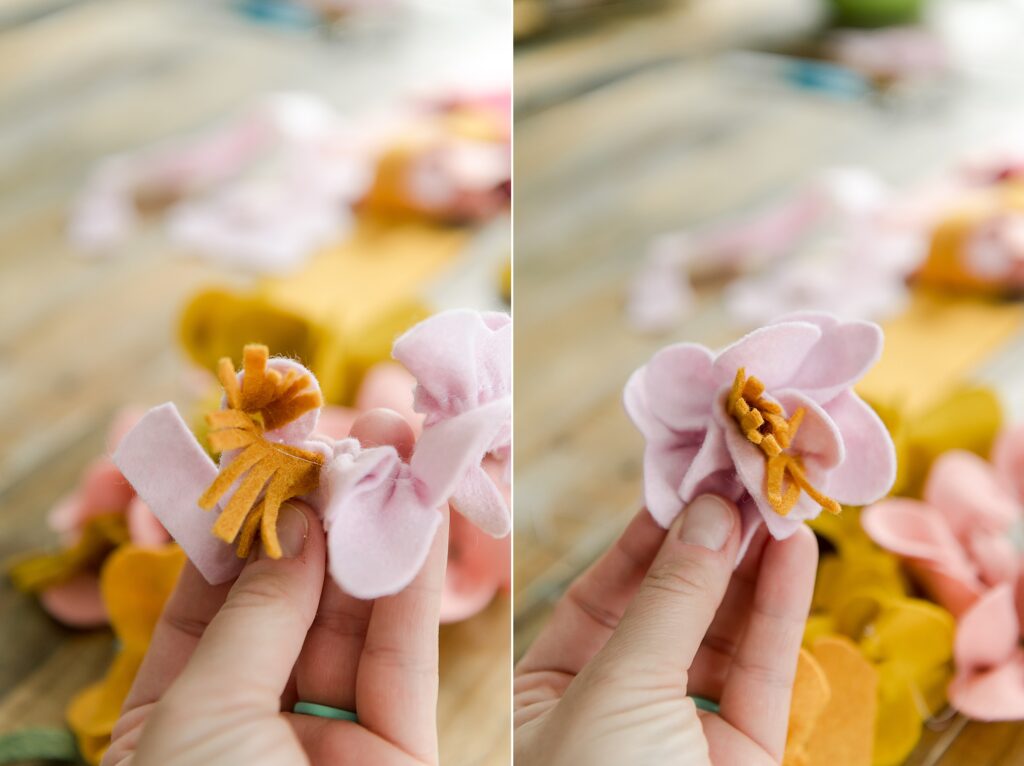
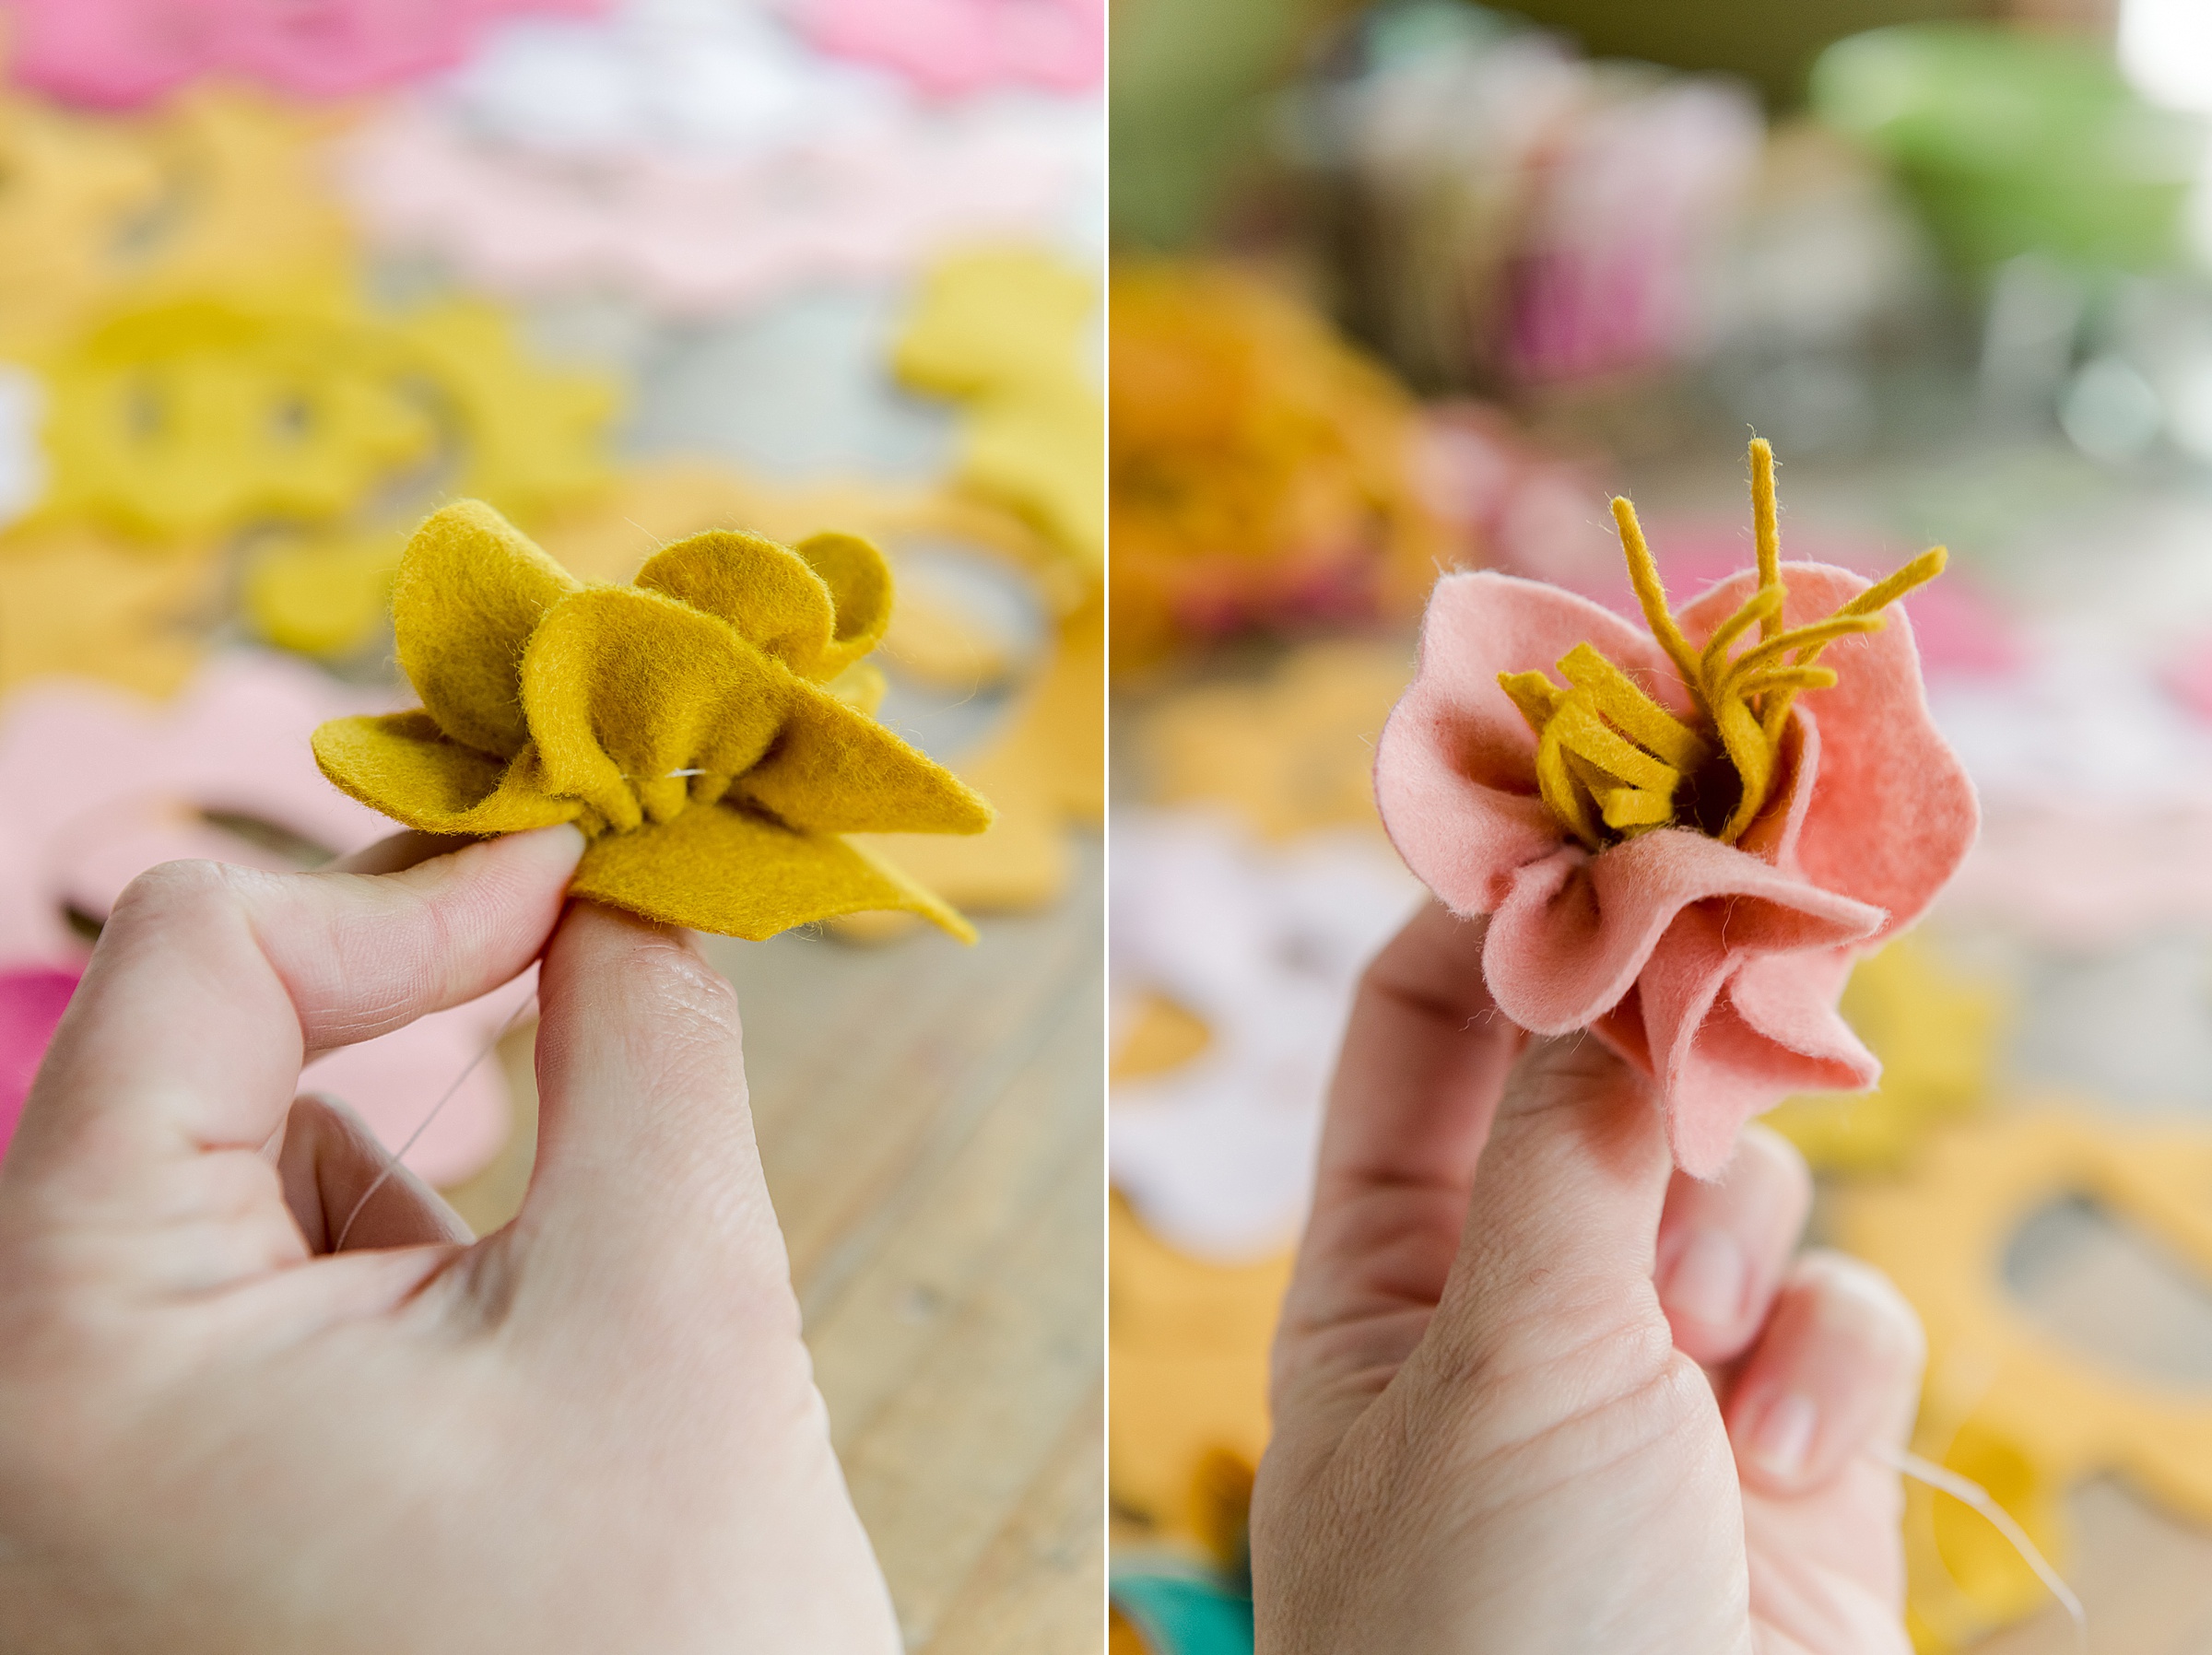
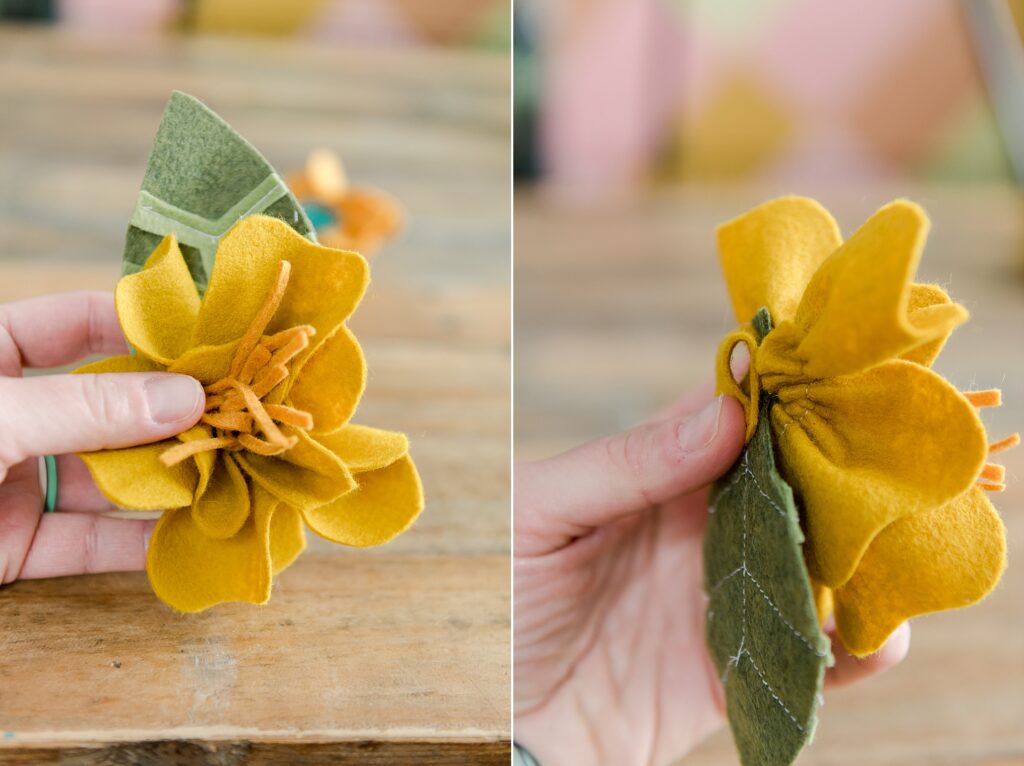
I then folded over the bottom tab to create a “channel” to thread the ribbon through and tacked it down! 🙂
NOTE: If you have any leaves that you cut out, you will want to glue the leave under the tab at the bottom of the flower!
AND TAAADAAAA I had my first flower completed!
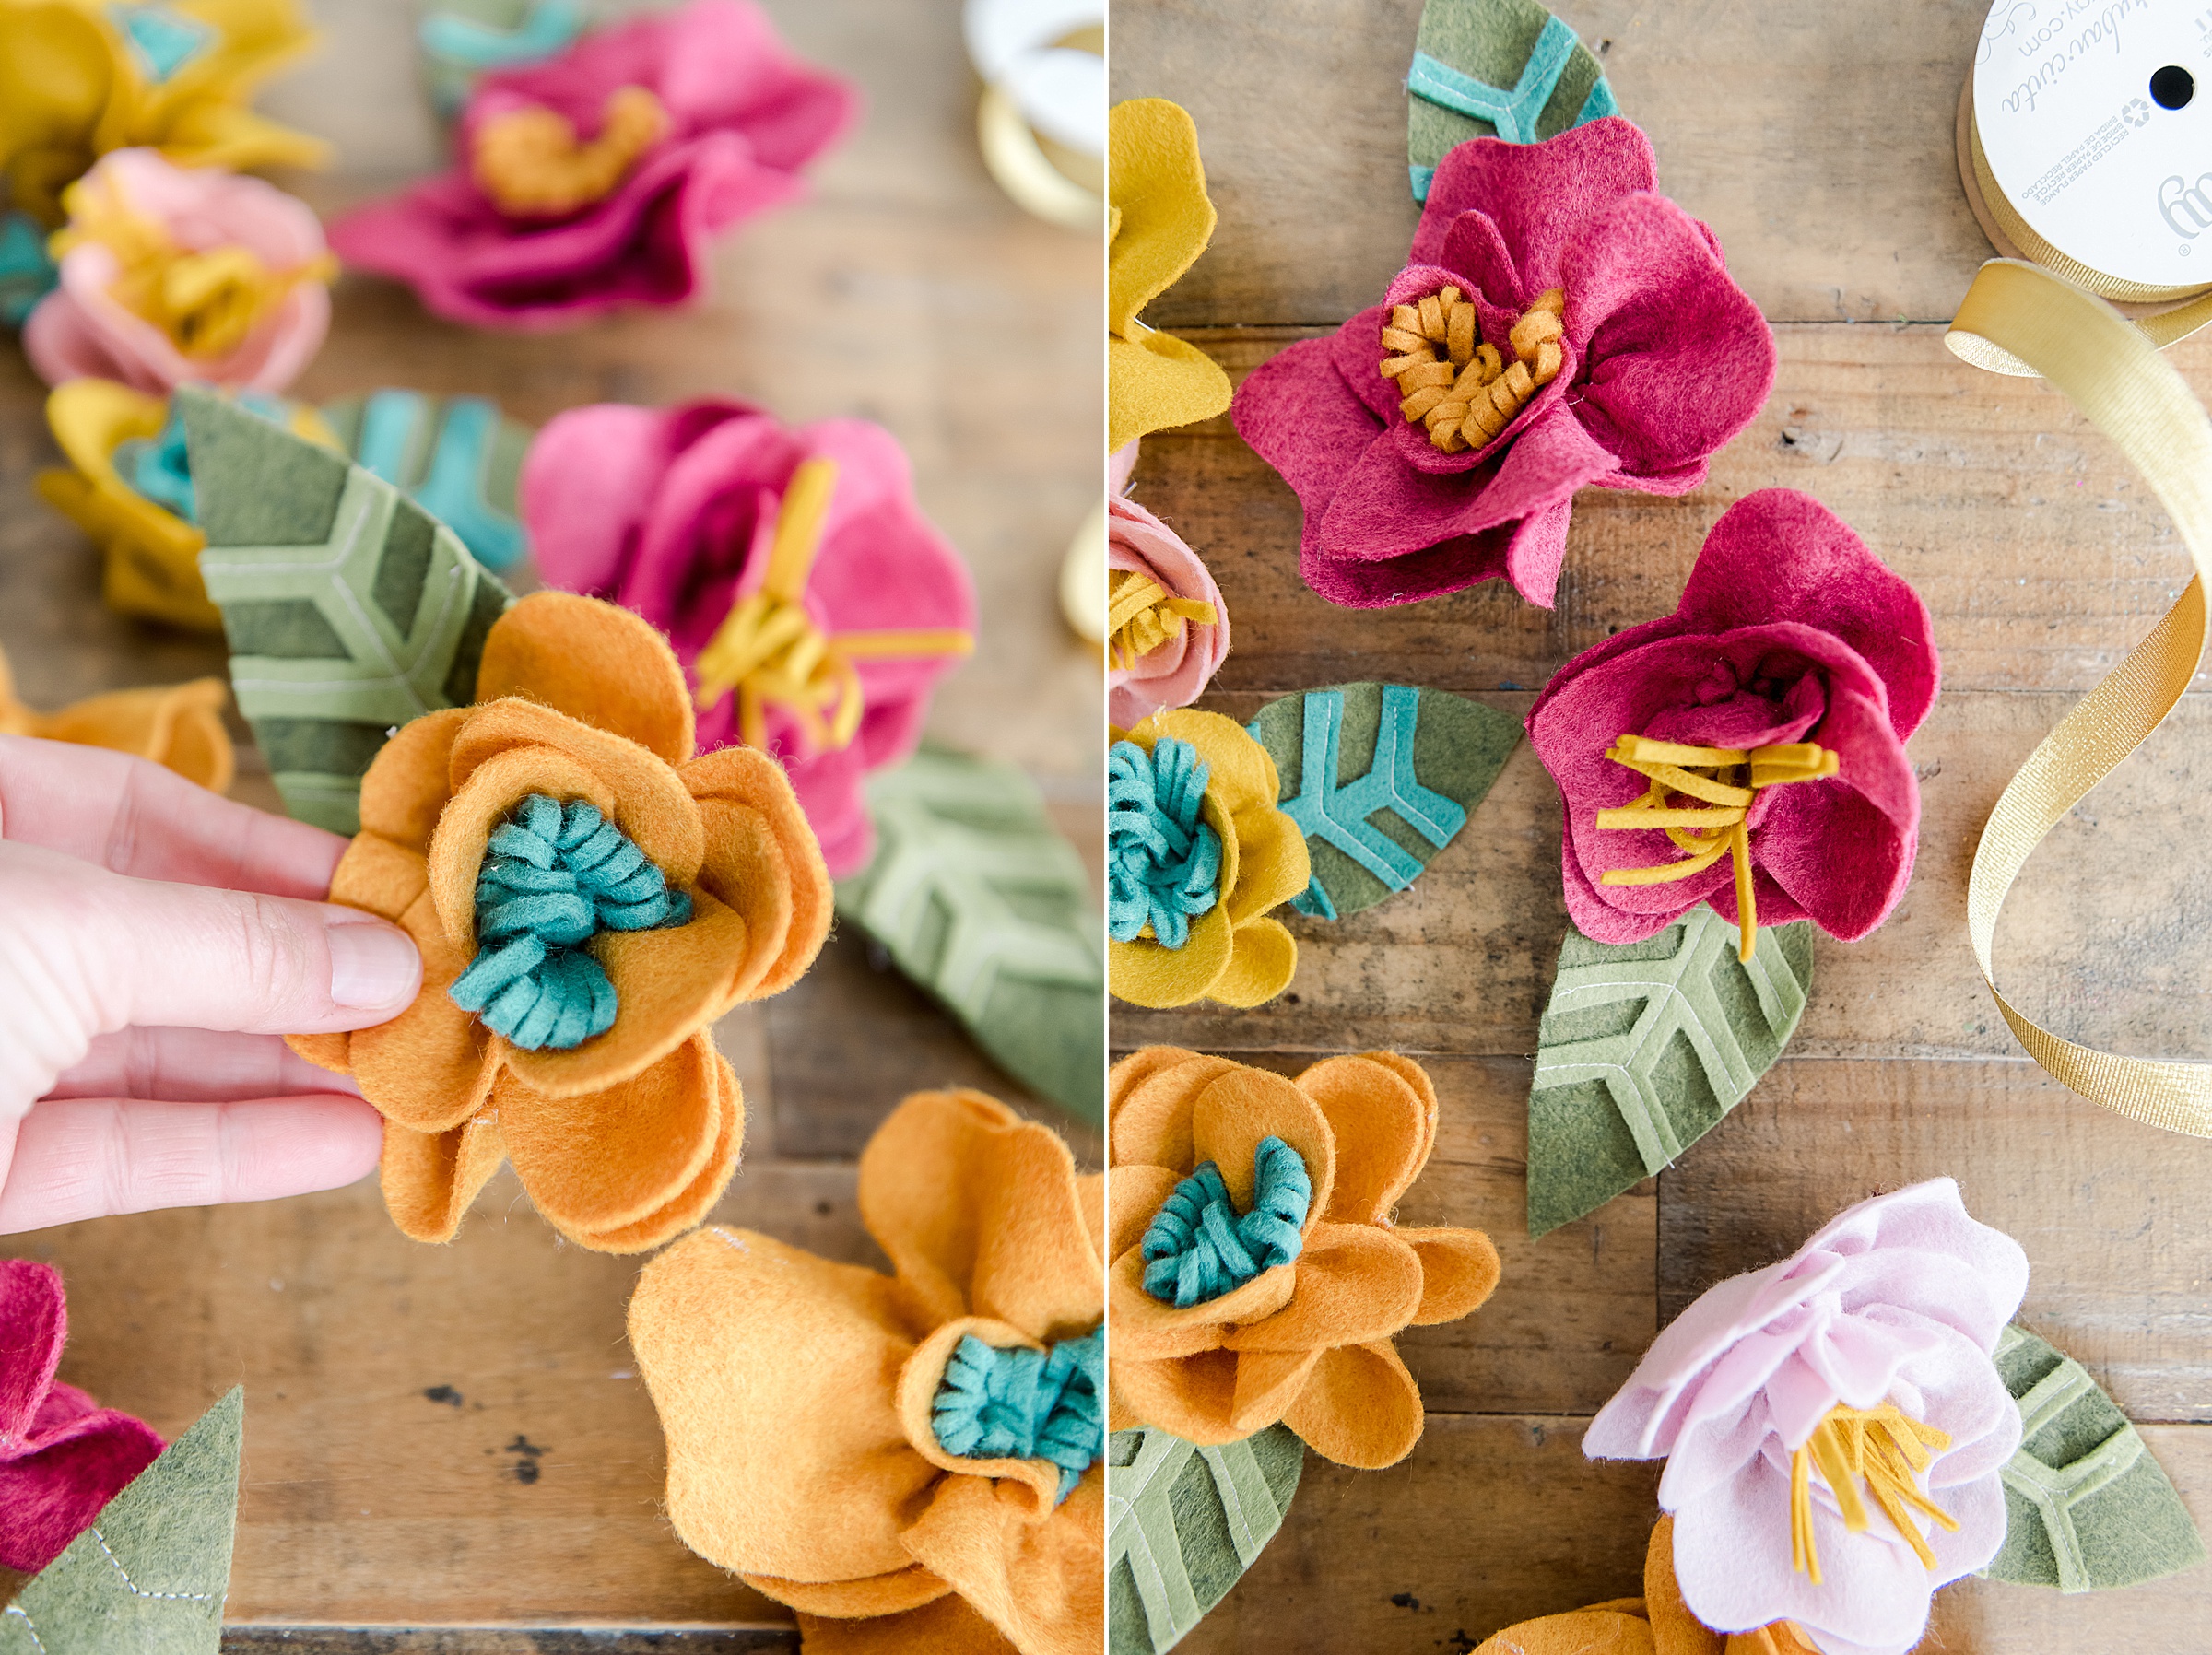
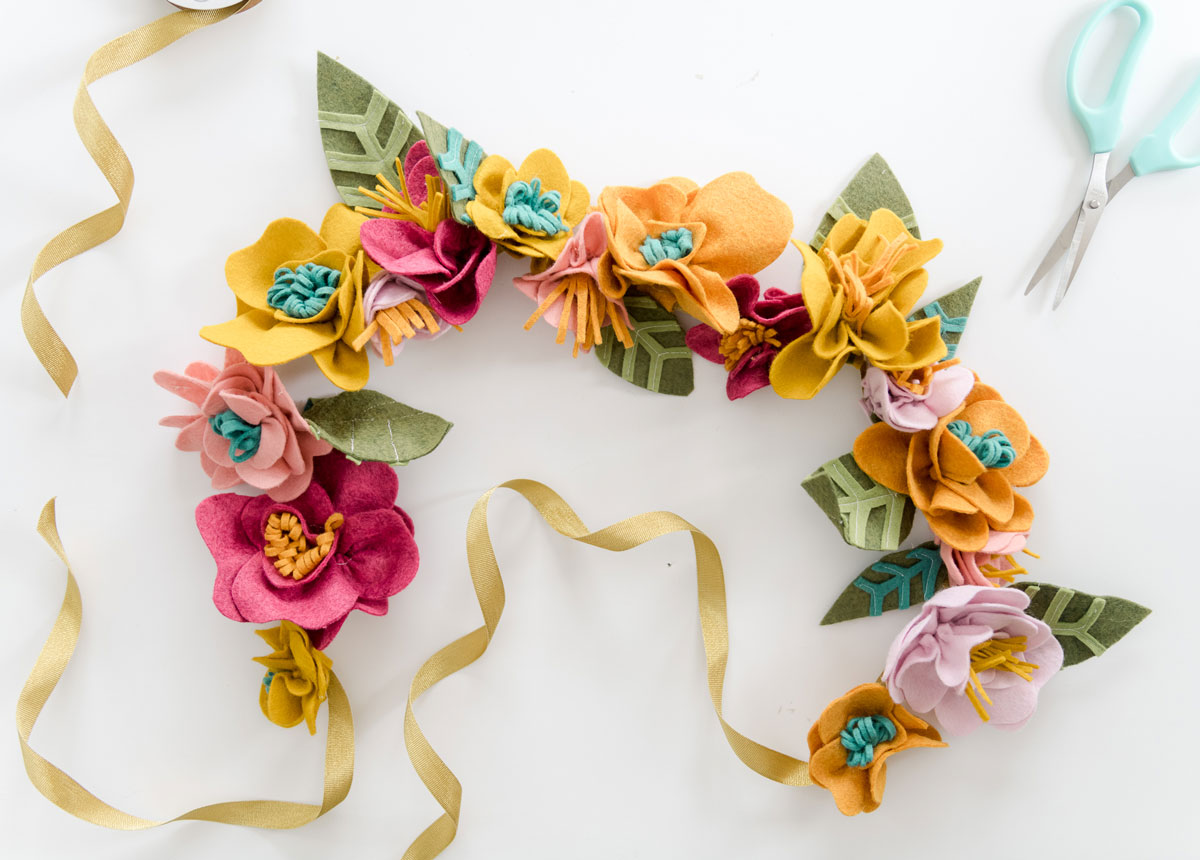
Repeat ALLLLL of these steps in an assembly line fashion to make as many amazing, felt flowers as you want!!! 🙂
