Halloween Surprise Balls!
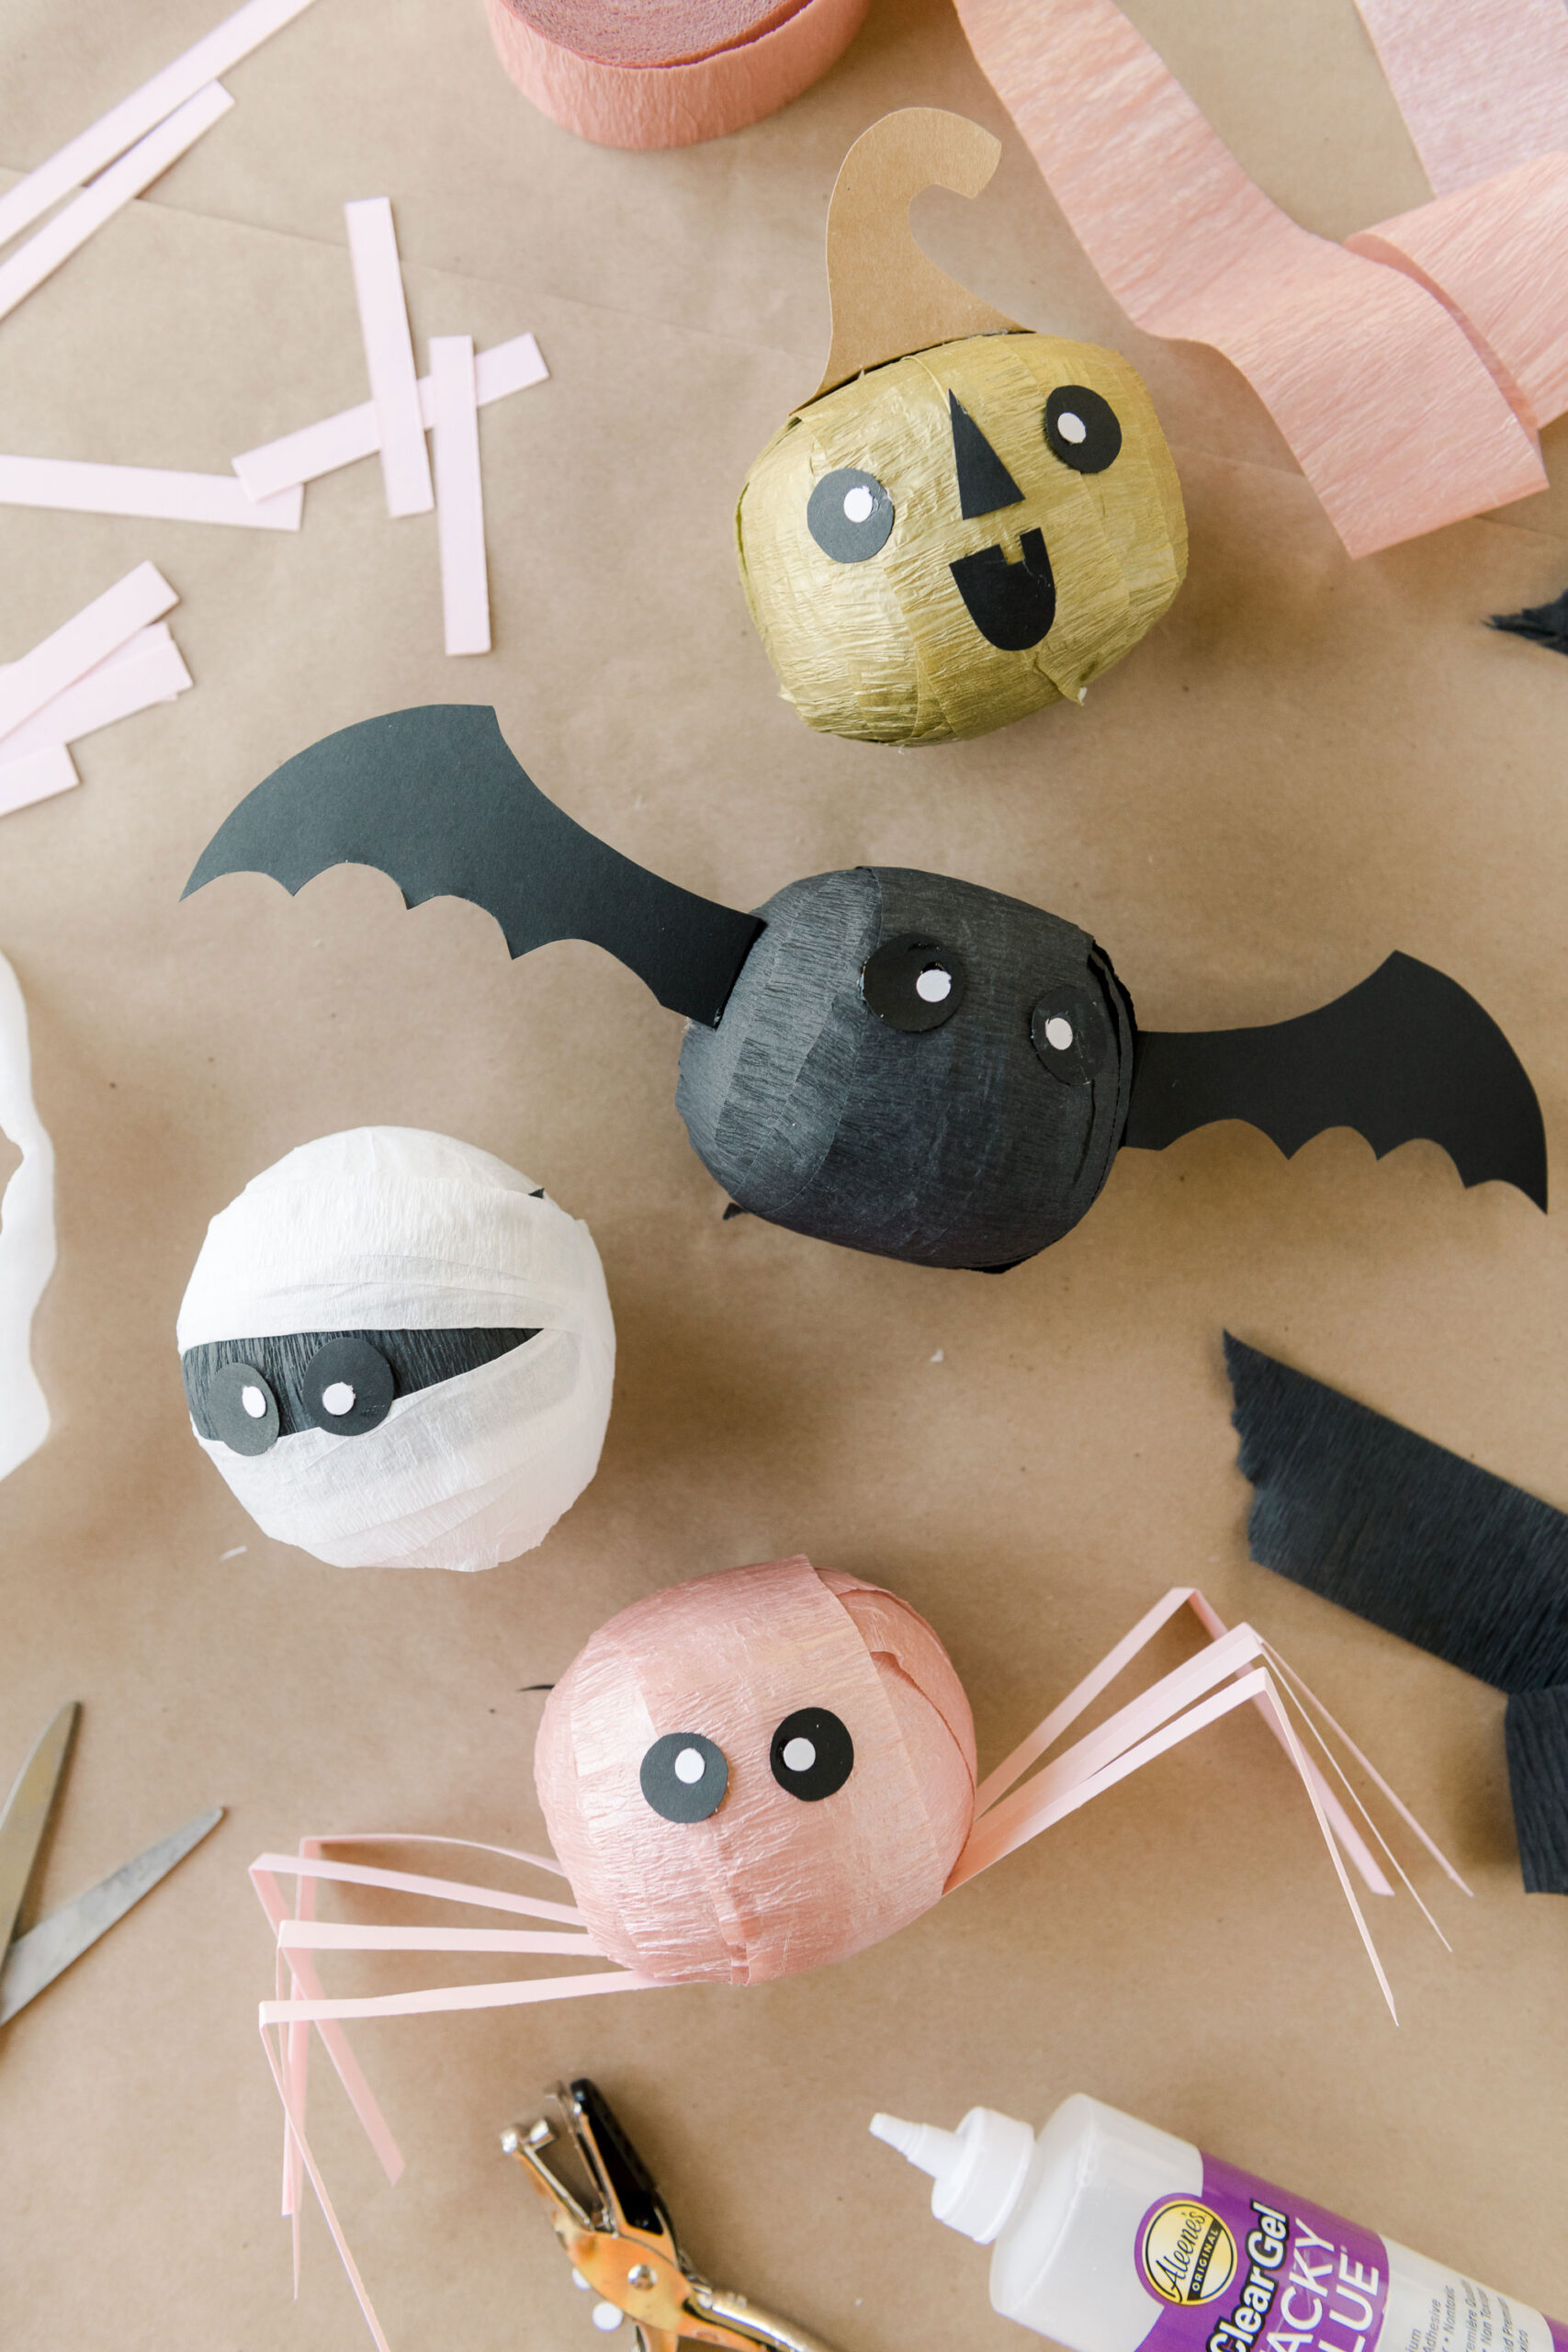
If you’re looking for some non-candy alternative for this Halloween then I have one of the funnest things on the block – these Halloween surprise balls are just the perfect thing for your own celebration on Halloween morning around the breakfast table, or for a classroom full of kiddos (with the best teacher ever to make these for them), or for party favors for your Halloween bash or even table placements at a fancier Halloween party or even just to hand out to surprise your neighbors! Honestly, once you make some of these surprise balls, they might just become a part of your holiday rotation!!!
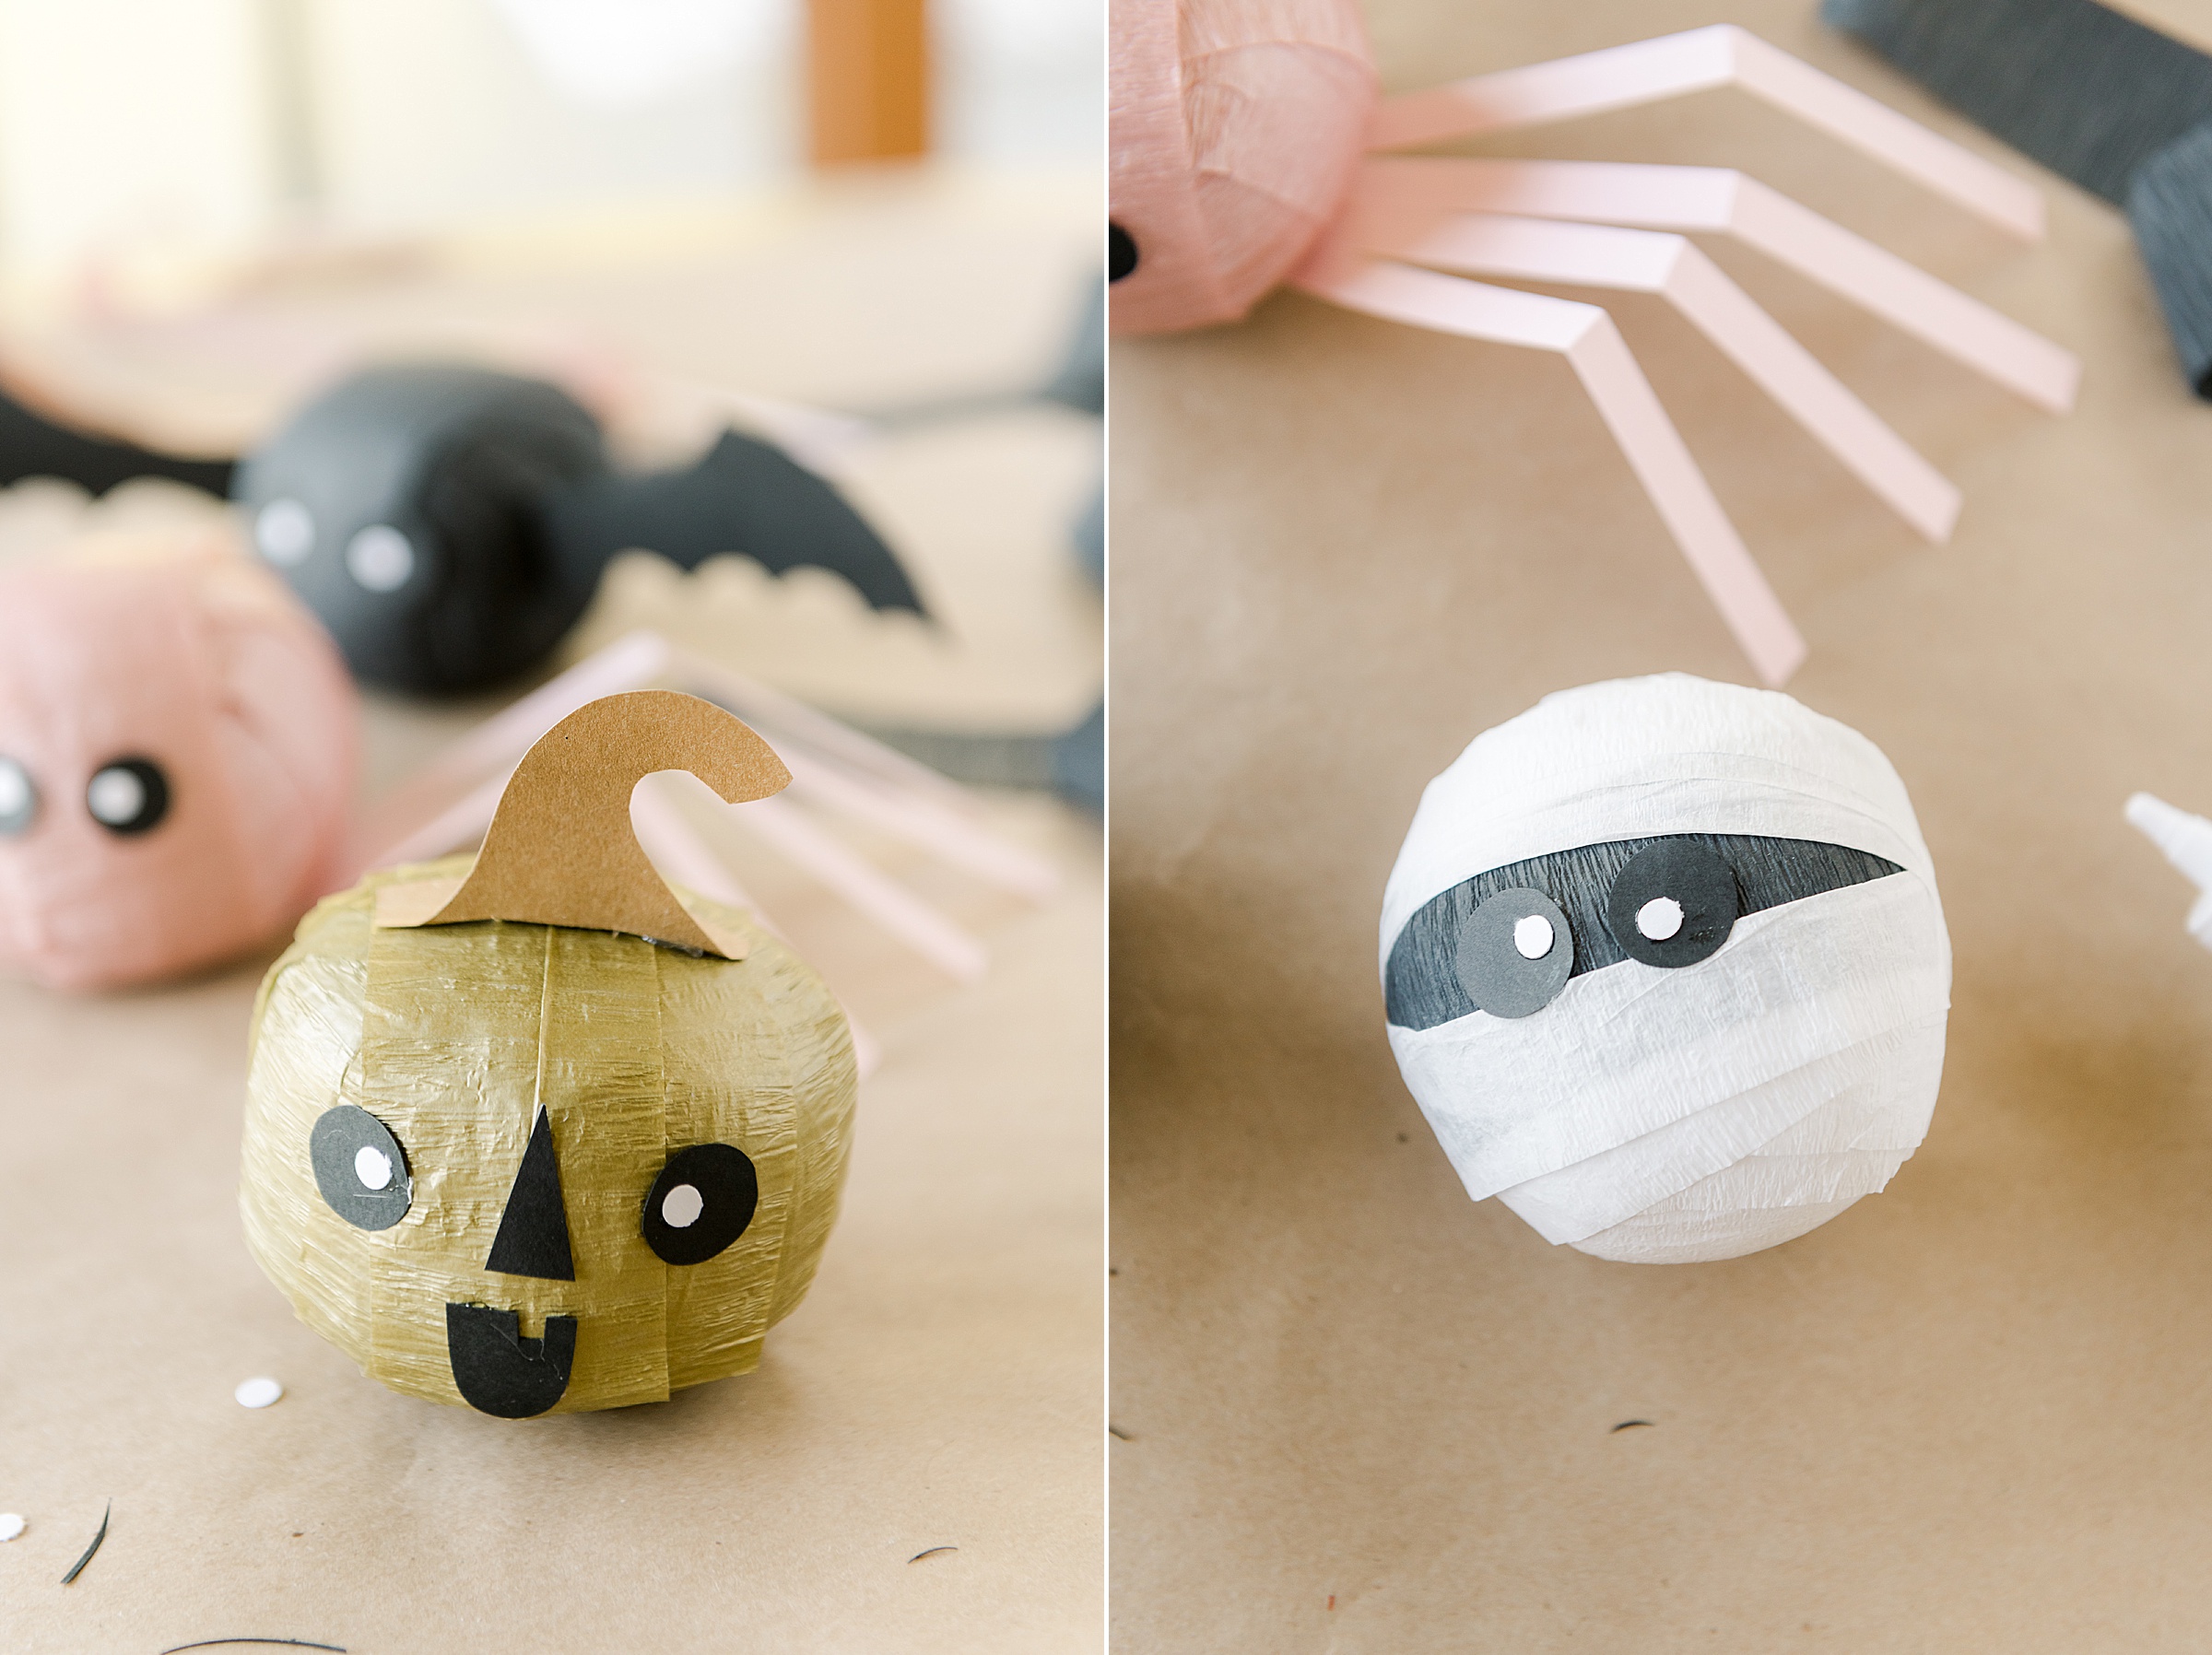
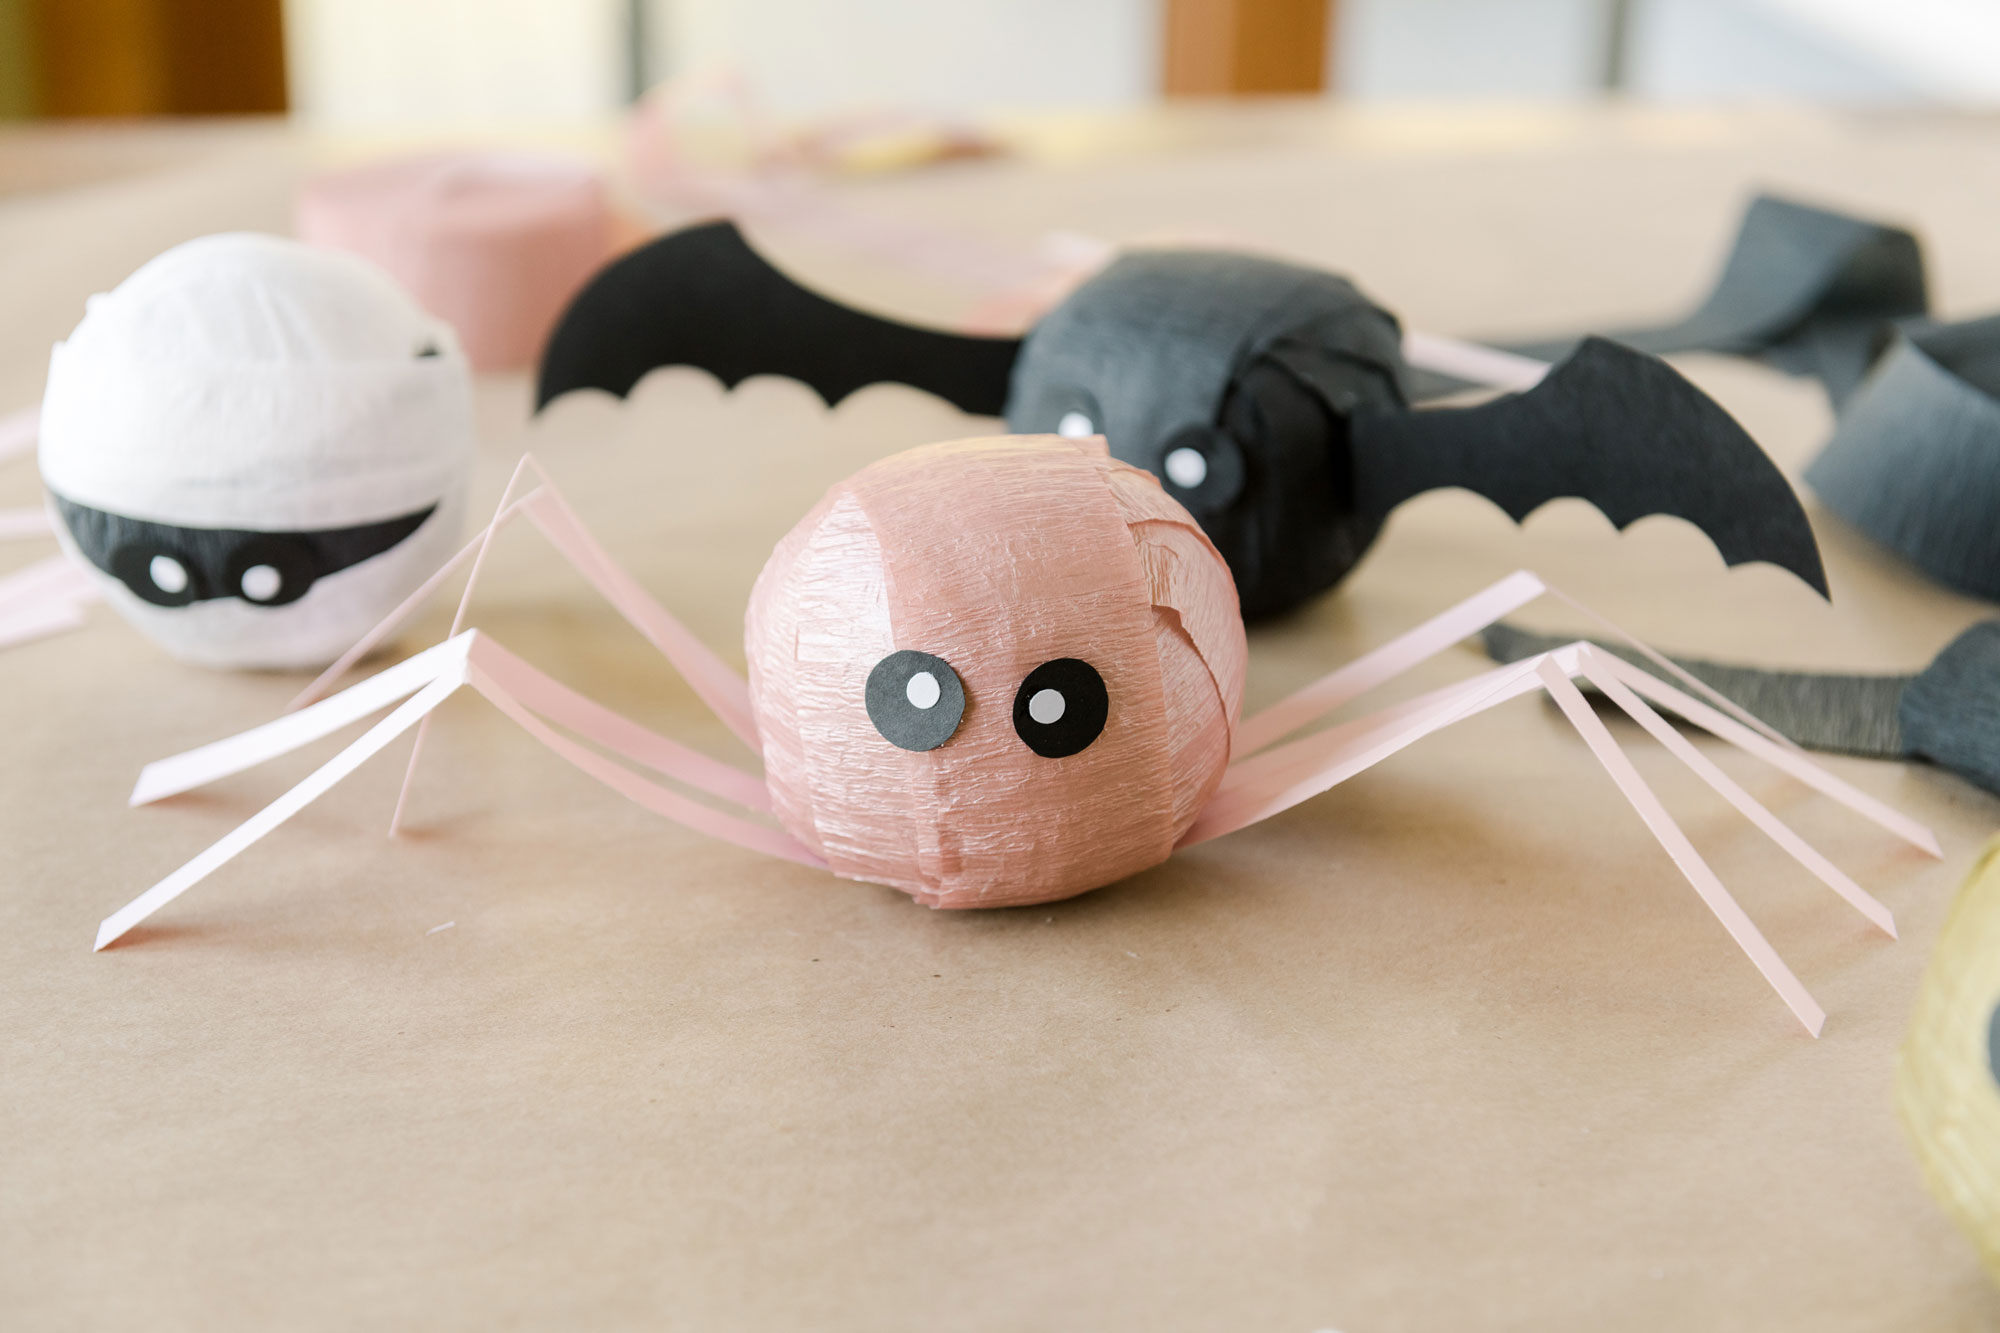
I am 100% NOT against treats and candy, it’s just that I love finding alternate ways to celebrate holidays other than the endless sweet treats (and honestly, my kids have an amazing Grandma that just showers them with homemade delish treat love, so I can’t compete with that)! 🙂
We have made these surprise balls previously for Valentines day and my kids have loved them! I fill them with small surprises (inexpensive…..yes, hit up the dollar store) and a few dollar bills and always some coupons for some special nights or meals out with either Mom or Dad (my kids both LOOOOOVE one on one time so this is a huge hit in our home)! I have a full list of ideas below if you want to get creative for your surprise balls….but honestly just have fun with it and don’t overthink it or overfill it….half the fun is unwrapping the balls and the anticipation of what is next or on the inside 🙂
MATERIALS:
- A variety of crepe paper on a roll – black, white, orange/gold, pink – or any variety of colors you love 🙂
- Cardstock in white, black and any color for the spider legs to coordinate
- Glue – I love the Aleene’s tacky glue, but you can use any honestly
- A mix of awesome small surprises to wrap in the surprise ball
- optional addition for personalization – like tags or washi tape
Here are some ideas of some surprises that I have found that work well (and let the sky be the limit with how fun or how personal you make this):
- Small plushies (bonus if they are round)
- Koosh balls
- Small bags of legos (for the middle starting)
- Keychains (works best for the middle starting)
- Slap bracelets
- Stickers
- Temporary tattoos
- Dollar bills
- Coupons for special dinner or “dates” with you – my kids love one on one time, so this one is a hit 🙂
- Coupons for no chore days or something special in your home
- Tickets to an event
- Personal affirmation notes 🙂
- Clues to a scavenger hunt to find bigger surprises that don’t fit inside these surprise balls 🙂 – this one is really fun for adults or bigger kids 🙂
INSTRUCTIONS:
1. Pick the first inside middle starting surprise and begin wrapping with your tissue crepe paper. This will 100% look wonky and not round to start out with, but just keep going. Wrap every which direction and just keep going at it. I find that it’s best to wrap 2ish times in one direction and then “migrate” the wrap in a circle, overlapping with each wrap….do that a few times and then change directions! 🙂
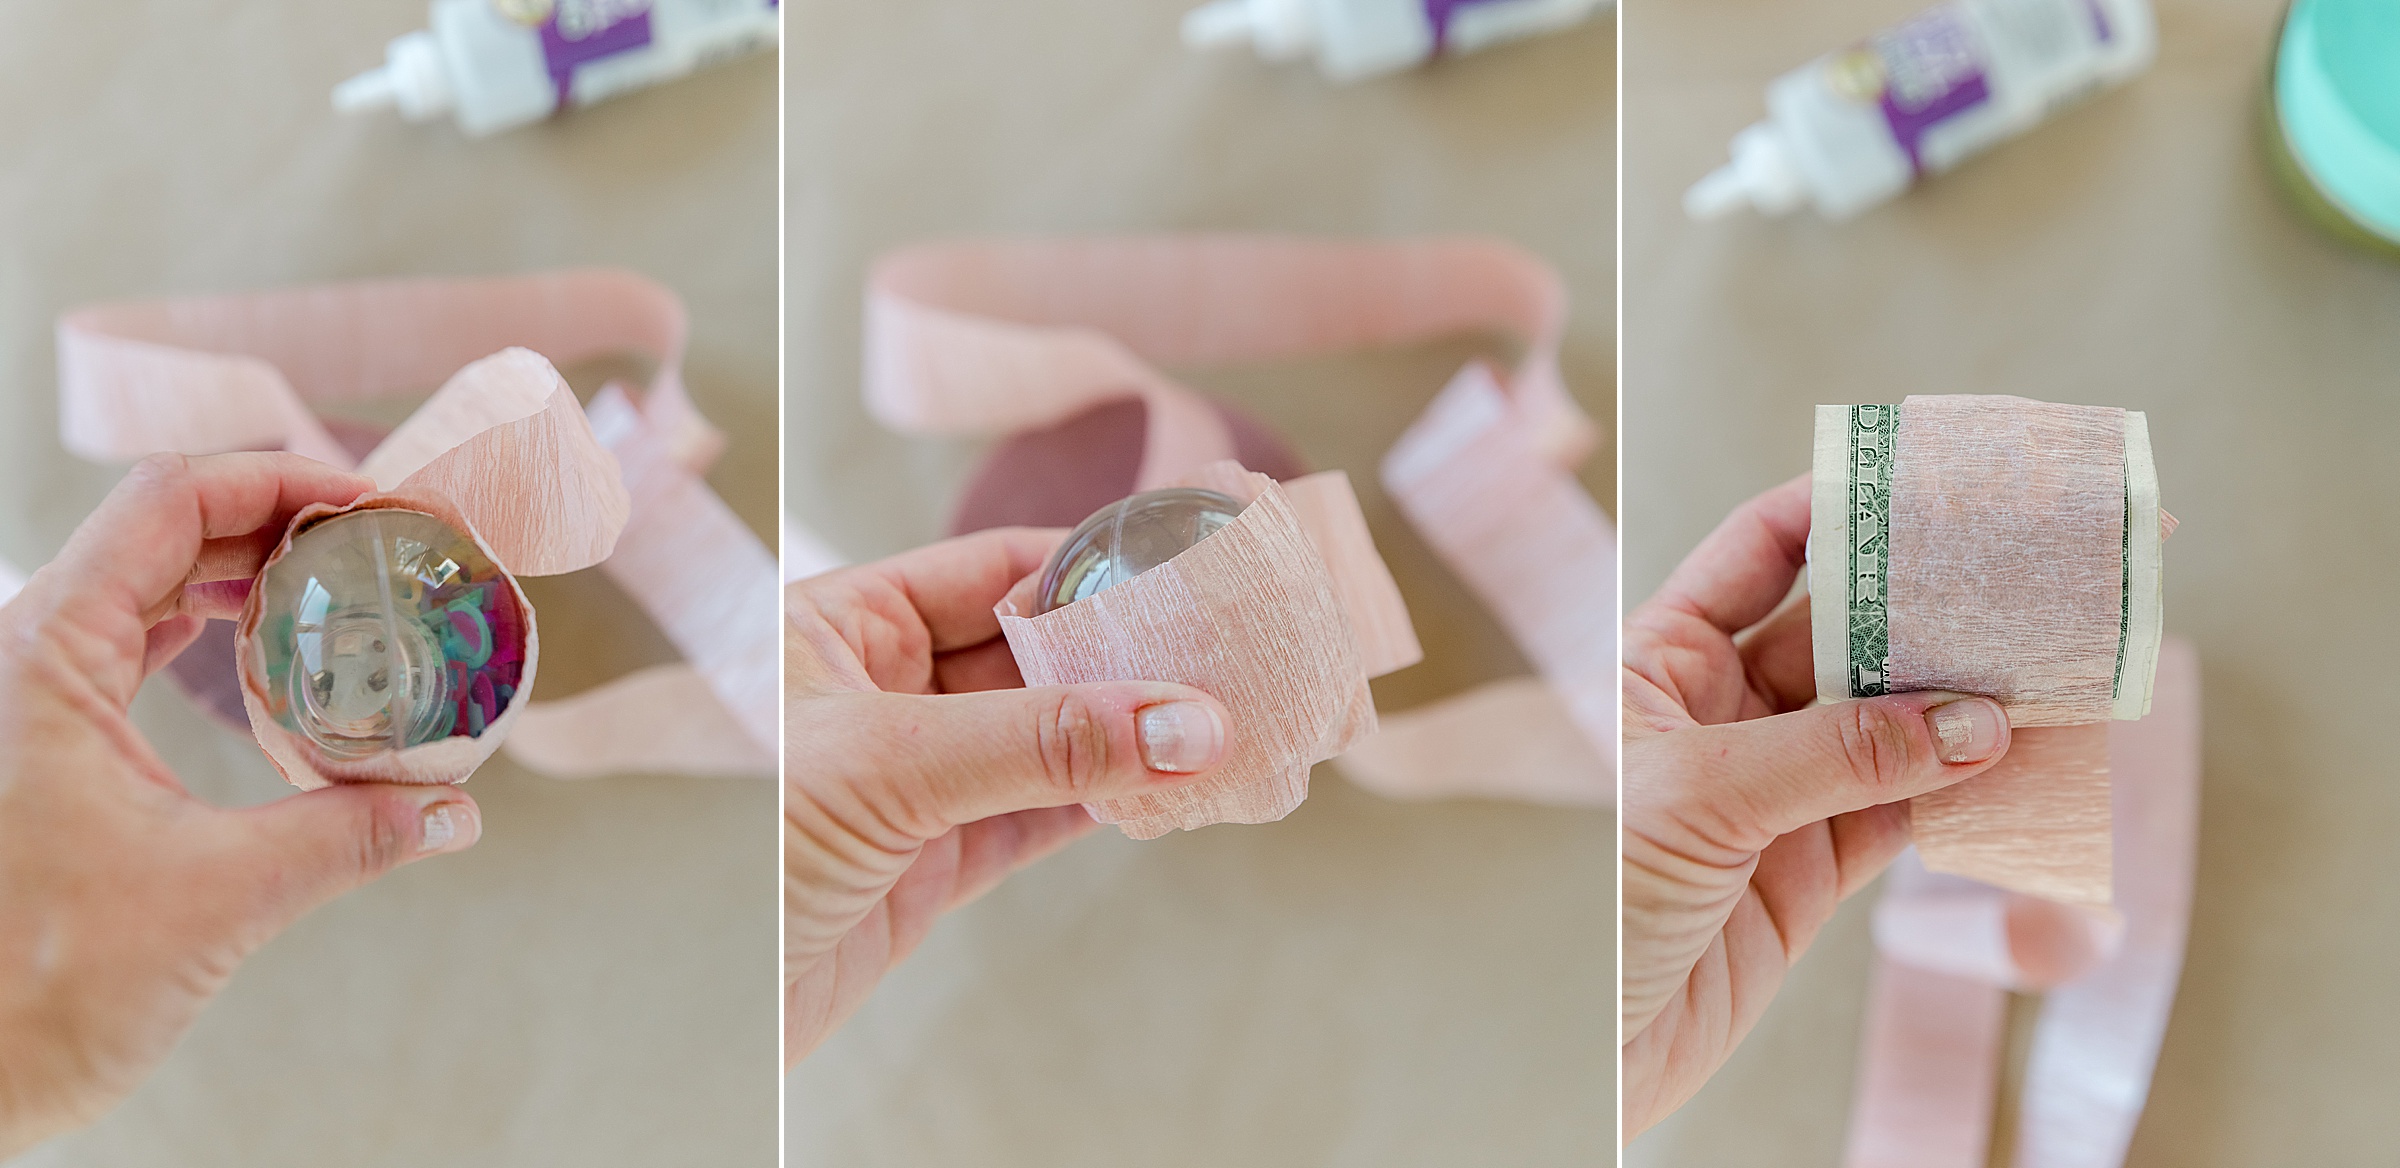
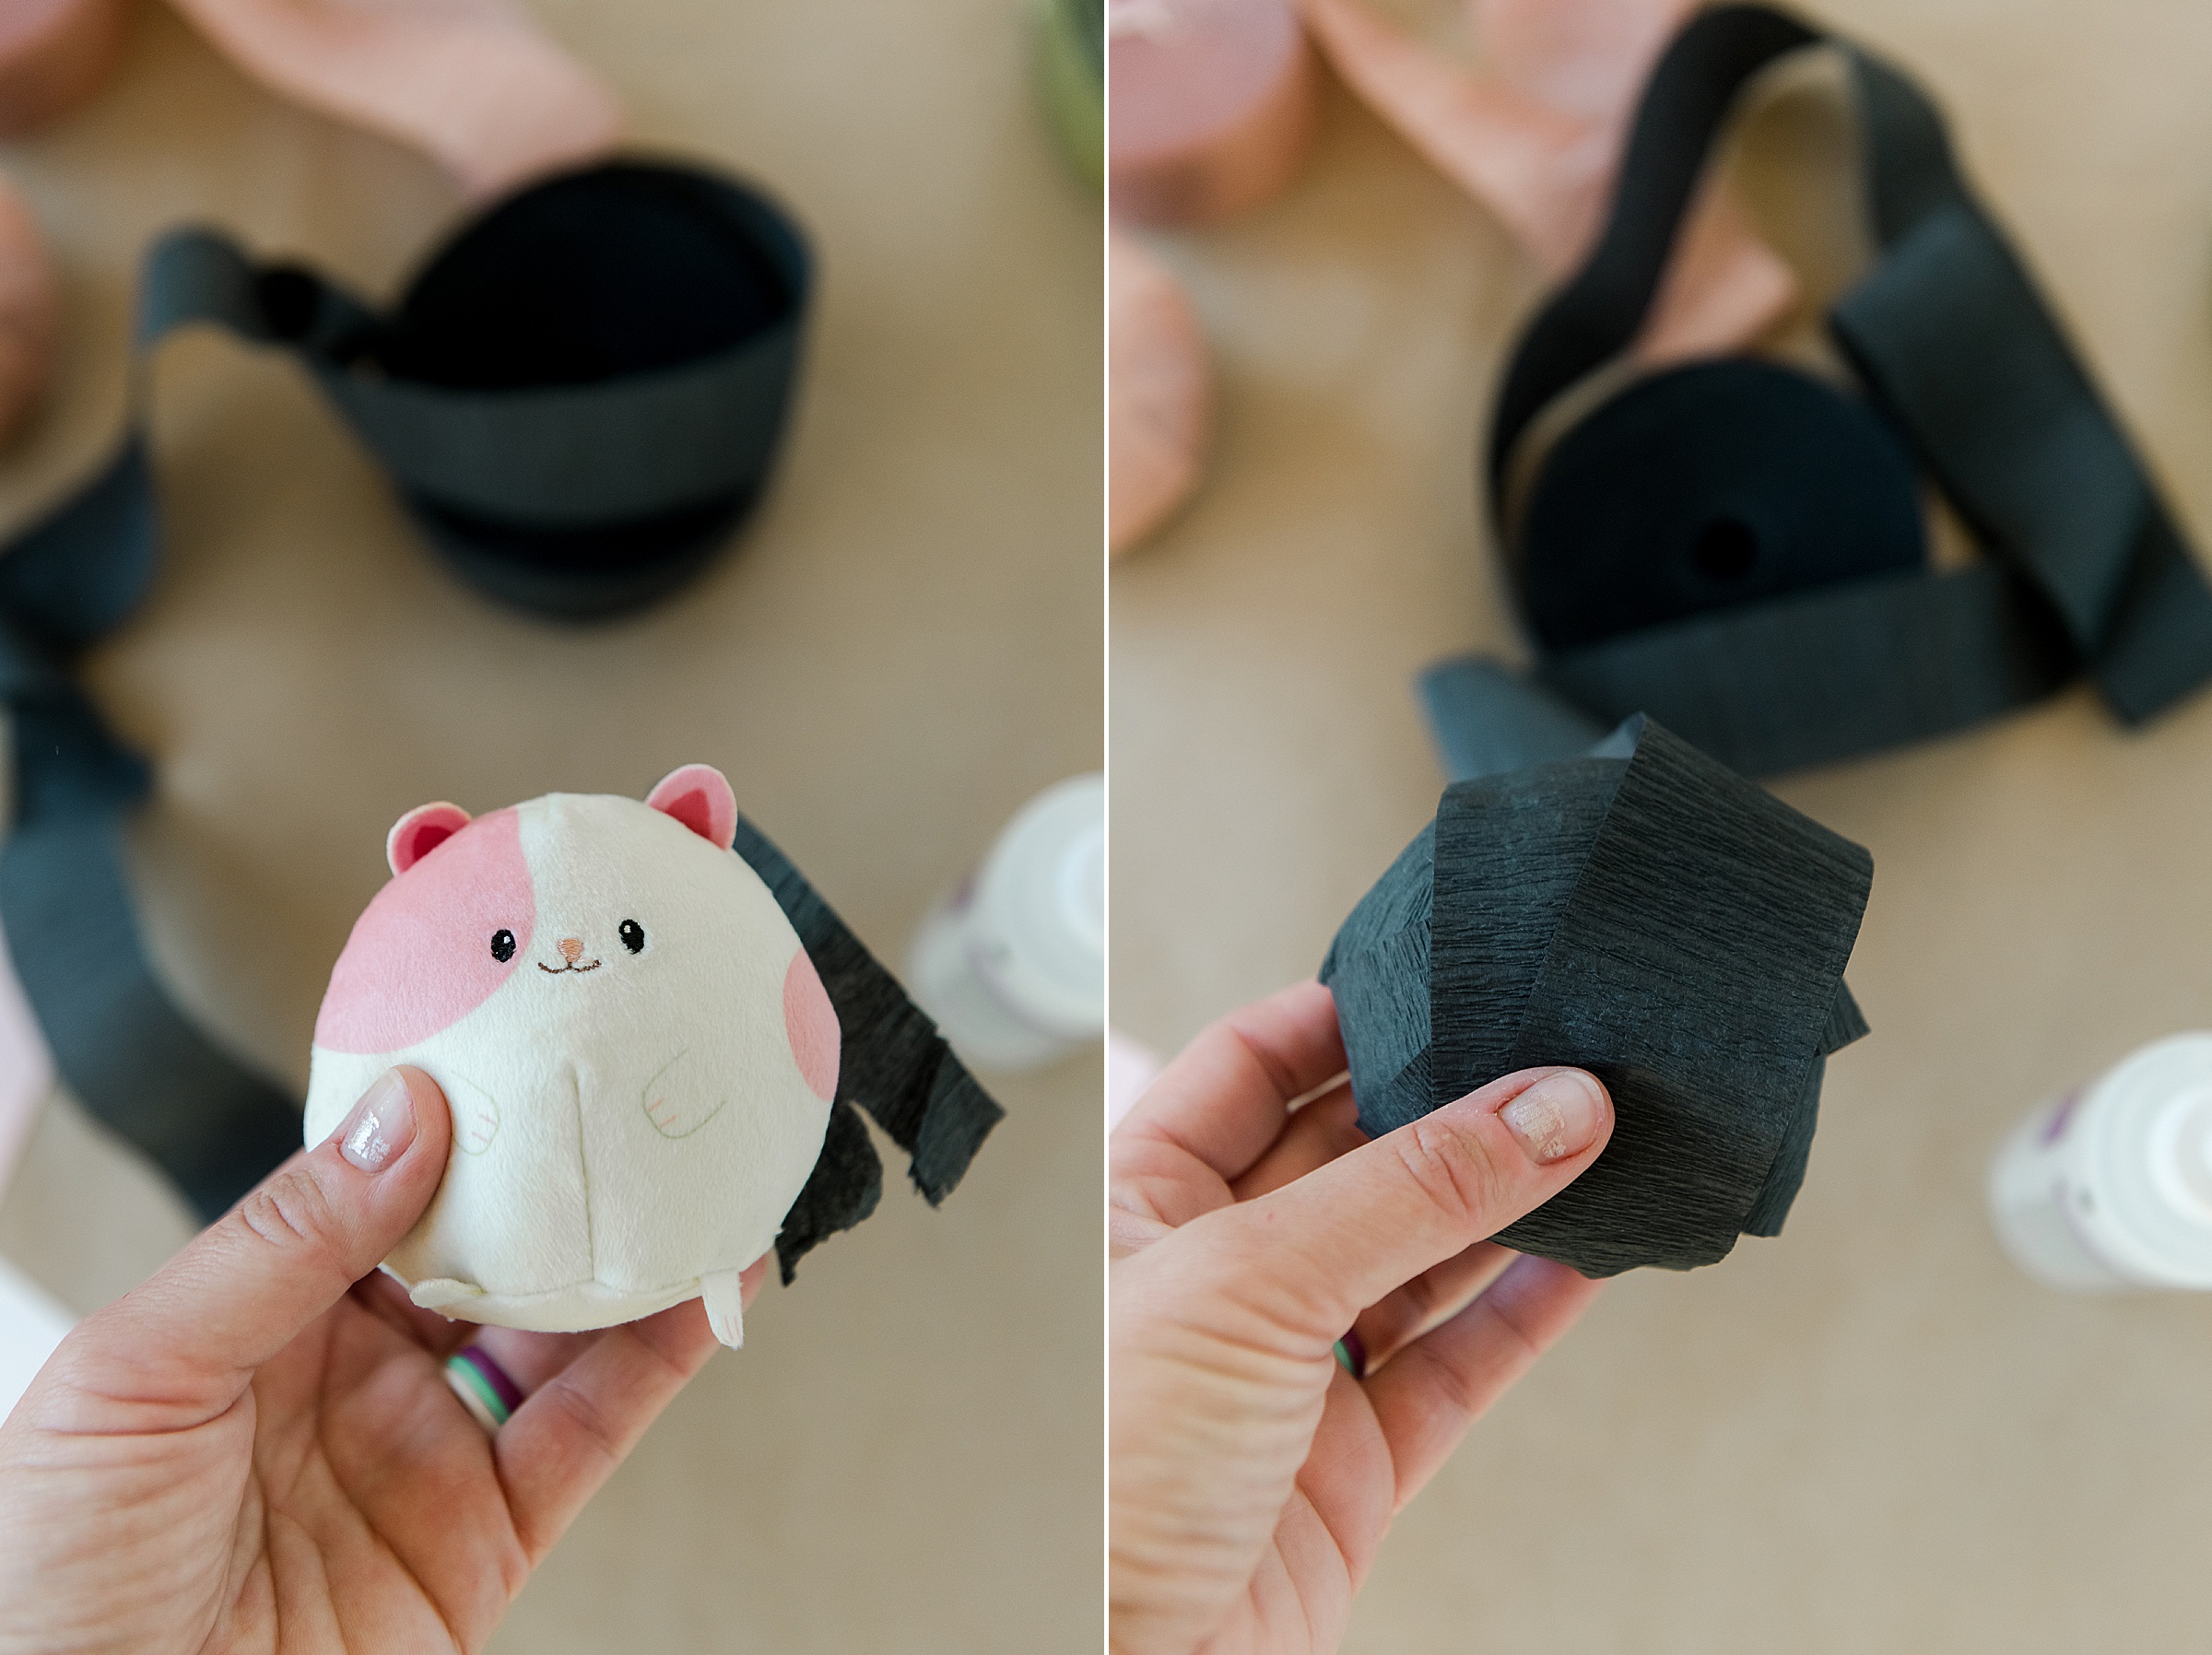
As you go, pause every little bit of the way and add in one of your surprise and keep wrapping.
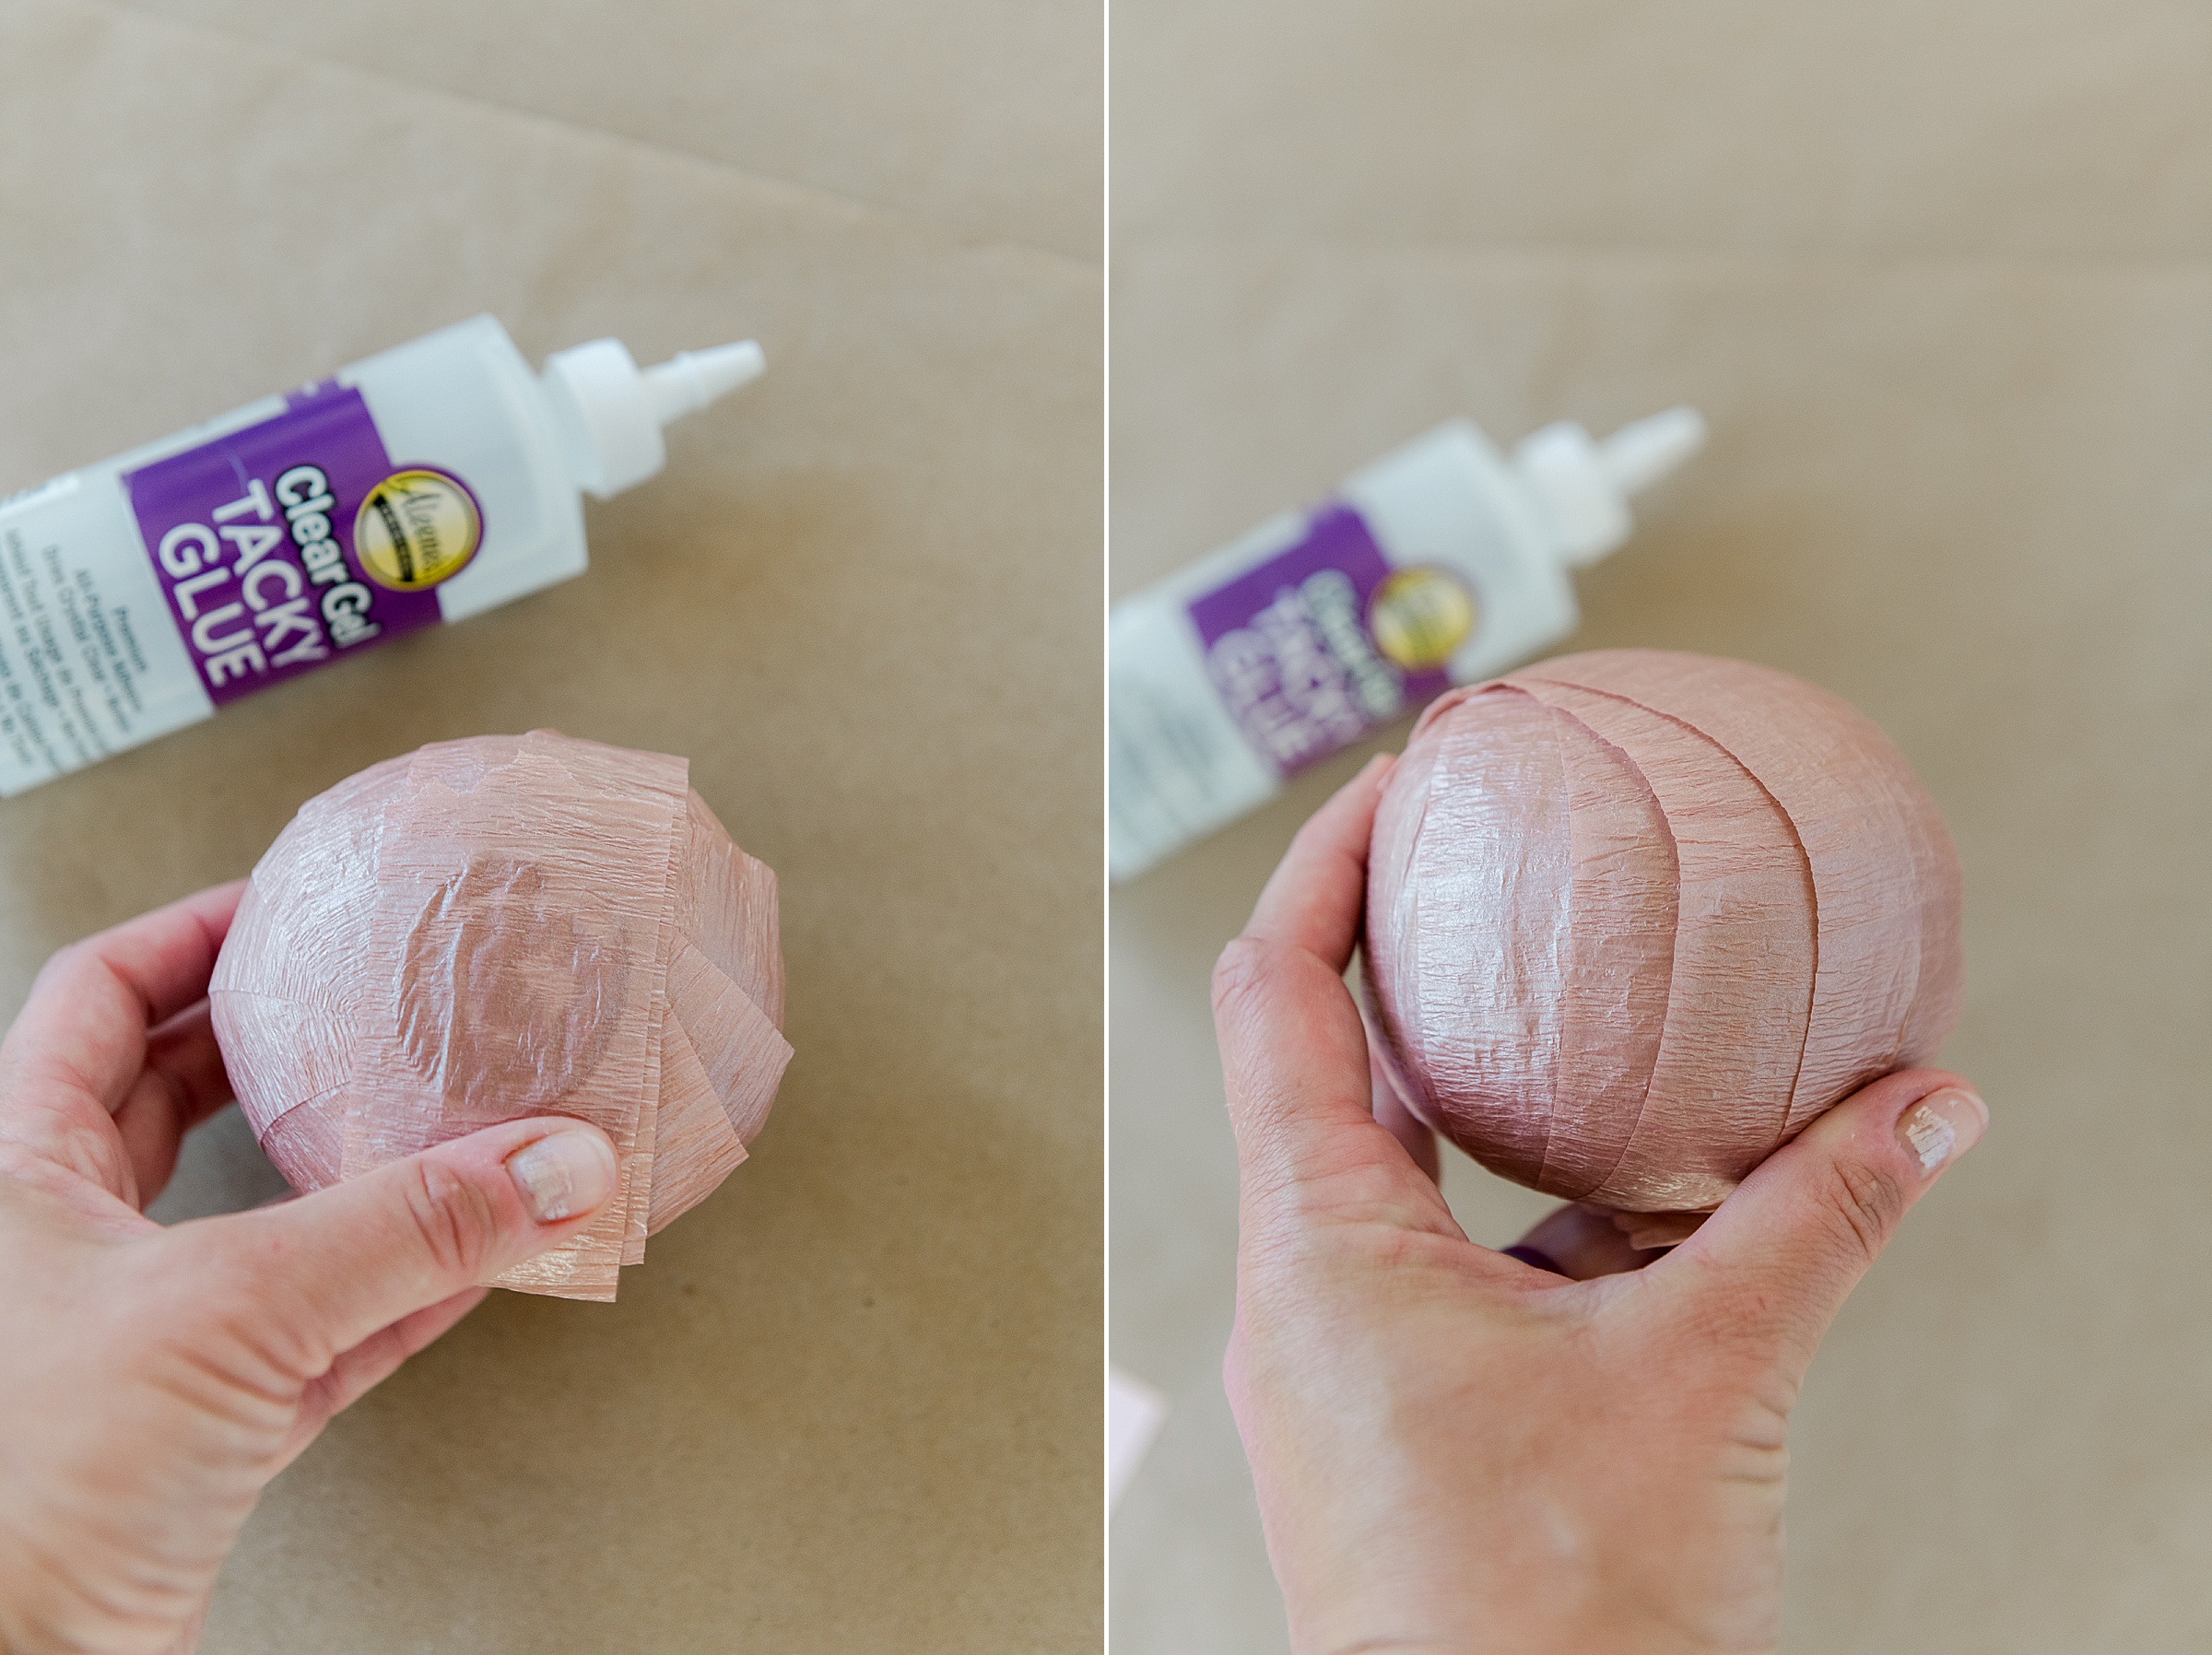
Once you get near the “end” of how big you want your ball, you will want to “finish” it cleanly and pretty – This will happen as you get the ball big enough so that it’s as wide as the crepe paper (so that there’s no square edges) 🙂 I tend to pull just slightly as I’m wrapping on these last few wraps just to make sure the surprise ball “cleans up” nicely 🙂
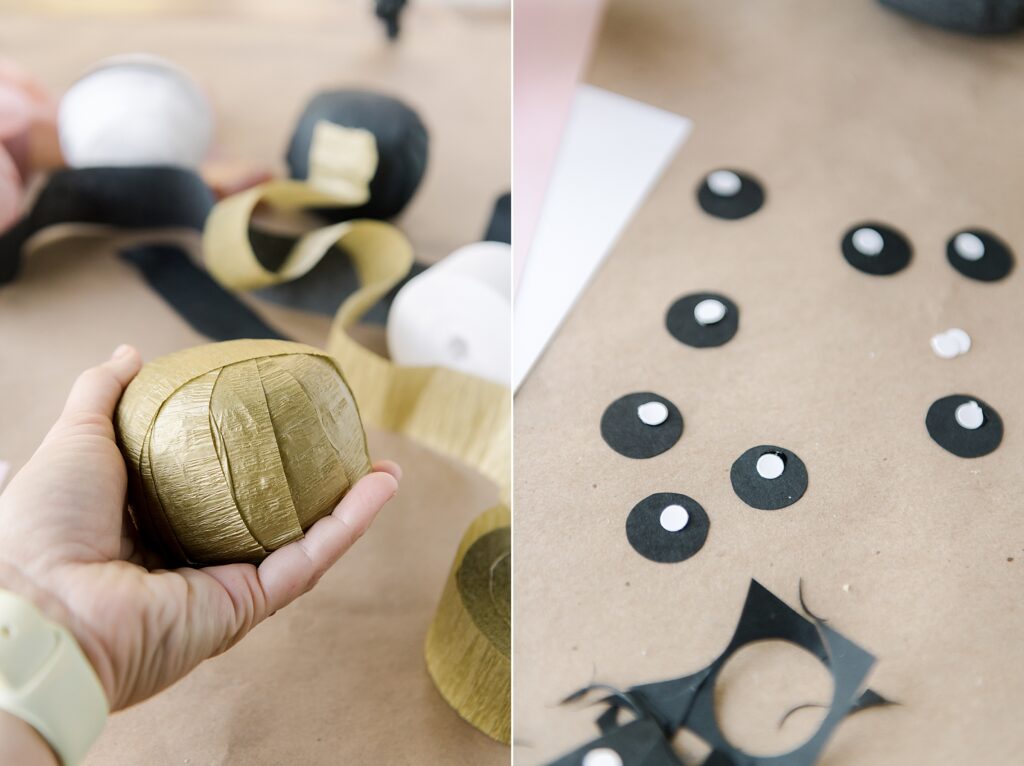
2. Now it’s time to add embellishments 🙂
Download the embellishment template HERE! 🙂
The Pumpkin: (wrapped in orange or gold crepe paper)
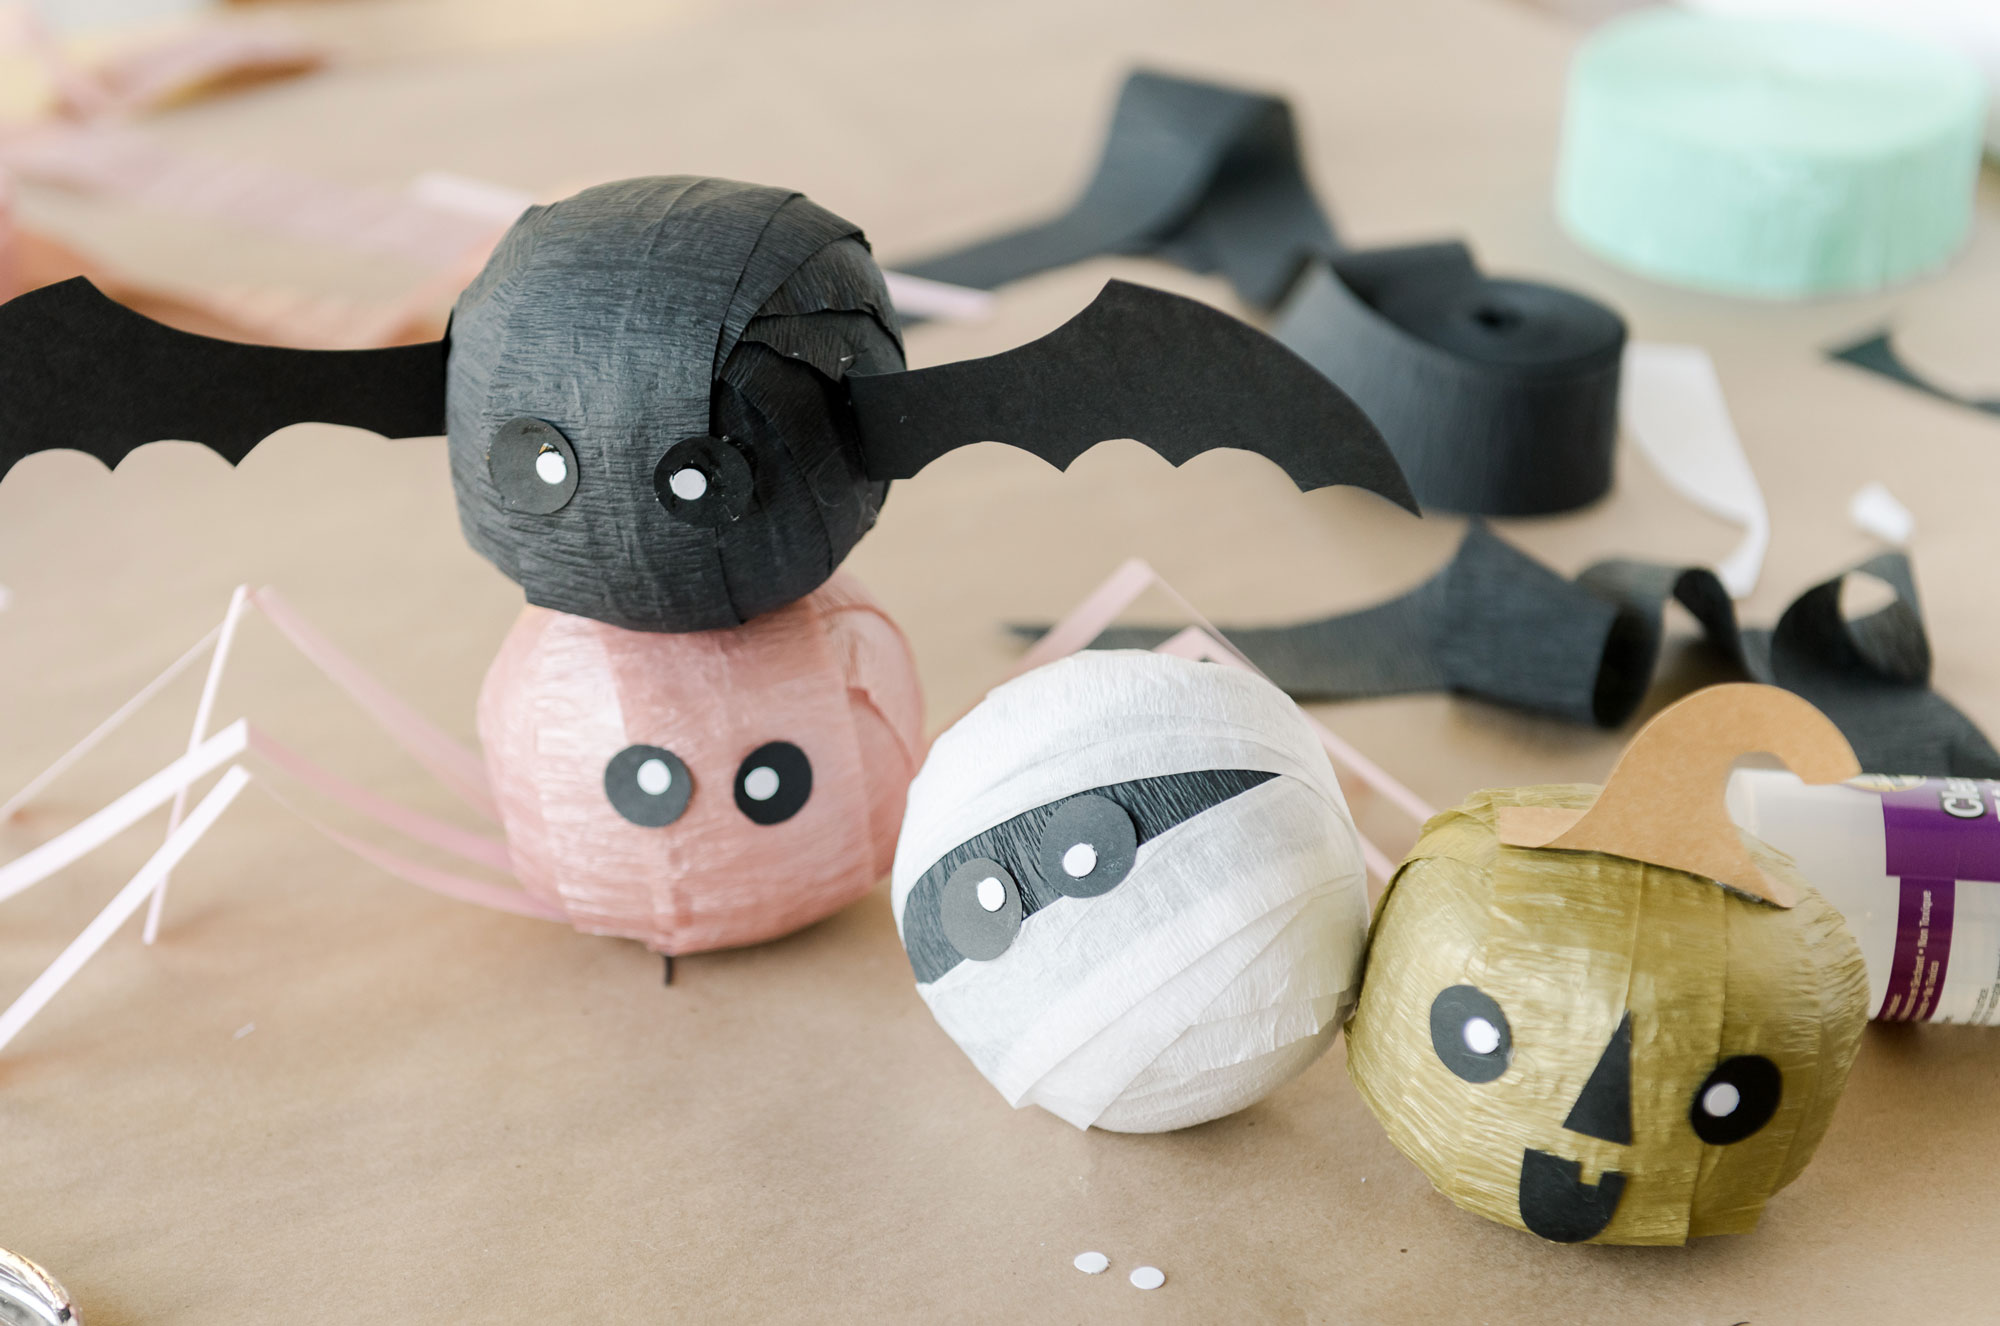
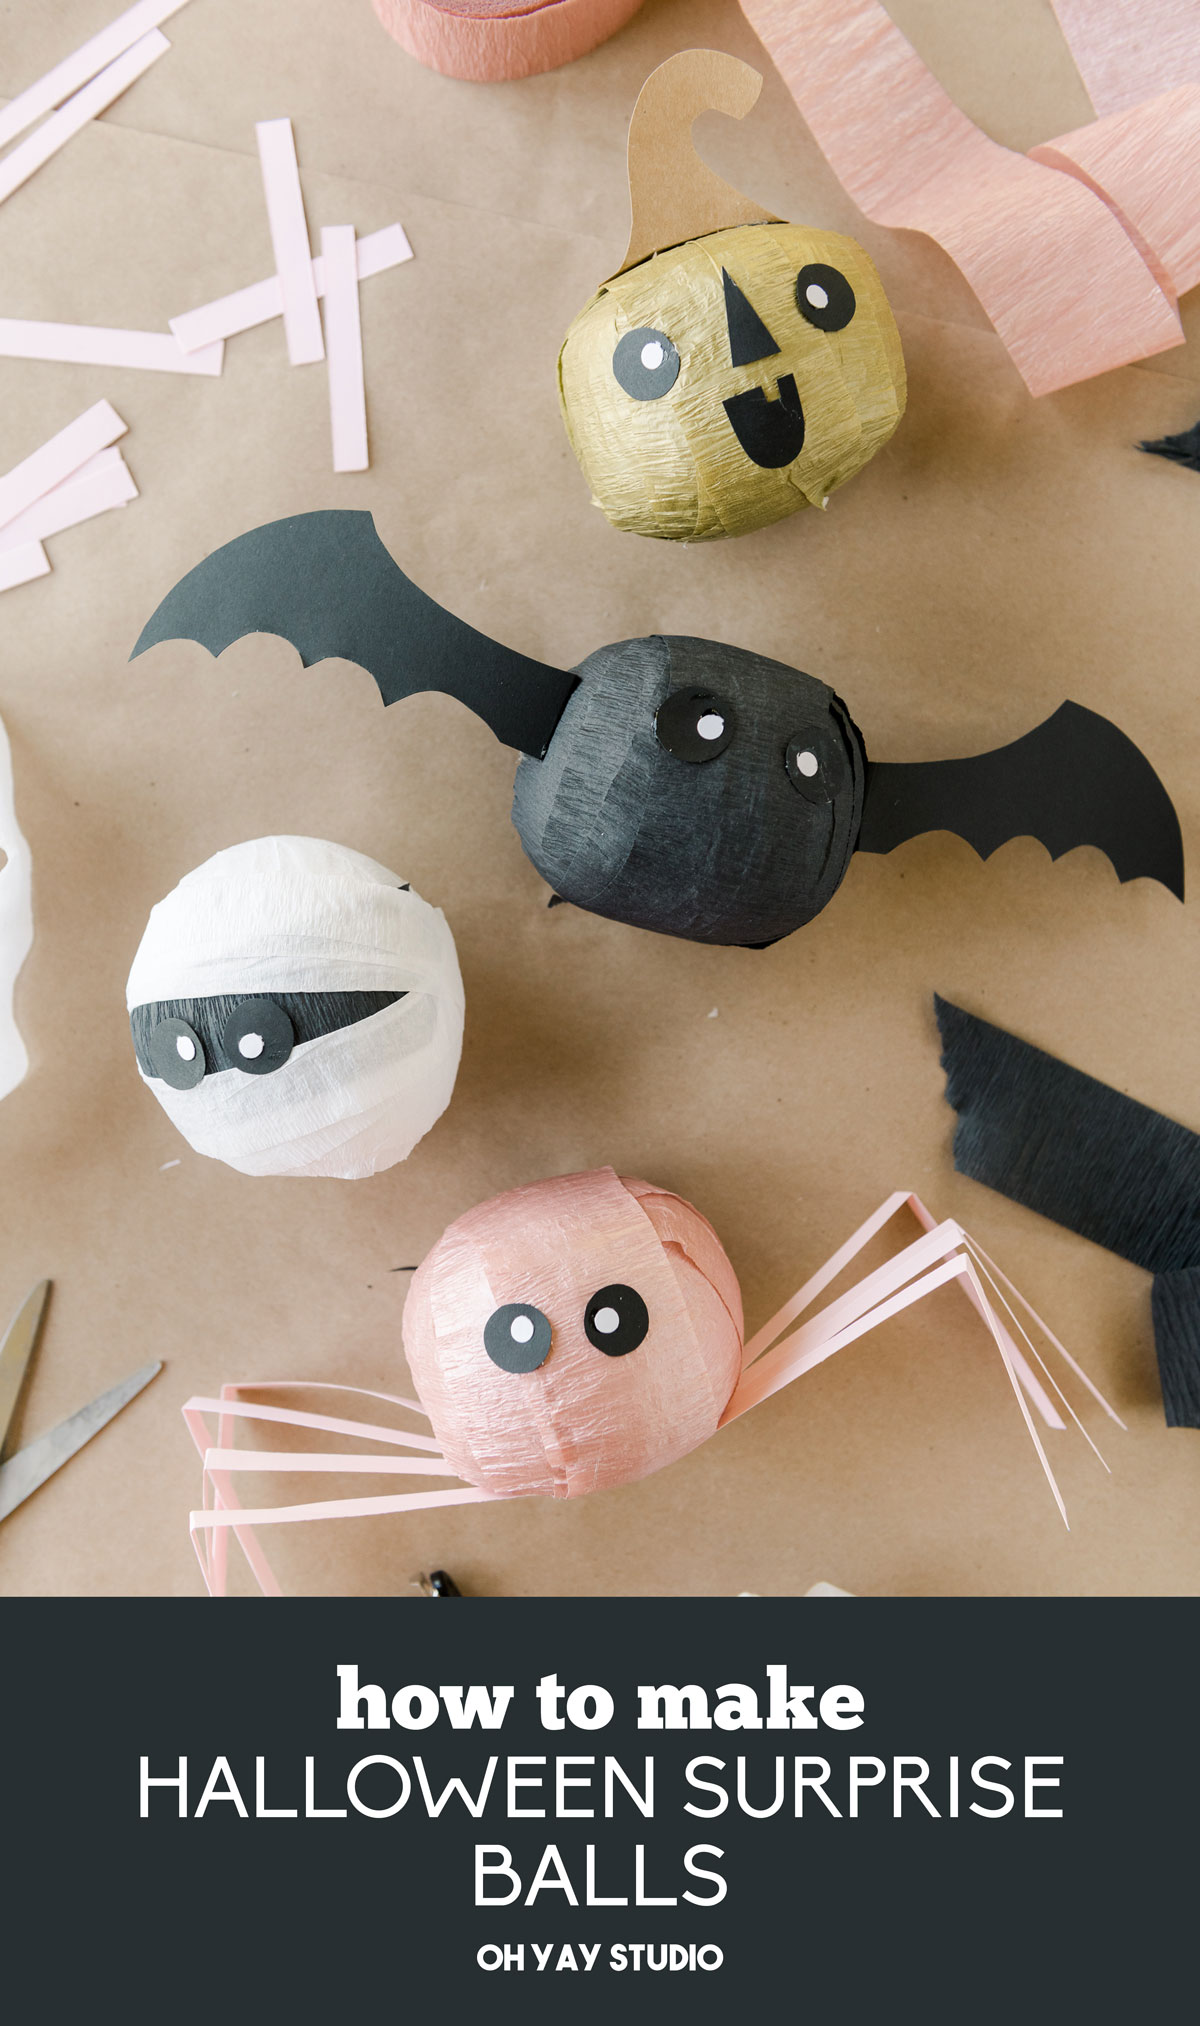
With kraft or brown colored paper cut out the stem of the pumpkin – be sure to cut the “slits” up the bottom so that the top stem can wrap/fold across the top correctly. Glue the stem to the top of the pumpkin. Then cut out some eyeballs, a nose and a mouth. This surprise ball can be so fun because you can convey a scary or happy or surprised emotion on the pumpkin with the shape of the mouth and eyes! 🙂
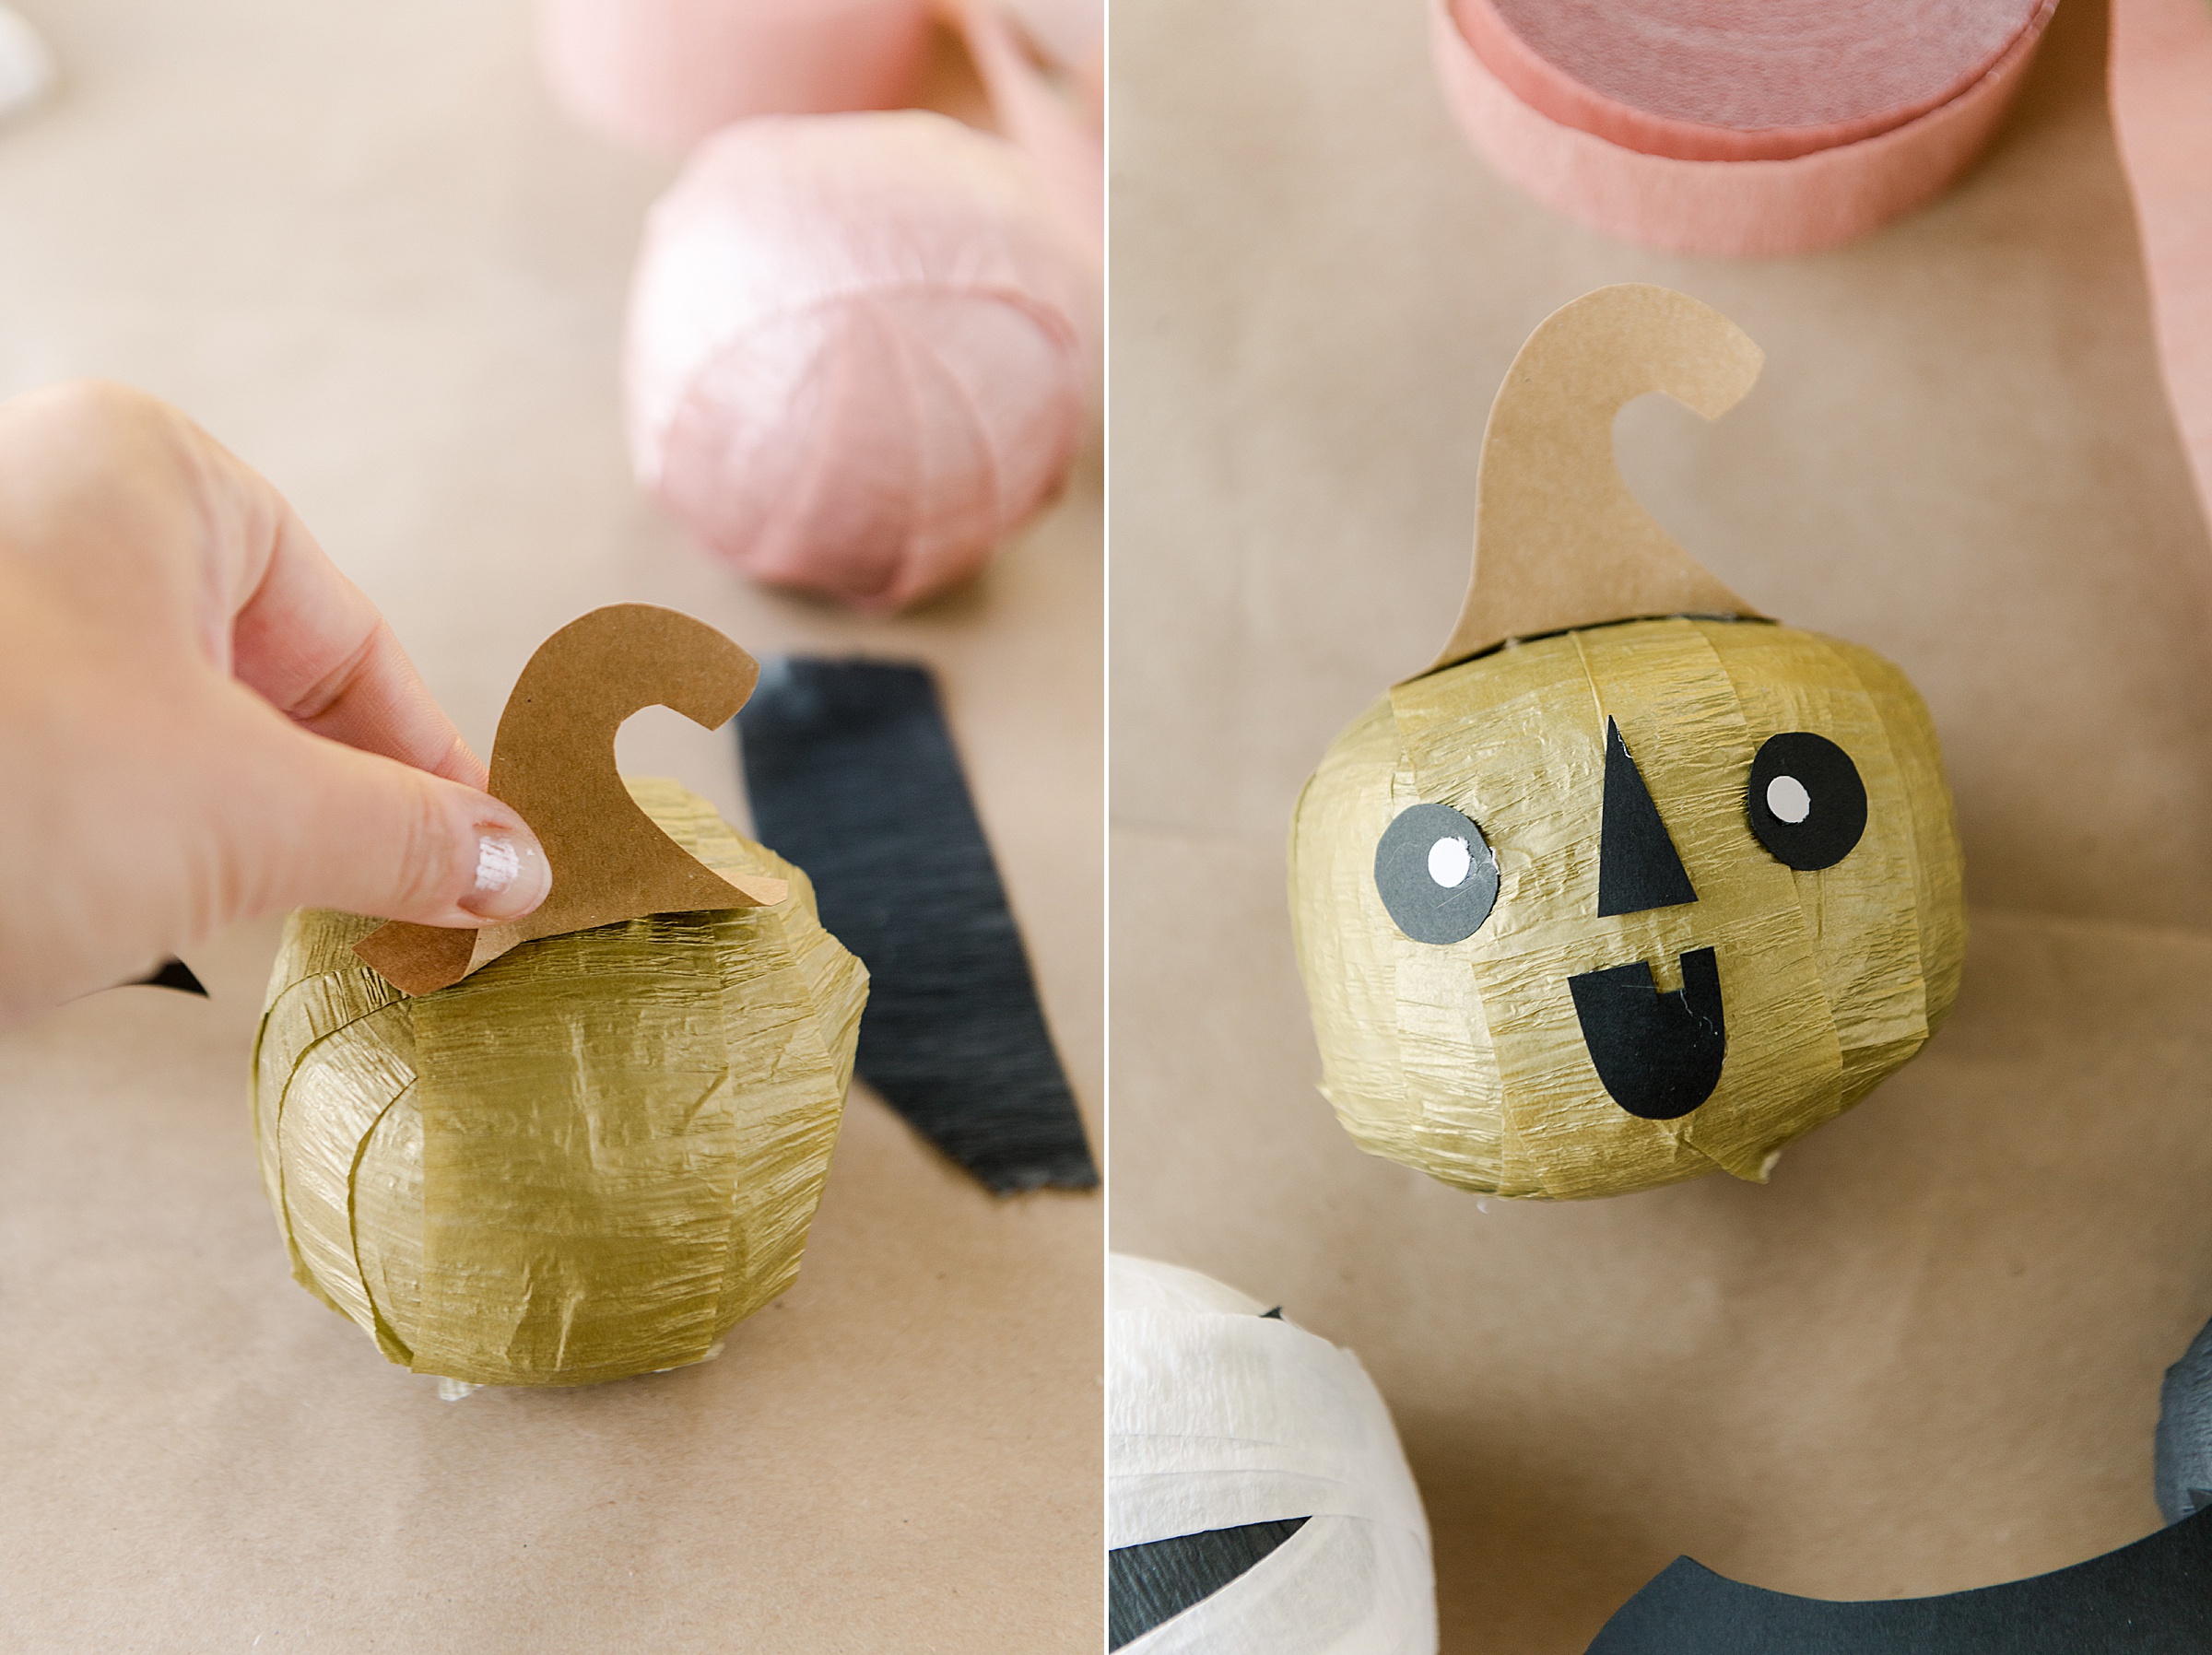
The Bat: (wrapped in black crepe paper)
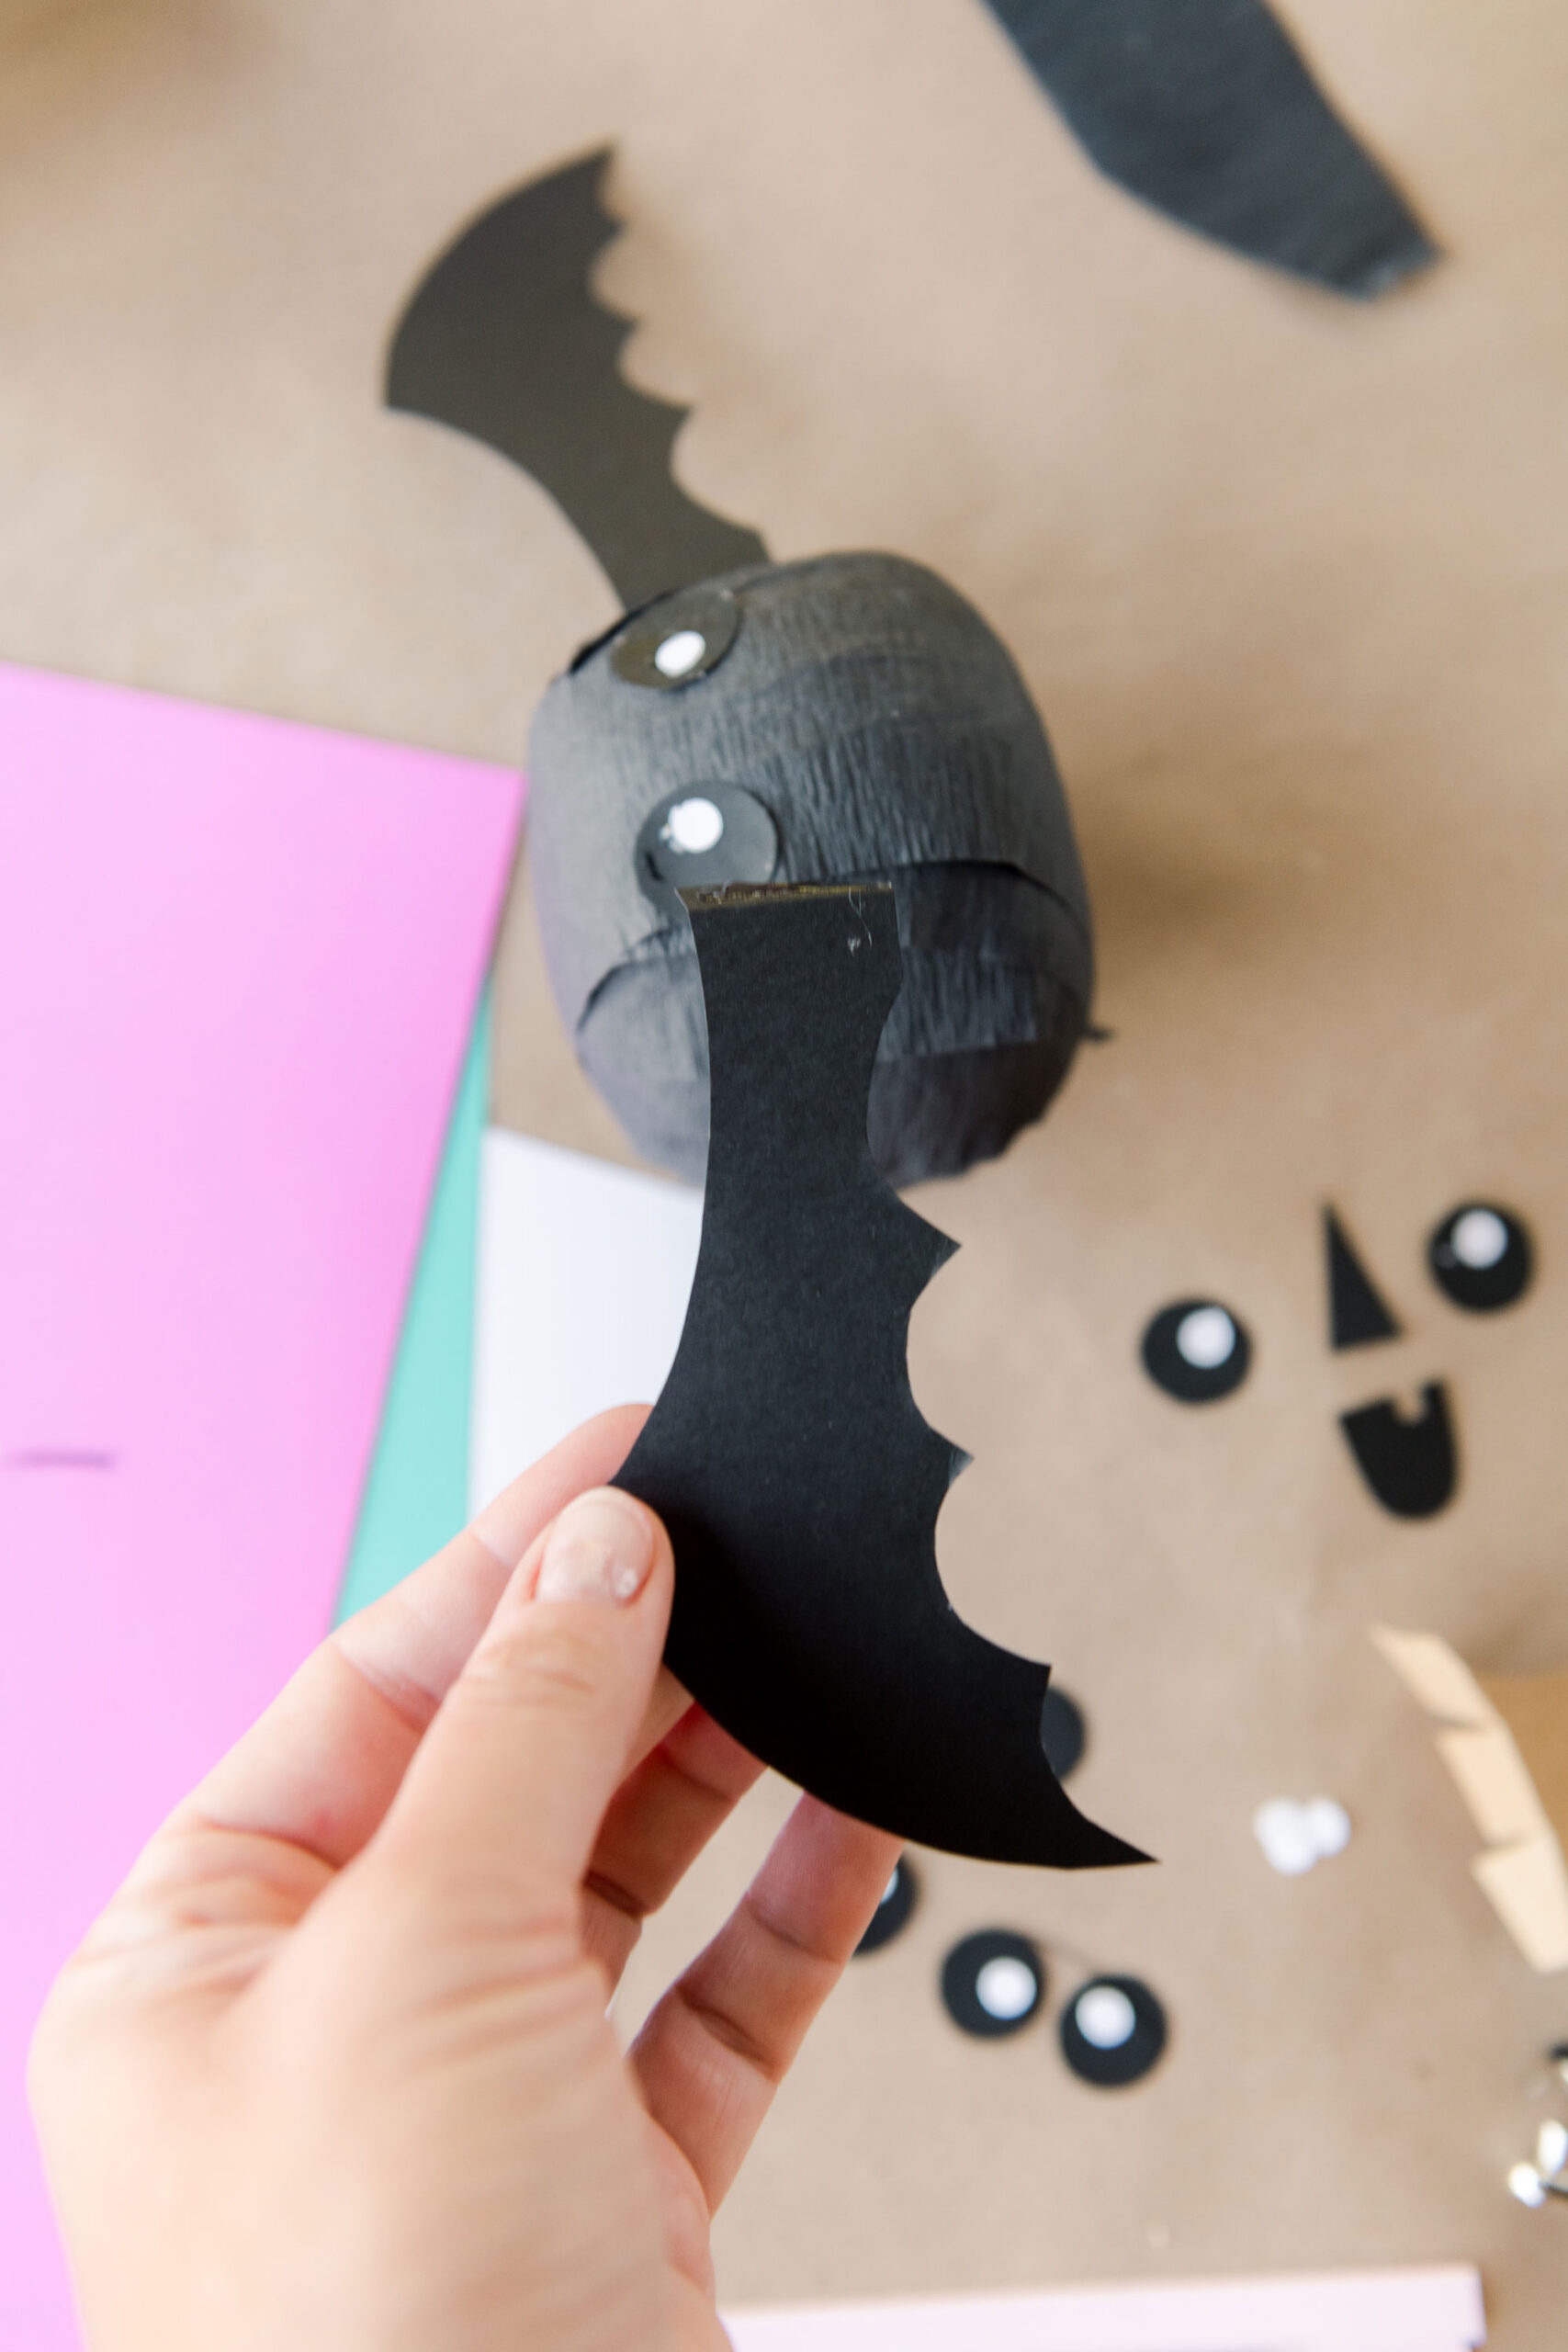
With some black paper, cut out 2 wings for your bat – the template has 2 sizes, depending on which suit the final size of your surprise ball! 🙂 Then cut out 2 eyes for your bat as well and glue both the eyes and the wings on the bat surprise ball!
The Mummy: (wrapped in white crepe paper)
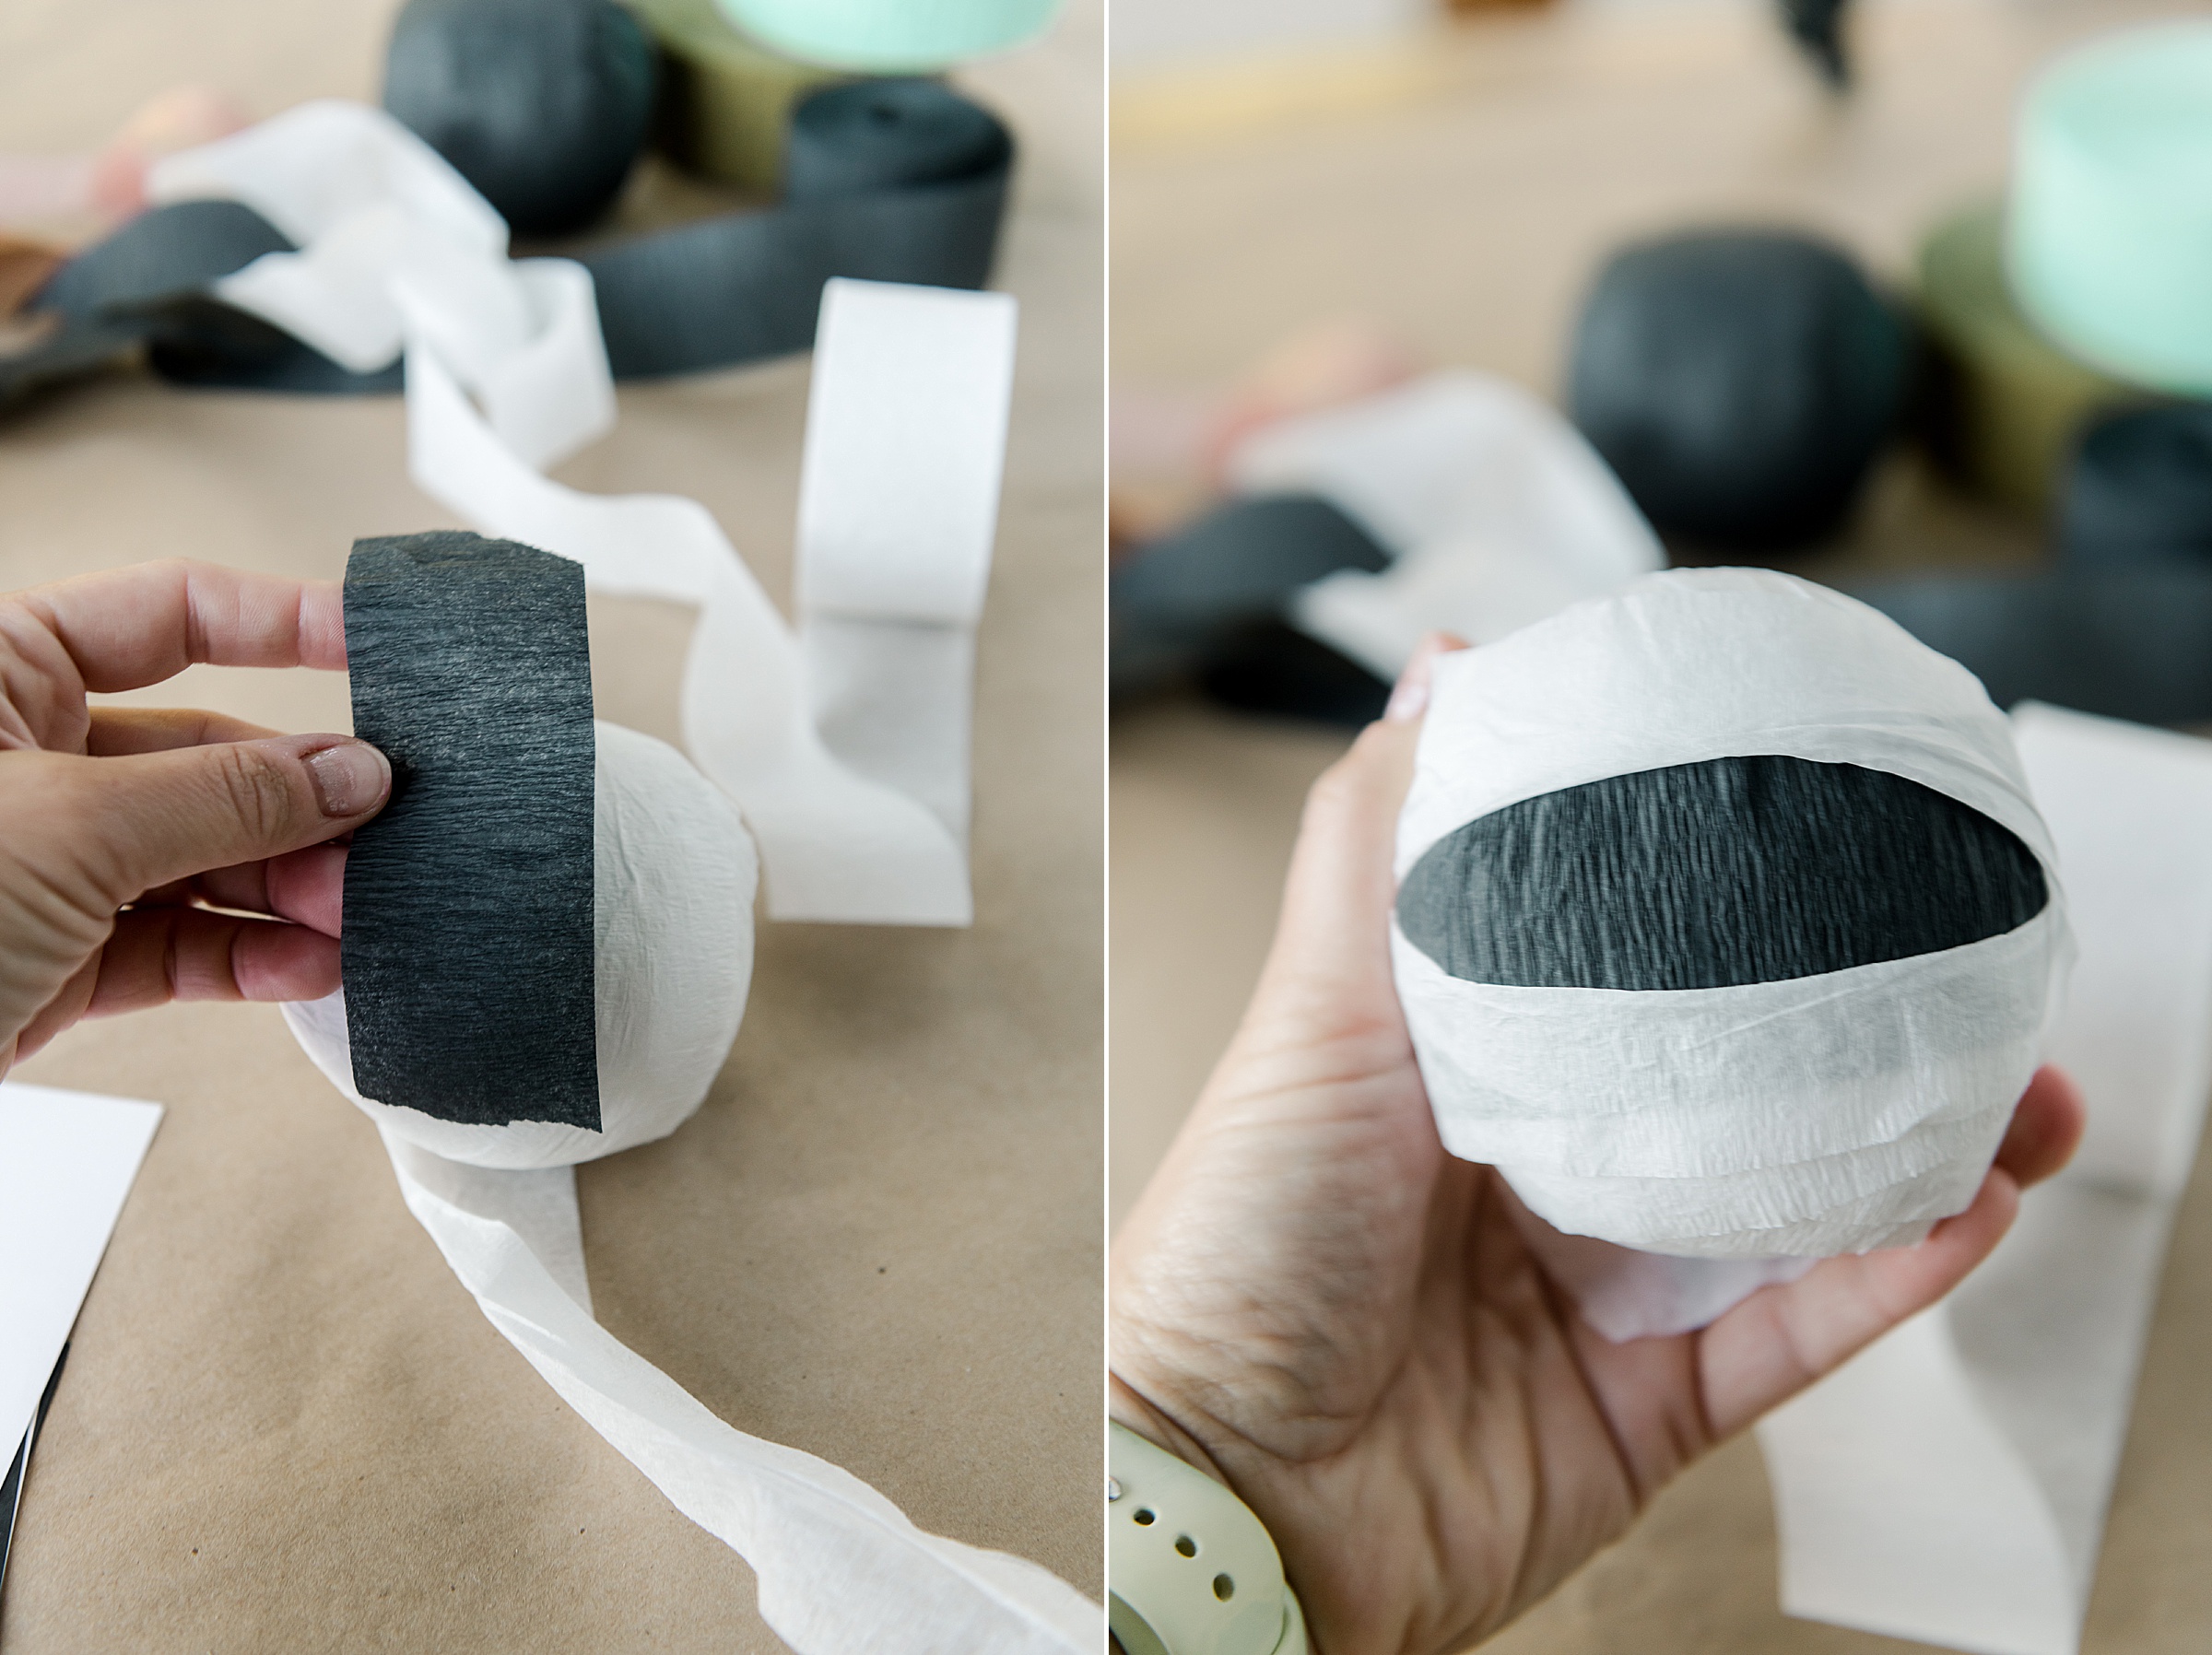
Start finishing your mummy surprise ball by tearing off a chunk of black crepe paper and laying it on top of the your finished white ball. Then do 1-2 more wraps of white around the edge of the black to make it look like the black is “peeking” out – I even folded the white crepe paper a bit of make it fit and lay just right! 🙂
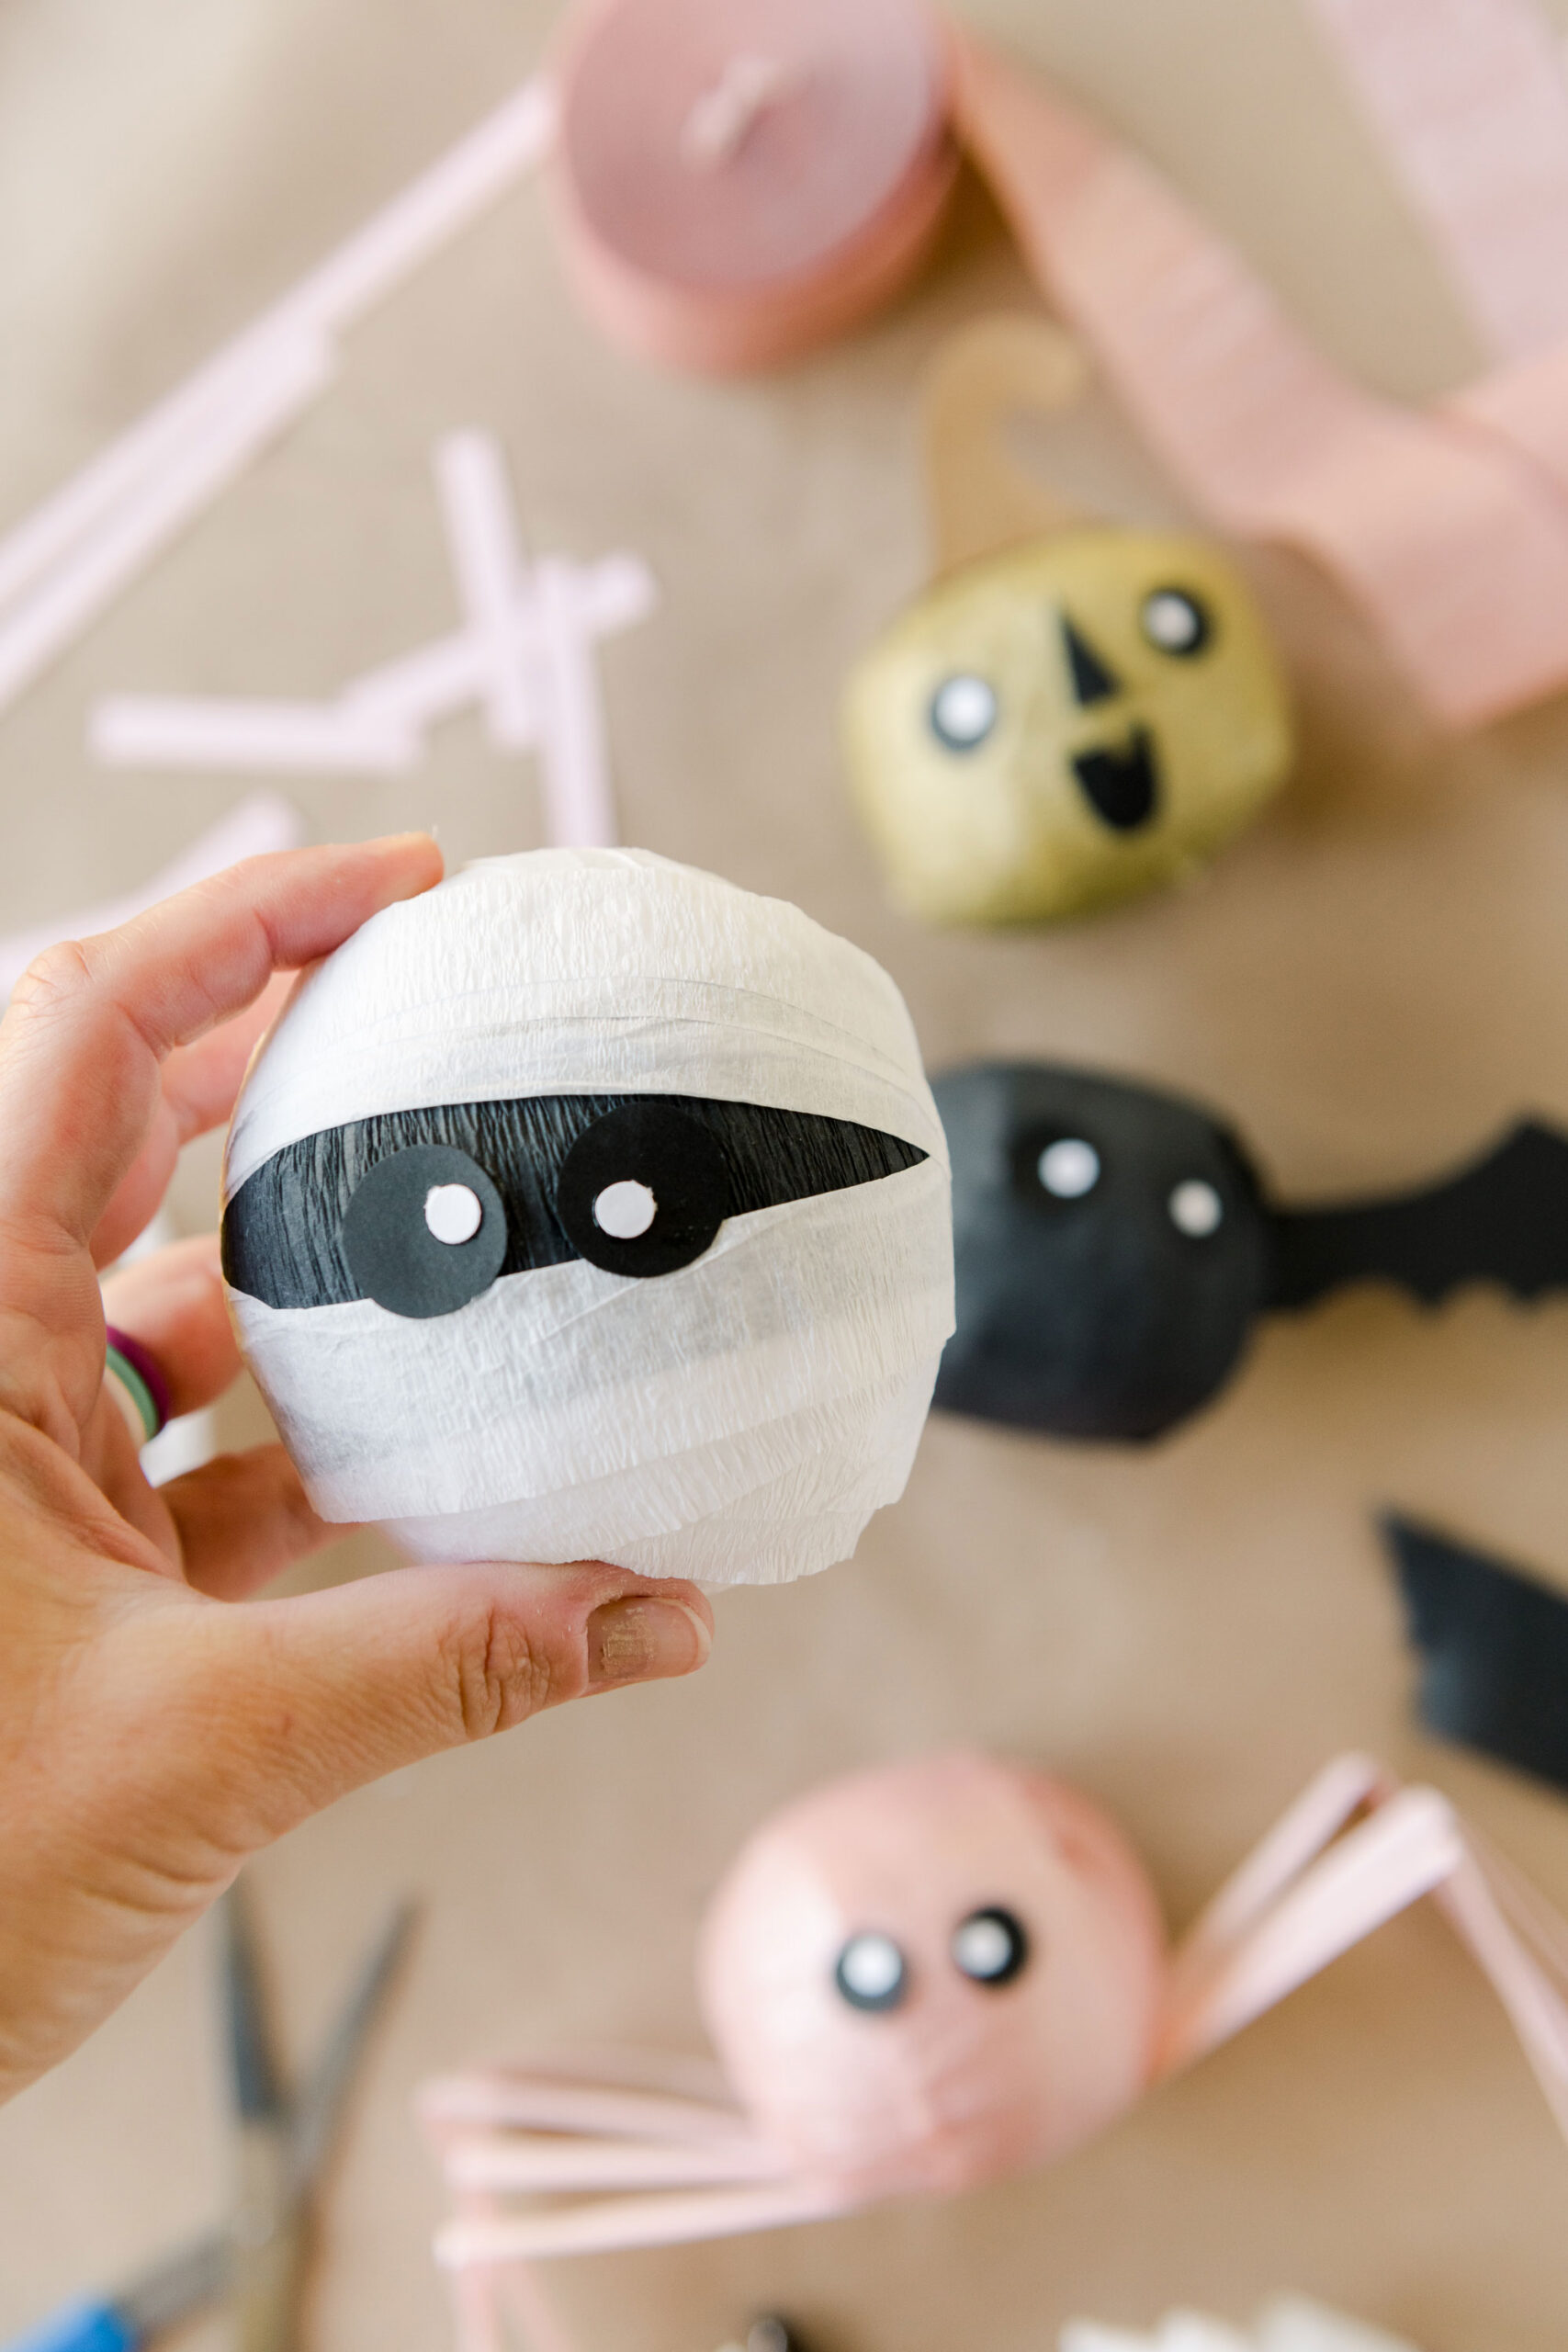
Then add your eyeballs on the black part to finish off your mummy surprise ball!
The Spider: (wrapped in ANY color crepe paper) 🙂
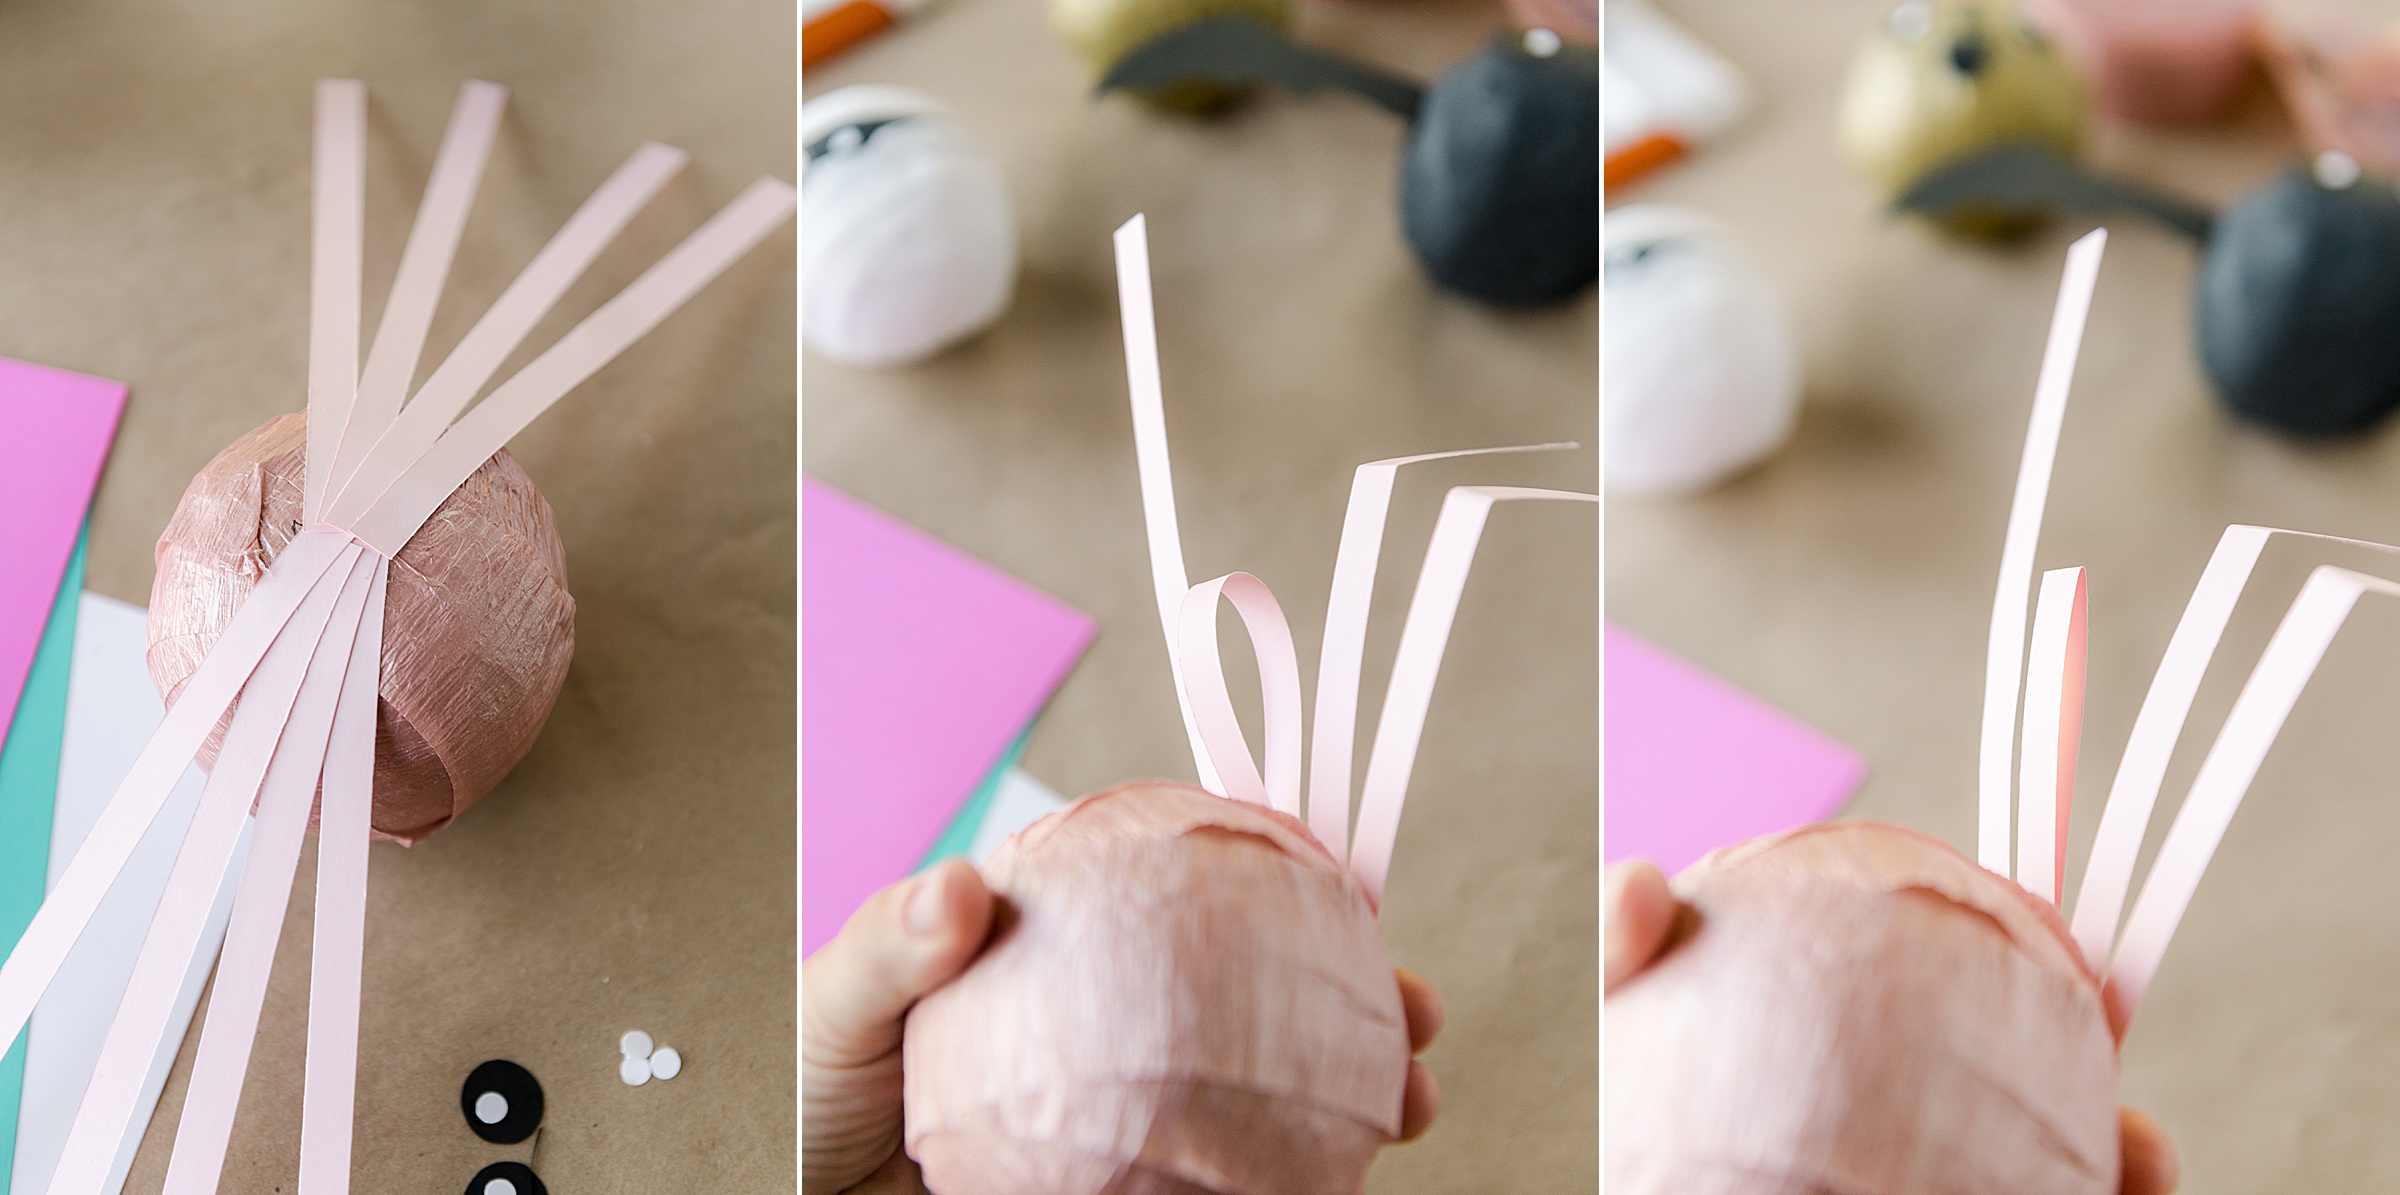
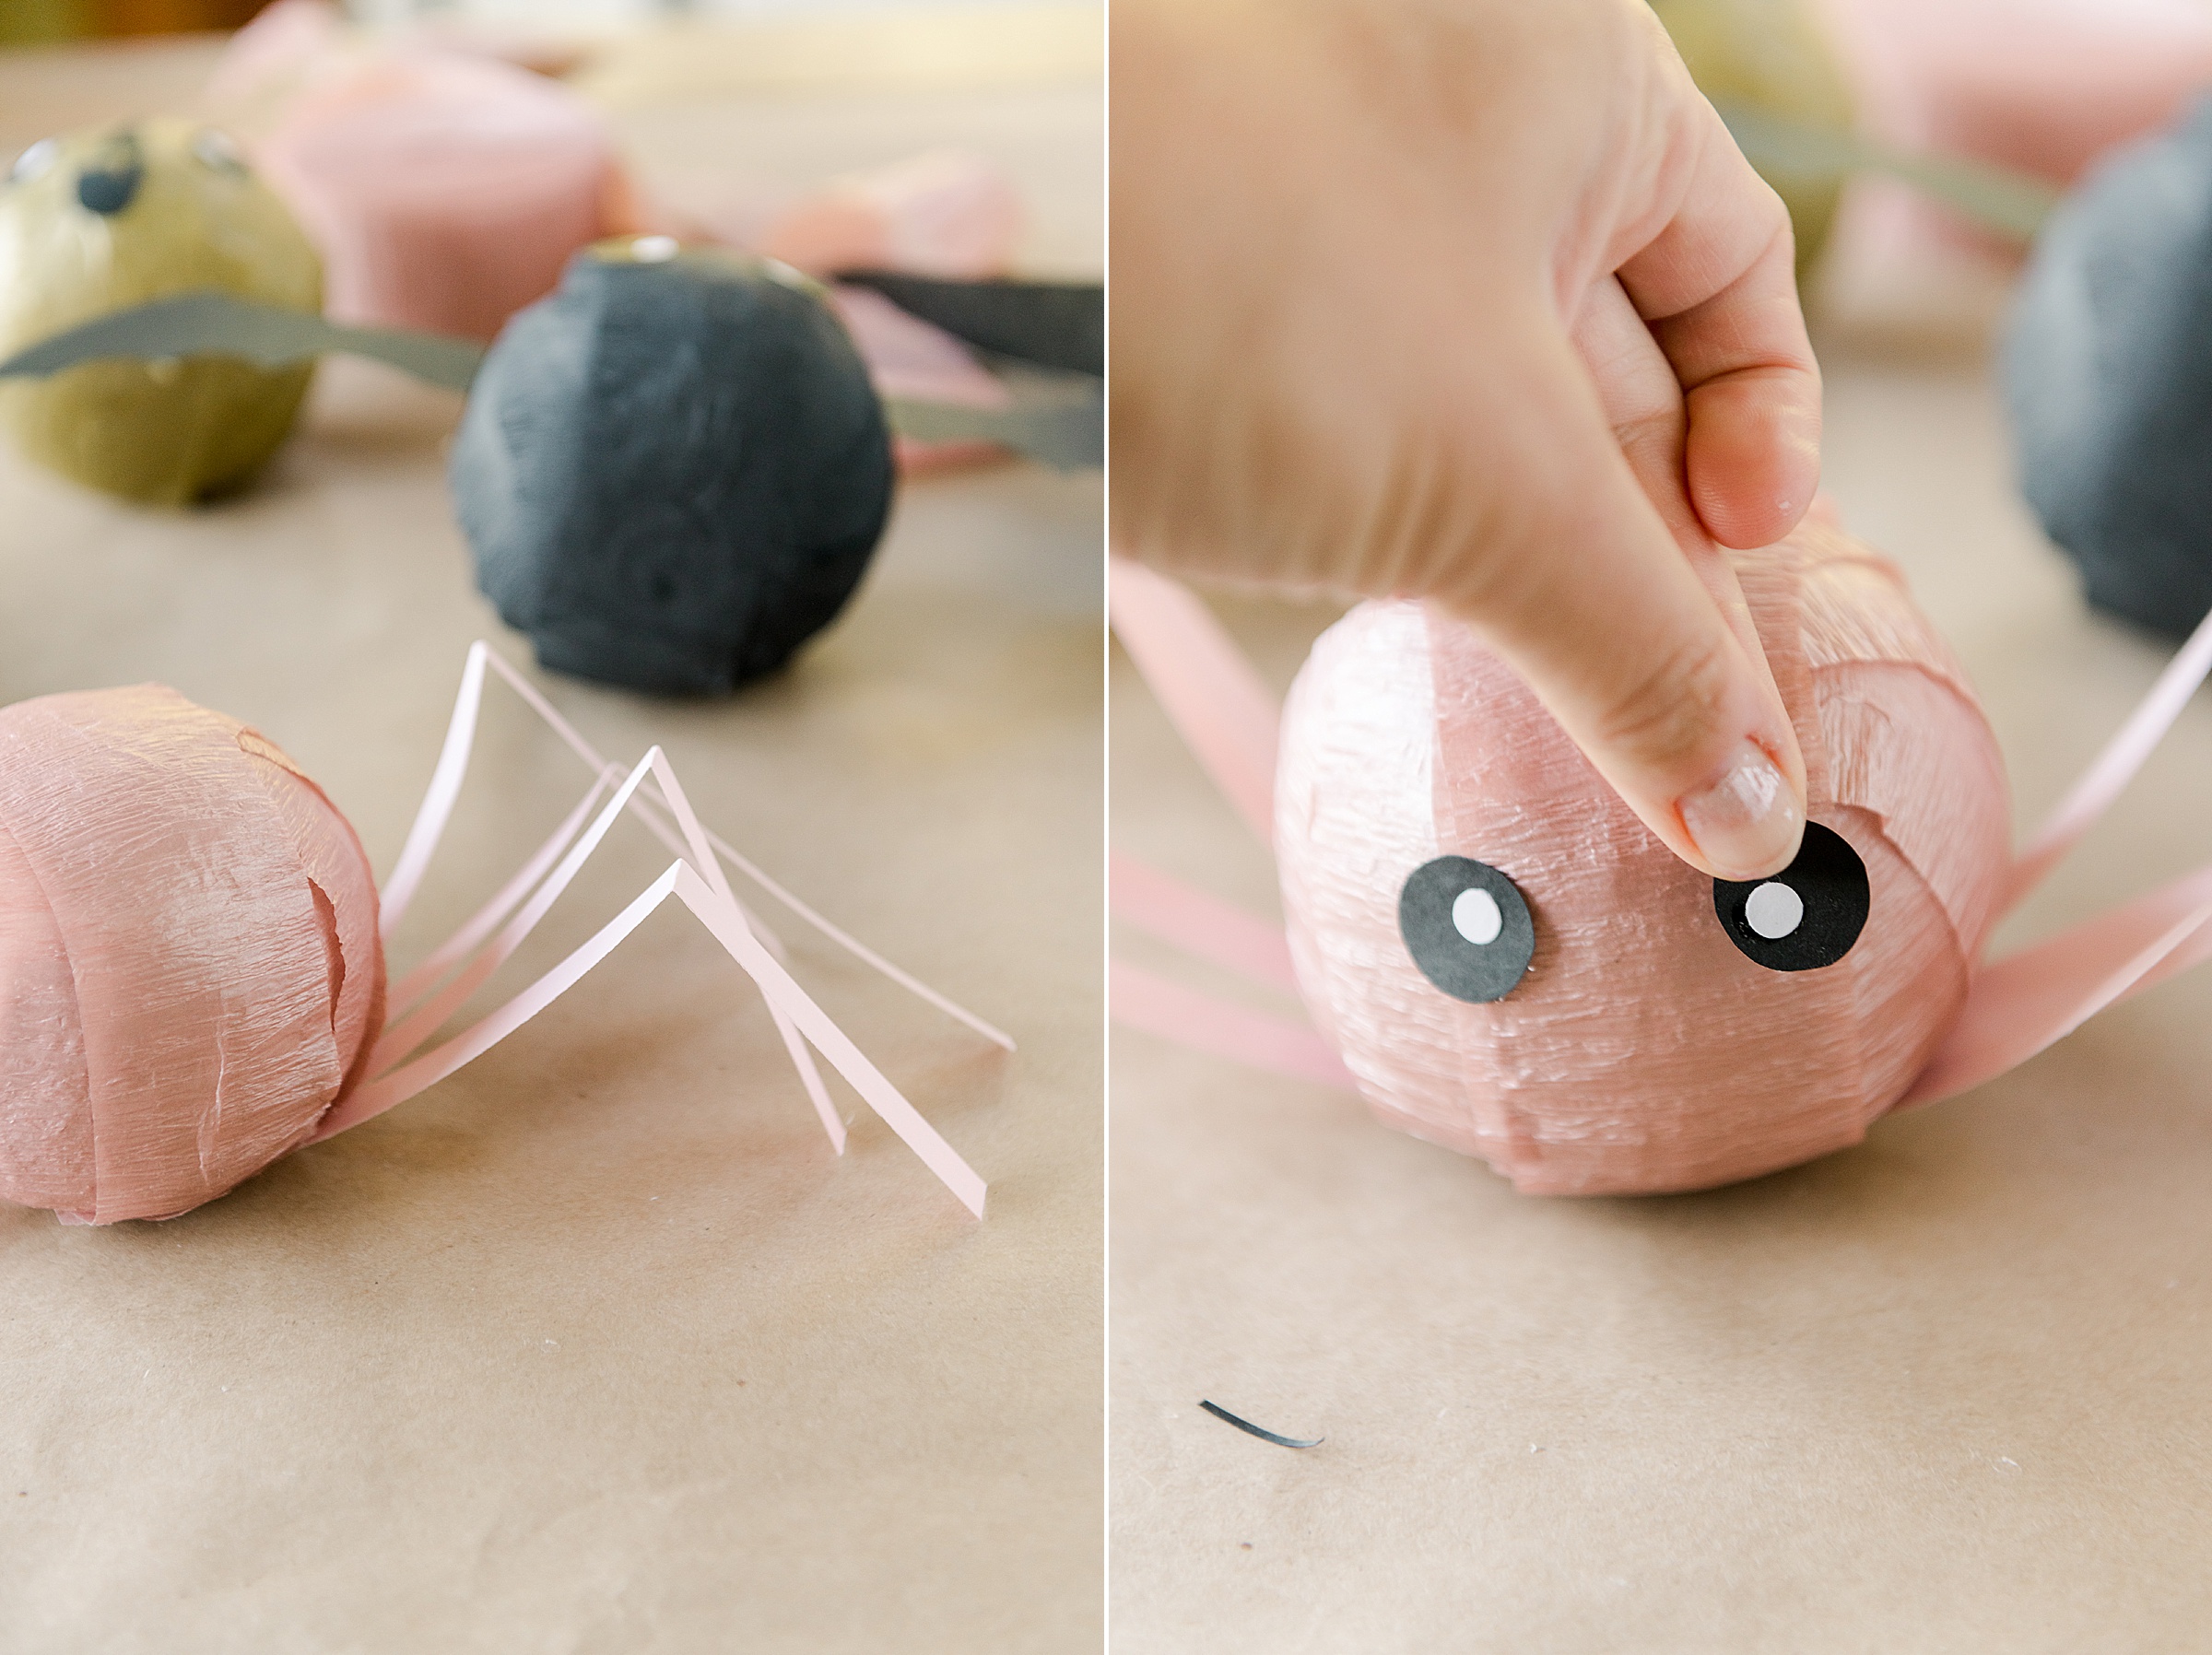
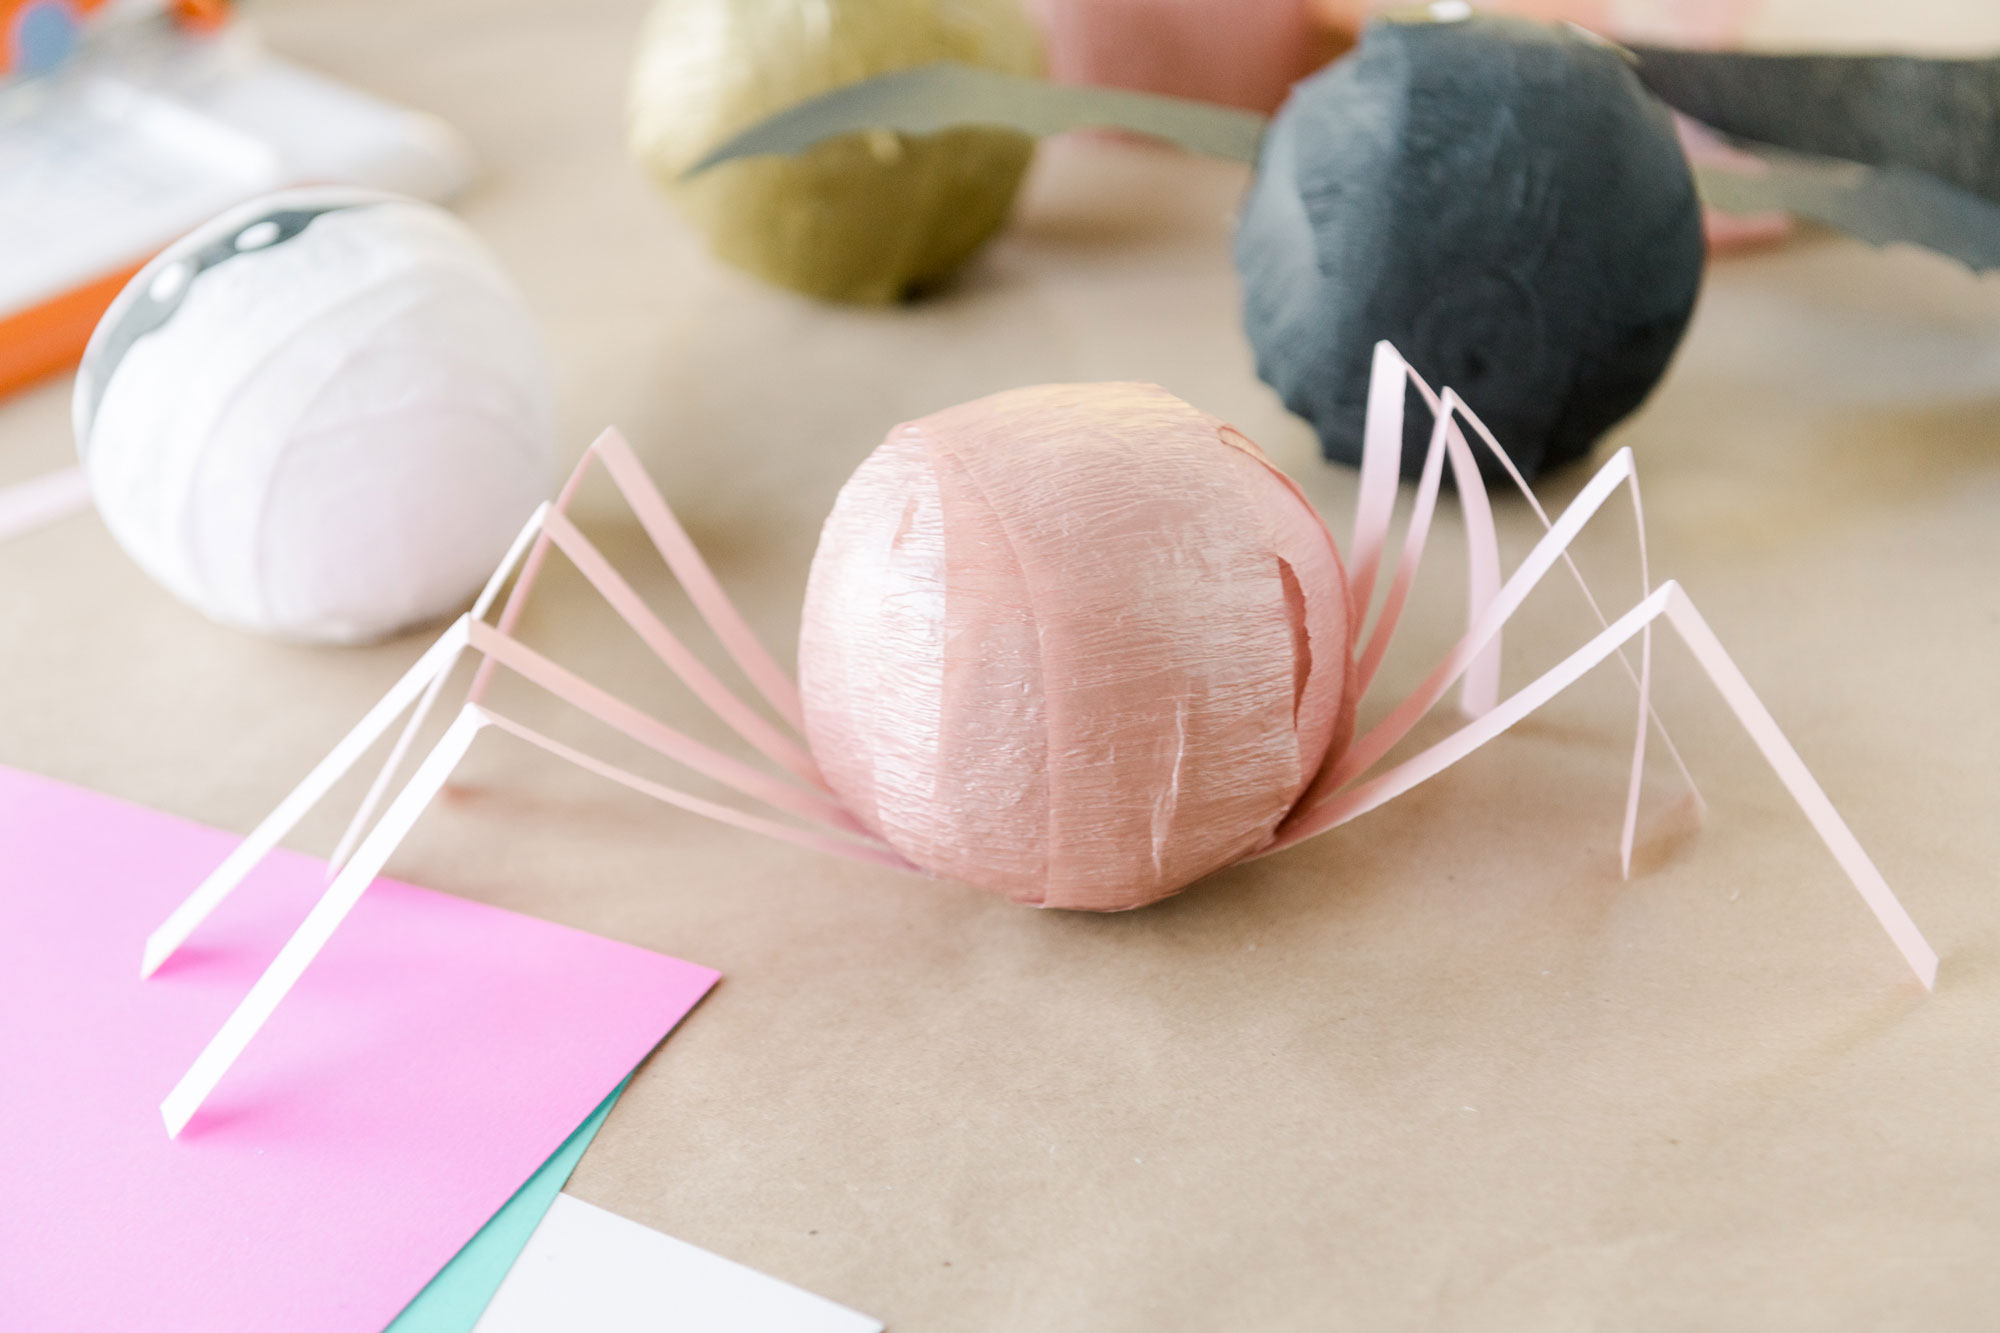
Cut 8 strips of paper width-wise from an 8.5×11 piece of paper (the 8.5” side) You will make each strip less than 1/4” in width to make sure they legs of the spider aren’t too wide. With 4 of the legs, glue them to the underside of your surprise ball on one side. Then fold the legs in 1/2 so that you create the bend in the leg for the spider. Then add the eyes on to complete the spider surprise ball!
3. You can either be done or add some personalization (specifically for parities or place settings) 🙂 You can add some washi tape tags to add names or even some tags to label or add names to these Halloween surprise balls! 🙂
