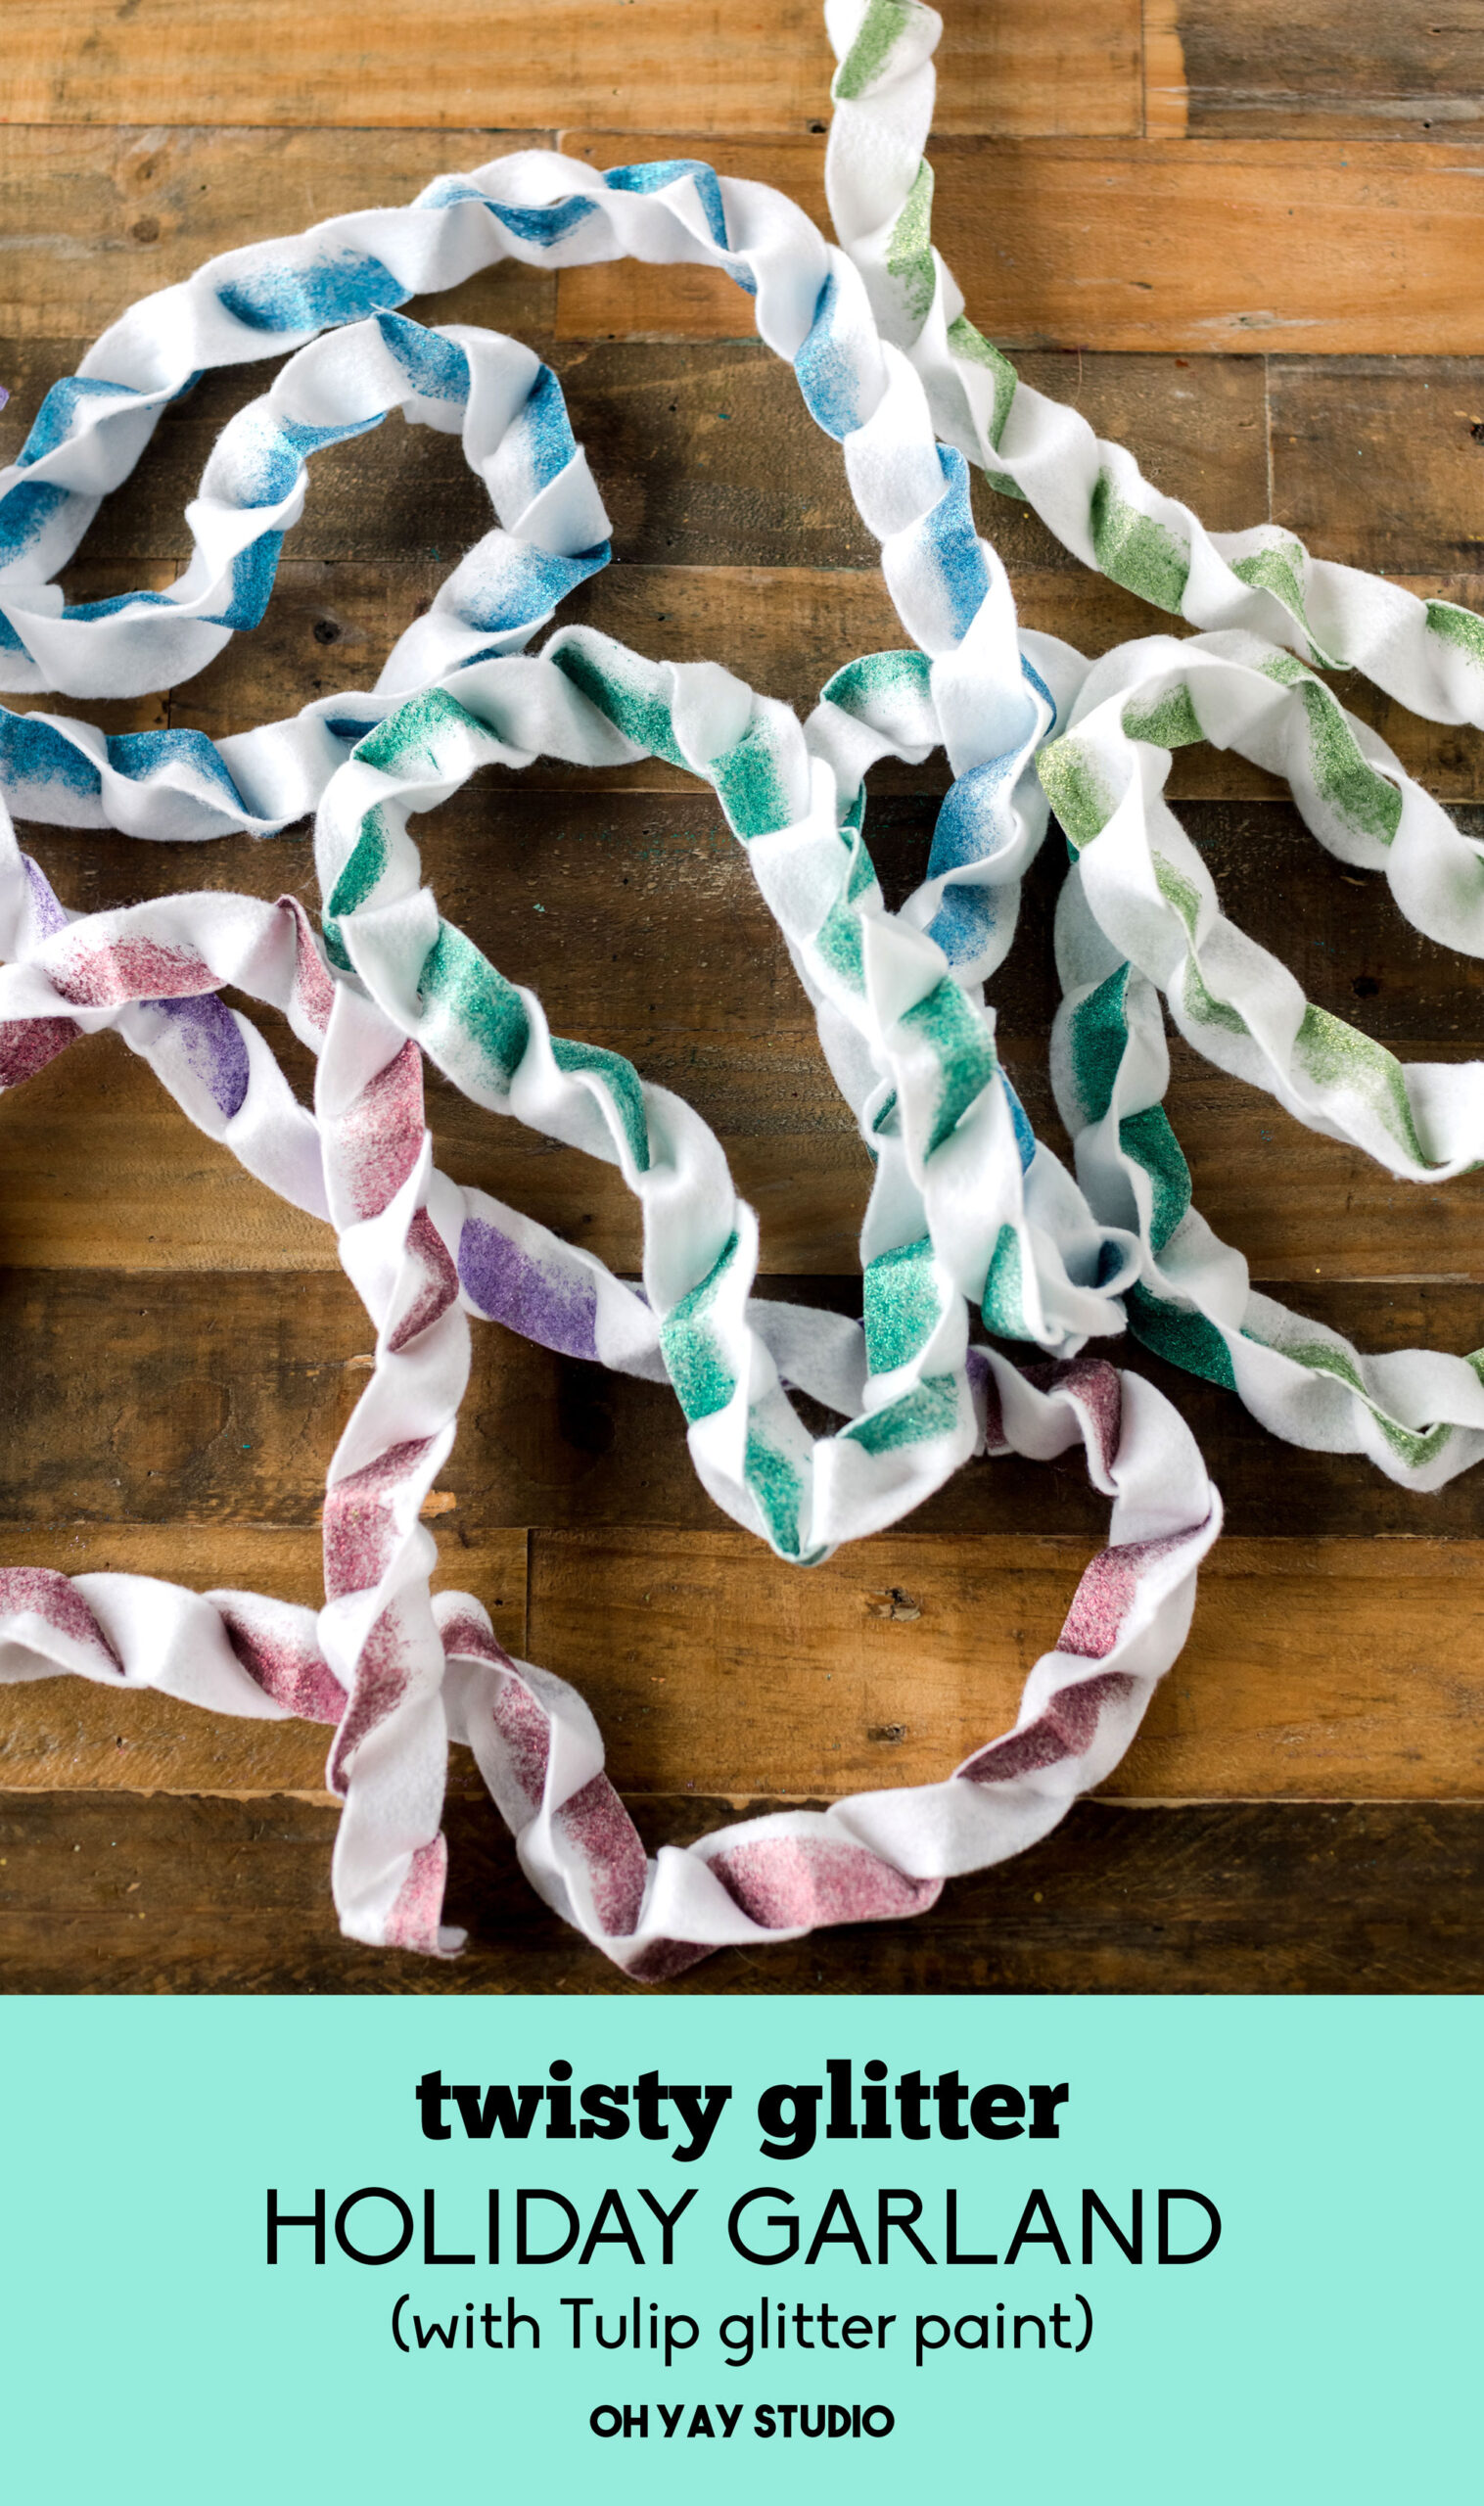
Glitter Christmas Garland DIY
*this project is in partnership with Tulip

We are a “ALL THE COLORS” kind of Christmas family around our house with decor….are you too? Or are you more of a red and green fam OR even a tone-on-tone decorating style? Either way, I have a gorgeous garland project for you this holiday season, one that can be customized to your decor style ANNND something even the kiddos can help out with! 🙂

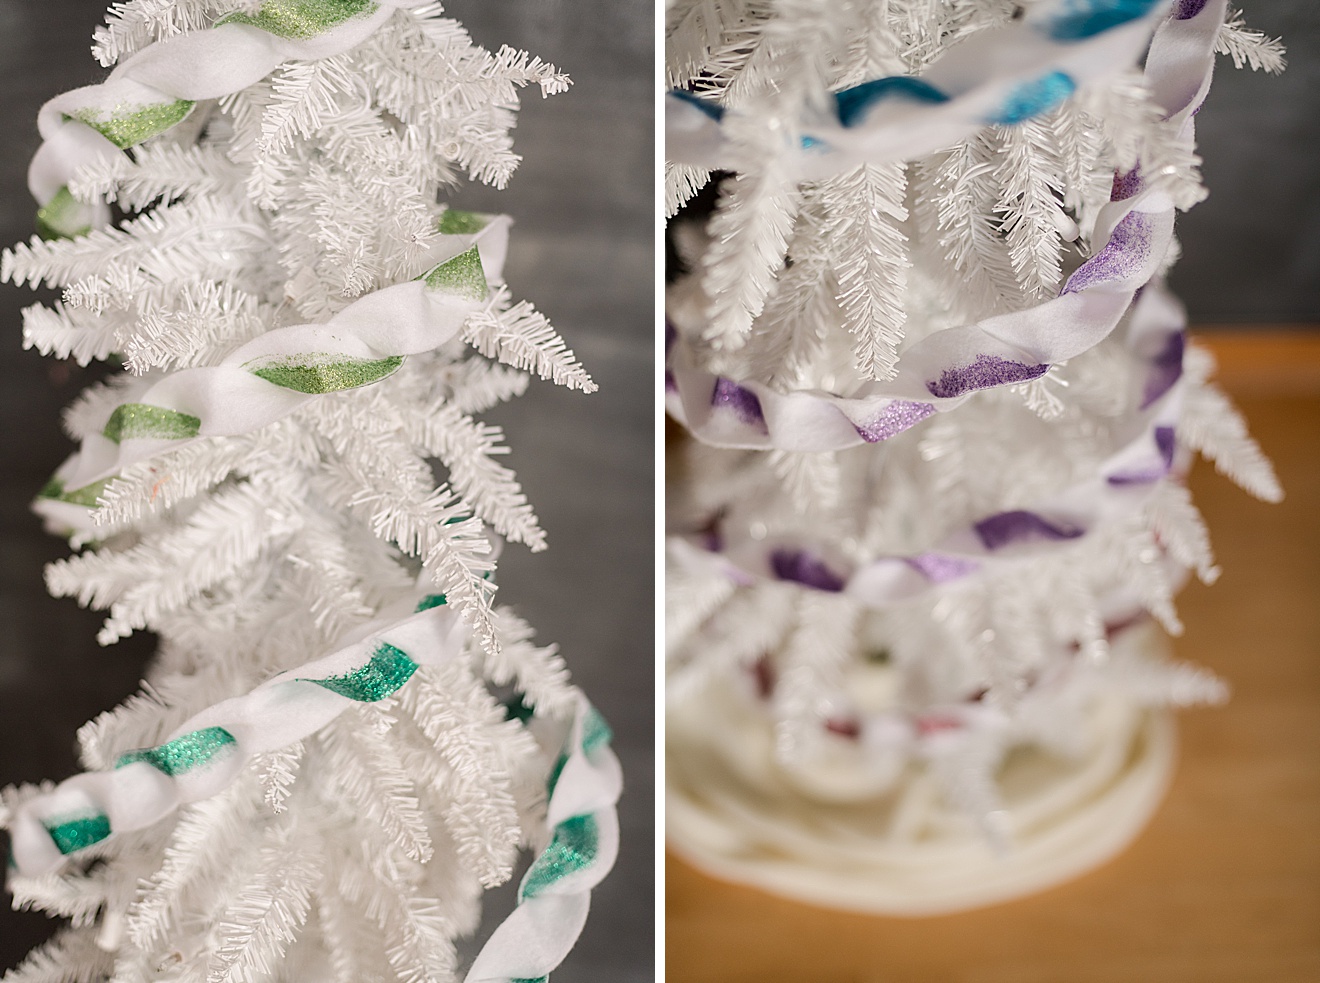
We needed a garland for a tall, skinny, kind of smallish white Christmas tree that we put in our basement. It’s the kind of tree that just lights up the whole room with its cheer and I wanted something that was happy and bright and simple. ENTER: this folded, twisted garland!
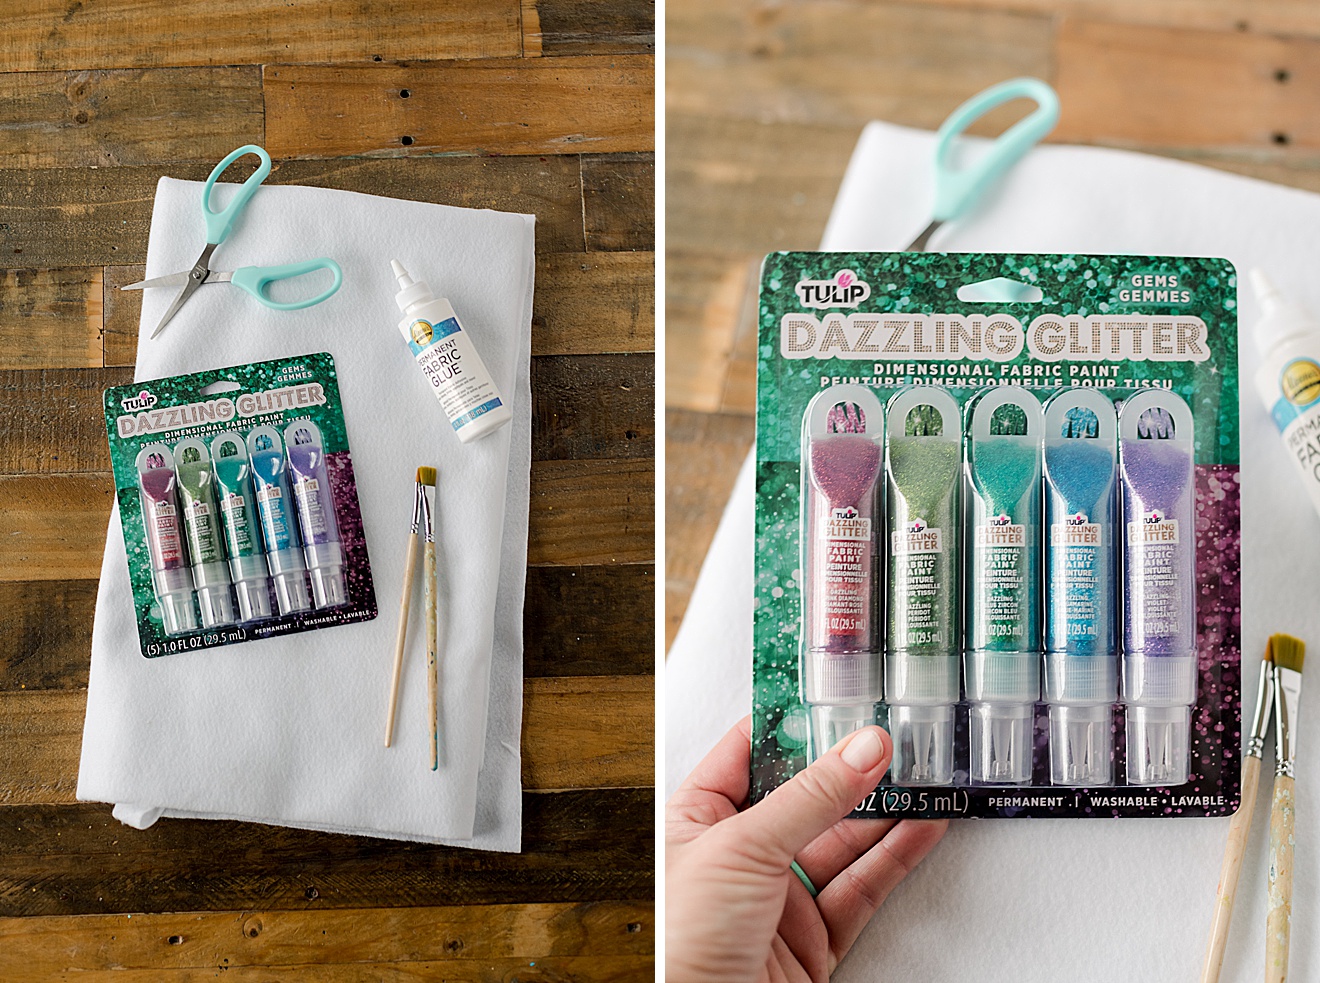
MATERIALS:
- 1/4 – 1/2 yard of white felt
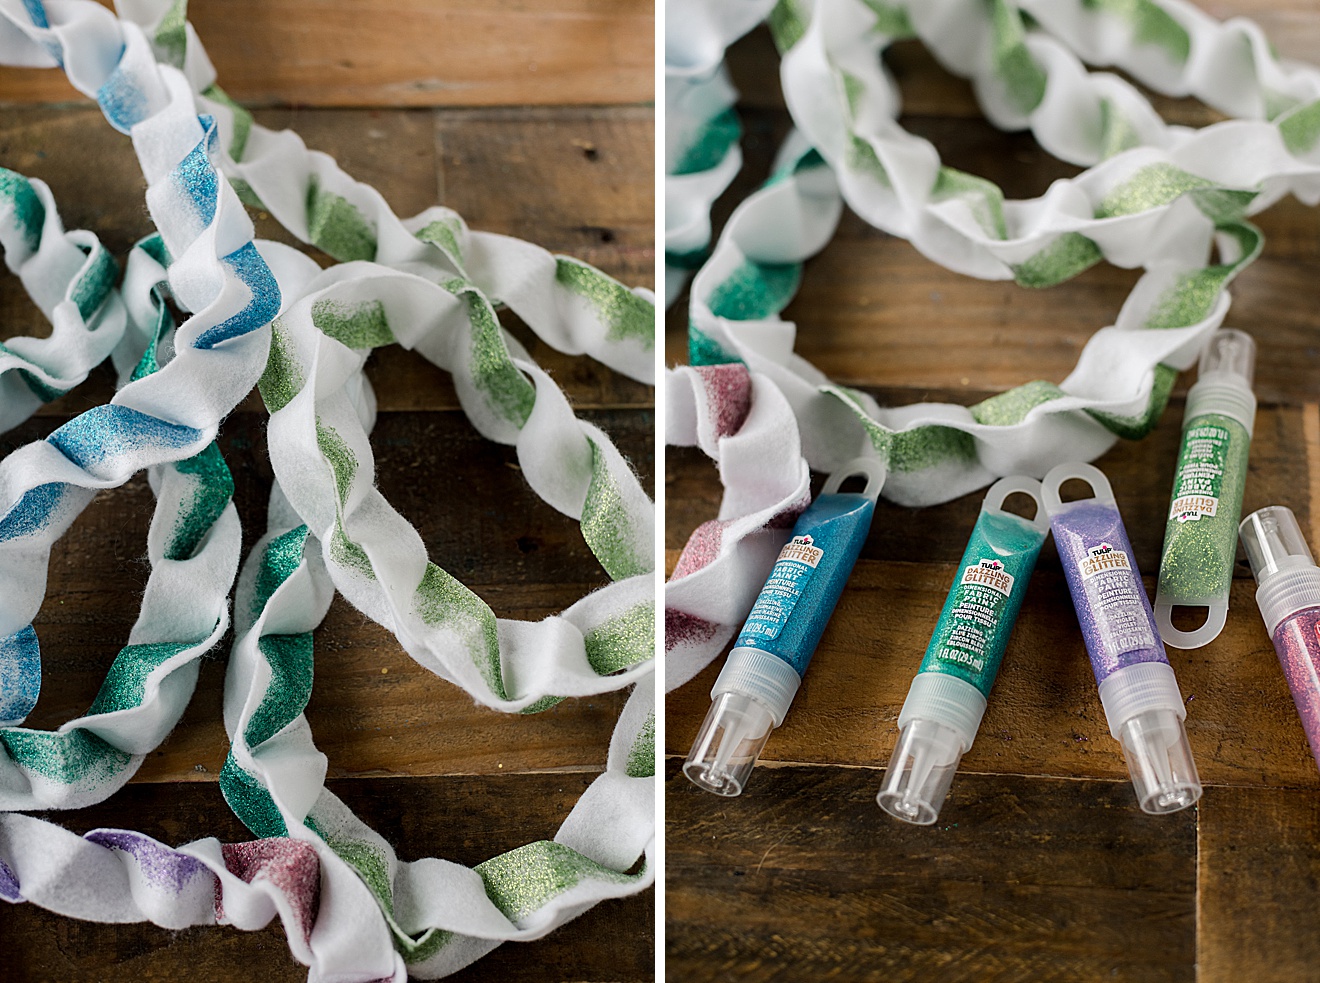
- Dazzling glitter dimensional fabric paint from Tulip (this stuff is SOOOO glitzy and awesome for the holidays)
- Scissors or a rotary + cutting board
- Paint brush
- Aleene’s permanent fabric glue (you could also use a sewing machine if you have one available, but the glue is SUPER easy)!
INSTRUCTIONS:
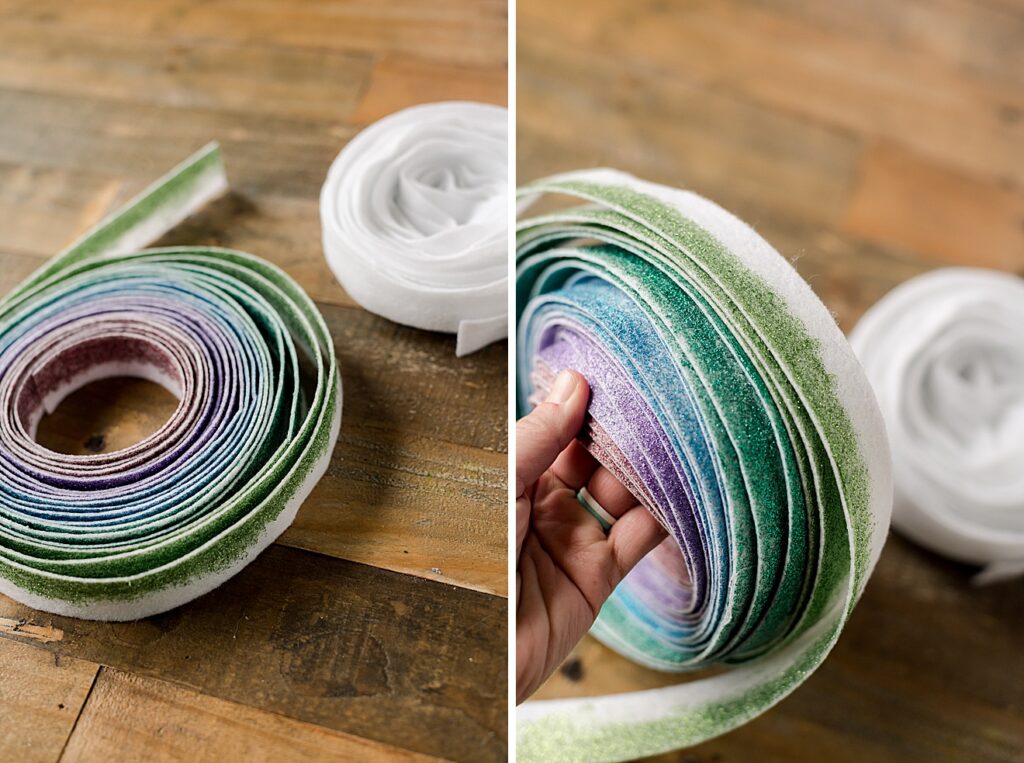
1. With your white felt, cut out 1- 1 1/4” inch strips the width of the fabric. Cut out an even number (I chose 10 so that I could have 1 of each of the 5 colors of glitter that come in the package) 🙂
Set aside half of the strips (I set aside 5) that will remain plain white for this project.
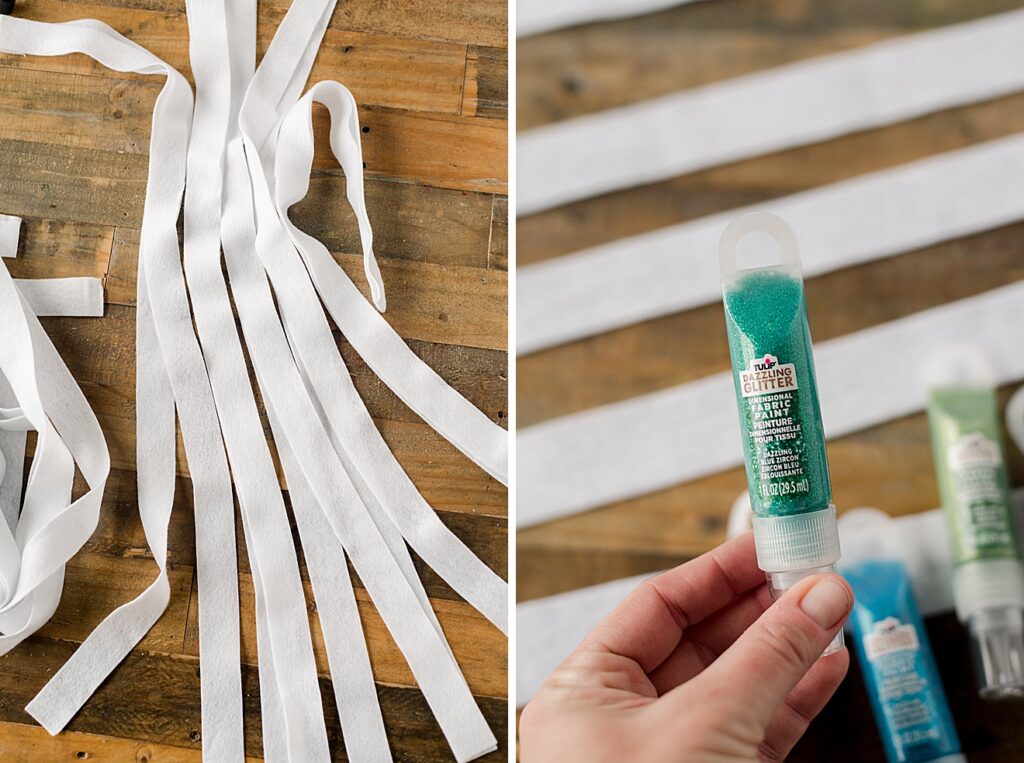
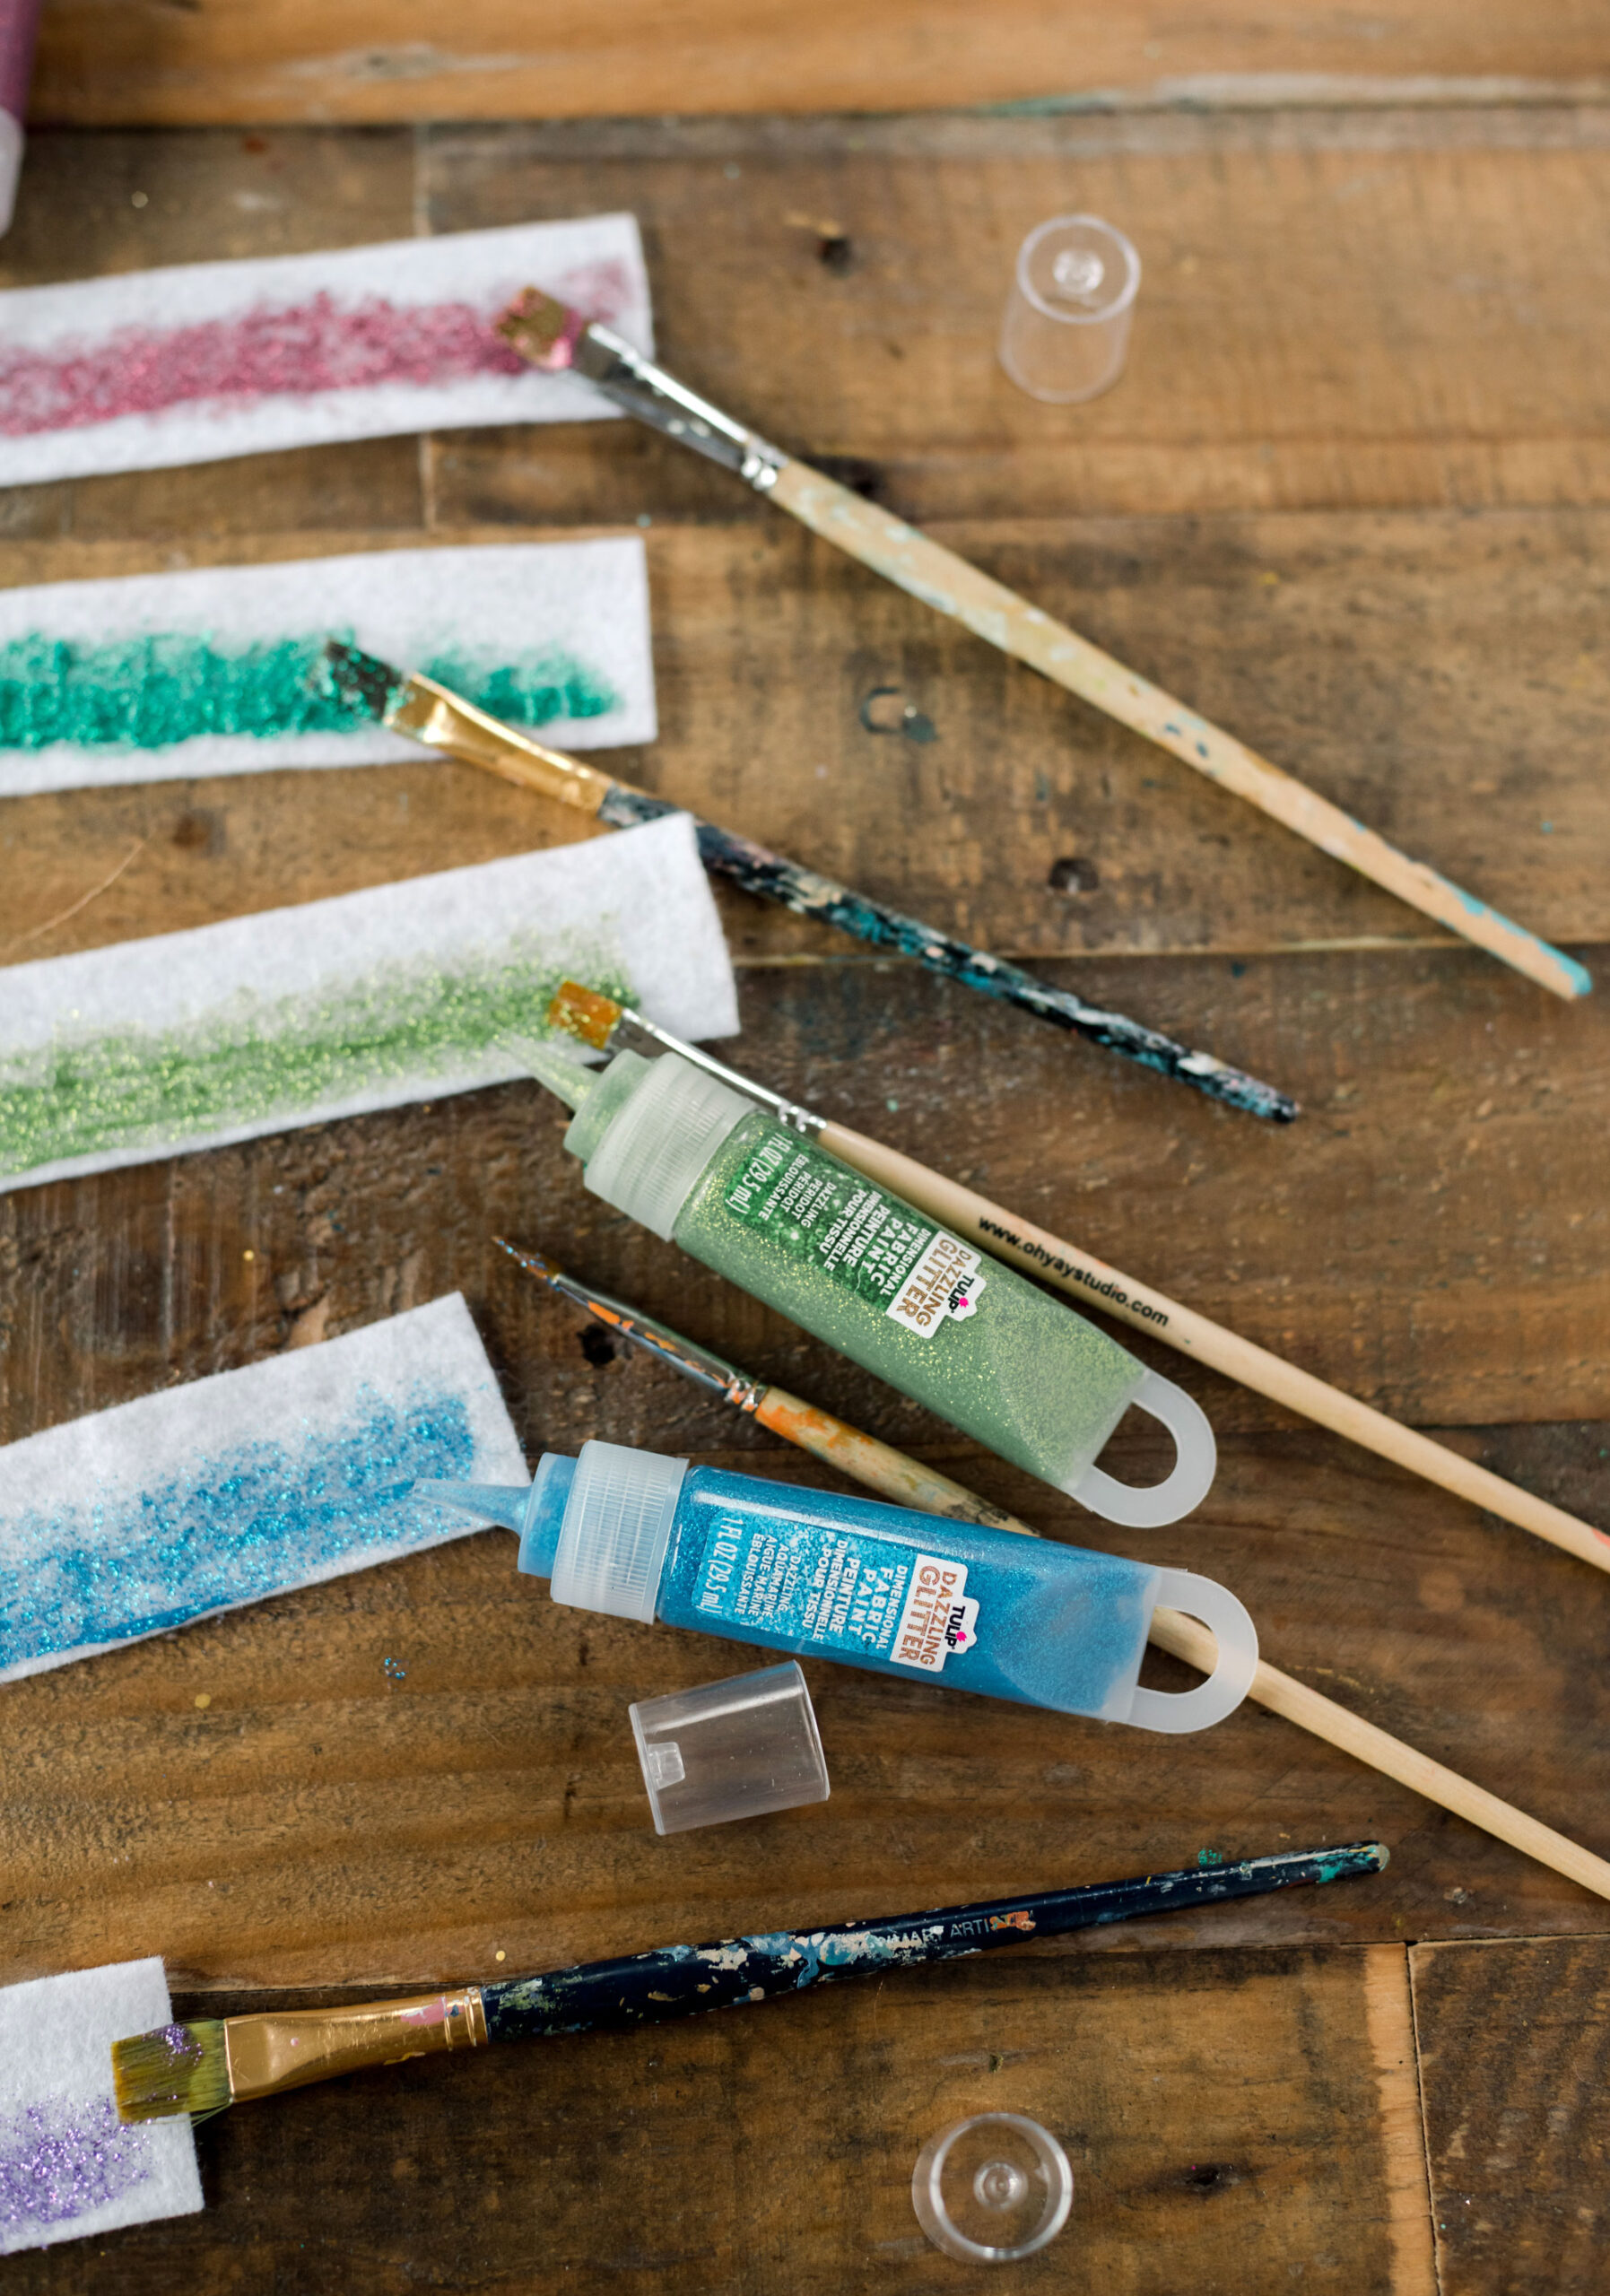
2. It’s time to add glitter 🙂 With a paint brush begin brushing some of the glitter glue onto the bottom half lengthwise of each strip of felt fabric (all but the 1/2 that you set aside….again, those will remain white).
I chose to run a bead of glue along the bottom edge of the felt and then use the paint brush to brush “up” towards the other edge of felt, leaving the bottom edge with a beautiful, organic “dipped” style of glitter glue.

**tip (I didn’t do this and wish I would have) – put a piece of paper or cardboard under your strips of felt so that the glue can be brushed VERY close to the edge without getting all over your table or surface. The glue isn’t hard to get off of a non-porous surface, BUUUT just something that would have made this project easier without extra clean up! 🙂
Allow these strips to fully dry and then repeat along the backside.
Allow to fully dry again 🙂
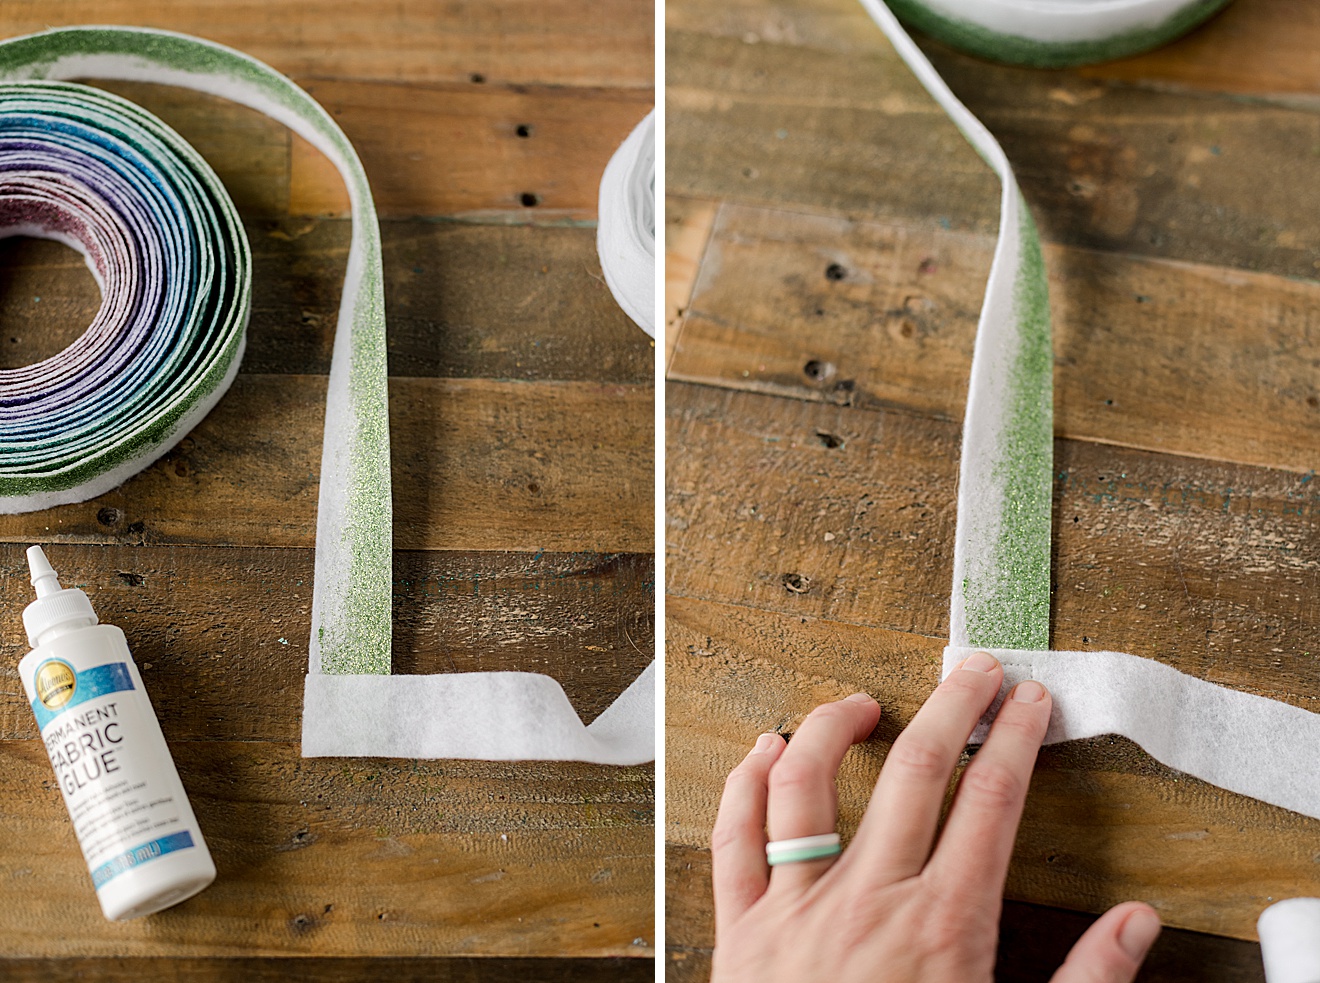
3. We will need to make 1 continuous strip of felt, so you will use some of Aleene’s permanent fabric glue (or even Aleene’s felt Tacky glue) to attach all of the glitter strips together. Do this by overlapping a small piece of each strip of felt to make one continuous strip. Repeat this with all of your white strips to make one continuous white strip.
Allow to dry.
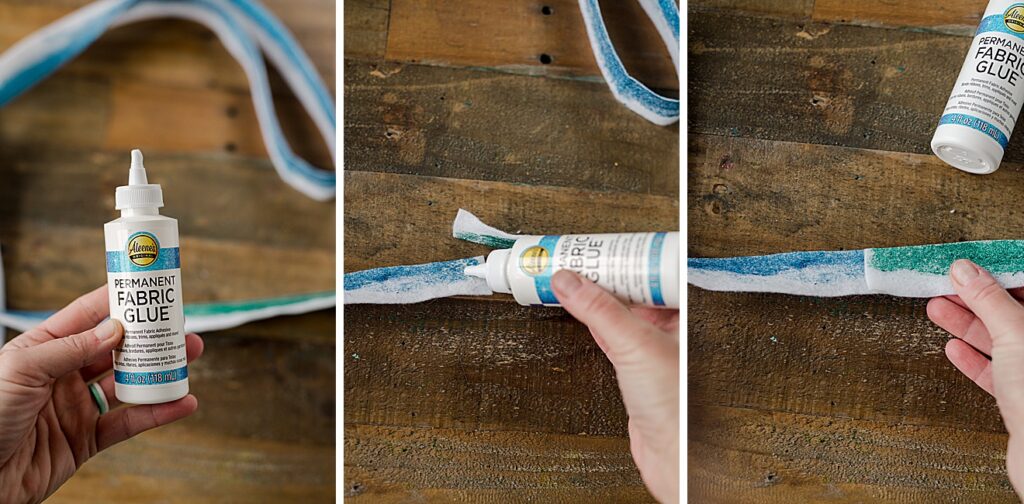
**you could also use a sewing machine to stitch together if you have one accessible as well
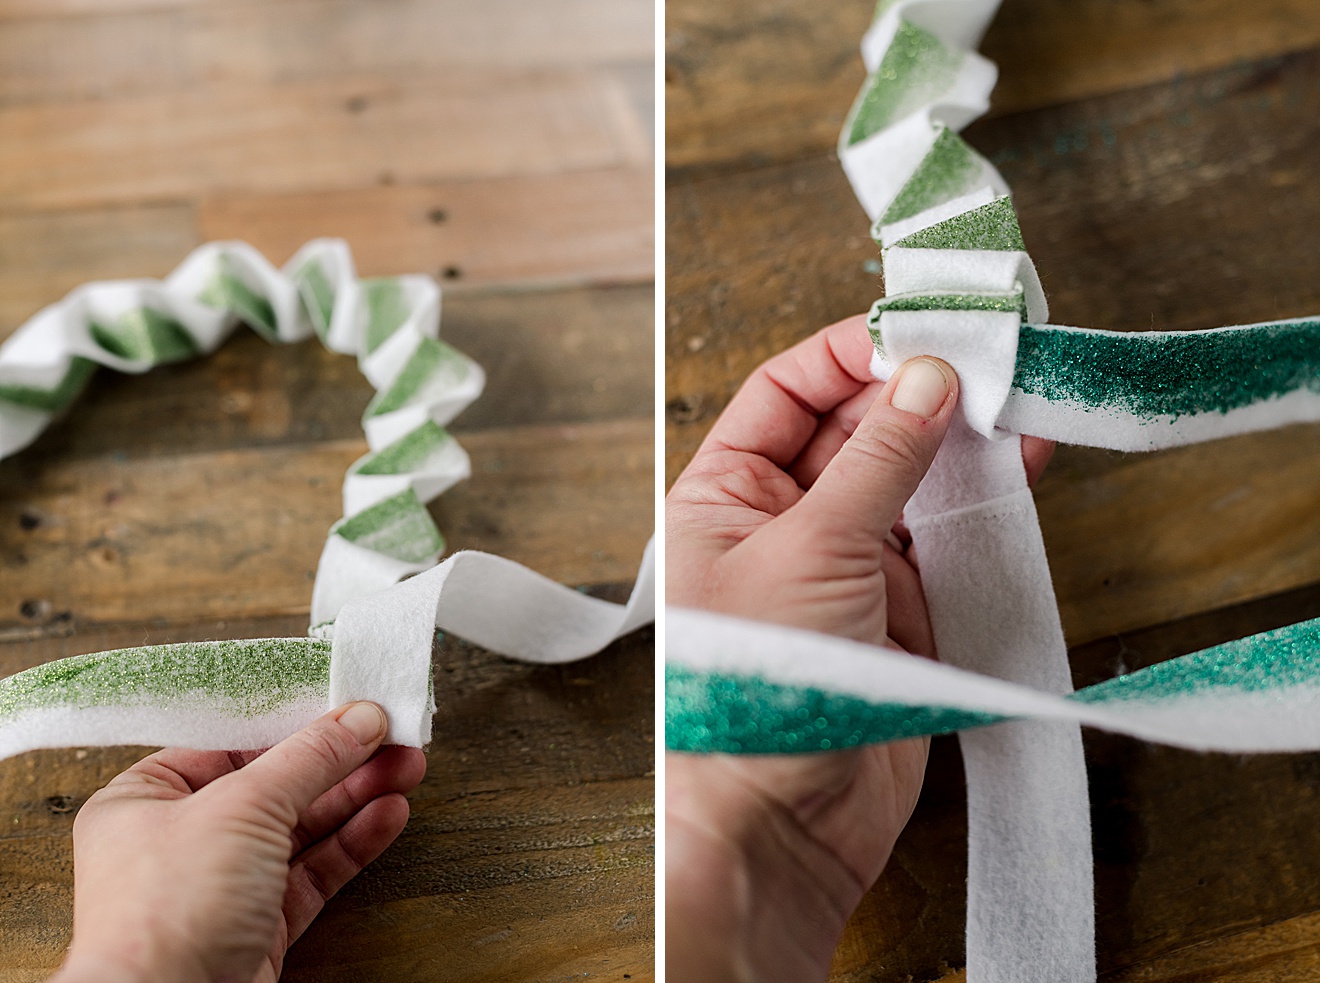
4. Roll up the glittered long strip and the white long strip to make this next step more manageable.
You will lay out each long strip perpendicular to one along, forming the letter “L” to get started. I laid the glittered strip down vertically and then laid the white strip horizontally, overlapping the edge (making the flush). You will attach both long strips by putting a dab of fabric glue (or stitching) to keep them secure.
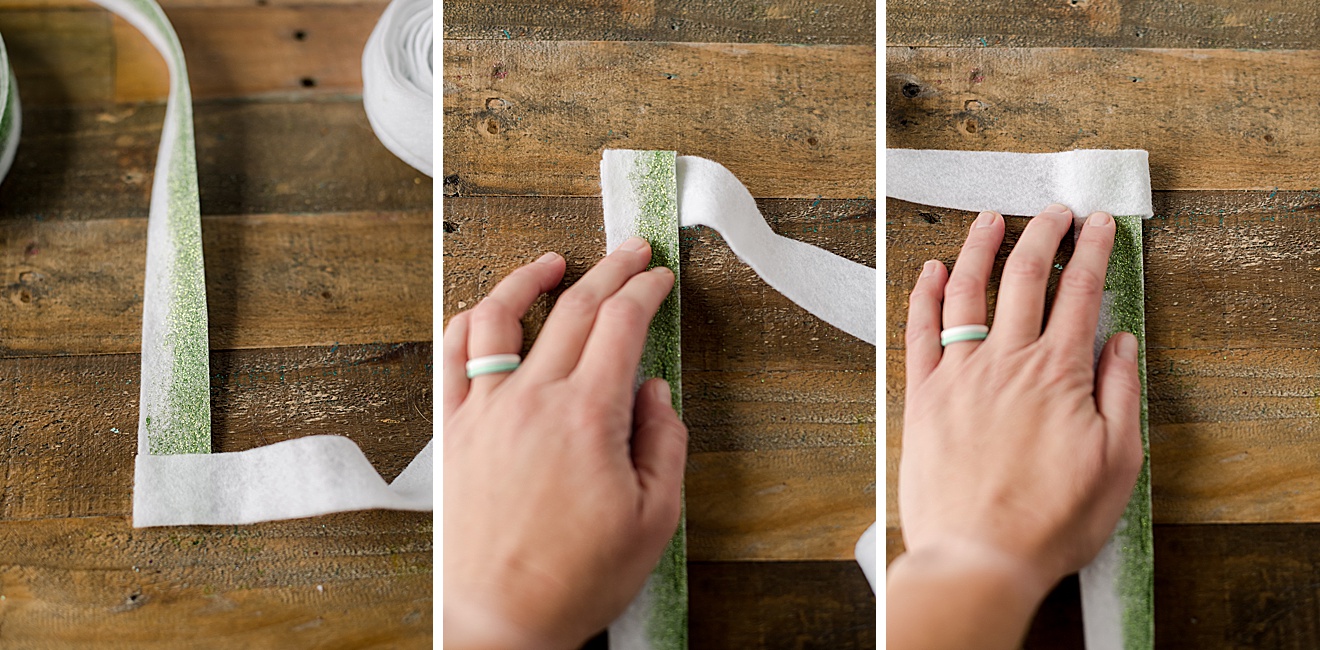
5. Now we will overlap the garland and make the twist. (I was a kid of the 80’s and used to do this with my fruit stripe gum wrappers all the time…..so perhaps you did too)! 🙂 You will essentially alternate glitter strip, white strip, glitter strip, white strip and overlap them back and forth.
So begin by overlapping or folding the glitter strip over top of white strip, then grab the white strip and fold it over top of the glitter strip, then fold glitter strip over top of the white strip, keep folding back and forth and back and forth making sure that you are keeping the edges flush with the sides as a “square” or 90* angle.
Repeat the folding for the length of the strips.
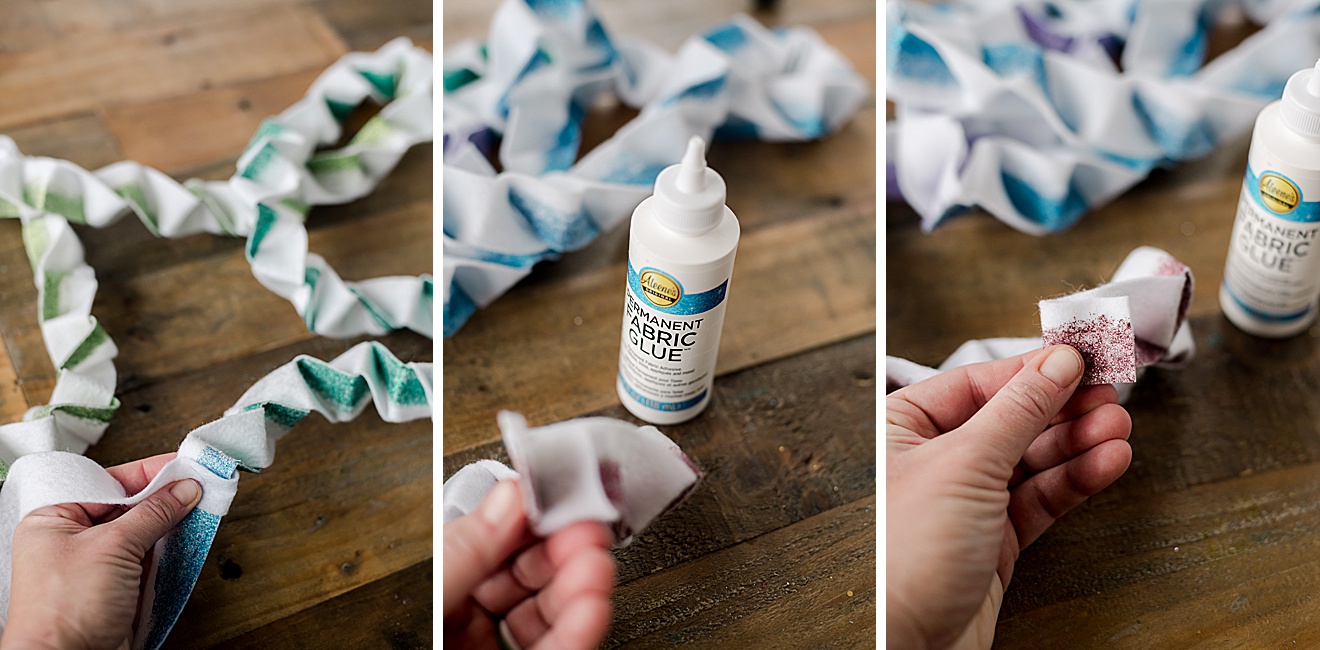
Once you get to the end, put one more dab of glue to secure your twist (or stitch in place). Trim any extra long edge to make this end flush, then hang on your tree or mantle and enjoy the glittery shimmering in the light of those holiday lights! 🙂