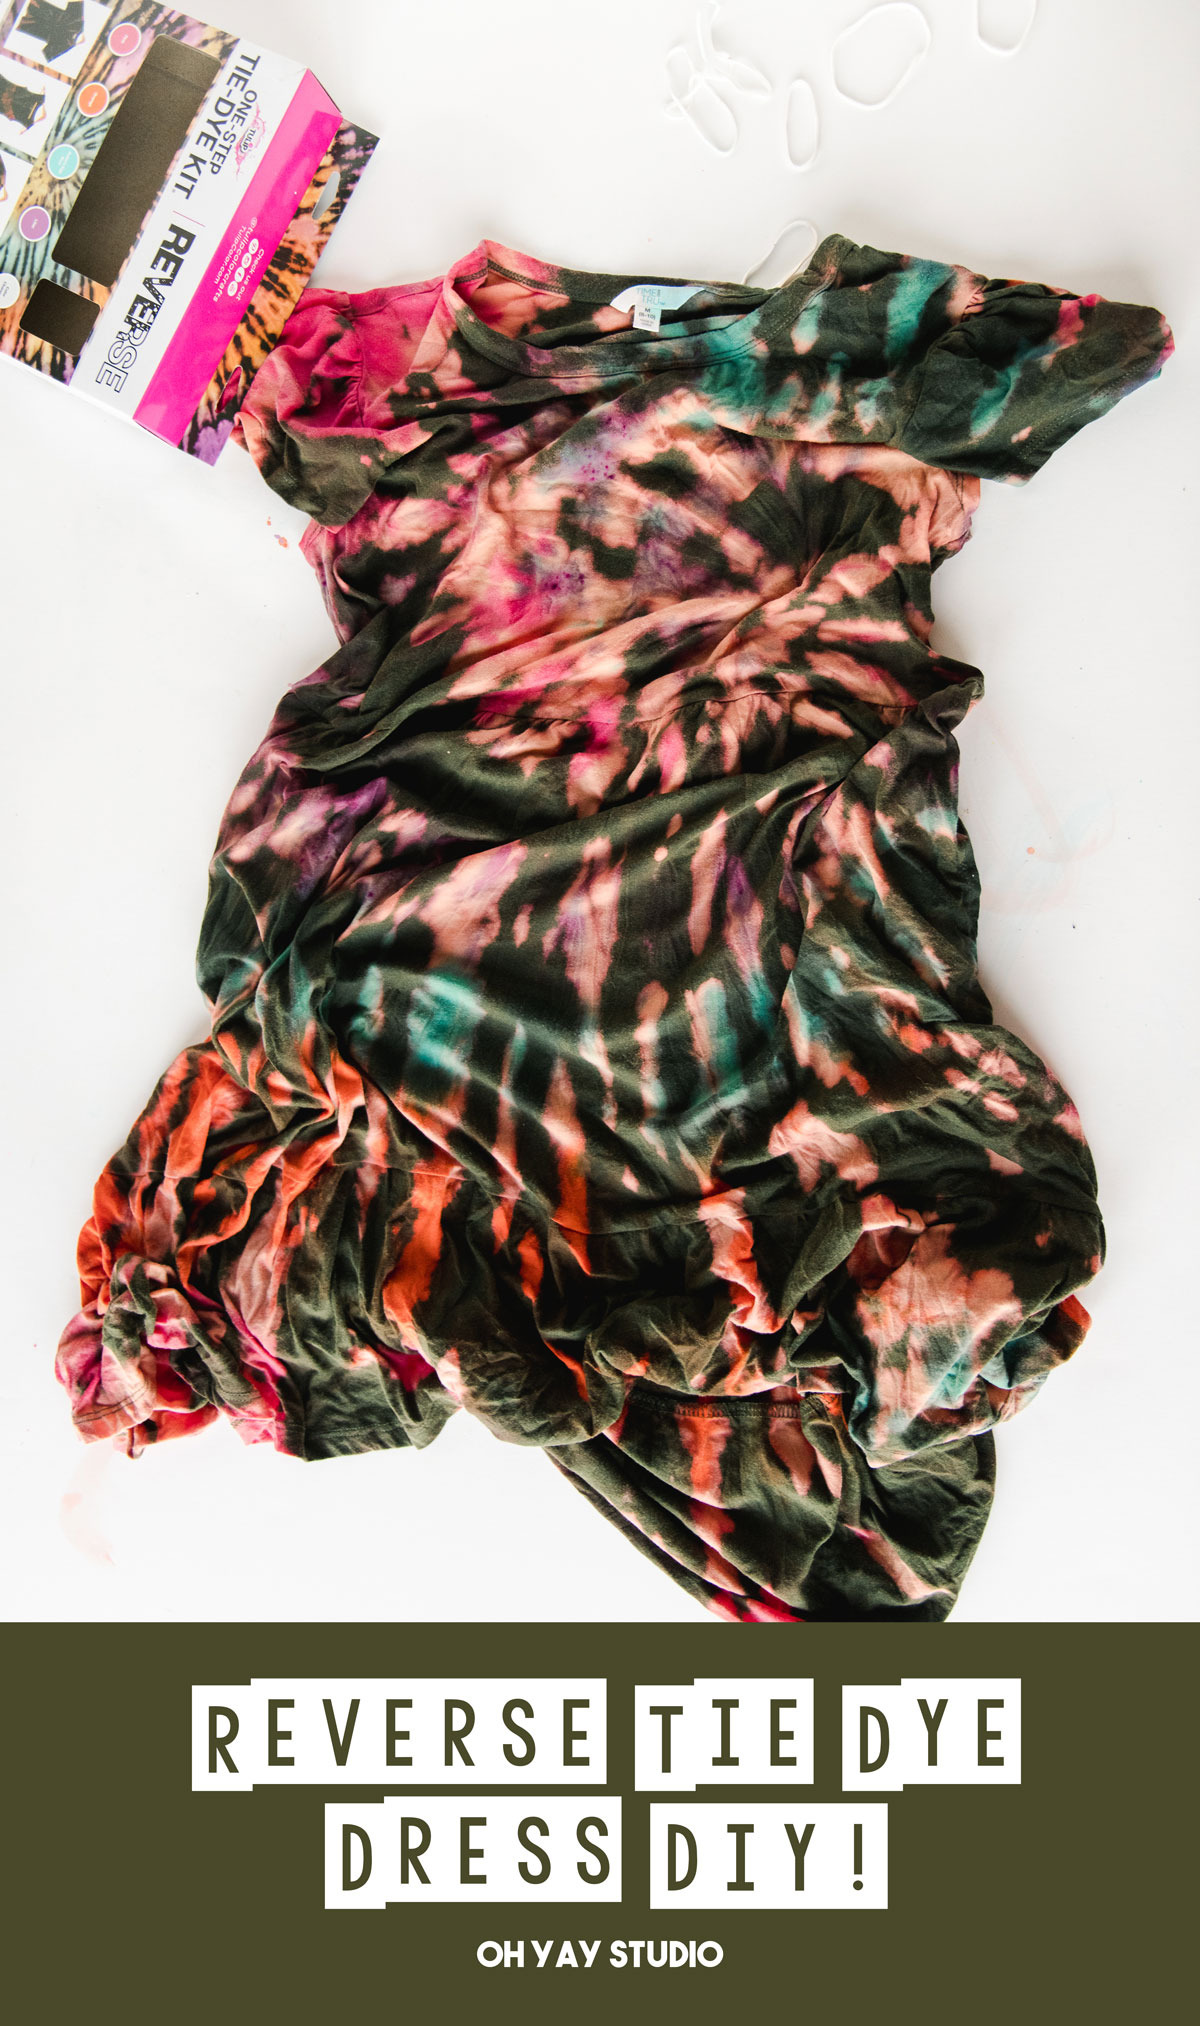
Reverse tie dye dress!
this project is in partnership with Tulip and their amazing tie dye kits
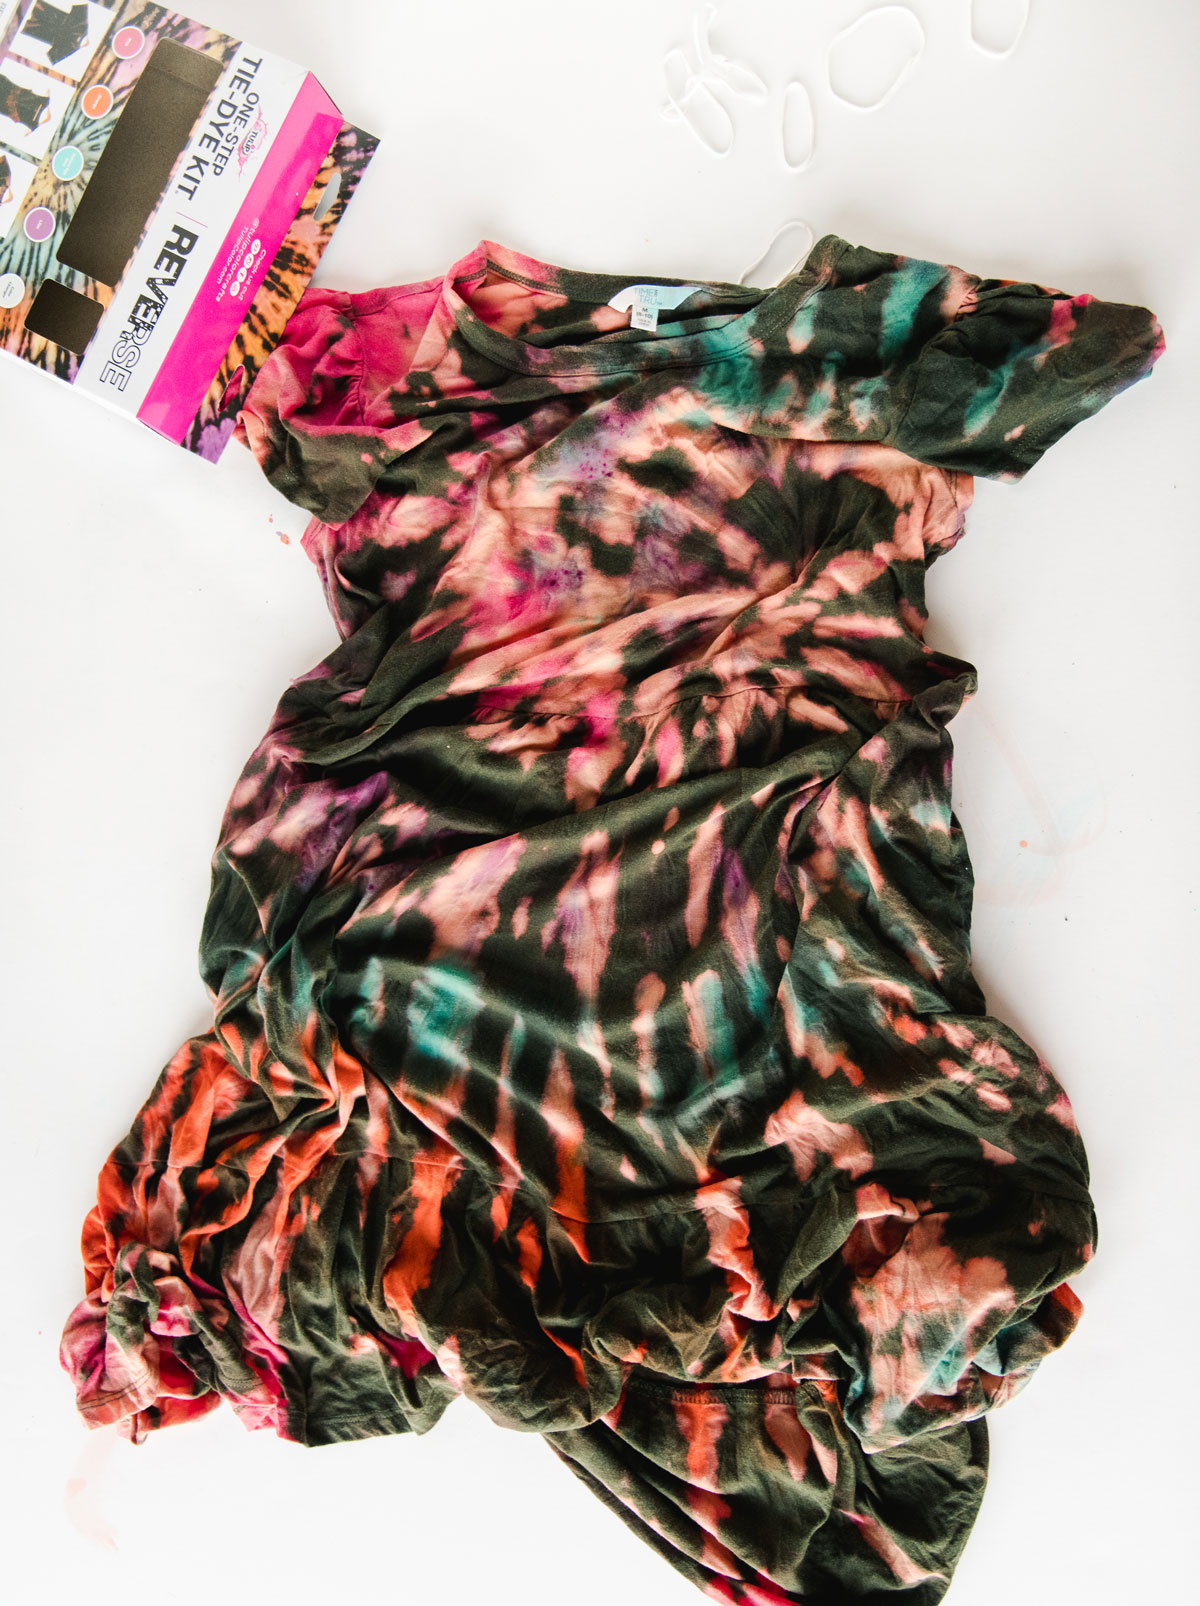
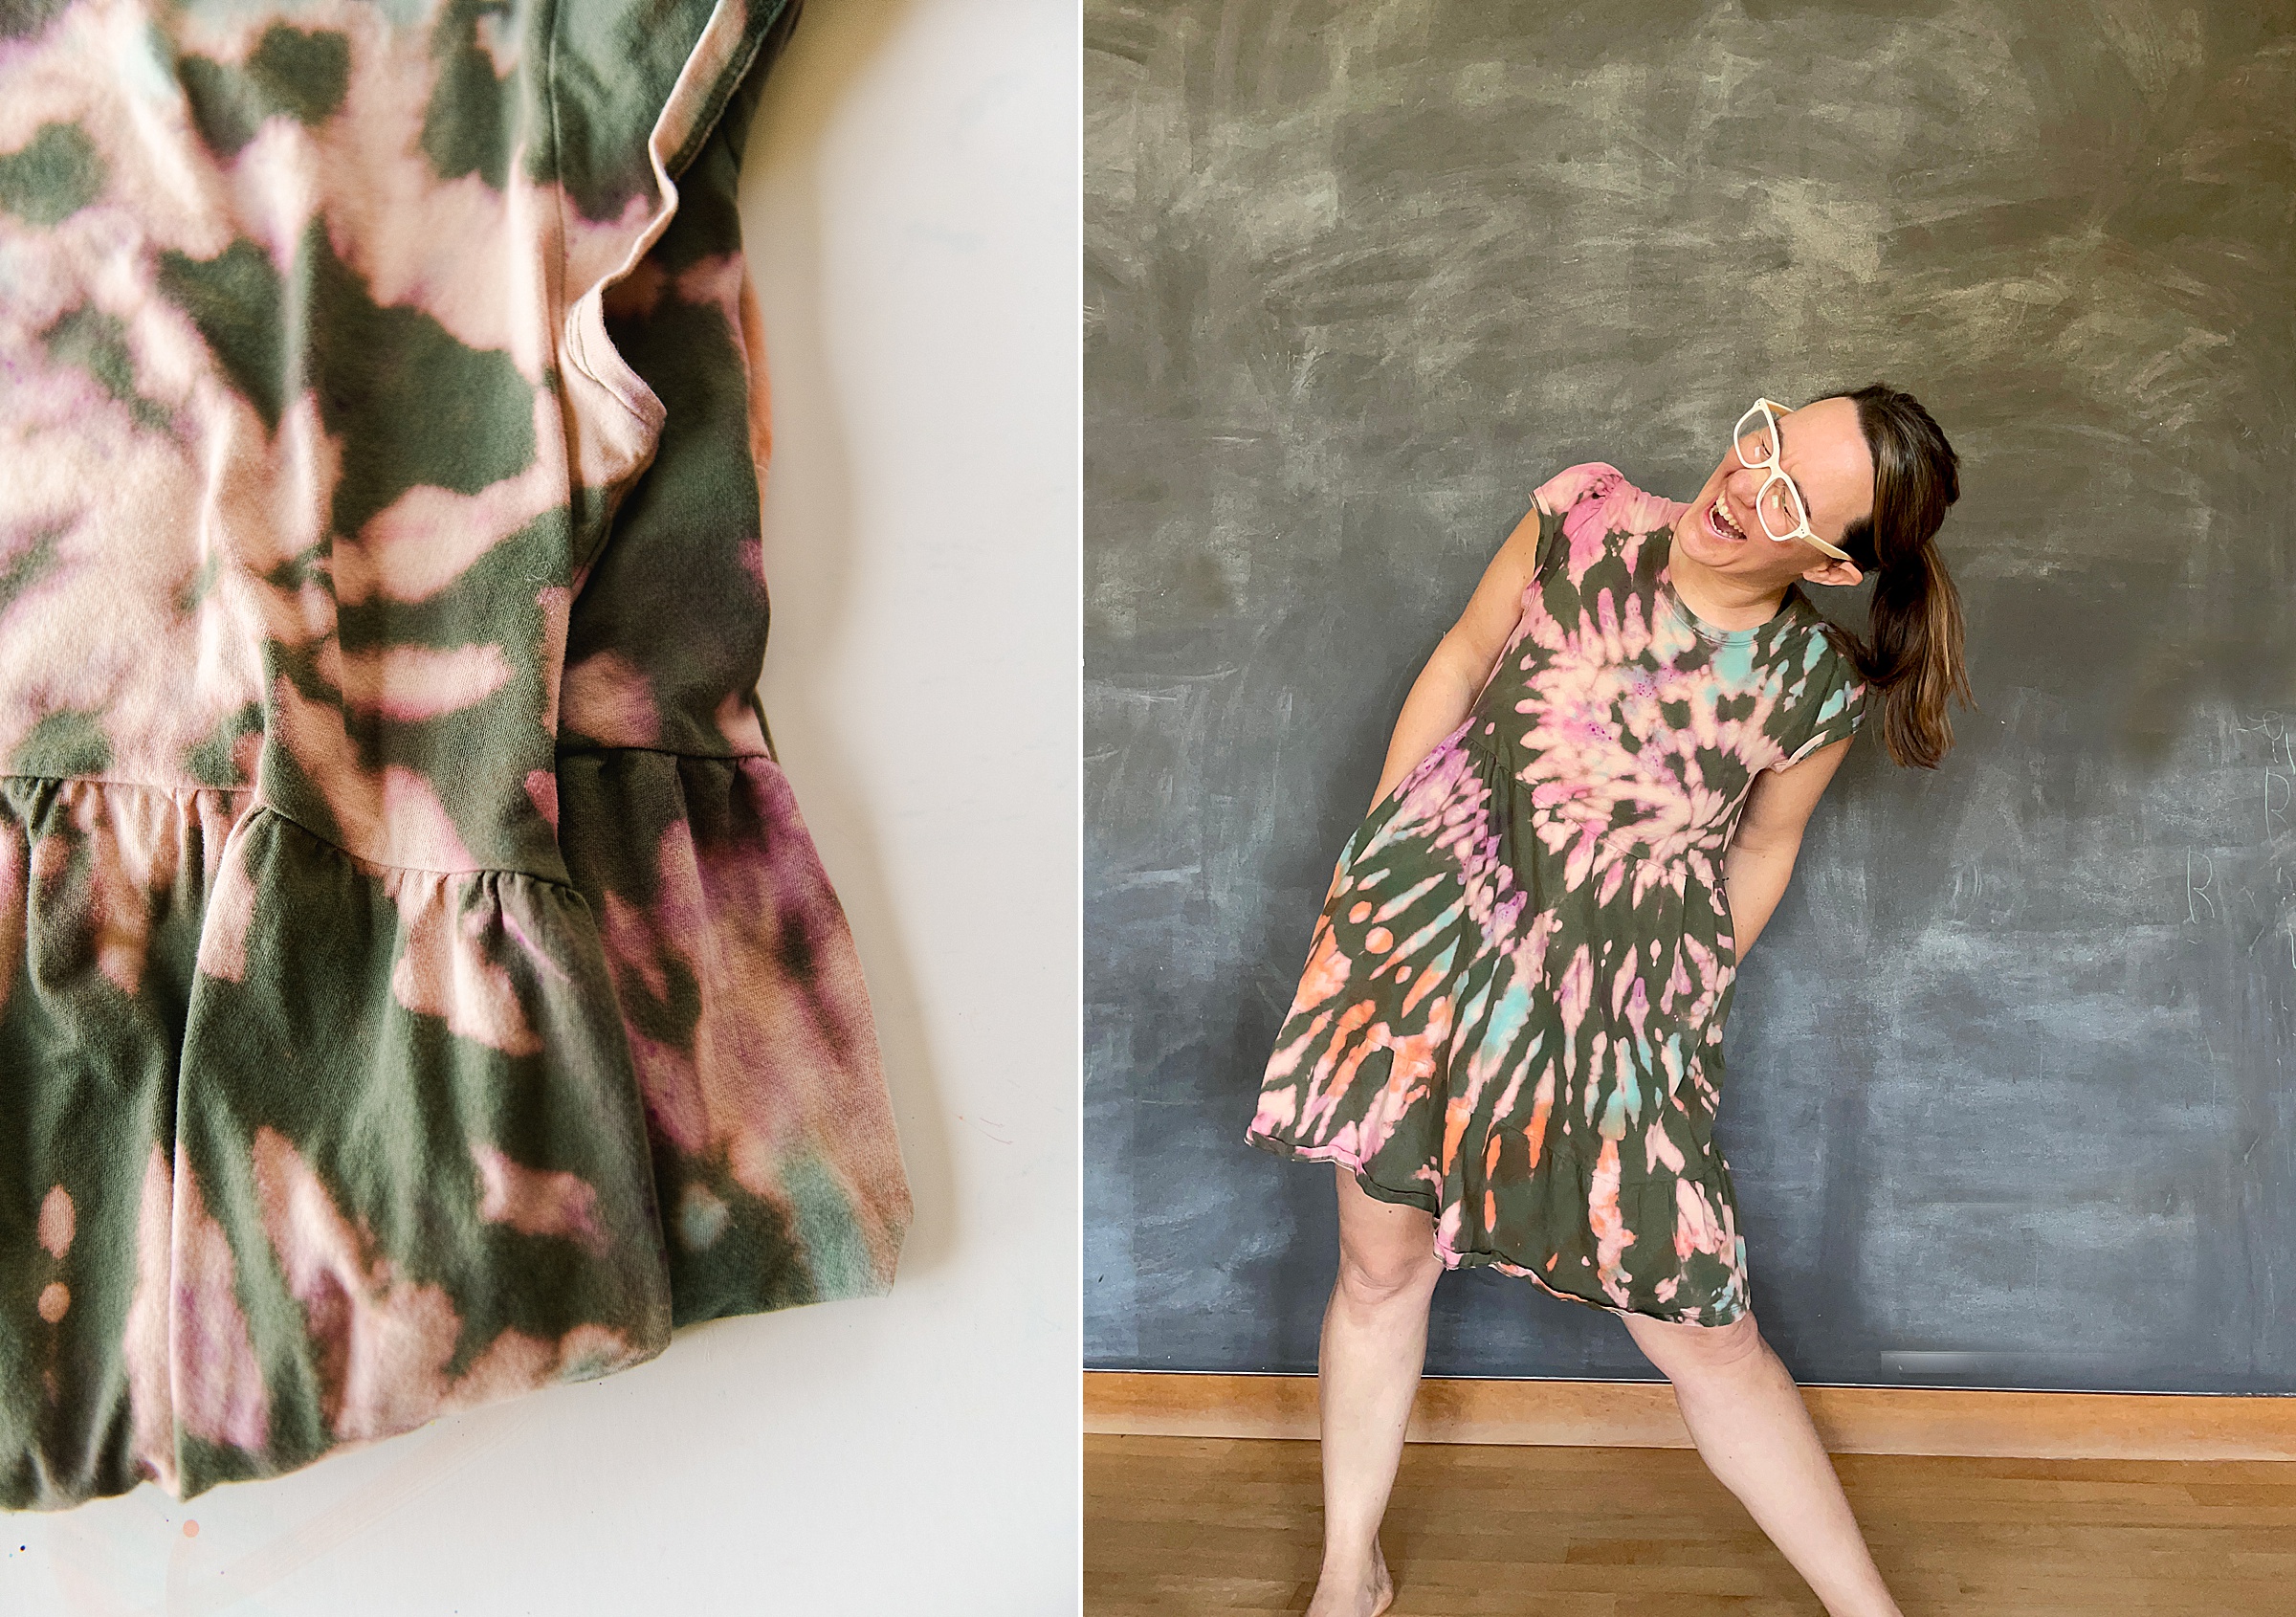
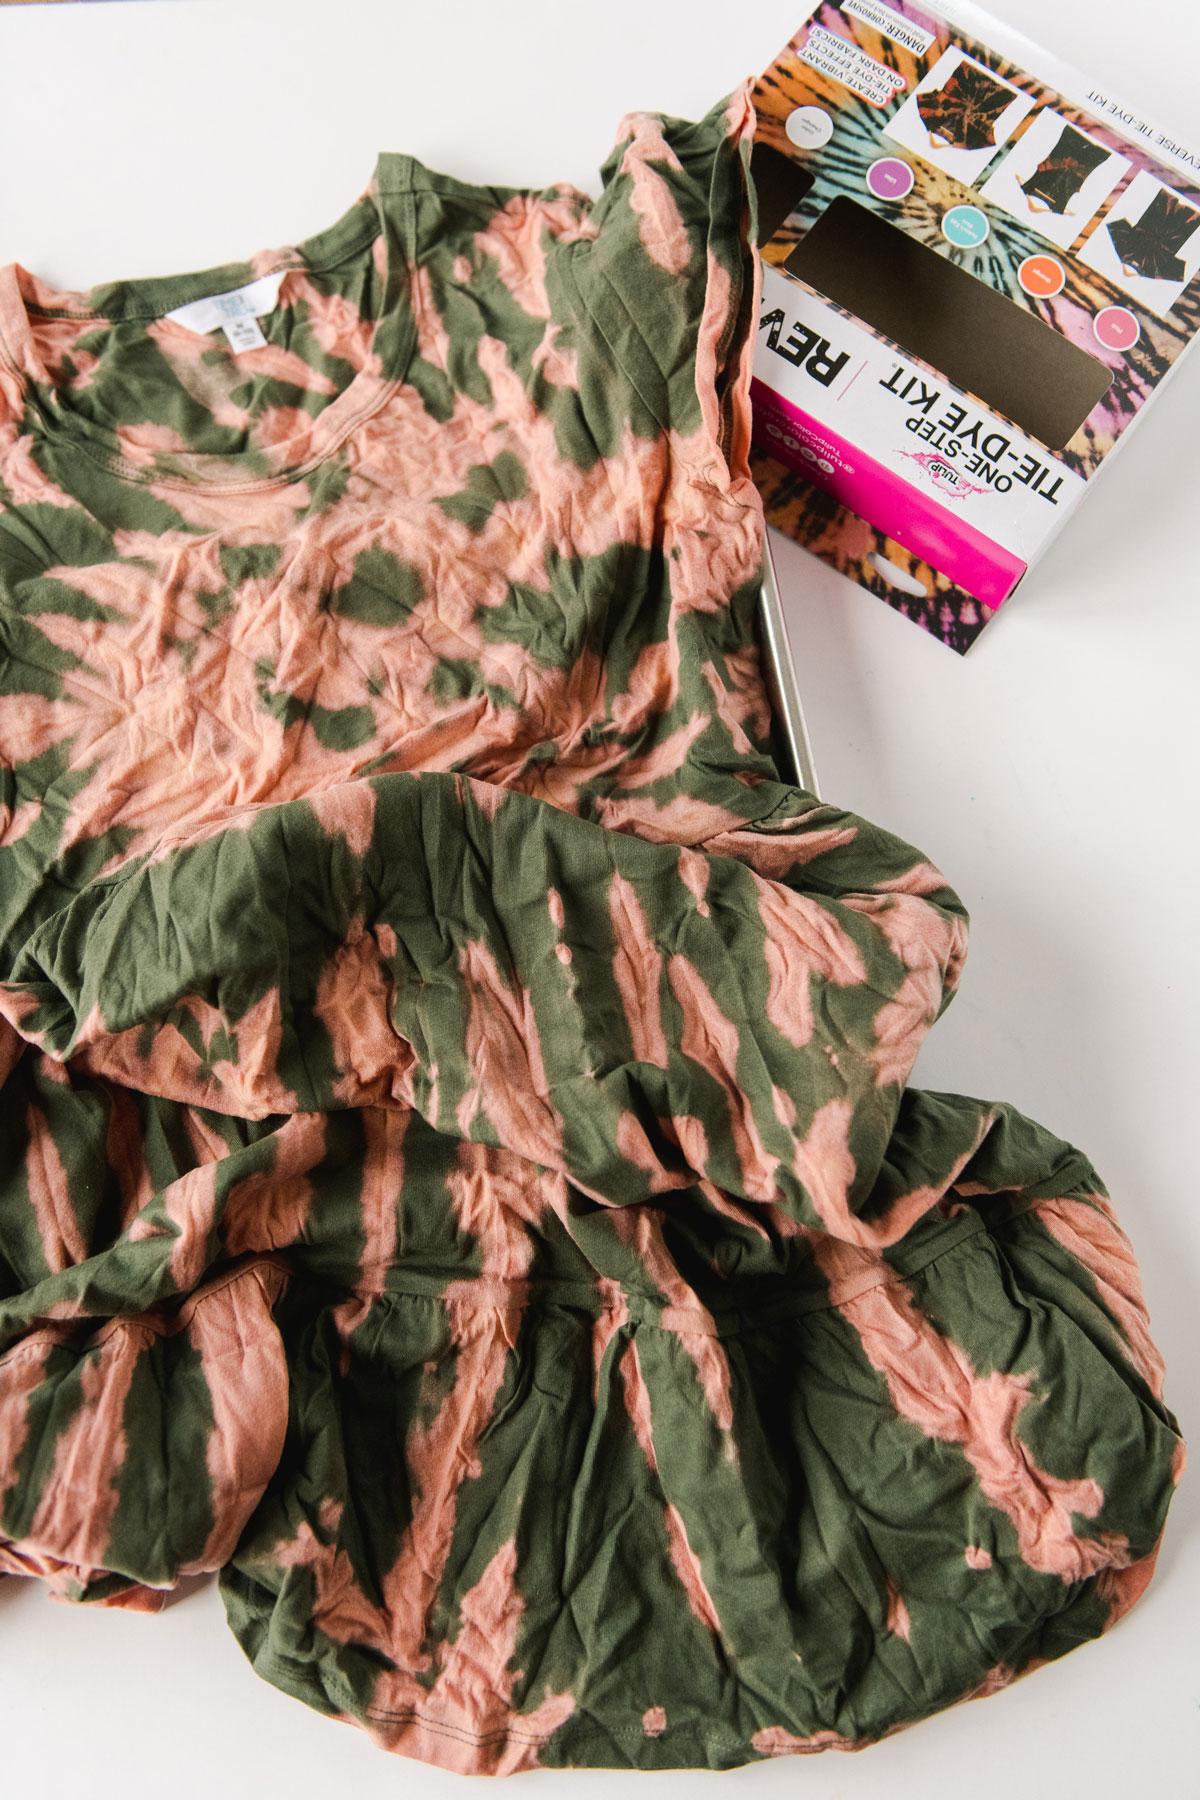
I have tie dyed my share of articles of clothing, BUT A DRESS! This is where things get fun! And not only did I dye it, I REVERSE DYED IT! Have you see this amazing trend?
Basically reverse dying is where you use a solution that lifts the pigment of the clothing so that it ends with this super cool two-toned look! Today, while using the Reverse Tie Dye kit from Tulip, I am going to give you all the tips, tricks, ins and outs on how I made my reverse tie dye summer dress!
Honestly, this revere tie dying is just the absolute best because it ends with a tone on tone color combo which feels so much more “fancy” – heck, the reason I decided to start with a dress!!!! 🙂 A perfect addition to my summer wardrobe, dontcha think? 🙂
This process is basically like 2 major steps – first you will bleach away the original color on your dark garment (in this case a dress) and then you will add in some color with the tie dye! Honestly, it’s like one giant, amazing, adult-ish science experiment and I unwrapping the tied up garment is LEGIT one of the best steps as you reveal the patterns and colors!!! 🙂
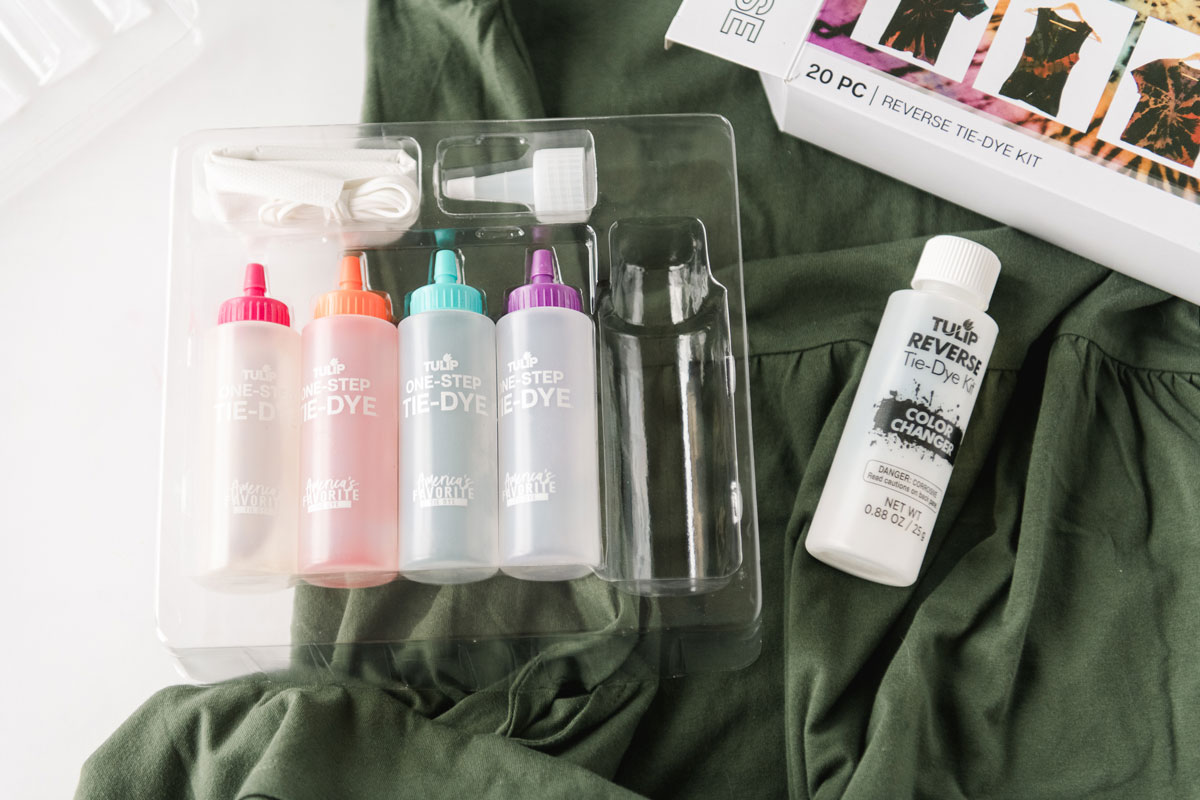
MATERIALS:
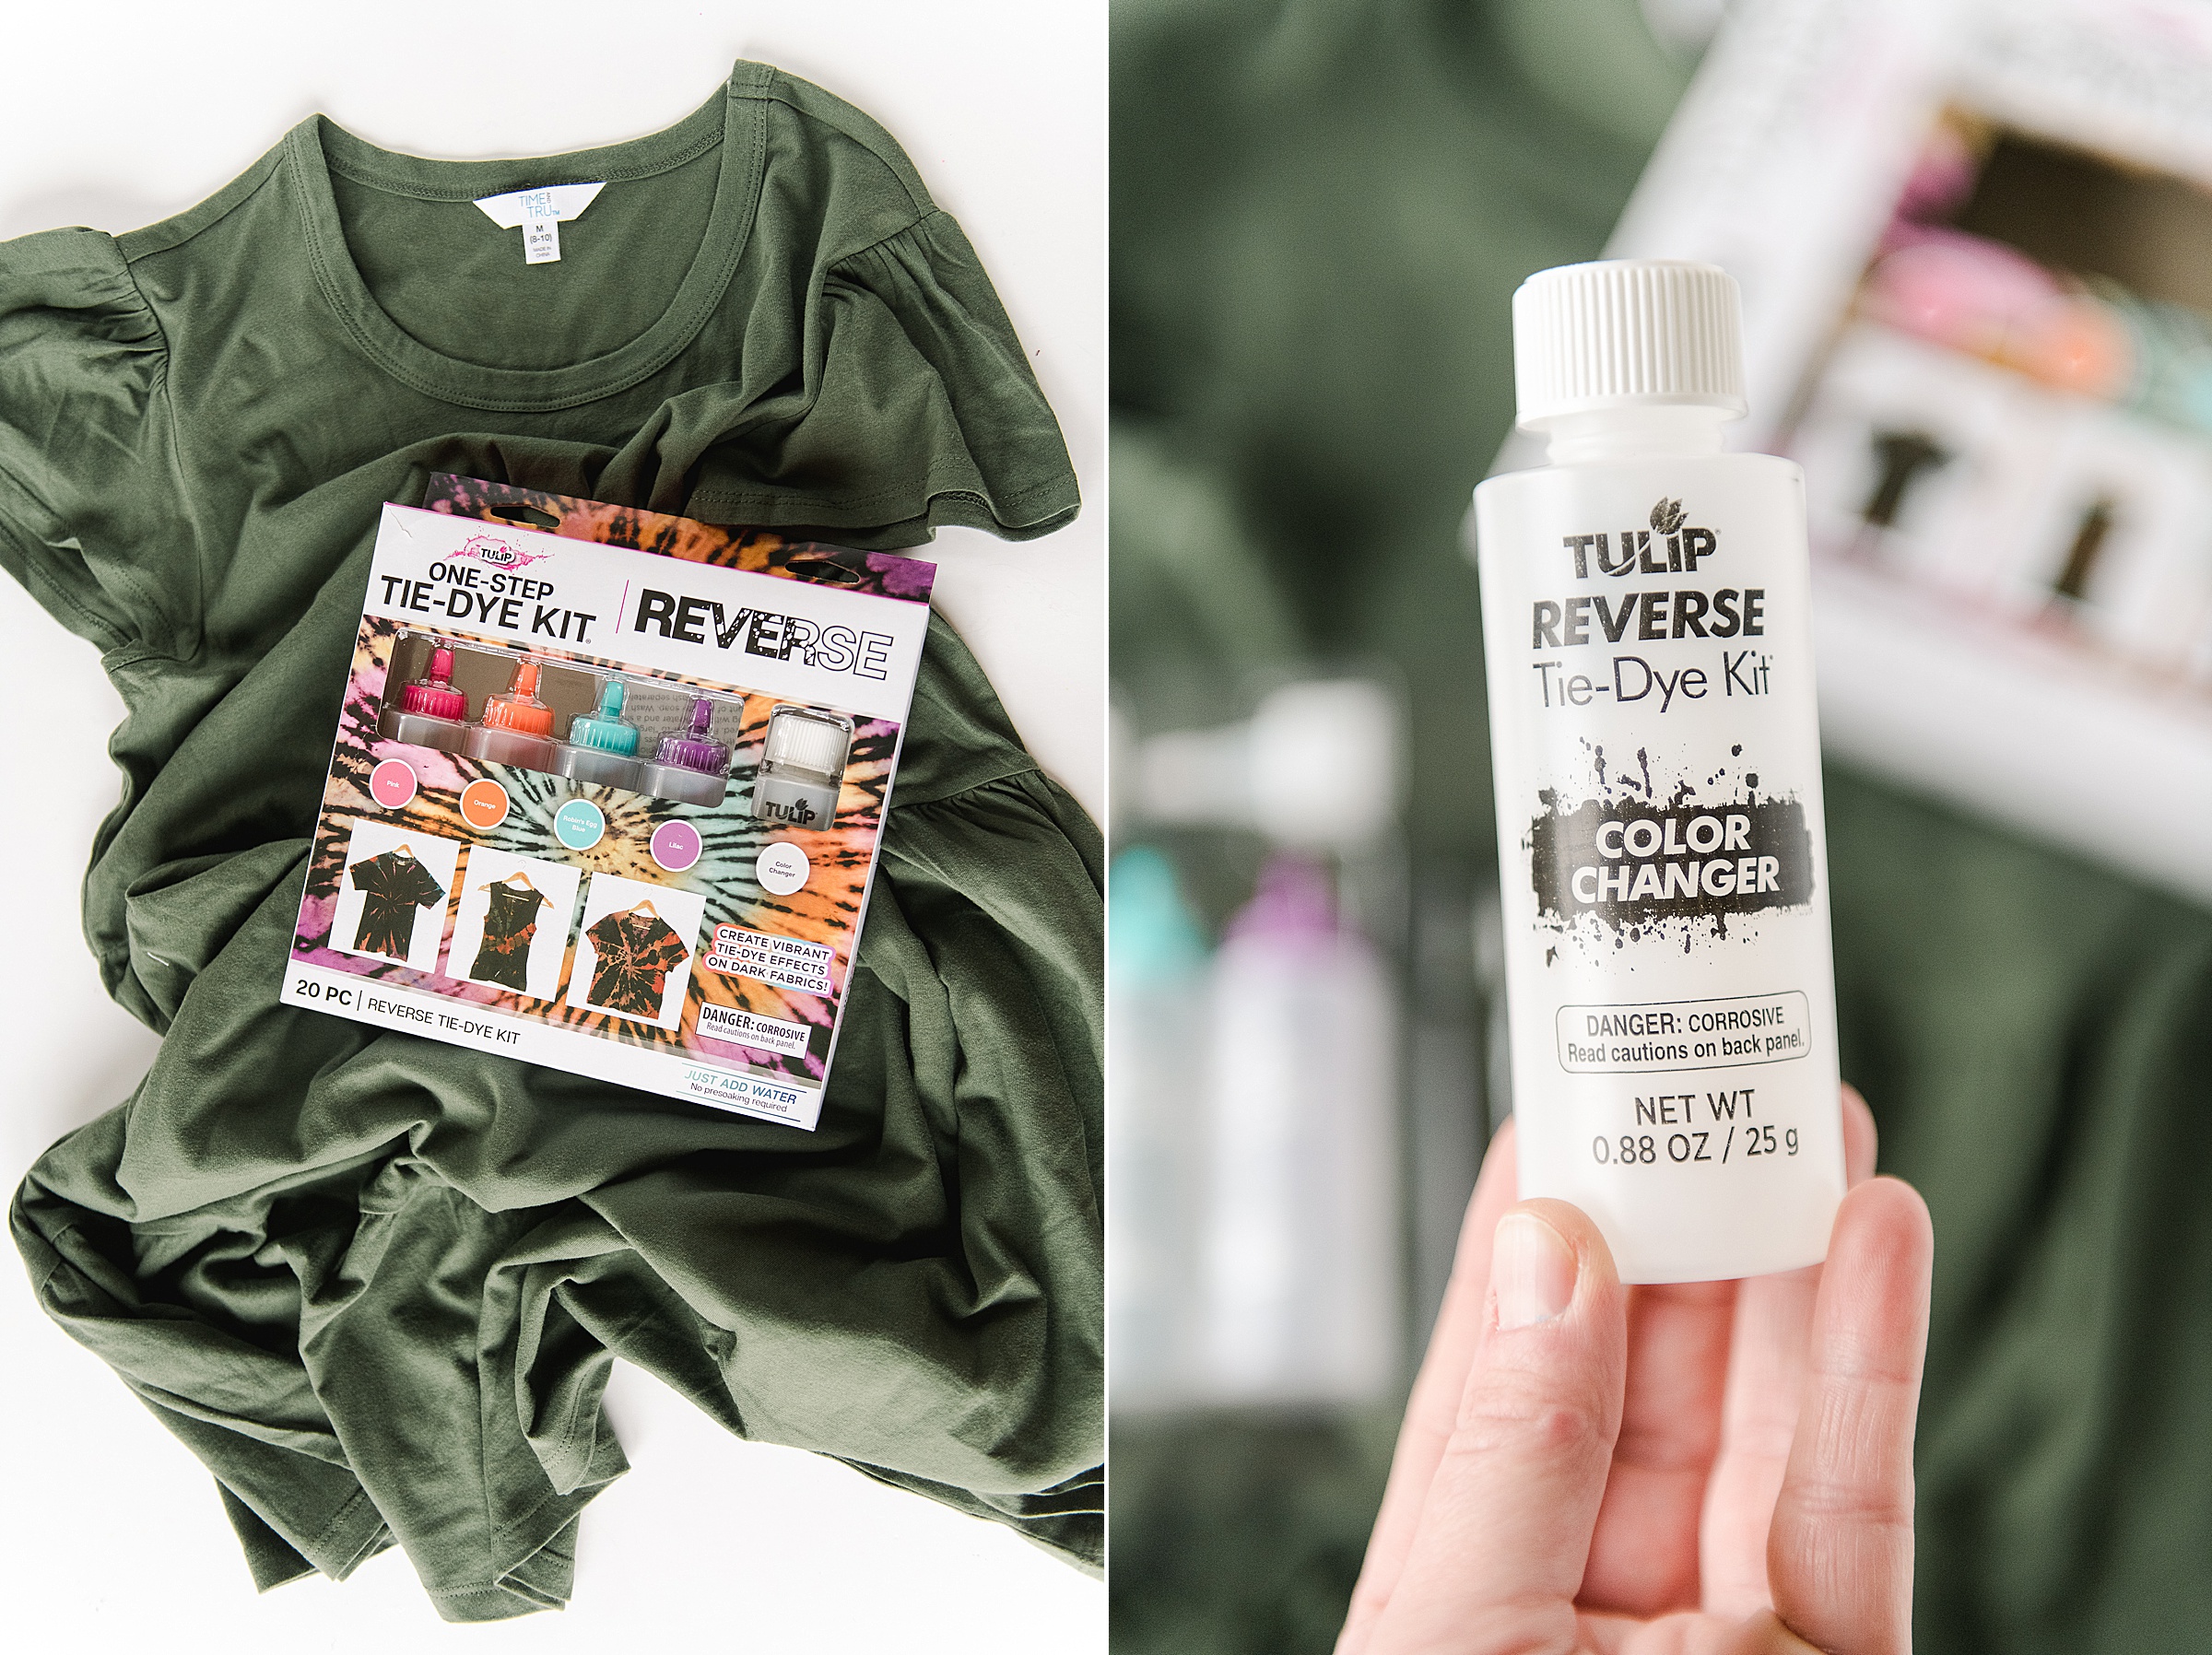
- A cotton dress – preferably in a dark color, like navy, black or emerald 🙂
- A box of the Tulip Reverse Tie Dye Technique kit (this has enough to reverse dye a few pieces, so grab some extra stuff in your closet to do at the same time)
- A tray and a rack for you to dye on (or outdoors is ok too)! 🙂
- A plastic bag or plastic wrap to let the dress sit in overnight while curing
INSTRUCTIONS:
1. First, read all of the warnings and instructions included in the Reverse dye kit – like, be sure to be working in a well ventilated area and WEAR THE GLOVES! 🙂 This isn’t like a dangerous operation, but these are surely more “chemically” than a traditional Tulip tie dye kit! 🙂 (but also soooo fun, so don’t let this warning scare you)! 🙂
2. Prep your dress by going it a quick wash and dry in your laundry cycle. And while your dress is washing, prep your area by placing a rack + catch tray in your space and covering any table top or floor. We use an old cookie drying rack and a baking tray that was found at a thrift store for alllll of our tie dye projects.
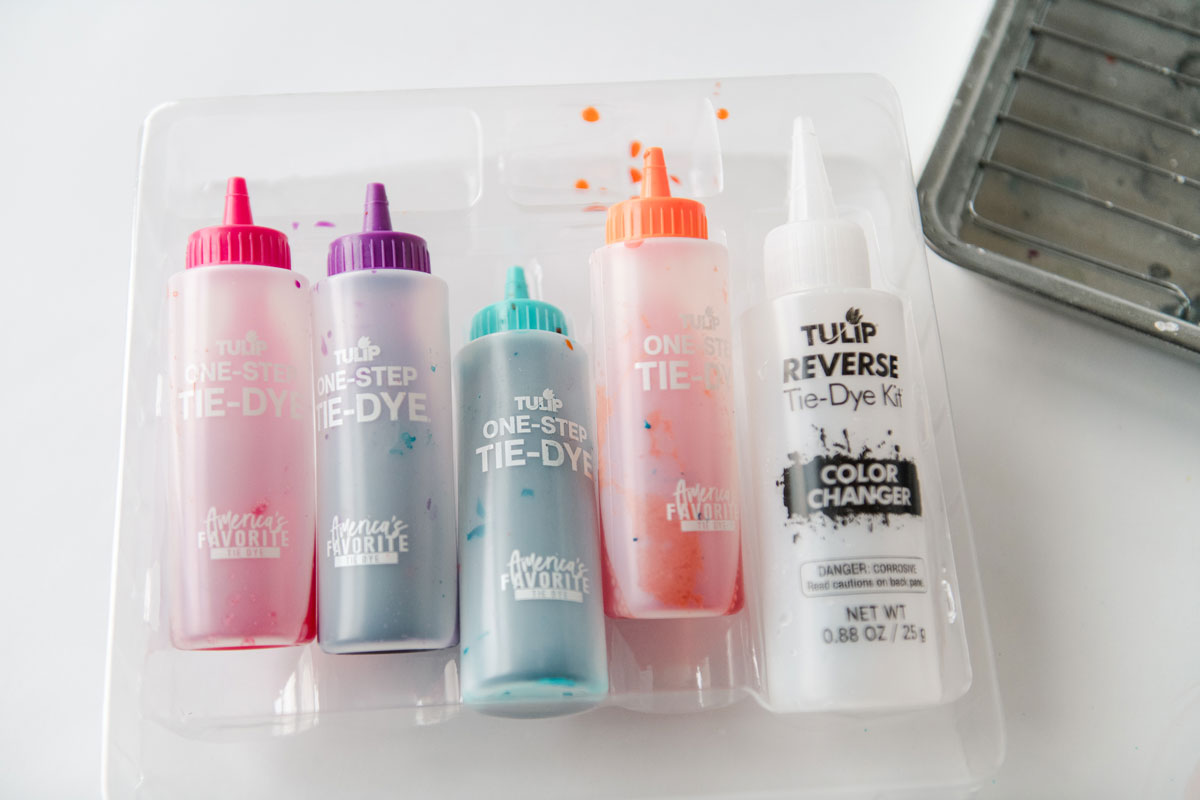
3. Mix your reverse dye by removing the color change solution from the Tulip Reverse tie dye kit and filling the bottle with warm water (hint, cold water won’t mix the solution all the way)! 🙂 Shake shake shake until all of the mixture is disolved! 🙂
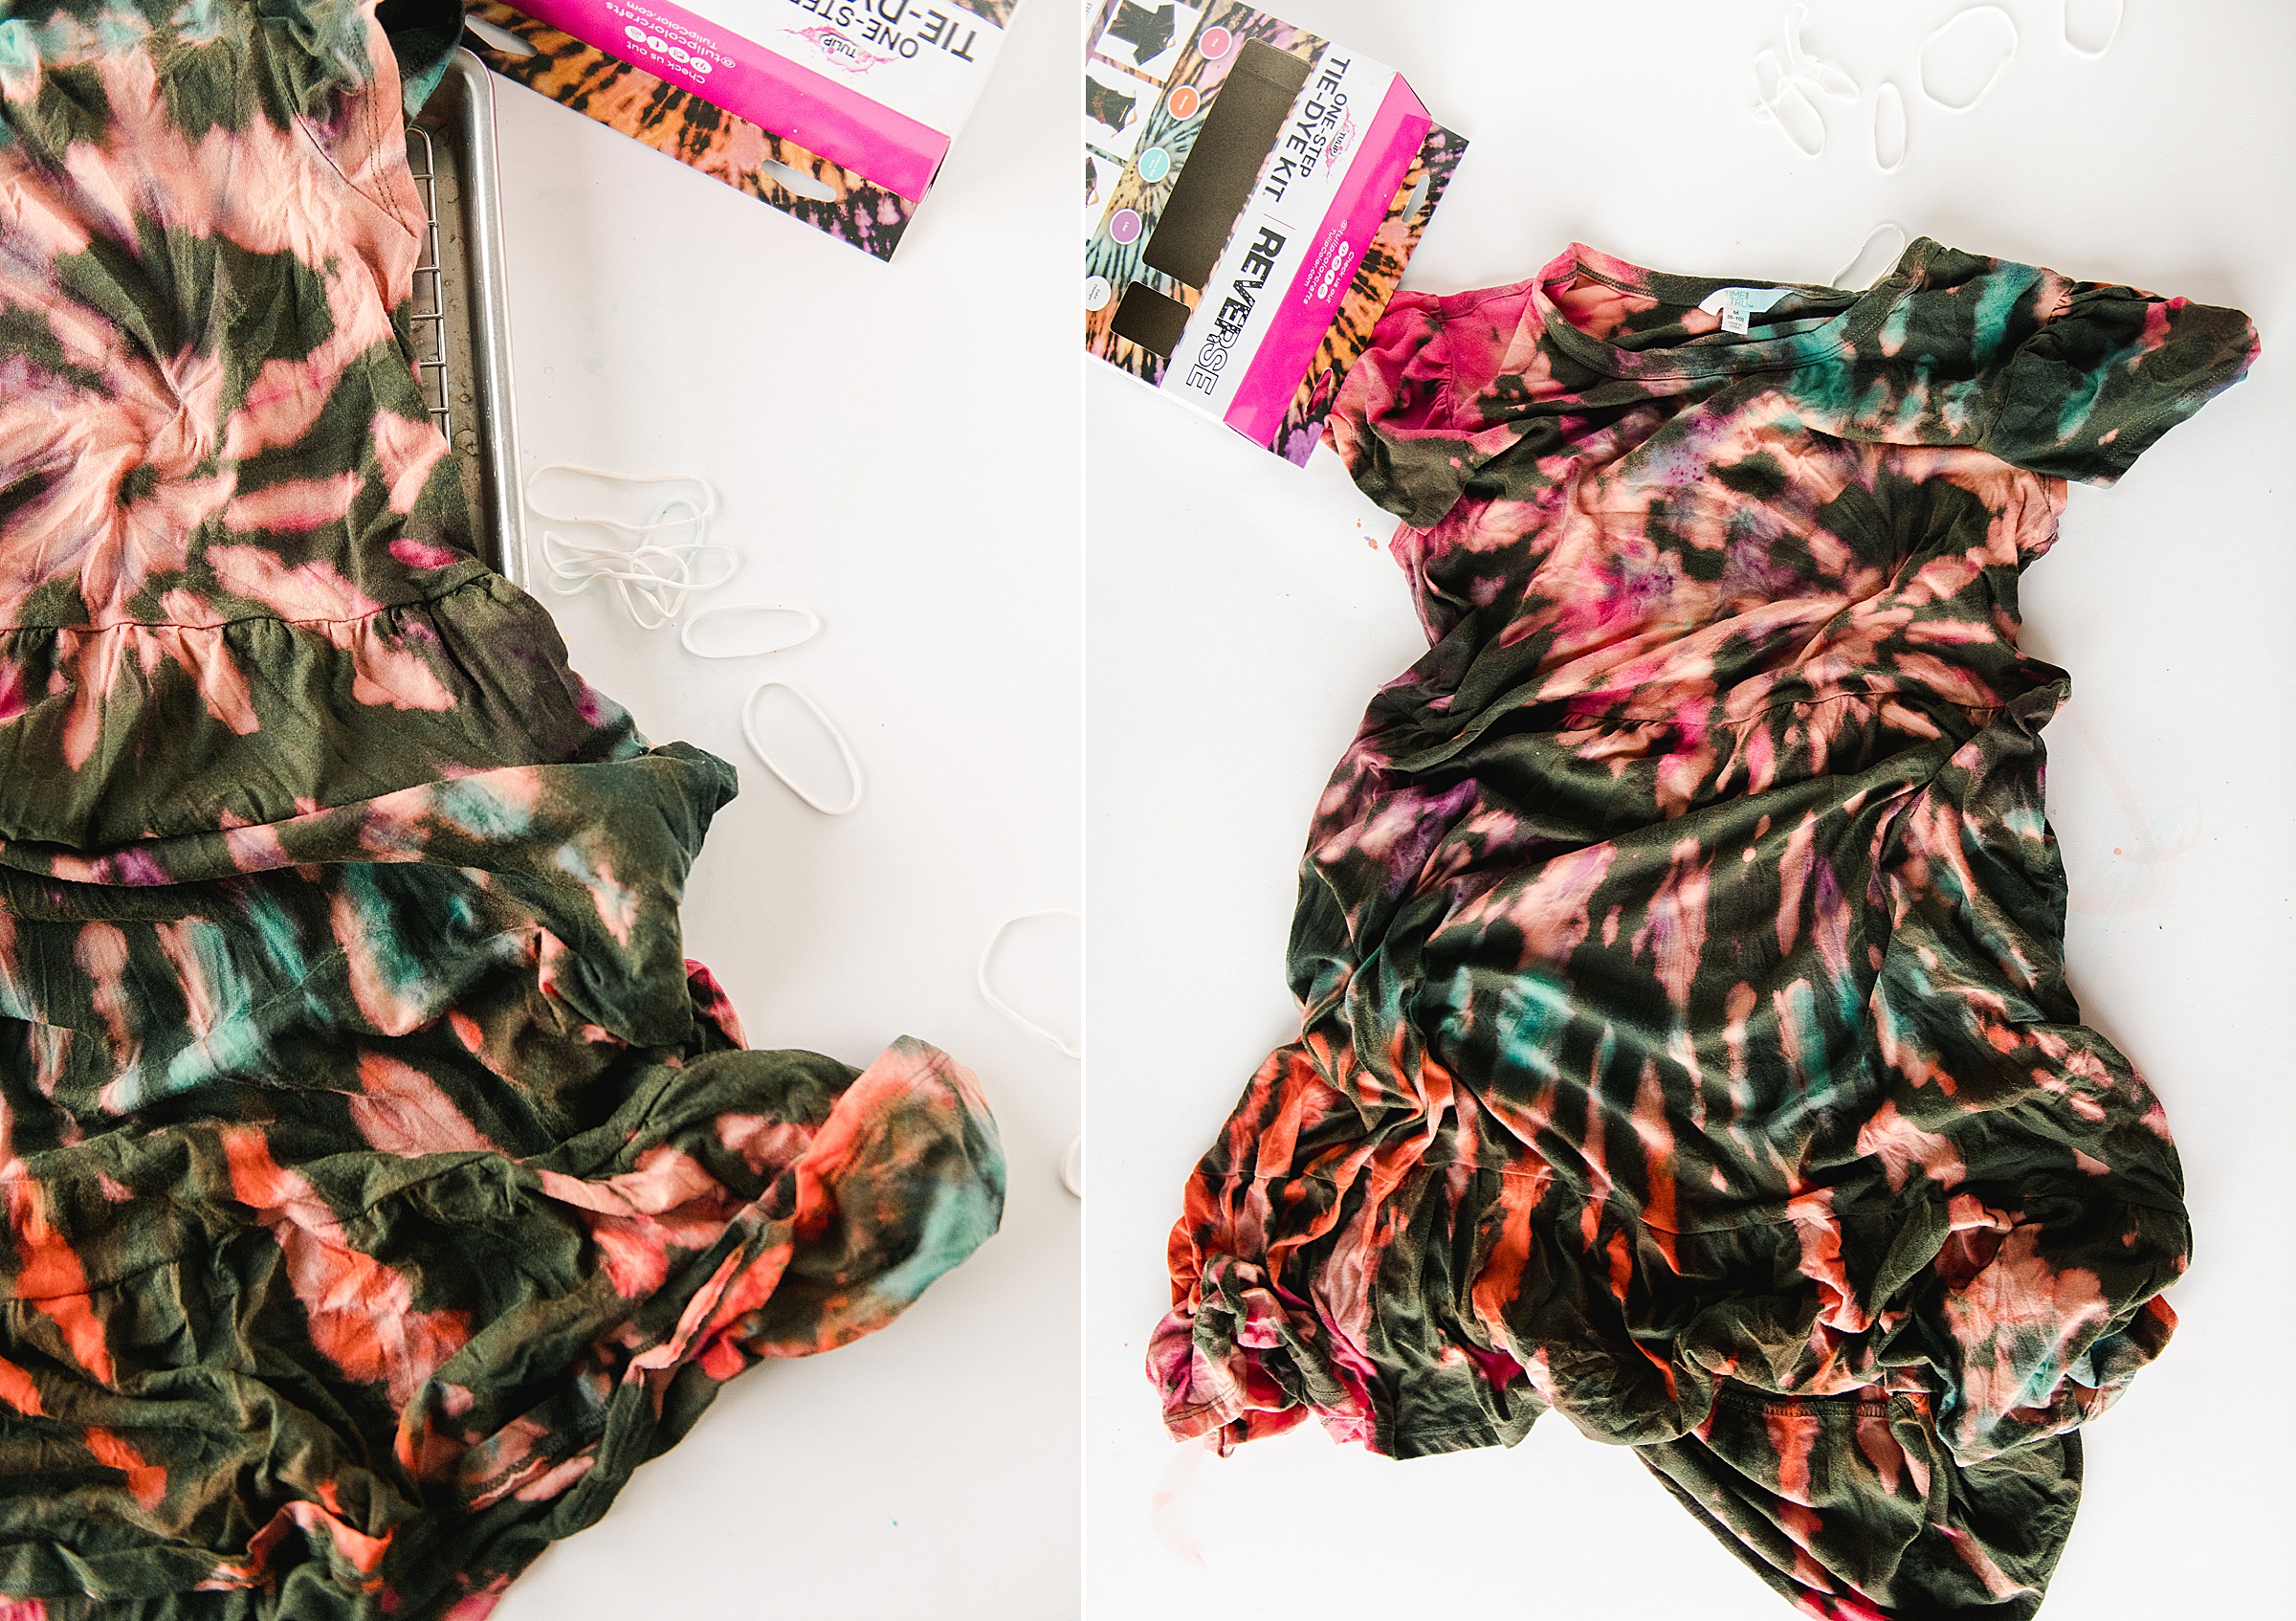
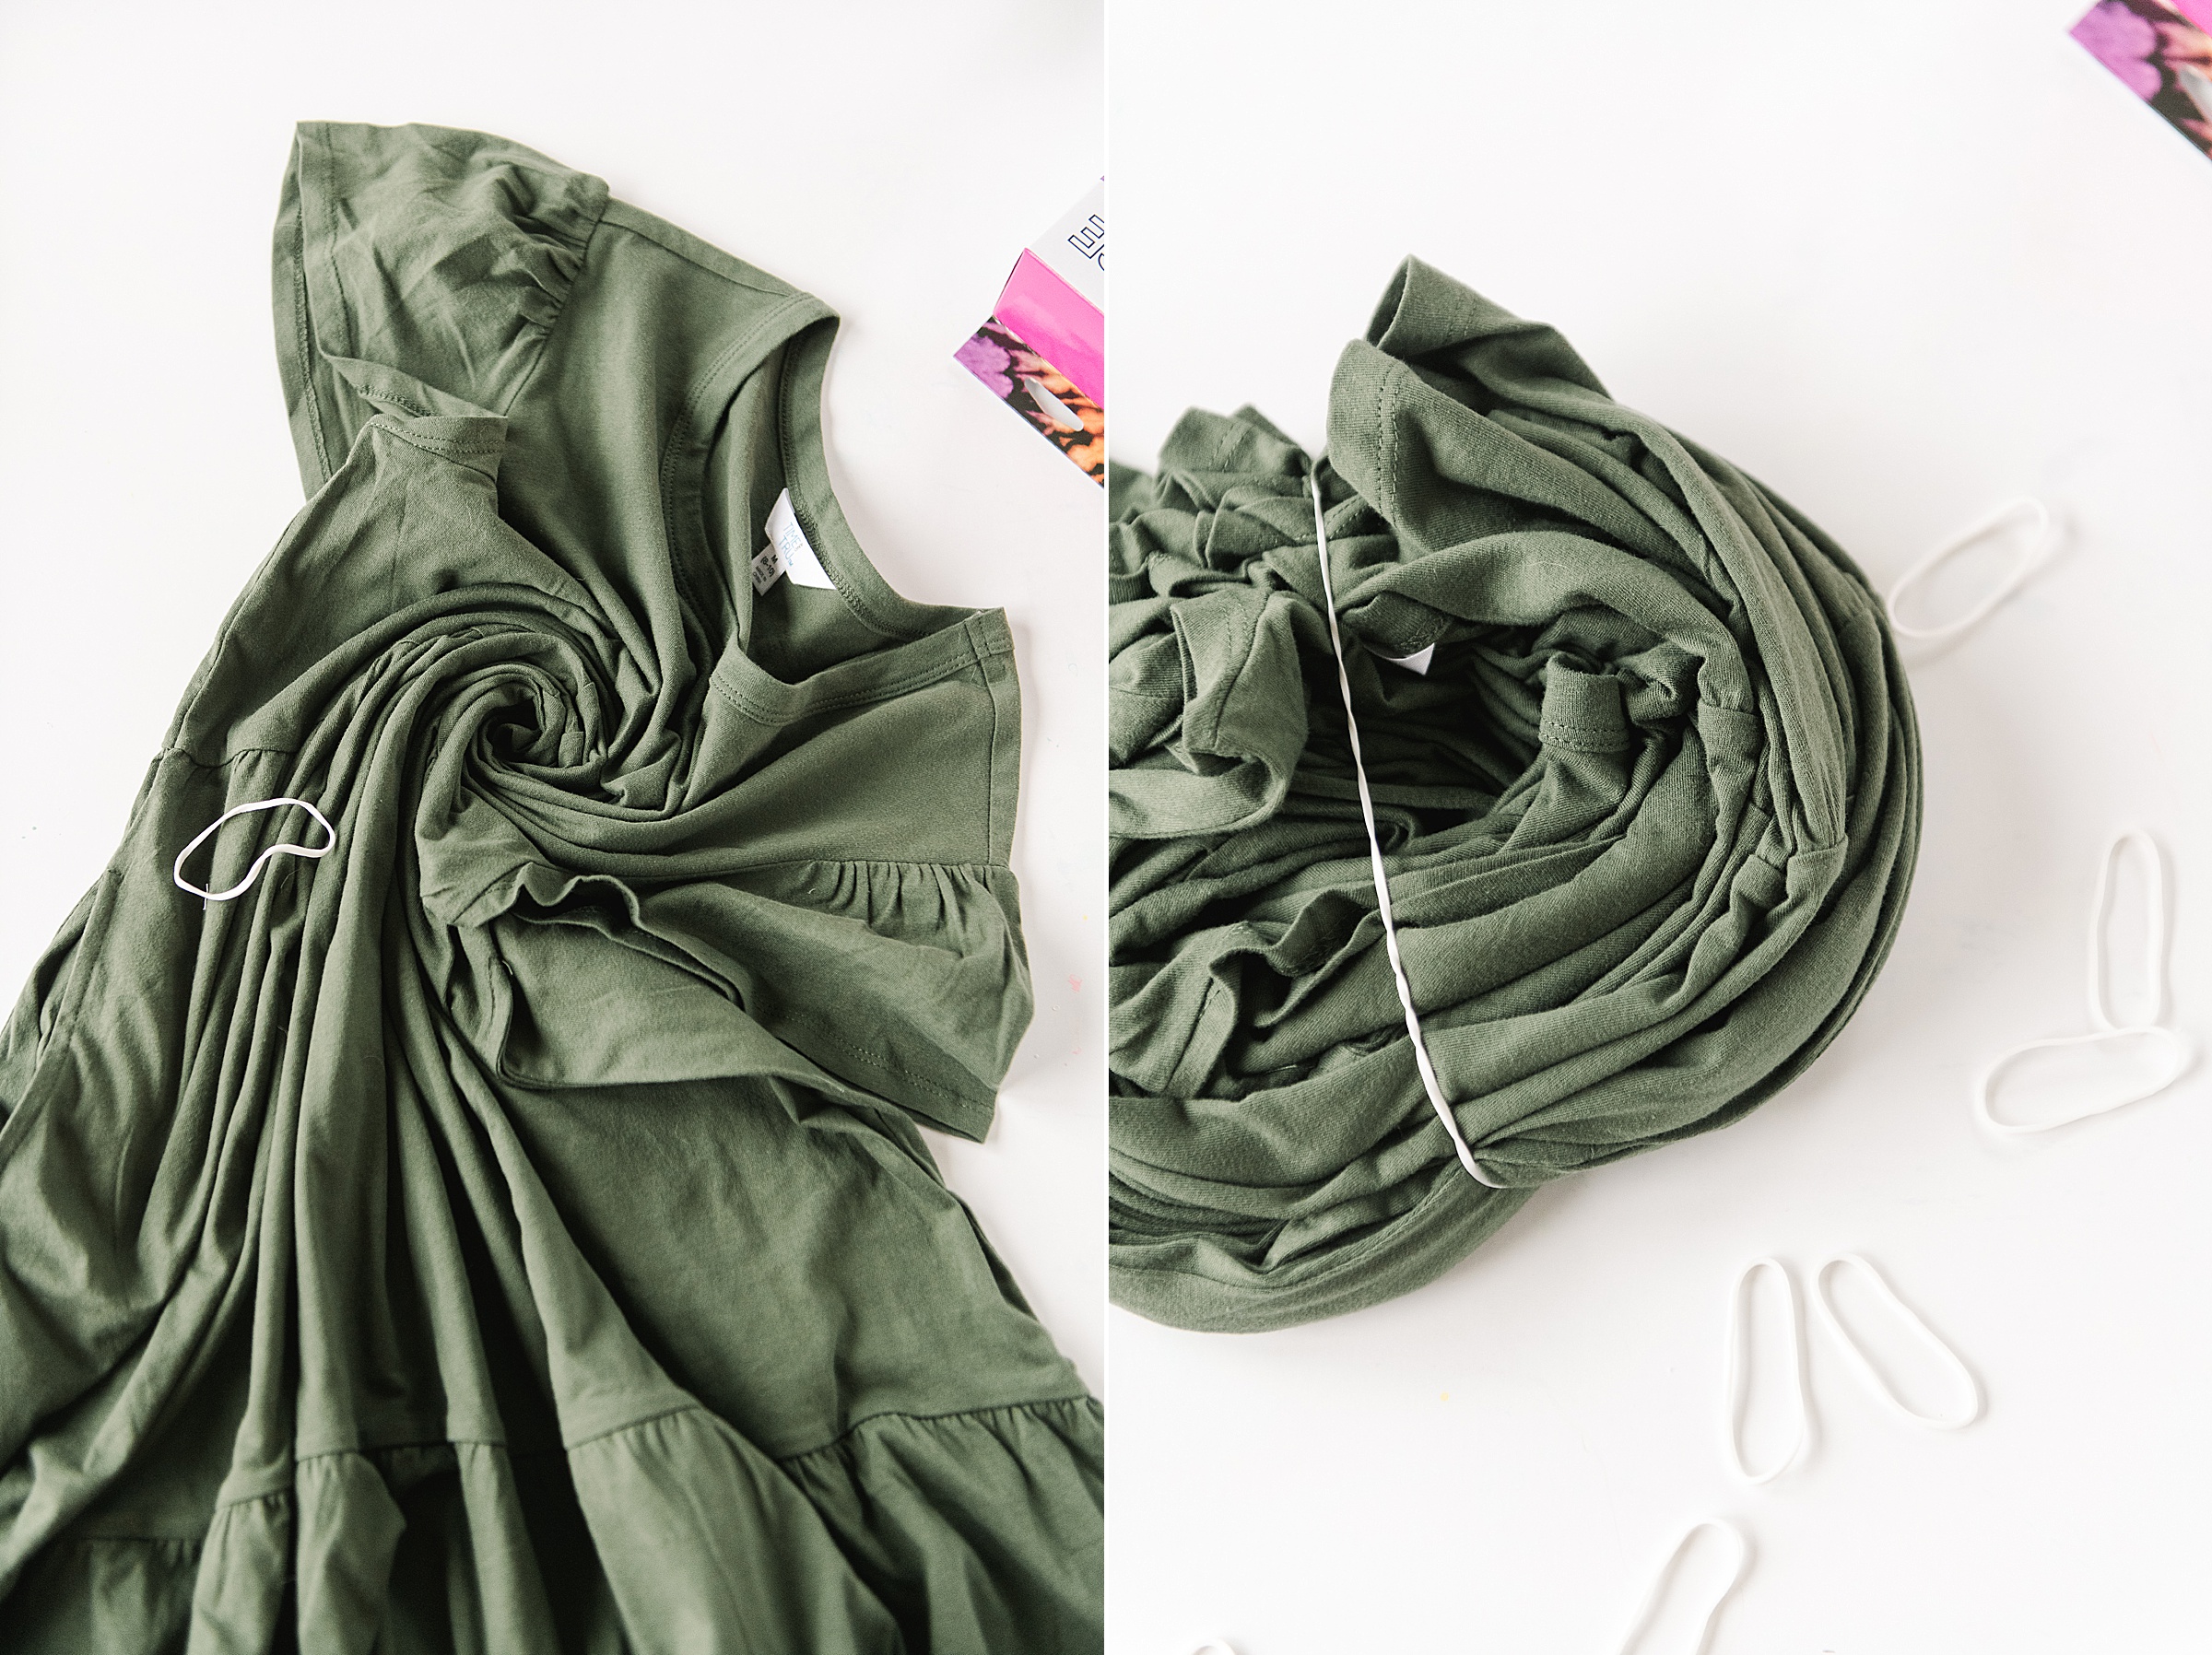
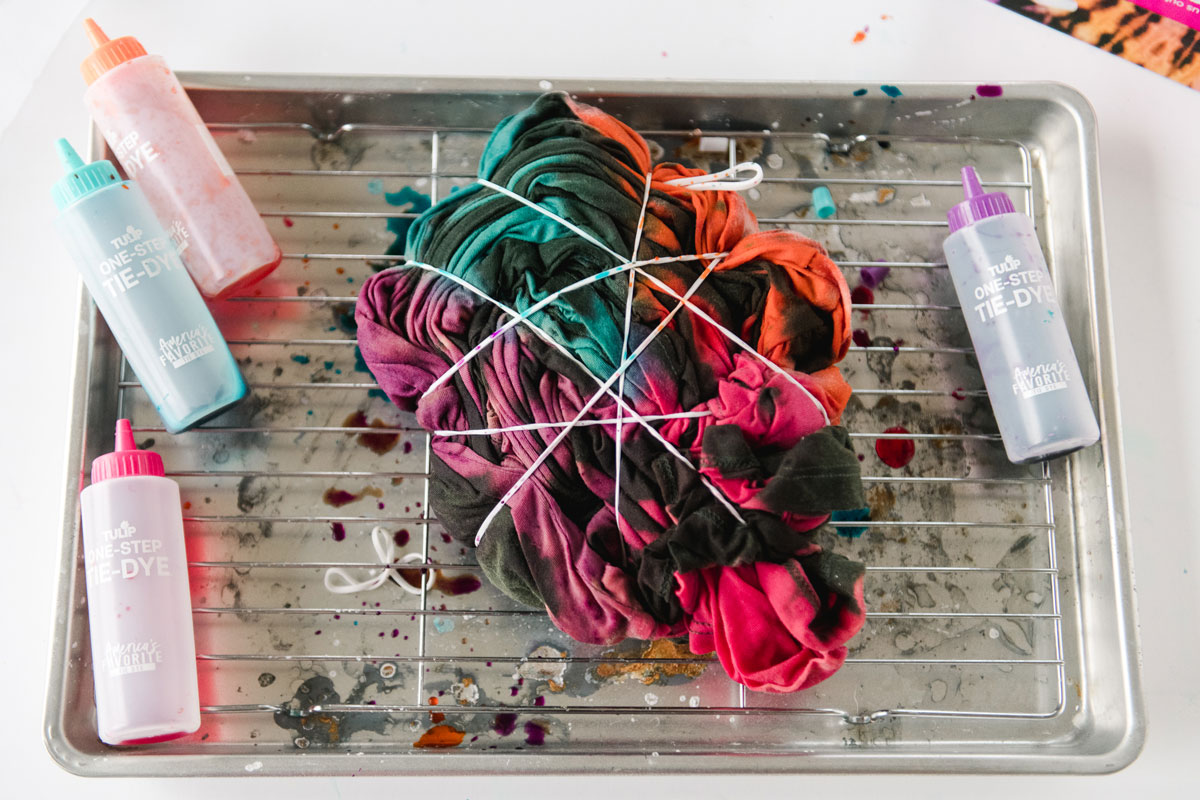
4. There are options to fold or band your dress, (you can reference the instructions included in your dye kit for various folding options), buuuuutttt I chose spiral option because I wanted to get a ridge pattern (or at least that was my initial thought)! 🙂 Secure tightly with rubber bands and set your garment on the tray!
Here are some tips on tie dying your dress with the Tulip Reverse color change solution:
- Go slow….you don’t want this solution squirting out off of your garment and hitting you as you work – it will lift dye off of the clothes you are wearing too if you aren’t careful! HA! 🙂
- In my opinion, you can’t apply too much…..so use the whole bottle 🙂
- It’s hard to see where you’ve gotten the solution (after all it is clear) so start on one side and work across to the other, and then flip! Go slow and take your time!
- Be sure to get into the cracks, folds and crevices of the dress….so use the tip of the bottle and gently squeeze some solution ALL OVER the scrunched up garment! 🙂
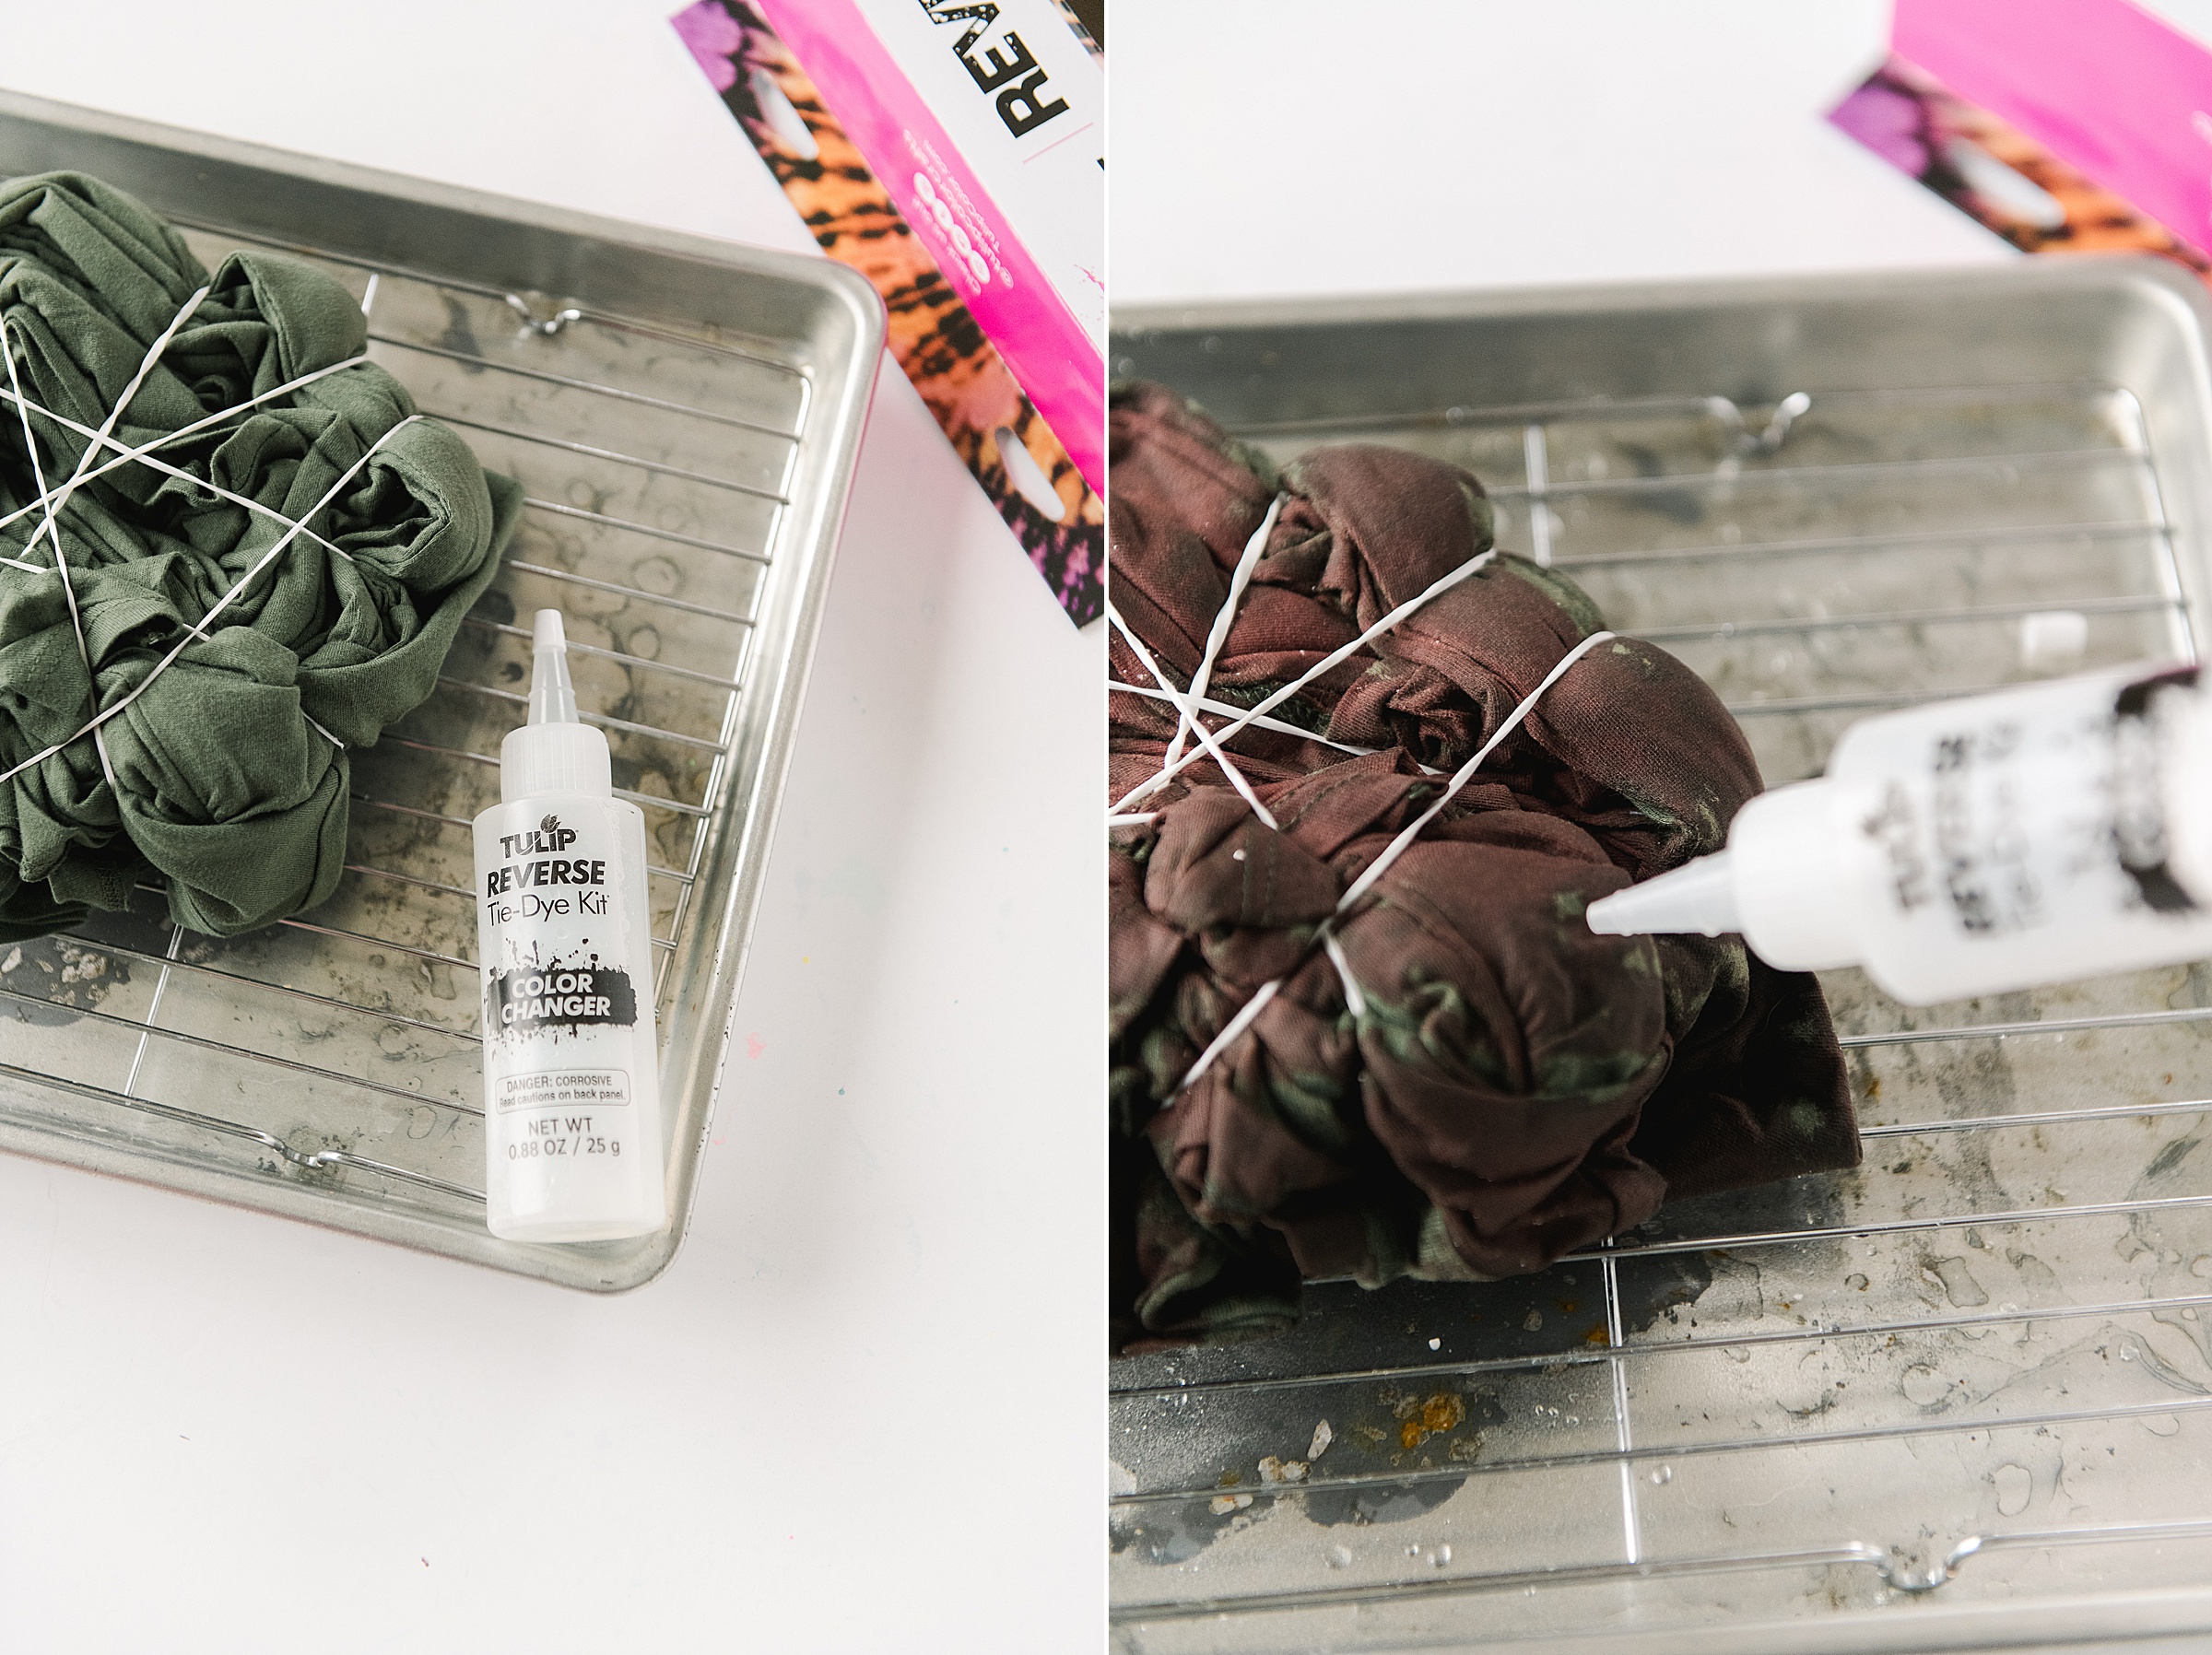
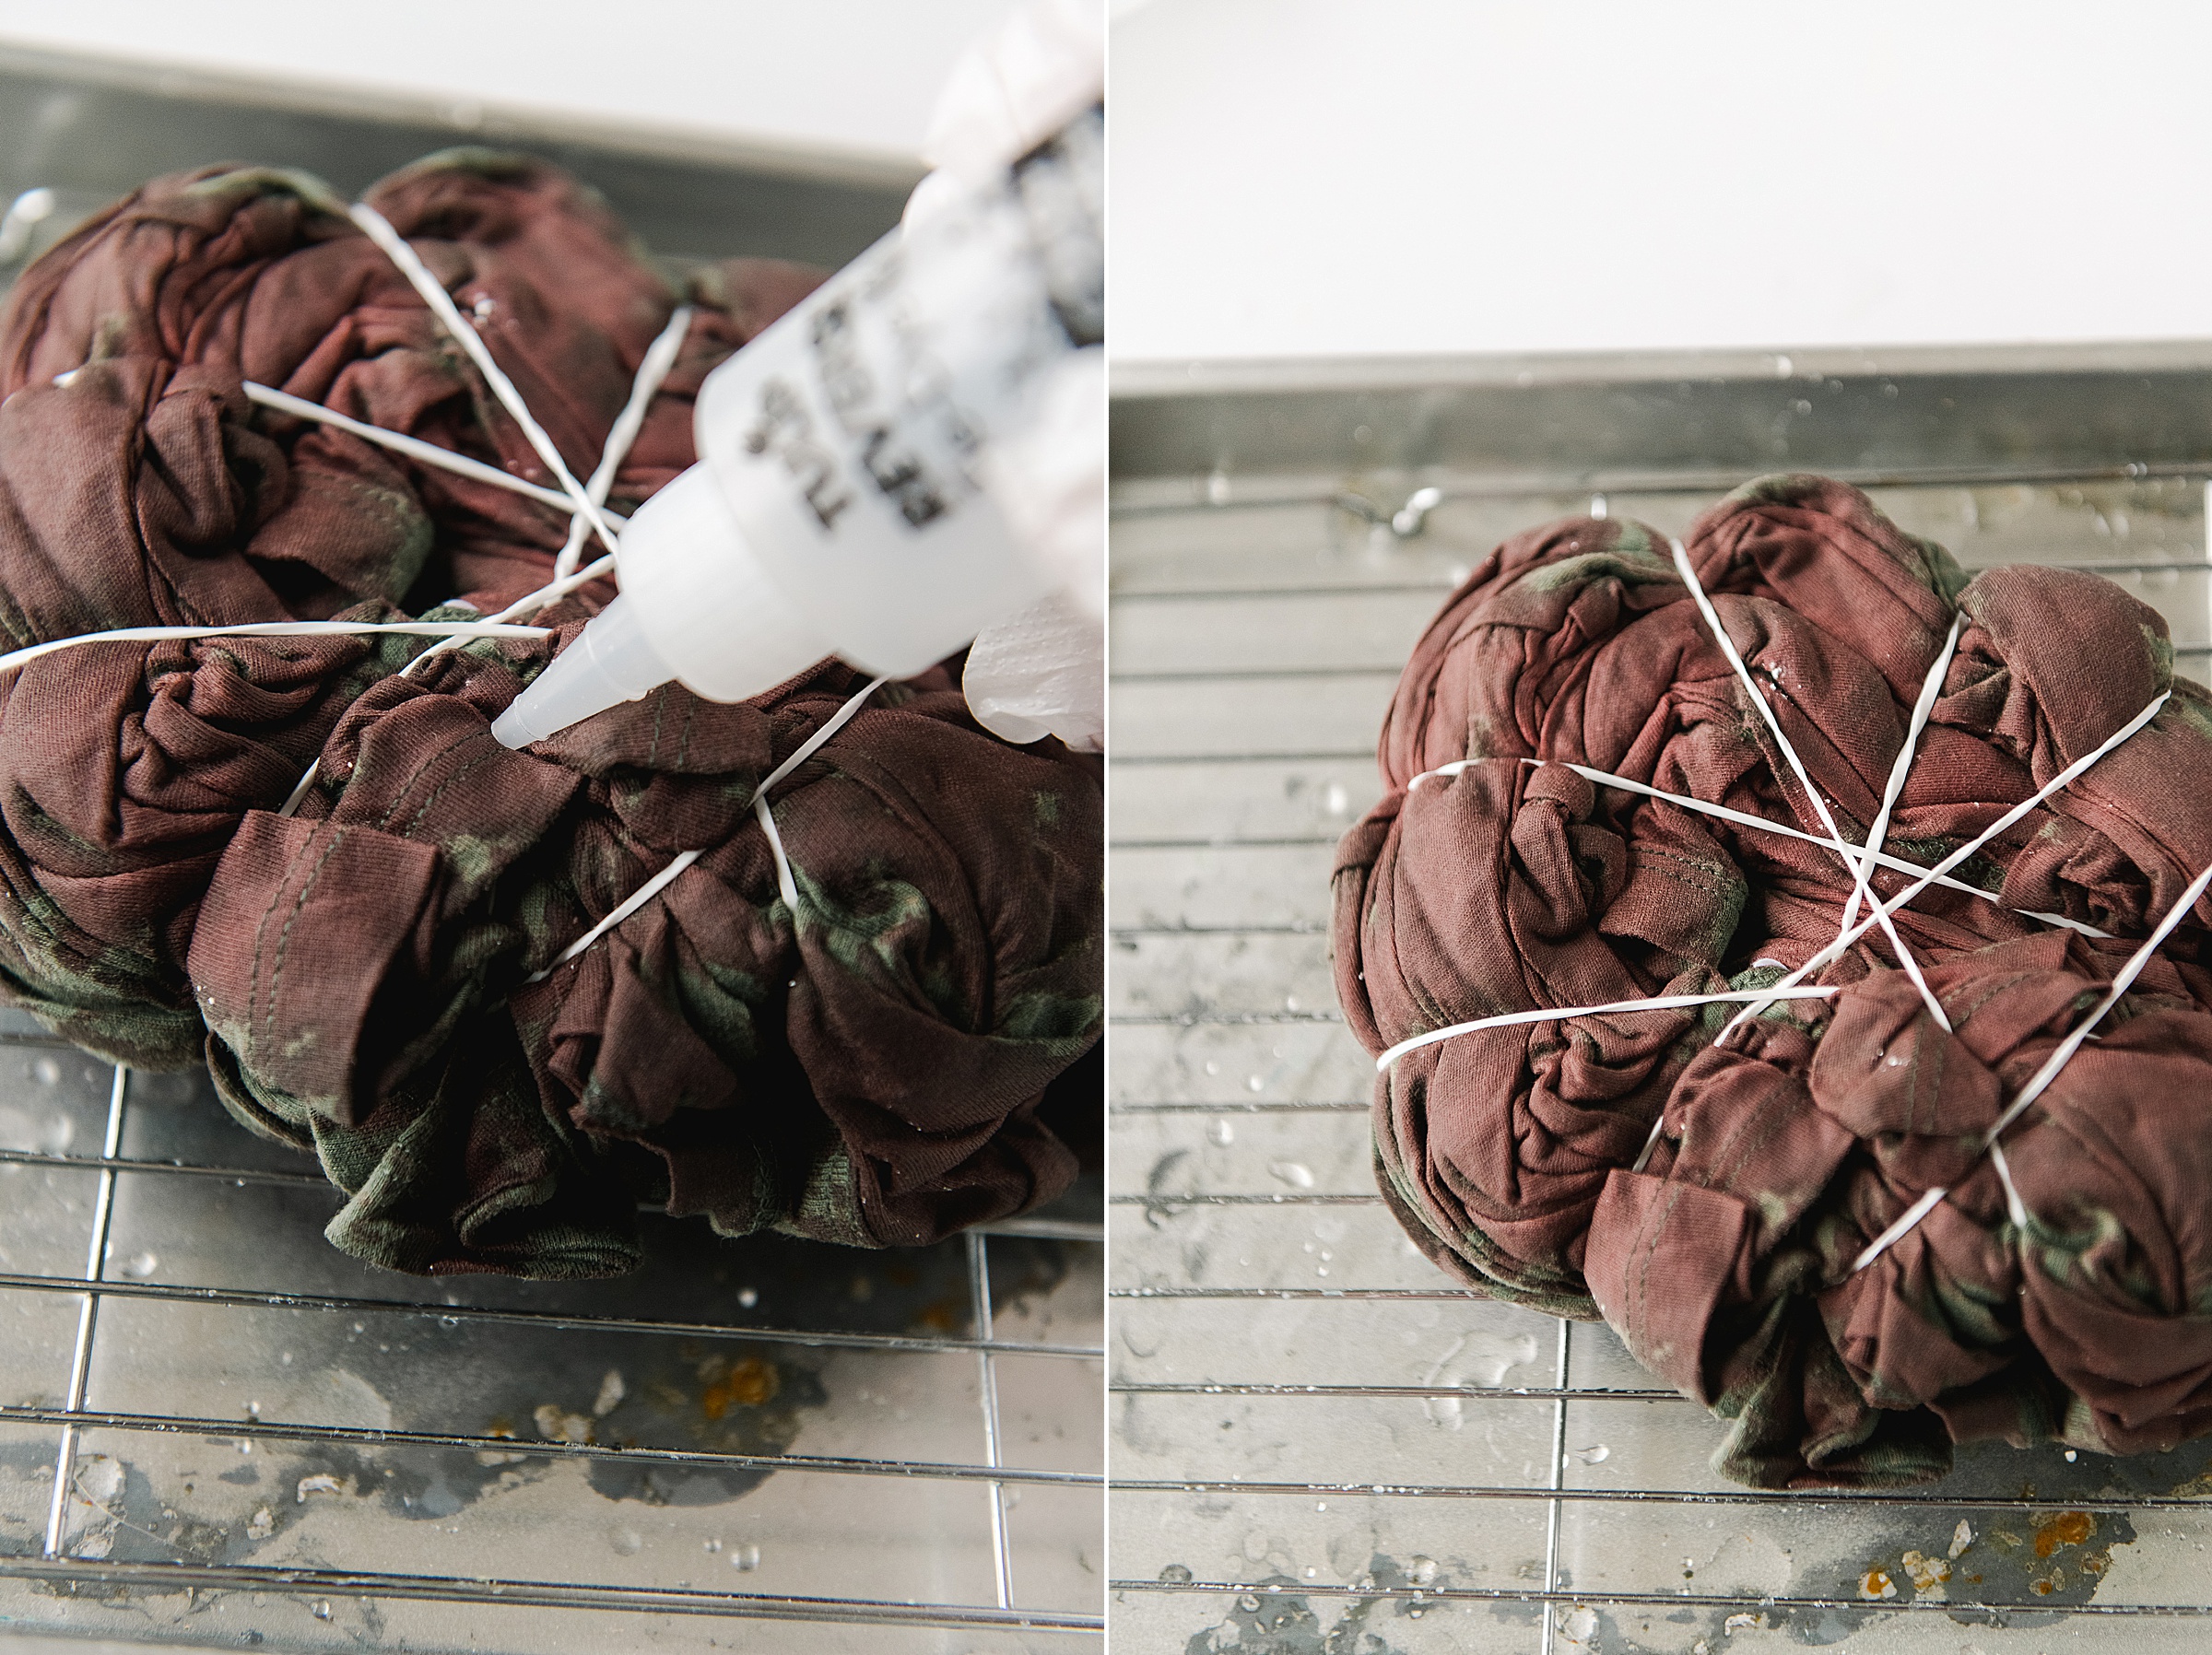
5. When the dress is covered and your solution is soaked in, you will want to put your dress in a plastic bag (or something you can seal)! 🙂 You will let your dress sit for awhile – the longer you sit, the more color gets lifted from the dress. I let mine soak for 3 hours – make sure to keep checking your garment as it sits. Since this is a pretty chemical solution, you don’t want it to sit too long and lift too much of your color away….so just keep checking as you go.
Once you think it’s lifted enough (you can see that my green dress actually turned pink when the color was lifted) begin to untie your rubber bands and rinse your dress in cold water (you will notice that the leftover solution that is leaving the garment is slightly yellowish, that means that it is being washed out). Rinse out SUPPPER WELL! 🙂
Then pop your dress into the dryer for a bit of time! I didn’t want to completely dry my dress, but I didn’t want it to be soaked from rinsing.
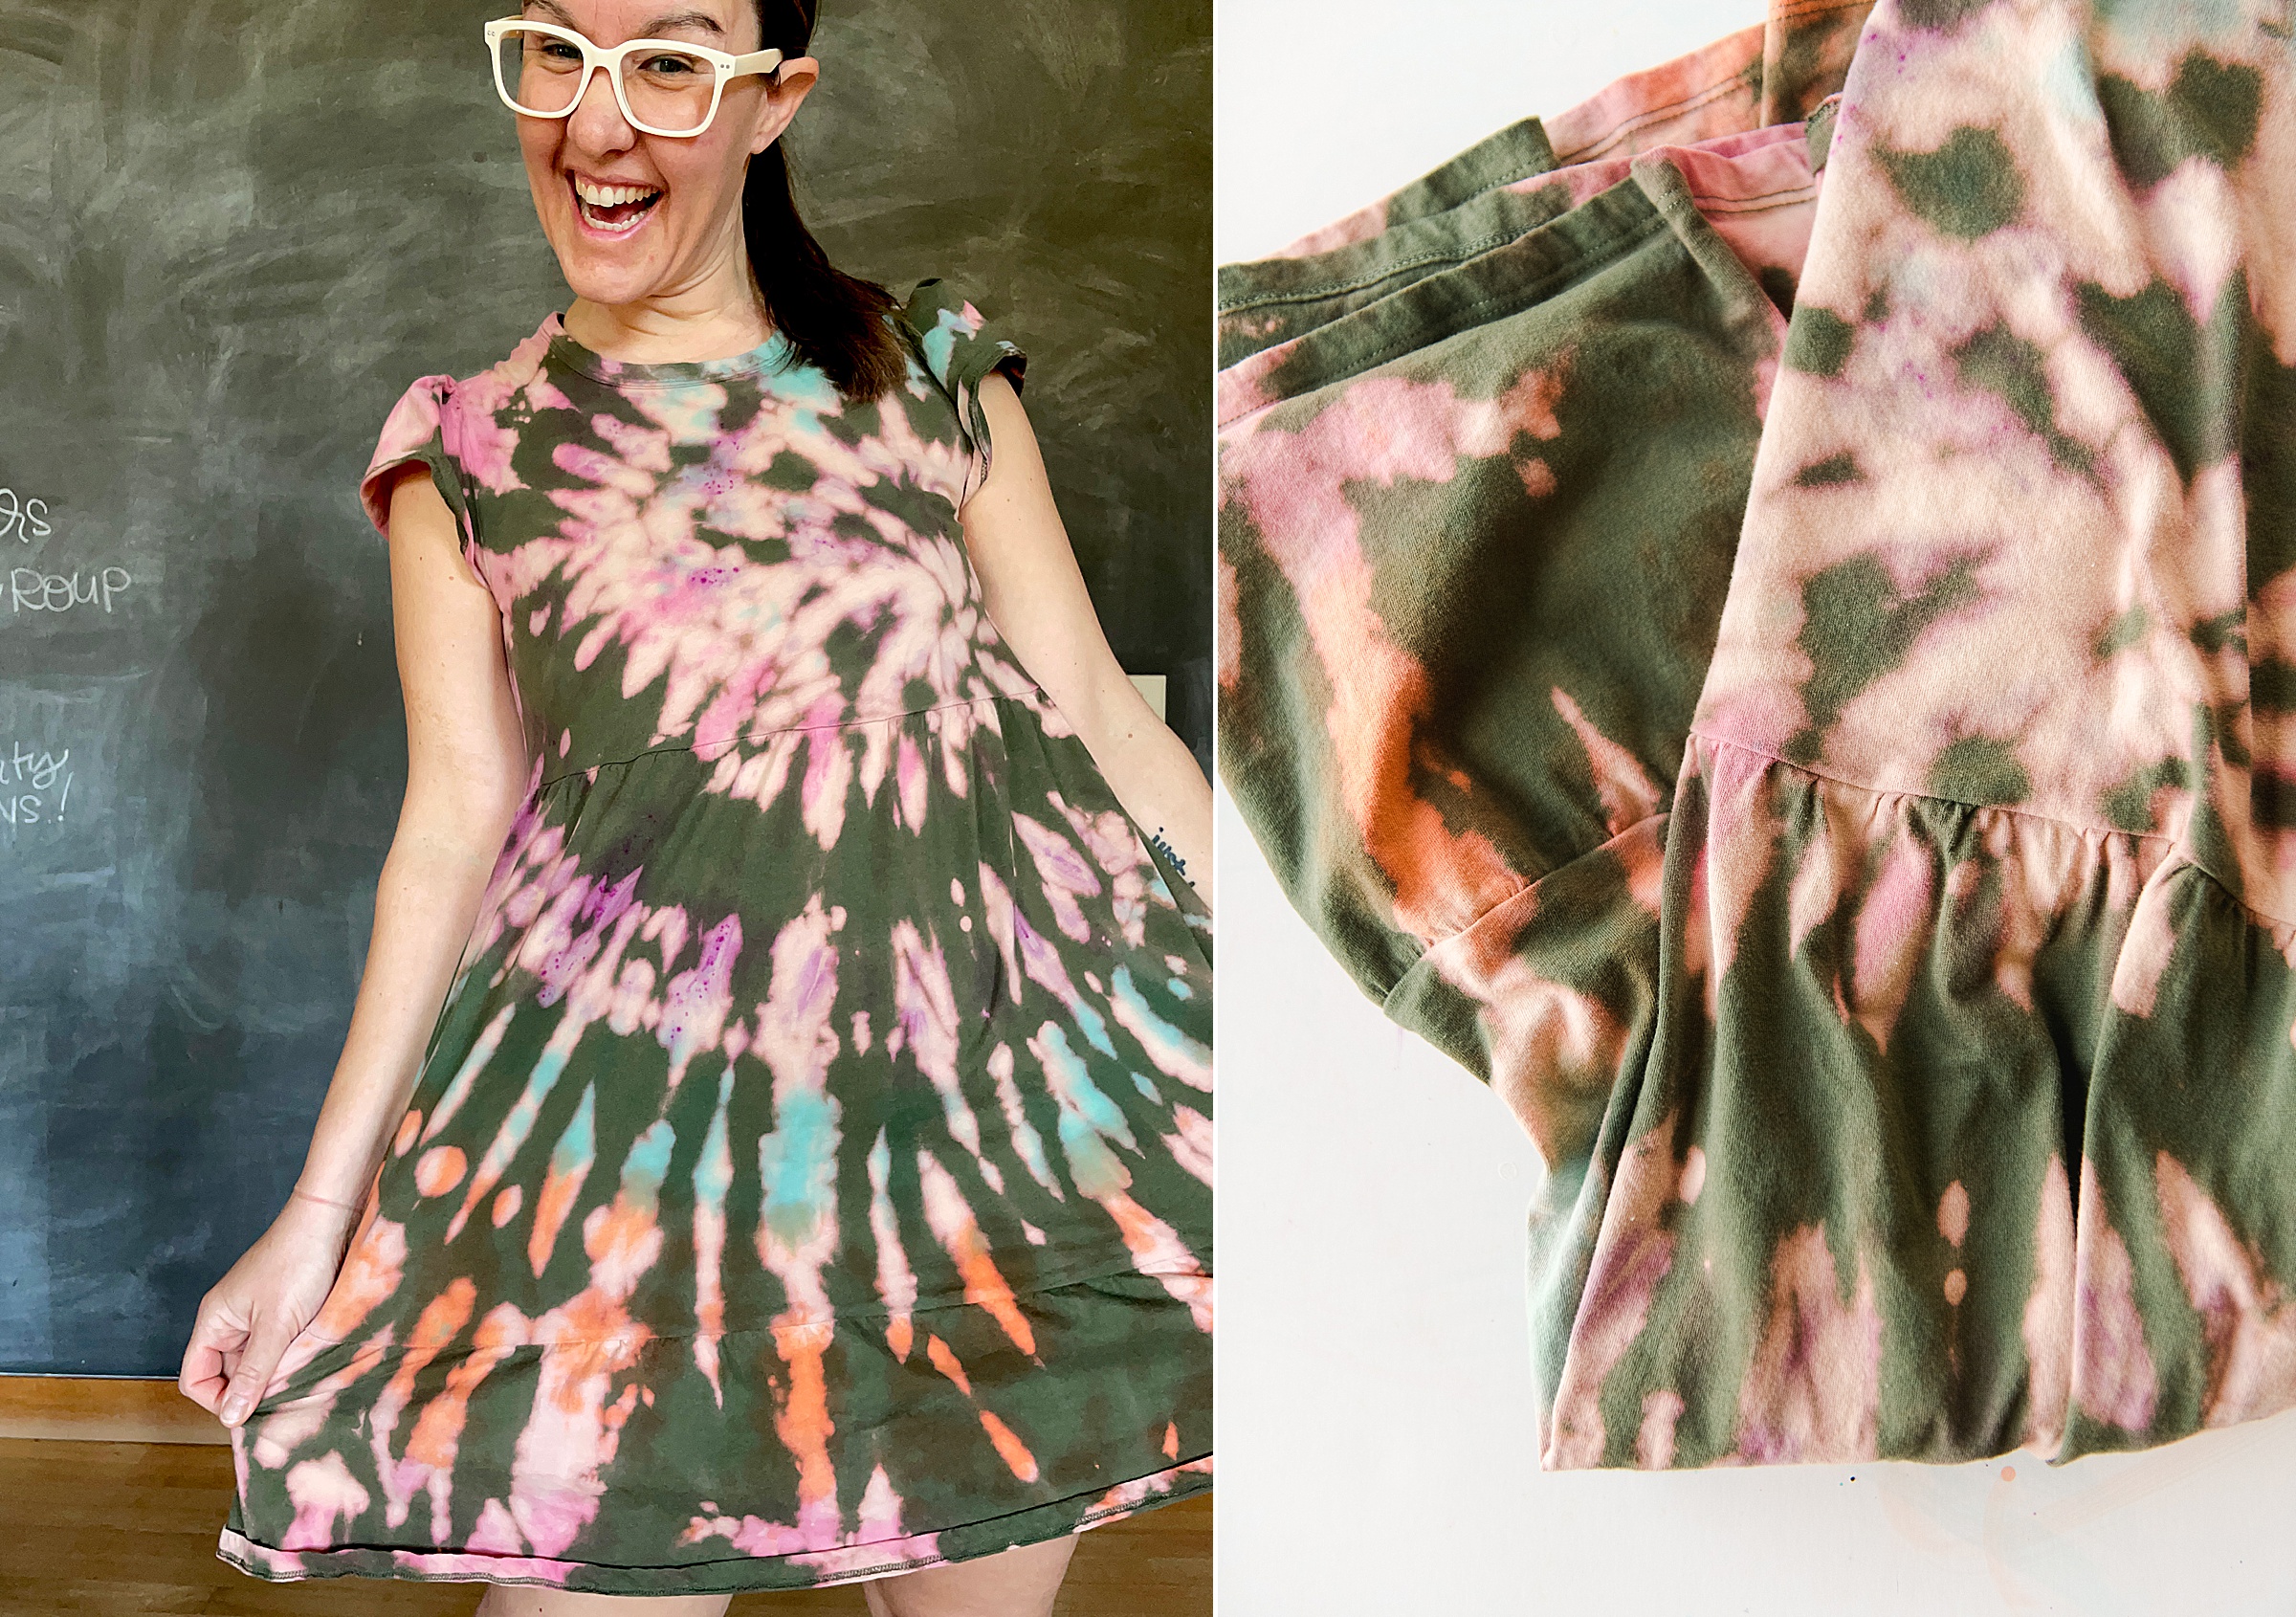
6. Once your dress is as dry as you want, bring your dress back over to your drying rack and repeat steps 4-5 except use the TIE DYE COLOR SOLUTION this time instead! 🙂 I decided to scrunch up my dress in the exact same way (spiral in the same spot) as I did when I used the color change solution.
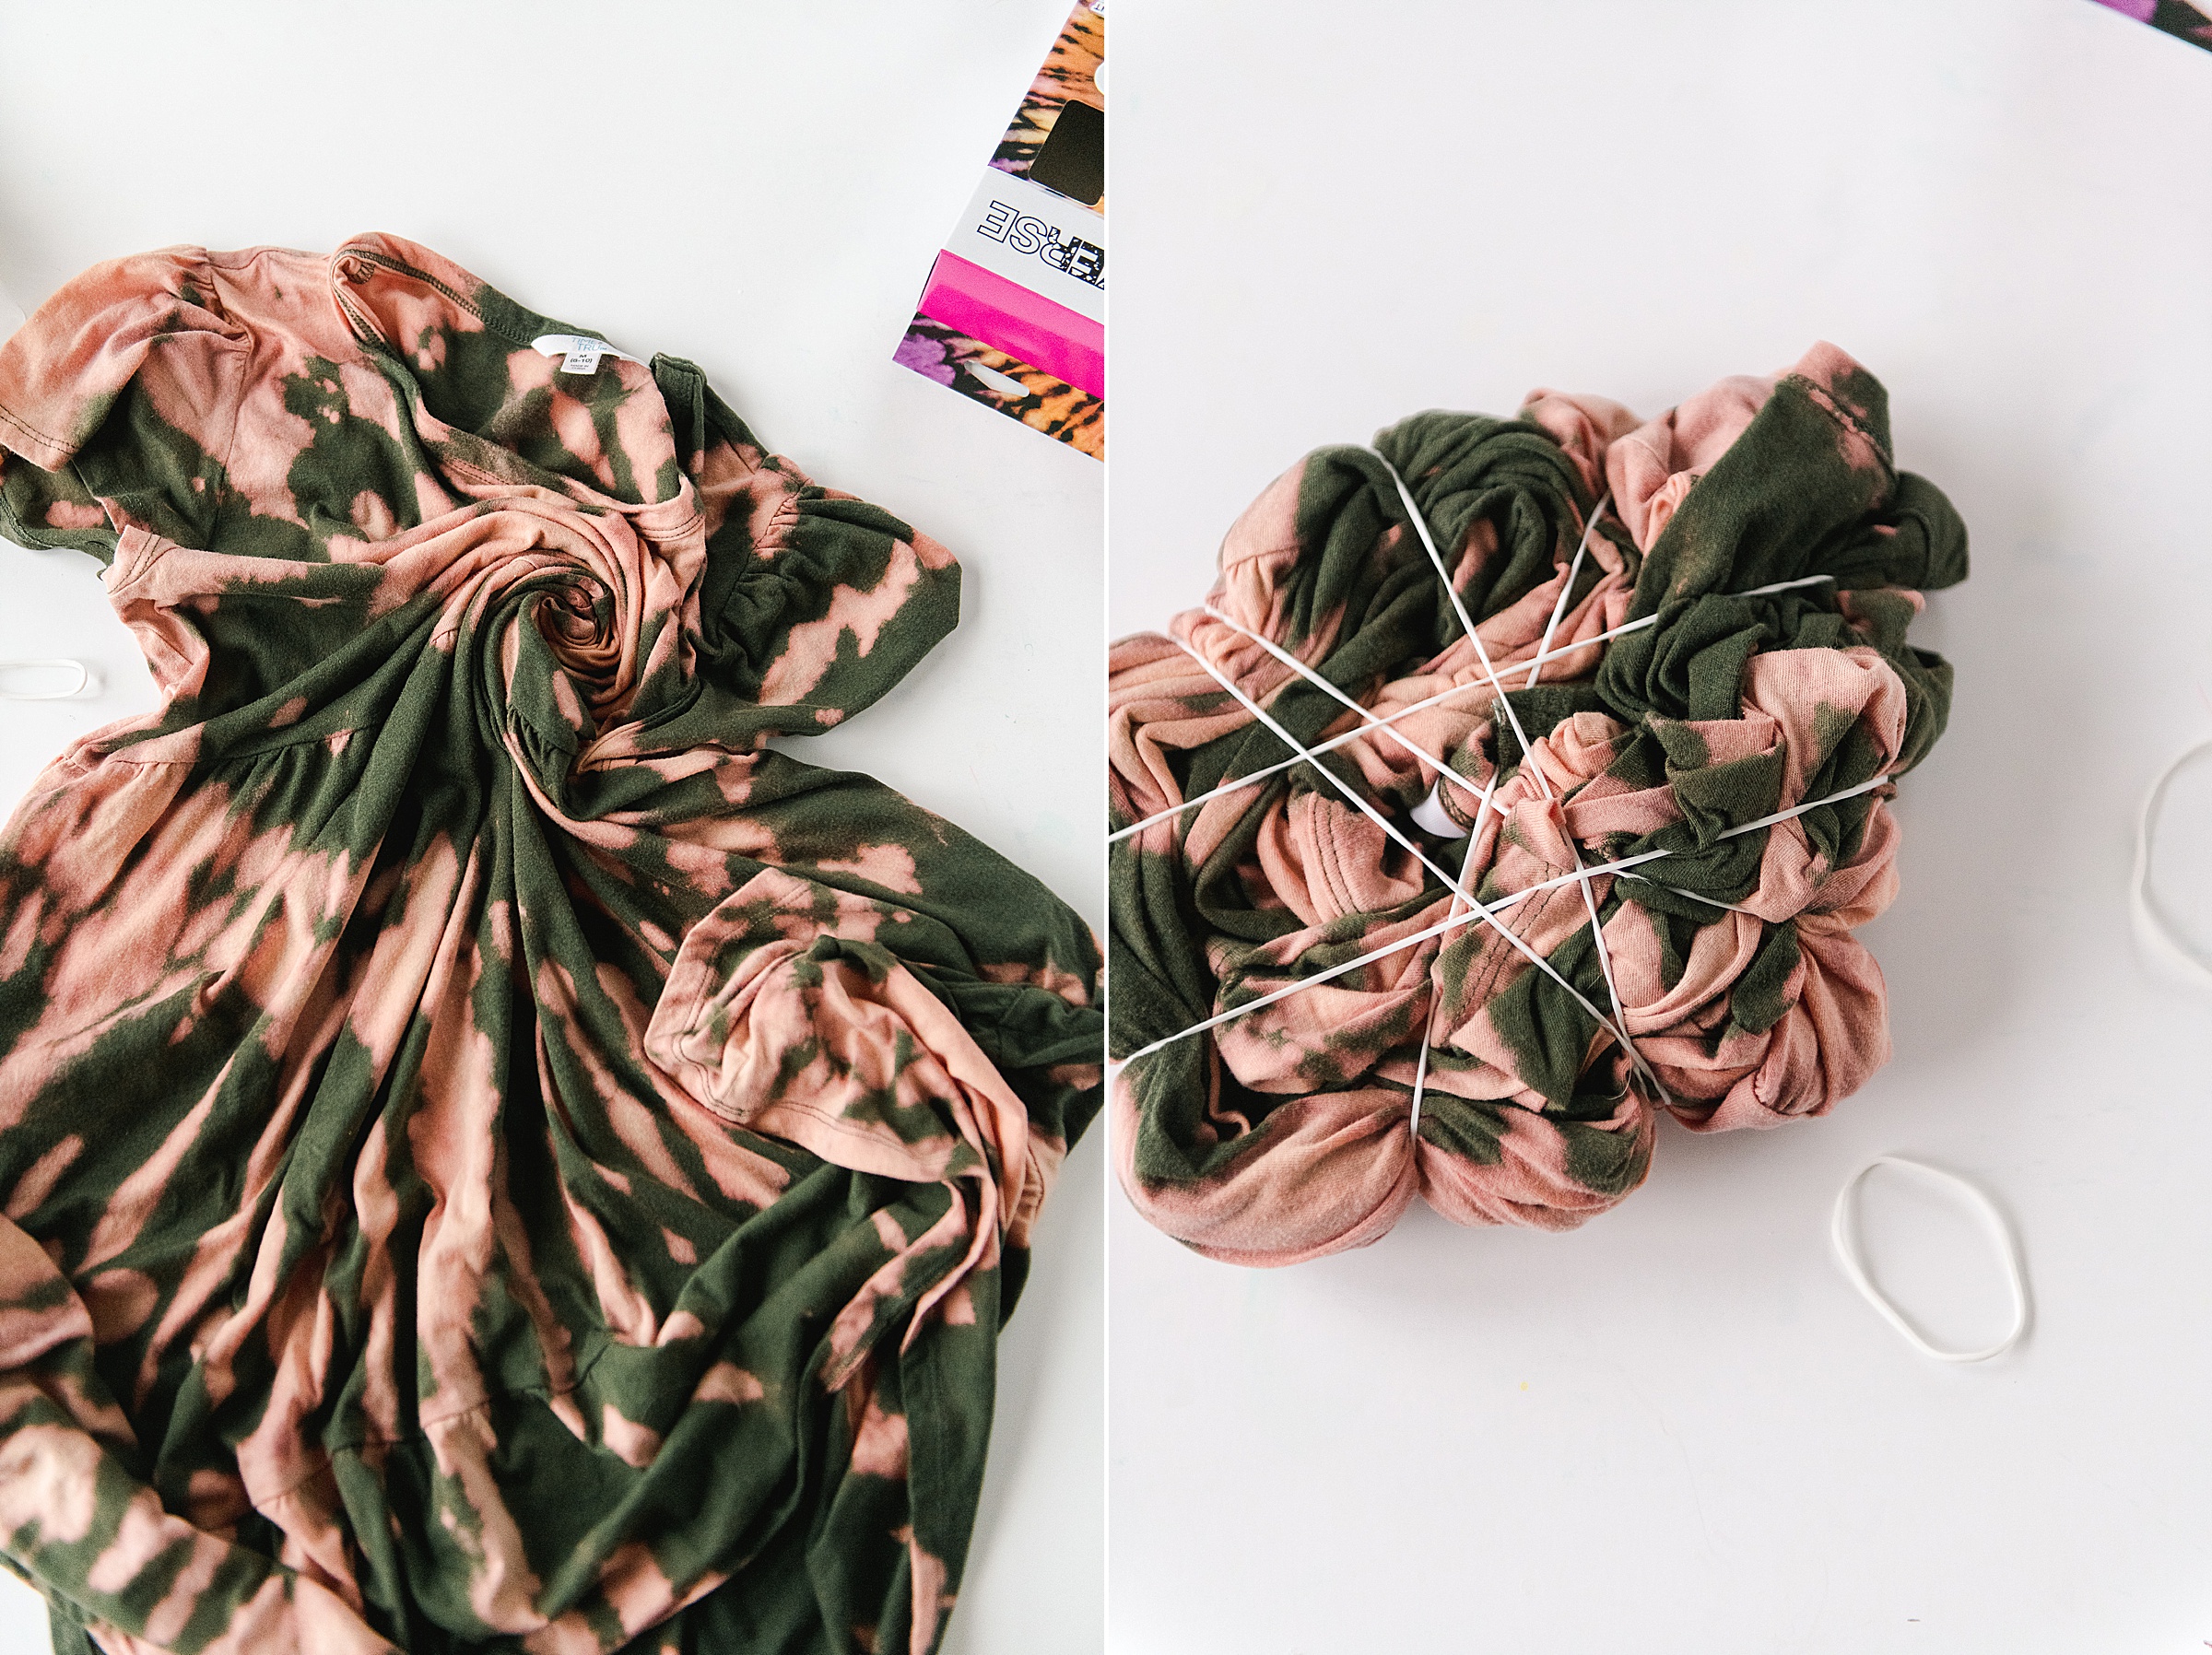
Bind up your dress again and place on the drying rack.
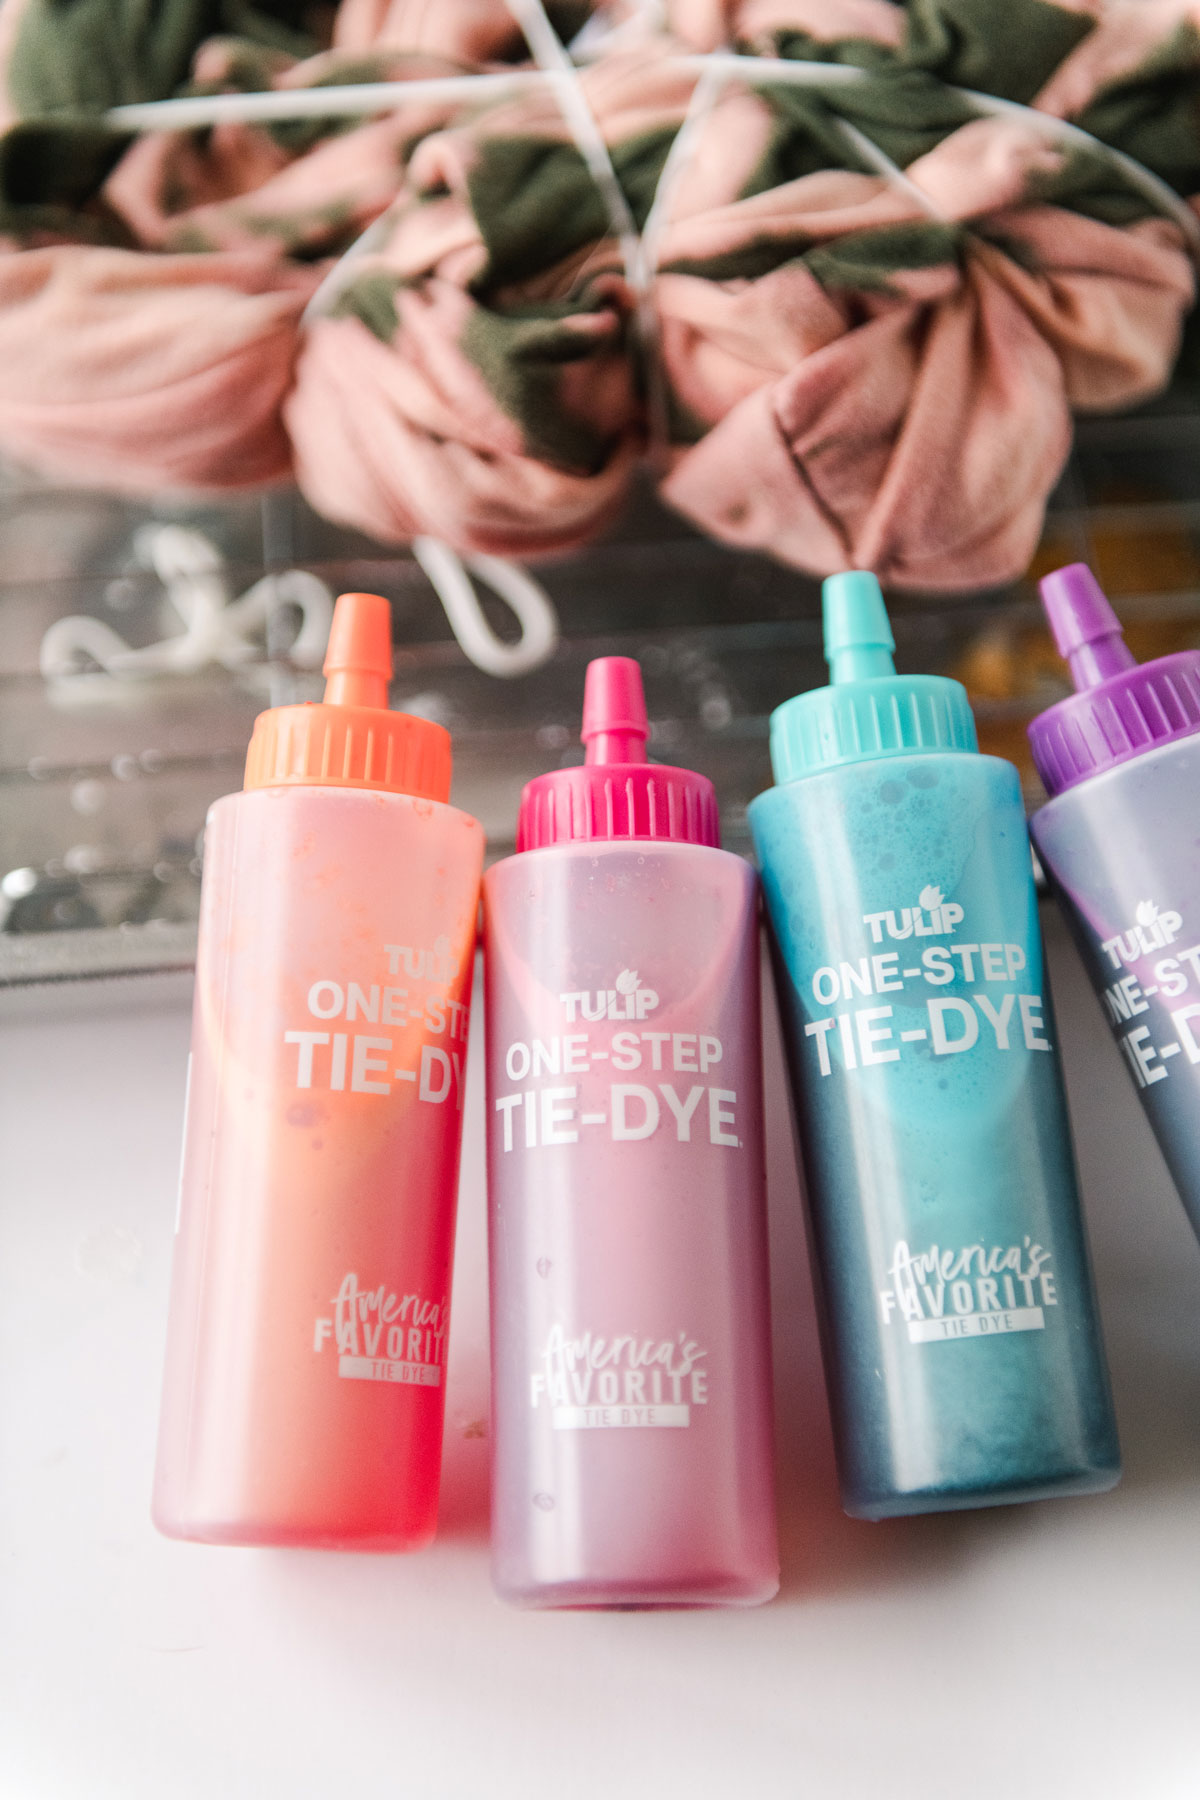
Mix up your bottles of color tie dye (I used all 4 colors, yay)! 🙂 Fill with like warm water to the fill line and shake well (mix mix mix)! 🙂

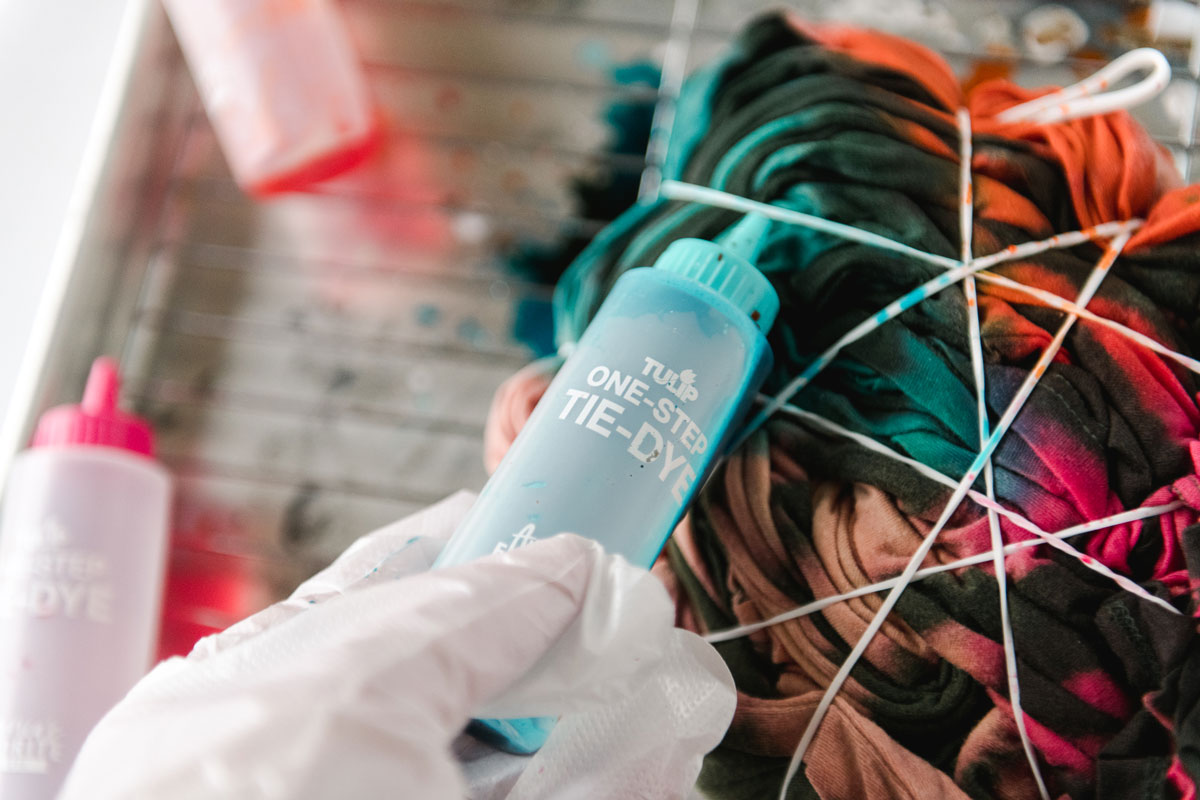
Then slowly and soaking-ly (that’s for sure a word) soak your garment with the Tulip color tie dye solution! Soak both sides well!
Let your dyed garment sit overnight in a sealed bag! 🙂 The longer you let it sit, the more the color penetrates, that’s why I like overnight so that the color gets nice and saturated! 🙂
6. THE REVEAL 🙂
aka: the best part!
Open your bag, and begin to unwrap or clip off your rubber bands with scissors! Then rinse you garment in cold water to wash away any excess dye that is still in the cloth. Rinse WELL! Then place in your washer (either alone or with other dyed garments) and give it a good wash and dry! Pull it out of the dryer and fall in love with your amazing new piece of summery-happy clothing! 🙂