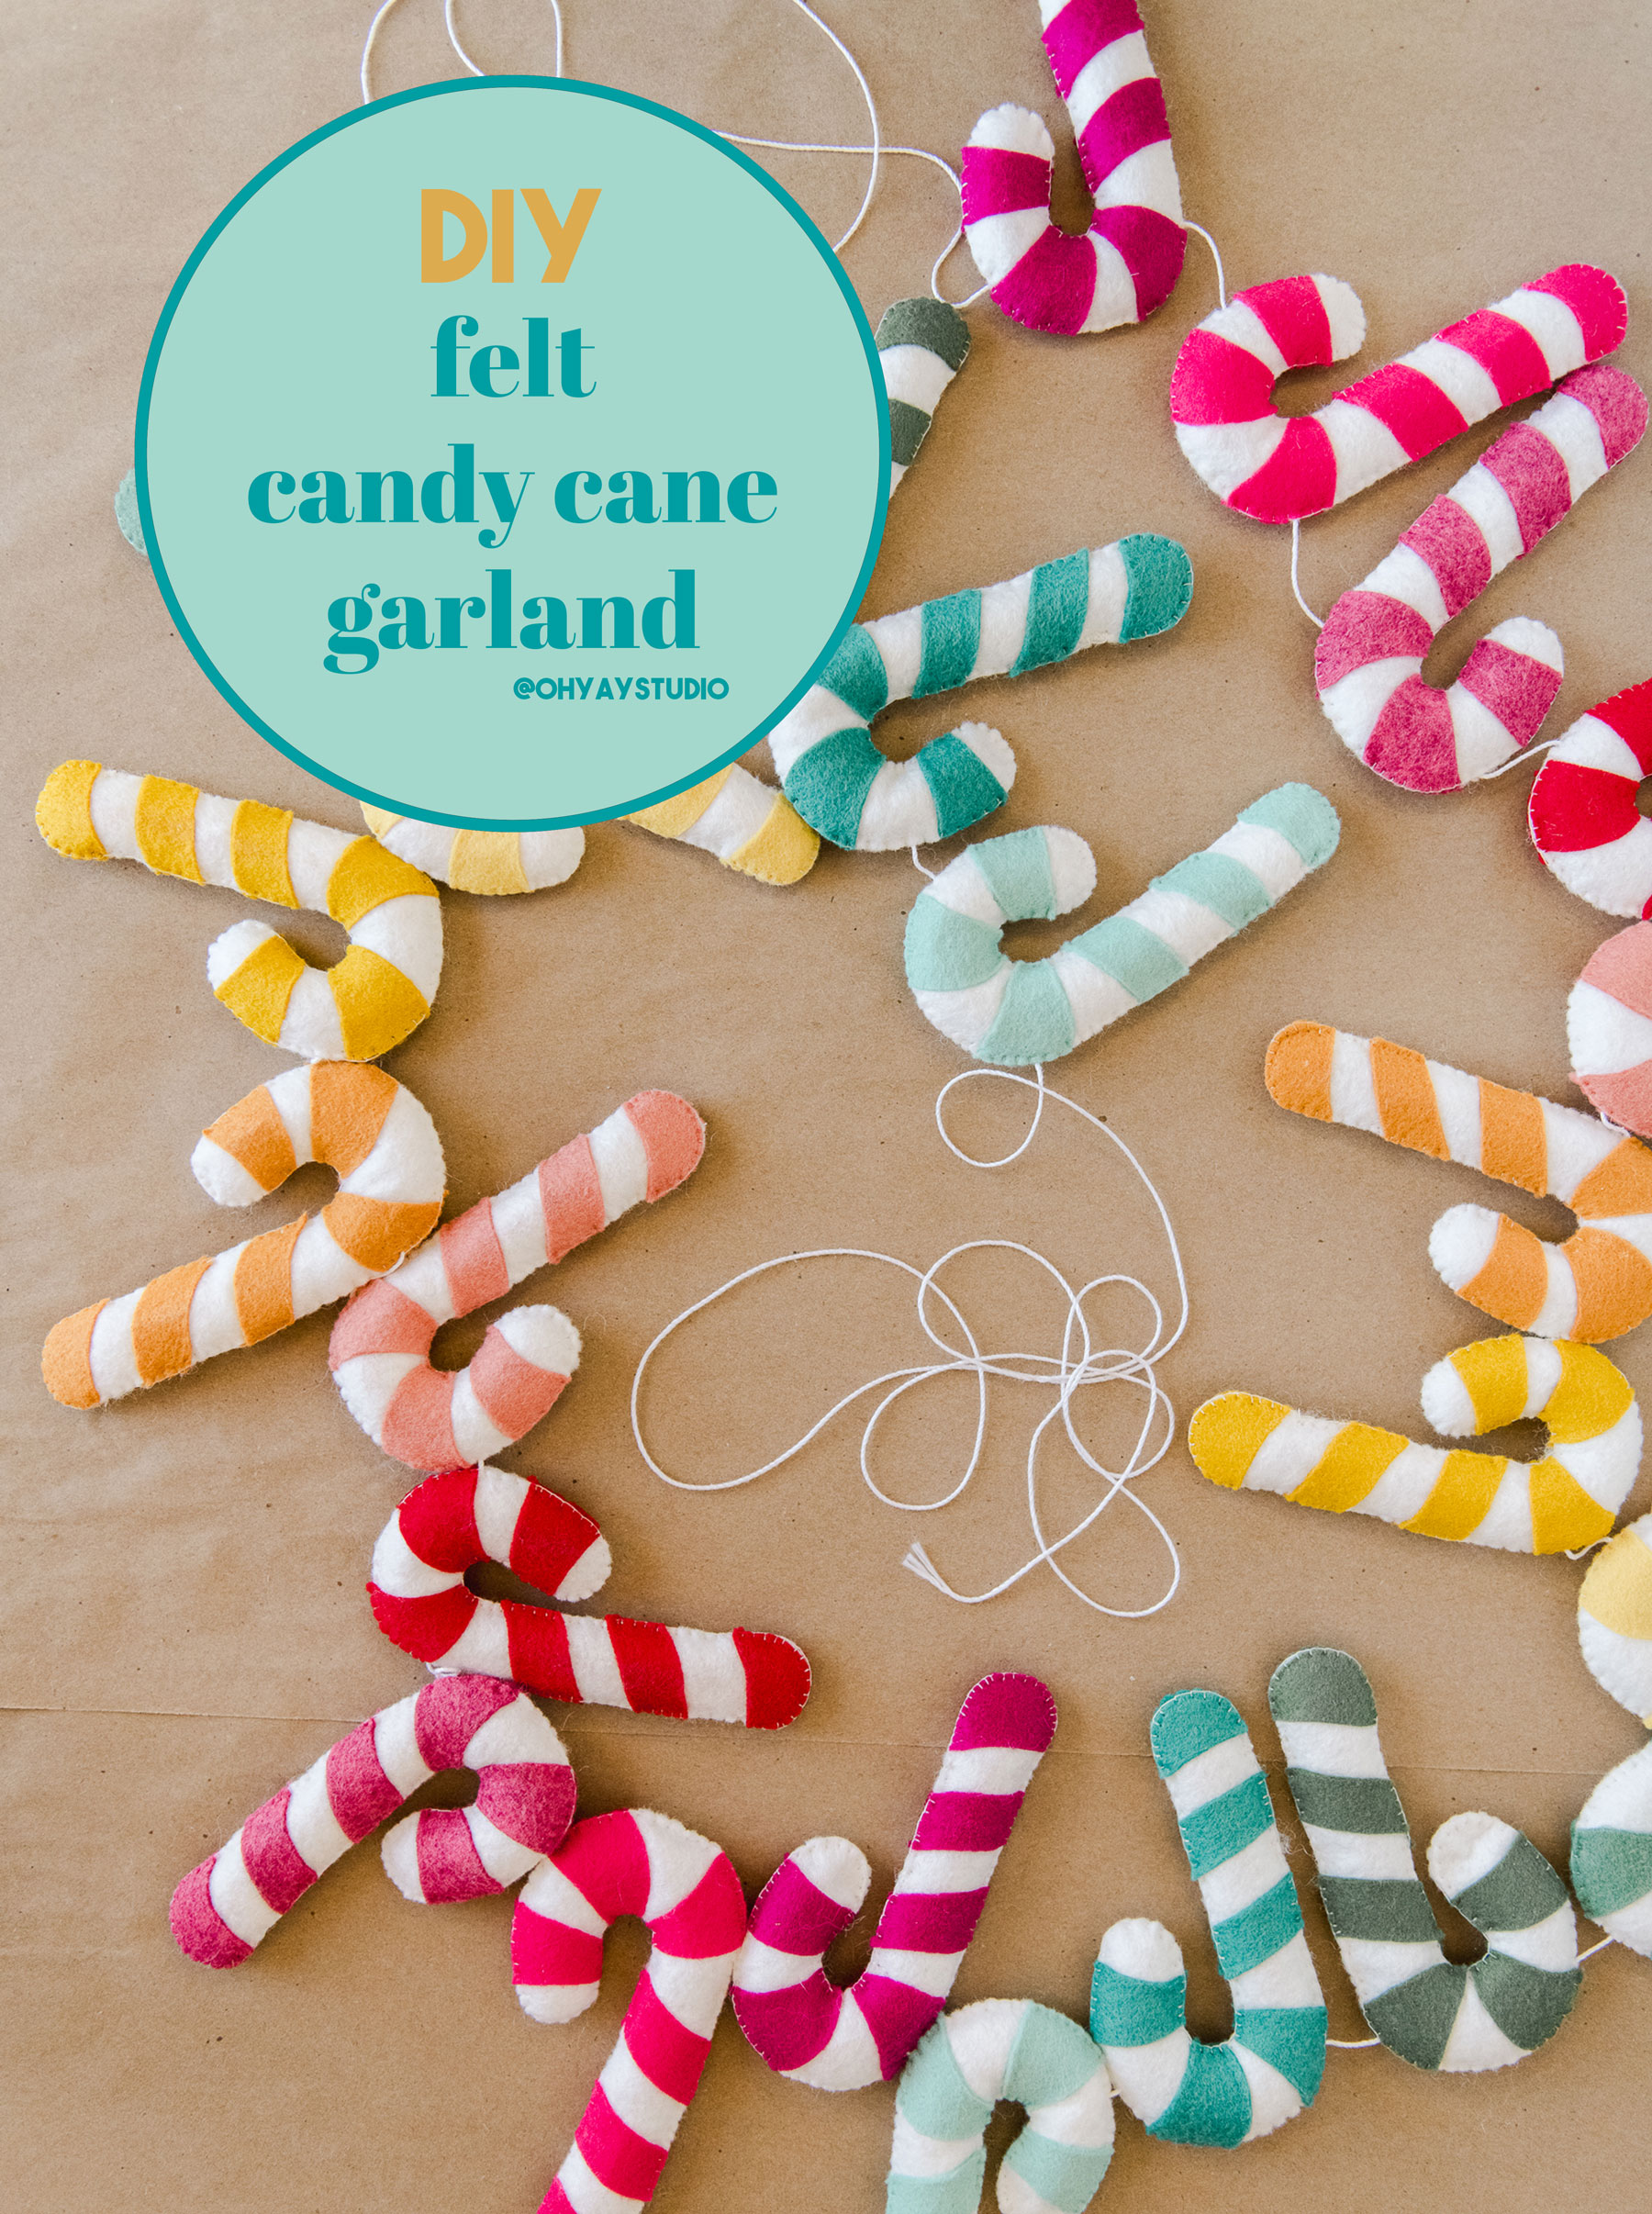
Felt Candy Cane Garland DIY
‘TIS THE SEASONNNNNNNN for making and baking and gifting and sitting down on a Friday night to craft while watching your fave holiday movie, amiright? 🙂 And this colorful candy cane garland is soooooo perfect for just that – it’s a project you can easily put down and pick up again (night after night if needed) and it’s a “mindless” hand stitching project that will put you in the holiday spirit! 🙂
If you aren’t into hand stitching – DO NOT WORRY! You can EASILY use fabric glue instead of stitching or your sewing machine if you really wanted to 🙂 Just follow the directions below and make your adjustments when you come to the hand stitching step!
MATERIALS:
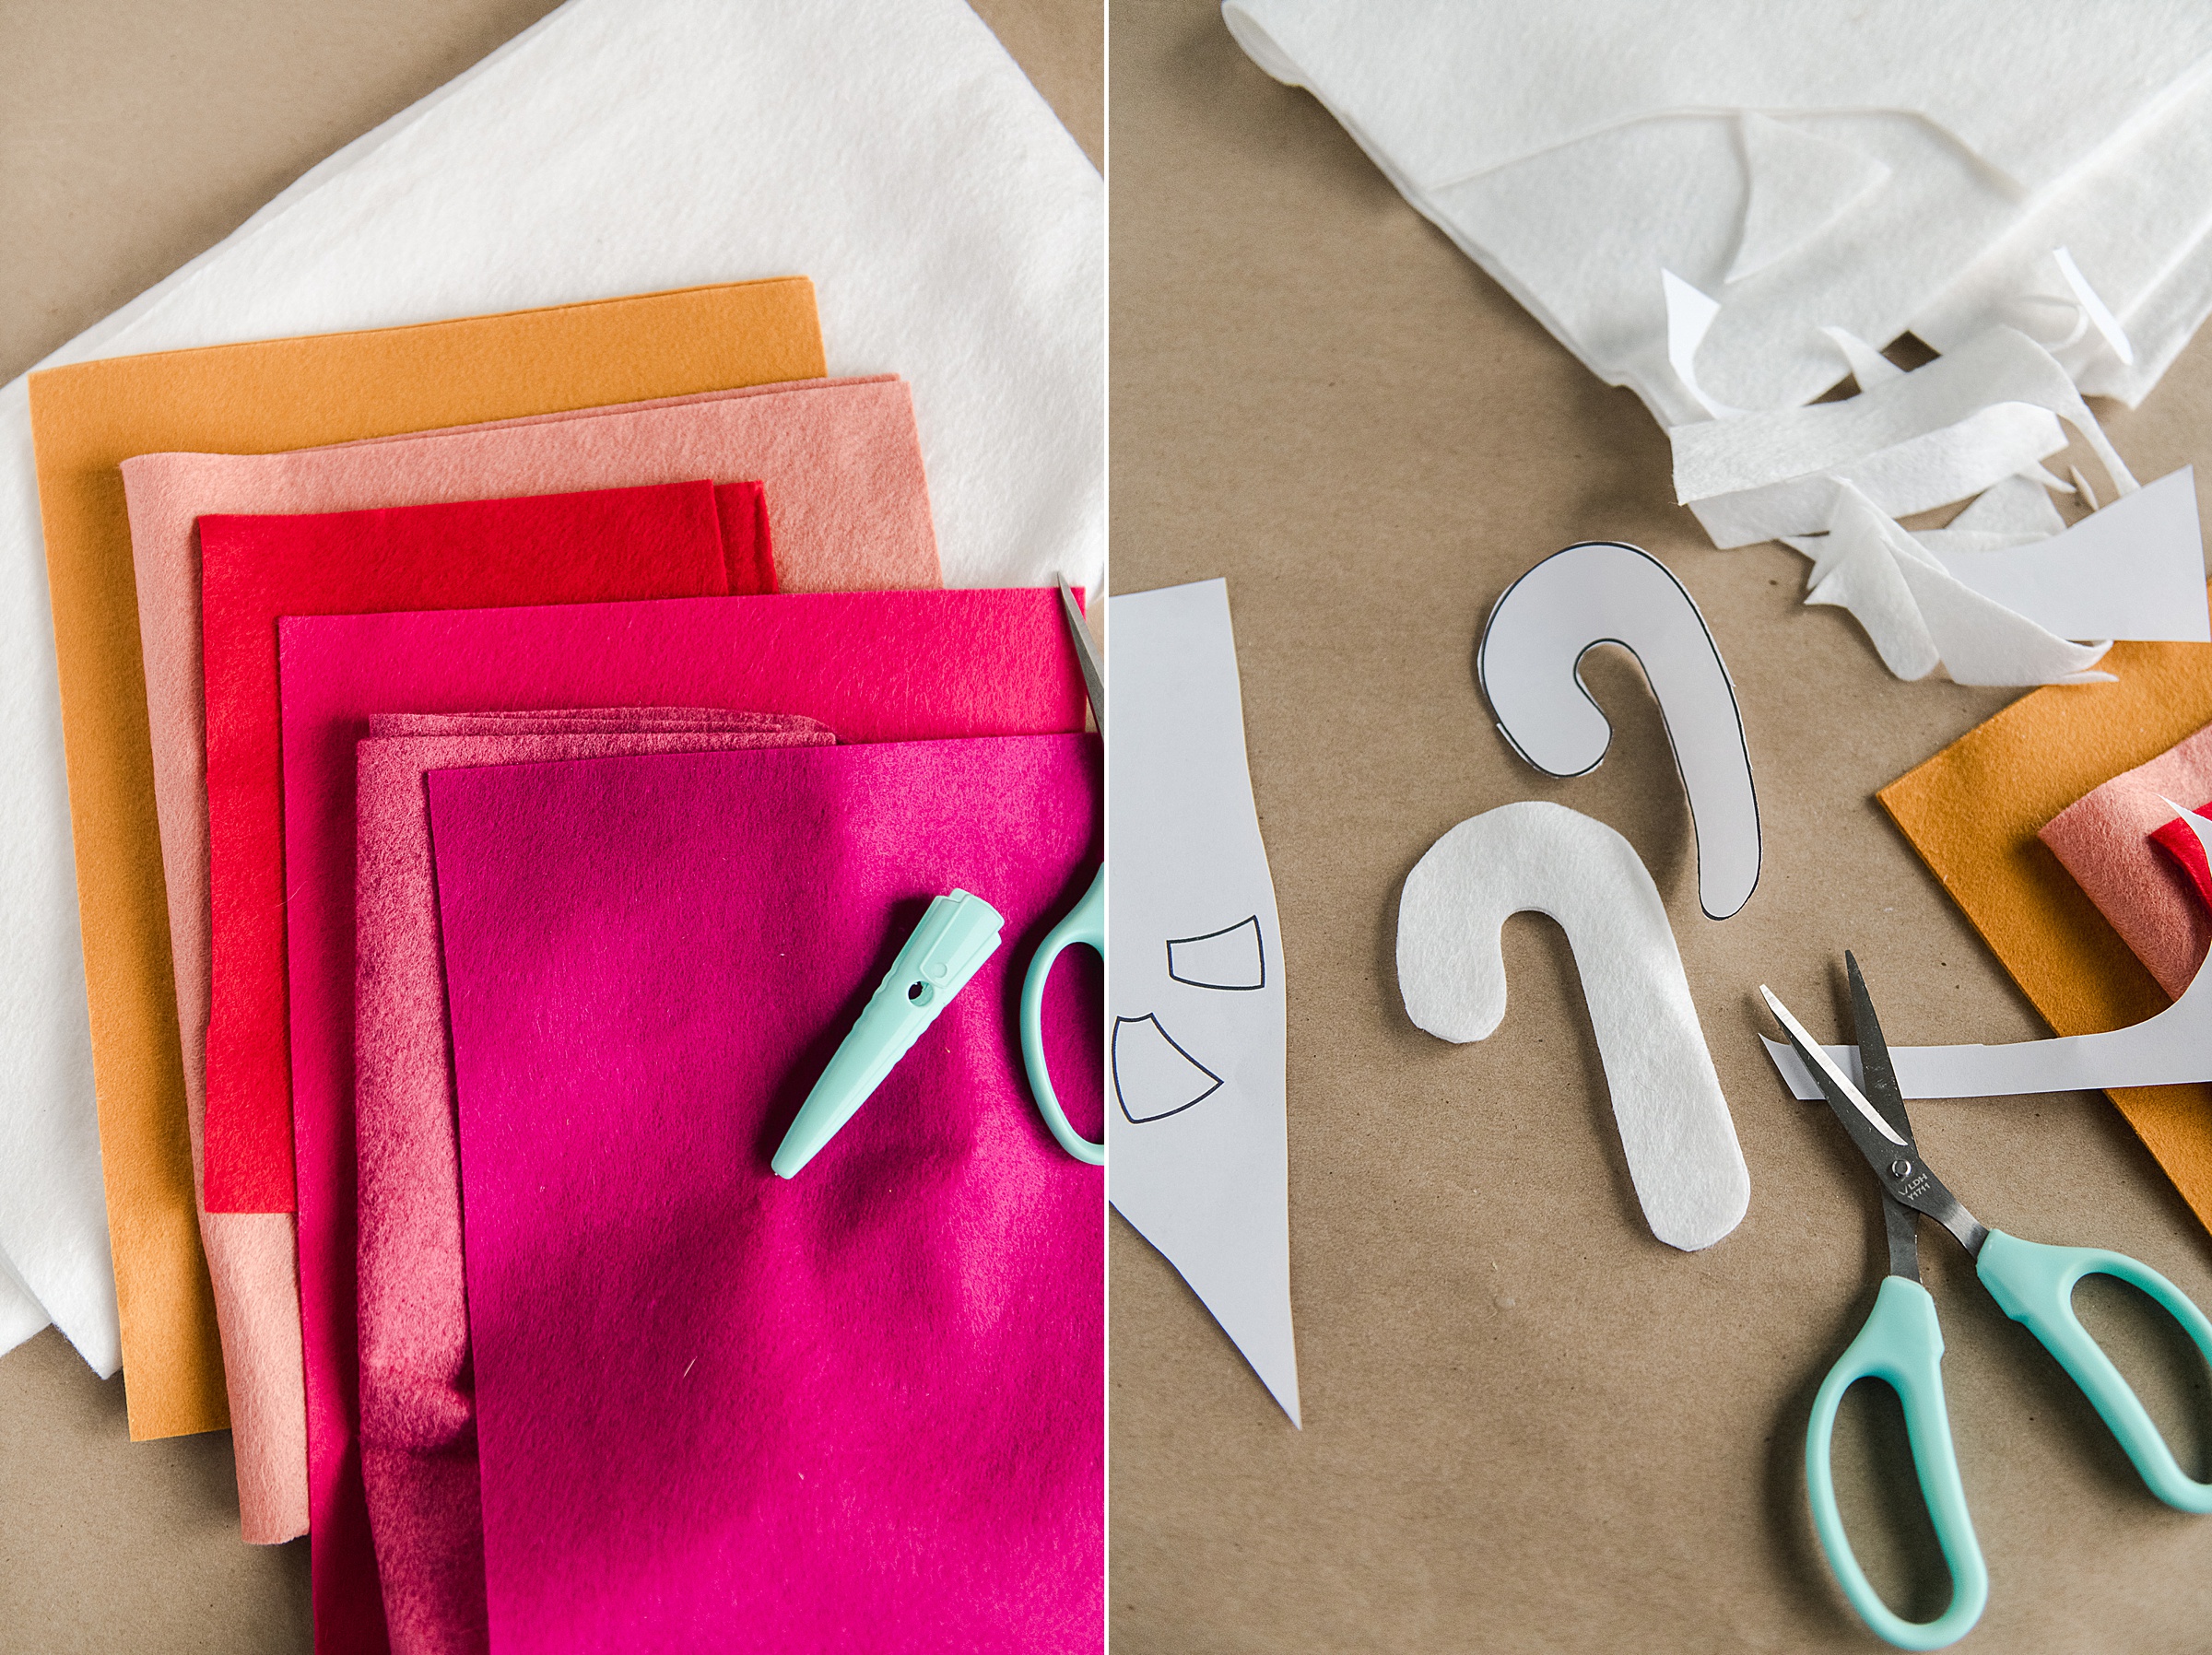
- White felt for the mine candy cane
- Felt in your favorite colors for the stripes
- A bottle of Aleene’s Felt + Fabric glue (my fave)
- A needle and thead (or sewing machine or glue if desired)
- Some poly-fil or stuffing of choice
- A larger darning needle and string for stringing the finished candy canes together
- optional straight pins for cutting out shapes on felt
INSTRUCTIONS:
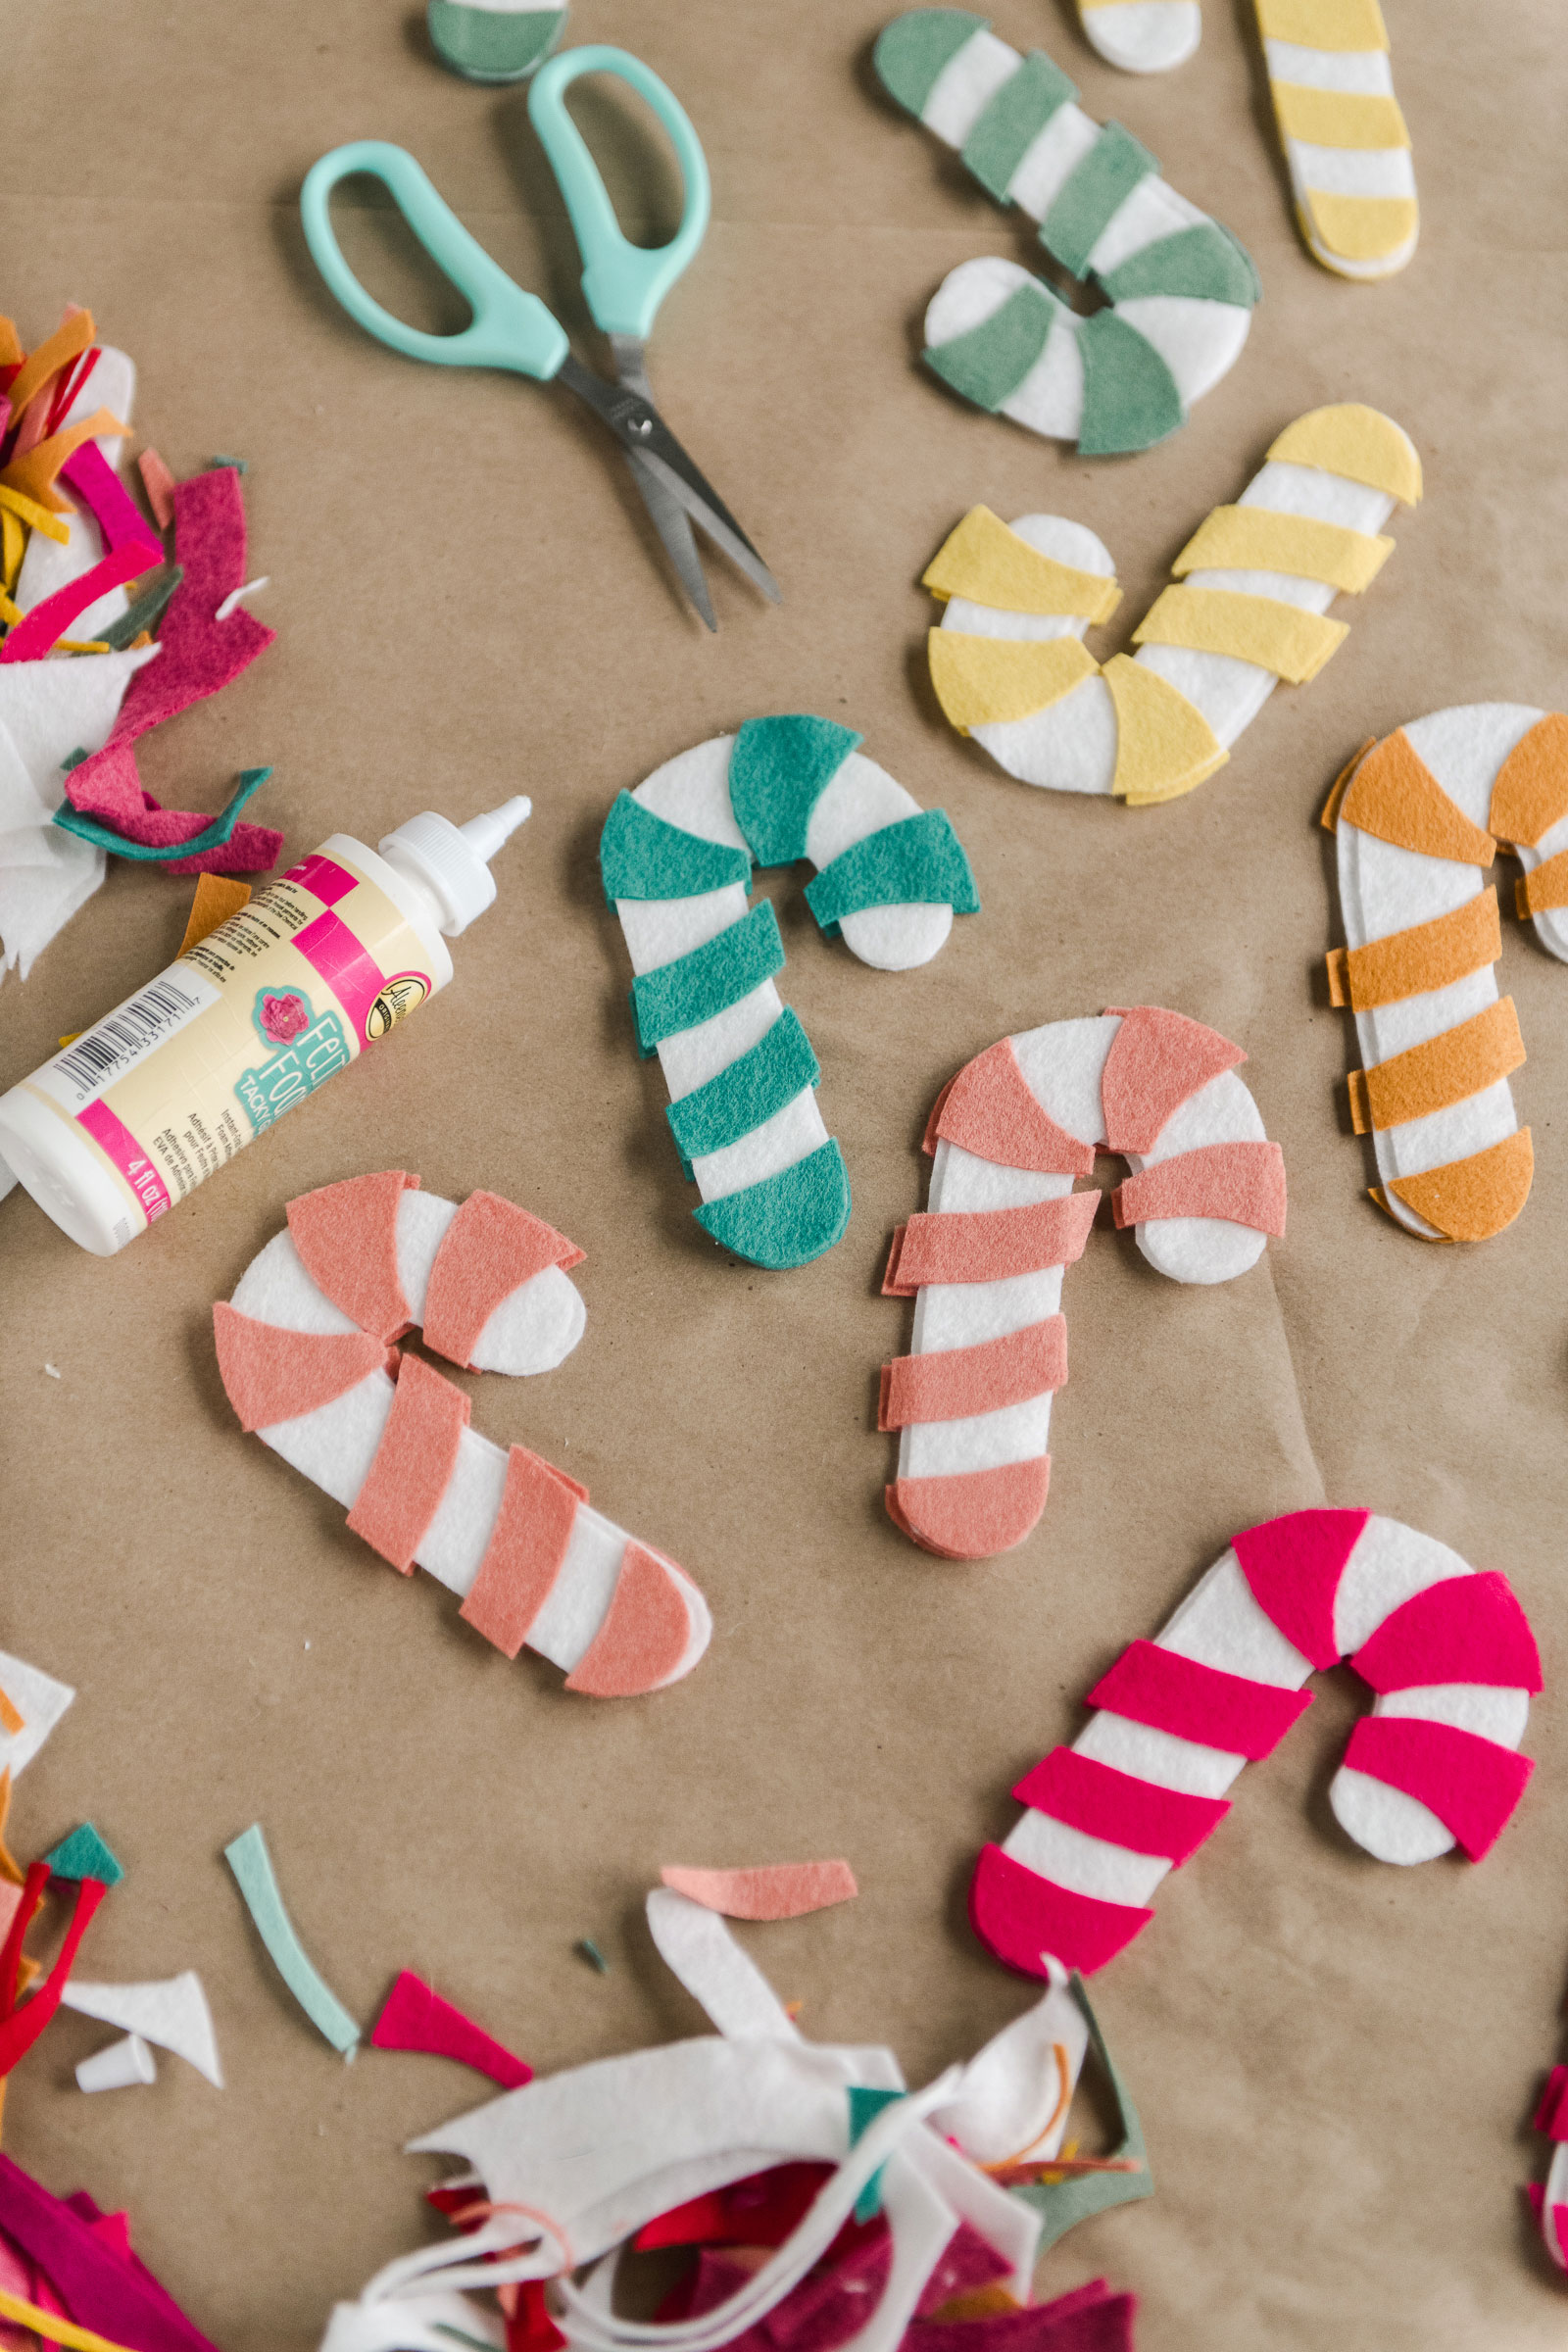
- Download the candy cane template HERE and begin to cut out your pieces.
You will ALWAYS want to cut out 2 at a time so that your pieces match together. I tend to cut out larger and then cut smaller; for instance I will cut out a larger rectangle of white (2 together) and then lay the main candy cane template over top to cut out the exact shape…I find that this works well because it’s less fabric to manage from the whole felt sheet as I cut.
Cut out 2 candy canes (together) from your white felt and 2 sets of number 1-6 strips (together) from your colored felt per finished candy cane.

NOTE: Your “stripes” (numbers 1-6) are intentionally wider than needed for your candy cane – I wanted to be sure that the stripes went all the way to the edge of the white candy cane when it came time to sew them and the best way to do this (since crafting is never perfect when handmade) is to make those stripes wider than needed to trim in a later step.
**tip: I find it best to cut out ALL the white first and then ALL the stripes in an “factory line” type style 🙂

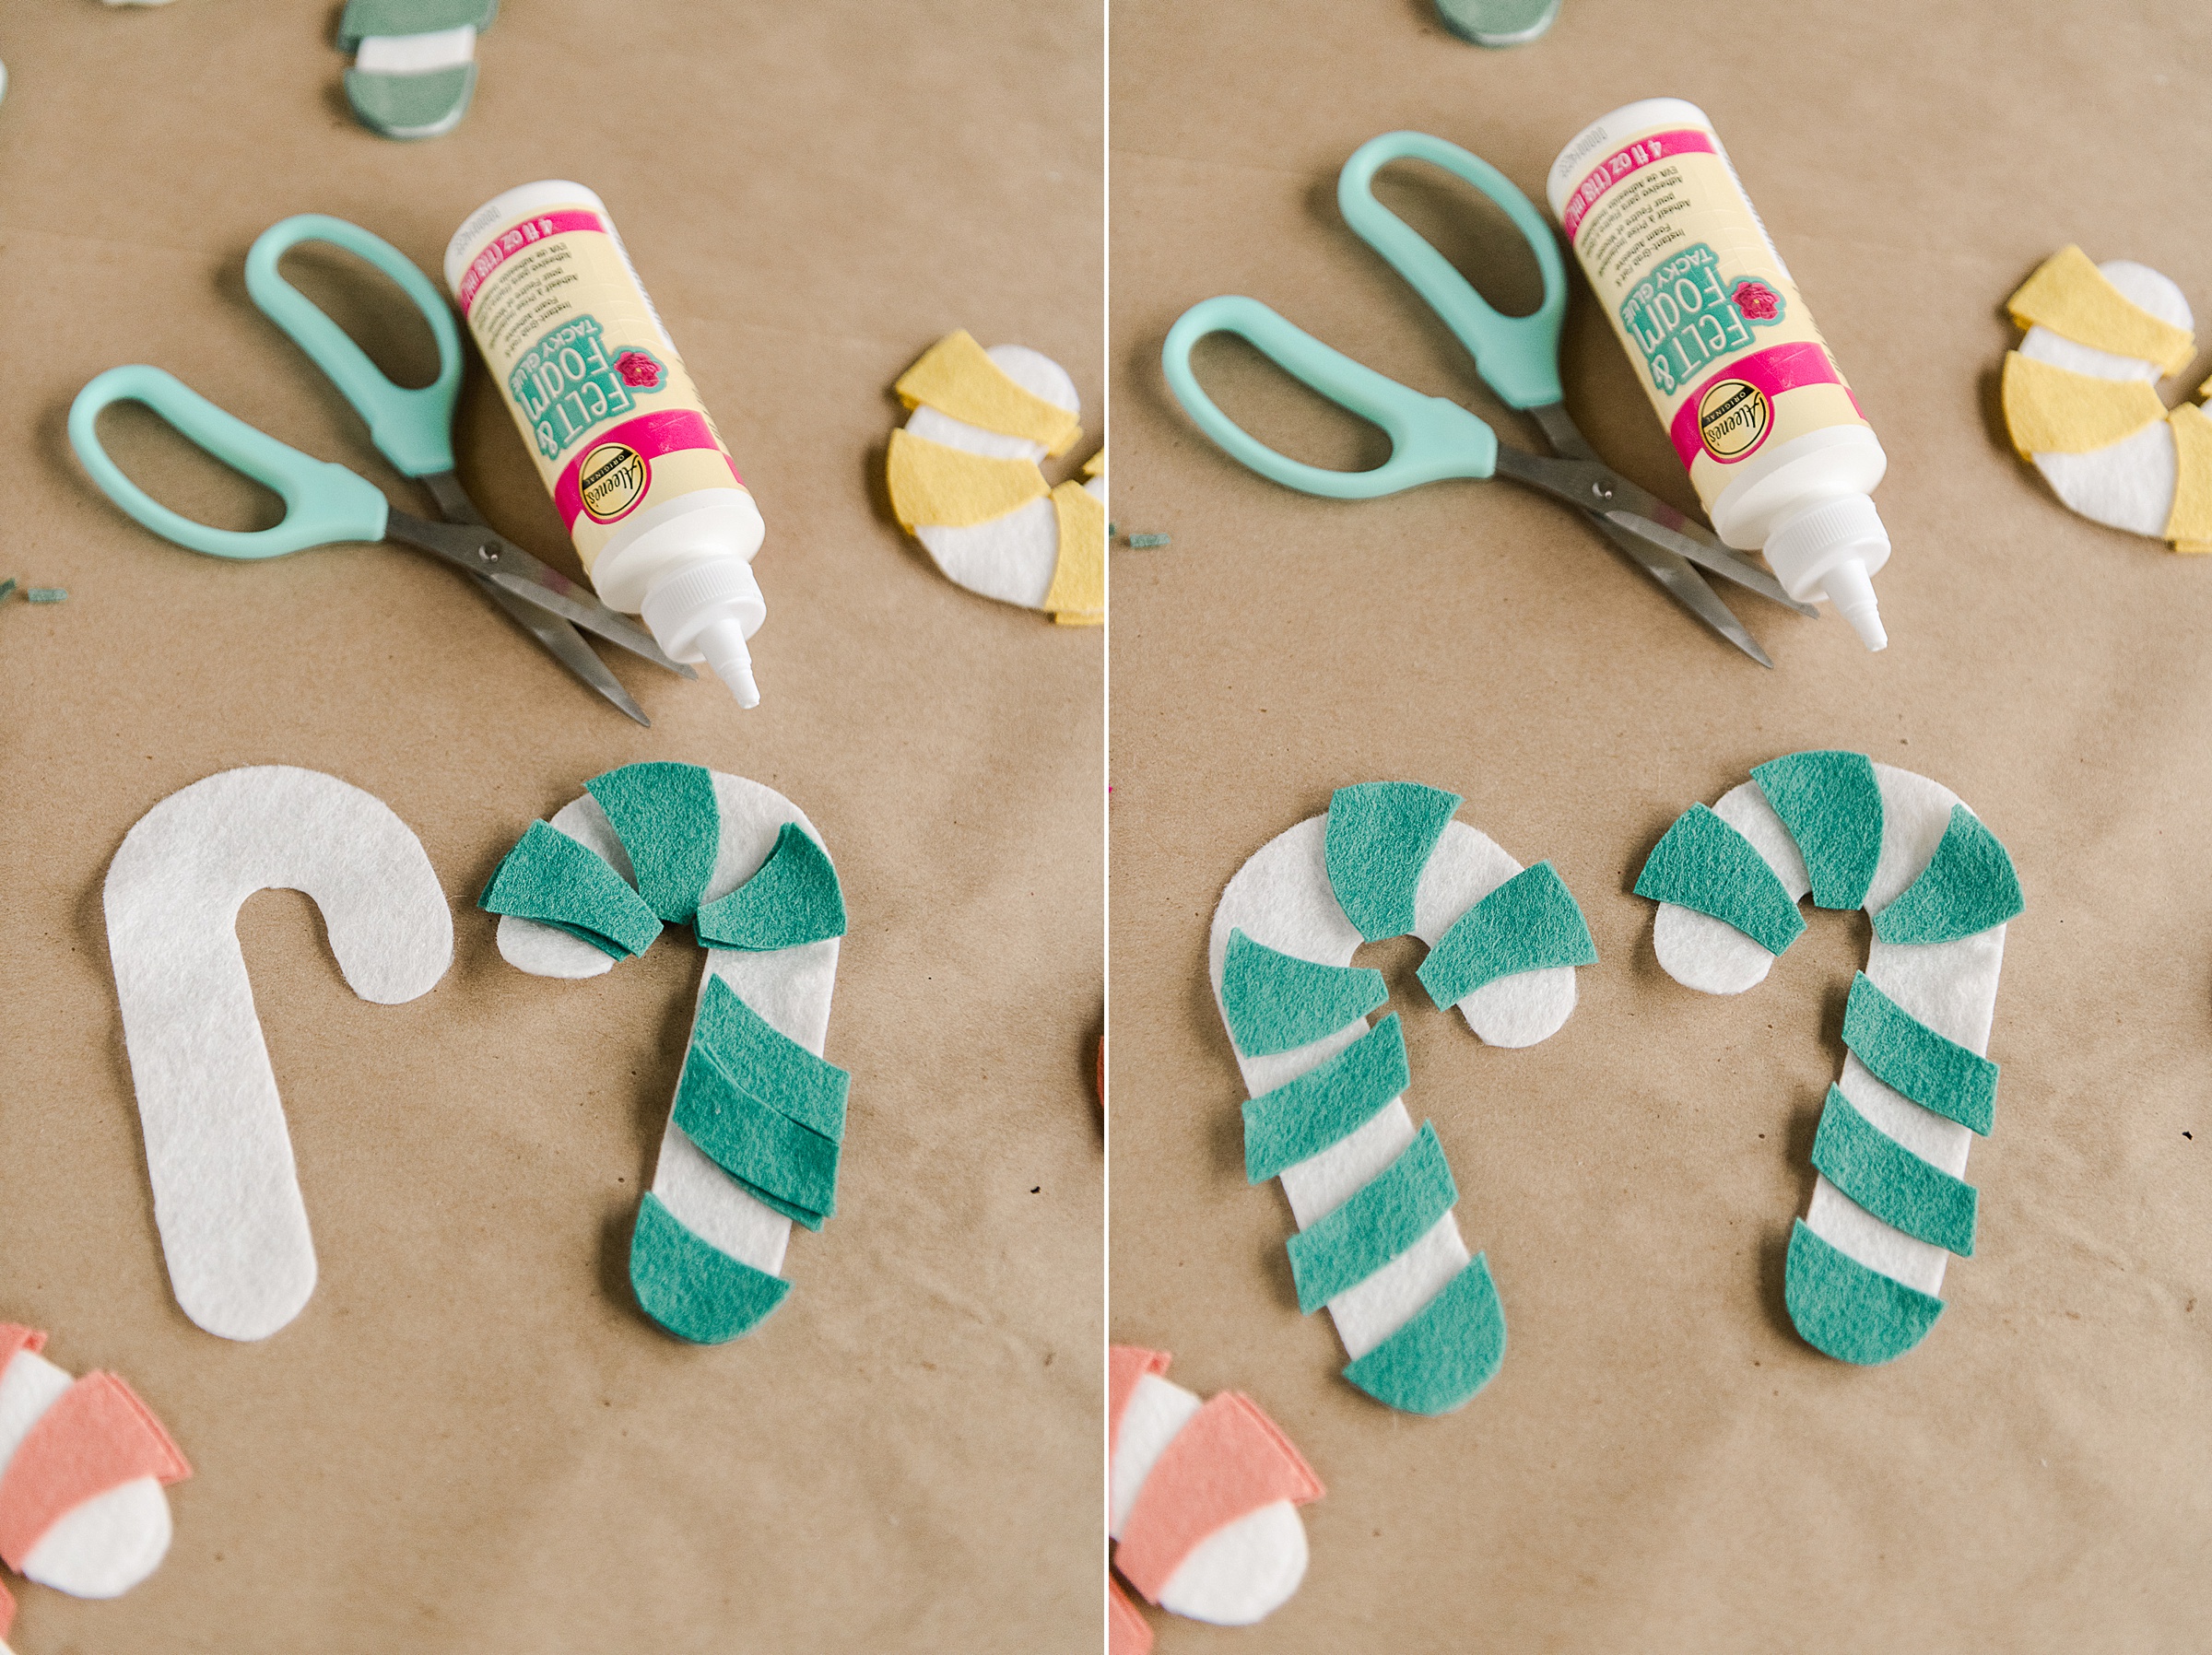
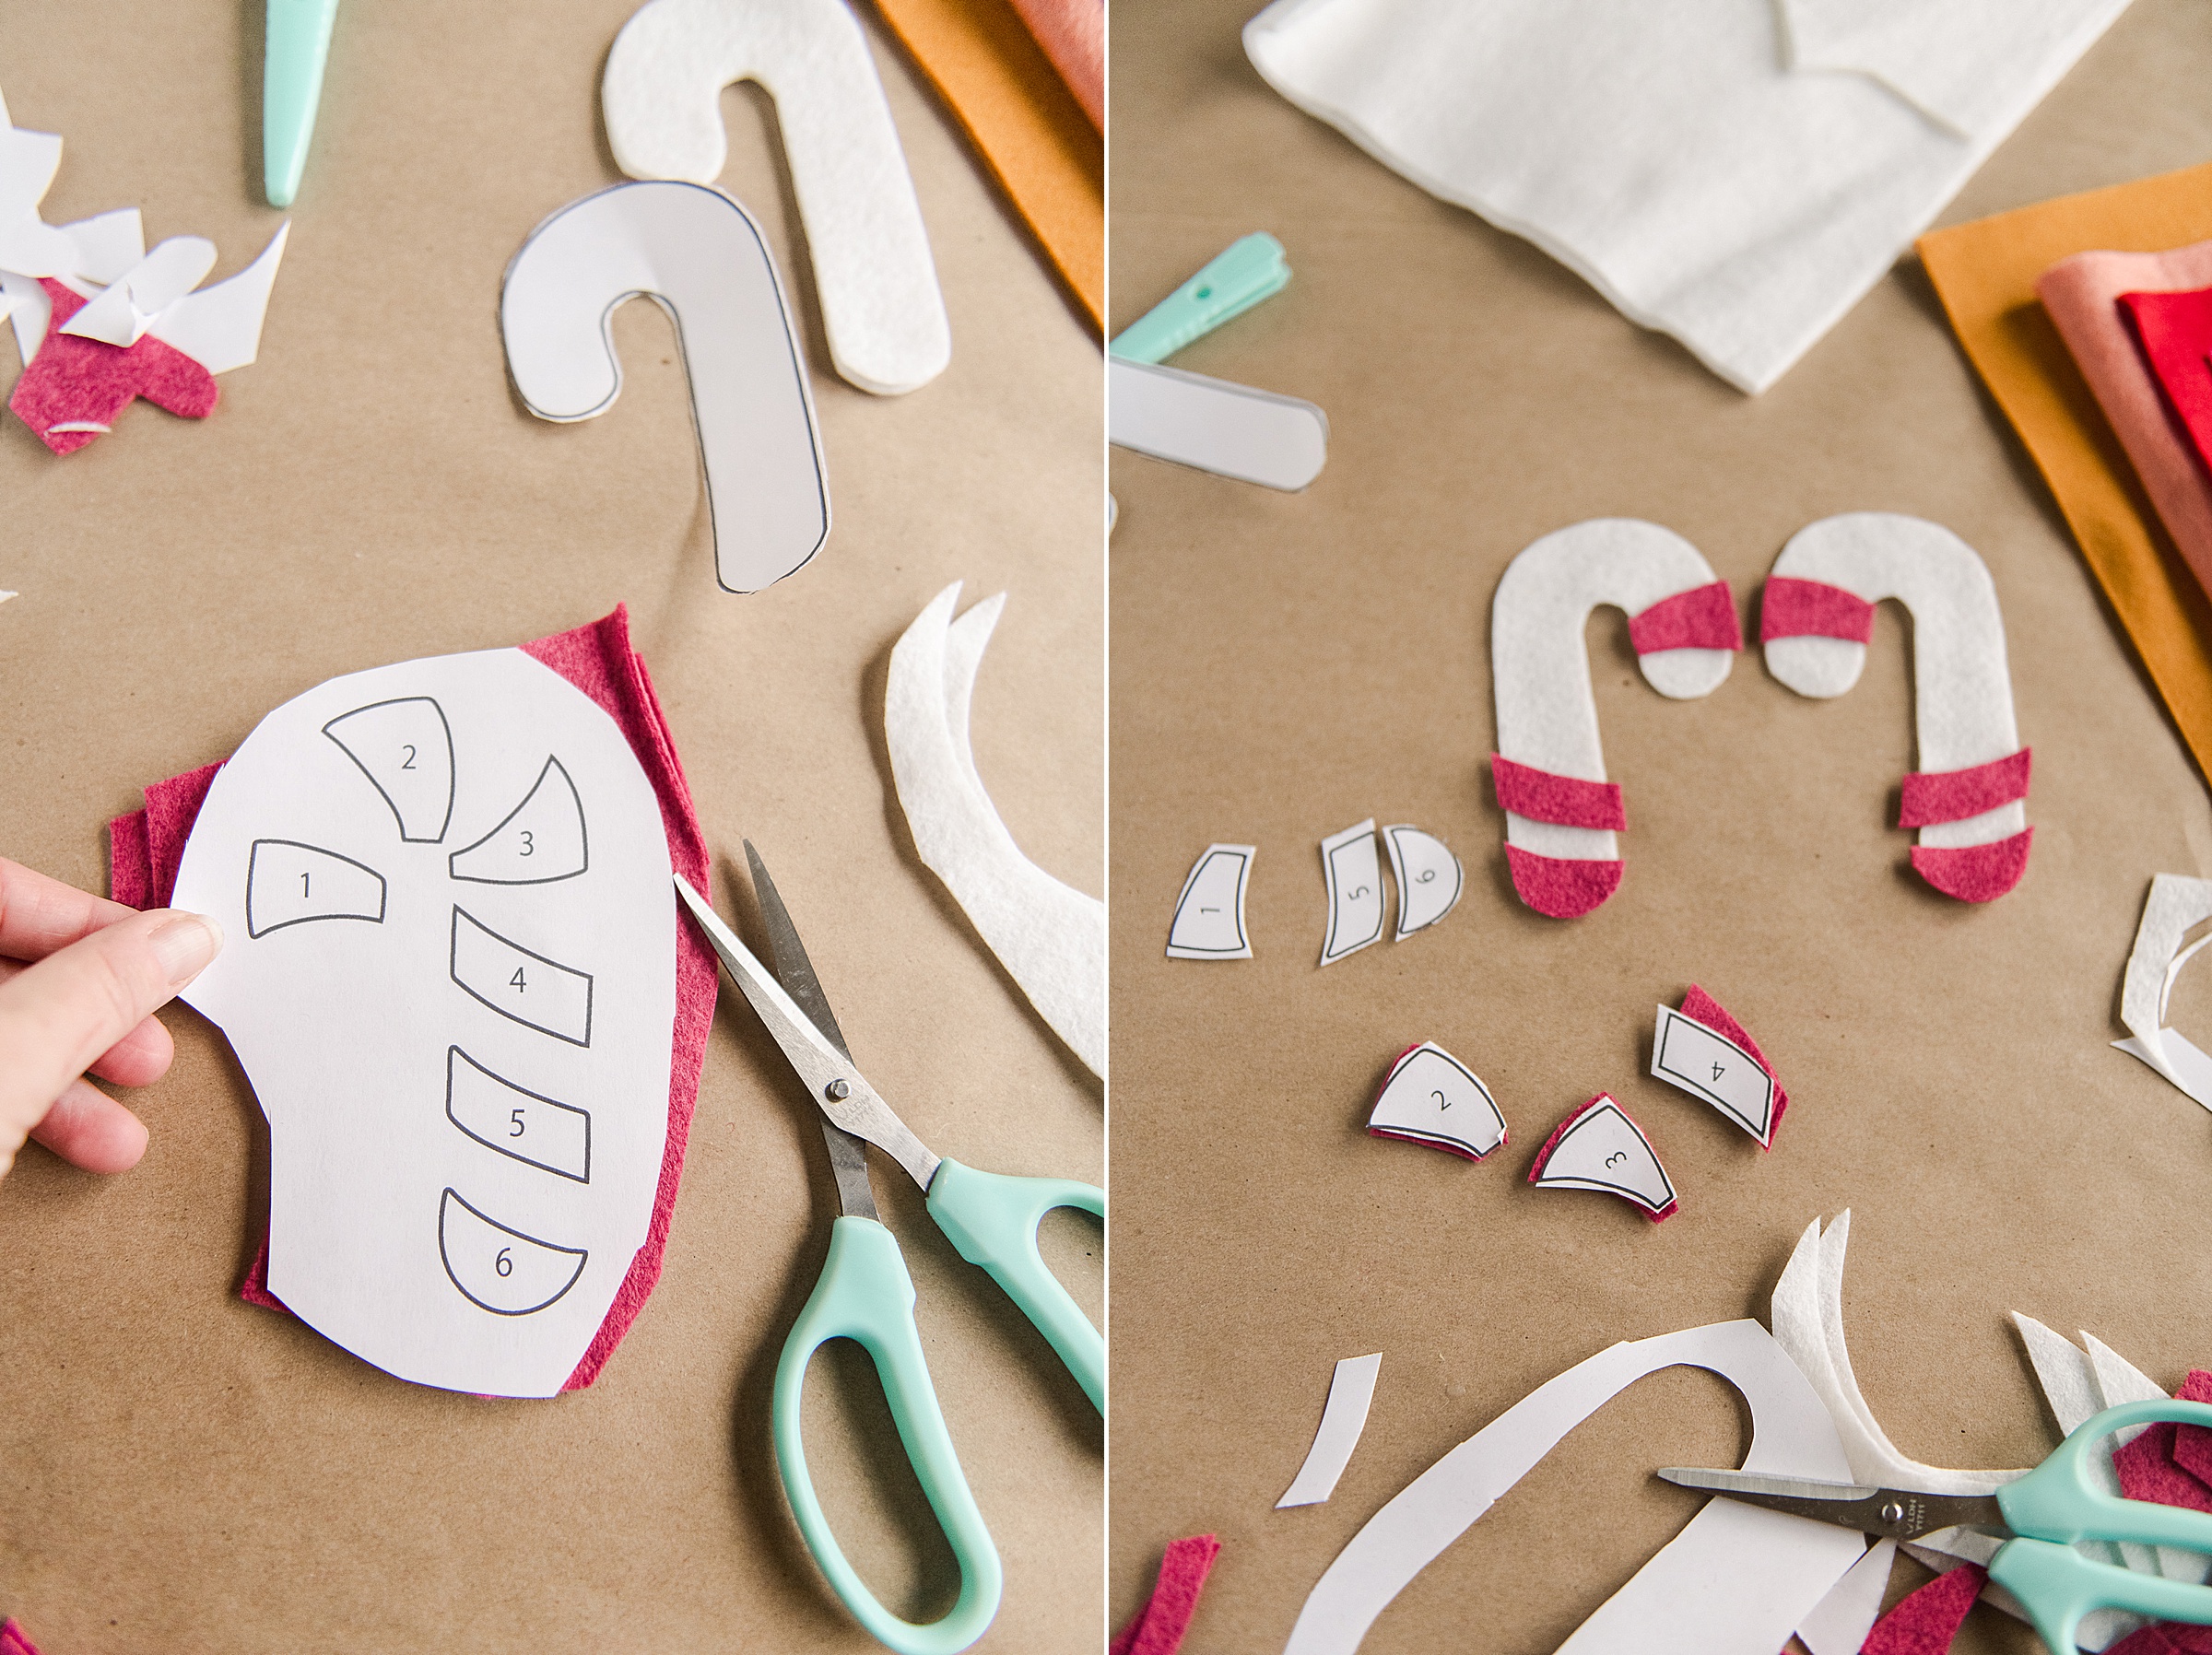
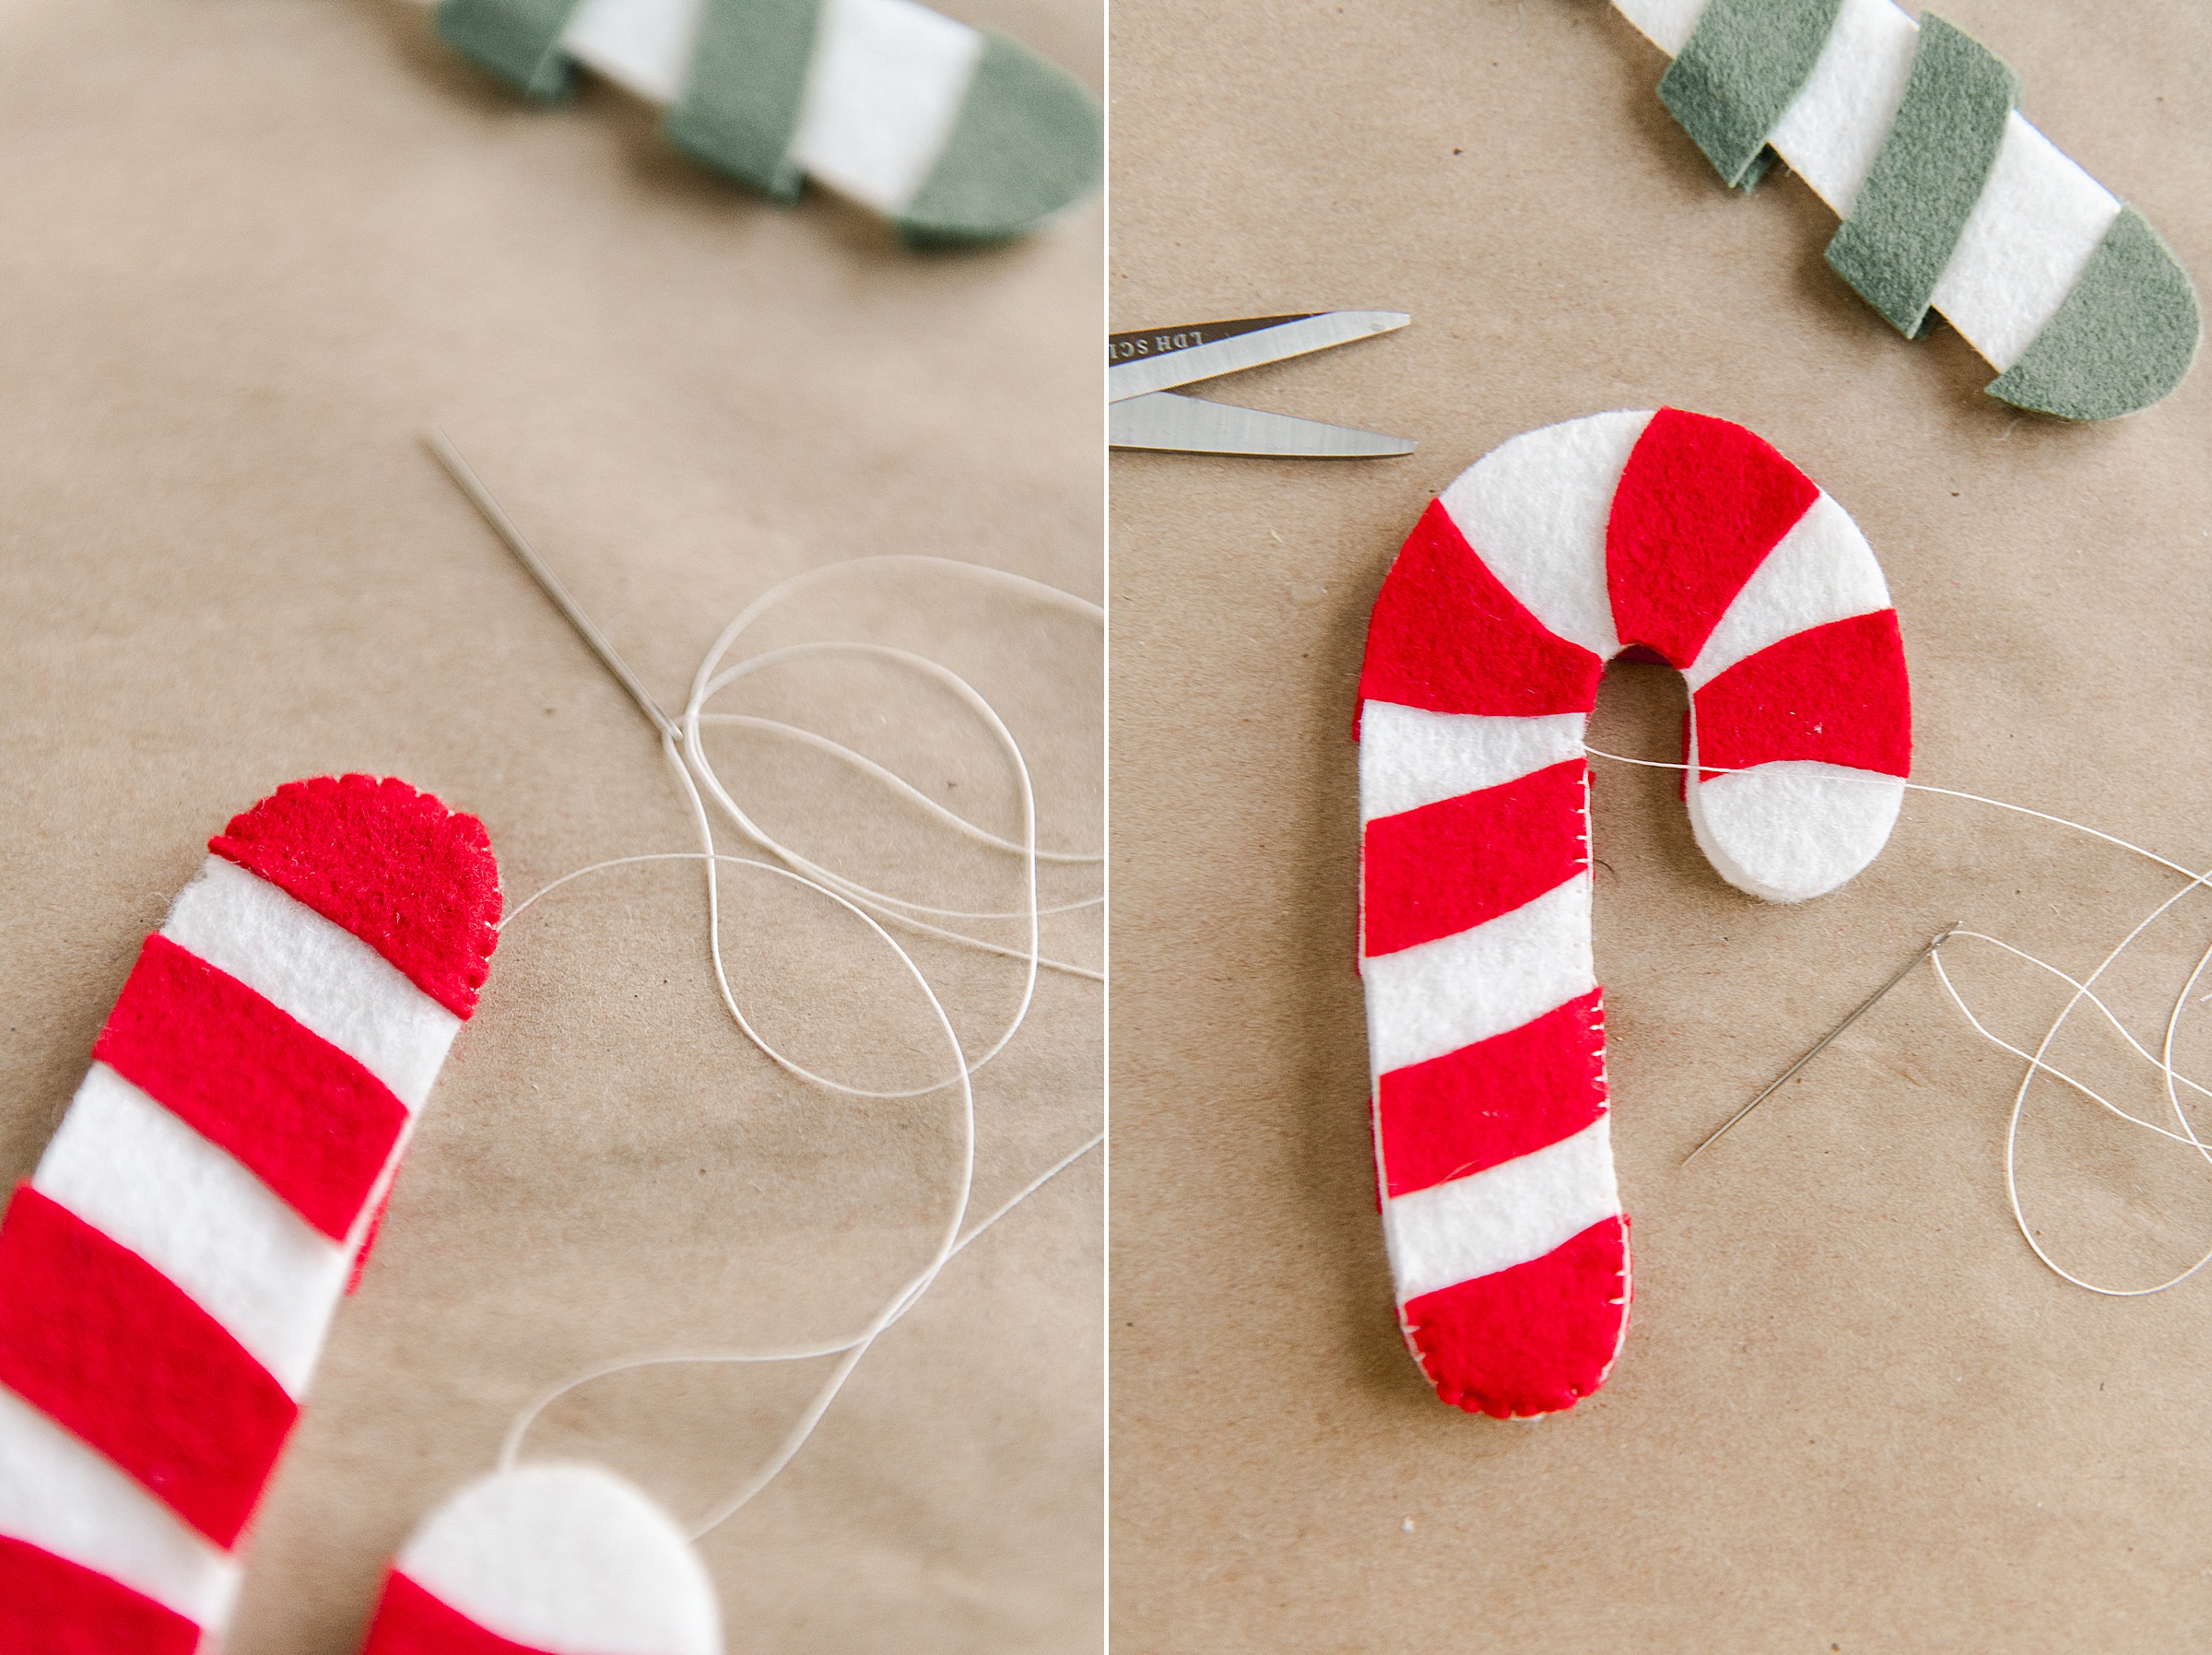
2. Begin to lay out your candy canes and stripes in a “mirrored” way (knowing that 2 of the same color will be stitched together).
I then began to glue the stripes onto the white candy cane background. I chose to use Aleene’s felt + fabric glue because it’s SUPPPER sticky but doesn’t dry solid and hard like hot glue would (for instance). Choose one of the mirrored white candy canes and glue each stripes (1-6) to the background of the first candy cane. Then you will flip that candy cane over and lay the other white candy cane (the mirrored one) on top so that you can lay/glue the other stripes (1-6) to the background doing your best to match them up to the stripes glued to the first background (you want them to line up as best as possible when you stitch in place to make it look like they are one stripe)! 🙂
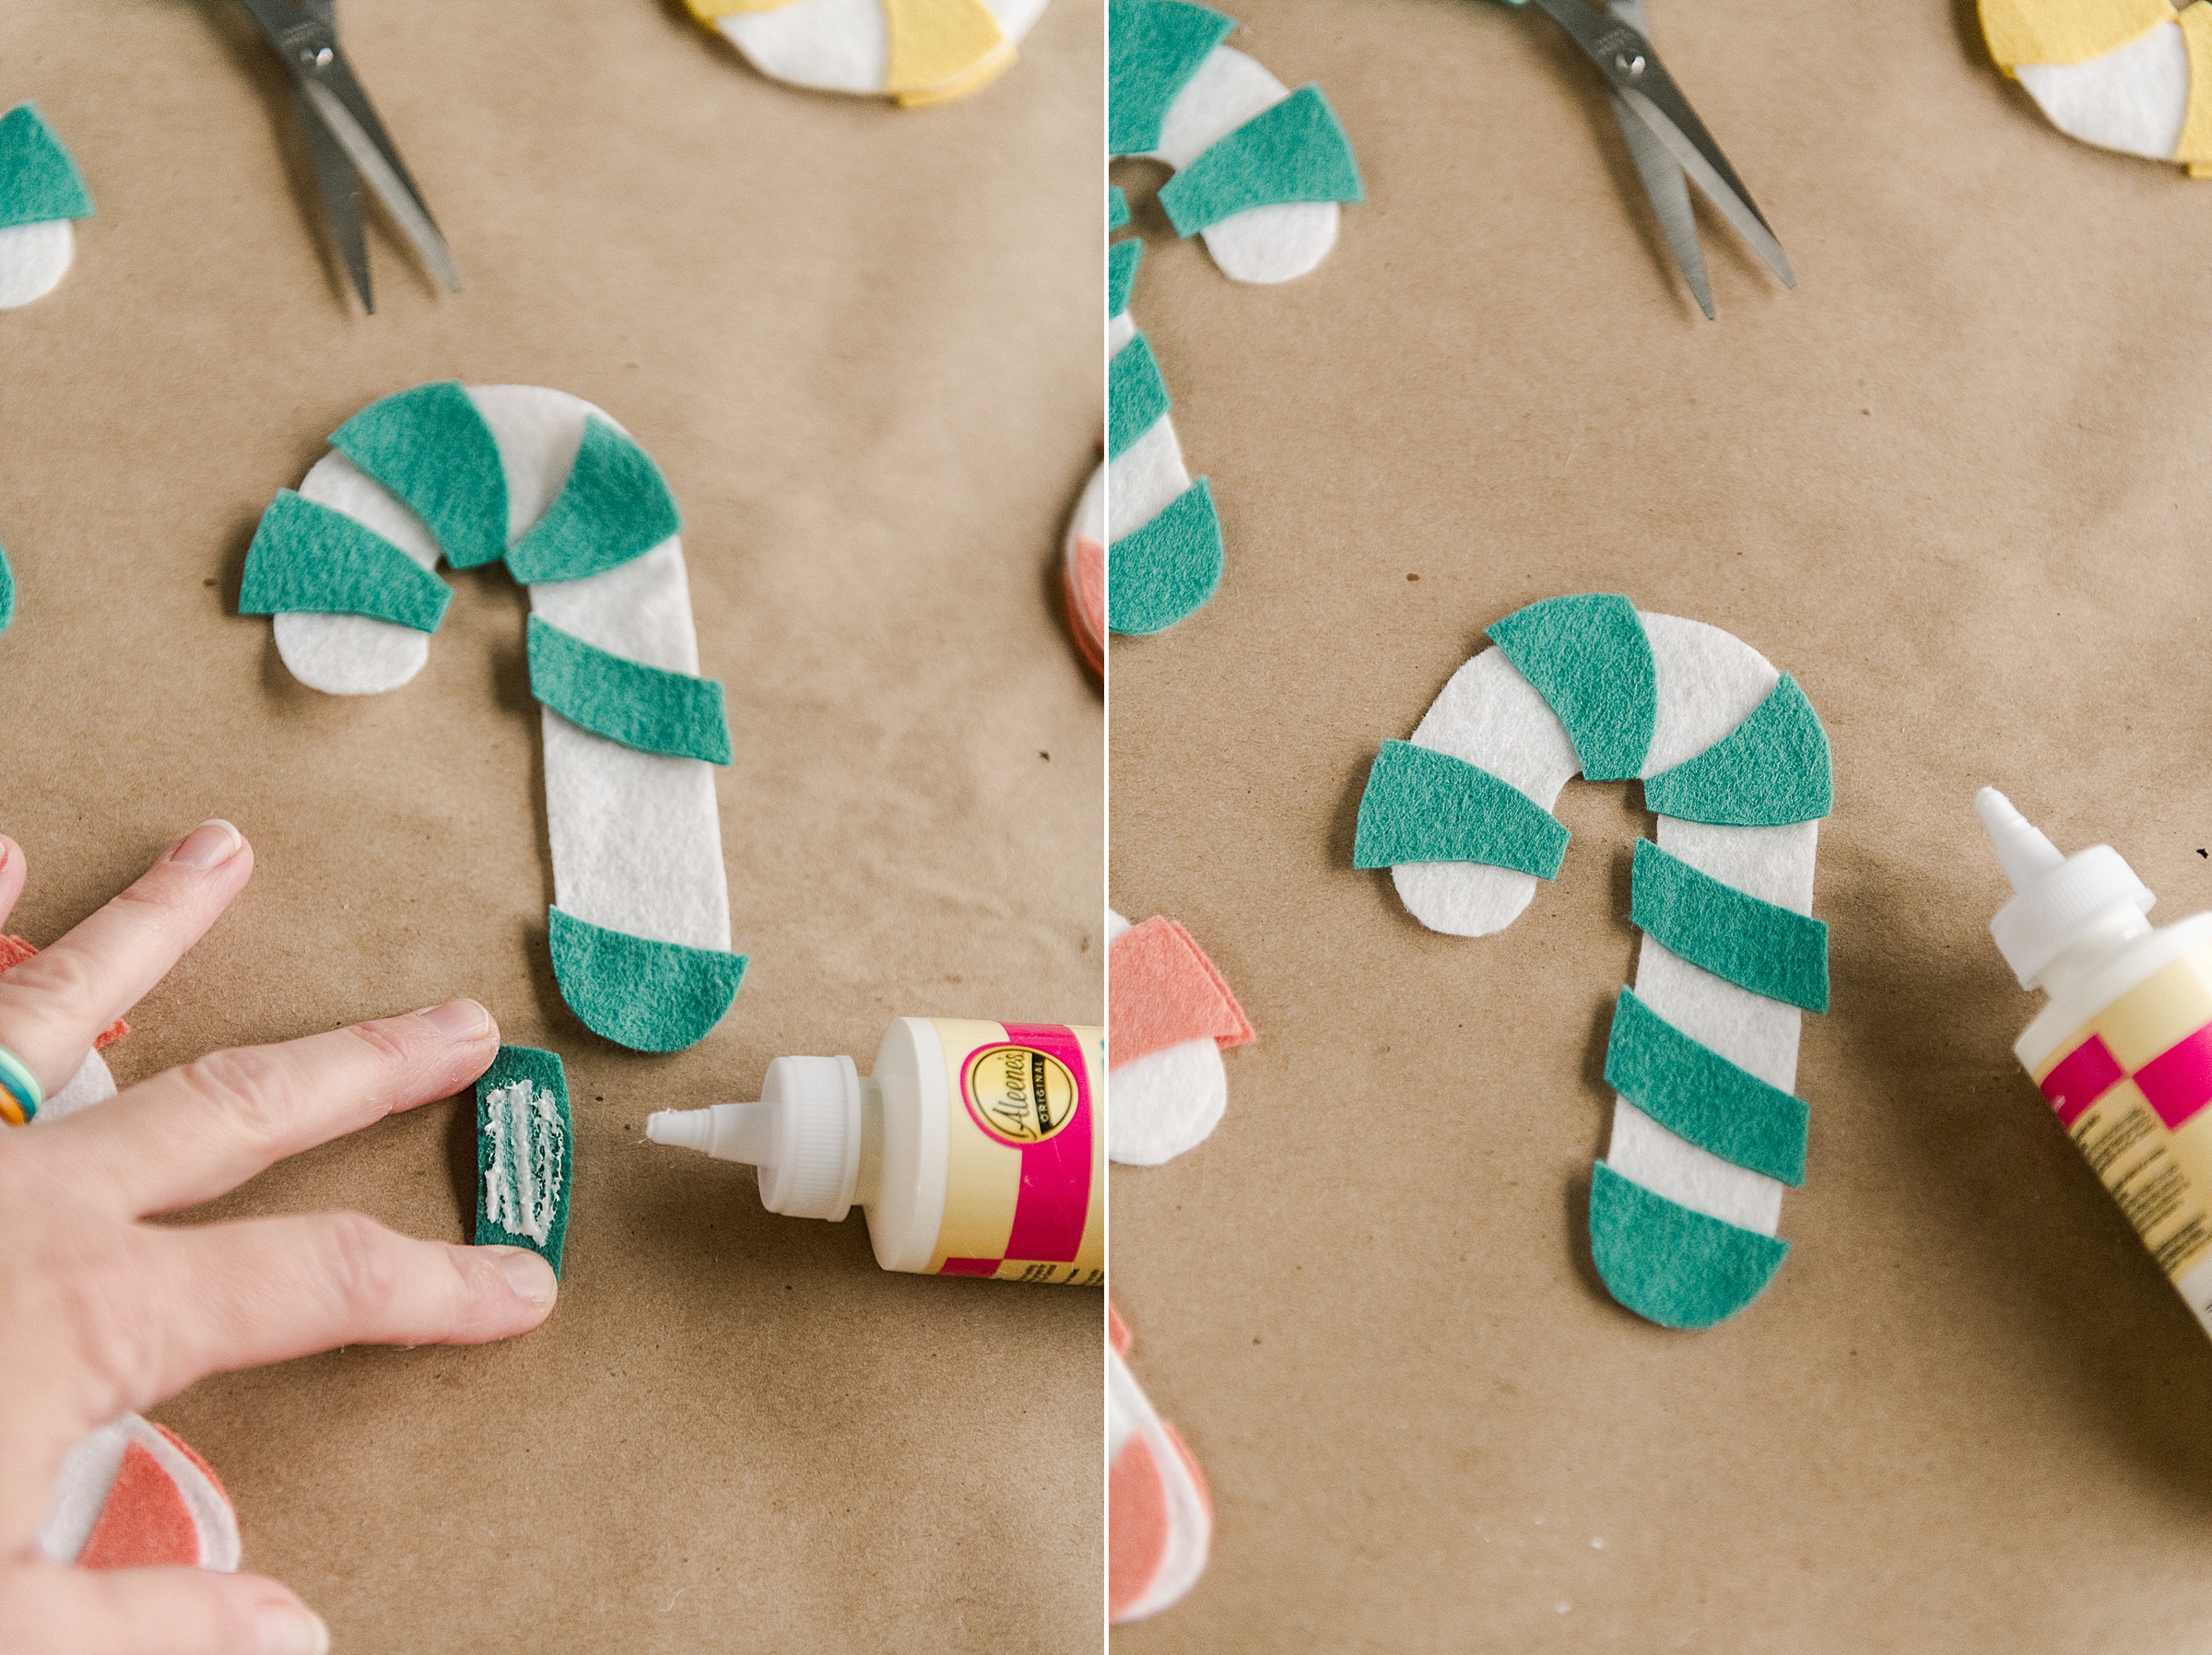
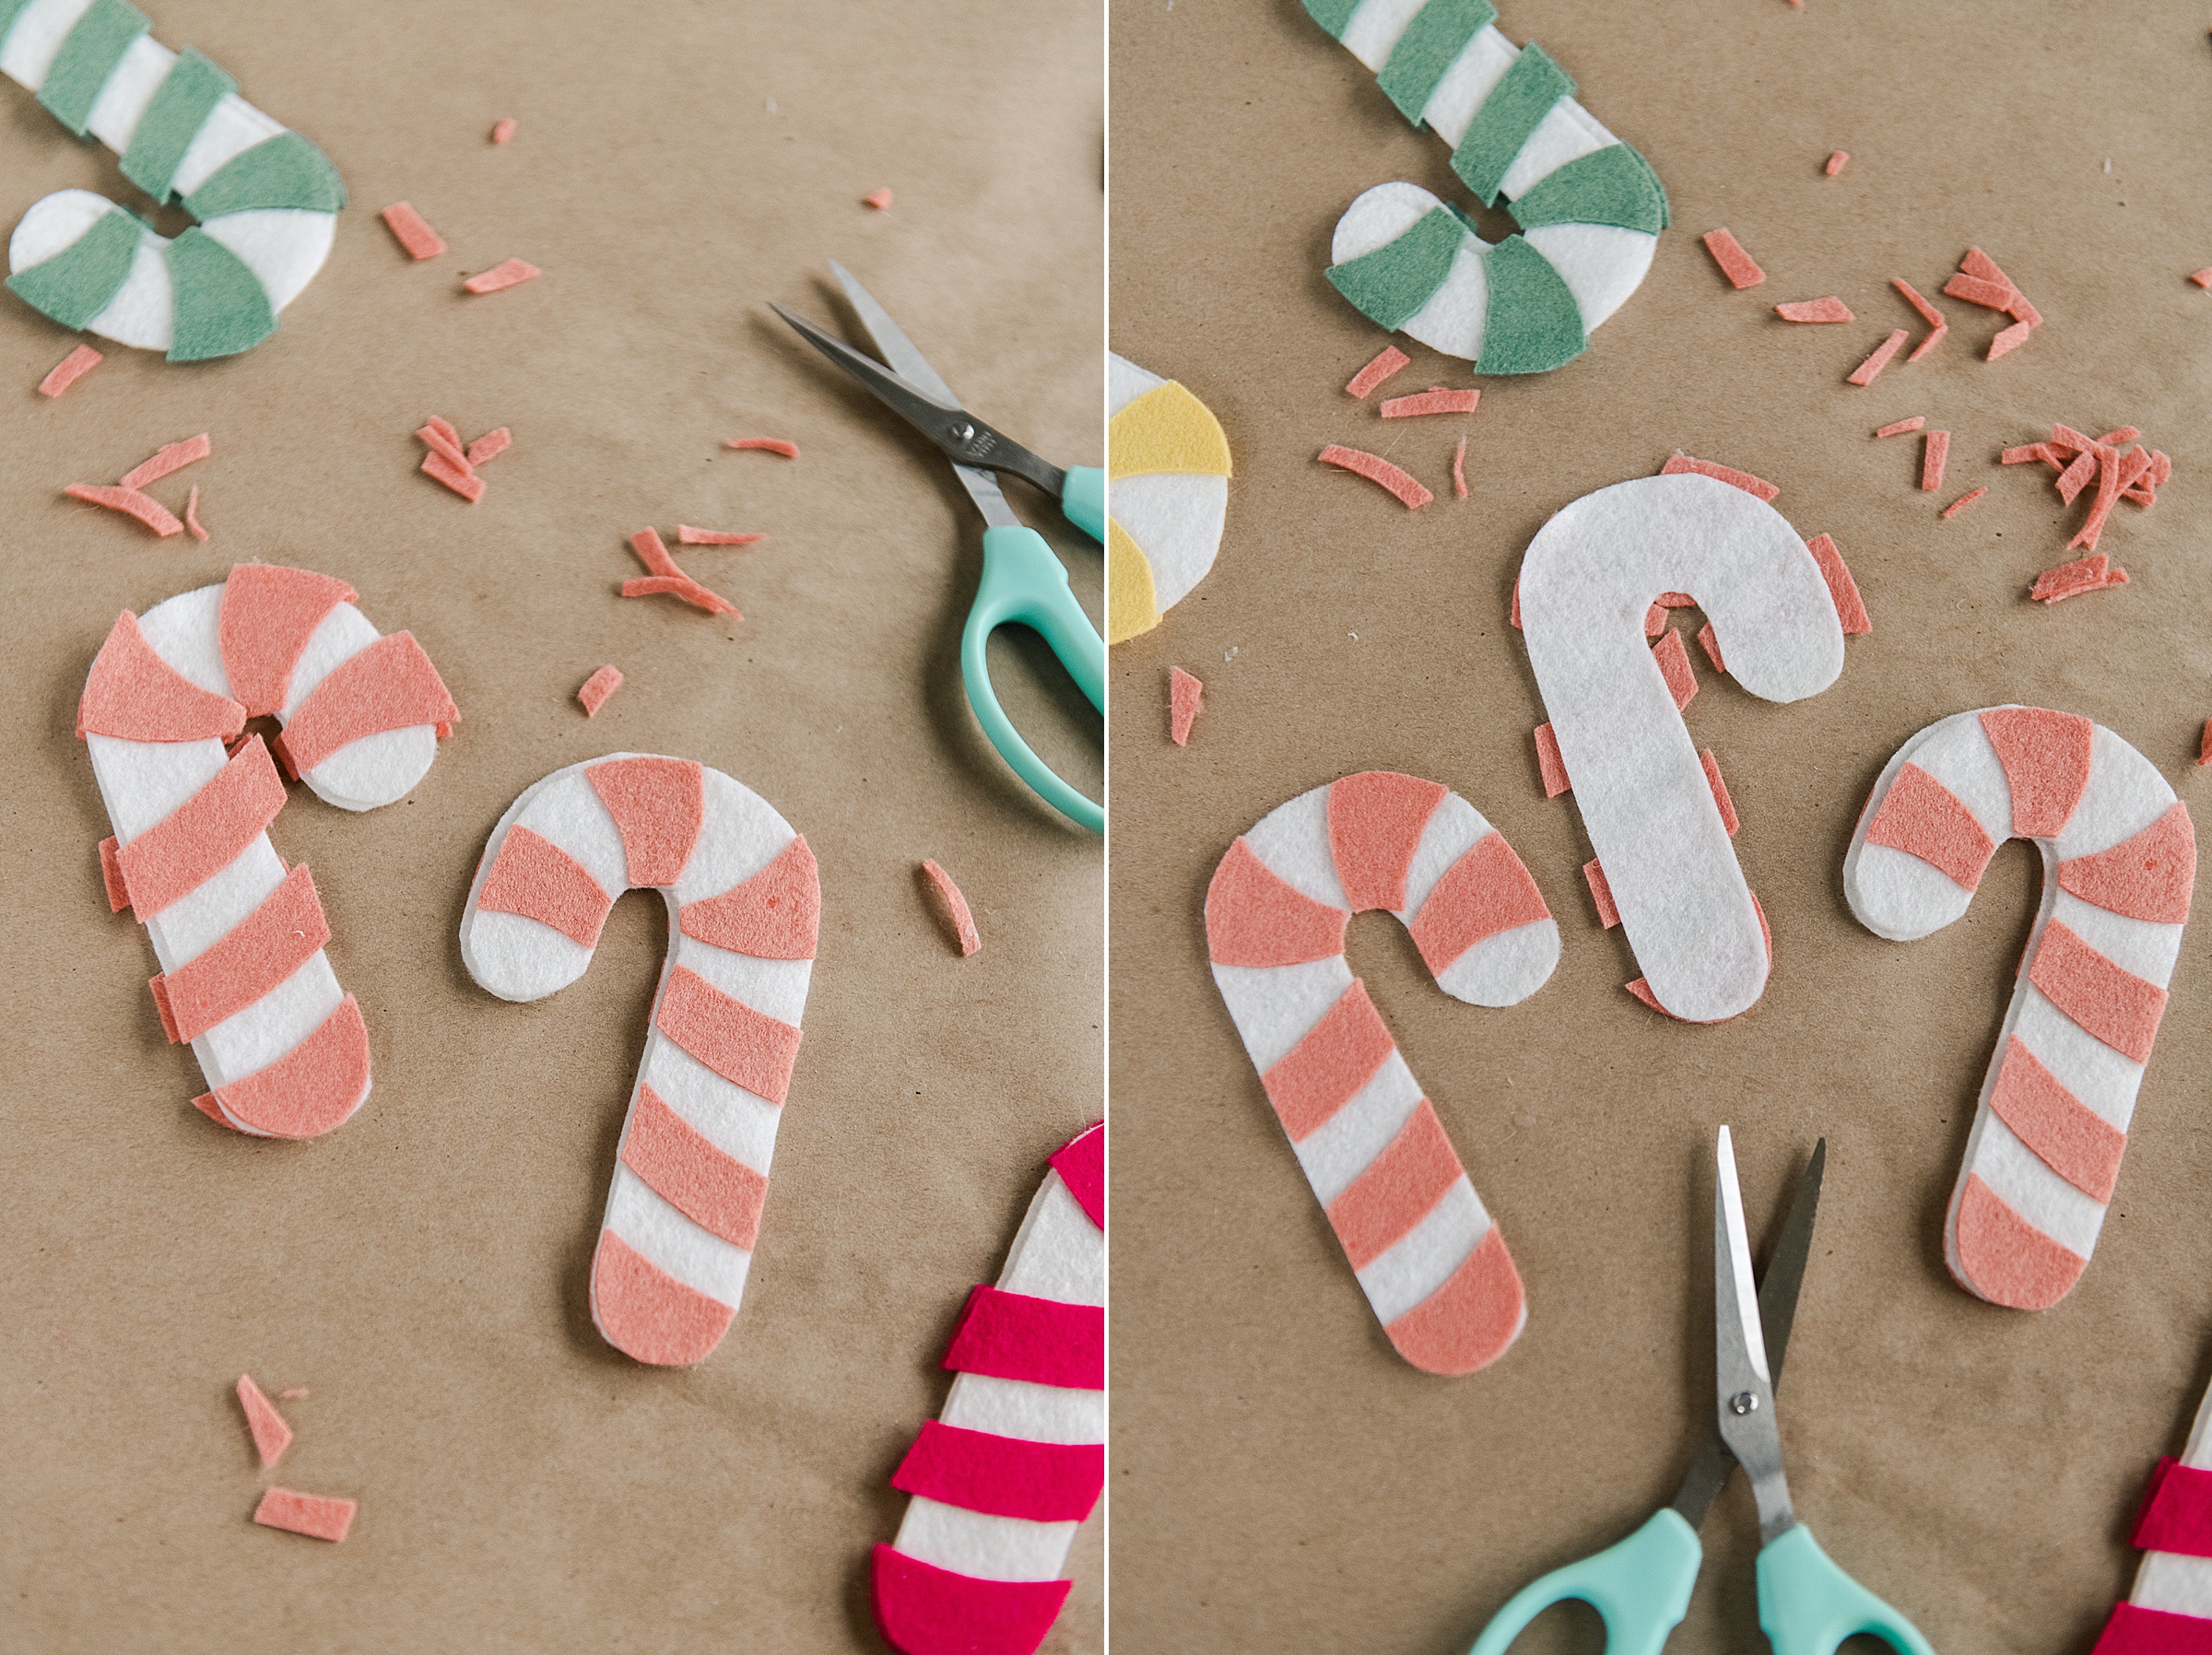
When done gluing both sides, lay the candy canes in pairs to dry. You can put them under a book or weighty surface to make sure they are flat if desired.
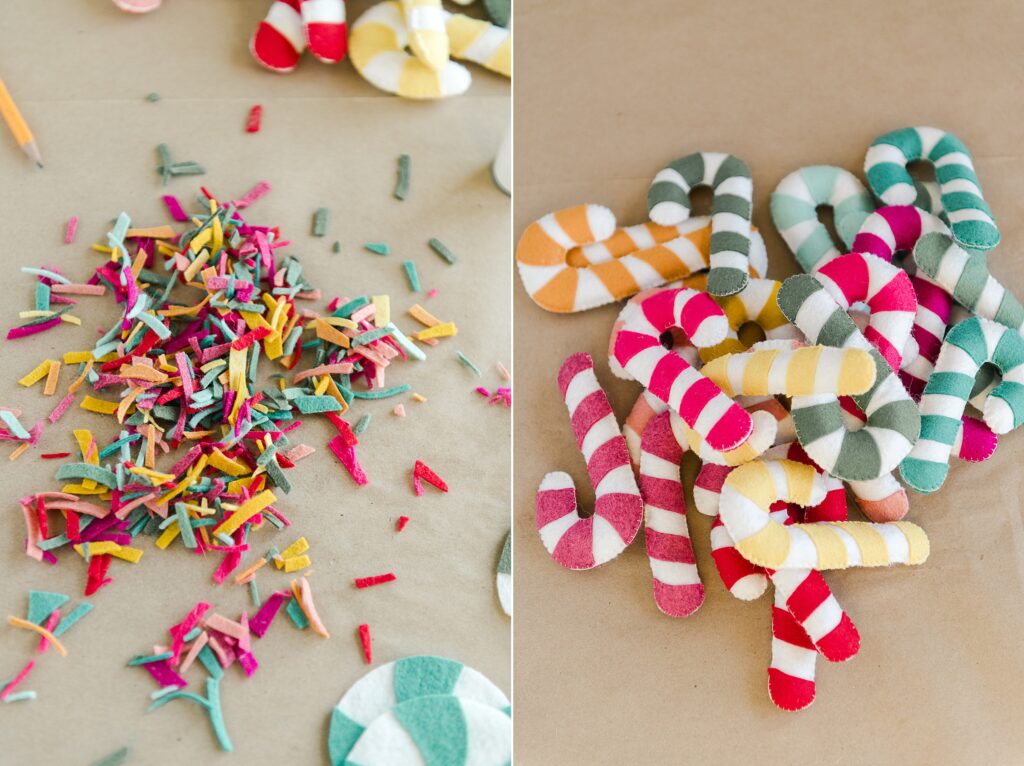
3. Once the glue is dry, you will want to trim off your “excess stripes”. I flipped over each candy cane and just trimmed off the length of the stripes to make them flush with the white part of the candy cane.
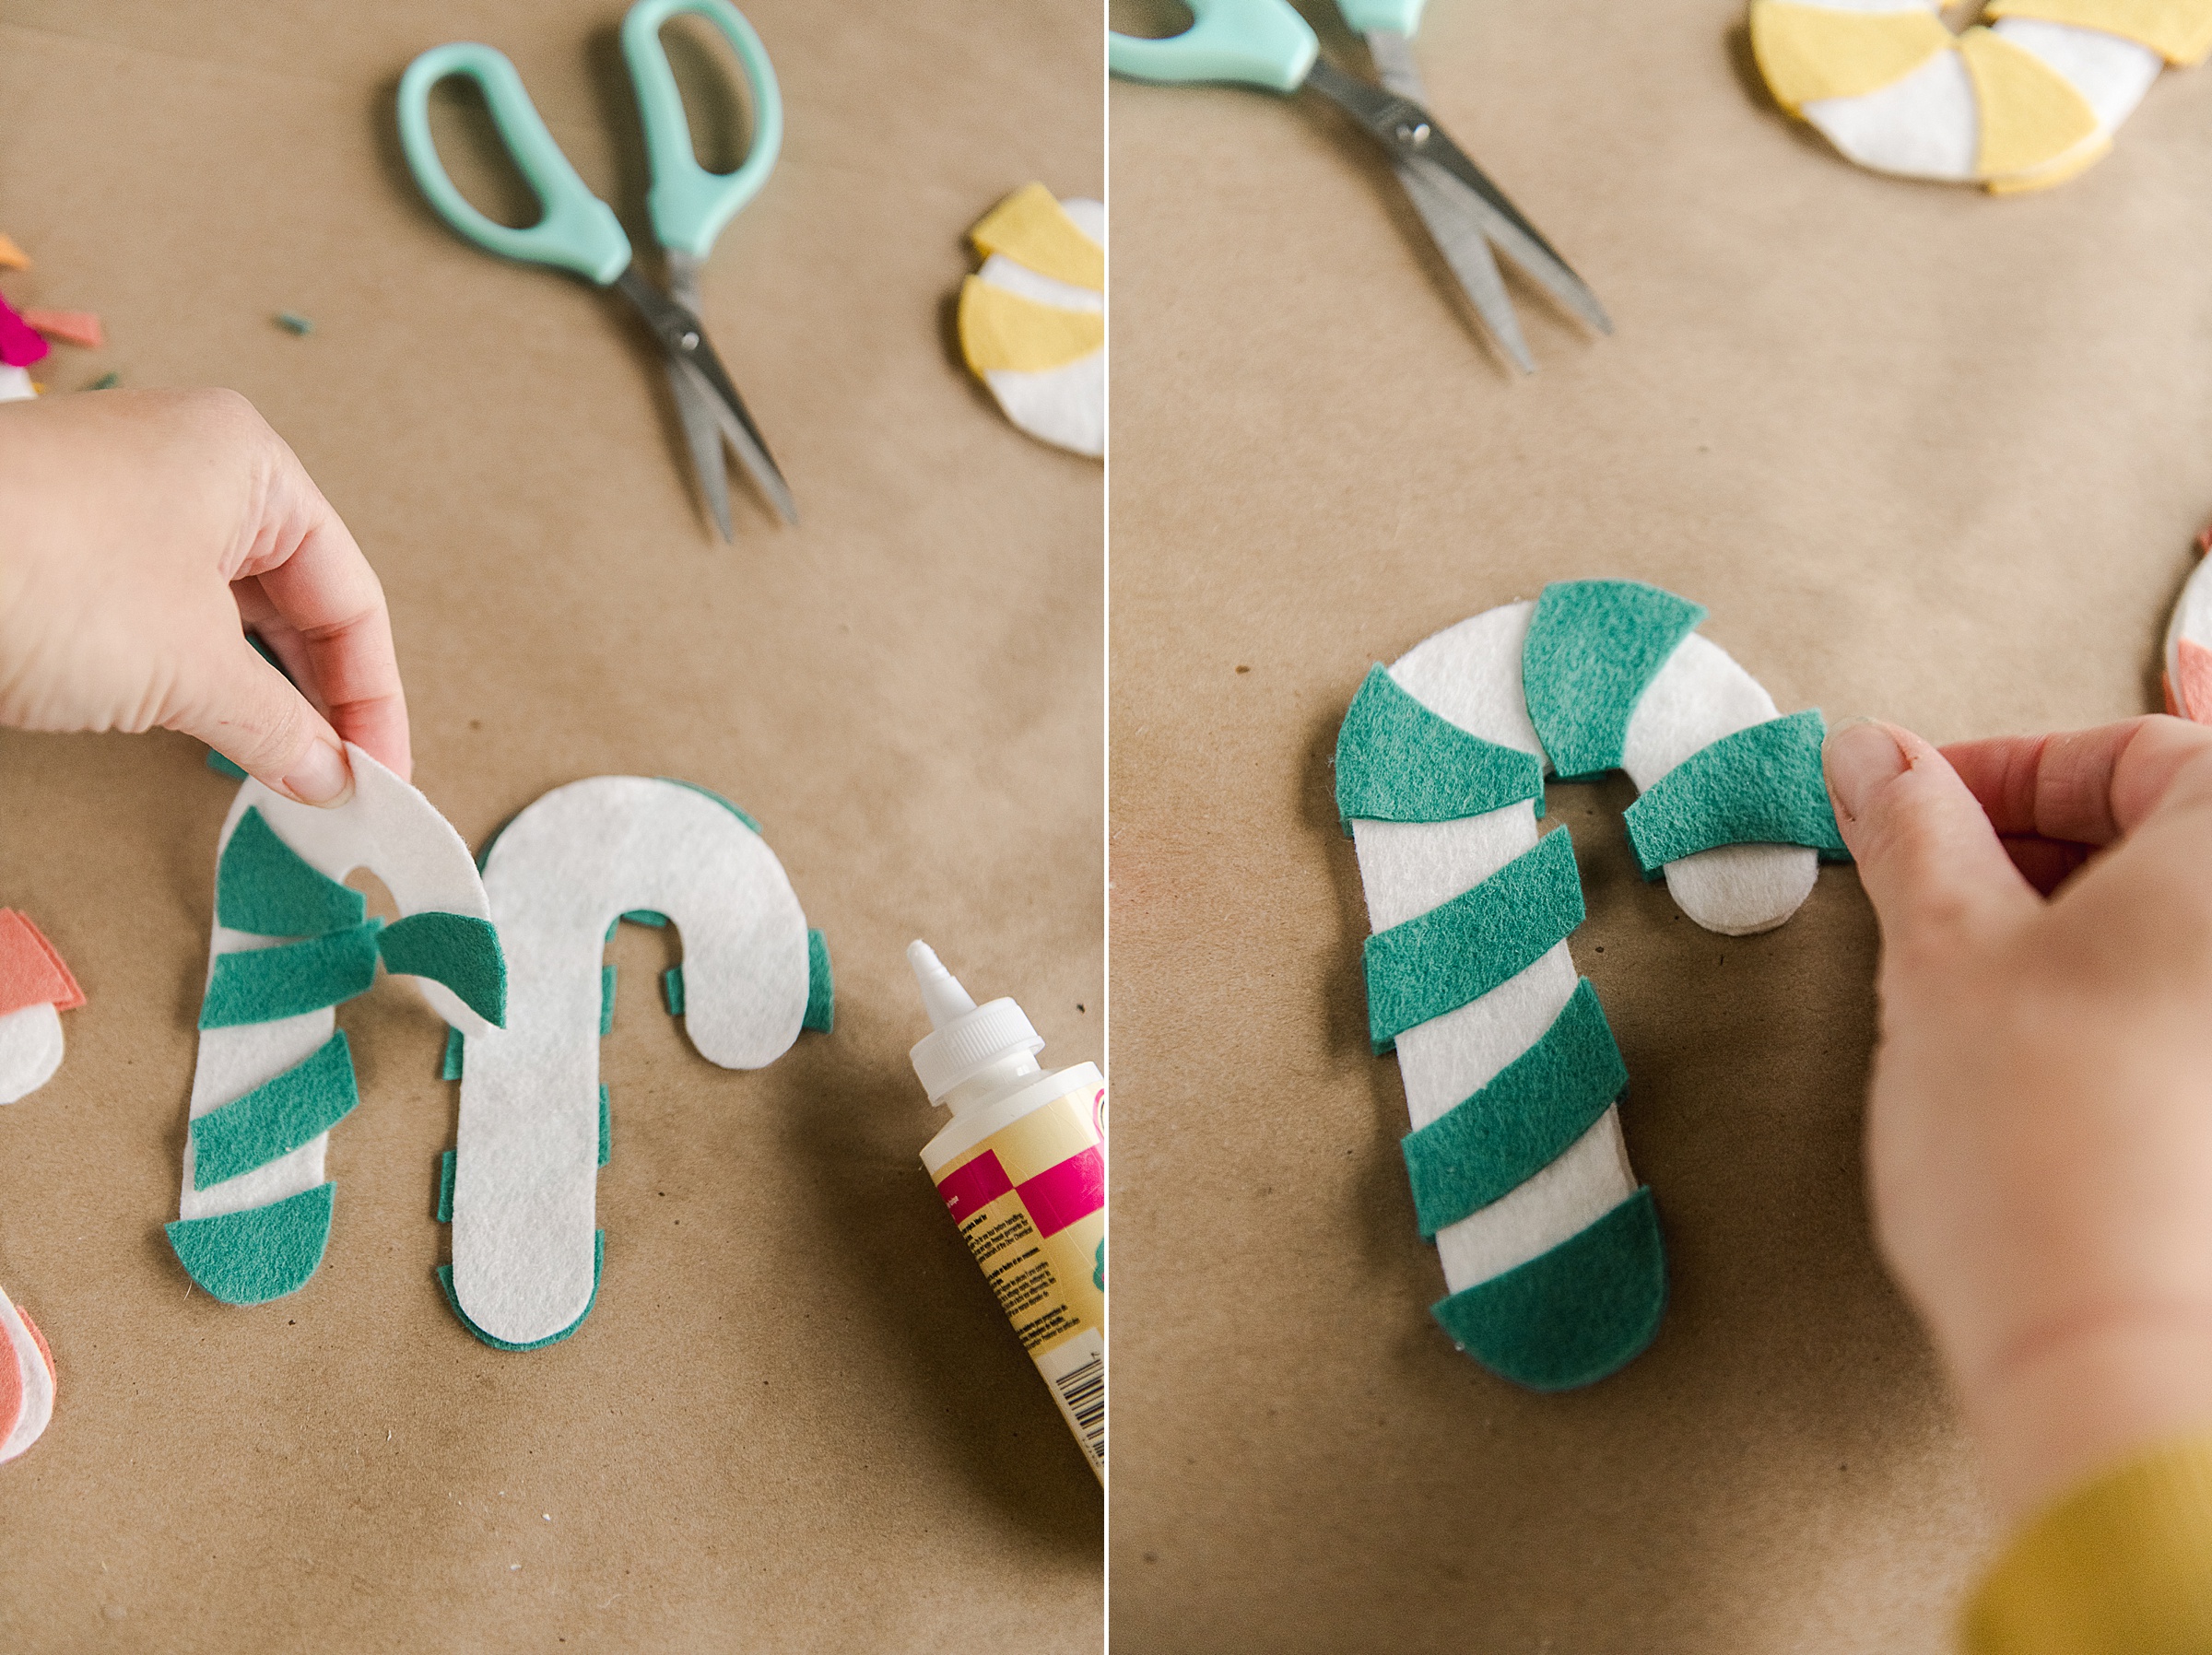
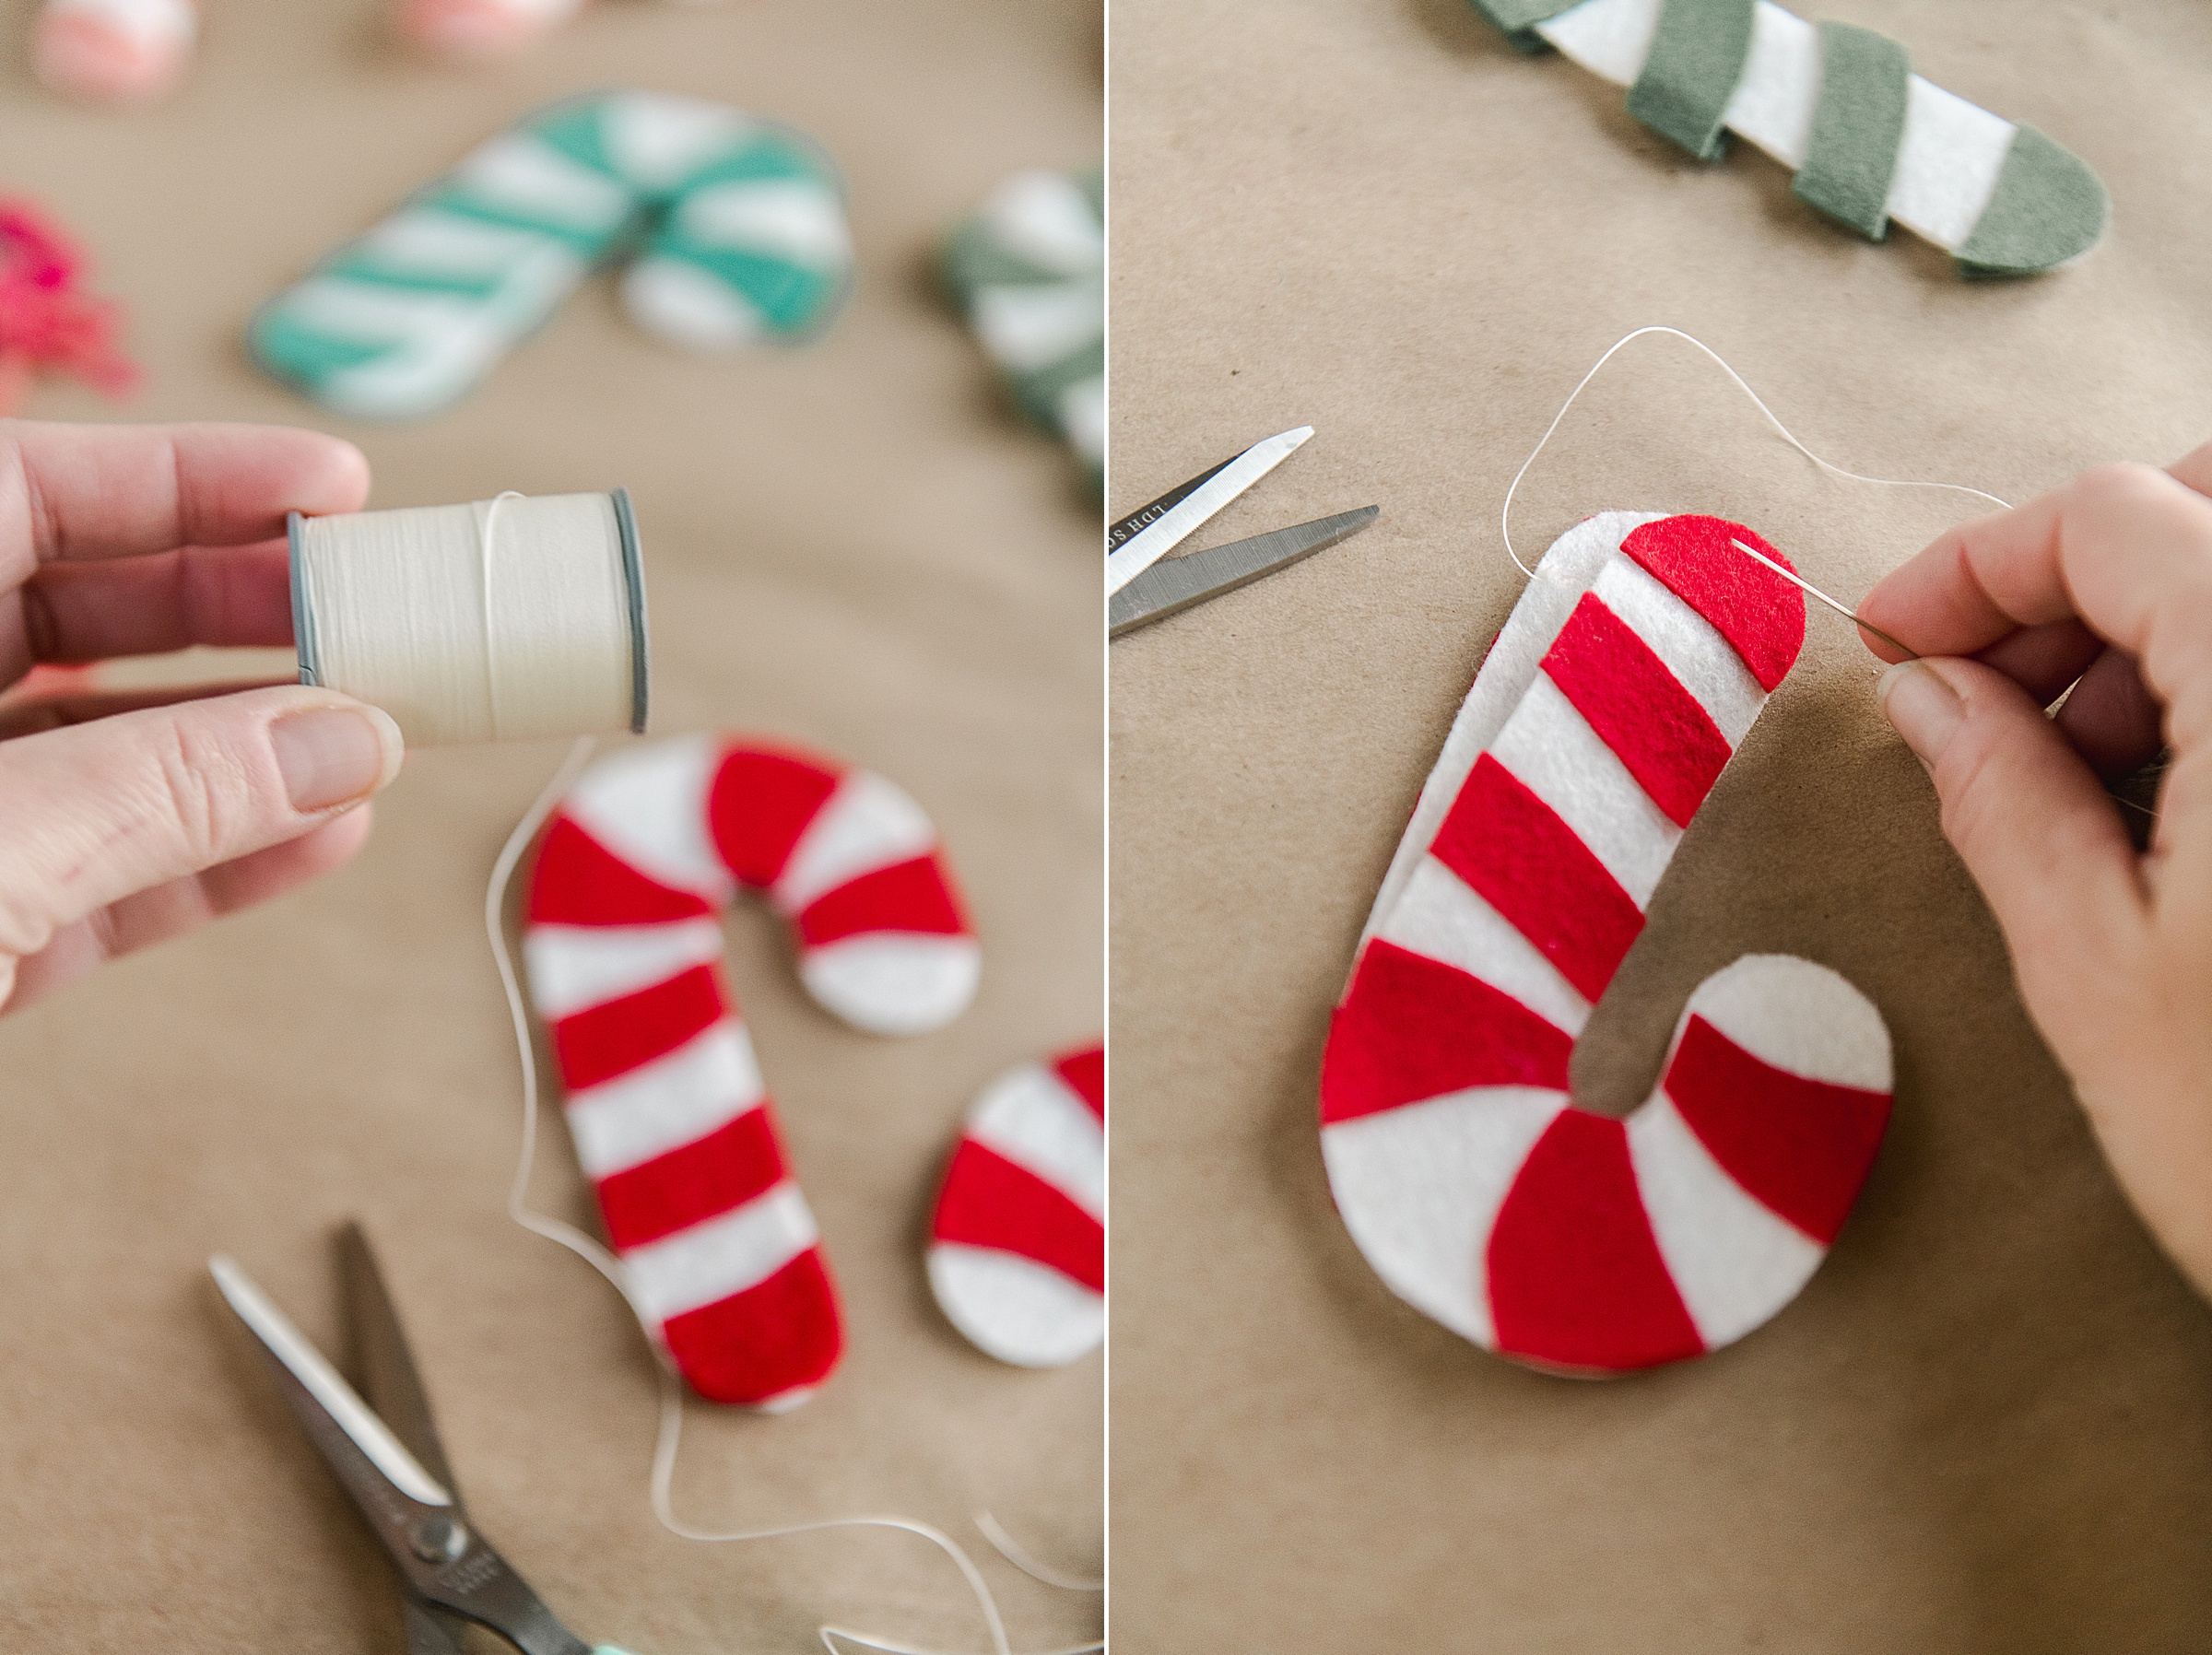
4. TIME TO SEW!
Line up your pairs of candy canes so that the edges are flush all the way around before you start stitching.
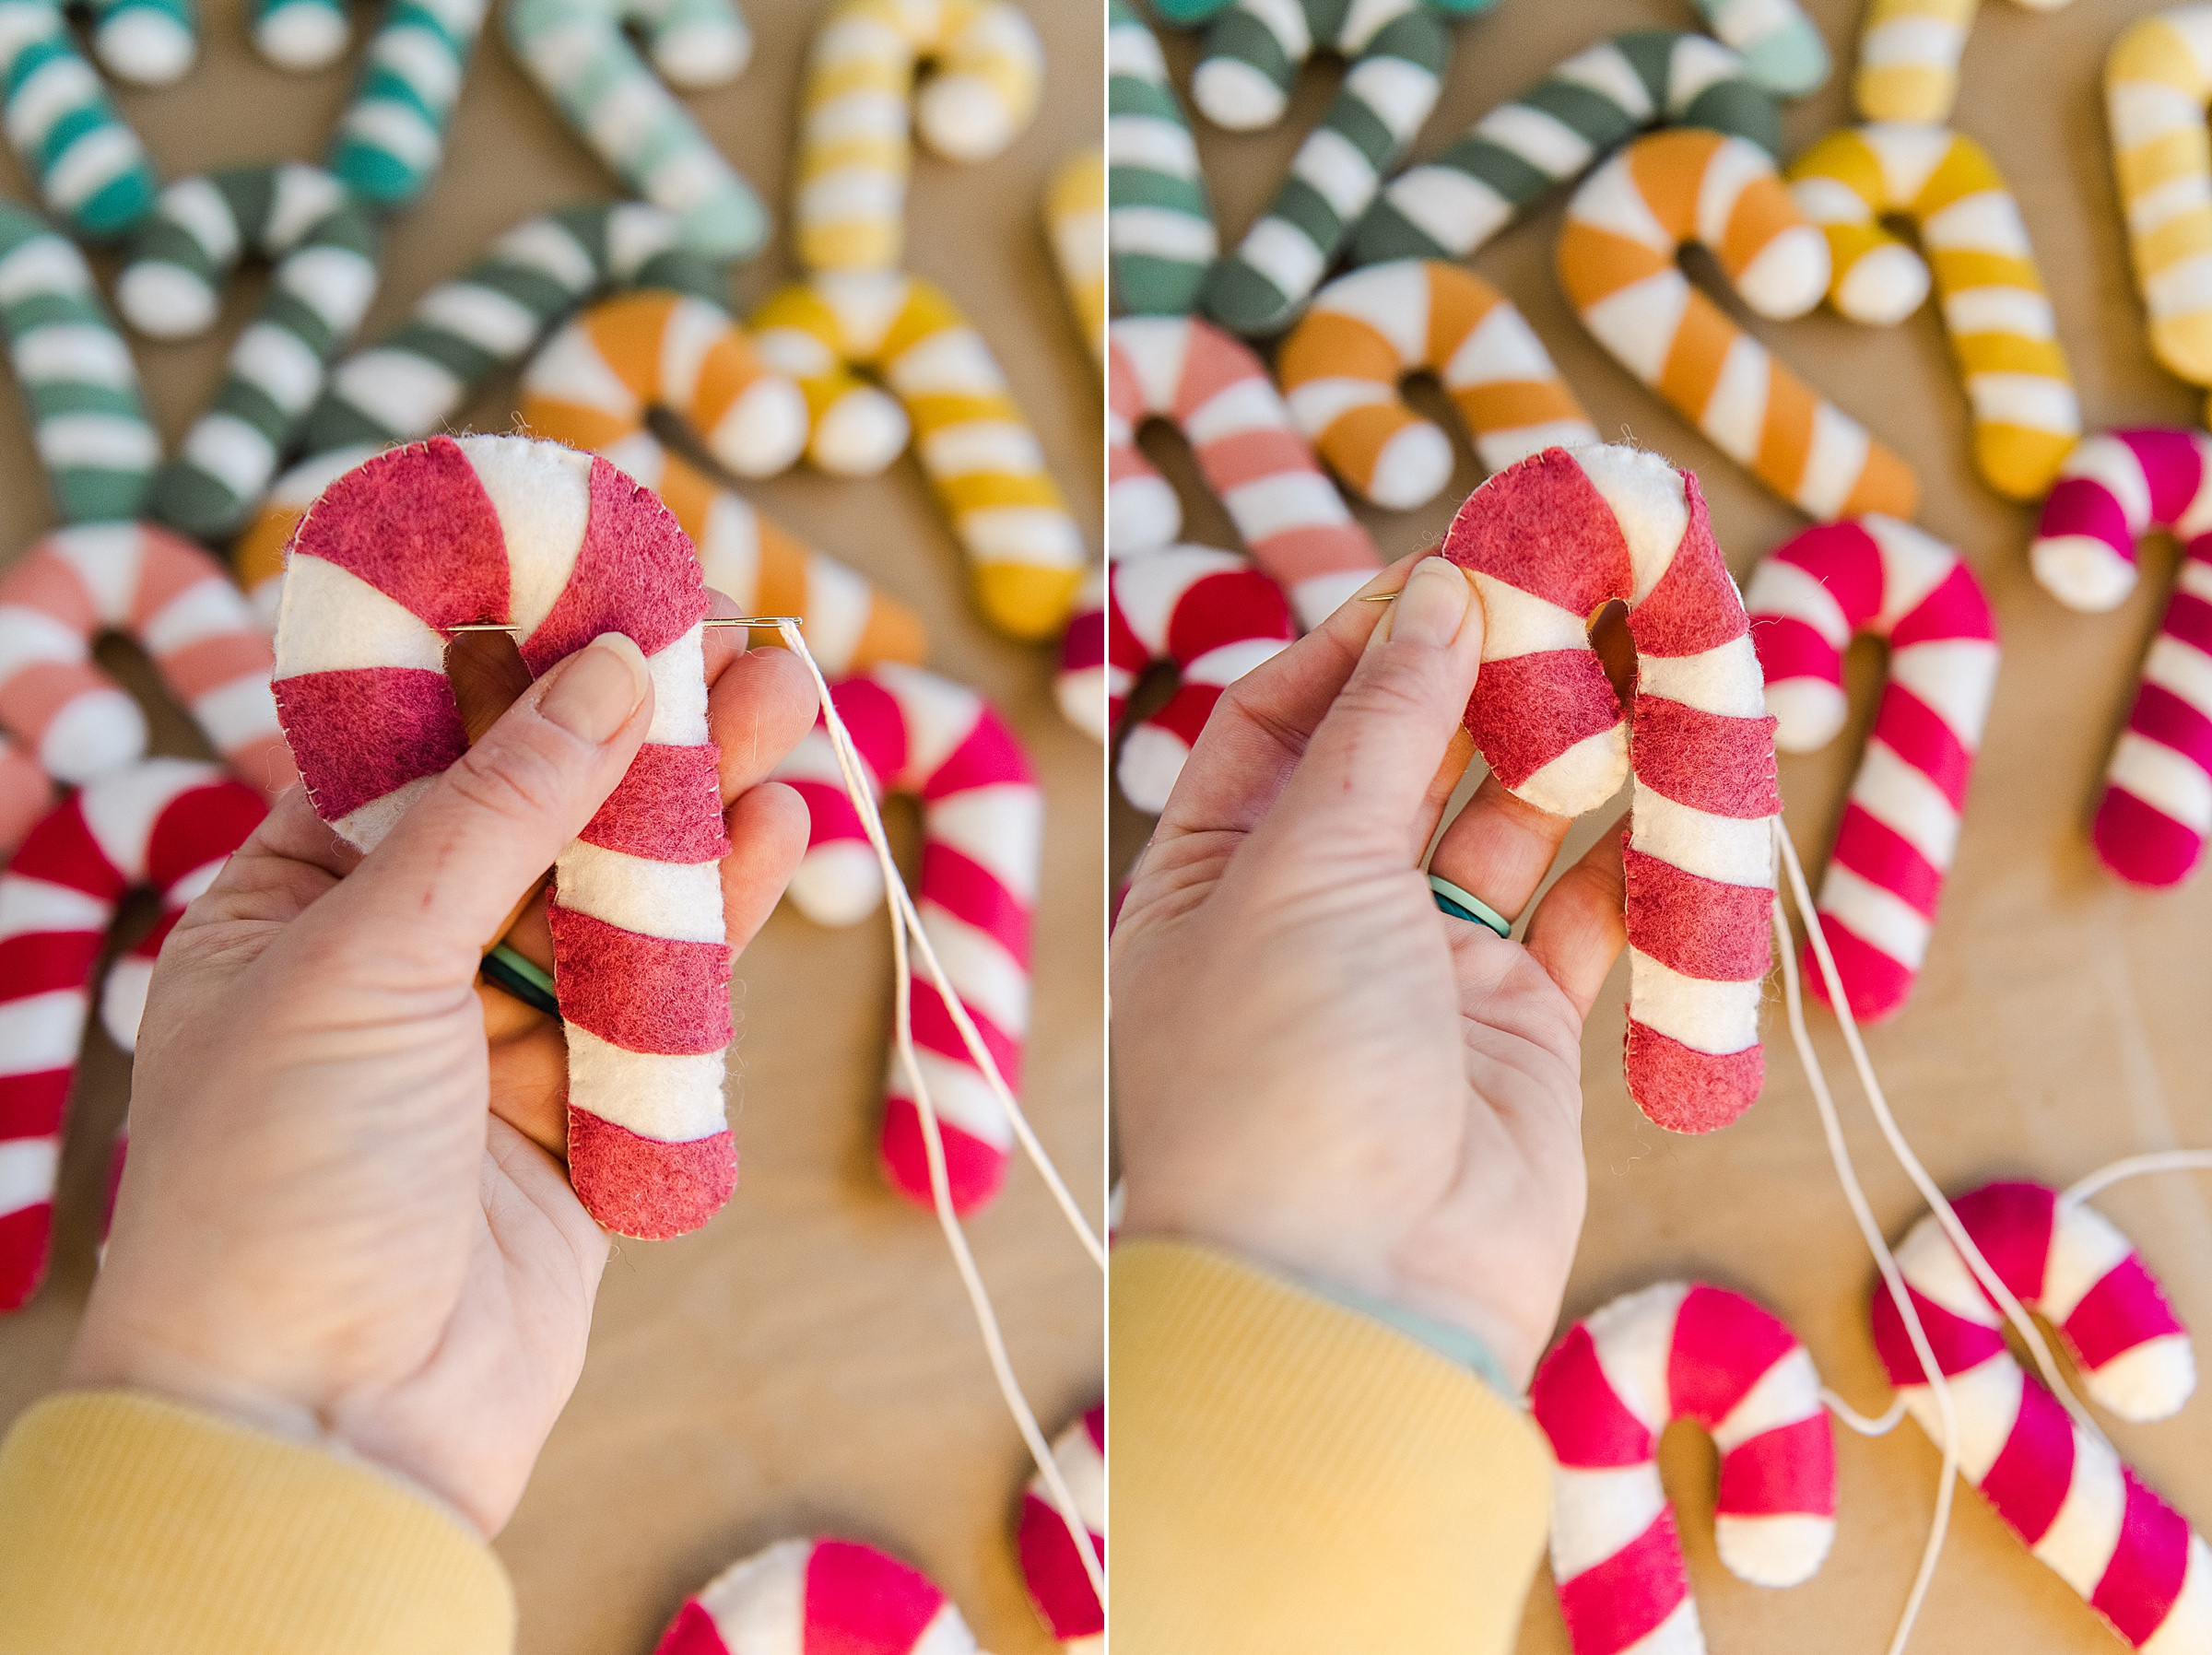
I chose to do a blanket stitch to sew the candy canes together. To do this you will want to cut some thread that is long enough that you won’t run out (I HATTTEEE when that happens). Anchor your stitch inside your candy cane near the bottom of the candy cane. I found it helpful to start near the bottom and go inside the “tighter J” of the candy cane and then finish along the outside long edge (I found this easier to stuff as I went).
Here are the steps to a good blanket stitch:
STEP 1: Start by bringing your needle and thread up through both layers of the felt candy cane about 1/4” away from the outside edge.
STEP 2: Poke your needle up from the back again so that the needle comes up through the SAME SPOT you started. This creates a loop around the edge.
STEP 3: Send your needle under the loop stitch that you just made. (Ie, poke your needle under your stitch sideways going from right to left. This isn’t technically your first blanket stitch, but gets your stitch “ready” and kinda begins the pattern.
STEP 4: *this begins your blanket stitch pattern repeat*
Poke your needle up from the bottom to top, through both layers of felt about 1/4” away from both the edge of the felt and the previous stitch. DO NOT PULL ALL THE WAY TIGHT YET
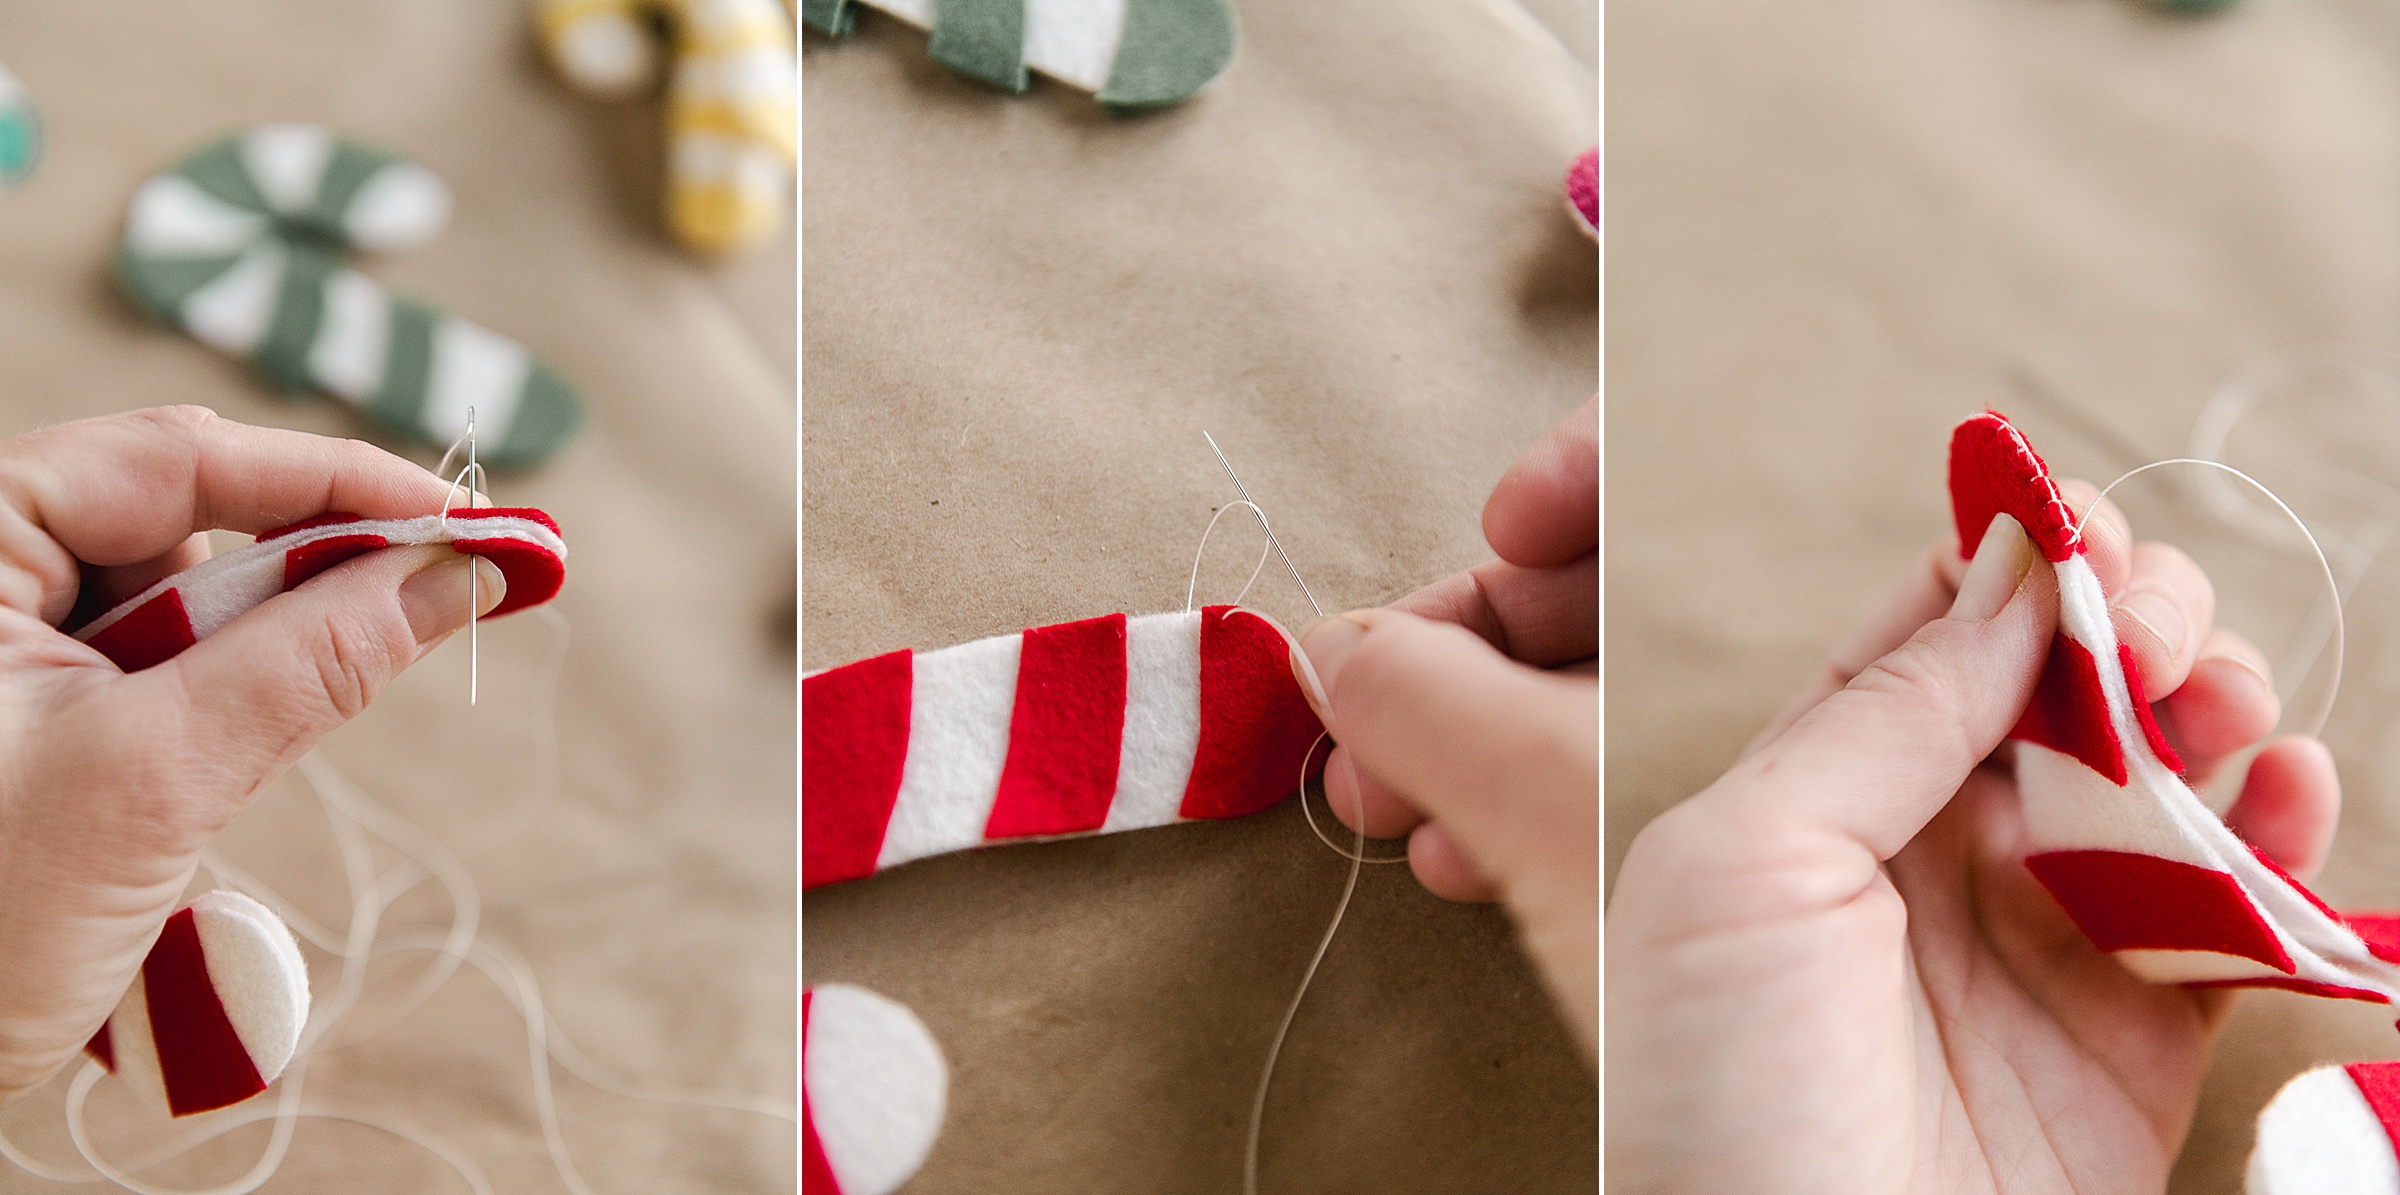
STEP 5: Before you pull your stitch tight from step 5, you will thread your needle through the “loop” along the edge and pull until flush with the thread makes a “u” shape along the edge of your felt.
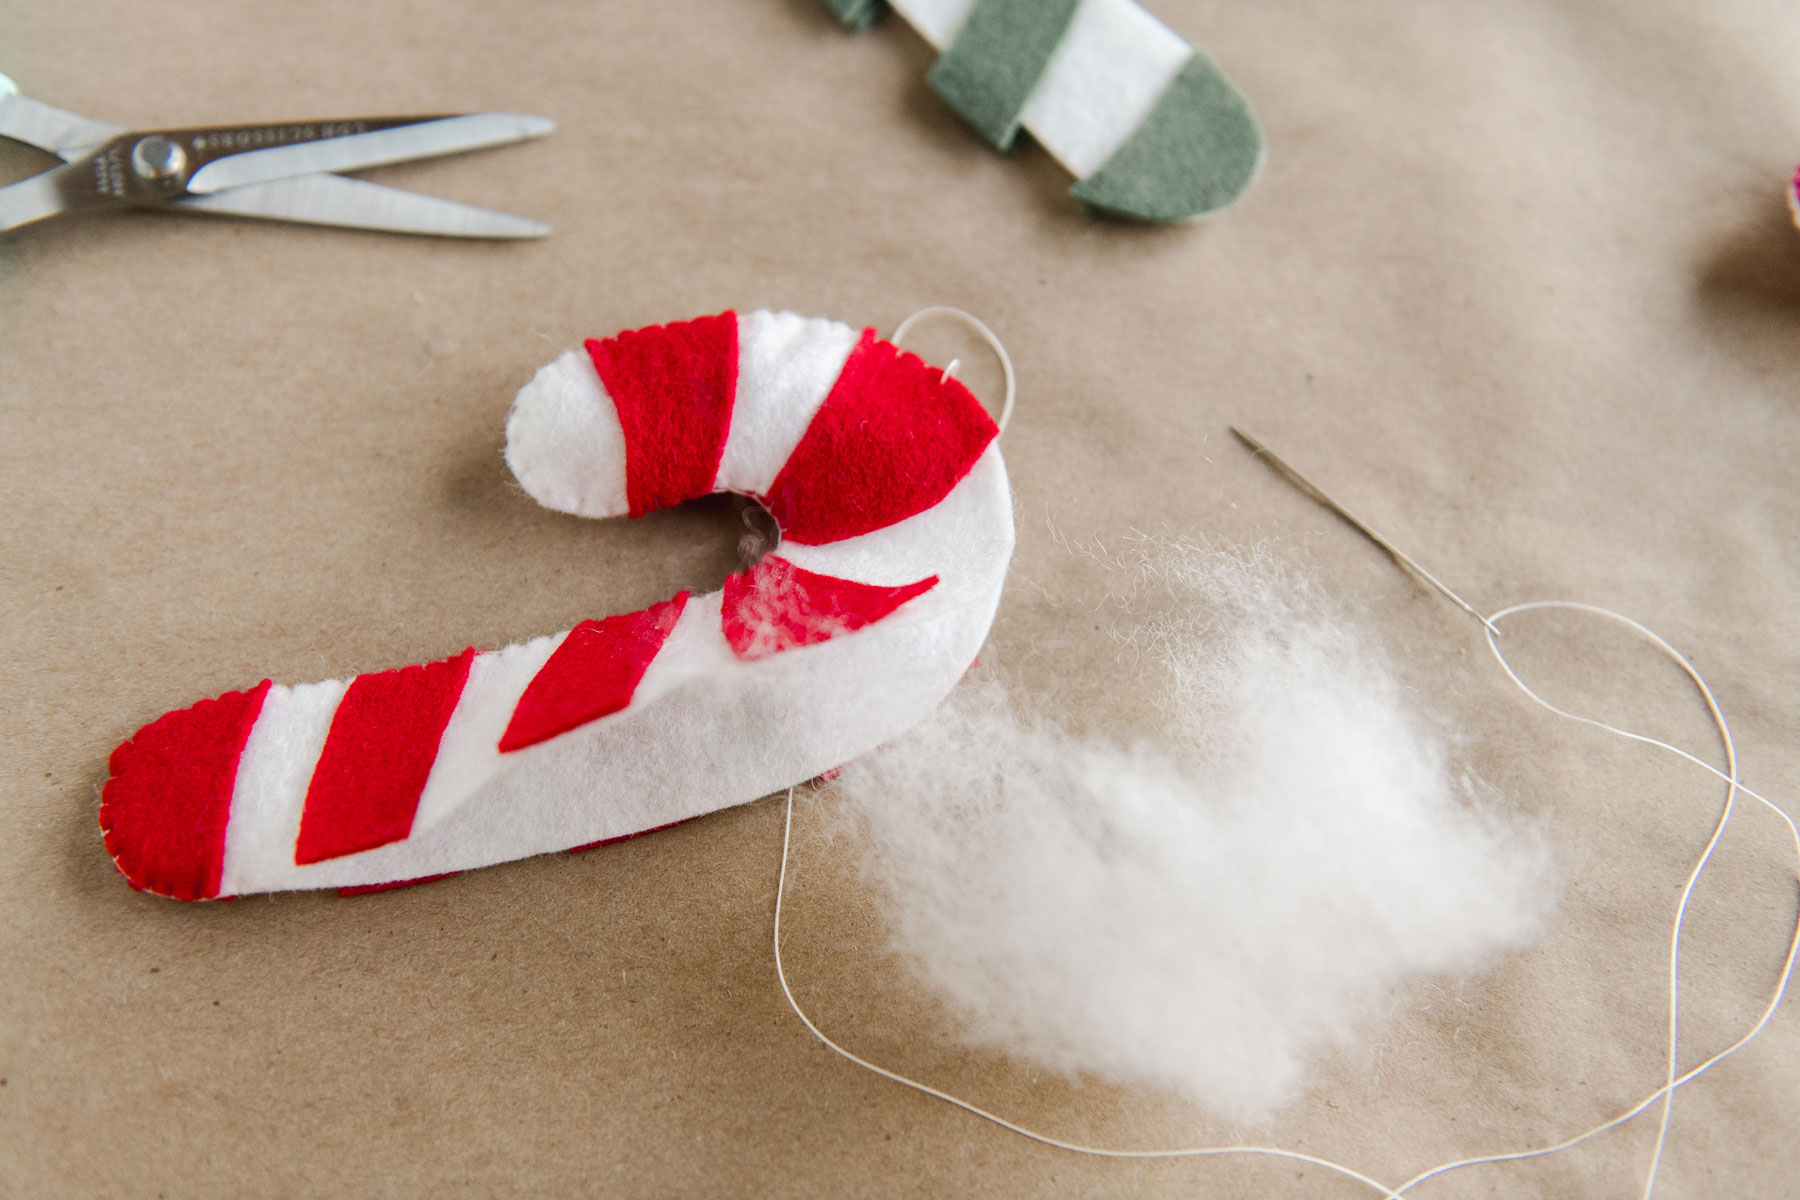
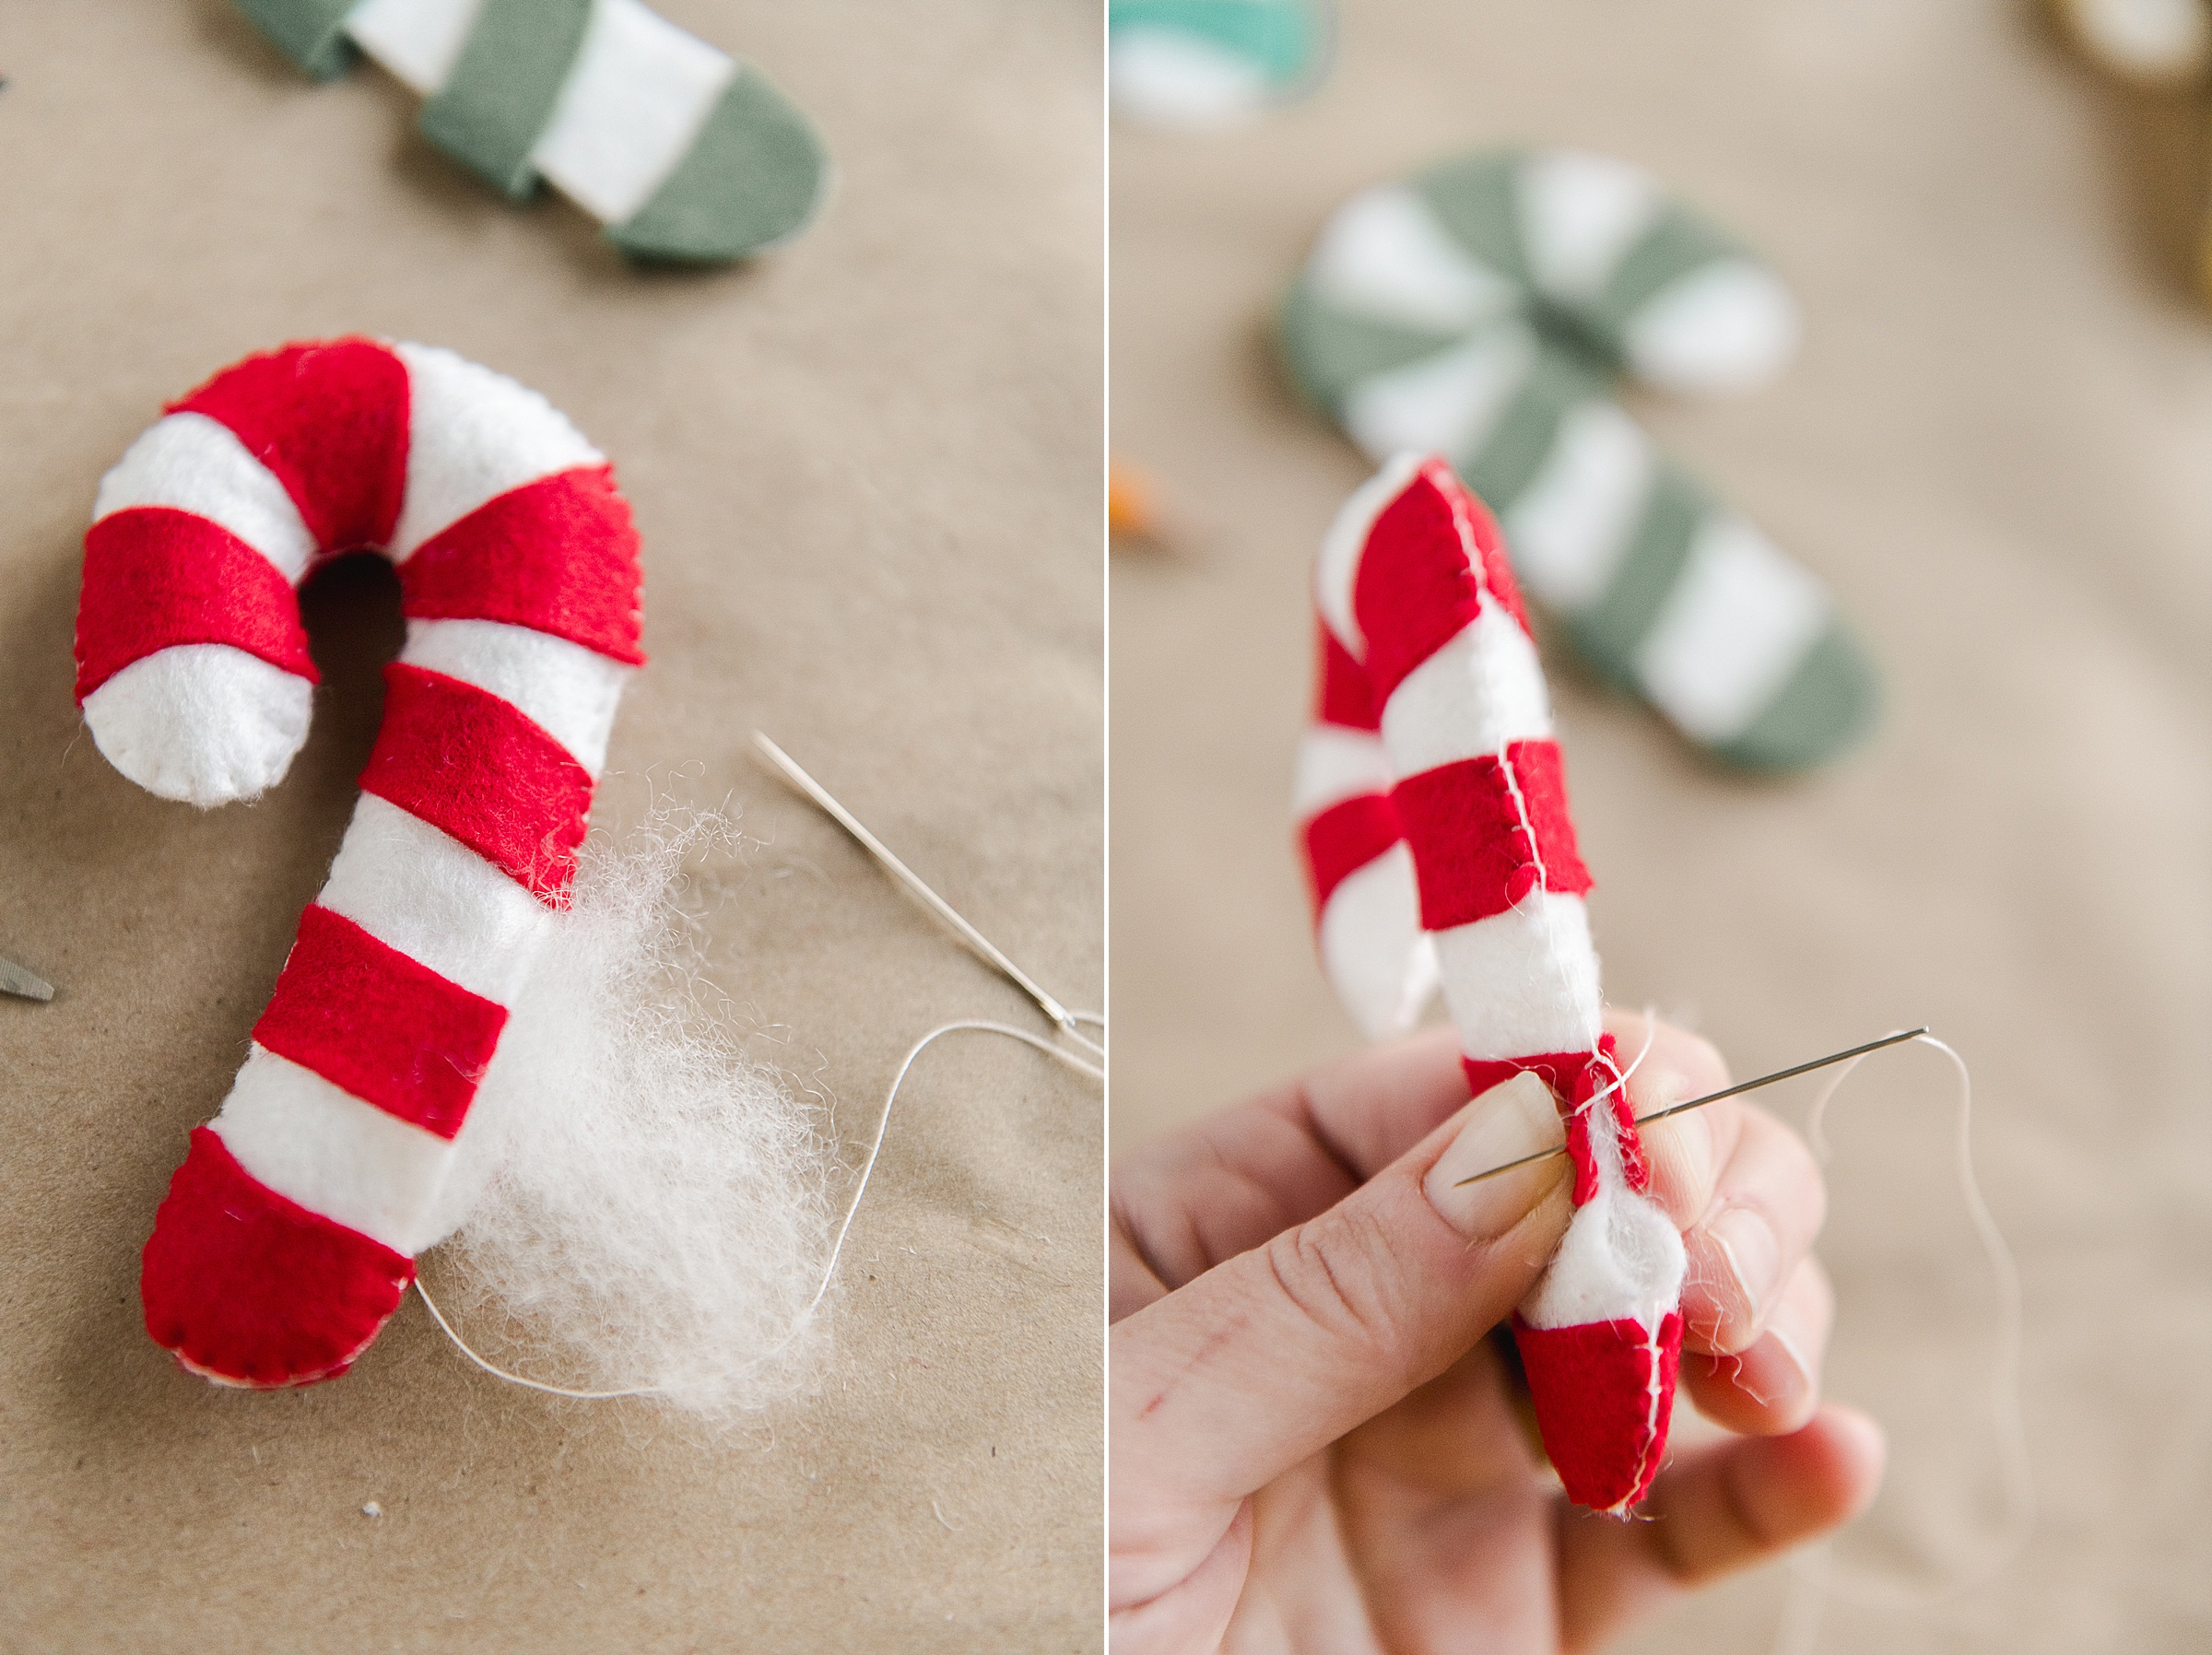
Repeat steps 4 – 5 until you’ve worked mostly the way around your candy cane! 🙂 You will want to stuff your candy cane with some stuffing or poly-fil before closing your shape completely! I actually chose to stop near the top once I completed the top of the “J” to stuff and then keep going and then pause again before closing completely to stuff again. (this just helps to stuff in that “curve” so that you’re not having to force poly fill or stuffing in the bend too much).
Then anchor (or knot) your thread and clip your extra thread!
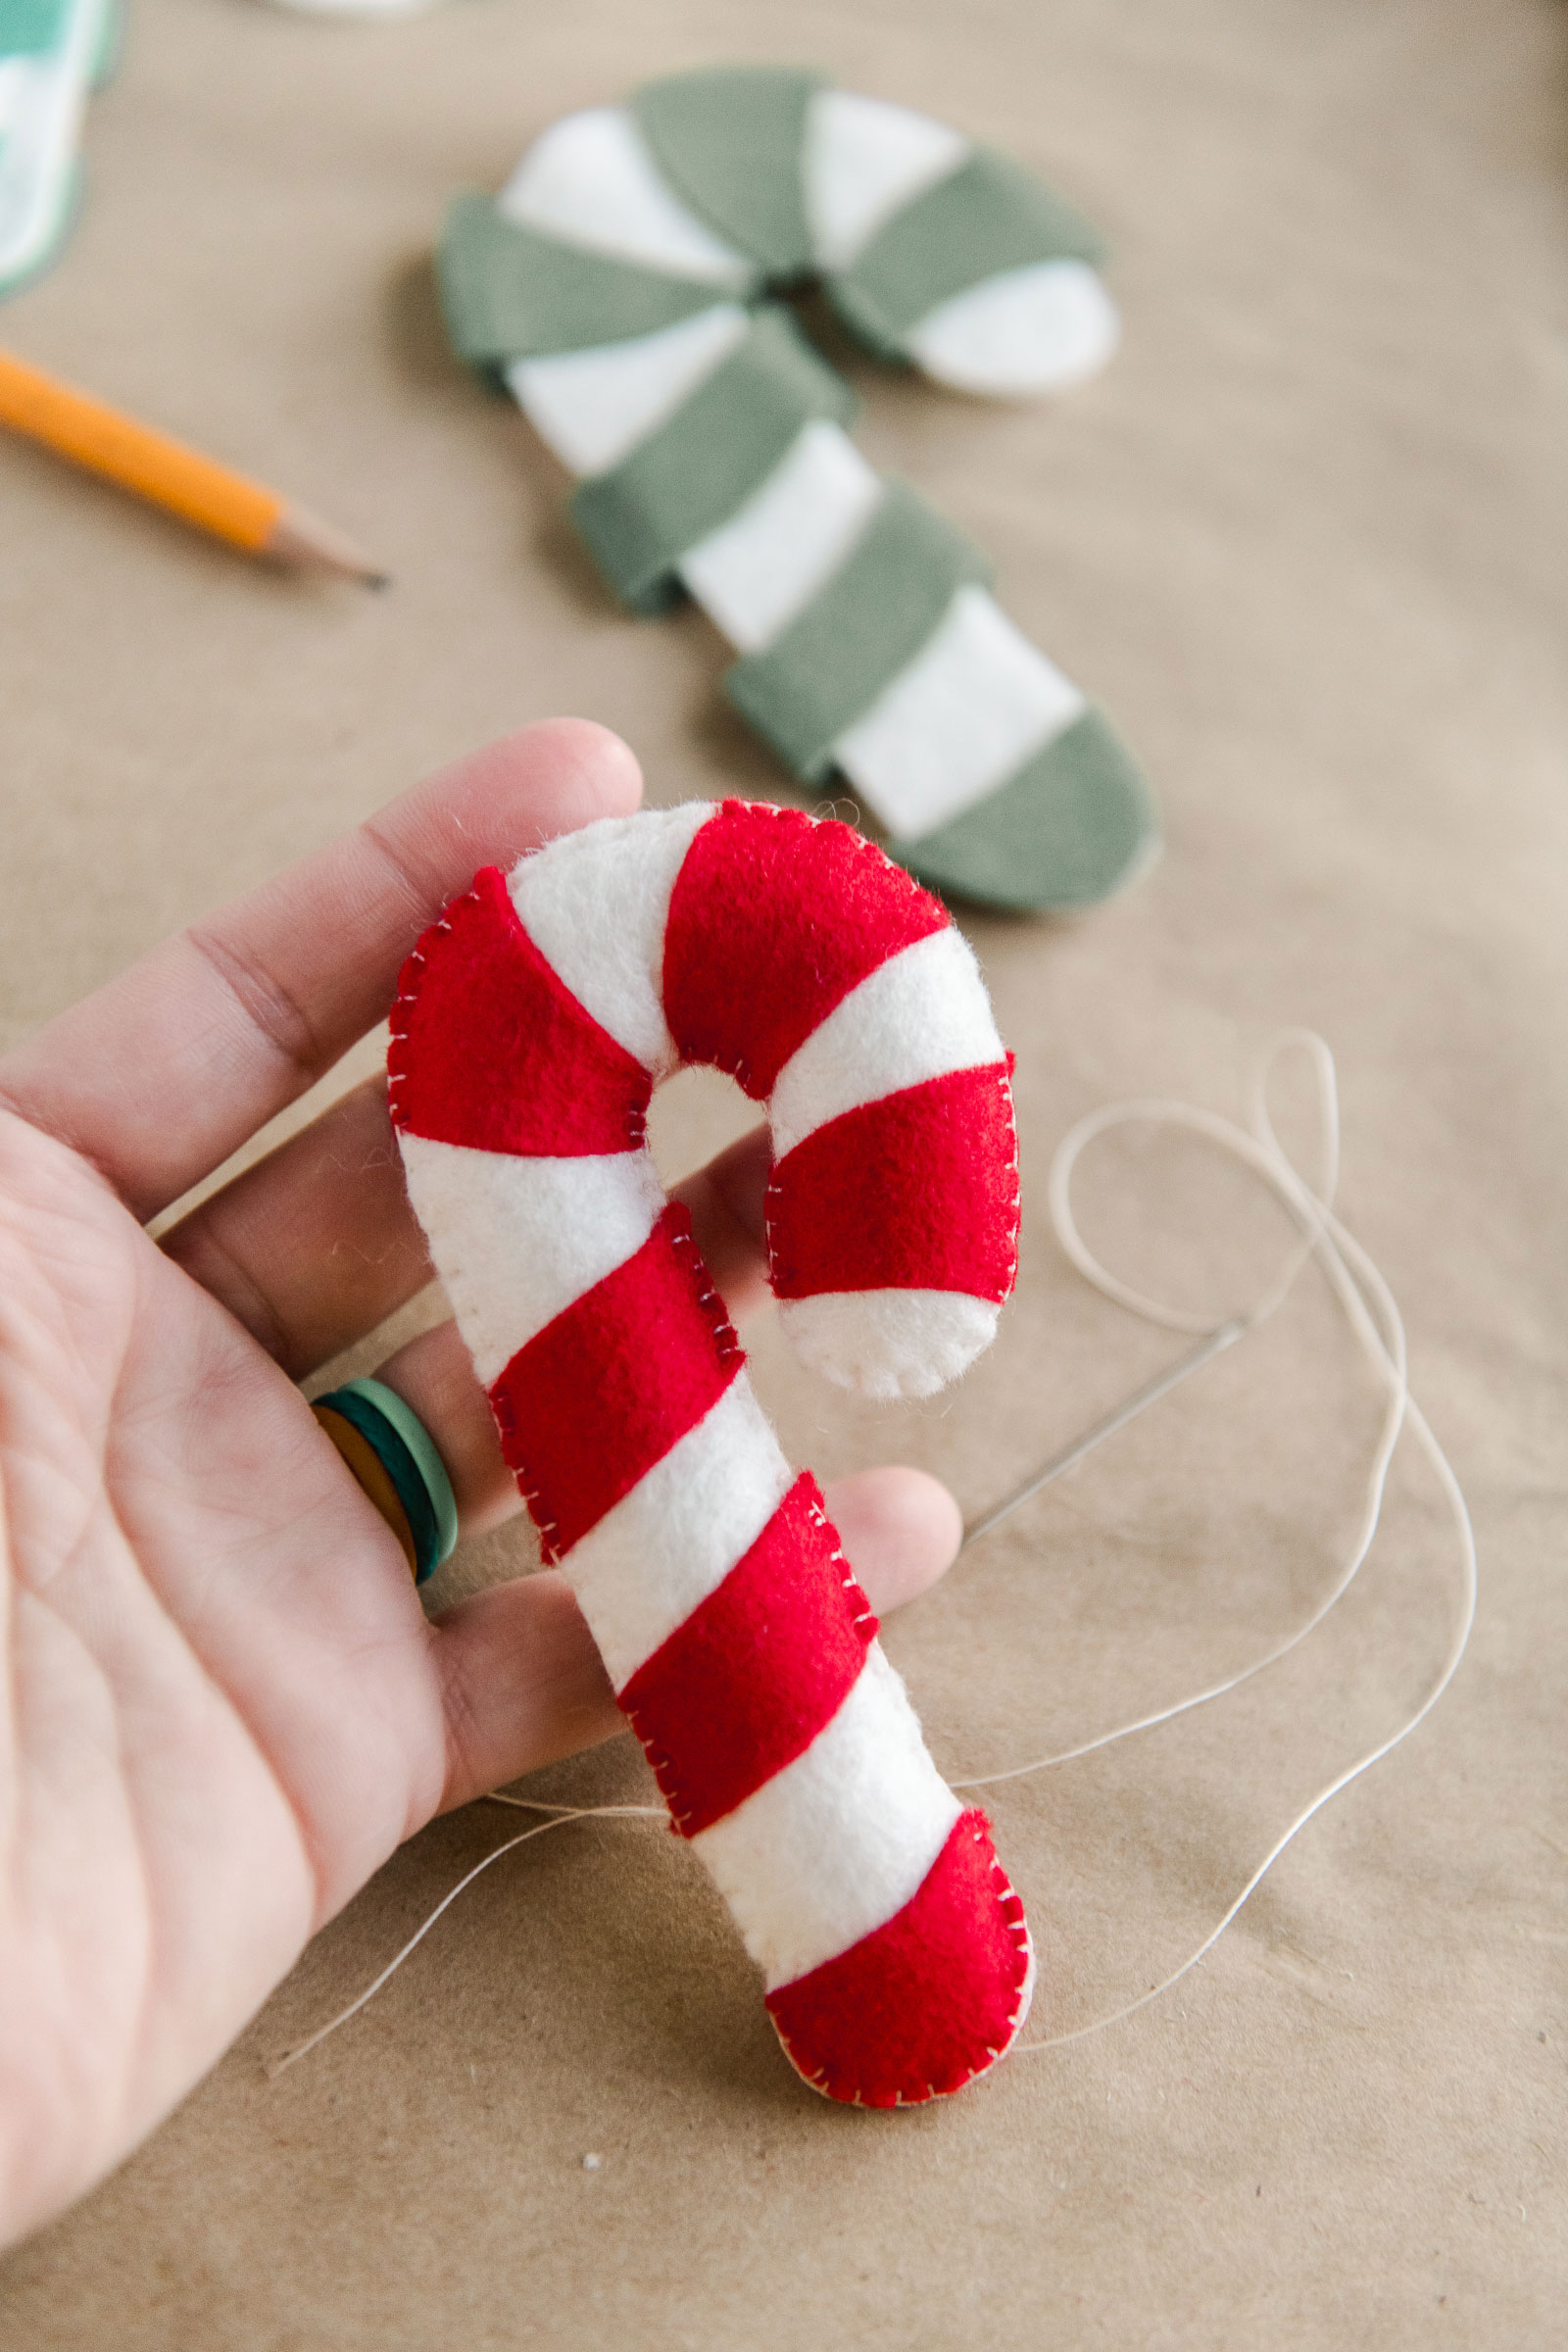
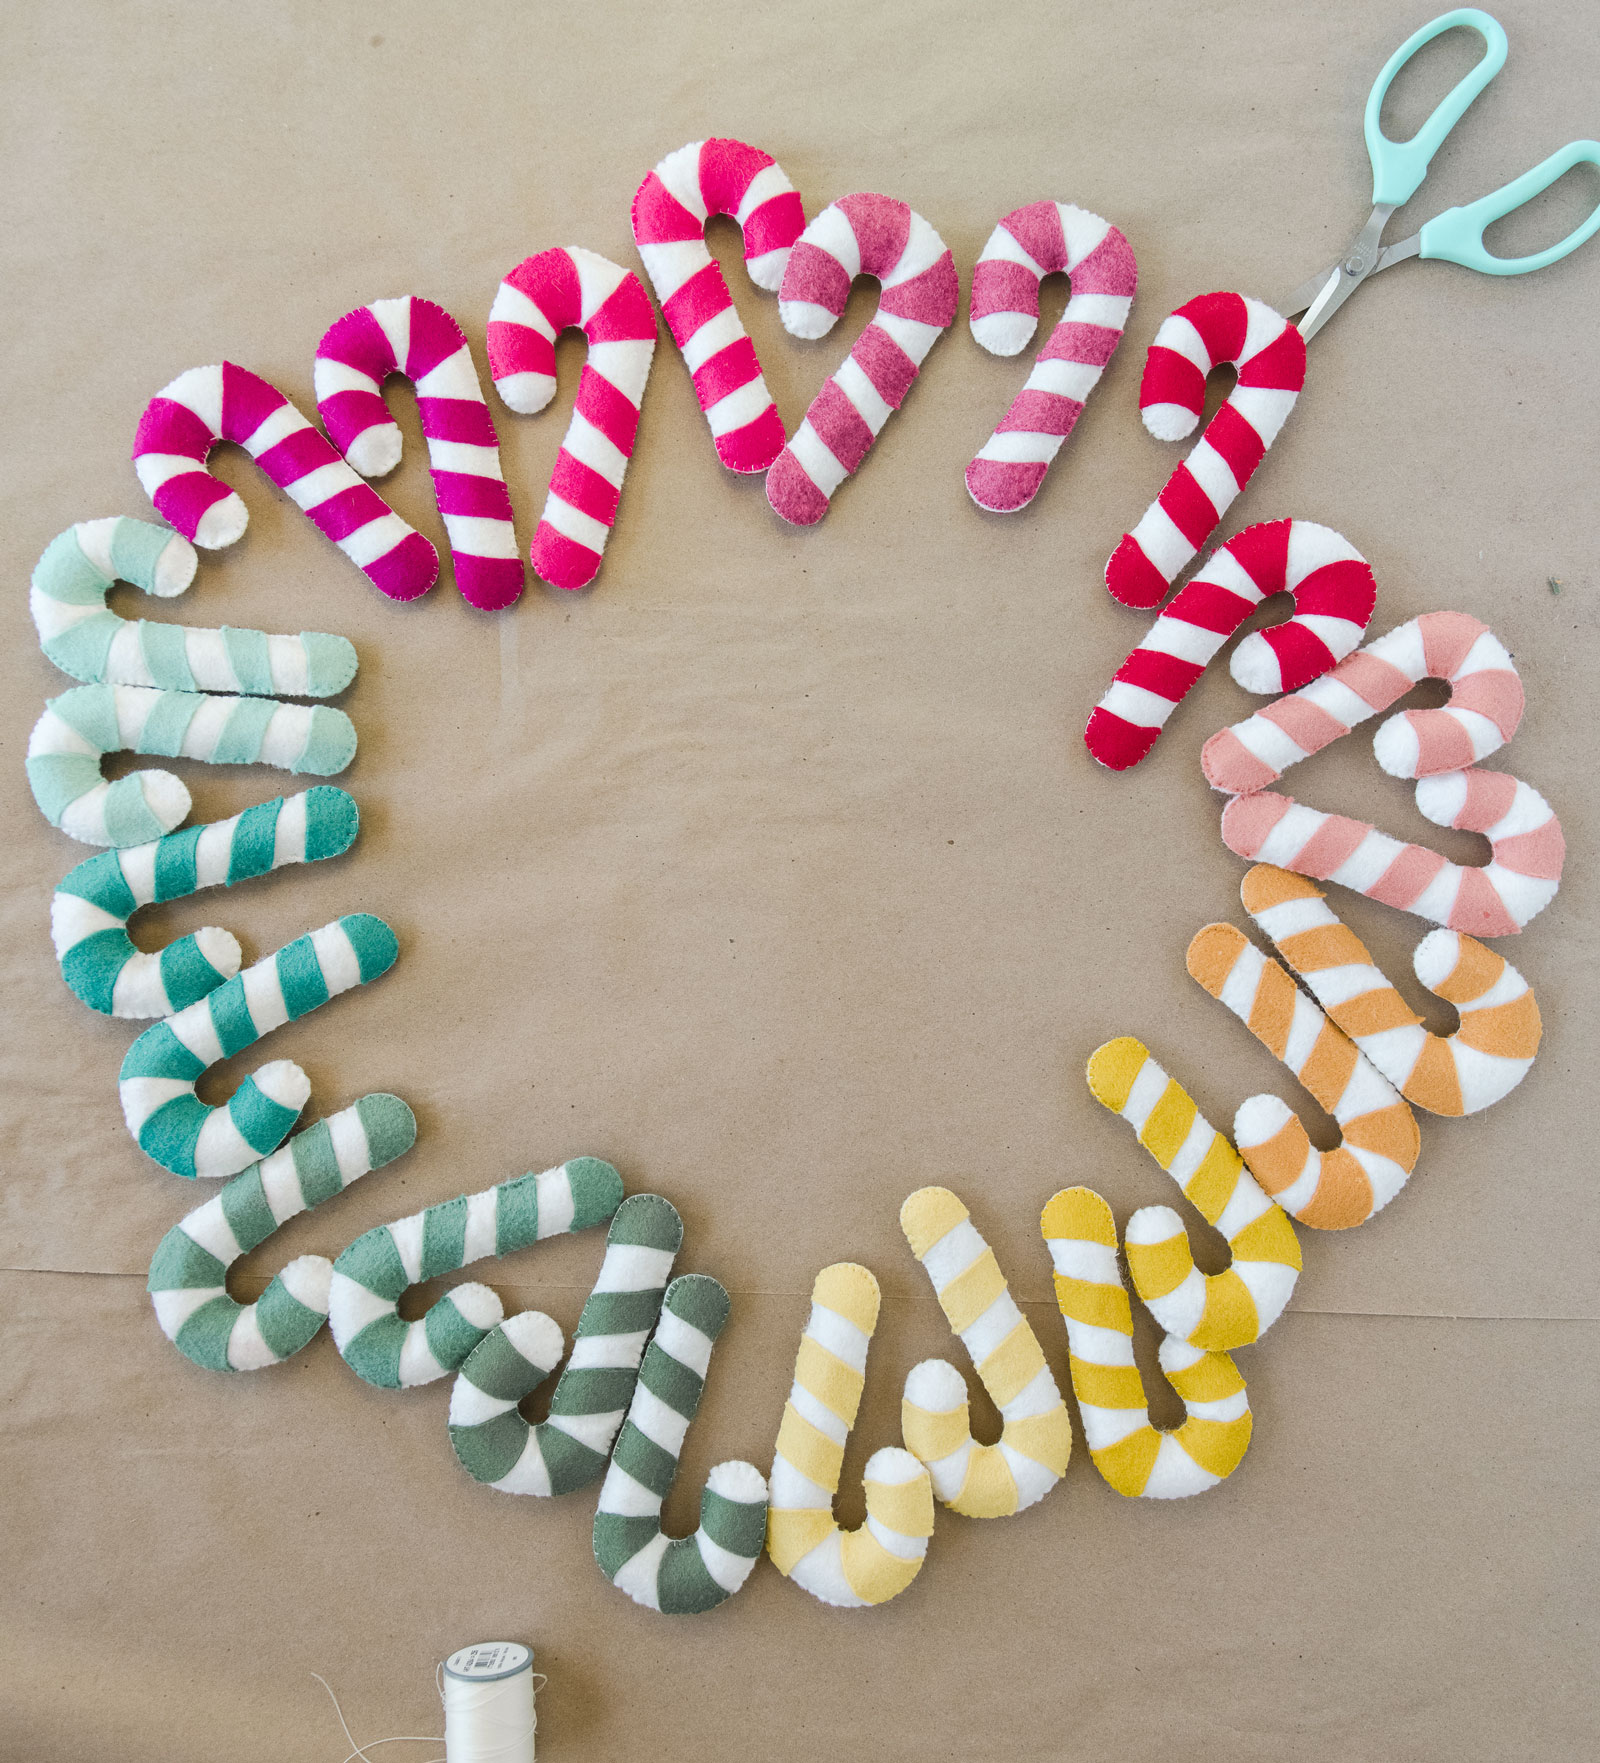
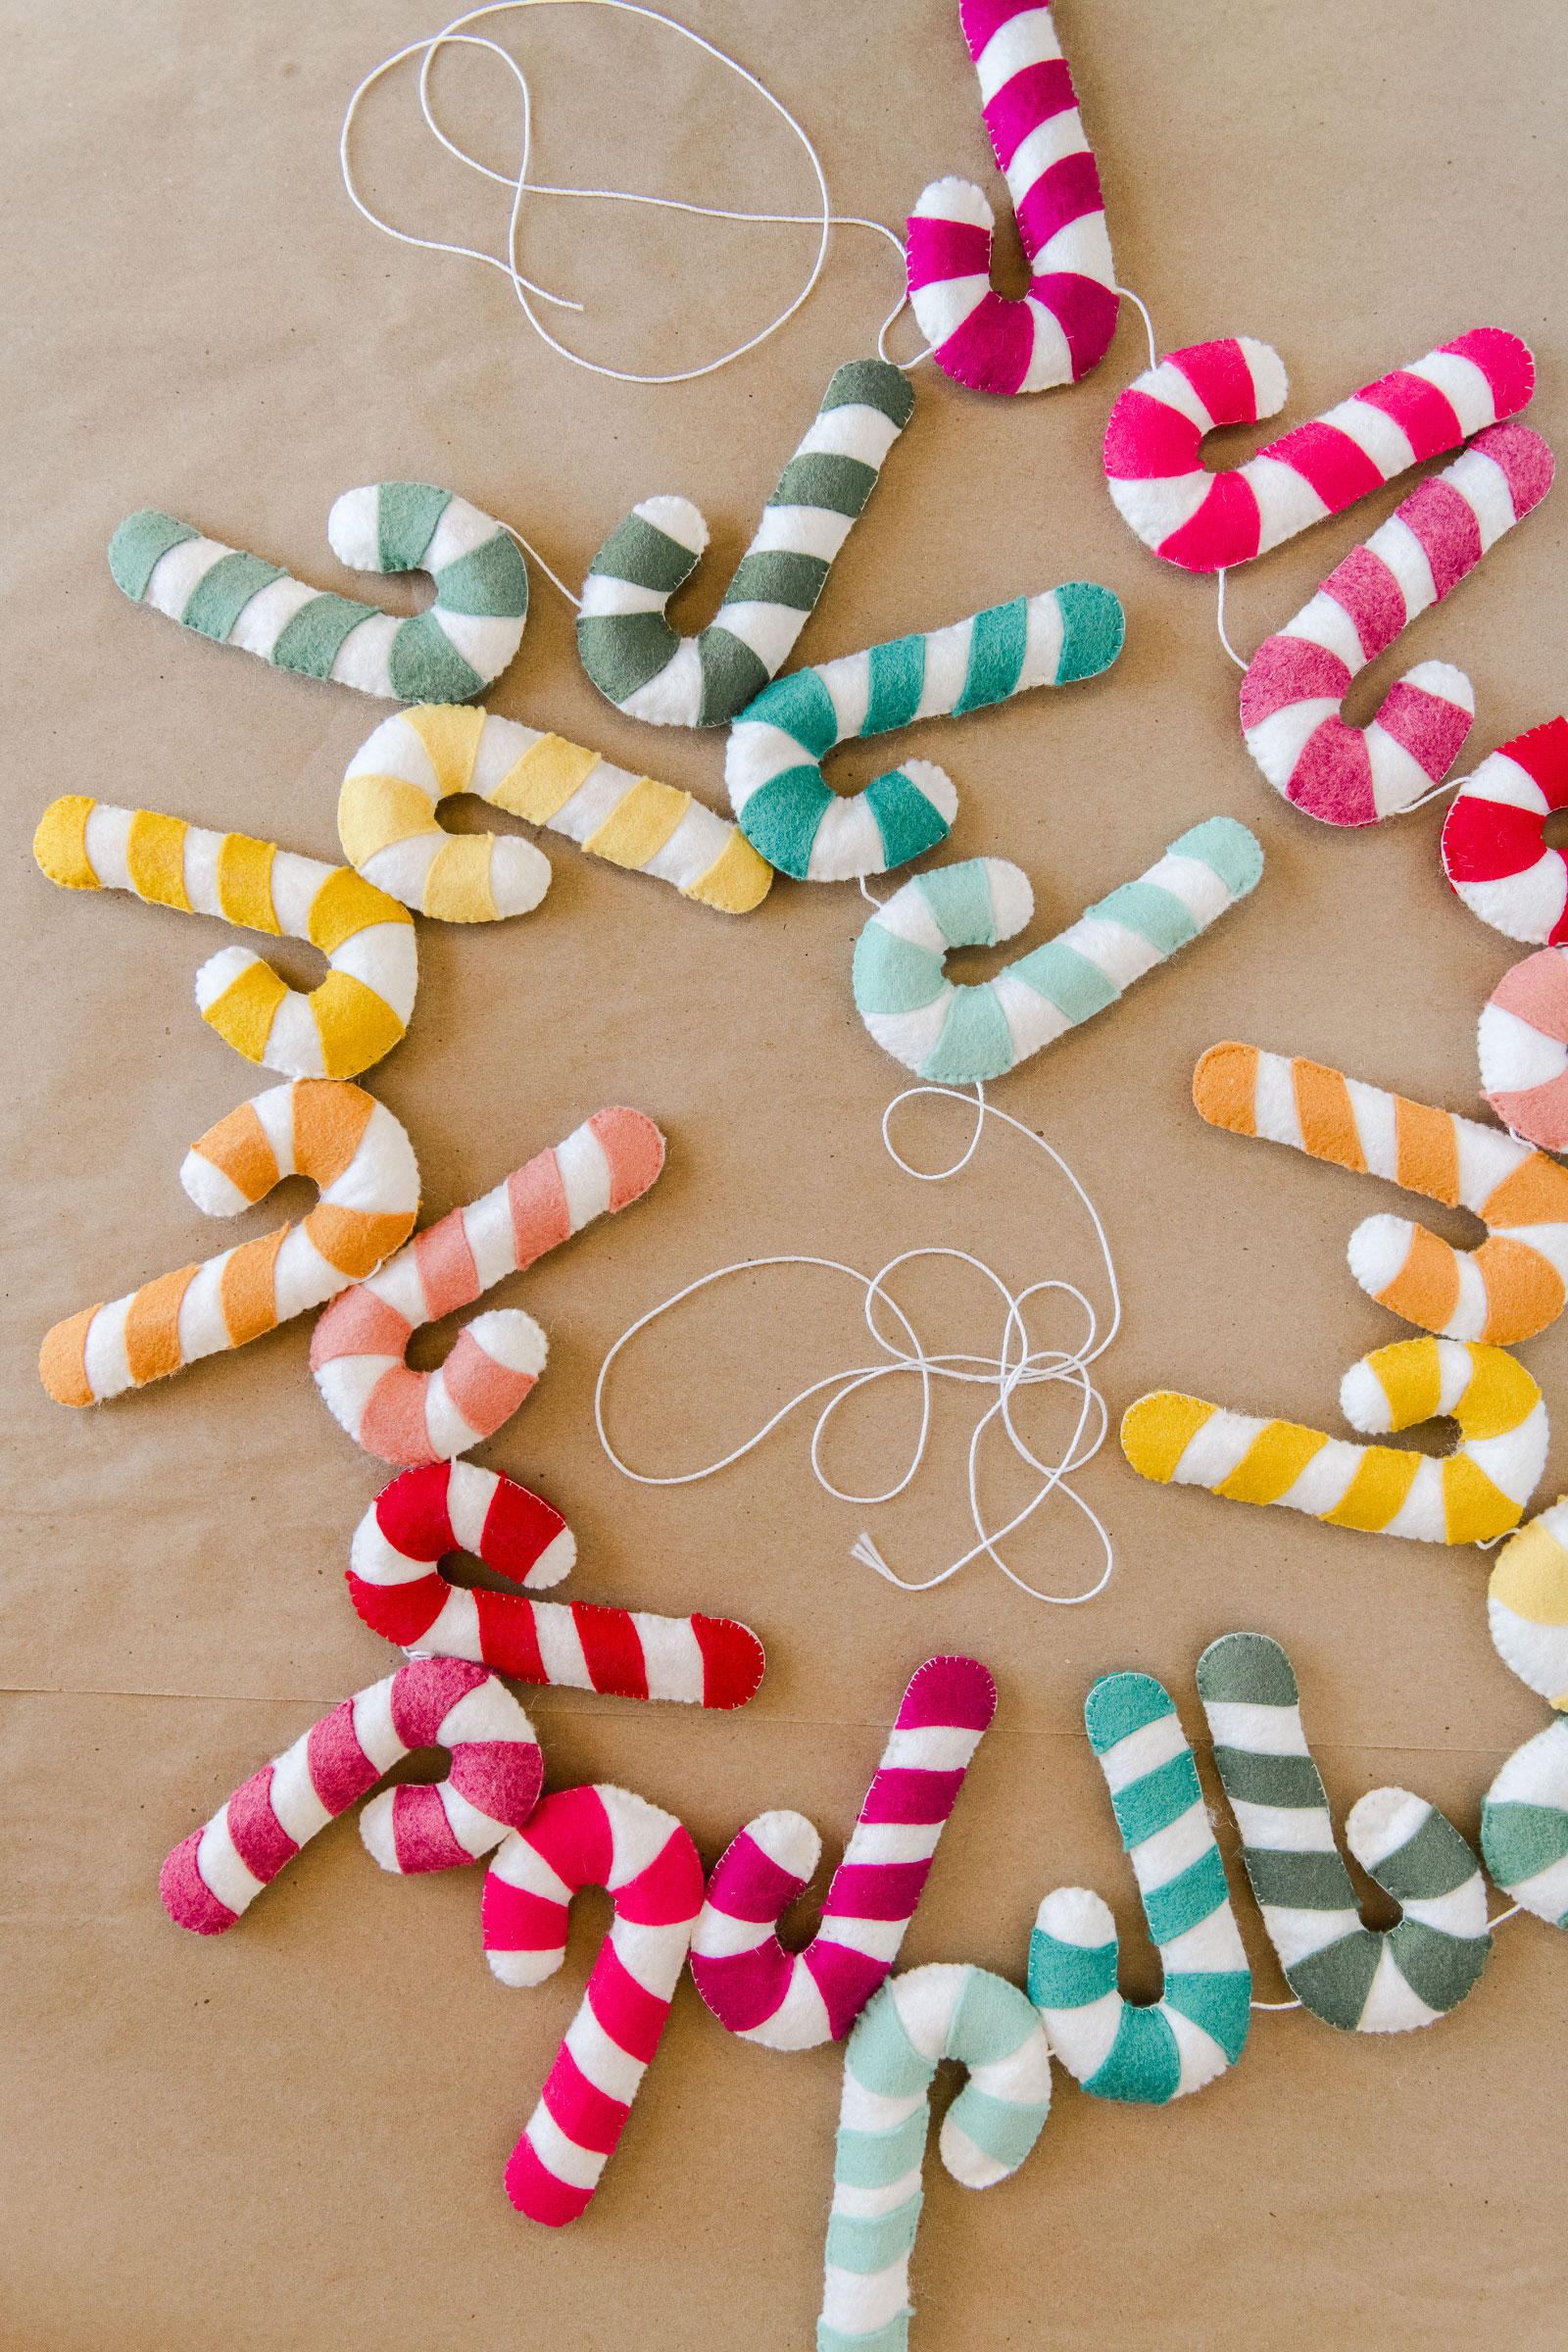
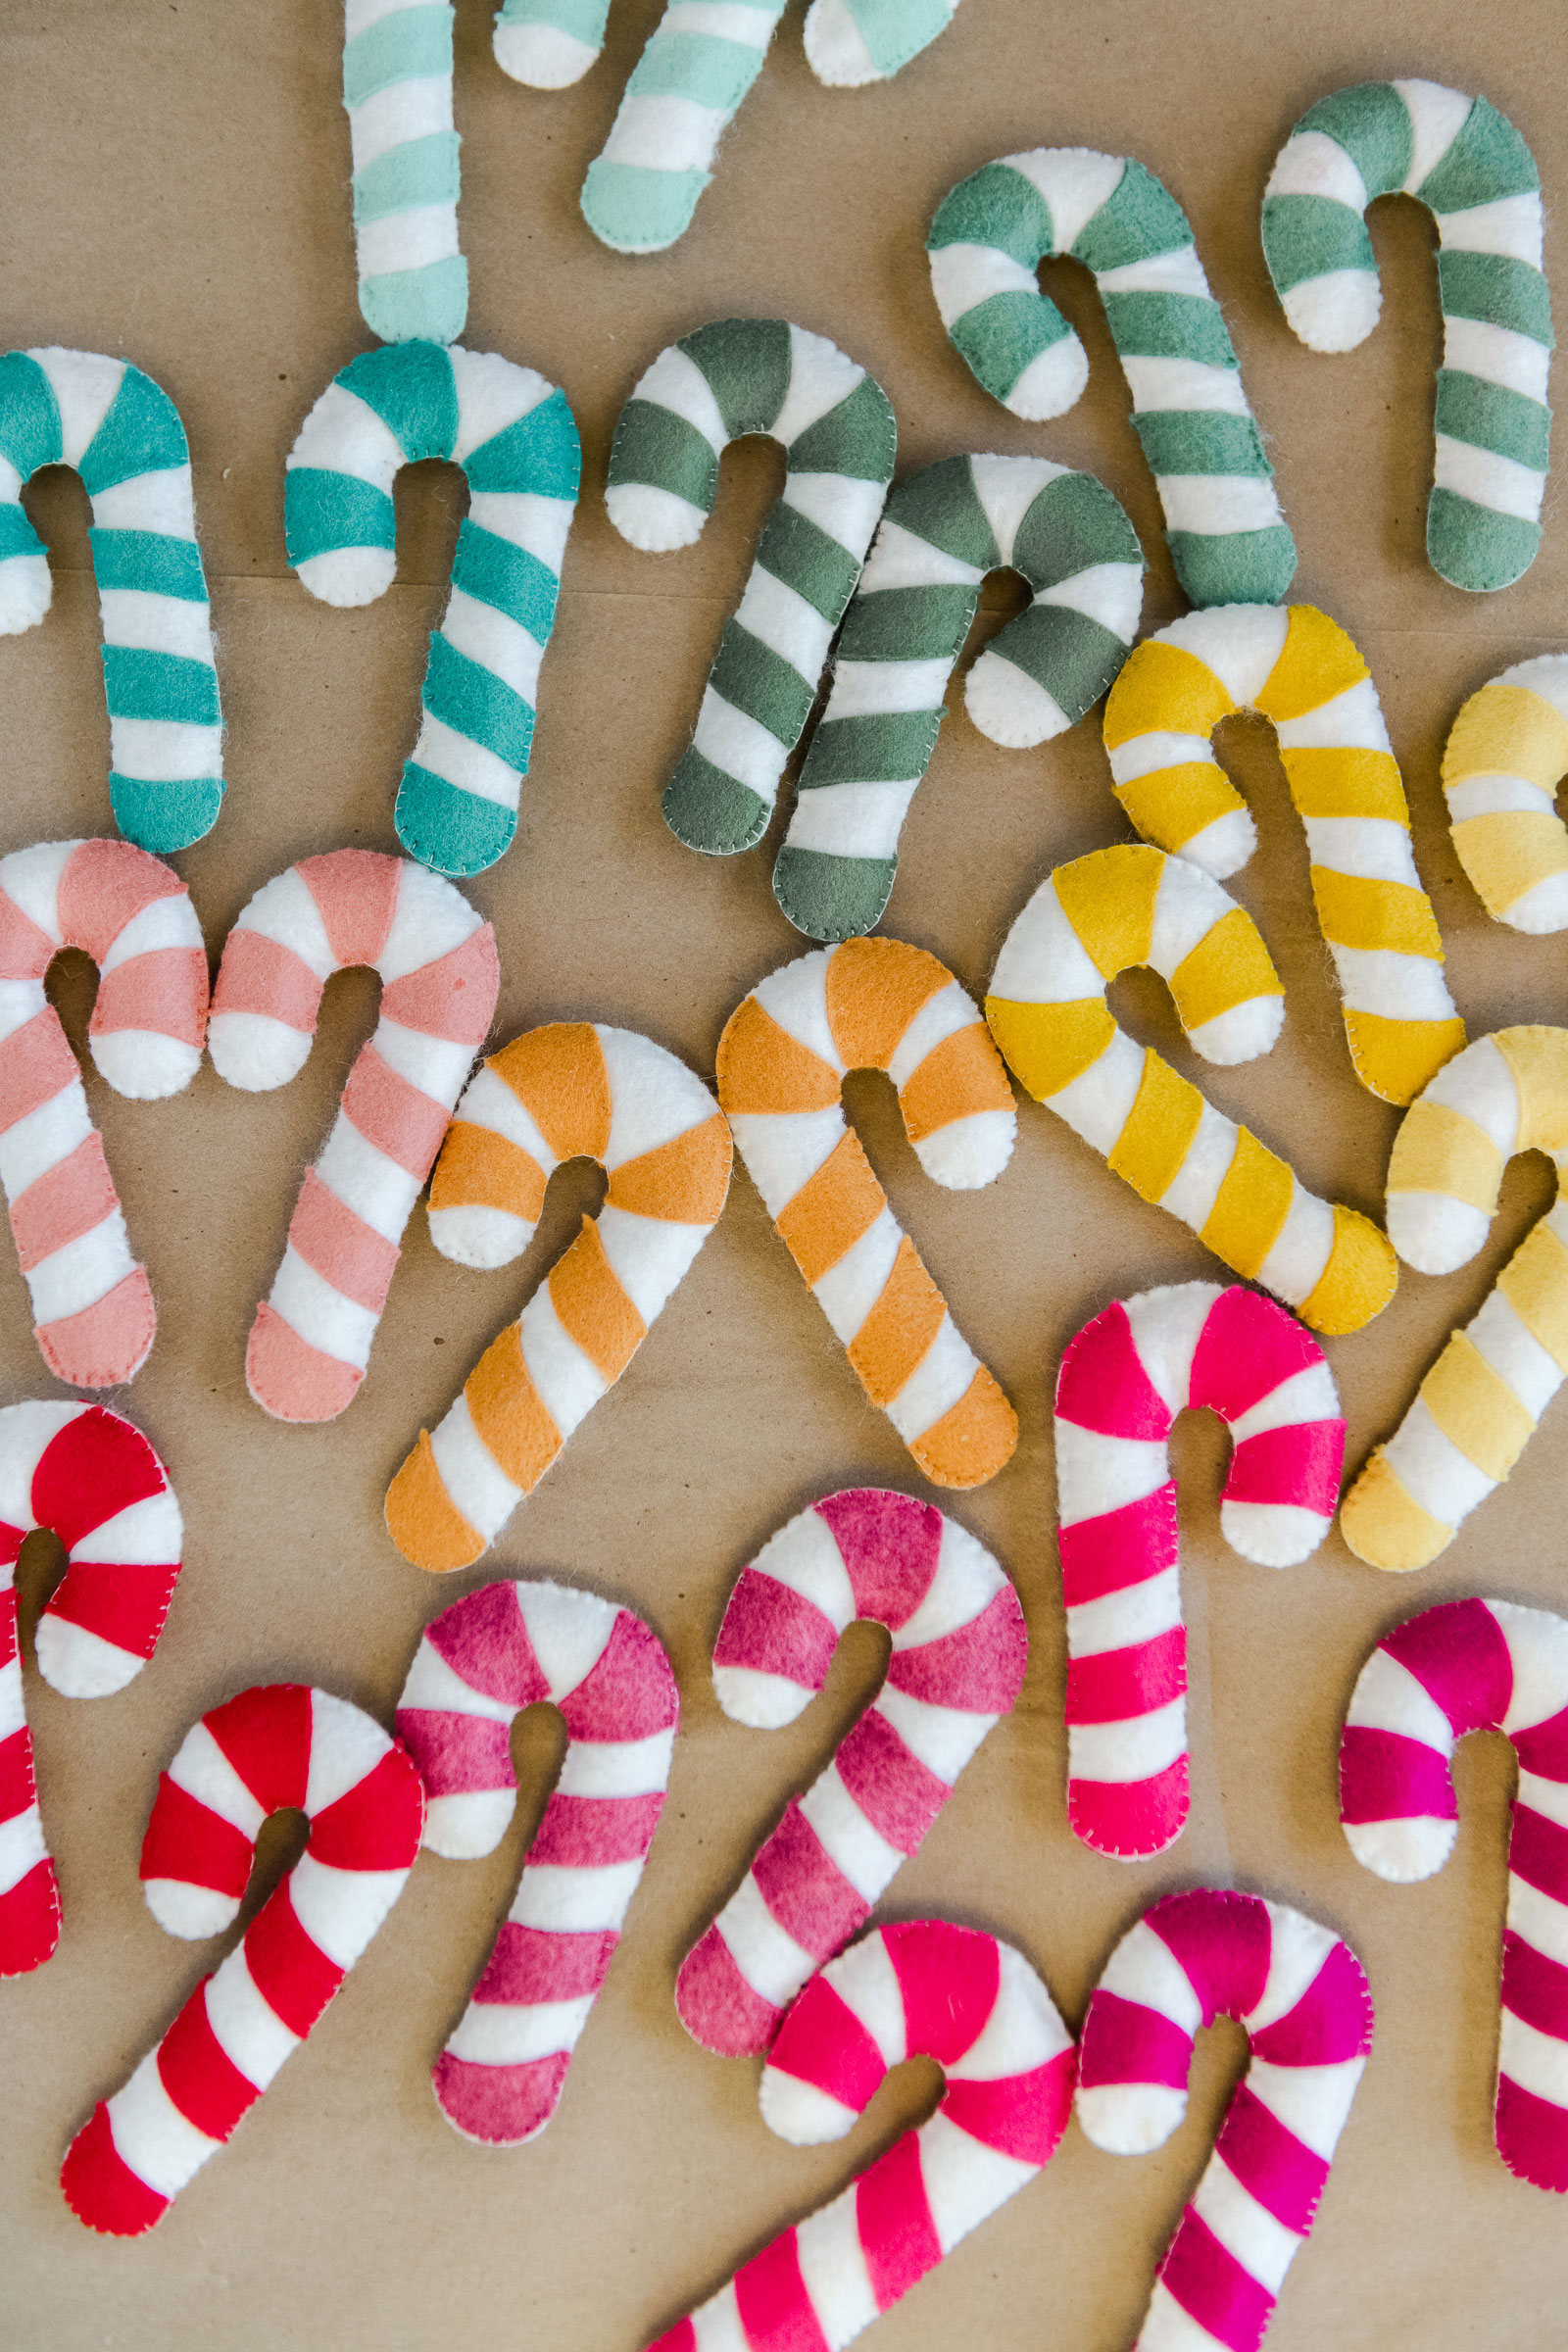
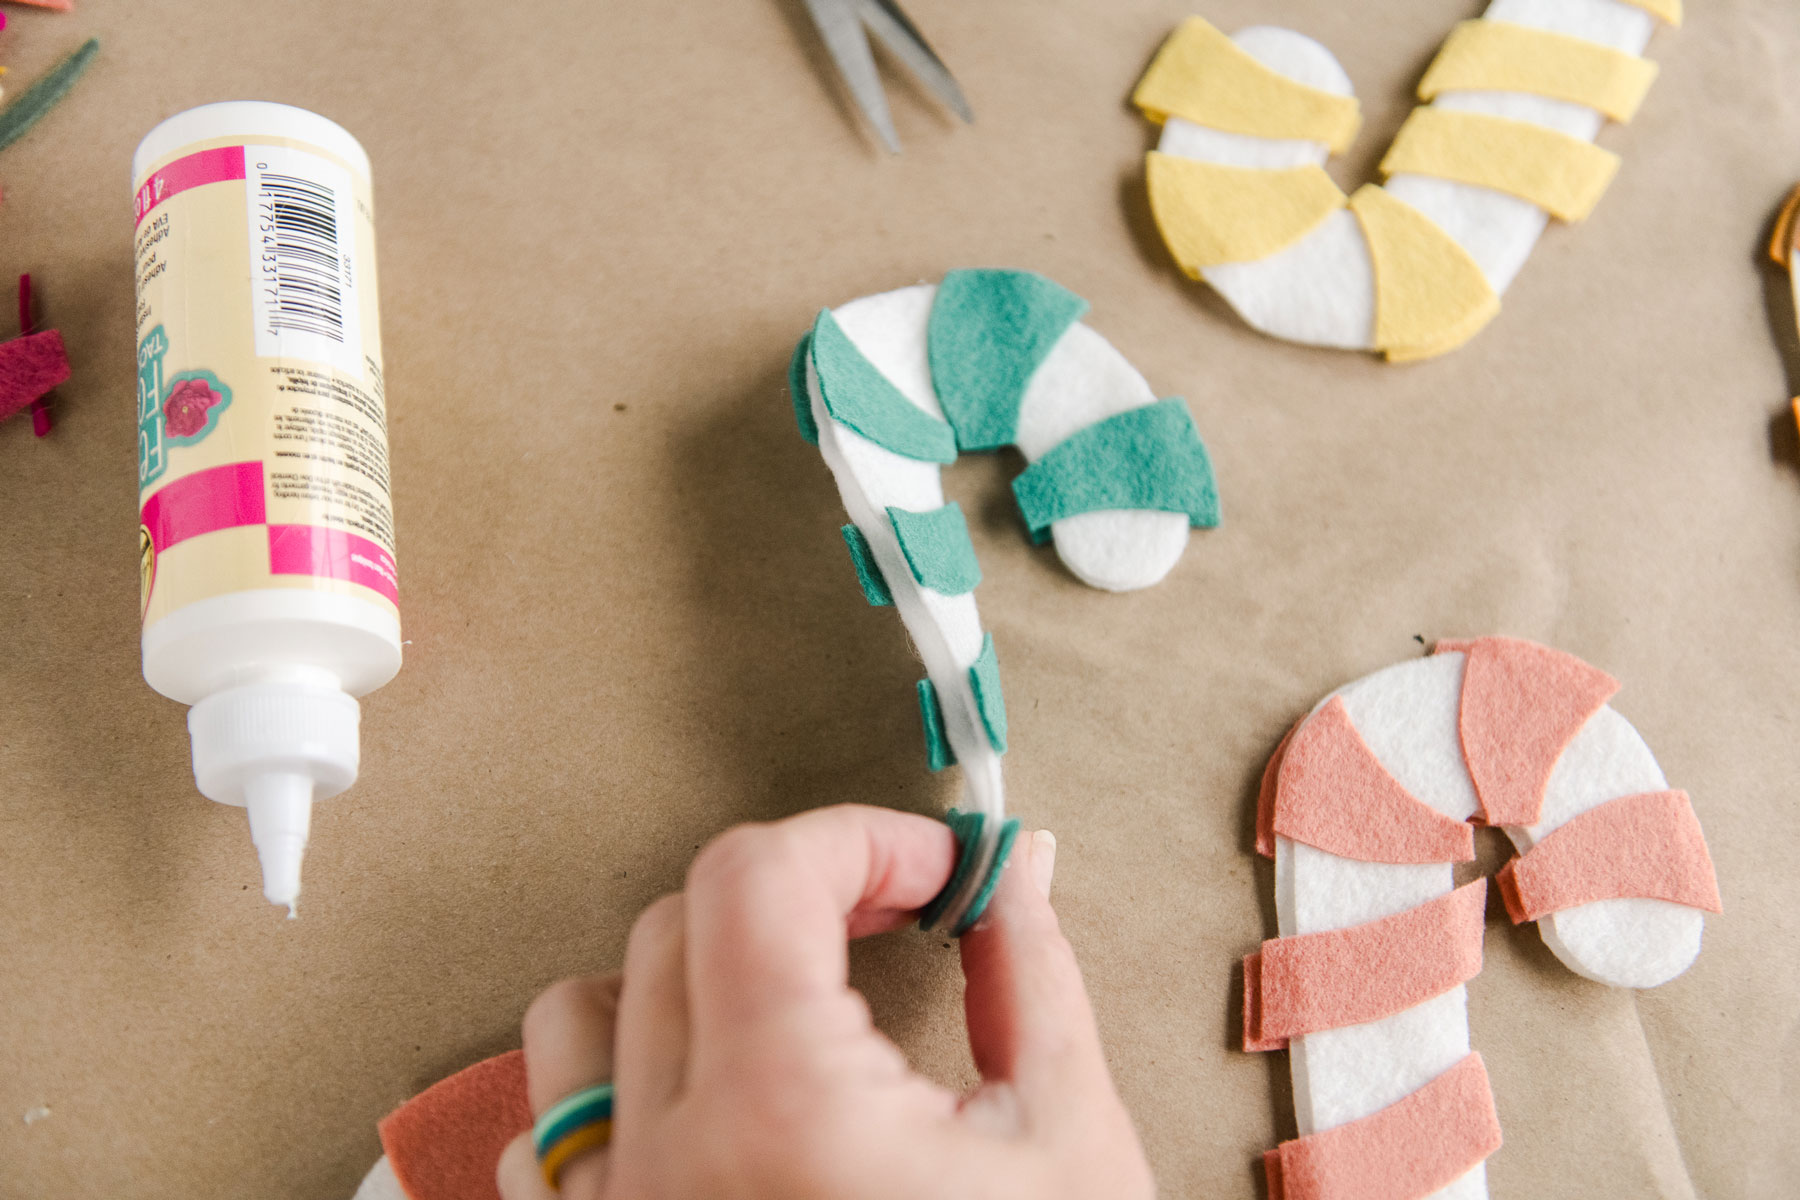
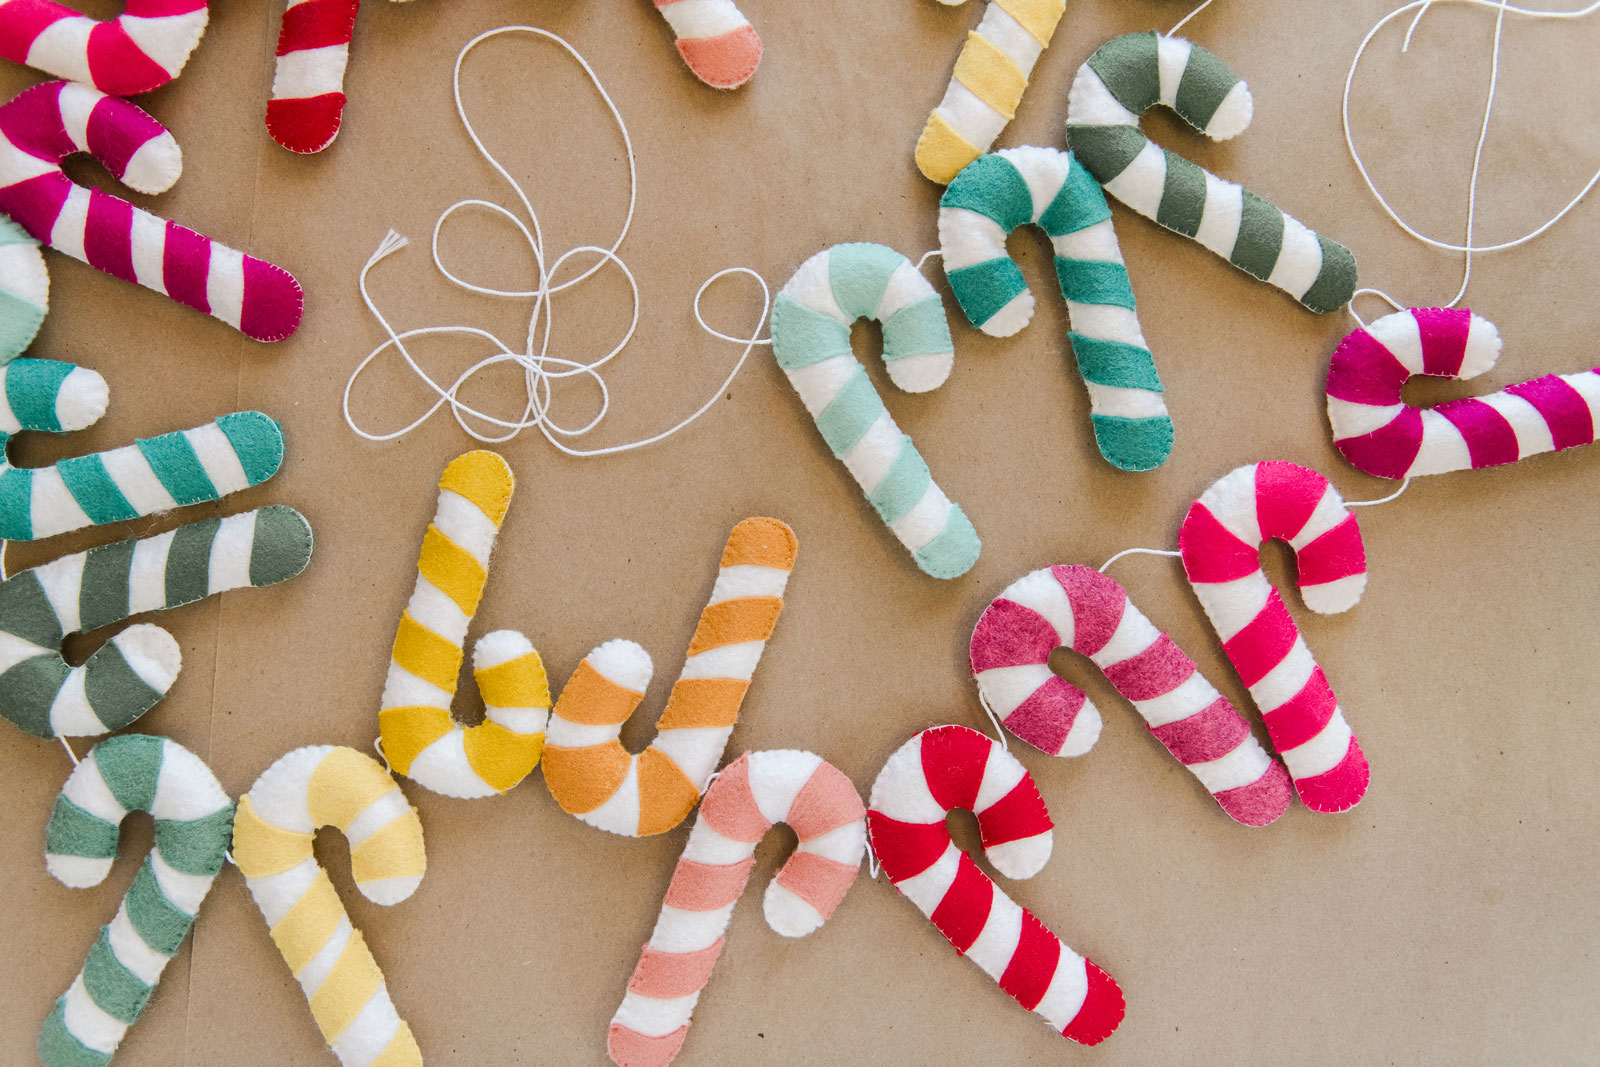
5. When all of your candy canes are stuffed, you will want to thread your larger string with your needle to begin threading your canes into a garland 🙂
I chose to poke the top “U” of the candy cane through the middle (to balance the candy canes as they dangled) and come out the other side. String your candy canes in the order you desire and then hang them up so proudly!!!!
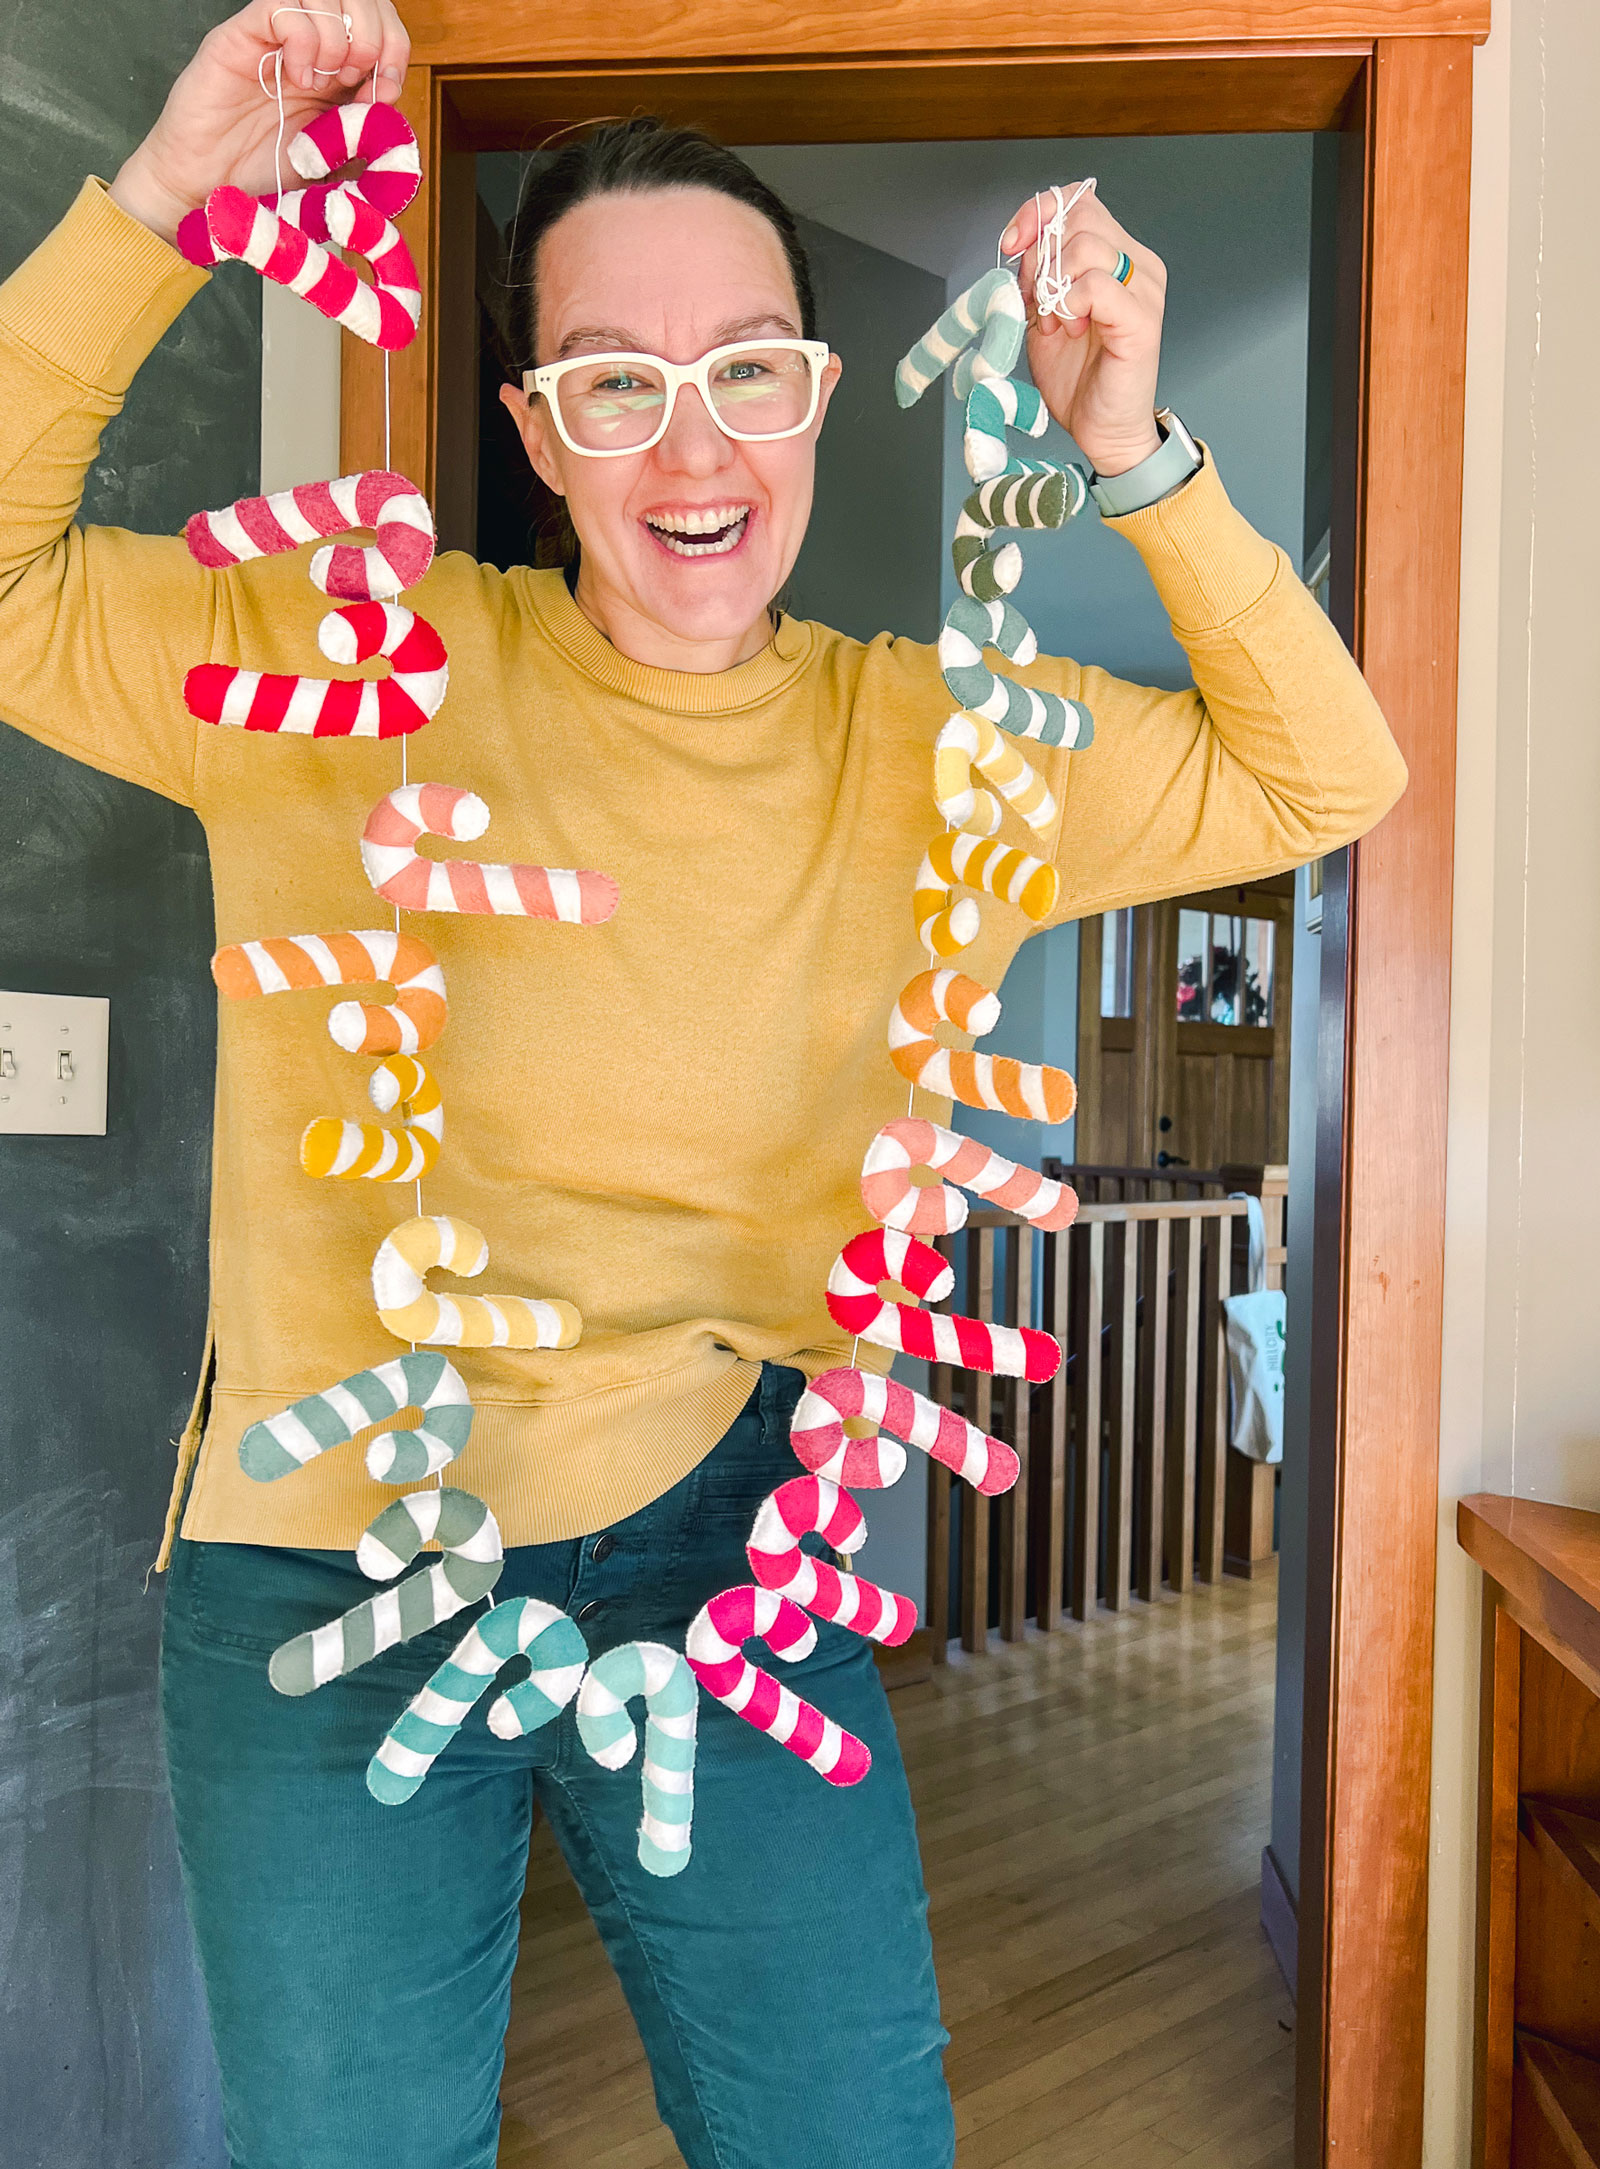
HAPPY CRAFTING AND HAPPPPPPPY ALL THE HOLIDAYS! 🙂


Thank you for tutorial! I can’t wait to make this 🙂
How beautiful and special to put up each year. Thank you for your wonderful tutorial 💛💜💚🤍🩷🩵