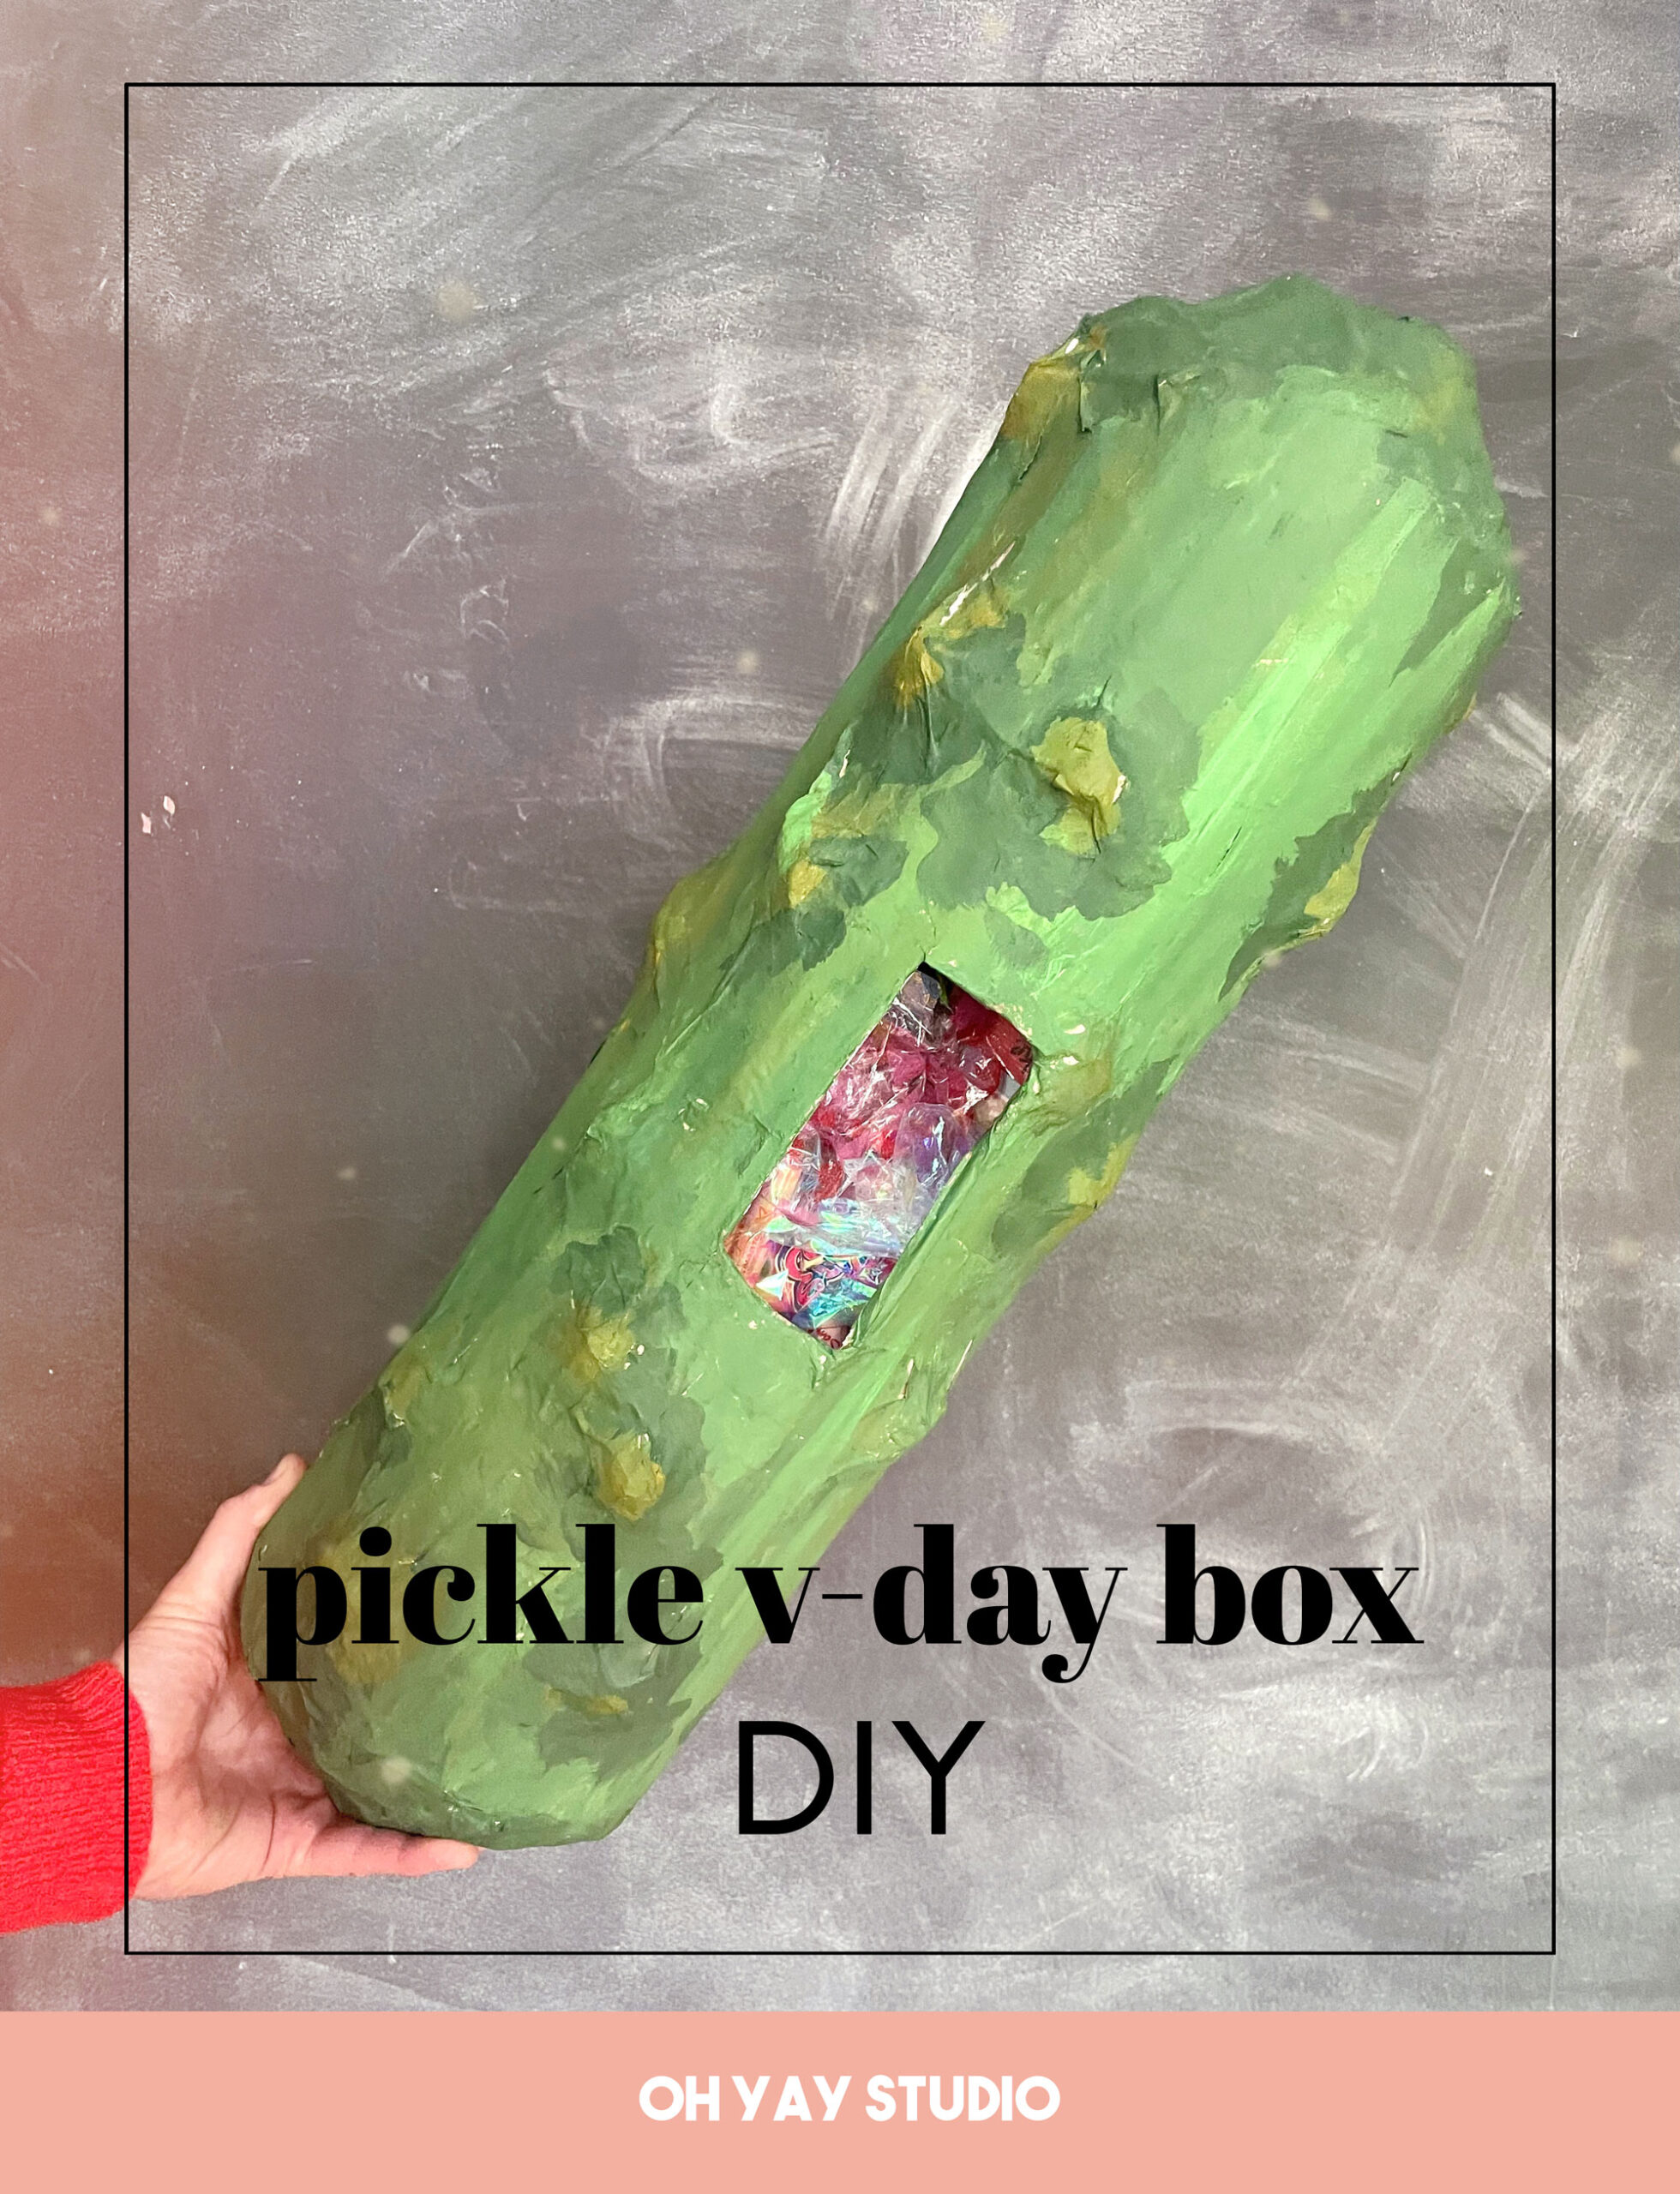
A Pickle Valentine day box DIY! :)
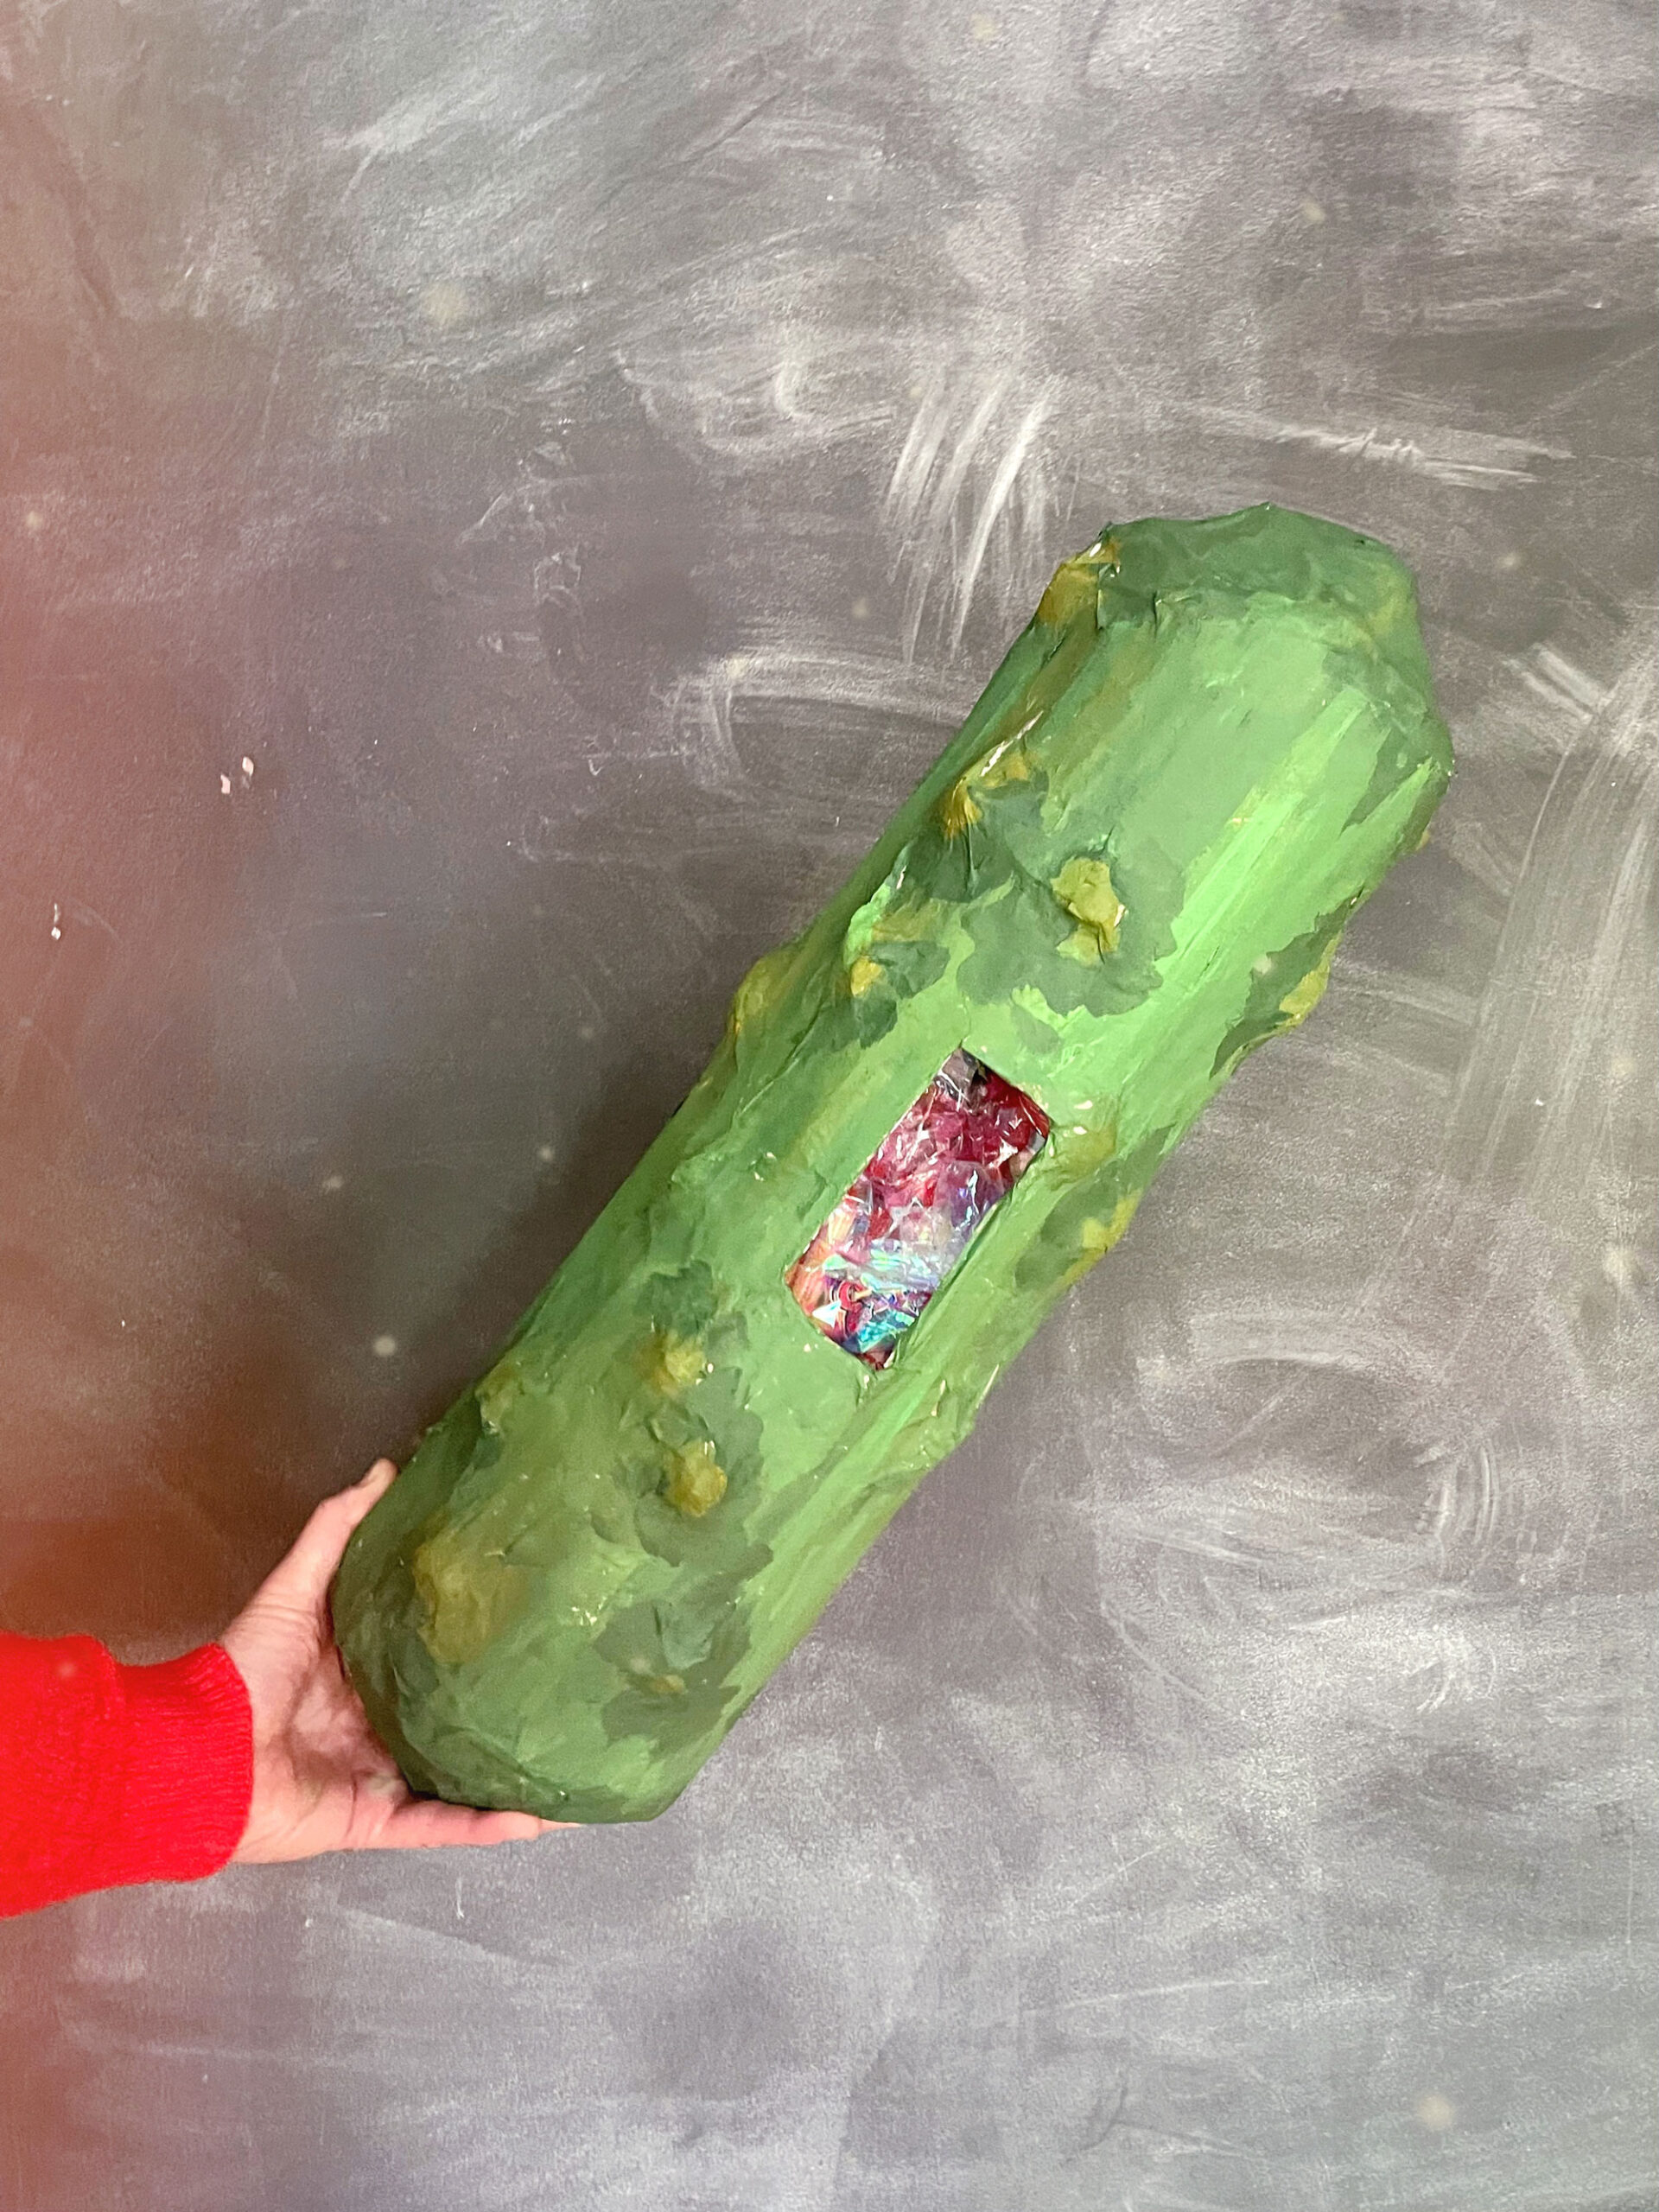
If you know anything about the Steffen family, then you know that we love our vinegar soaked veggies (remember our pickle + pickle jar Halloween costumes that my kids were SOOO into?!) SOOO when Zeke told me that he wanted to make a pickle Valentine’s Day box we absolutely had to make his dreams come true (and hint hint….this legit came together in one afternoon-ish, give or take some drying time, so it was not hard one single bit)!
ANNND the best part about this project is that it is one of those projects that gives you and your kids permission to be messy and get their hands full of goo and just DIVE INNNNNNNN! The materials list is simple and the results are soooo awesome!
Zeke also told me that when Valentine’s day is over he plans to use his pickle as a giant piggy bank in his room because he has so many dollar bills (welp, sounds good to me)! 🙂
Materials:
- Piece of foam core board
- 2 balloons of any color
- a straight edge, like a ruler
- an x-acto knife or sharp blade
- a cutting mat (or extra pieces of cardboard so you don’t cut a table or floor surface)
- Paper mache materials – flour, water, salt, and lotttssss of strips of paper
- Masking tape (or duct tape or painters tape) and/or paper for making the bumps of the pickle 🙂
- Green paint
- And whatever else you want to decorate it with 🙂
INSTRUCTIONS:
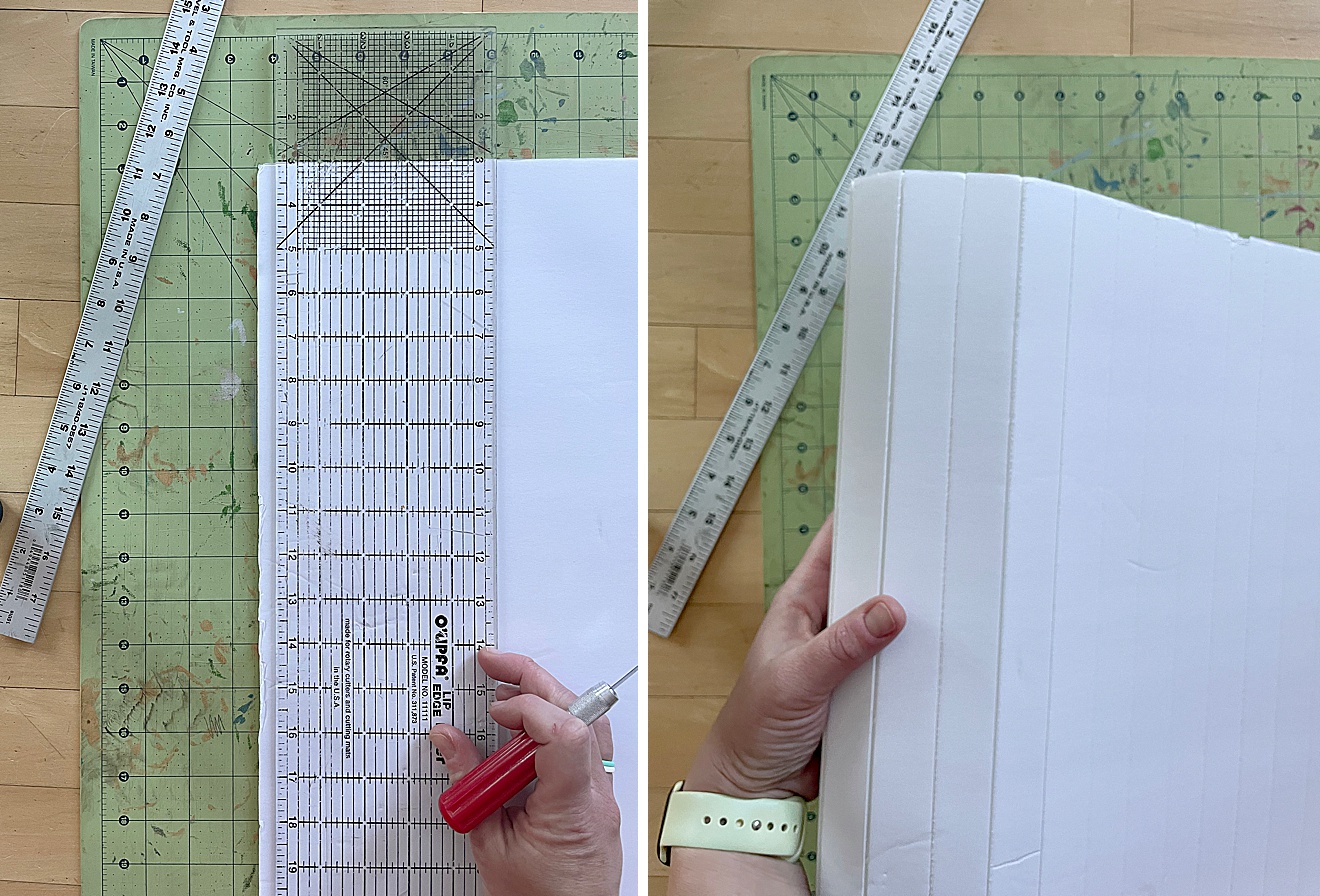
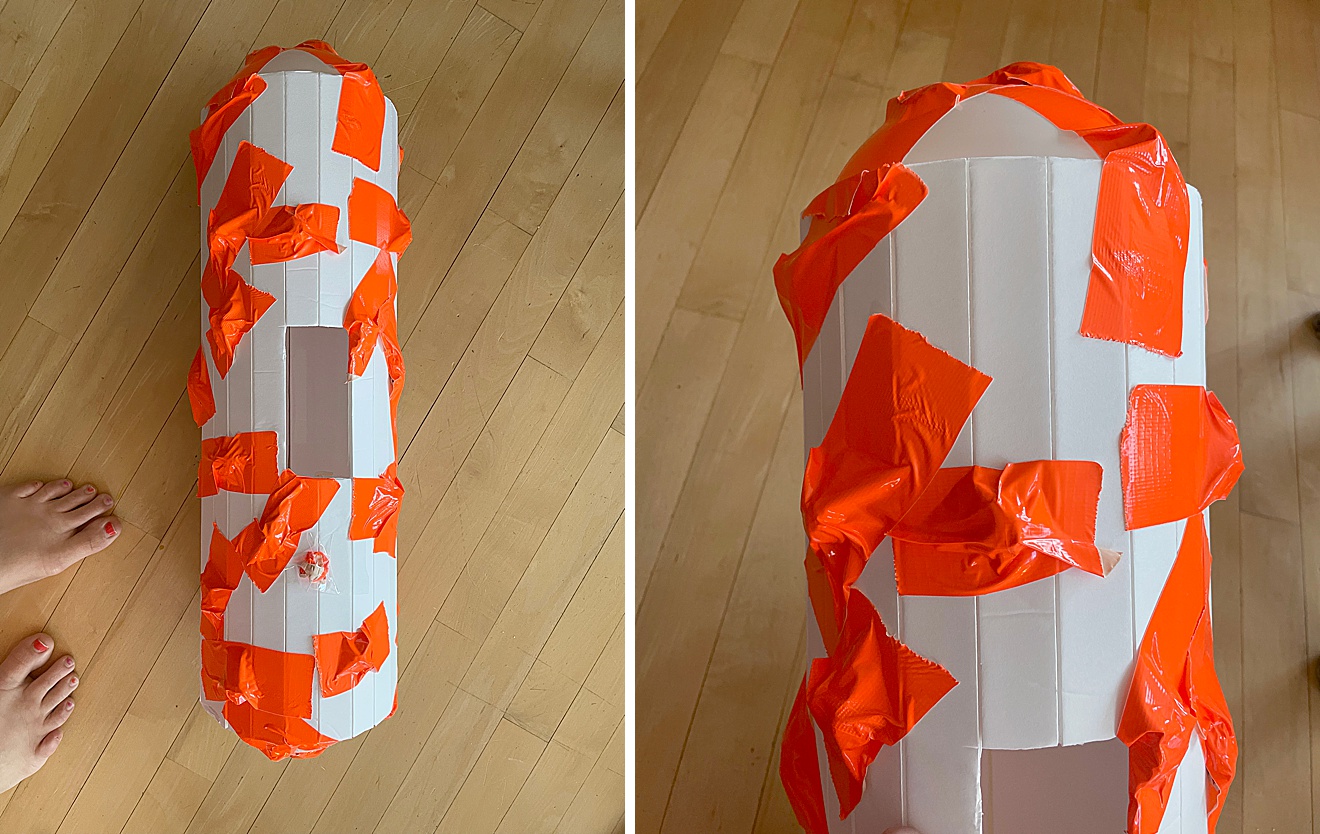
1. With your straight edge cut 1-2 inch slits into your foam core board. DO NOT CUT ALL THE WAY THROUGH. Simply cut one pass through so that you can fold or snap the foam core (note, I only used about 3/4 of the foam core) Then shape your pickle into a long tube and tape together.
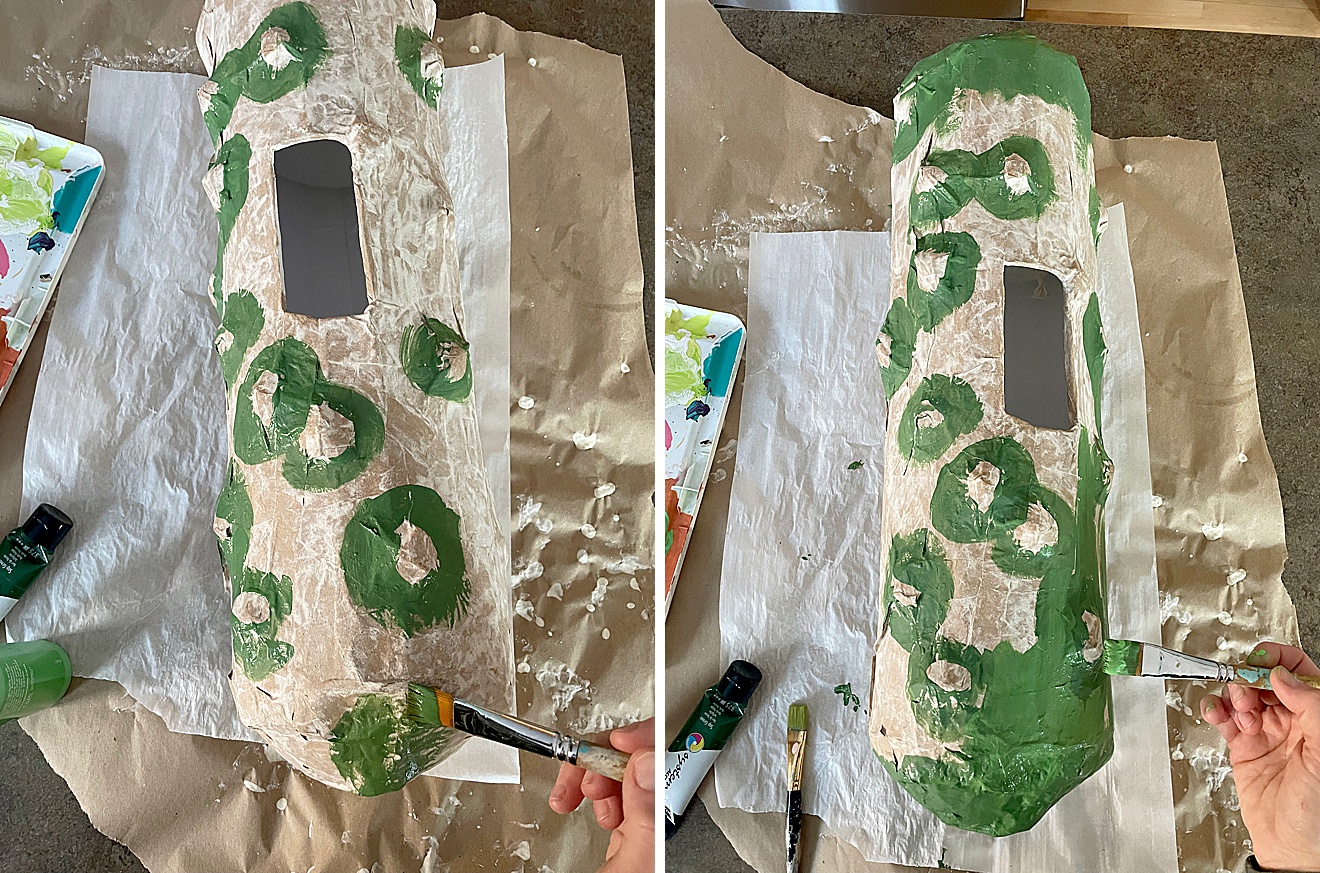
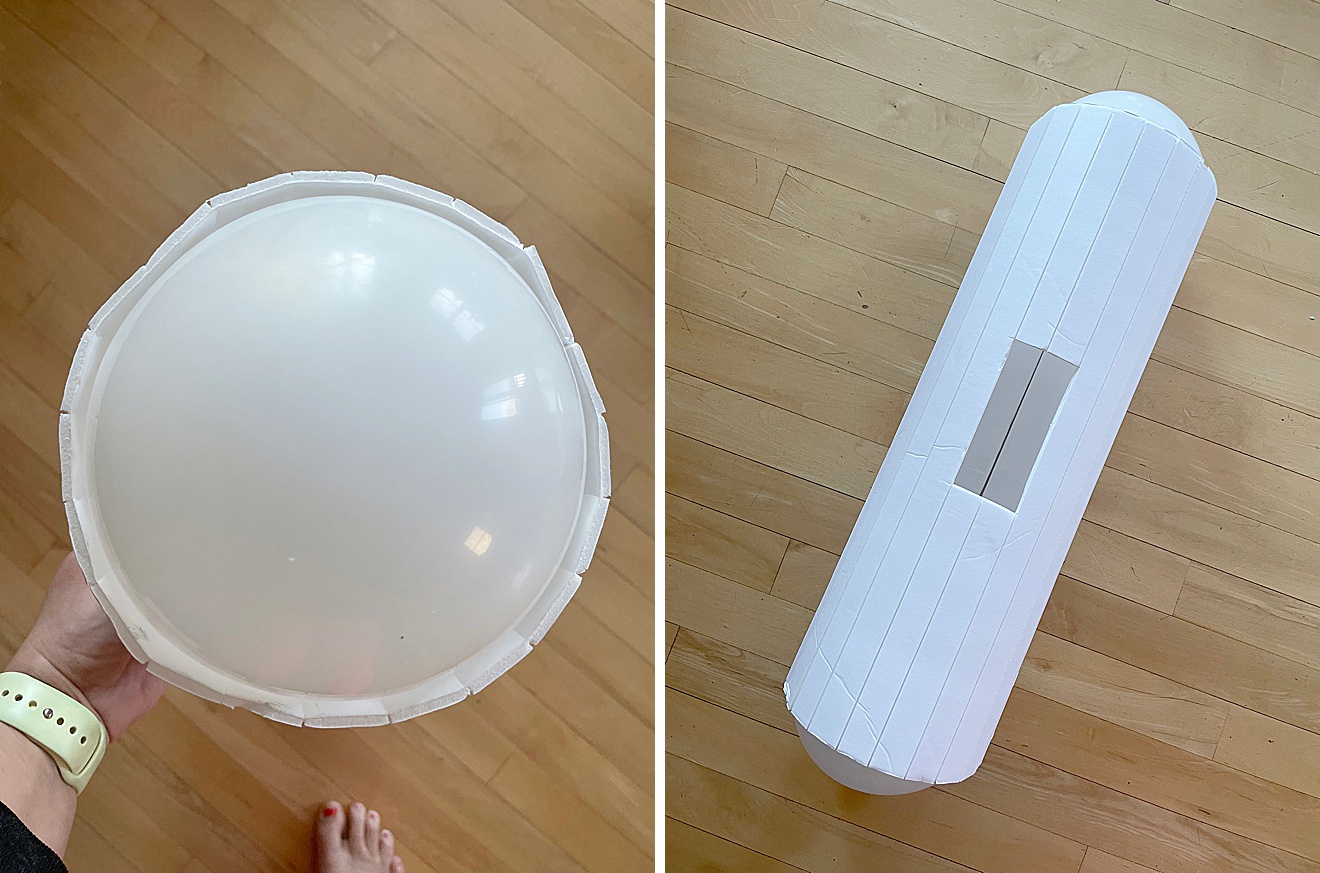
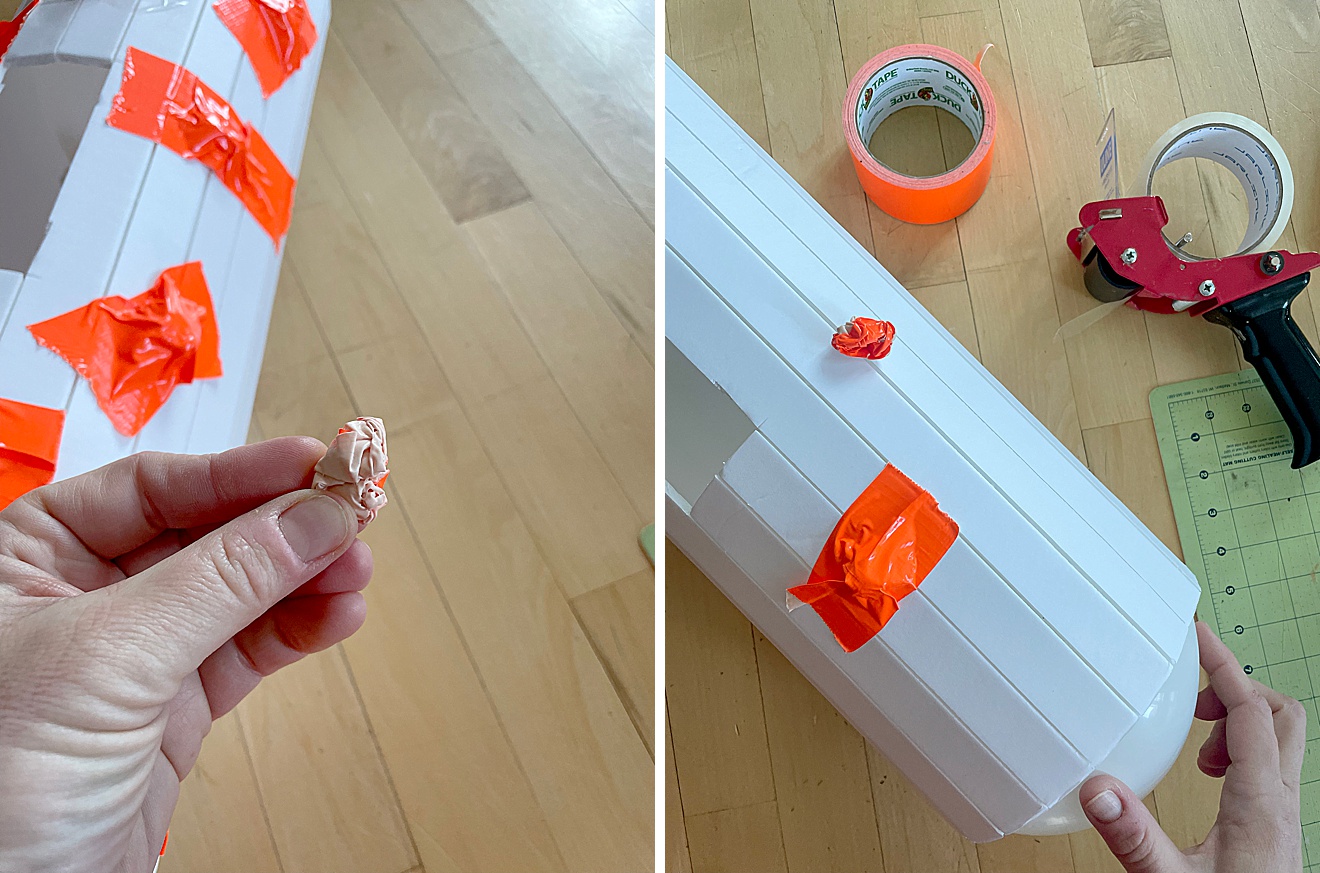
2. Blow up 2 balloons about the same size as the end opening of the pickle. Stuff the balloons into each end of your tube to make the rounded pickle ends. Then add the bumps by using 2 pieces of tape – 1 piece you will roll into a ball (or you can use bits of paper for this too), and then use the 2nd piece to tape the ball onto the pickle shape – these bumps will be placed all over the pickle (except the bottom – for stability) and will give the pickle it’s rough pickle texture! 🙂
3. Tear your strips of paper (yes, we did use old school work and homework in ours). The strips should be about 1”-2” in width and as long as you want (we did about 6”-8”)
The mix up your paper mache with this recipe:
- 1 part water
- 1 (plus a little) part flour
- and a pinch of salt (some argue, that you don’t need salt….but from my experience, the salt is what makes the paper mache last forever without molding and getting super smelly….so I argue FOR the salt! 🙂
The consistency should be about pancake batter – maybe a bit thinner 🙂
Start with 2 cups flour and go from there…you can mix more as you go! 🙂
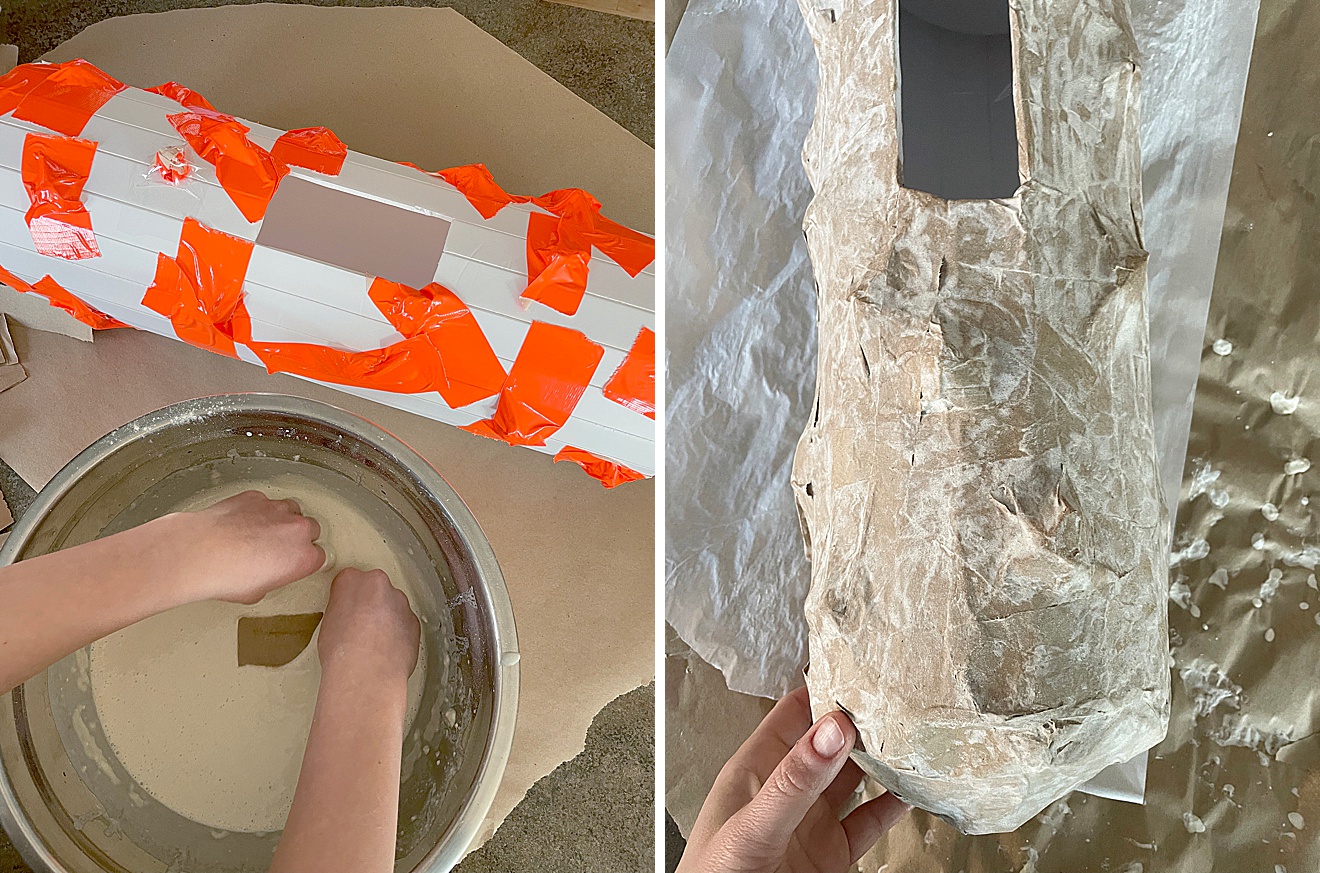
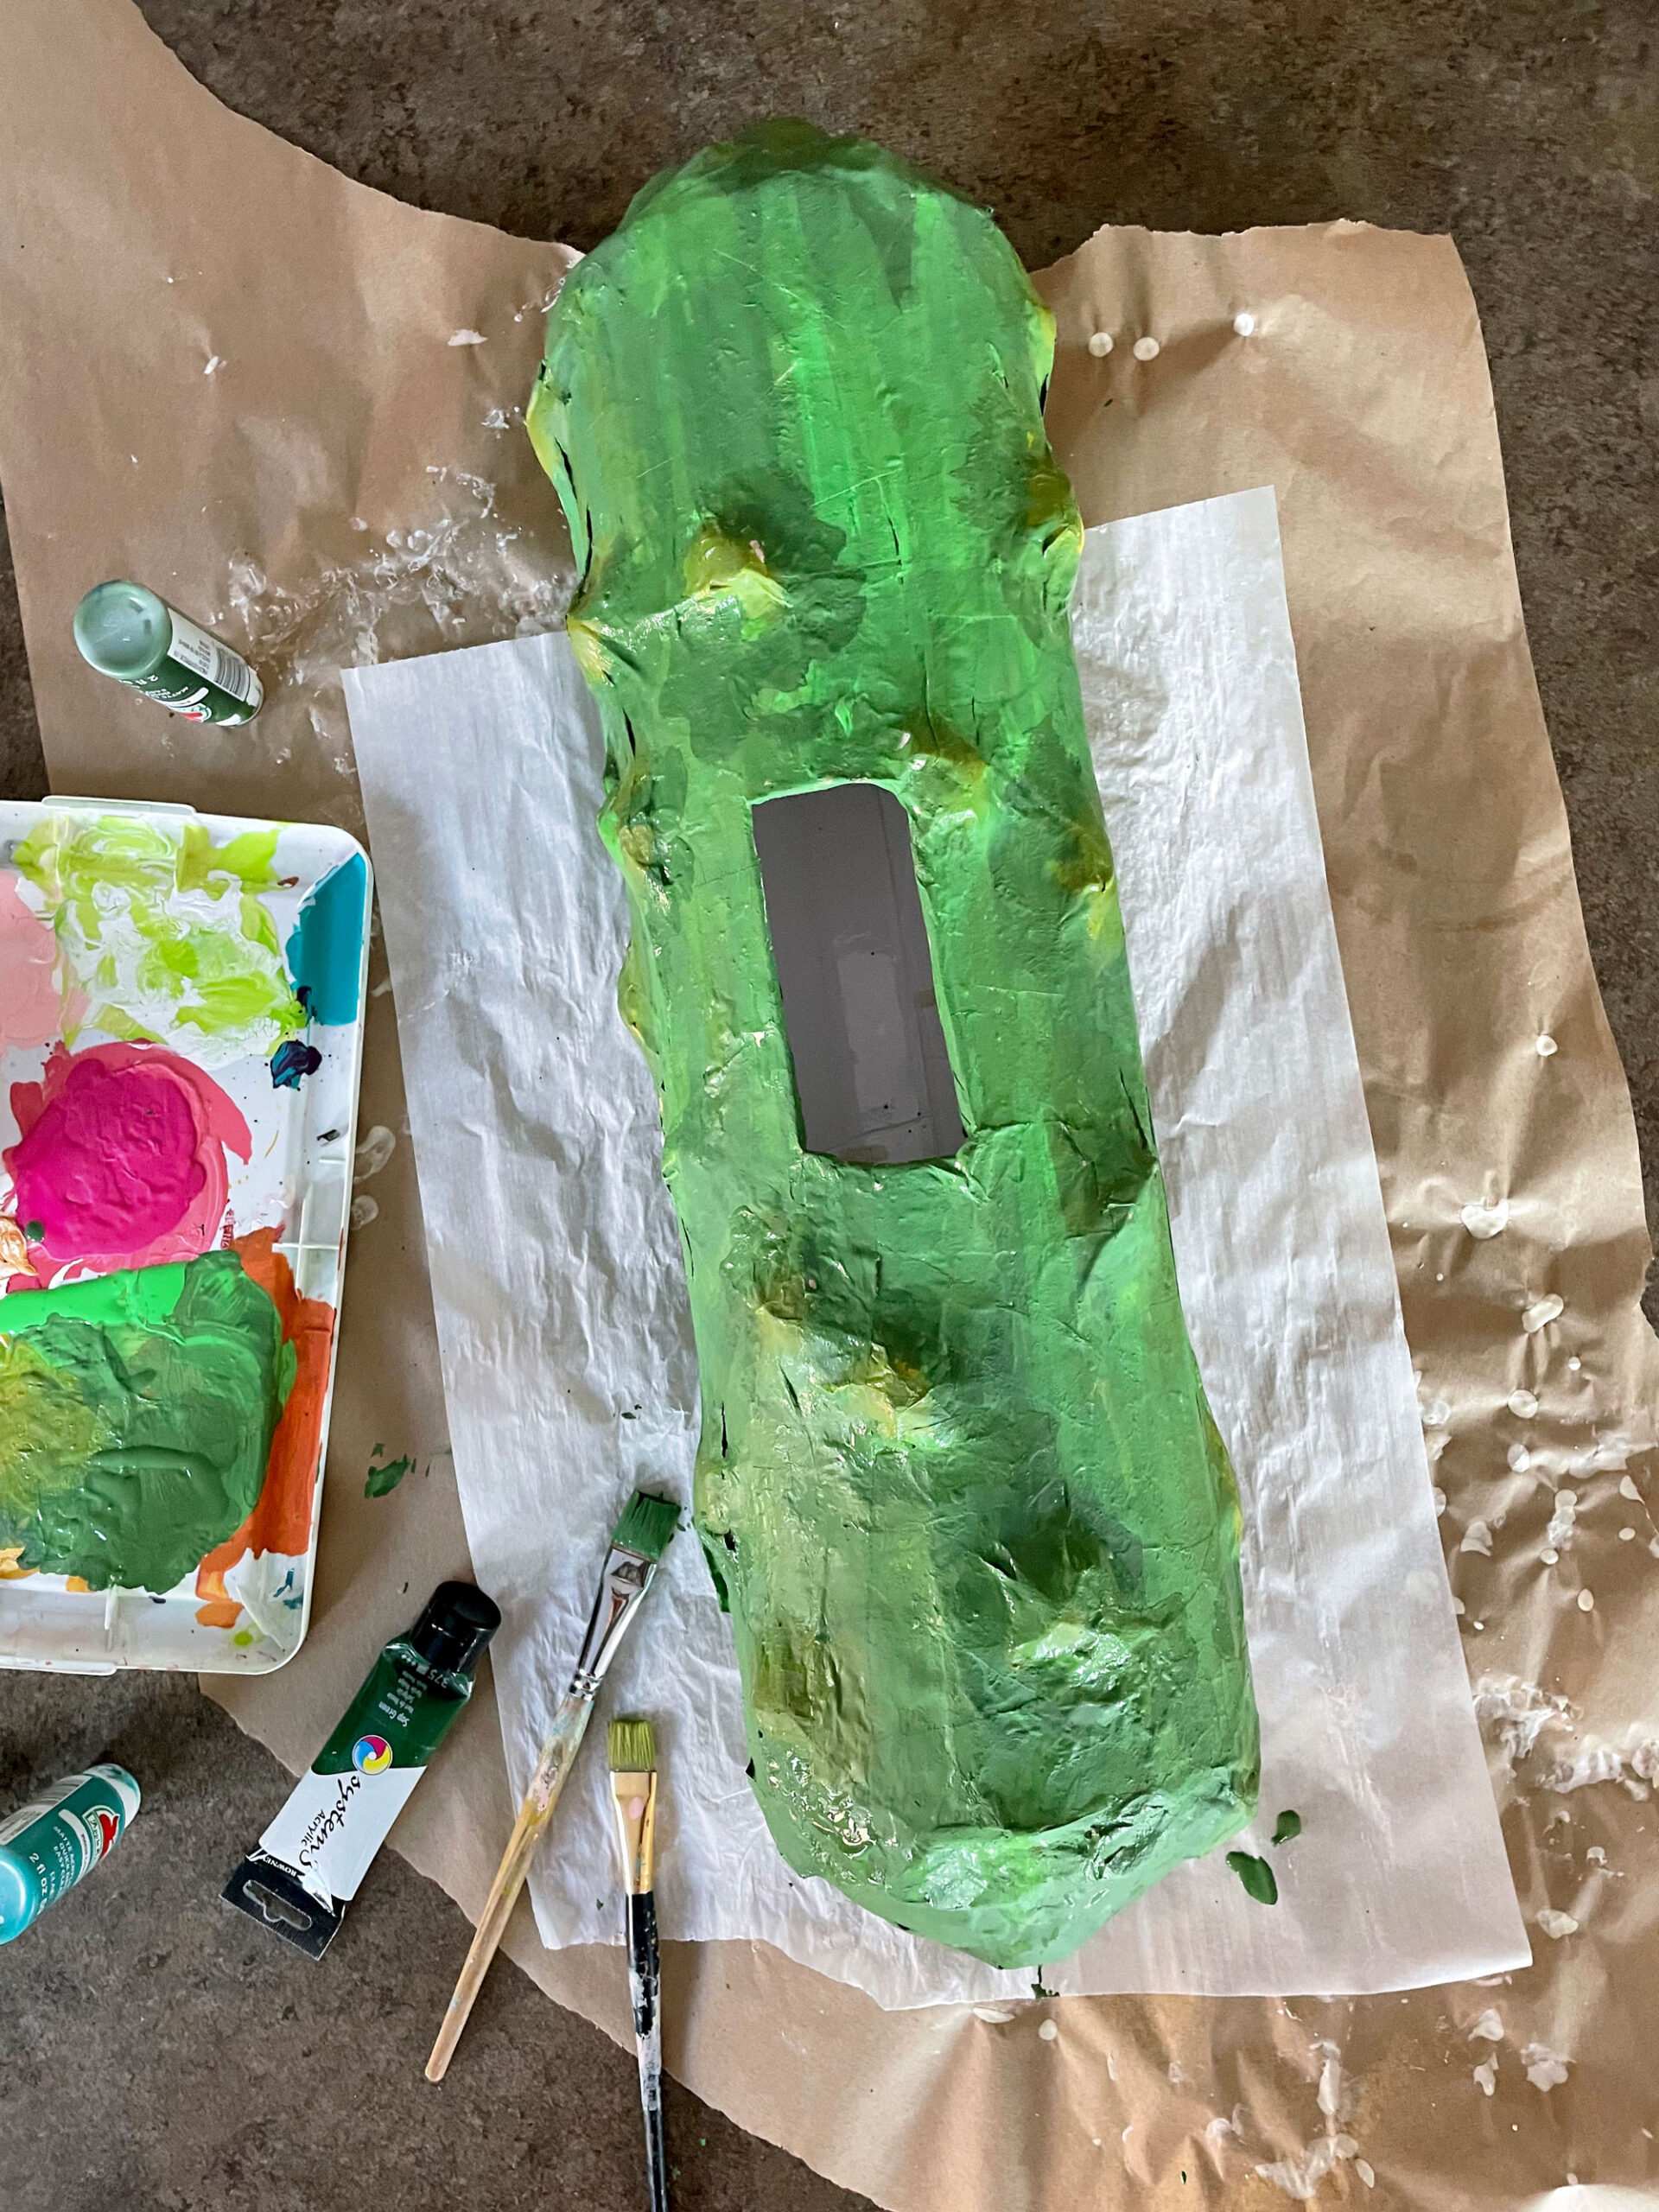
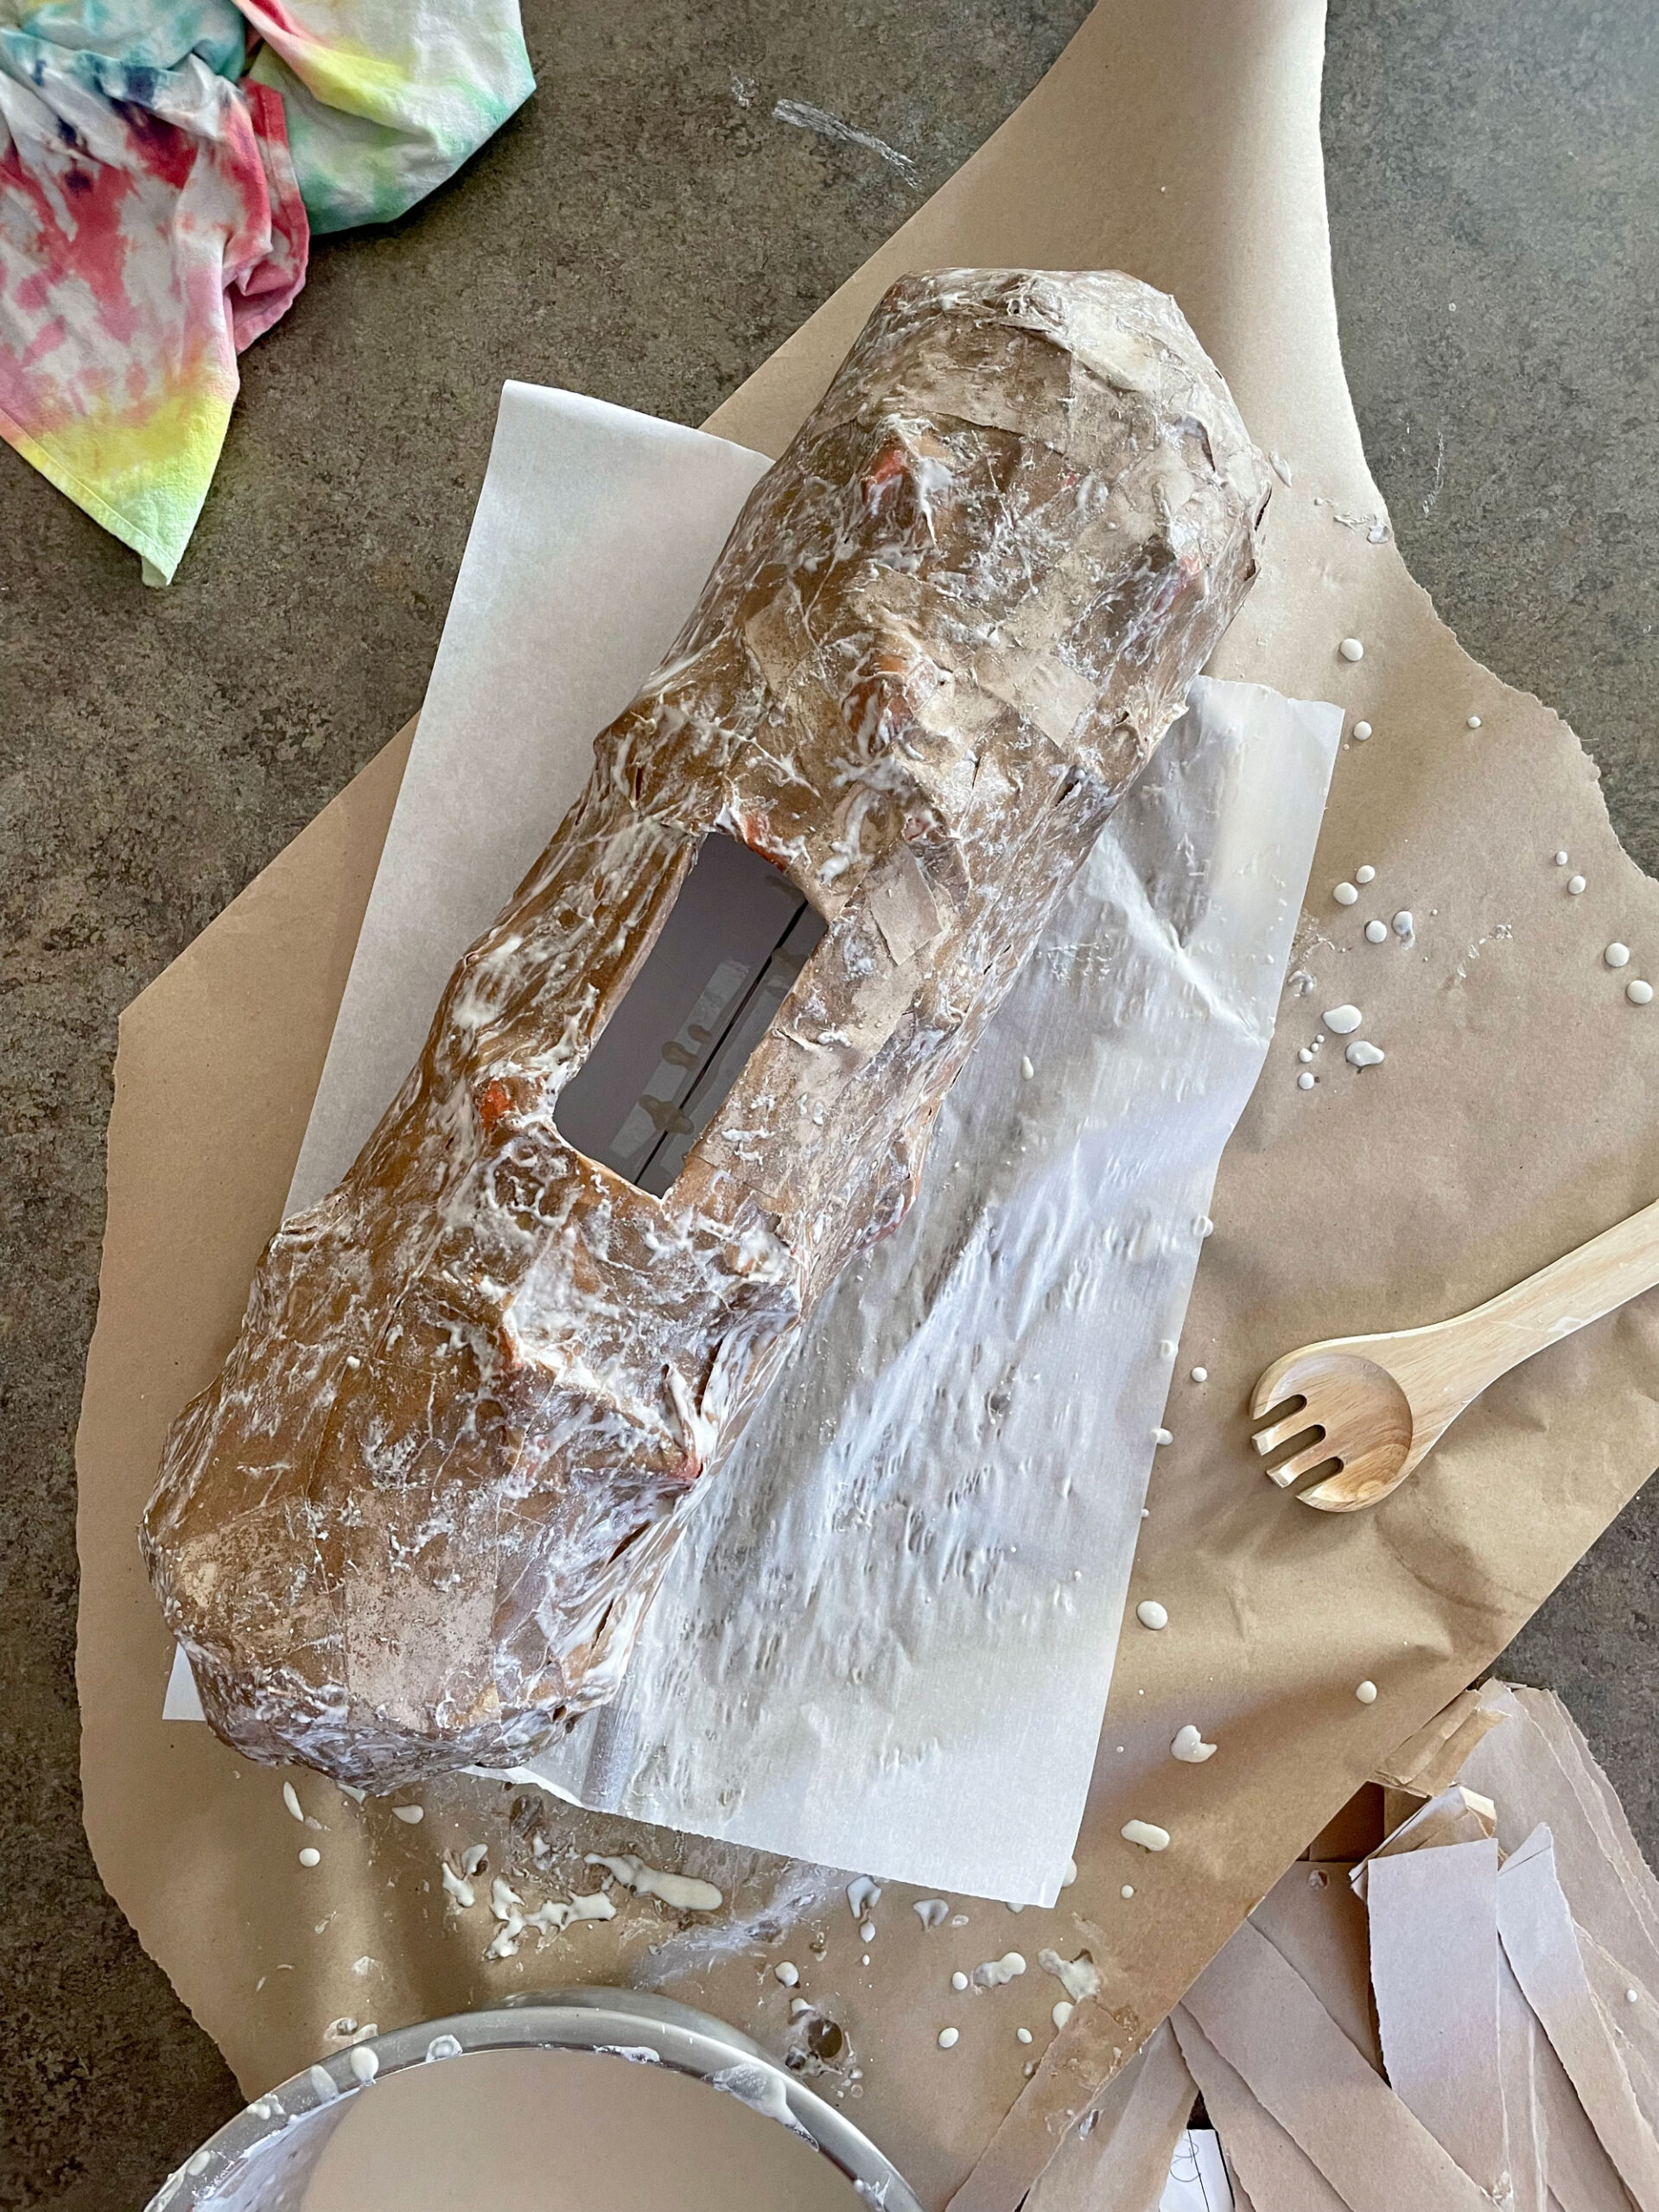
4. Place some wax paper or parchment paper onto your table, place the pickle on the paper and begin to paper mache! Do this by dipping each strip of paper into your mache goo….then with your middle finger and pointer finger, run your fingers on either side of the paper to get the excess goo off before placing it and smoothing it onto your pickle shape. You don’t want too much goo on your pickle or it will take FOREVERRRRRR to dry….but you want enough to make sure that it’s thick and sticky! 🙂
Cover your entire pickle (including bumps) with the paper mache and then allow to fully dry.
You can do an optional 2nd coat of paper mache to make it thick and super covered if you want to (allow to dry again)! 🙂
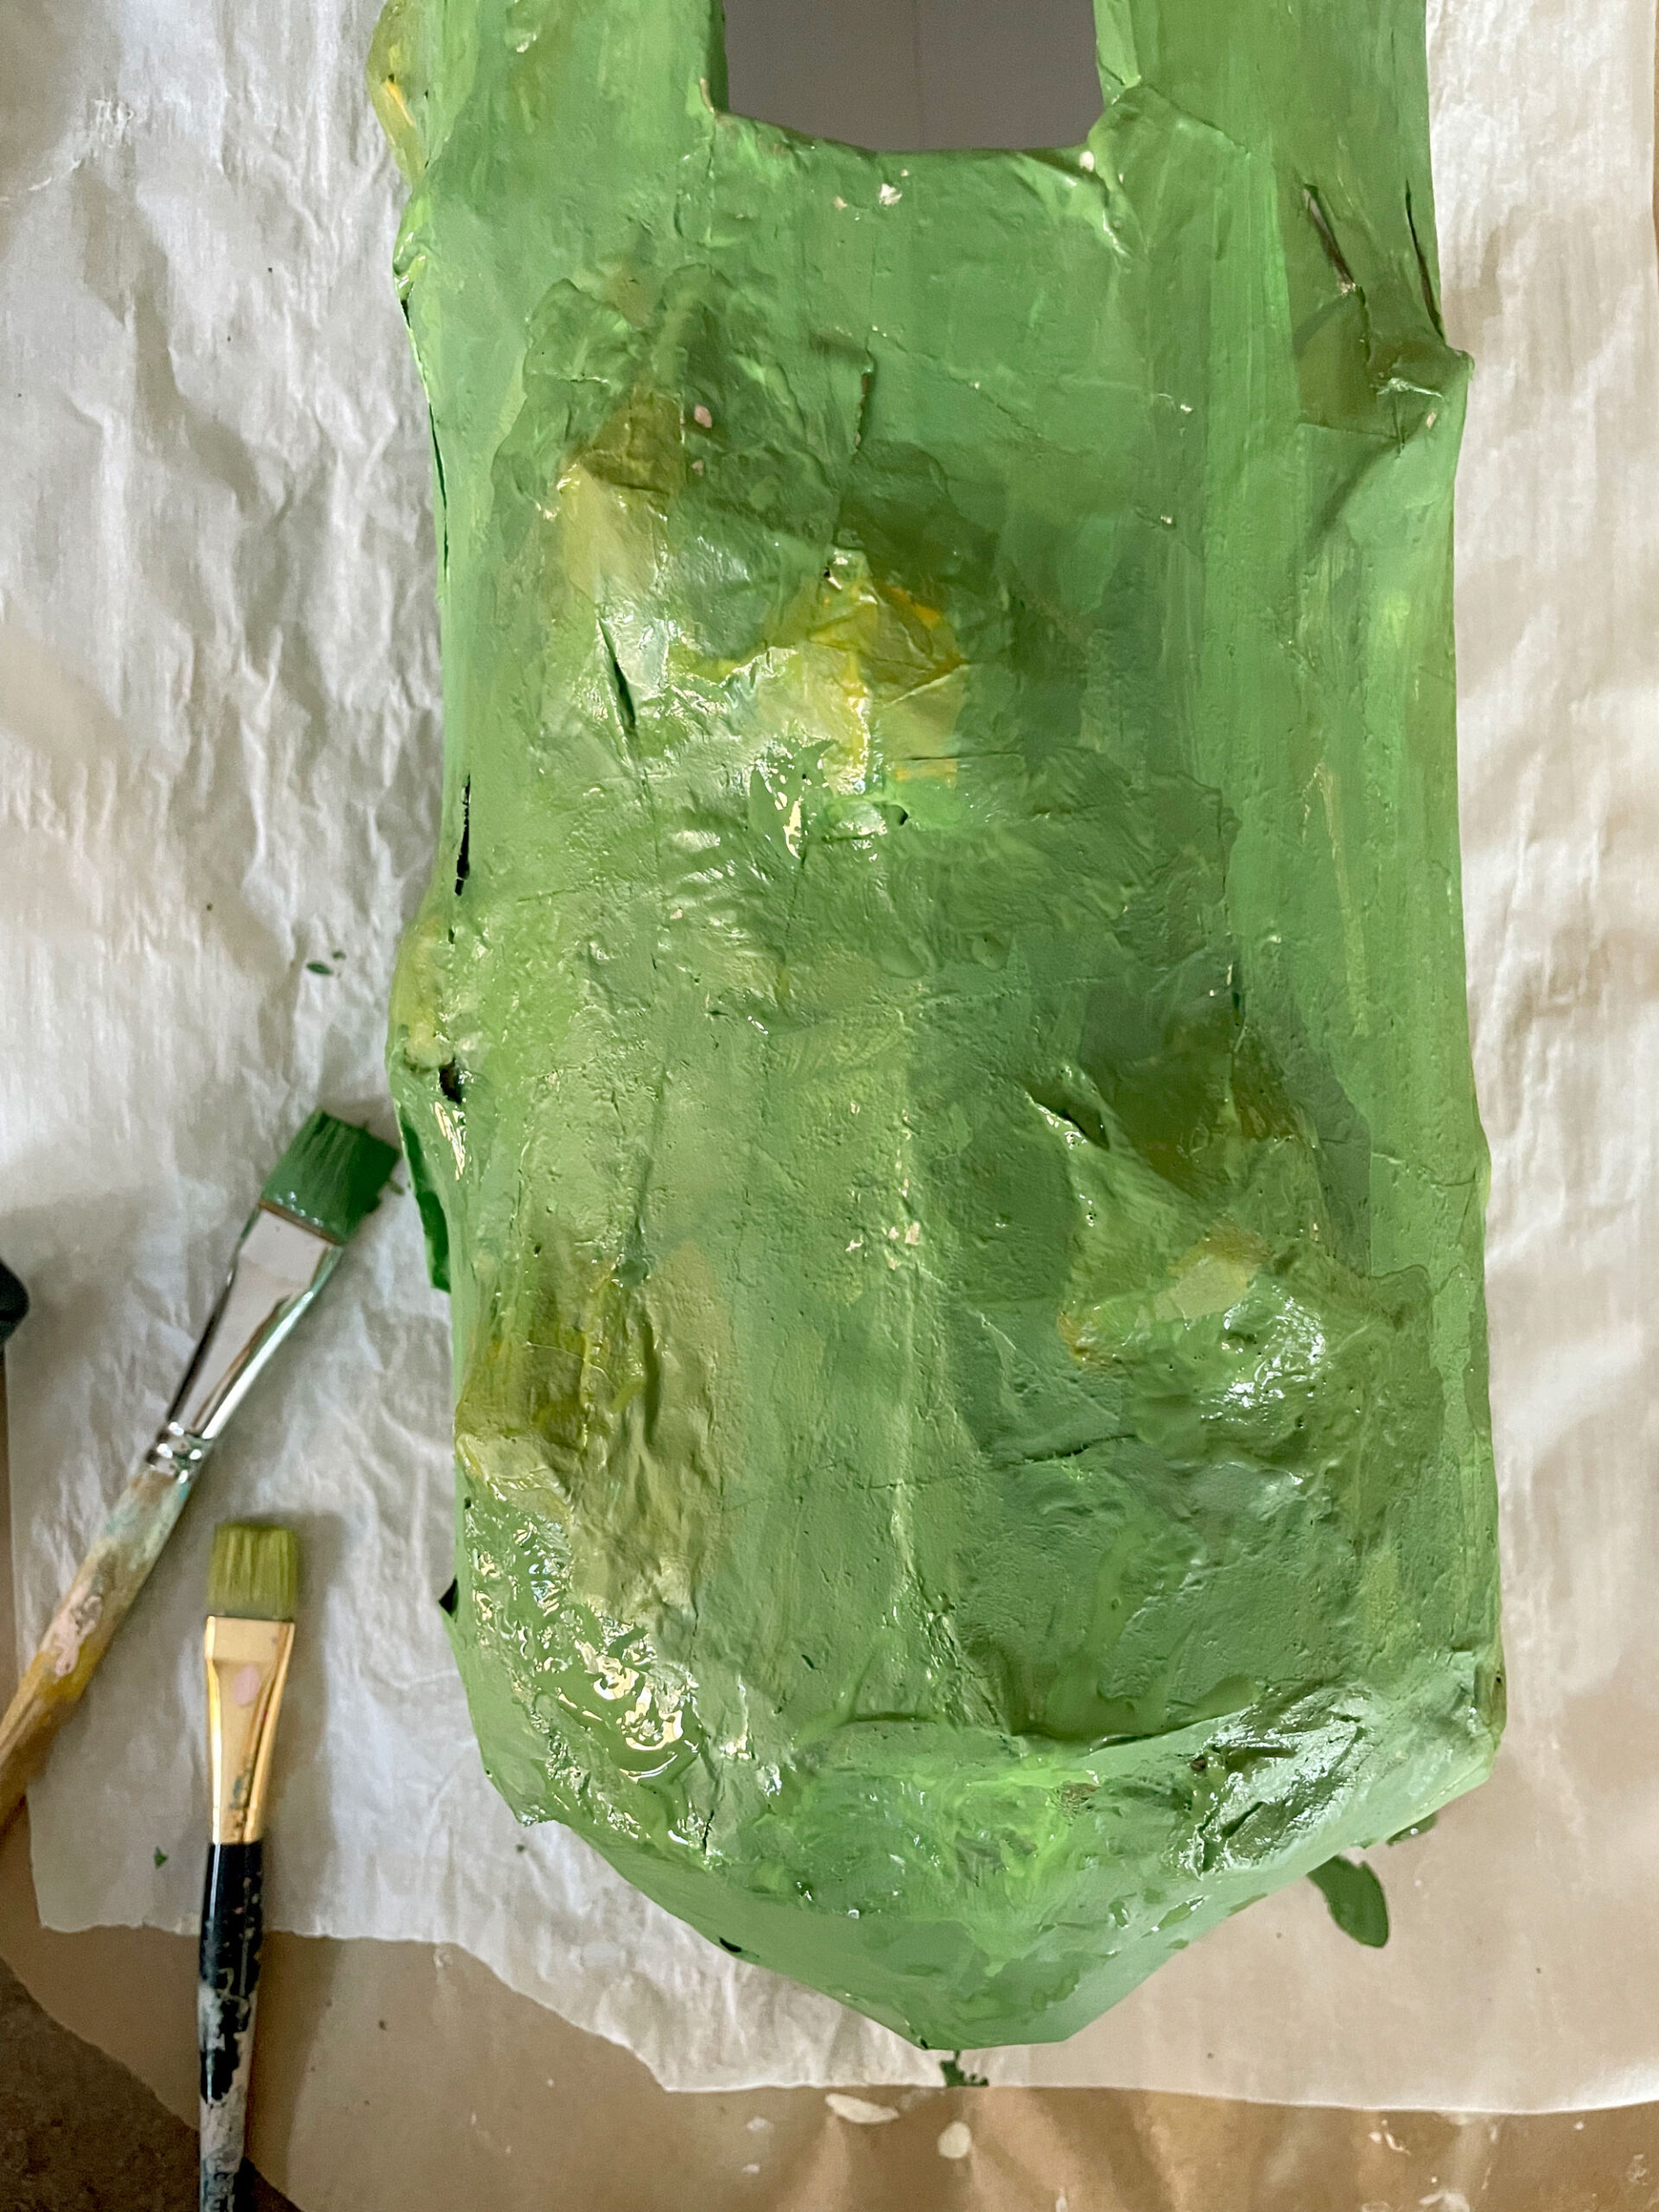
5. Mix up your paint and PAINT AWAYYYYY! Make sure to add dimension by using some darker and some lighter green shades—-darker green shades at the top and bottom ends of the pickle and around the outside of the bumps!
Then add any hearts or other embellishments that you want to make your Valentine pickle extra special!