Summer styrofoam block printing!
AKA: how to use household items to make some super cute kitchen towels on a rainy summer day to give your kids something to be crafty about! 🙂
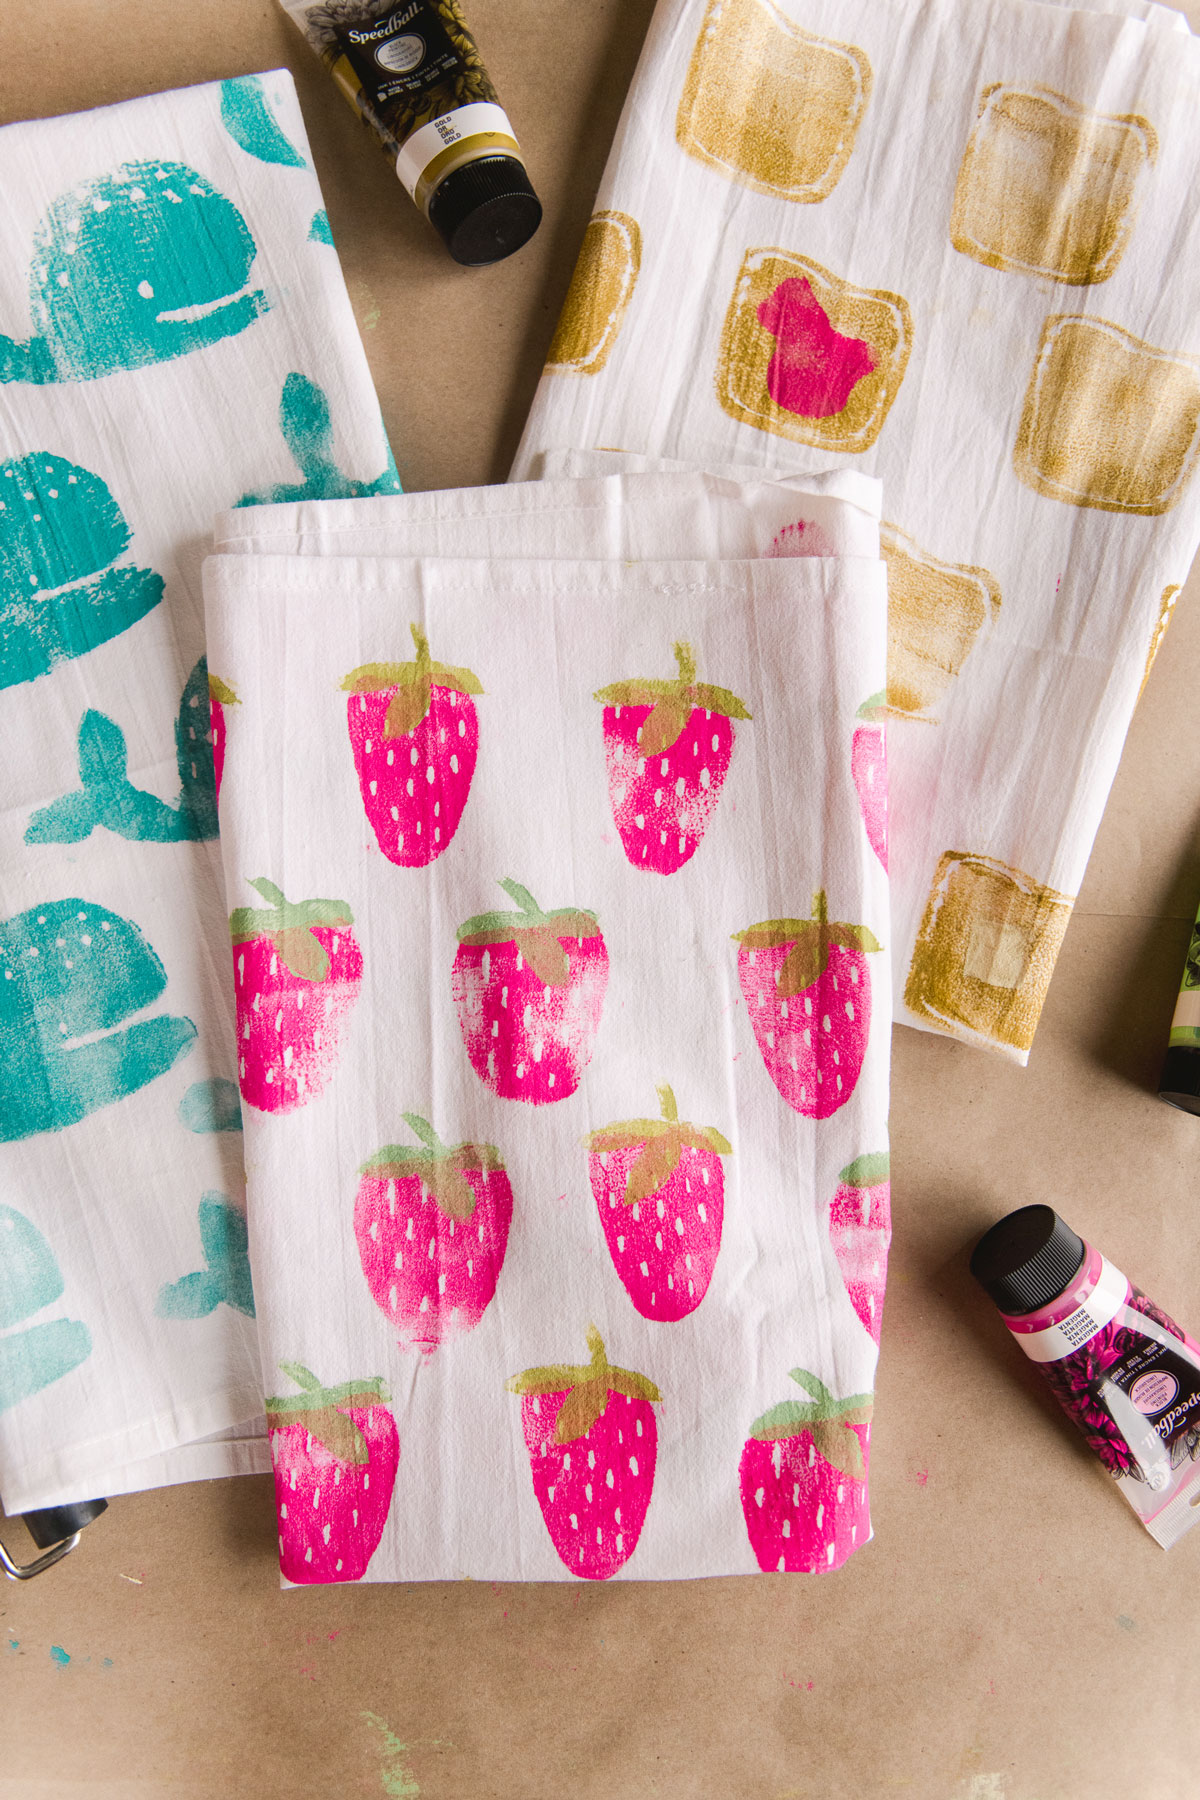
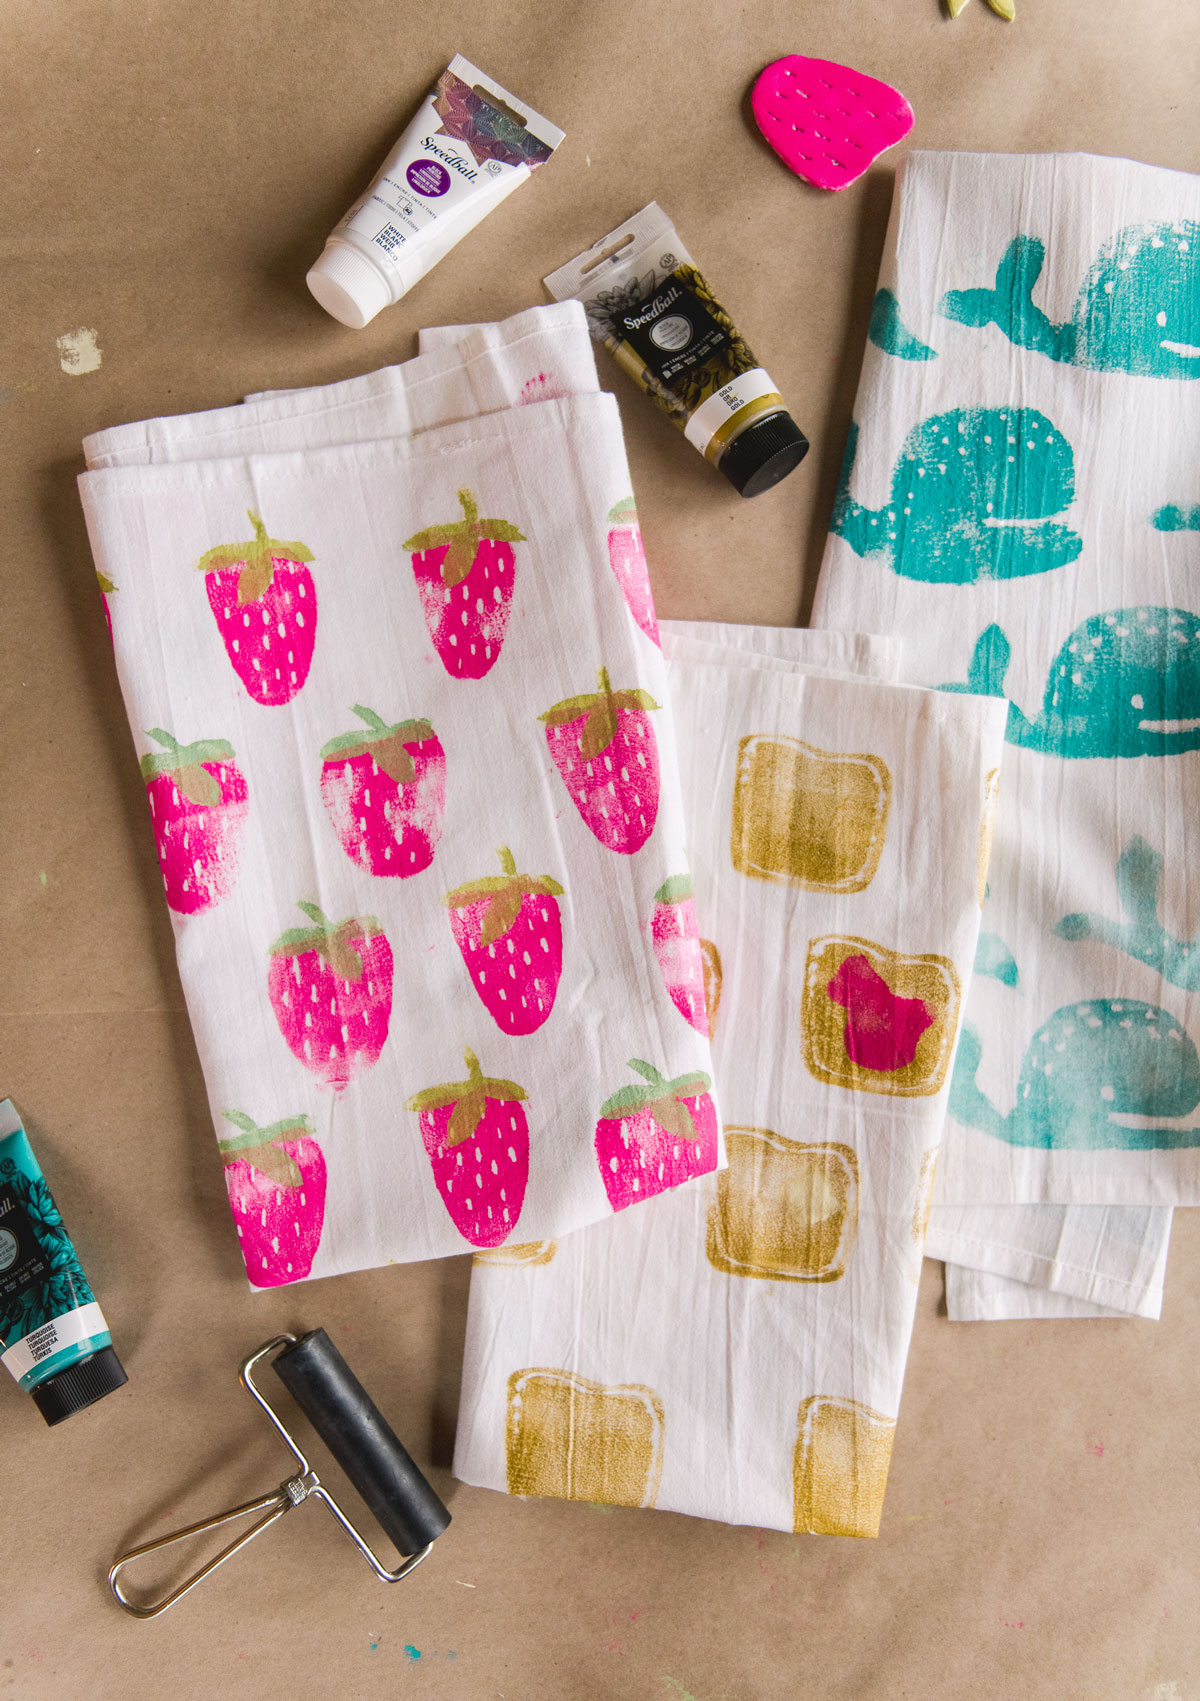
This is one of those “YESSSS” projects that I get just as excited as my kids when they ask me to do some block printing – the materials list is easy and anything you don’t already have at home, you can *easily* get at your local craft store or Michaels (so save those leftover food container boxes)! 🙂 ANNND it’s *so* easy for kids – block printing has SO MUCH forgiveness because it *for sure* doesn’t have to be perfect, which I just love. And heck, who doesn’t want a towel for your kitchen with toast and jam on it? HA! 🙂
MATERIALS:
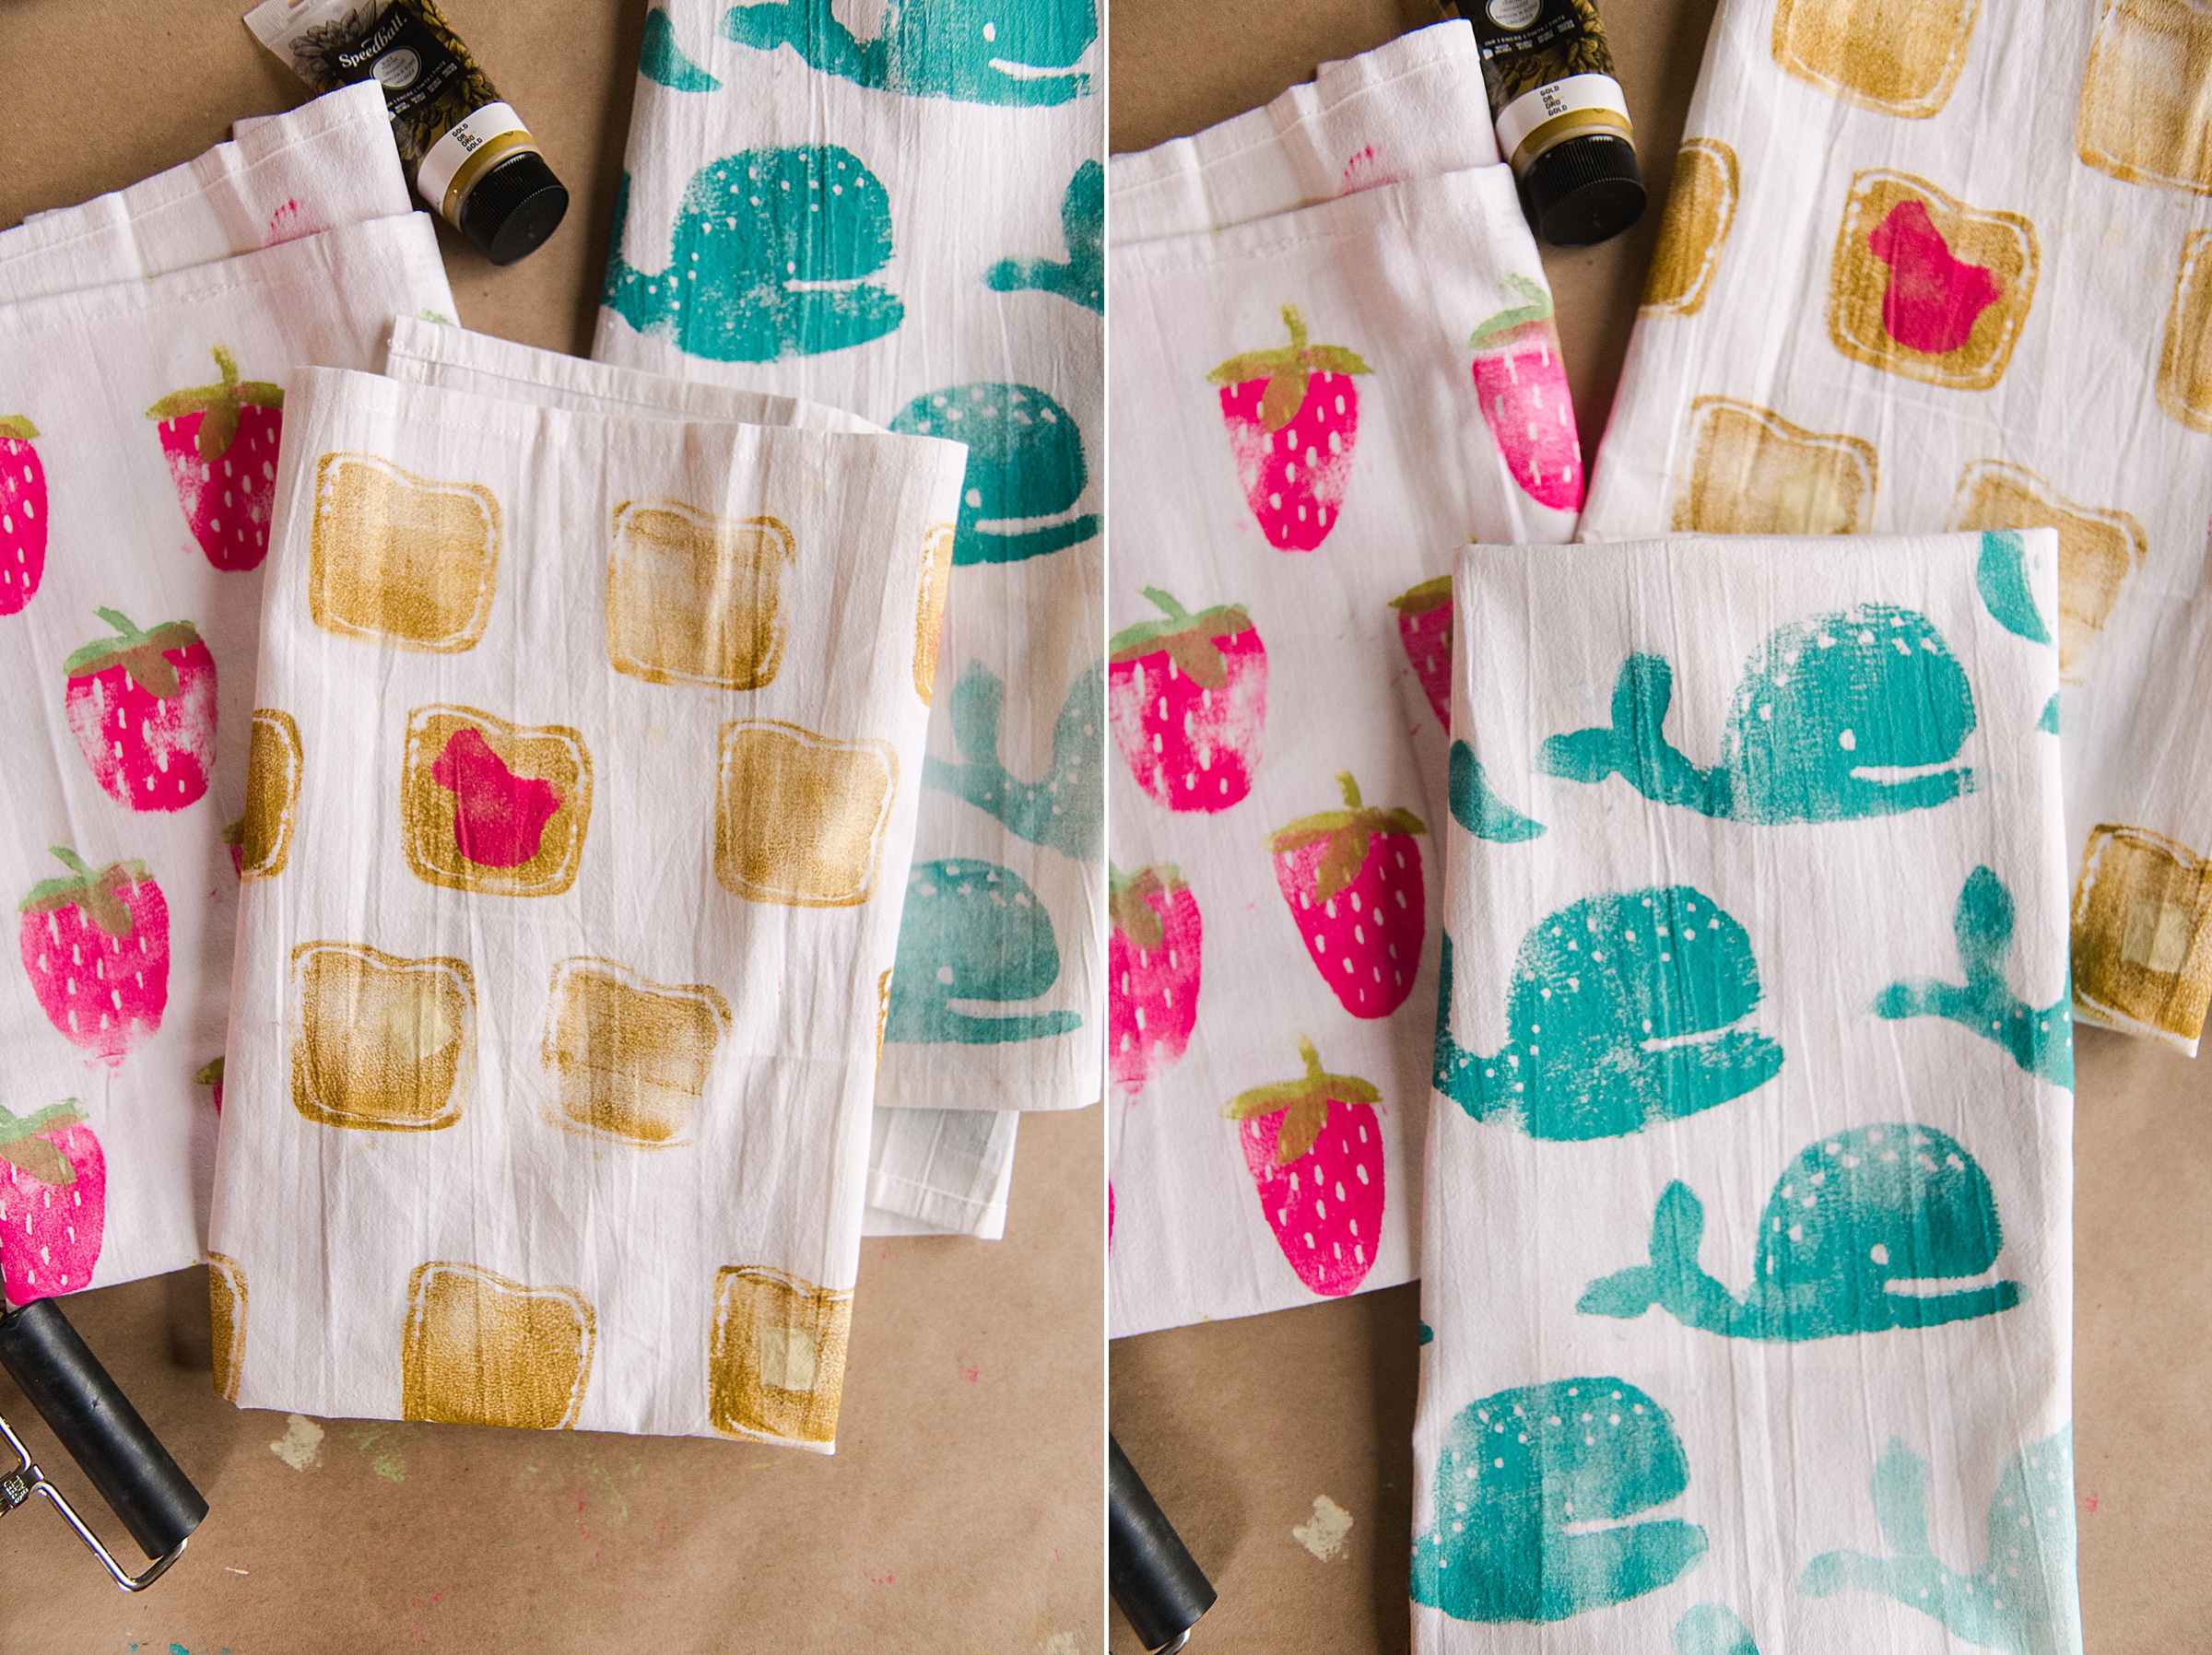
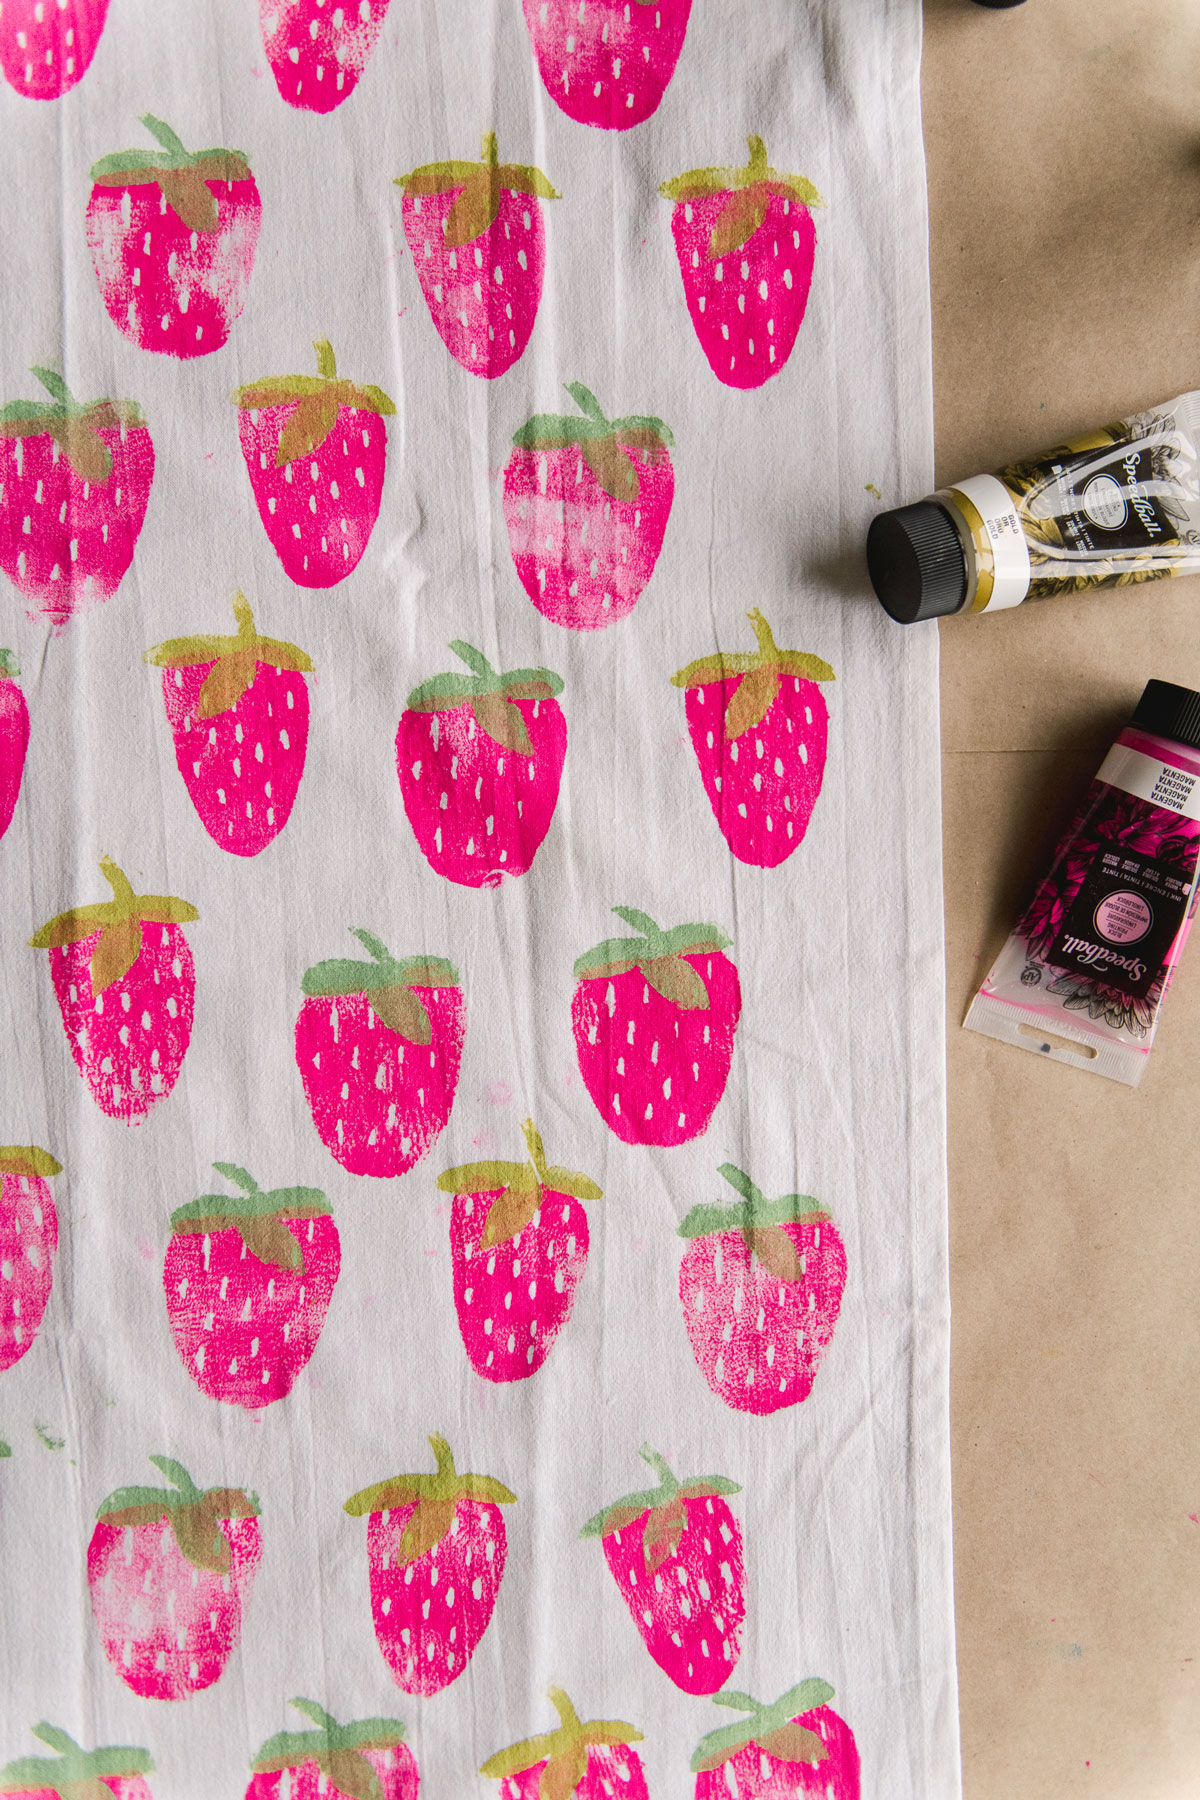
- Your fave kitchen towels – I’m a fan of “flour sac” towels because they are thin enough but also absorbent and quite simply cute IMO
- Something to cover your work surface (paper or table cloth, etc)
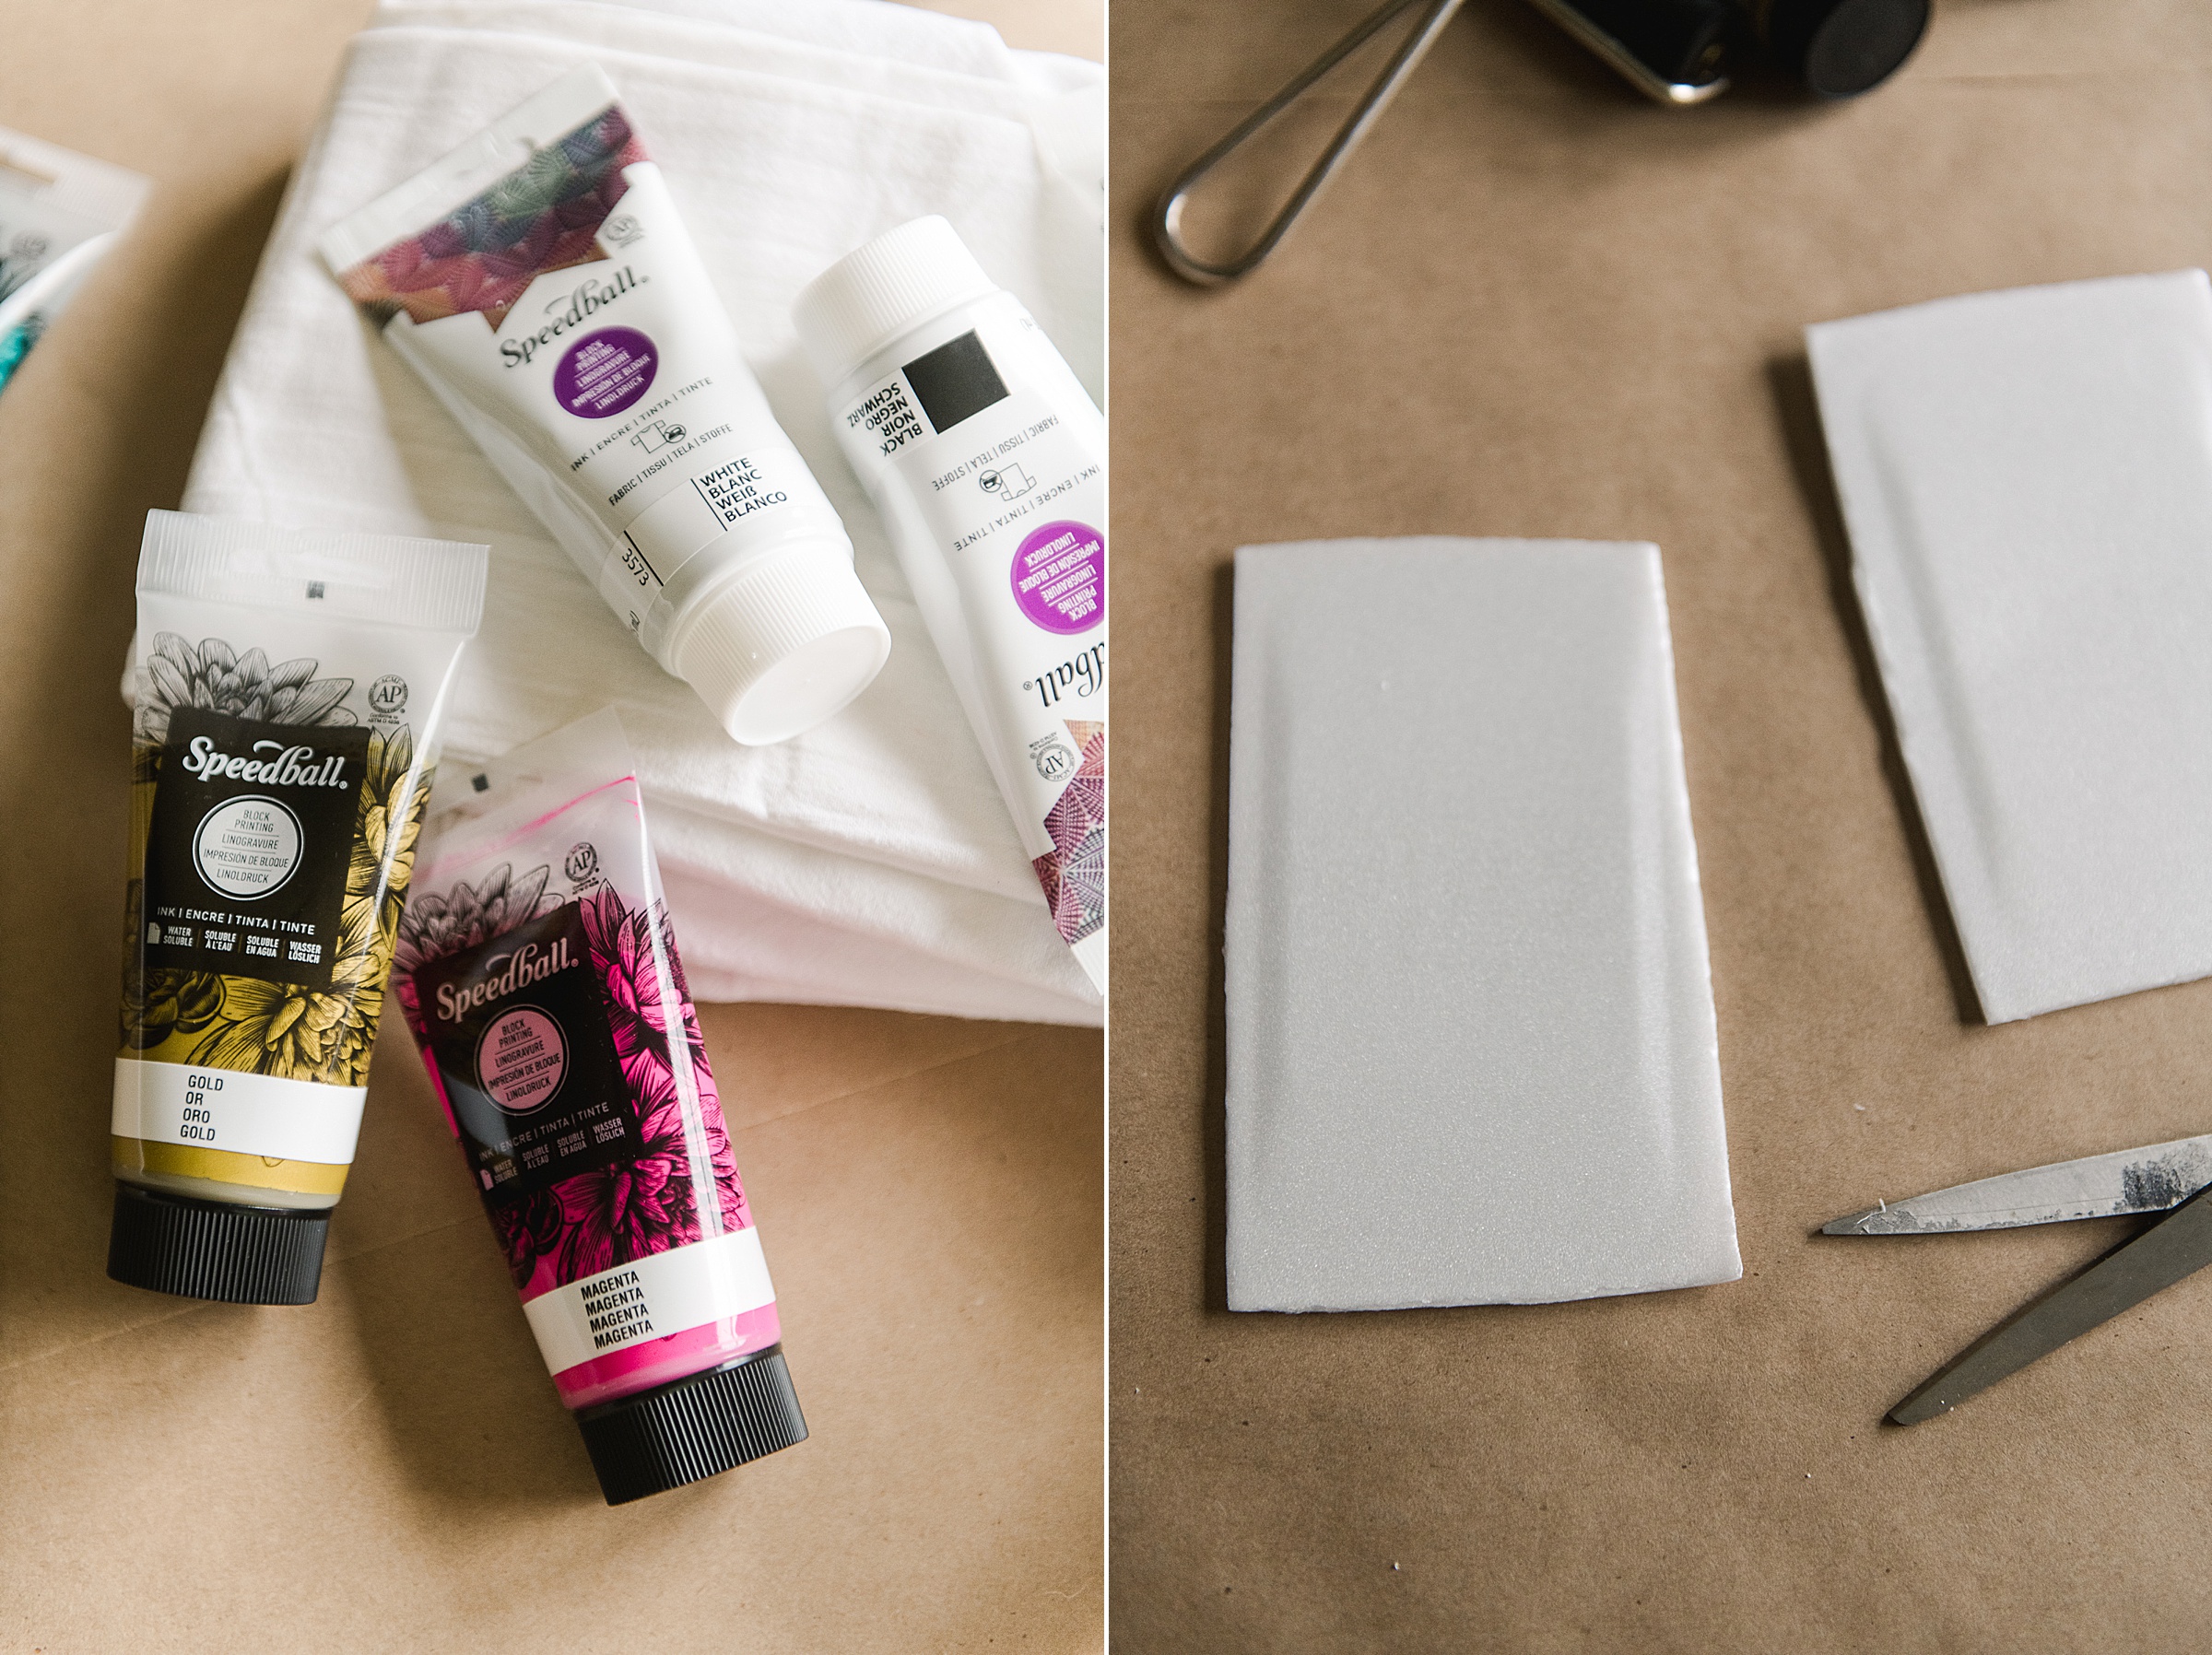
- Some block printing fabric ink – SpeedBall has some awesome ones for inexpensive at Michaels
- A brayer (the rolling thing)
- A flat surface for mixing and rolling ink (piece of glass, plexi, tray, paint palette, hunk of flat cardboard, etc)
- A pen
- Some styrofoam containers – either save your food containers or use the trays you can find at a craft store
INSTRUCTIONS:
1. Doodle out what you want to stamp – this will give you the idea of size/scale and form and just exactly how you are going to plan to do your prints
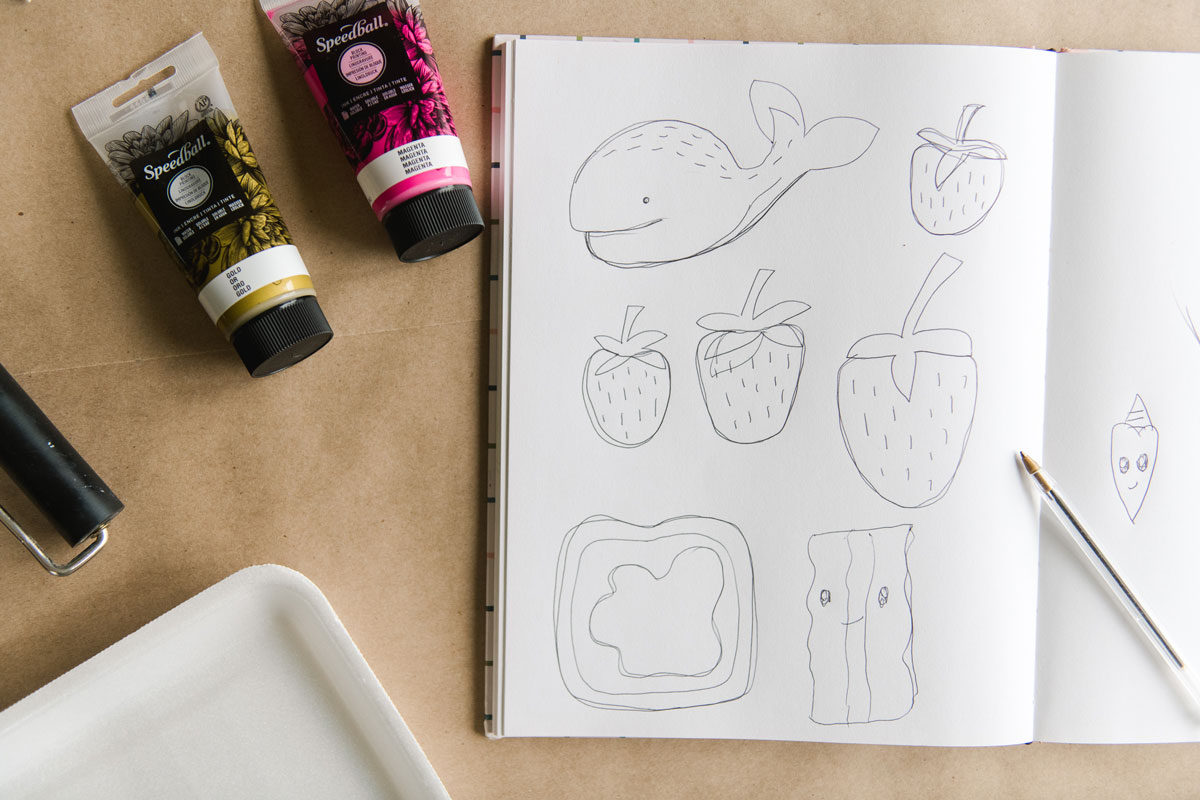
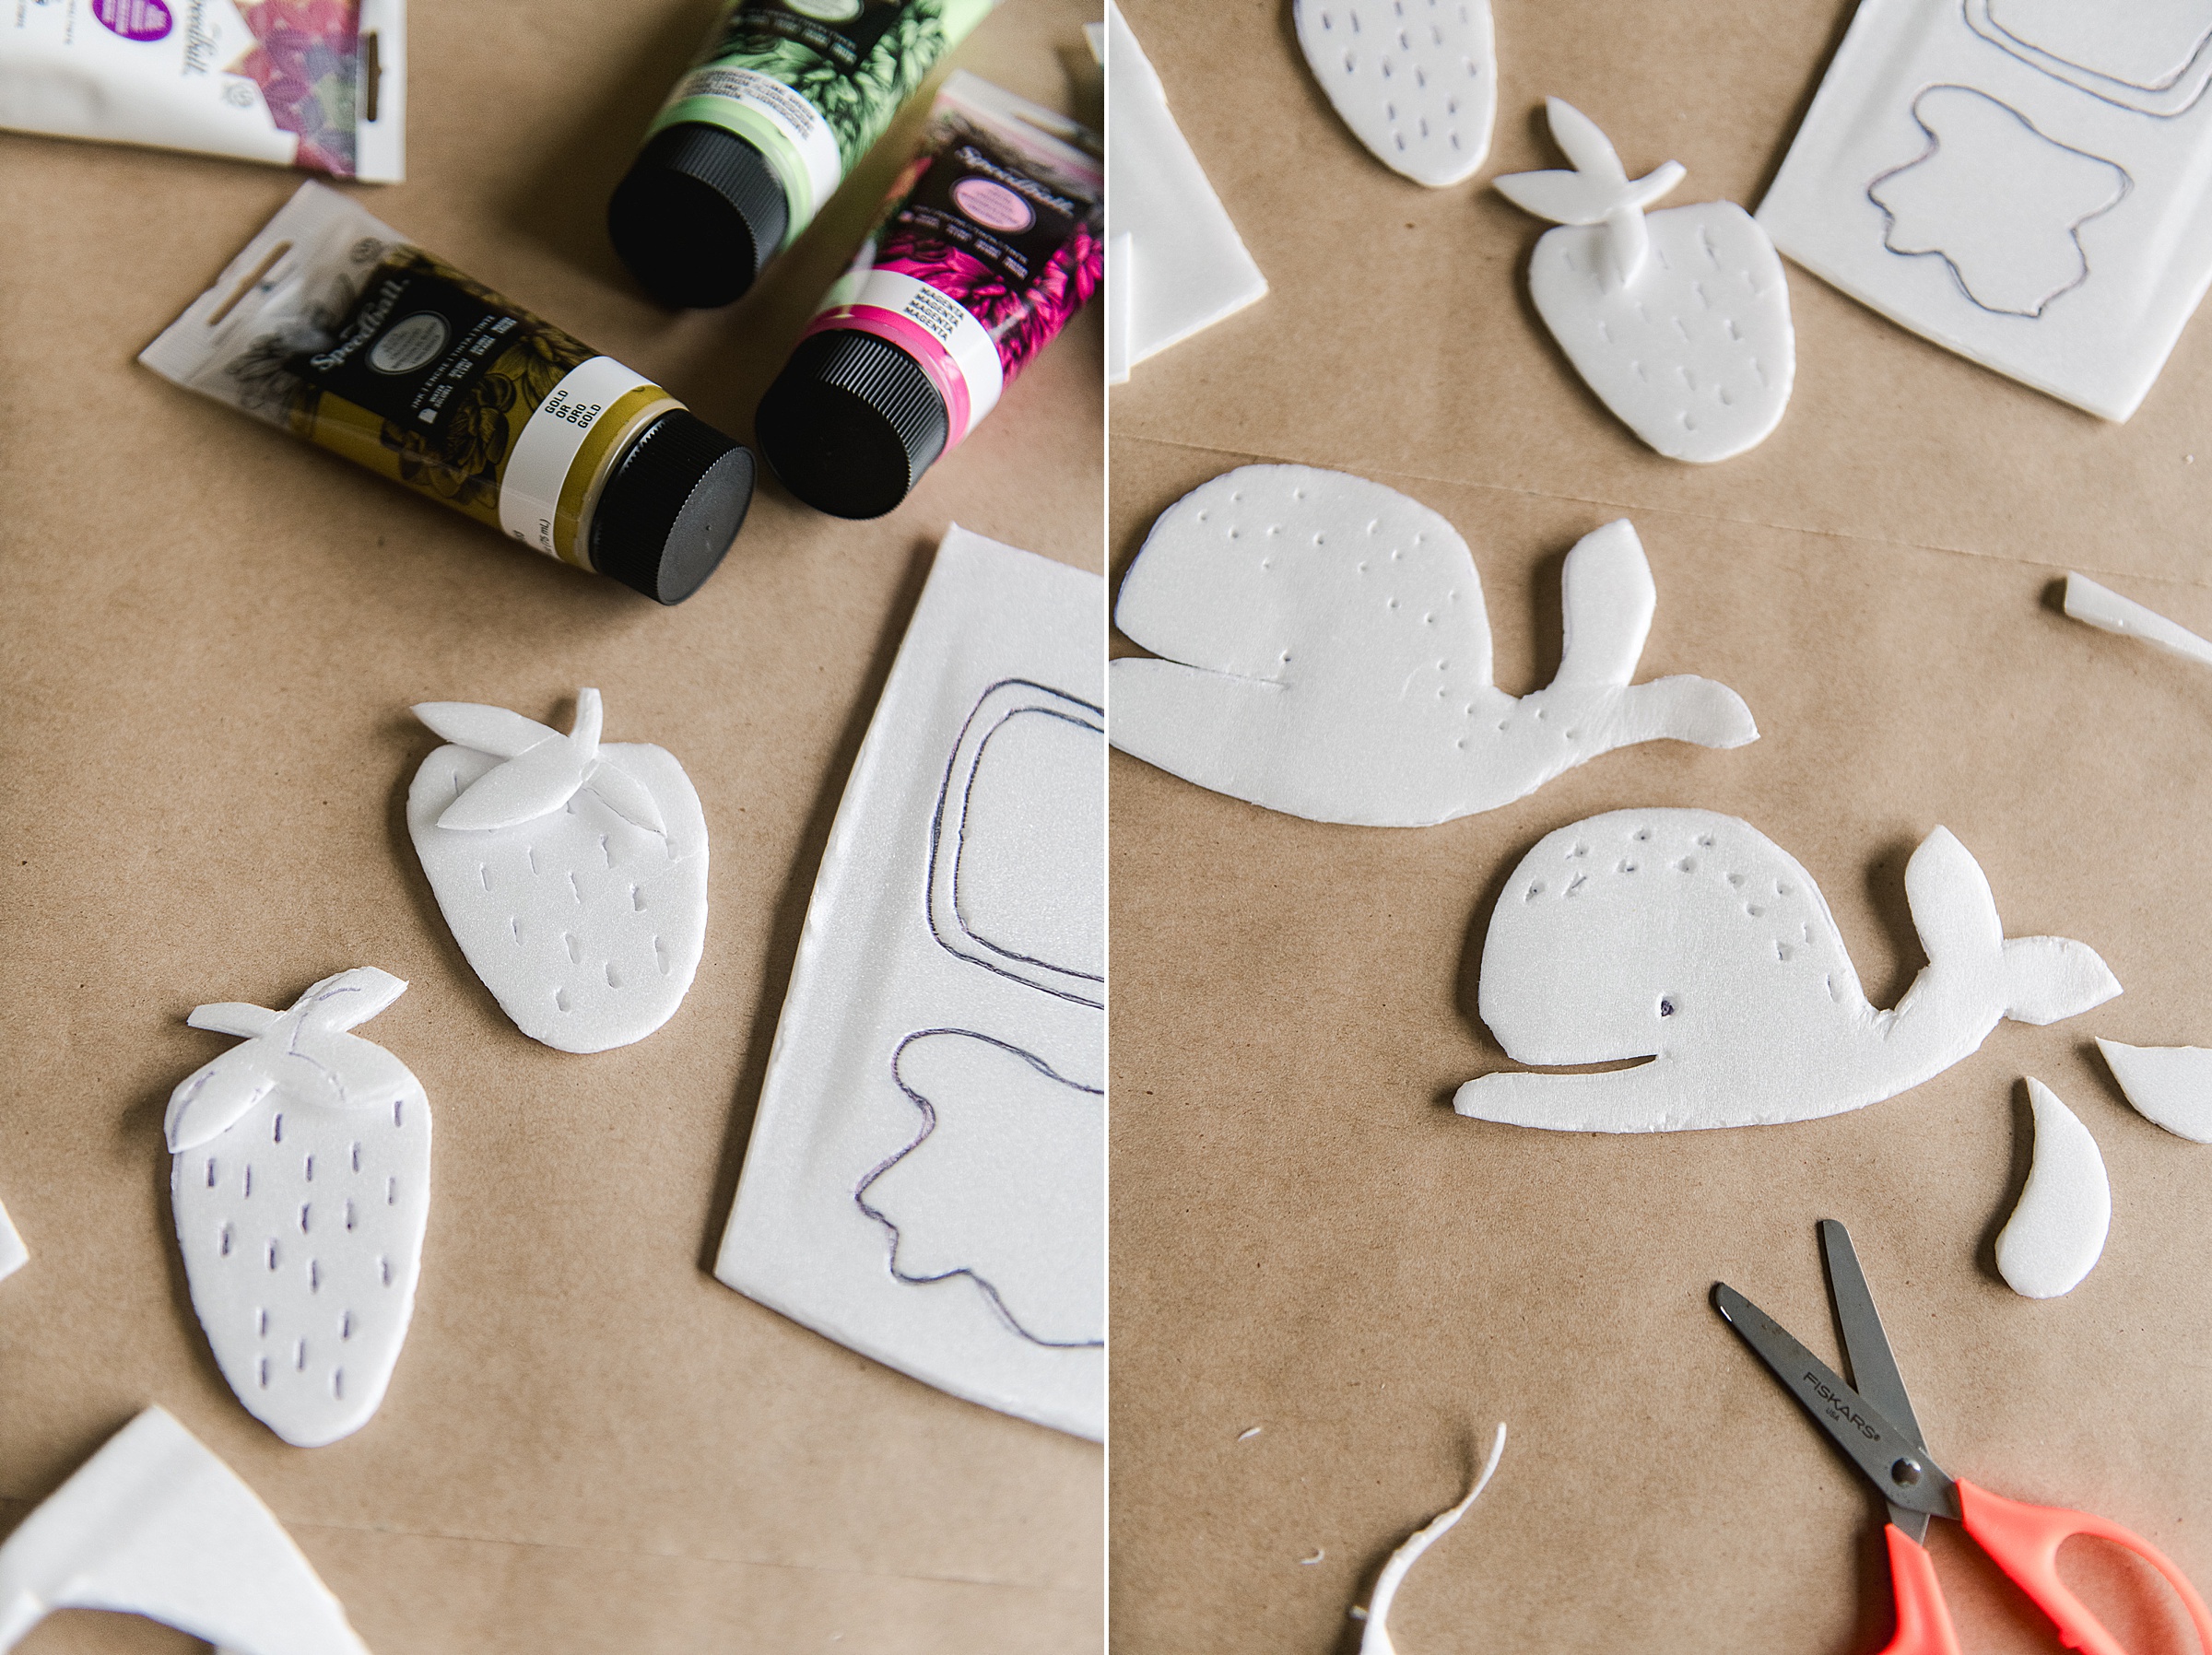
2. Now it’s time to make your block (or stamp) from your styrofoam. We did this by lightly drawing our shapes onto the styrofoam with a pen. Then trace over those lines 2 more times going deeper each time to create the “grooves” (start light and go heavier with your lines each time)- everything that is indented will NOT be inked up so those lines or textures will be the color of your cloth/towel when printed.

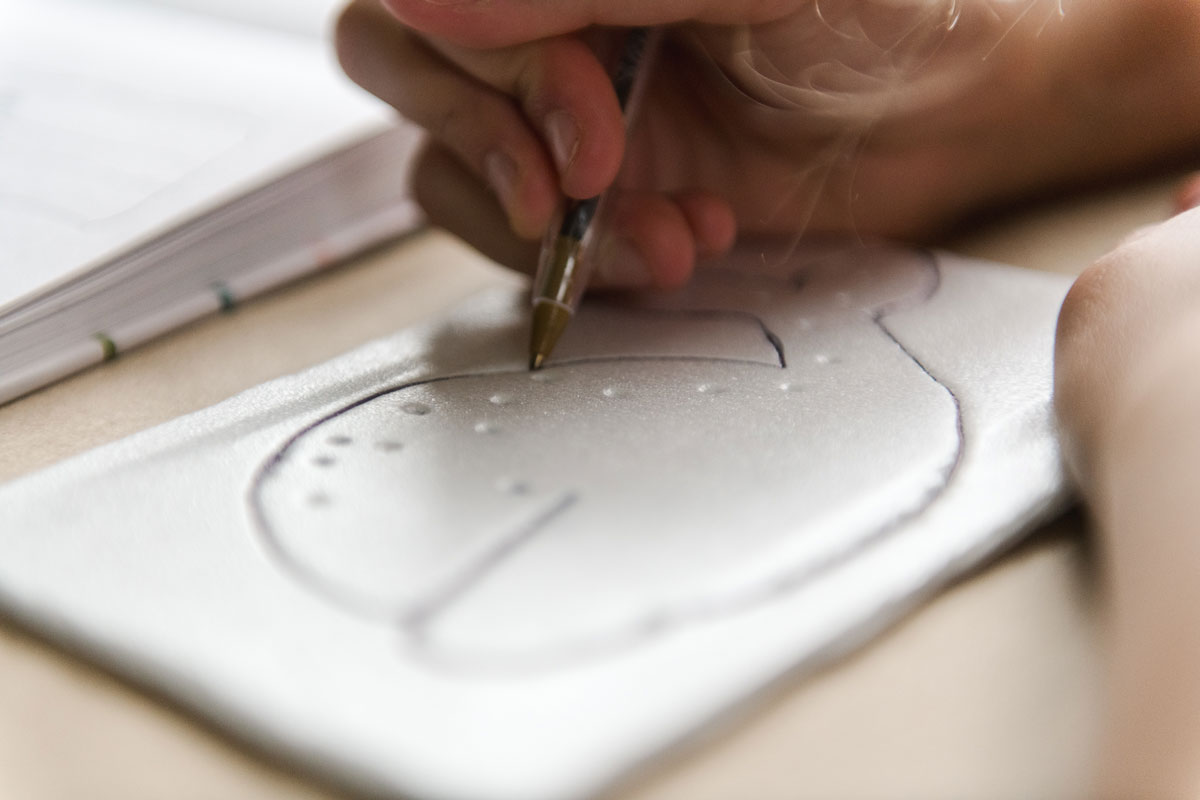
Then you will cut your shapes out. I found it easier to cut out a clean shape when the indents were nice and deep along the outside edge (and it was easier to get a clean cut with little hands with those indented outer lines too).
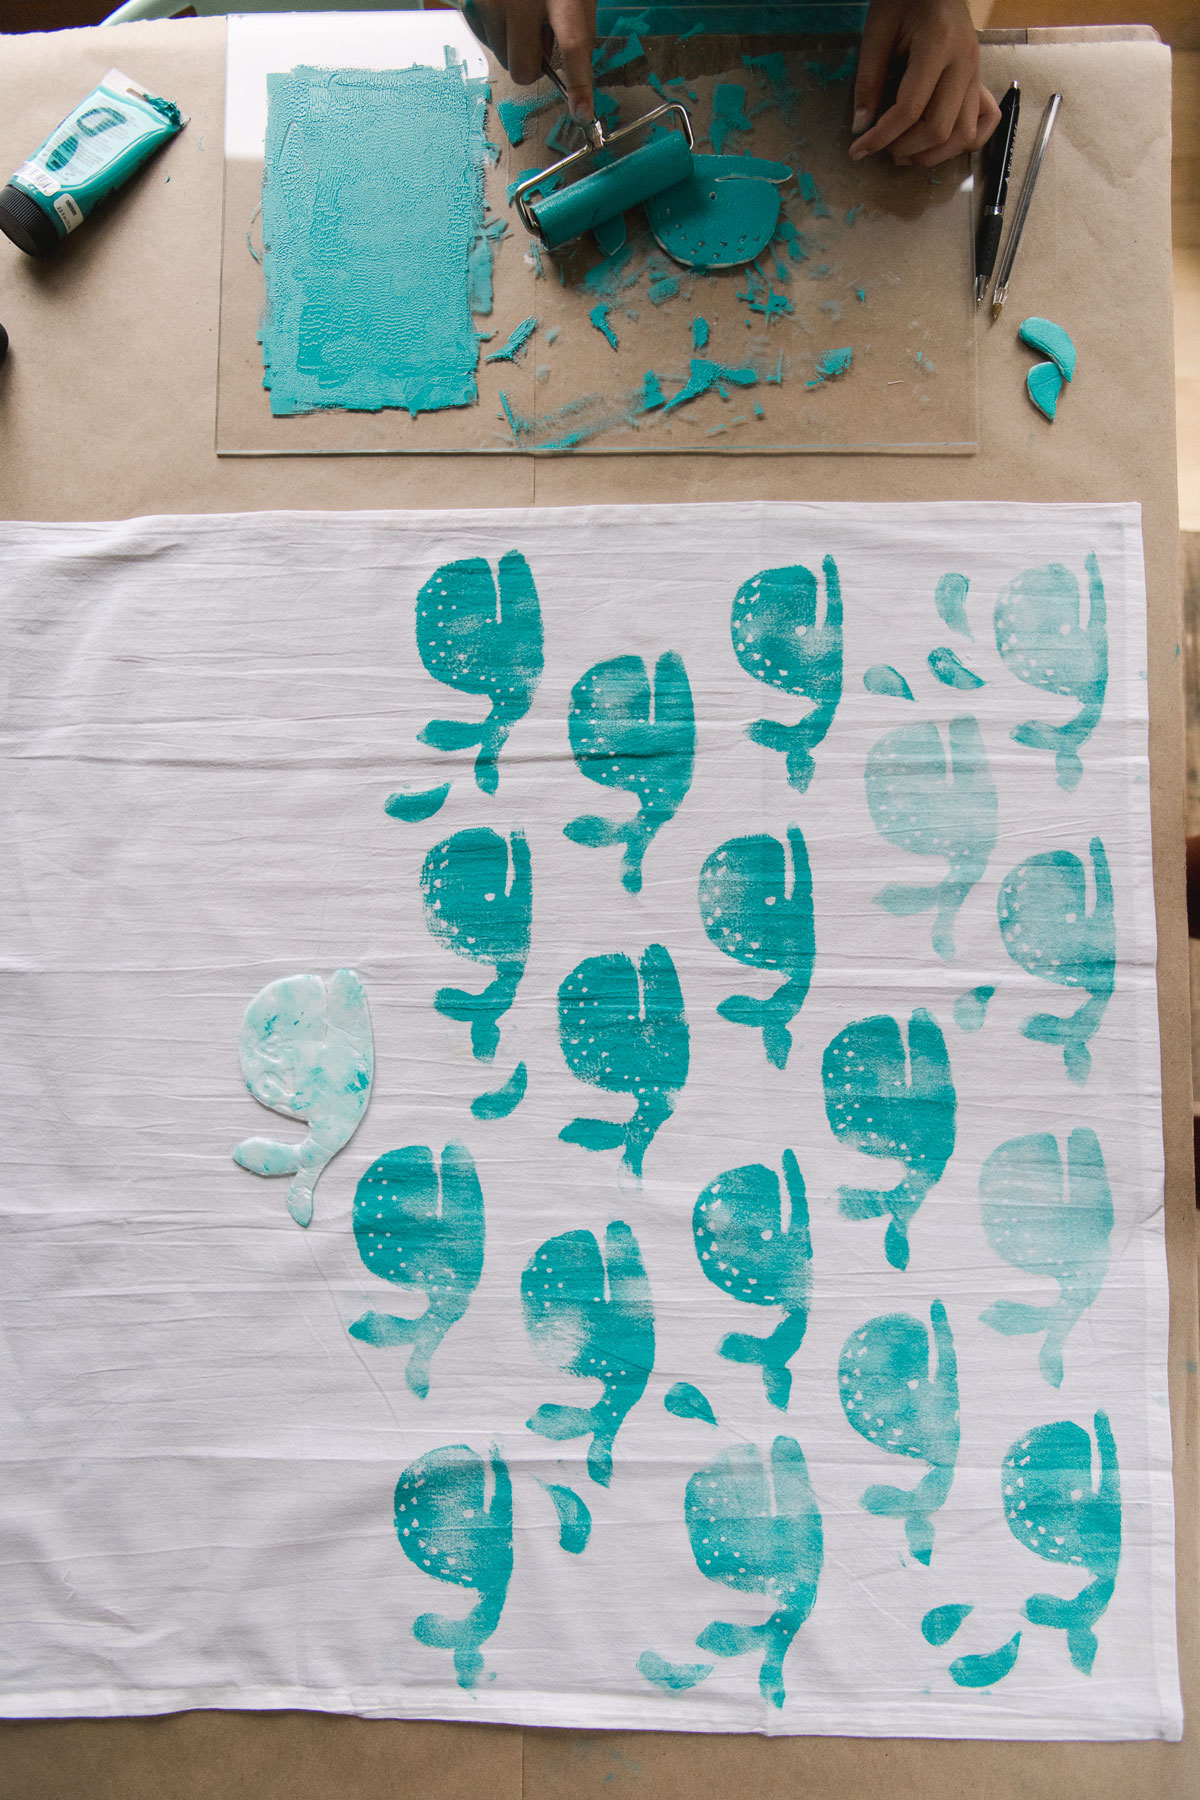
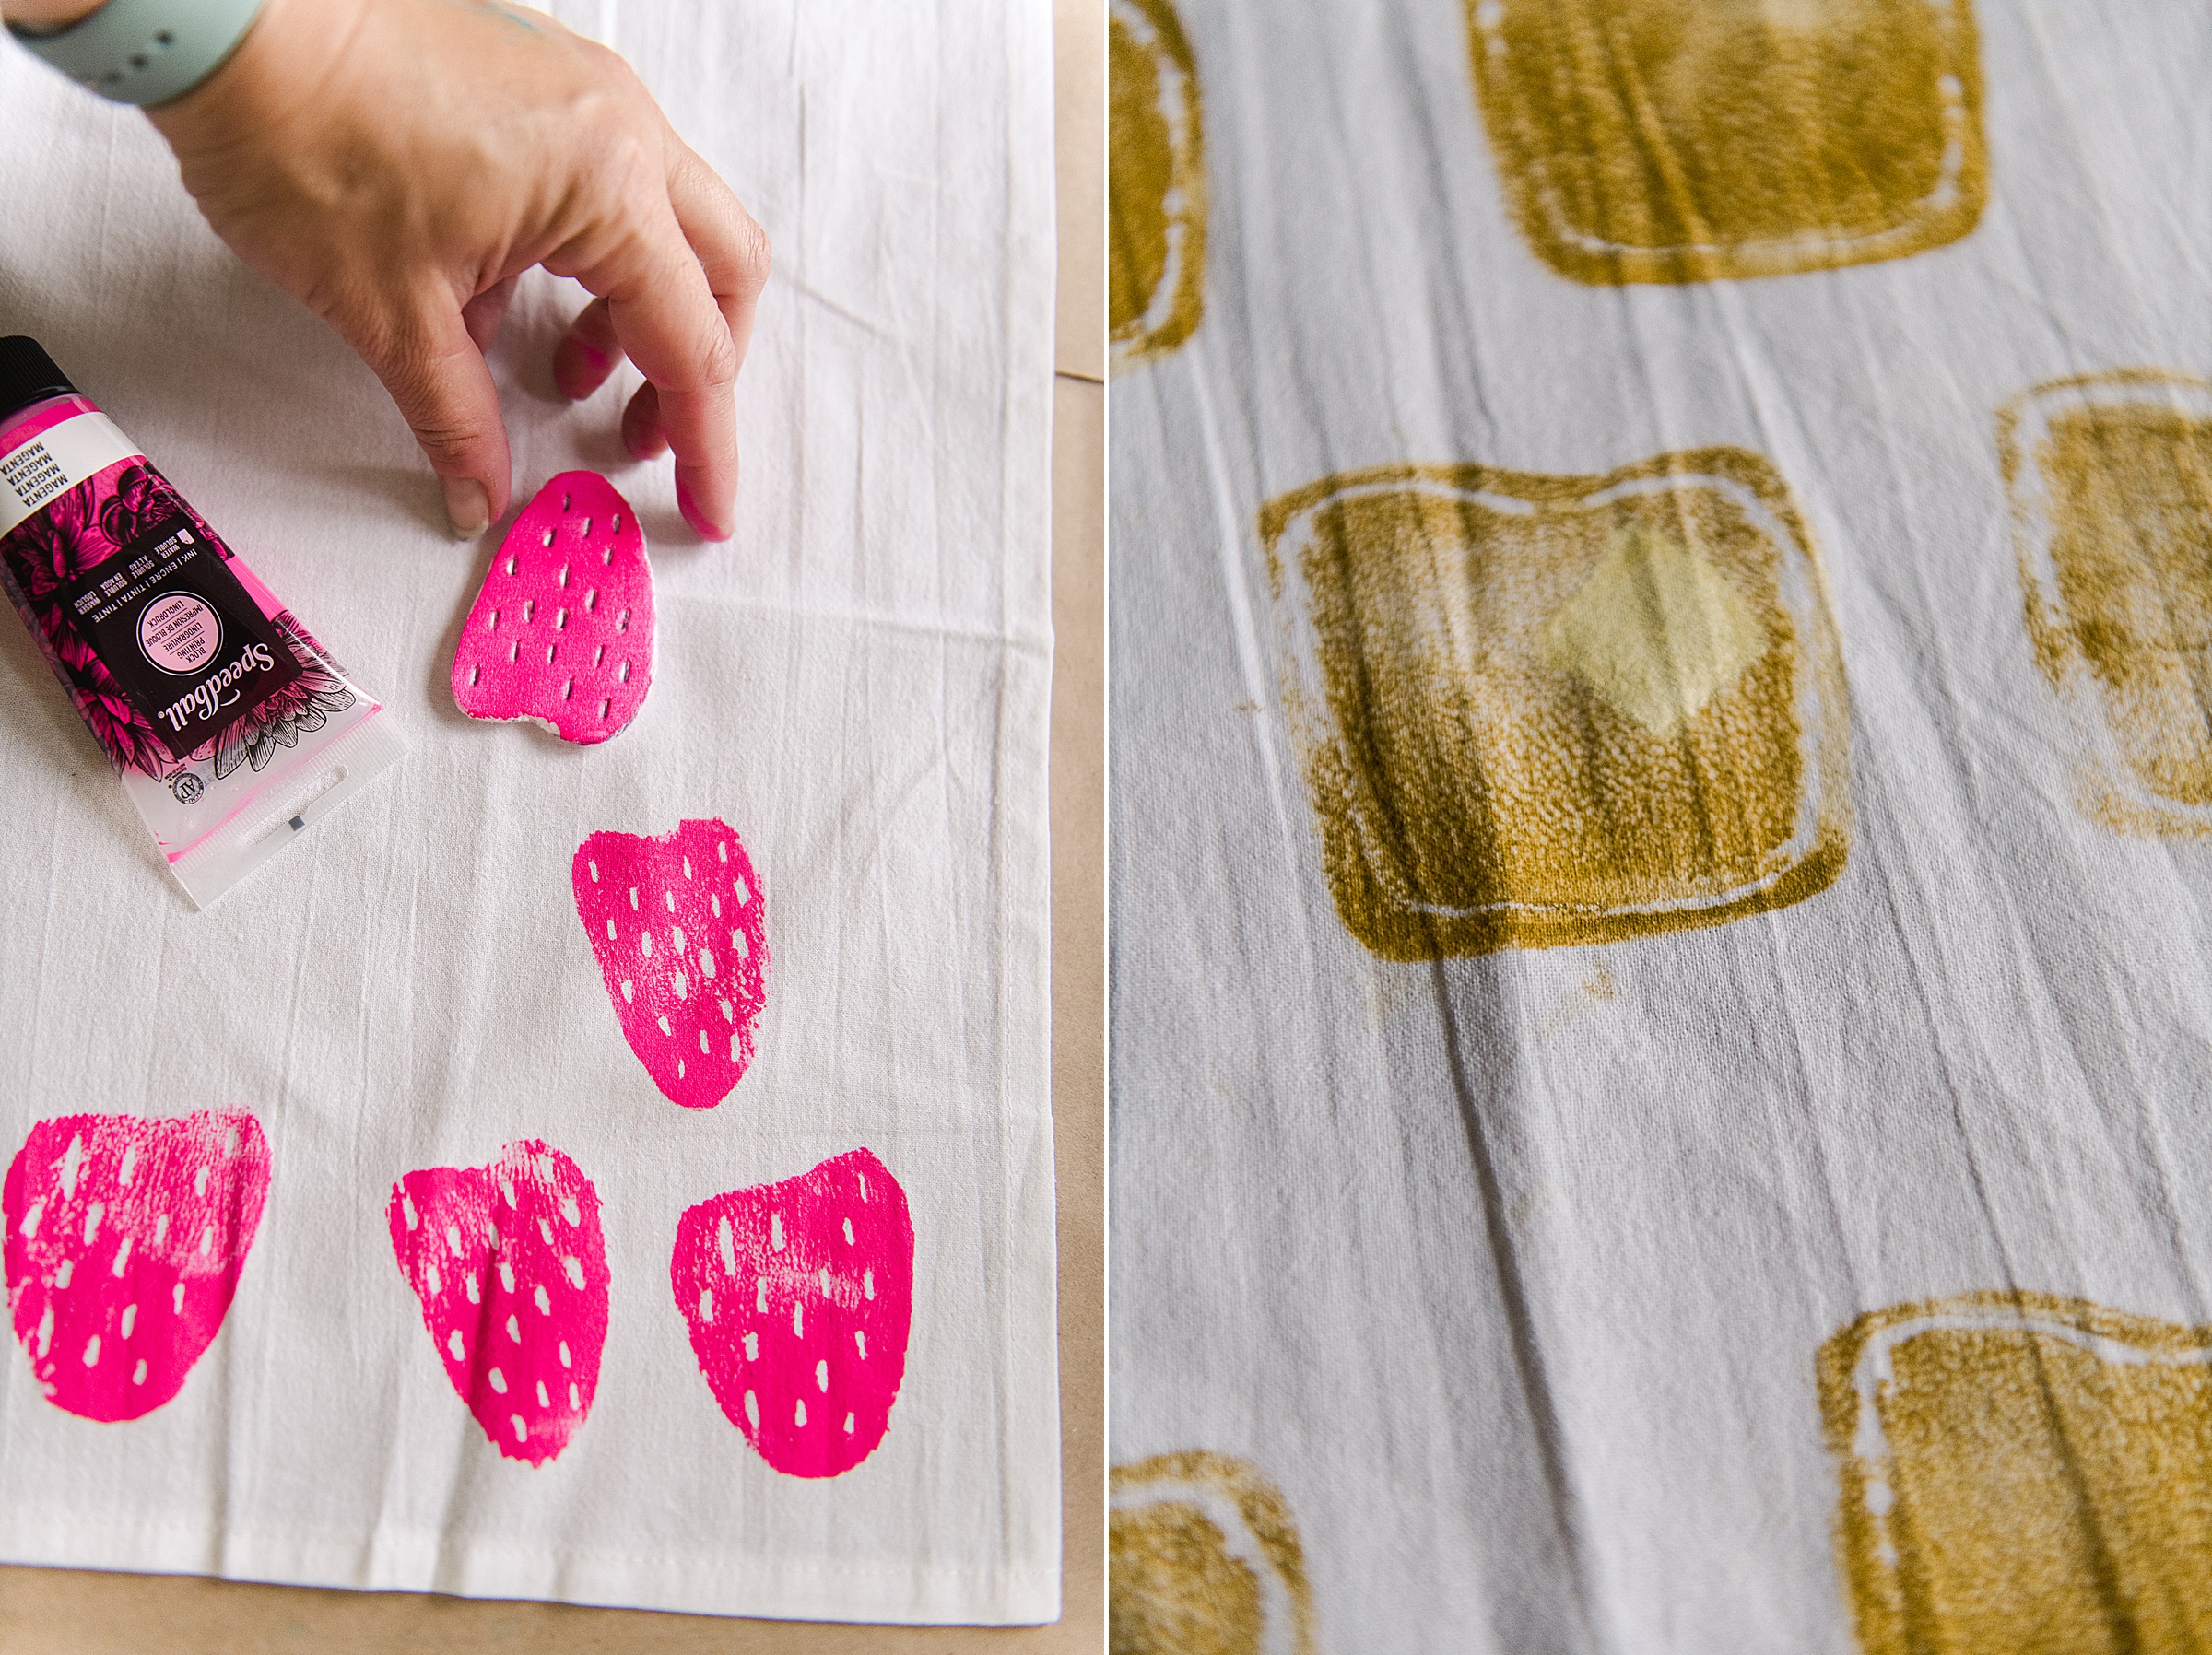
3. Get your ink ready by squirting a “line” of paint/ink onto a clean, flat surface plate. Then with your brayer, roll back and forth until it’s all spread out in an even layer. You will then ink up your styrofoam plates with a good amount of paint, making sure that it’s applied flat so that those indents stay ink free.

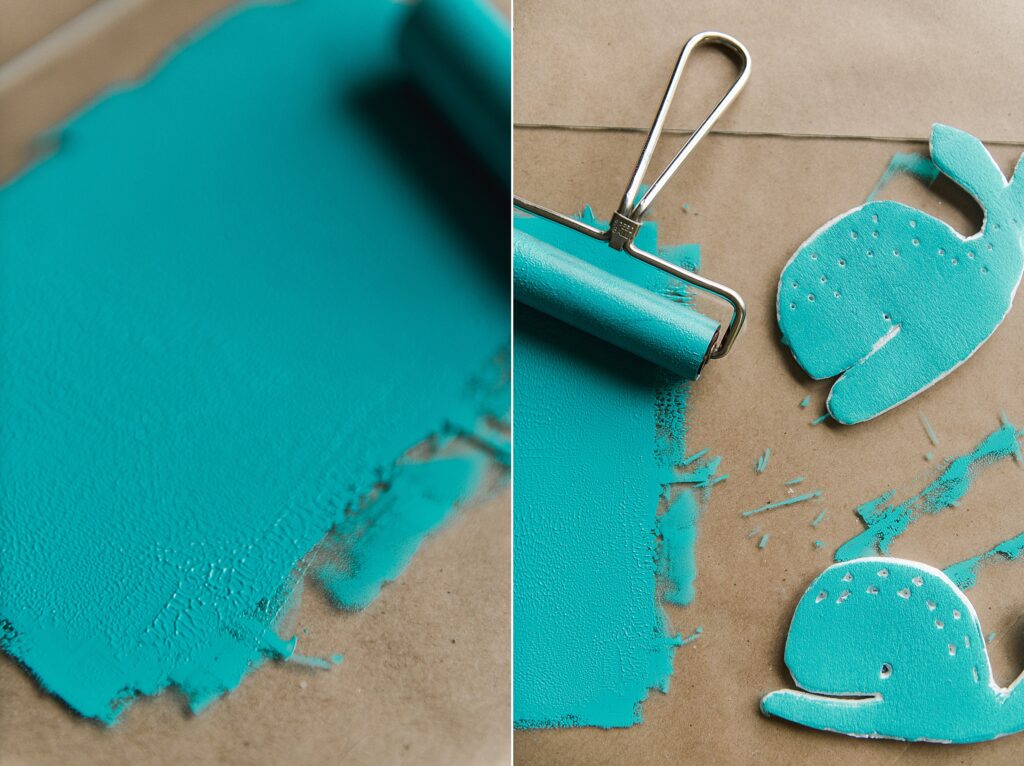
Then you will begin to press your shapes over and over onto your towel or cloth of choice. Press all the edges and the middle so that the ink transfers nicely! 🙂
Be sure to ink up your styrofoam in between each presses/stamps.
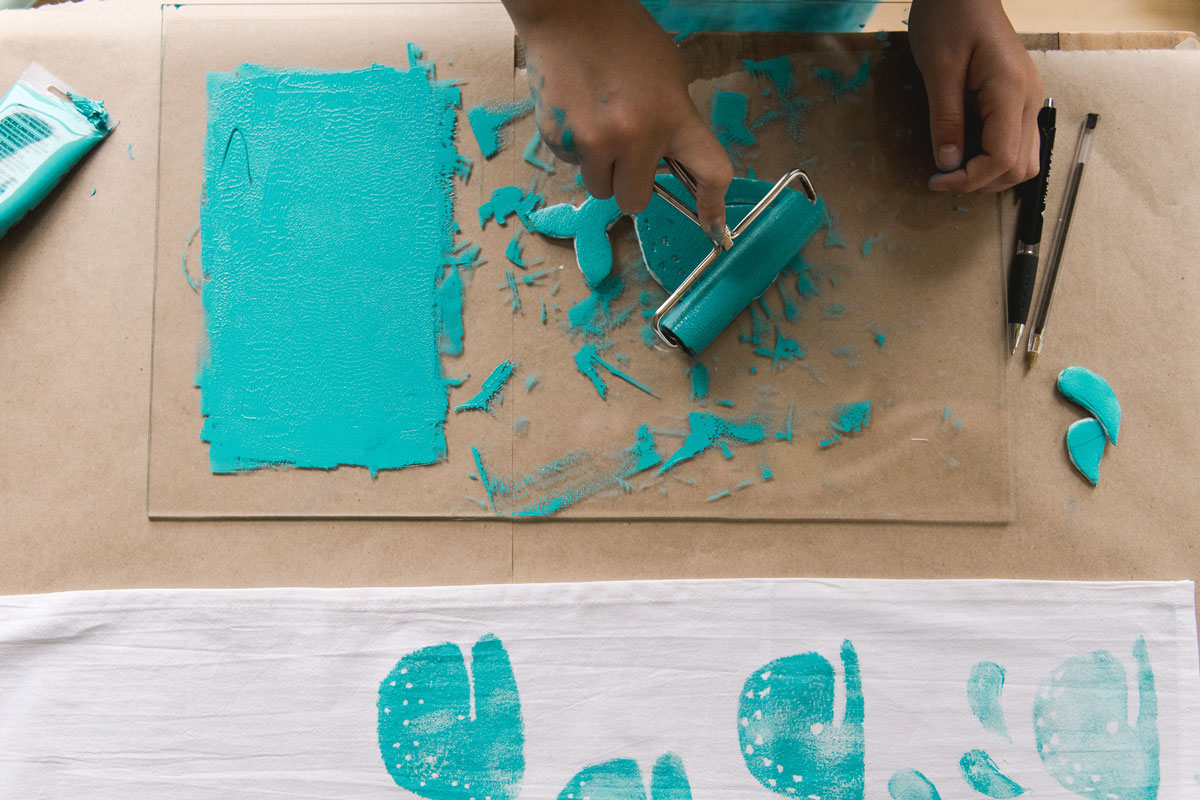
Tip: Be sure to have enough ink on your plate so that when you roll your brayer, theres a “tooth” or a texture to the ink, this lets you know that there’s enough ink to be able to transfer to the stamp and then to the towel.
4. Once you have all of your cloth covered in the way you desire, then set it aside and allow it to dry according to the instructions on your ink container 🙂


Do These wash in the washer ok?
Where did you get your flour sack towels?