Easy Married With Children Halloween costumes!
This post is sponsored by Married With Children – watch full episodes on Hulu, Pluto TV, Peacock and Prime Video.

Do you remember this show from the 90s?
I MEANNNNNNNN!
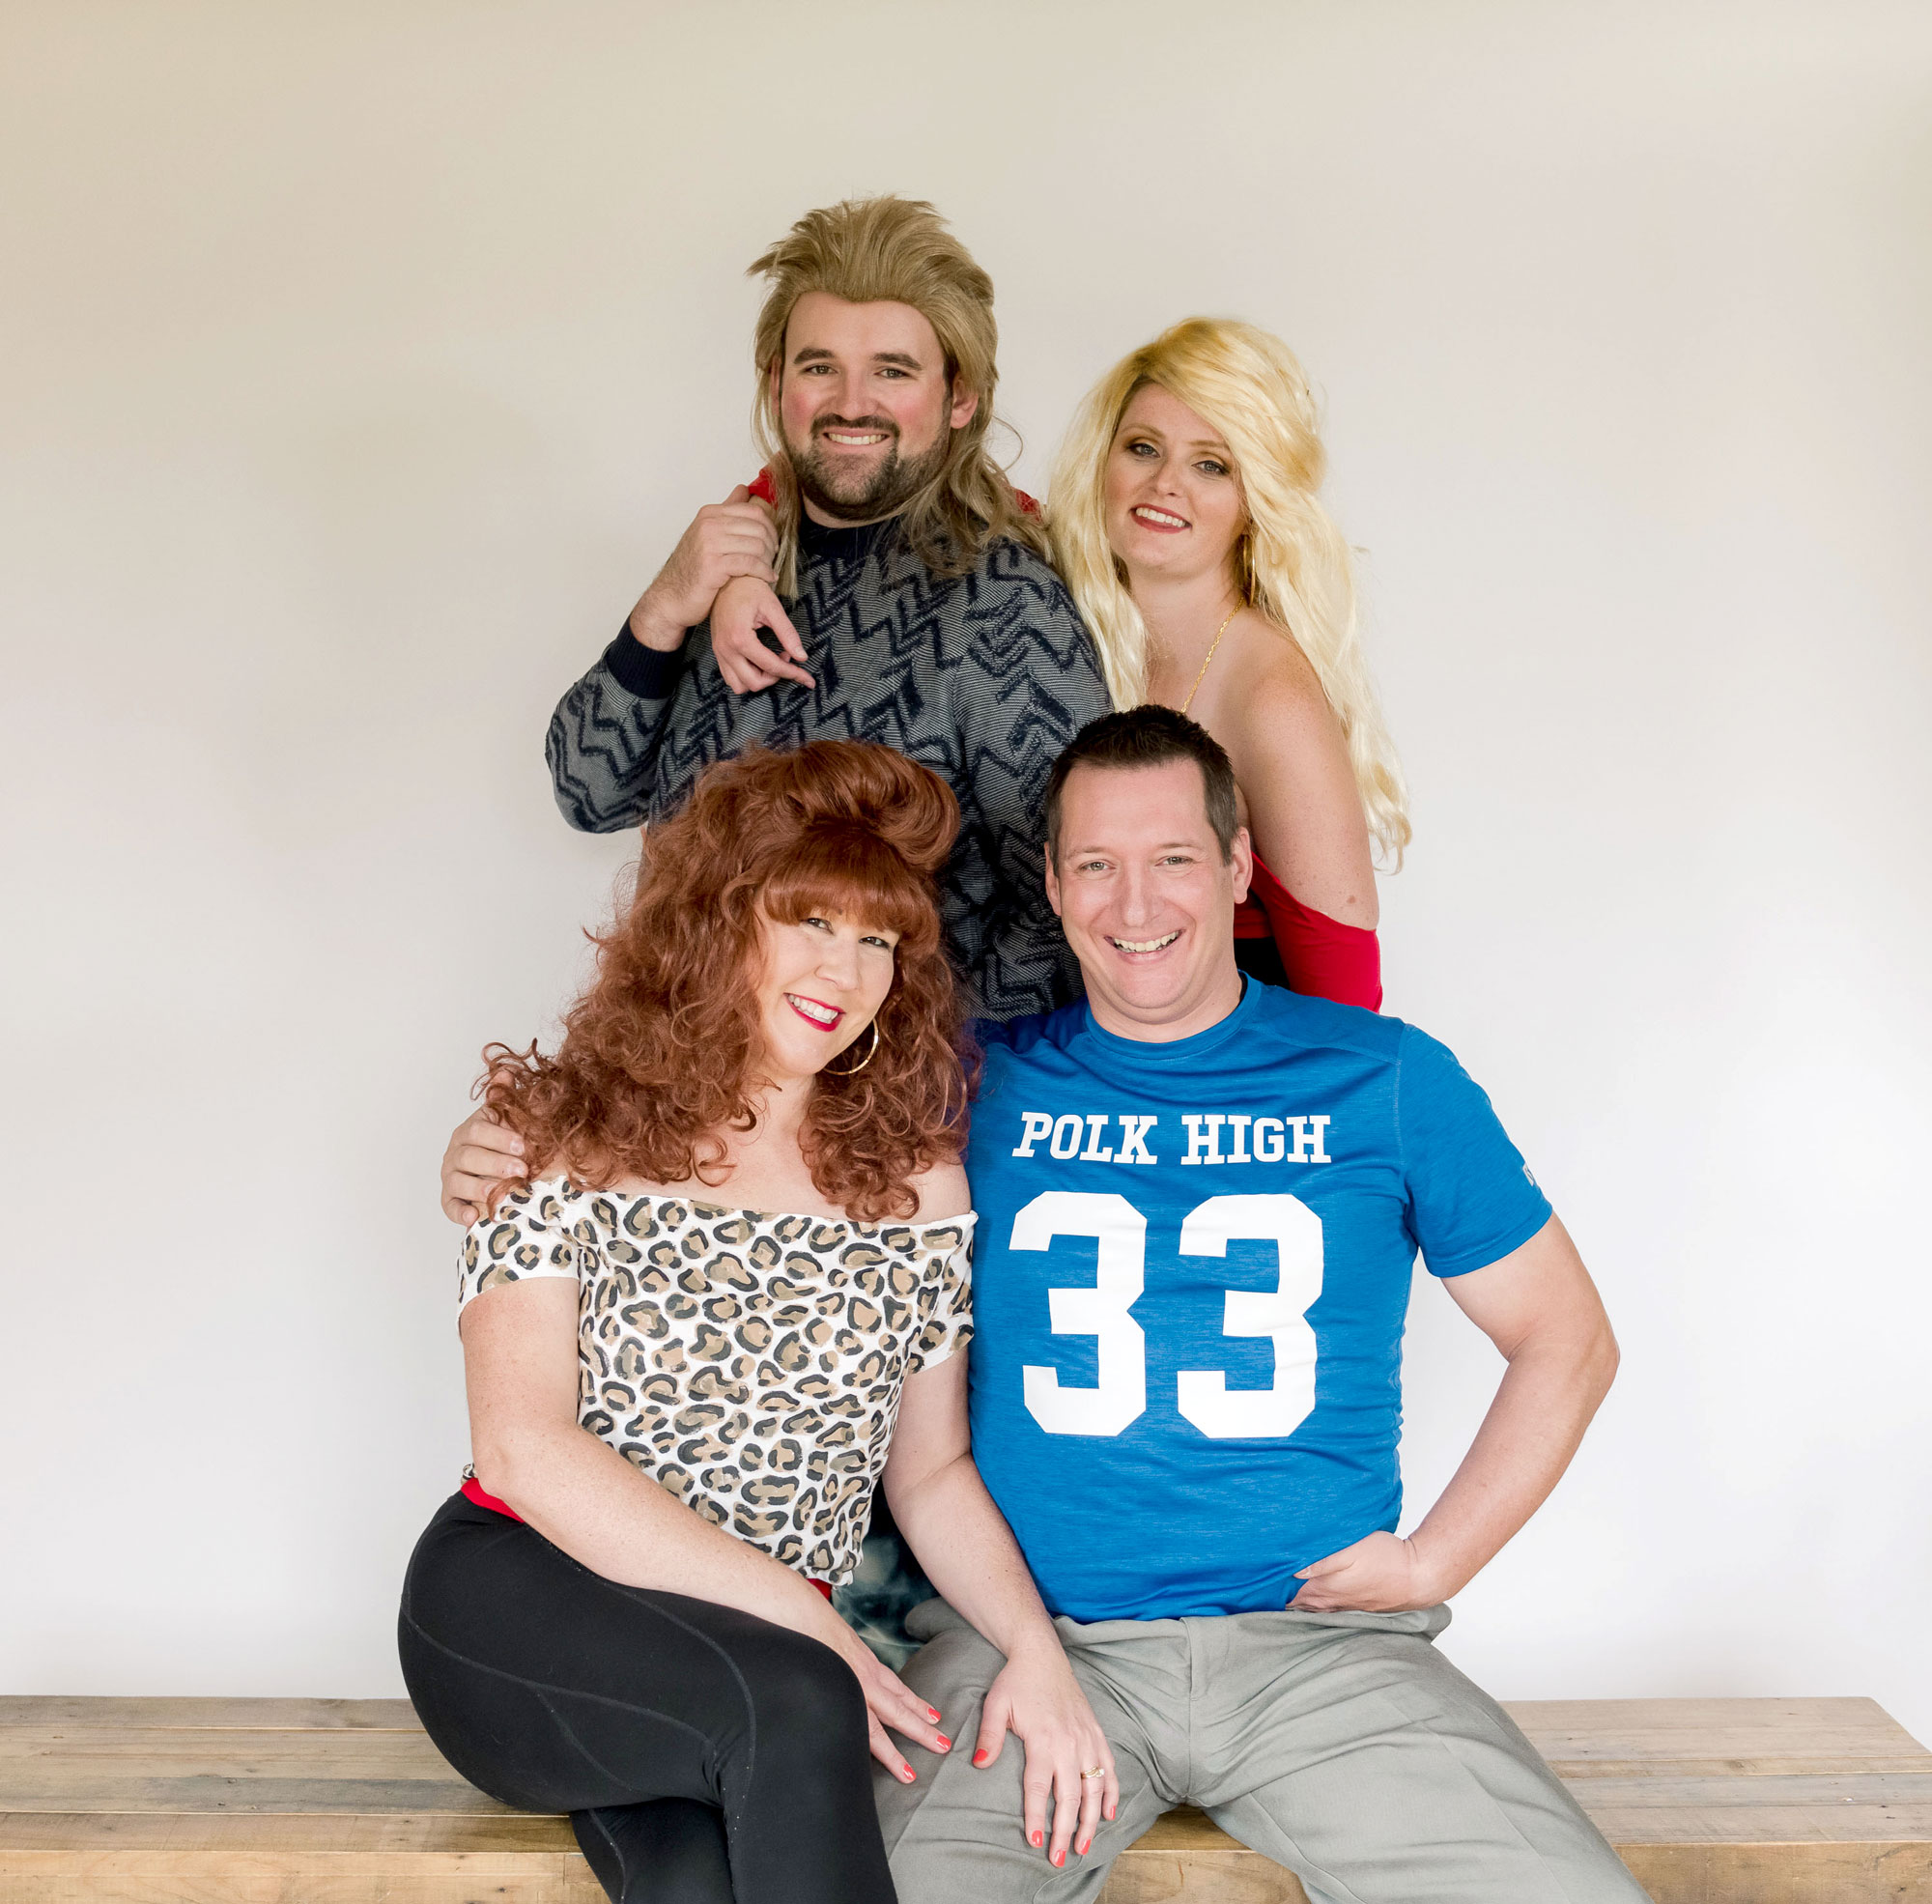
The hair and the shoes and the pants…..ALL THE CLOTHING! This is a throwback to say the least and I am thrilled to show you just how to make the Bundy family from “Married with Children” in Halloween costume form. And don’t you worry, all of the looks are just minimal DIY…….so shop your closet, head to the thrift store or go to your friend’s house to grab the essentials to make your fave character from this fave 90s sitcom come to life! 🙂
And hint, hint…..if you’re looking for a group costume for your family or friends, this is a SUPERRRRRRR good one that will have everyone in stitches! 🙂
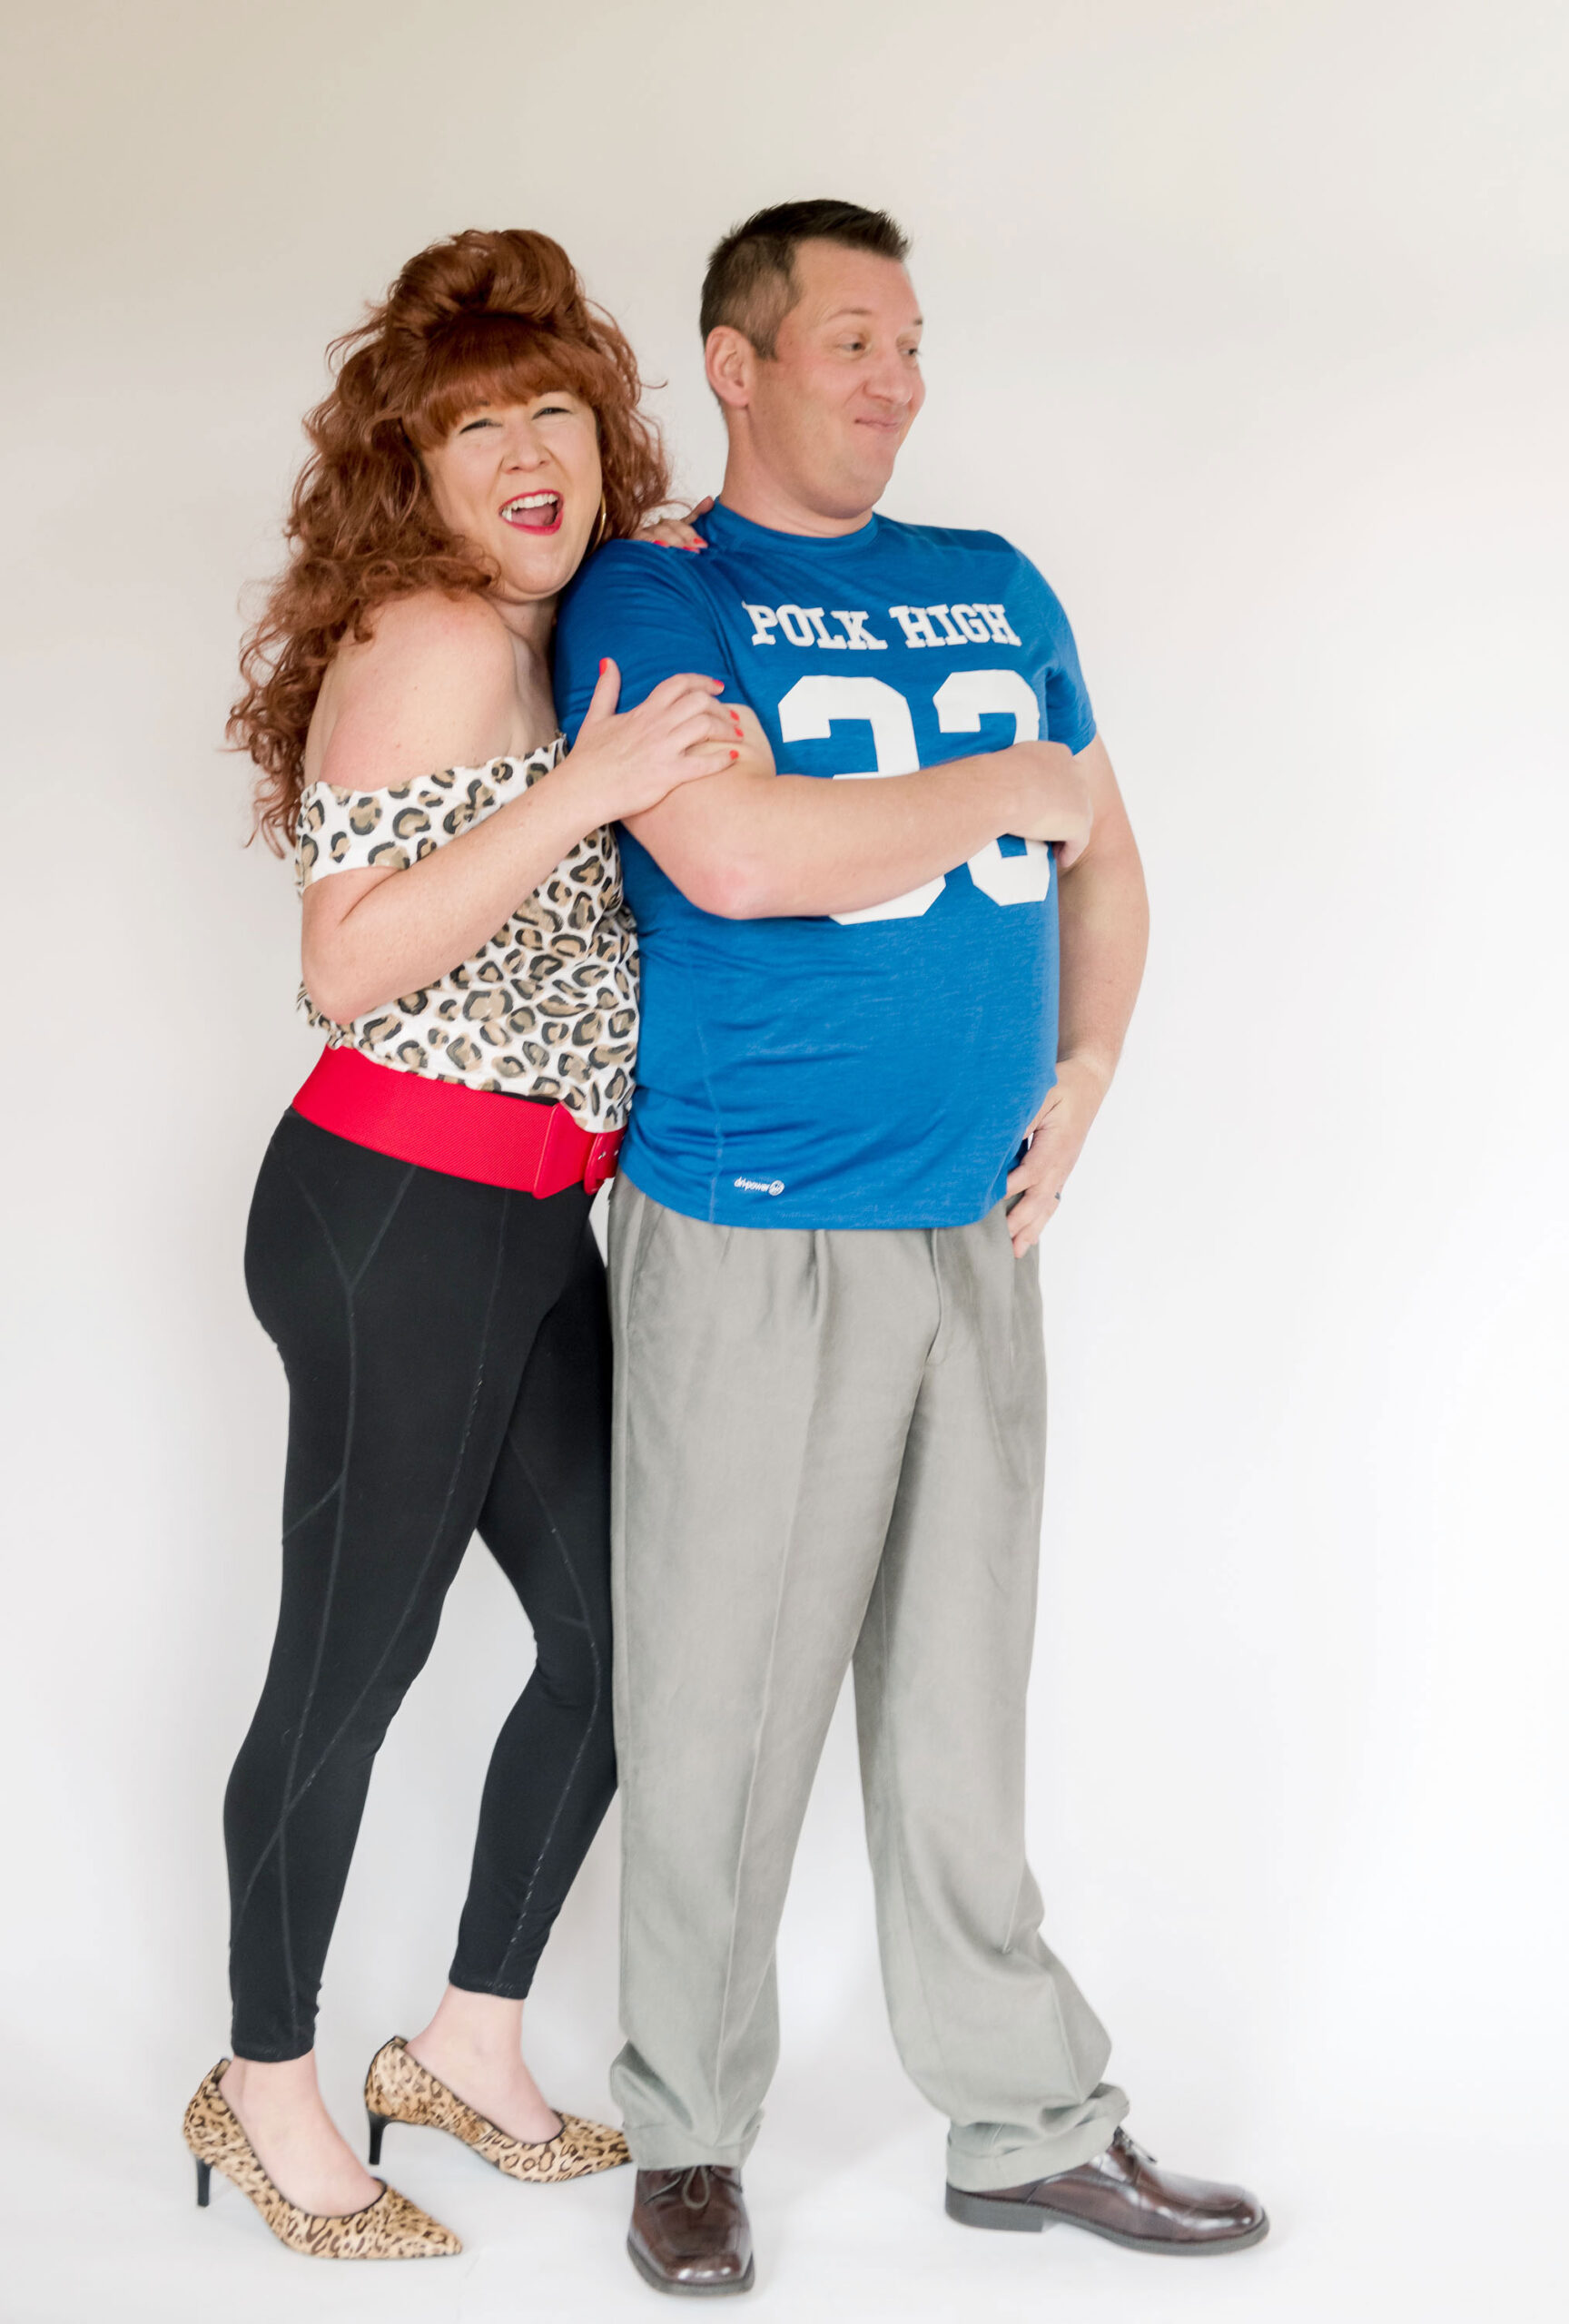
Married With Children is celebrating its 35th anniversary so of course with Halloween coming up, this is a *perfect* time to bring out your inner 90s sitcom style in Halloween costume form! 🙂 I can, 100%, remember the series theme song and it’s instantly paired in my head with the visuals of the huge hair and gum chomping of Peg, the couch in the Bundy living room, the sarcasm of Bud, the iconic fashion and style of Kelly and Al’s attitude! If you’re needing to brush up on your fave moments from the show to bring back these memories, the show is now available to watch on Hulu, Pluto TV, Peacock and Prime Video.
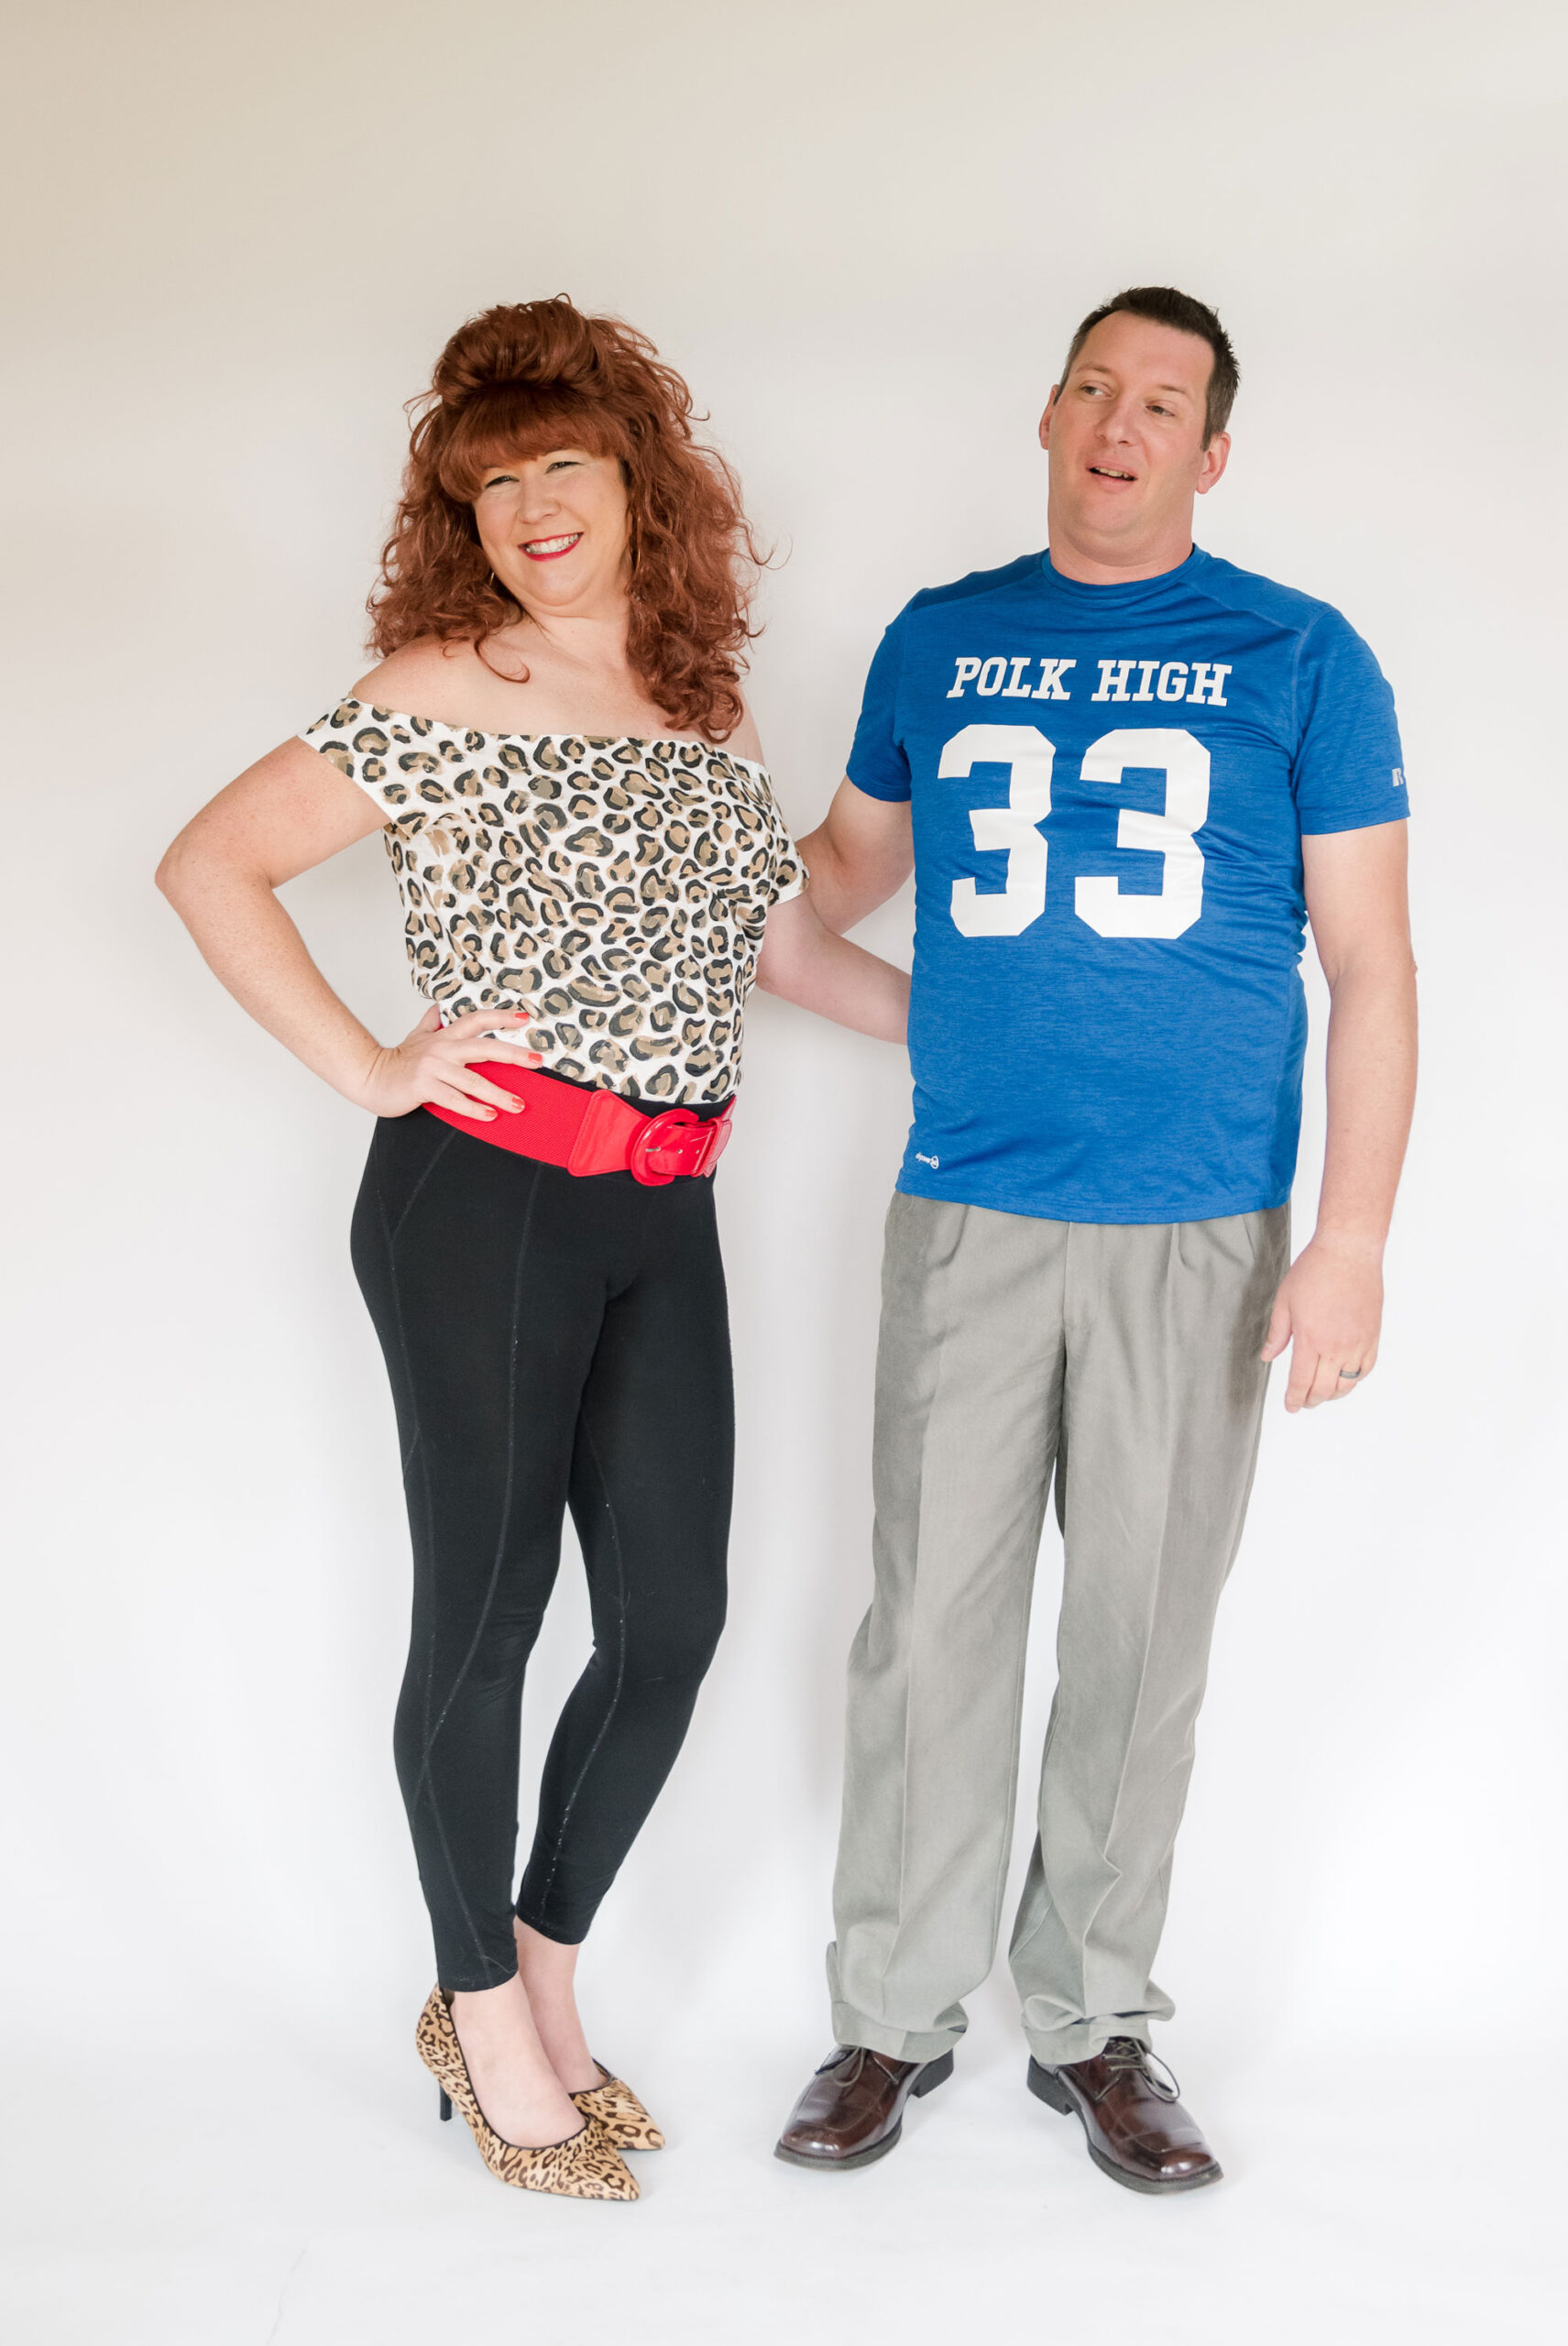
Each one of these looks to create for Al, Peggy, Bud and Kelly Bundy aren’t hard….they are last-minute-friendly because you’d be surprised at what you likely already have in your closet or lying around to make each character come to life. I have the essentials listed below to make sure that you hit all of the key elements for each character’s aesthetic (although I’m sure you can already guess from reminiscing or re-watching the show)! 🙂
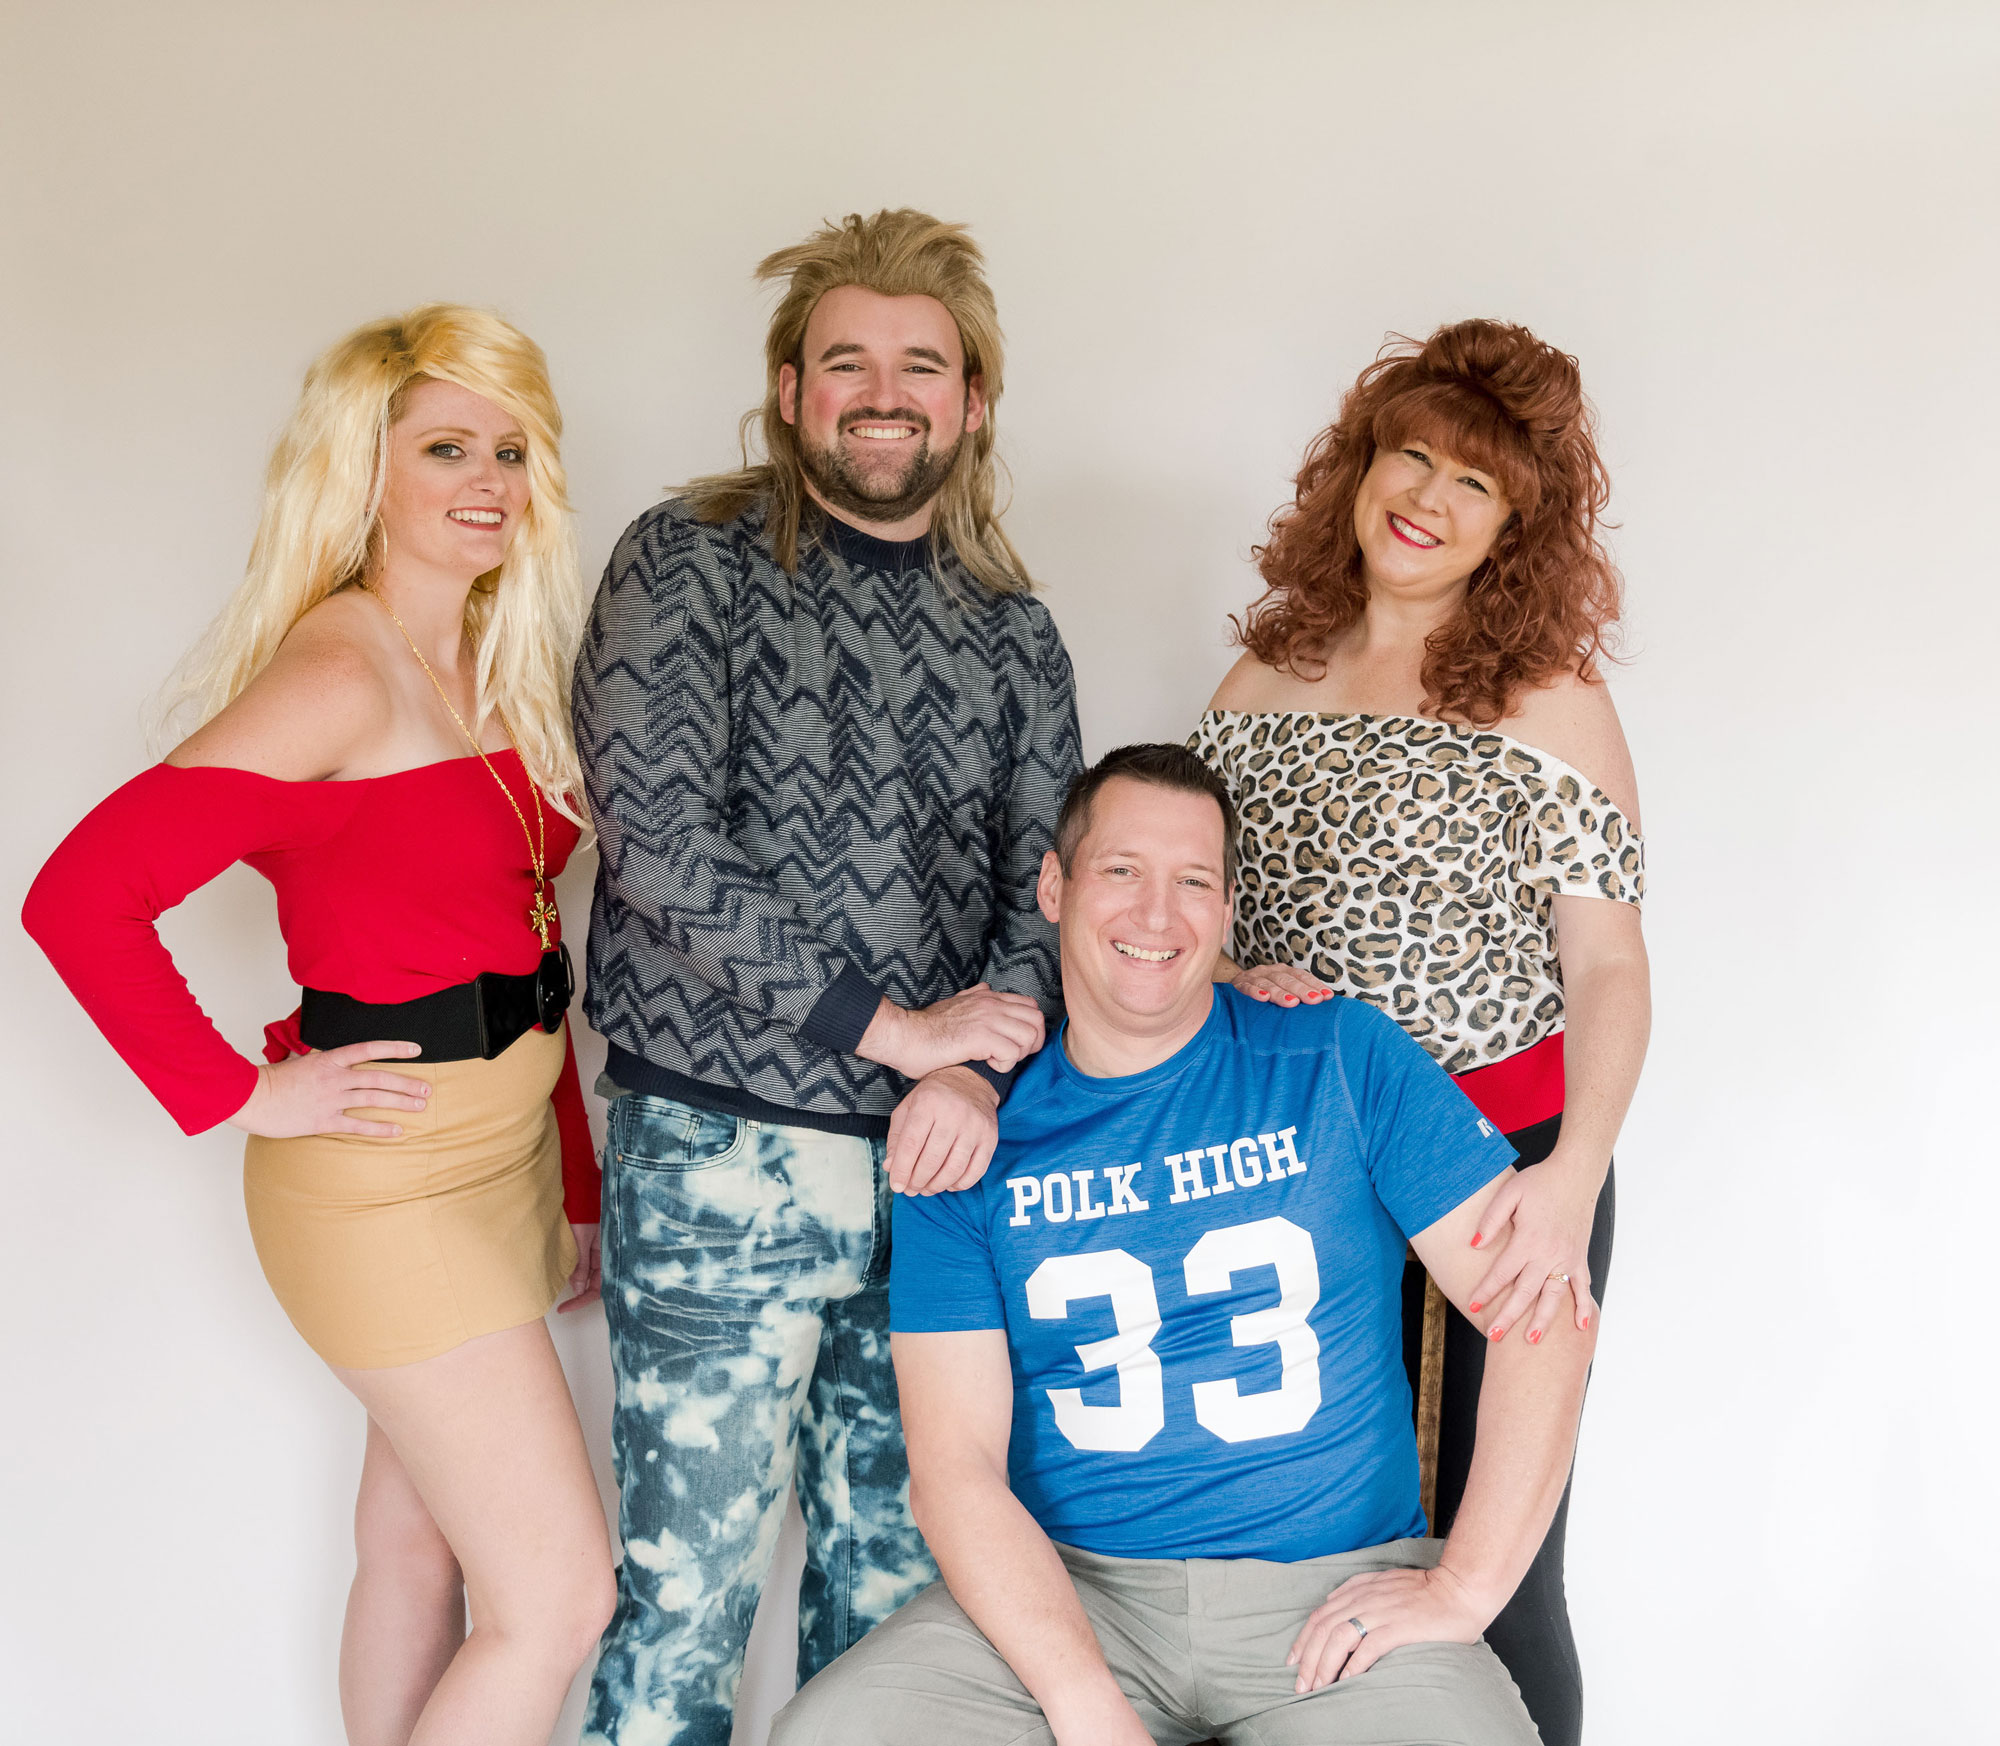
PEGGY:
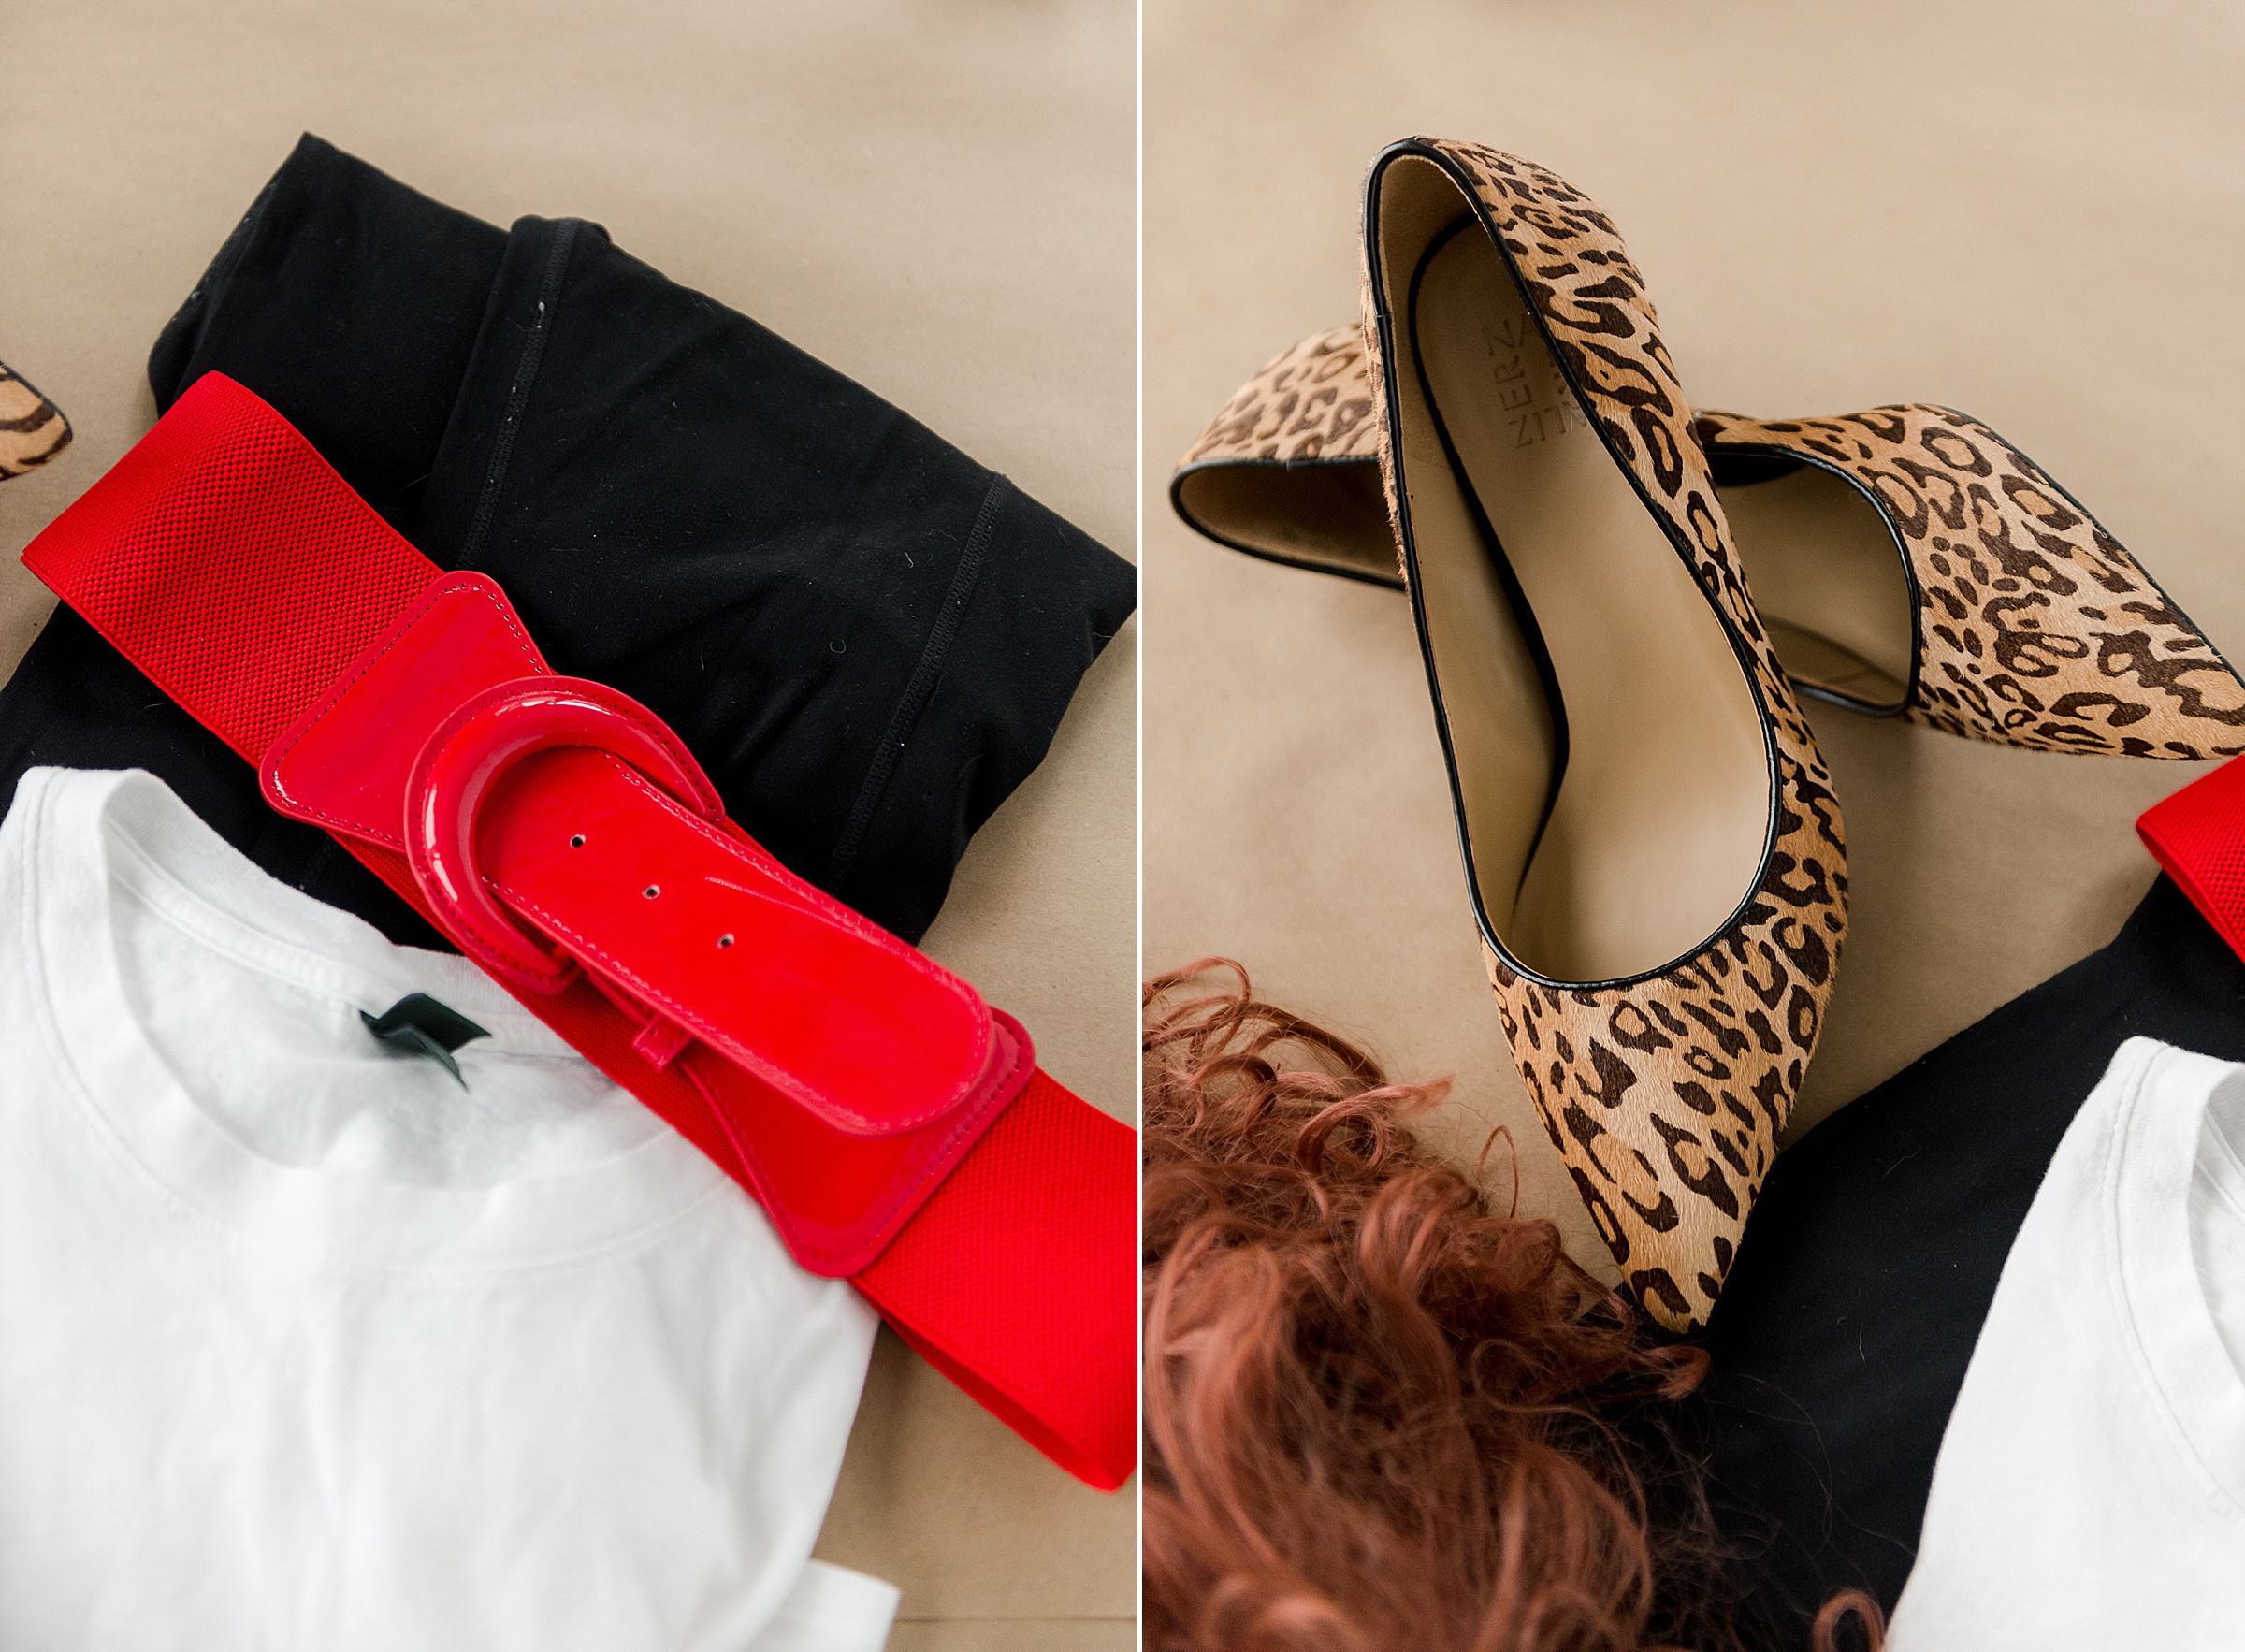
- Some black leggings
- High heels (leopard print or bright red are preferred 🙂
- Any chunky belt
- Big earrings – hoops or studs
- A red wig – I found one at our local thrift store and manipulated it to be more “Peggy” – details on how I did this are HERE 🙂
- A white tee (that is fitted as best as possible) – and of course you could skip the DIY entirely and just purchase a leopard print tee to customize
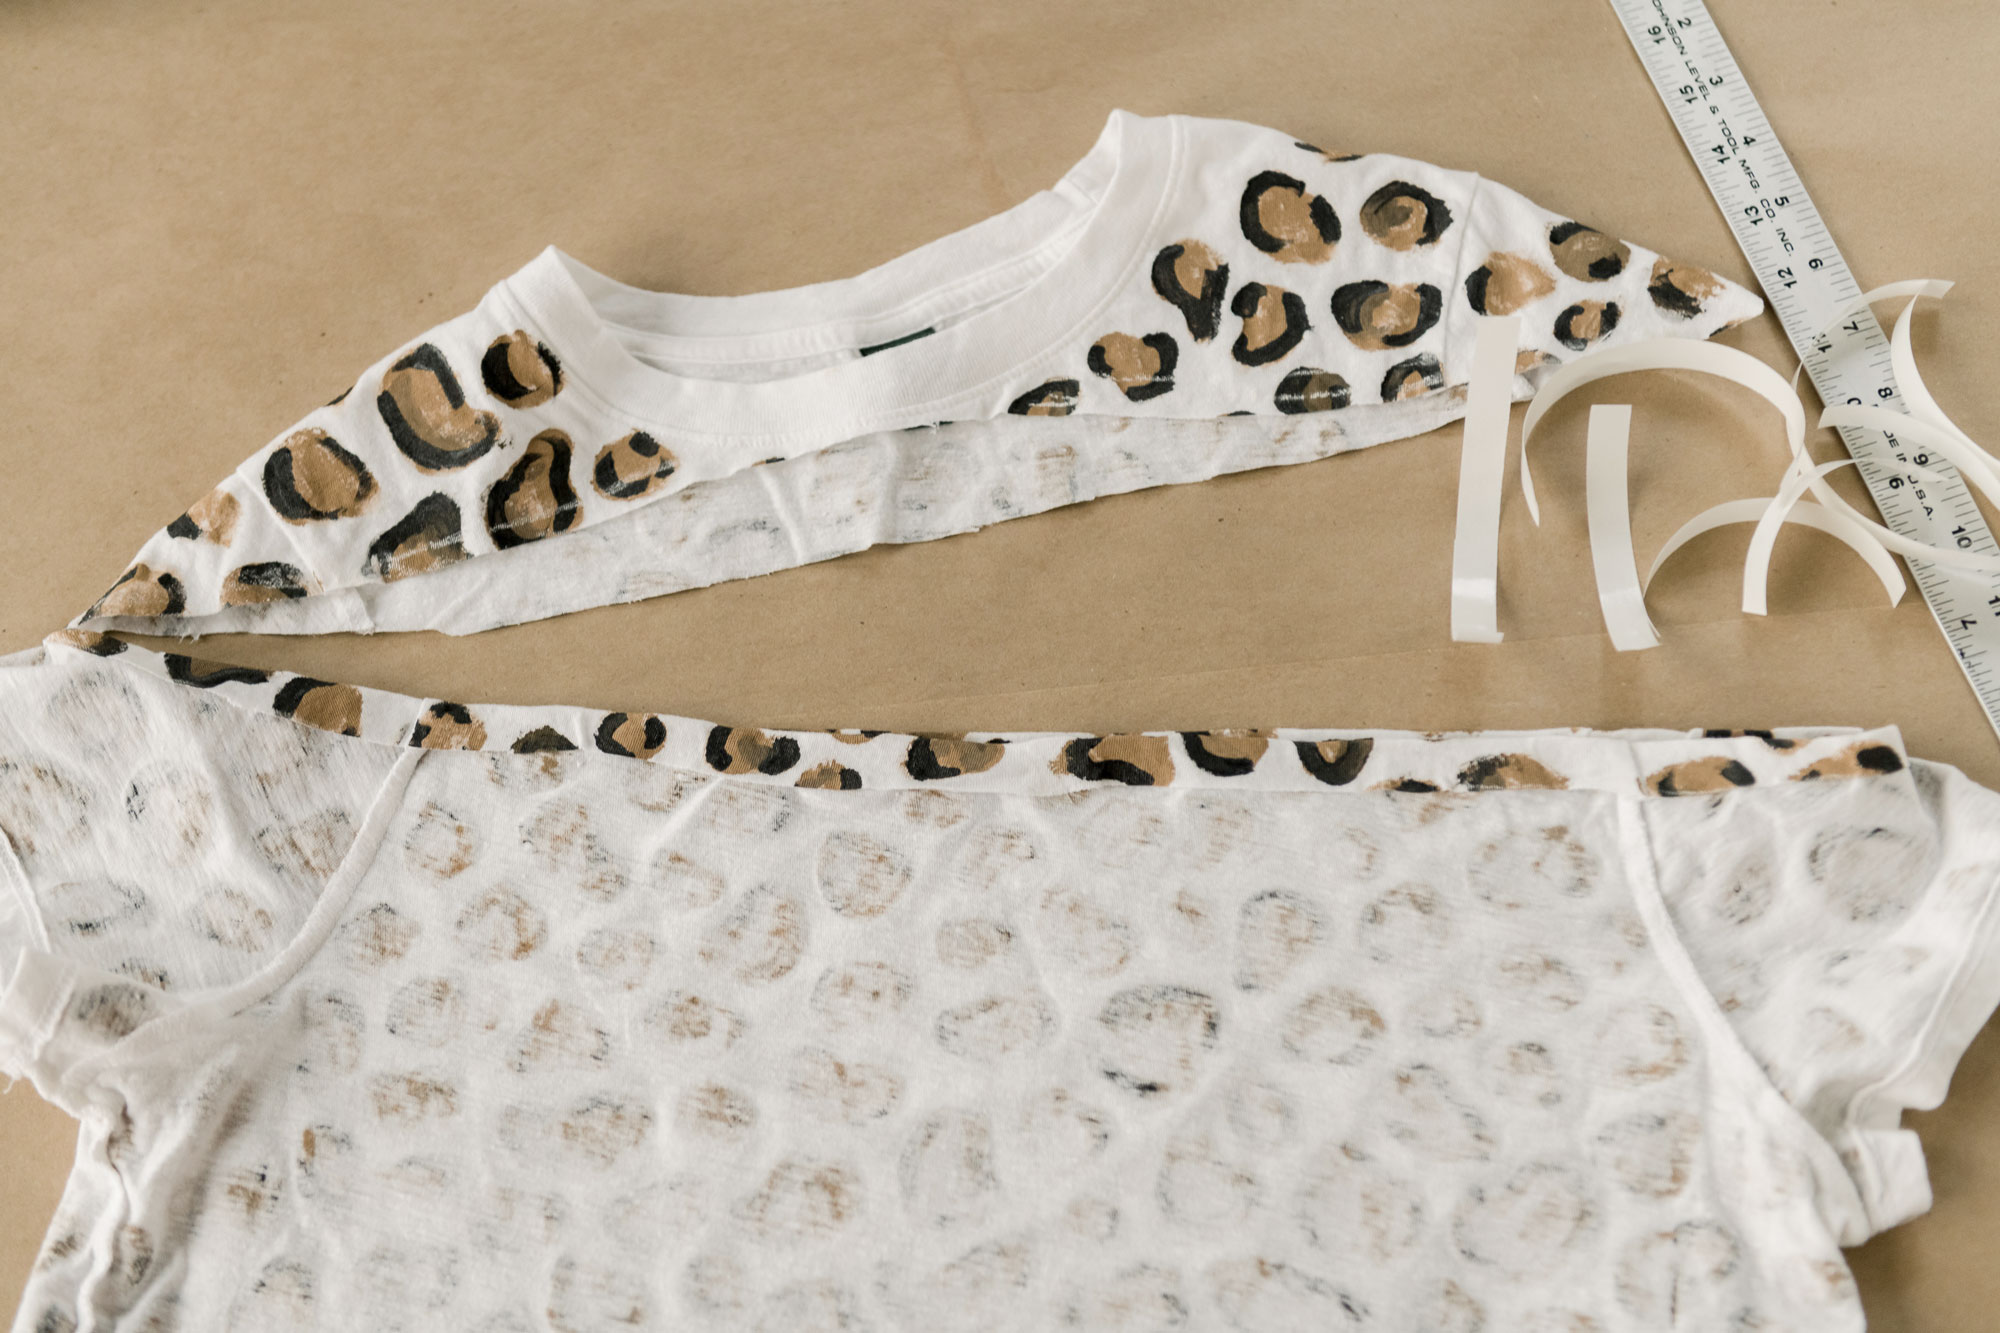
**The DIY portion of Peggy’s costume Is turning your white tee into an off-the-shoulder leopard print shirt
TO MAKE PEGGY’S LEOPARD PRINT SHIRT:
MATERIALS:
- A white tee shirt (any style will do)
- Fabric paint in tan, brown, and black
- Some paint brushes
- Extra cardboard (grab some boxes from your garage to use as a shirt insert while painting)
- Scissors
- Some no sew fabric tape
- Ruler
- Chalk for marking line on fabric
1. Begin by inserting your cardboard into your shirt (this keeps the paint from seeping through to the other side while you paint….so insert loosely on the body of the shirt AND the arms since we will be painting the entire thing)!
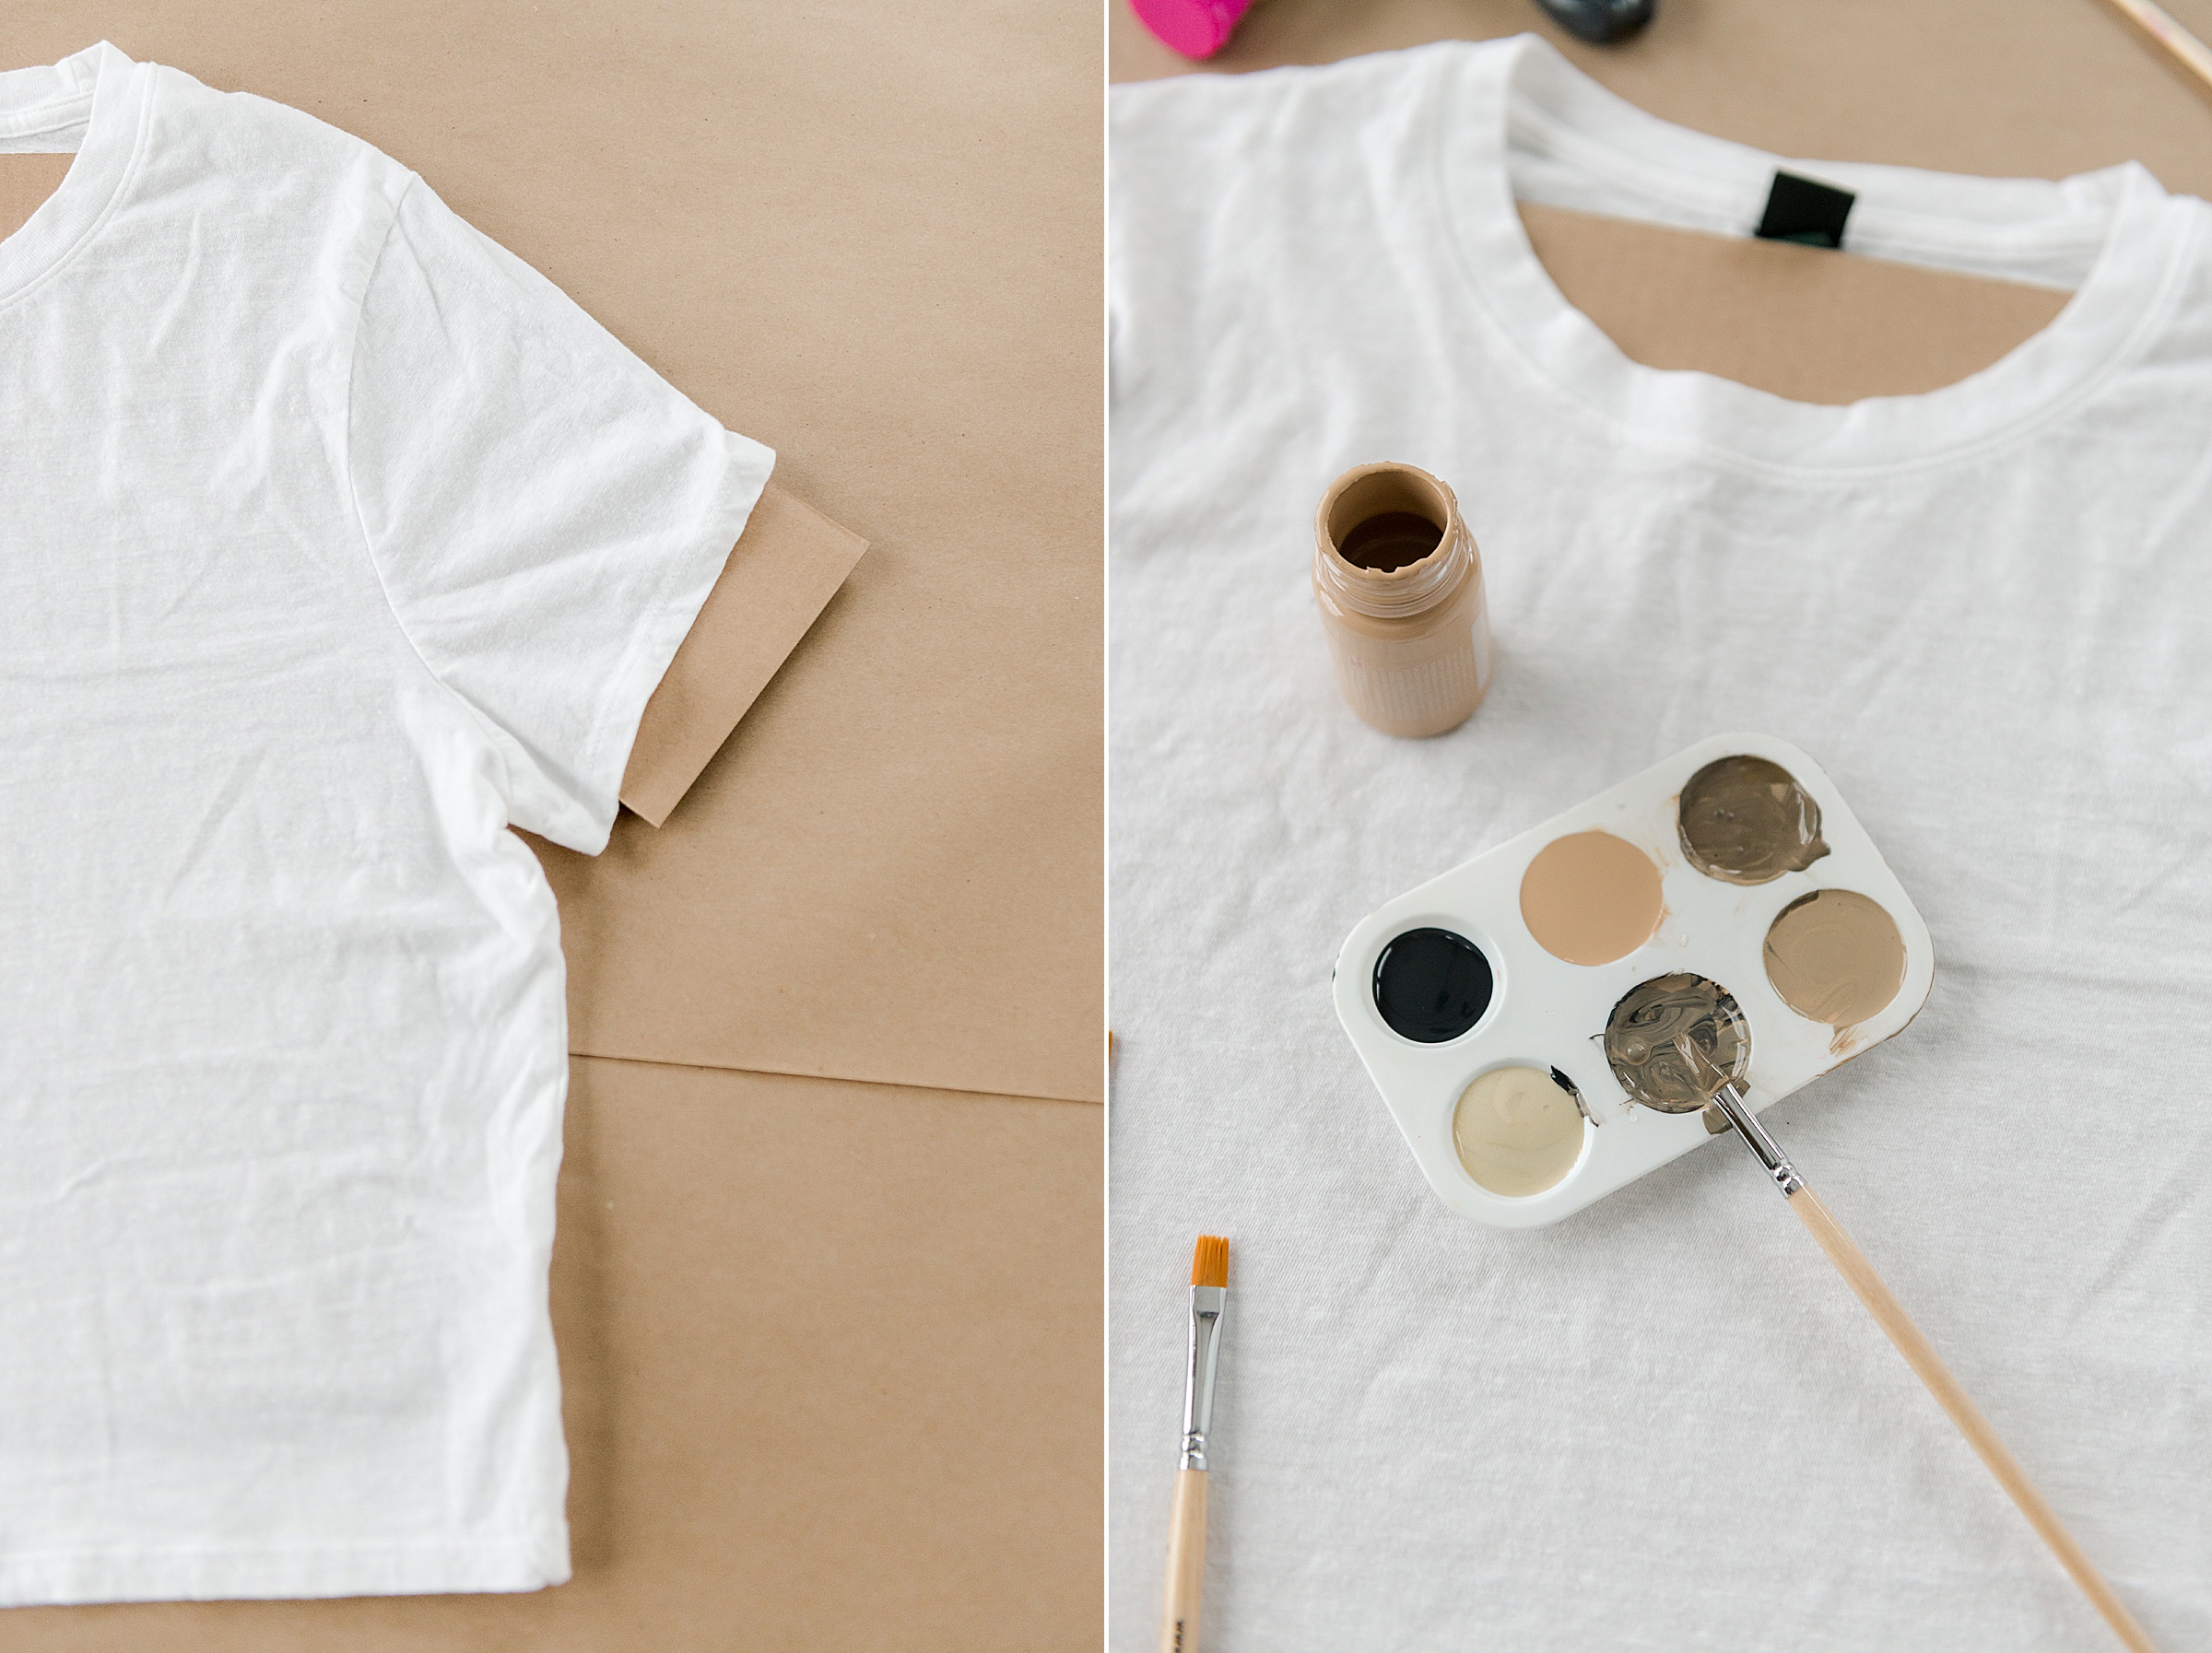
2. Mix your paint (if needed) and begin painting! To make a leopard spot, you will do 3 steps:
- one: Paint a blob of tan paint
- two: Add a bit of darker tan around one side of the outer edge (going inwards towards the middle of the blob/spot…..this adds variation and makes it look less “flat”).
- three: Add some black lines (with a thinner brush) around the outer edge of the tan blob – you won’t completely outline it, but rather add 1, 2 or 3 lines with separation in between.
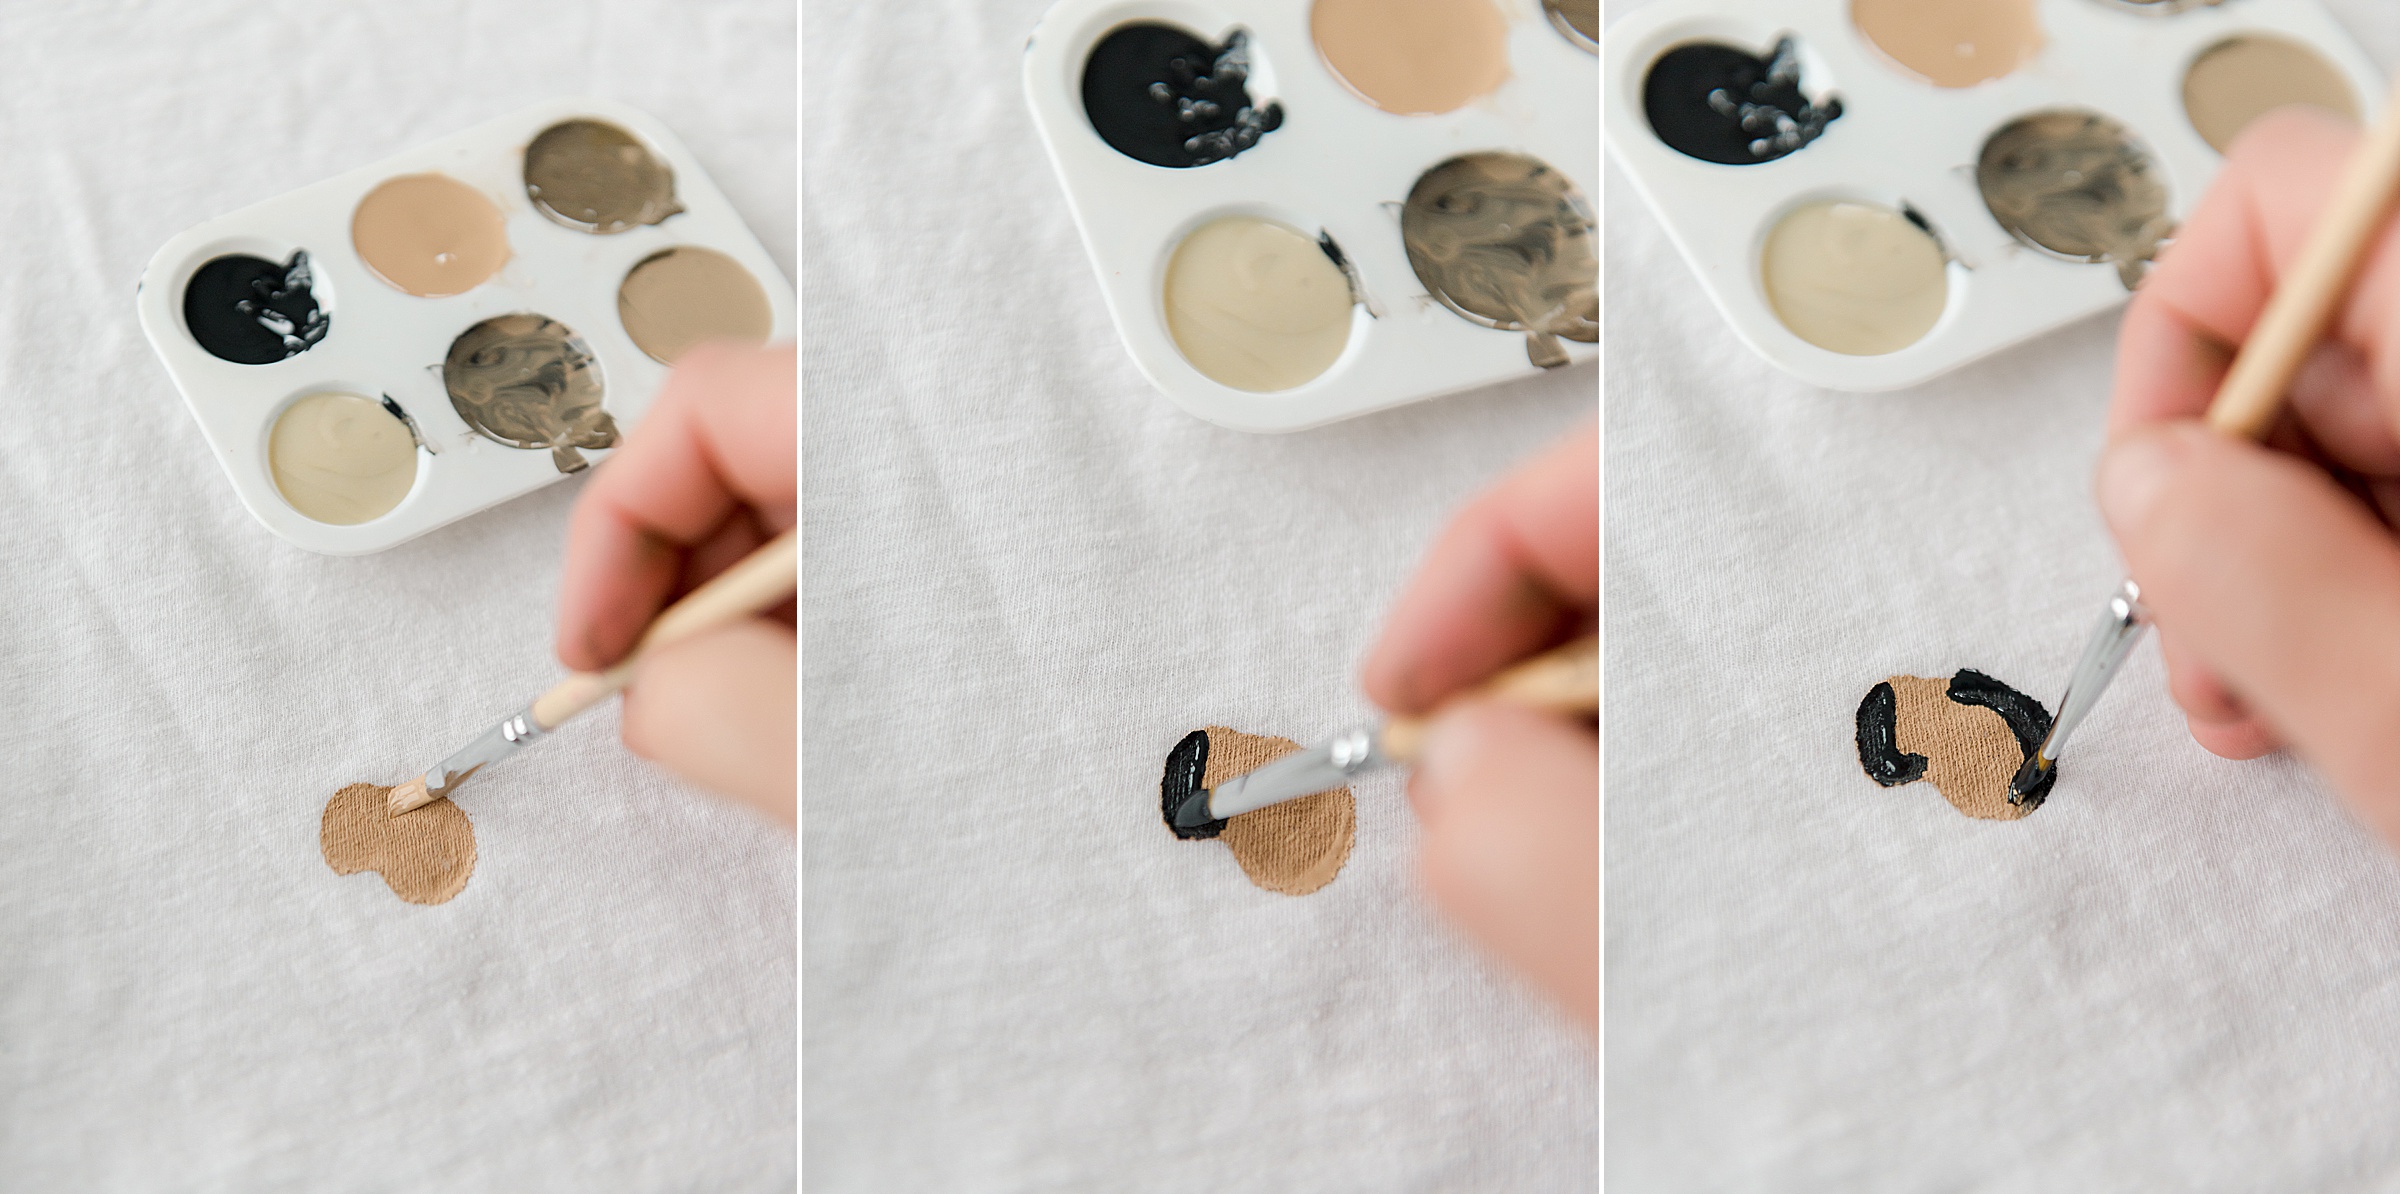
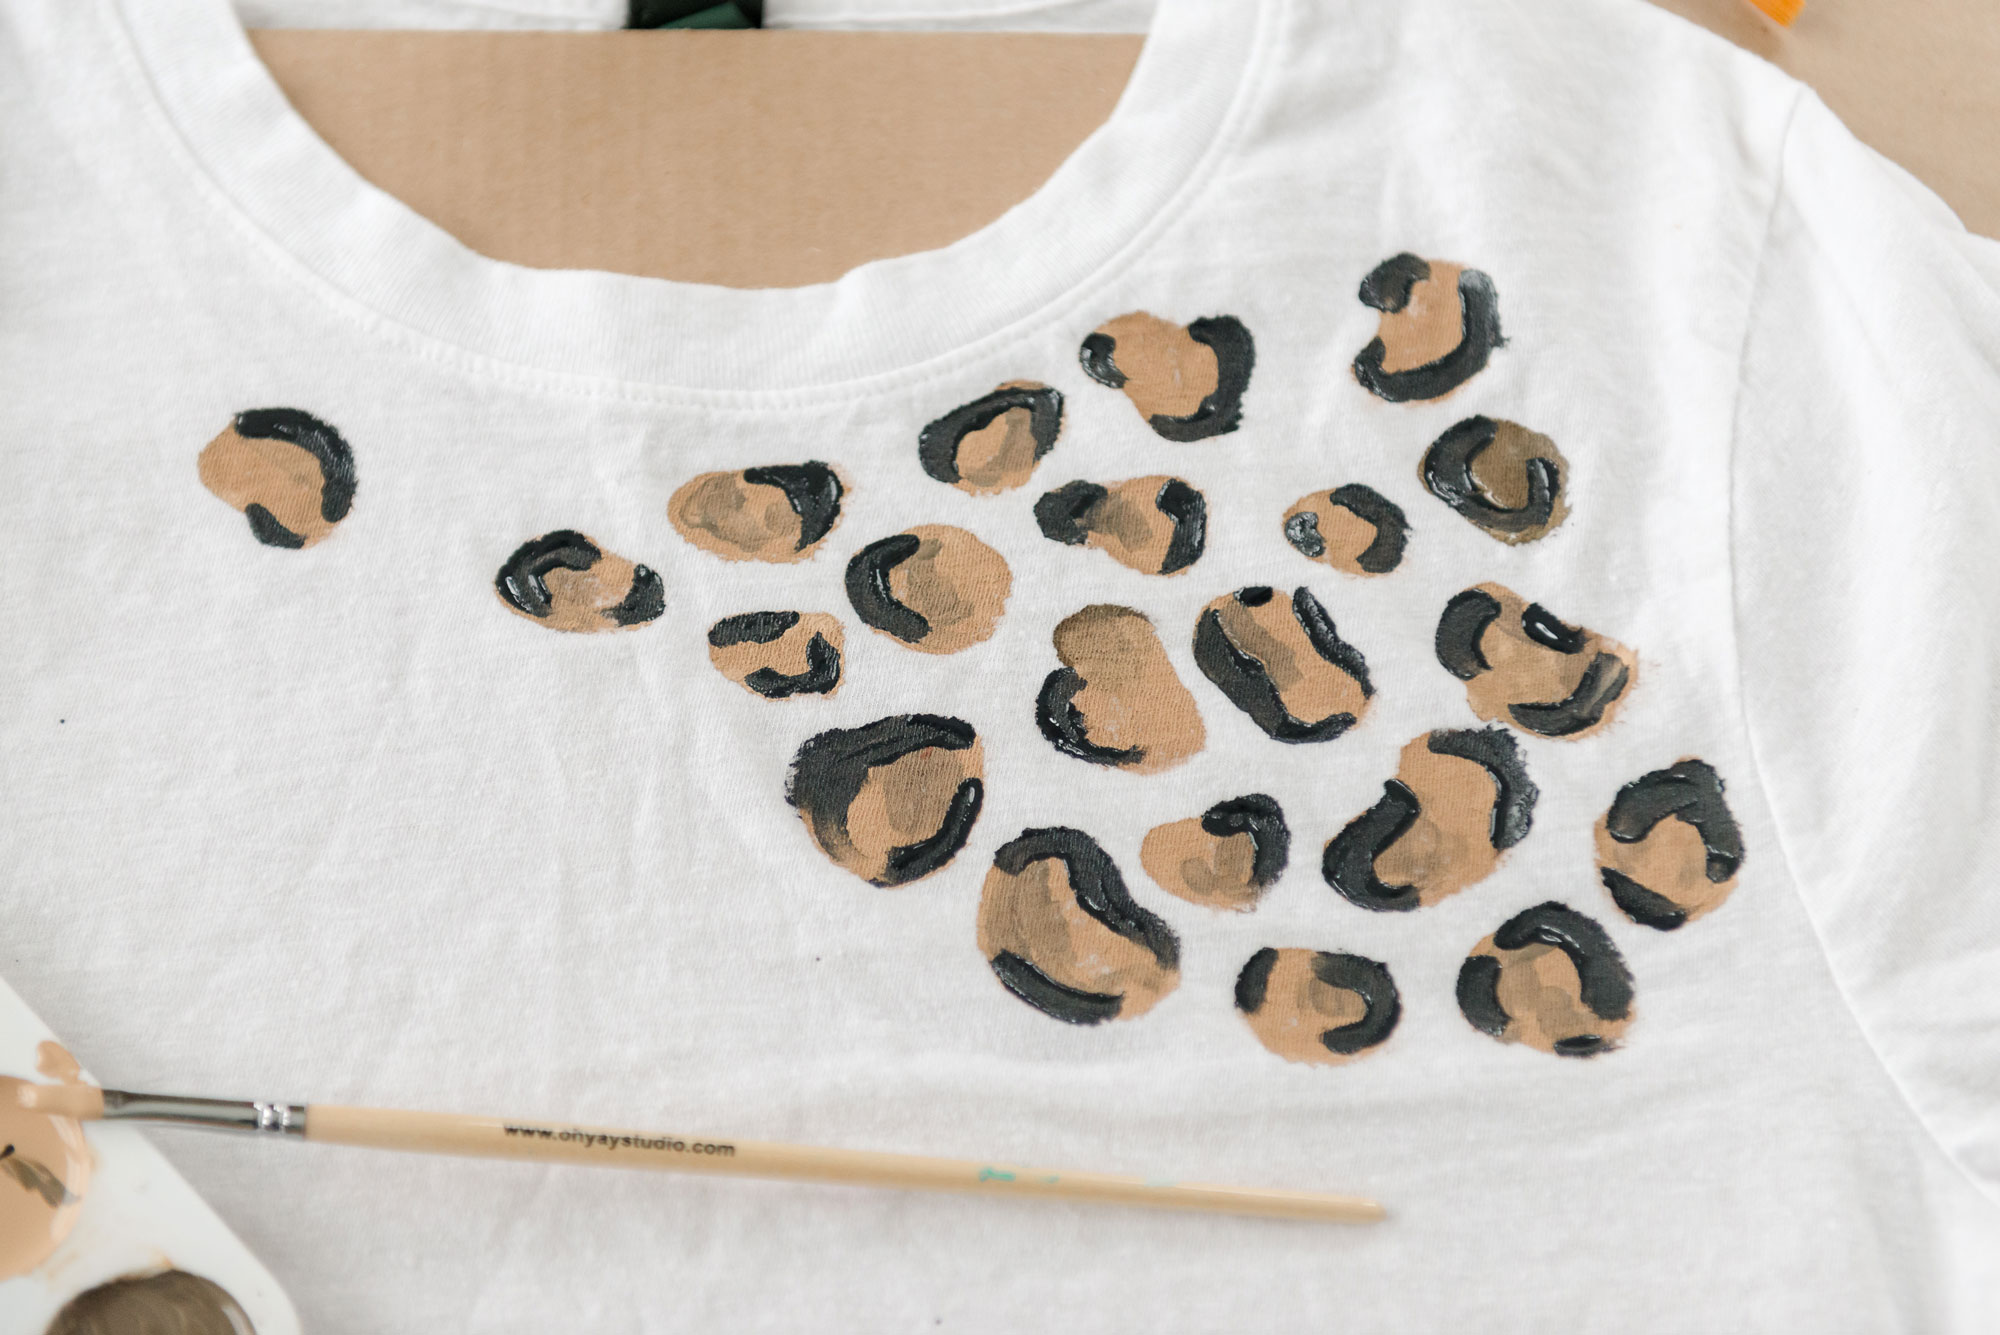
The key to making these painted leopard spots looks real is to add variation in both shapes and black lines! Make the tan blobs/shapes kinda close together without just being circles (let your brush just make blobs) AND use a variety of kinds of black lines (1, 2 or 3 total) around the outer edge! And honestly, this painting is SOO easy and quite satisfying – esp if you turn on a few episodes of Married With Children while you paint so that you can brush up on your best Peggy character before you dress up! 🙂
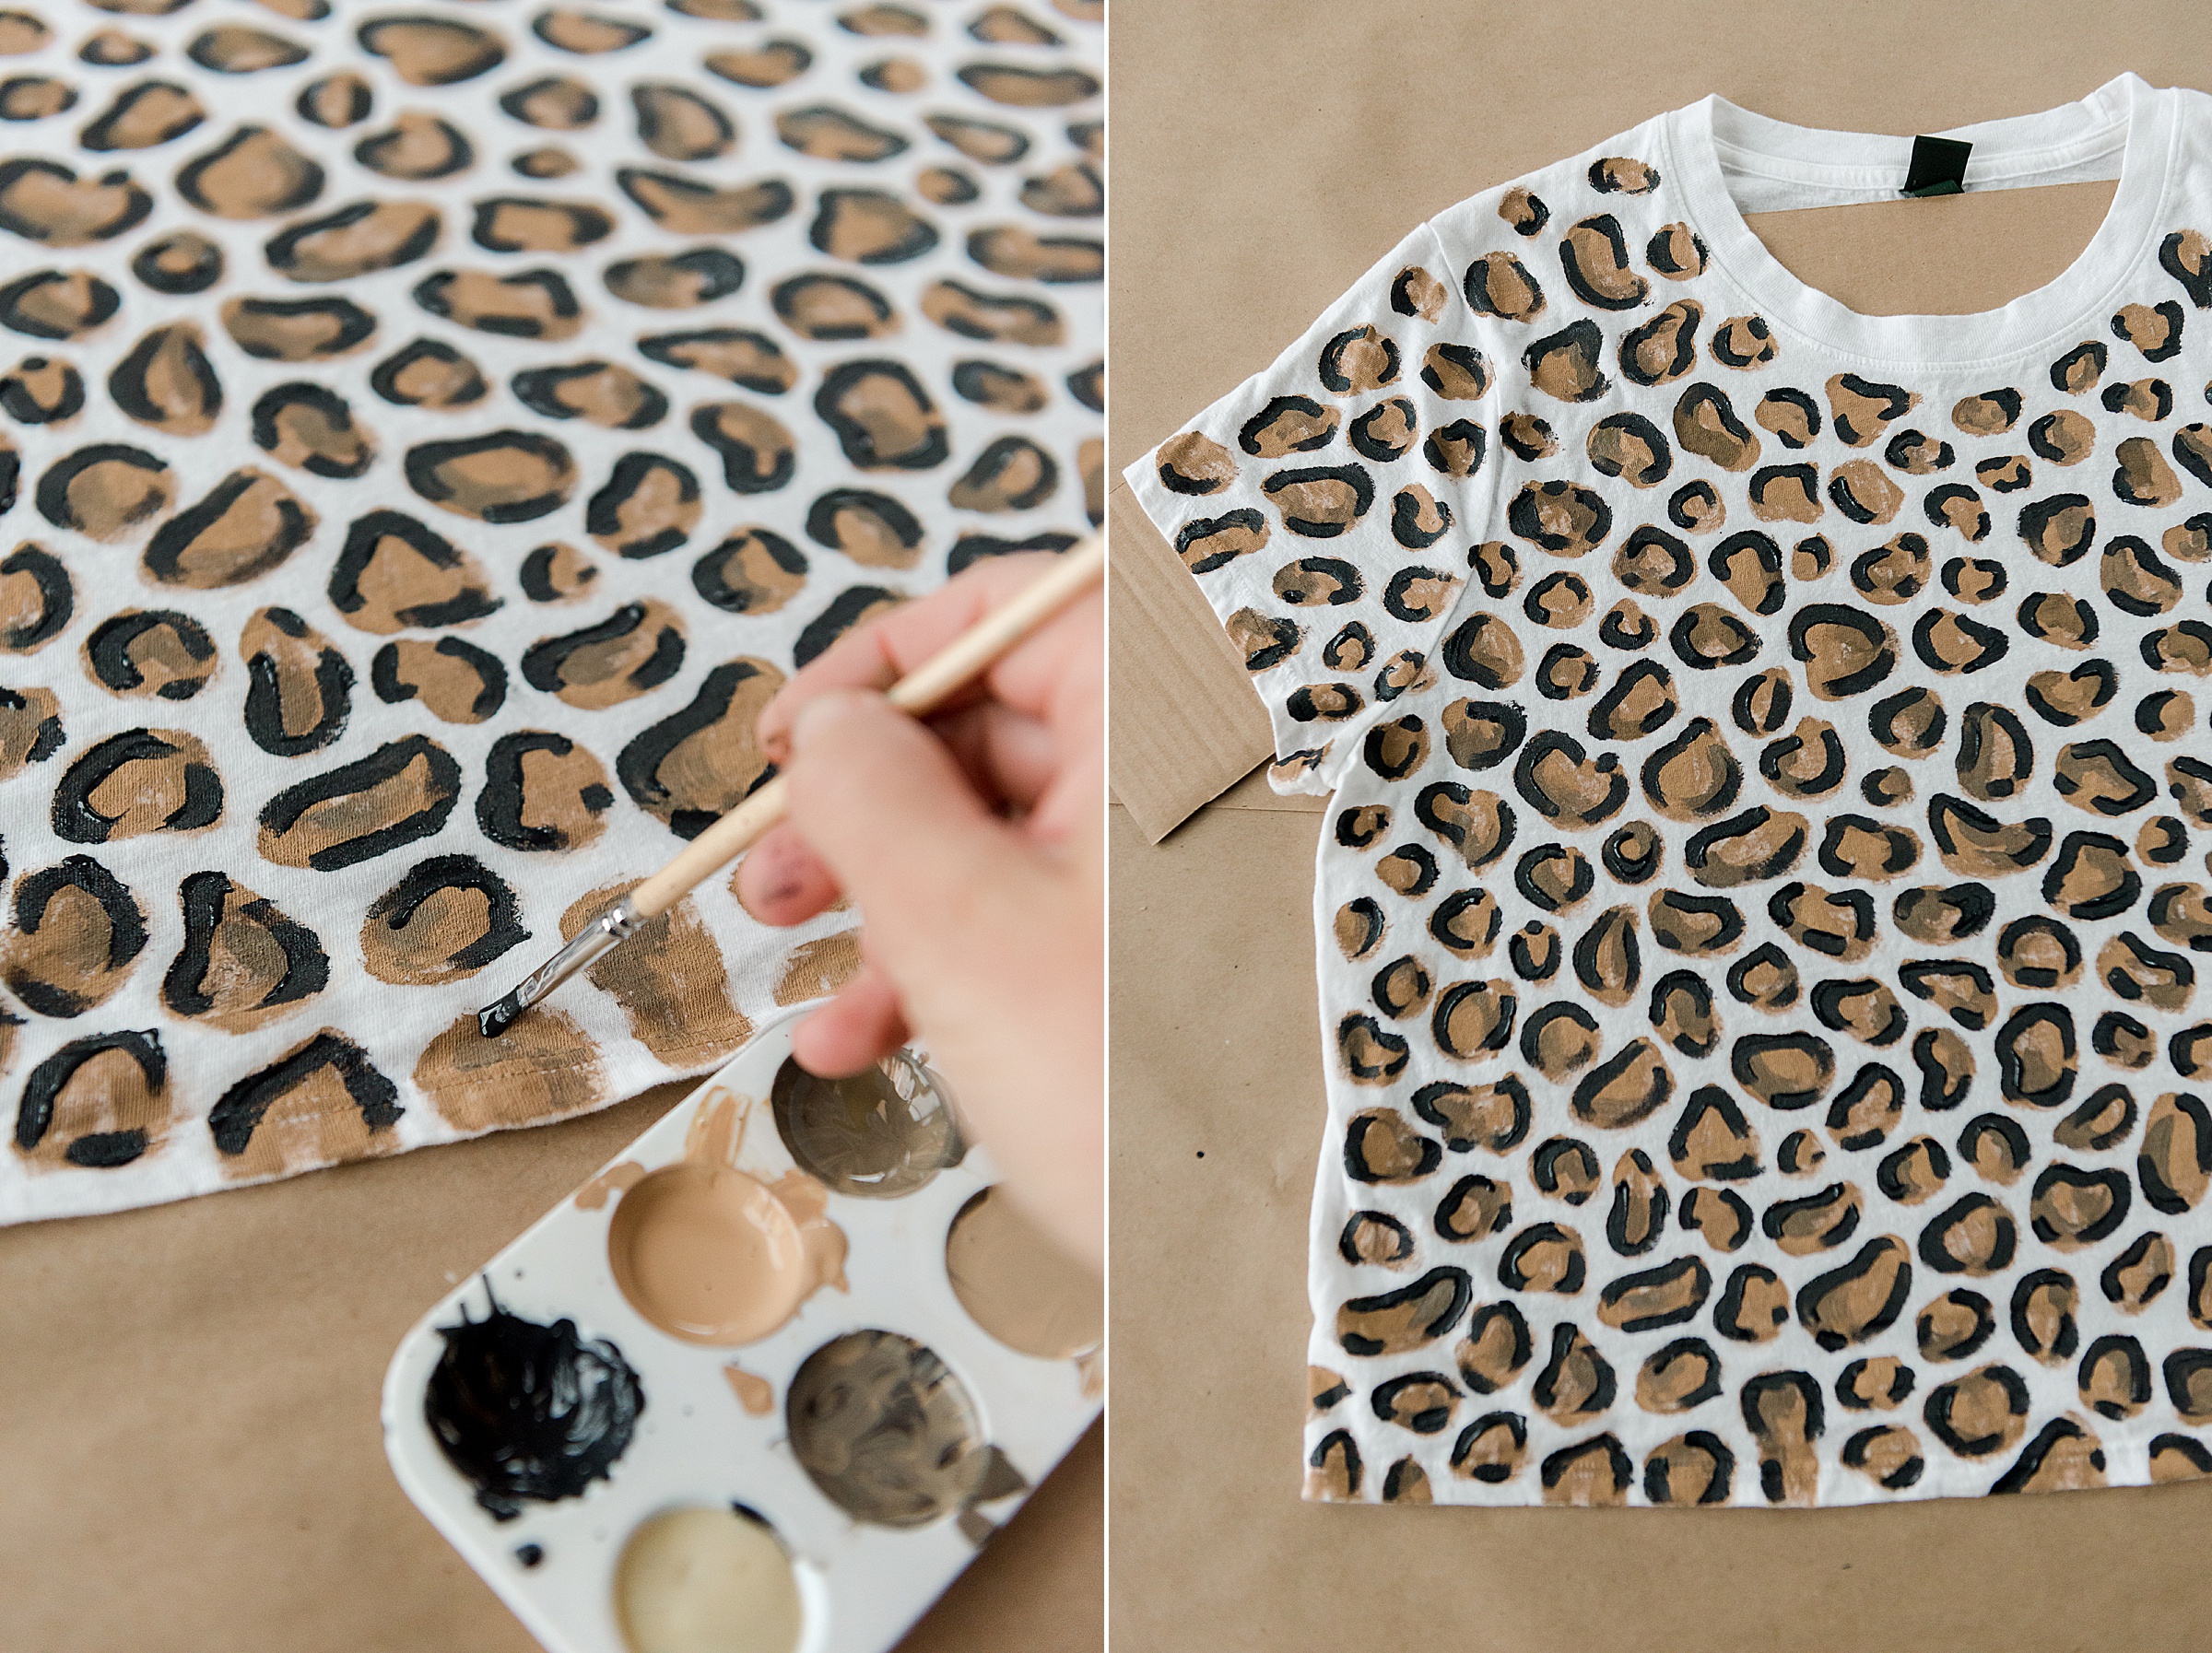
3. Be sure to paint both sides of the shirt along with the “sides” – keep in mind that you don’t necessarily have to paint super high up on the neck of the shirt since that will eventually be cut off to make it off the shoulder.
4. Follow the same steps for Kelly’s off the shoulder top HERE (LINK) to complete this beauty!
AL:
- A pair of pleated khakis or dress pants
- A pair of dress shoes
- A plain royal blue tee, jersey or work-out style shirt
- A football as a prop 🙂
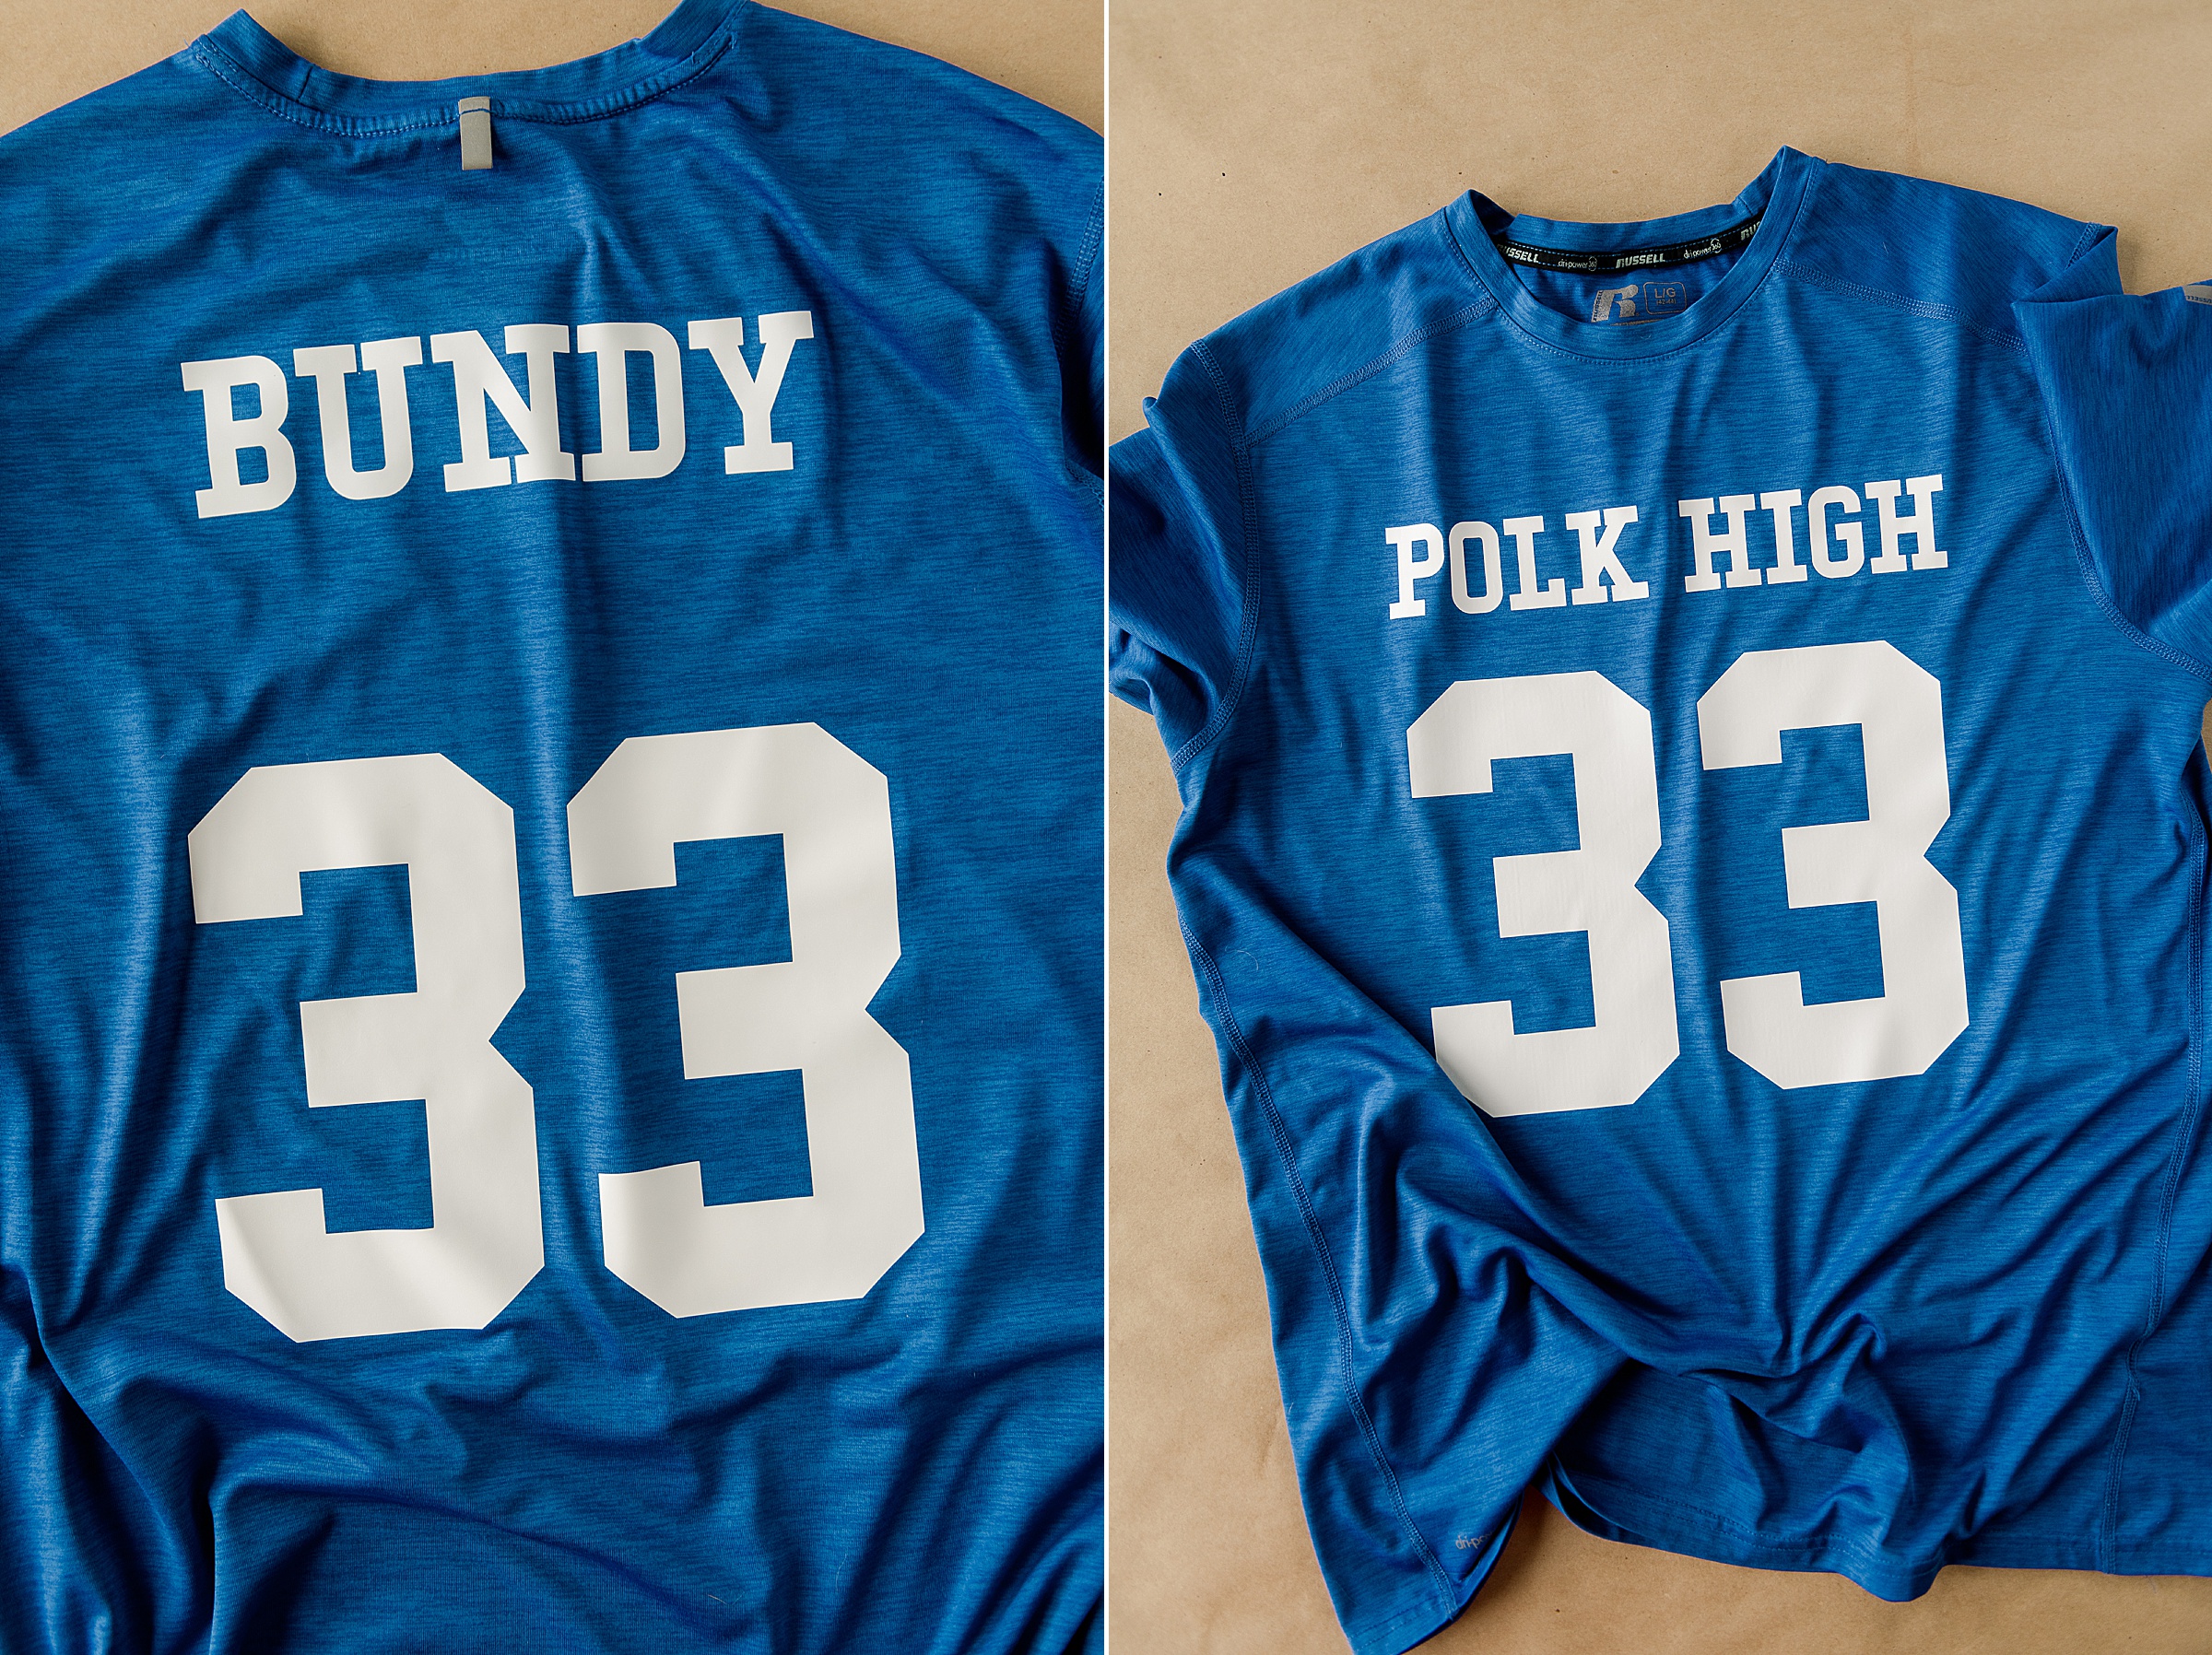
**The DIY portion of this costume is turning the blue shirt into the Al’s Polk High football jersey
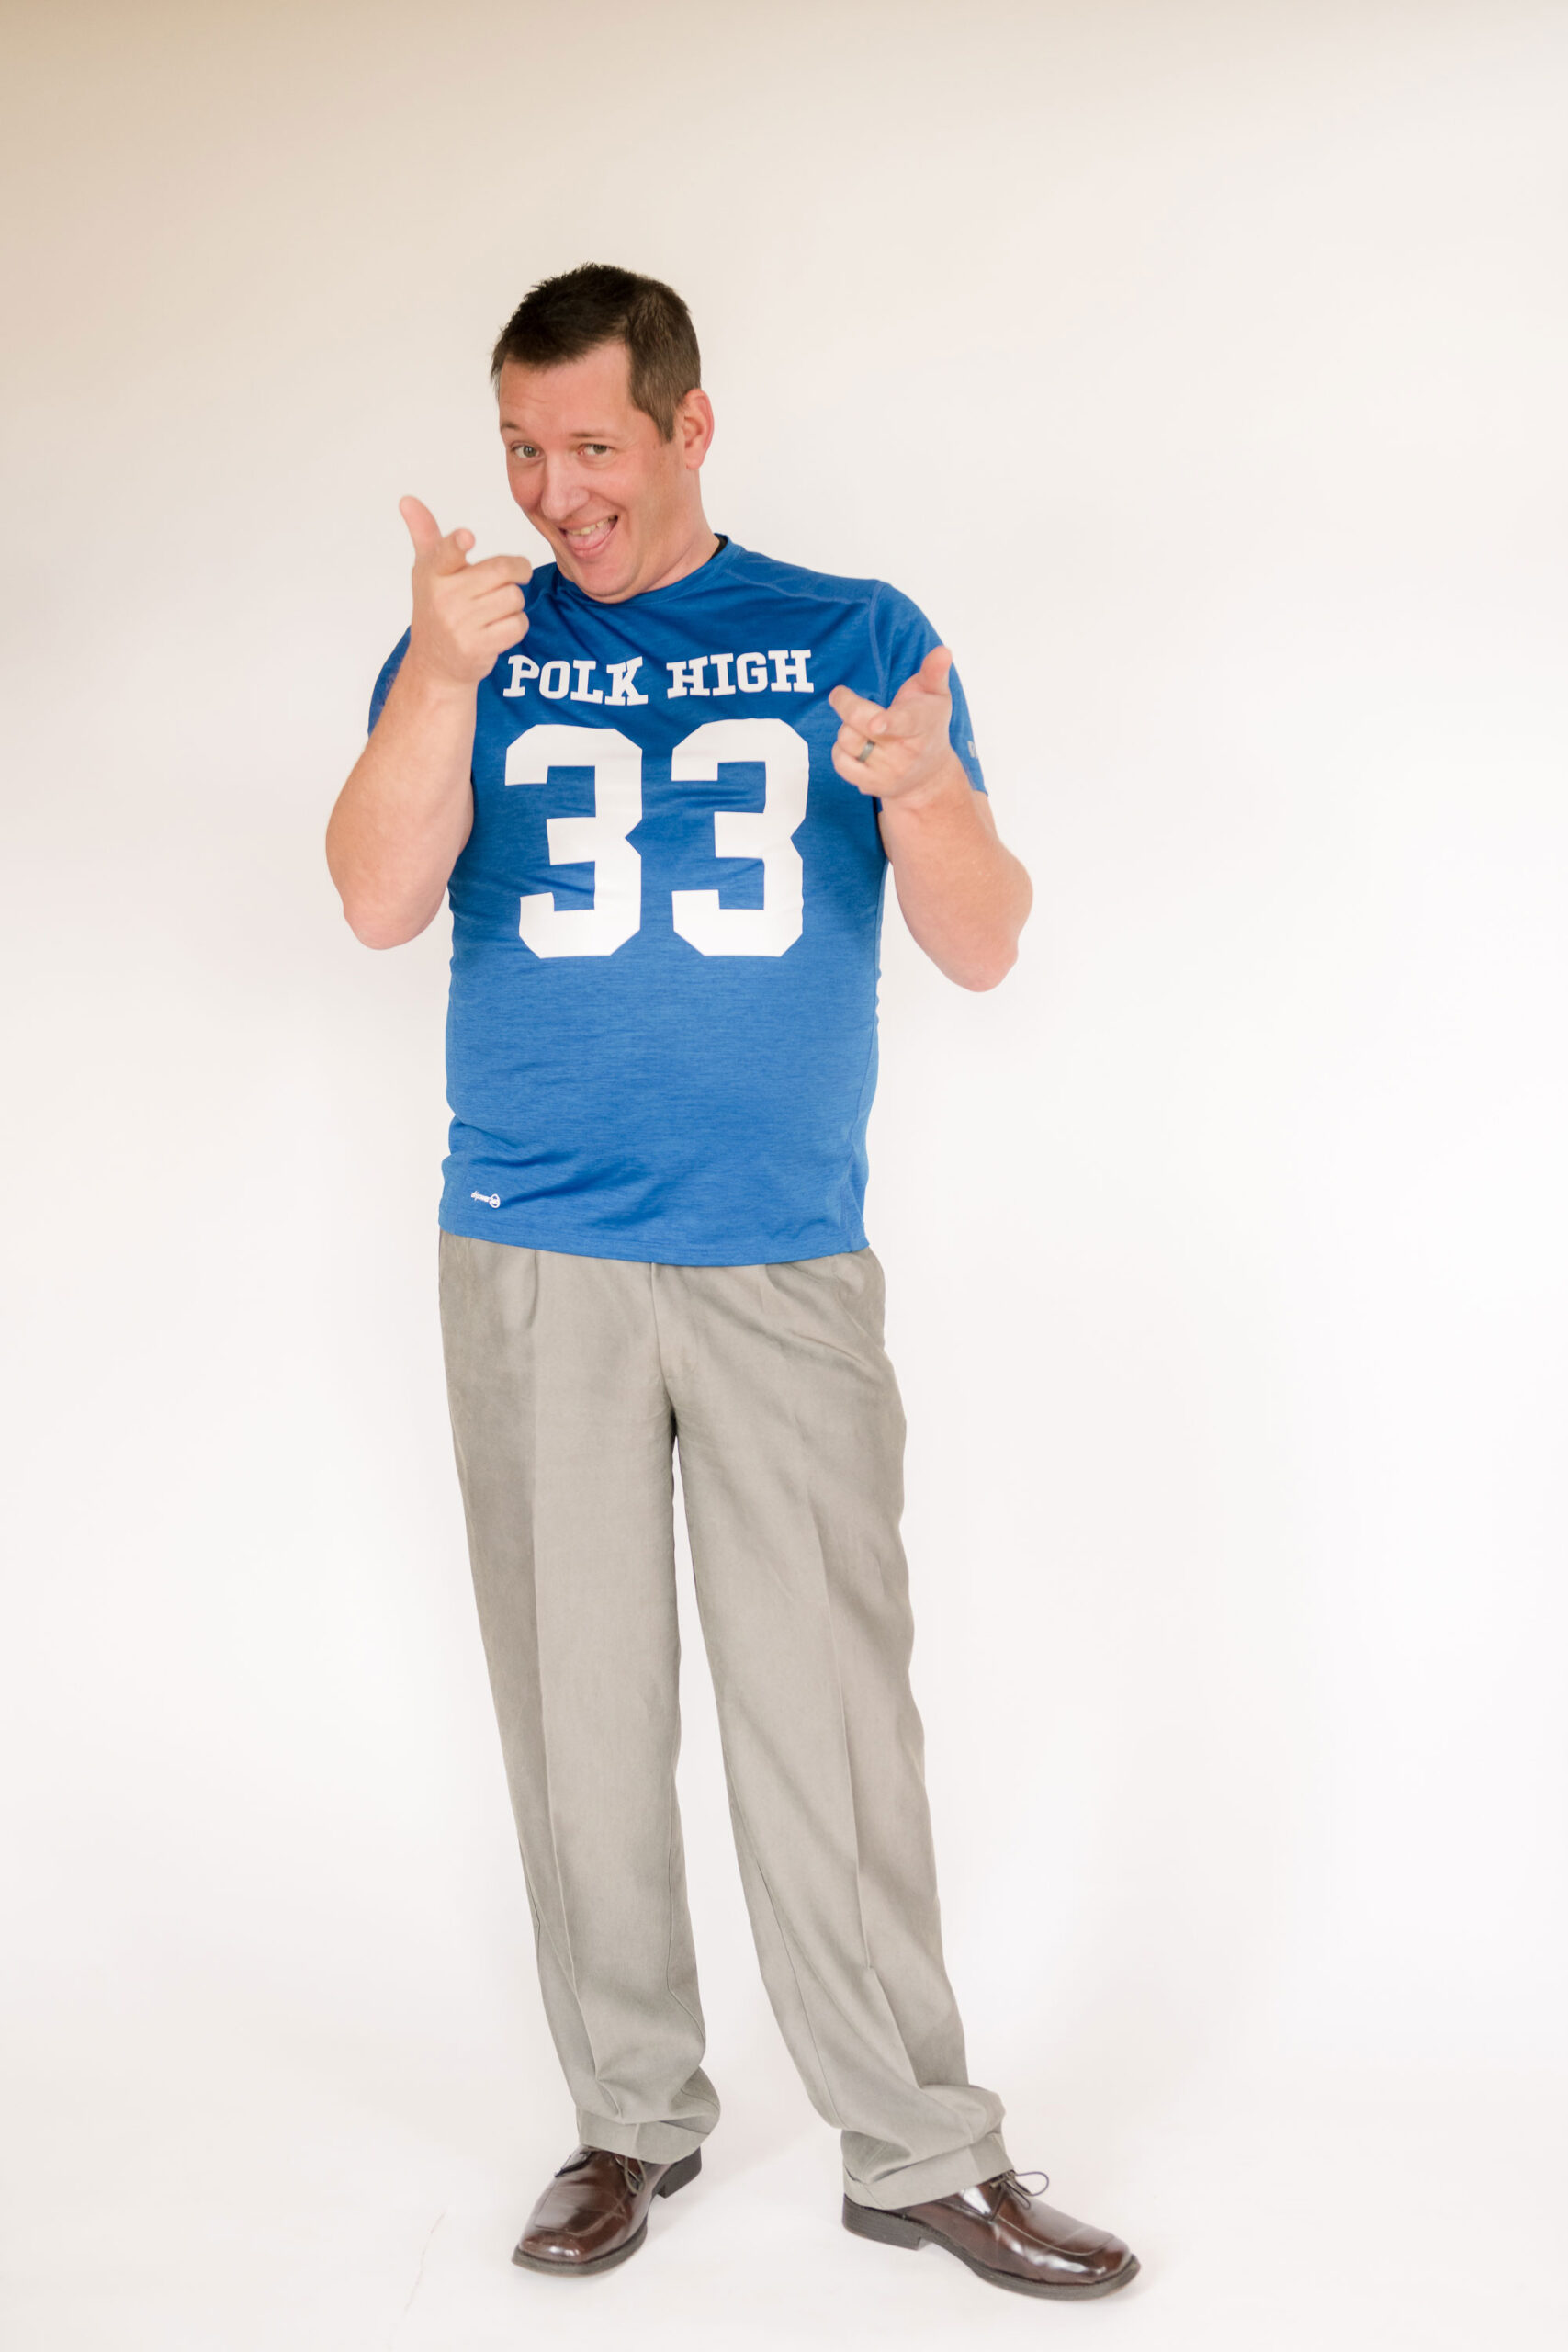
TO MAKE AL’S “POLK HIGH” FOOTBALL JERSEY:
MATERIALS:
- A royal blue tee shirt, plain jersey or work out shirt
- Some white iron on vinyl (or if you don’t have access to vinyl, white stick on letters or white fabric paint will do too)
- An iron or heat press
1. Download Al Bundy’s Polk High jersey front of the jersey and back of the jersey below:
POLK HIGH FRONT JERSEY SVG file (for cutting machine)
POLK HIGH BACK JERSEY SVG (for cutting machine)
POLK HIGH FRONT JERSEY PDF (for cut + stencil option)
POLK HIGH BACK JERSEY PDF (for cut + stencil option)
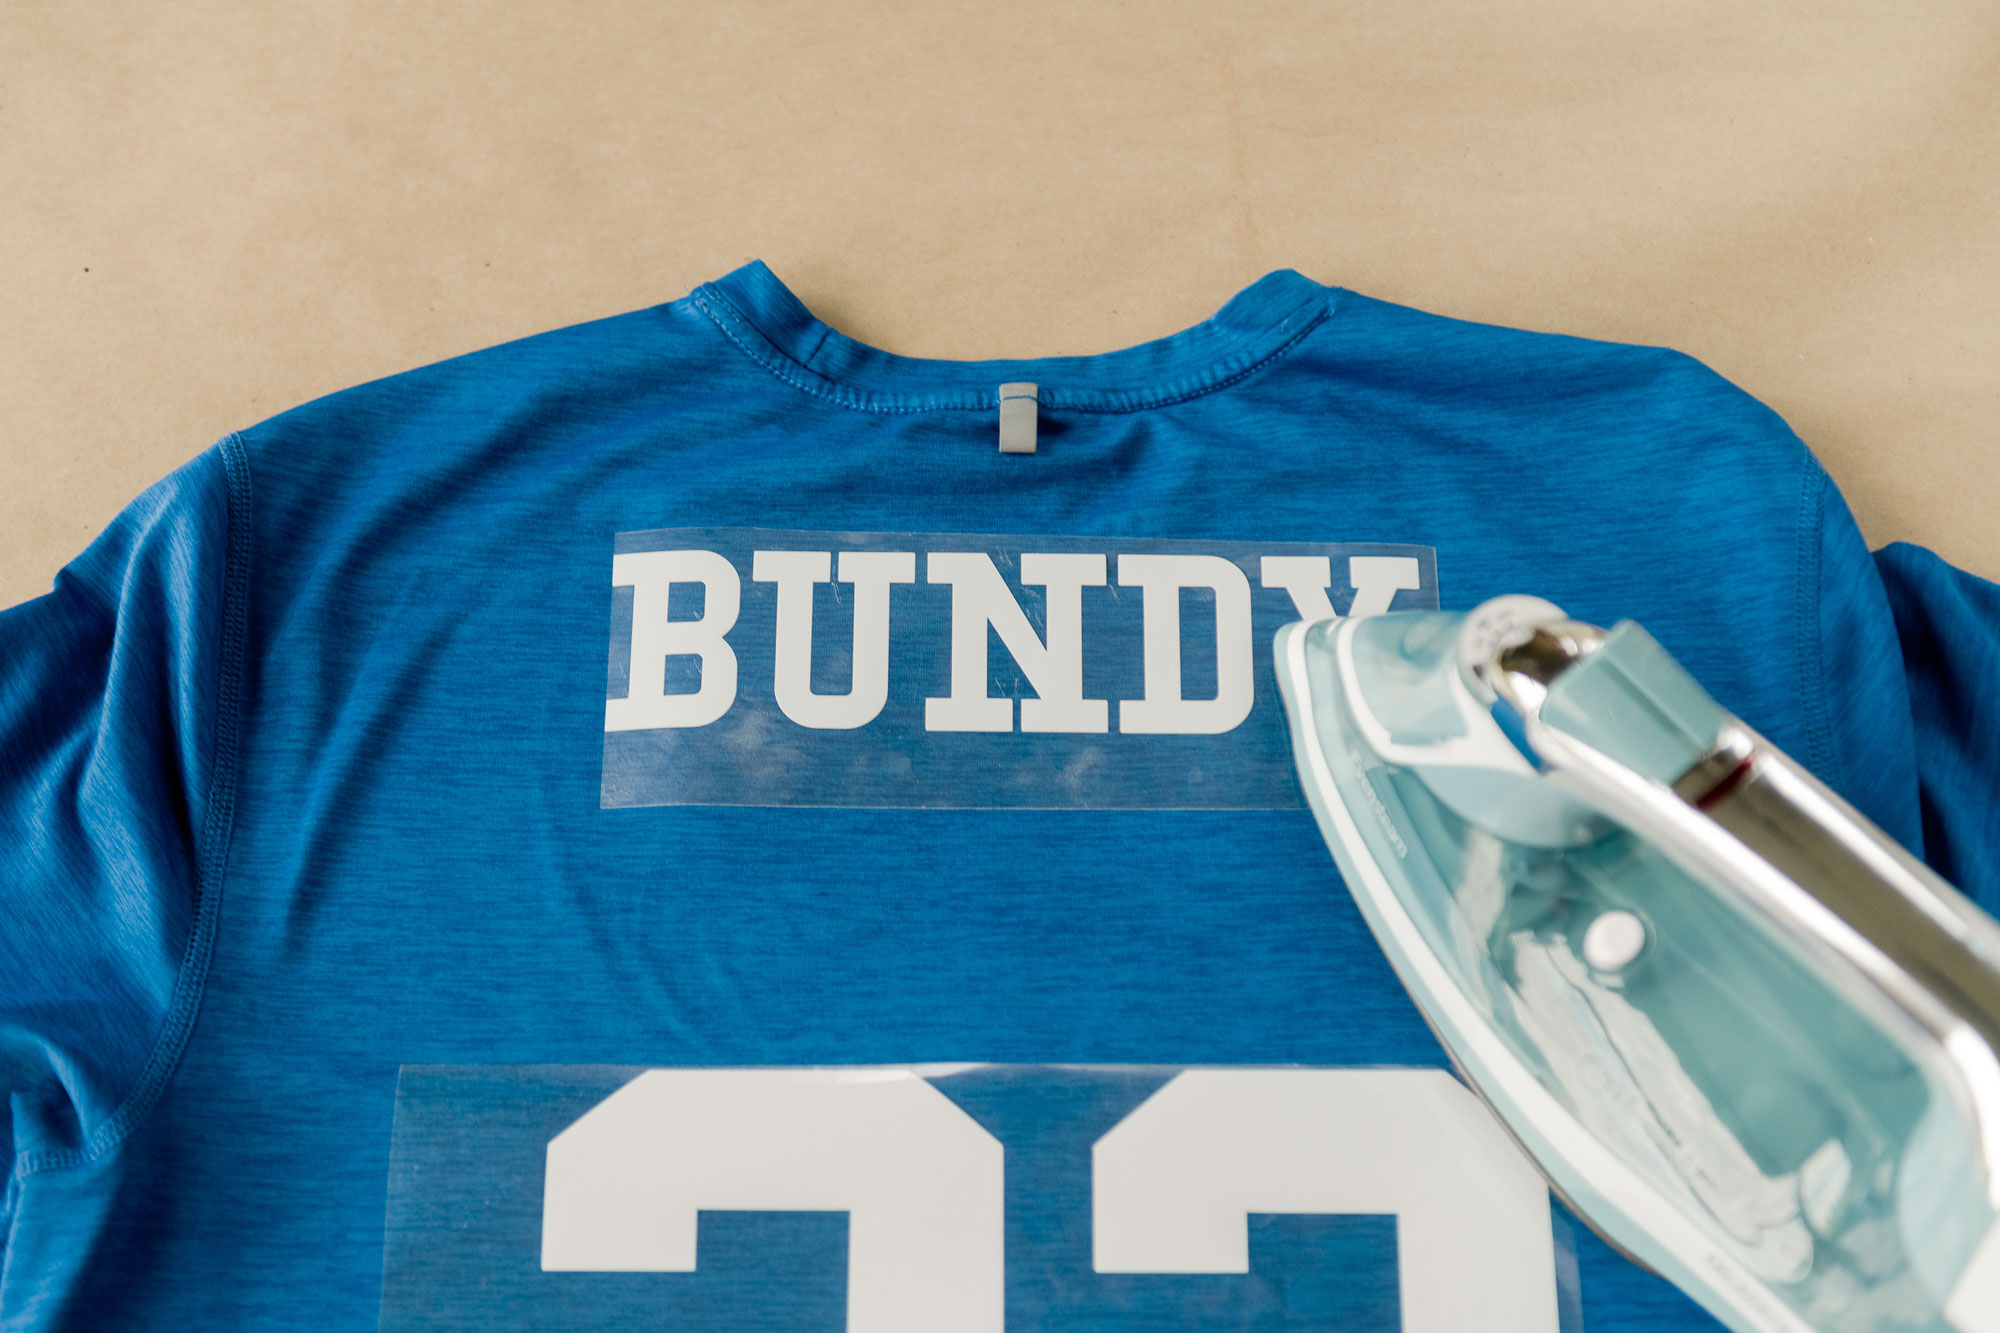
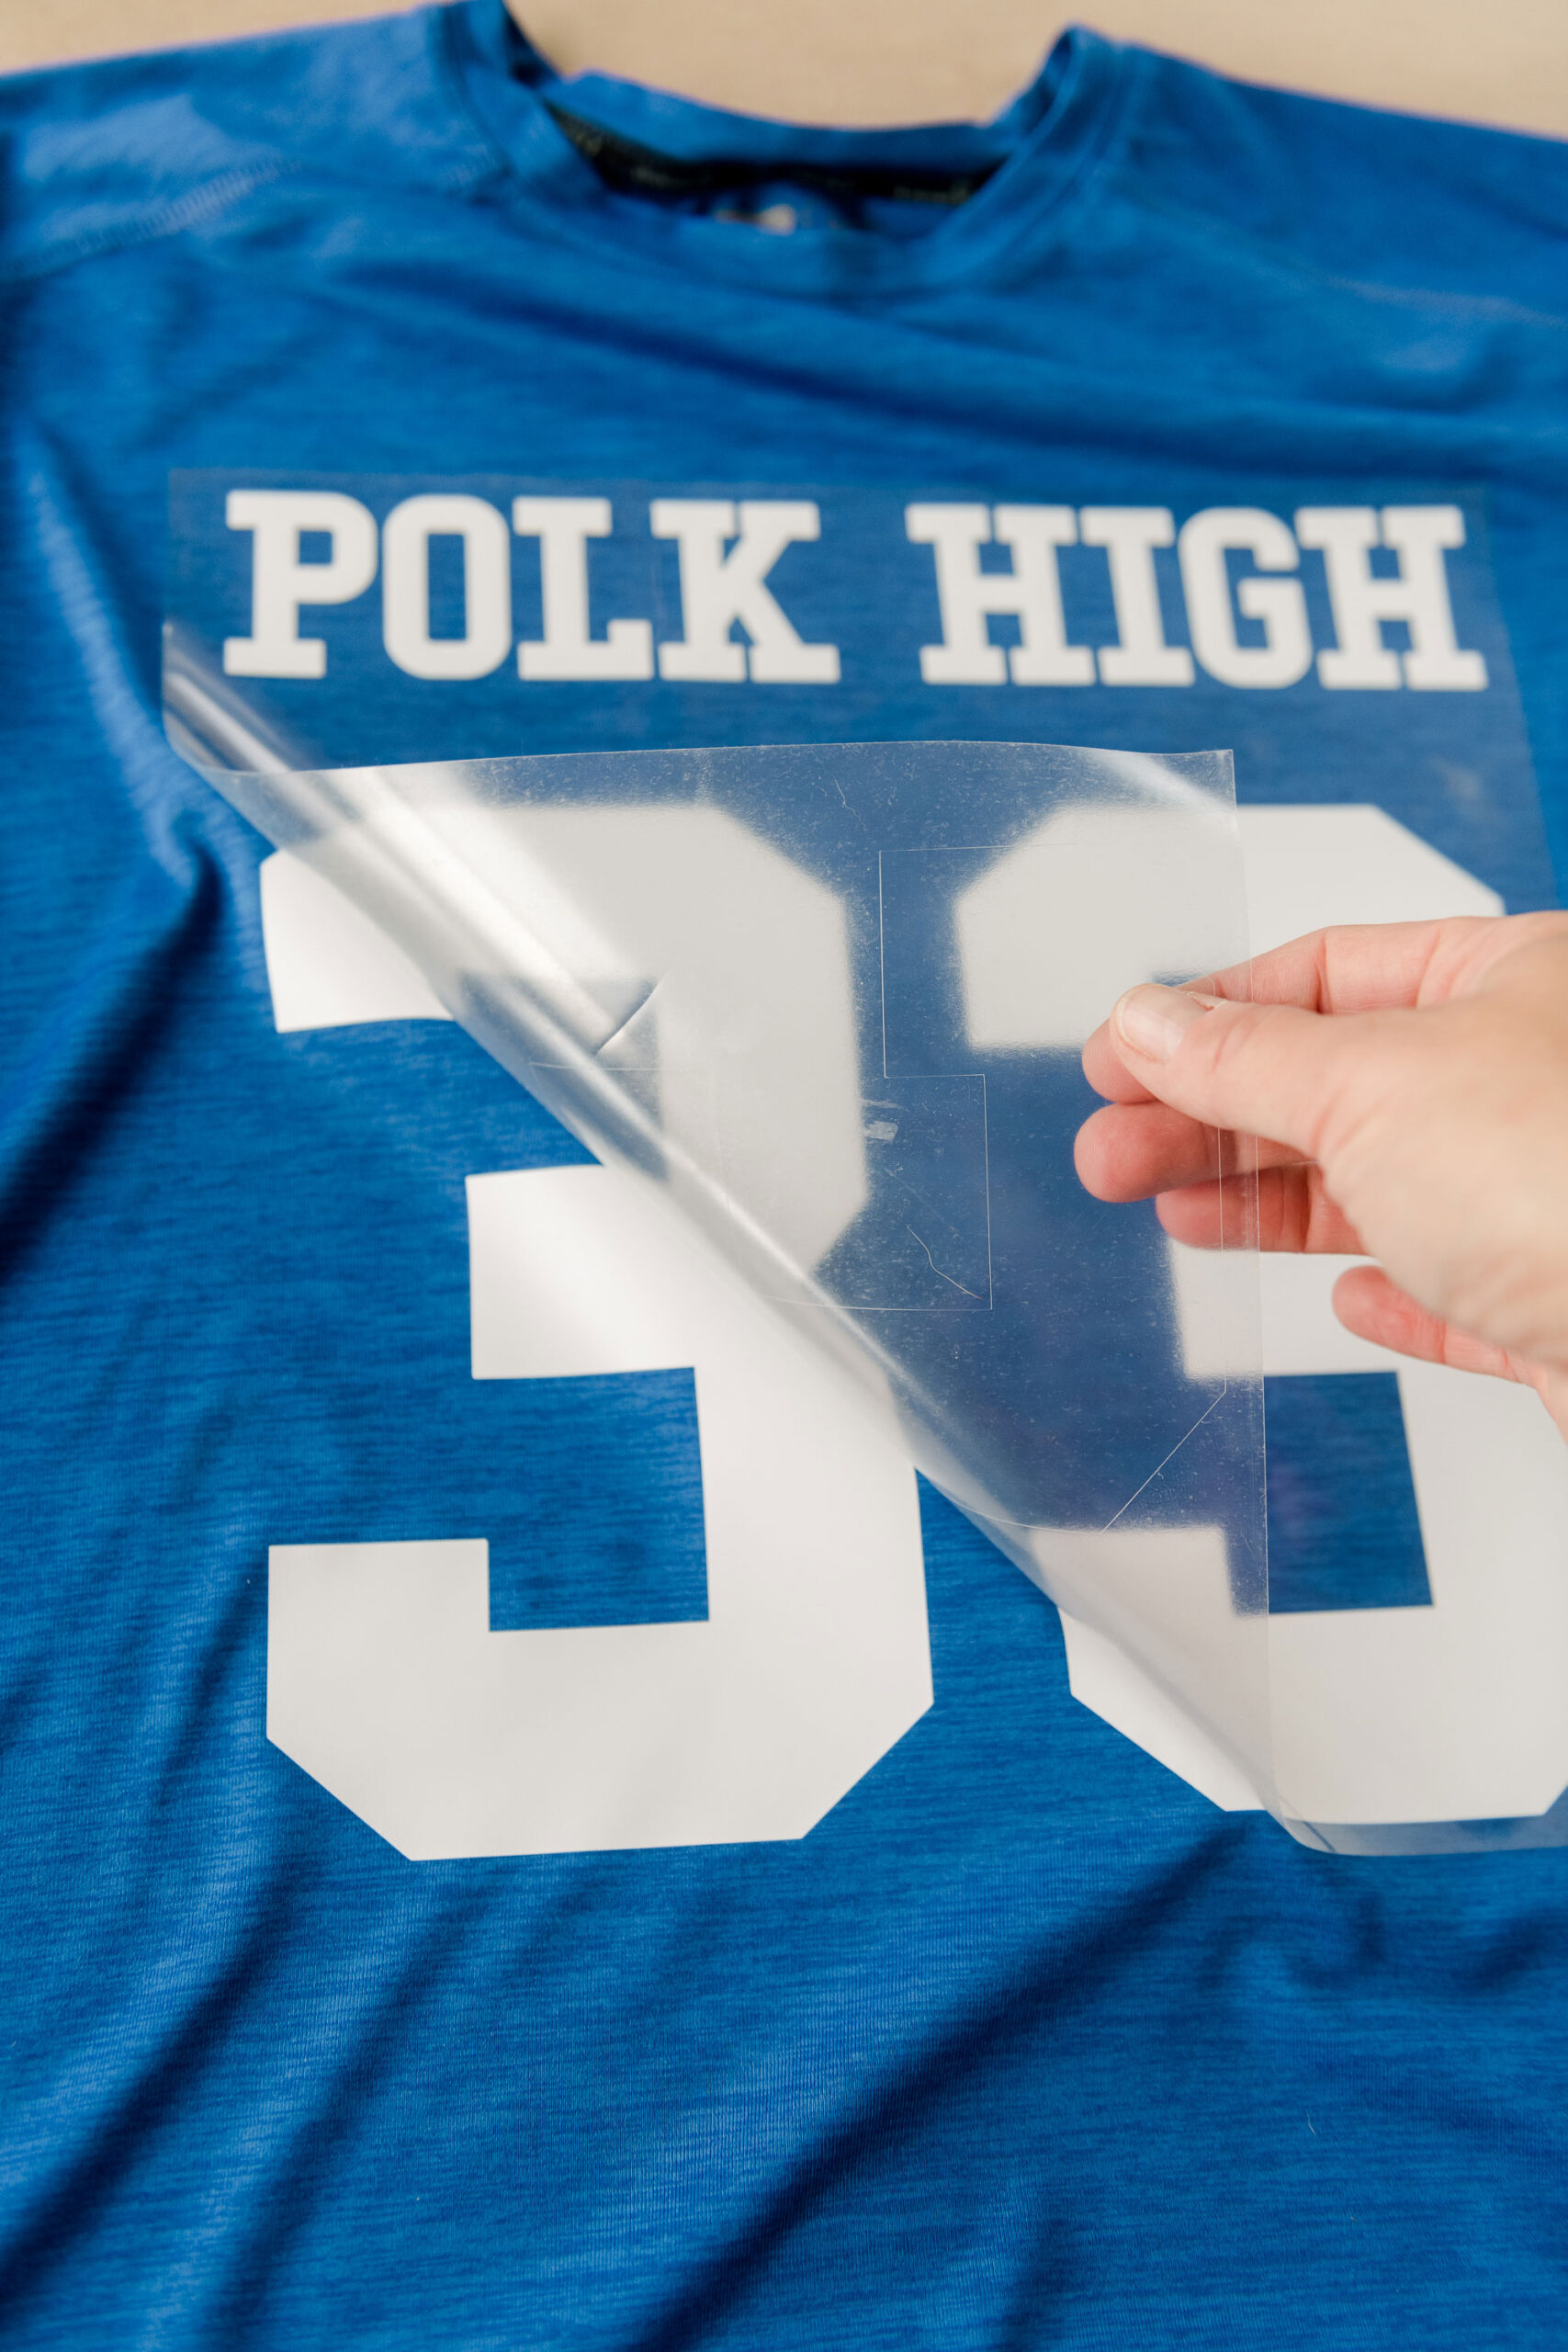
2. Upload your SVG file into your cutting machine and cut out white heat transfer vinyl according to your specific machine instructions. Be sure to mirror your lettering before you cut, then weed the design and heat press or iron onto the jersey front and back accordingly! 🙂
If you don’t have a cutting machine (like a Cricut or Silhouette) don’t worry – you can use the PDF files above to cut out and use as a stencil to paint on your jersey! Simply use an x-acto knife or carefully cut with scissors, then use painter’s tape to tape onto your shirt and dab (or sponge) fabric paint onto the jersey! Be sure to place a protective piece of cardboard or sheet of paper in between the shirt layers so that your paint doesn’t seep through to the other side! 🙂 The lettering and letters are so chunky that this wouldn’t be a hard substitution!
KELLY:
- A well fitting long sleeve shirt (I chose red because it seems like an iconic color for Kelly) 🙂
- A mini skirt
- Pair of your fave high heels
- Big, chunky belt – I found a black one from our local thrift store
- Big earrings – hoops or studs
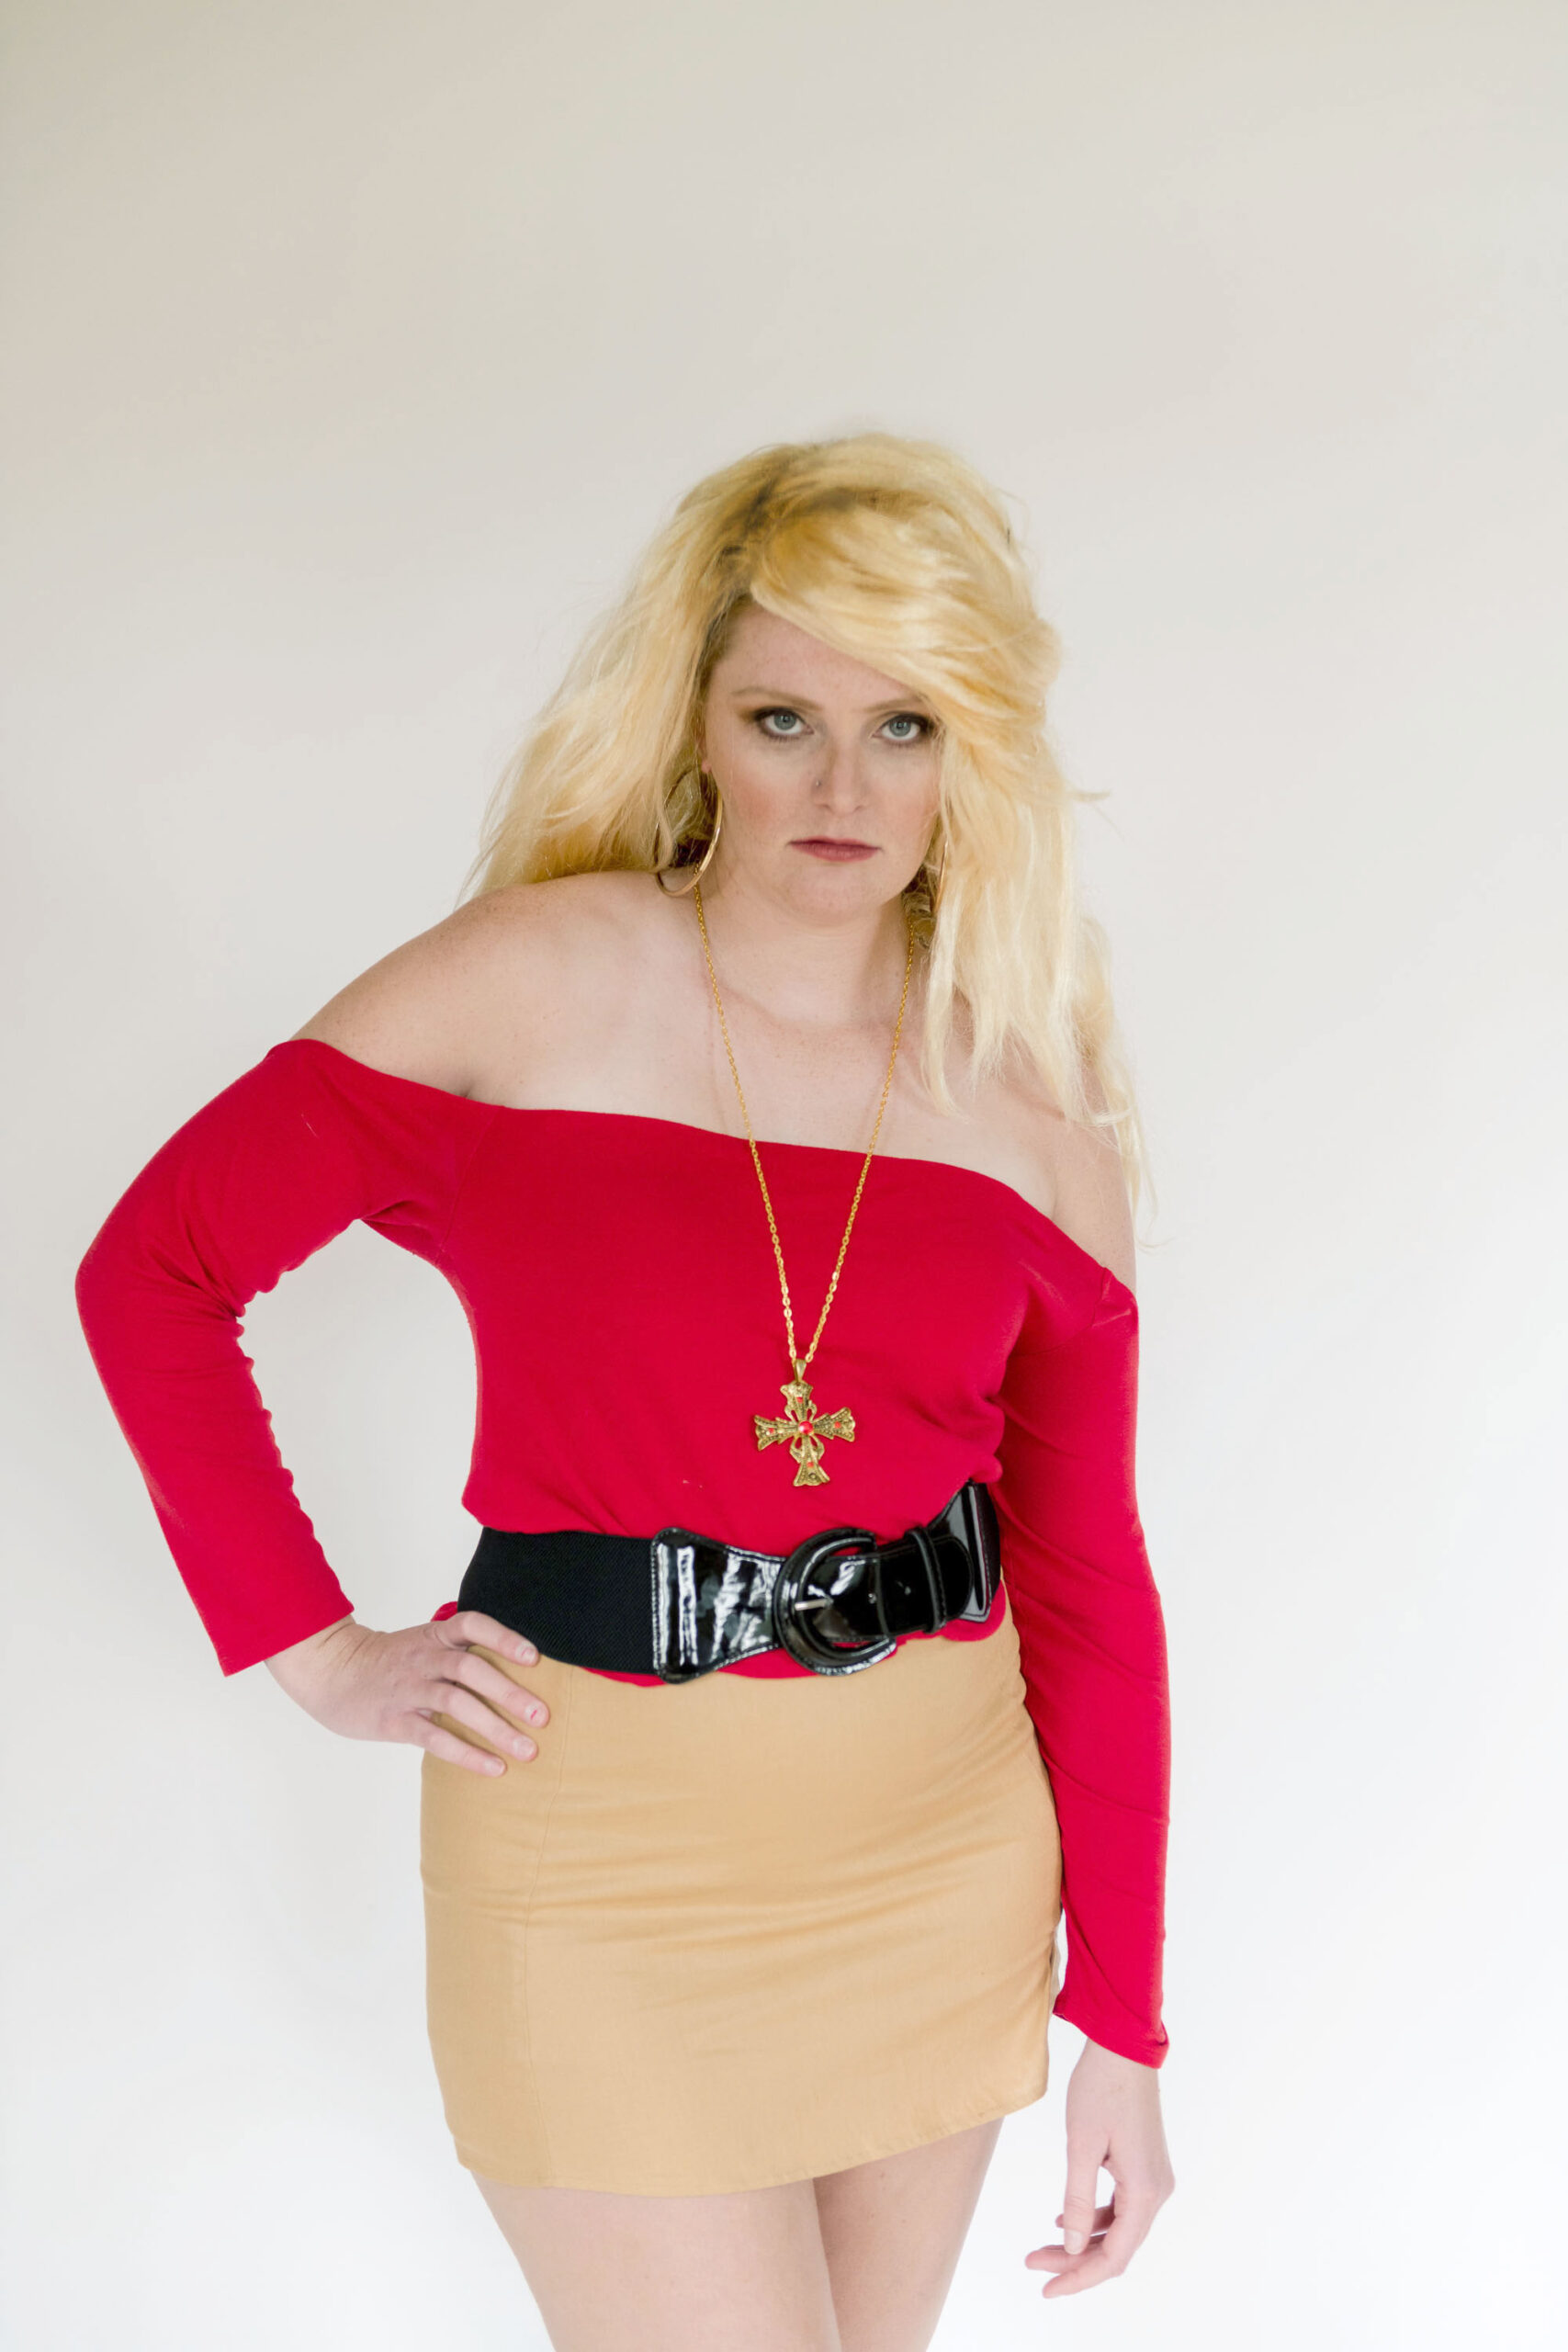
- A blond wig (bonus points if it has darker roots like Kelly Bundy often has) – reference HERE if you want to know how to manipulate any wig to work for Kelly
- A long necklace – preferably a big, chunky cross
**The DIY portion of Kelly’s costume is how to turn an ordinary long-sleeved shirt into an off-the-shoulder shirt

TO MAKE KELLY’S OFF-THE-SHOULDER TOP:
MATERIALS:
- Your fave shirt that is fairly fitted (loose won’t work too well with this style)
- Some no sew fabric tape
- Some scissors
- Ruler
- Chalk
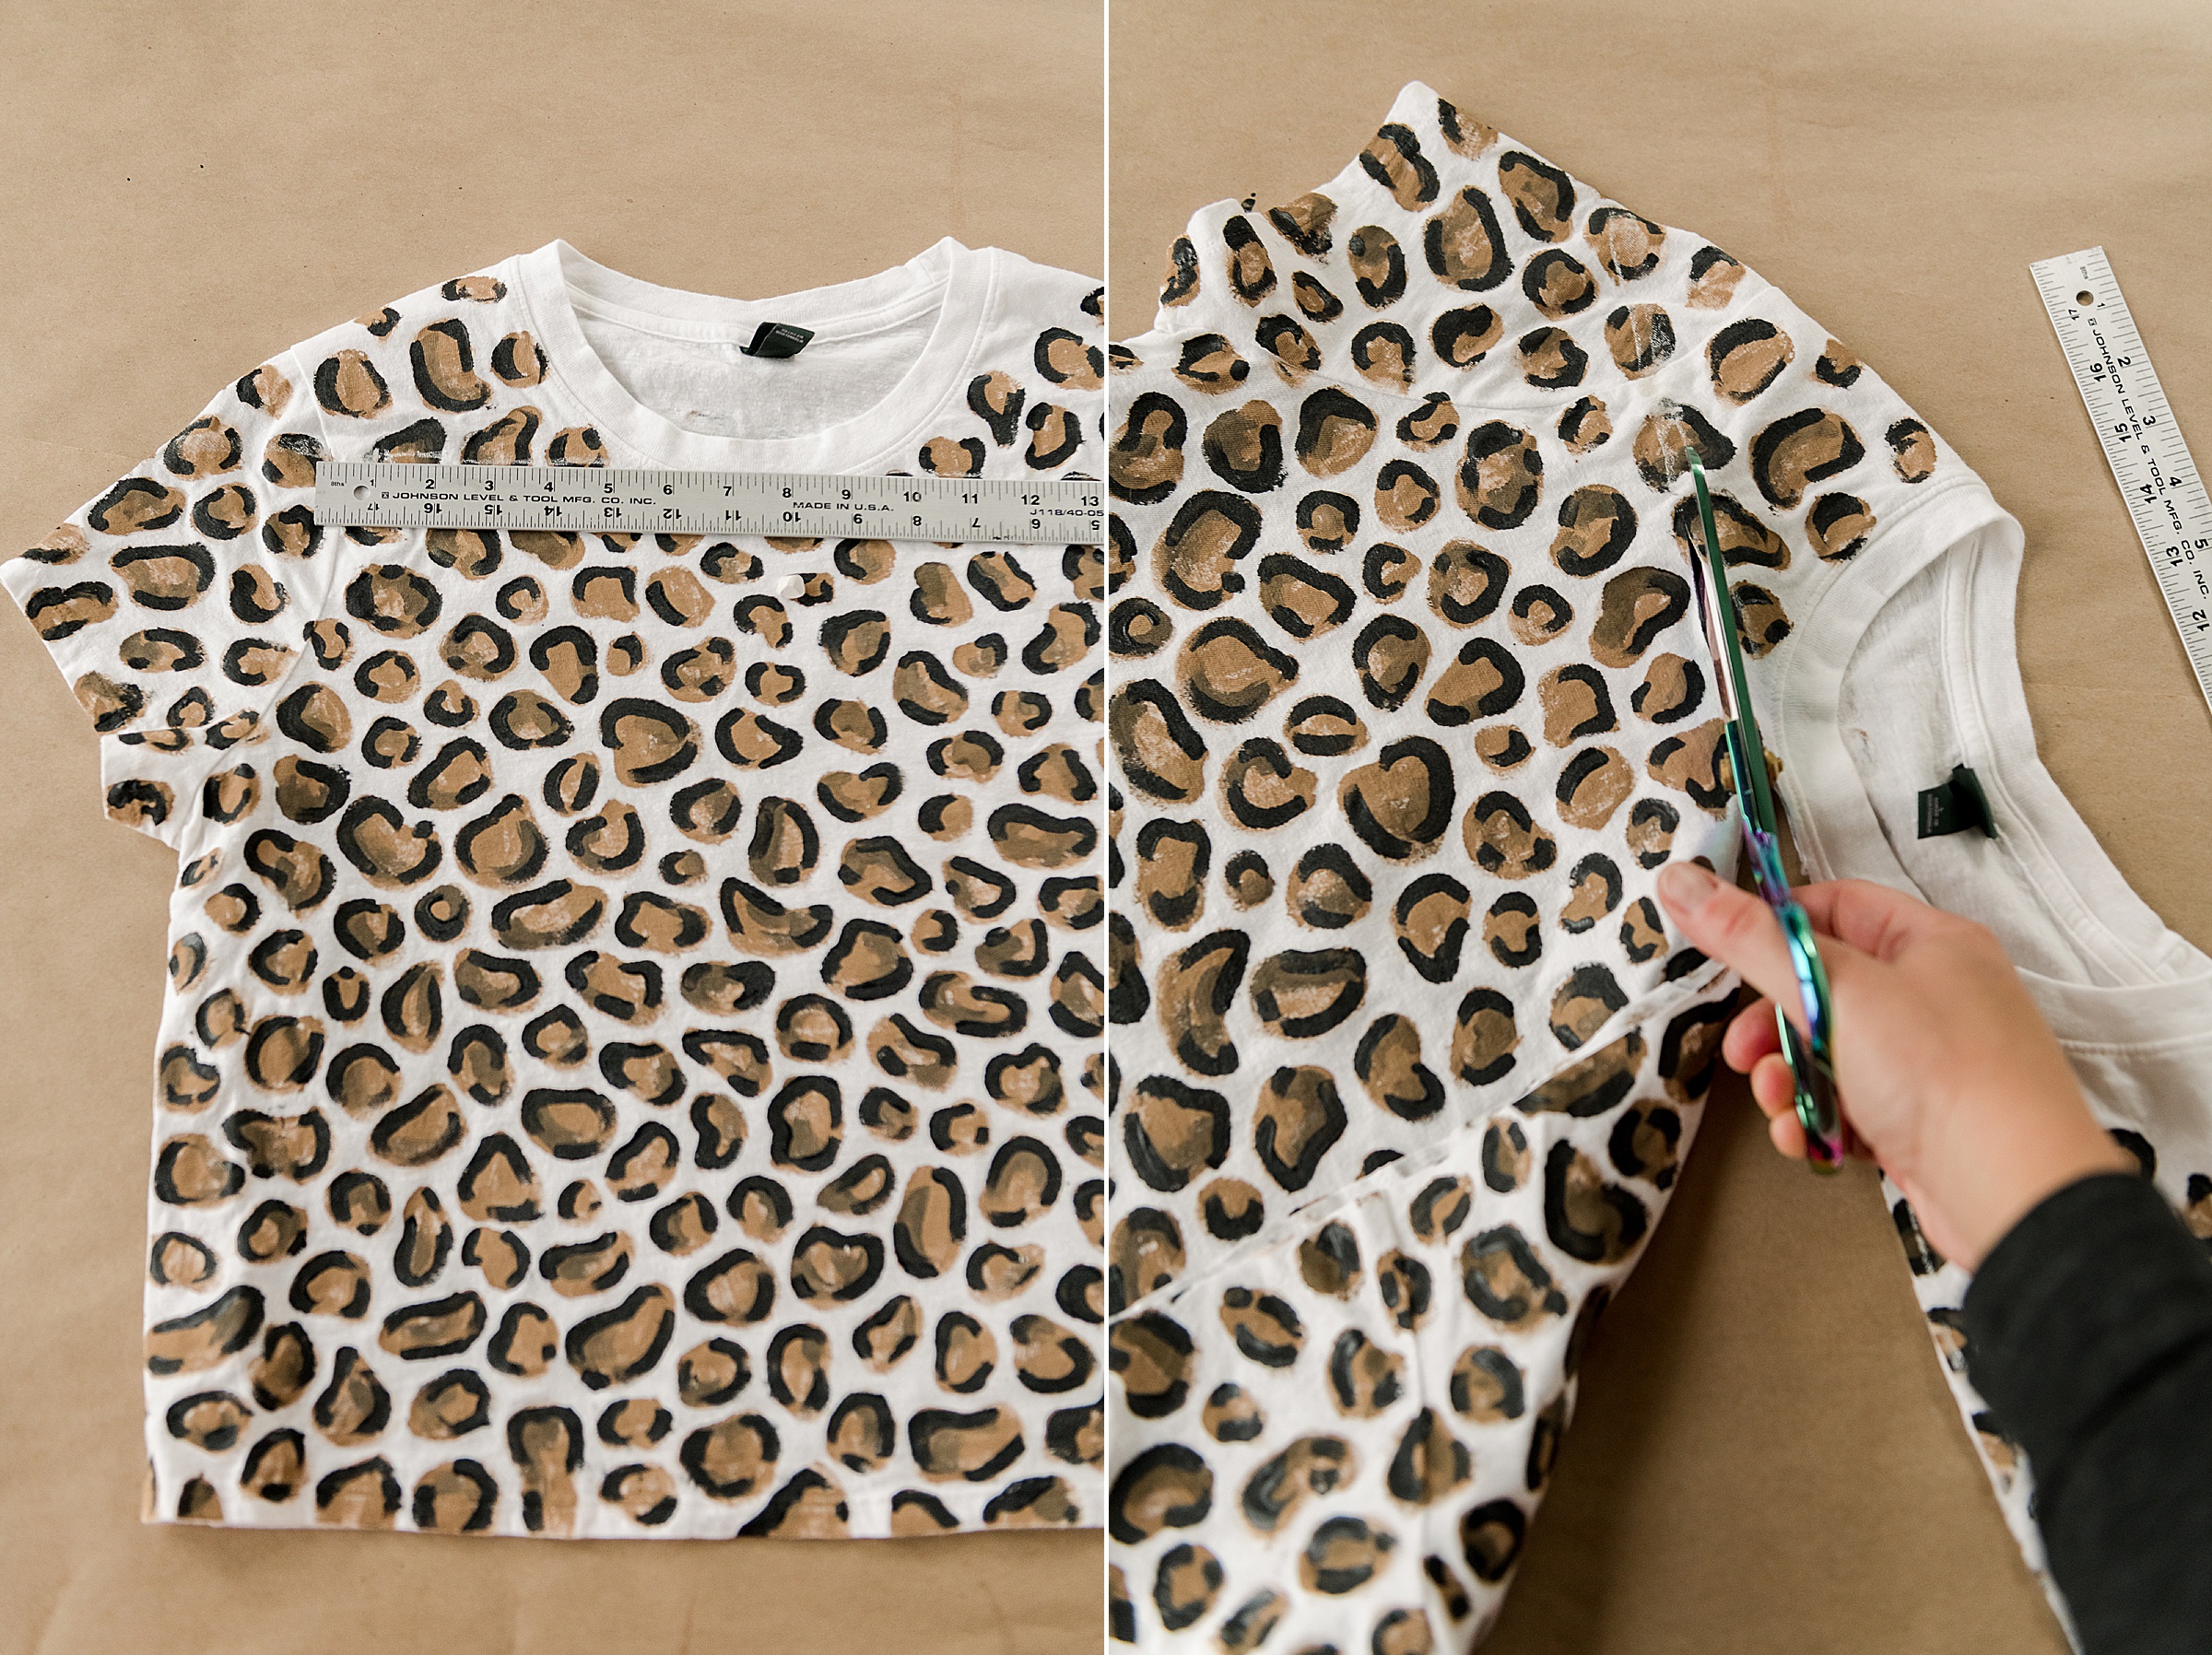
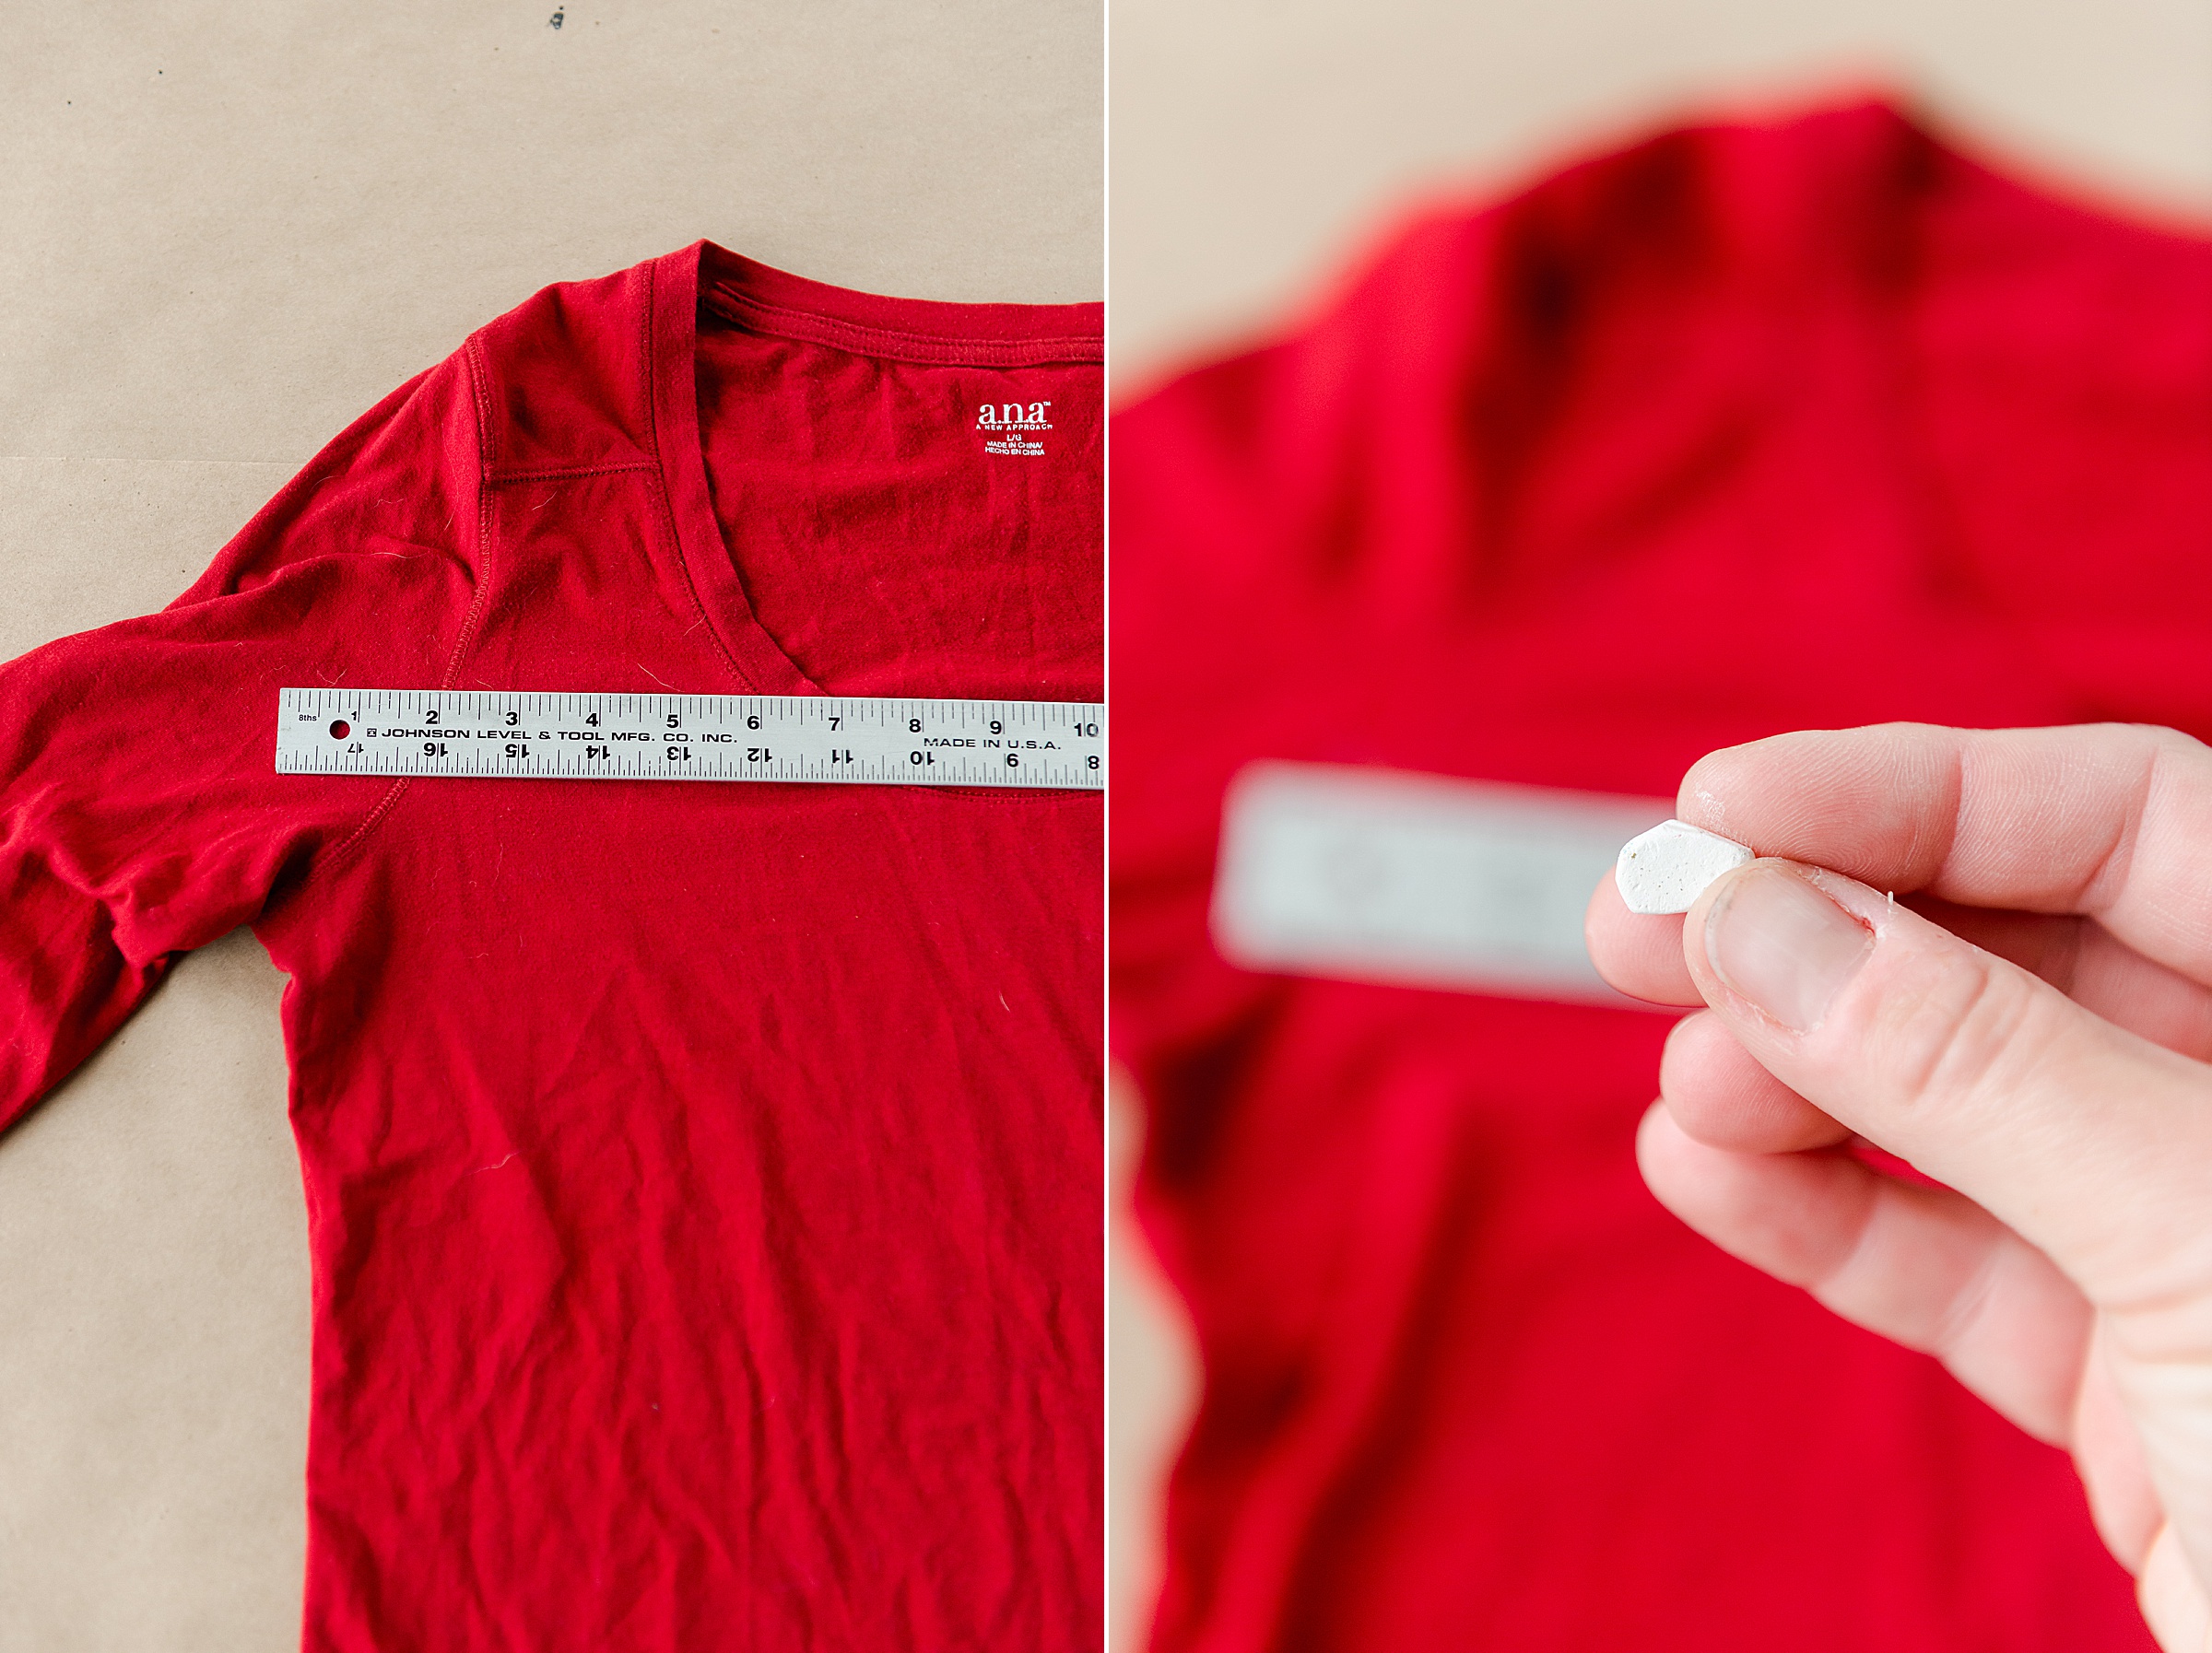
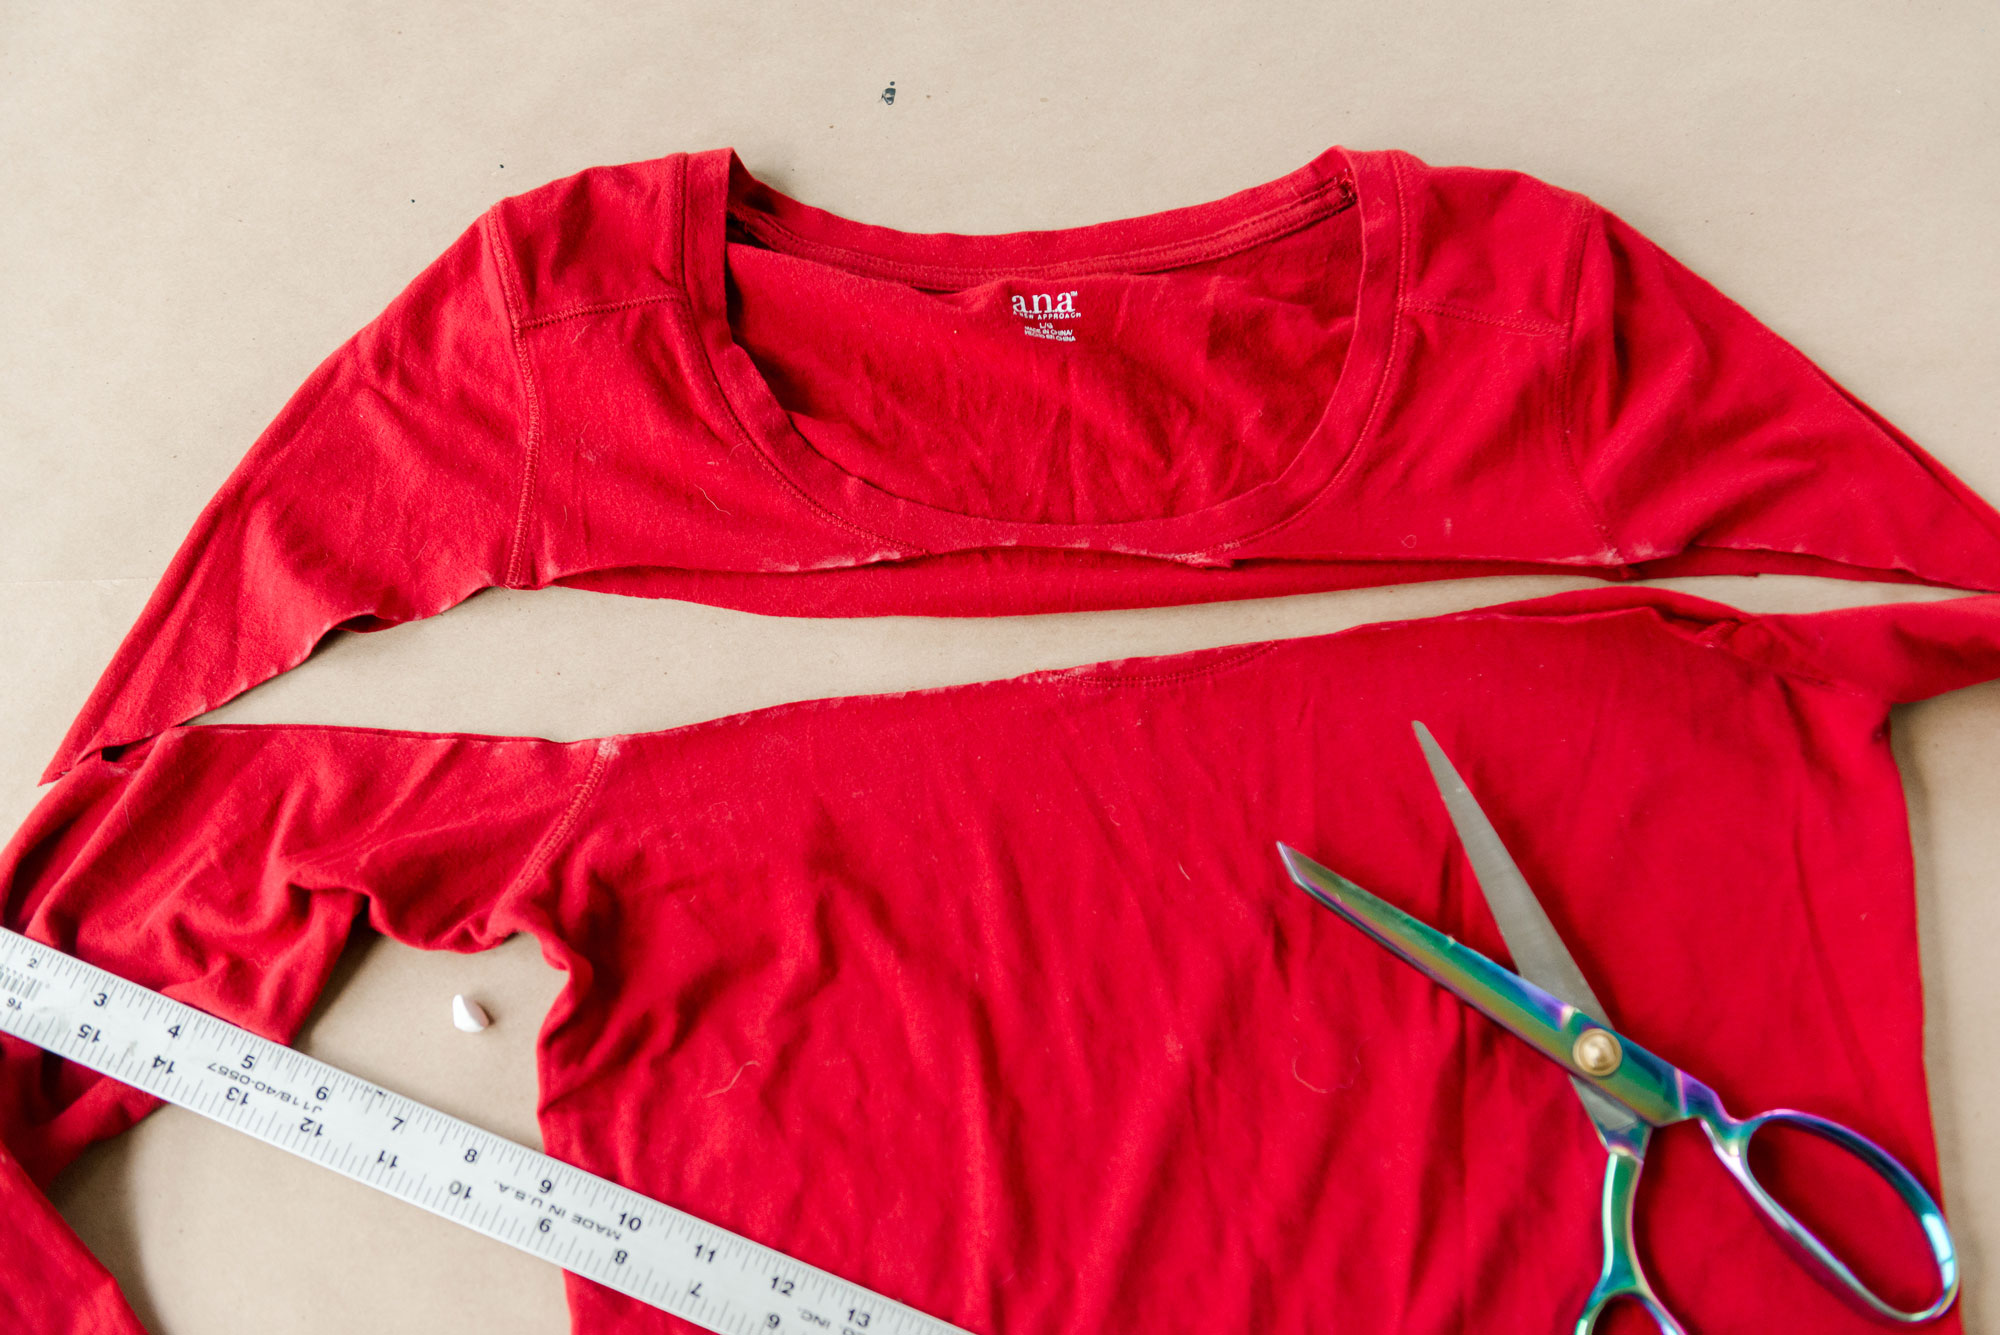
1. Choose how low you want to cut the shirt. Keep in mind that you will lose another 1/2” or less by turning the hem inward, so I chose right at the v-neck cut line knowing that “v” of a shirt usually falls right below the clavicle. Smooth out any wrinkles and lay your shirt completely flat on your surface. With your ruler and chalk, make a straight line (that you will cut) across both the sleeves and the top of the shirt – make sure it’s straight and take your time with this step
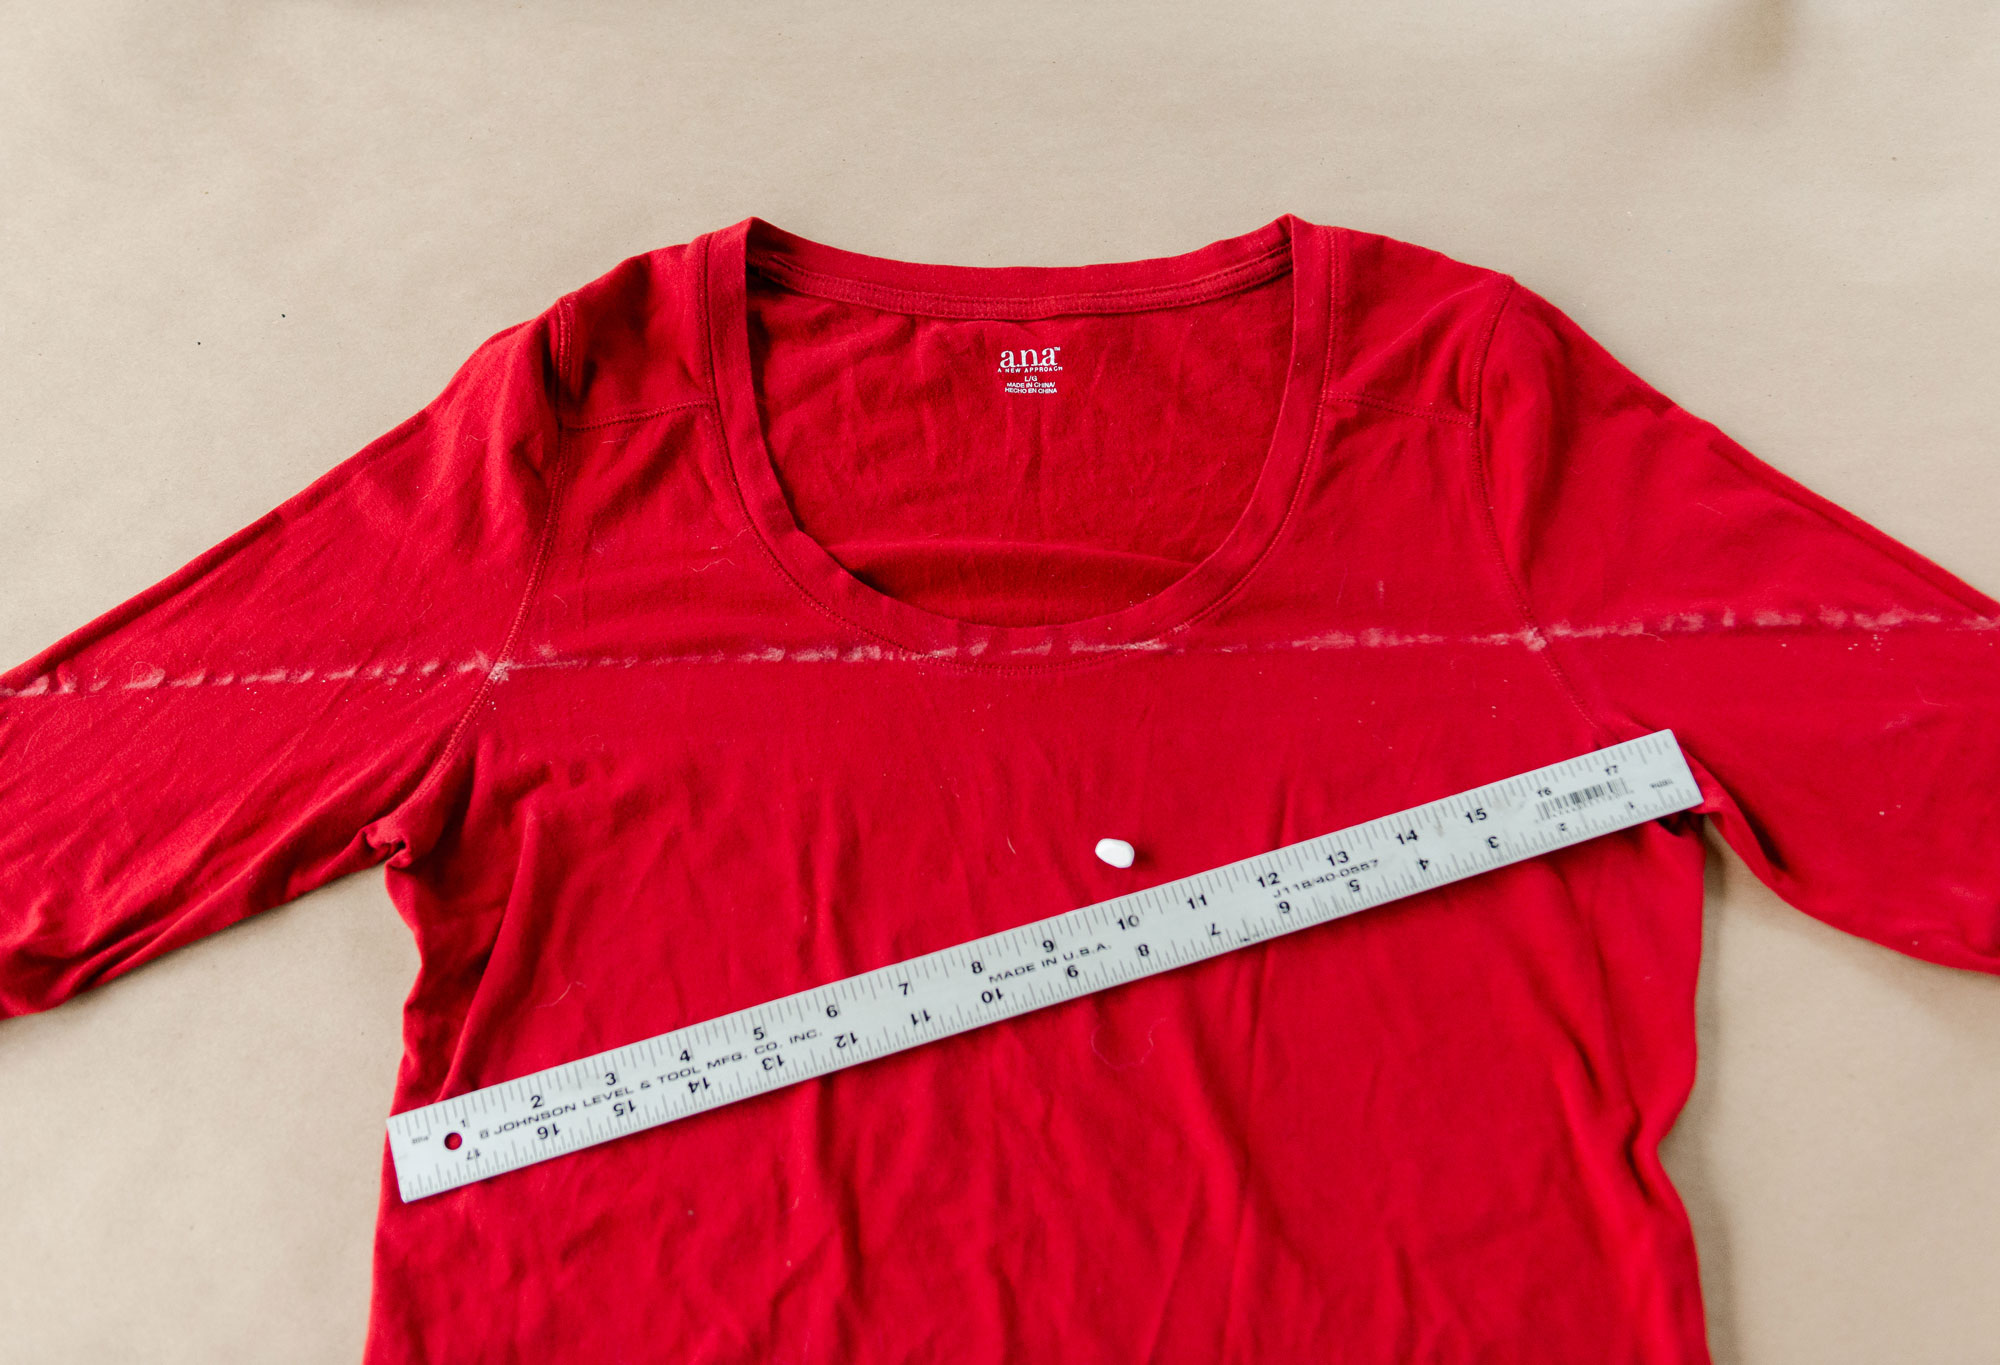
2. Cut carefully along the chalked straight line (cut both layers of the shirt at one time if you can). Set aside the top part of the shirt that you just cut off!
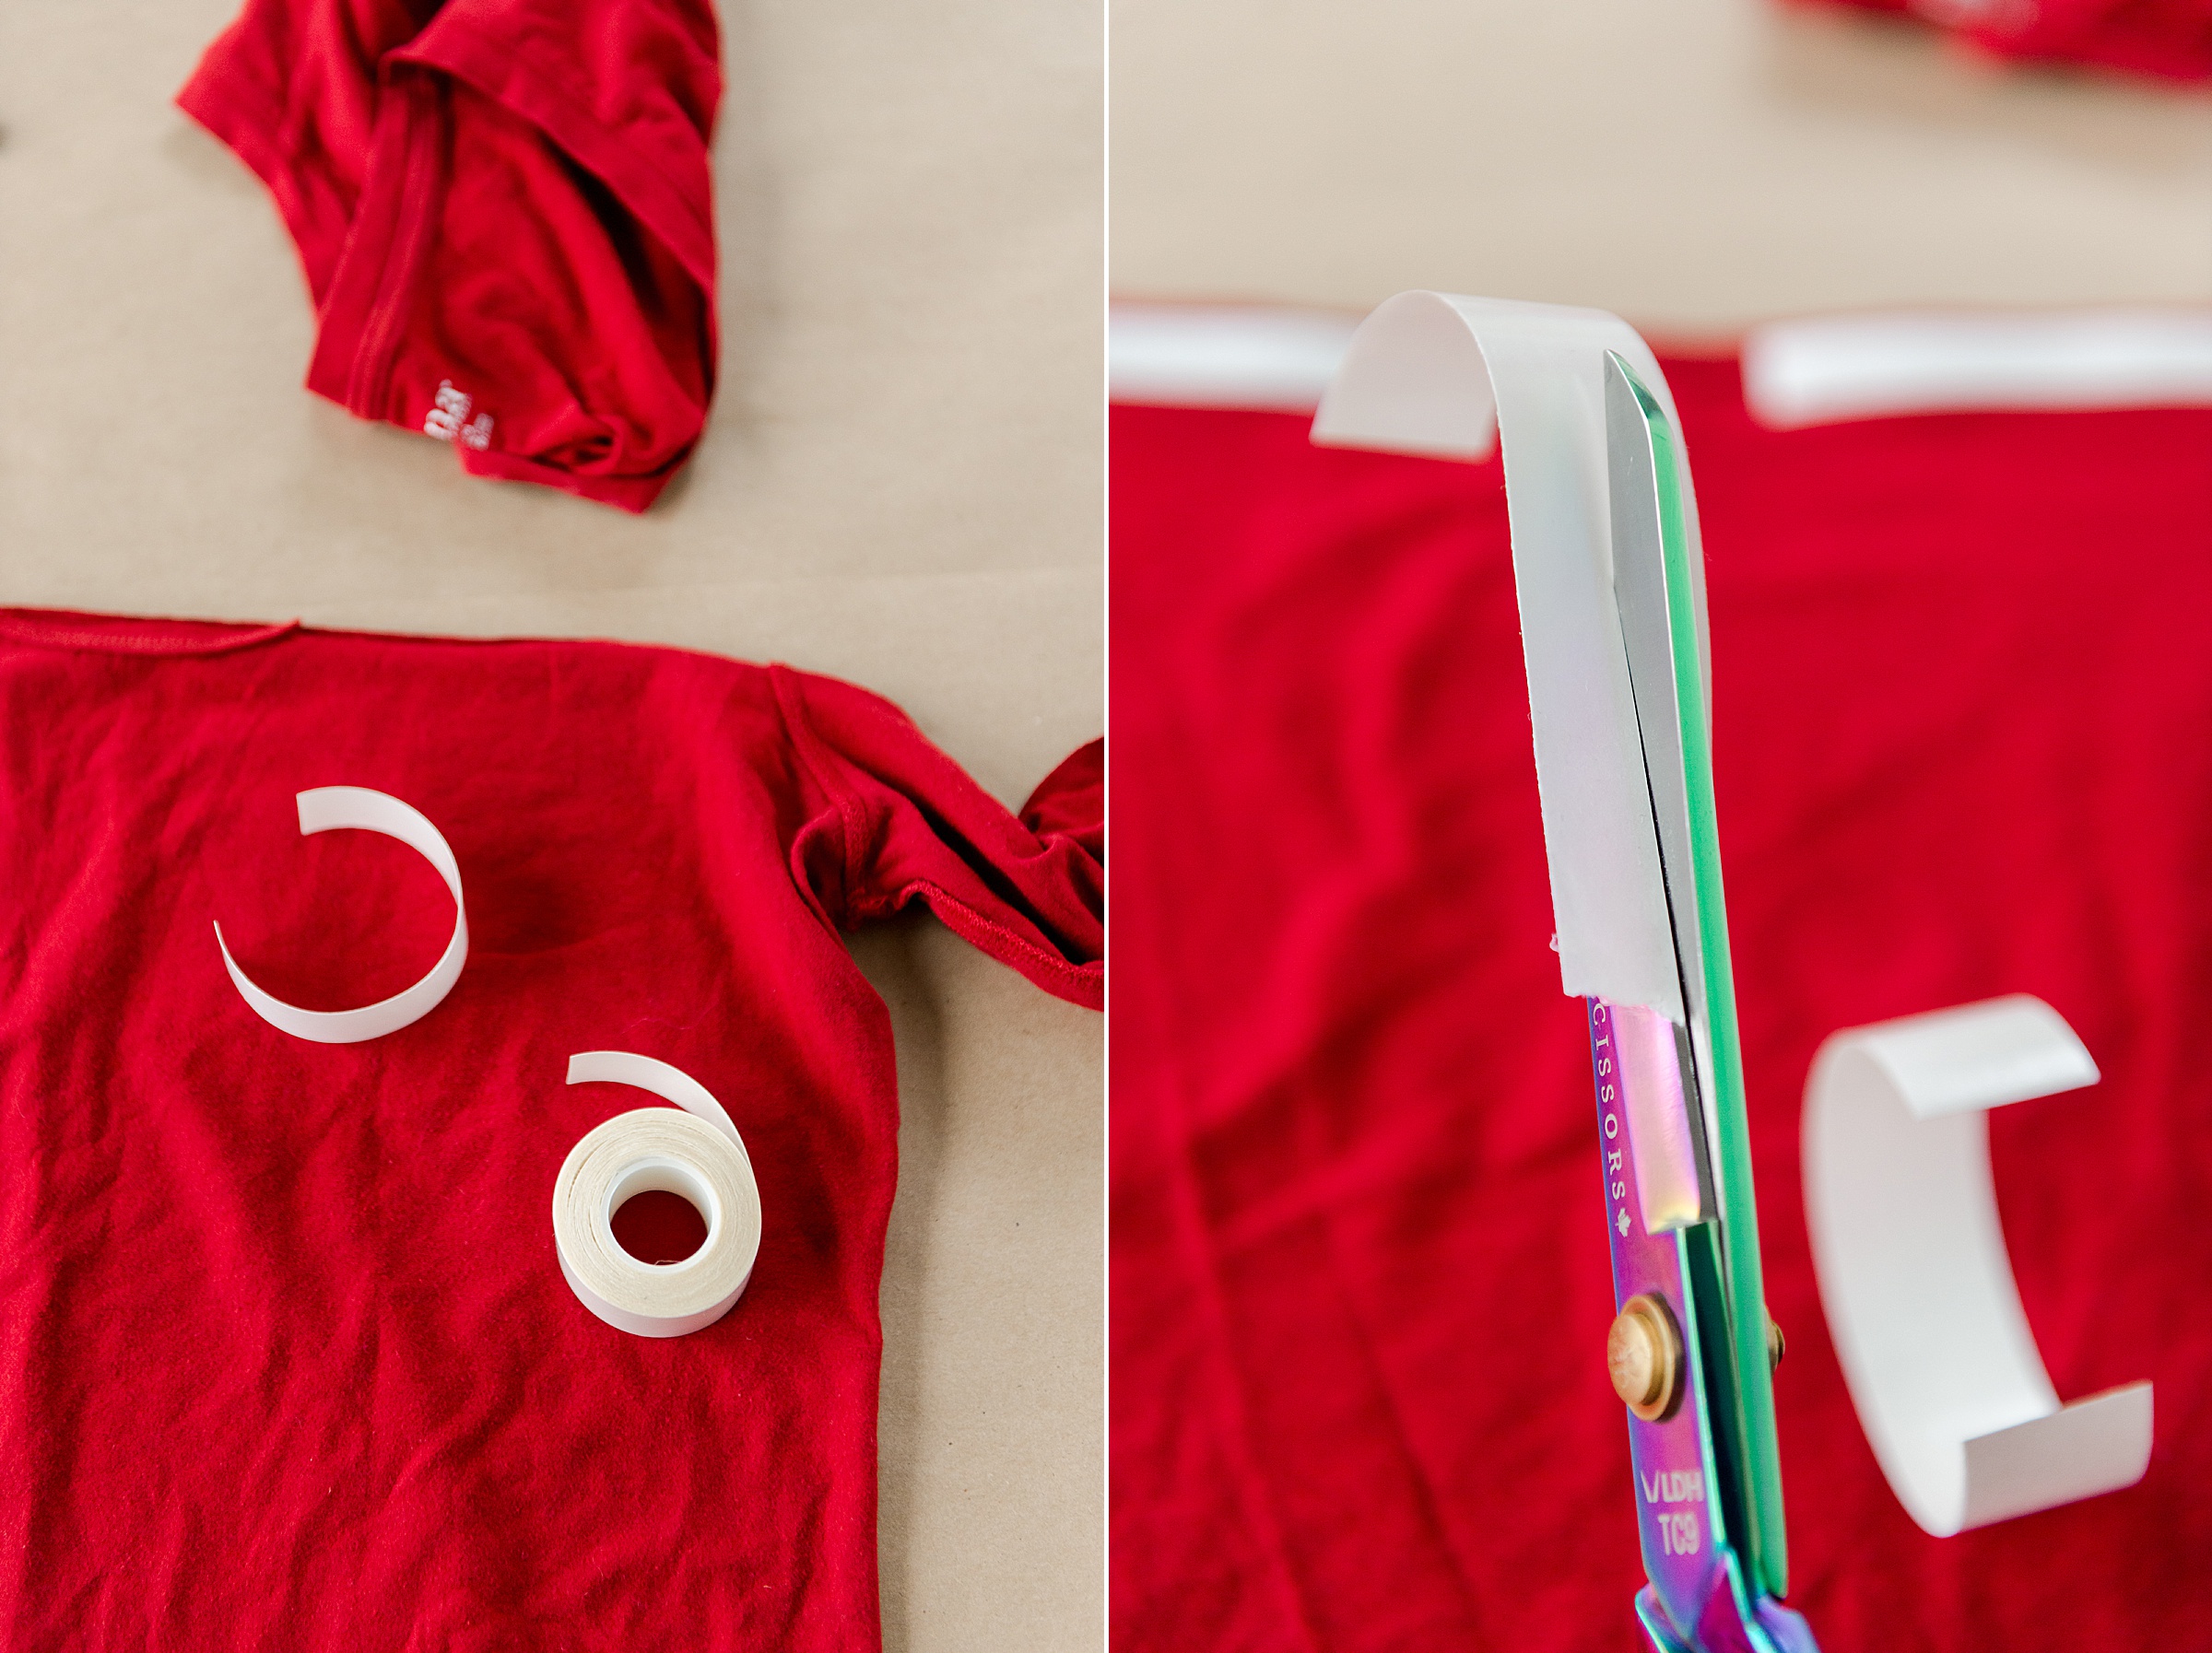
3. Turn the shirt inside out and smooth out any wrinkles to lay completely flat. Test folding over the cut edge towards the inside of the shirt, matching insides sides together. You will get an idea of how thick to cut your fabric tape (I noticed that I needed to cut my tape in 1/2 width wise to make my folded edge work, so this is just a visual before actually taping/ironing the hem).
Then cut your fabric tape into sections – enough sections to go across the top of the shirt. Be sure to cut into at least 4 sections as you want the top of your shirt to be a bit flexible without being so firm that it doesn’t “give” when moving about your Halloween activities.
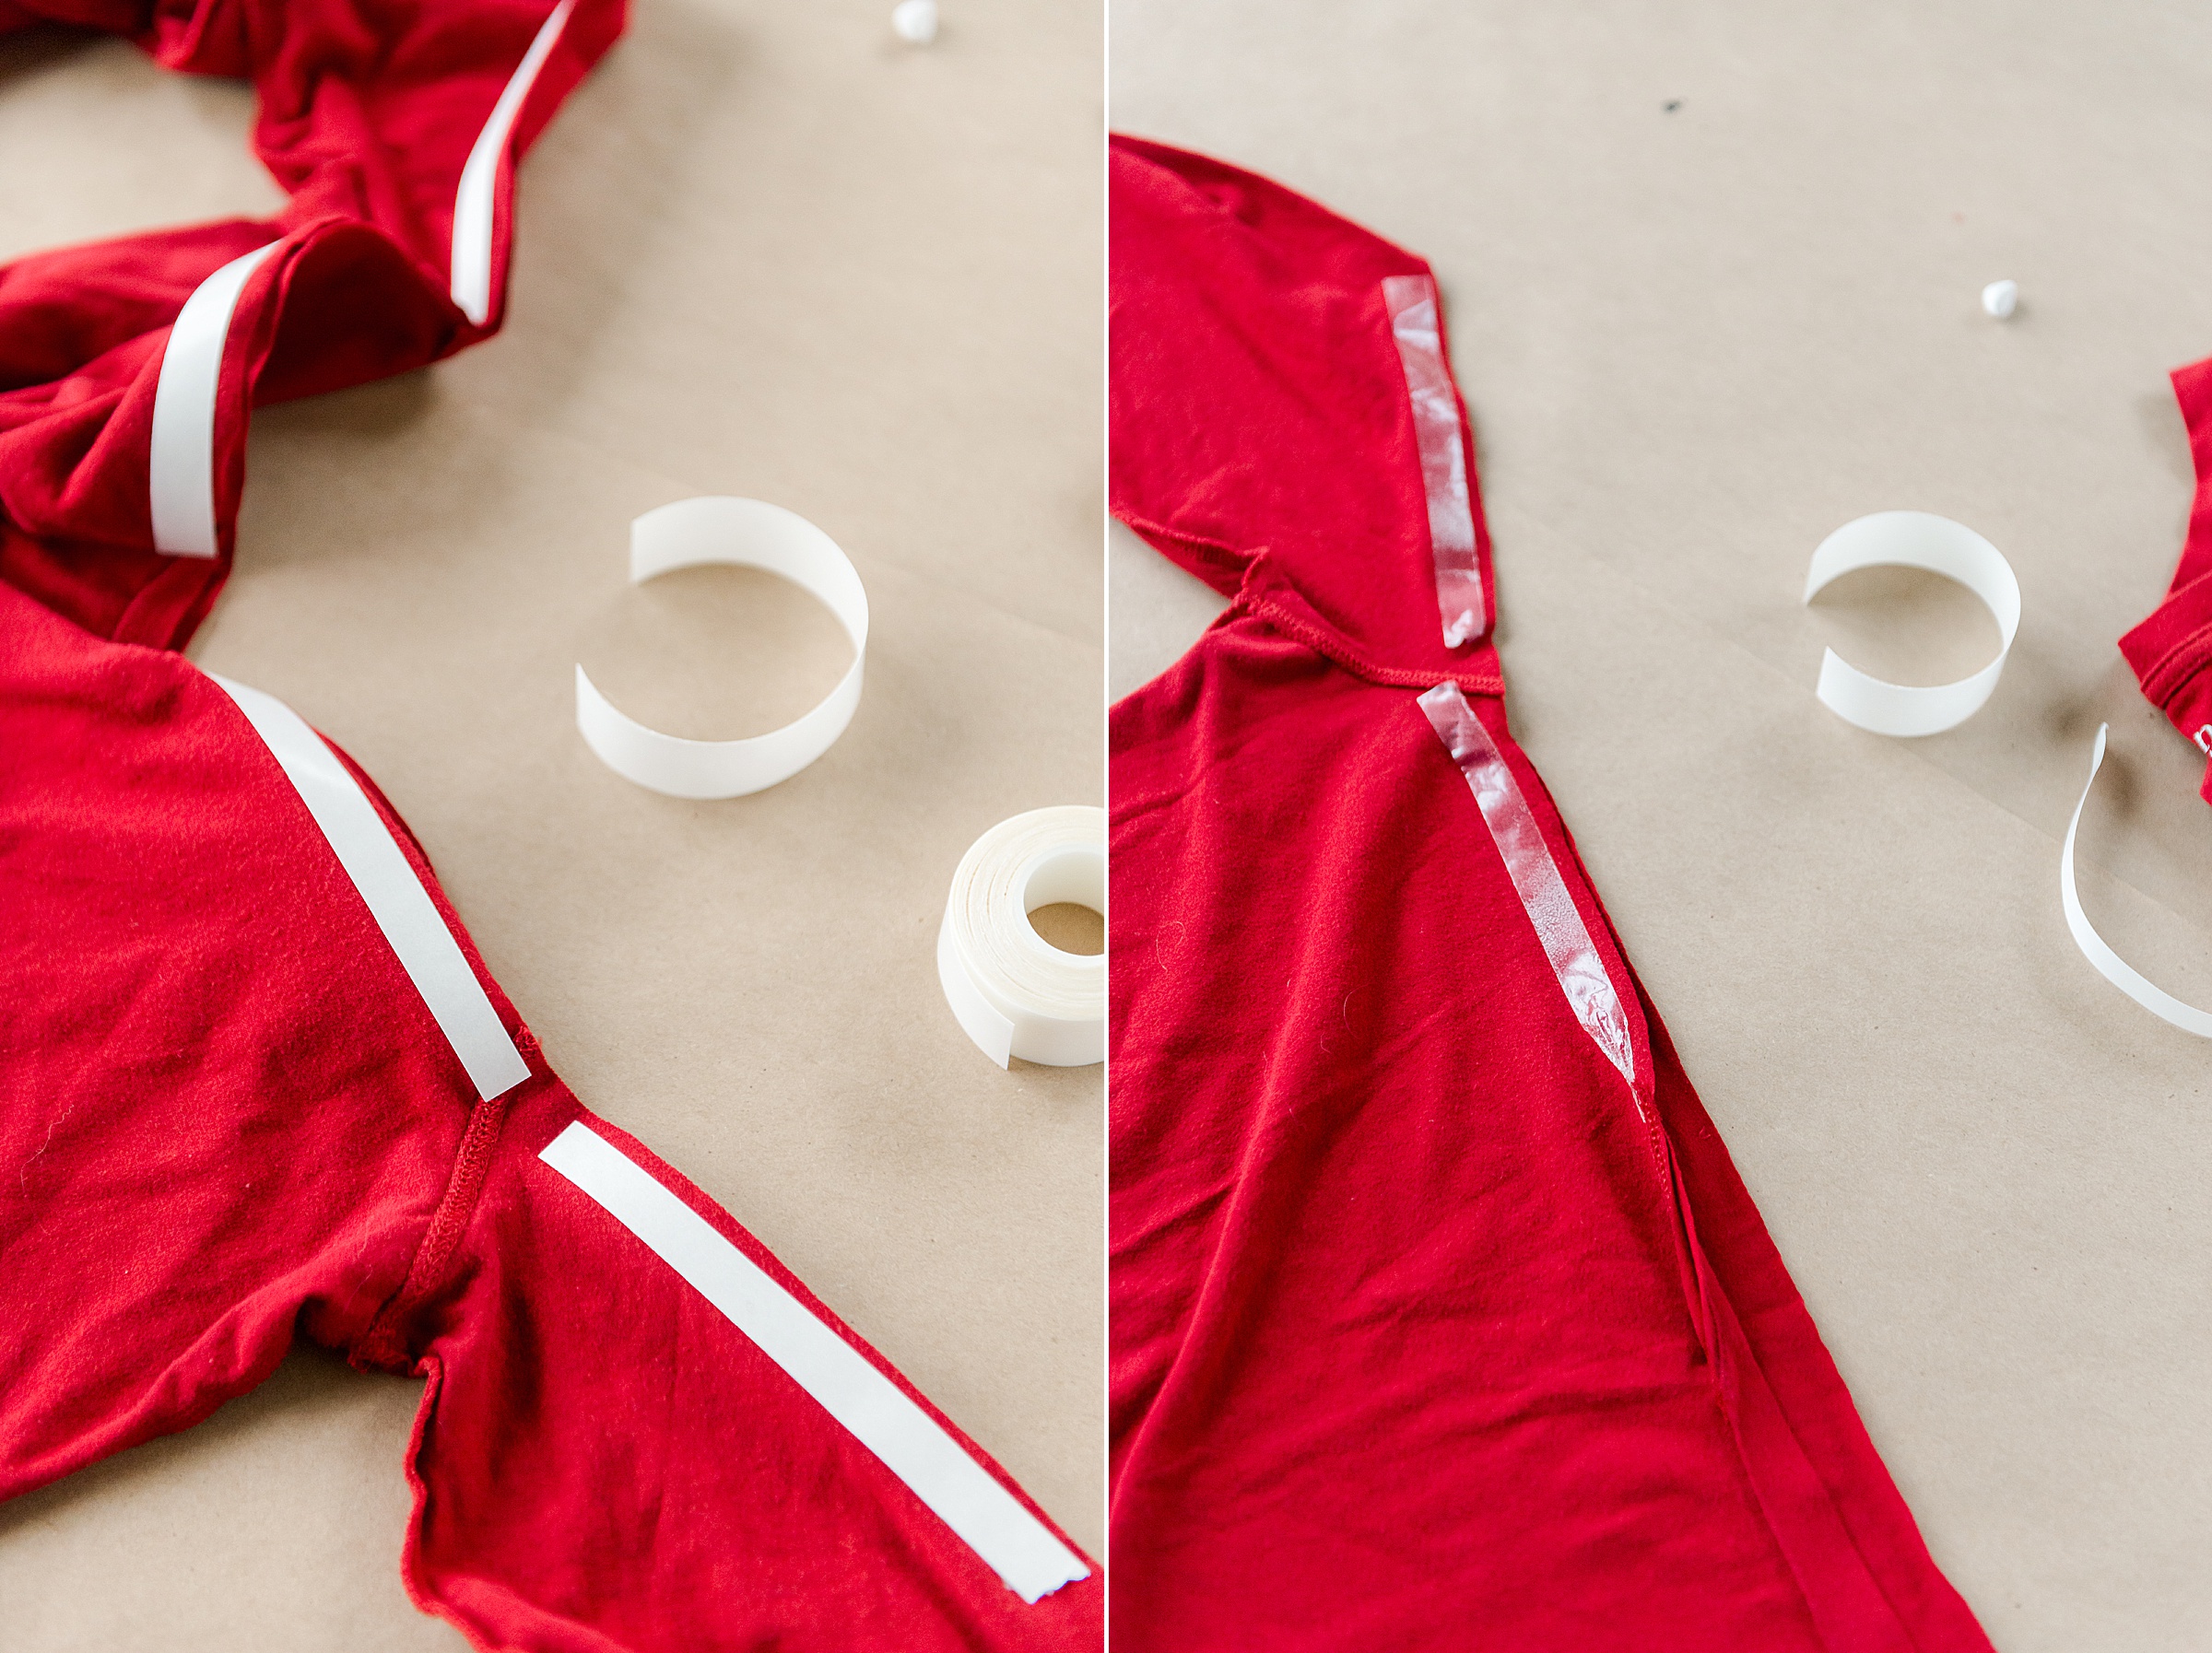
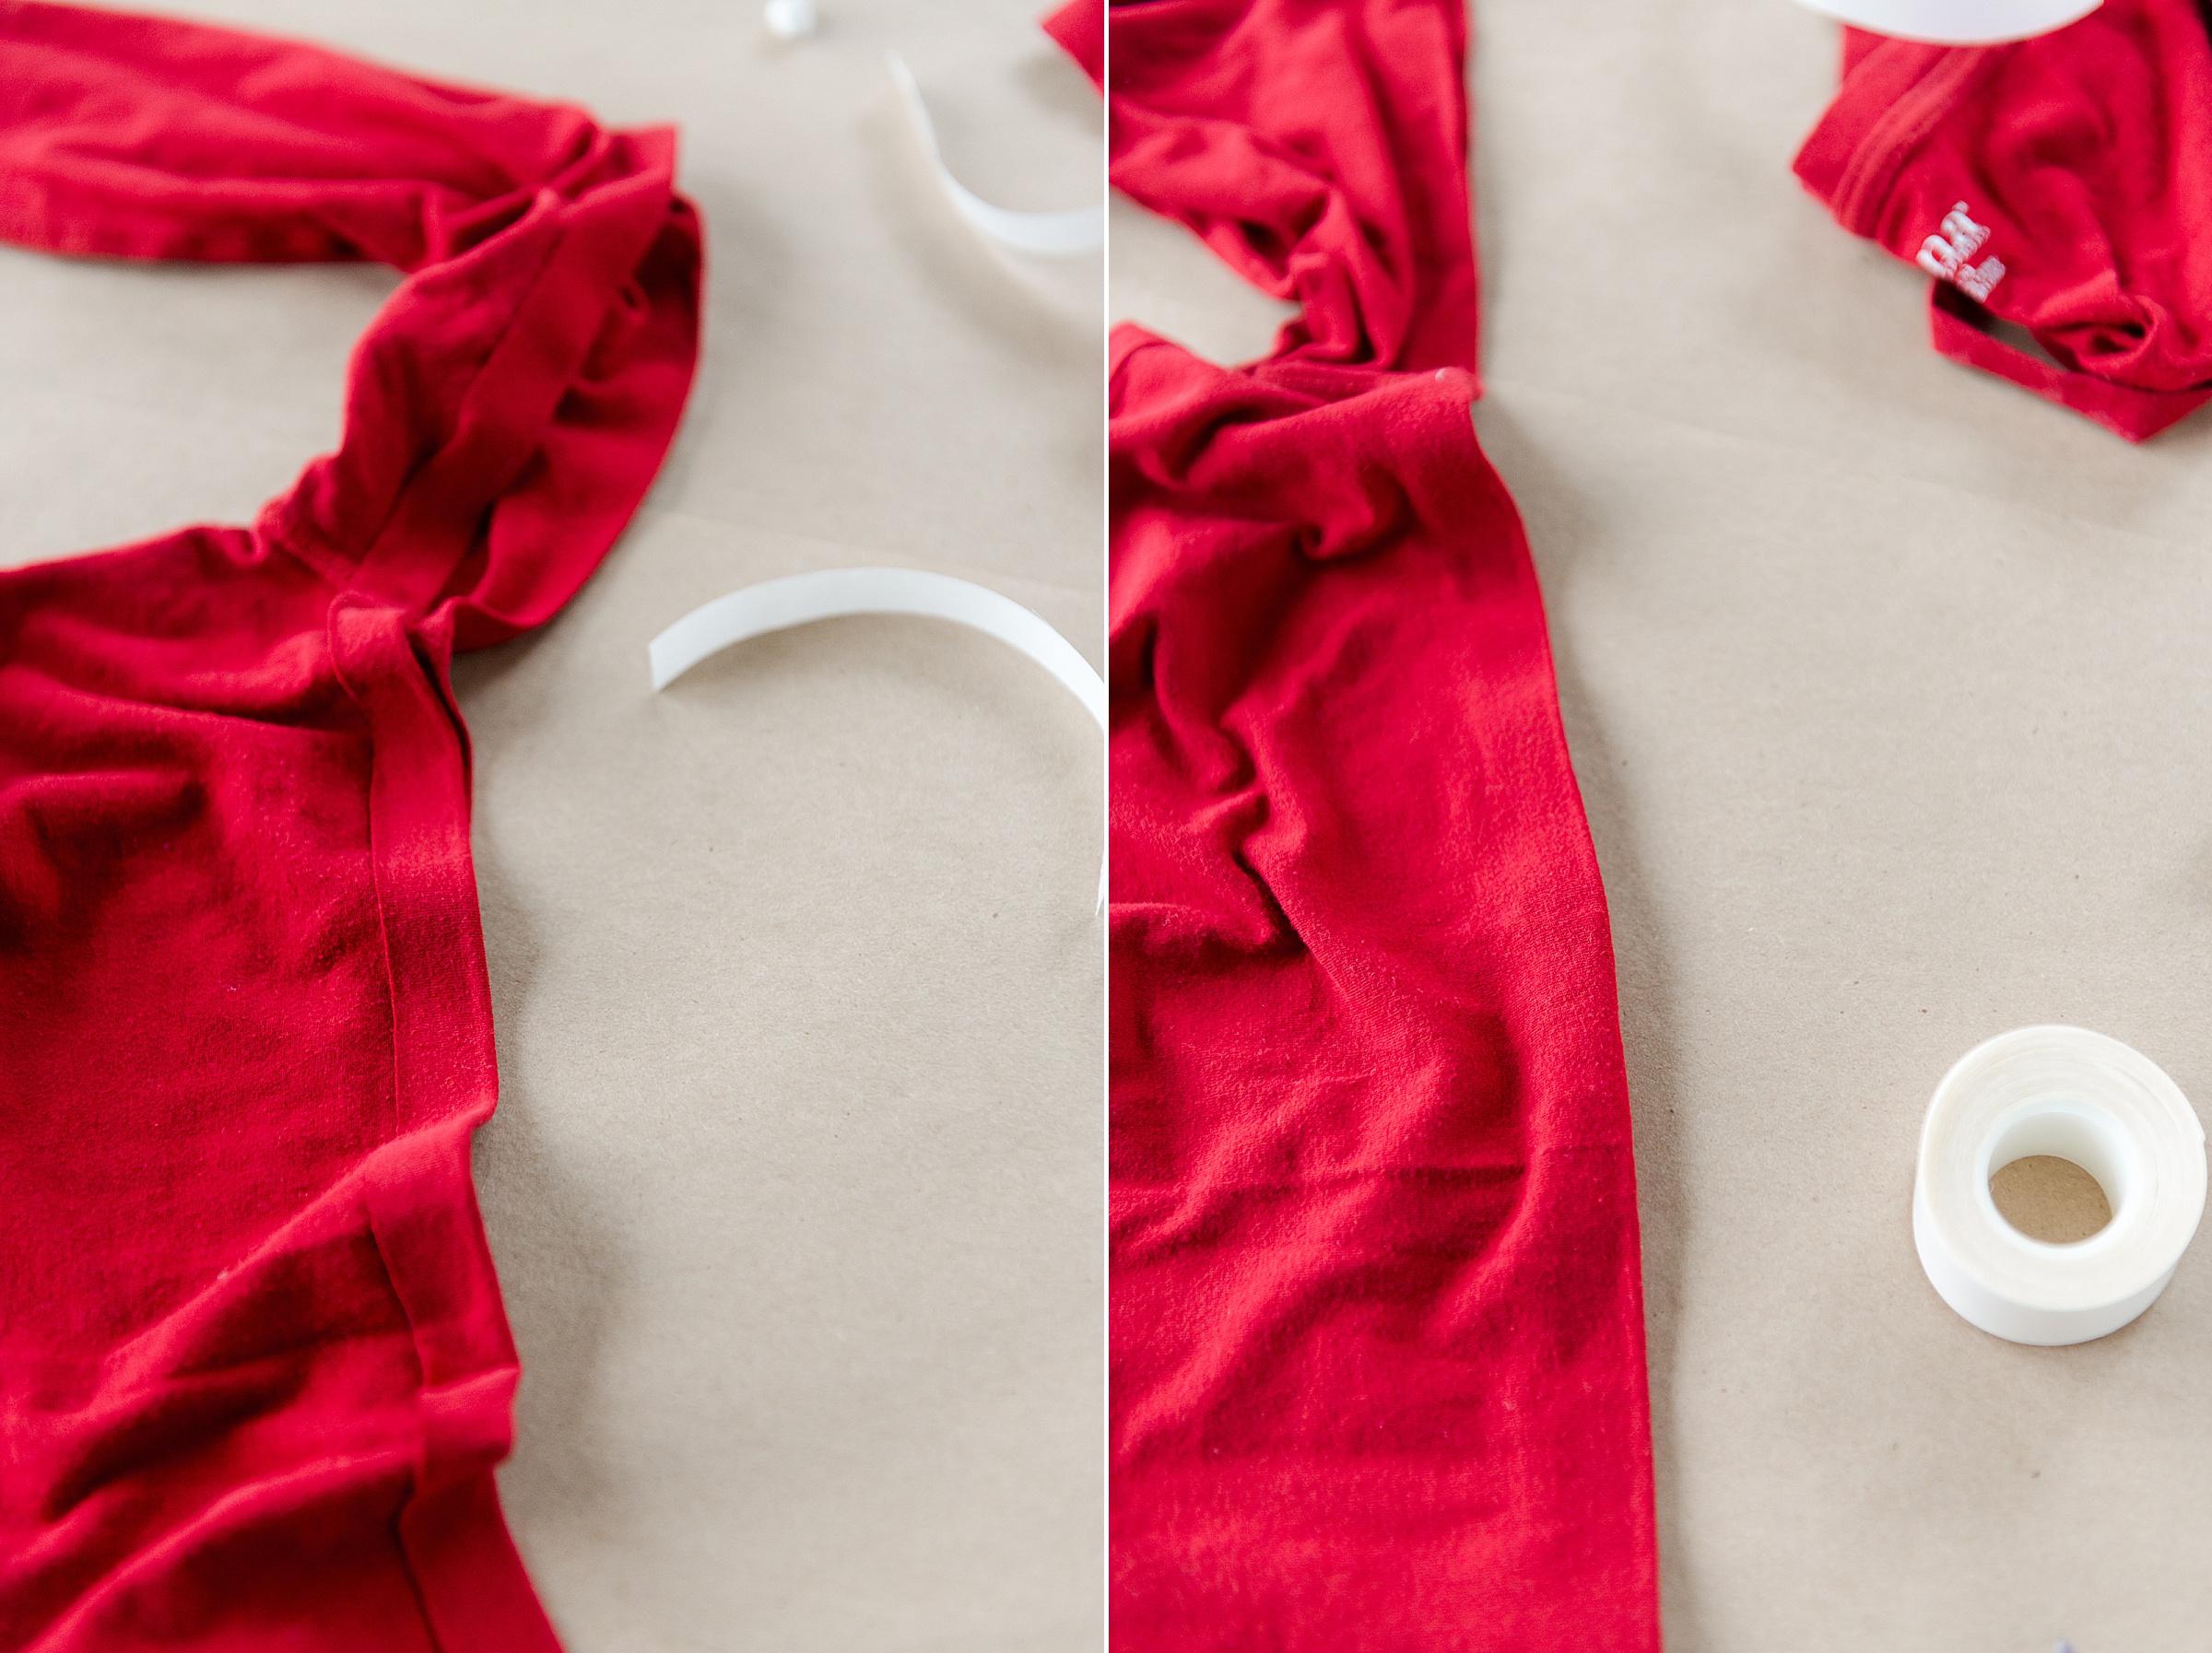
4. Follow the instructions on your fabric tape to adhere to the fabric. With the tape that I used (honestly this is SO easy) you just tear off one side of the tape, stick to one side of the fabric, tear off the other side of the tape and fold the fabric on top. Stick well with your fingers and VOILA! 🙂
Repeat this for the front and back of the shirt – don’t forget any “sides” along the “edge” of the arm too!
BUD:
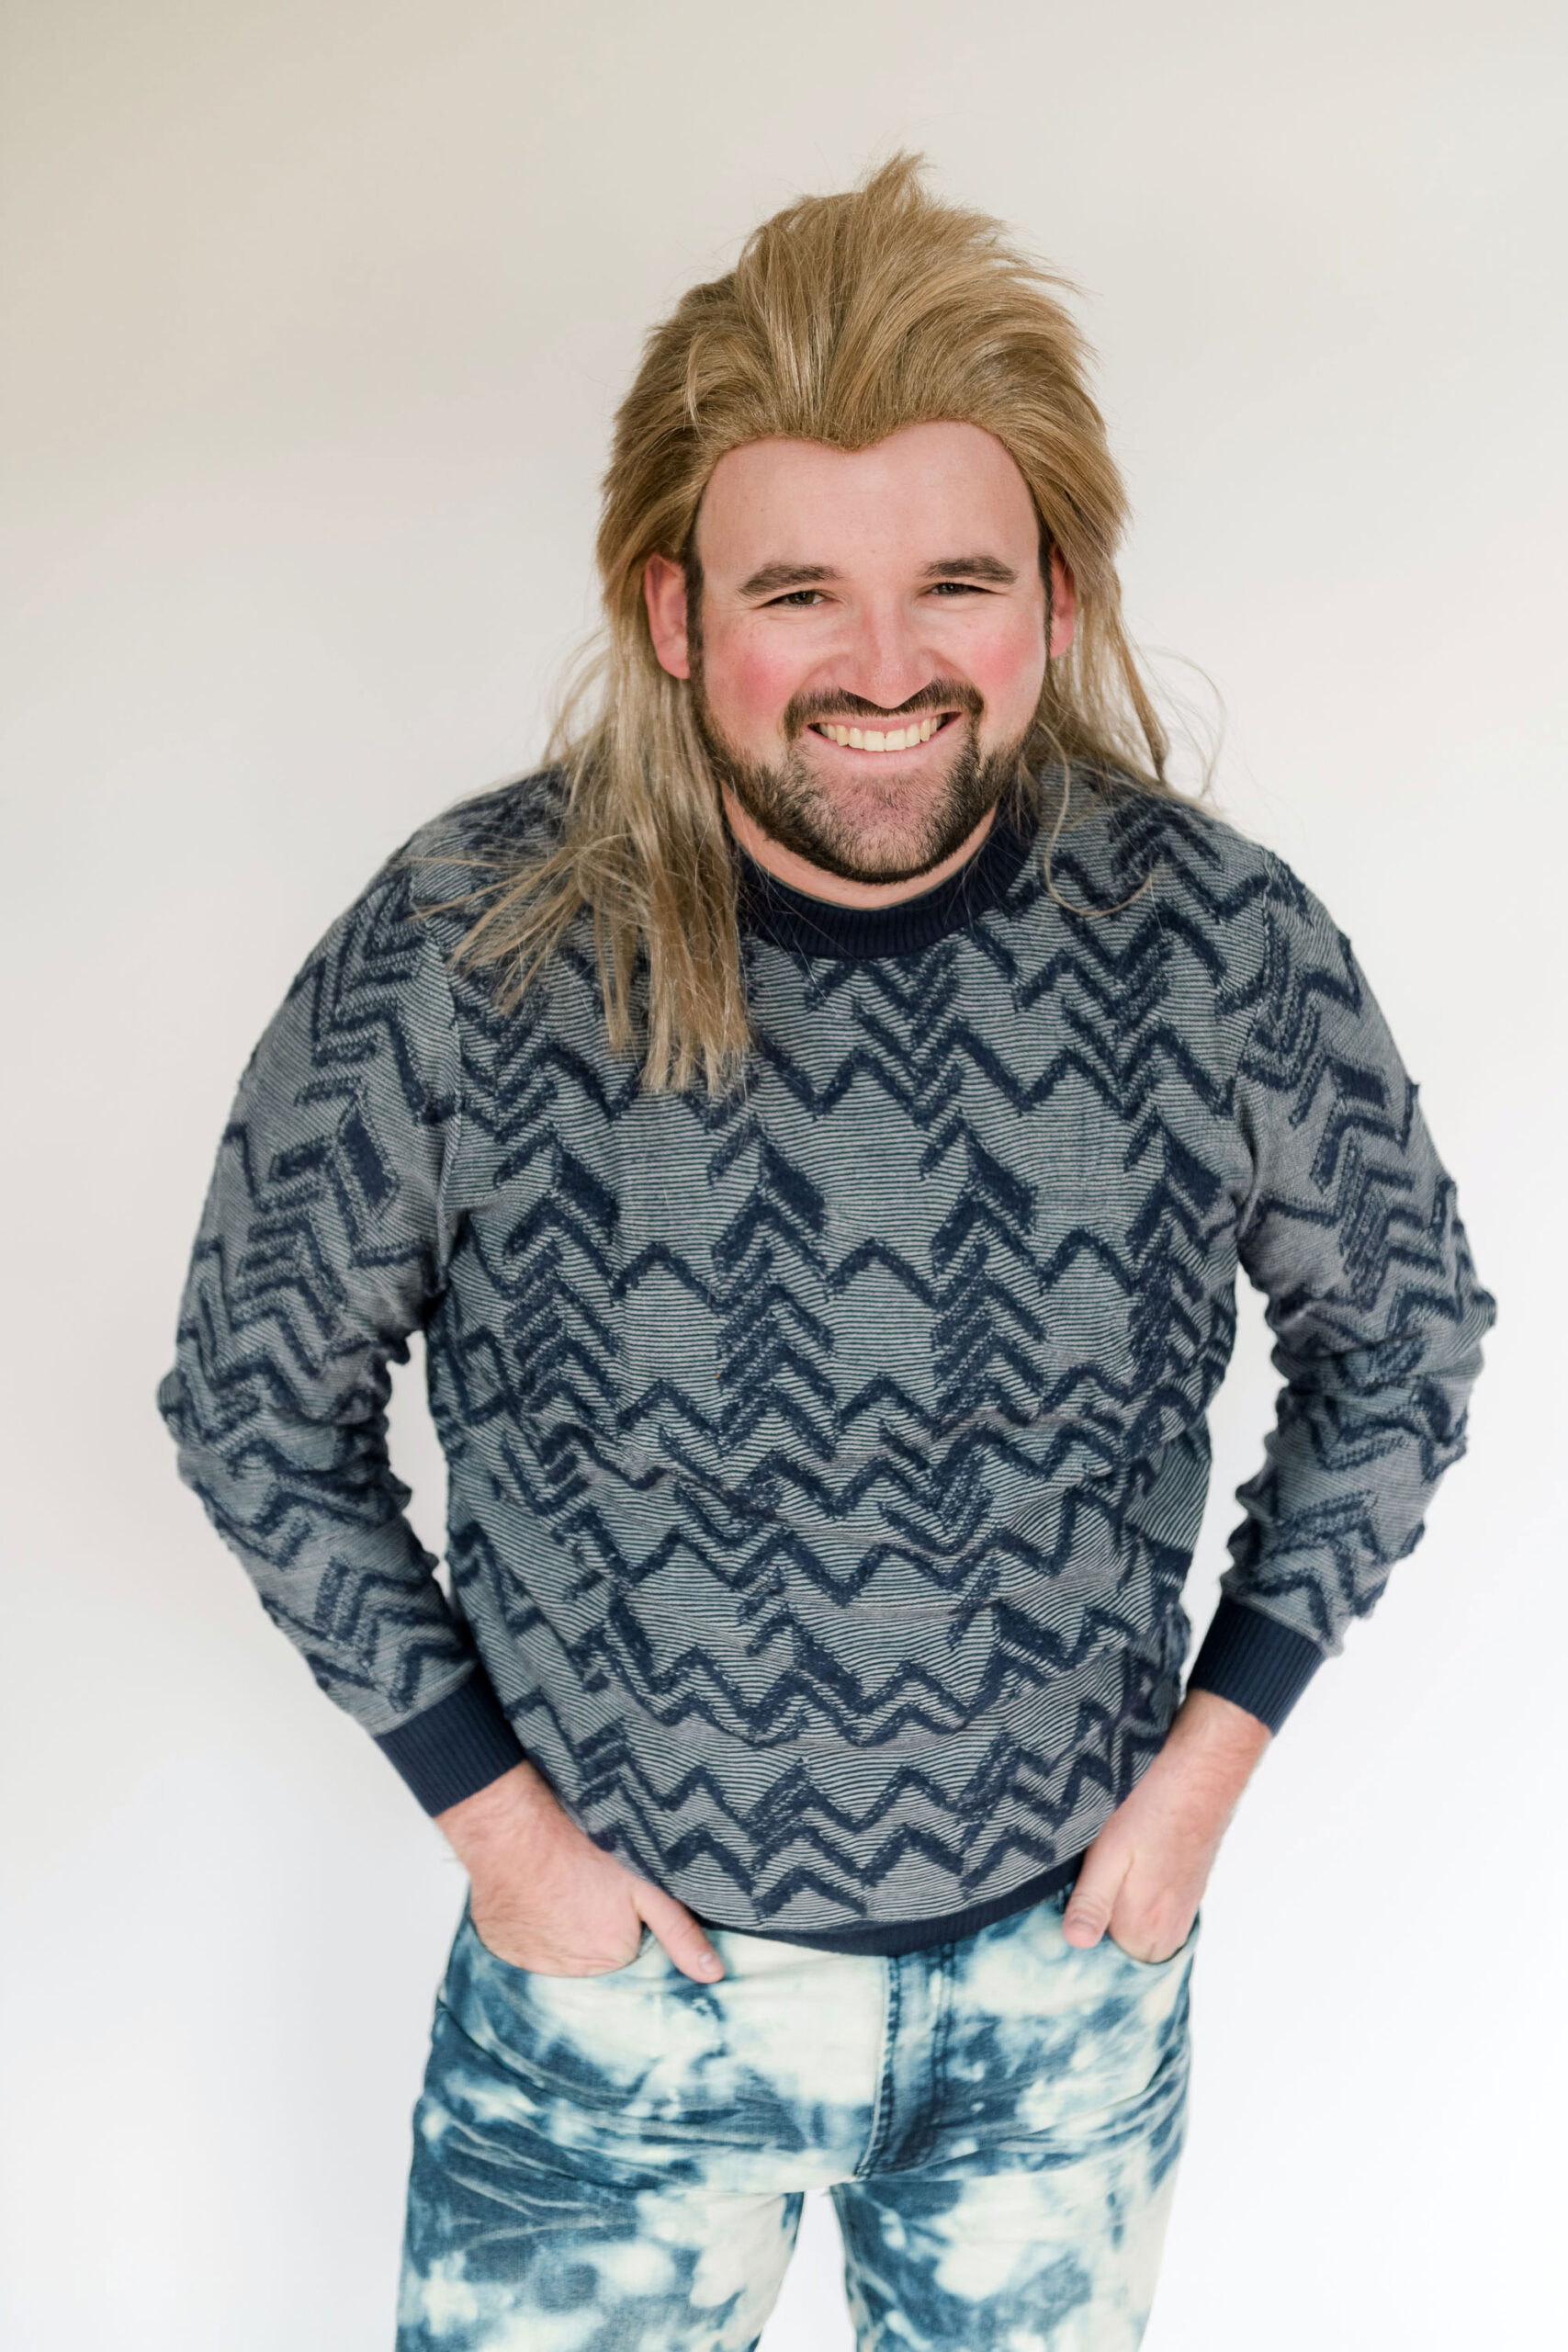
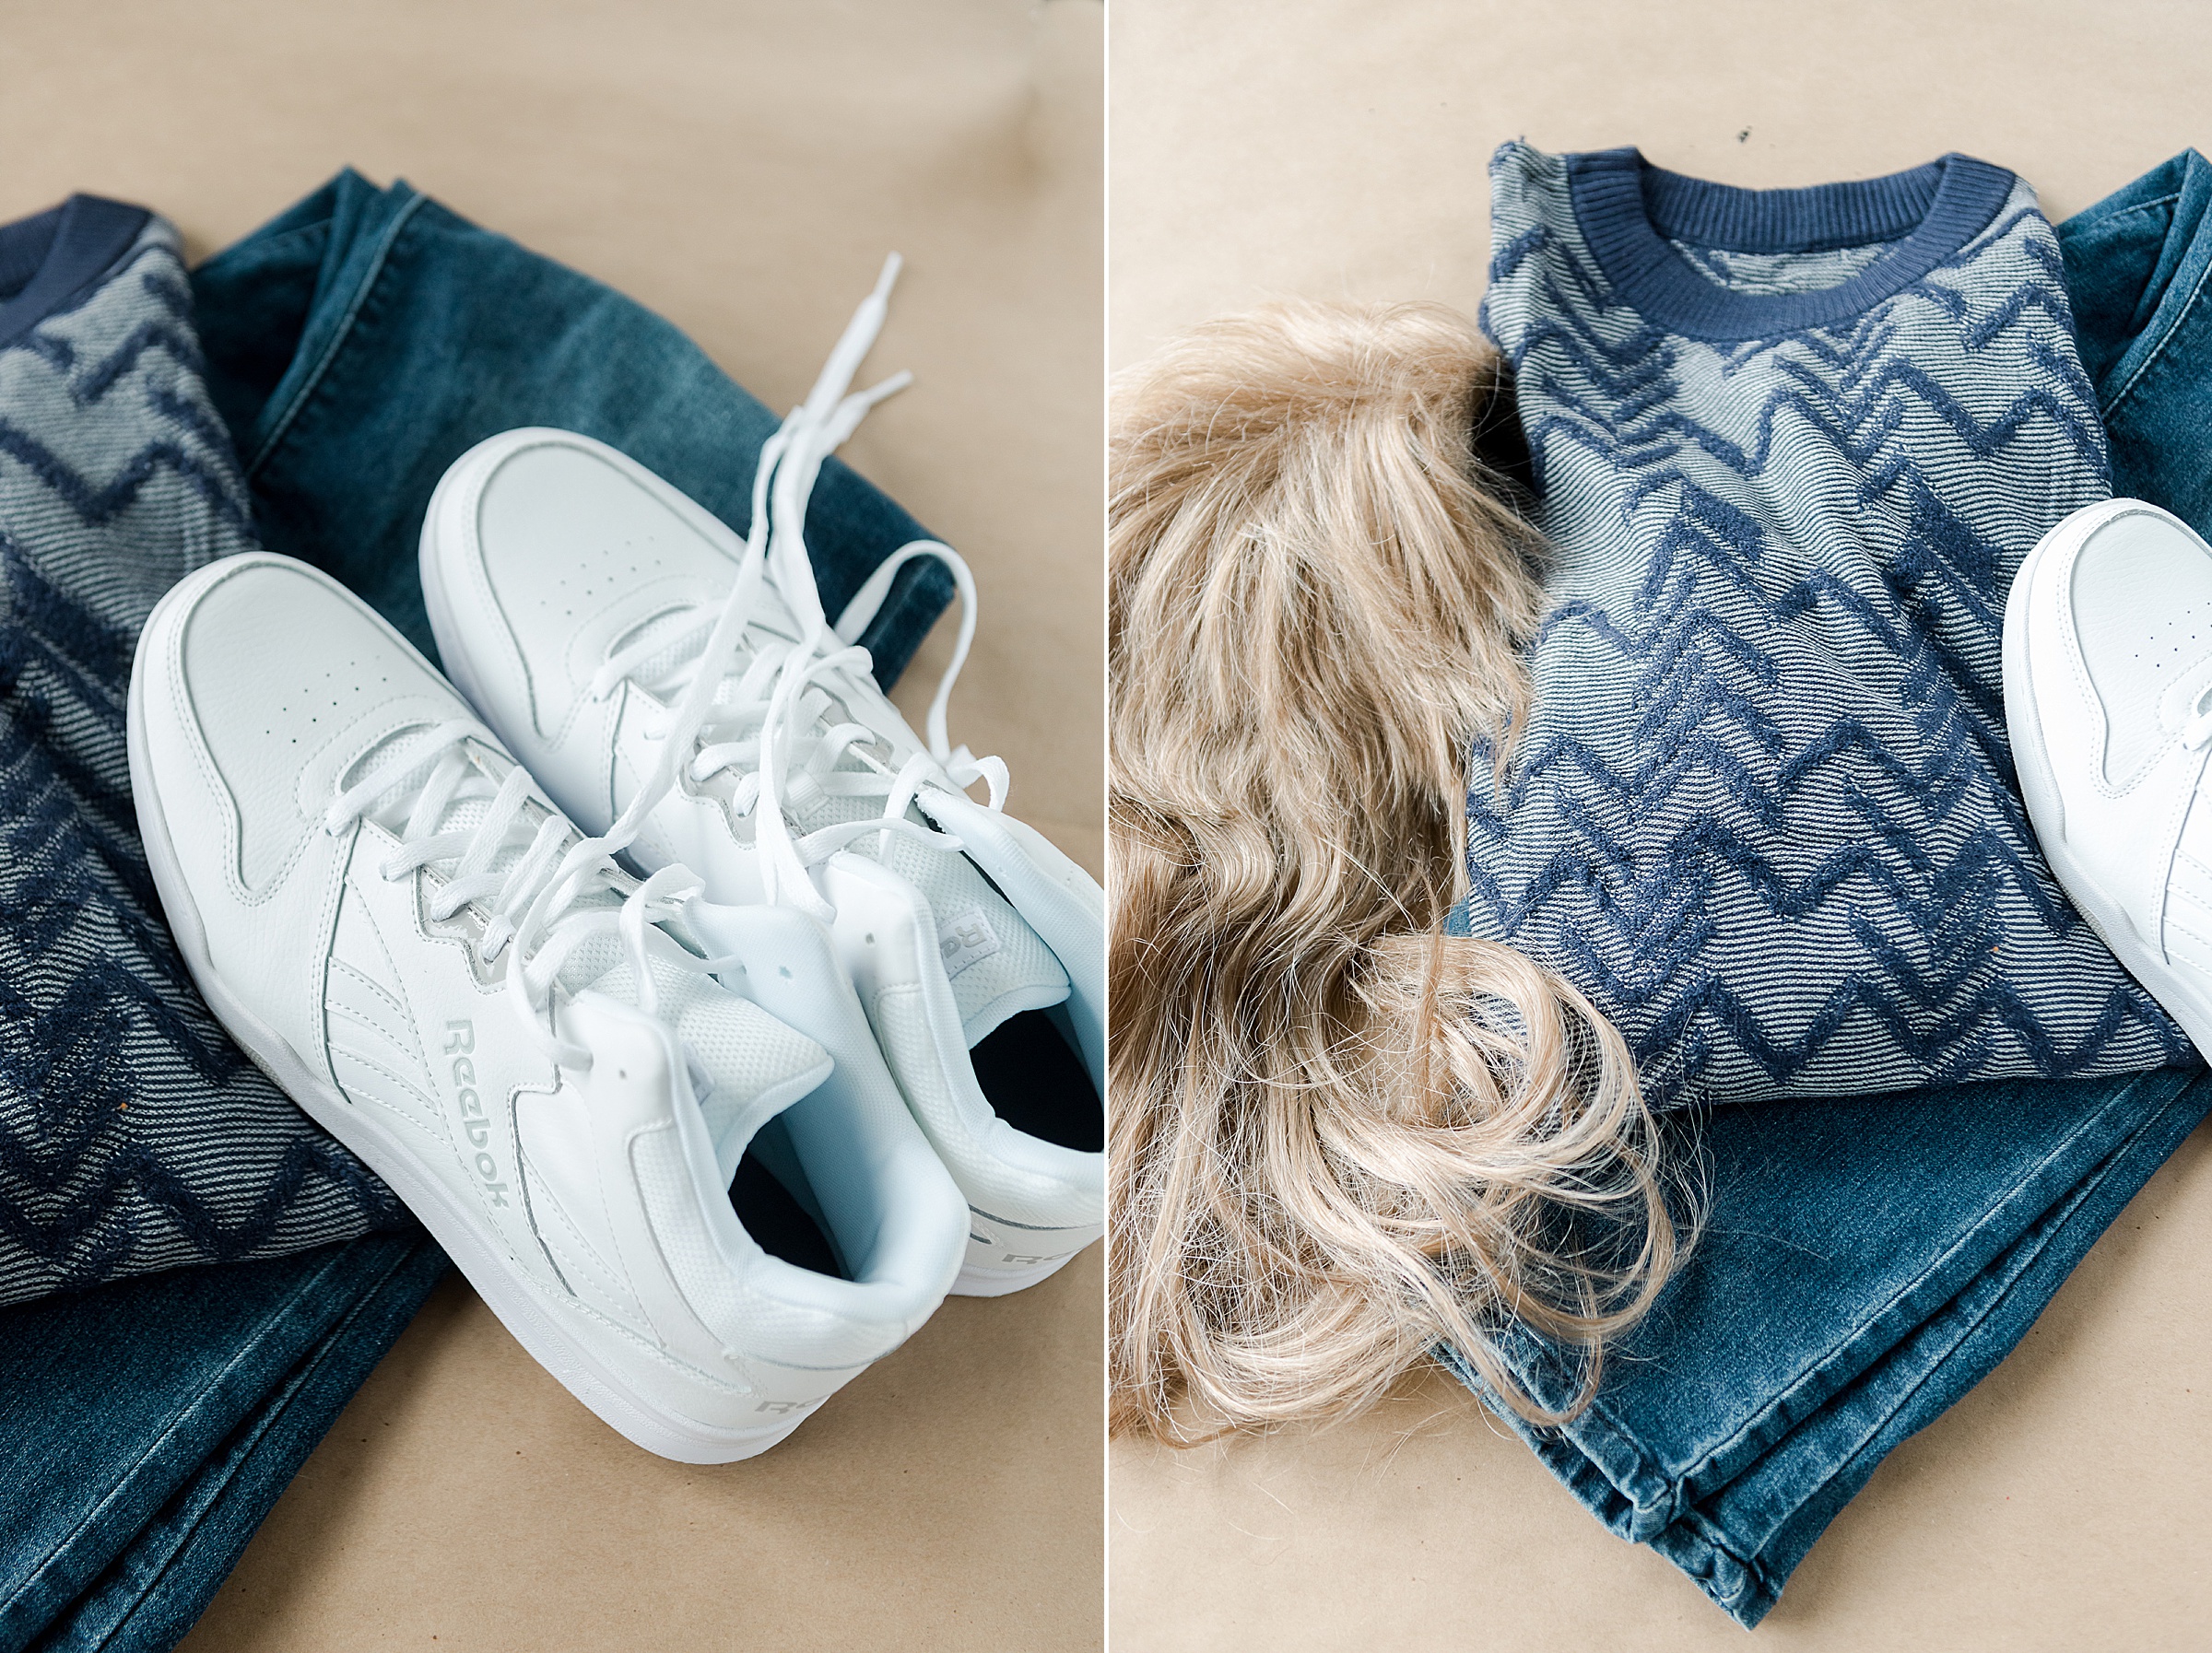
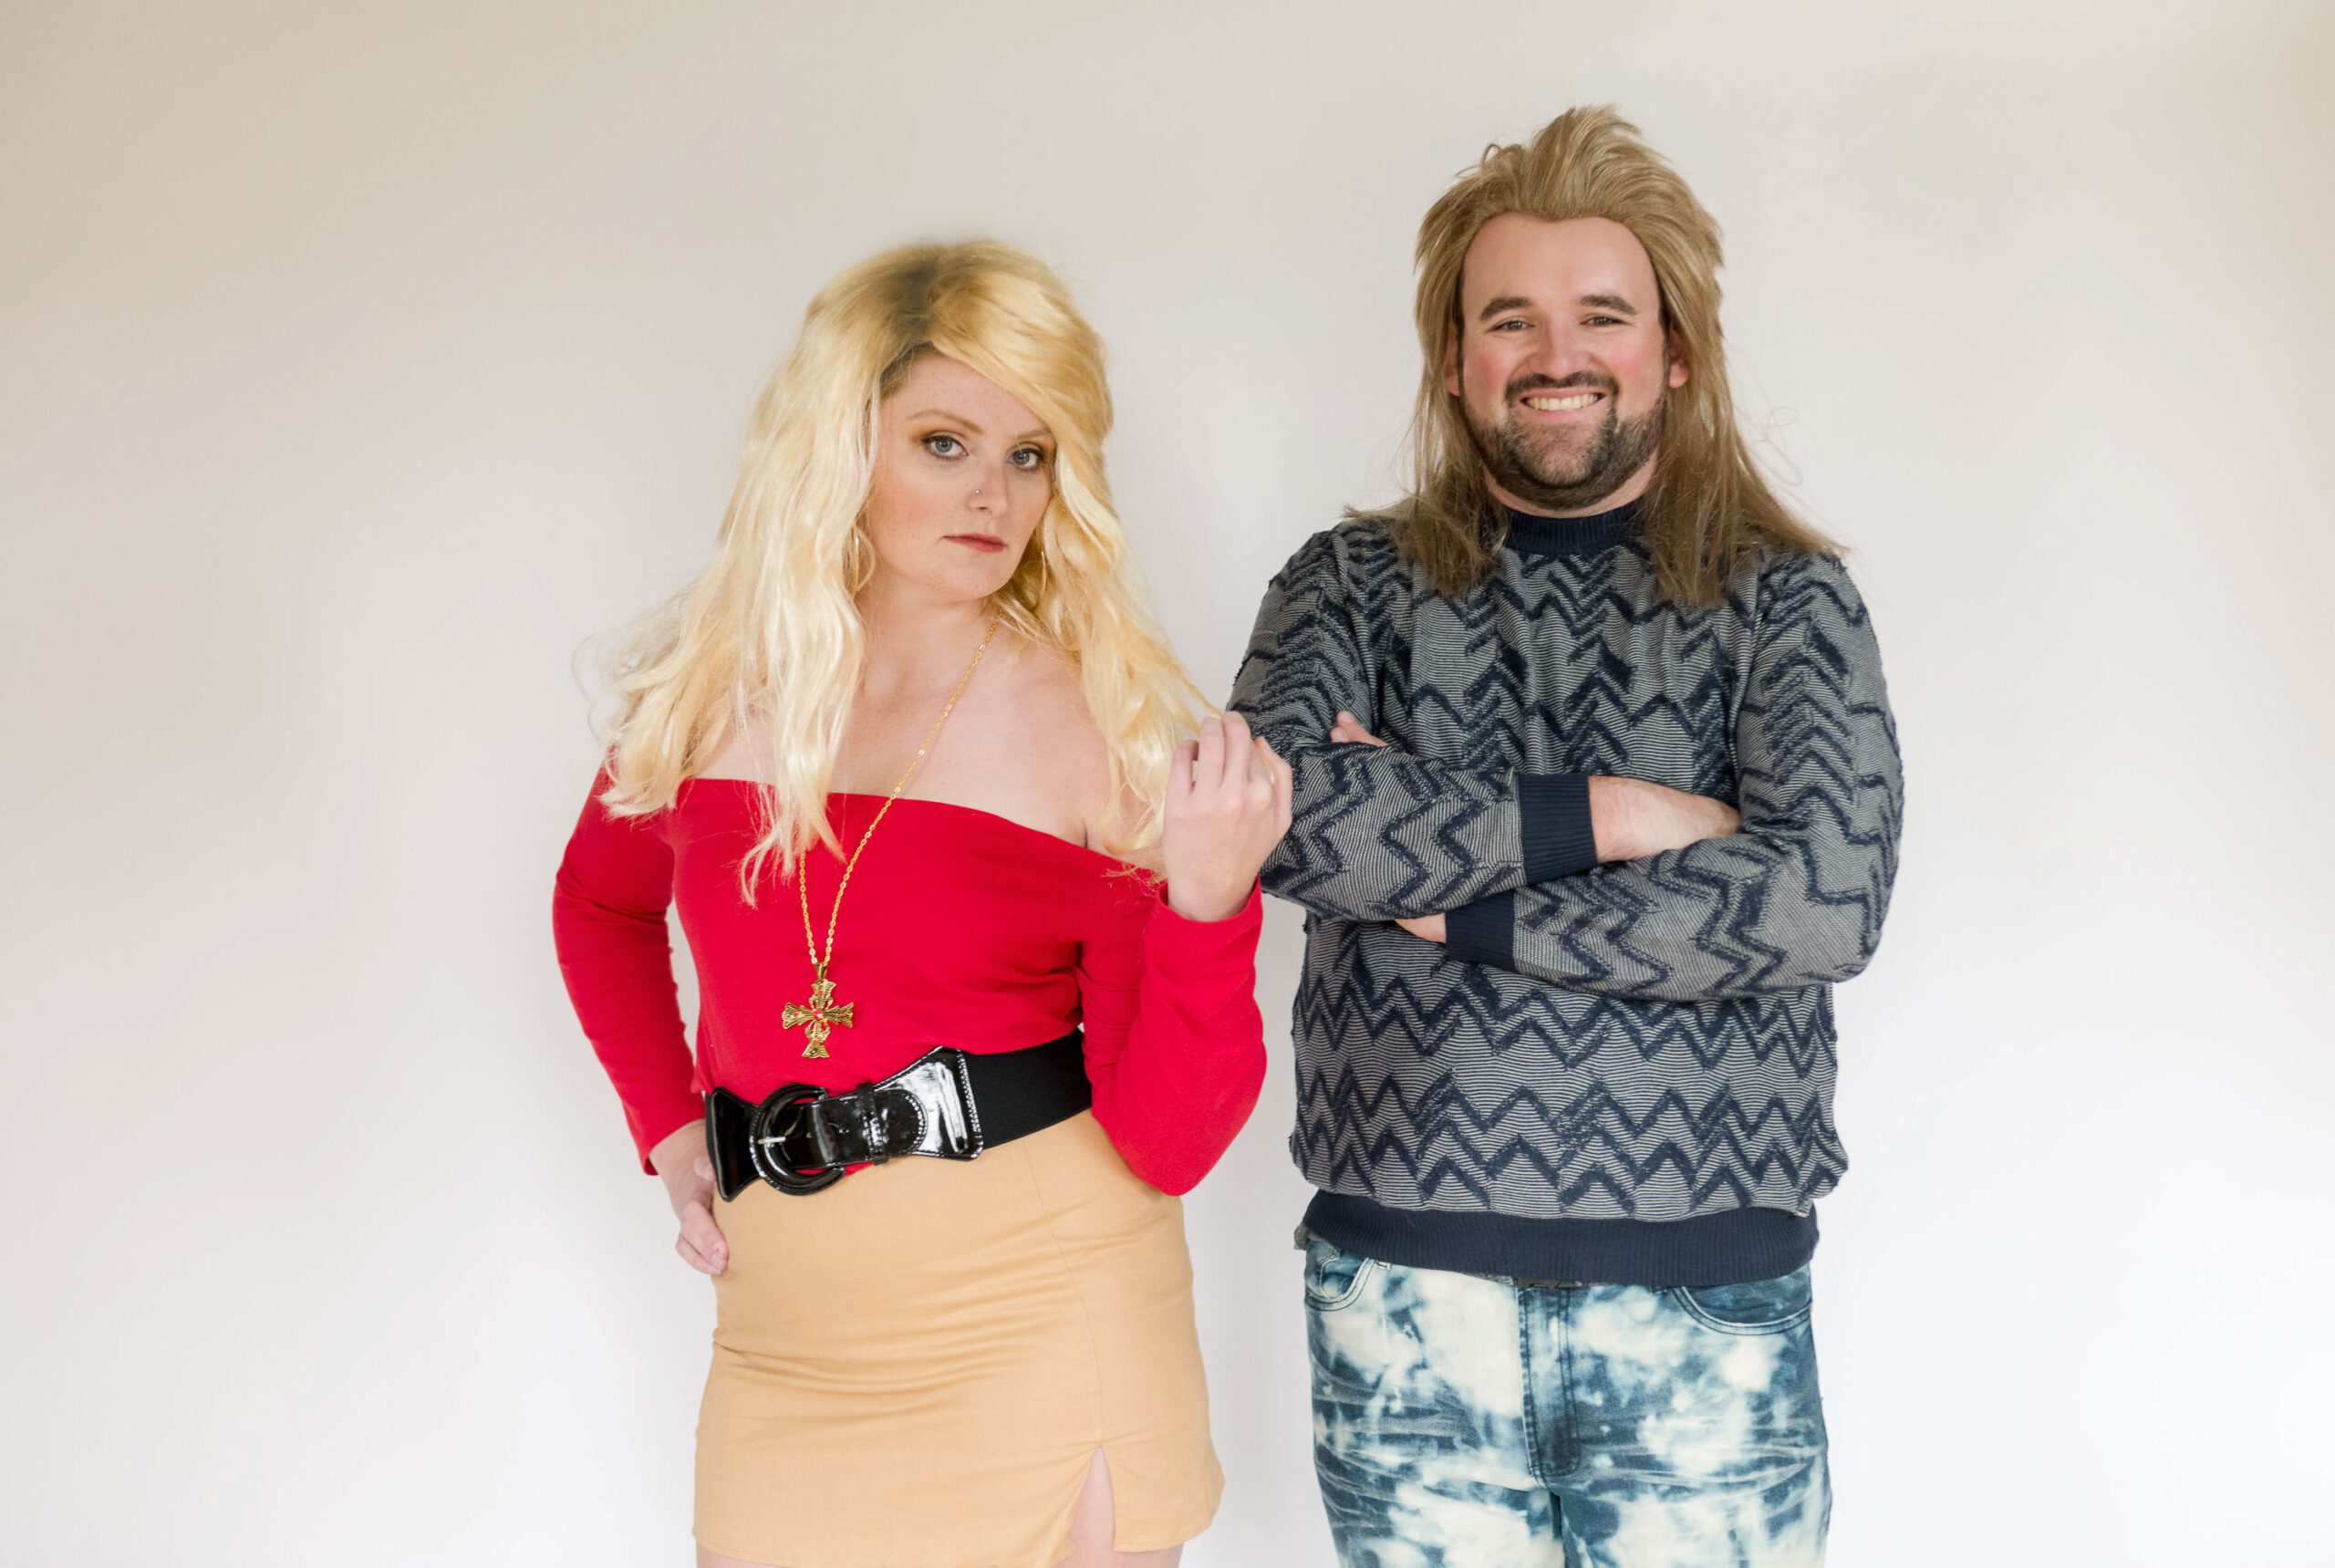
- A pair of jeans (maybe even some that are a bit big to allow the 90’s baggy style)
- Oversized sweater
- A pair of high top sneakers – we found a BIG selection at our local thrift store
- A mullet wig
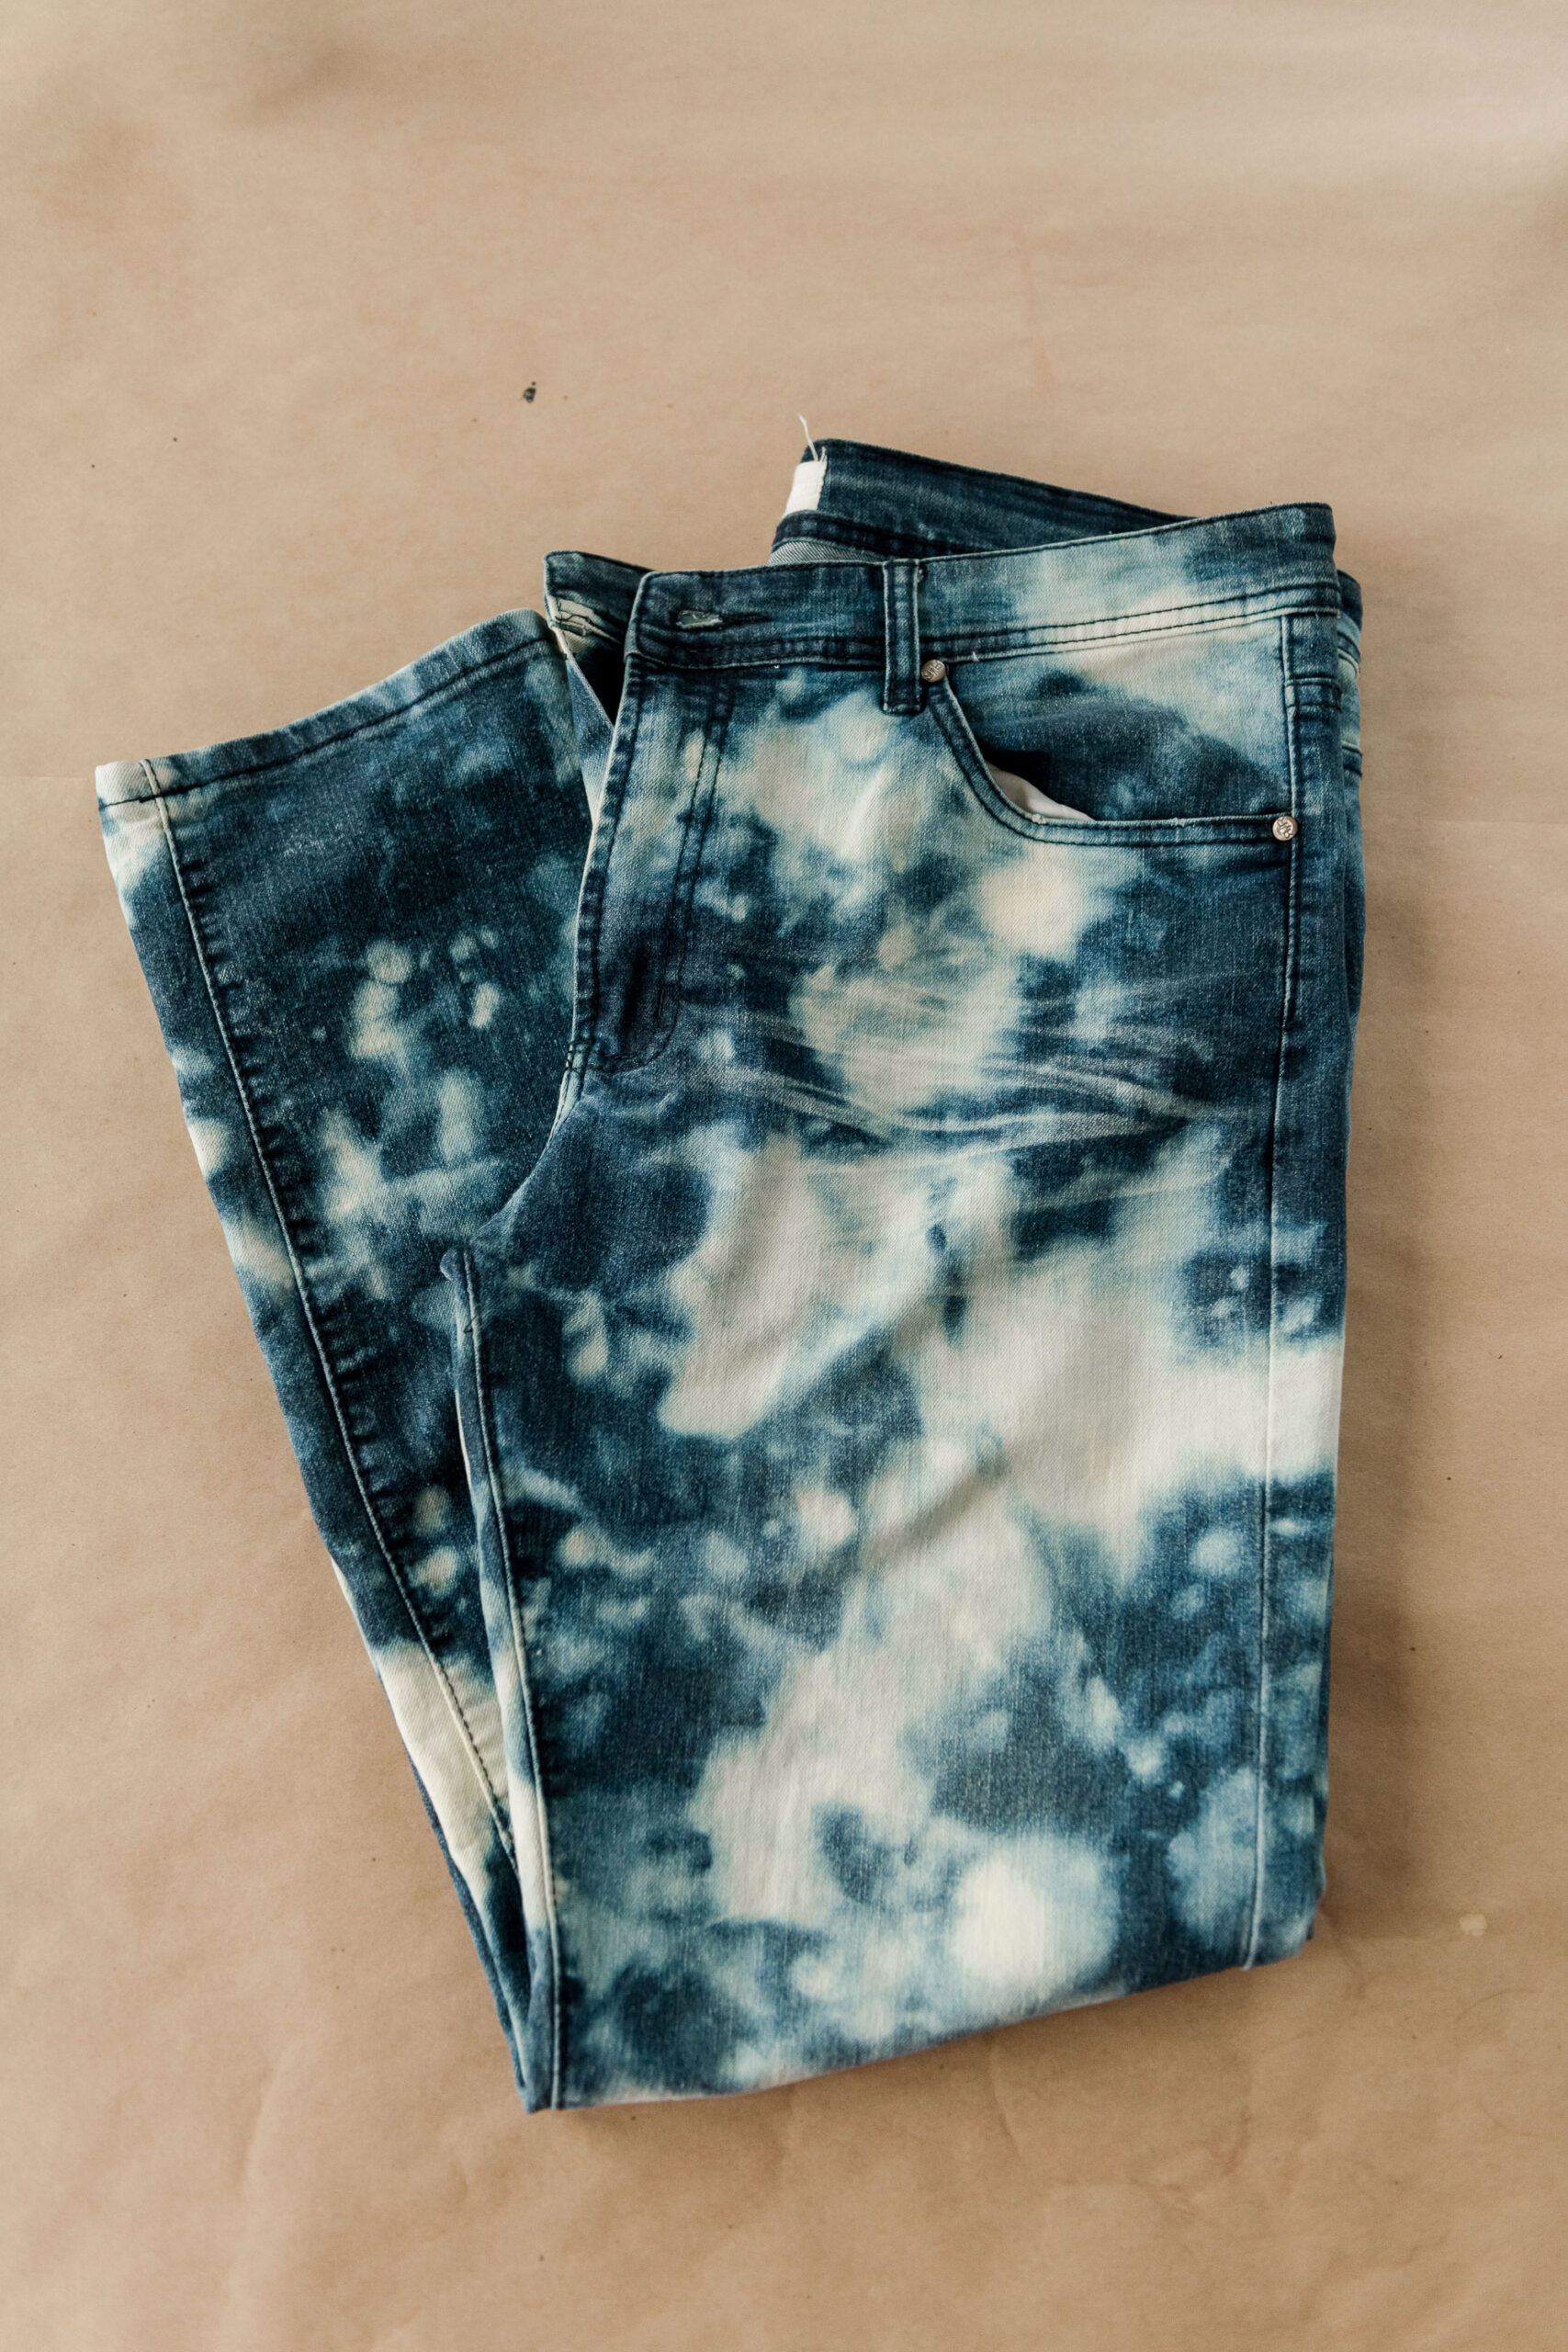
**The DIY portion of this costume is to acid wash some jeans for Bud
TO MAKE BUD’S ACID WASH JEANS:
MATERIALS:
- A pair of jeans – baggy ones would be preferred
- A tub or some sort of container to let jeans soak while treating
- Bleach
- A spray bottle
- Rubber bands
- Gloves for protection
INSTRUCTIONS:
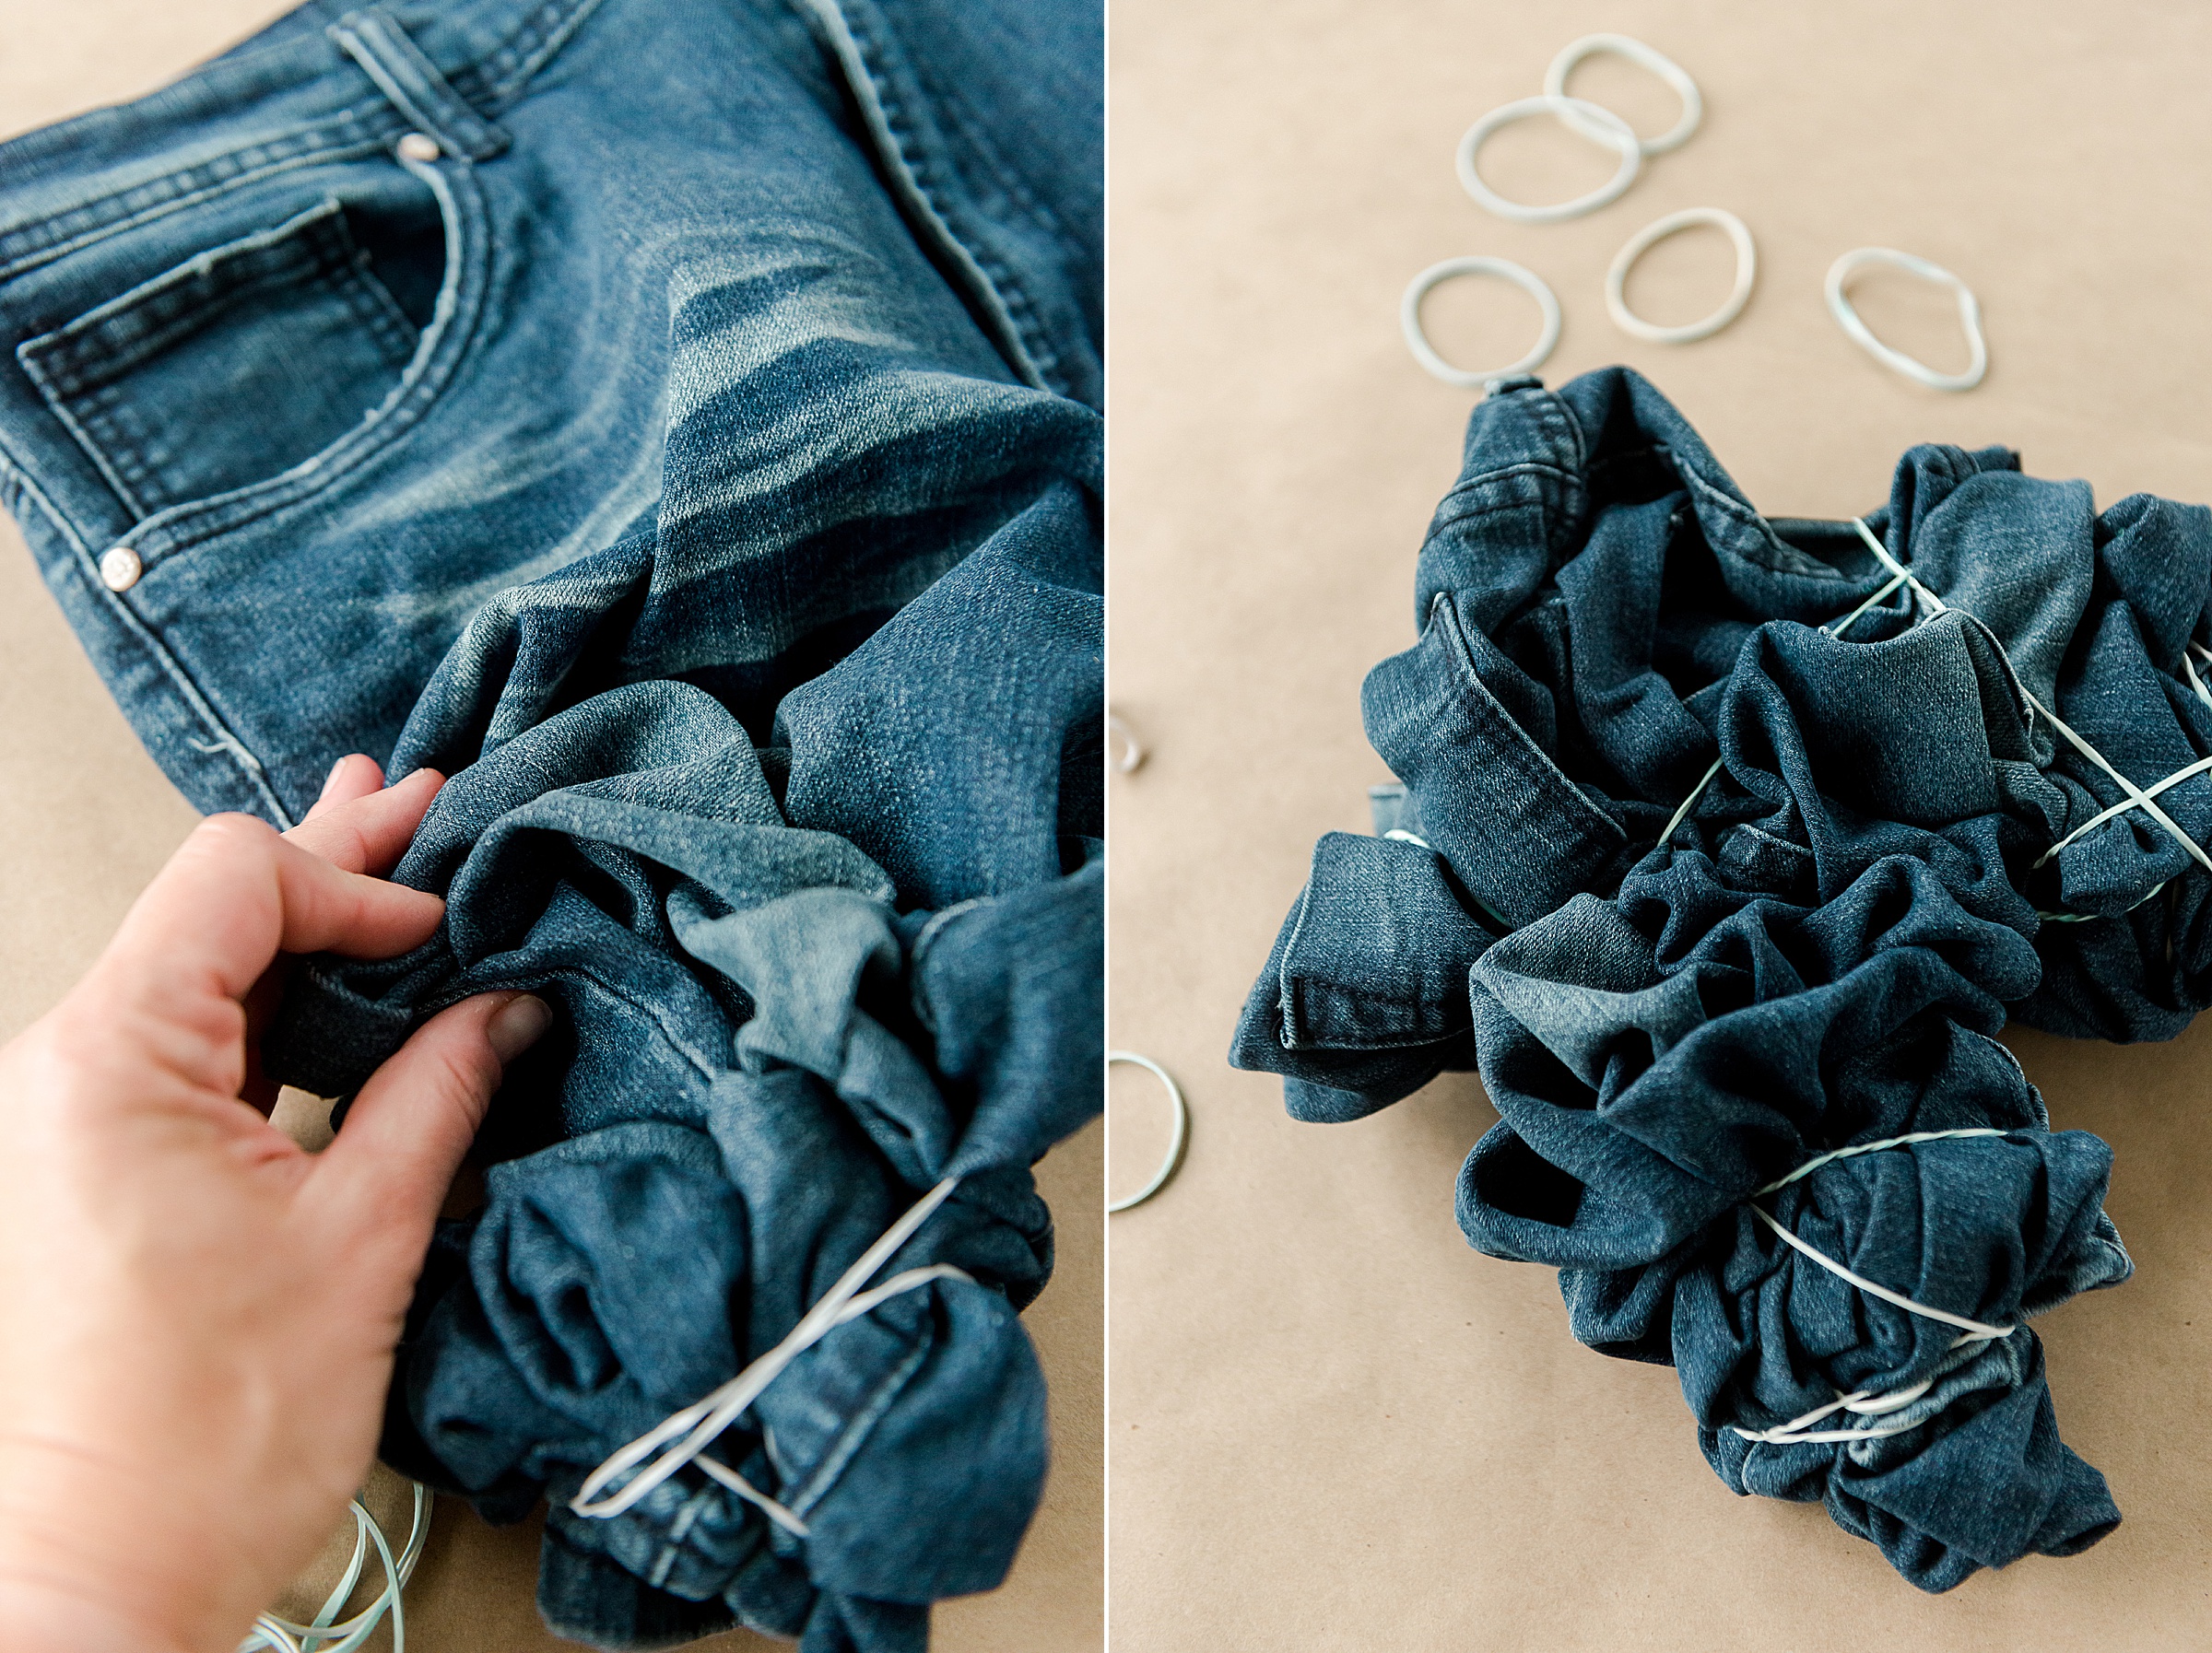
1. Begin by scrunching up our jeans in the best scrunchy pattern! 🙂 Then secure the scrunches with rubber bands – be sure not to make this too tight because the tightest area that gets scrunched into the center is the part that won’t be bleached – it will remain just the plain jean material.
2. Put on your rubber gloves and mix up your bleach solution with 2 parts bleach to one part water (basically just dilute it a bit so that it spreads and sprays well).
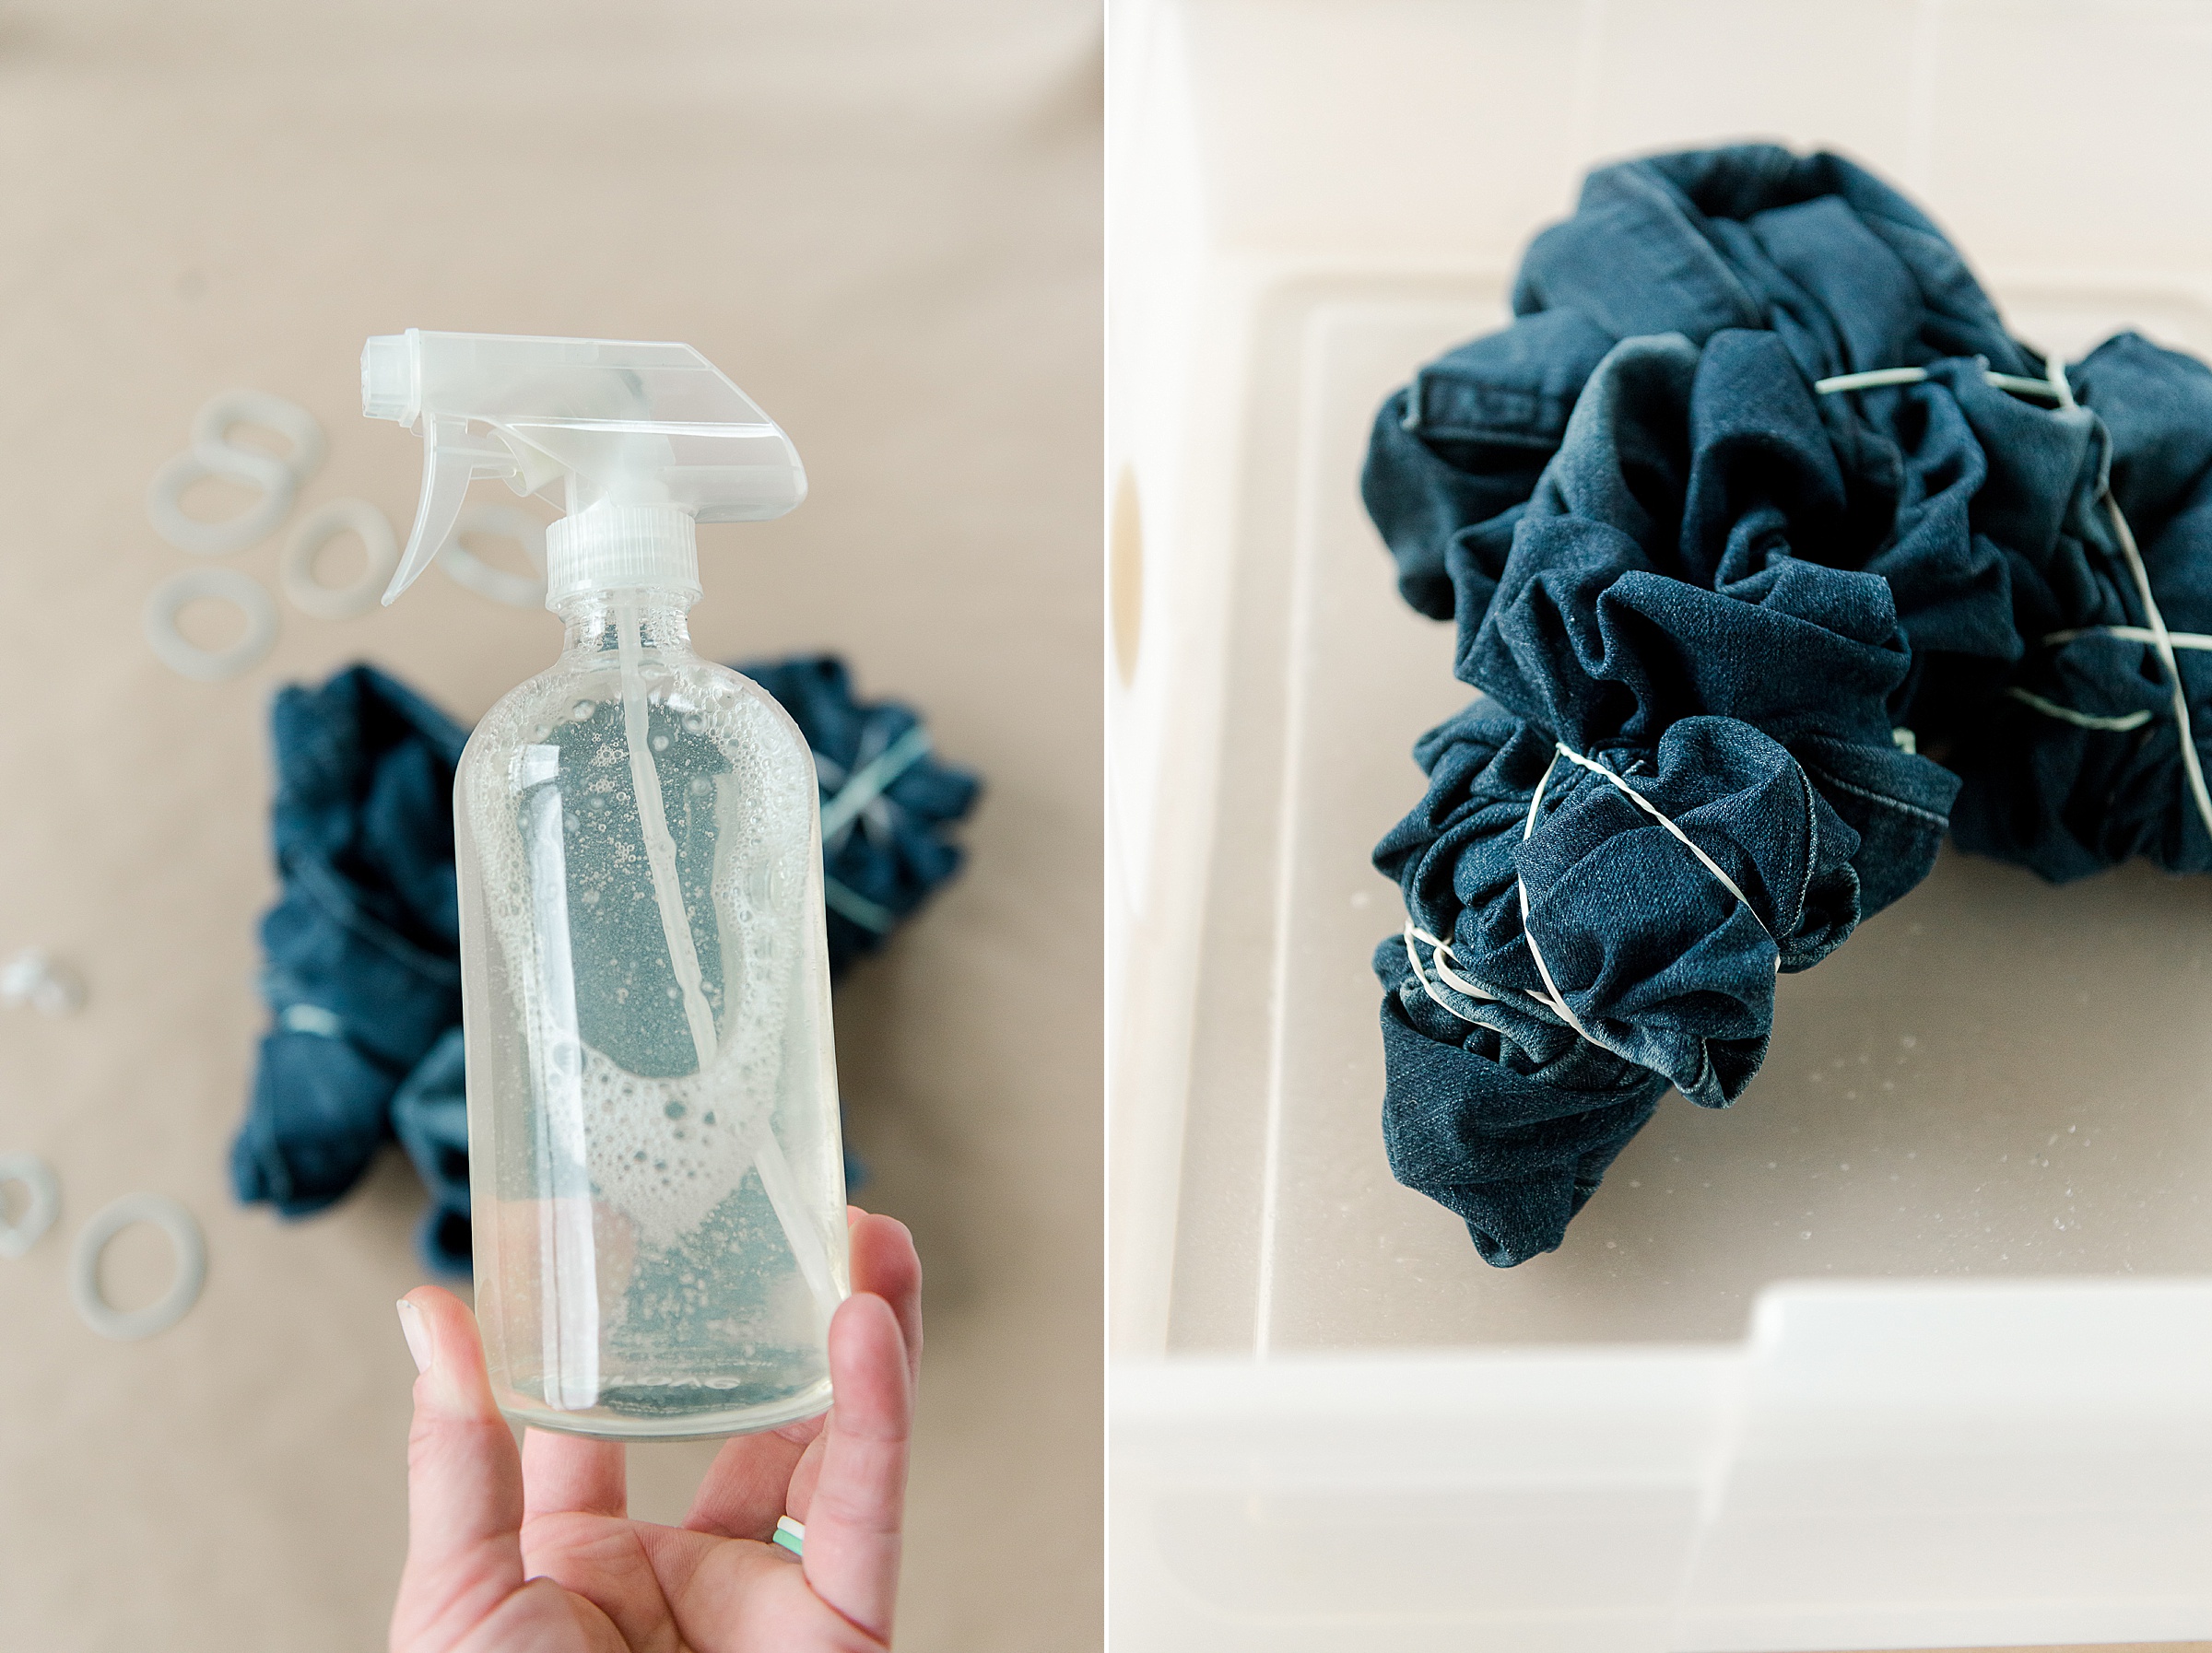
3. **PLEASE do this next part in a well ventilated area and follow all instructions for safety on your bleach bottle! 🙂
Lay your scrunched jeans into your tub or container and begin spraying and soaking the material. You want to soak WELL! Like, cover that jean in your solution until it is visibly wet!
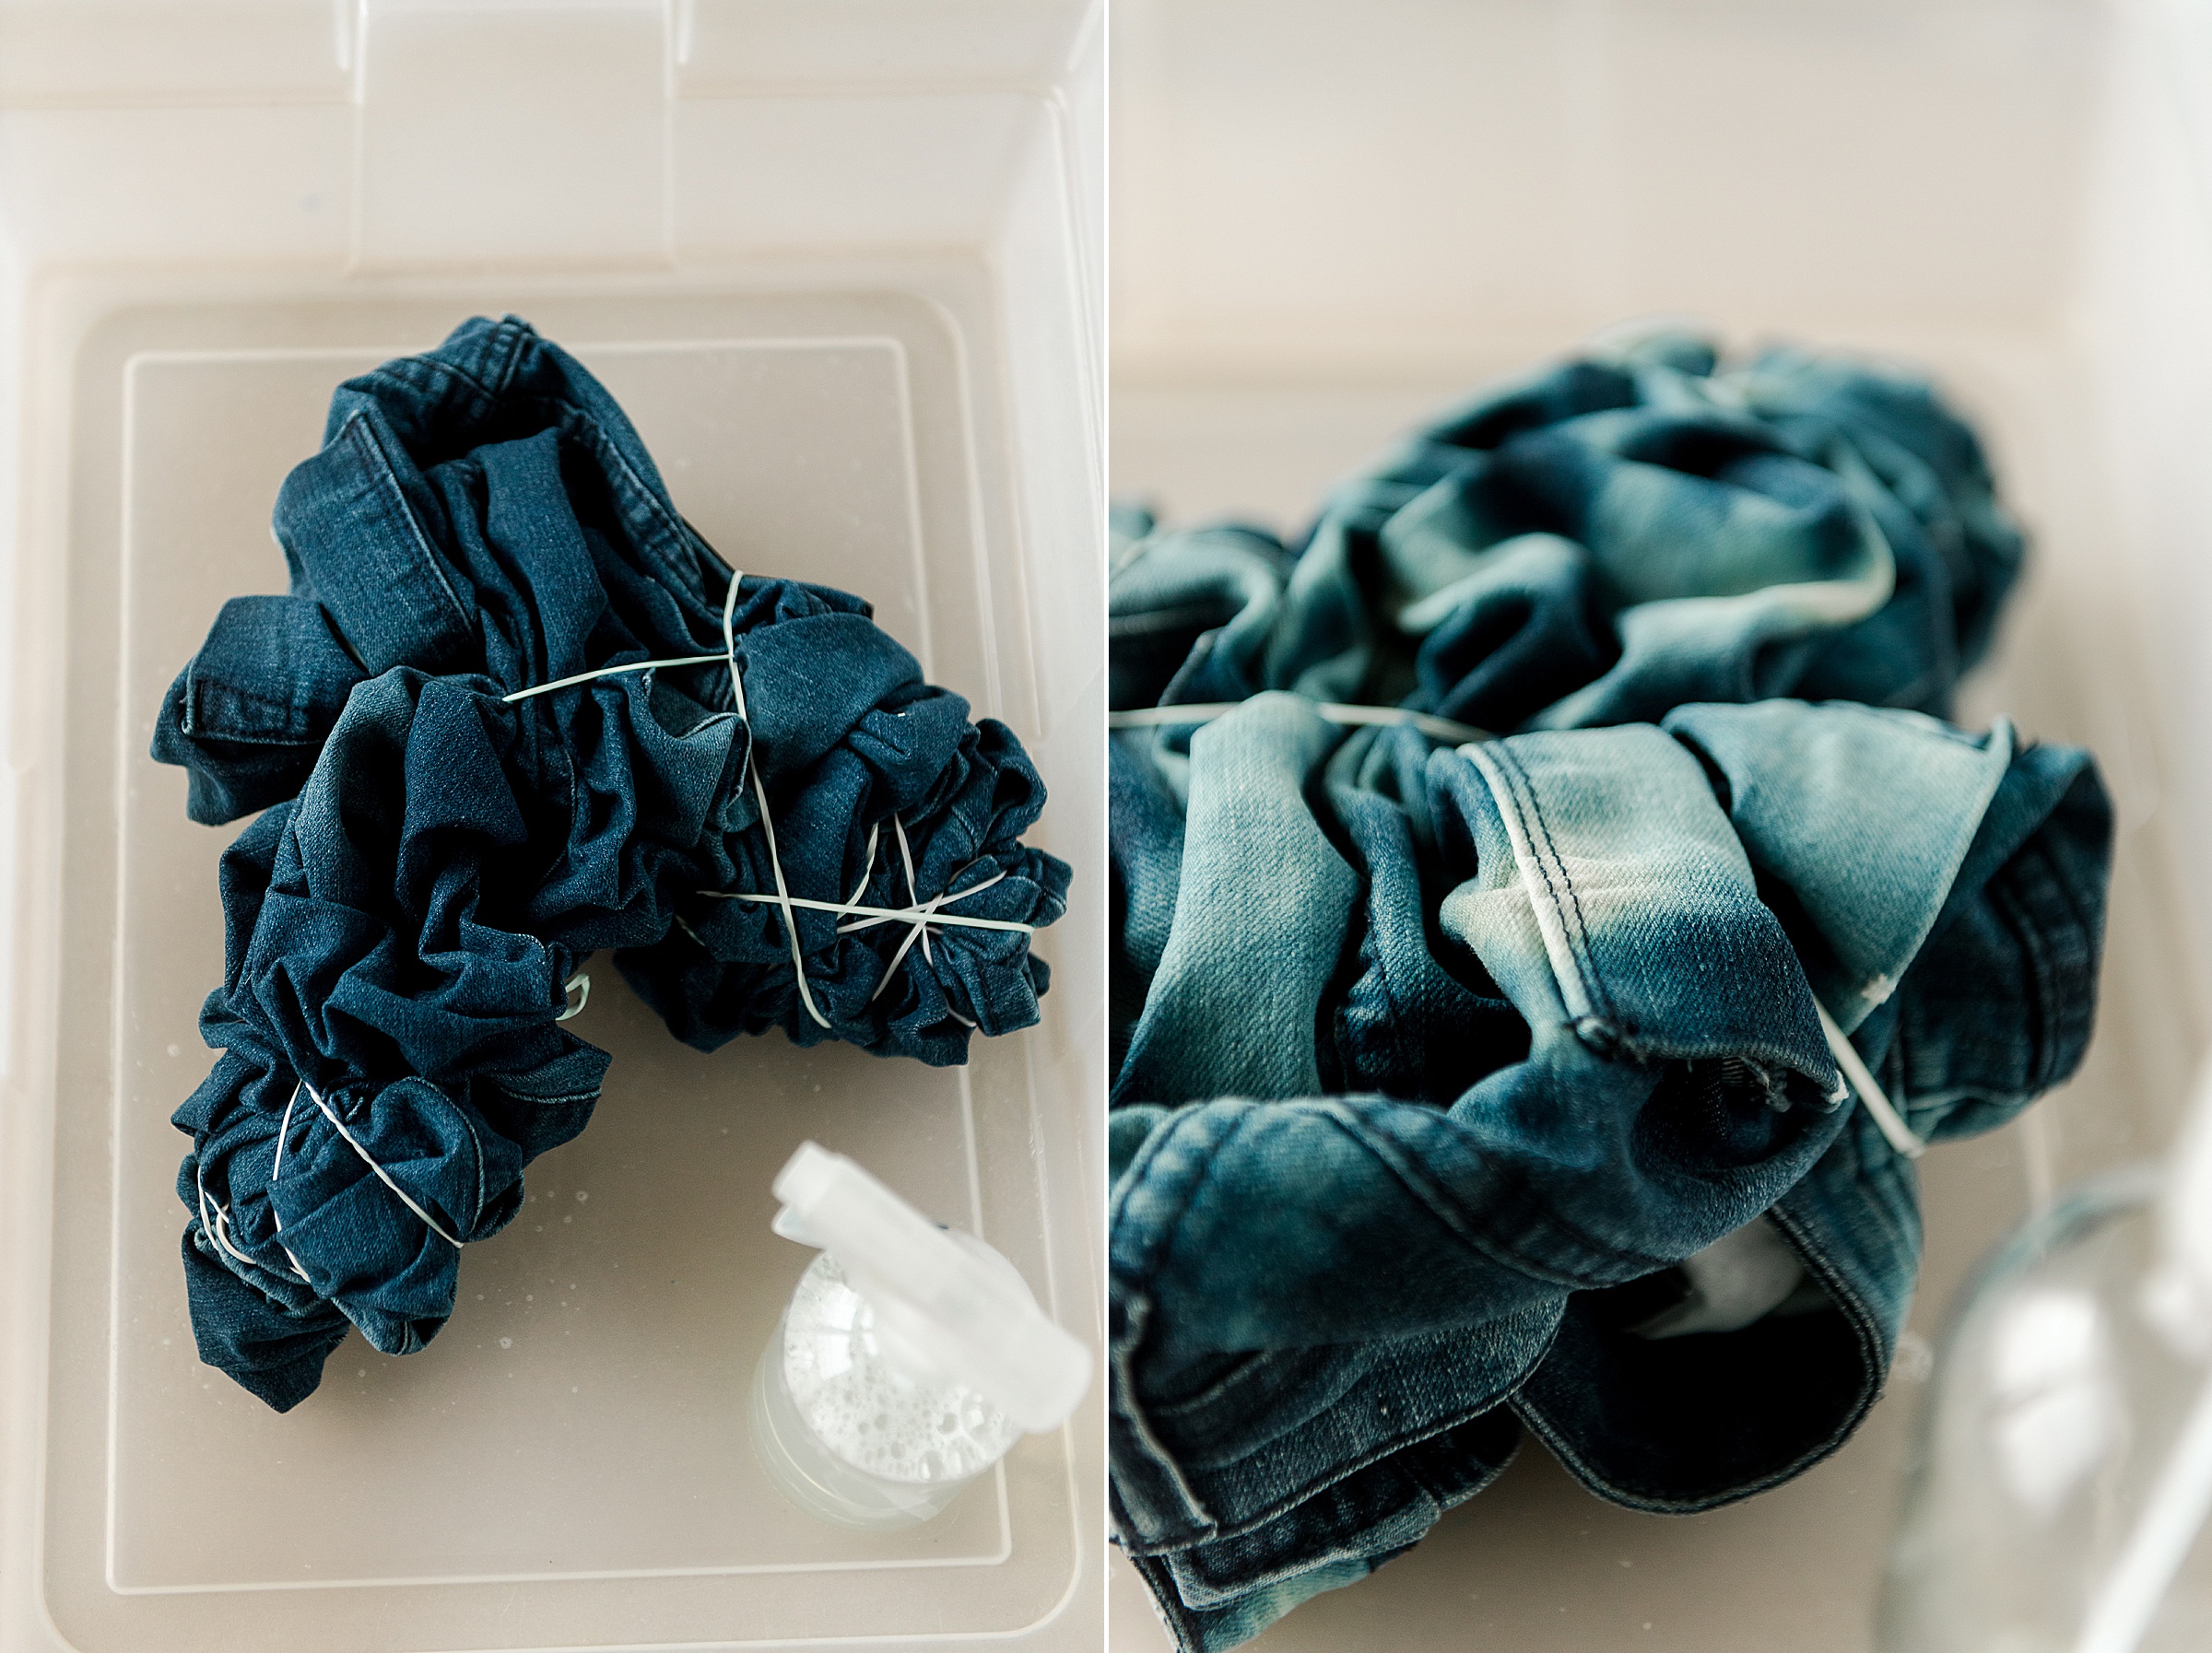
4. Now the waiting game! Let your jeans sit. I set a timer for 30 minutes to check them and the color was lifting quite well. I left the jeans about 70 minutes in total, checking on and off to be sure that I wasn’t letting them go “too long” (because it’s important to note that bleach can deteriorate the fibers in the jeans if you let them sit too long).
You can choose to put more sprays of bleach on your pants as time passes so that you get variations of the color lifting – honestly, more is MORE in this DIY! 🙂
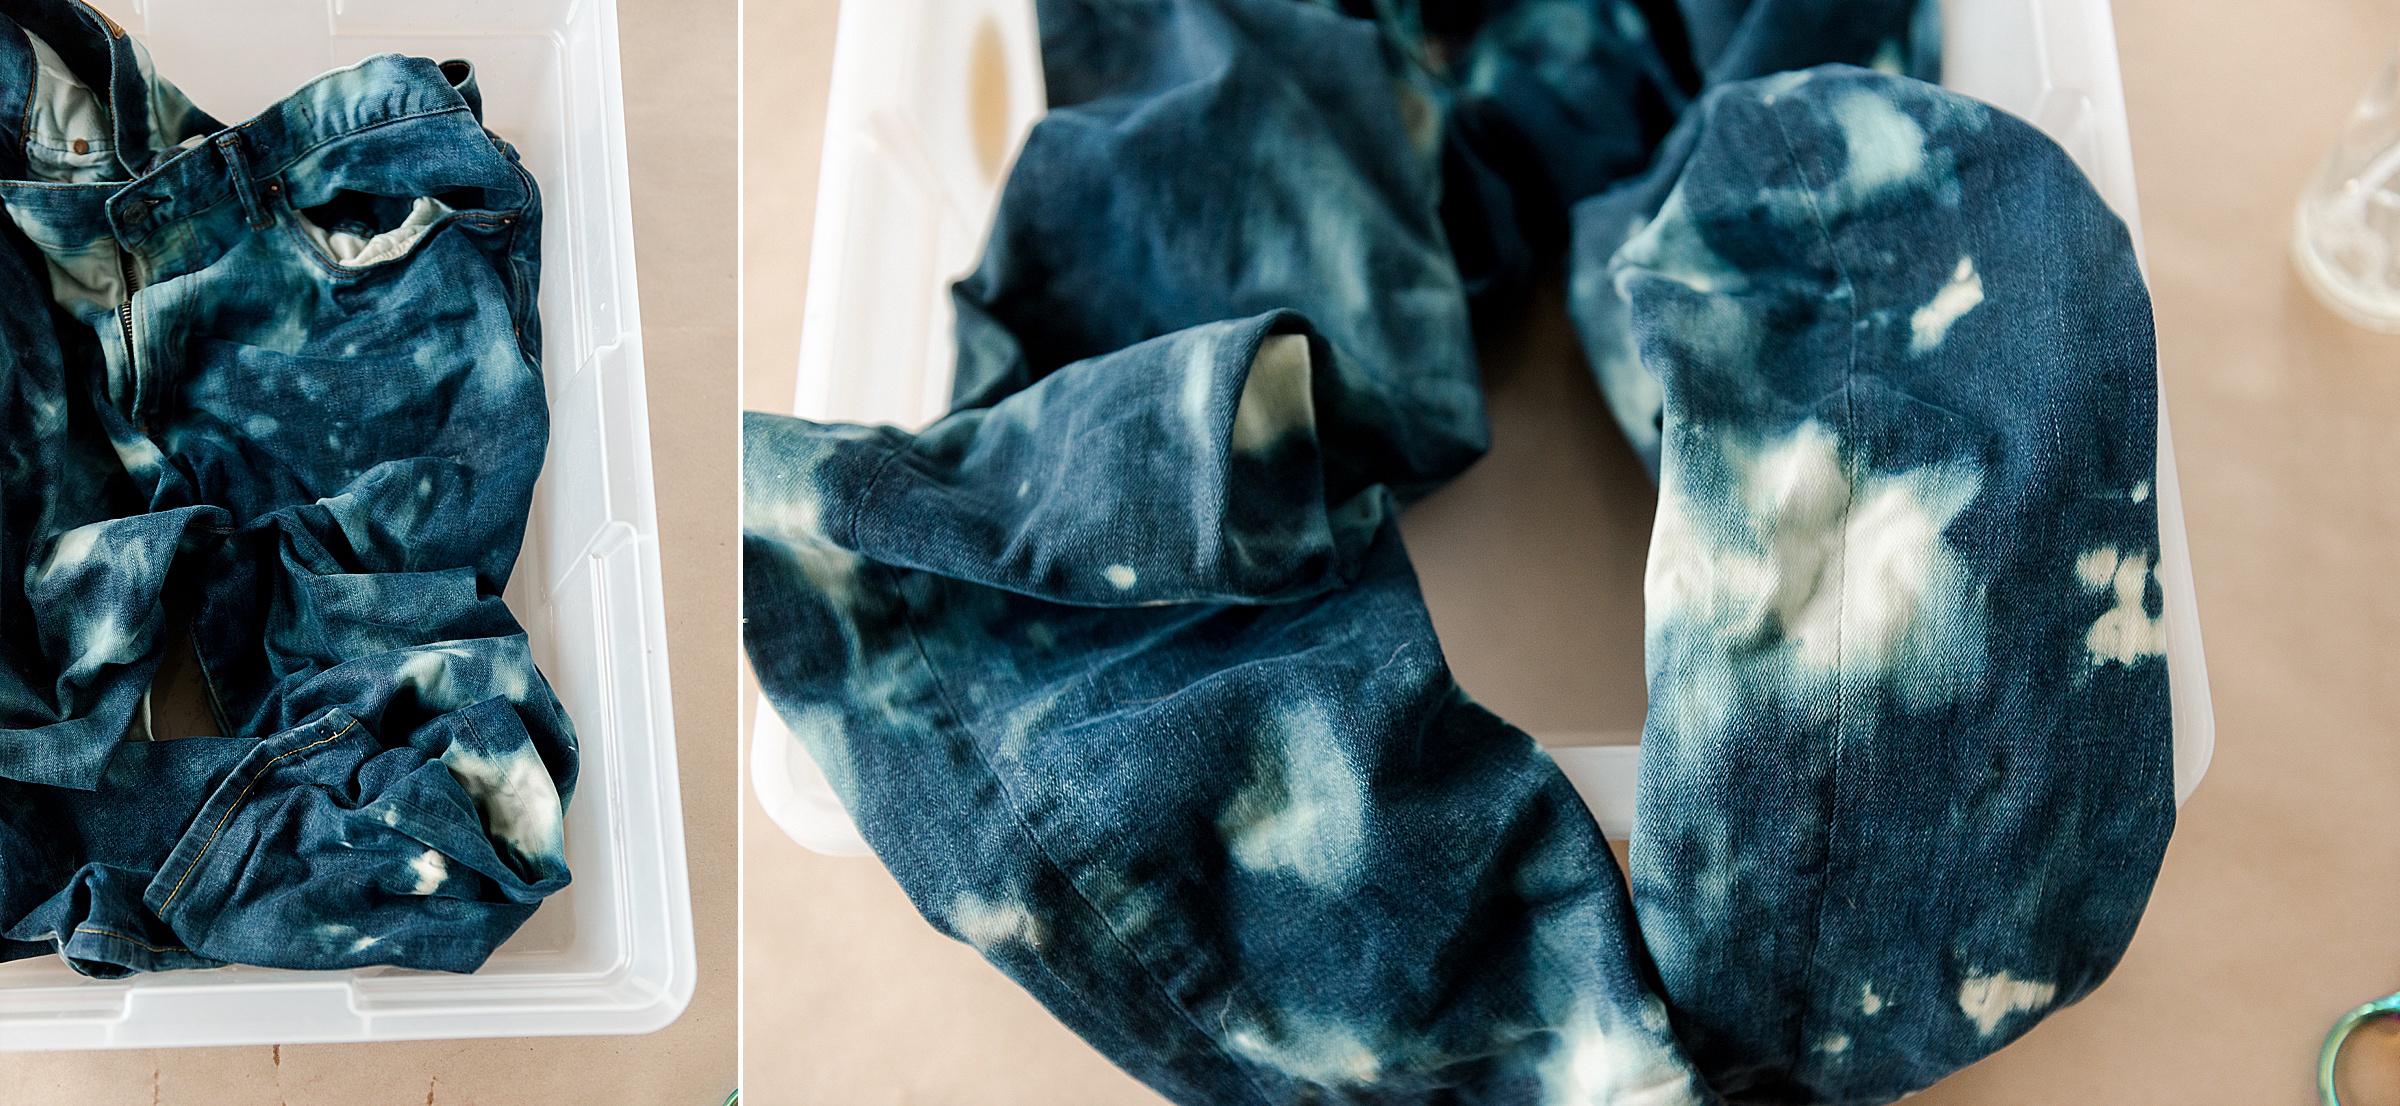
5. Once the color lift is to your liking, rinse them in a sink well before throwing them into a quick cycle in your washing machine (don’t put them in with other clothing to be washed initially)!
Then dry and try on our Bud’s amazing acid wash style jeans!!
TIPS ON HOW TO MANIPULATE A SYNTHETIC WIG:
I found some wigs at our local thrift store but needed to give them the exact “Married with Children” love to turn them into the PERFFFECT wigs for both Peggy and Kelly.
I tested out a few techniques and I found that the best way (for me) was to use an iron and steam on a low setting and a brush.
The wig that I found for Peggy was a supppppper curly red wig and I wanted to “tame down” the front of her wig so that I could get her iconic poof. So I began by brushing out the dry wig. Then I laid it on the ironing board and with the low setting on the iron, began ironing out portions of her hair. Then while the wig was still warm, I brushed out the portion that I had just ironed! Keep ironing and brushing to your heart’s content!
**I think that it’s SUPPPPER IMPORTANT to note here to TEST your heat setting before ironing out the wig, etc! Don’t melt your wig (although I never got close enough with my heat to do that….but do a test or perhaps use an old pillowcase between your iron and the wig as you get comfortable with the heat settings!)
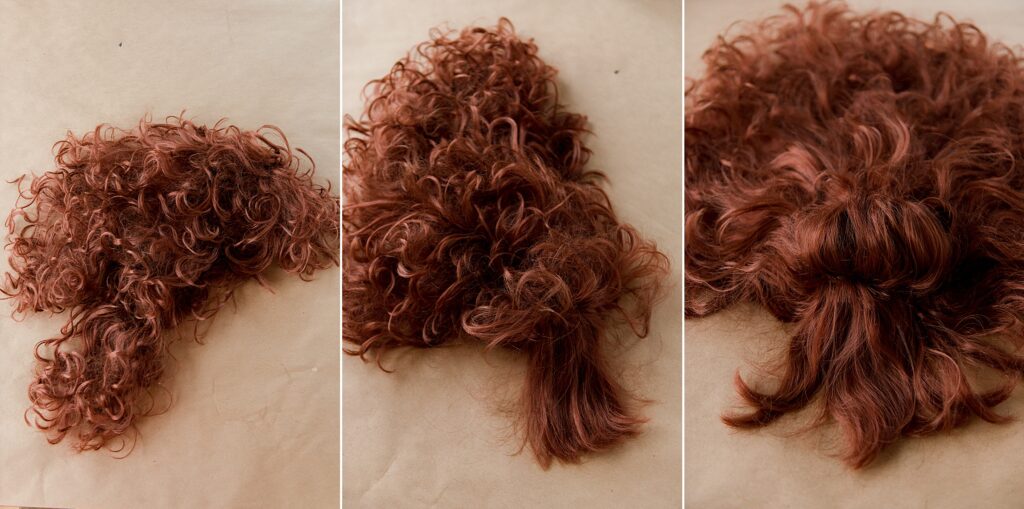
Then to get Peggy’s poof, I sectioned it off (as I would with hair on someone’s head) and began backcombing to get a ratted, “tall” part and pinned it in place with some bobby pins!
With Kelly’s hair, I just made sure to get her iconic, side part with hair swooping to the side! Either way, with both wigs, I began with curls and ended with semi-straight hair to pull off each character’s aesthetic! 🙂

Have SO MUCH FUN re-watching Married With Children (remember full episodes are now streaming on Hulu, Pluto TV, Peacock and Prime Video for the show’s 35th anniversary) and reminiscing about the 90s style and making these costumes! And of course, give a shout out to @officialmarriedwithchildren on Facebook and YouTube (and ME) if you make them (! I’d LOVE LOVE LOVE LOVE to see! 🙂
HAPPPPPY COSTUMING and HAPPY HALLOWEEN!

