• Murals
  • Paper Crafts
  • Cricut + SVG files
  • Sewing
  • doodled coloring pages
    • Facebook
    • Instagram
    • Pinterest
    • Twitter

oh yay studio - Making + baking + everyday celebrating

Celebrating Holidays + everydays through making + DIYs + Murals + costumes + a creative monthly subscription

  • Home
  • About
  • Categories
    • DIYs
      • Painting
      • Cricut + SVG files
      • Paper Crafts
      • Sewing
      • Yarn + Fibers
      • Tie Dye
    • Printables
    • Murals
    • Recipes
    • Holiday
    • Costumes
    • Life
    • Uncategorized
  • Contact
  • SHOP!

All Tie Dye

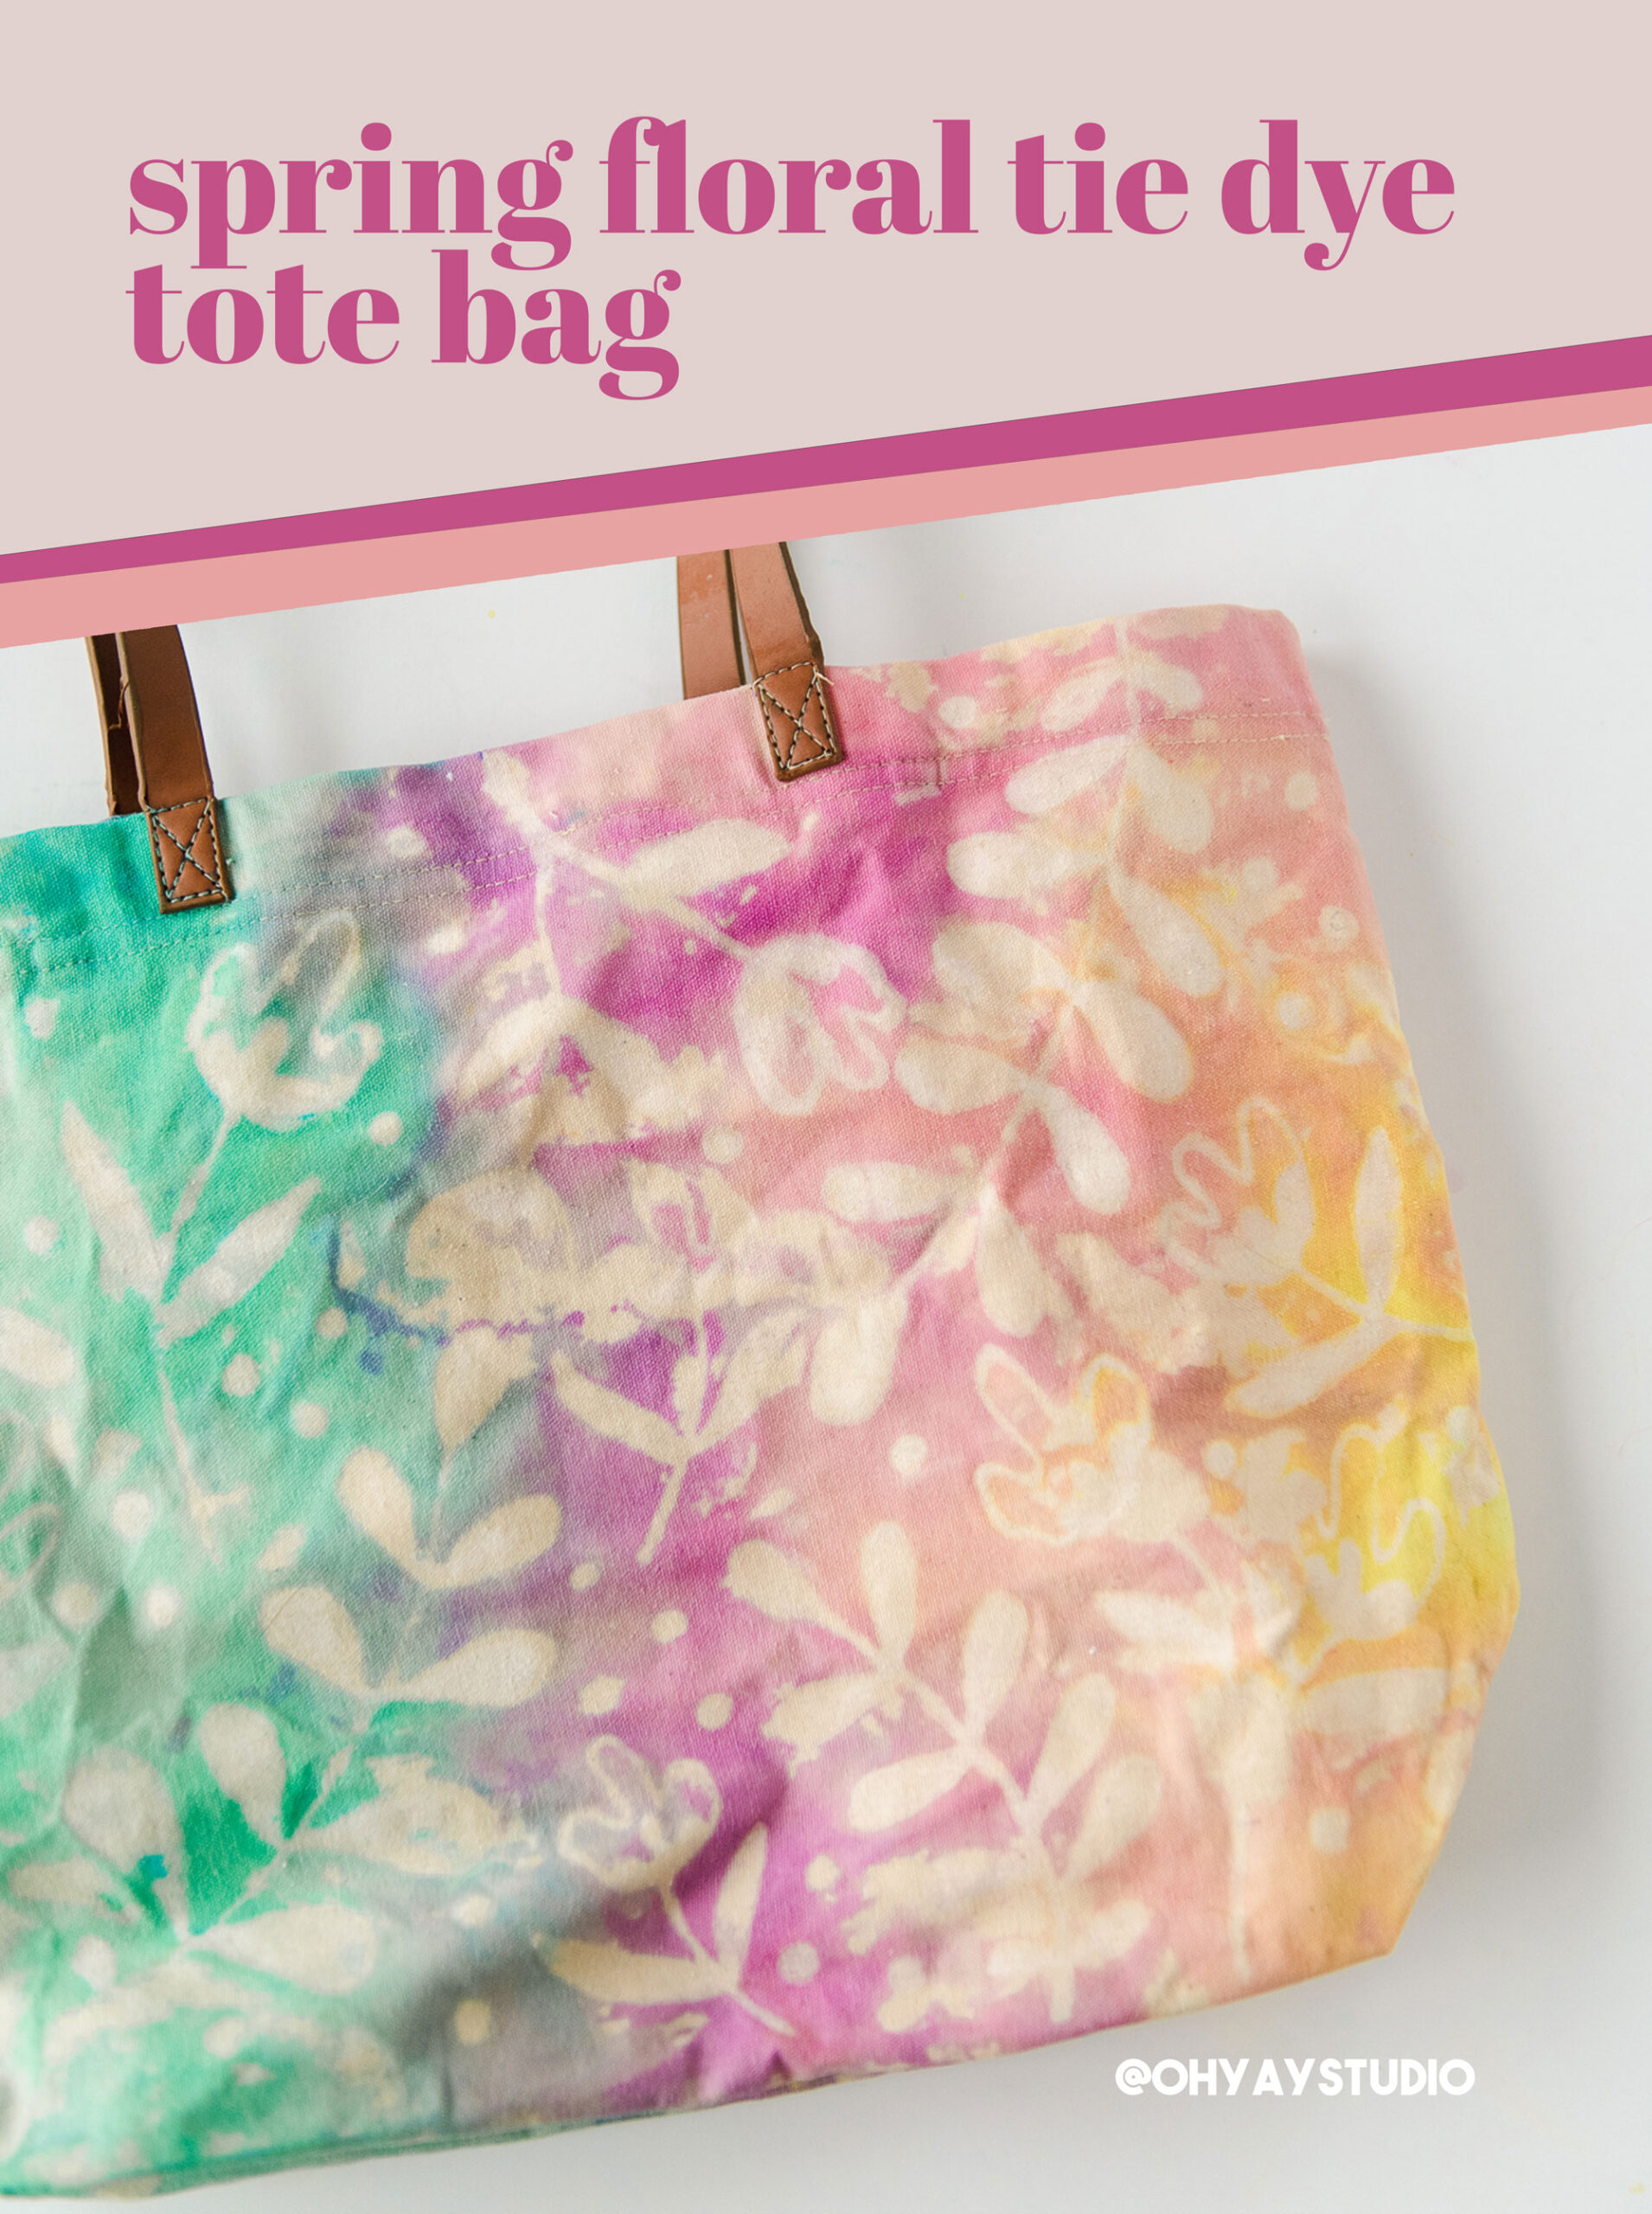
Colorful spring tie dye tote bag

*this project is in partnership with Create Basics tie dye purchased from Walmart

Spring floral tie dye, flower tie dye DIY, how to do tie dye resist, Tulip tie dye kit, How to tie dye a tote, Tie dye resist project

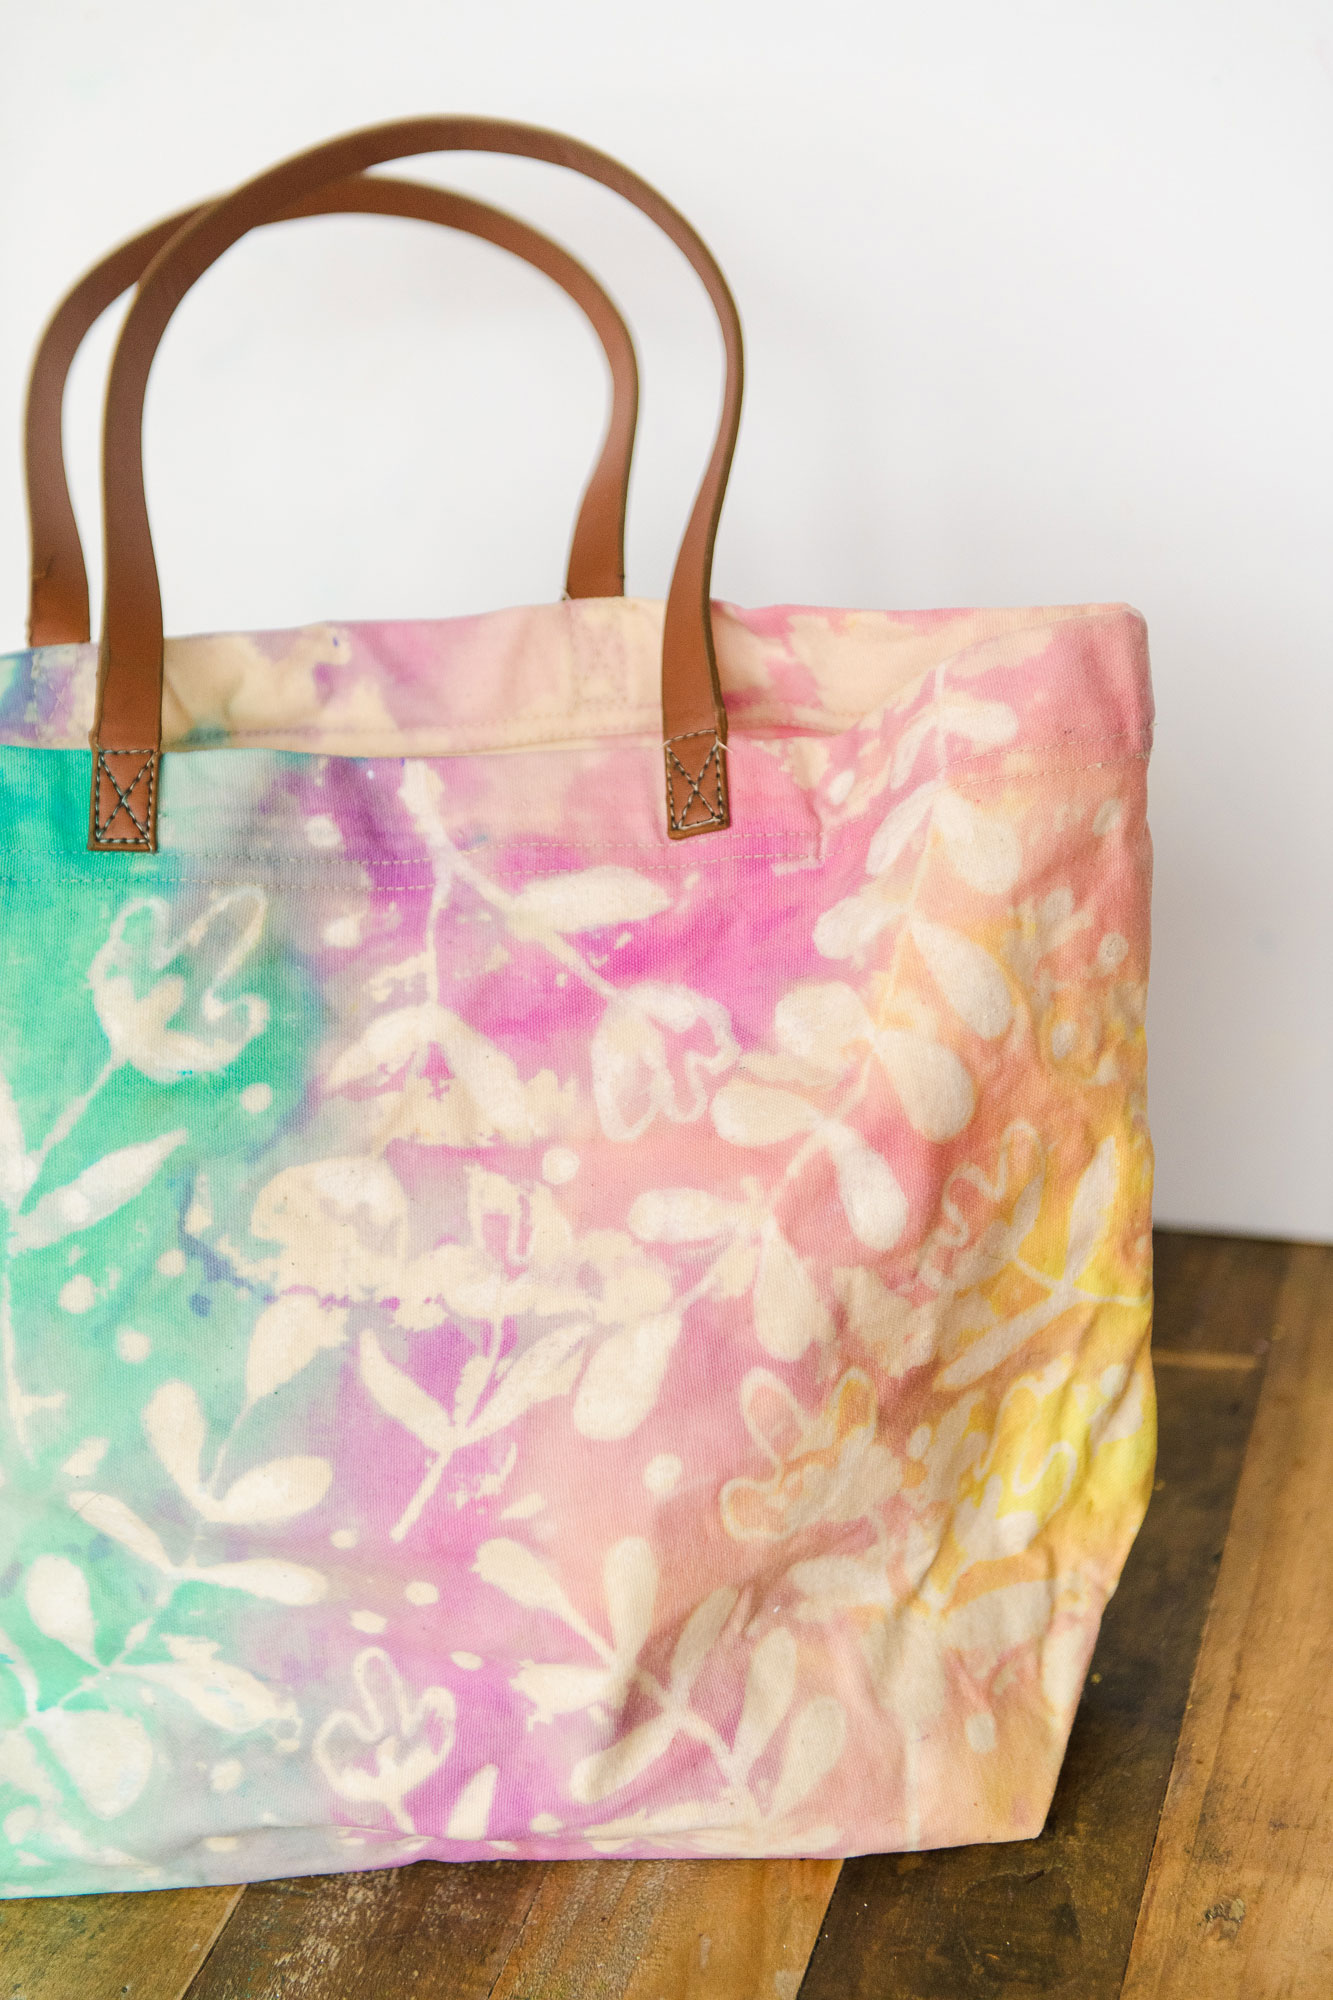
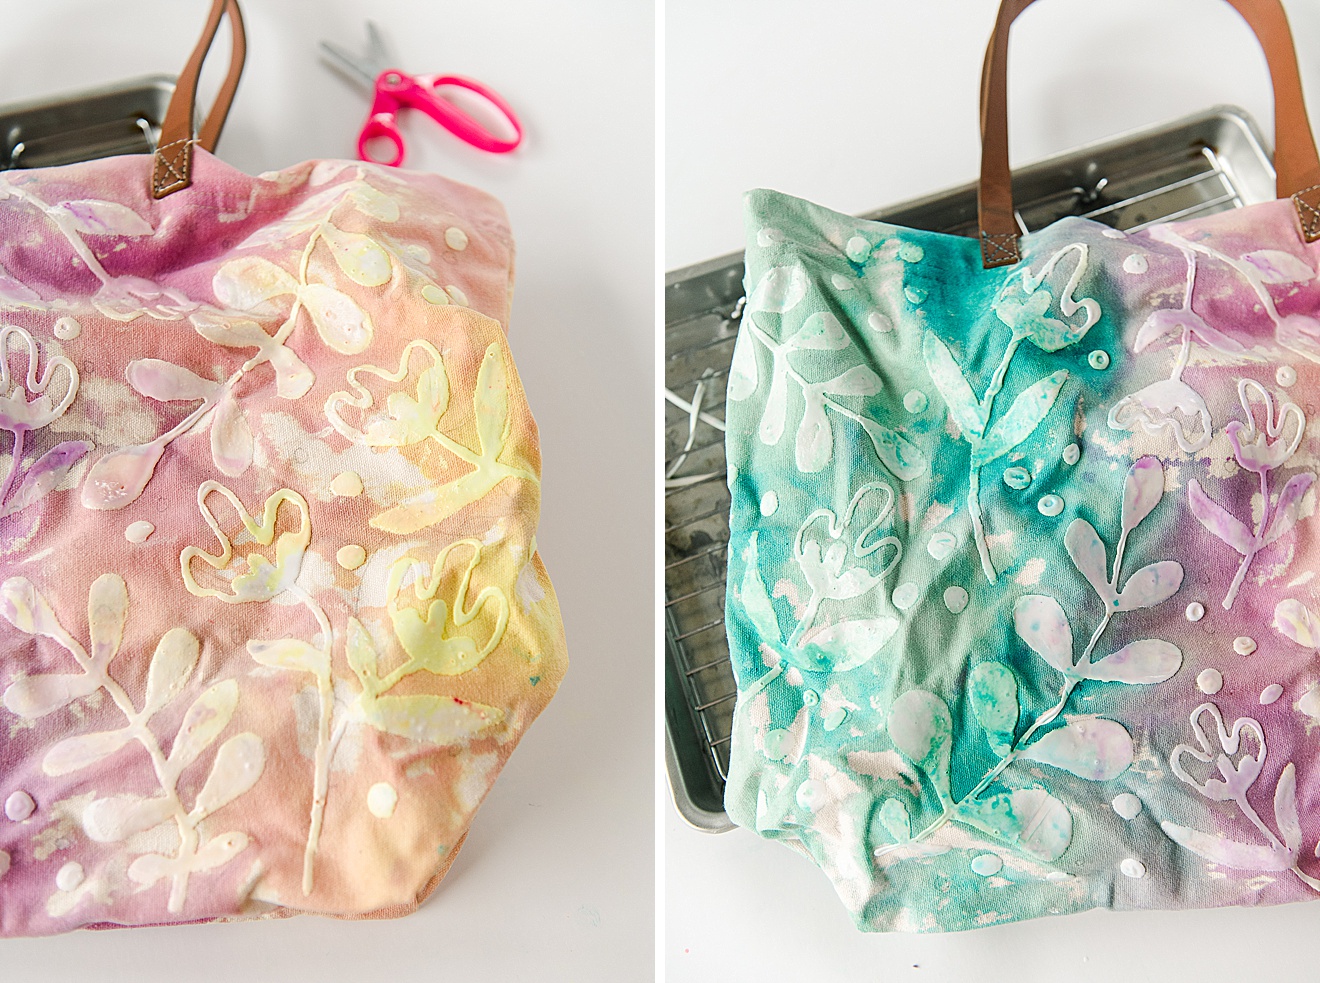
This project is one that I wish I could make over and over and over and over and over again! I mean, flowers (YES), rainbow colors (YES) and a super cute and USABLE end product (DOUBLE YES)! SO here you have it, the most colorful, floral tie dye tote bag EVER! 

You may remember my slight obsession with tie dye resist (The earth day tote HERE and the peace sign tee HERE) so this is a similar idea because finding out that glue can be a resist to tie dye LEGIT changed my making life! Honestly, drawing with glue knowing that it will turn into a colorful amazing project is such a fun experiment….so even if you don’t draw detailed flowers or fern leaves please give it a try with a phrase or someone’s initials or even just an abstract glue SOMETHING! 🙂 

Spring floral tie dye, flower tie dye DIY, how to do tie dye resist, Tulip tie dye kit, How to tie dye a tote, Tie dye resist project

MATERIALS:

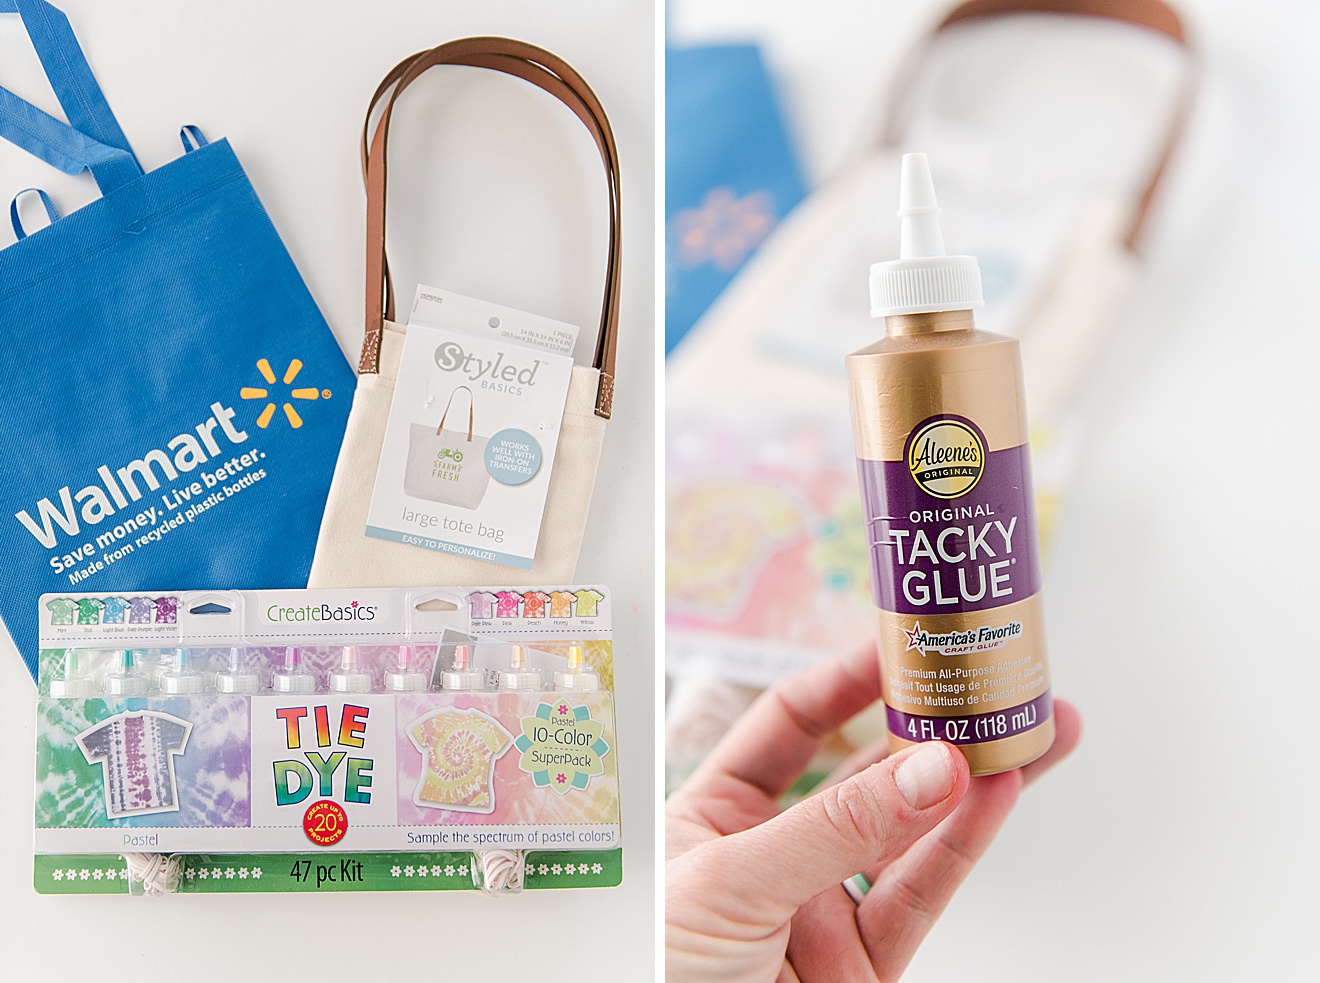
  • A canvas tote – the thicker canvas the better (The one I used was a super amazing one that I got for inexpensive from Walmart that is thick canvas AND has awesome leather handles….it’s the Styled Basics brand size 14×14 🙂 
  • A pack of Create Basics Pastel colored tie dye (AMAAAZING colors)
  • A bottle of Aleene’s Tacky Glue (PVA washable glue)
  • A rack and tray for dying on and catching excess dye when dying 🙂 
  • Iron
  • Pencil
  • Plastic bags or an airtight container to allow your tote to soak overnight
Spring floral tie dye, flower tie dye DIY, how to do tie dye resist, Tulip tie dye kit, How to tie dye a tote, Tie dye resist project

INSTRUCTIONS:

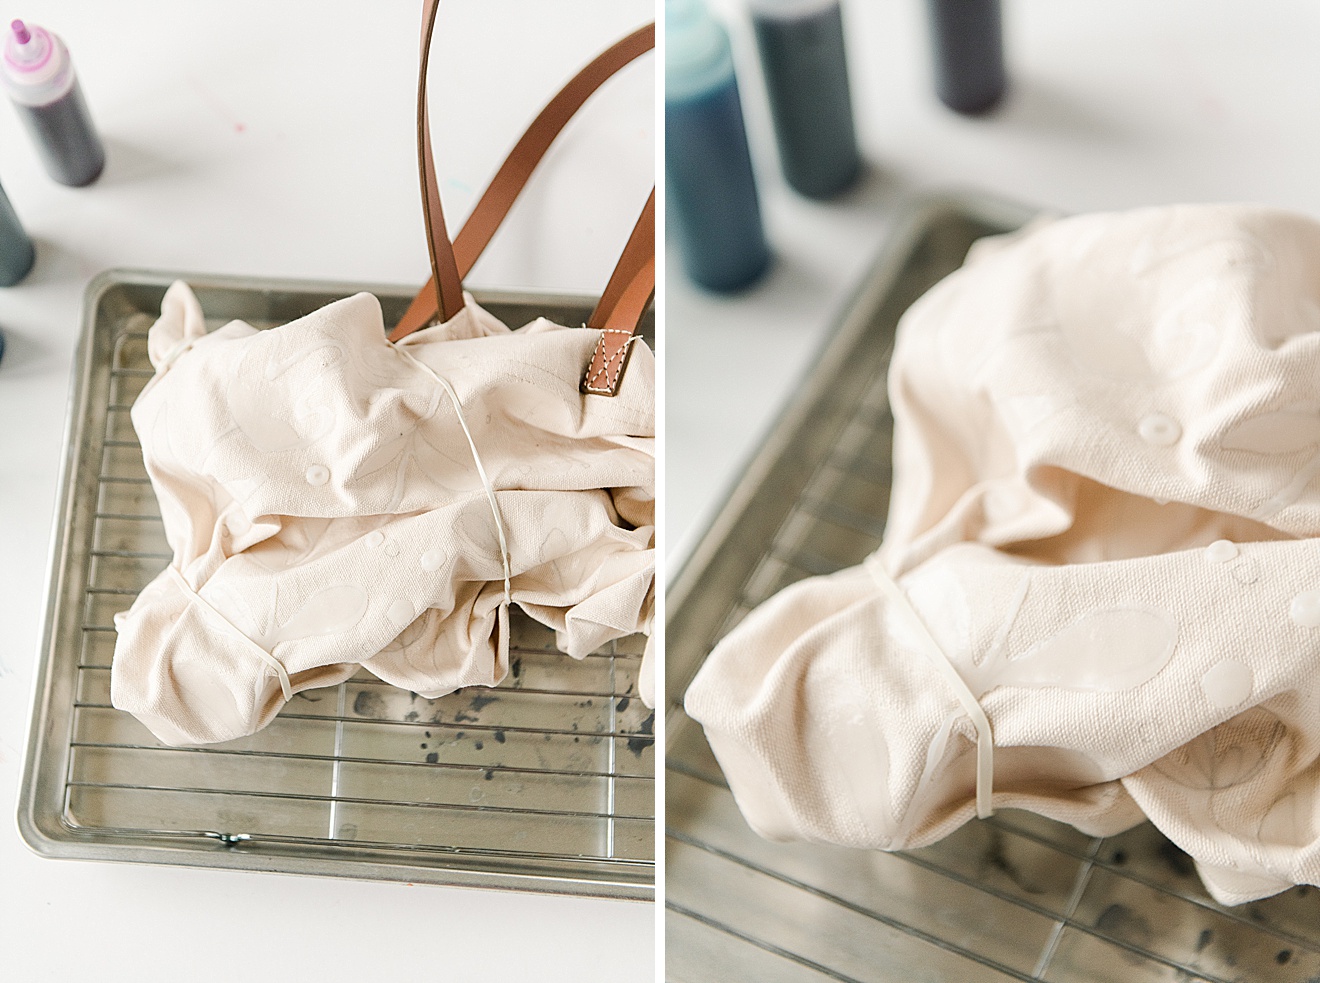
1. Iron your canvas bag to make sure that all of the wrinkles and creases are out. This is important so that you can make sure your glue lays flat while it dries and doesn’t run or drip from creases 🙂 

Spring floral tie dye, flower tie dye DIY, how to do tie dye resist, Tulip tie dye kit, How to tie dye a tote, Tie dye resist project

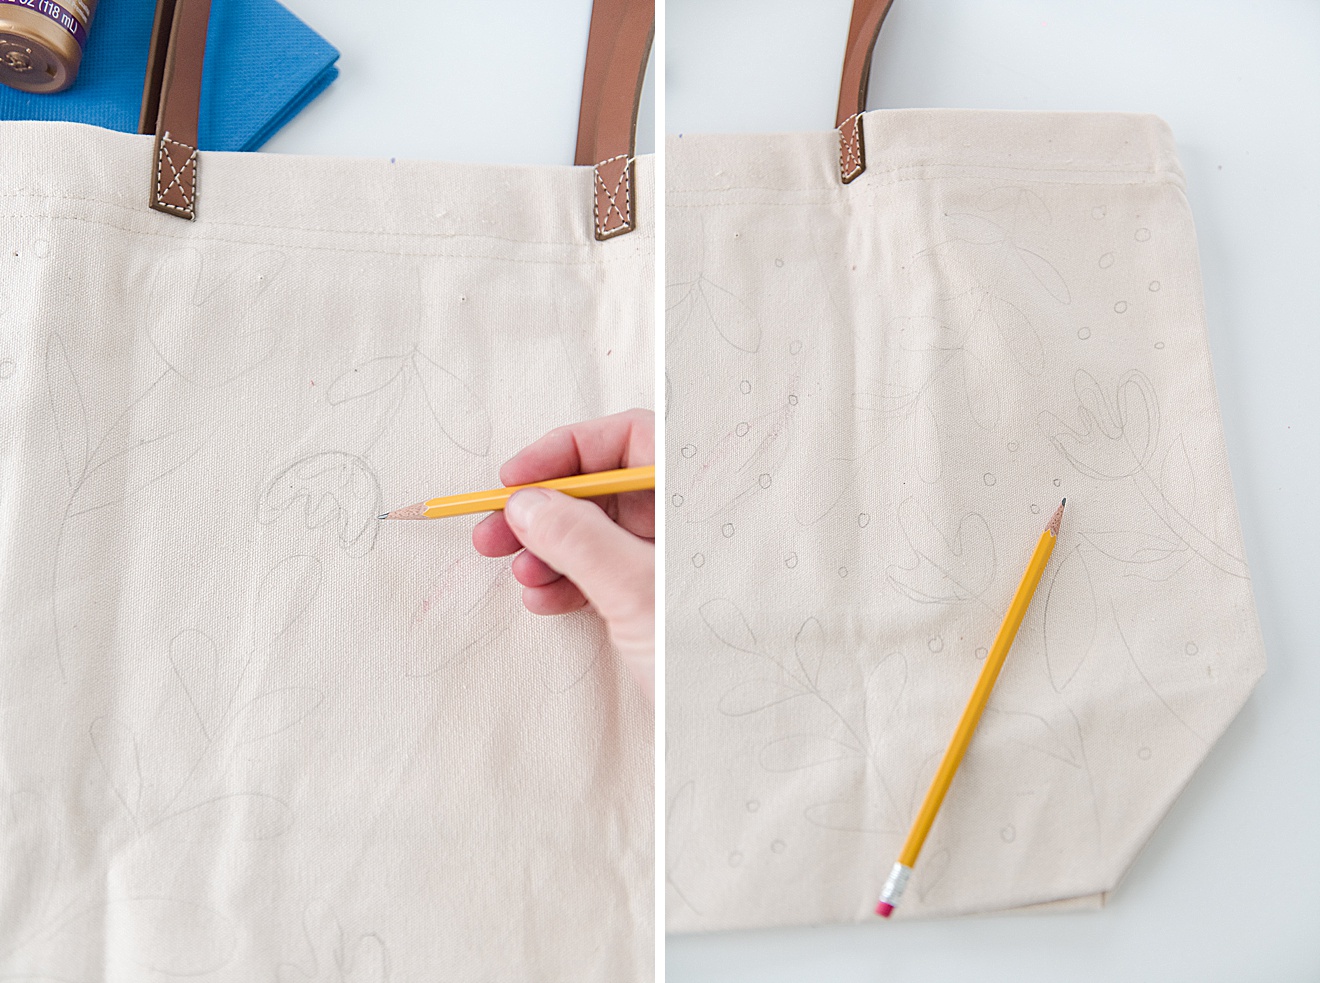
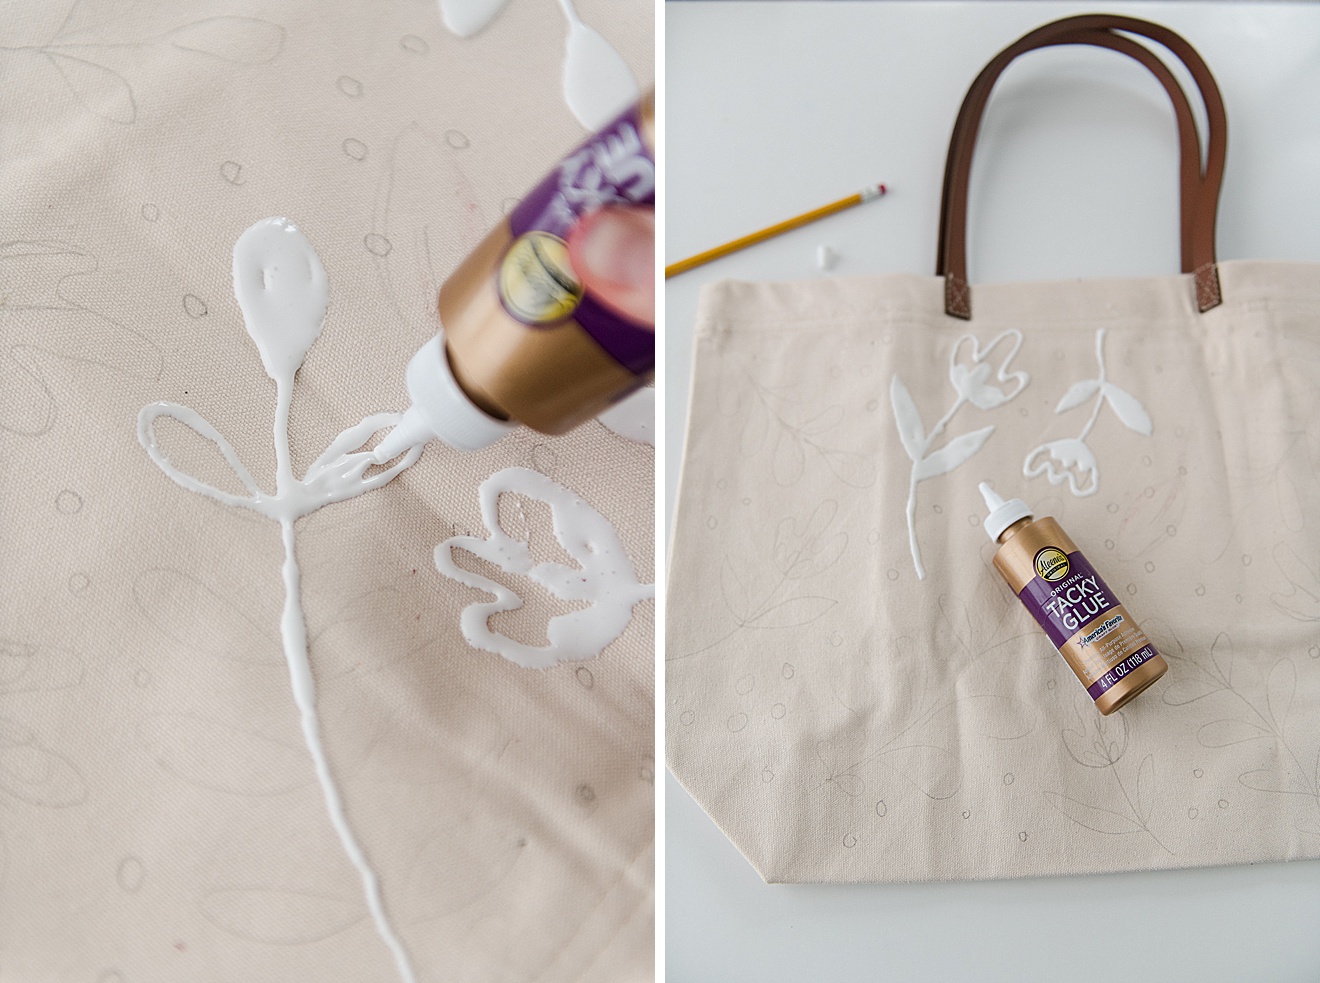
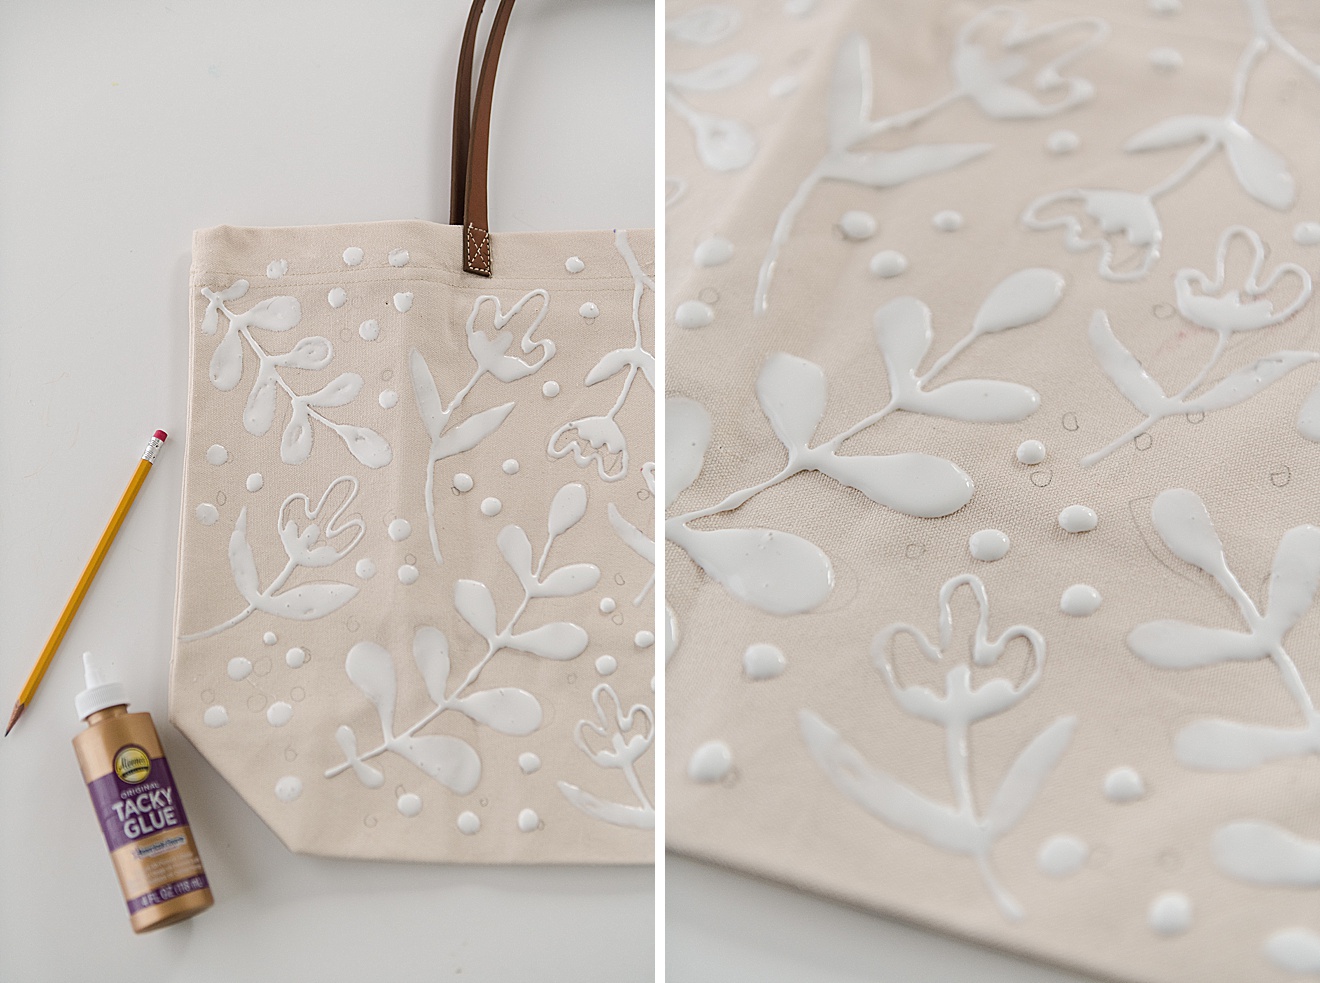
2. Pencil on your design (LIGHTLY….you don’t want your pencil marks to be too dark that potentially don’t wash out in the end). Then generously (but without too much “pooling”) trace your pencil lines with your glue. Begin by testing your “line” on a piece of paper to make sure that you have the right thickness that you’d like to cover the designs. 

*tip – look at various angles to be sure that you’ve covered the areas completely with enough glue to resist the dye. You will want the glue to be “complete and full” without a break in the glue line in the areas you’ve applied, but not pooling too much that’s its dribbling outside of your shape or line. And if needed, go back and fill in spots with more glue if necessary 🙂 

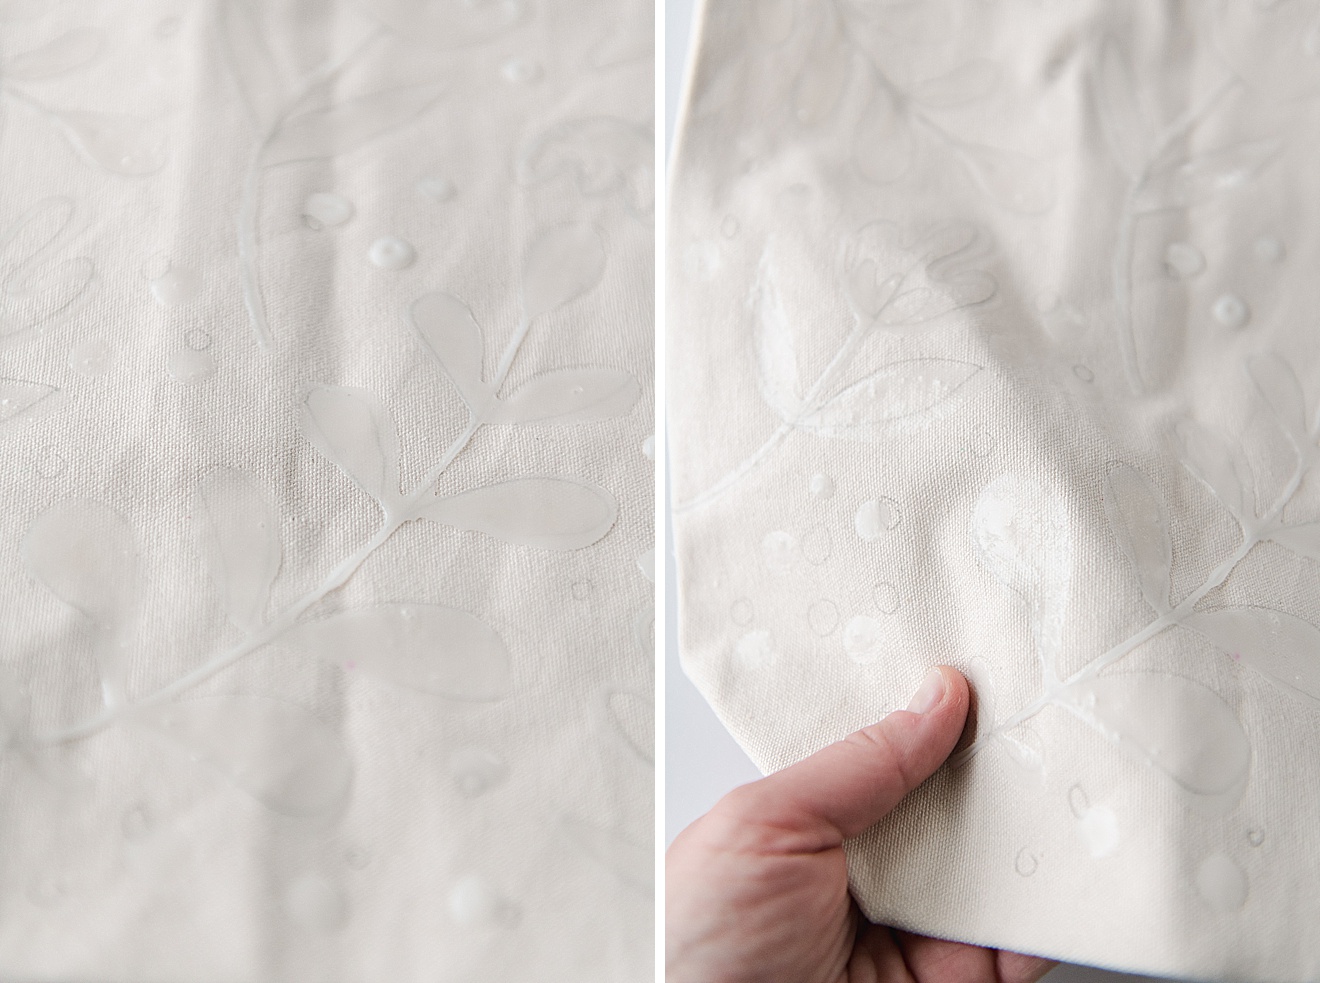
Then set aside and allow the glue to completely dry (I let ours dry overnight)

Spring floral tie dye, flower tie dye DIY, how to do tie dye resist, Tulip tie dye kit, How to tie dye a tote, Tie dye resist project

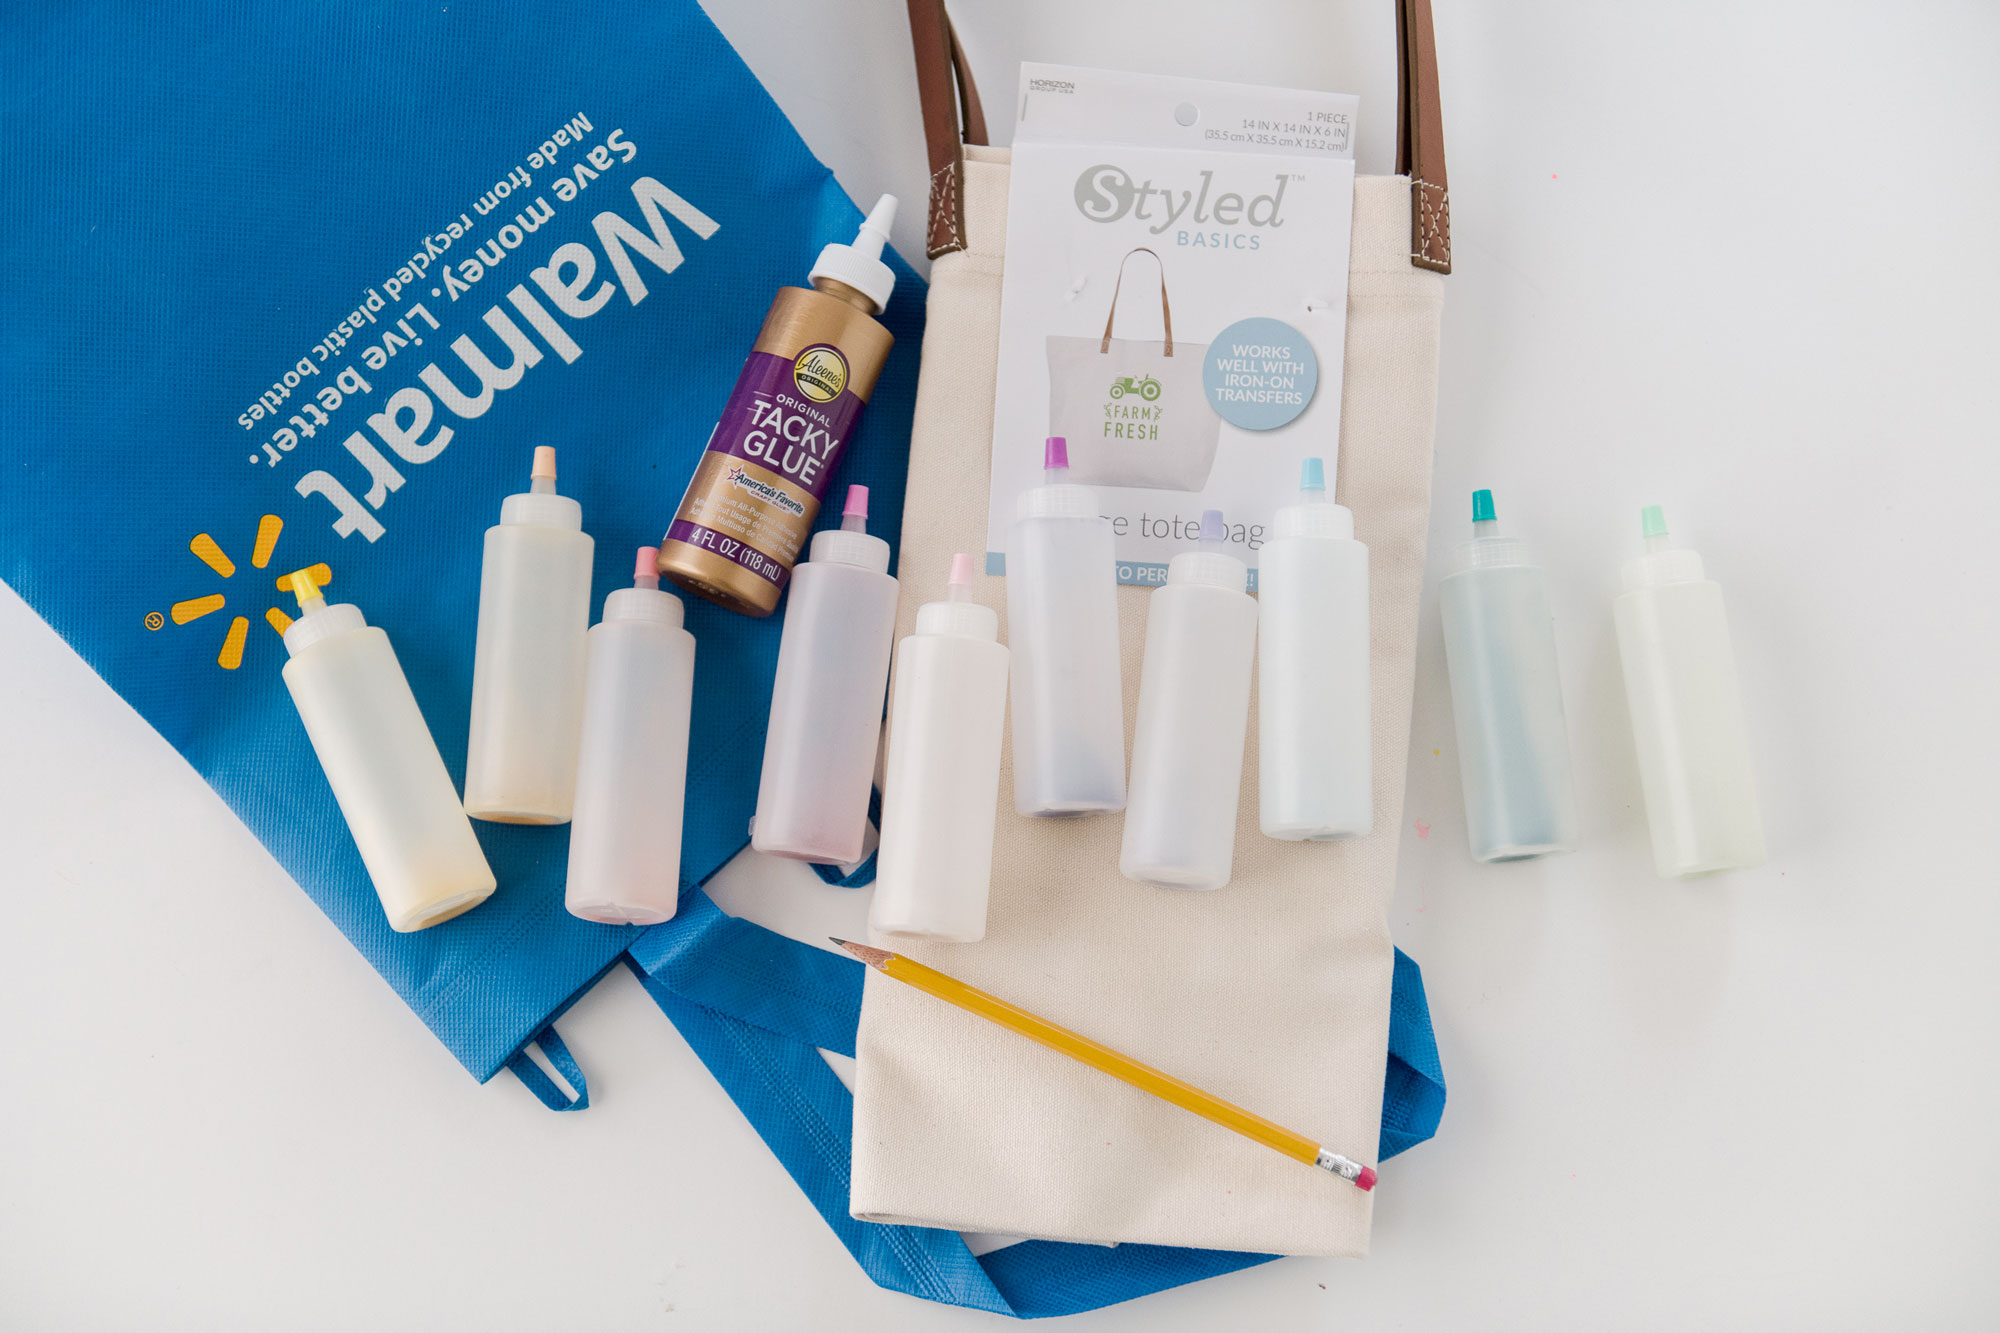
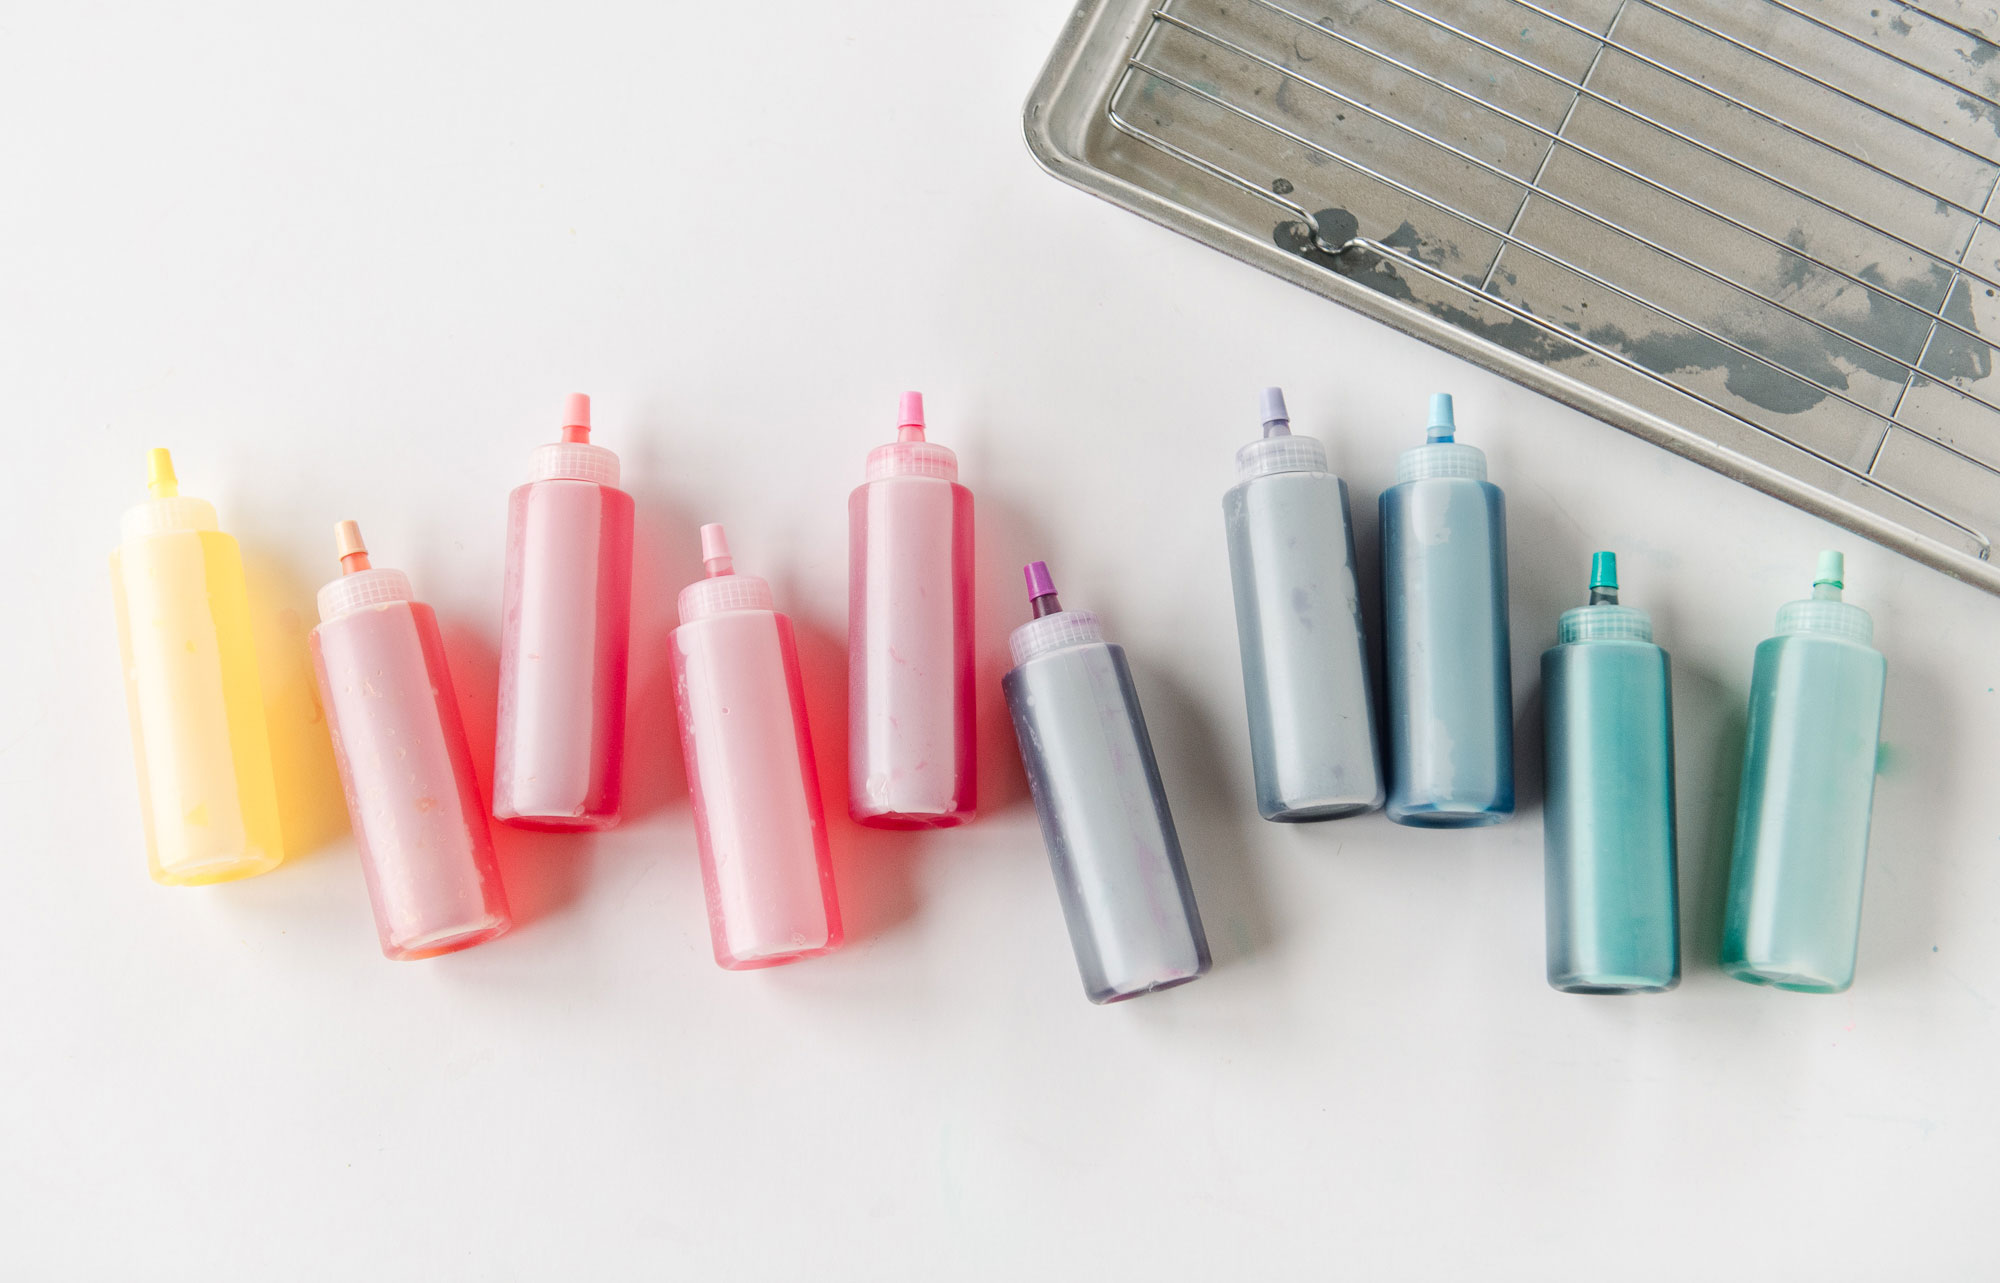
3. Prep your dye by removing the bottles from the Create Basics Pastel kit and filling alllllll of the amazing colors to the fill line instructed on the bottle! Carefully shake the bottles to make sure all of the dye is mixed

**and remember to cover the top of the bottles as you shake with a paper towel——we don’t want to accidentally tie dye our walls! 🙂 

Spring floral tie dye, flower tie dye DIY, how to do tie dye resist, Tulip tie dye kit, How to tie dye a tote, Tie dye resist project

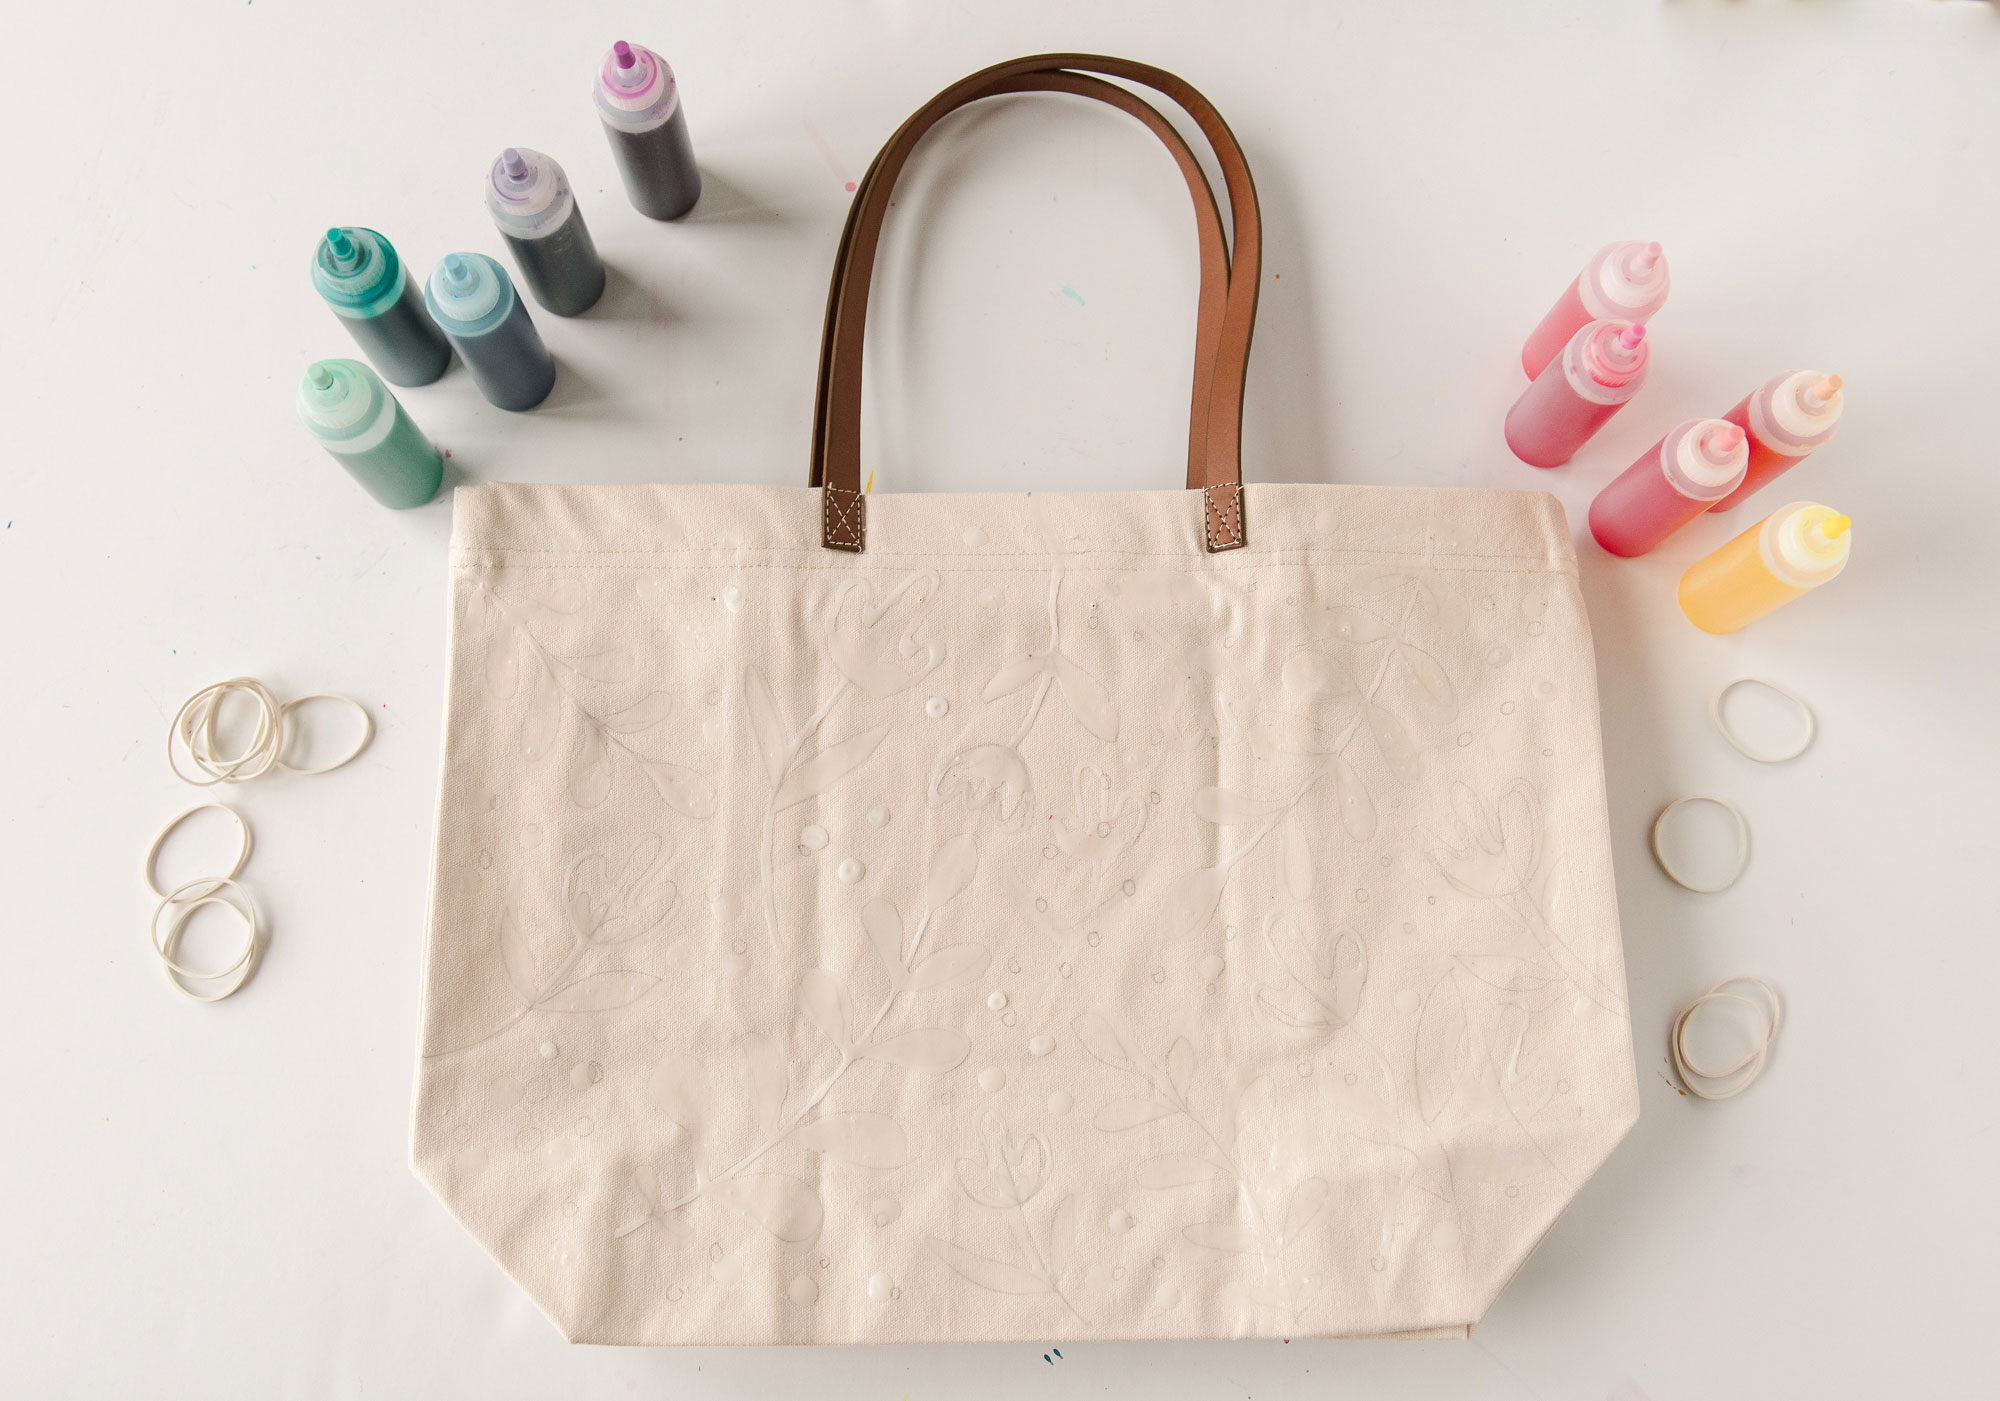
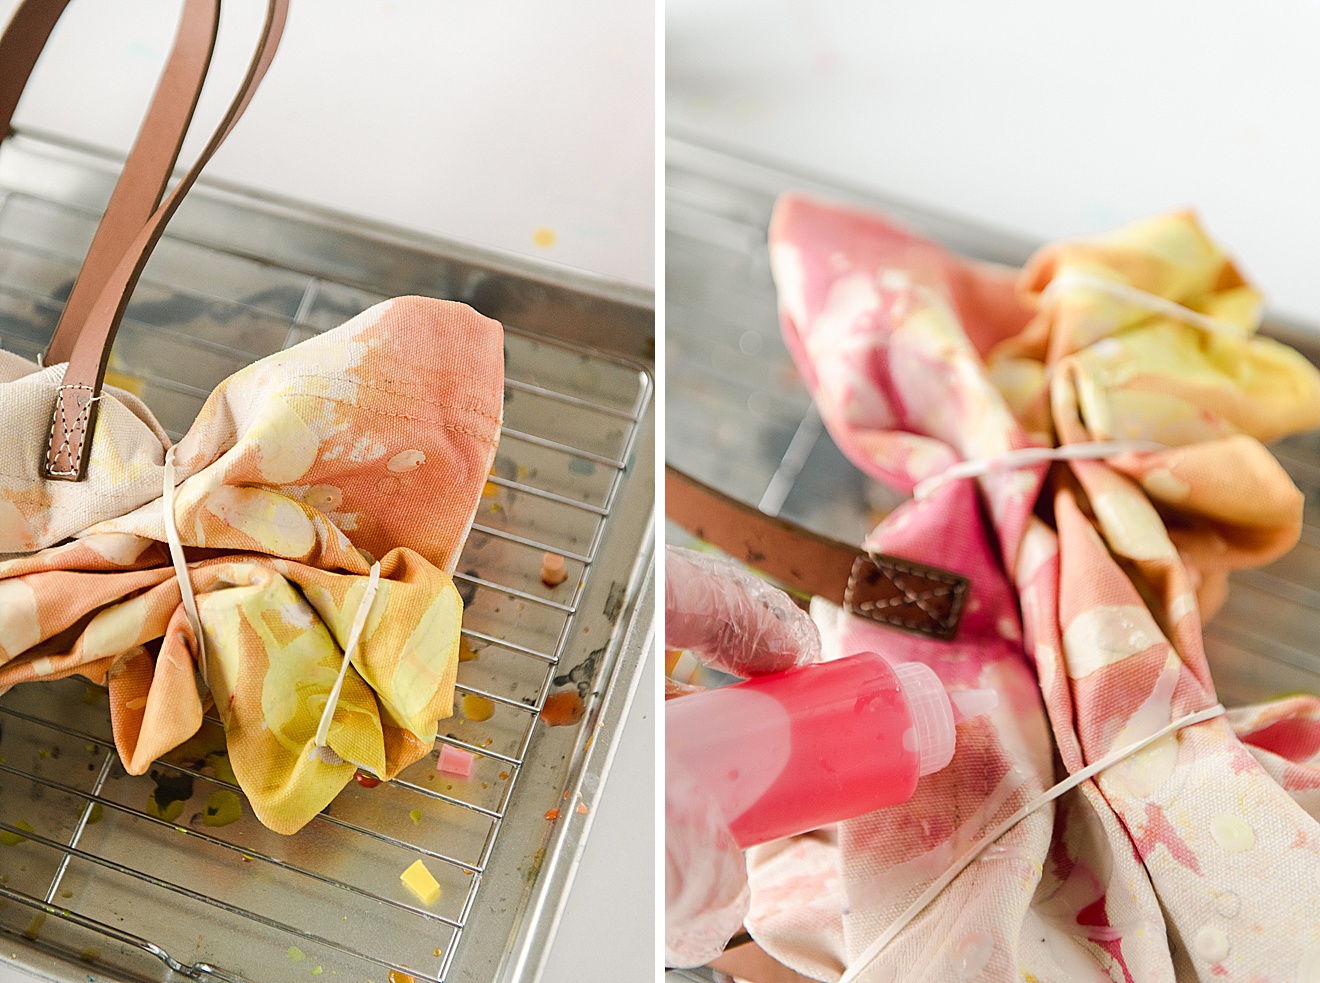
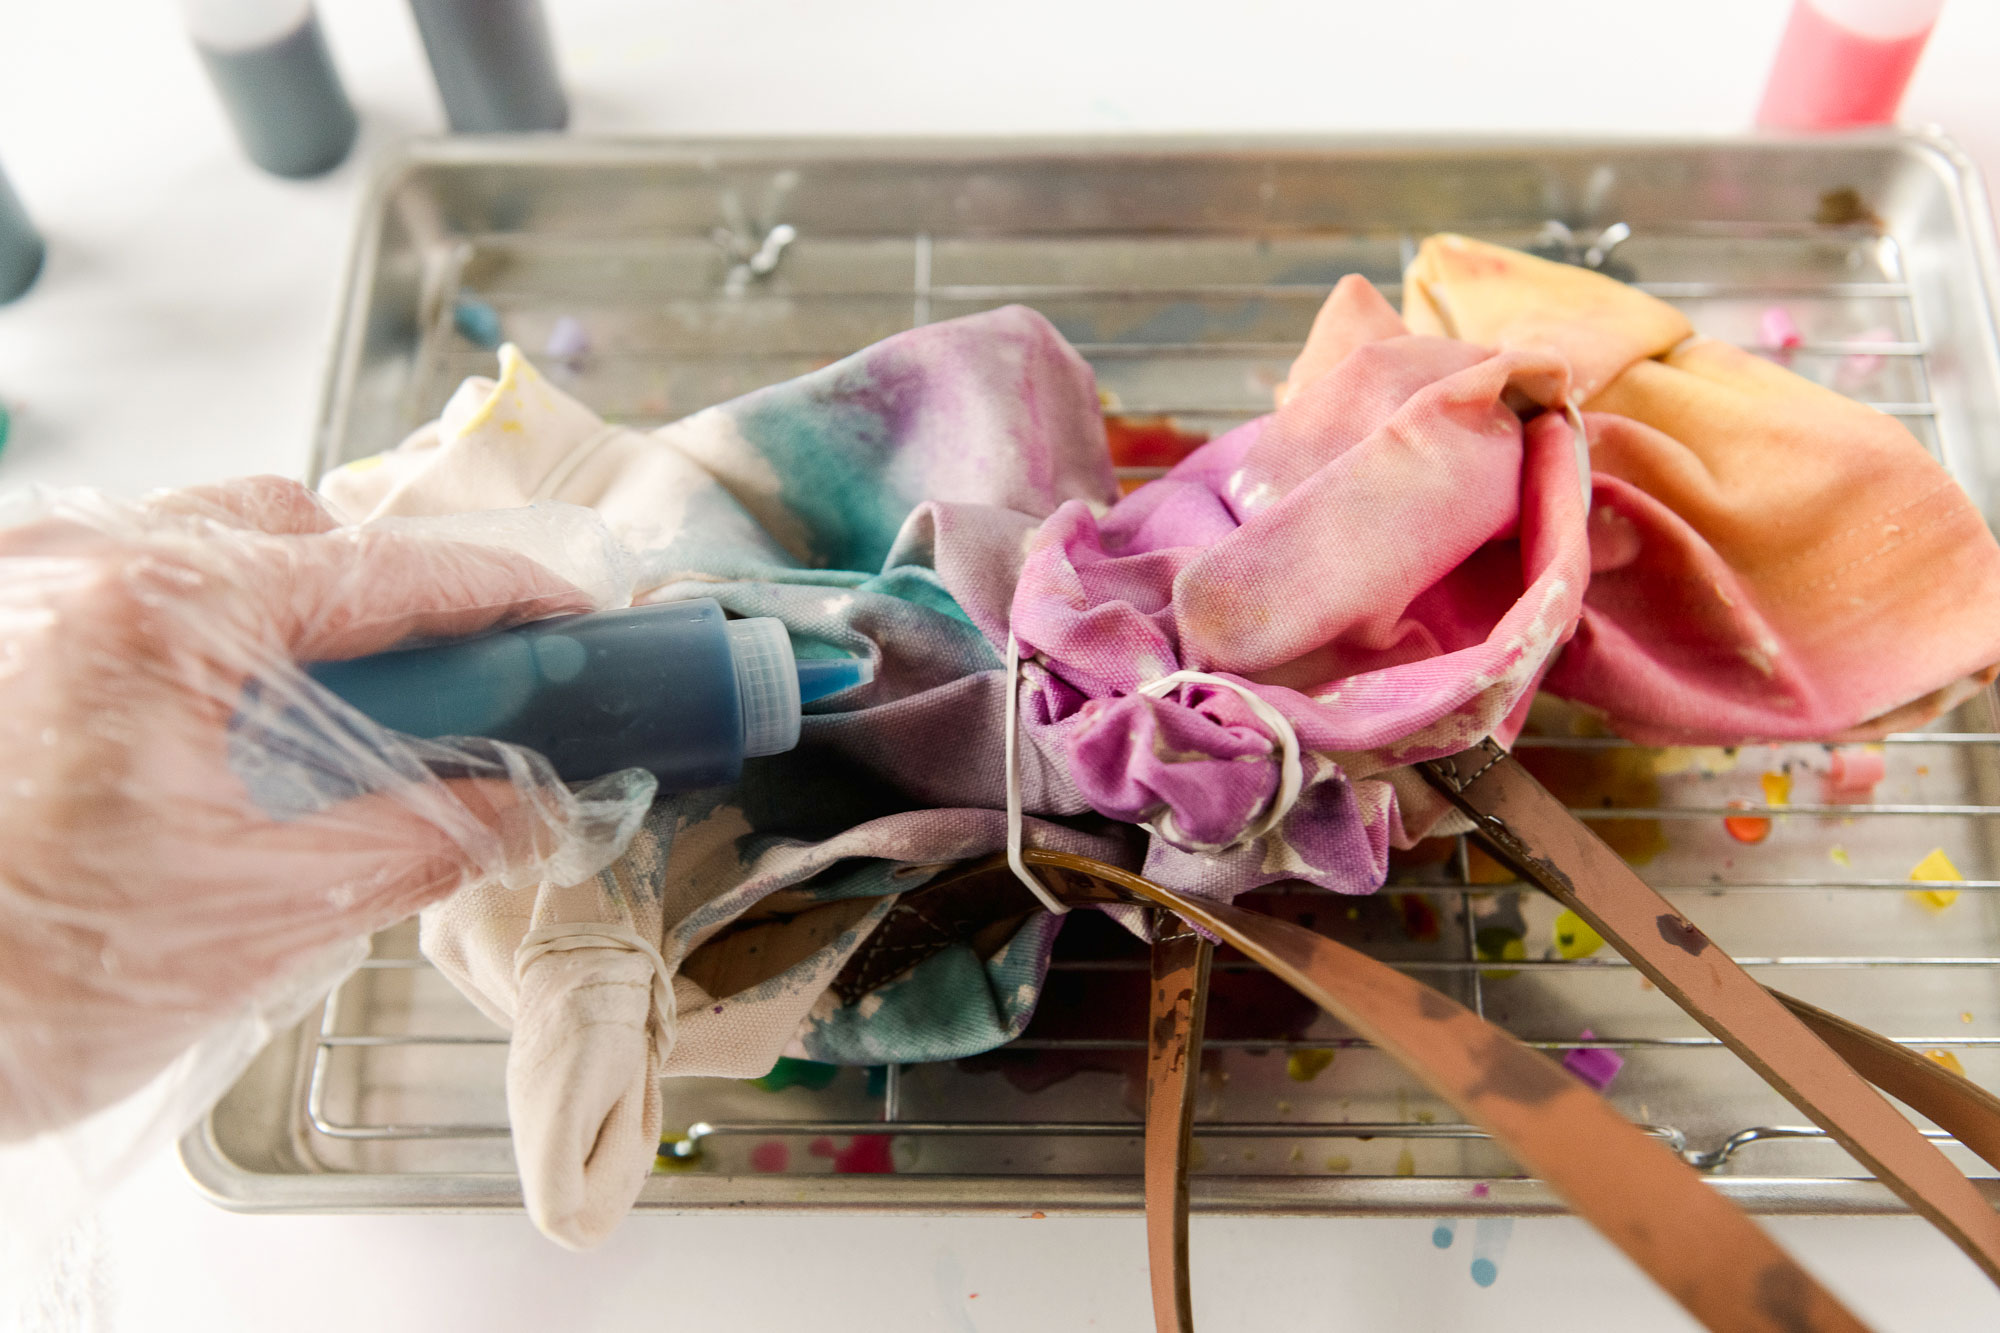
5. Place your tote onto the cookie rack inside the tray (this will catch the excess dye AND make sure your tote isn’t “sitting in dye” while it permeates overnight). Then with one color at a time, begin to squirt the tote, making sure to cover the WHOLE tote. Don’t forget to the get backside too!

Spring floral tie dye, flower tie dye DIY, how to do tie dye resist, Tulip tie dye kit, How to tie dye a tote, Tie dye resist project

Here are a few tips on using the Create Basics dye to dye the tote:

  • I highly recommend starting with yellow first! I started from right to left and started with yellow because it was the *lightest* color (although there are all sorts of light colors in this kit because it’s pastel…but yellow tends to be blended over with darker colors easily.
  • You will notice that the tote seems to want to repel the dye at first, just go slow and take your time applying it. I found that touching the tip of the dye bottle to the canvas, helped it to soak into the tote itself. 
  • option: Before applying any dye to the tote, you can lightly spray the canvas with water. This will “prep” the surface of the canvas to allow the dye to soak in faster BUUUUUT it also means that your colors likely won’t be as vibrant. 
Spring floral tie dye, flower tie dye DIY, how to do tie dye resist, Tulip tie dye kit, How to tie dye a tote, Tie dye resist project

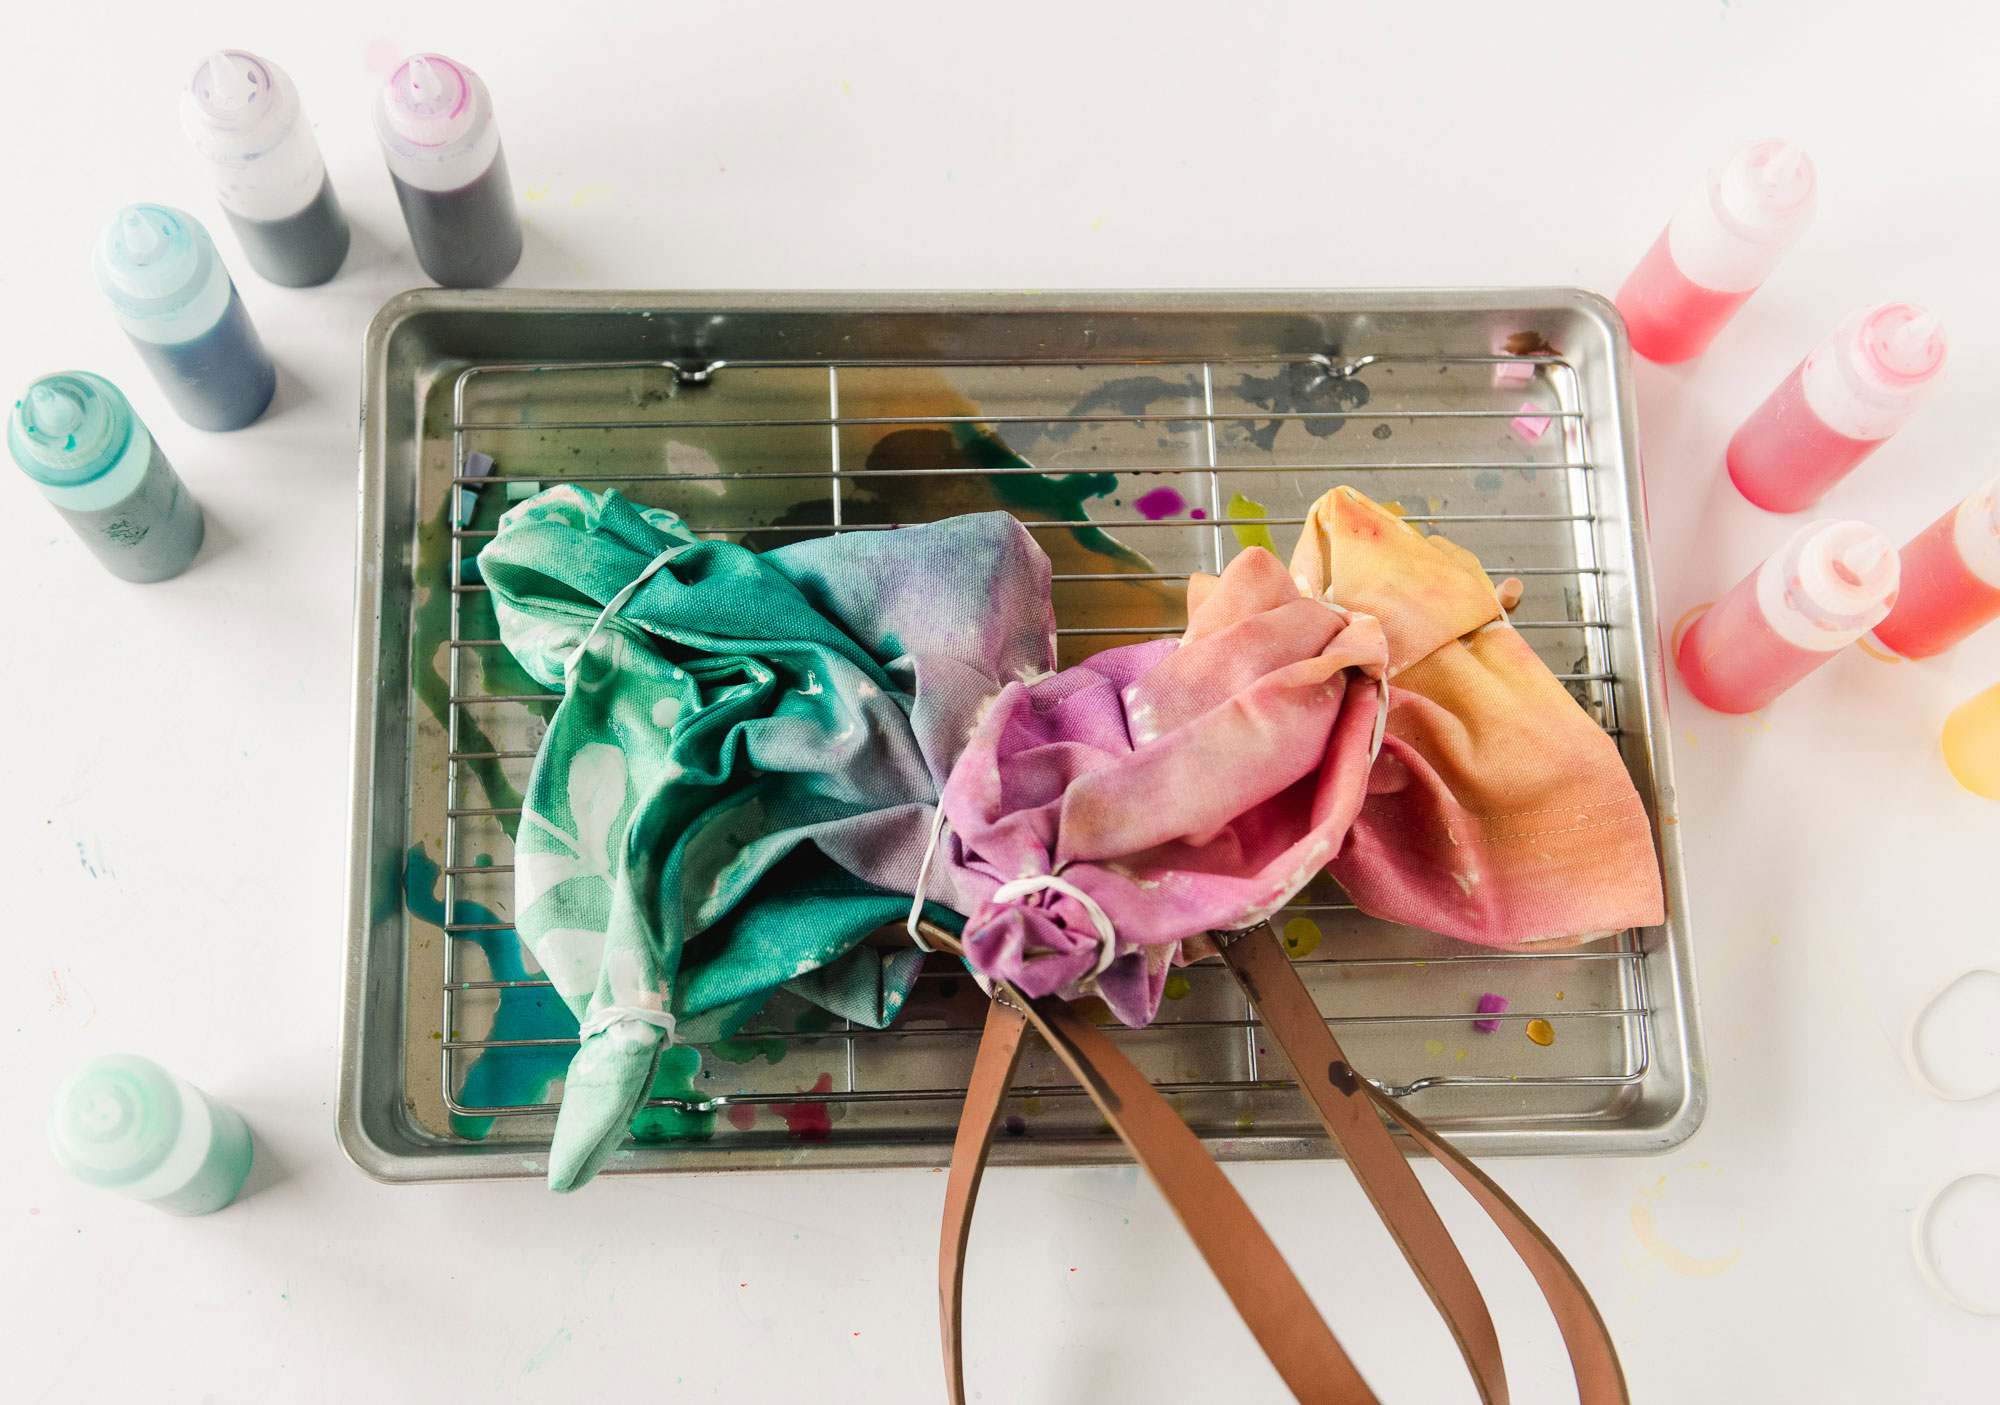
6. Once every area of your tote is covered it’s time to let it sit. Either cover your tray with plastic wrap or remove the tote and place it gently into a reusable plastic bag. Allow to sit overnight (I suggest at least 6 hours)……the longer you let it sit, the more vibrant the colors 🙂 The key here is to seal the tote so that tit doesn’t dry out while you let it sit. 

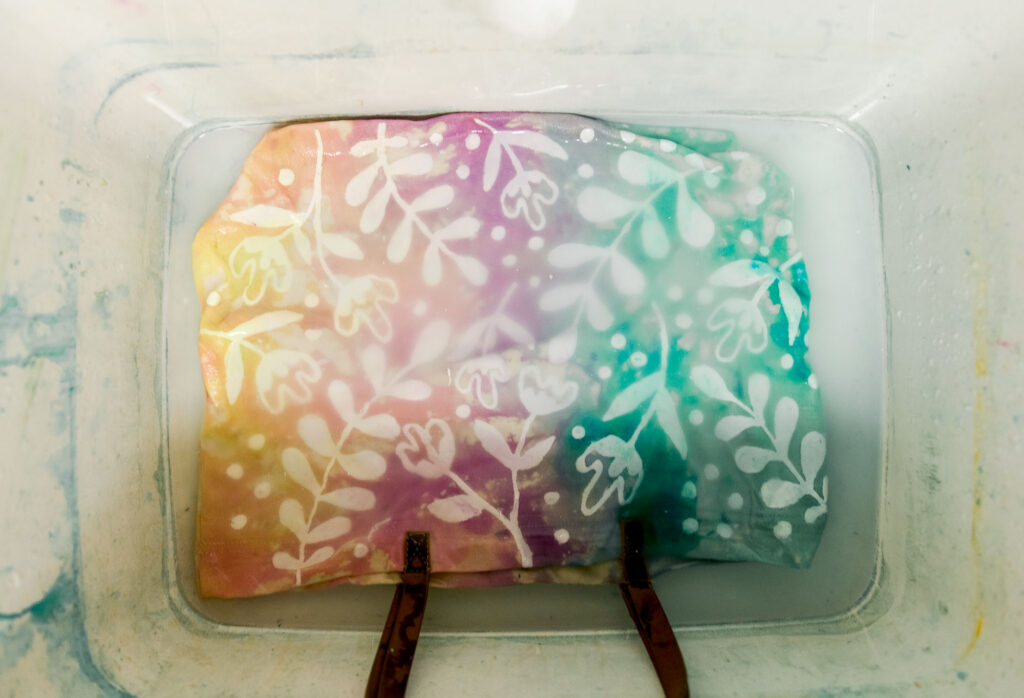
7. After you’ve removed any rubber bands, rinse off any excess dye. Then fill a non-porous sink with enough (preferably warm) water to cover the tote lying flat. Place your tote in the standing water for about 30 minutes….this will allow the glue to begin to soften and lift off. After a few minutes, you can use your fingers to begin to scrape off the glue (you will feel it kinda slimy as it is coming off the canvas). 

Don’t be alarmed if you don’t see your design right away……sometimes the dye sits on top of the glue and once the glue is removed the design is revealed more 🙂 

Spring floral tie dye, flower tie dye DIY, how to do tie dye resist, Tulip tie dye kit, How to tie dye a tote, Tie dye resist project

8. Repeat step 7 as many times as necessary until the water runs clear and all glue is removed 🙂 

9. Wash and dry your tote (separately than other clothing) then fill it with all of your spring time flowers! 

Spring floral tie dye, flower tie dye DIY, how to do tie dye resist, Tulip tie dye kit, How to tie dye a tote, Tie dye resist project
Pin
Share
Tweet
0 Shares


Leave a Comment

  • Facebook
  • Instagram
  • Pinterest
  • Twitter
« How to paint your Kitchenaid mixer!
SUPER EASY kids shoes tie dye DIY! »

Leave a Reply Cancel reply

Your email address will not be published. Required fields are marked *

Recipe Rating


oh hi there, i’m Emily!

I am a believer, dreamer, photographer and maker! I use almond extract in all of my baking, have a problem hitting the snooze button and I truly believe that smiling can change the world!

Learn more about me HERE!

  • Facebook
  • Instagram
  • Pinterest
  • Twitter

Looking for something?

Popular posts!

DIY felt christmas garland, DIY Christmas bulb ornaments, DIY christmas bulb garland, how to make a felt christmas garland, DIY christmas garland ideas, christmas bulb DIY, christmas bulb decorating, colorful christmas garland, colorful christmas decor DIY

How to make a felt Christmas bulb garland (or ornaments)

Fruit slice wet bag pattern, watermelon pouch pattern, janome memory maker sewing machine, fruit pouch swimsuit bag, swimsuit wet bag pattern, free wet bag sewing pattern

How to make a fruit slice summer swimsuit wet bag!

How to DIY a colorful wall mural, colorful wall mural, joyful wall mural, in home mural, how to make an easy colorful wall mural, dining room mural, house mural, how to paint a wall, diagonal grid on wall

Our colorful, diagonal grid dining room mural + my urge to paint more!

how to make a plushy bookend, sloth plushie pattern, sloth pattern, DIY sloth bookend, handmade bookend, janome sewing machine review, janome kids camp project

How to make the cutest sloth plush bookend or doorstop!

Categories

  • All
  • Costumes
  • Cricut + SVG files
  • DIYs
  • Donuts
  • Holiday
  • Ice Cream
  • Kids
  • Life
  • Murals
  • Painting
  • Paper Crafts
  • phone backgrounds
  • Printables
  • Recipes
  • Sewing
  • Tie Dye
  • Uncategorized
  • Yarn + Fibers
Adding color and lots of little personalities and Adding color and lots of little personalities and faces to our weekend. Because love wins and death is conquered….so yes, this is for sure how we celebrate🎉 
Also, every time I cracked an egg this weekend, I squealed in the sound or noise that I thought the personality of the egg would sound 😂😂😂 obvi.
I would PICKle you as my Valentine over and over i I would PICKle you as my Valentine over and over if I could! 😂
Also, yes, this is clearly a @claussenpicklesofficial because duh, they are the best! ❤️

The alternate caption could also be “yup…..it’s a Valentine pickle. Because my kids are obsessed with vinegar soaked veggies. Just swipe for the Halloween pickle proof 🥒 “
For the record, I got approximately zero adulting For the record, I got approximately zero adulting things done while constructing this cardboard @encantomovie Casita of my daughters dreams. Except of course inserting many phrases in place of the “we don’t talk about Bruno” song…..ya know, “we don’t talk about dishes no no nooooo. We don’t talk about laundryyyyyy.” 🏠 🎨 💛 
Also, the minute the hot glue was dry, Esther picked up the Casita, hugged it and ran it to the living room where she played most of the afternoon. A moment of Mom win to warm my heart 😭❤️
“May you find the light that guides you home” “May you find the light that guides you home” 
One of my fave song + fave yearly progression that makes me allll happy and sappy. Merry Christmas 🎄 I hope you’re finding light this holiday season!
If I’ve said it once and I’ll say it 3 squllio If I’ve said it once and I’ll say it 3 squllion more times: I LOVE PAINNNTTTTT! Here’s the thing……paint is always, 100% paint-overable. If you paint something, step back, live with it for while but just doesn’t feel right…..simply paint over it. Like really that simple. 
I’ve done this a handful of times in our own home….bathrooms, bedrooms, hallways (like so many times in the hallways 😂)! 
Painting to me is a slight reflection of life: nothing is perfect, and even when mistakes or missteps feel overwhelming they are always worth fixing and usually fixable annnnnd it’s amazing how much a  small moment can bring big joy…..or in this case a big moment on a biiigggg wall 🎉🎨
I am doing my last restock of these little nutcrac I am doing my last restock of these little nutcracker buddies tonight at 7pm (central time)! So if you’ve had your eyes on them, especially after seeing them in @hgtvmagazine (gahhhhhhh, still can’t get over this), then be sure to find yourself in my shop tonight at 7pm central!
Even thought I had alllll the intentions of postin Even thought I had alllll the intentions of posting this sooner, I make no apologies because I don’t like living in the land of the “shoulddas”. Especially during this season of intentional slowing down and anticipating the arrival of Christmas. 
Download this coloring advent village and take a few min away to color each house and talk about the season and the way you can shine light! 
PS, download the file on my blog amongst the other holiday themed doodles coloring sheets…..AND we printed our village in gargantuan size from Staples….(their engineer print) and I am not one but mad about the fact that it will take up nearly half a wall! 😂 ❤️🎄
Tis the season for my crafting fingers to be full Tis the season for my crafting fingers to be full of hot glue burns and can honestly say it makes me happy. Like so thankful and happy! 
Okkayyy well maybe not the burns themselves but the fact that I’m over here, in my little studio space in Wisconsin crafting my heart out and you’re sending the love right back to me with all the support! Support for the doodles and painting and costumes and sewing and other colorful things that I’m eager to share! 
SO thankful. Like I’d really love to give you all a humongous big hug right now. 

And for all the online shoppers this weekend, use code YAYcreatives for 20% off everything in my shop through Monday night. Including these happy Colorful felt trees! (I meannnnn, look at their personality 😂😍)
Follow Emily on Insta

Stay Connected

  • Facebook
  • Instagram
  • Pinterest
  • Twitter

all rights reserved © oh yay studio 2019

  • About
  • Contact
  • Disclosure
  • Terms
Adding color and lots of little personalities and Adding color and lots of little personalities and faces to our weekend. Because love wins and death is conquered….so yes, this is for sure how we celebrate🎉 
Also, every time I cracked an egg this weekend, I squealed in the sound or noise that I thought the personality of the egg would sound 😂😂😂 obvi.
I would PICKle you as my Valentine over and over i I would PICKle you as my Valentine over and over if I could! 😂
Also, yes, this is clearly a @claussenpicklesofficial because duh, they are the best! ❤️

The alternate caption could also be “yup…..it’s a Valentine pickle. Because my kids are obsessed with vinegar soaked veggies. Just swipe for the Halloween pickle proof 🥒 “
For the record, I got approximately zero adulting For the record, I got approximately zero adulting things done while constructing this cardboard @encantomovie Casita of my daughters dreams. Except of course inserting many phrases in place of the “we don’t talk about Bruno” song…..ya know, “we don’t talk about dishes no no nooooo. We don’t talk about laundryyyyyy.” 🏠 🎨 💛 
Also, the minute the hot glue was dry, Esther picked up the Casita, hugged it and ran it to the living room where she played most of the afternoon. A moment of Mom win to warm my heart 😭❤️
“May you find the light that guides you home” “May you find the light that guides you home” 
One of my fave song + fave yearly progression that makes me allll happy and sappy. Merry Christmas 🎄 I hope you’re finding light this holiday season!
If I’ve said it once and I’ll say it 3 squllio If I’ve said it once and I’ll say it 3 squllion more times: I LOVE PAINNNTTTTT! Here’s the thing……paint is always, 100% paint-overable. If you paint something, step back, live with it for while but just doesn’t feel right…..simply paint over it. Like really that simple. 
I’ve done this a handful of times in our own home….bathrooms, bedrooms, hallways (like so many times in the hallways 😂)! 
Painting to me is a slight reflection of life: nothing is perfect, and even when mistakes or missteps feel overwhelming they are always worth fixing and usually fixable annnnnd it’s amazing how much a  small moment can bring big joy…..or in this case a big moment on a biiigggg wall 🎉🎨
I am doing my last restock of these little nutcrac I am doing my last restock of these little nutcracker buddies tonight at 7pm (central time)! So if you’ve had your eyes on them, especially after seeing them in @hgtvmagazine (gahhhhhhh, still can’t get over this), then be sure to find yourself in my shop tonight at 7pm central!
Even thought I had alllll the intentions of postin Even thought I had alllll the intentions of posting this sooner, I make no apologies because I don’t like living in the land of the “shoulddas”. Especially during this season of intentional slowing down and anticipating the arrival of Christmas. 
Download this coloring advent village and take a few min away to color each house and talk about the season and the way you can shine light! 
PS, download the file on my blog amongst the other holiday themed doodles coloring sheets…..AND we printed our village in gargantuan size from Staples….(their engineer print) and I am not one but mad about the fact that it will take up nearly half a wall! 😂 ❤️🎄
Tis the season for my crafting fingers to be full Tis the season for my crafting fingers to be full of hot glue burns and can honestly say it makes me happy. Like so thankful and happy! 
Okkayyy well maybe not the burns themselves but the fact that I’m over here, in my little studio space in Wisconsin crafting my heart out and you’re sending the love right back to me with all the support! Support for the doodles and painting and costumes and sewing and other colorful things that I’m eager to share! 
SO thankful. Like I’d really love to give you all a humongous big hug right now. 

And for all the online shoppers this weekend, use code YAYcreatives for 20% off everything in my shop through Monday night. Including these happy Colorful felt trees! (I meannnnn, look at their personality 😂😍)
Follow Emily on Insta

Copyright © 2022 · Divine theme by Restored 316

Copyright © 2022 · Divine Theme on Genesis Framework · WordPress · Log in