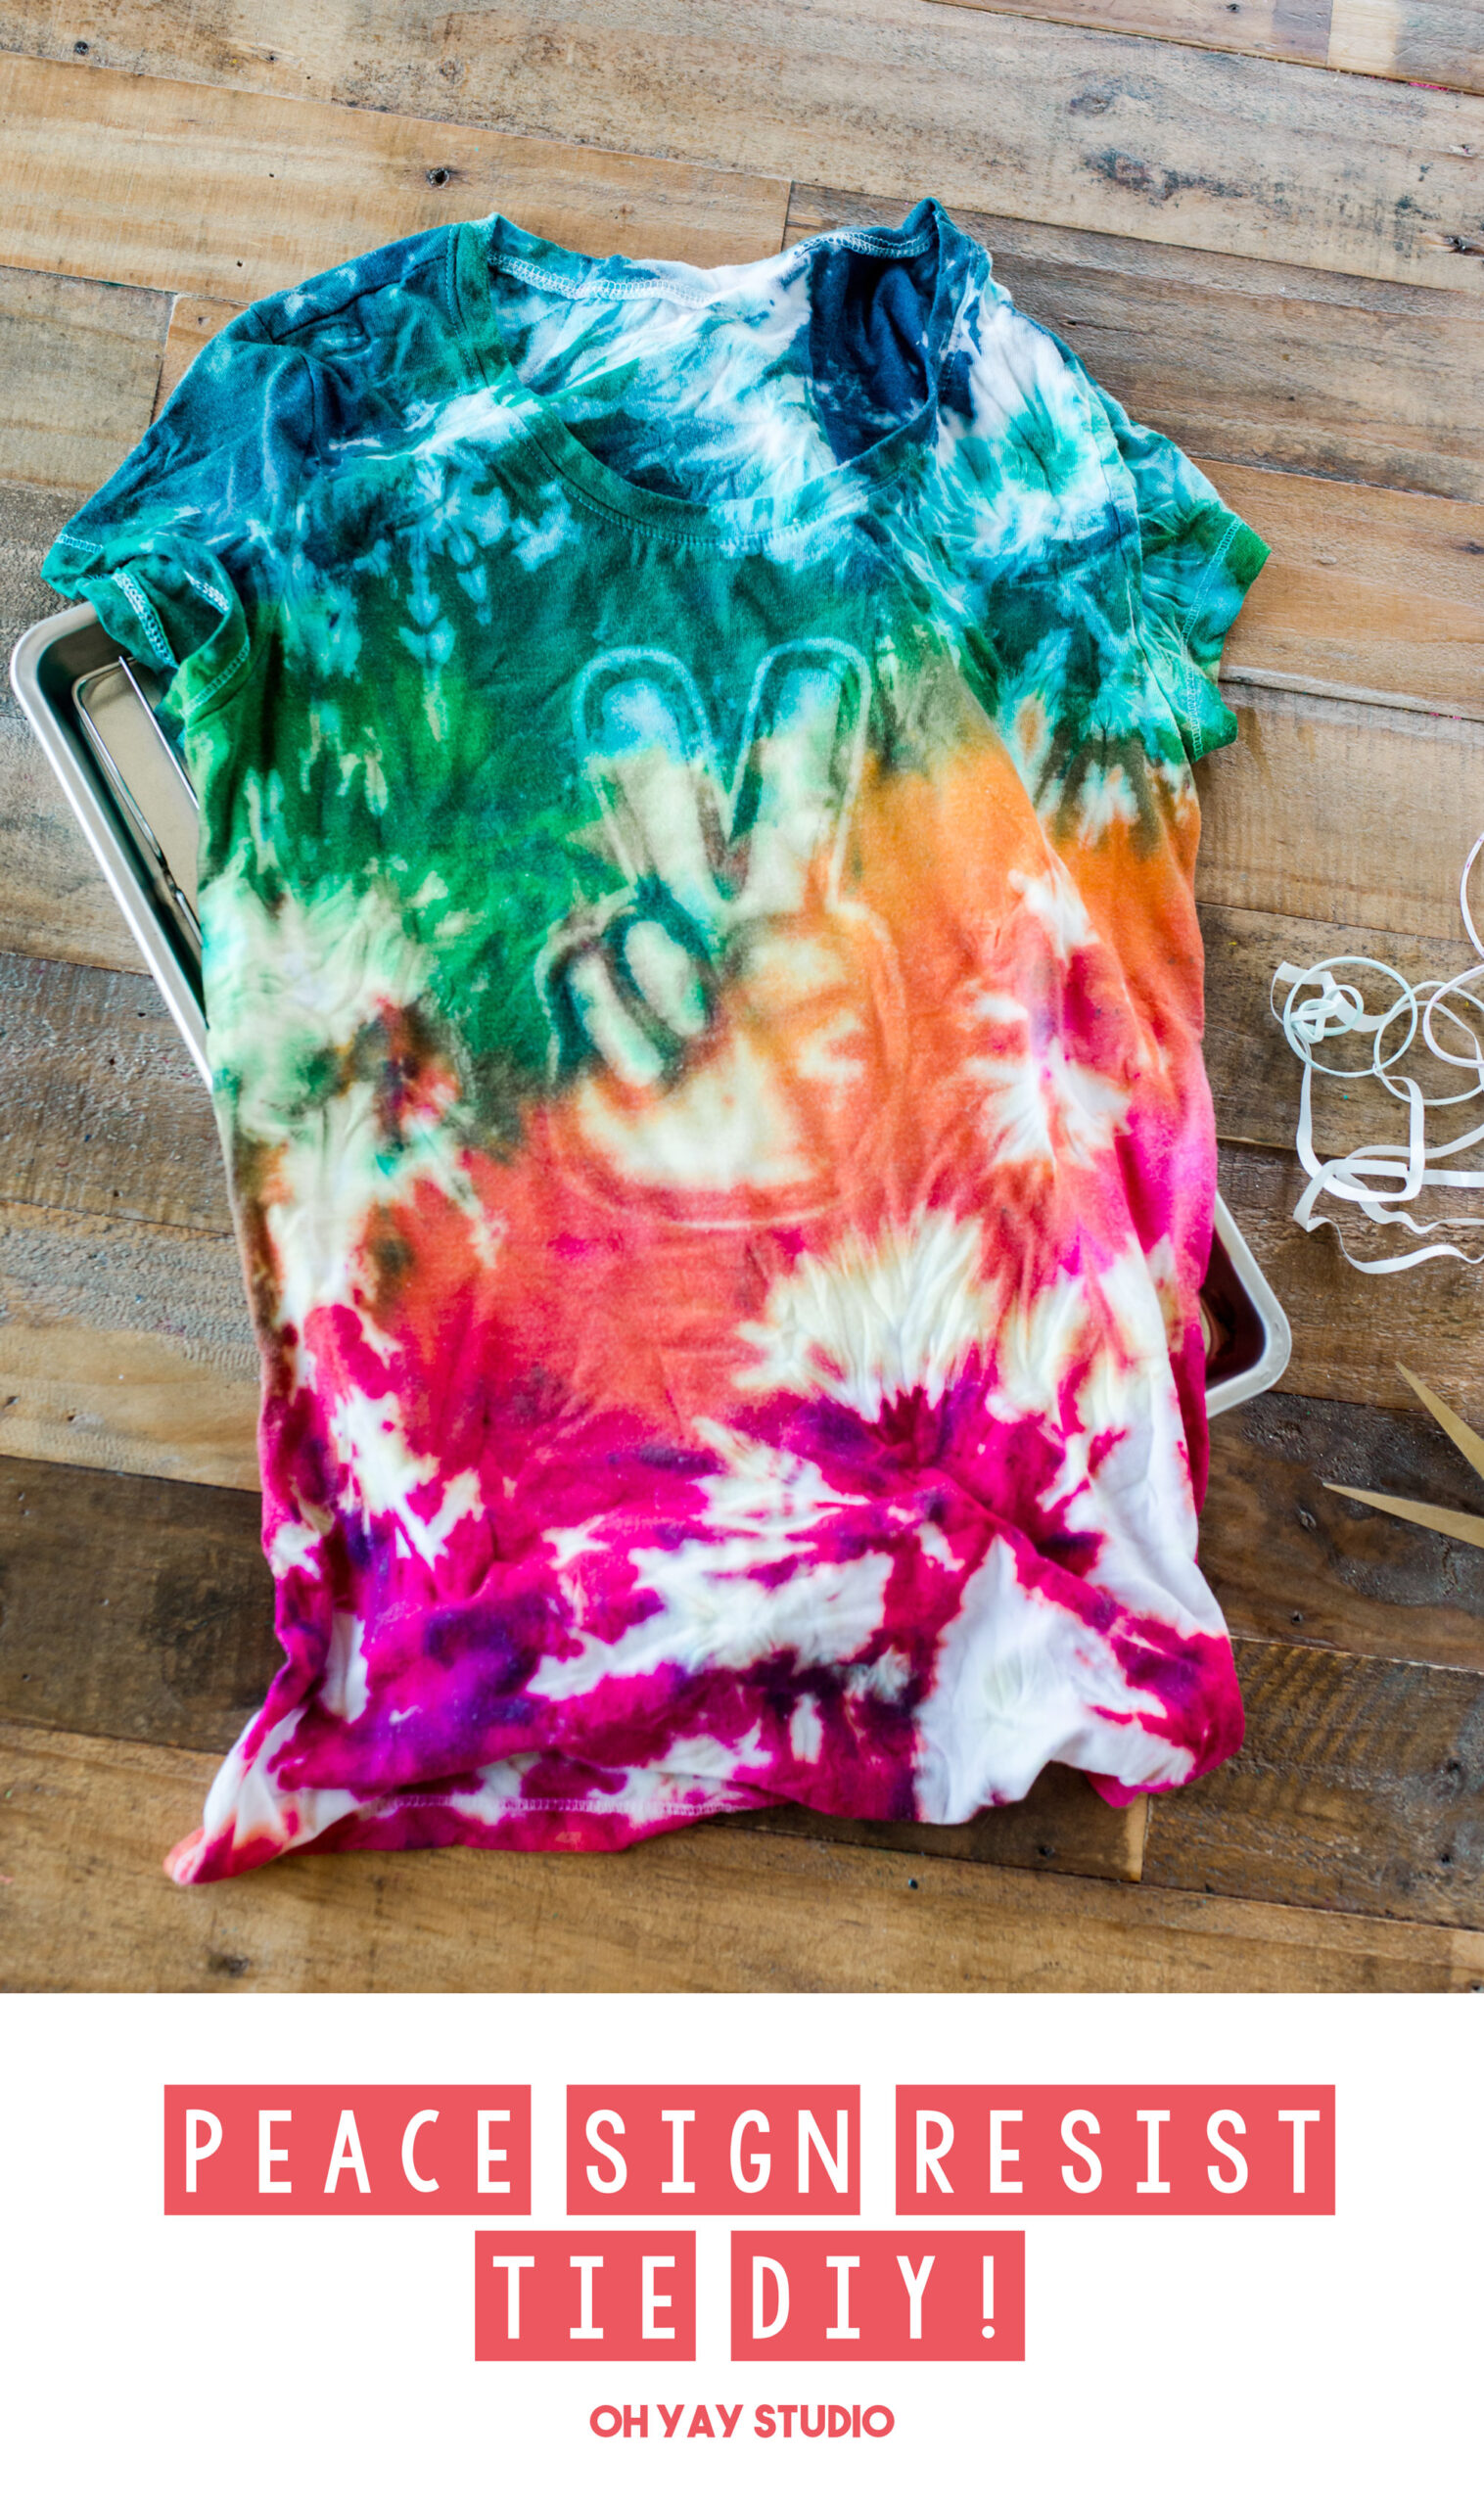
Peace sign tie dye resist!
**Created in partnership with Create Basics
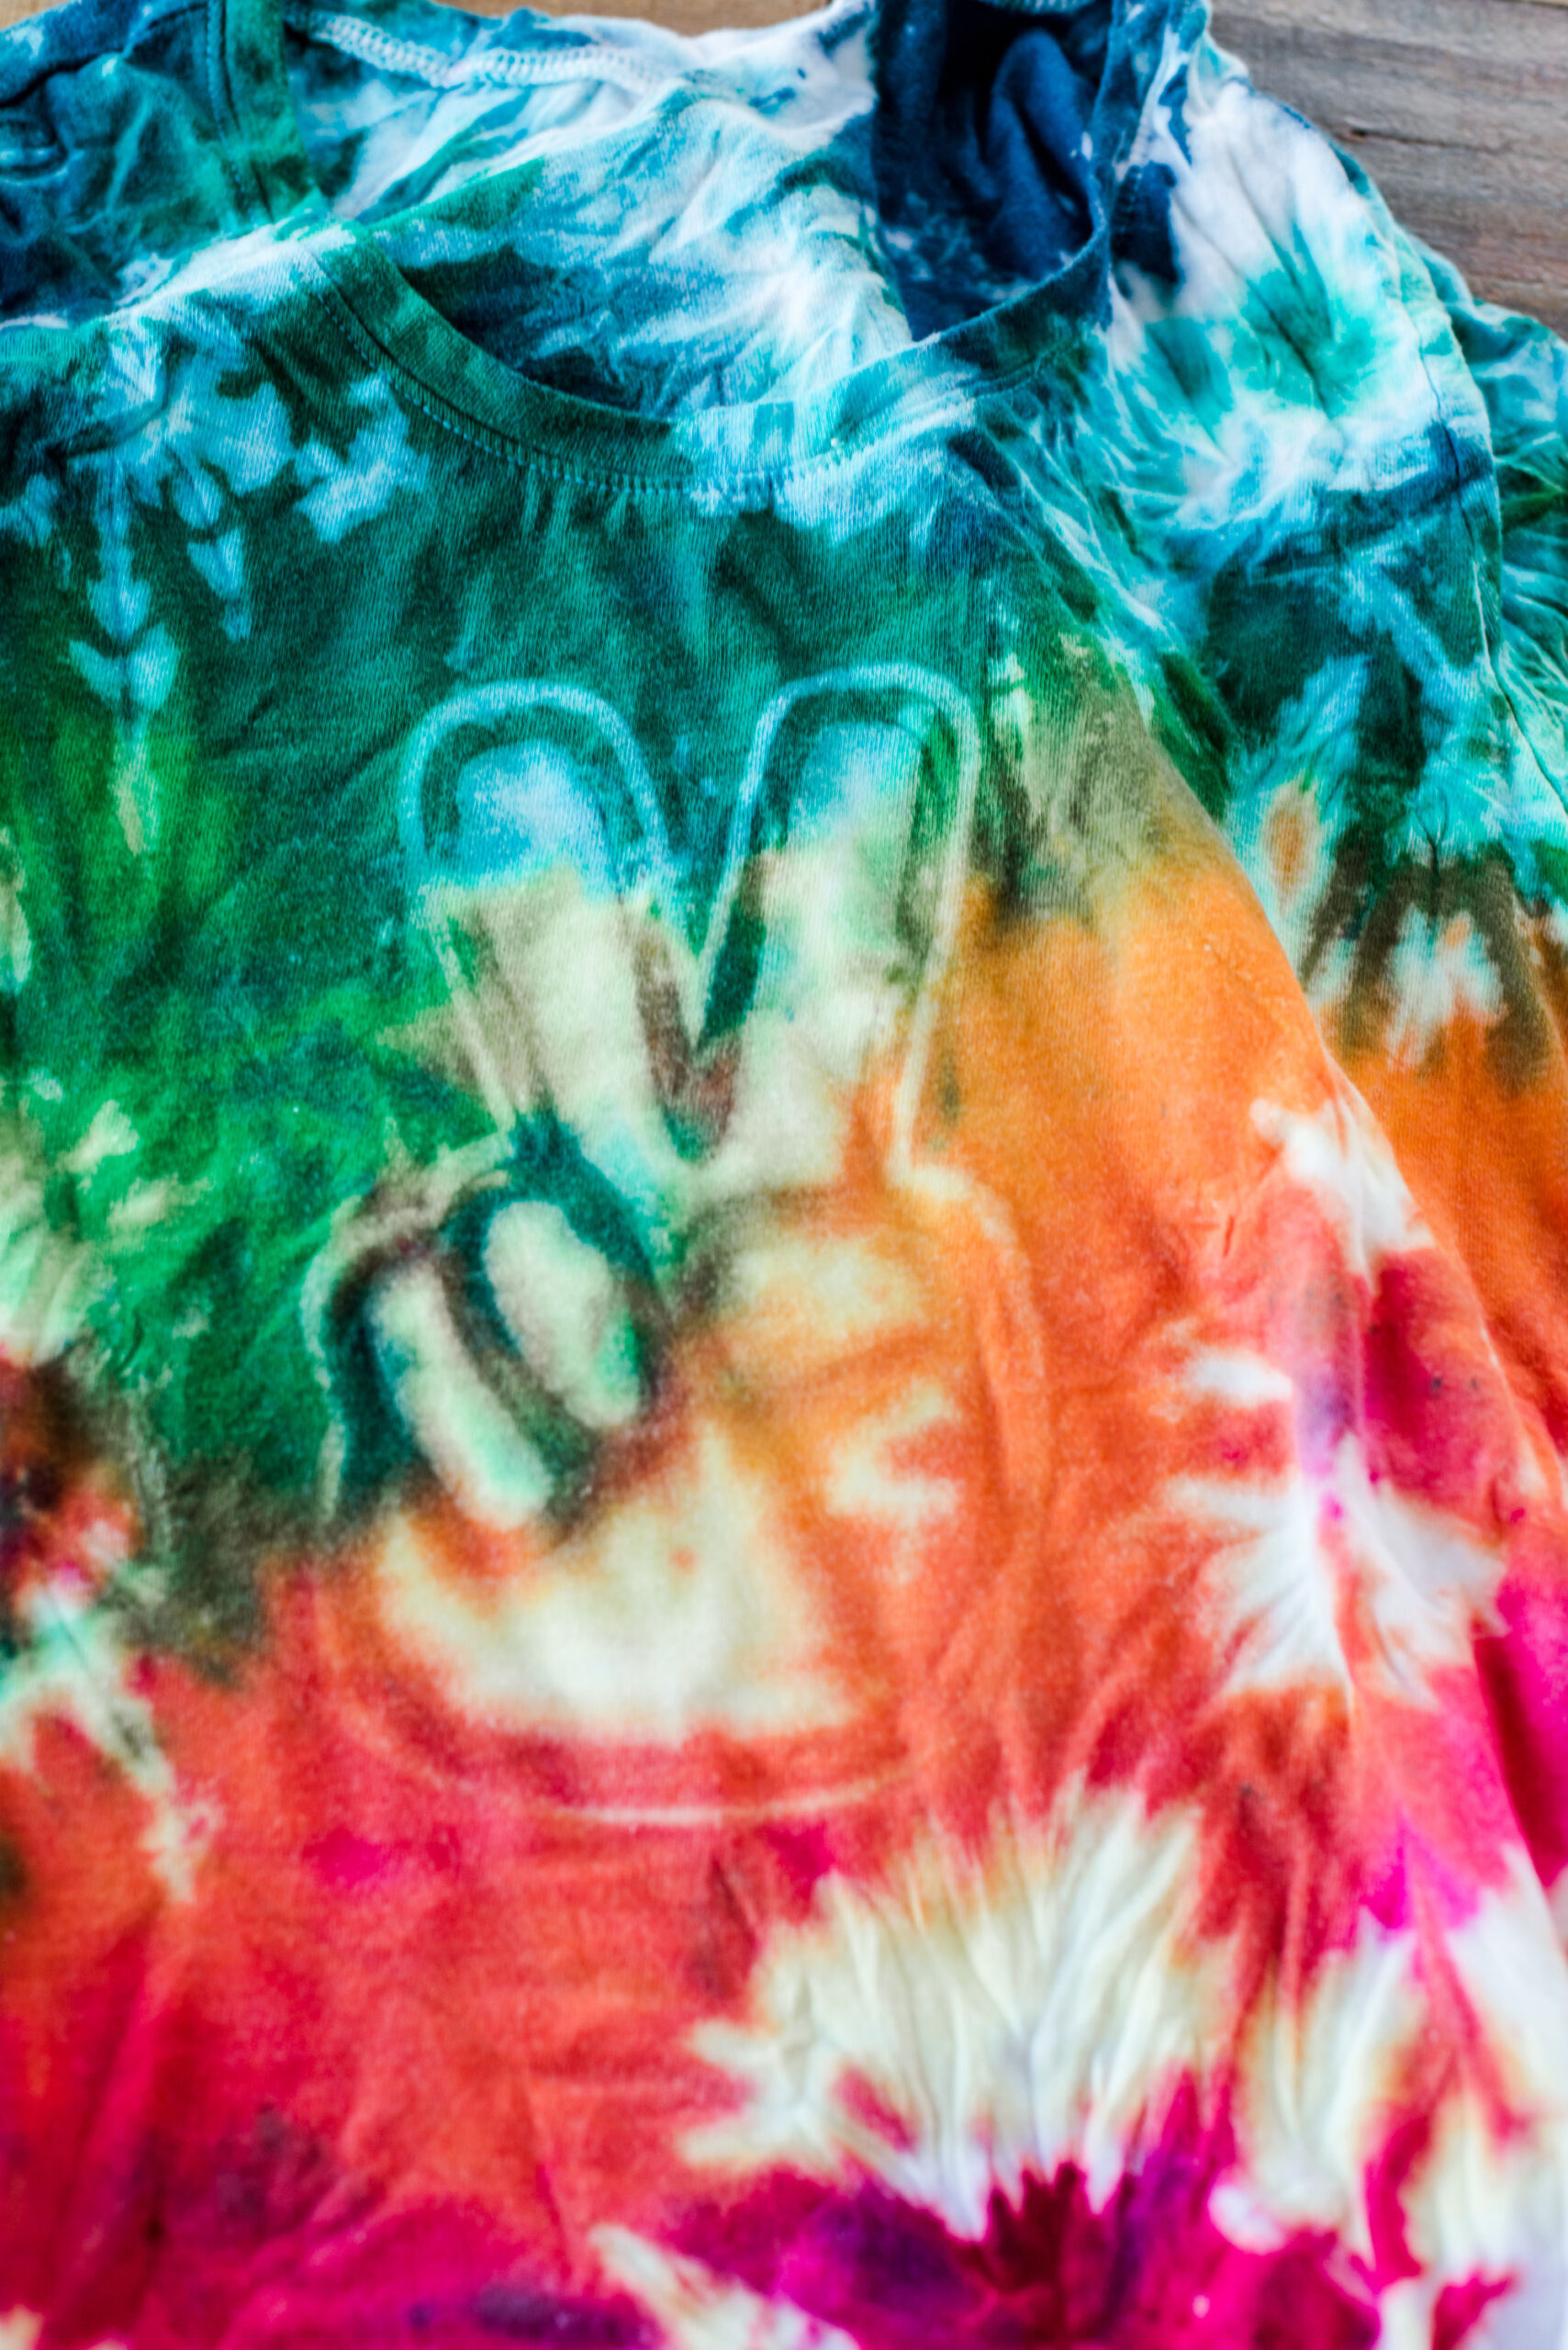
I am on a tie dye kick these days (like soooo many others) and I have been experimenting with how to resist or make designs on garments (you can see how I resist dye using glue HERE on this post). And today I am SOOOOO excited to show you my latest resist creation using an SVG file to cut out of vinyl to resist the tie dye! Talk about blowing the tie dye ideas WIDE OPEN in my brain after I figured this out!
OK! So most dying will use folding, pinching, spiraling, winding, tying and other odds and ends technique to create the pockets of negative space to resist the dye….in this method, you will use the vinyl adhesive to stick securely to your garment and then use the dye around it. This is more of a subtle resist, but I LOVE the way that it turned out! 🙂
MATERIALS:
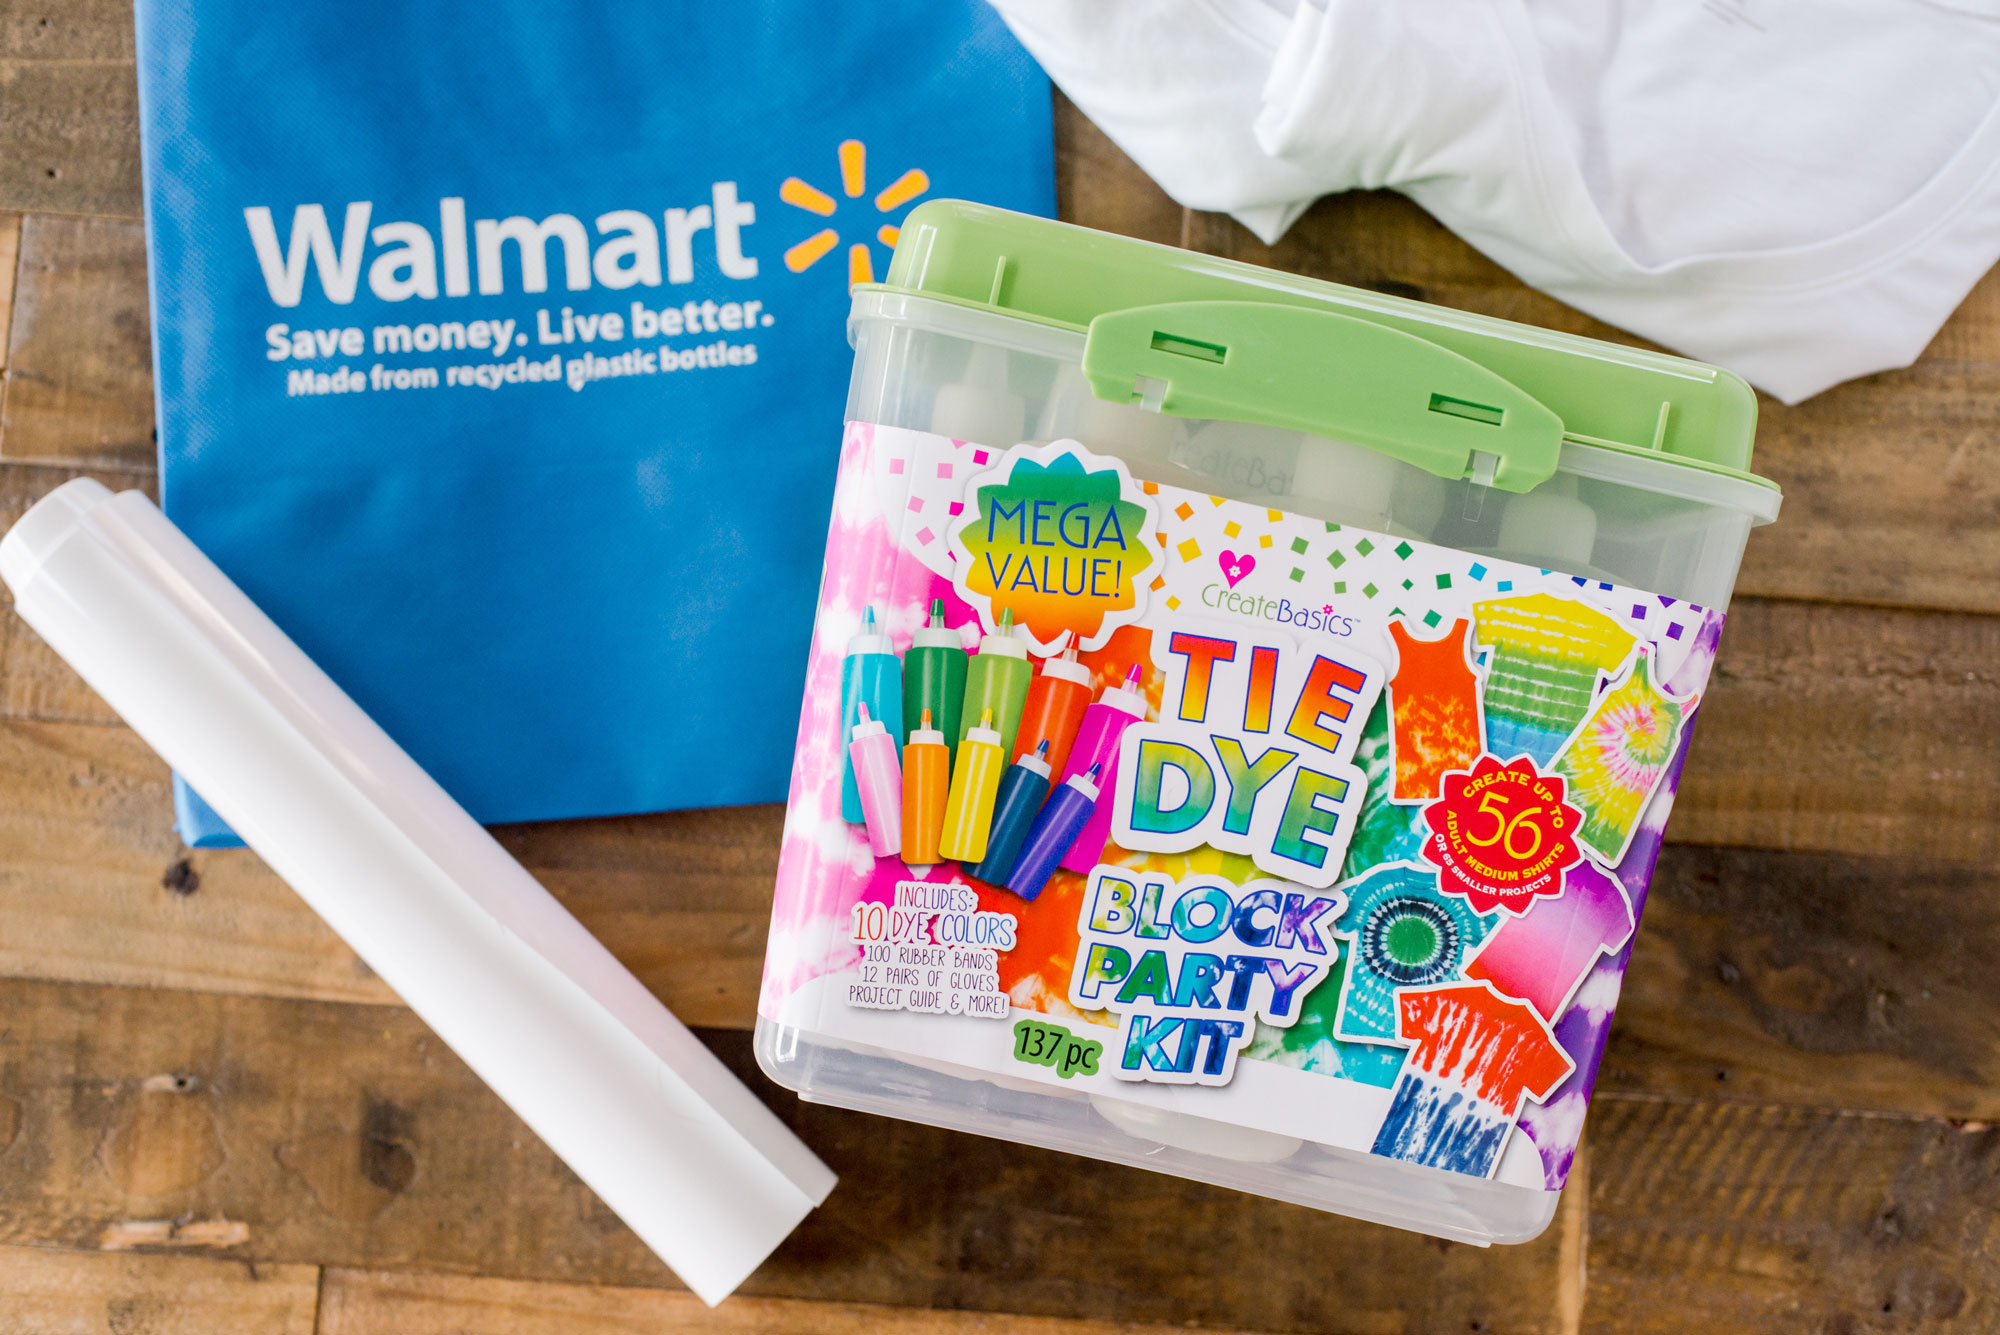
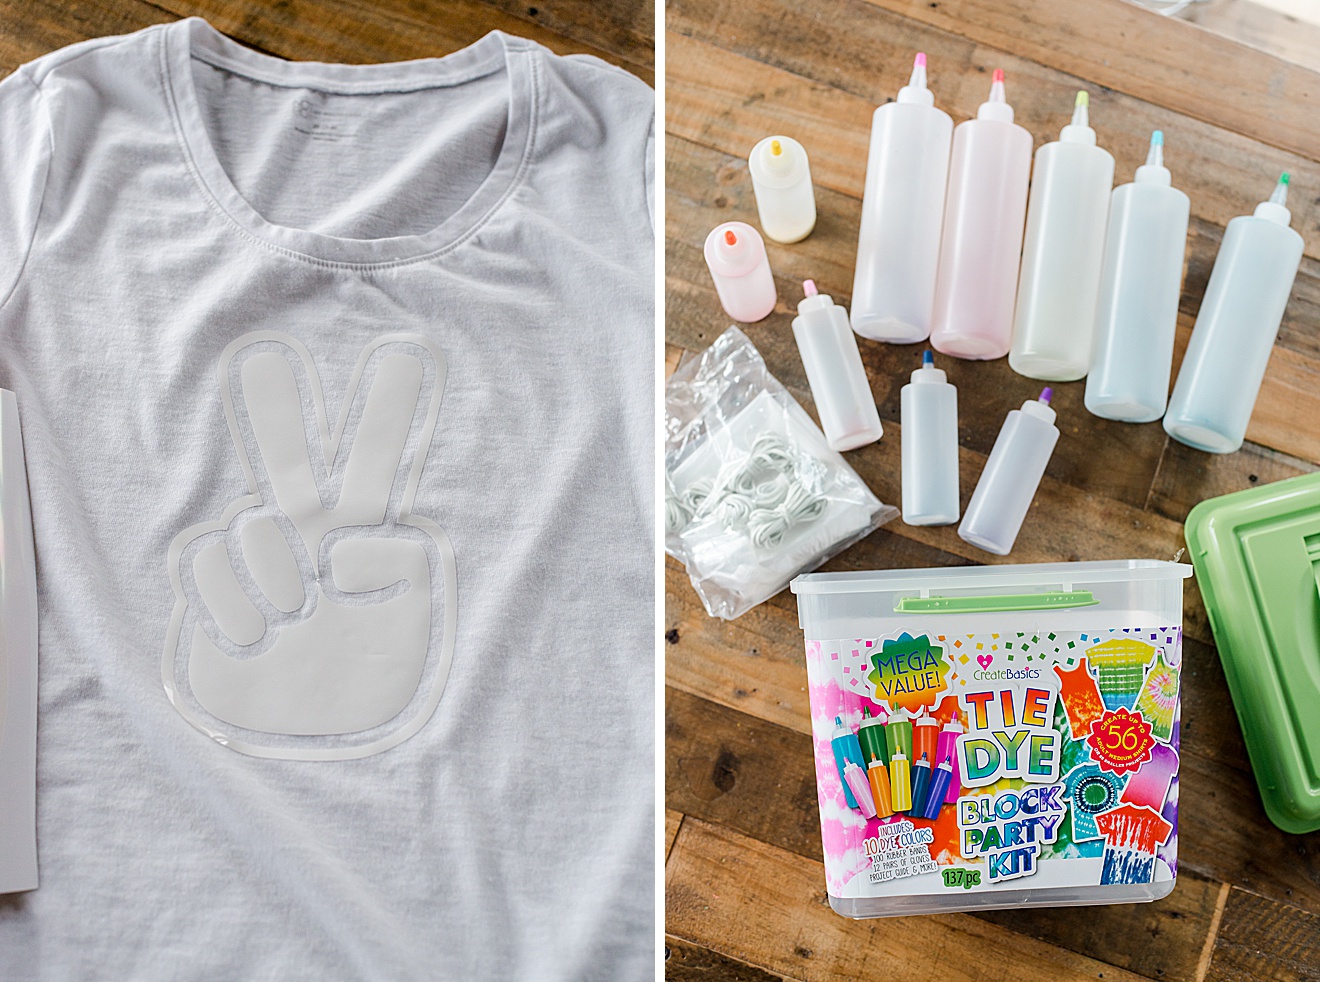
- Create Basics Tie Dye Block Party Kit
- Blank shirts (there are AWESOME selections of them in the craft section at Walmart)
- Iron + ironing board
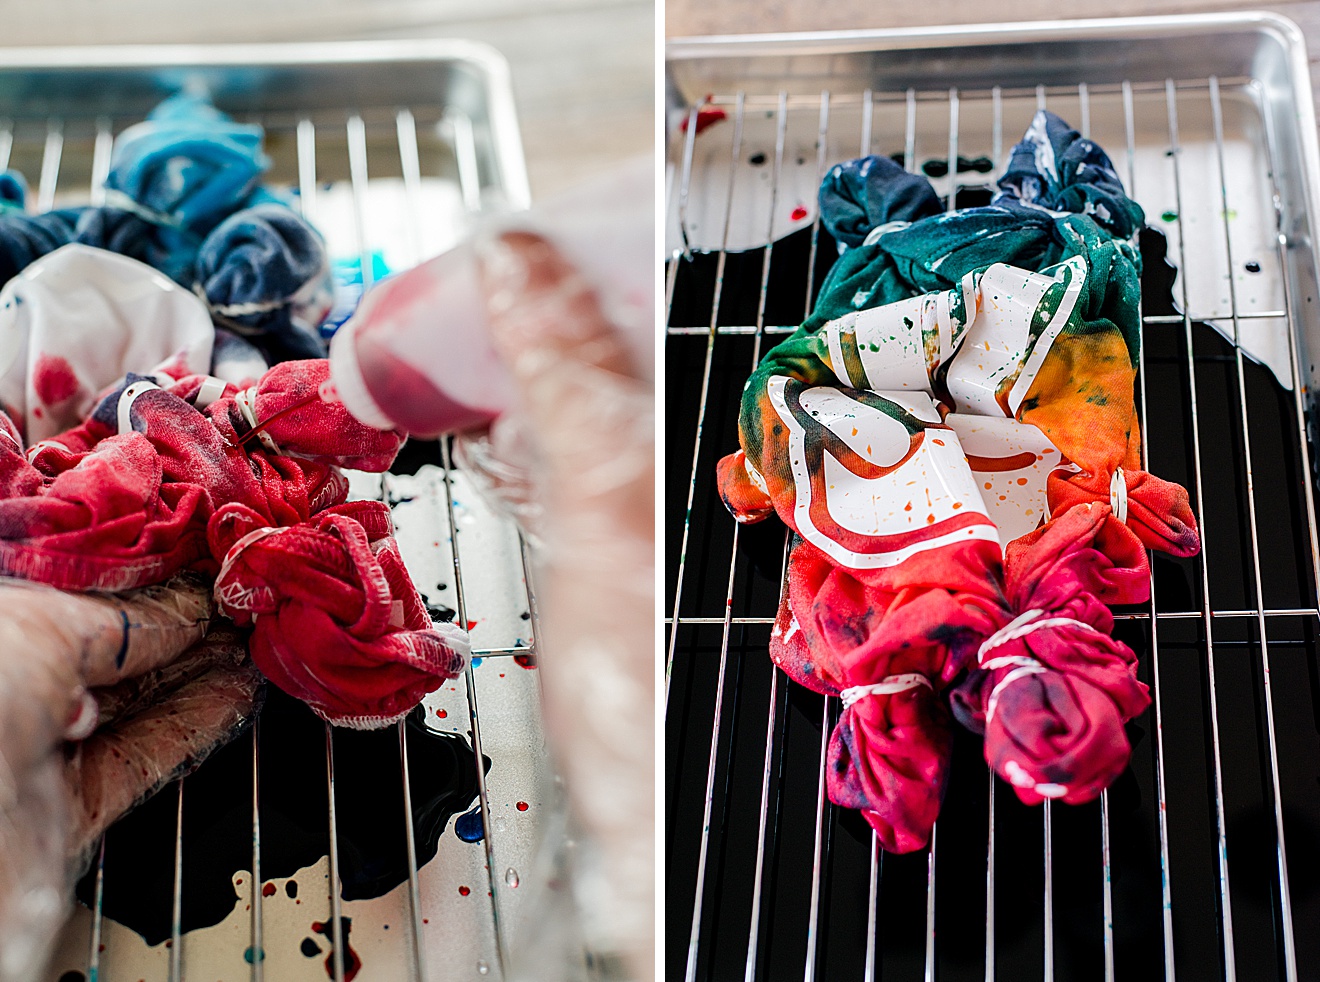
- A cookie drying rack + cookie sheet with edges (large enough to catch any excess dye)
- Permanent Vinyl (I used Cricut brand in white purchased at Walmart)
- Weeding tool or sharp point
- Peace sign PDF or SVG to resist
- Sharp Scissors OR a cutting machine (like a Cricut or Silhouette)
- Optional Transfer tape for transferring your vinyl design easier
INSTRUCTIONS:
1. Wash and dry your garment (this is important to get all of the sizing out of the shirts to allow the dye to soak in to the best of it’s ability)! 🙂
2. While your garment is washing, prep your peace hand vinyl resist.
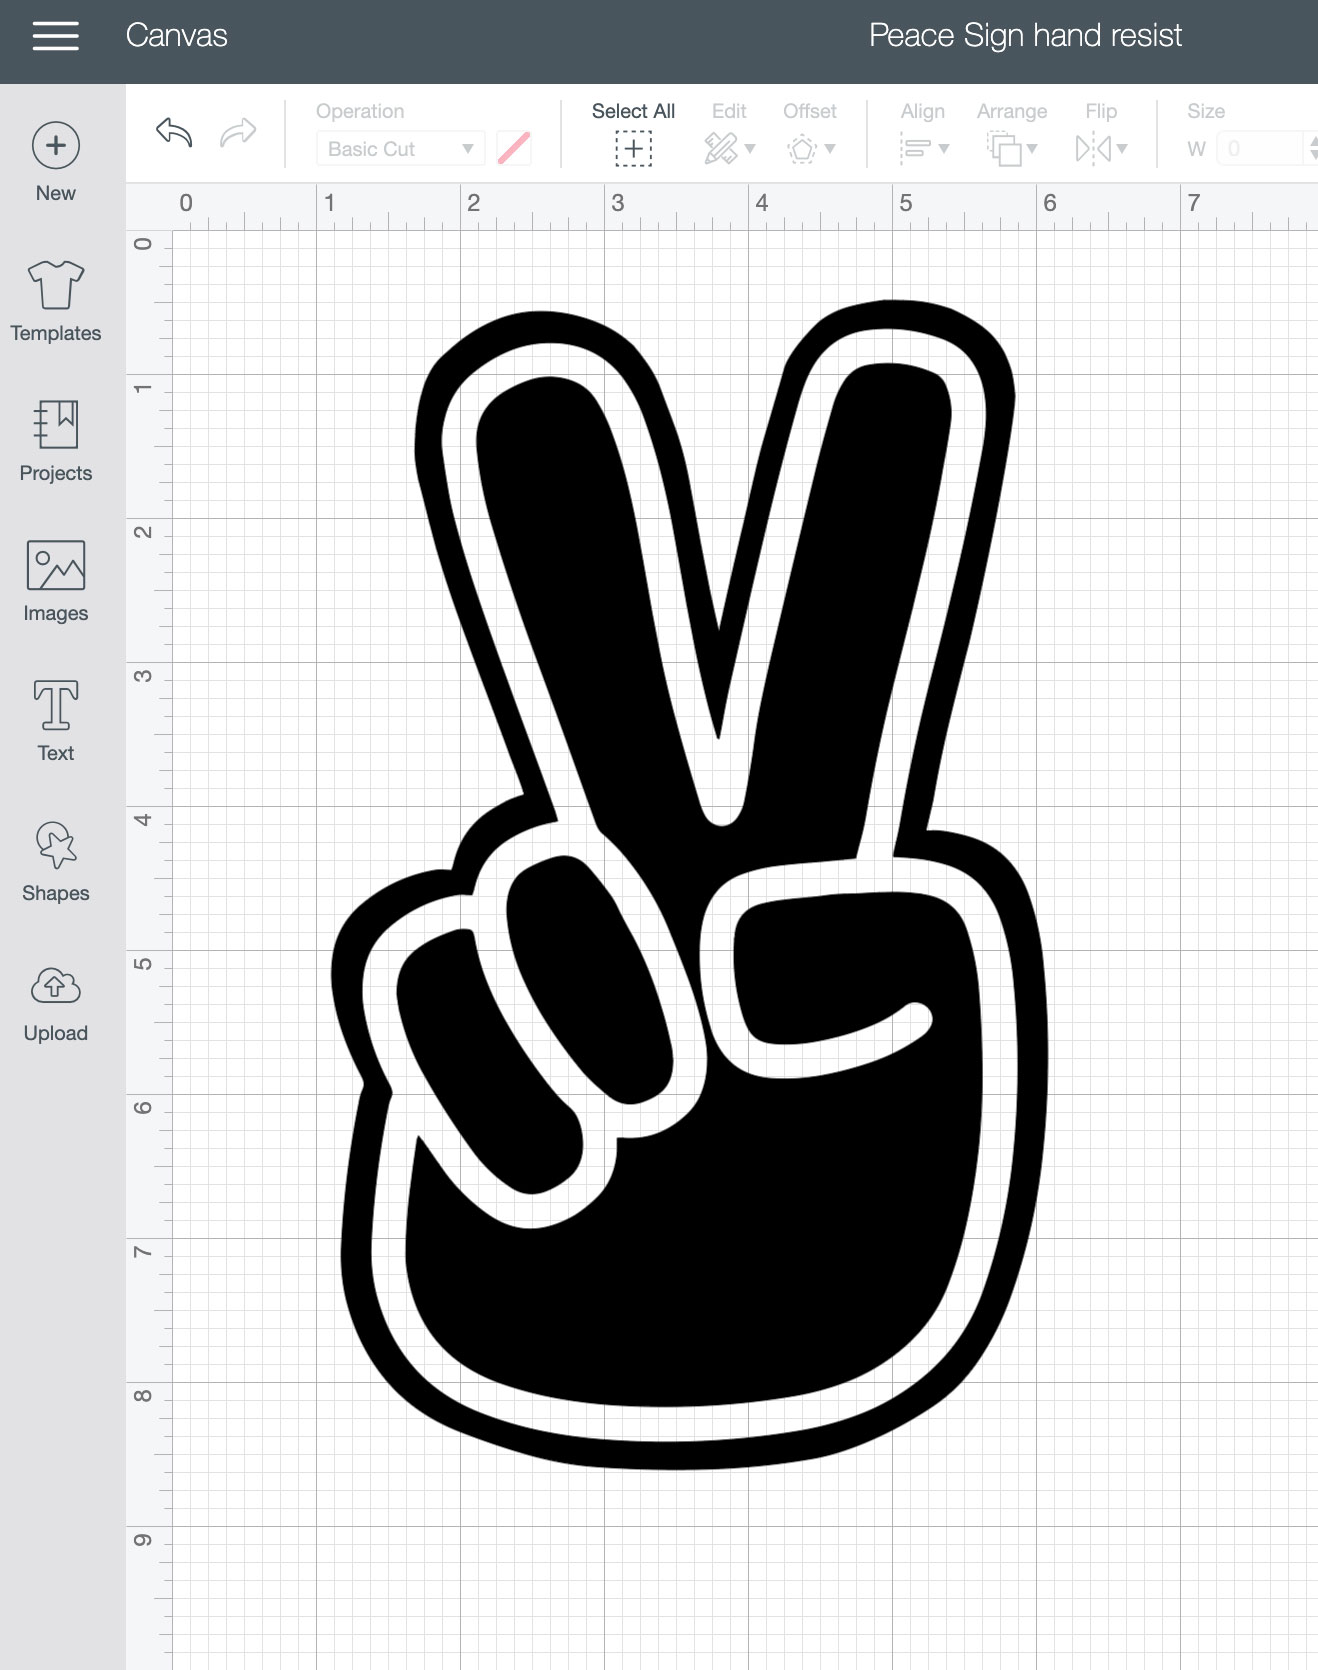
Measure your garment and how large your want your peace hand, adjust your PDF file OR SVG file accordingly. With sharp scissors OR your cutting machine, cut out your Peace sign hand from Vinyl. Then “weed” any of your negative space away from the peace sign (this will be the outer background, and then inside line around the hand). You can use a weeding tool for this or a sharp edge to begin to peel the vinyl away to reveal the design.
**note: if you don’t have a cutting machine, you can certainly simplify this design by downloading the PDF and only cutting out the outer line for a “solid” and more abstract peace sign! I think it still looks quite cool and completes this resist technique well! 🙂
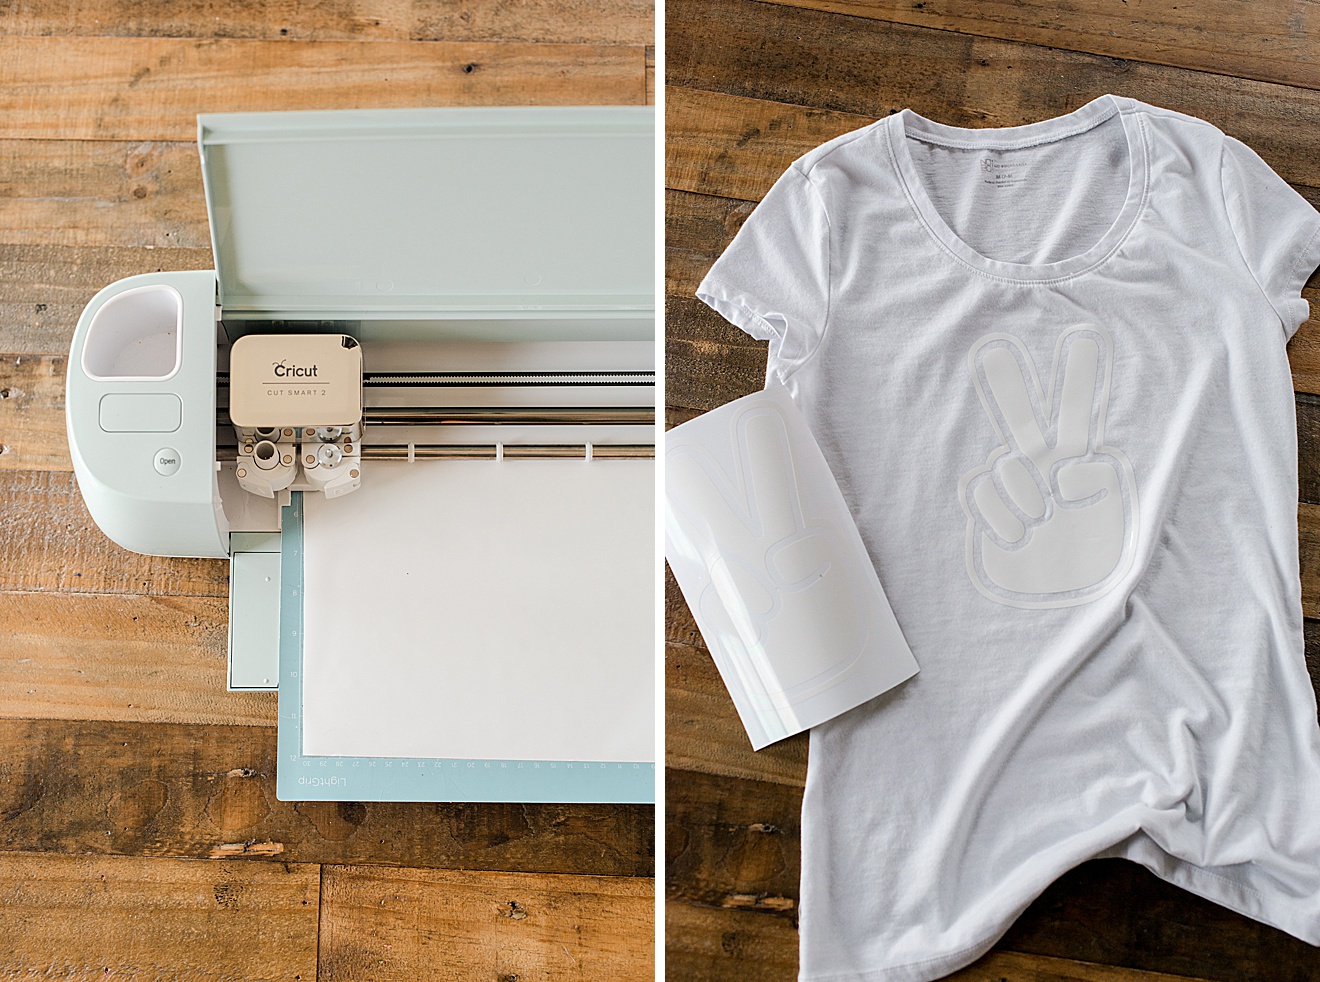
3. Once your garment is dried, quickly iron out any wrinkles on a light setting (you want your vinyl to stick with every corner and curve as possible)! 🙂 Then, either with your transfer tape OR by peeling up with your fingers, place your peace sign hand to any area of the garment that you desire. Stick down SUPPPPPER well (this is ULTRA important)! You will want every curve and shape of the vinyl peace hand stuck down very securely because this is your resist. If any dye gets “under” the shape, it will loose detail! 🙂
**tip: Once I transferred the peace hand, I flipped the garment over and pressed down, rubbed and used my hand to rub back and forth to be sure the vinyl was VERY secure!
4. Scrunch up your garment (without too many creases) and using the included rubber bands (in the kit) to “secure” it together in a scrunch. I made sure not to scrunch too tightly as I want to the vinyl to do most of the “resisting” while still being able to see the shape of the peace hand.
5. Pep your dye by removing the bottles from the Black Party box and filling all colors to the fill line instructed on the bottle! Carefully shake the bottles to make sure all of the dye is mixed.
**tip: cover your bottles with a paper towel when shaking…sometimes, in the excitement, the caps doesn’t get screwed on as tightly as needed and this will prevent the dye from splattering all around.
6. Place your scrunched up garment onto the cookie rack inside the tray (this will catch the excess dye AND make sure your garment/garments aren’t “sitting in dye” while they cure overnight). Then with one color of dye, begin to squirt onto your garment, making sure to fill all of the holes and folds with dye. Then with your next color begin to soak the garment, being careful not to “overlap” colors too much (overlapping will sometimes turn dye brown and make those bright and happy colors muddy).
7. Once you’ve covered the whole garment (front and back) set aside and continue with any additional garments. This tub includes enough dye to make LOOOOOTSSS of shirts or totes or bandannas or socks or….or….orrrrr……..
Set your dyed items back onto your drying rack and cover completely with plastic wrap or a re-usable plastic bag. The idea here is just to seal the garments so that they don’t dry out while curing. The longer you let the garments sit in the dye, the more vibrant they become (I suggest at least 6 hours if possible)….I chose to let everything sit overnight! 🙂
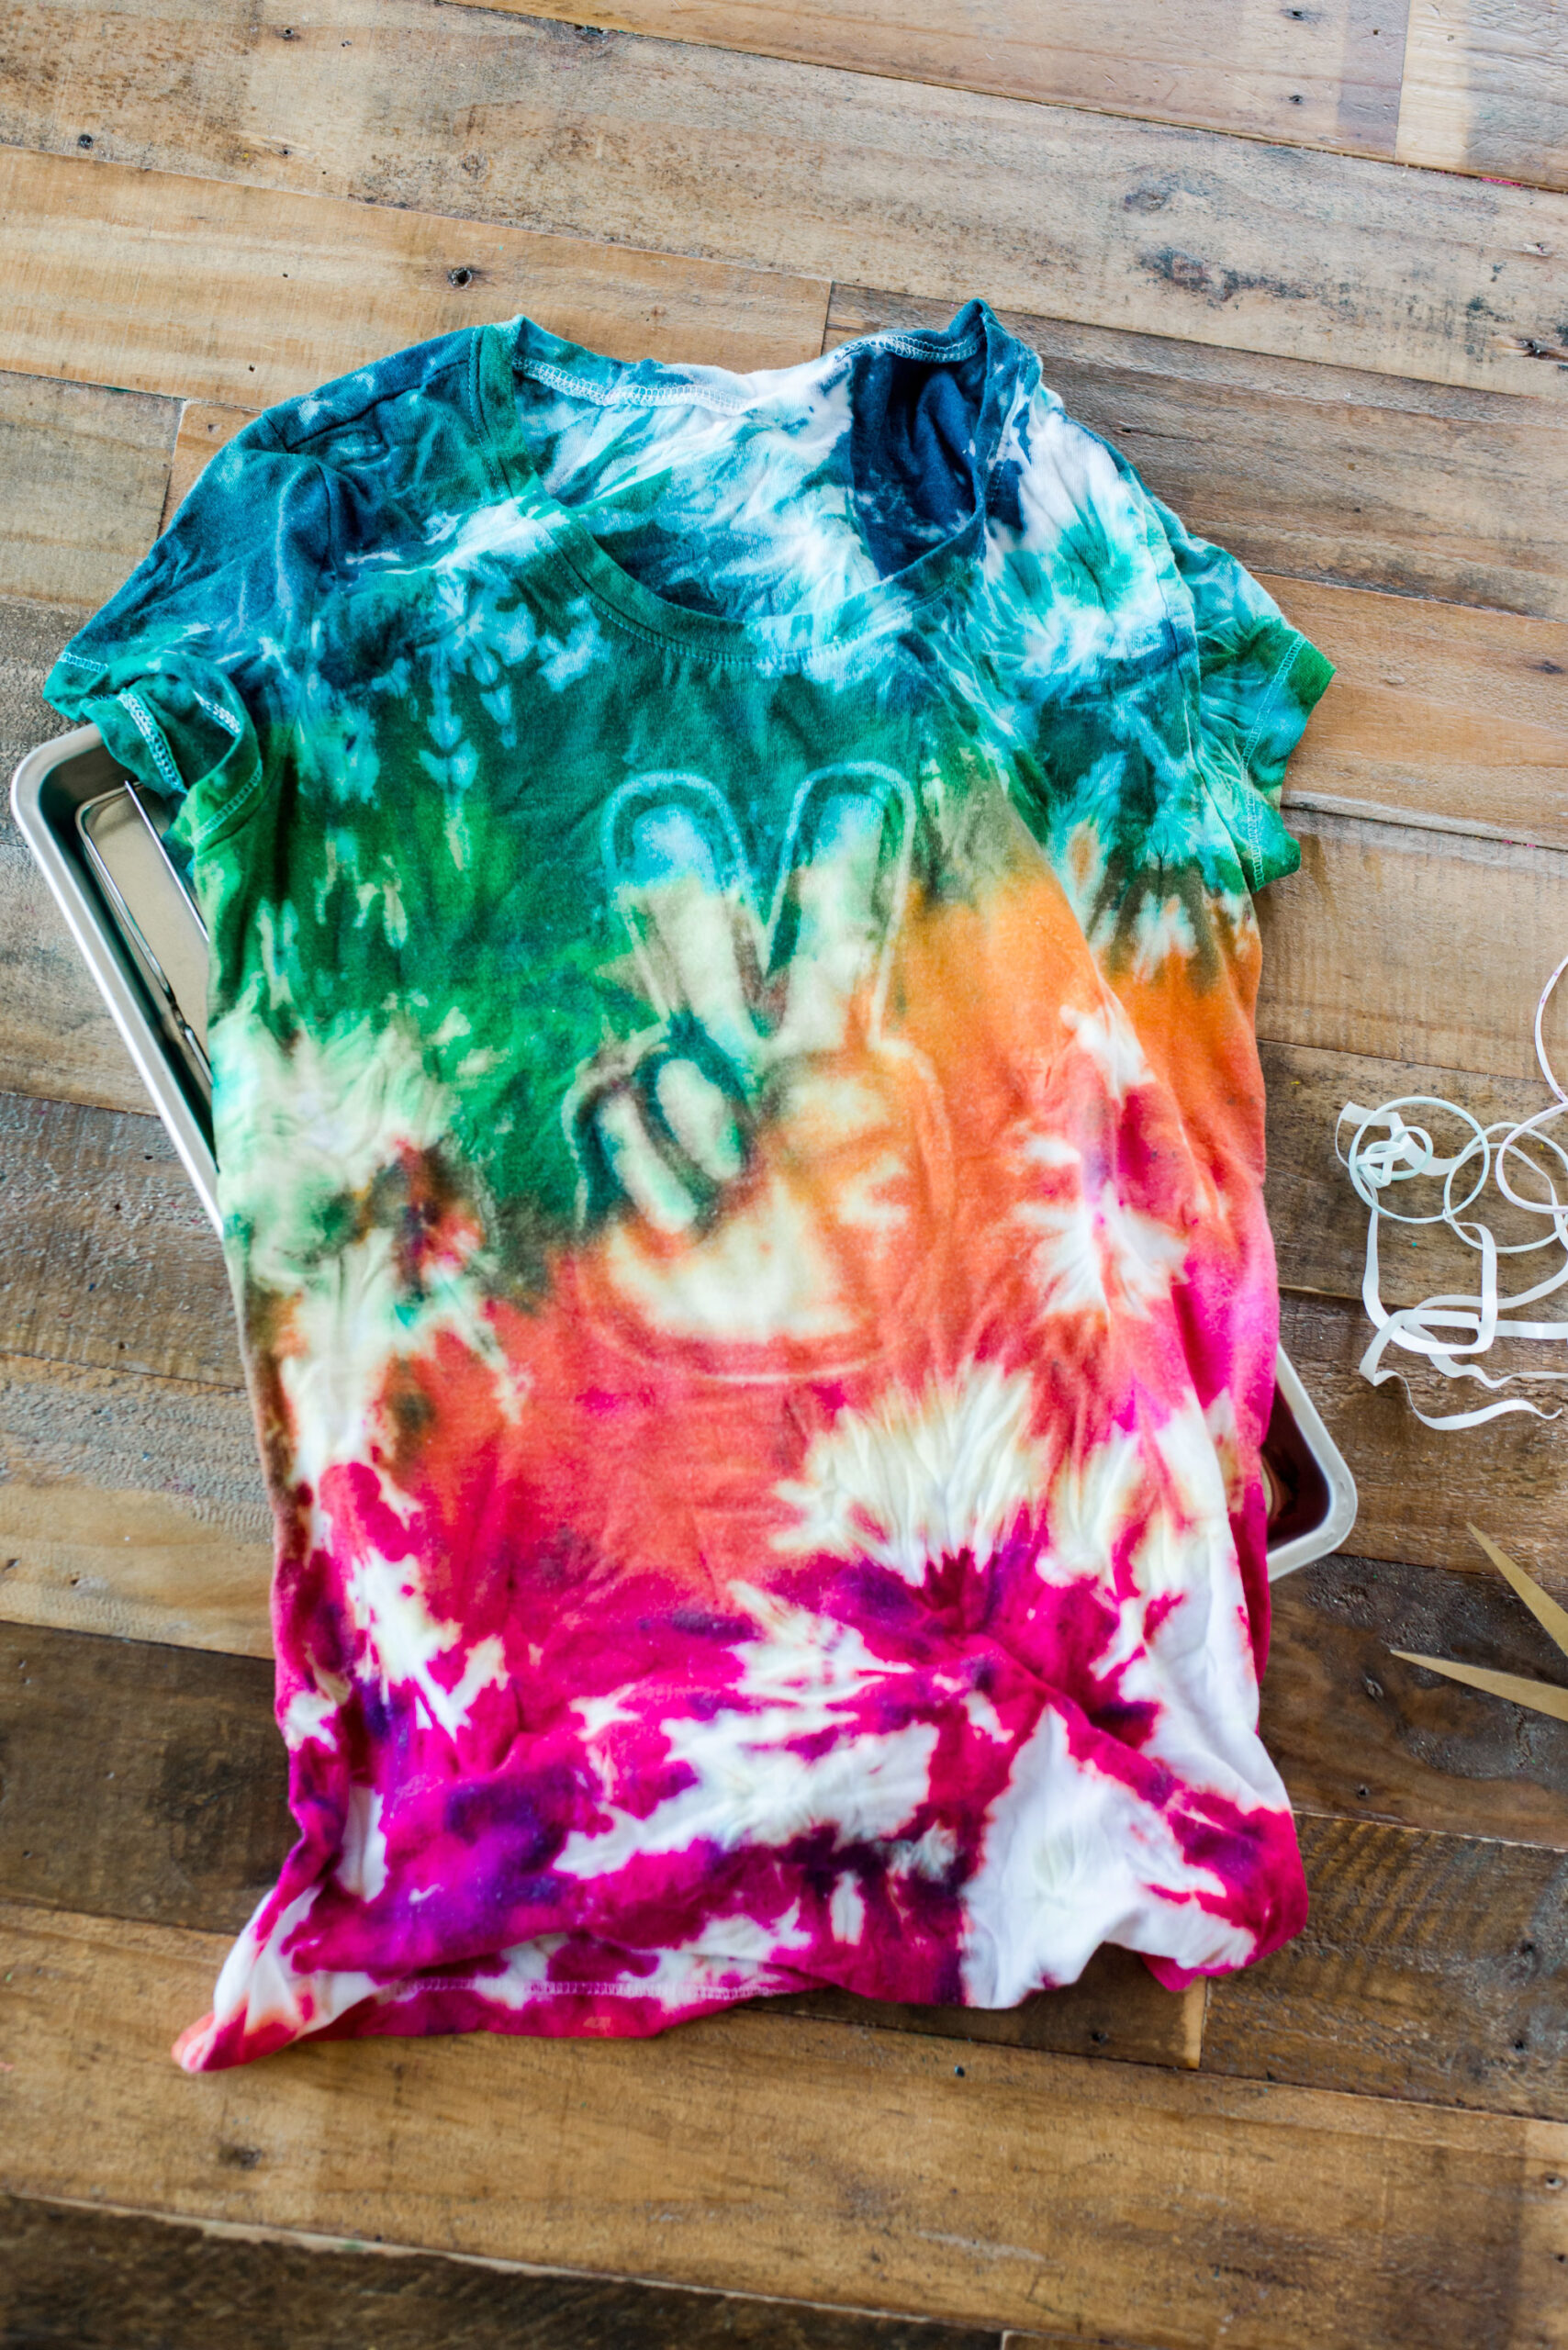
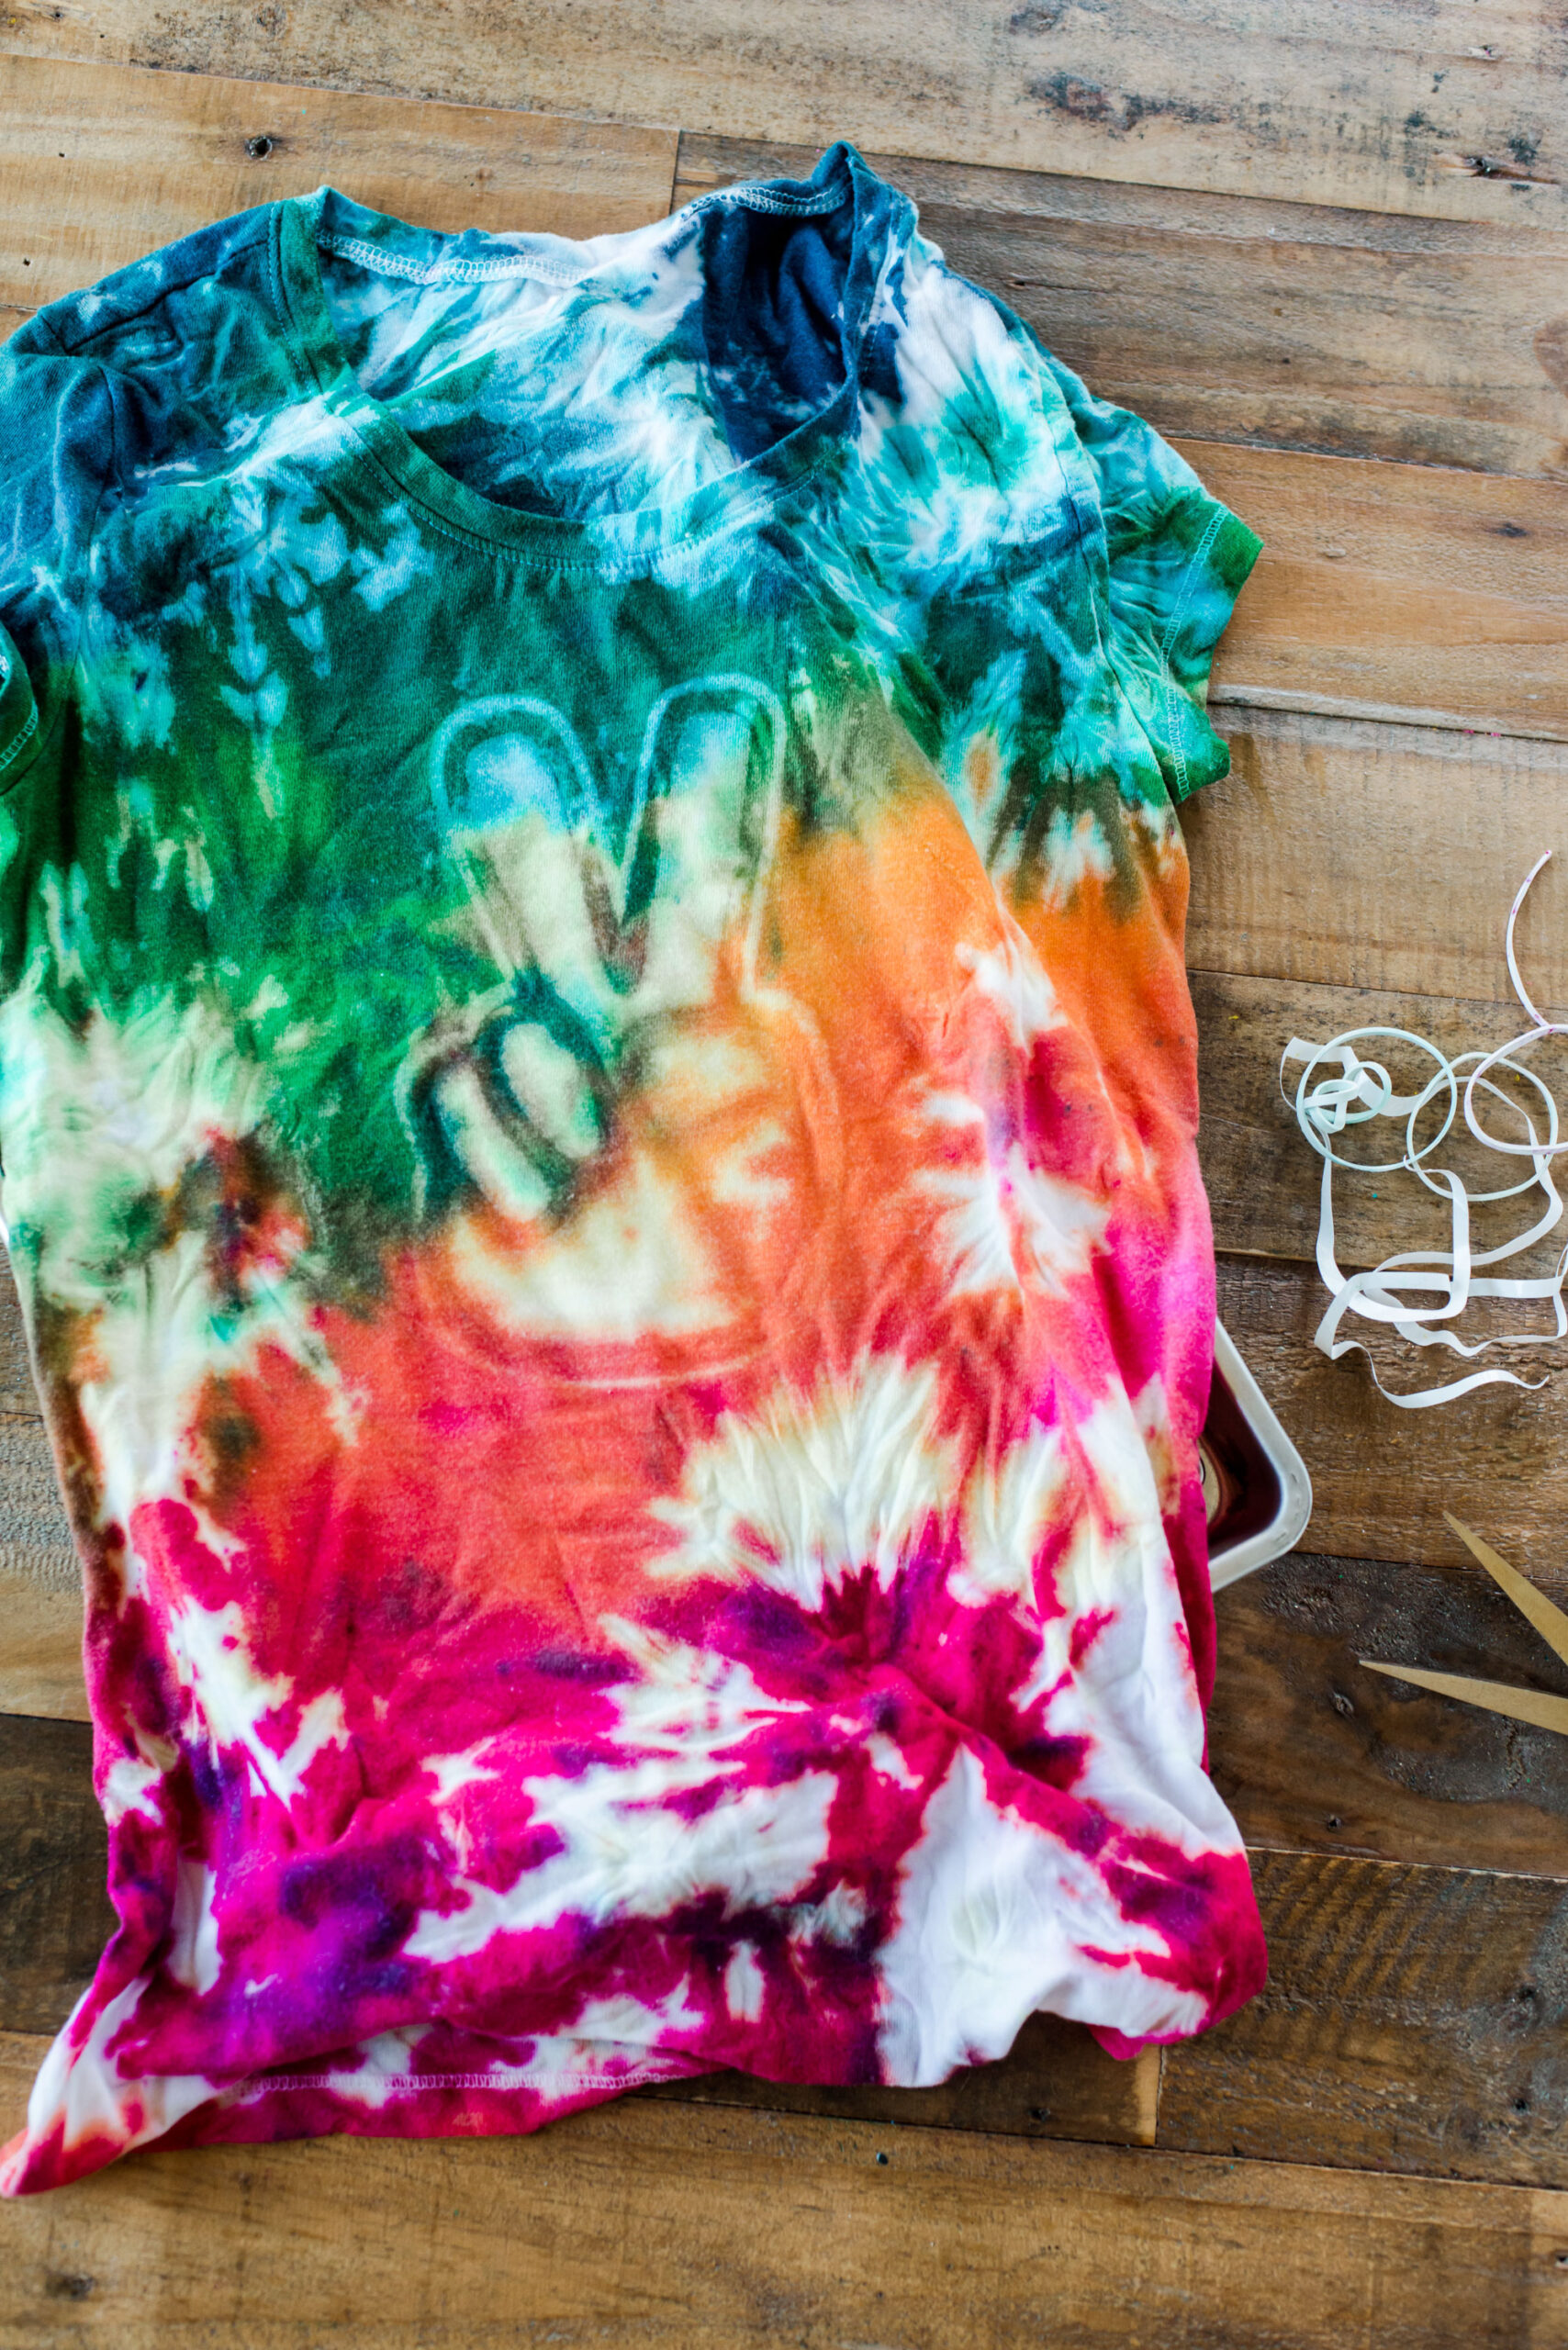
8 After you’ve removed any rubber bands, rinse off any excess dye until the water runs clean. Then gently begin to peel back your vinyl to reveal your peace hand resist! YAYYYYYYYY!
9. Wash and dry your garment(s) separately from other laundry! Then proudly show off your amazing new tie dye technique as you sport your peace sign shirt around! 🙂
TAAA DAAAA! You’re done and you can proudly wear you awesome, colorful, peace sign shirt out and about!!!