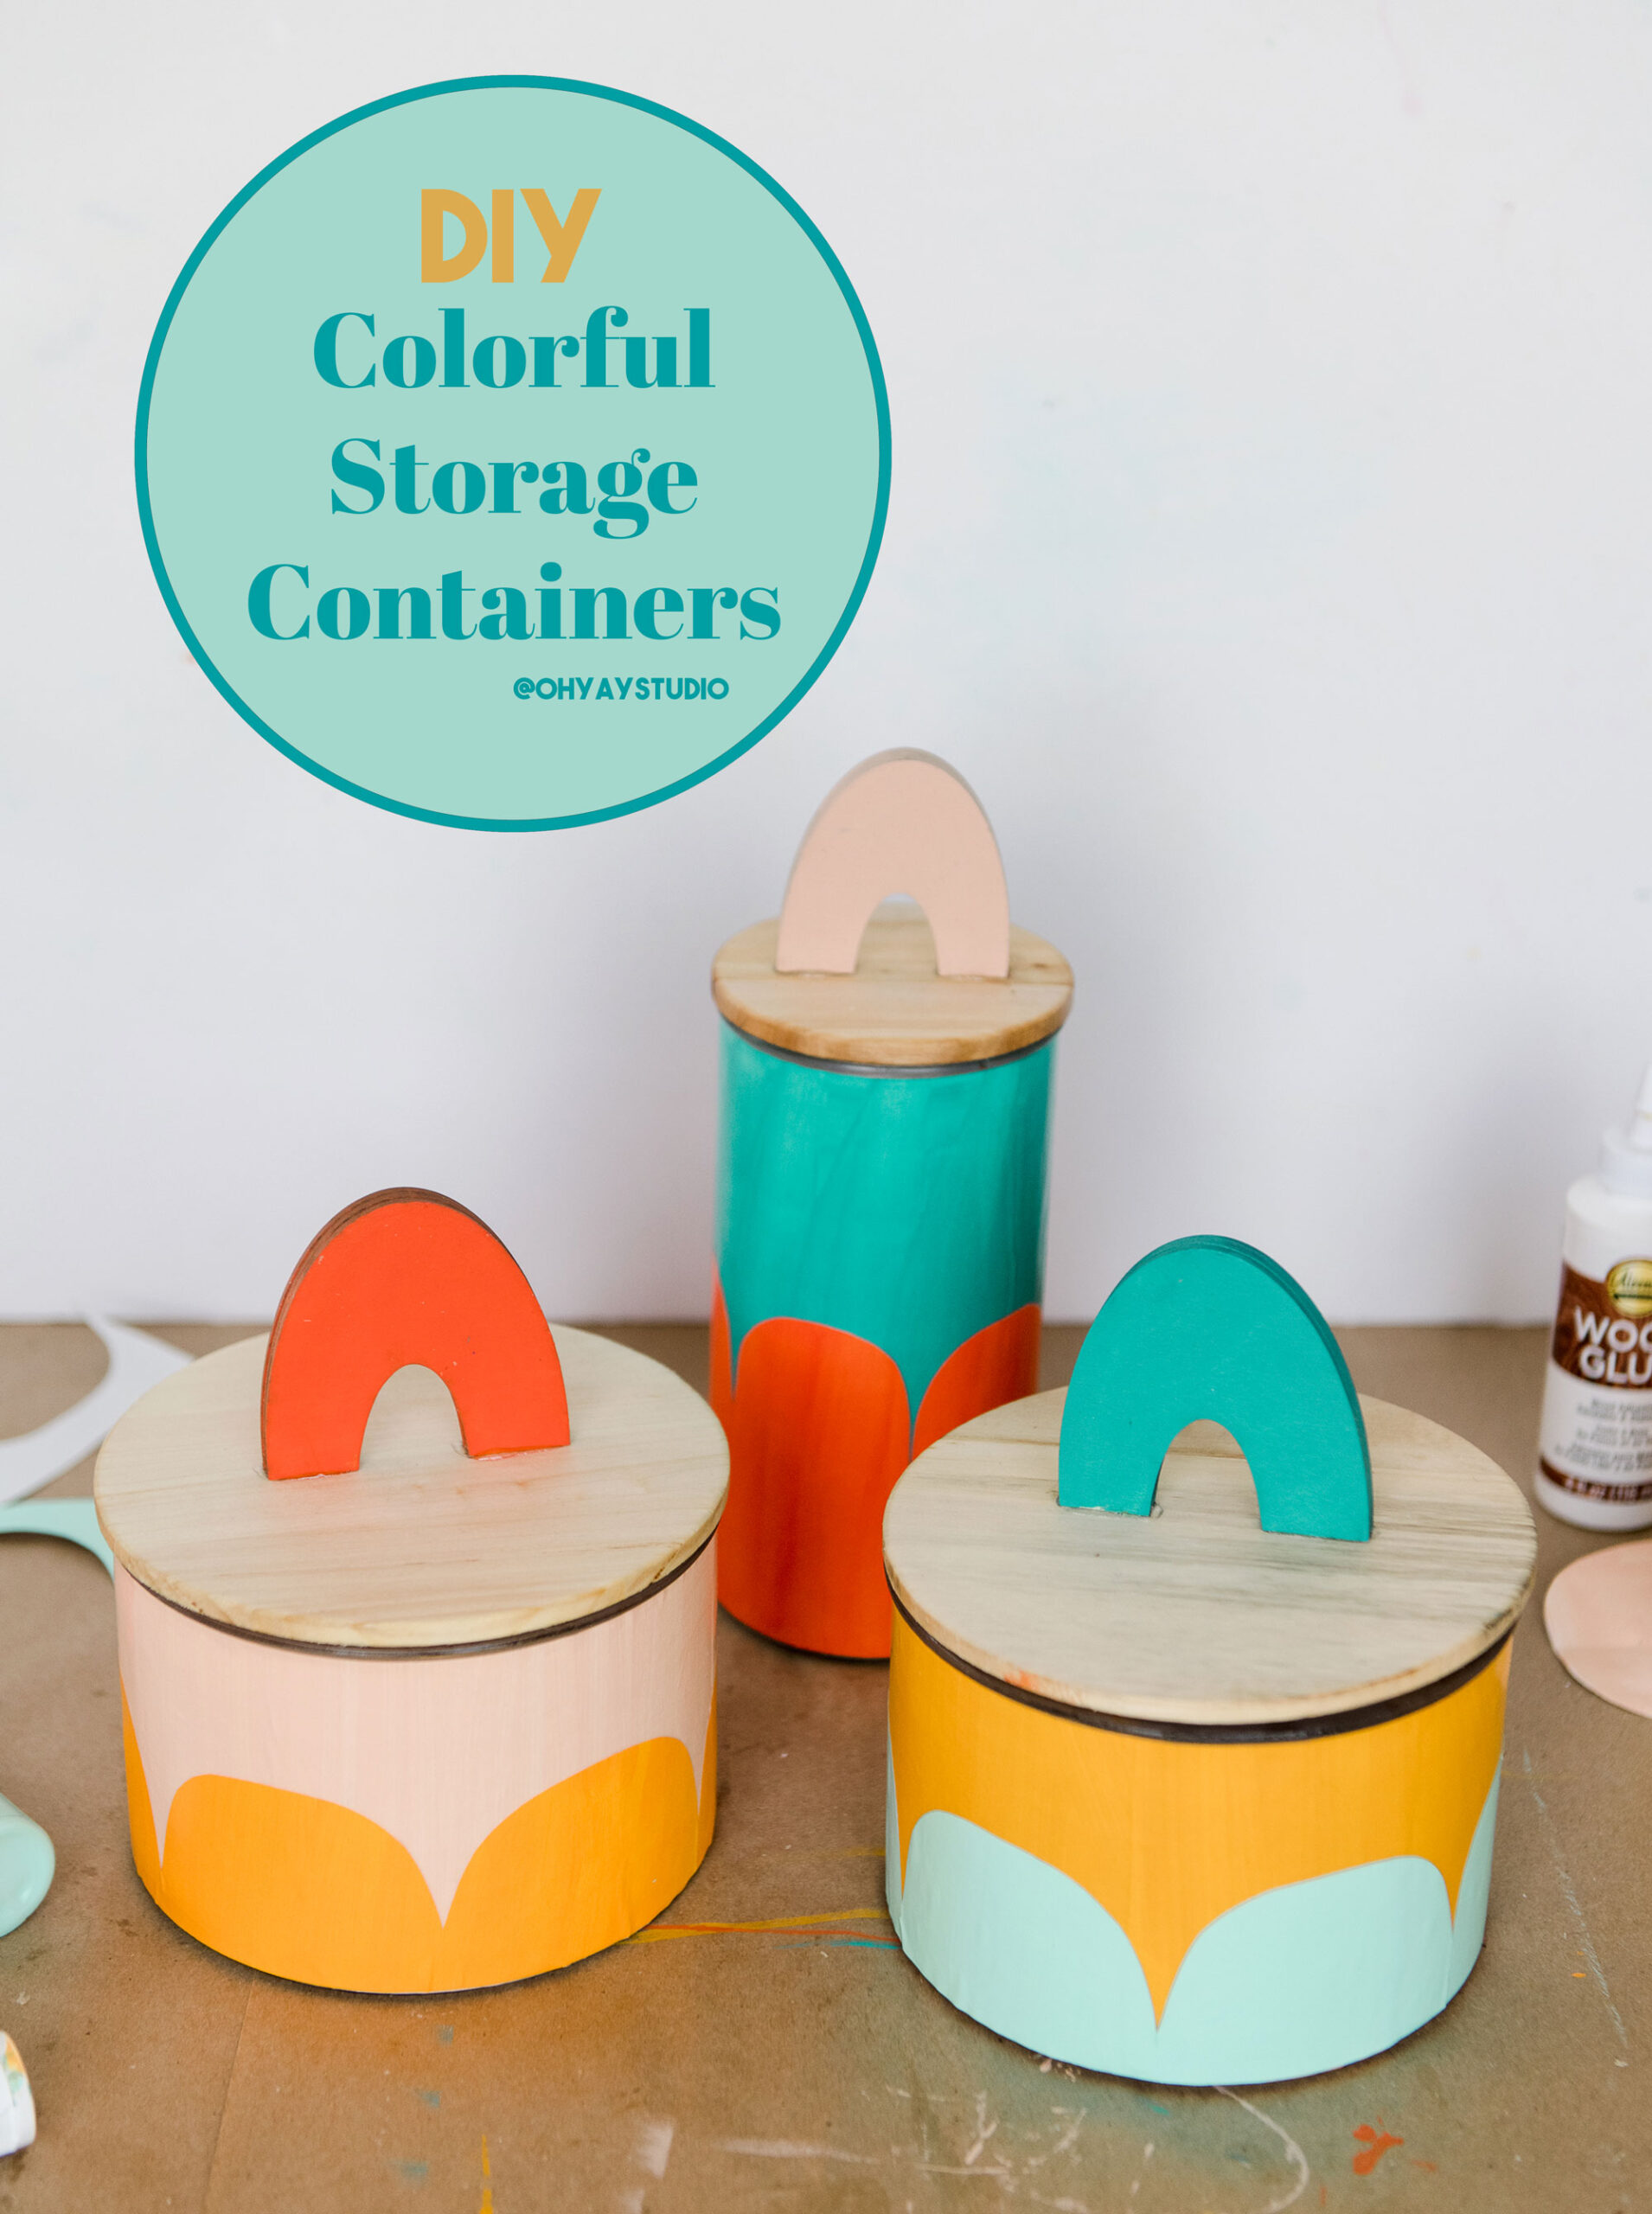
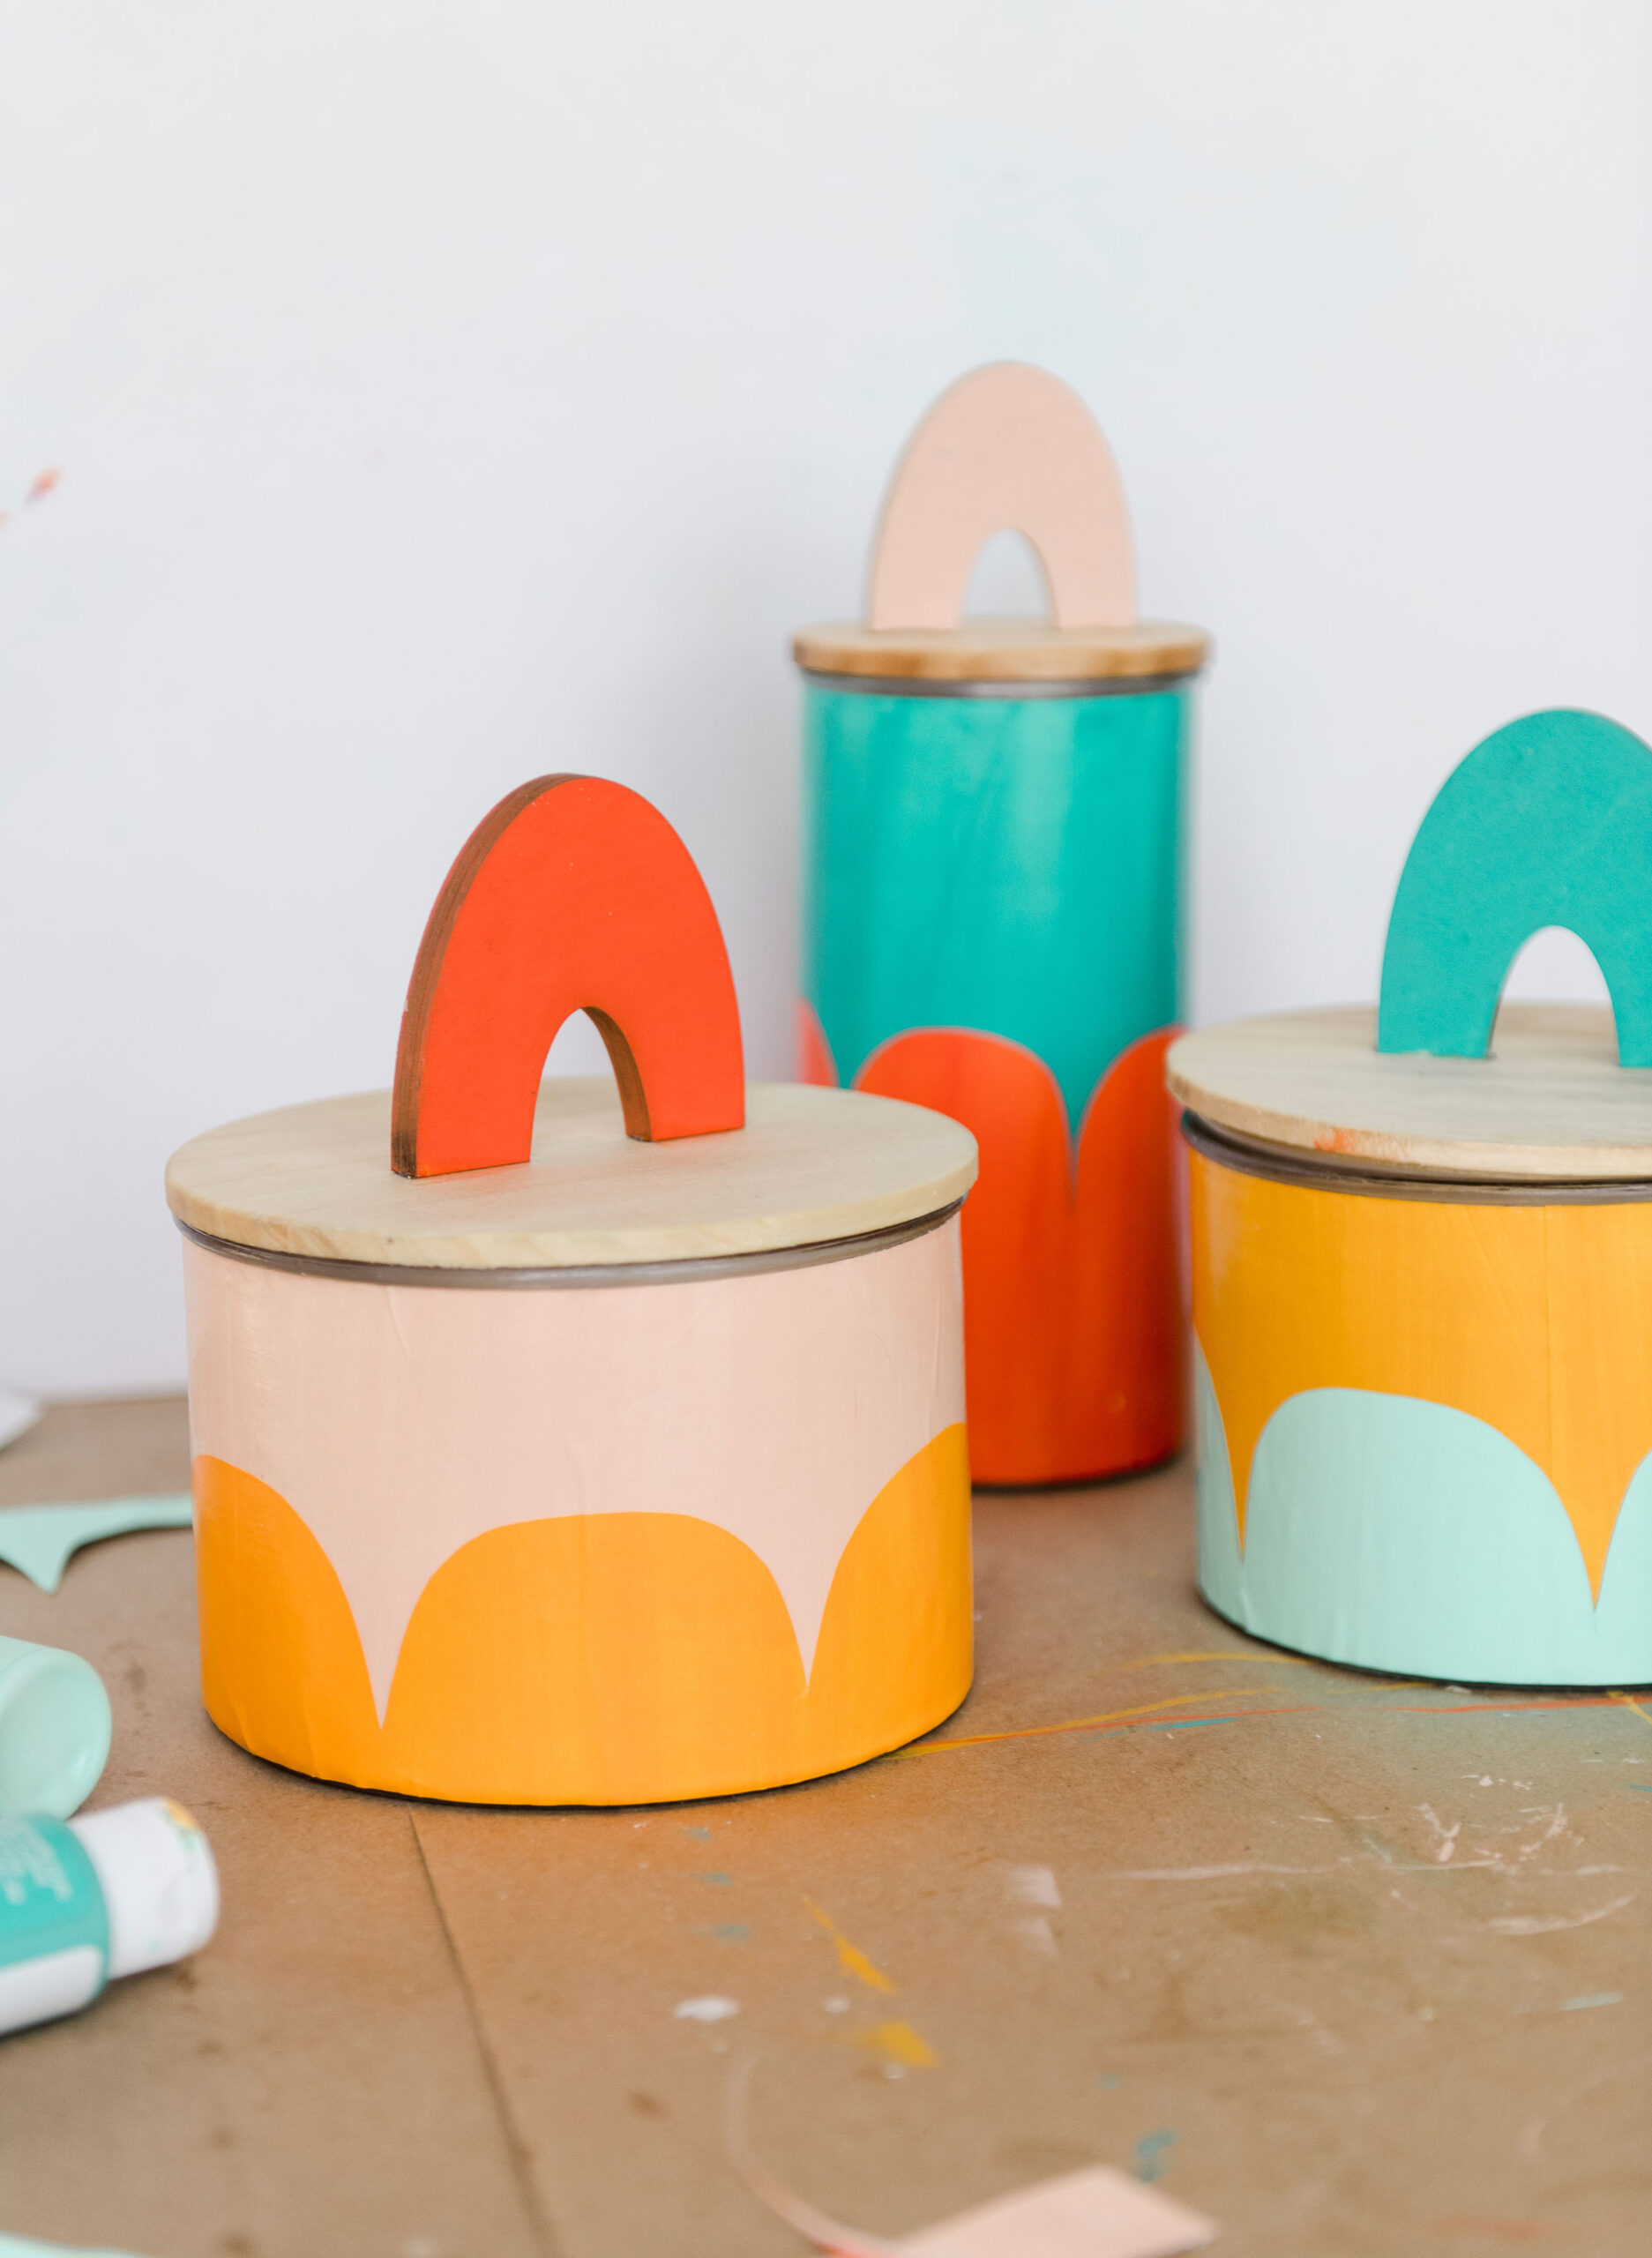
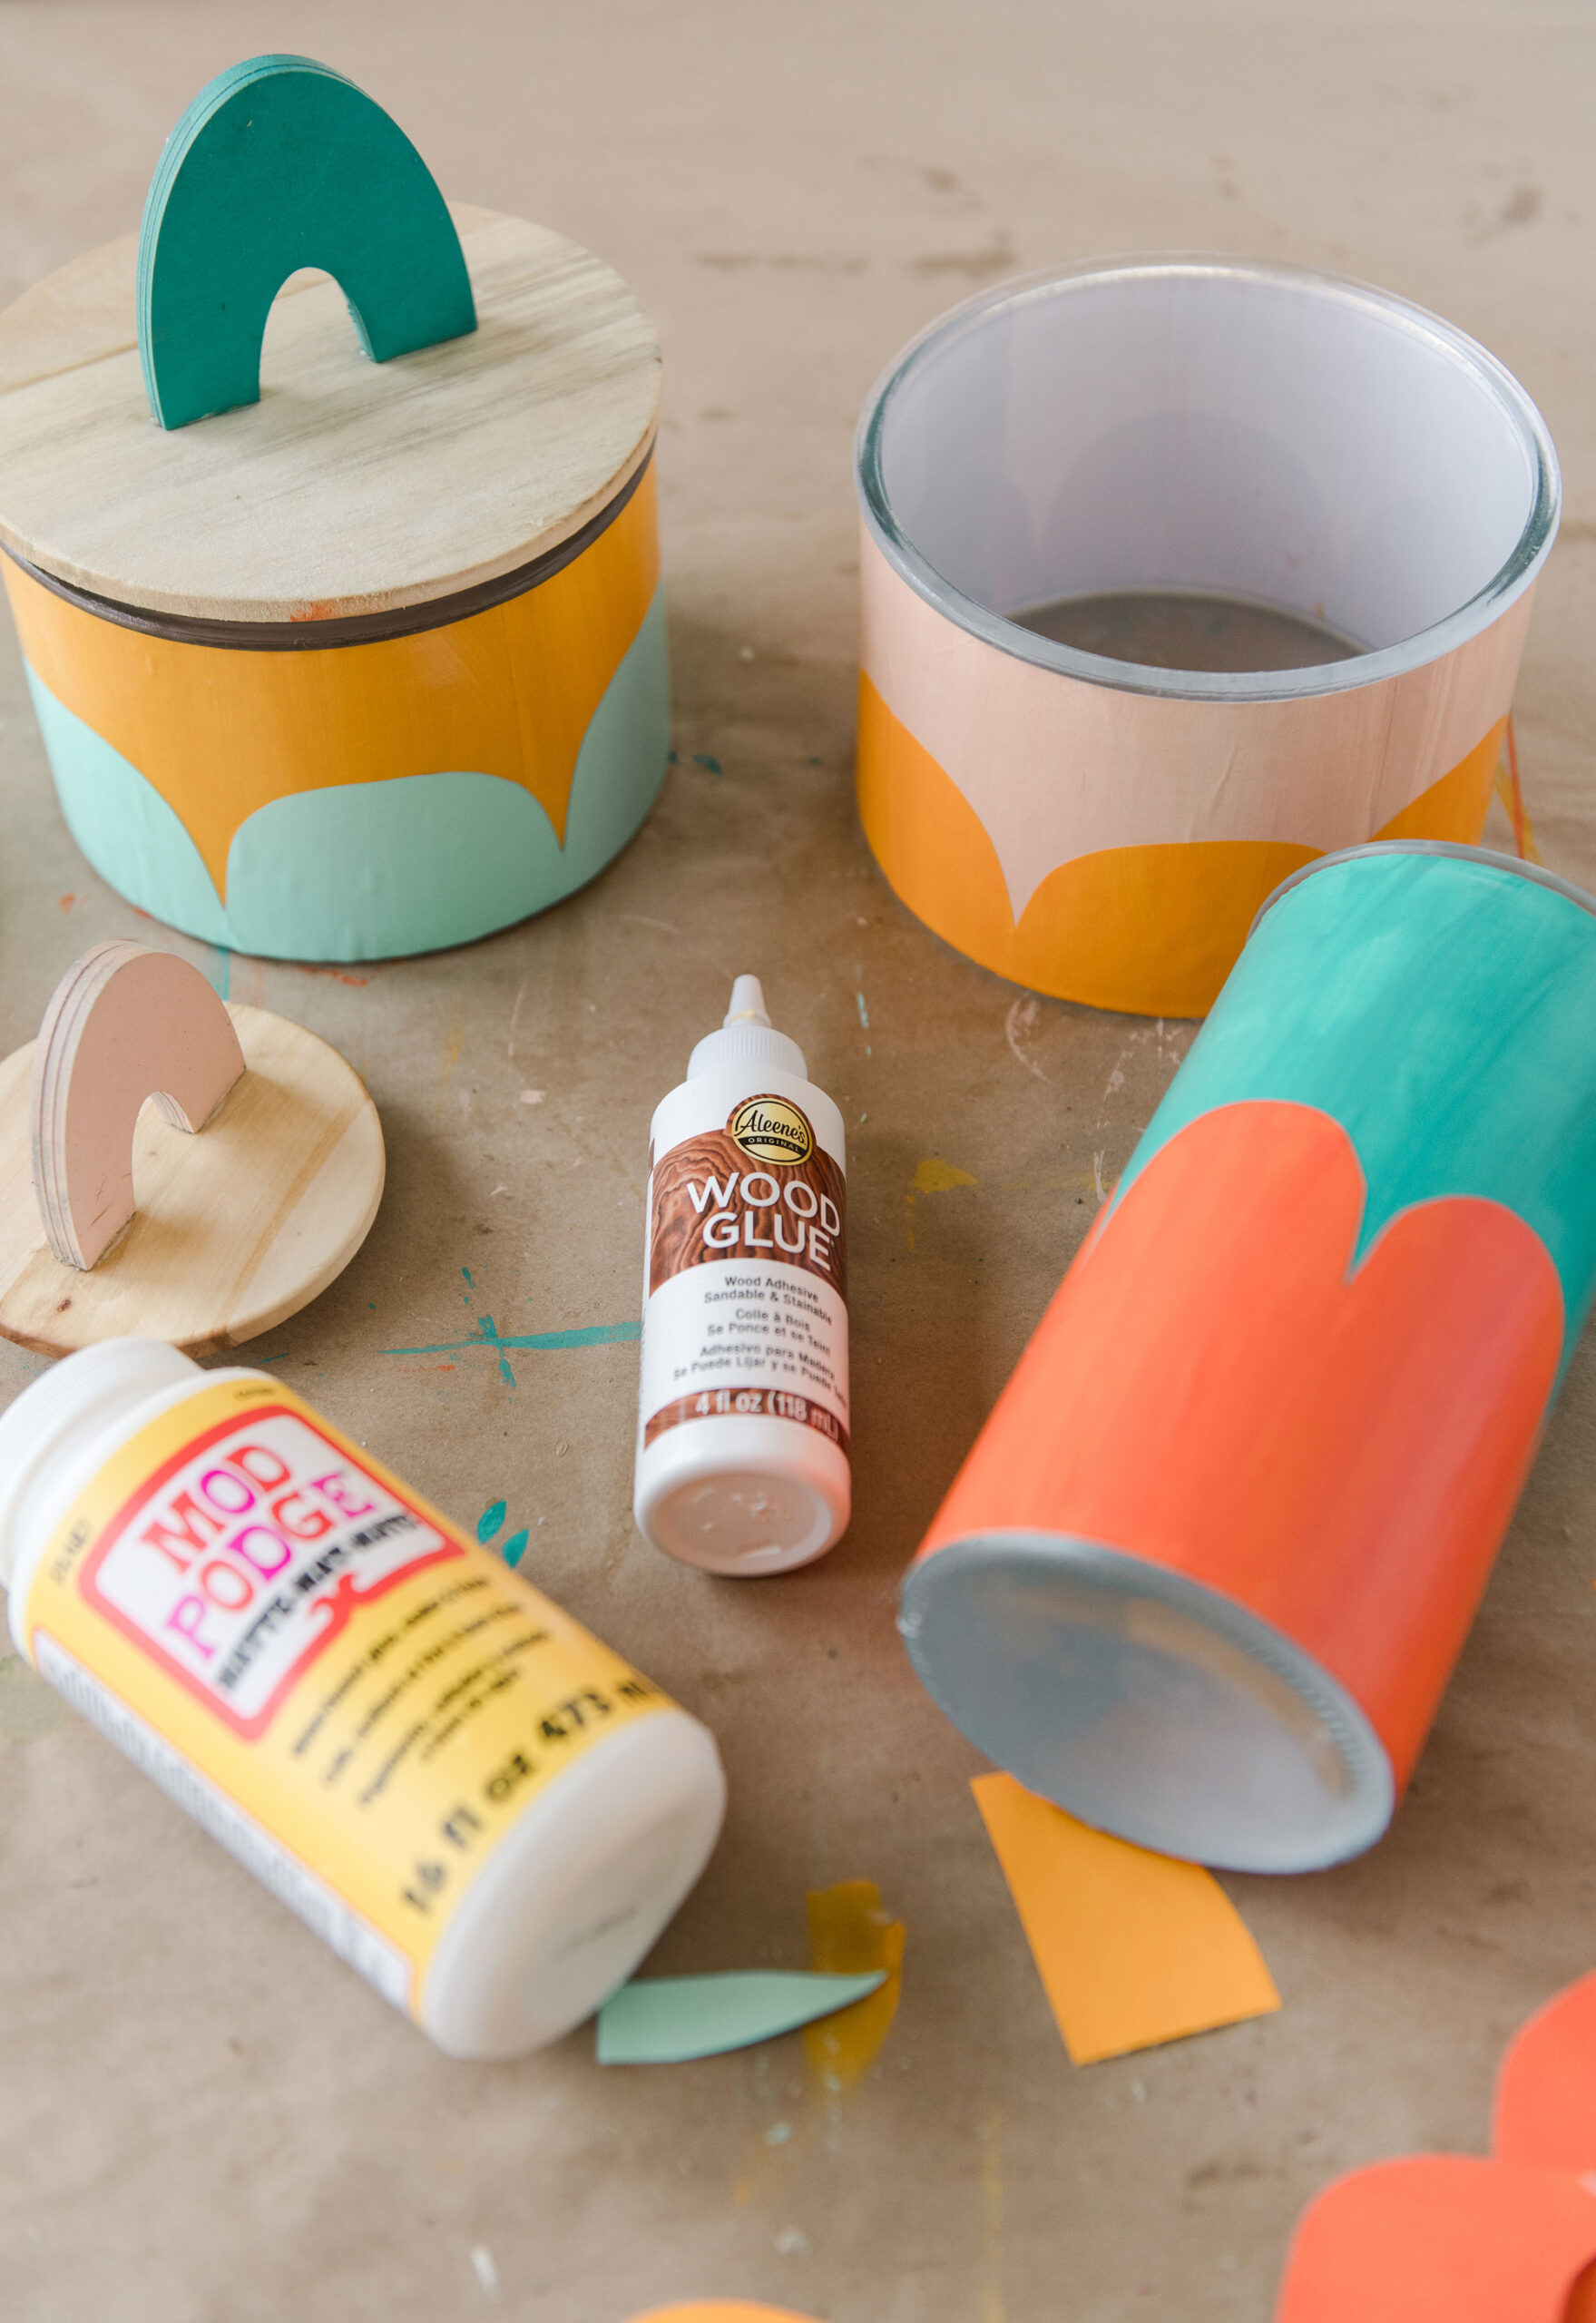
Colorful scalloped containers for holding ALLLLL the things :)
*this project is in partnership with Mod Podge and Aleene’s amazing products
Raise your hand if you have kids that are collectors? (this is me raising my hand so dang high)! You know, the piles of rocks or mini squishes or small figurines or even hair binders or clips! I love it, in fact I encourage it……because collections are a byproduct of curiosity (for the most part). BUUUUT there are so many times that I don’t necessarily need to SEEEEEE the collections all the time (and all the Moms say AMEN)!
SOOOOO today, make these super colorful, paper mod-podged containers with me to hide and keep the collections safe! 🙂
If you know anything about me, then you know that one of the biggest reasons I craft isn’t only because it makes me so happy but I just LOVE LOVE LOVE the idea of making small moments of colorful joy – whether these moments are in the end project or with the project process itself!!! Truthfully this project, these seemingly mundane canisters, turned happy, colorful holders are just the essence of a moment of joy sitting in my daughters room collecting treasures! 🙂
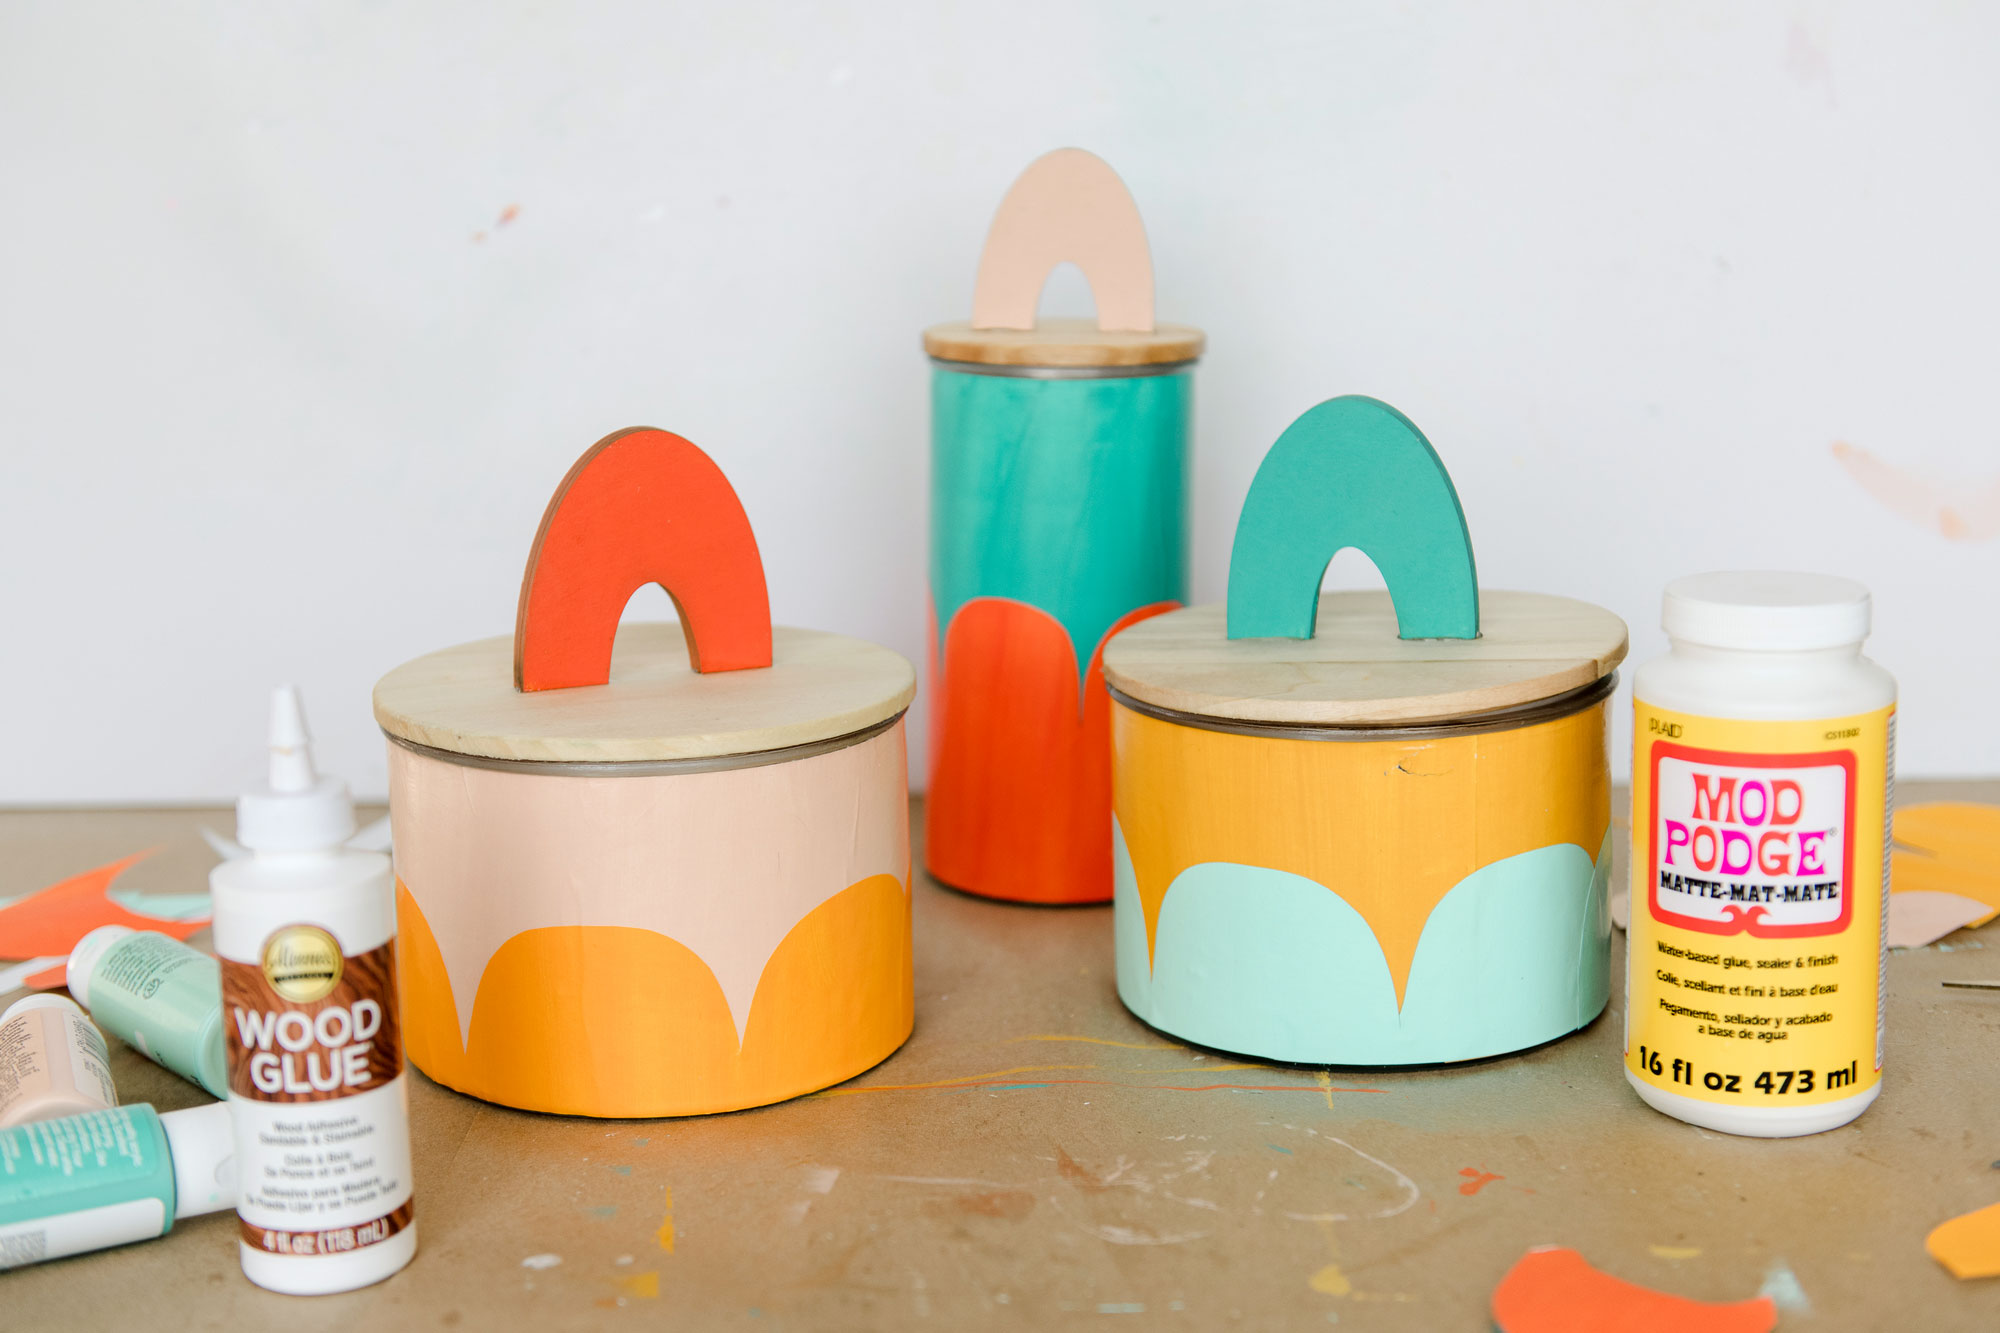
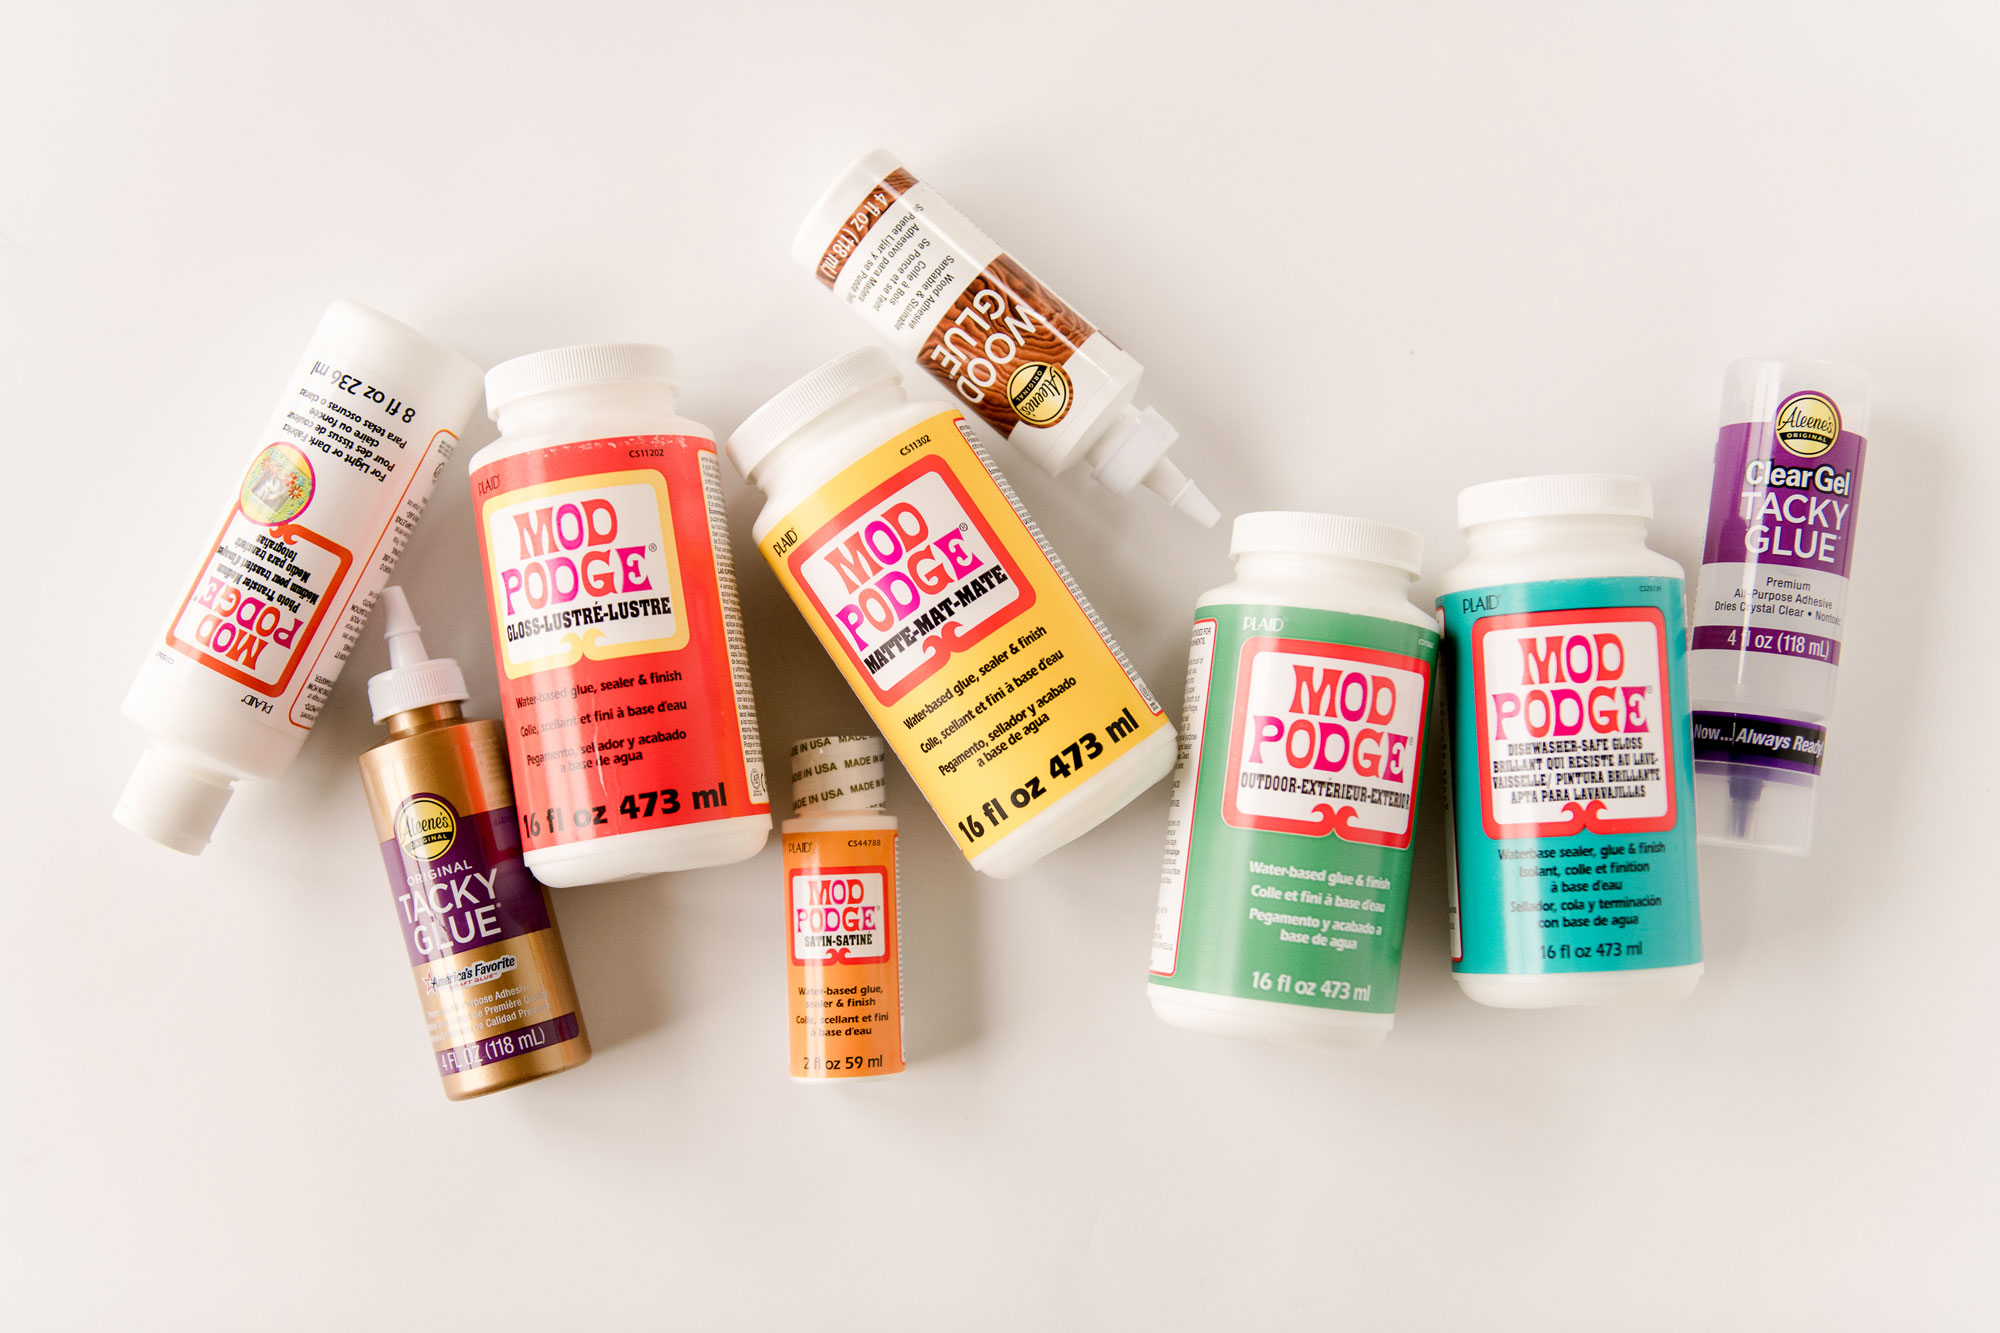
ALSO ALSO ALSO! May is officially the 55th anniversary of 2 incredible women that began incredible companies in the crafting industry: Aleene, inventor of Aleene’s Tacky glue and Jan, the inventor of Mod Podge! YAY for amazing women that paved the way in the crafting industry! So in honor of them I am using these 2 incredible products to make our colorful canisters! 🙂
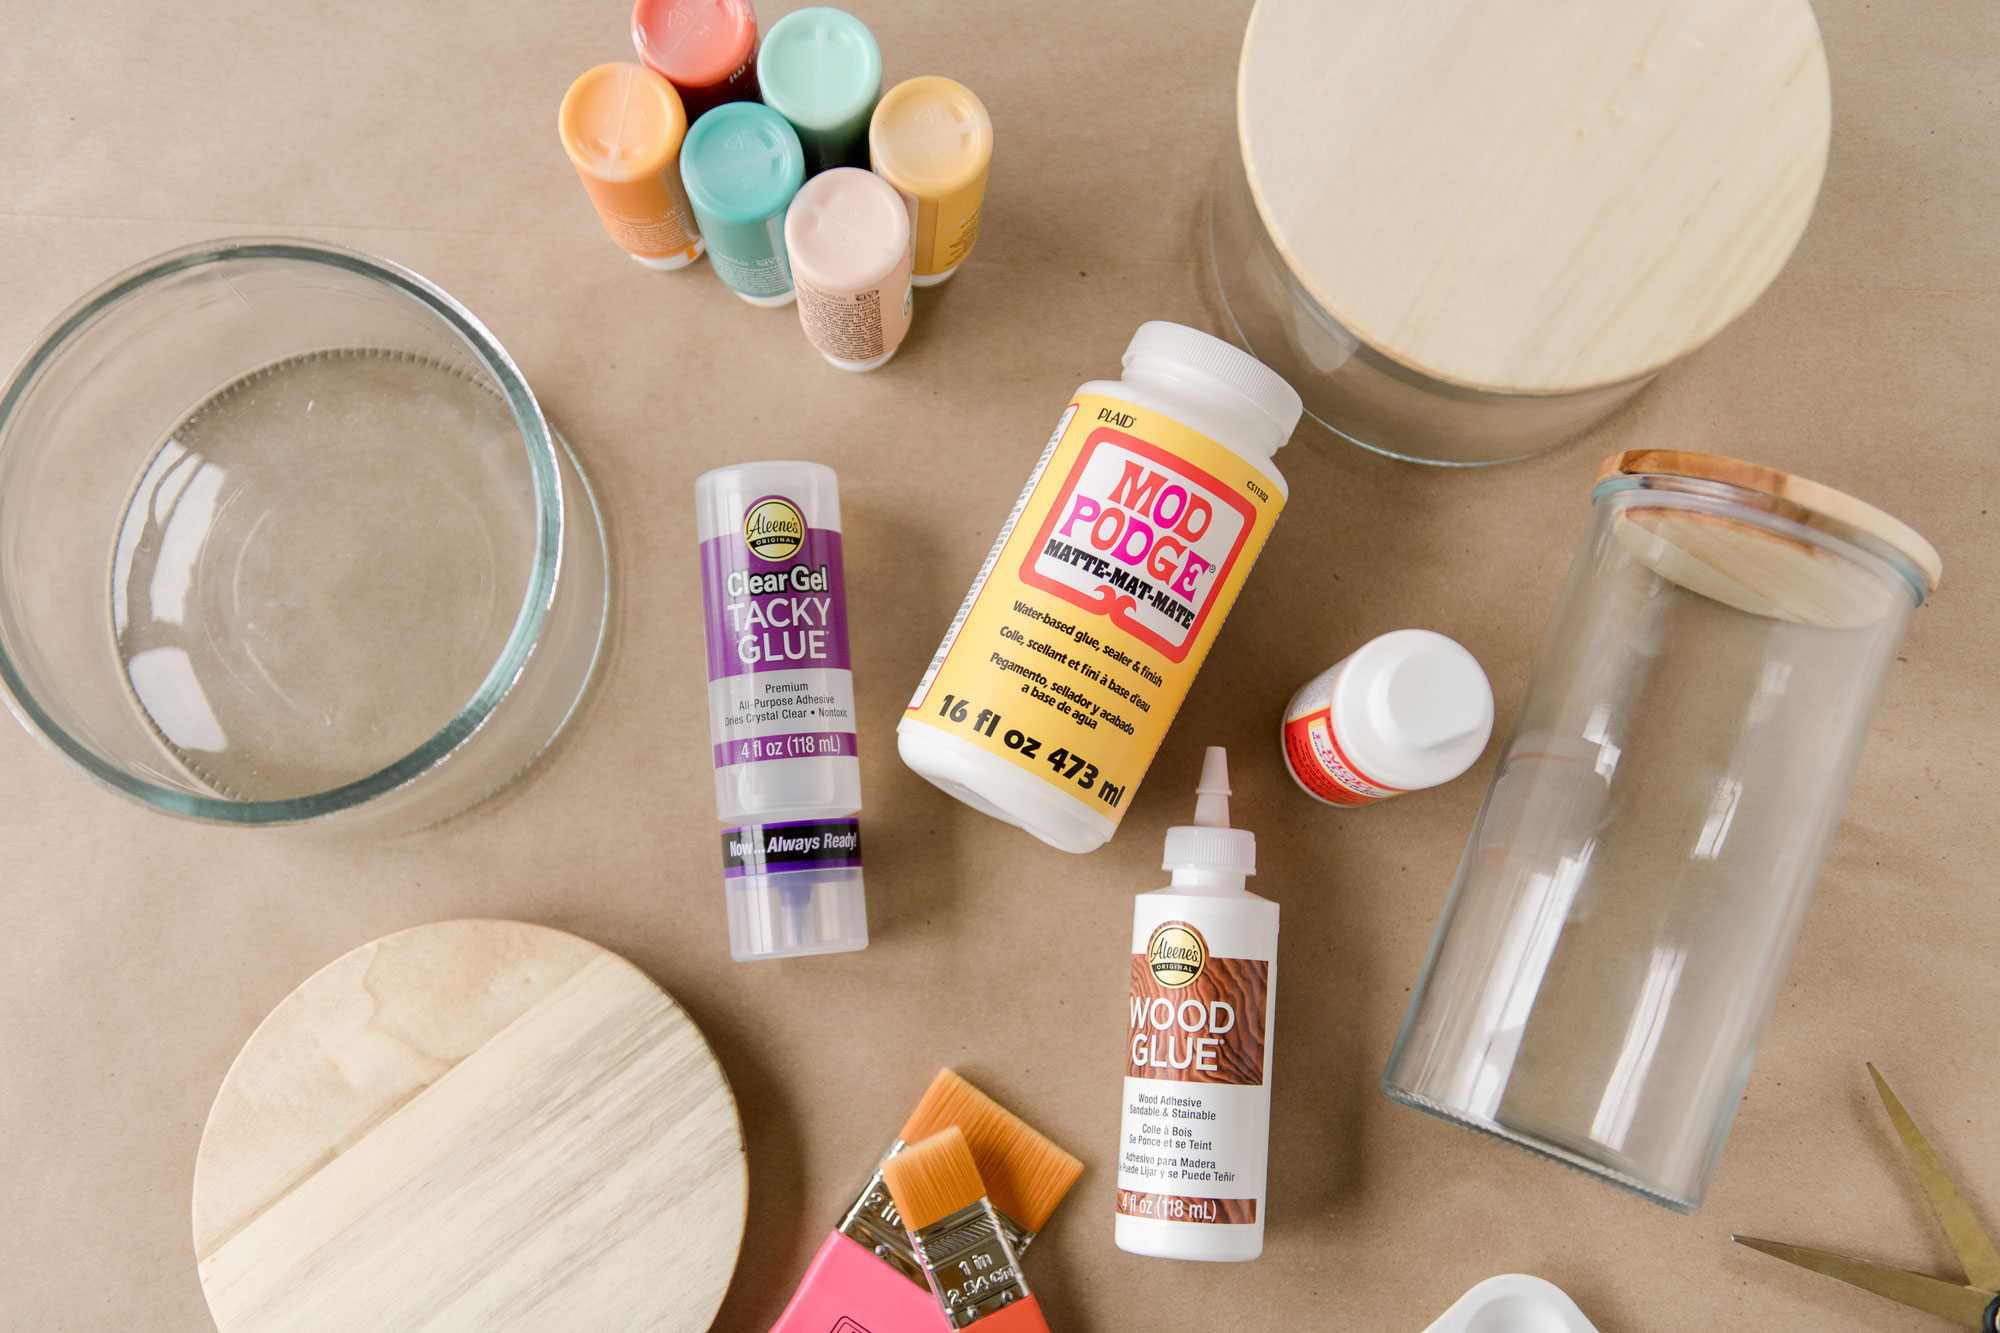
MATERIALS:
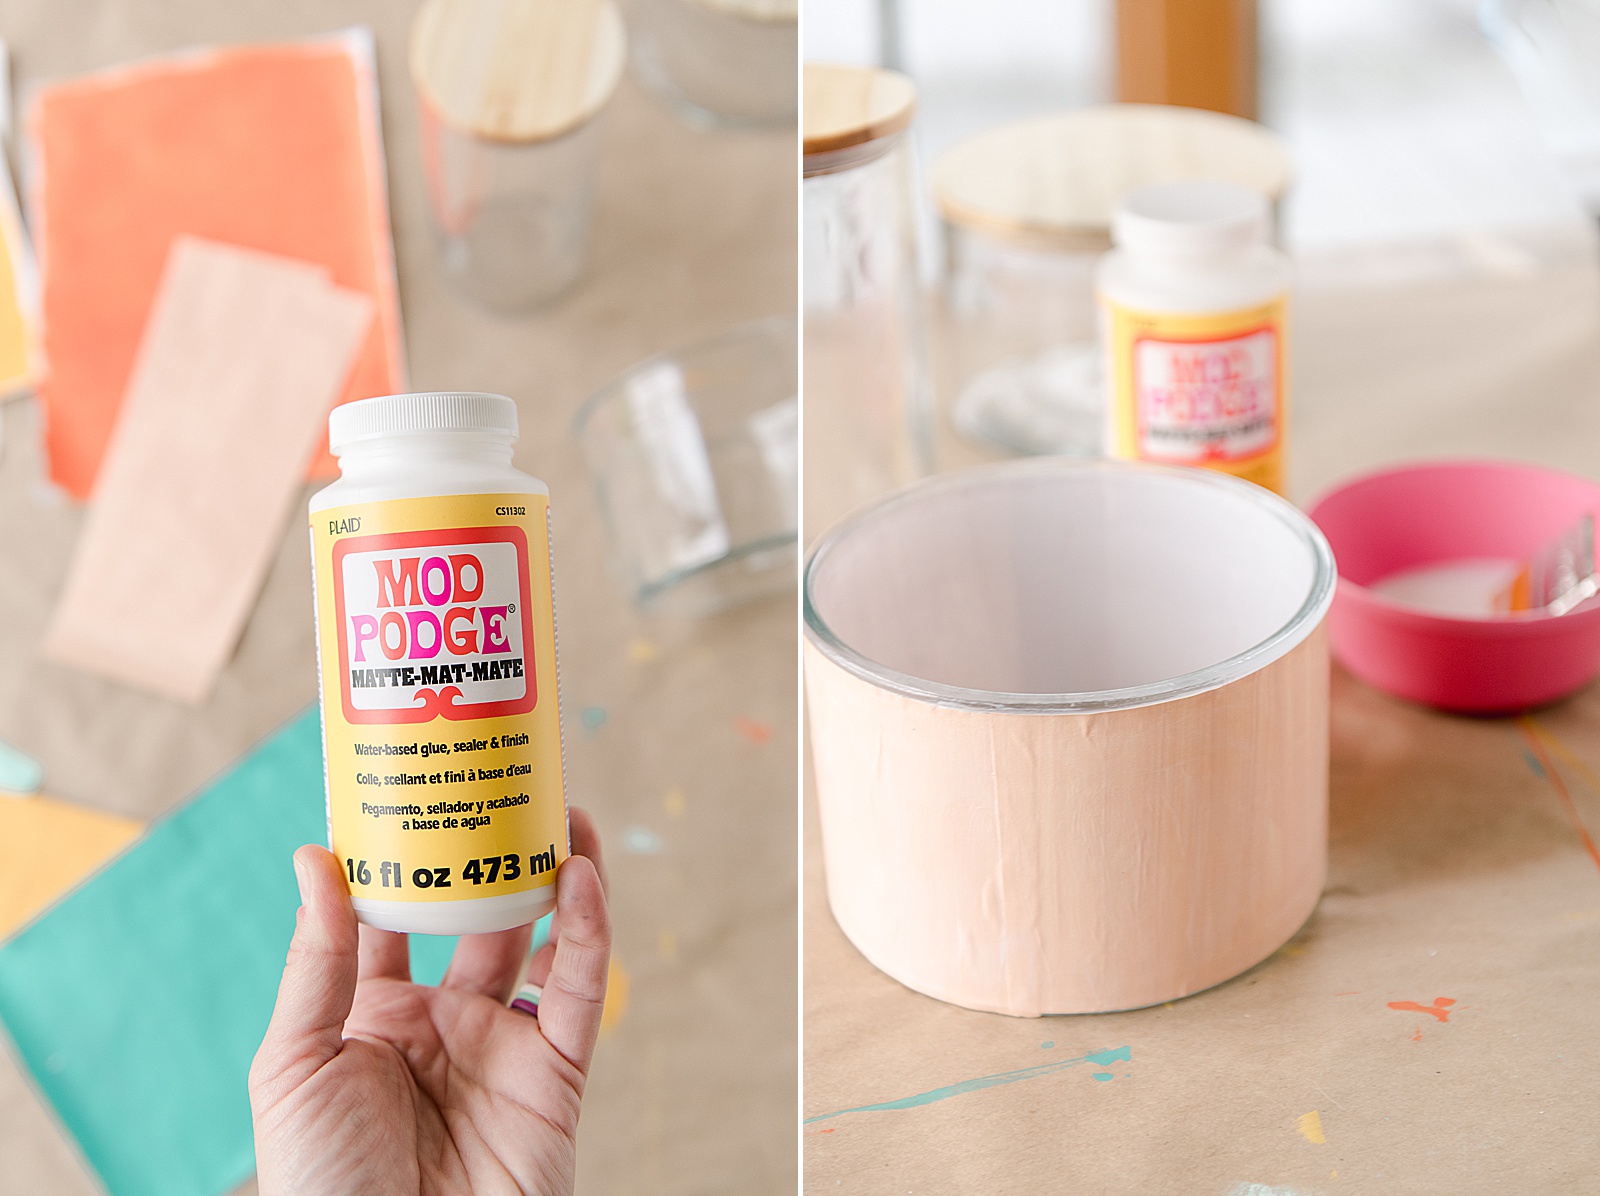
- Any containers that you have or want to repurpose – I found some inexpensive glass ones in the Target dollar spot
- Some white paper – copy paper, drawing paper, anything that isn’t super thick
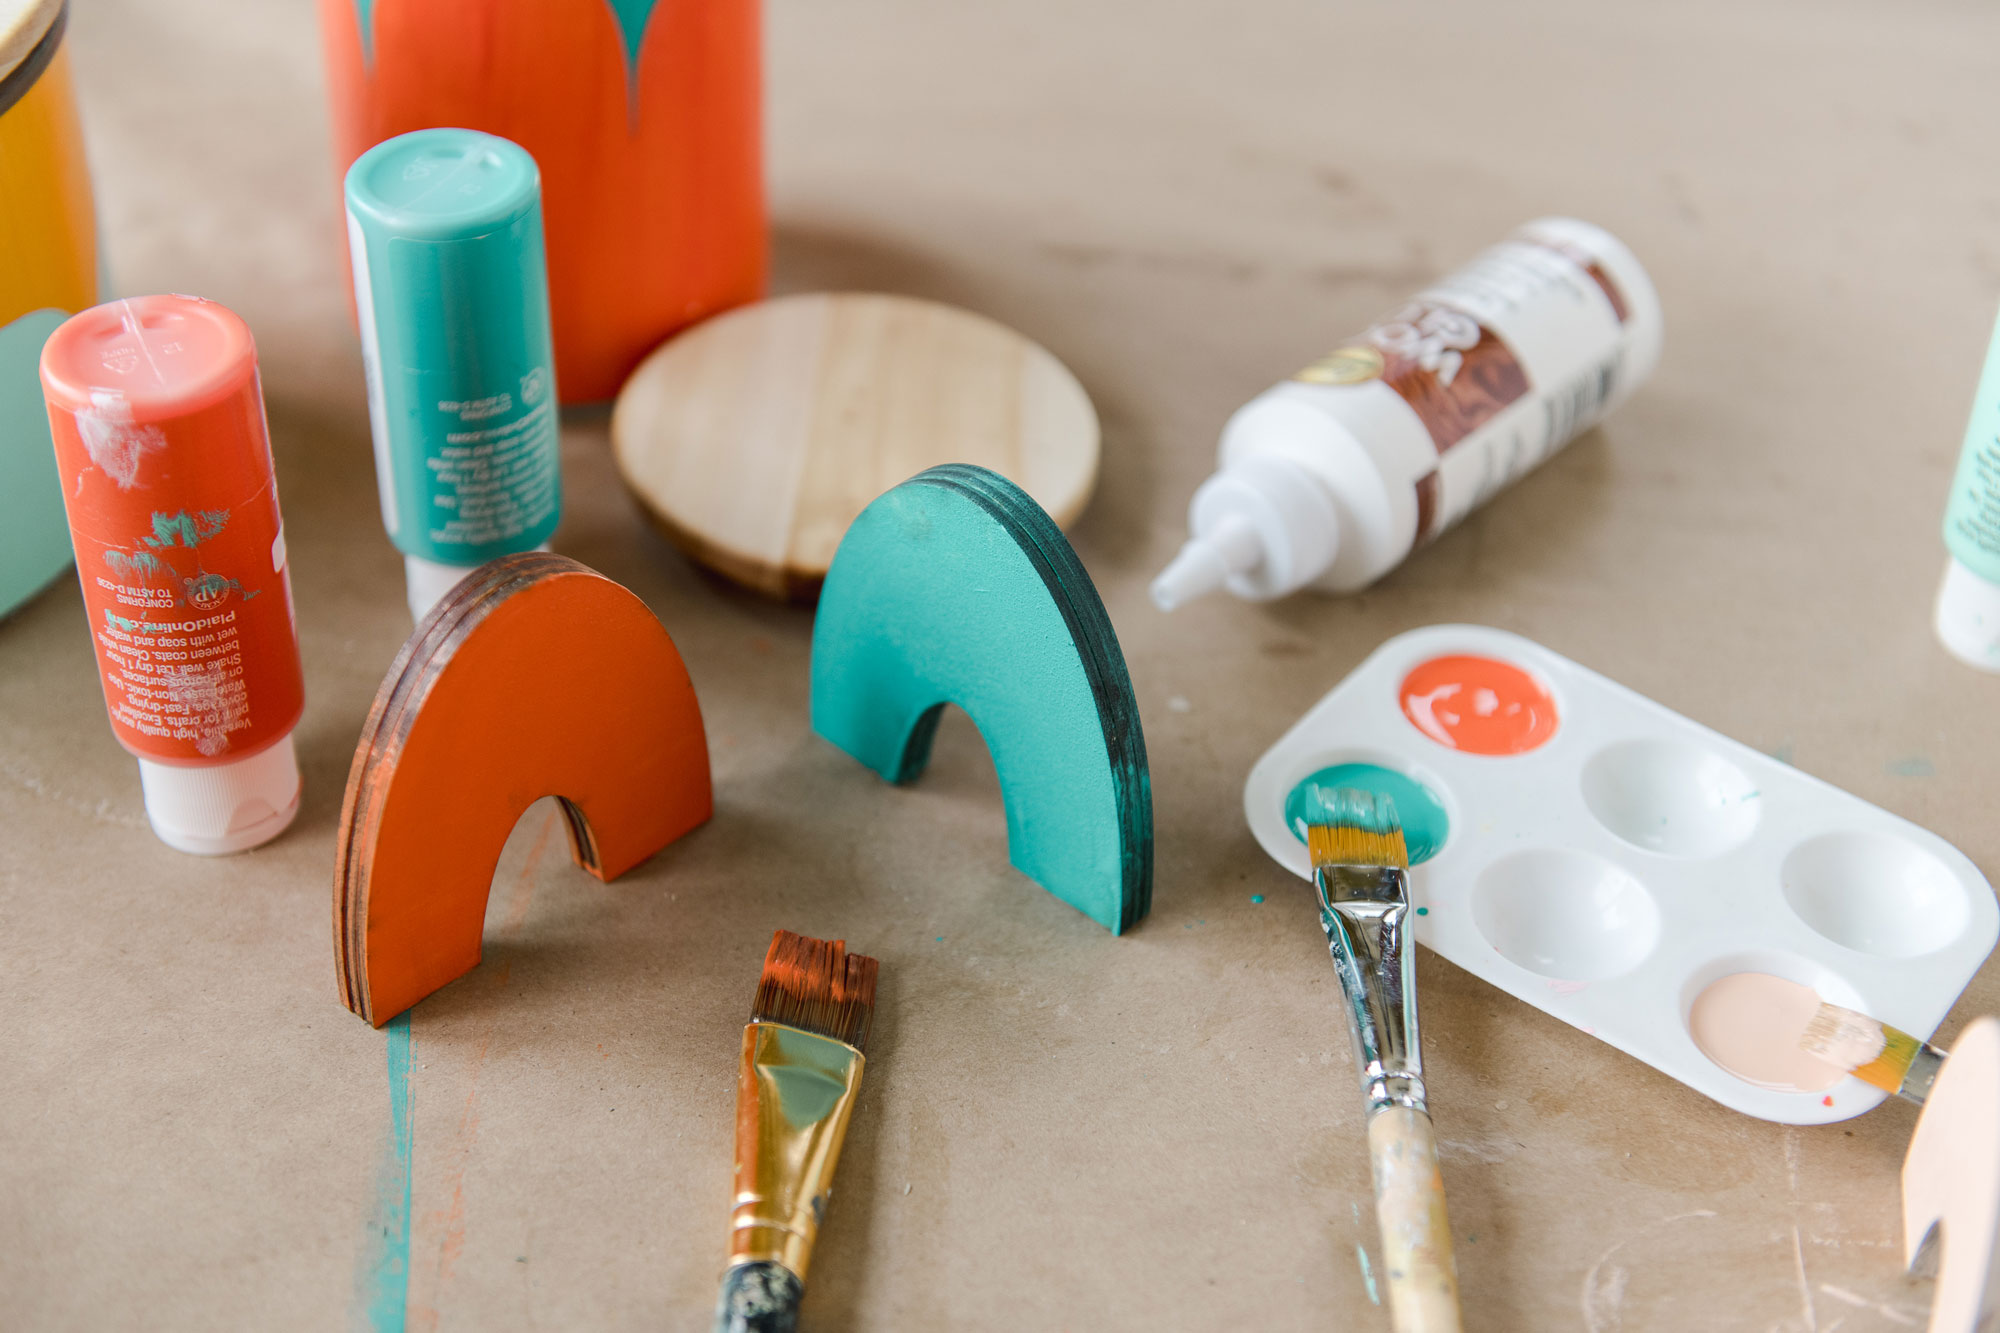
- Your fave colors of acrylic paint + brushes
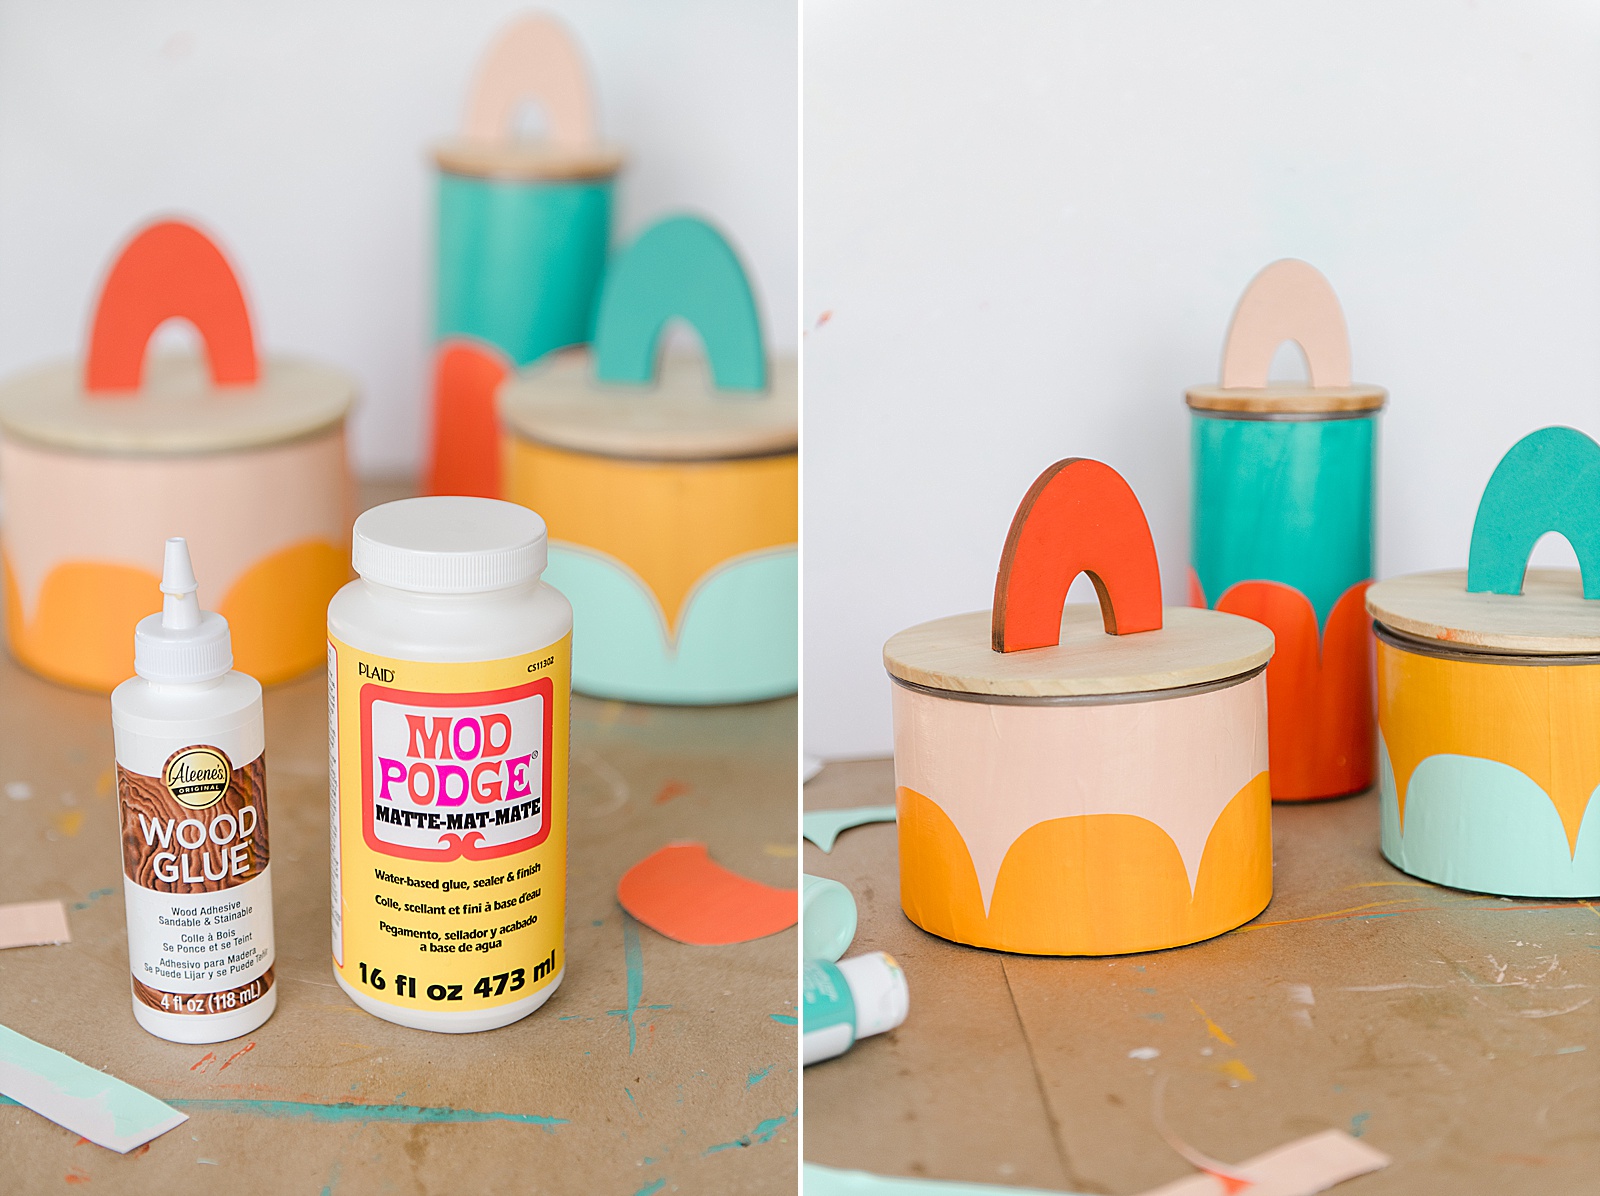
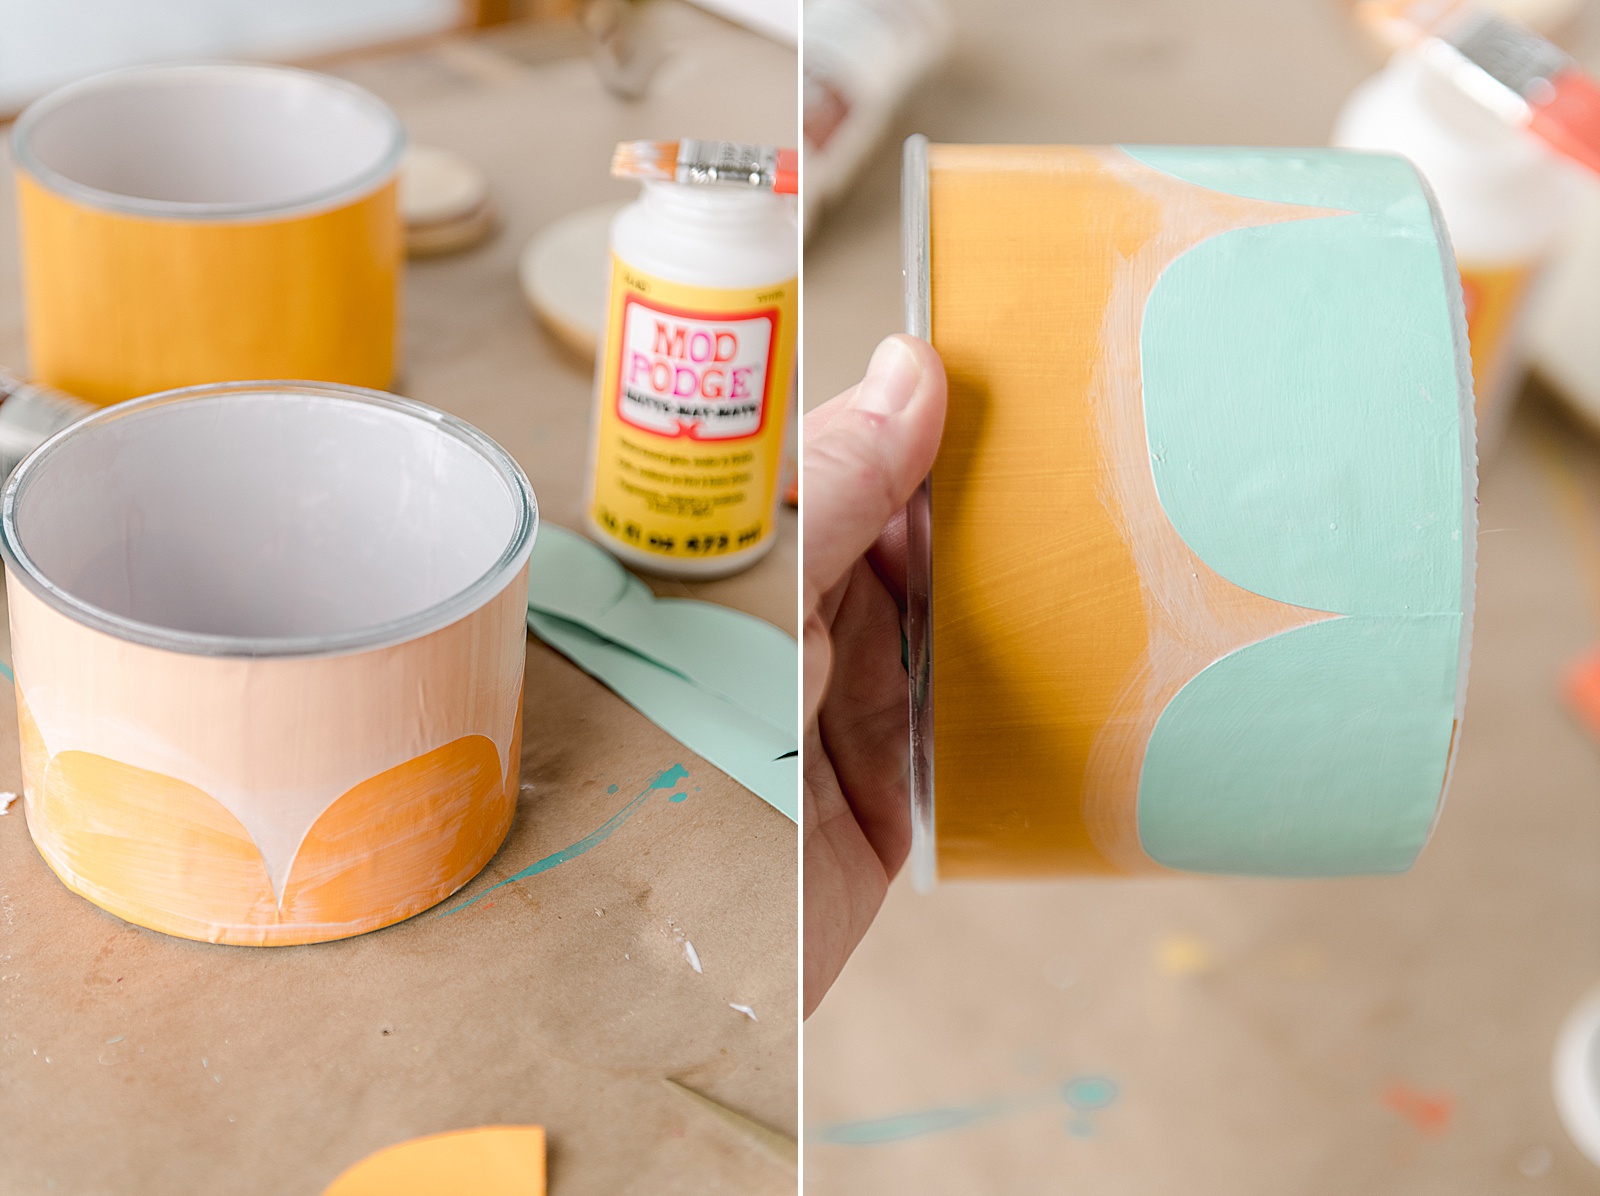
- A jar of Matte Mod Podge
- A bottle of Aleene’s wood glue
- Some scissors
INSTRUCTIONS:
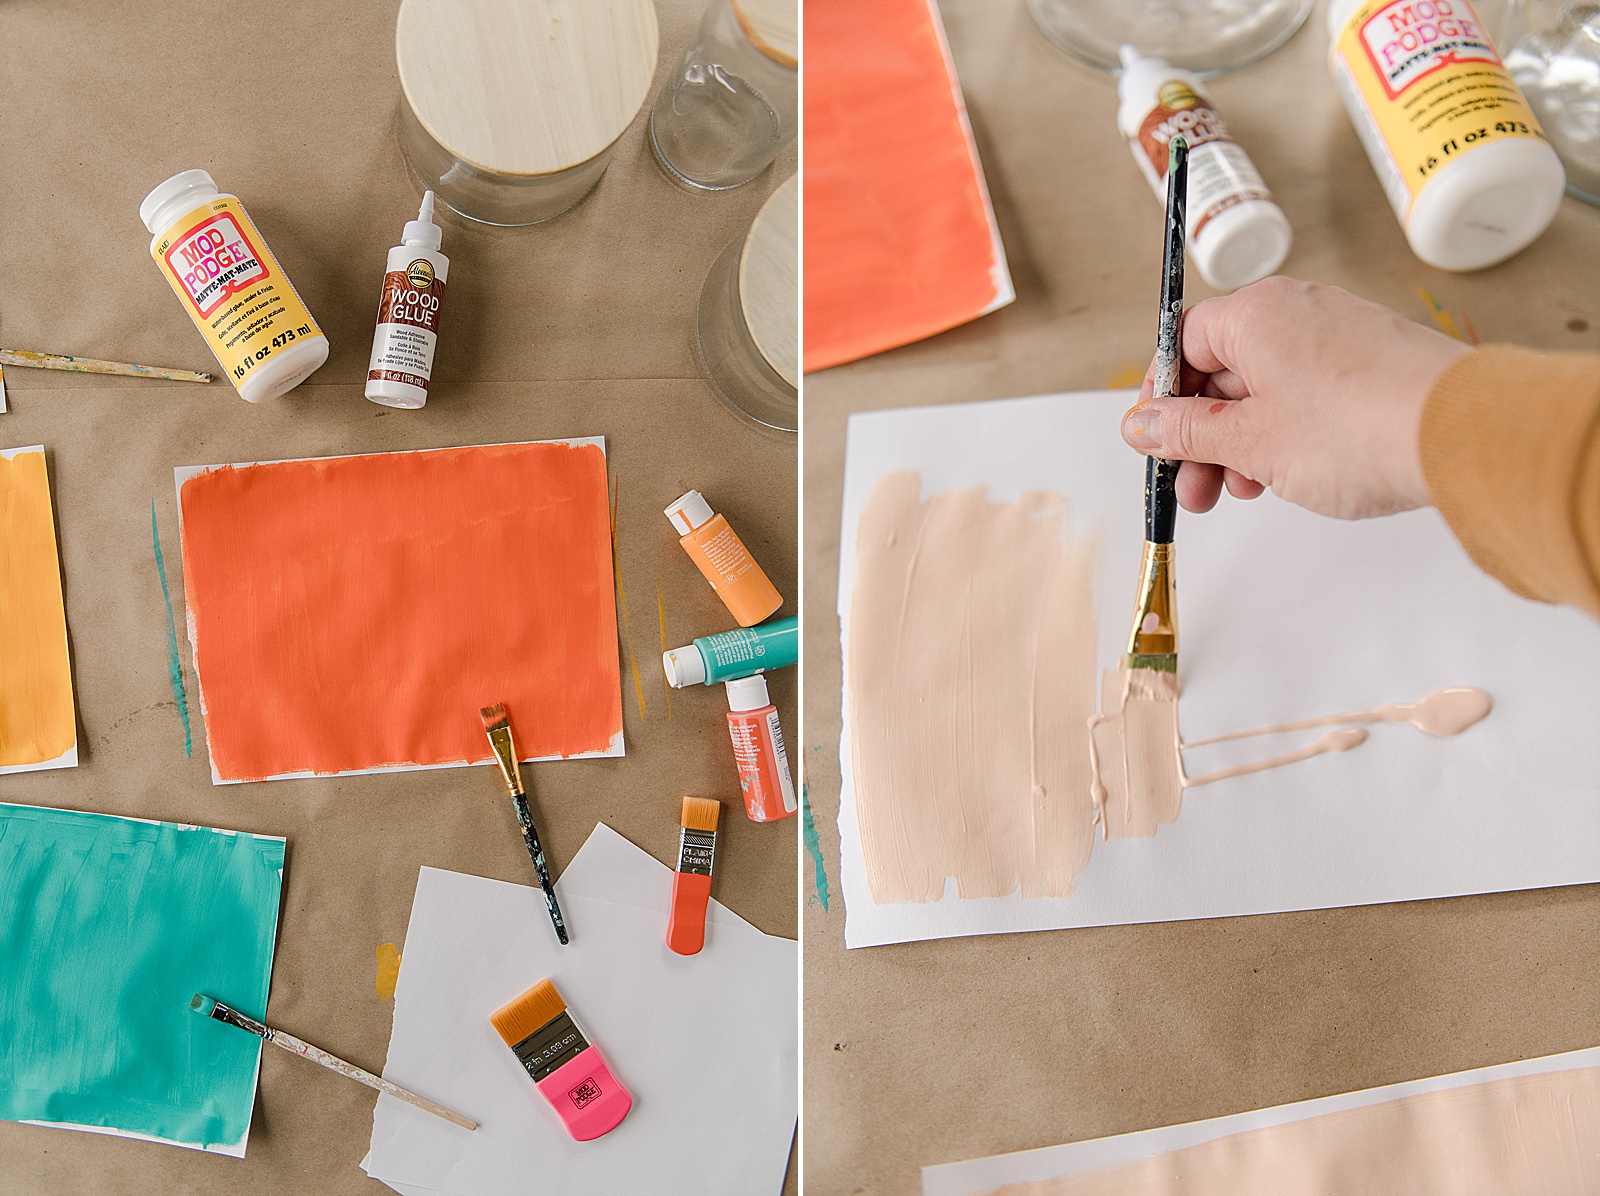
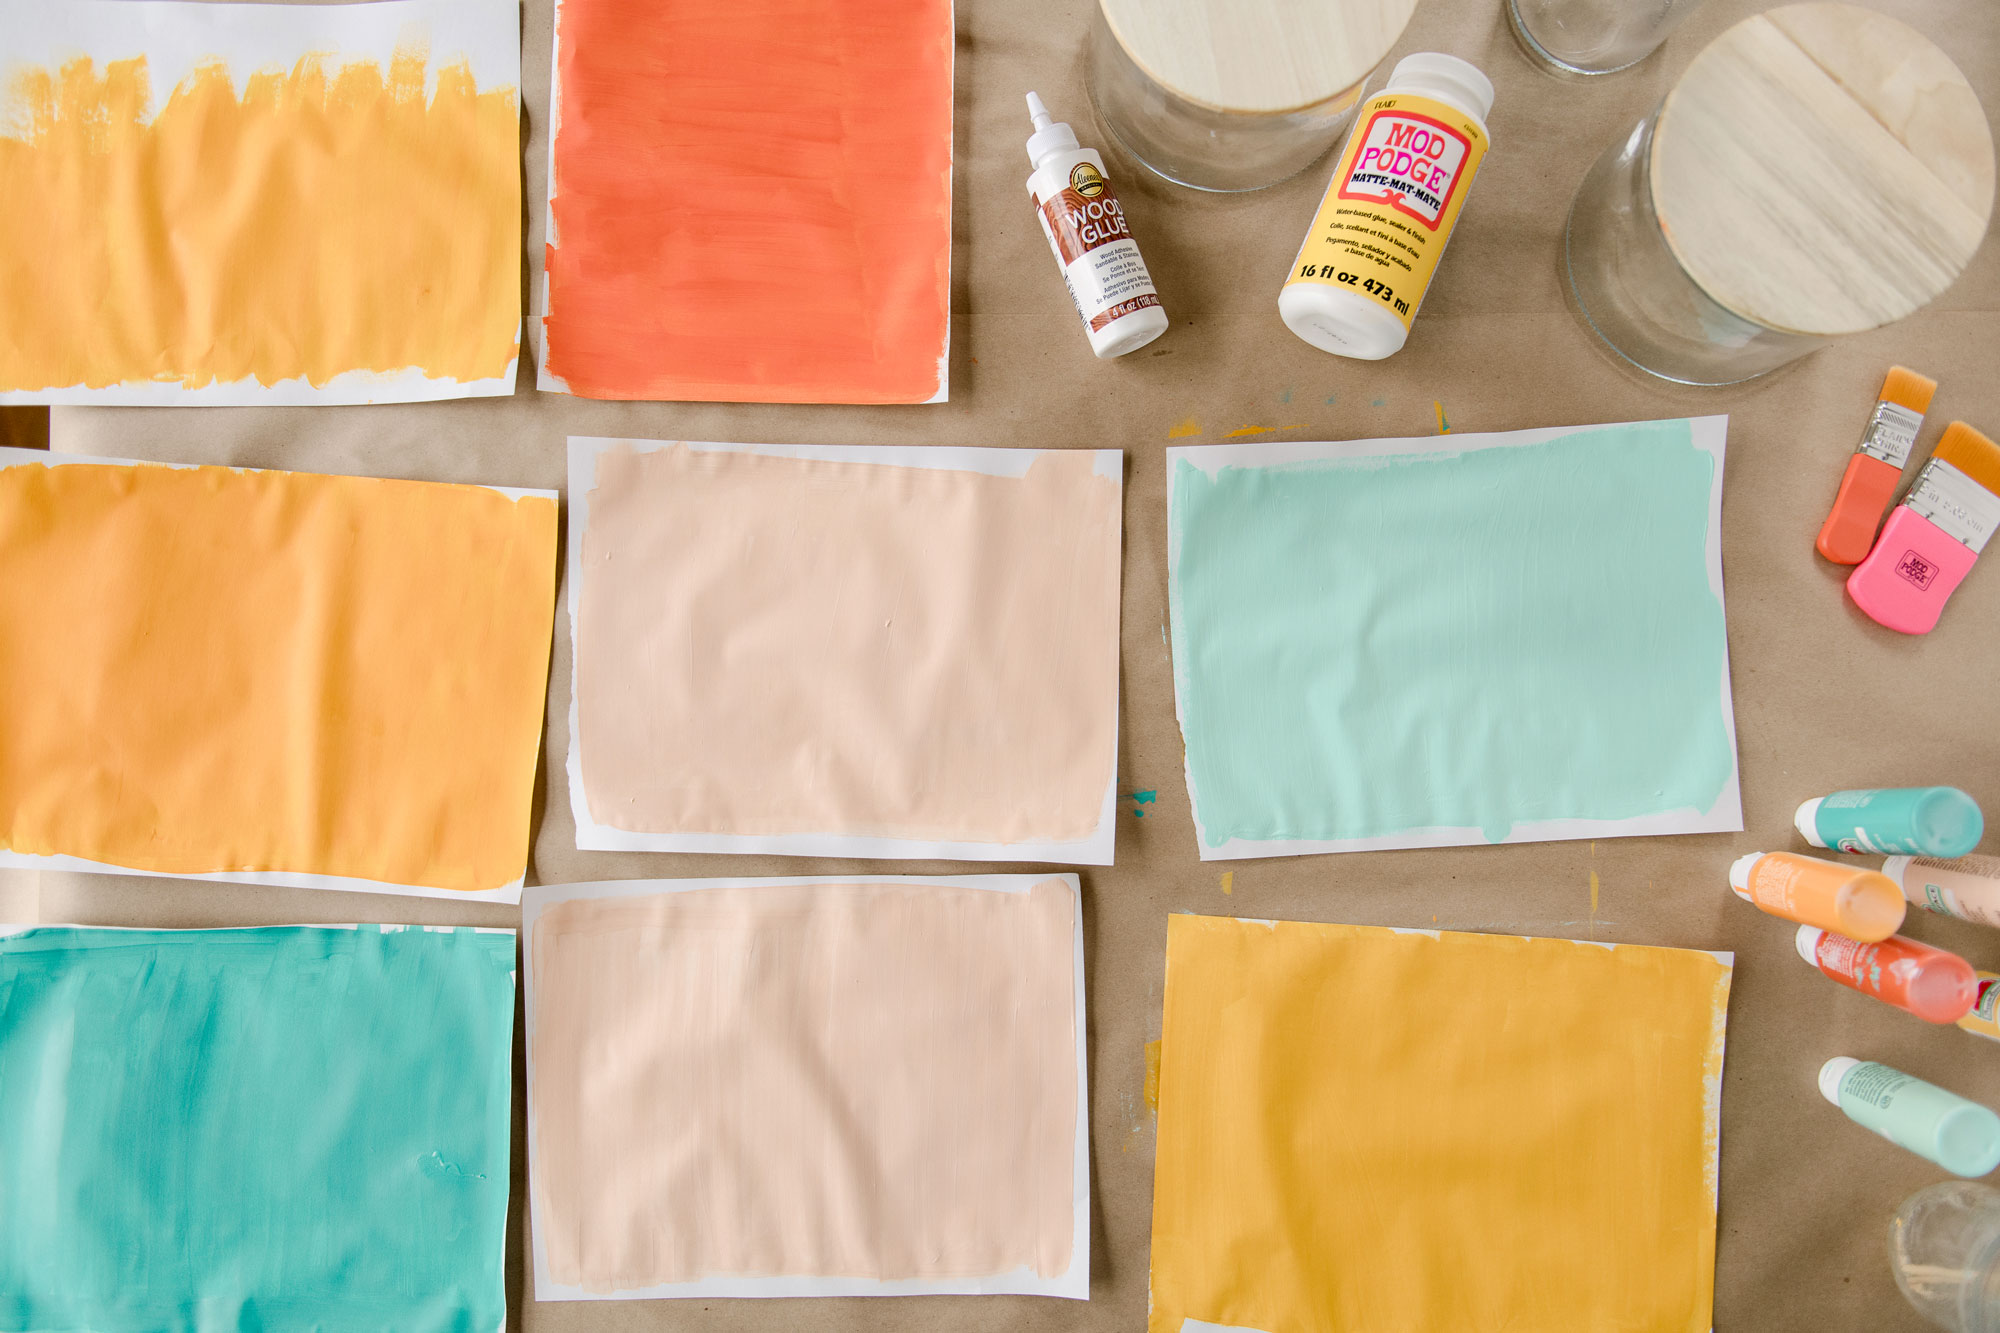
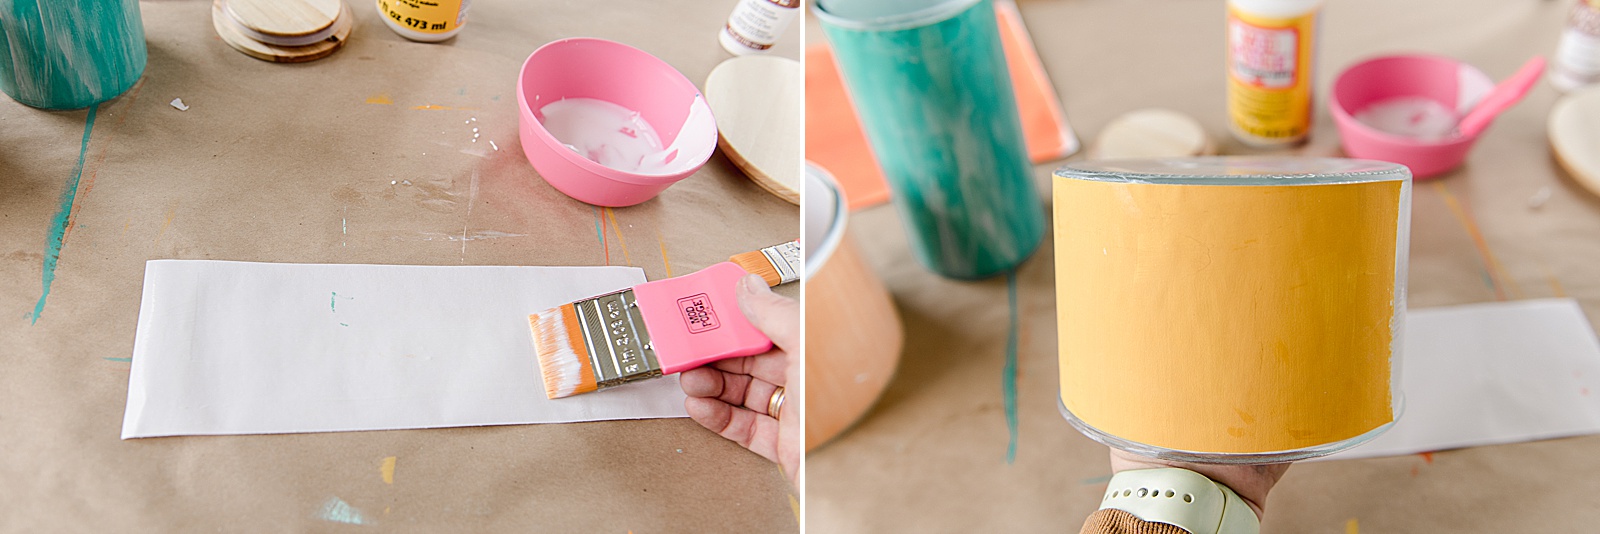
1. Paint your papers! Squirt some paint onto your drawing/copy paper and paint the paper! 🙂 I decided to use upward strokes so that the stoke lines went towards the top of the container when mod-podged on! 🙂
Set aside and allow to dry fully! 🙂
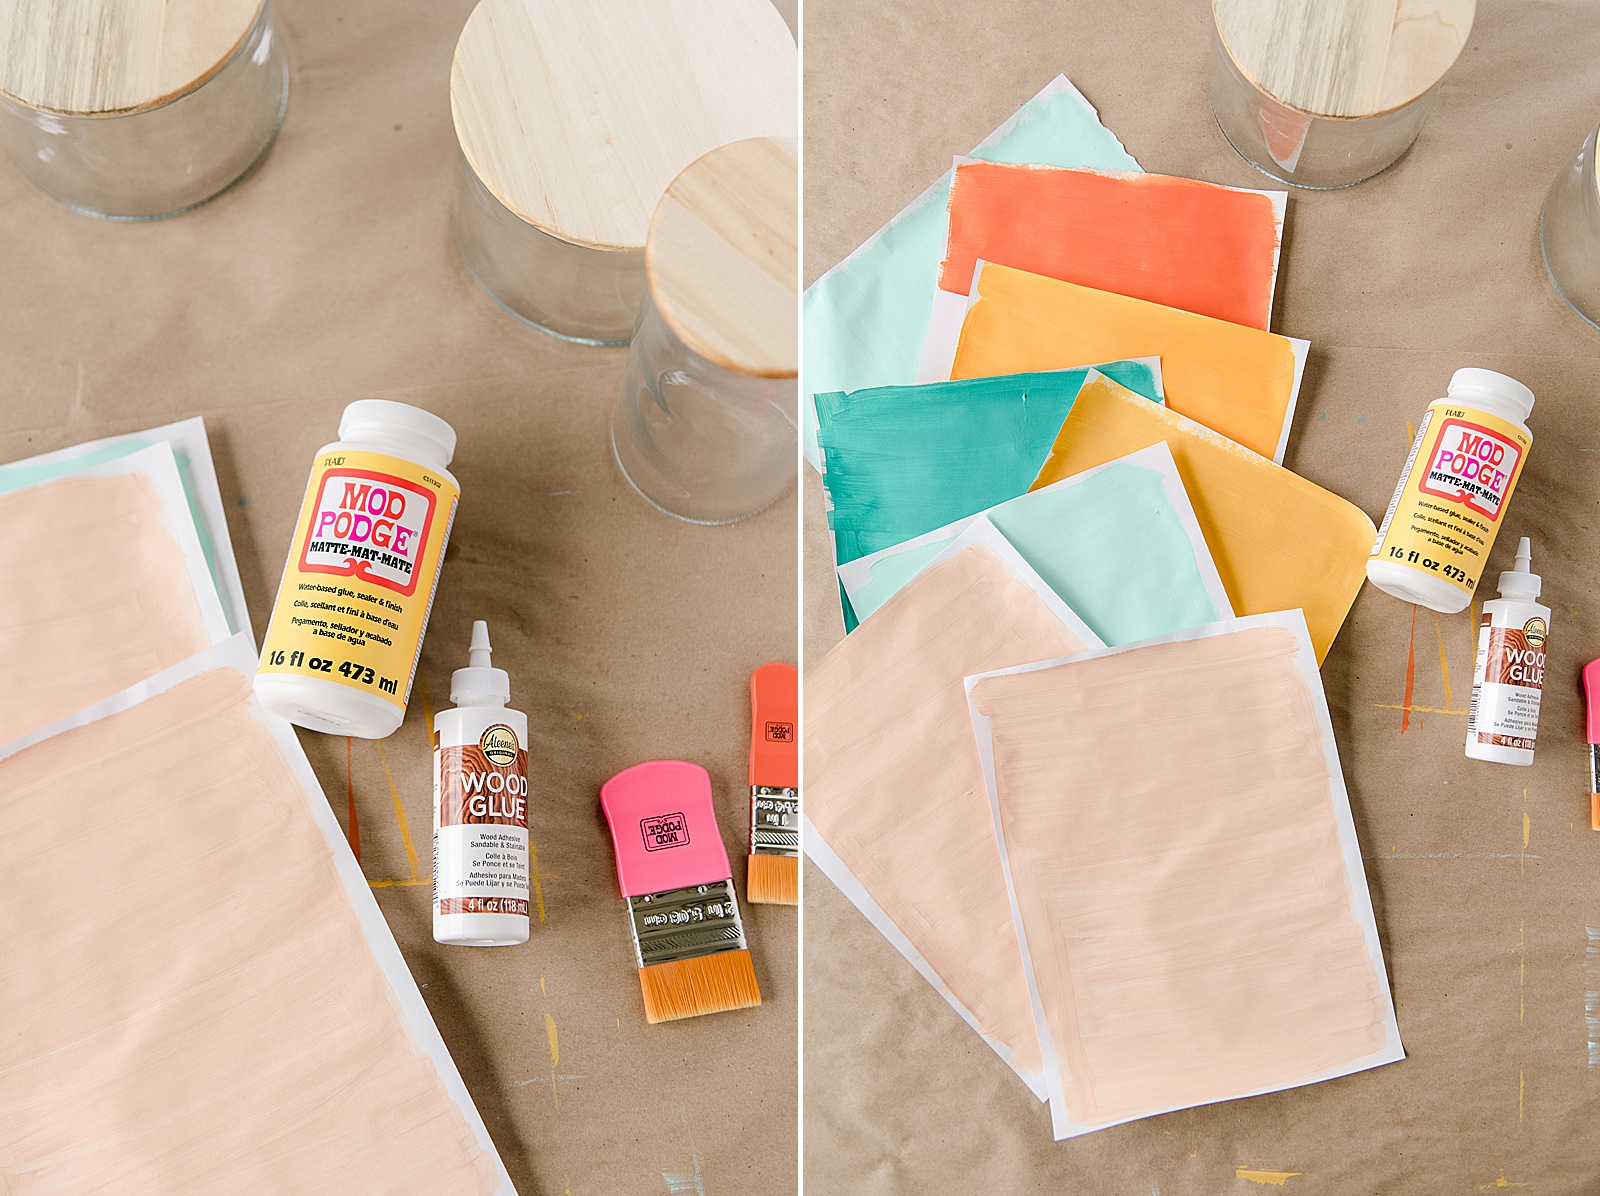
*Note: Make extras if you’re unsure of how many you need…you’d rather have too much. And if you have leftovers, you can always use them to mod-podge a small design on your fave notebook or something! 🙂
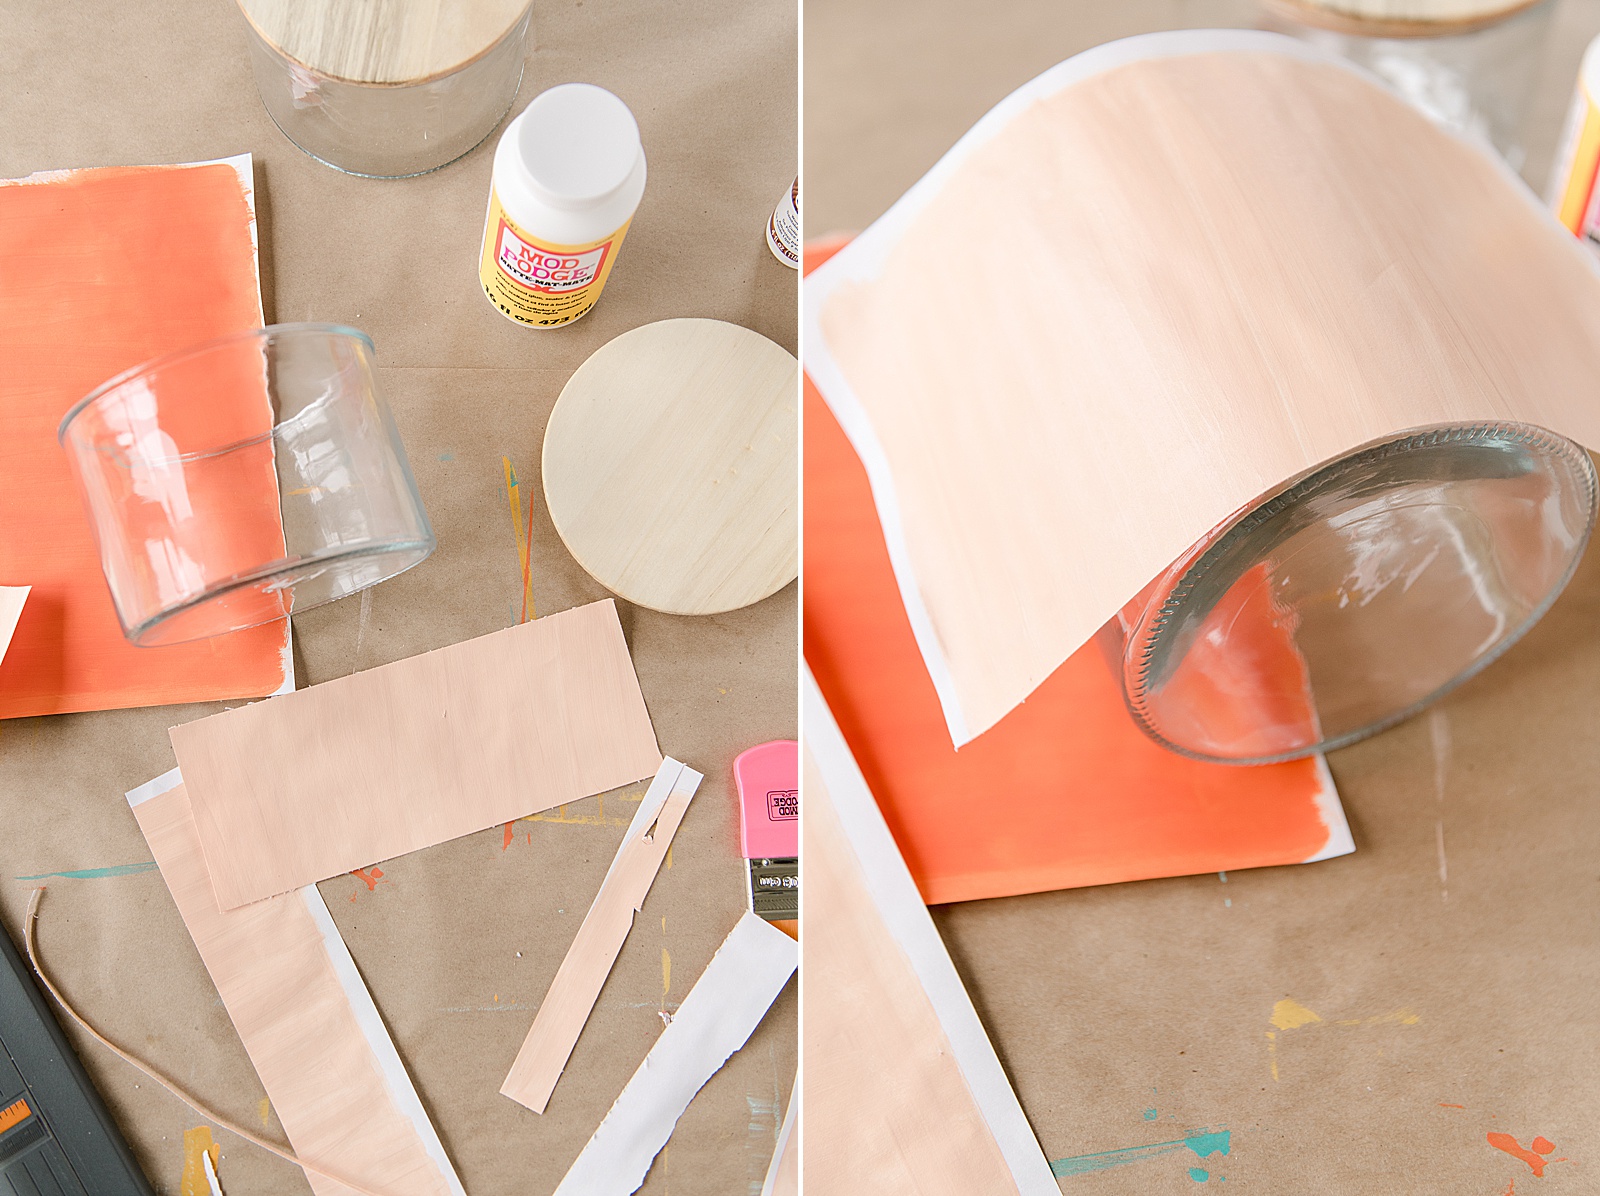
2. Prep your papers to fit around your containers. I began cutting my “background color” to fit around each container. Some containers used one piece of paper, some used 2…..cut however many you need.
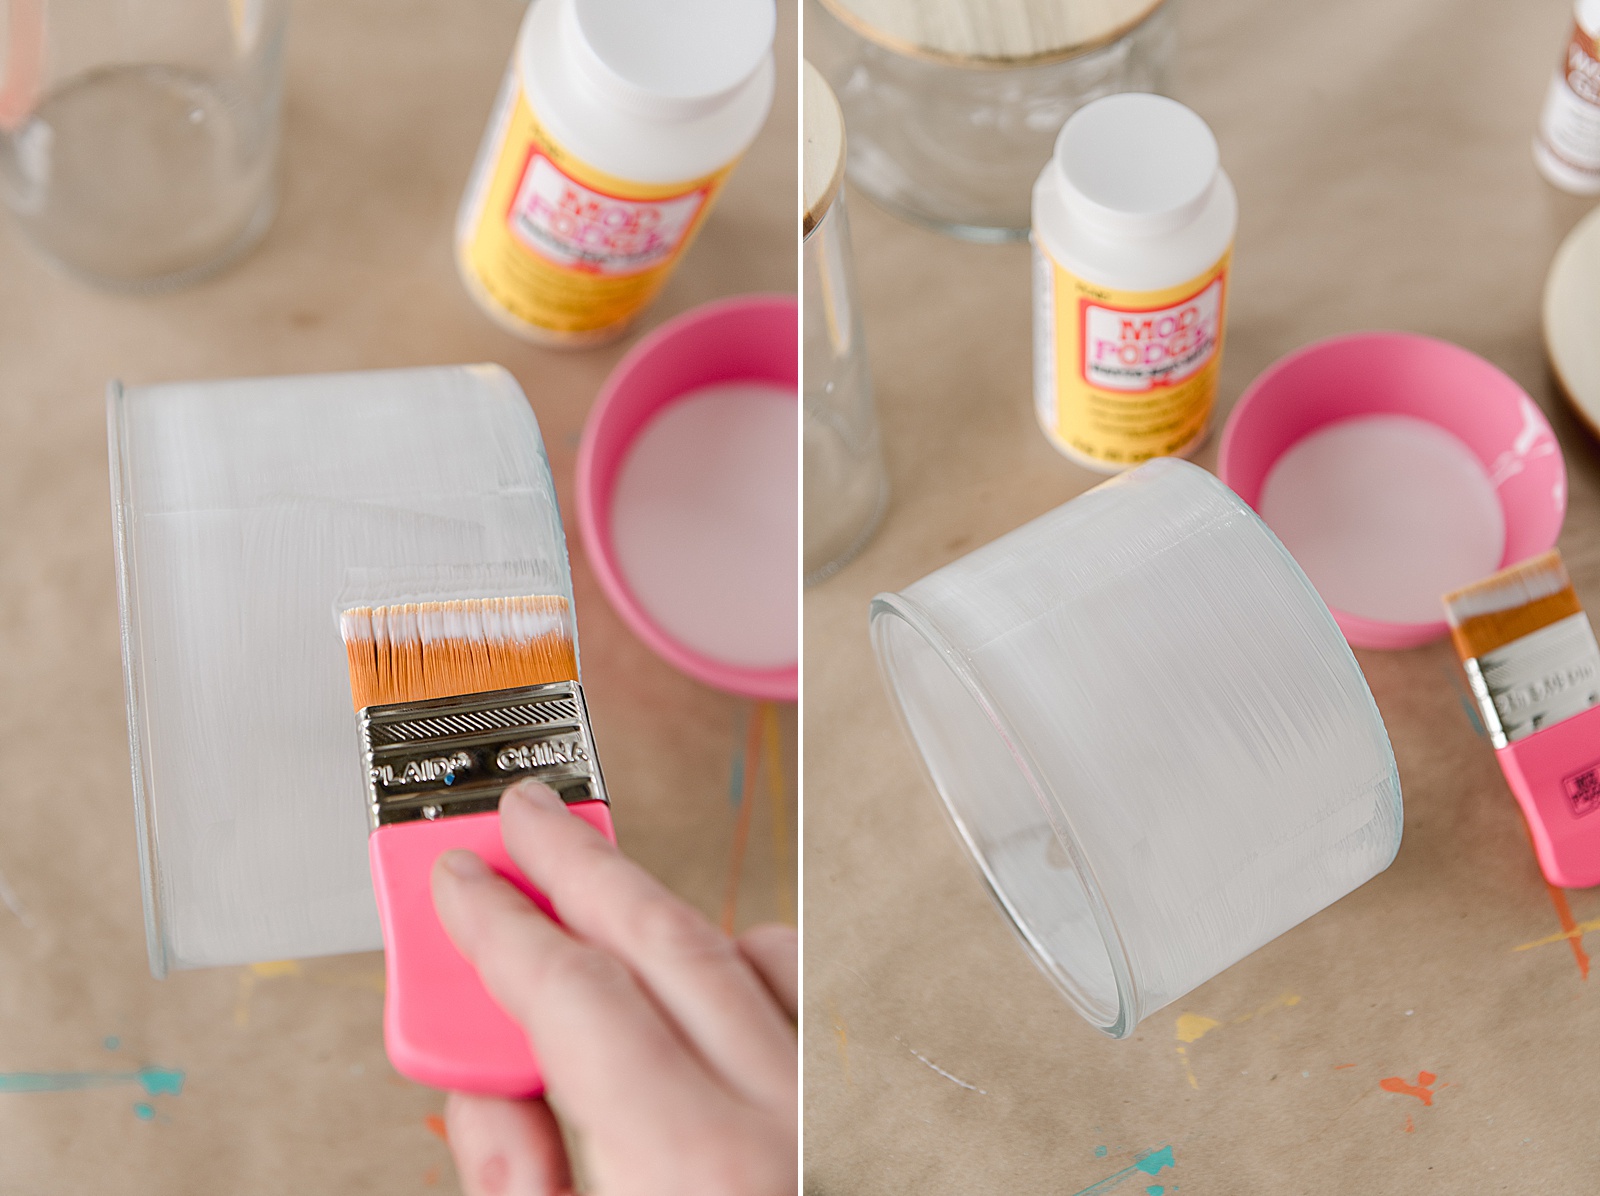
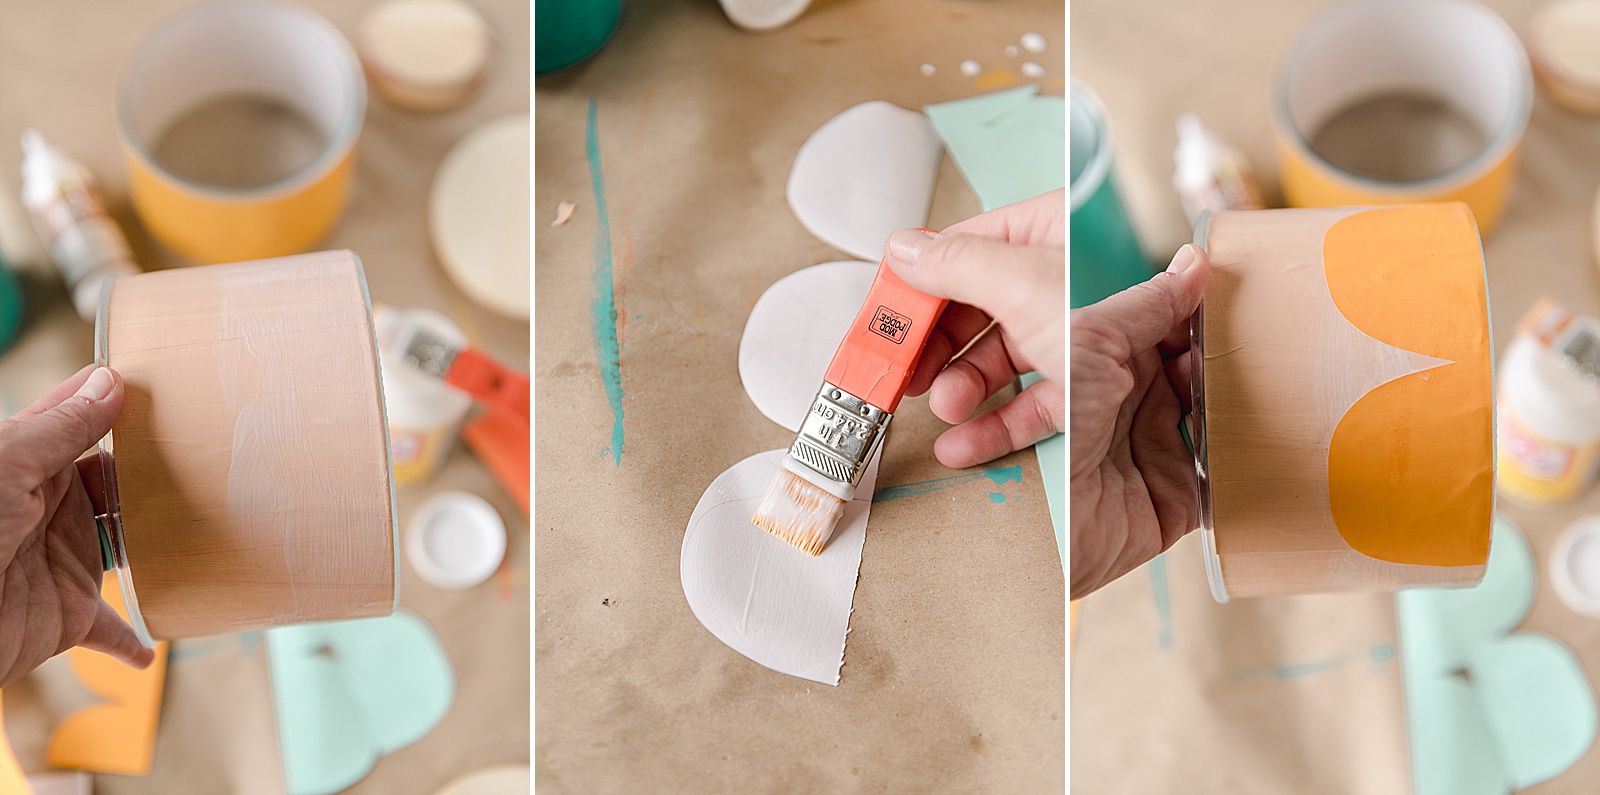
3. MOD PODGE TIME! 🙂
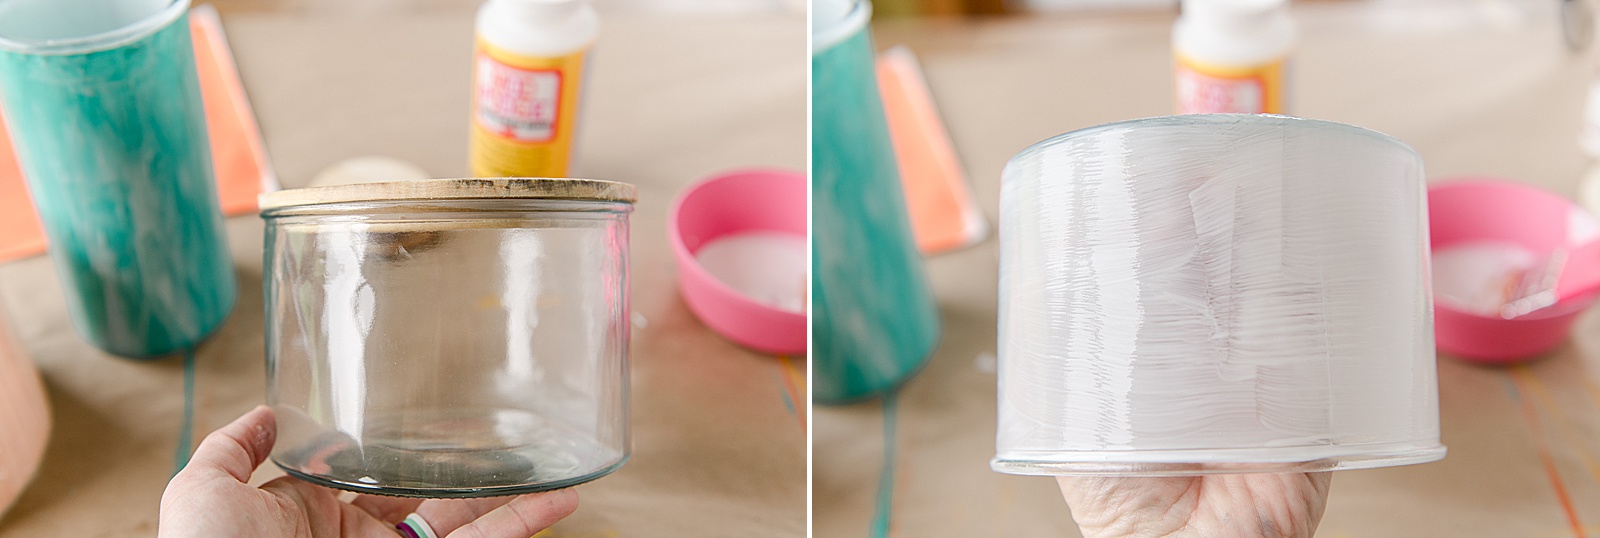
With a soft bristled brush, paint an even layer of Mod Podge onto the outside of your container. Be sure to use long, even brush strokes and be sure to cover the edges of your jar SUPER well (if anything will ever come off, it will be at these points of the container, so be generous in your application around the top and bottom rim)!
Then repeat this light, even layer of Mod Podge on the backside of one of your background pieces of painted paper.
Lay your paper onto your container by lining up one edge of the paper and slowly laying down the paper as you rotate the container. Press out any air bubbles with your fingers as you go and be sure to go slow and smooth in your motion. If necessary, smooth out any bubbles and then apply one more thin layer over top of your painted paper background! 🙂
Repeat this process for as many background papers as you have until the jar is completely covered around the outside main area.
Then set aside to dry for 20-30 minutes.
After the first coat is dry, apply one more even layer of Mod Podge over top of your paper, sealing it down super well.
Set aside to dry again for another 20-30 minutes.
*note: All Mod Podge bottles have incredible directions on the back of the jars – directions for ALL surfaces and uses. So be sure to consult your container if you’re having troubles or want to know specifics to your sub straight or material! 🙂 Most Mod Podge applications are similar!
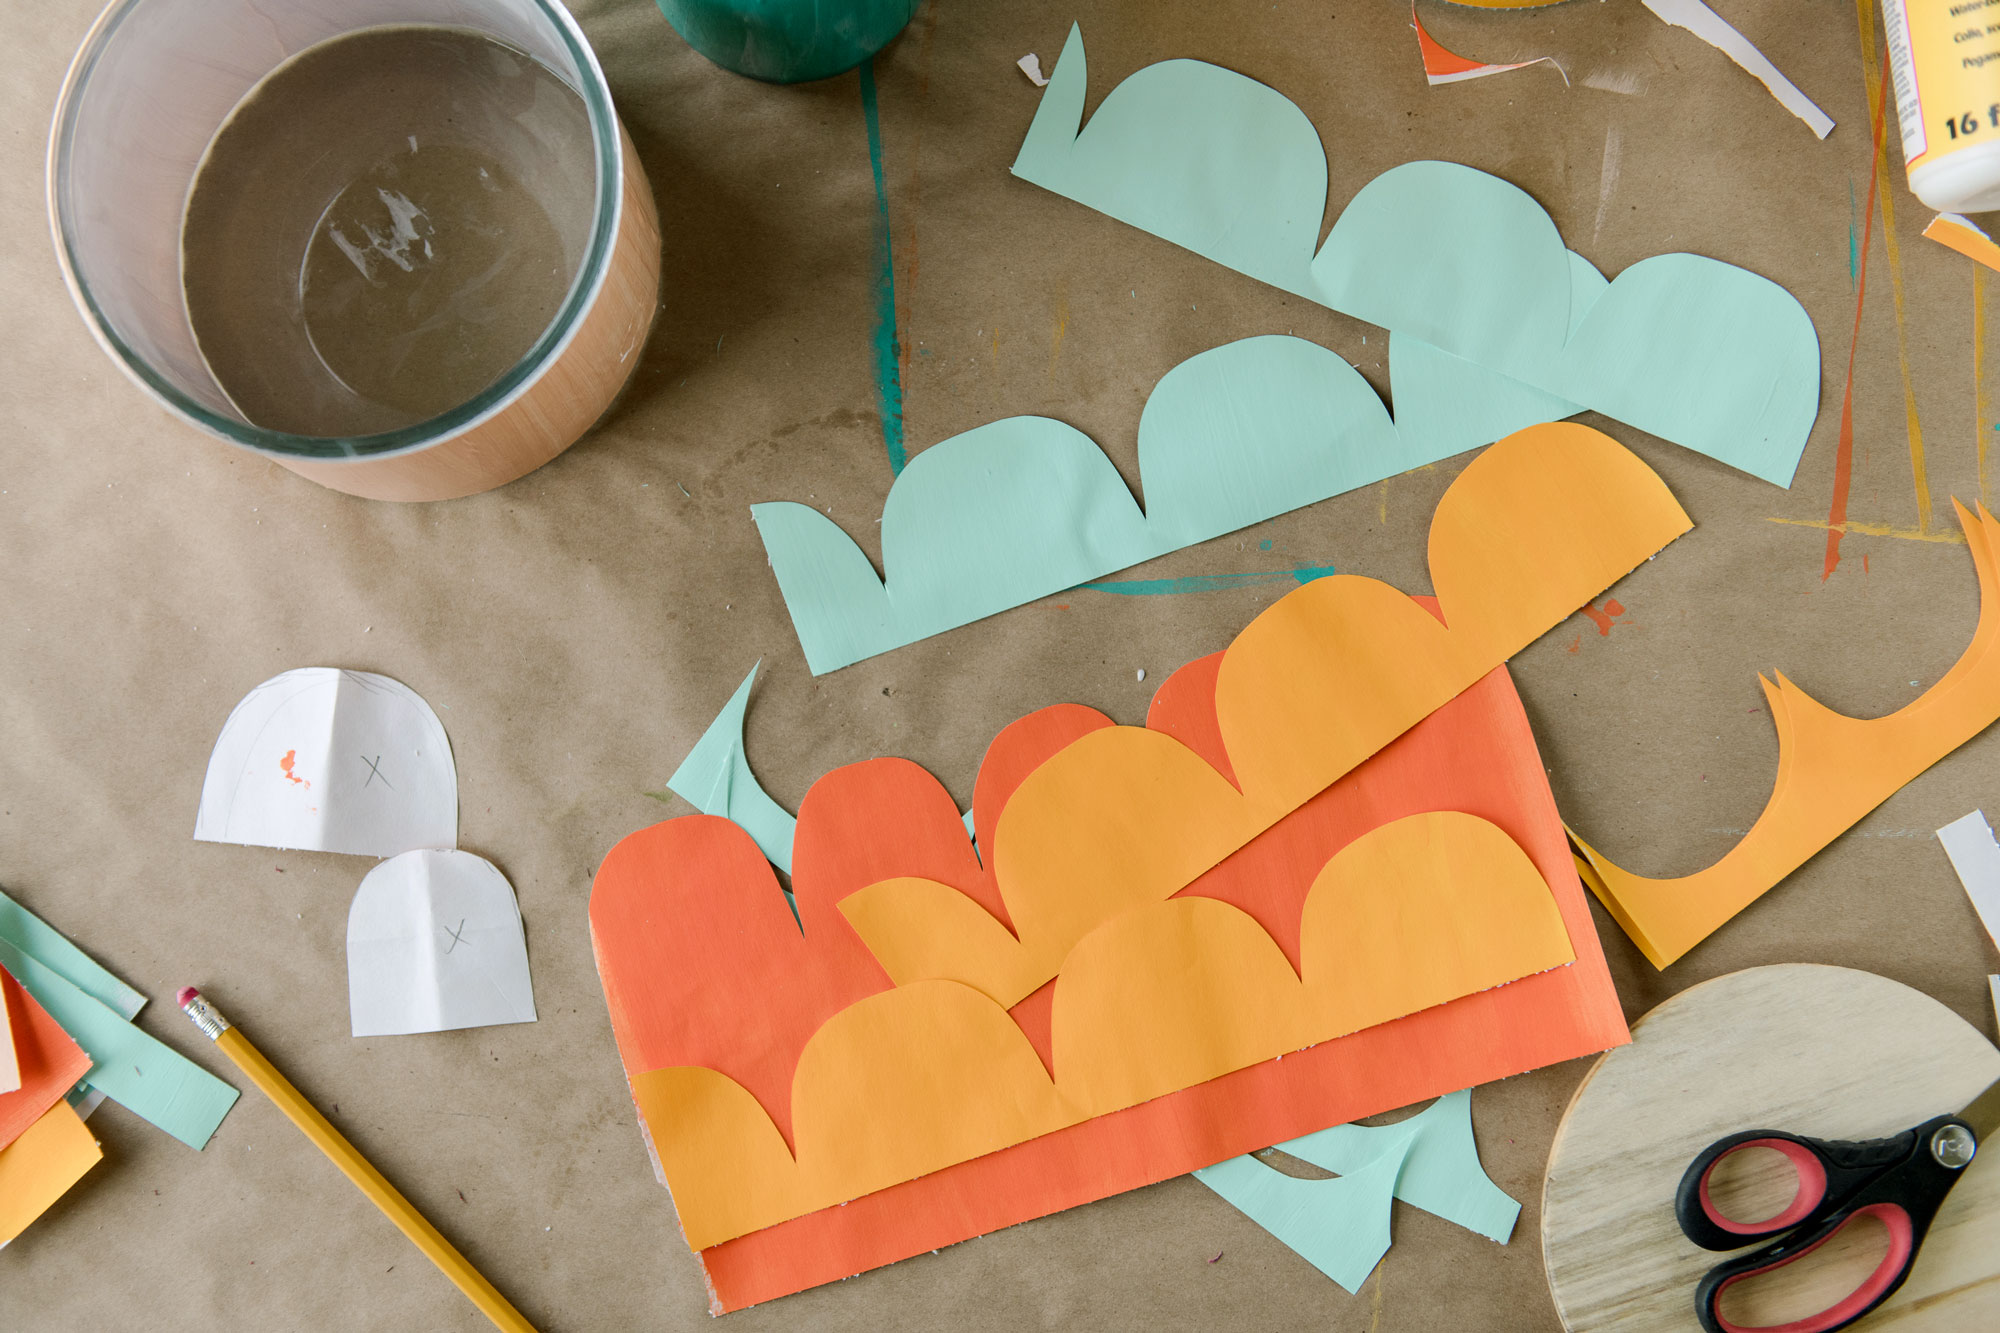
4. While your Mod Podge is drying, you can cut out your scalloped detail for overtop of your background paper. I chose to cut a semi circle as a “stencil” and trace this onto the back of the strips of paper for the scallops. Then I cut them out and set them aside until the jars were dry from the 2nd coat of Mod Podge 🙂
5. Repeat step 3 (the MOD PODGE STEP) for adding the scalloped detail to the jars. I made sure that the scallops were nice and flush to the bottom of the jar while I was smoothing it out!
And just the same with the background, apply the initial coat of Mod Podge, allow to dry for 30 minutes and then apply one more coat of Mod Podge to the overall jar! Allow to dry for 30 minutes.
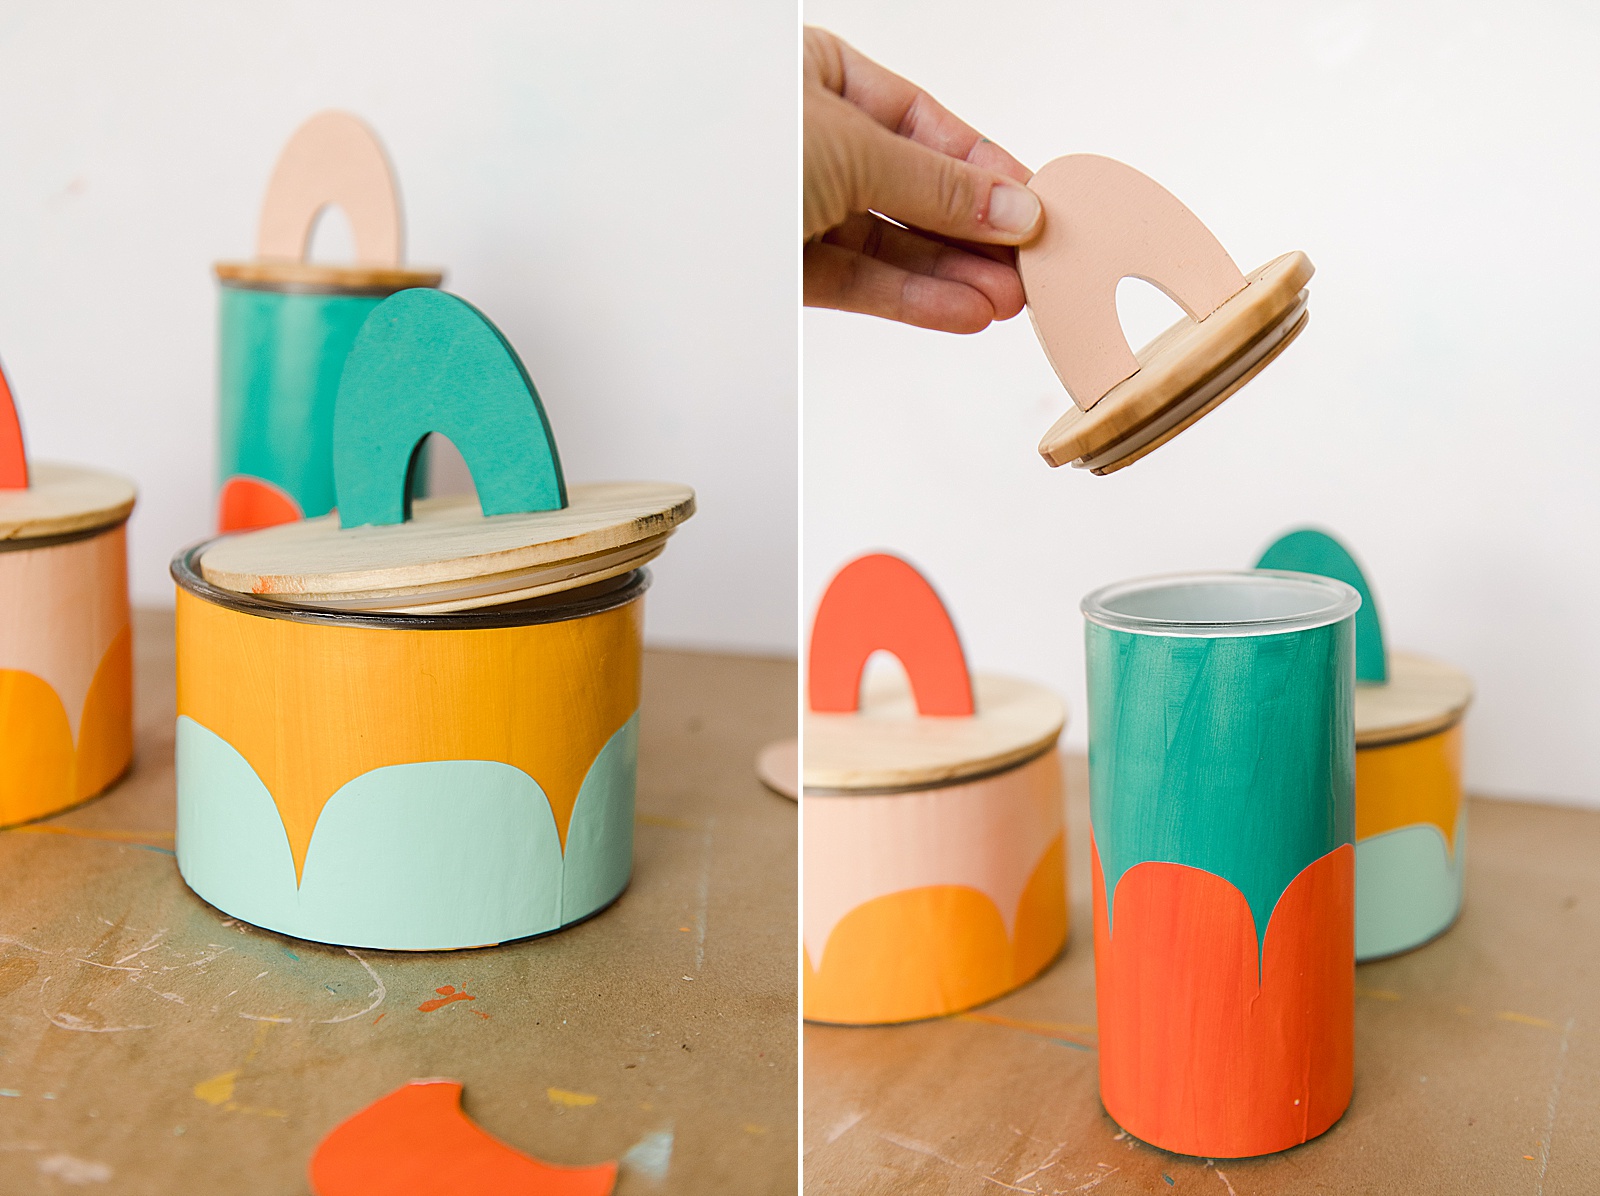
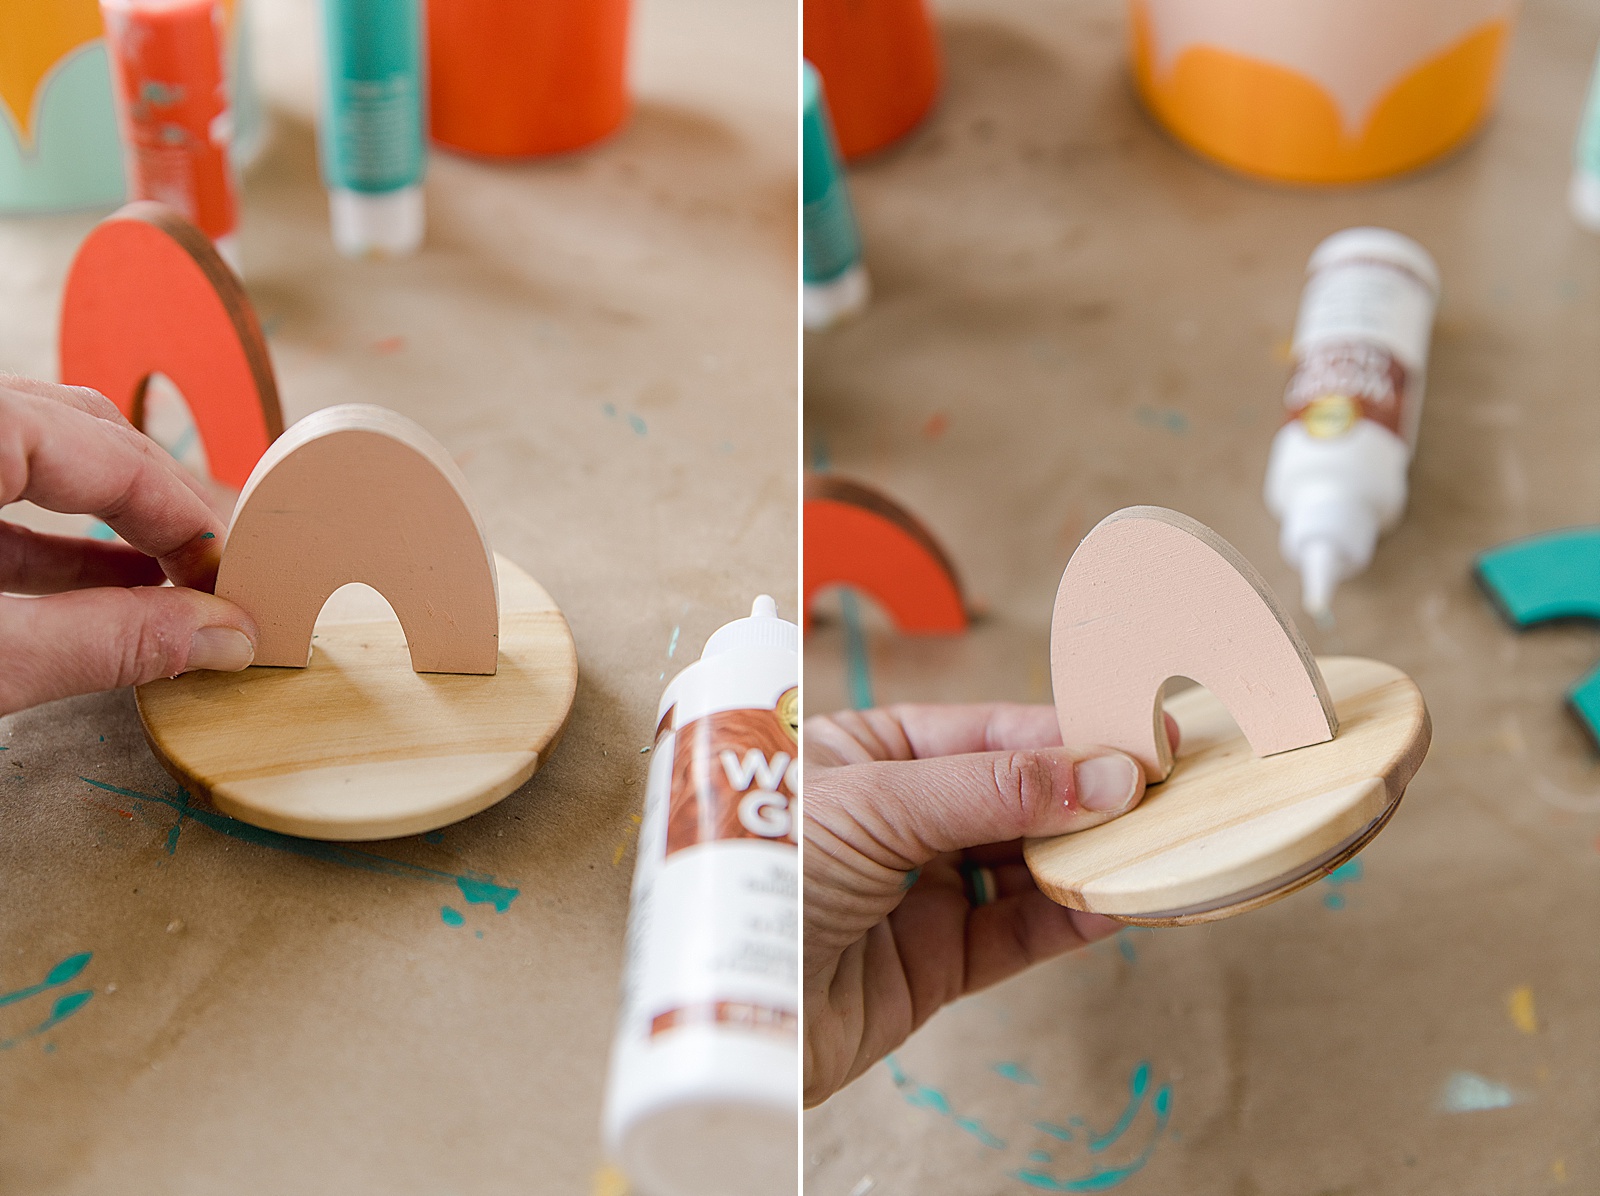
6. White the jar is drying, you can prep + add any other details that you’d like! I wanted to add handles to the top (ya know, for little fingers to access easier)! So I cut out some scalloped shapes out of 1/8” wood and decided to add those.
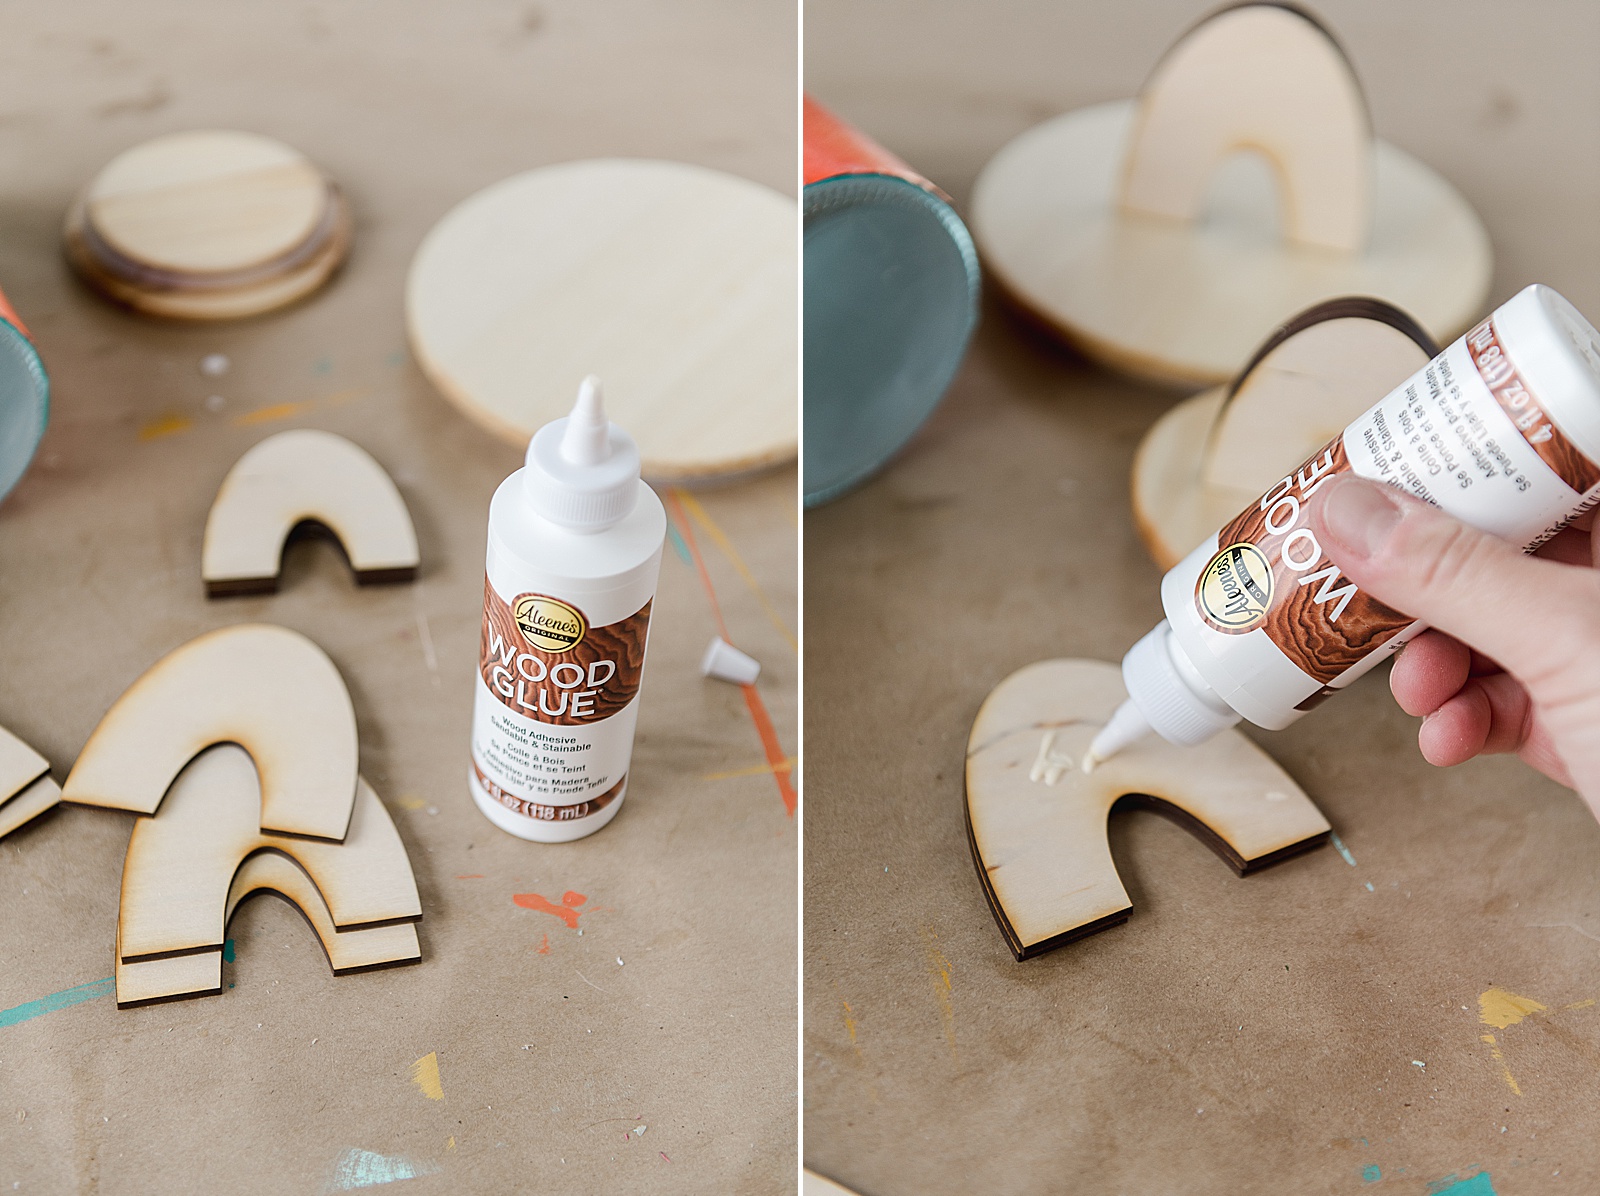
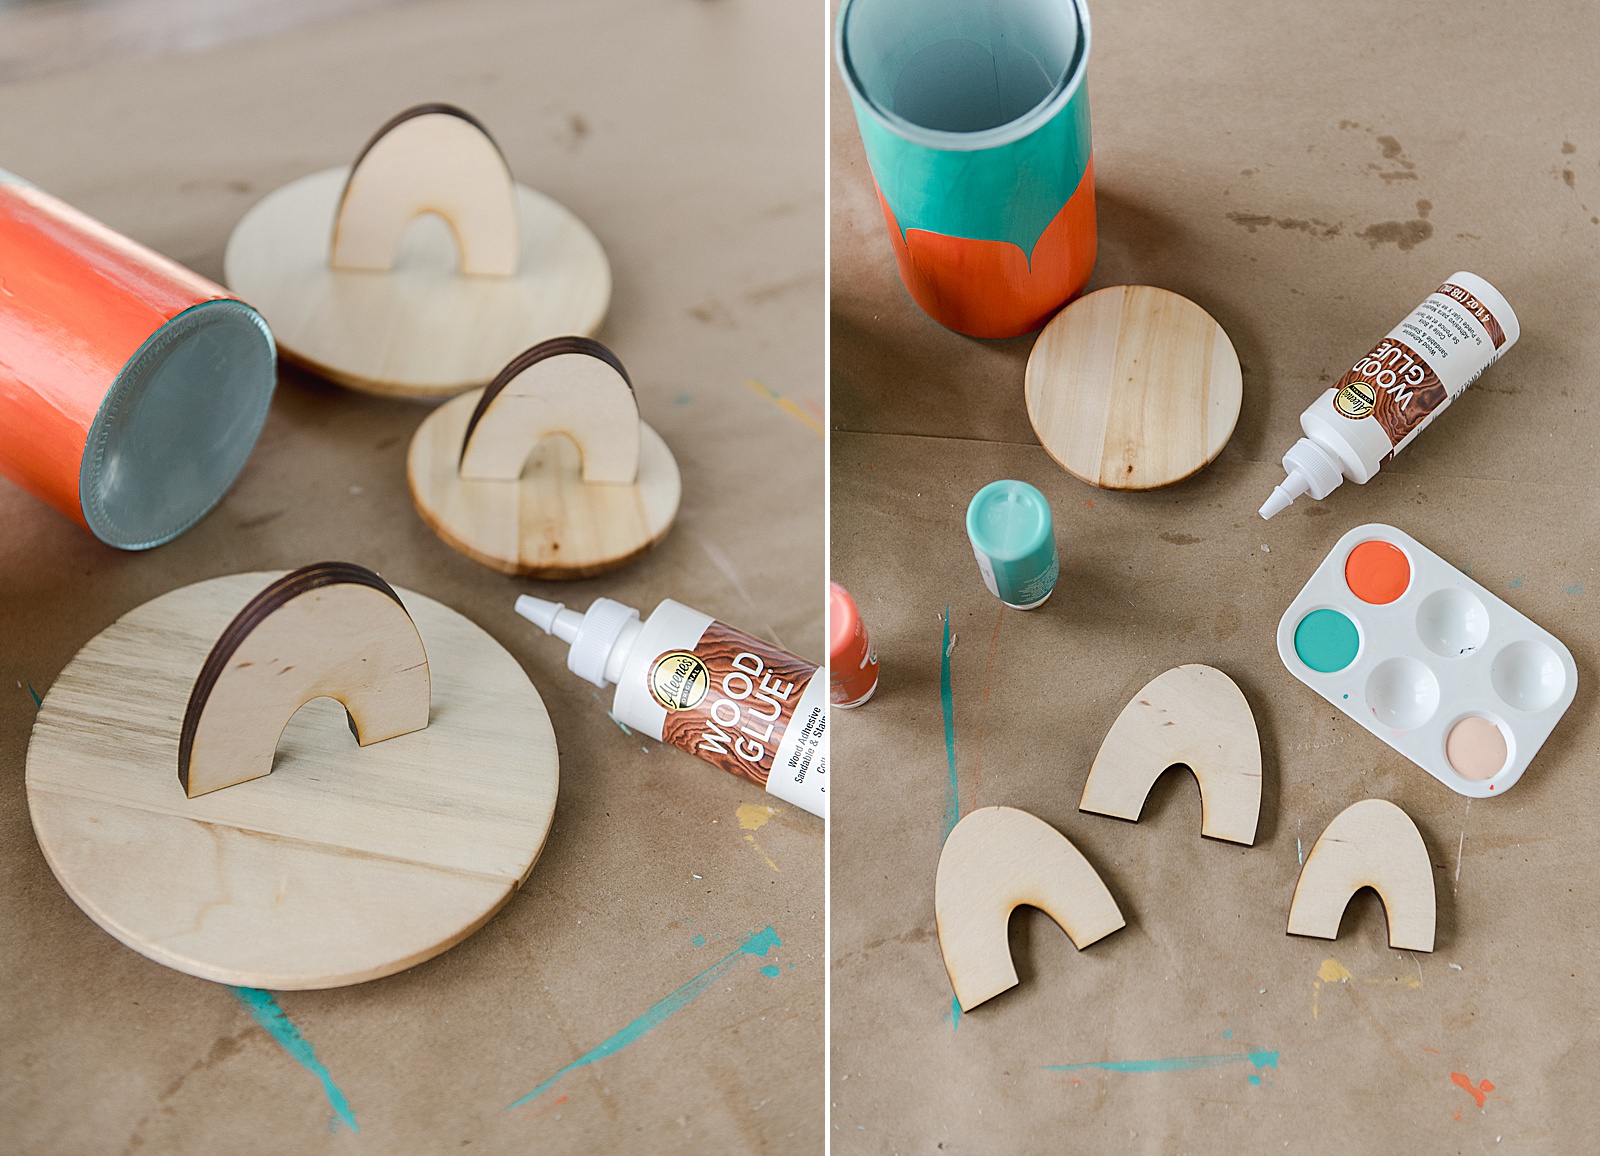
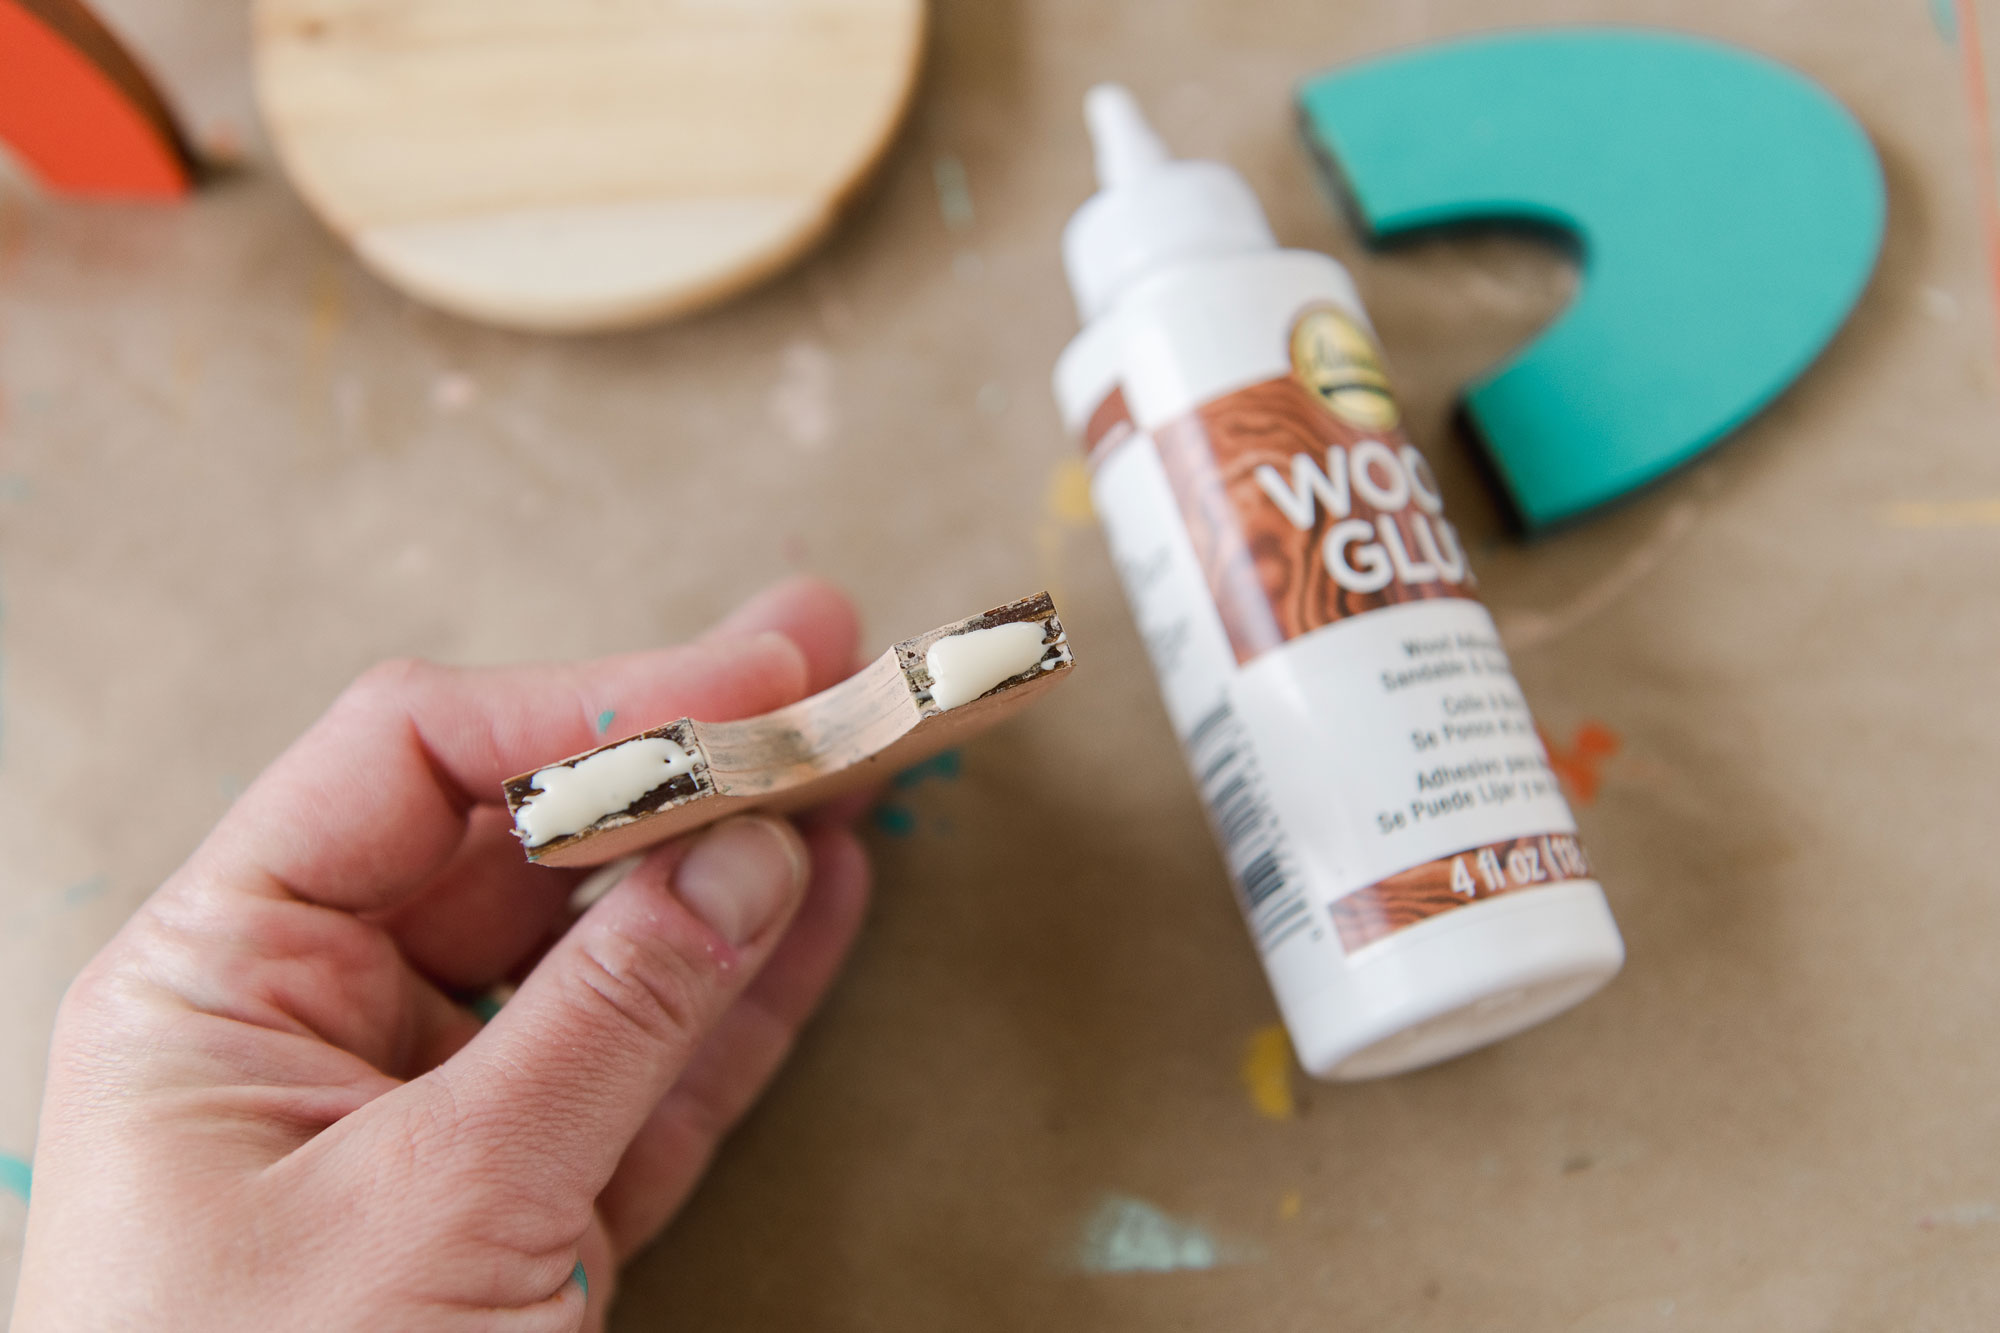
I used Aleene’s amazing Wood Glue (legit the best wood glue that I’ve used and I’ve tried just about every brand on the planet). I glued 3 layers of the wood handles together so that they were nice and thick and sturdy for (again) those little fingers.
When I use wood glue, I like to make sure that the wood is nice and clean, add glue and then smush the 2 pieces of wood together. I like to wiggle the pieces of wood back and forth as I am smushing them together to make them nice and suction cupped together. Sometimes a small bit of glue will come out of the edges and you can just wipe with your finger! 🙂
I painted all 3 handles and set them aside to dry! When they were dry, I used Aleene’s wood glue (again) to attach the handles to the top of the jar lids! 🙂
Then I passed the jars off to Esther and she filled them to the brim with her treasures!!!!! 🙂 For real! I now want to make some of these for our kitchen counters as little treat jars for the kids! 🙂