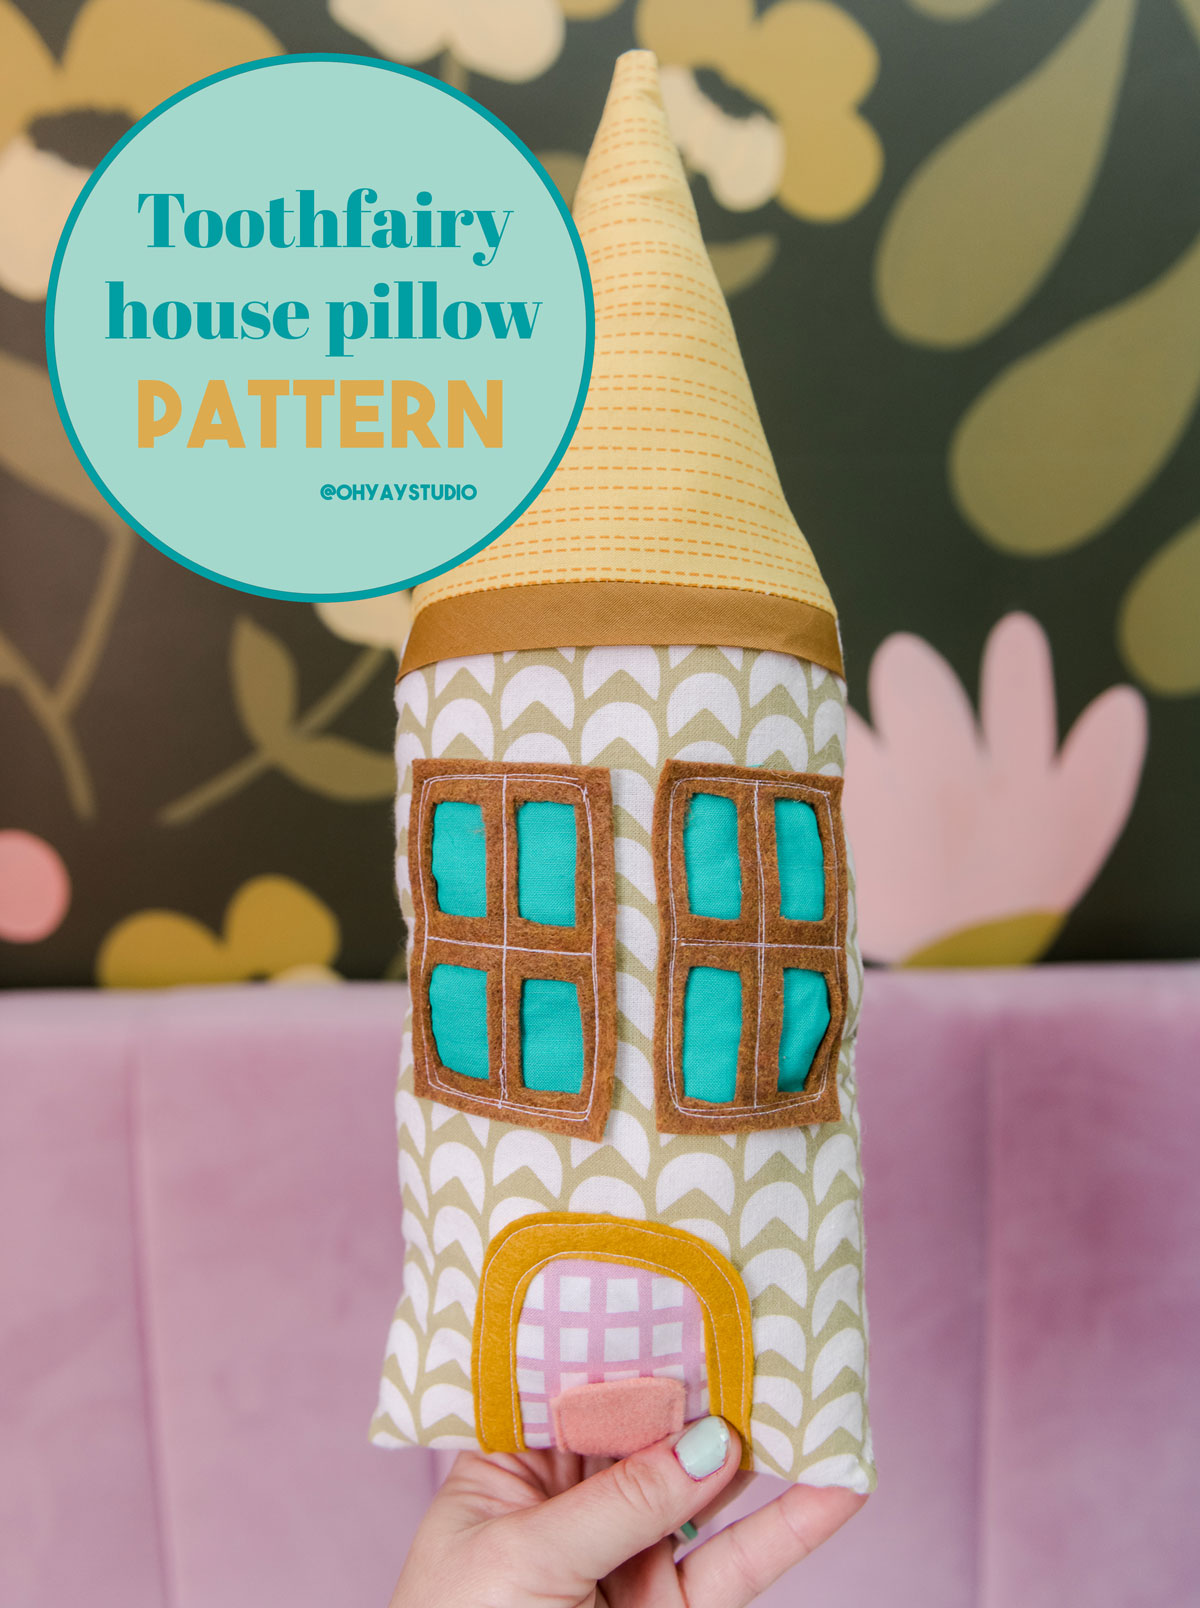
Sewing a tooth fairy (house) pillow :)
If you are a sewer (or even just have a sewing machine that you want to use more often that is sitting in your closet) then I have a supppppper cute little project for you! 🙂 ANNND this is even a happy little project for kiddos that are learning to sew too (or even Moms or Uncles or Grandmas that are teaching kiddos to sew) – these little house pillows (that double as tooth fairy pillows) allow for LOADS of creativity and imagination, some simple straight seams, a bit of hand sewing, and lots of color all packed into a super quick project!
MATERIALS:
- Fabric in various sizes – scraps and small pieces work AMAZING for this project 🙂
- A few pieces of felt (you can use fabric for this too, but felt is SO much easier so that you don’t have to finish the edges)
- Some ribbons, trims or other fun “add on” items to customize the house
- Some batting or stuffing or Poly-fil
- An iron
- A needle and thread for hand-stitching the pillow closed
INSTRUCTIONS:
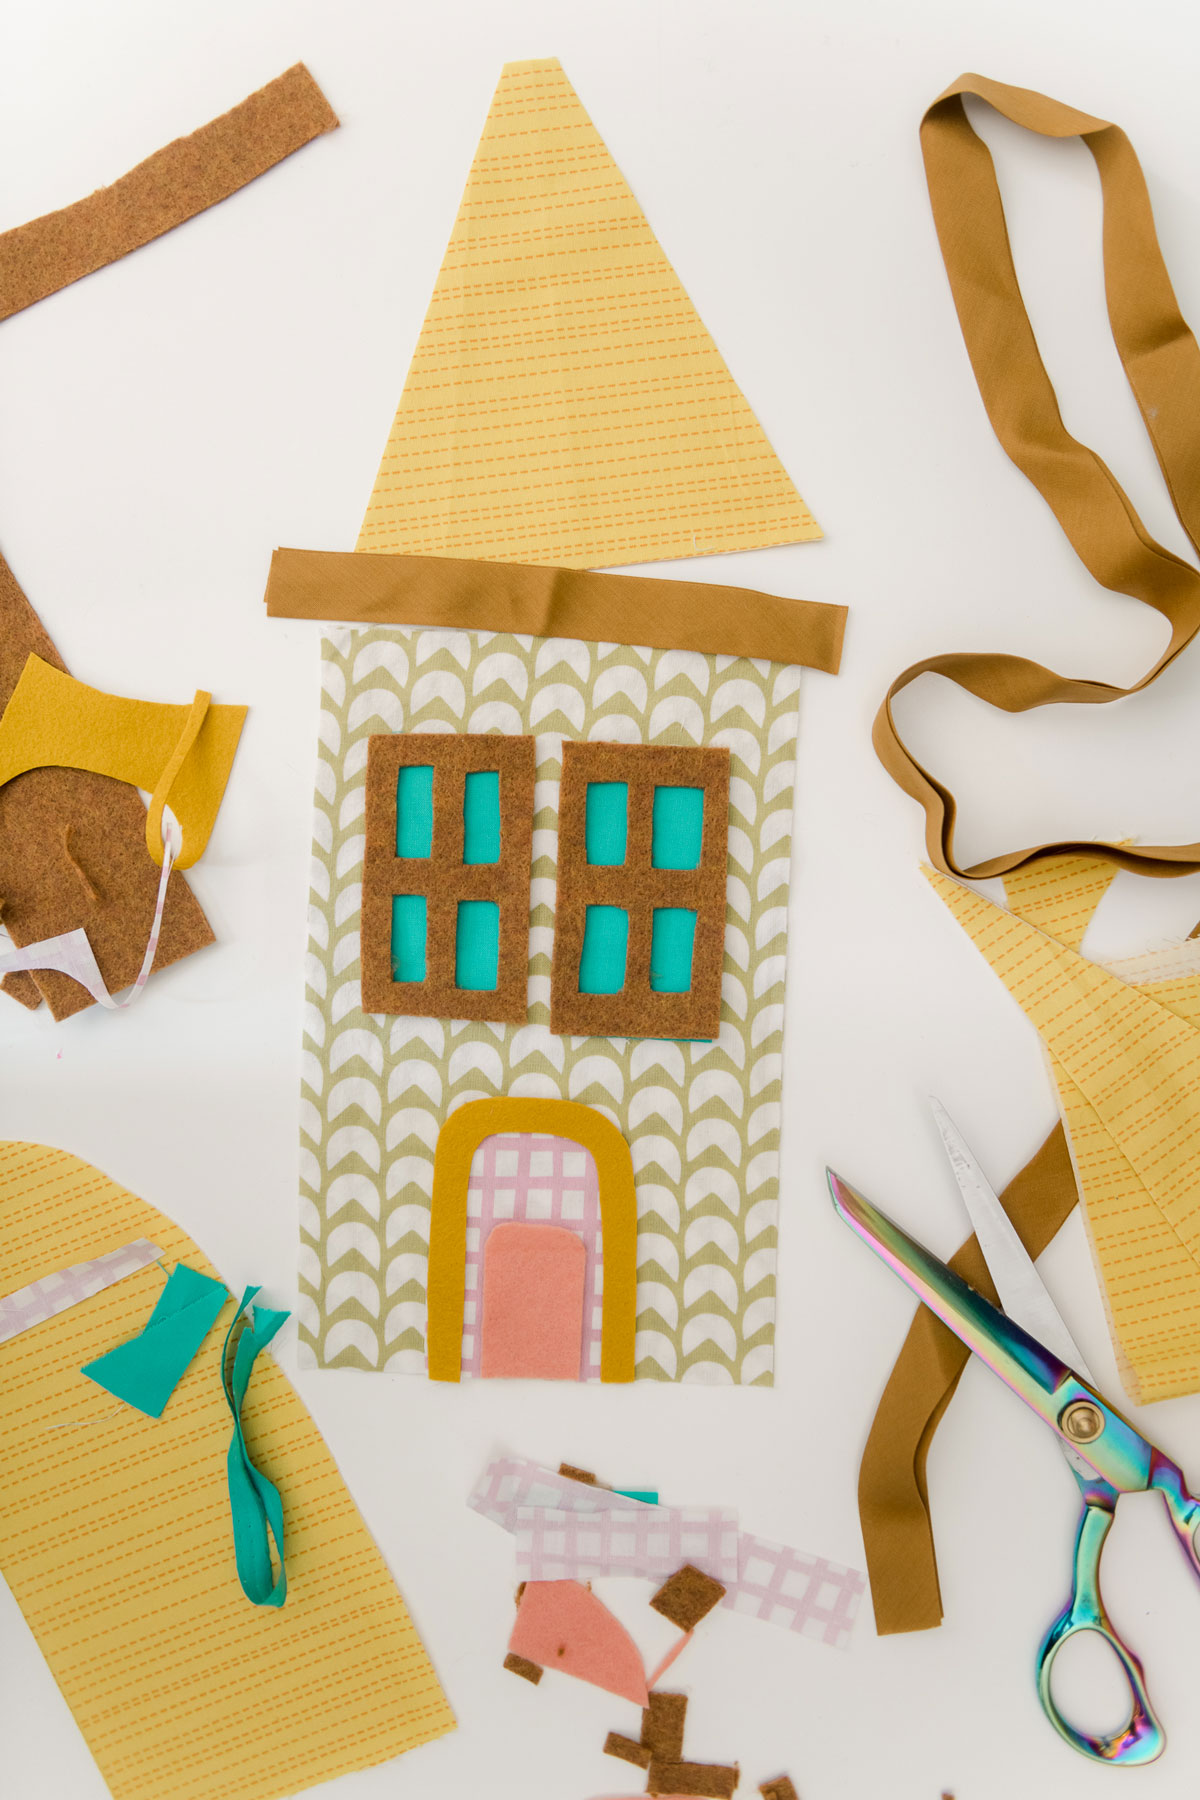
1. Cut out the pieces of the house
**and PLEASSEEE keep in mind that this can be sized up or down depending on what your final end product is that you want! 🙂 Honestly…..you can remove the “tooth” part completely and make this a giant house throw pillow too. Take the idea of this pattern and let you imagination run wild…that’s the fun of being creative and sewing! 🙂
But for those wanting to make a smaller tooth fairy house pillow, cut:
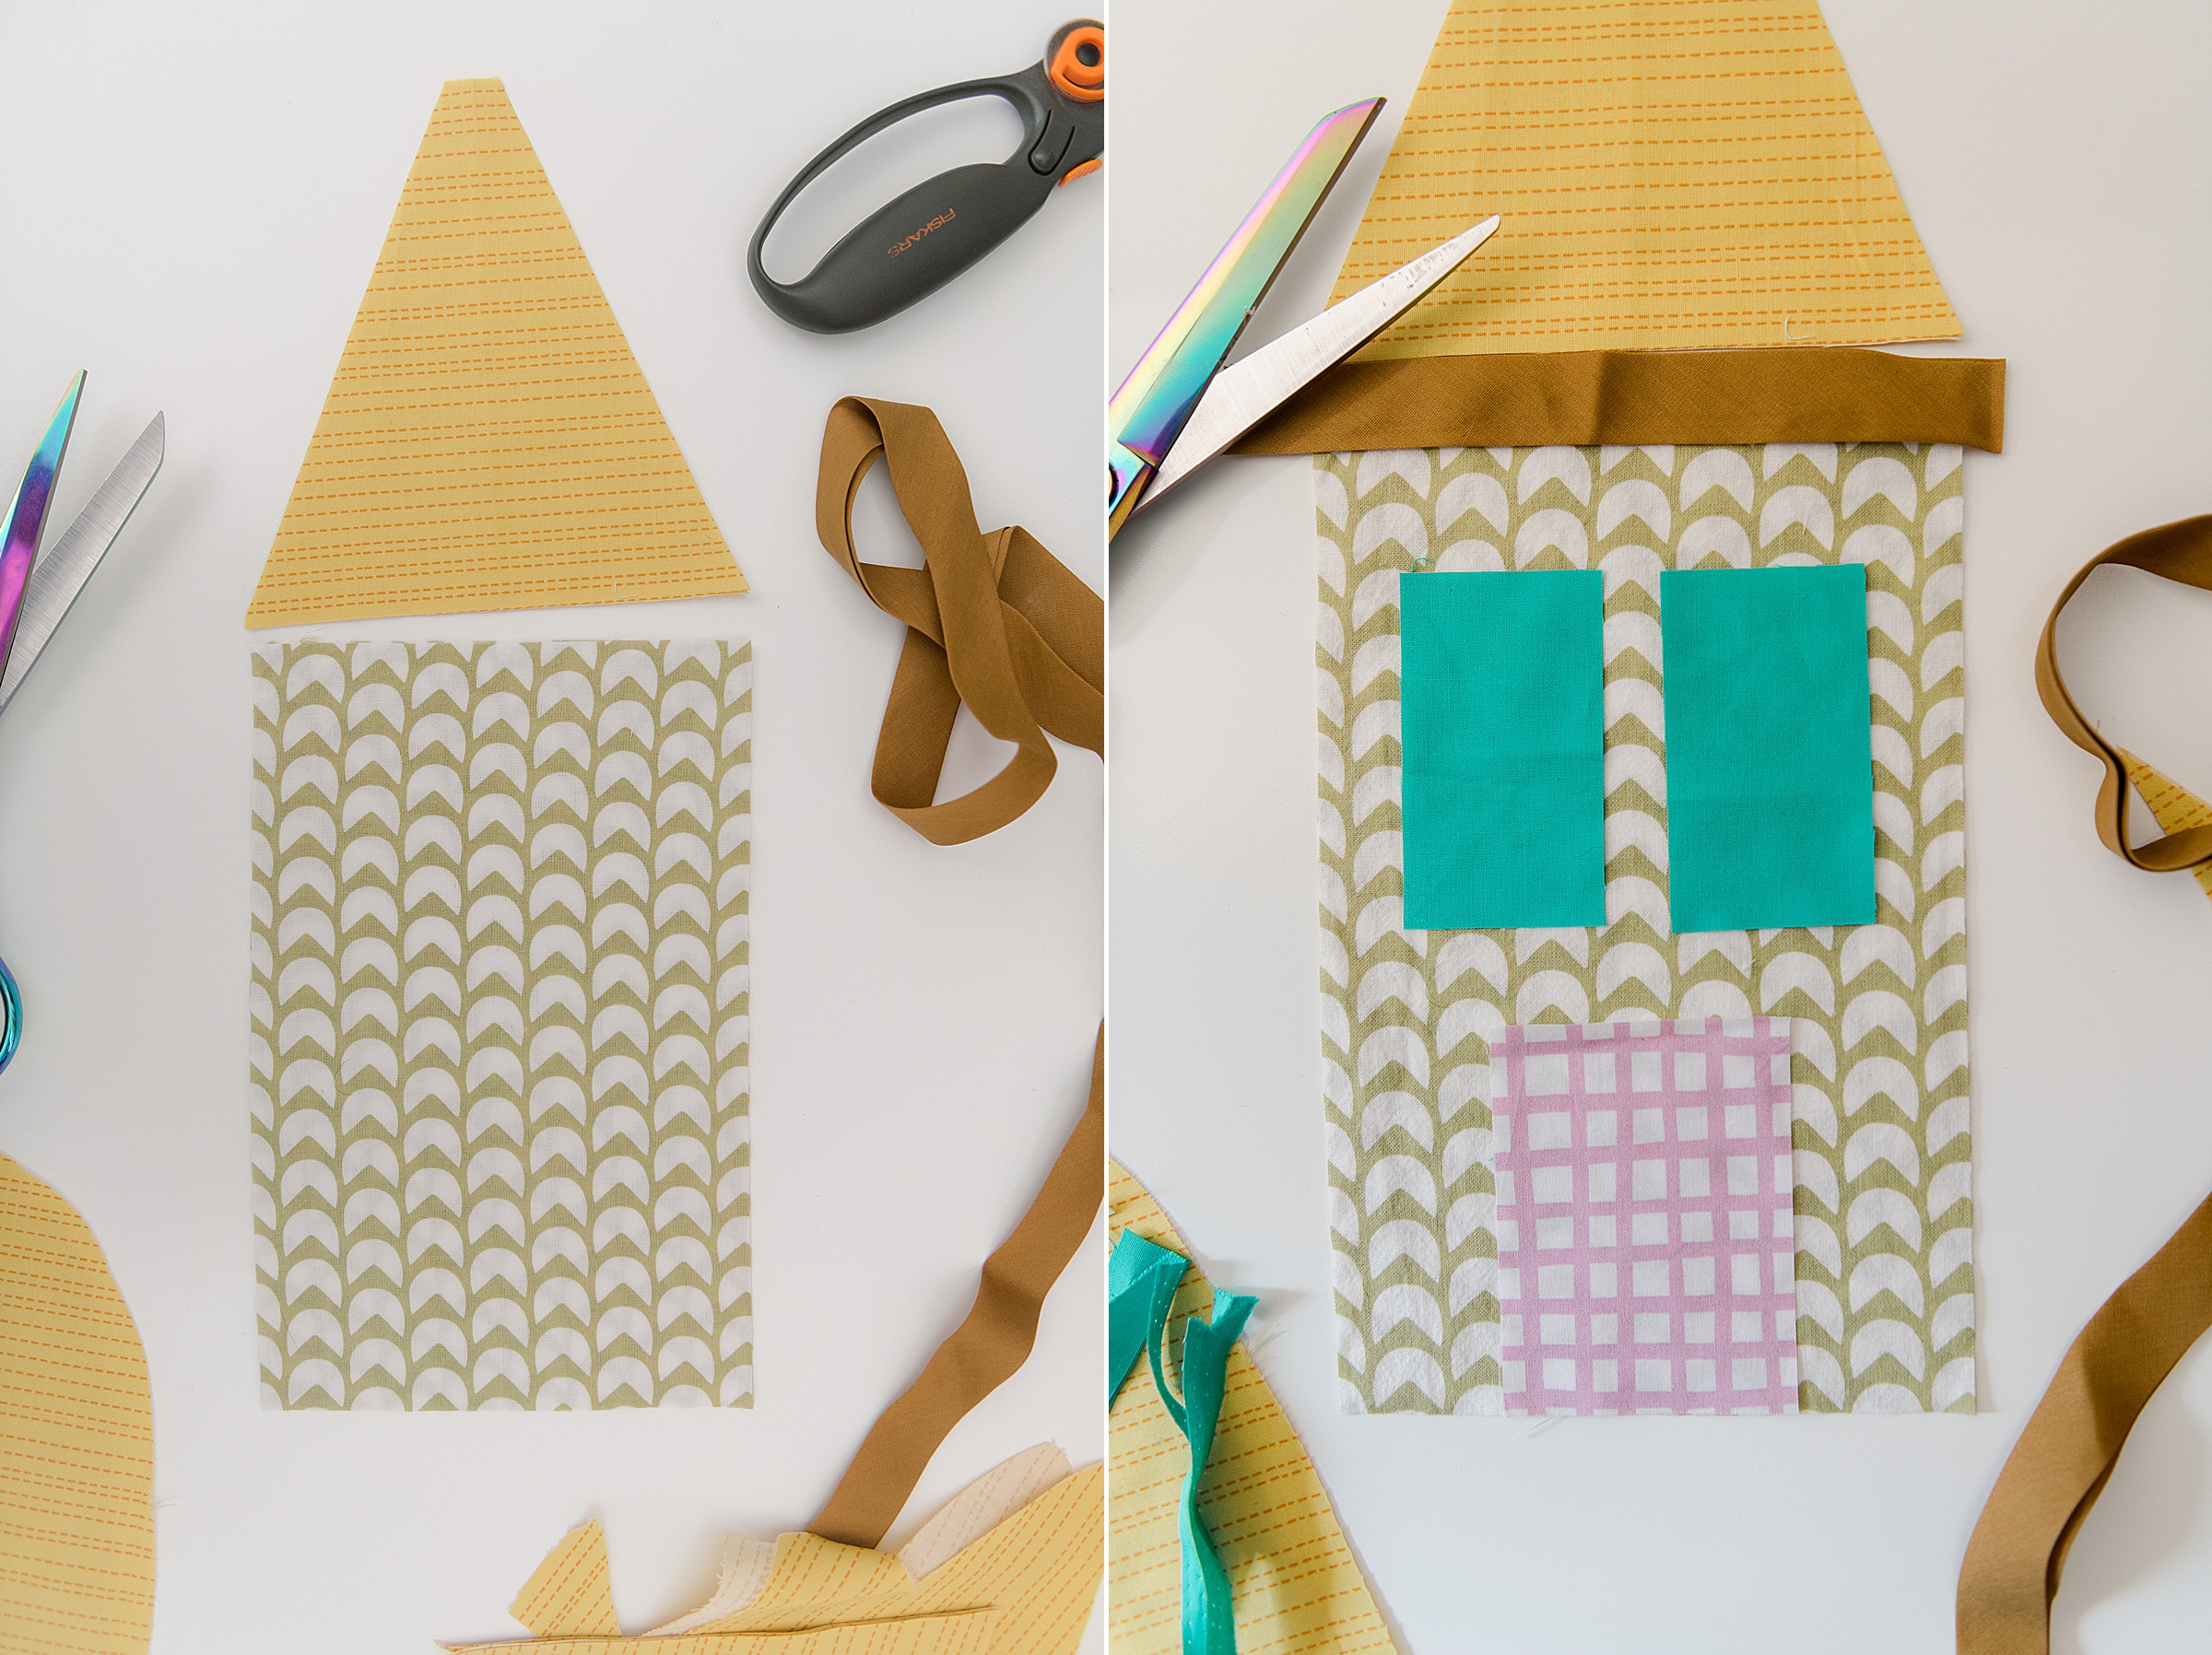
- Main house fabric – cut 2 rectangles, size 6” x 10”
- Roof fabric – cut 2 squares, size 6” x 6” and then fold the 2 squares in 1/2 to cut a diagonal line for the pitched roof (note: I left the top point of the roof not quite fully pointed so that it adds some character….but you can choose to cut a pointed roof I you’d like)
- Window inside fabric – cut out 2 rectangles, size 2” x 3.5”
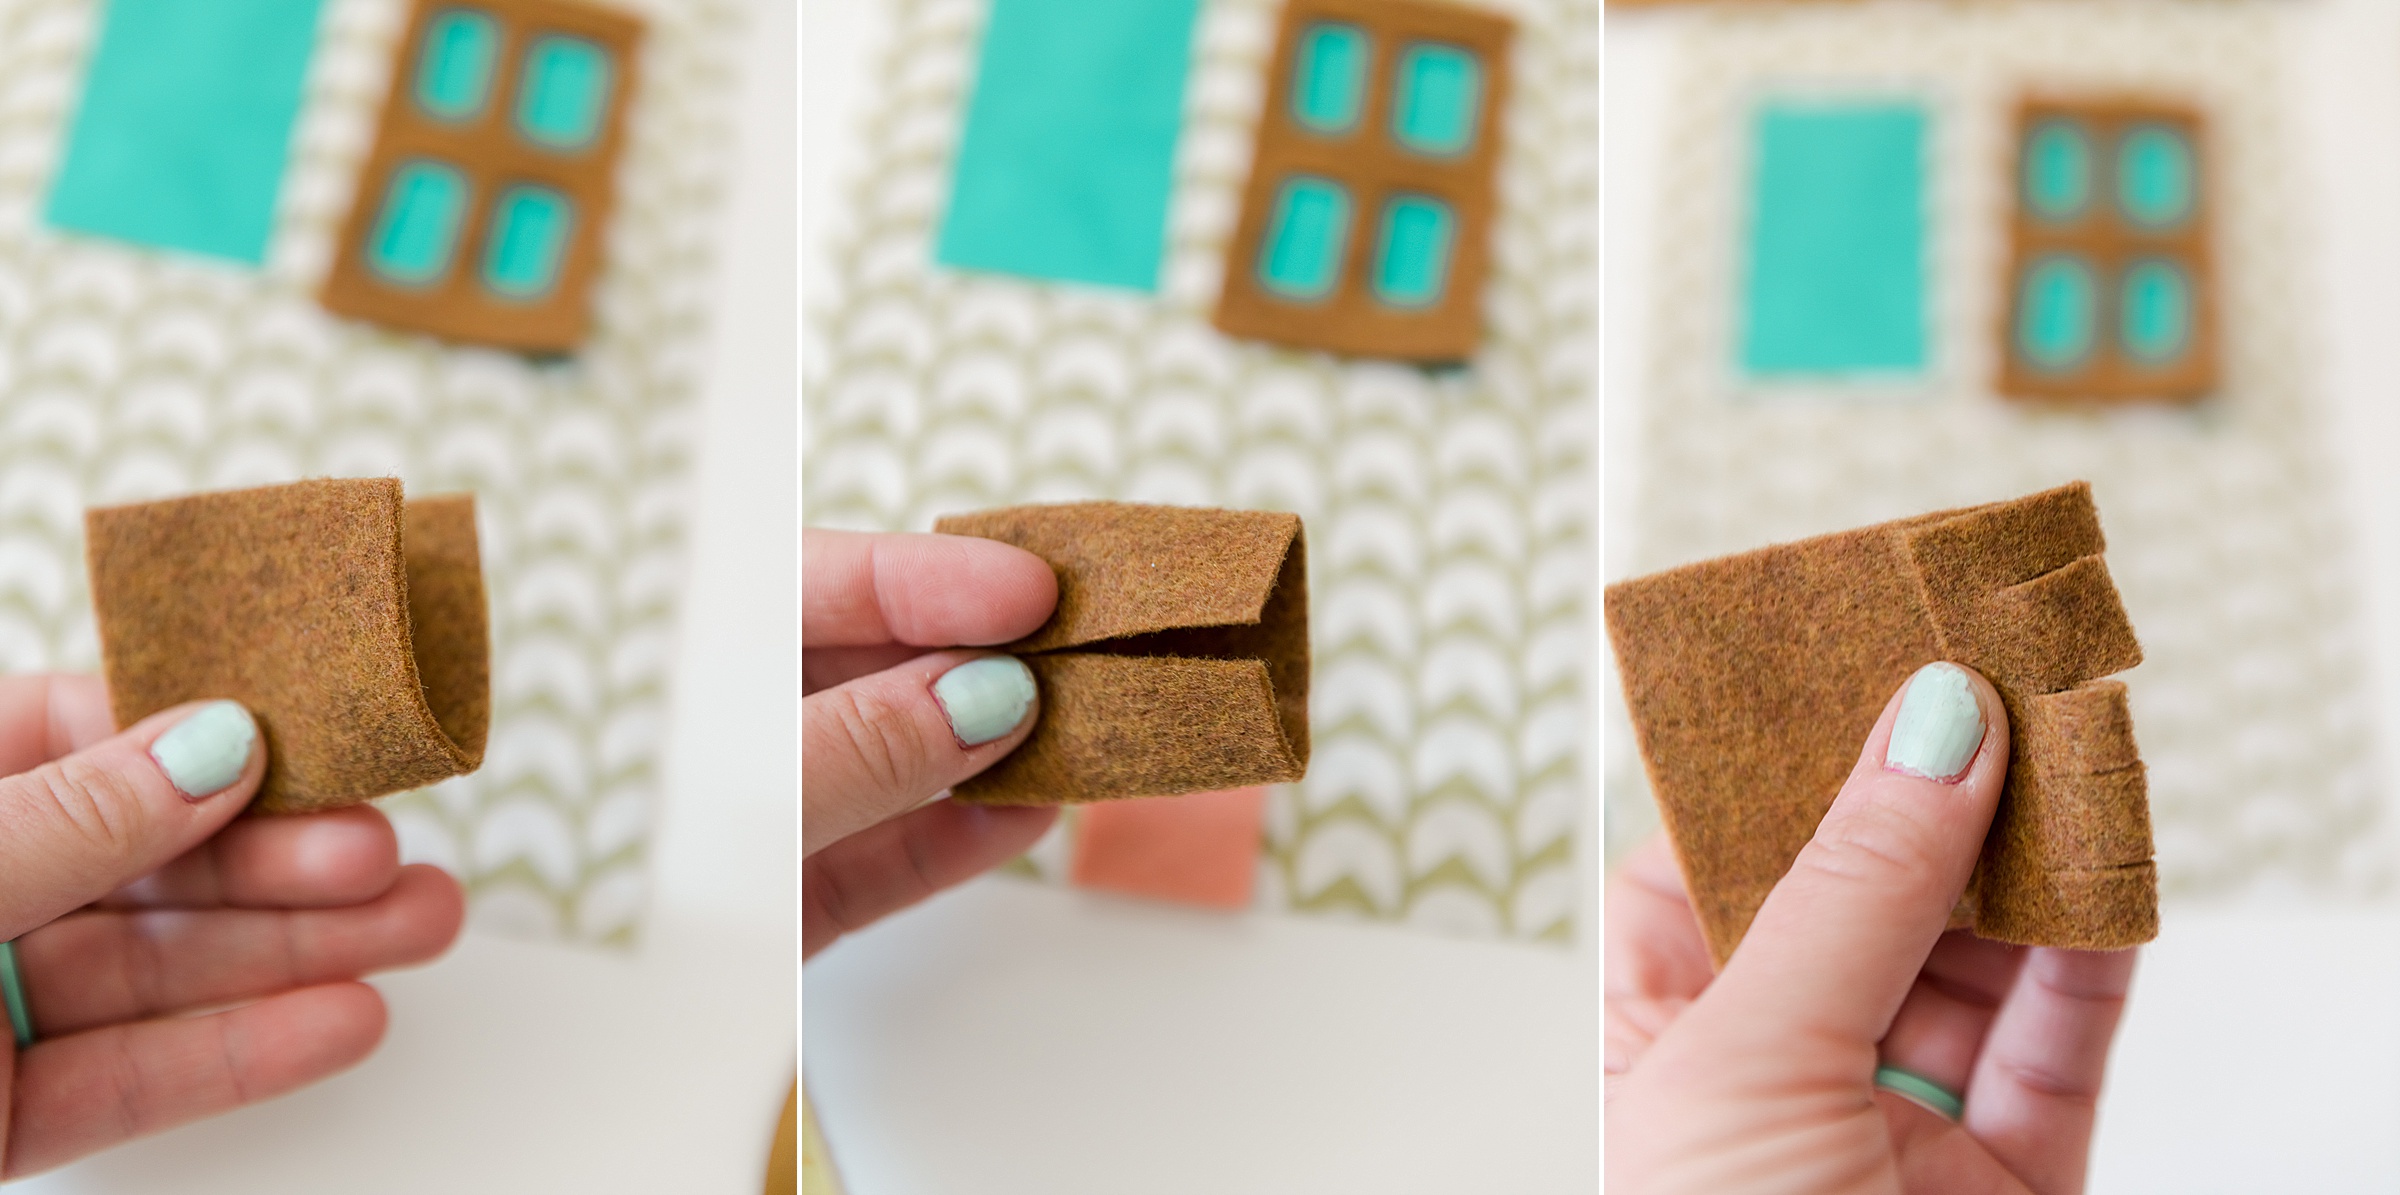
- Window moulding (cut from felt) – cut out 2 rectangles size 2” x 3.5” with some smaller squares cut out inside (make slits in 4 space and cut out some rectangles)
- Inside door pieces from fabric – cut 1 rectangle piece size 3” x 4”
- Door pieces (cut from felt) – cut out 1 rectangle piece size 3” x 4” (and cut this into a “moulding” for around the door frame) AND 1 rectangle piece size 2.25” x 1.5” (or so)
- **and cut out any additional trims or “add ons” to the house that you want 🙂
2. Sew front and main part of house
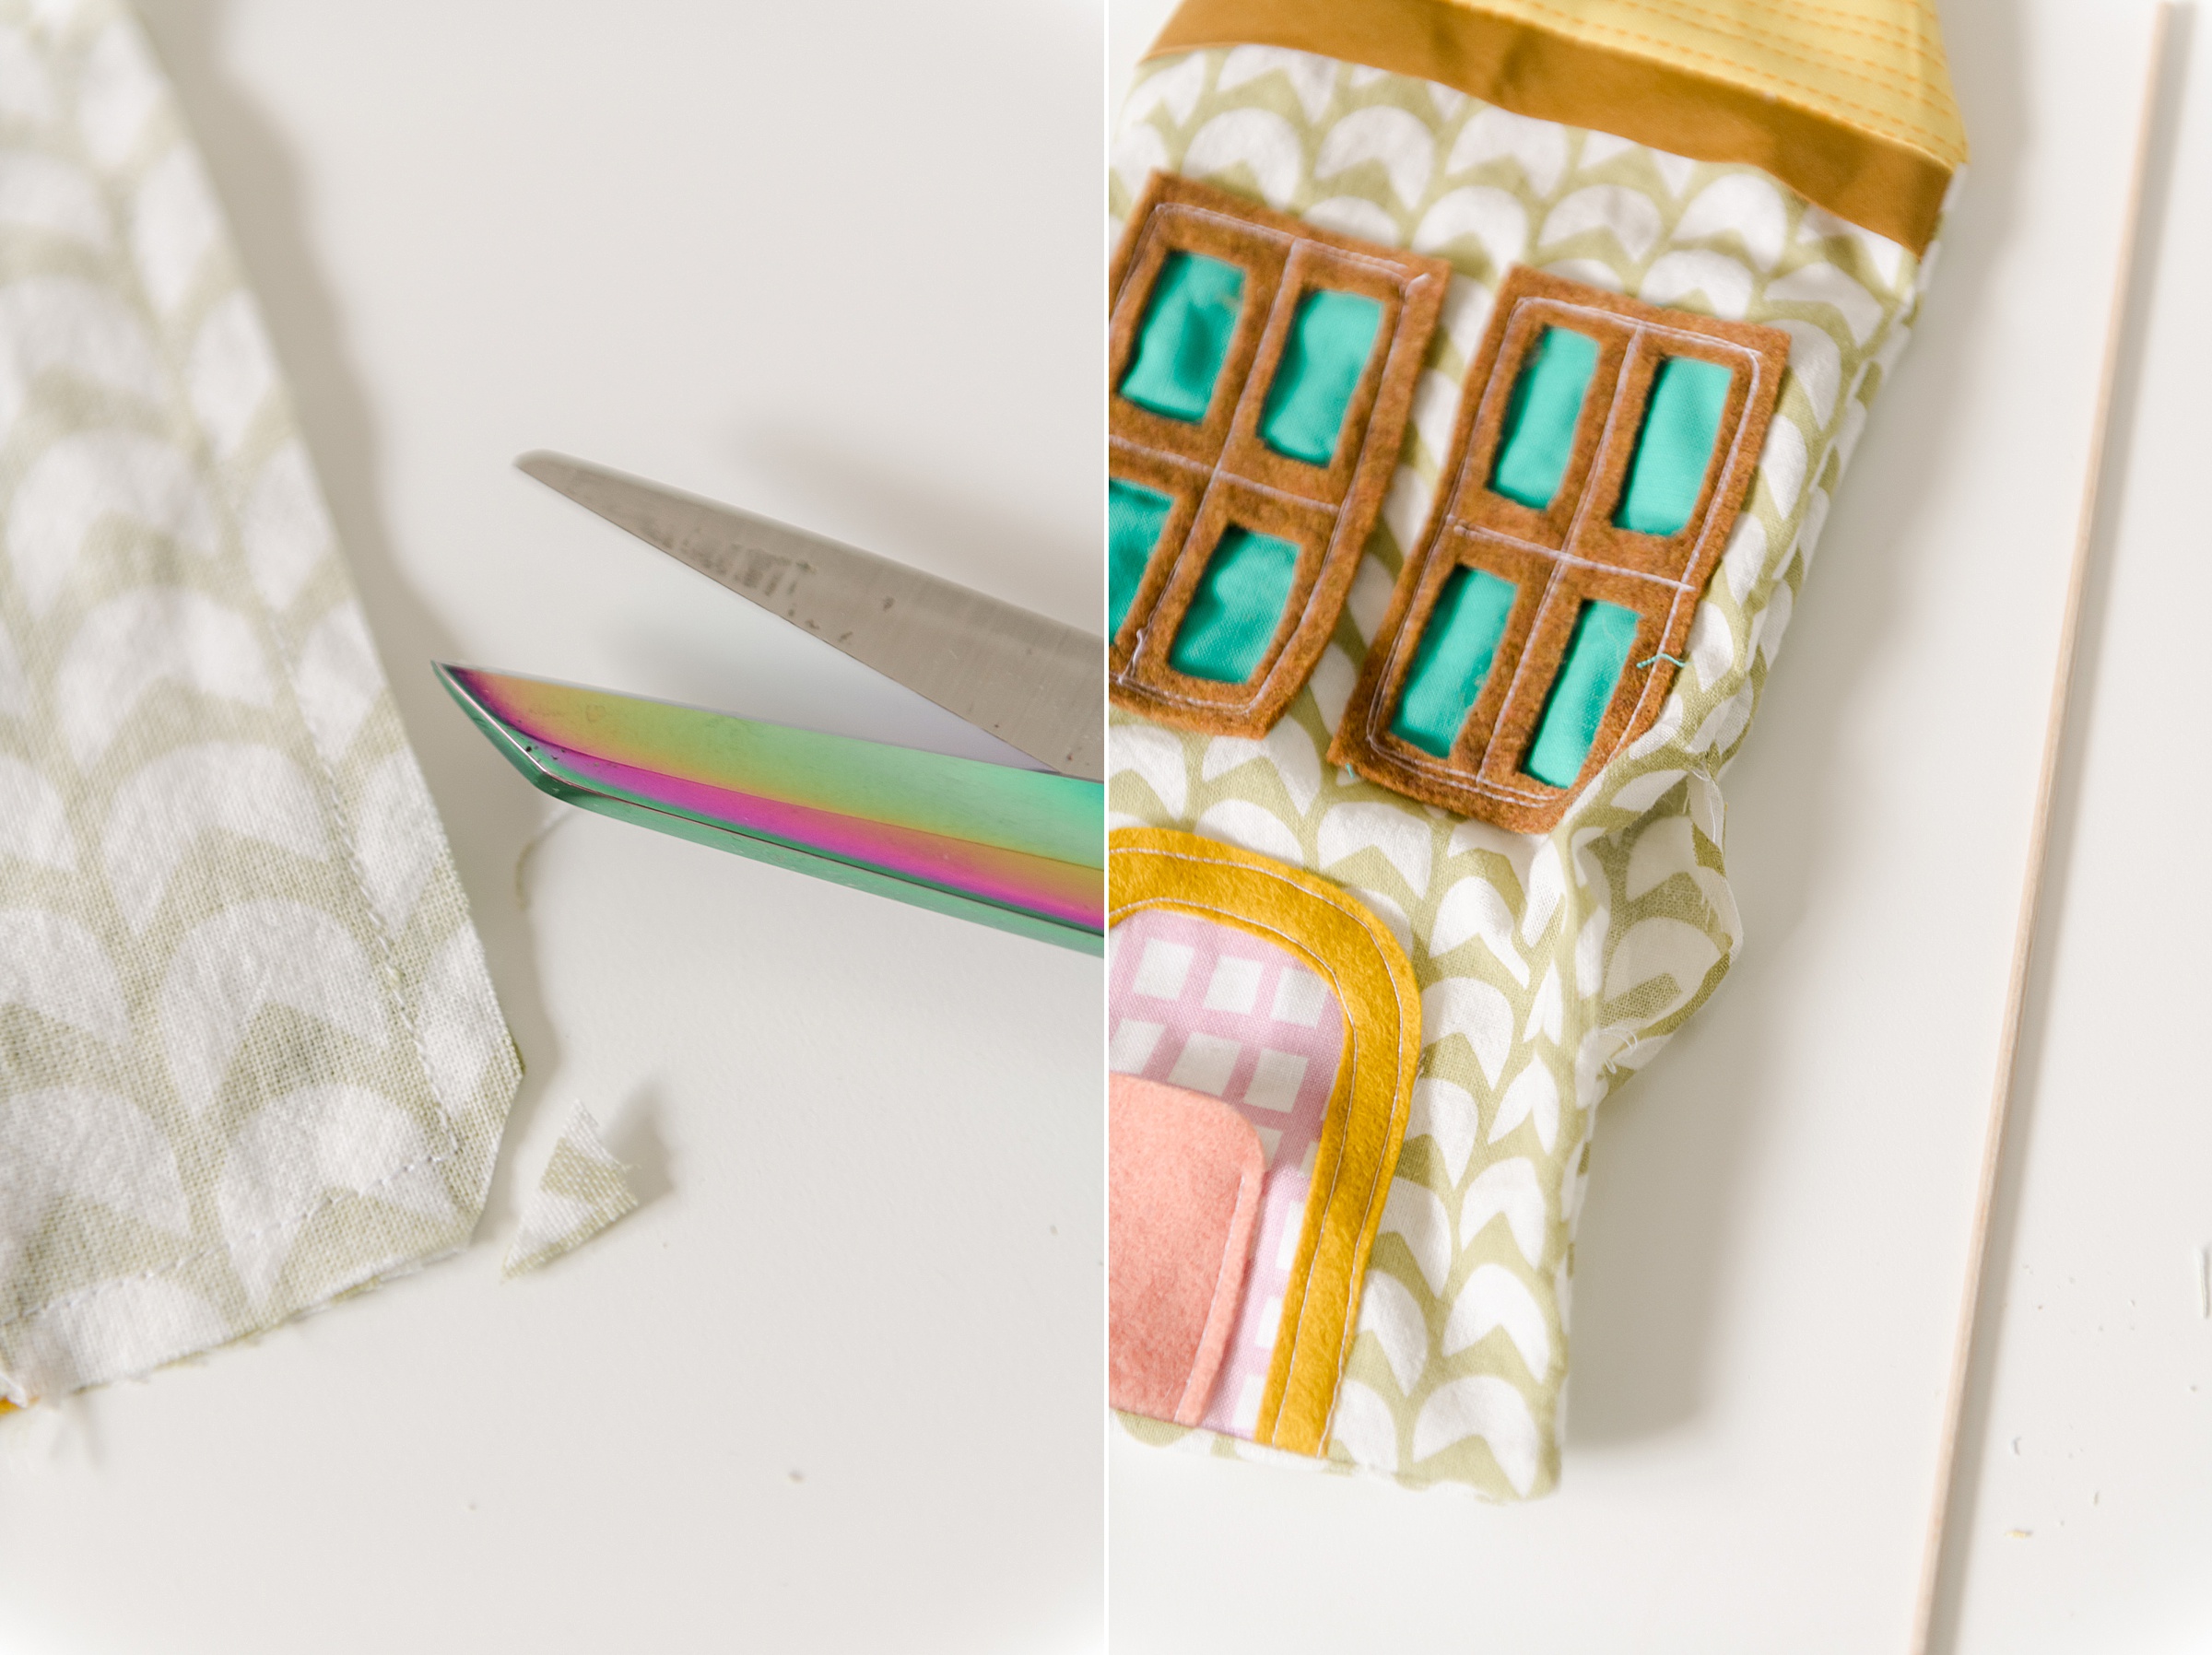
First start by constructing the FRONT of your house. This means, that you will start by adding your windows and doors. I added the inside windows, stitched them on and then added the moulding over too to cover the raw edges of the fabric underneath! You will then add on the 2 door pieces (making sure to leave the smaller rectangle “open” on top to slip a tooth in for the night).
**You can also get SO creative with the stitching options for this part – think about adding in some decorative stitching like zig zags, appliqué stitching or MORE (explore your machine and make this part super fun with what you can “try out”).

You will then stitch on the roof pieces on.
With right sides together, start by lining up the top, upper edge, of the house rectangle with the bottom, longer edge, of the roof. Stitch this in place. NOTE: you will want to add in any trims along the upper edge at this time by “sandwiching” the trim between the right sides of the roof and the main house fabric BEFORE you stitch all together – pin in place if necessary to make sure that none of it moves around while stitching.
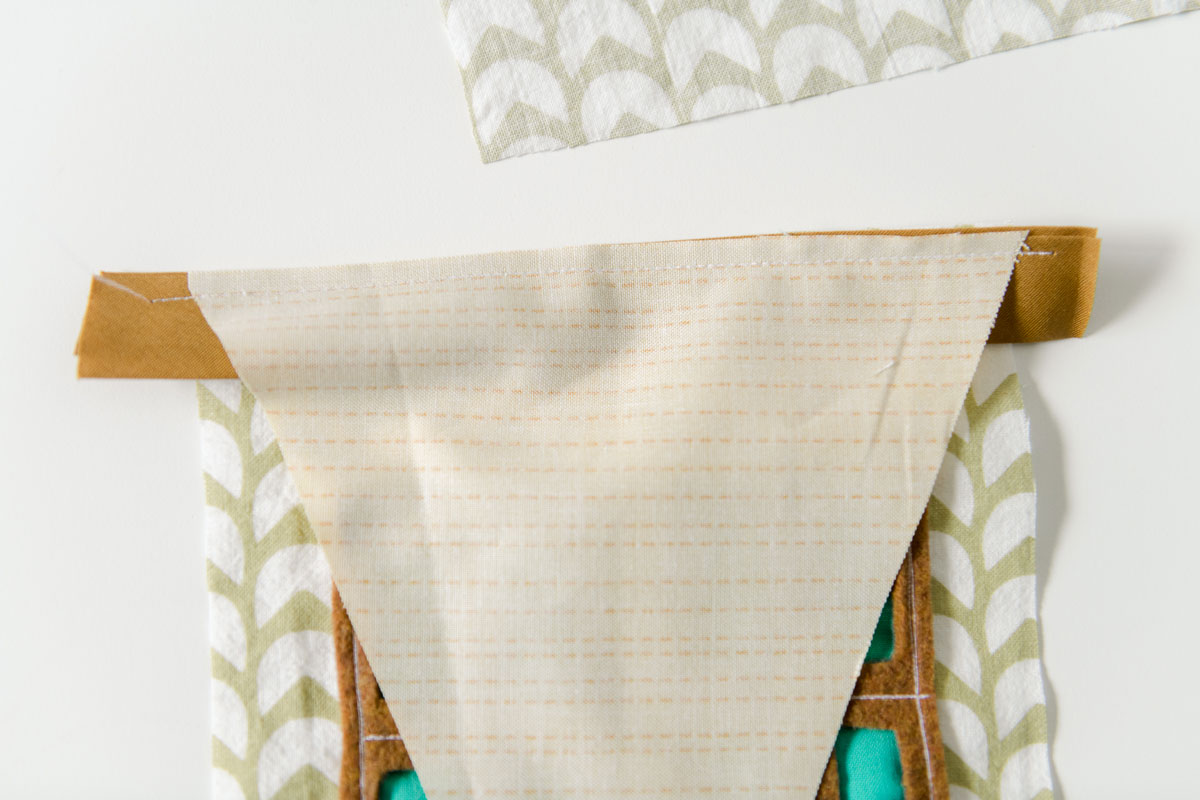
Repeat this with both the front and back main house rectangles. Press your seams to make sure that everything is laying flat before final construction
NOTE: When ironing, BE CAREFUL if you used synthetic felt on the front of house – you don’t want to melt it 🙂
3. Stitch the house together
With right sides together, pin the front and back of the house together, making sure to line up the roof lines (the corners the the roof and main house meet just so that everything is level and looks great when stuffed).
Be sure to leave a small opening so that you can turn the pillow right side out when done! 🙂
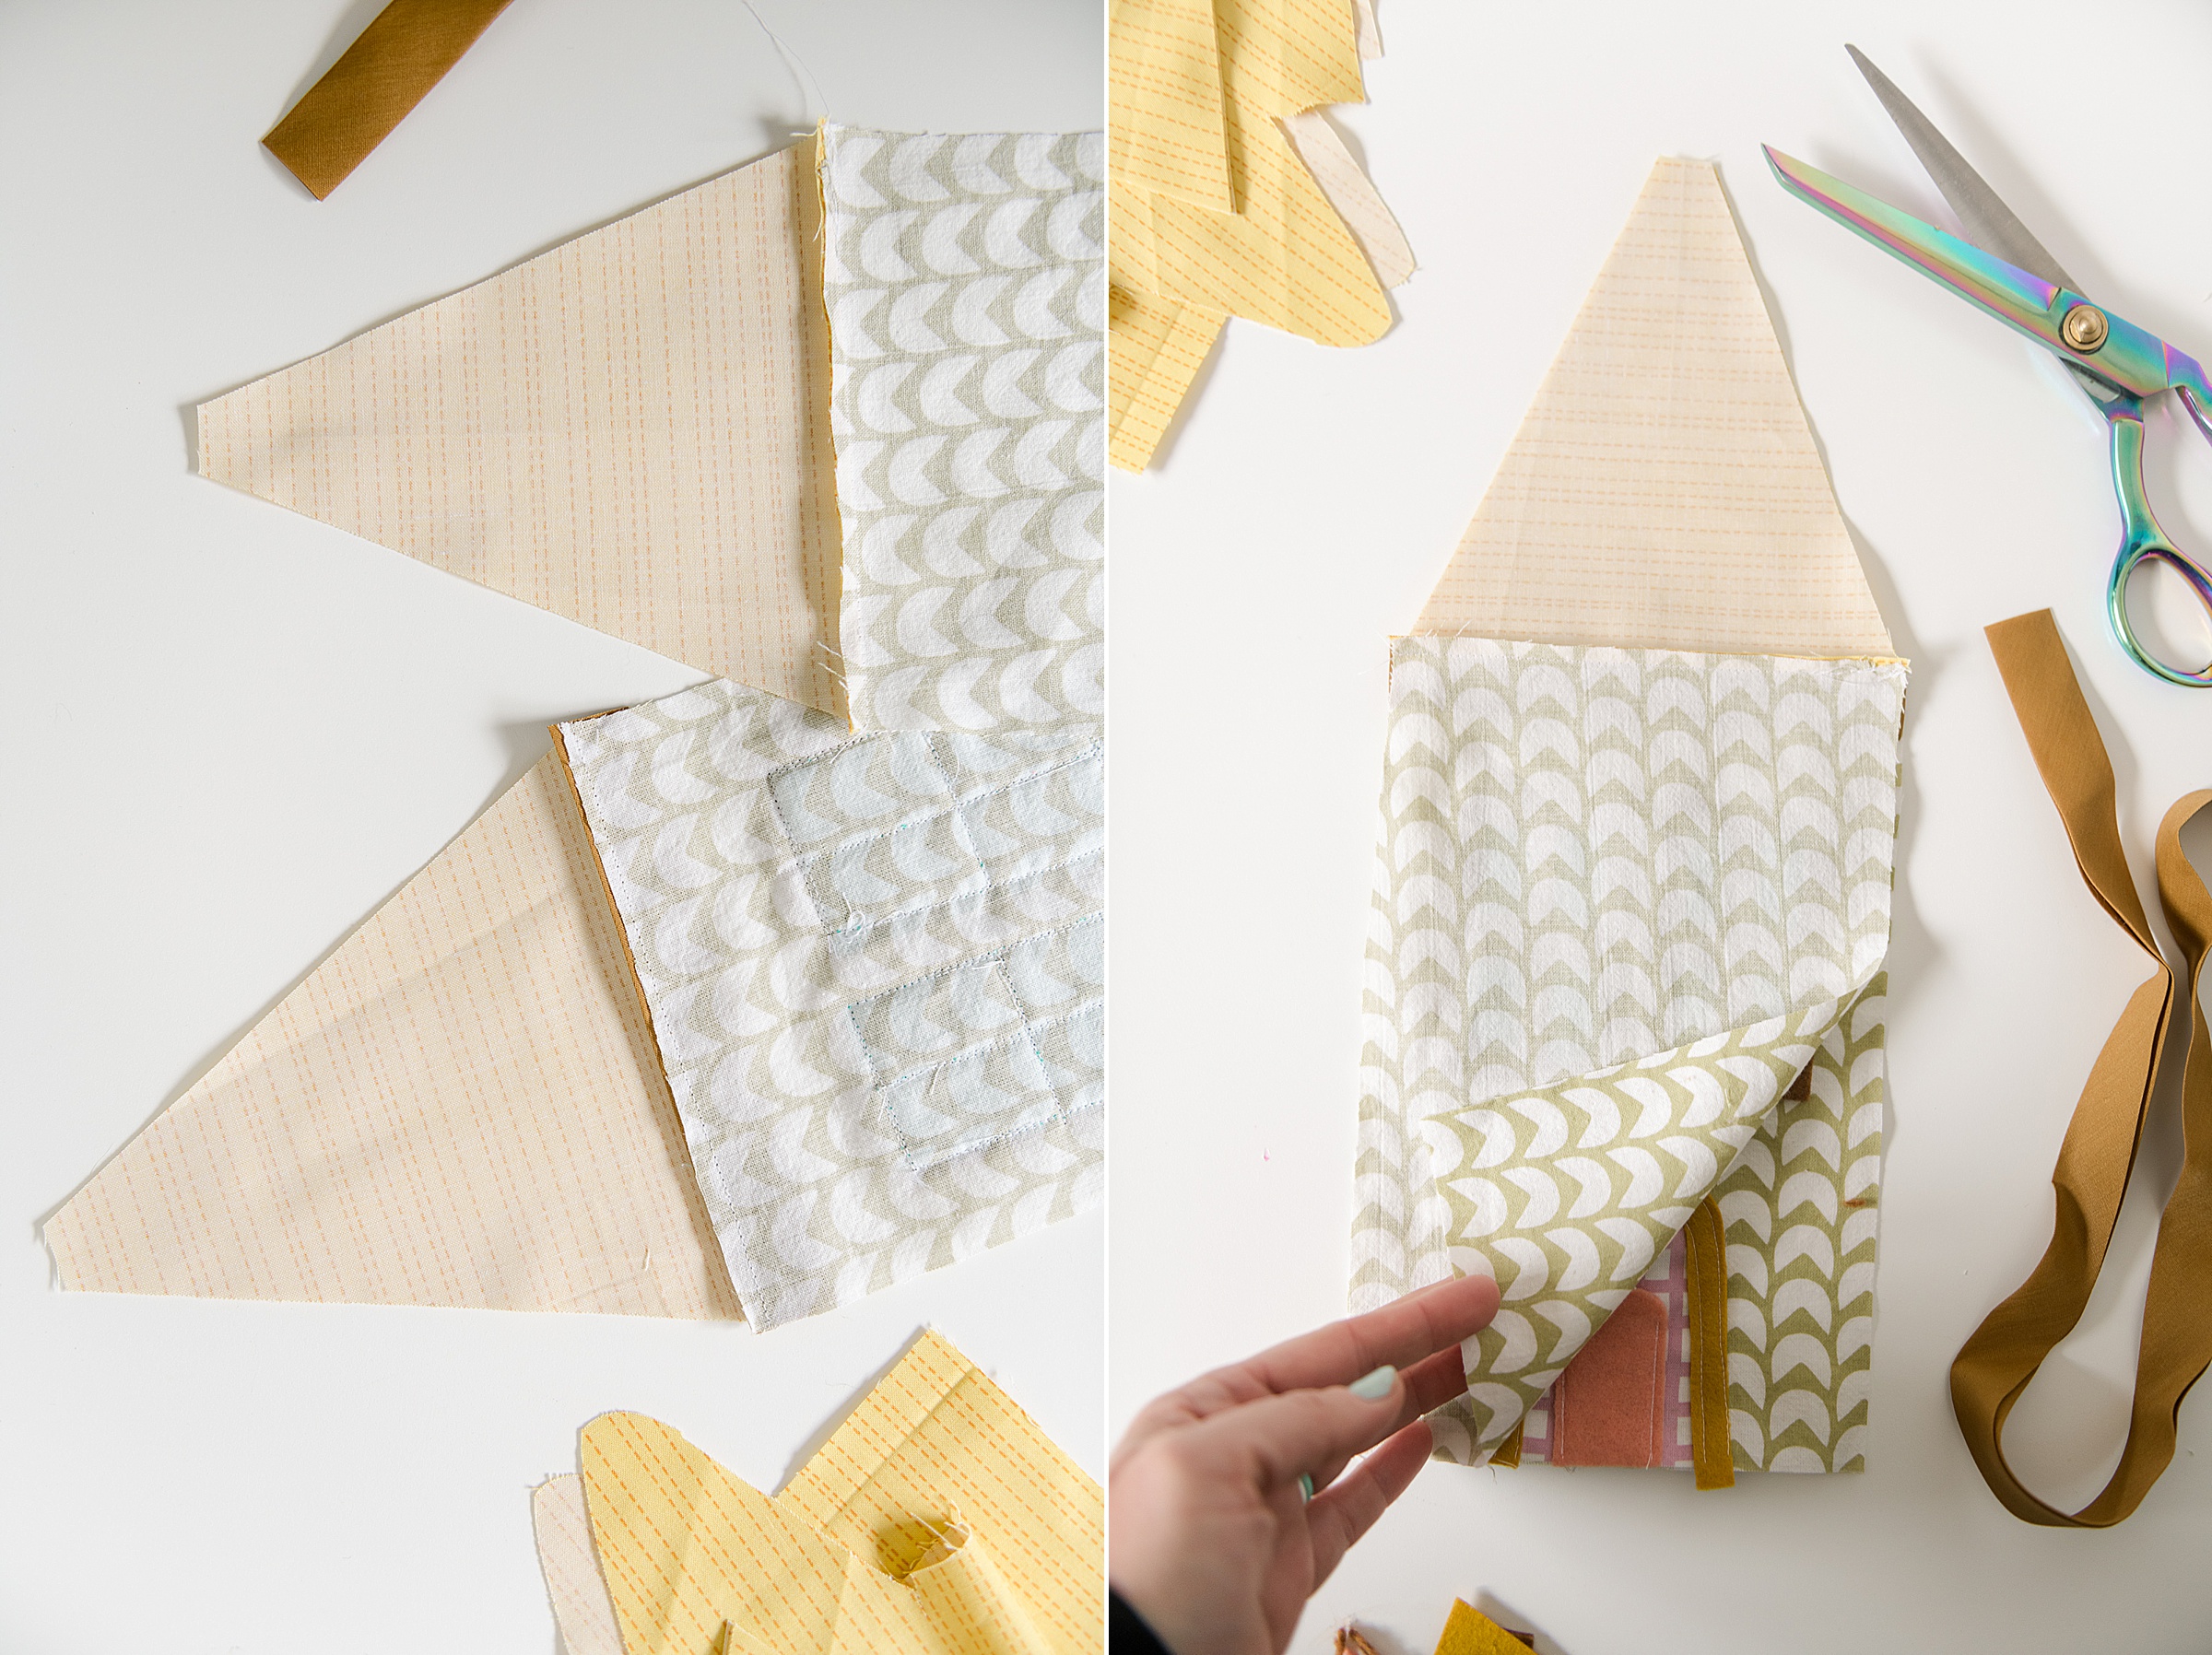
BUUUUT before you turn the pillow right side out, be sure to clip the corners and the edges or any area where there is “bulk” when turning your pillow (the corners of all the roof and main house) – this eliminates the bulk to be sure the corners are nice and square!
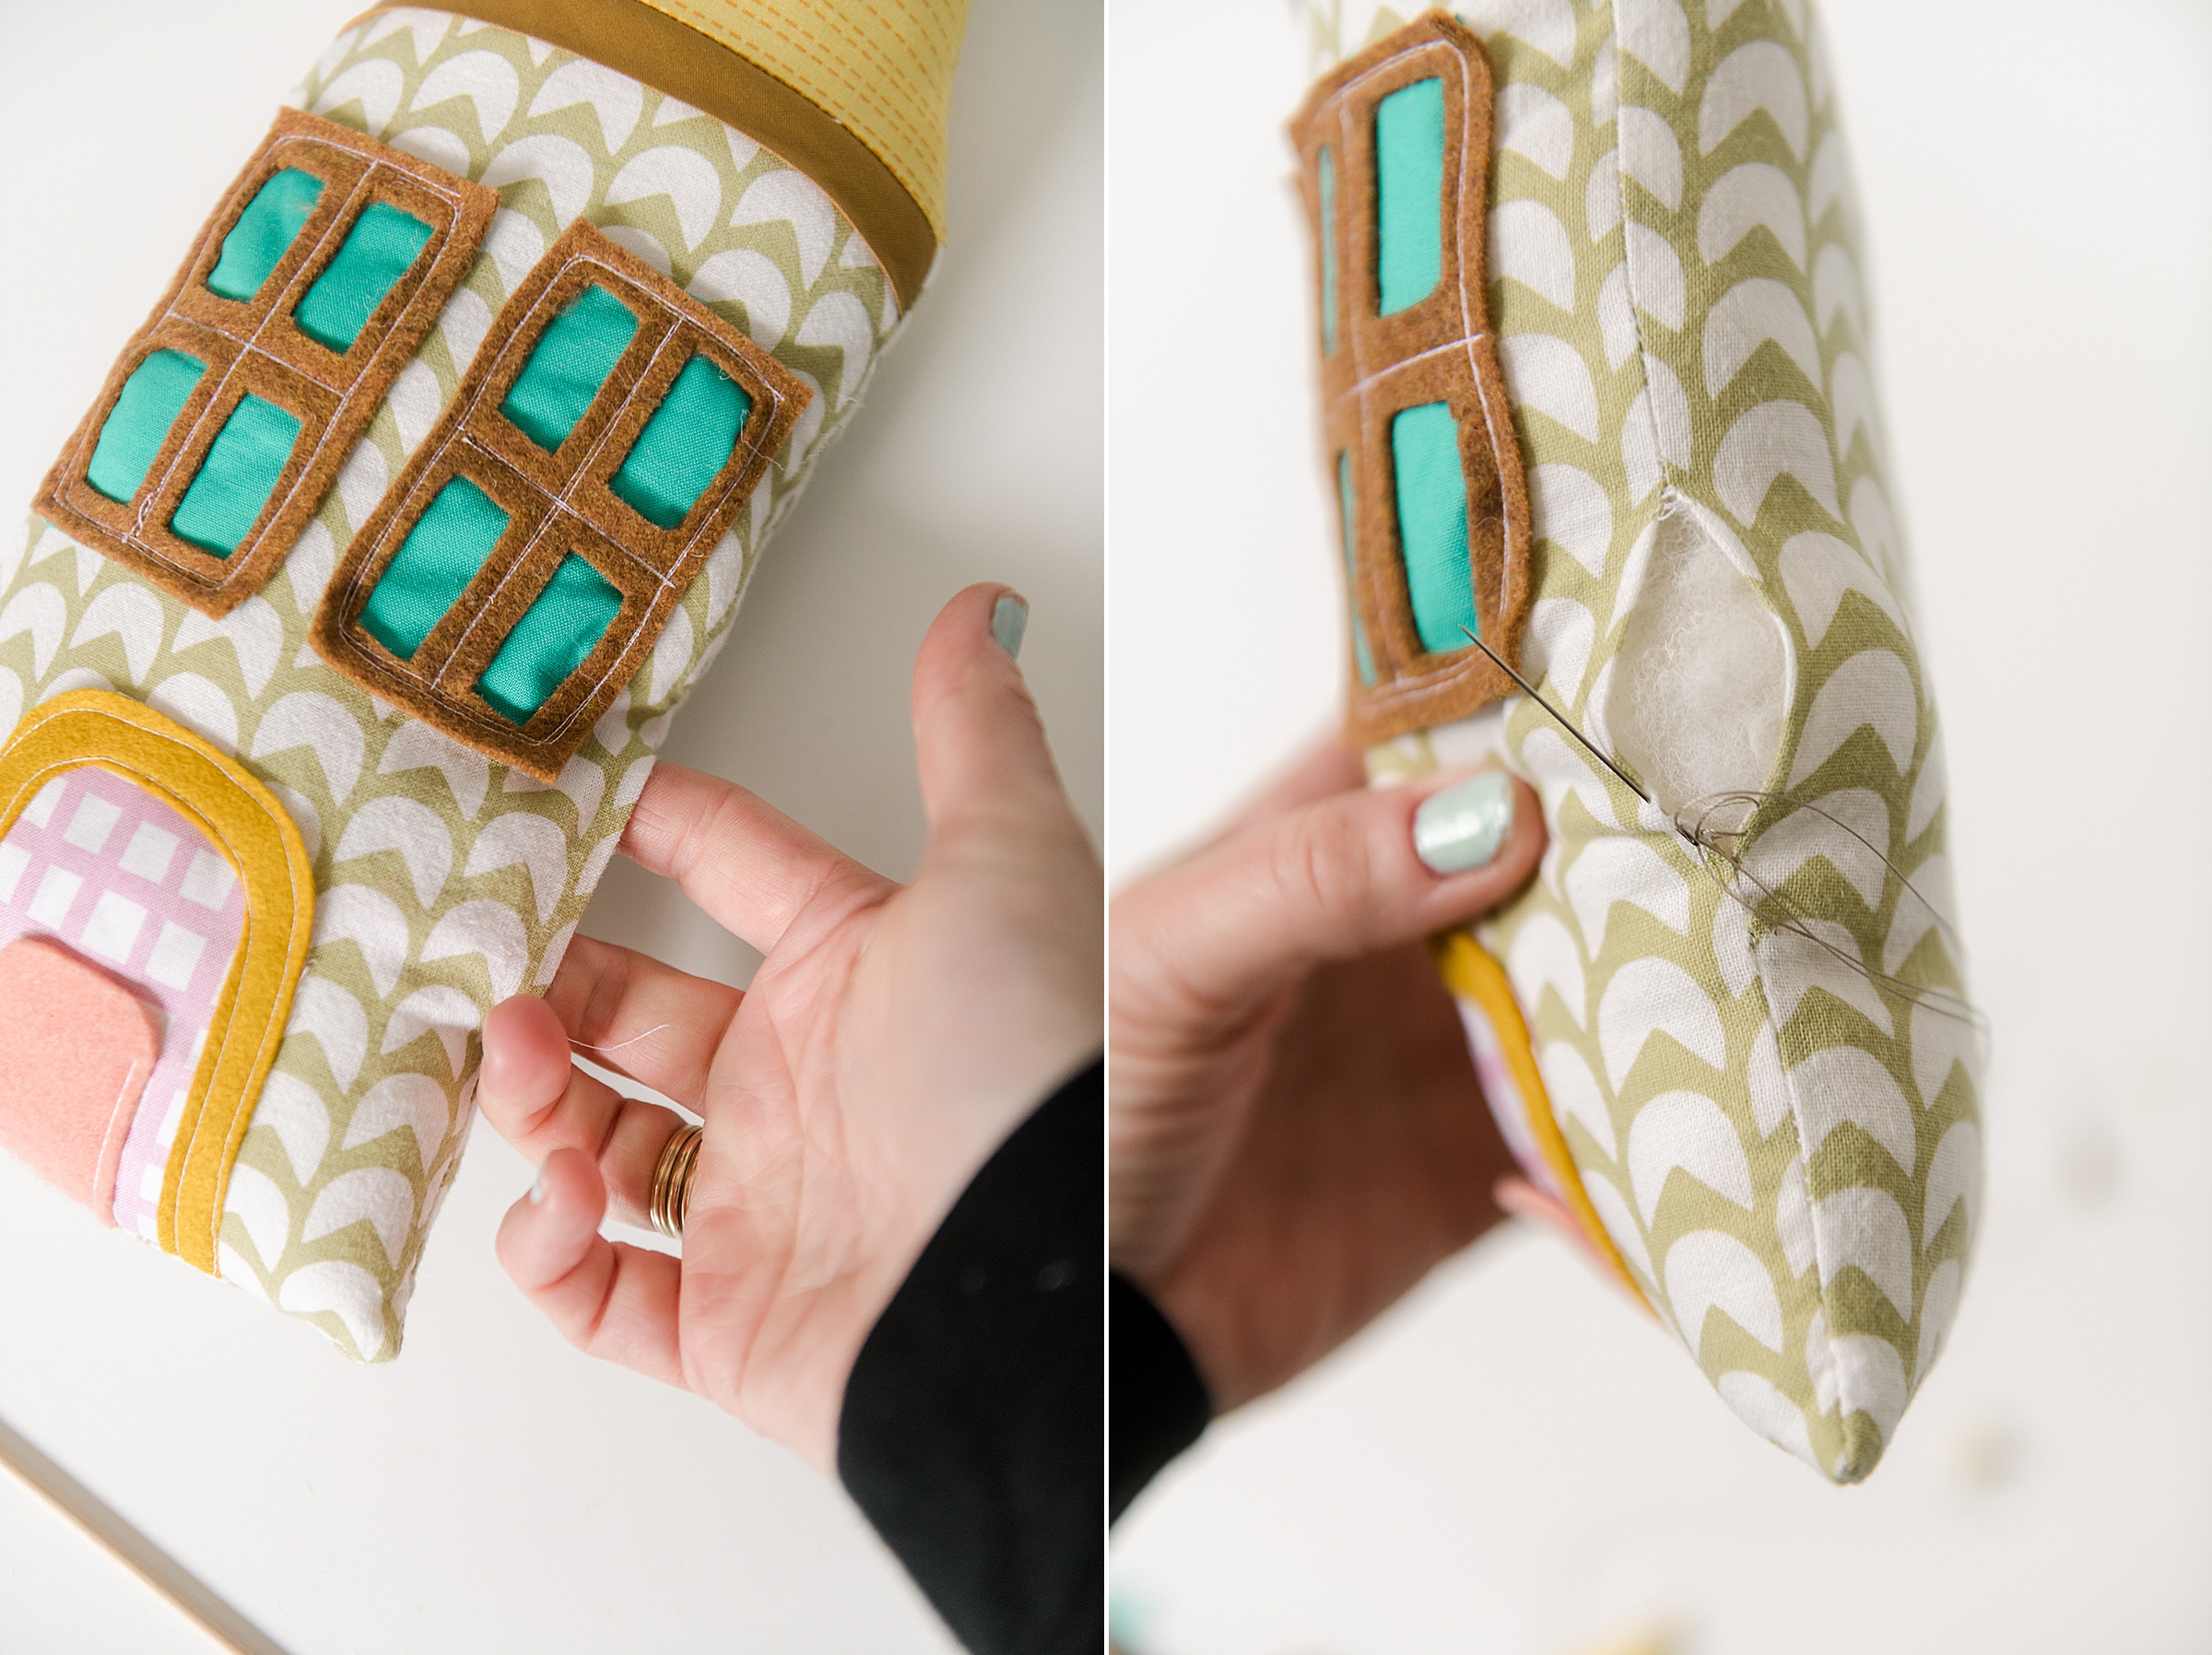
4. Stuff and finish
Now stuff your pillow with fluff or poly-fil and fill it as full as you want it to be 🙂 You will then hand stitch the opening closed so that everything is secure and ready to use! 🙂
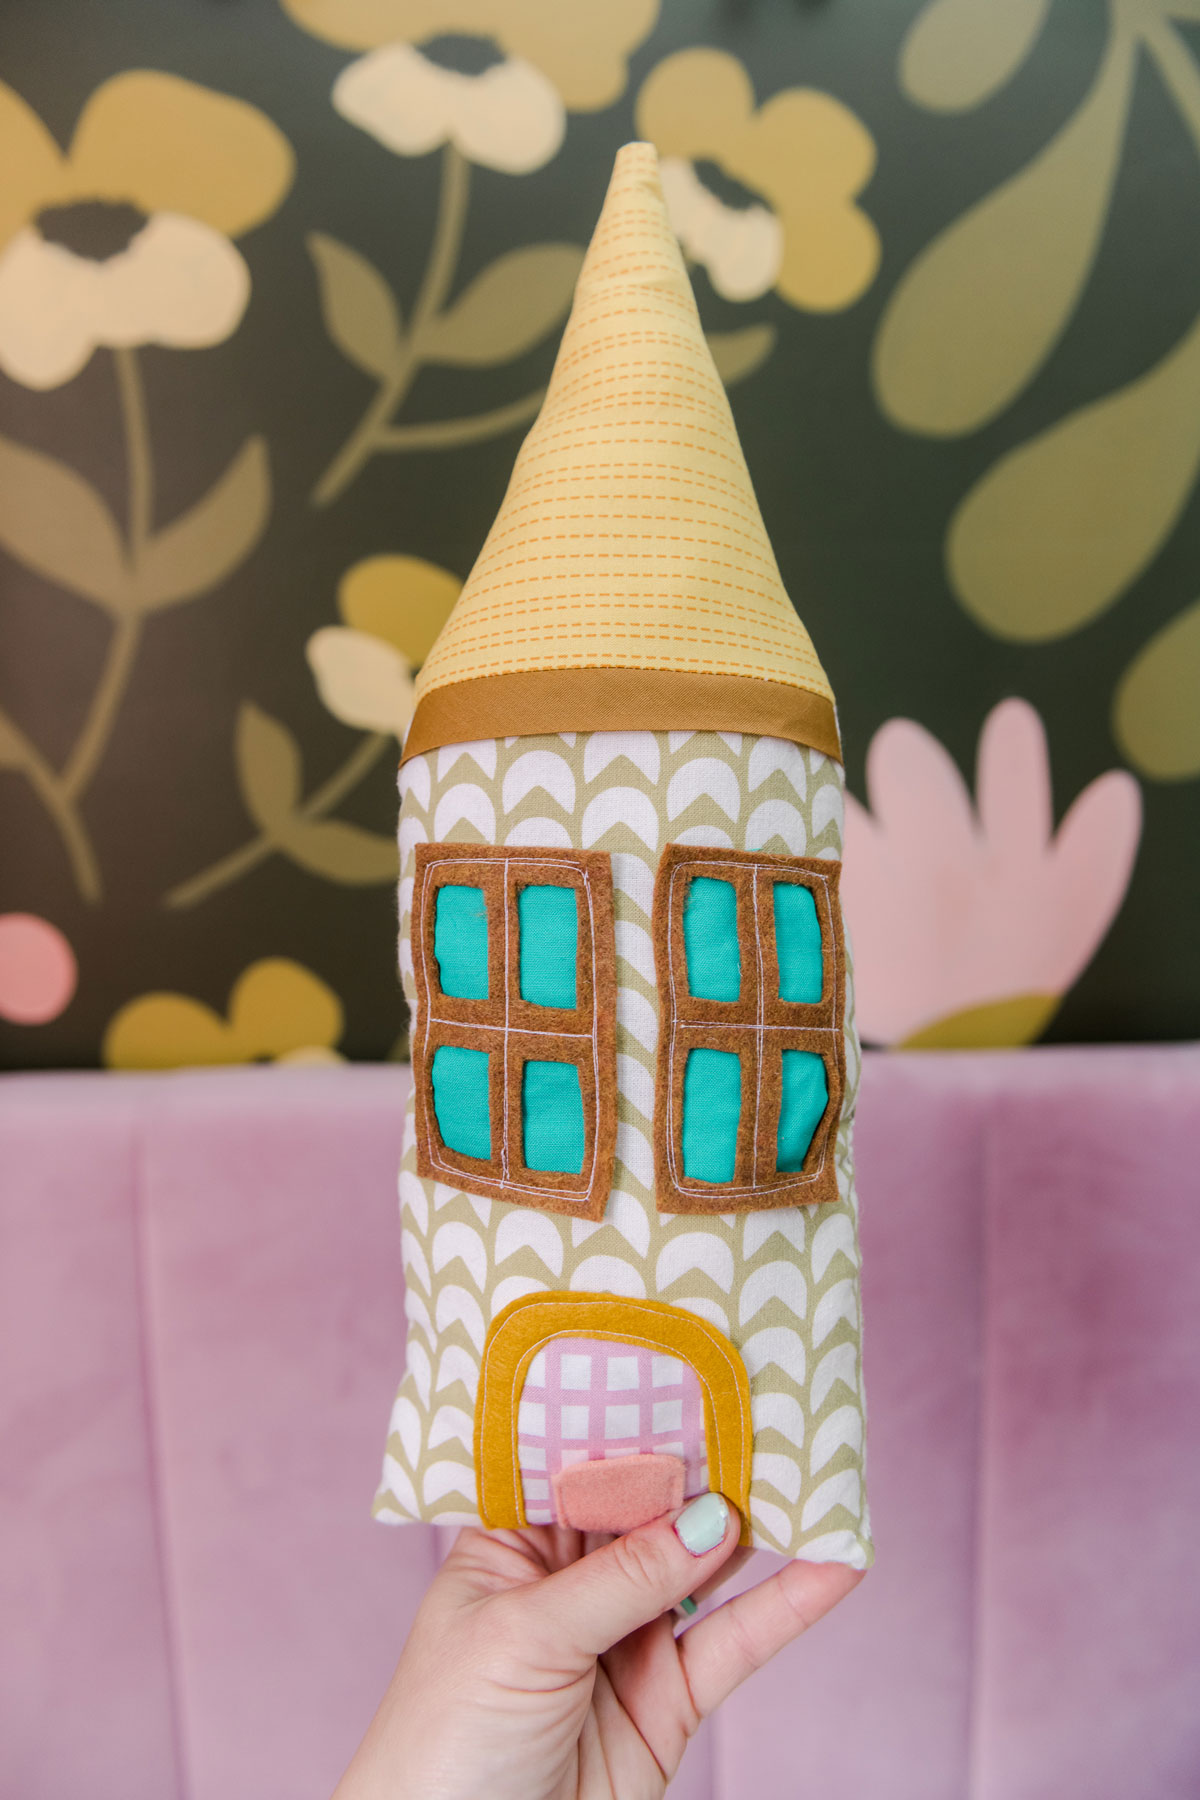
TAAA DAAAA! 🙂
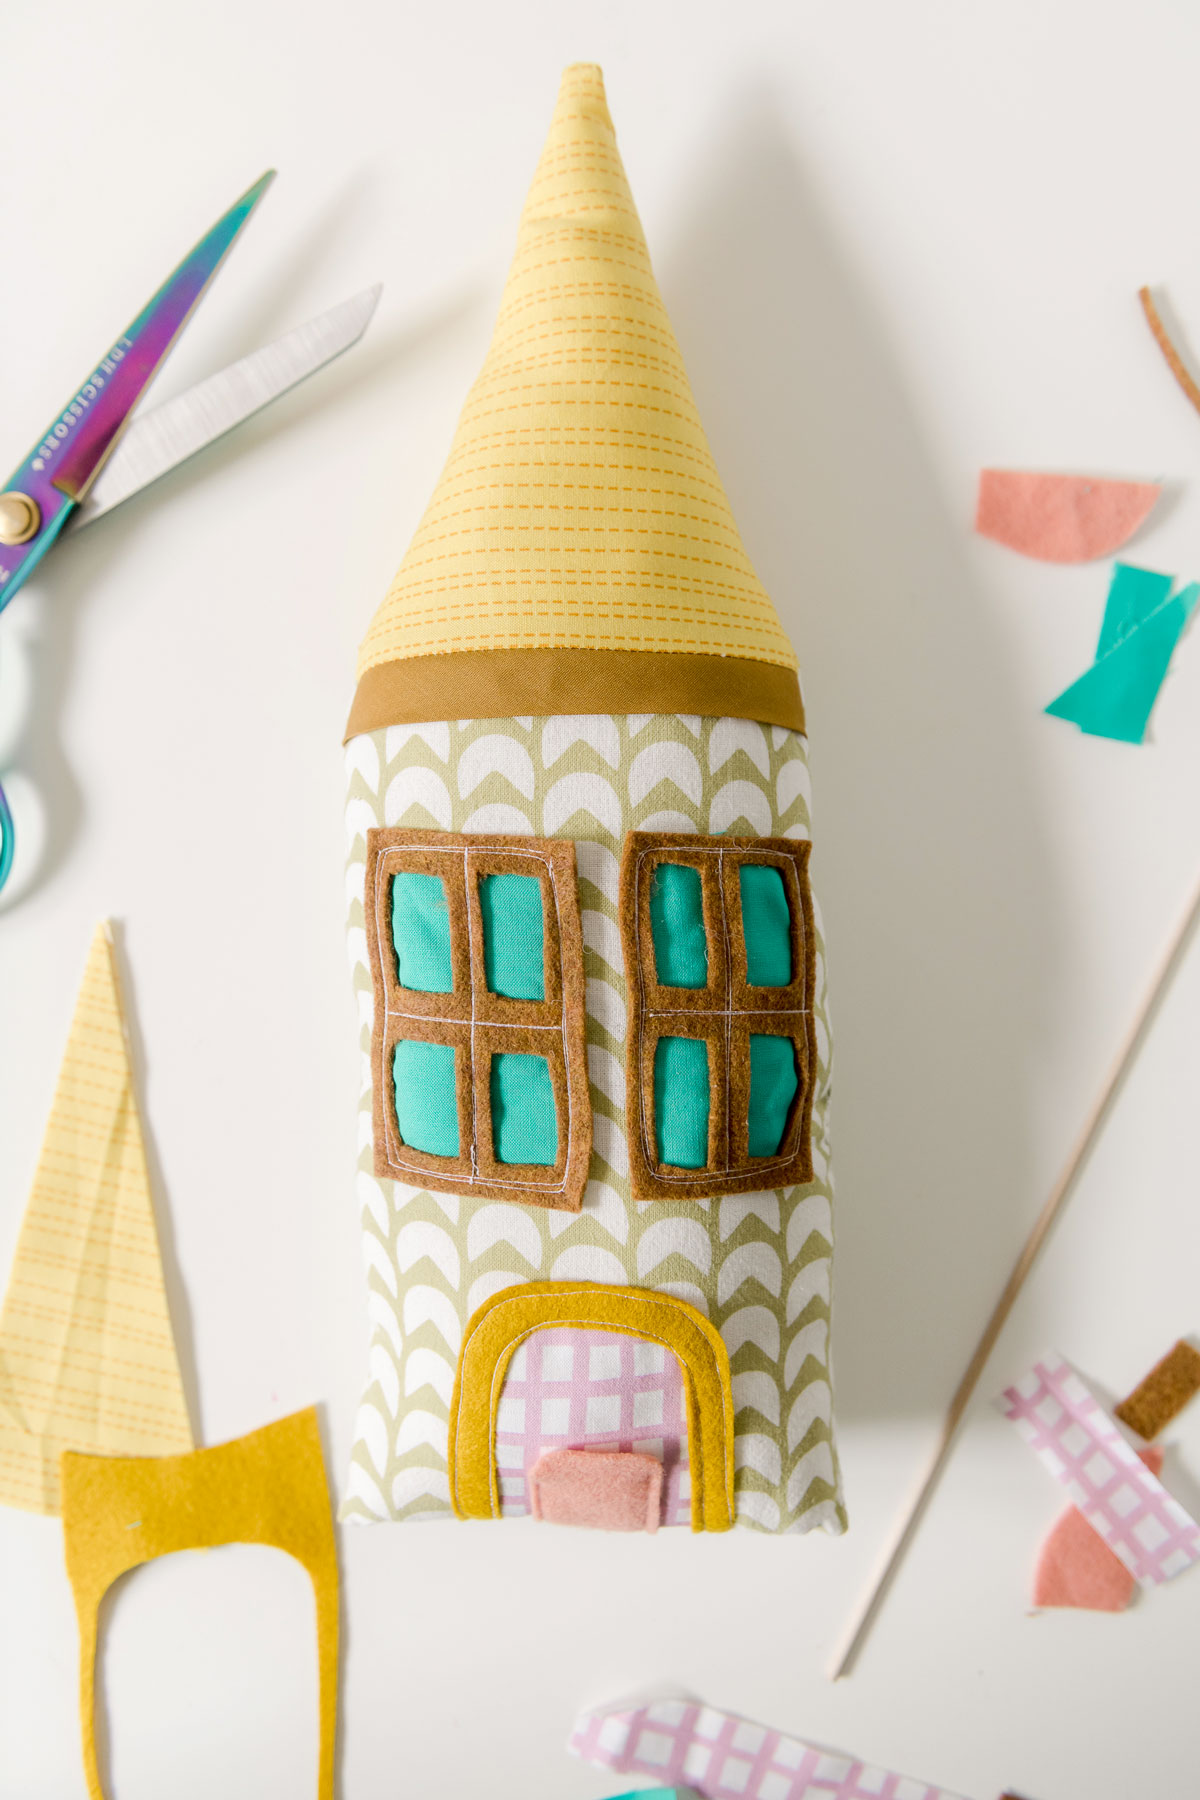
A cute little house throw pillow ORRRRR an adorable tooth fairy pillow for your fave tooth-loosing kiddo 🙂
HAPPY SEWING!