Ice Cream Cone planter DIY
What’s better than plants and ice cream?! Well, when you combine the 2 and make a GIANT ICE CREAM CONE PLANTER OF COURSEEEEE! I had a seen pictures, circulating online, of a super cute ice cream cone planter but were sold out many places AND also seemed a bit too small to my liking – so of course, like every good DIY-er, I said “I CAN MAKE THAT”! And I set out to figure it out and make it —— and I hope that you make one of your own because it is a gosh darn, super fun, adorable project!
MATERIALS:
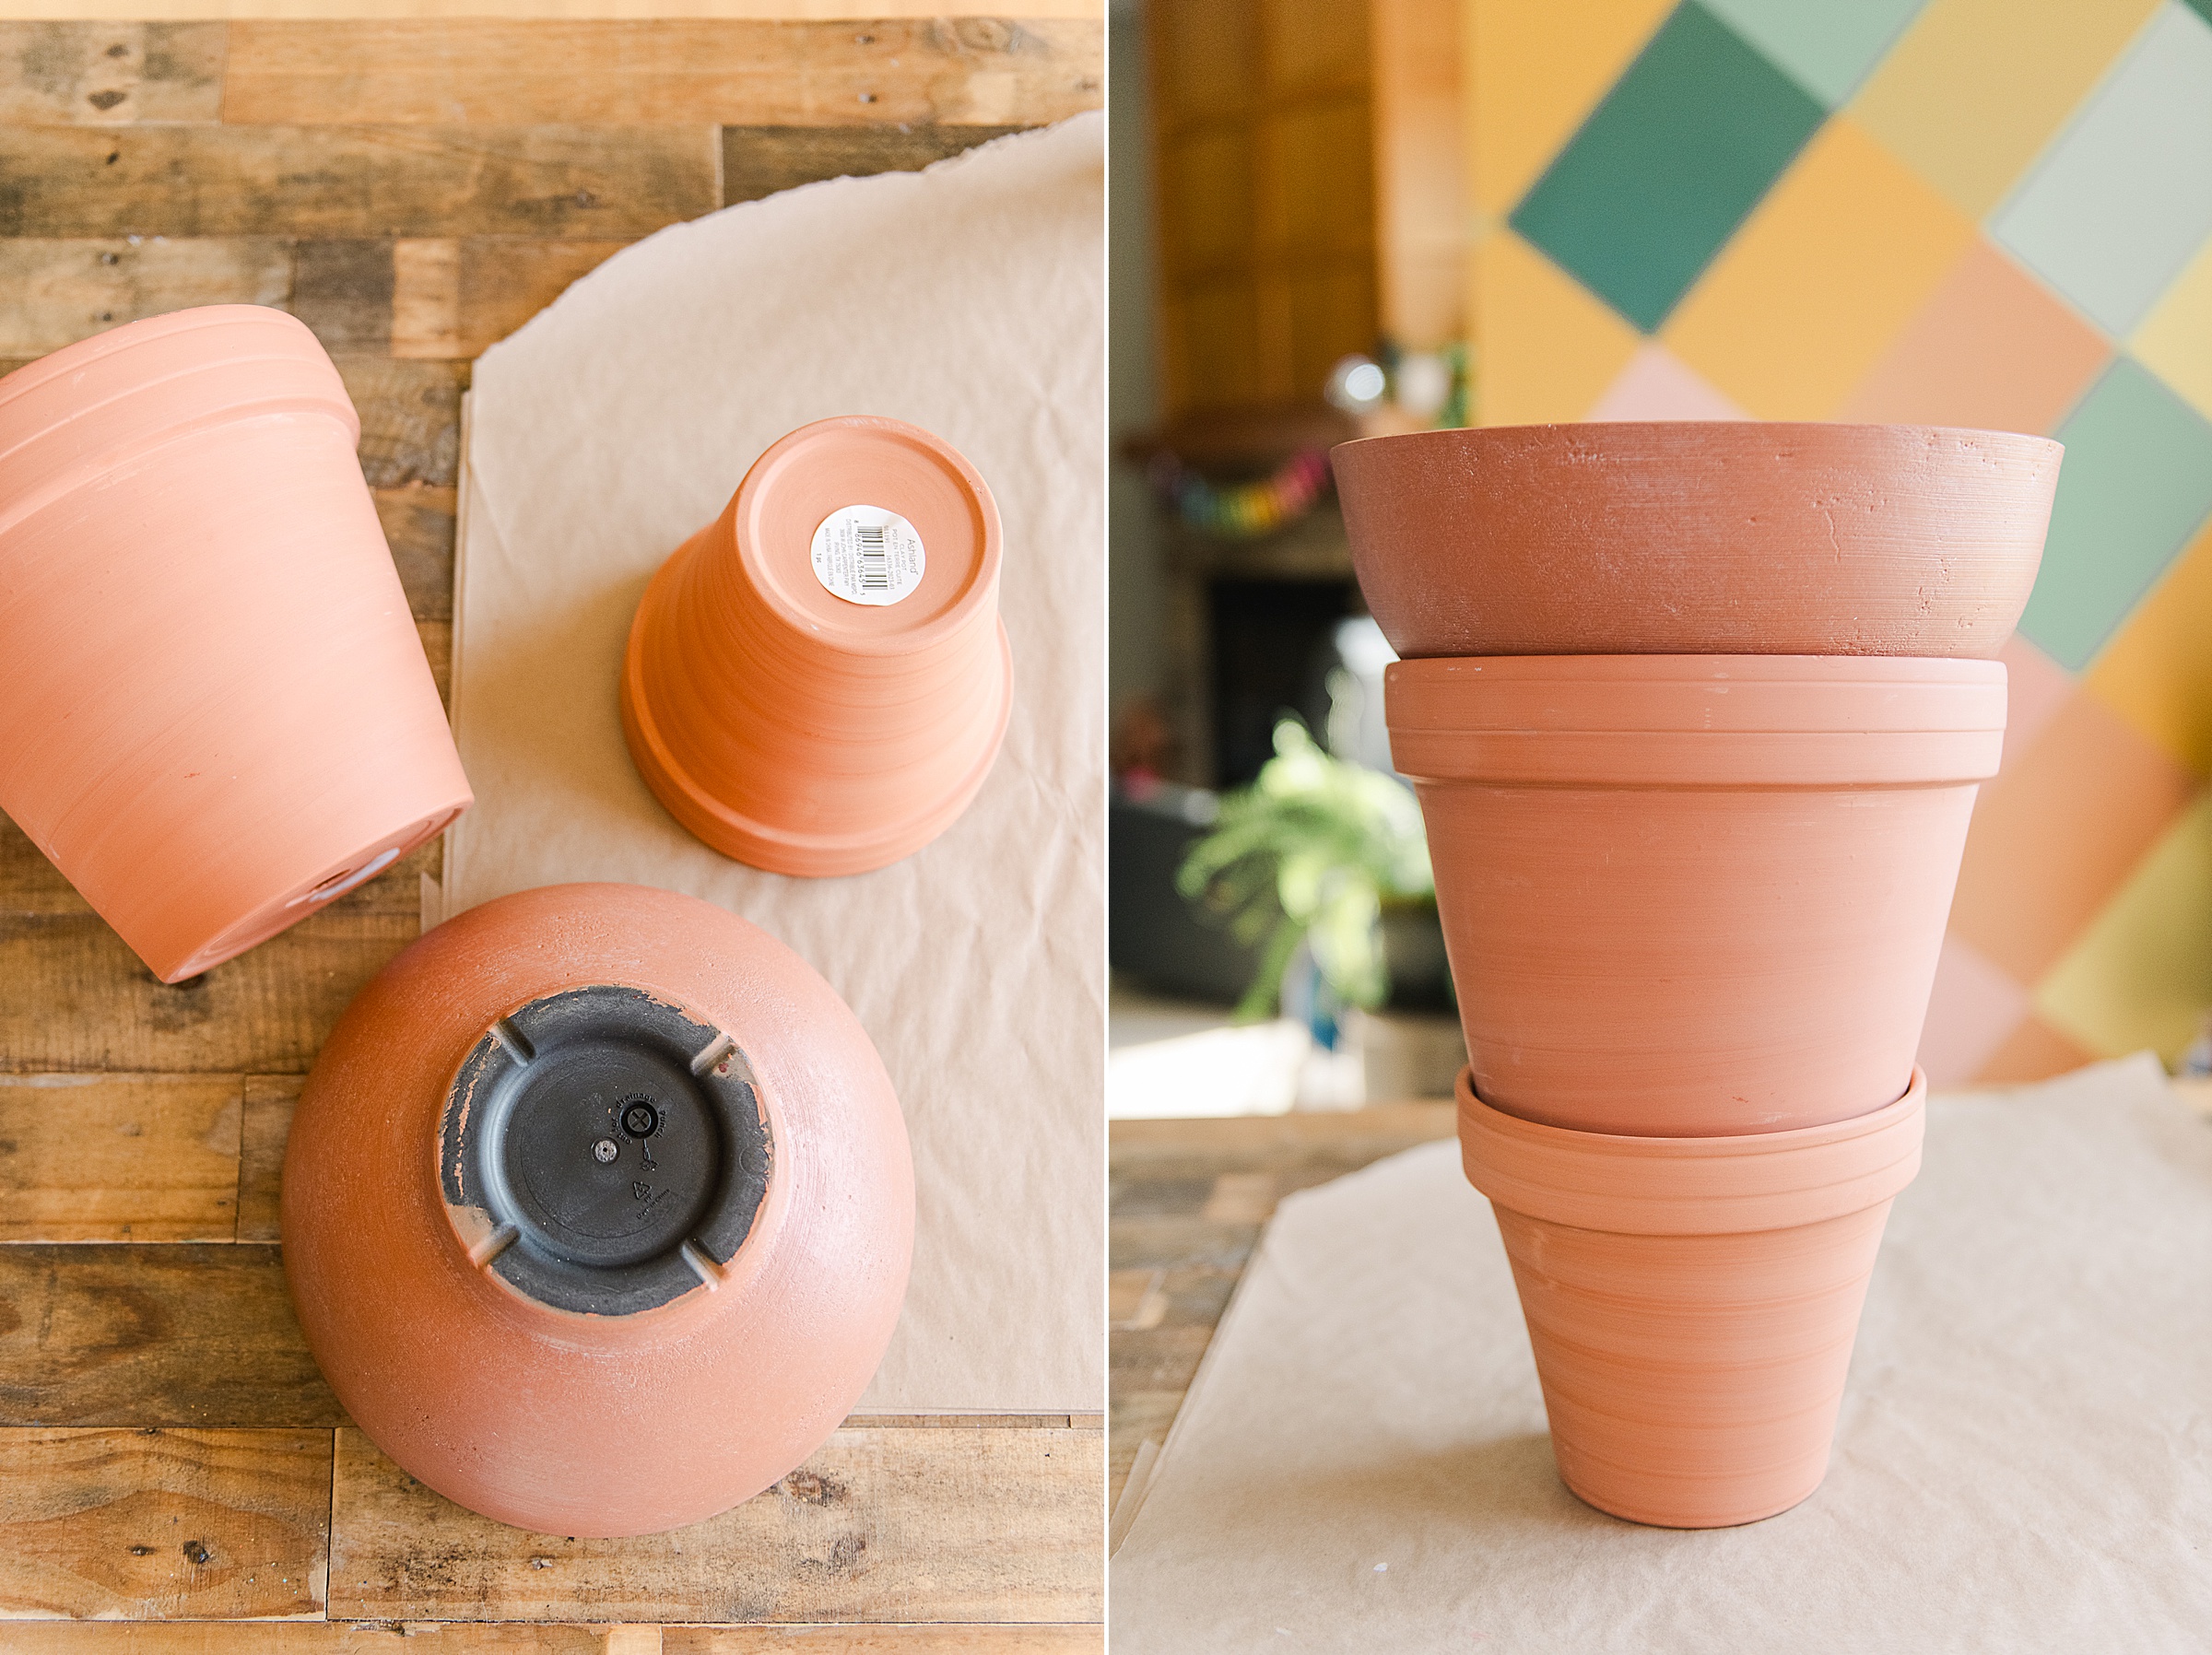
- 2 pots stacked on top of one another for the desired height (mine were terracotta pots from Michaels sized 10” opening and the other was just over 6”)
- another wide and short pot to stack for the top of the cone (this one was about 12” at the opening)
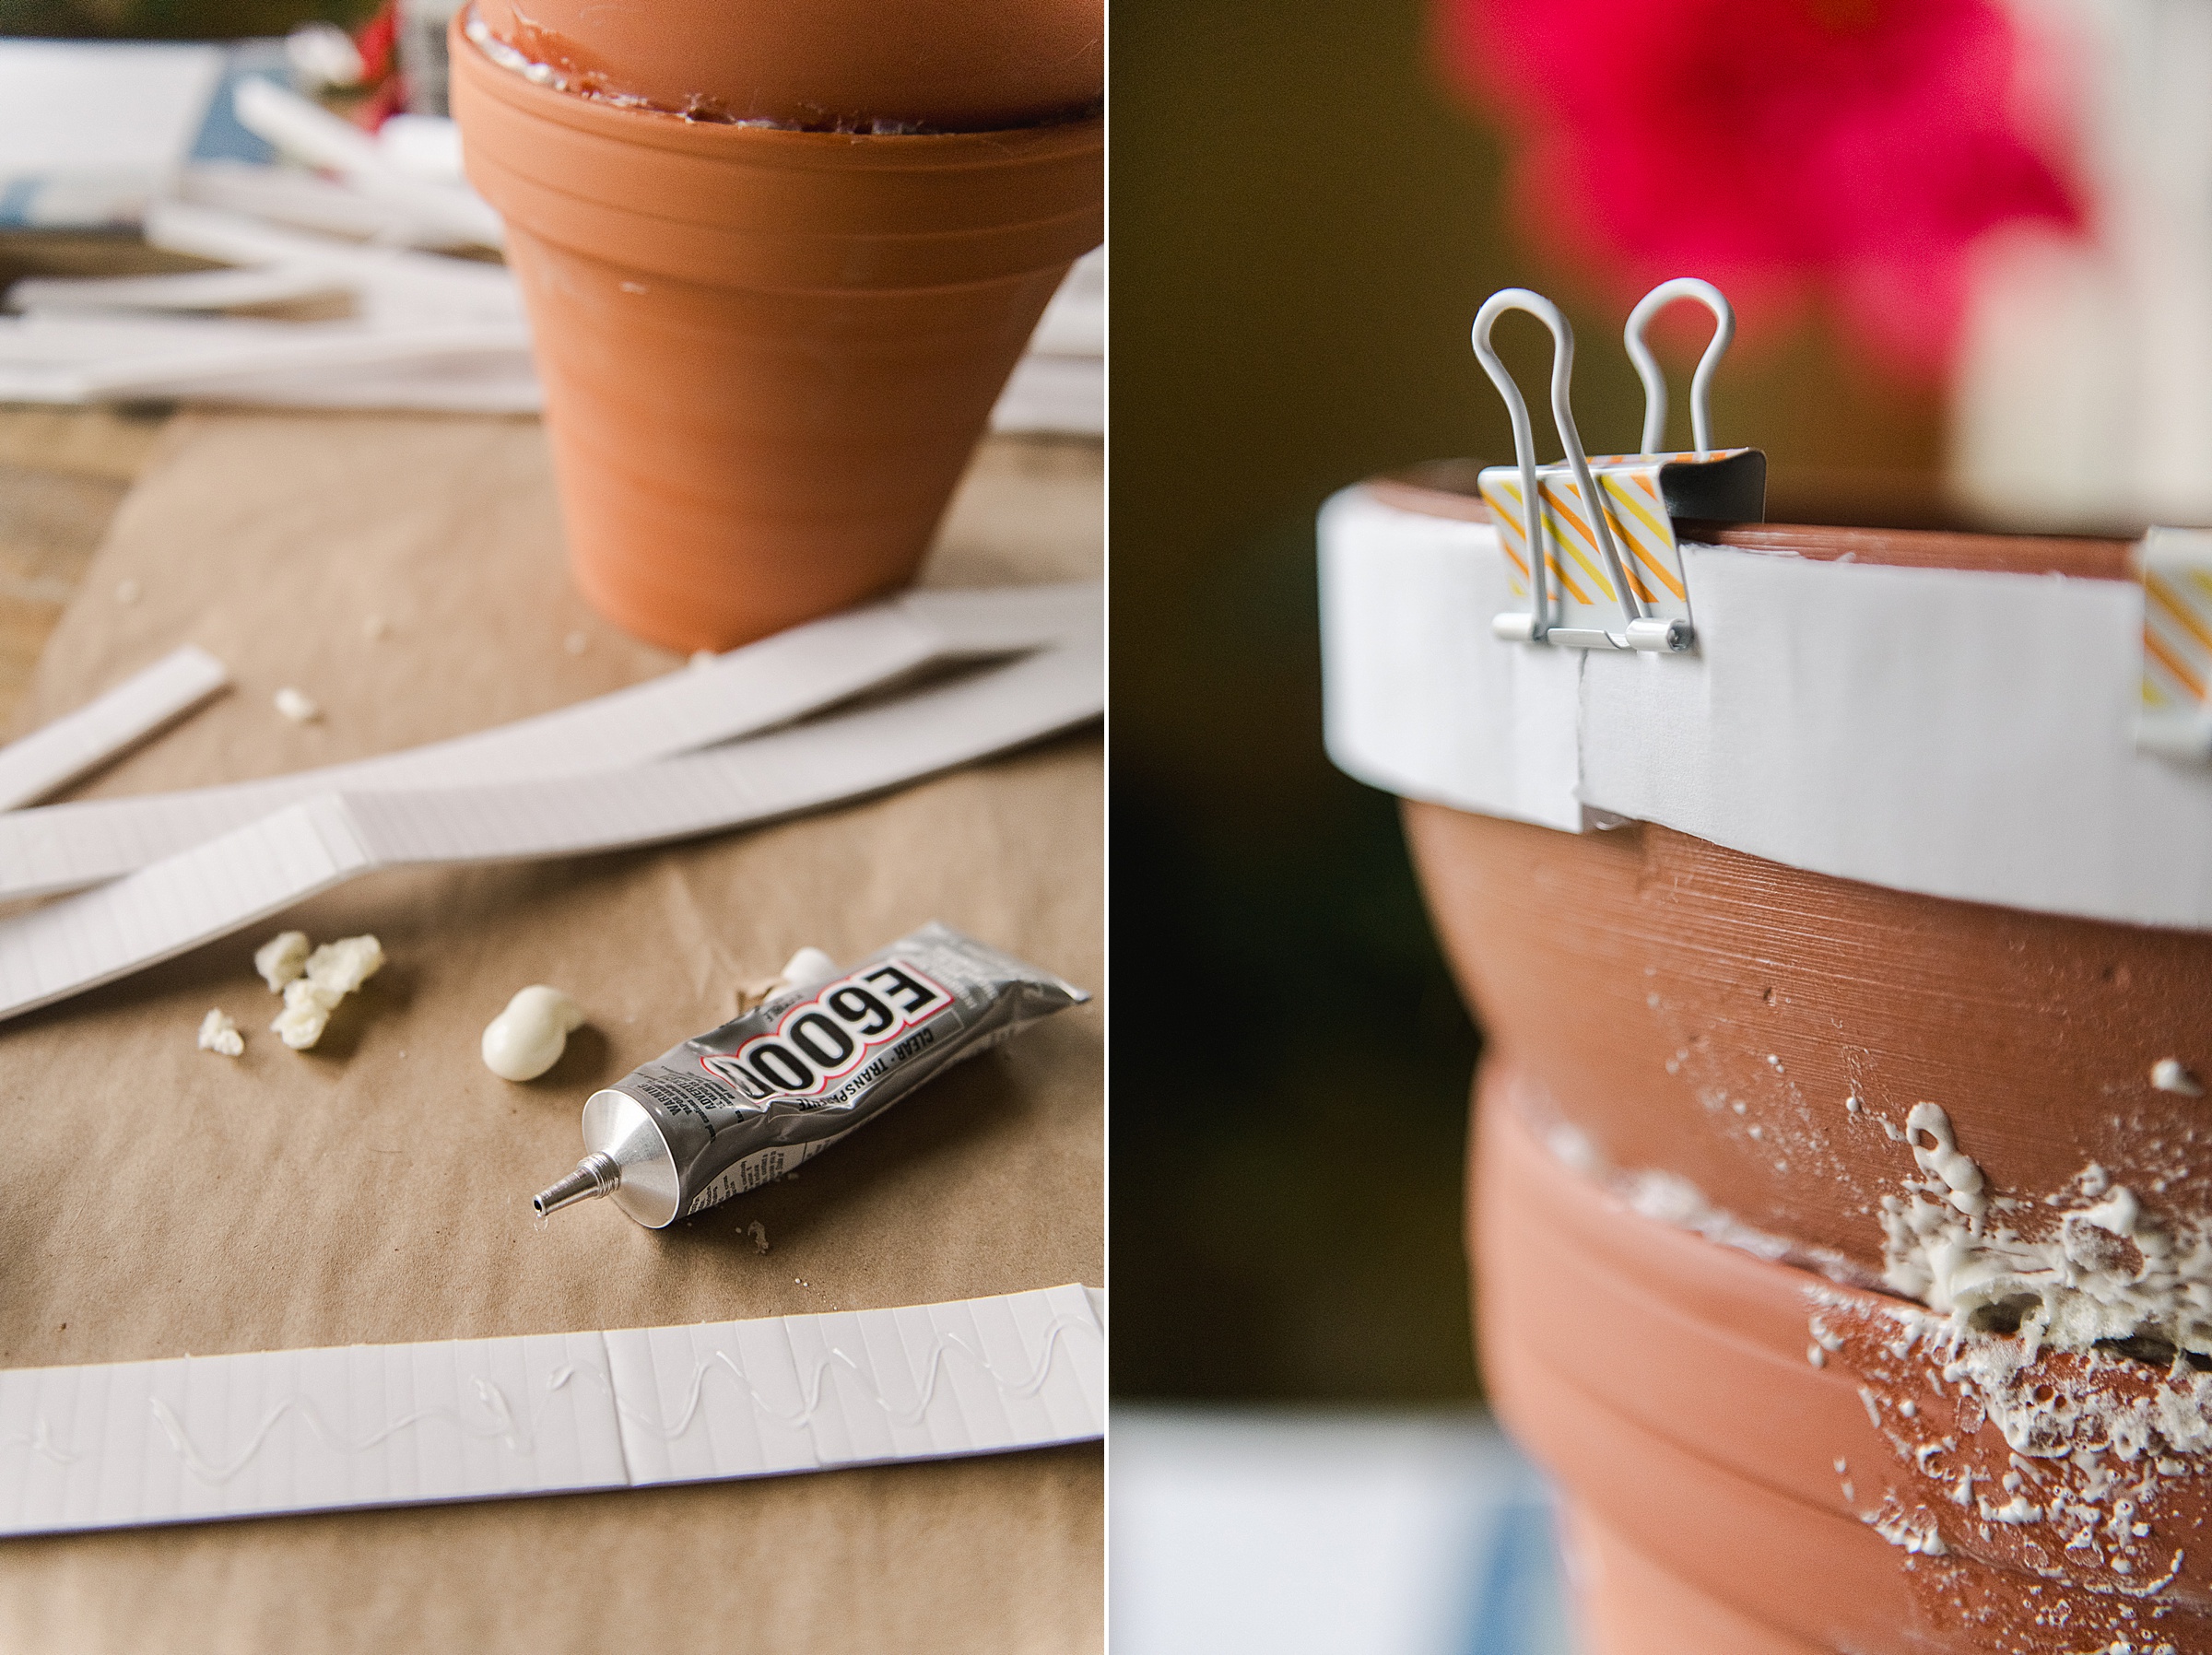
- Some E6000 glue
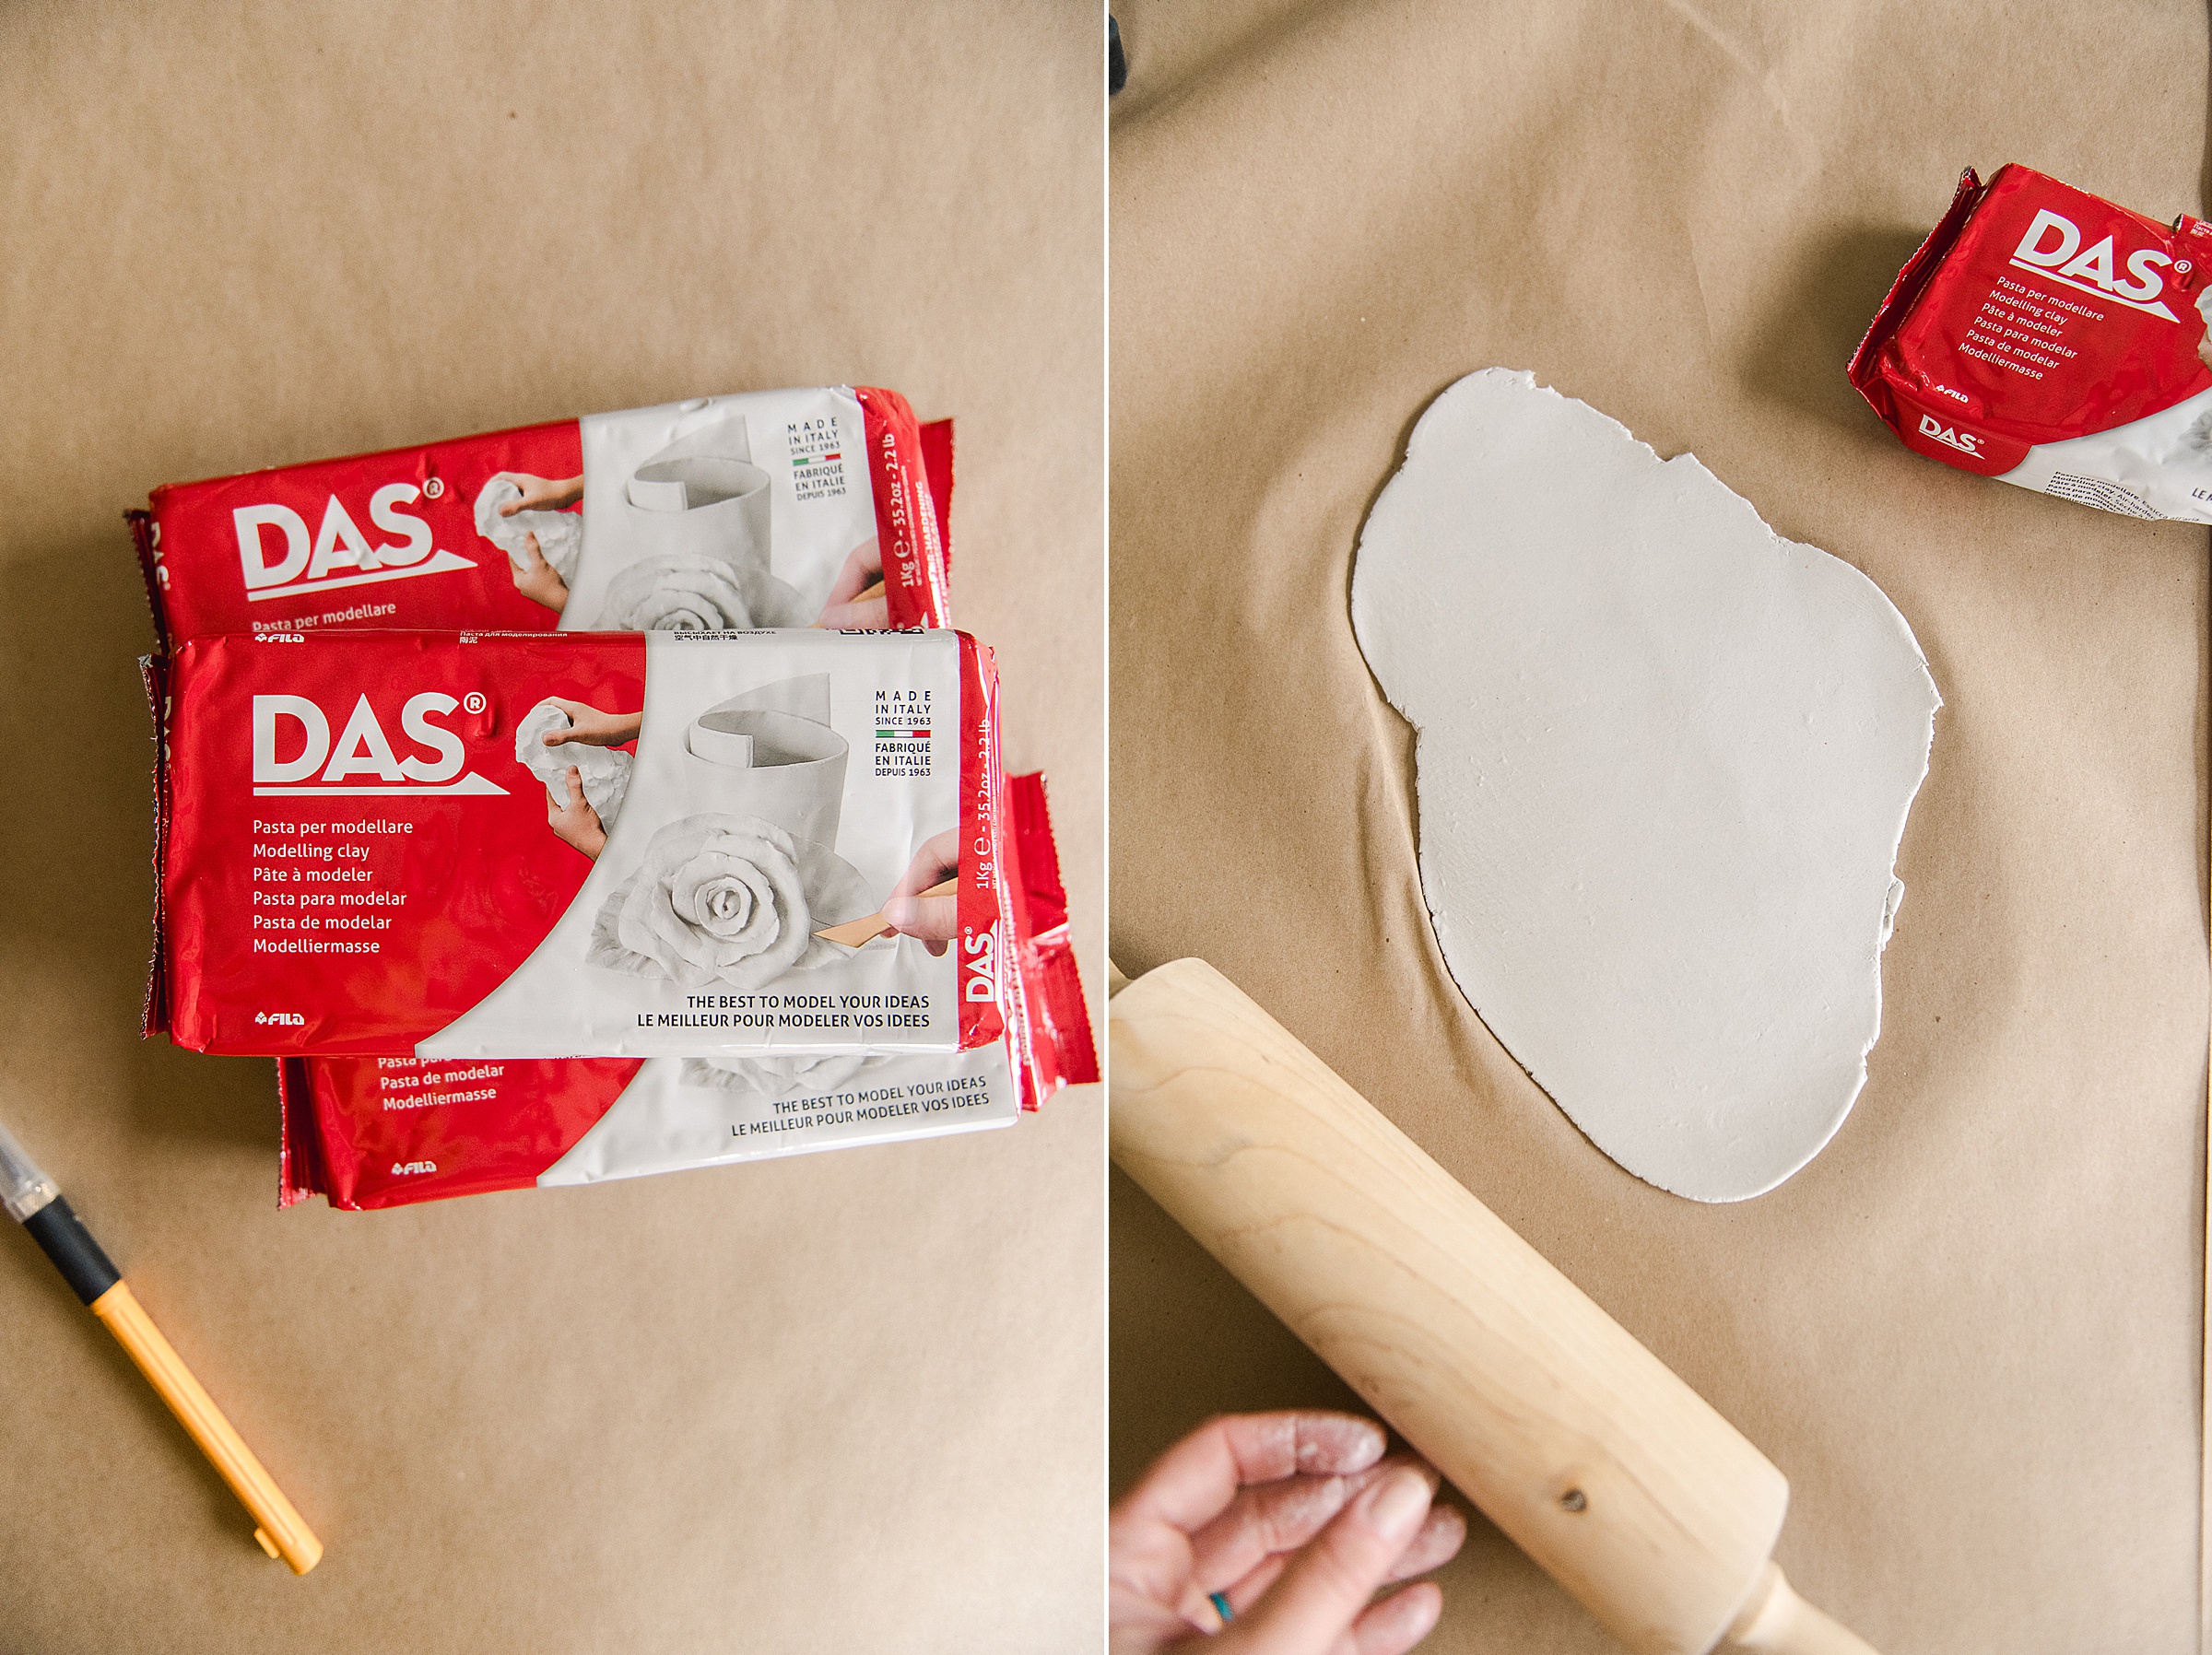
- Airdry clay (I like the DAS brand best for this project….and if you get it at Michaels with a coupon, it’s SO cost effective comparatively)
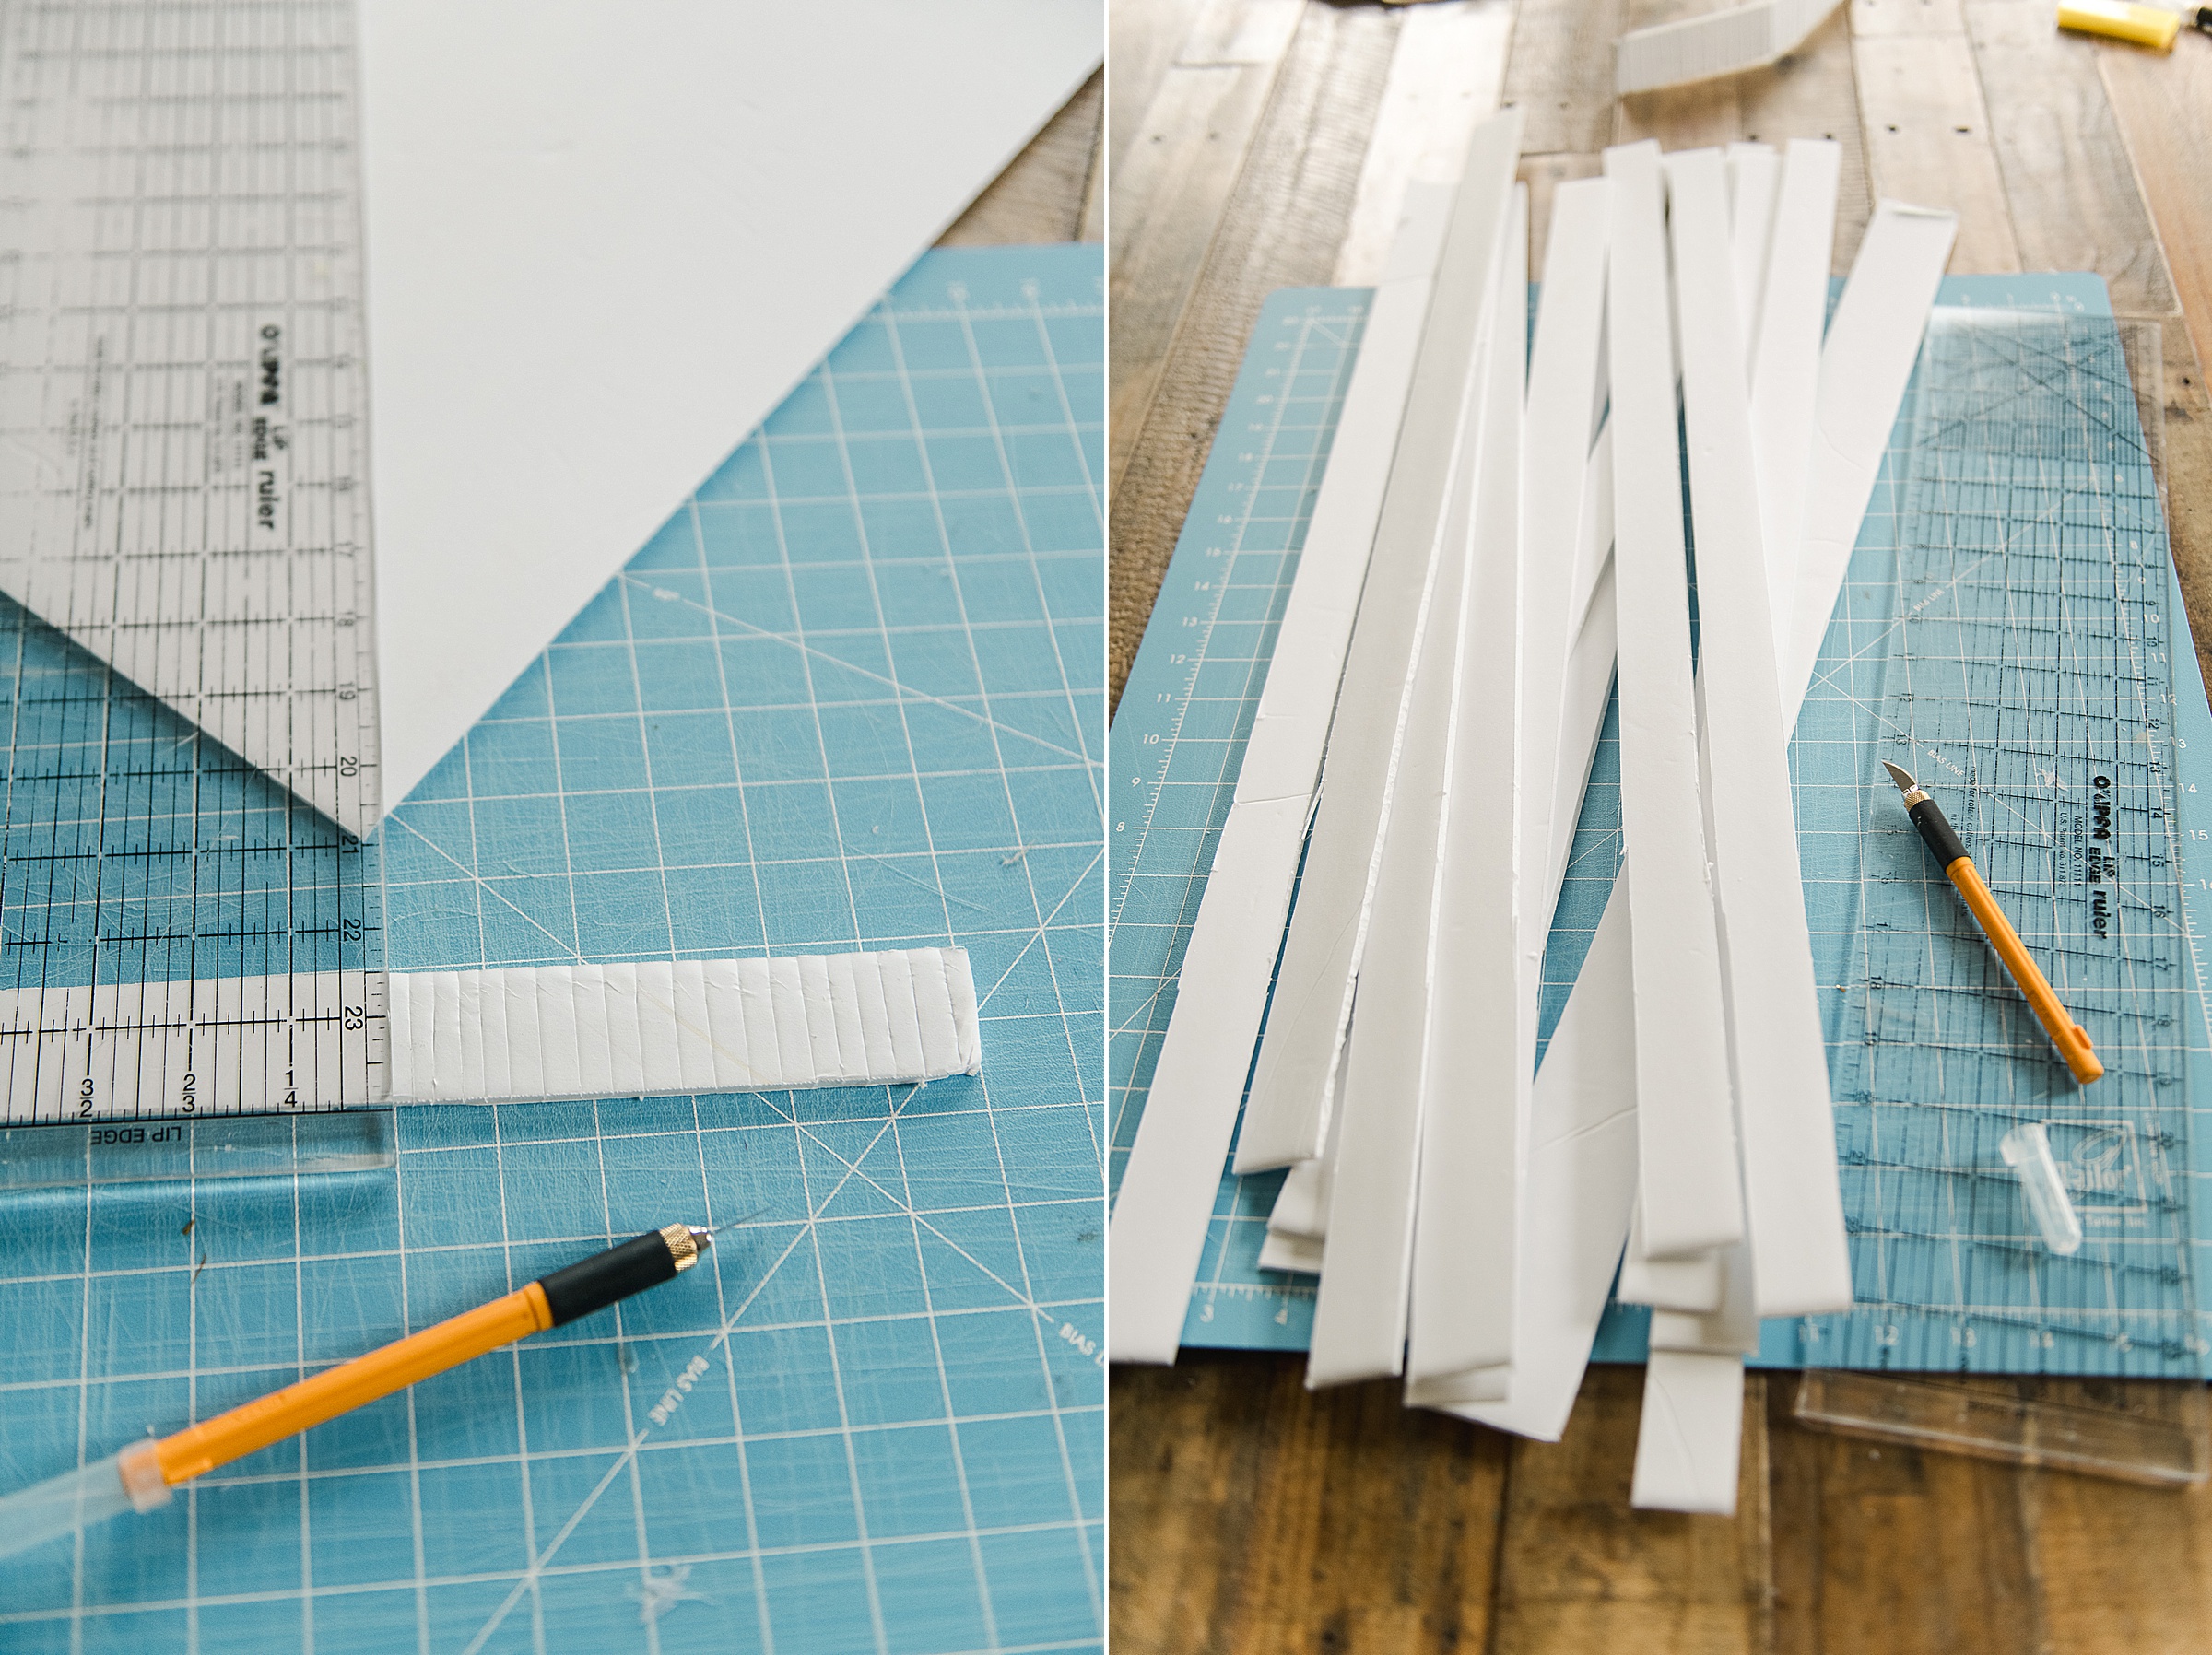
- A straight edge and cutting knife
- Some cardboard or foam core board
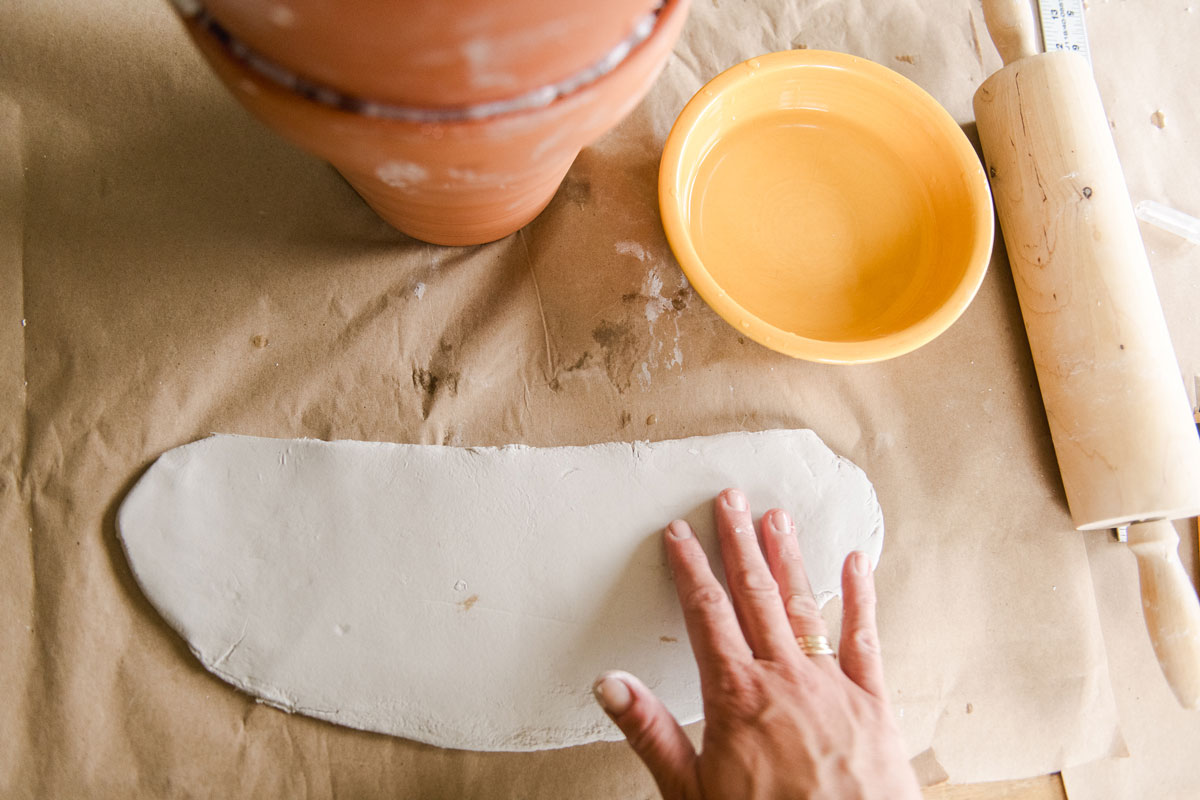
- A bowl of water
- A roller or rolling pin
- Something to cover your work surface 🙂
INSTRUCTIONS:
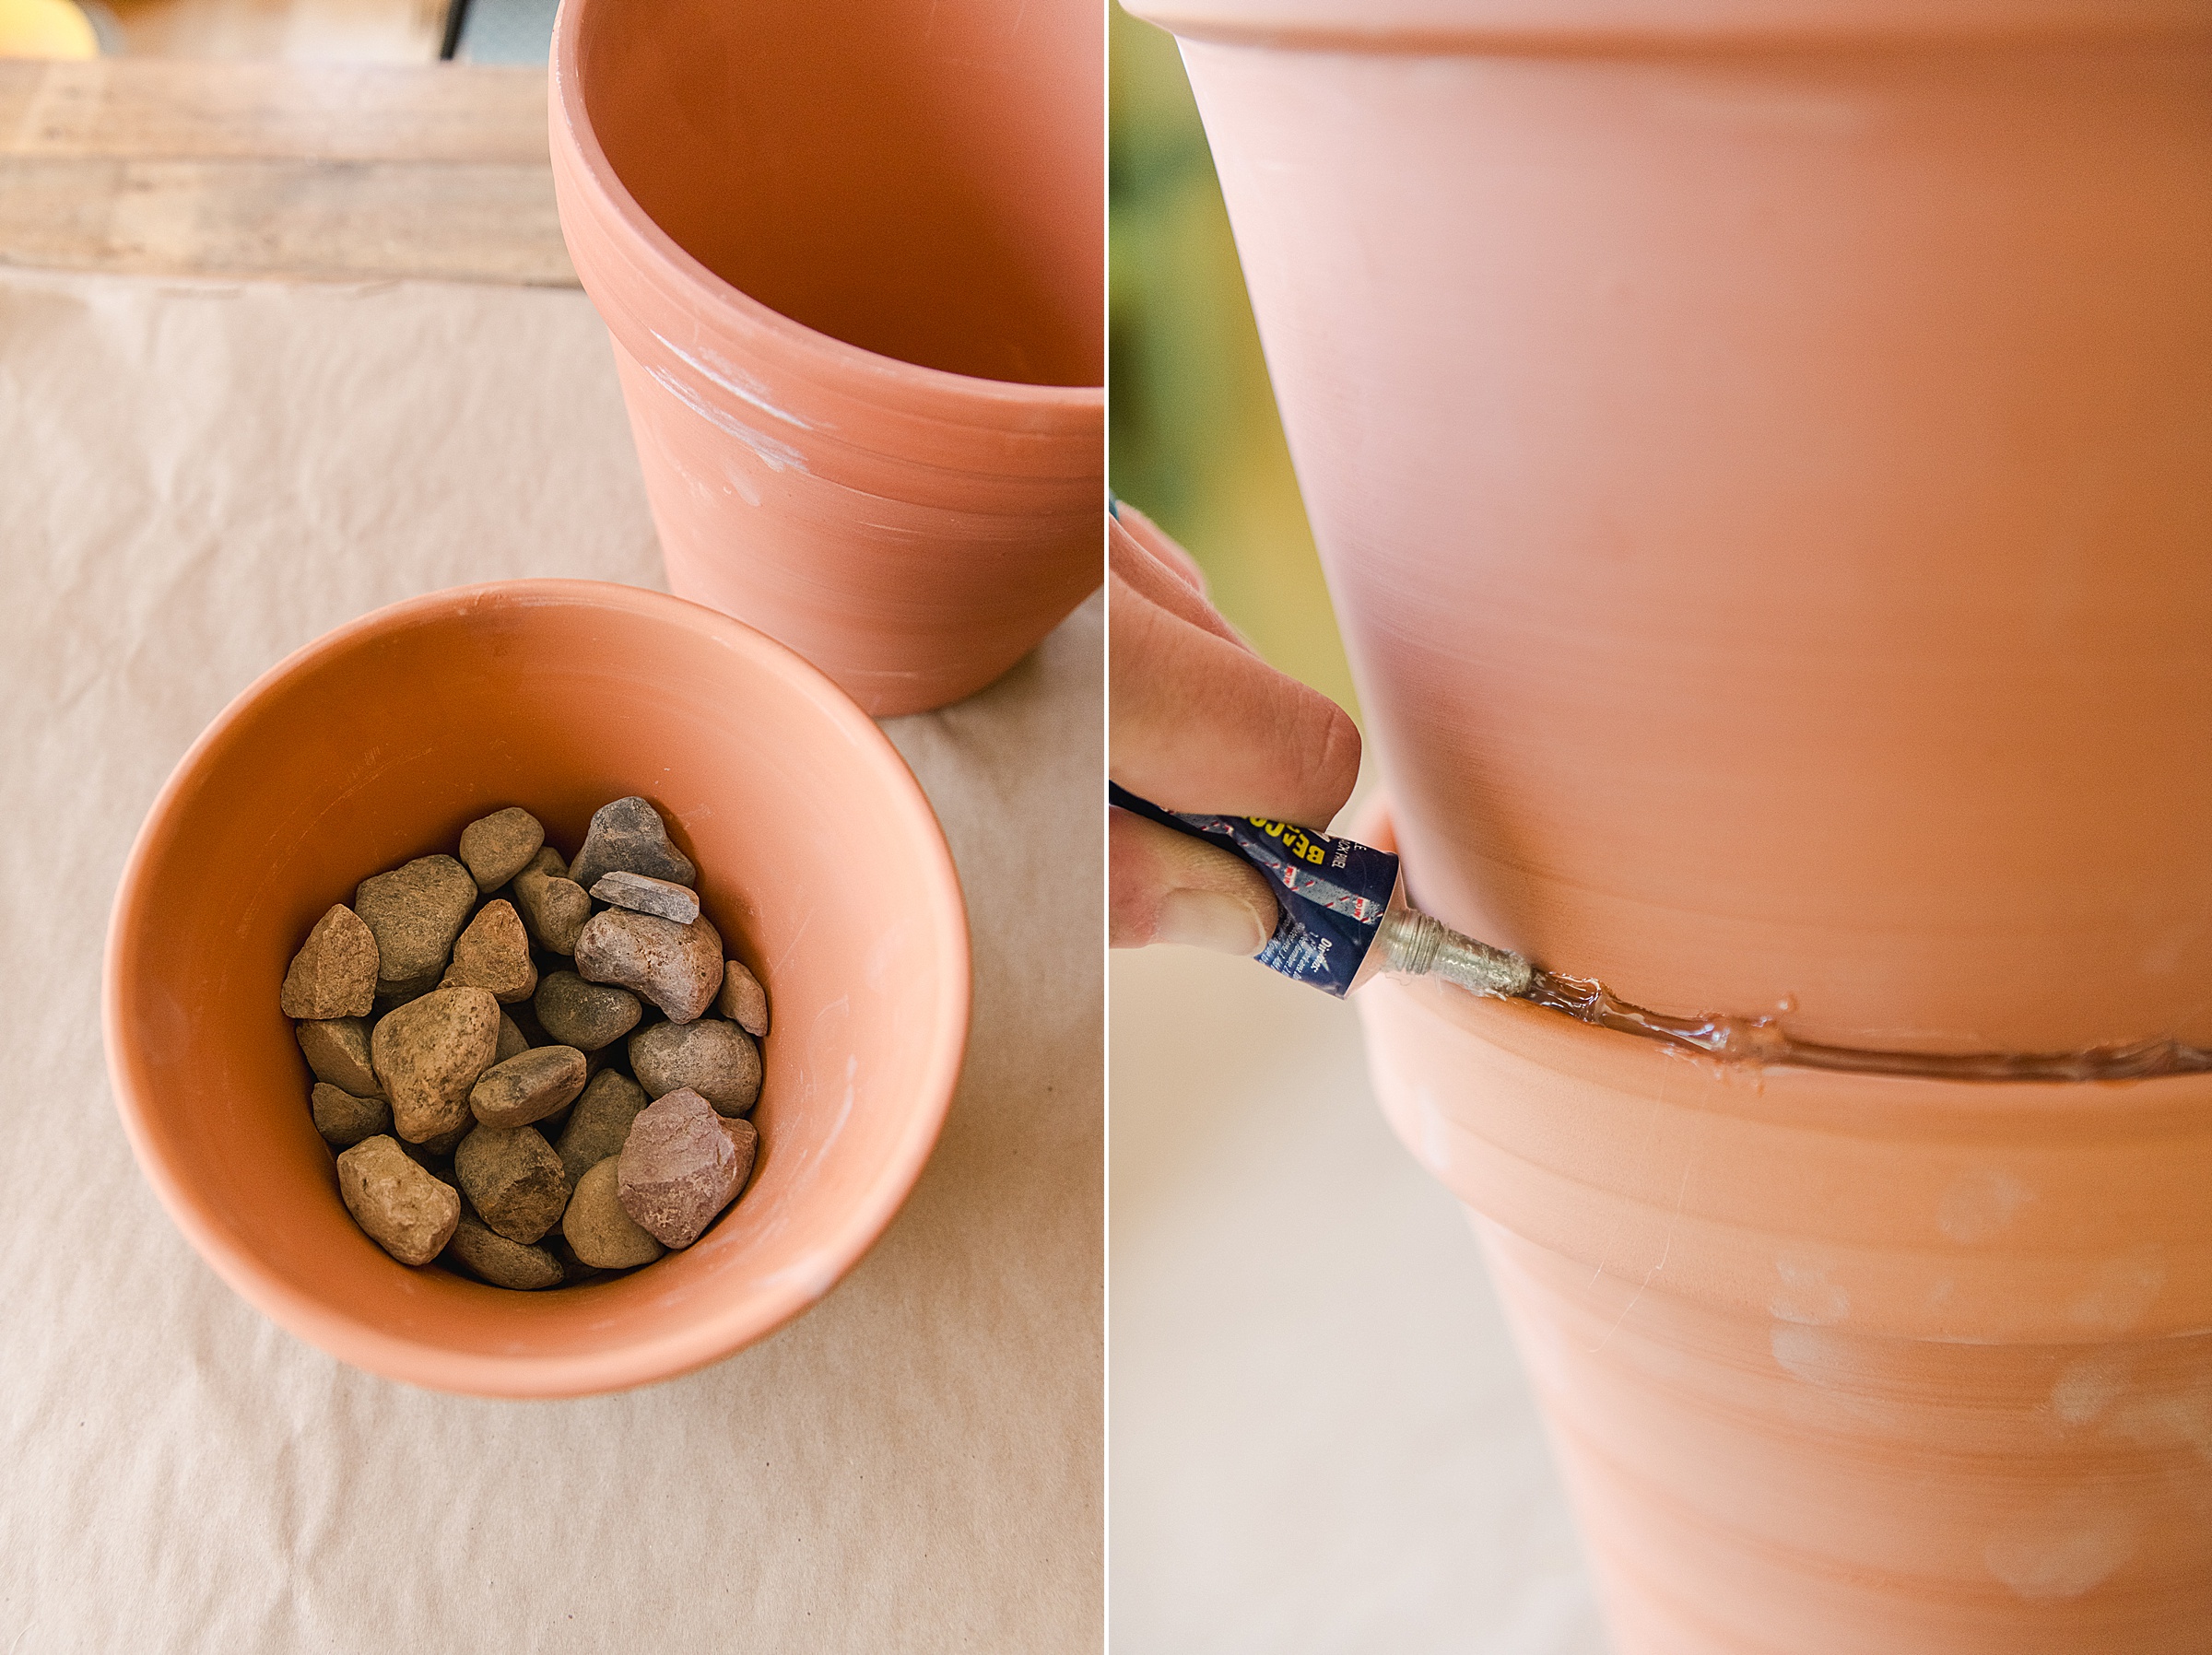
1. Fill the bottom cone with a handful of rocks or any material to weigh the planter down (it tends to be too top heavy if you don’t counterbalance the weight of the plant that you will be placing in the top even if just a little bit).
2. Then with your E6000 glue (or your industrial strength adhesive of choice) you will glue your pots together starting with the smallest post, then the largest then the widest one on top. Set aside to dry per your instructions on your adhesive bottle (mine completely cured in 24 hours, but was VERY stable in about 2).
3. Grab your cardboard or foam core board and cut out a few strips of the material. I cut one strip about 1 1/2” thick (for along the top of the cone) and another about 1/2” thick for just under the “ridge” of the curve on the top. I needed 2 strips per area to go around the circumference of the cone.
I then added little slits in each of the strips about 1/4” apart from one another (this makes it easer to bend the foam core or cardboard – be sure not to cut all the way through the material with the slits, but just the top layer)
4. Glue your strips to your planters – I used some binder clips to make sure they stayed on as they dried.
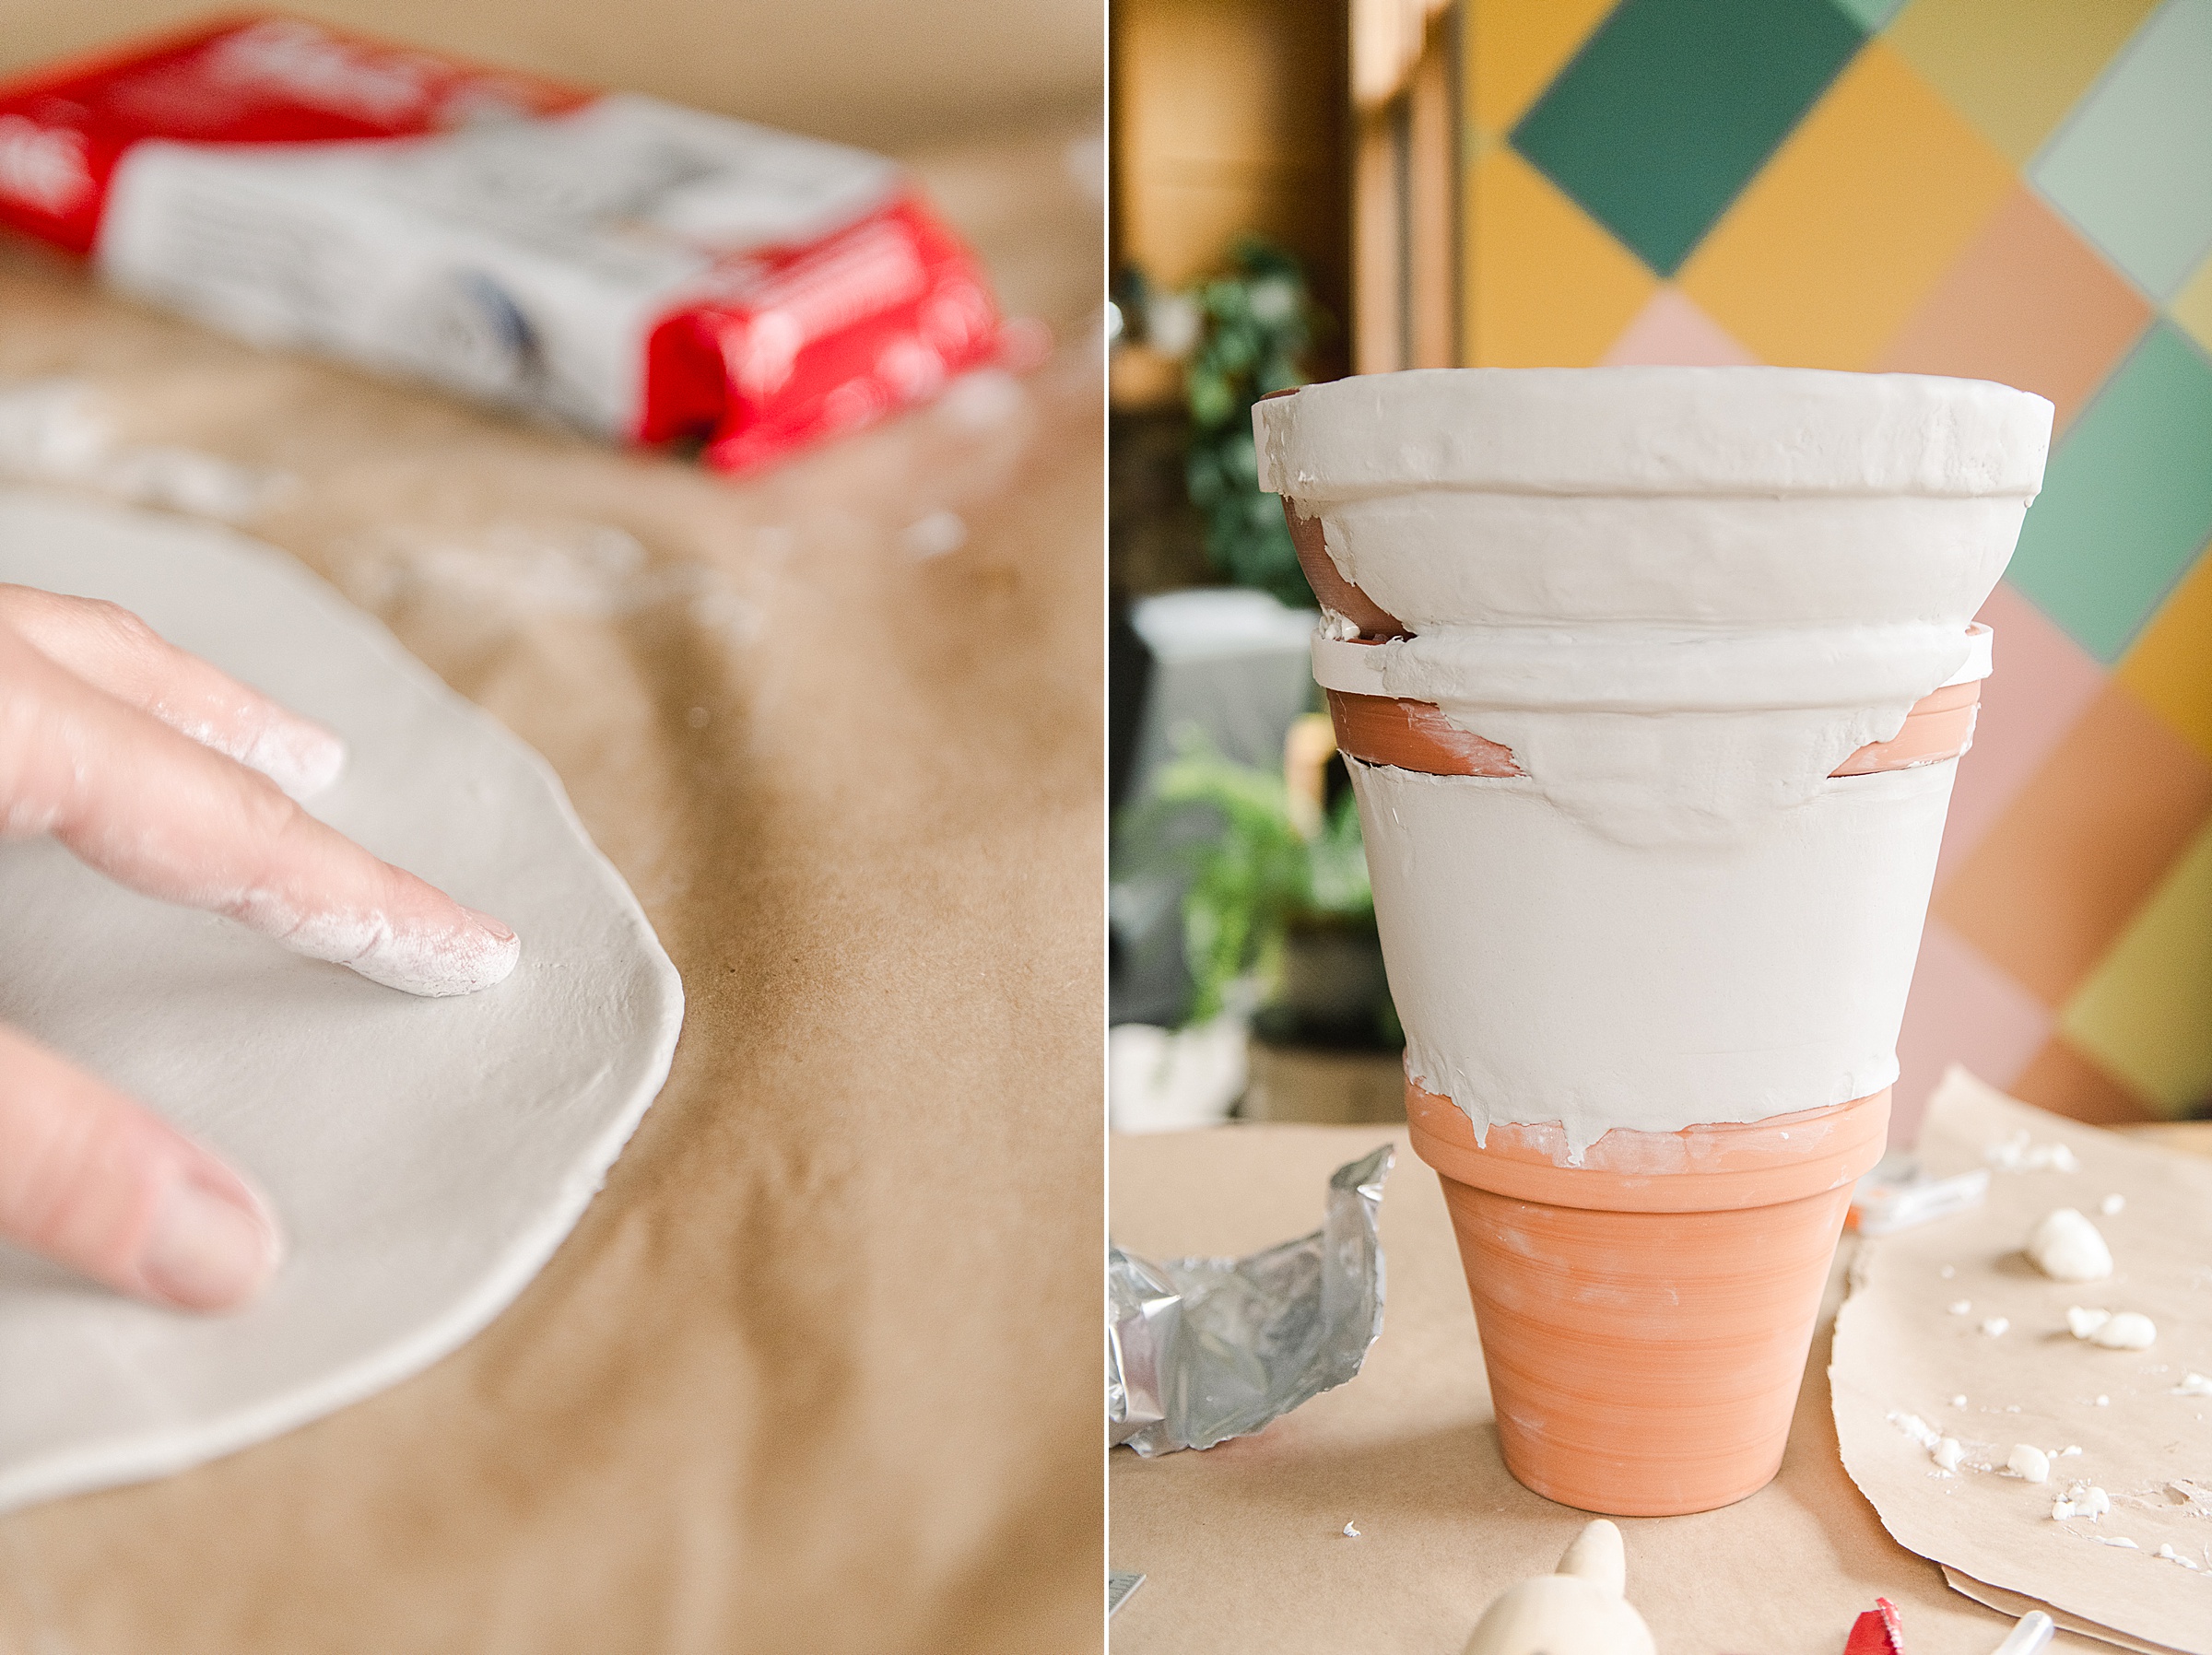
5. Now it’s time for the CLAYYYYY! I *LOVE* this DAS brand clay because it’s unlike the other “kid-like” air dry clays that are more spongy and light in texture – this clay feels more like a lighter weight porcelain body clay (although not the same, but closer to kiln clay than any other air dry clay I’ve found).
Cover your work surface, grab your roller and a bowl of water and get to work covering your planters to make your cone start coming to life! 🙂
Here are some tips on how I used the clay:
- Work in small batches – I used about 1/3 of each brick of clay at a time to roll out
- Cover the remaining or left-over clay back into the wrapping and seal it as you go so that it doesn’t begin to dry out (although it doesn’t dry too terribly fast)
- Flatten the chunk of clay with your hands first before you start to roll out so that it’s easer to get an even slab
- Once you’ve rolled out your clay slab, wet the back of it before sticking it to the planter – this acts as a sort of “glue”
- Start at the top often planter and work your way down – join seams using your finger and some water (but not too much water)
- I also had my sharp knife on hand to scrape off any excess clay as I was smoothing things out
- Go SLOW when smoothing and take your time. You want to join the seams well and evenly and make sure that everything sticks! 🙂
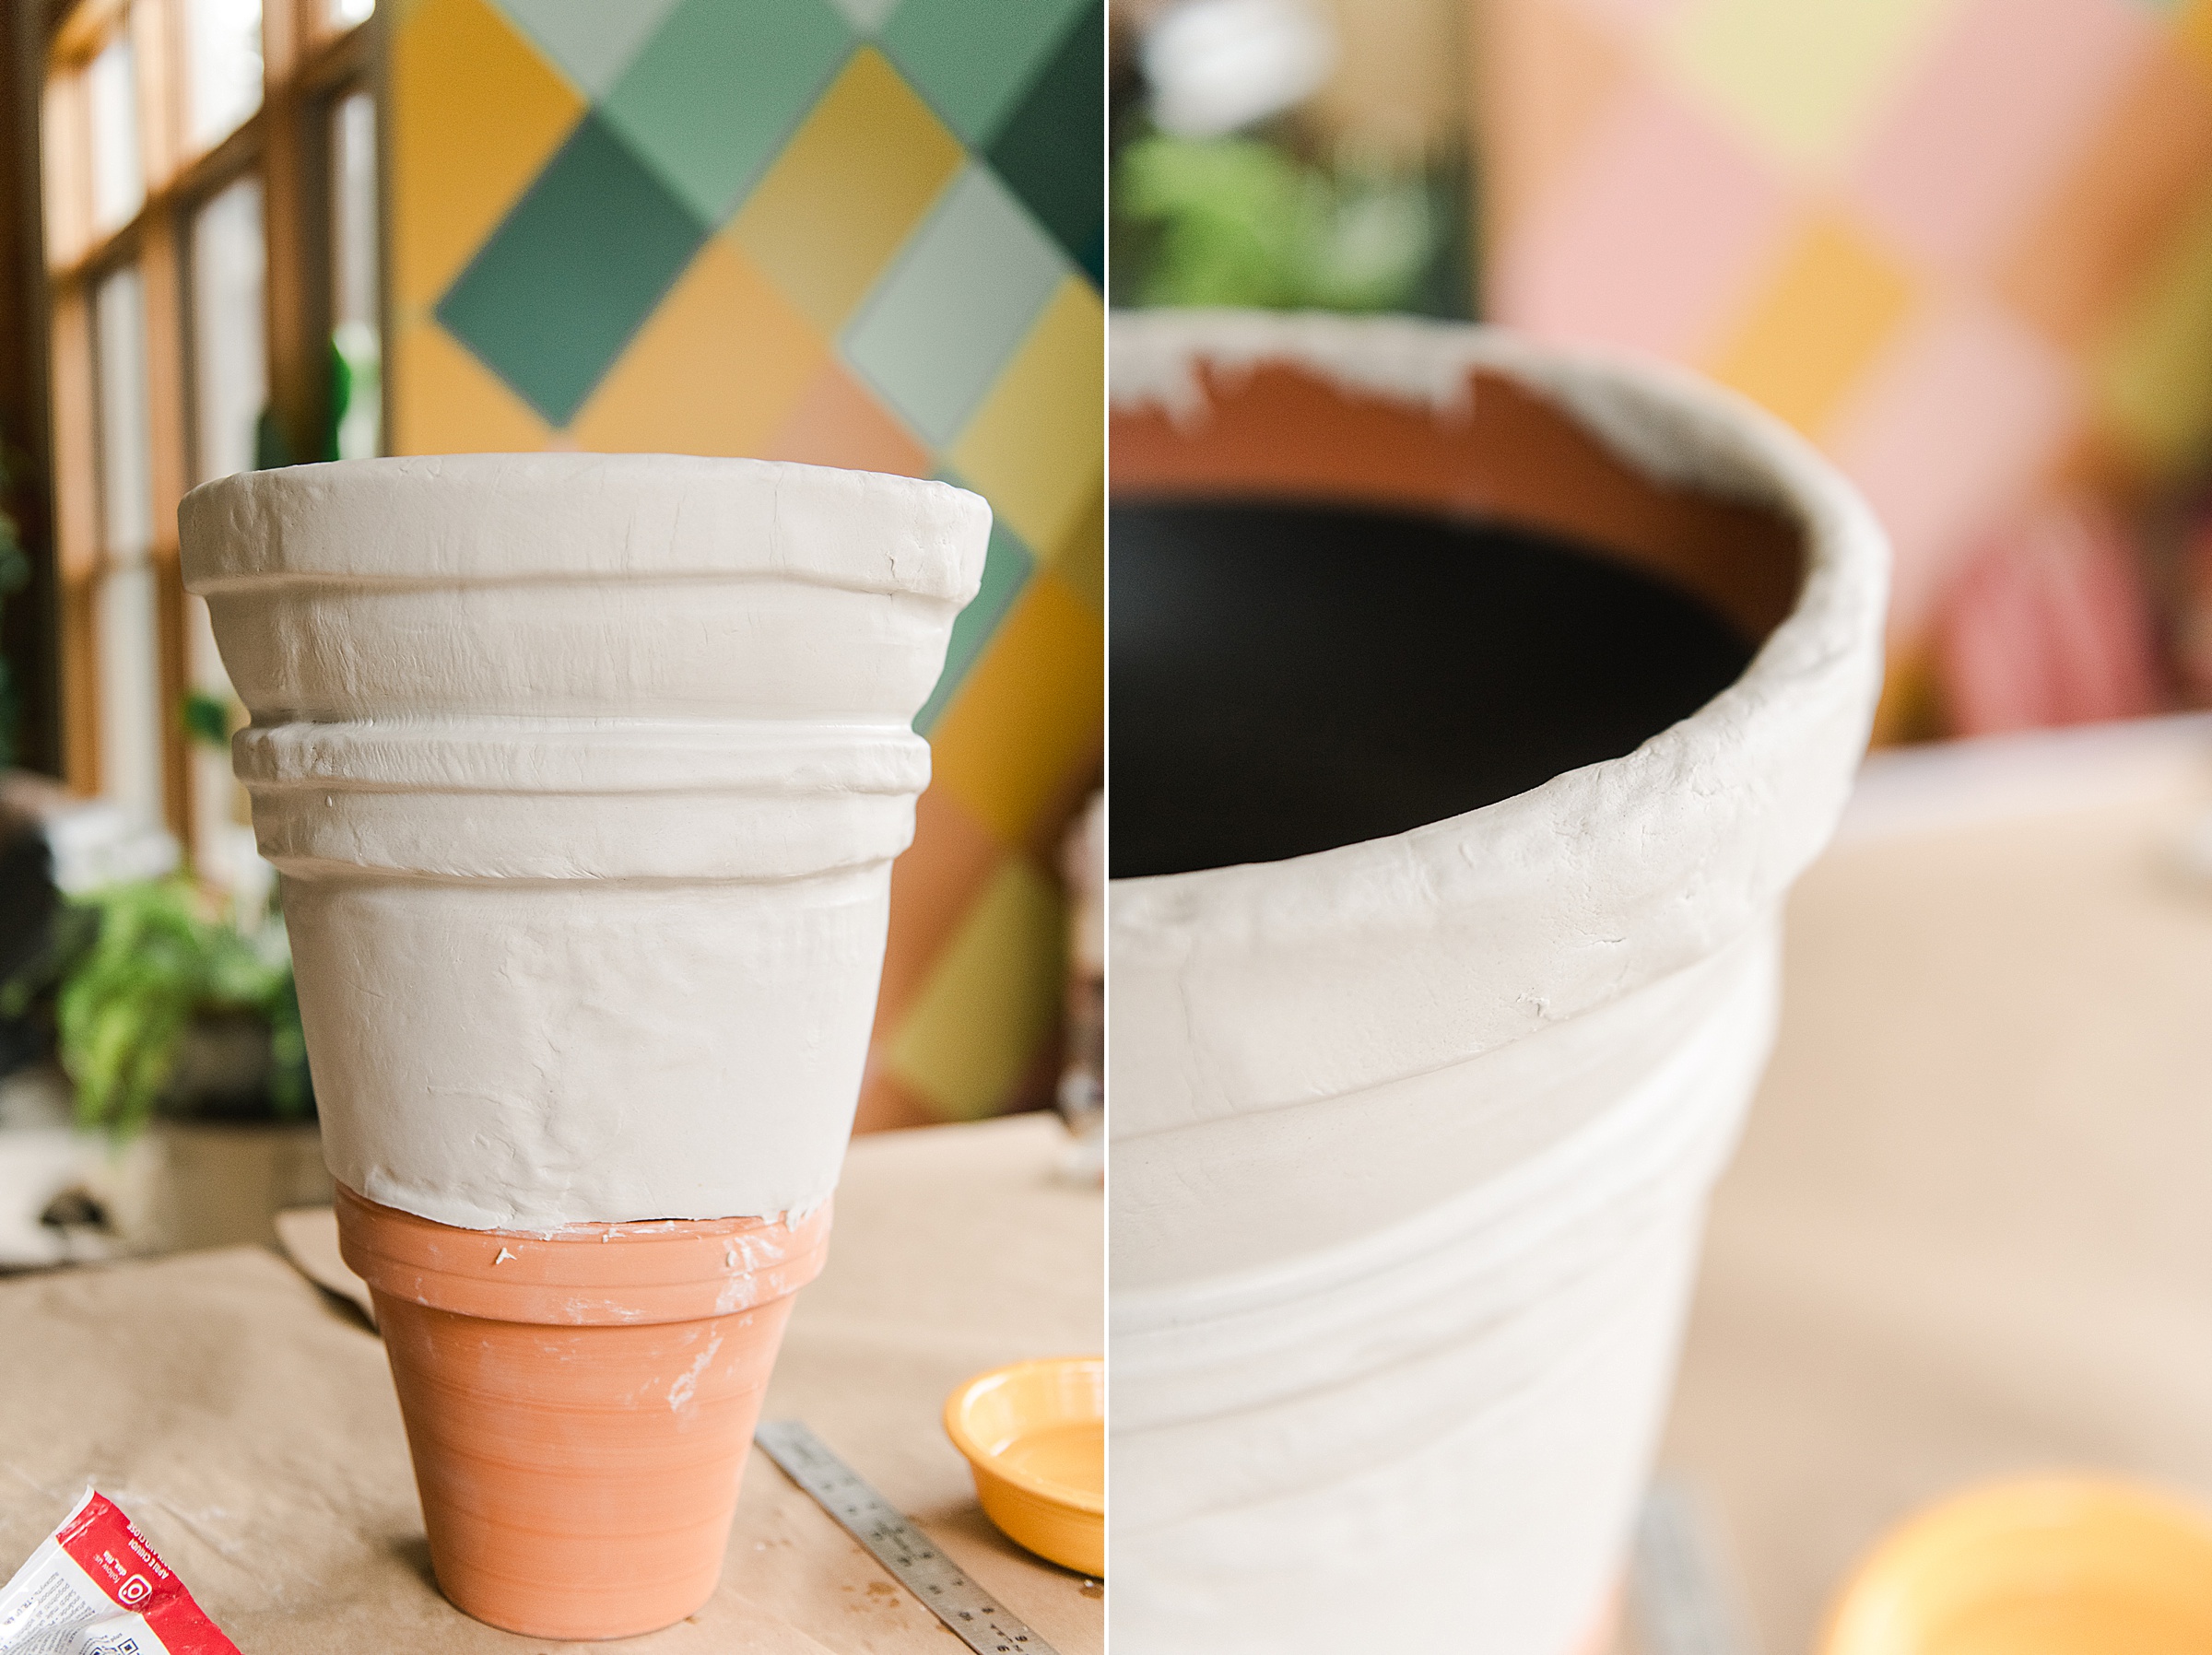
Also, note where the clay can be SUPER thin and where you need thicker pieces to be able to smooth everything out well for the cone shape.
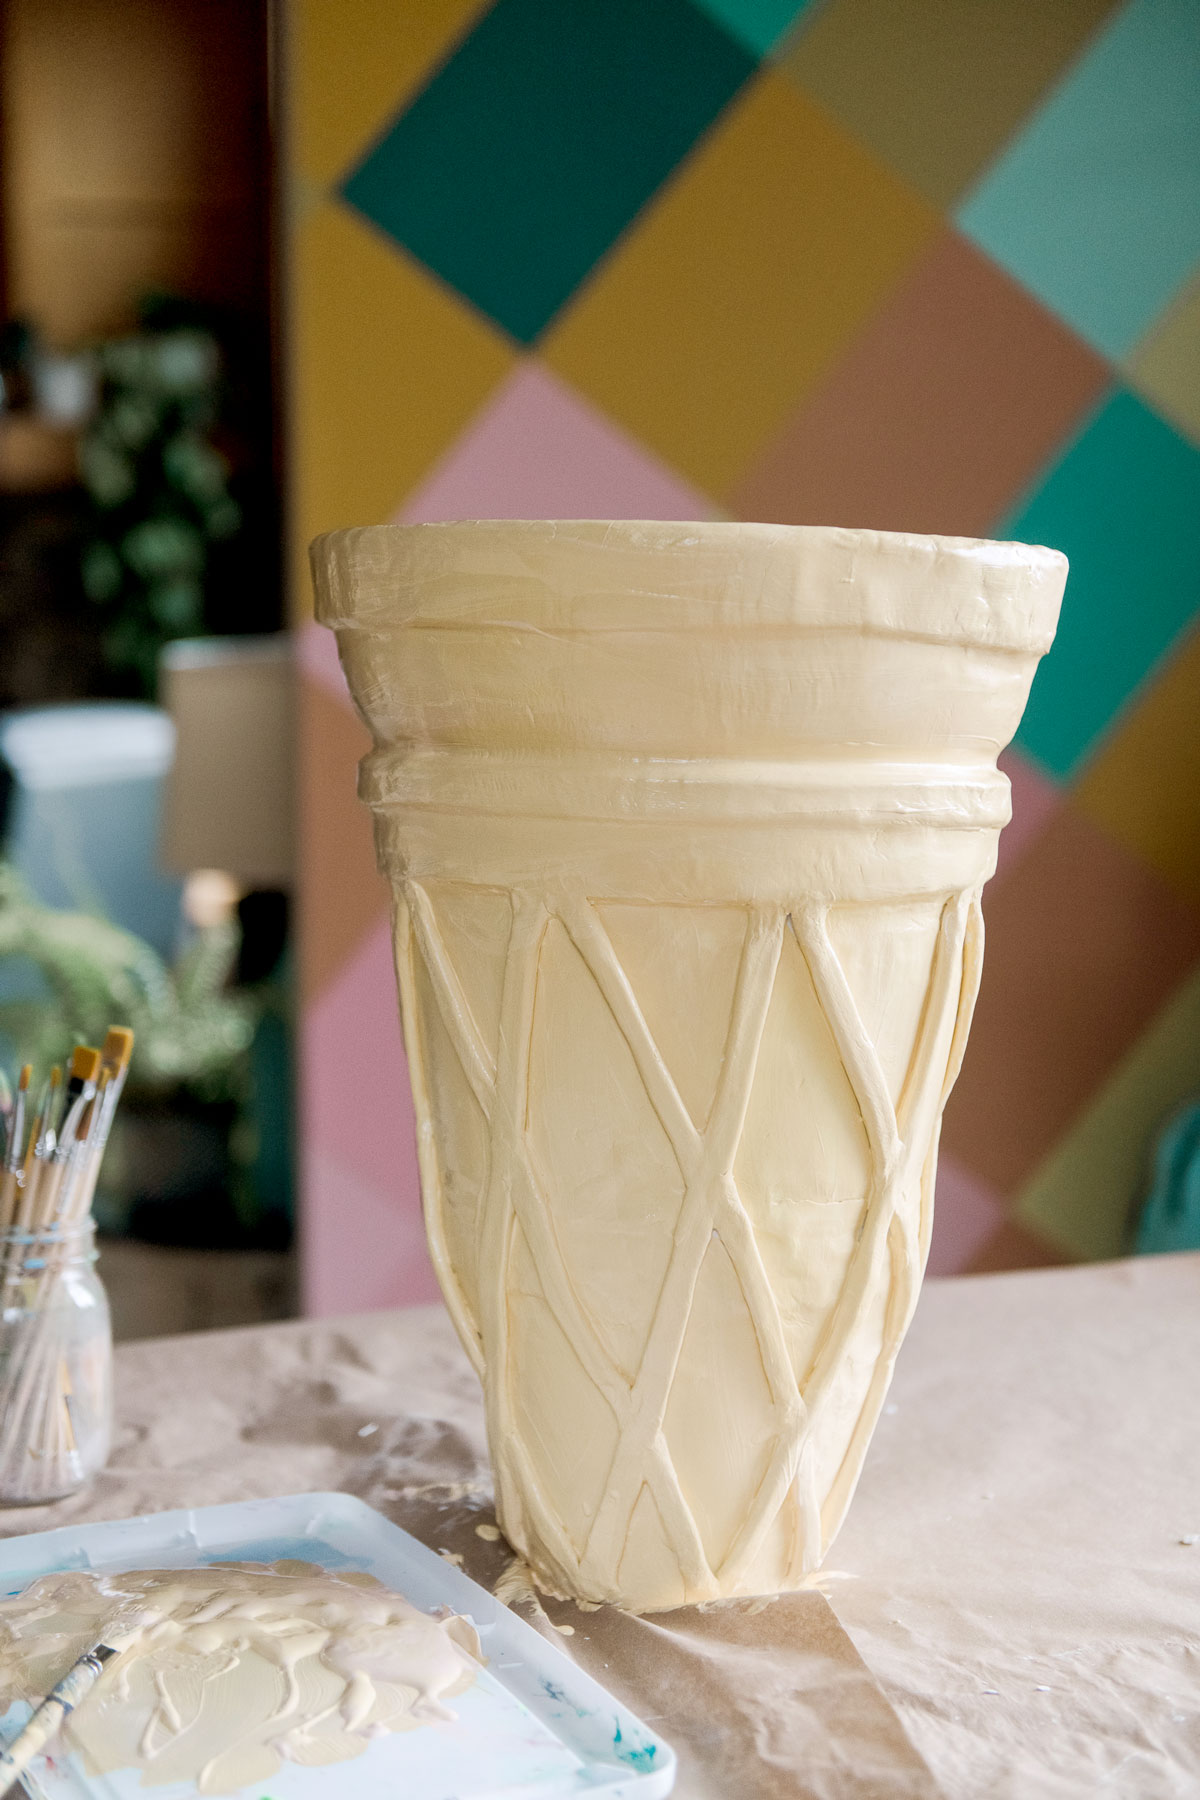
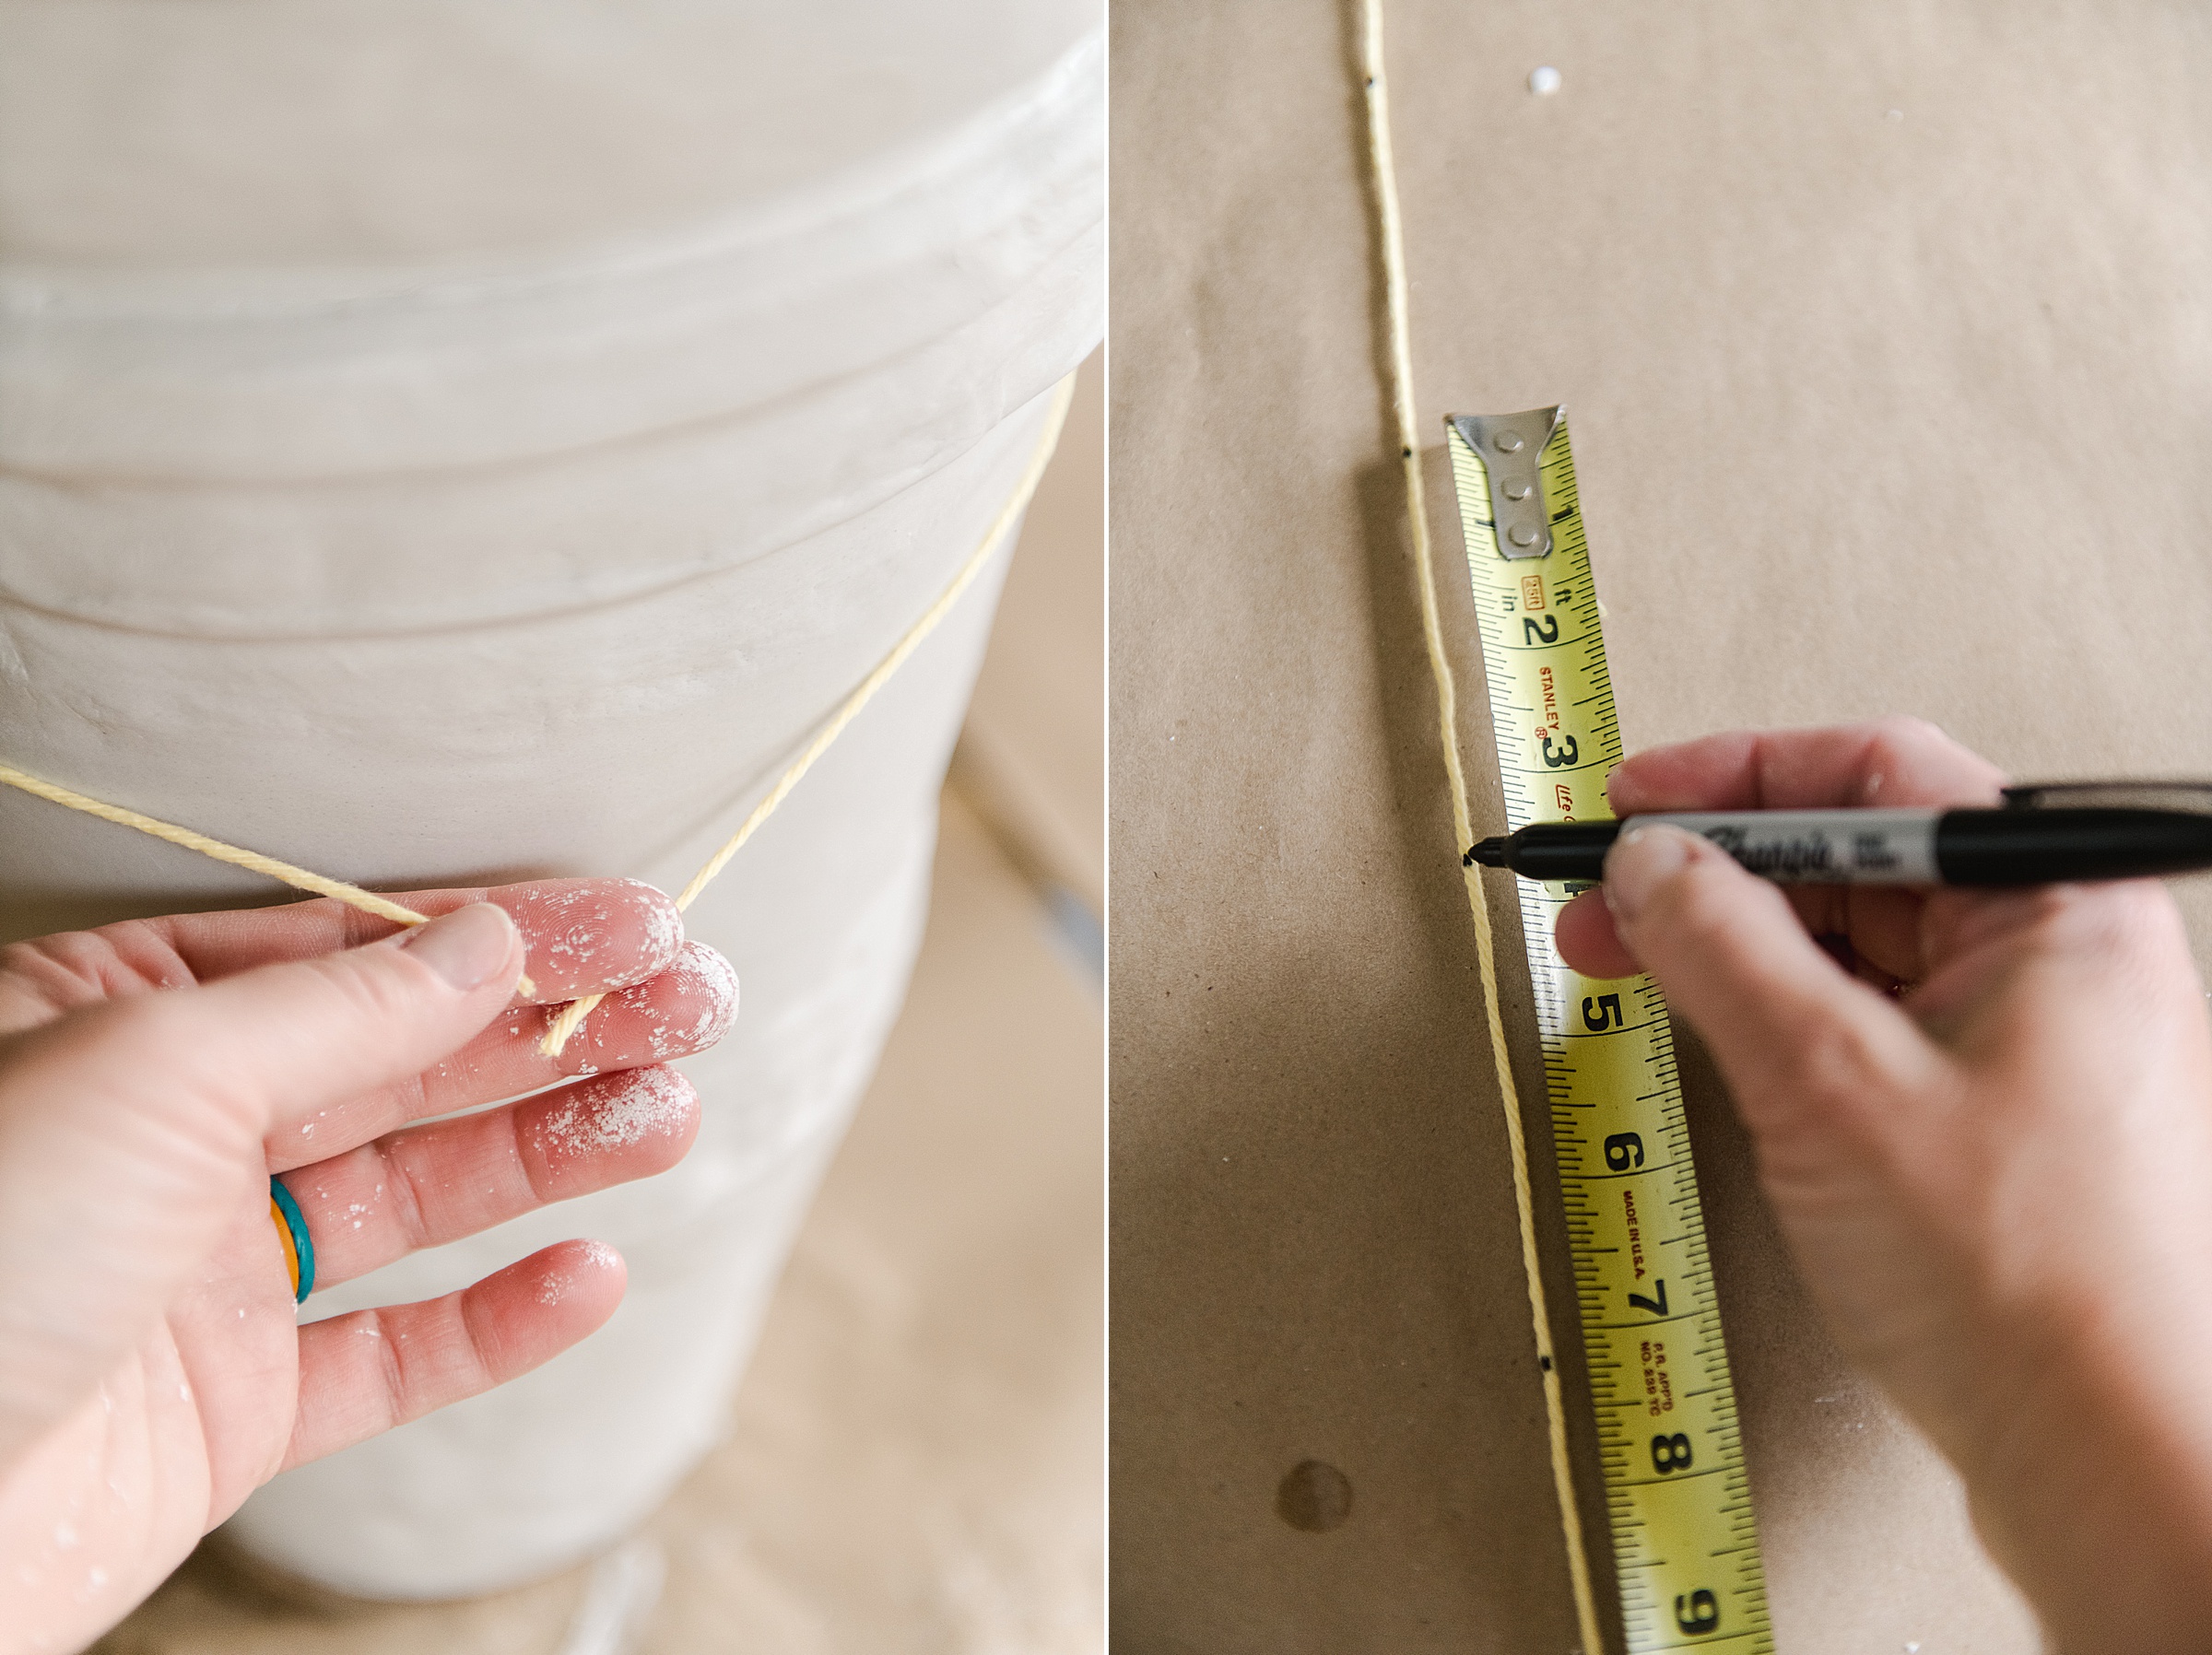
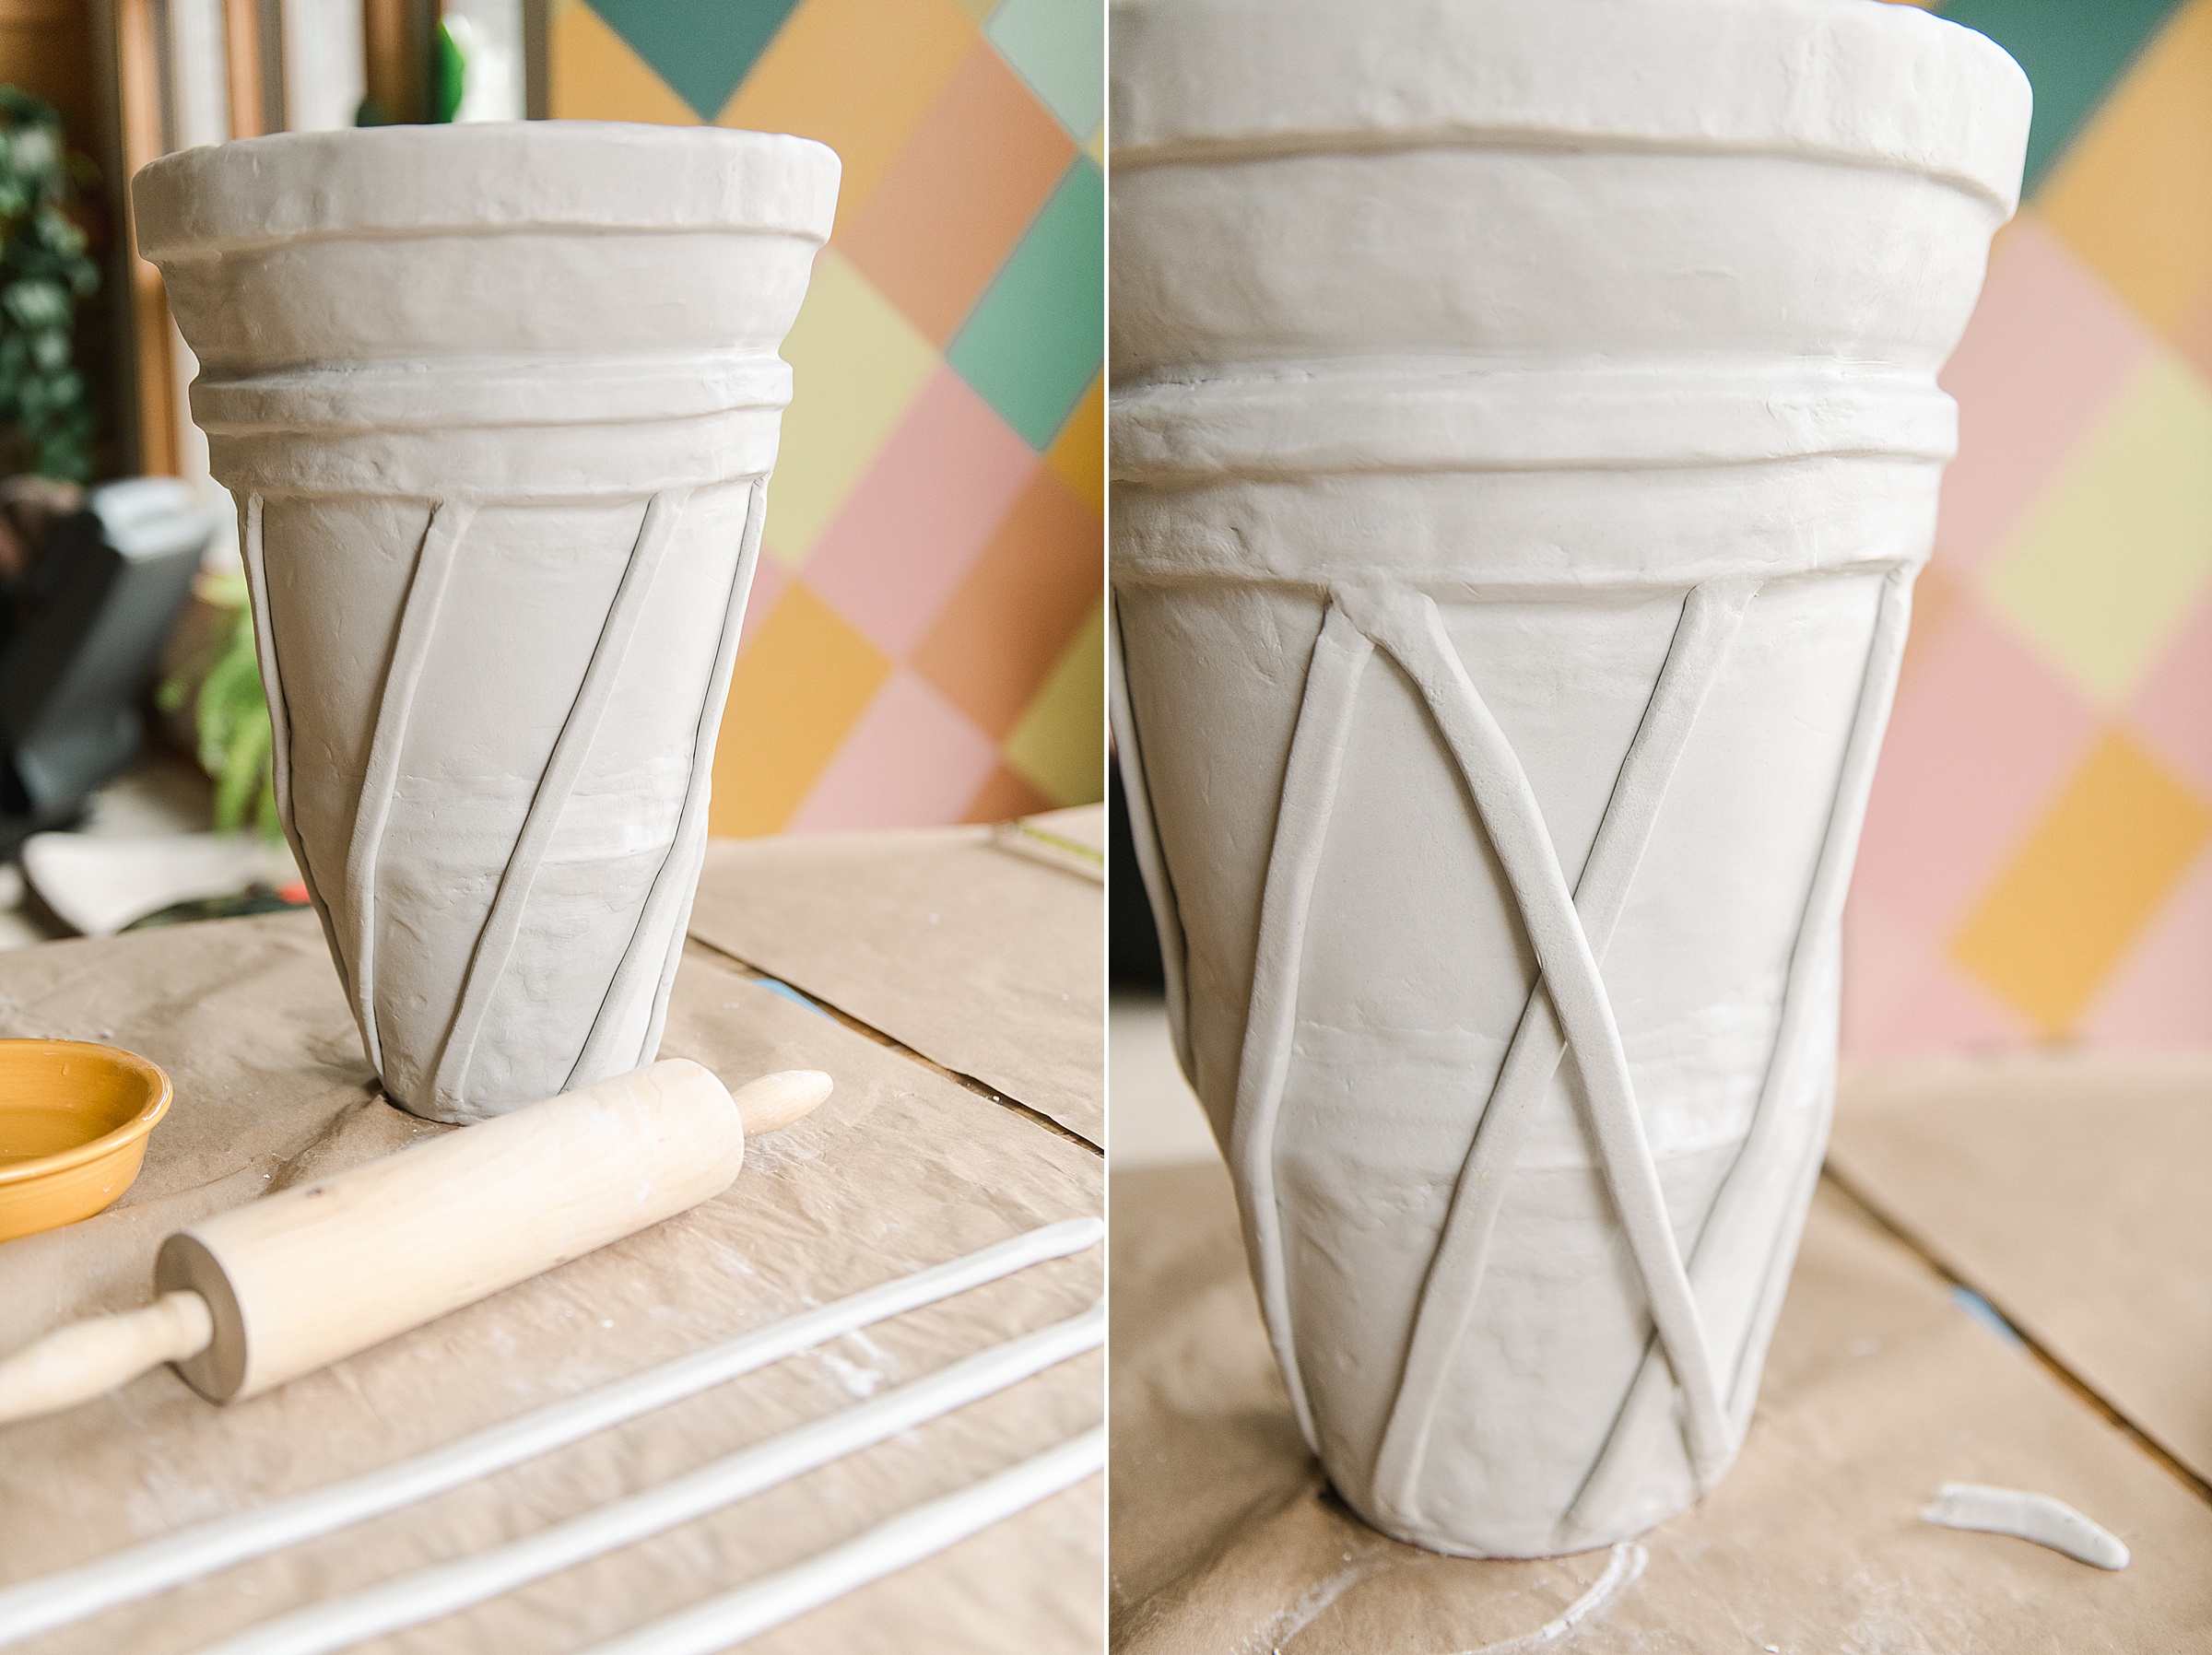
Once you’ve covered your planter entirely in clay, it’s time to add the diagonal details. I used a piece of string to wrap around where I wanted each of the diagonal lines to start and end – the top and the bottom of the cone. I then marked out 8 lines on each of those strings to get even spacing to then transfer those marks into the clay on the planets.
I rolled out some coils (smaller than the diameter of my pinky) and then gently rolled the roller over those coils to flatten them just a bit.
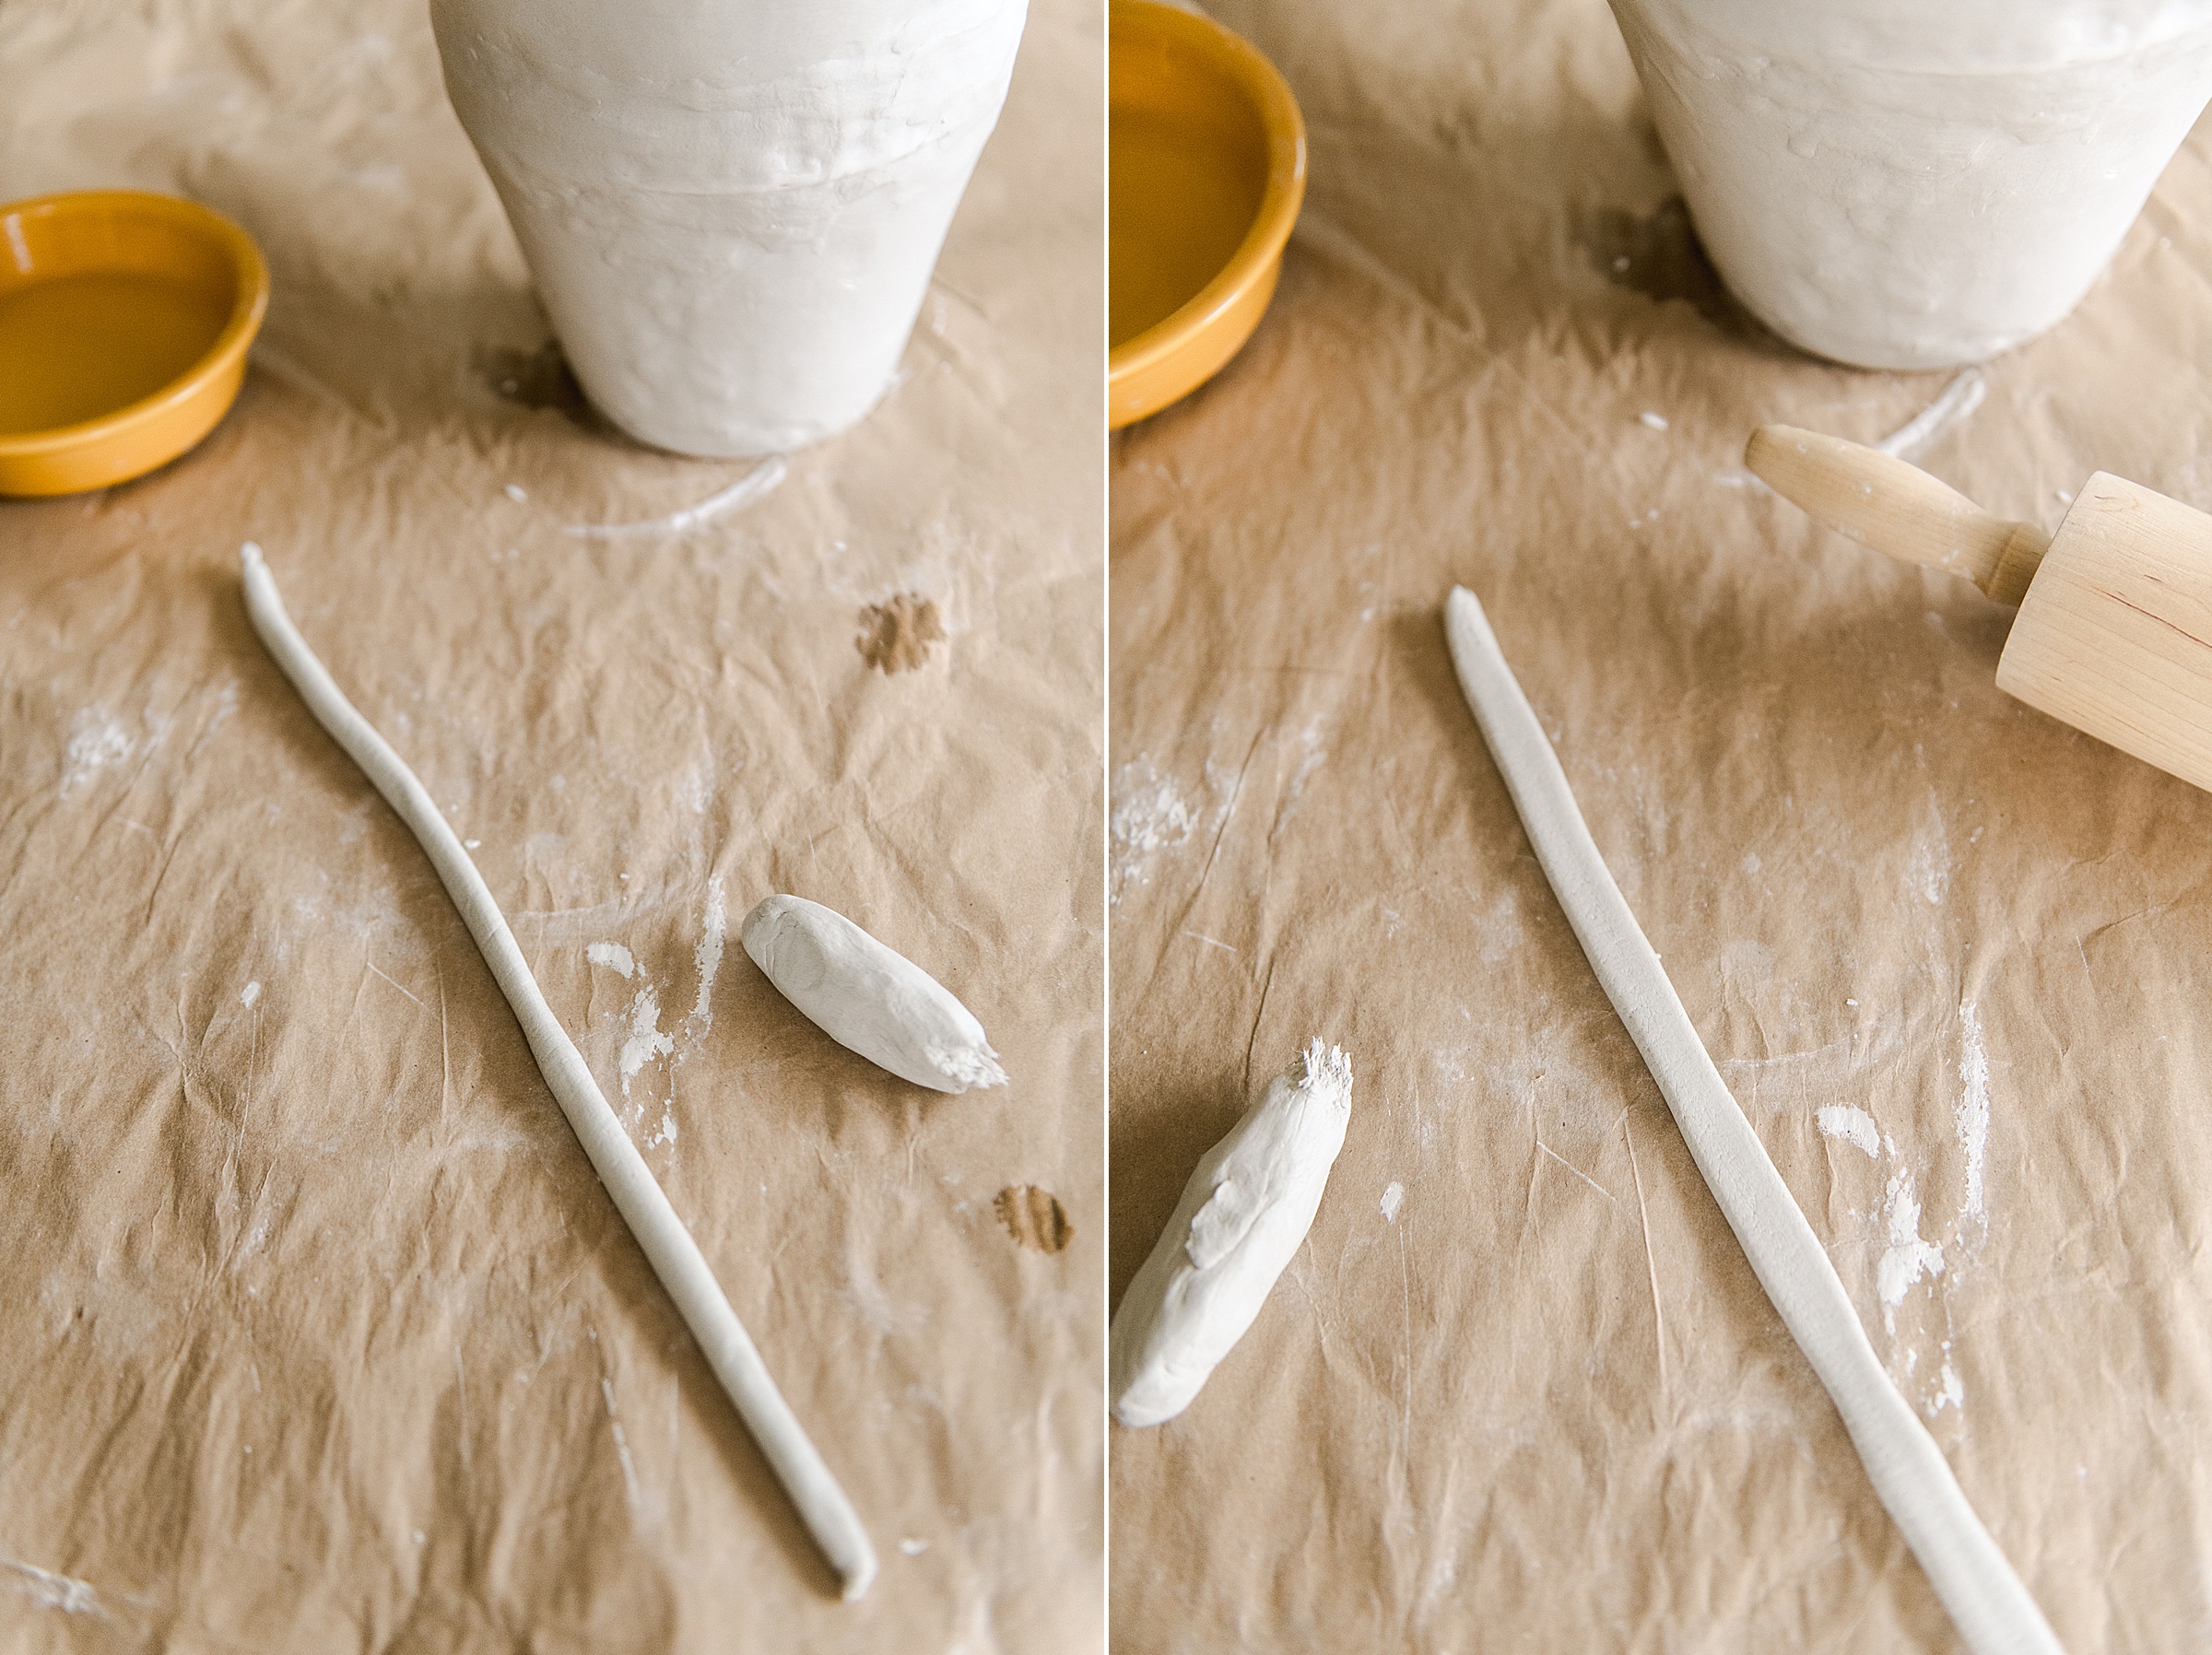
After wetting the back of each flattened coil, I began putting them onto the cone making sure to line them up on the evenly spaced marks.
Blend the lines into the cone planter as you go and begin to criss cross the lines when needed! 🙂
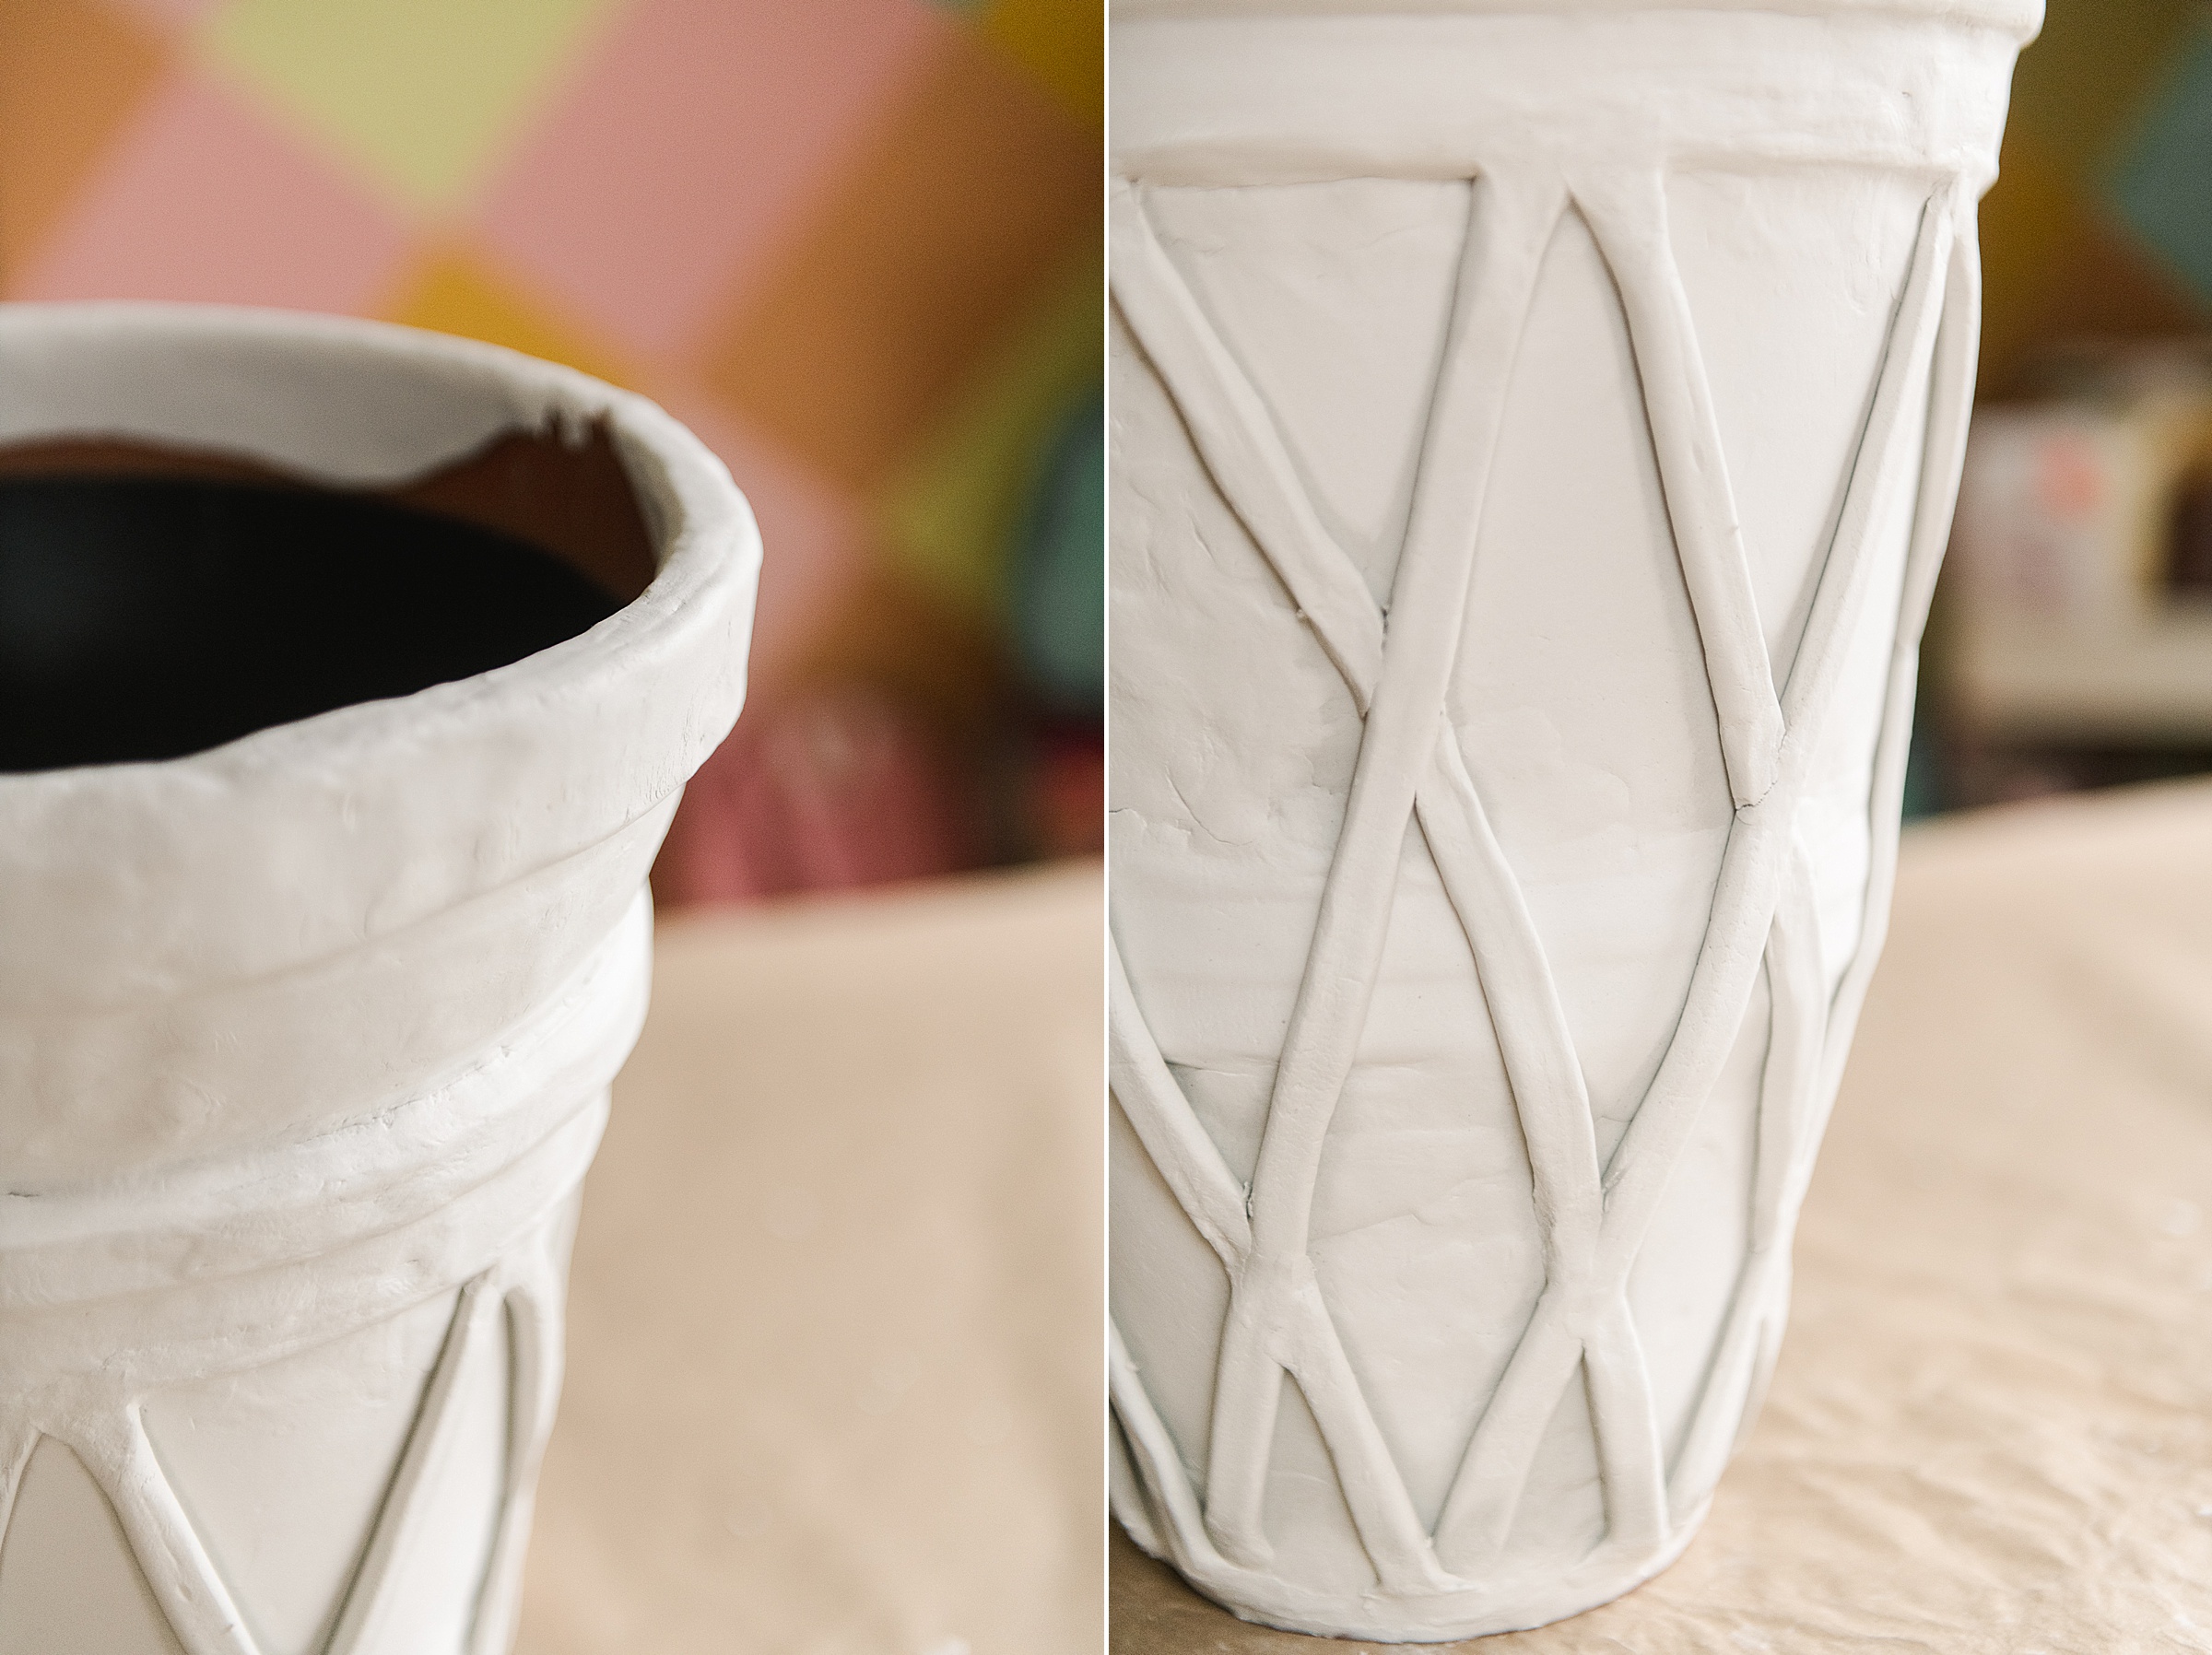
Then set aside the planter to fully air dry – about 24 hours 🙂
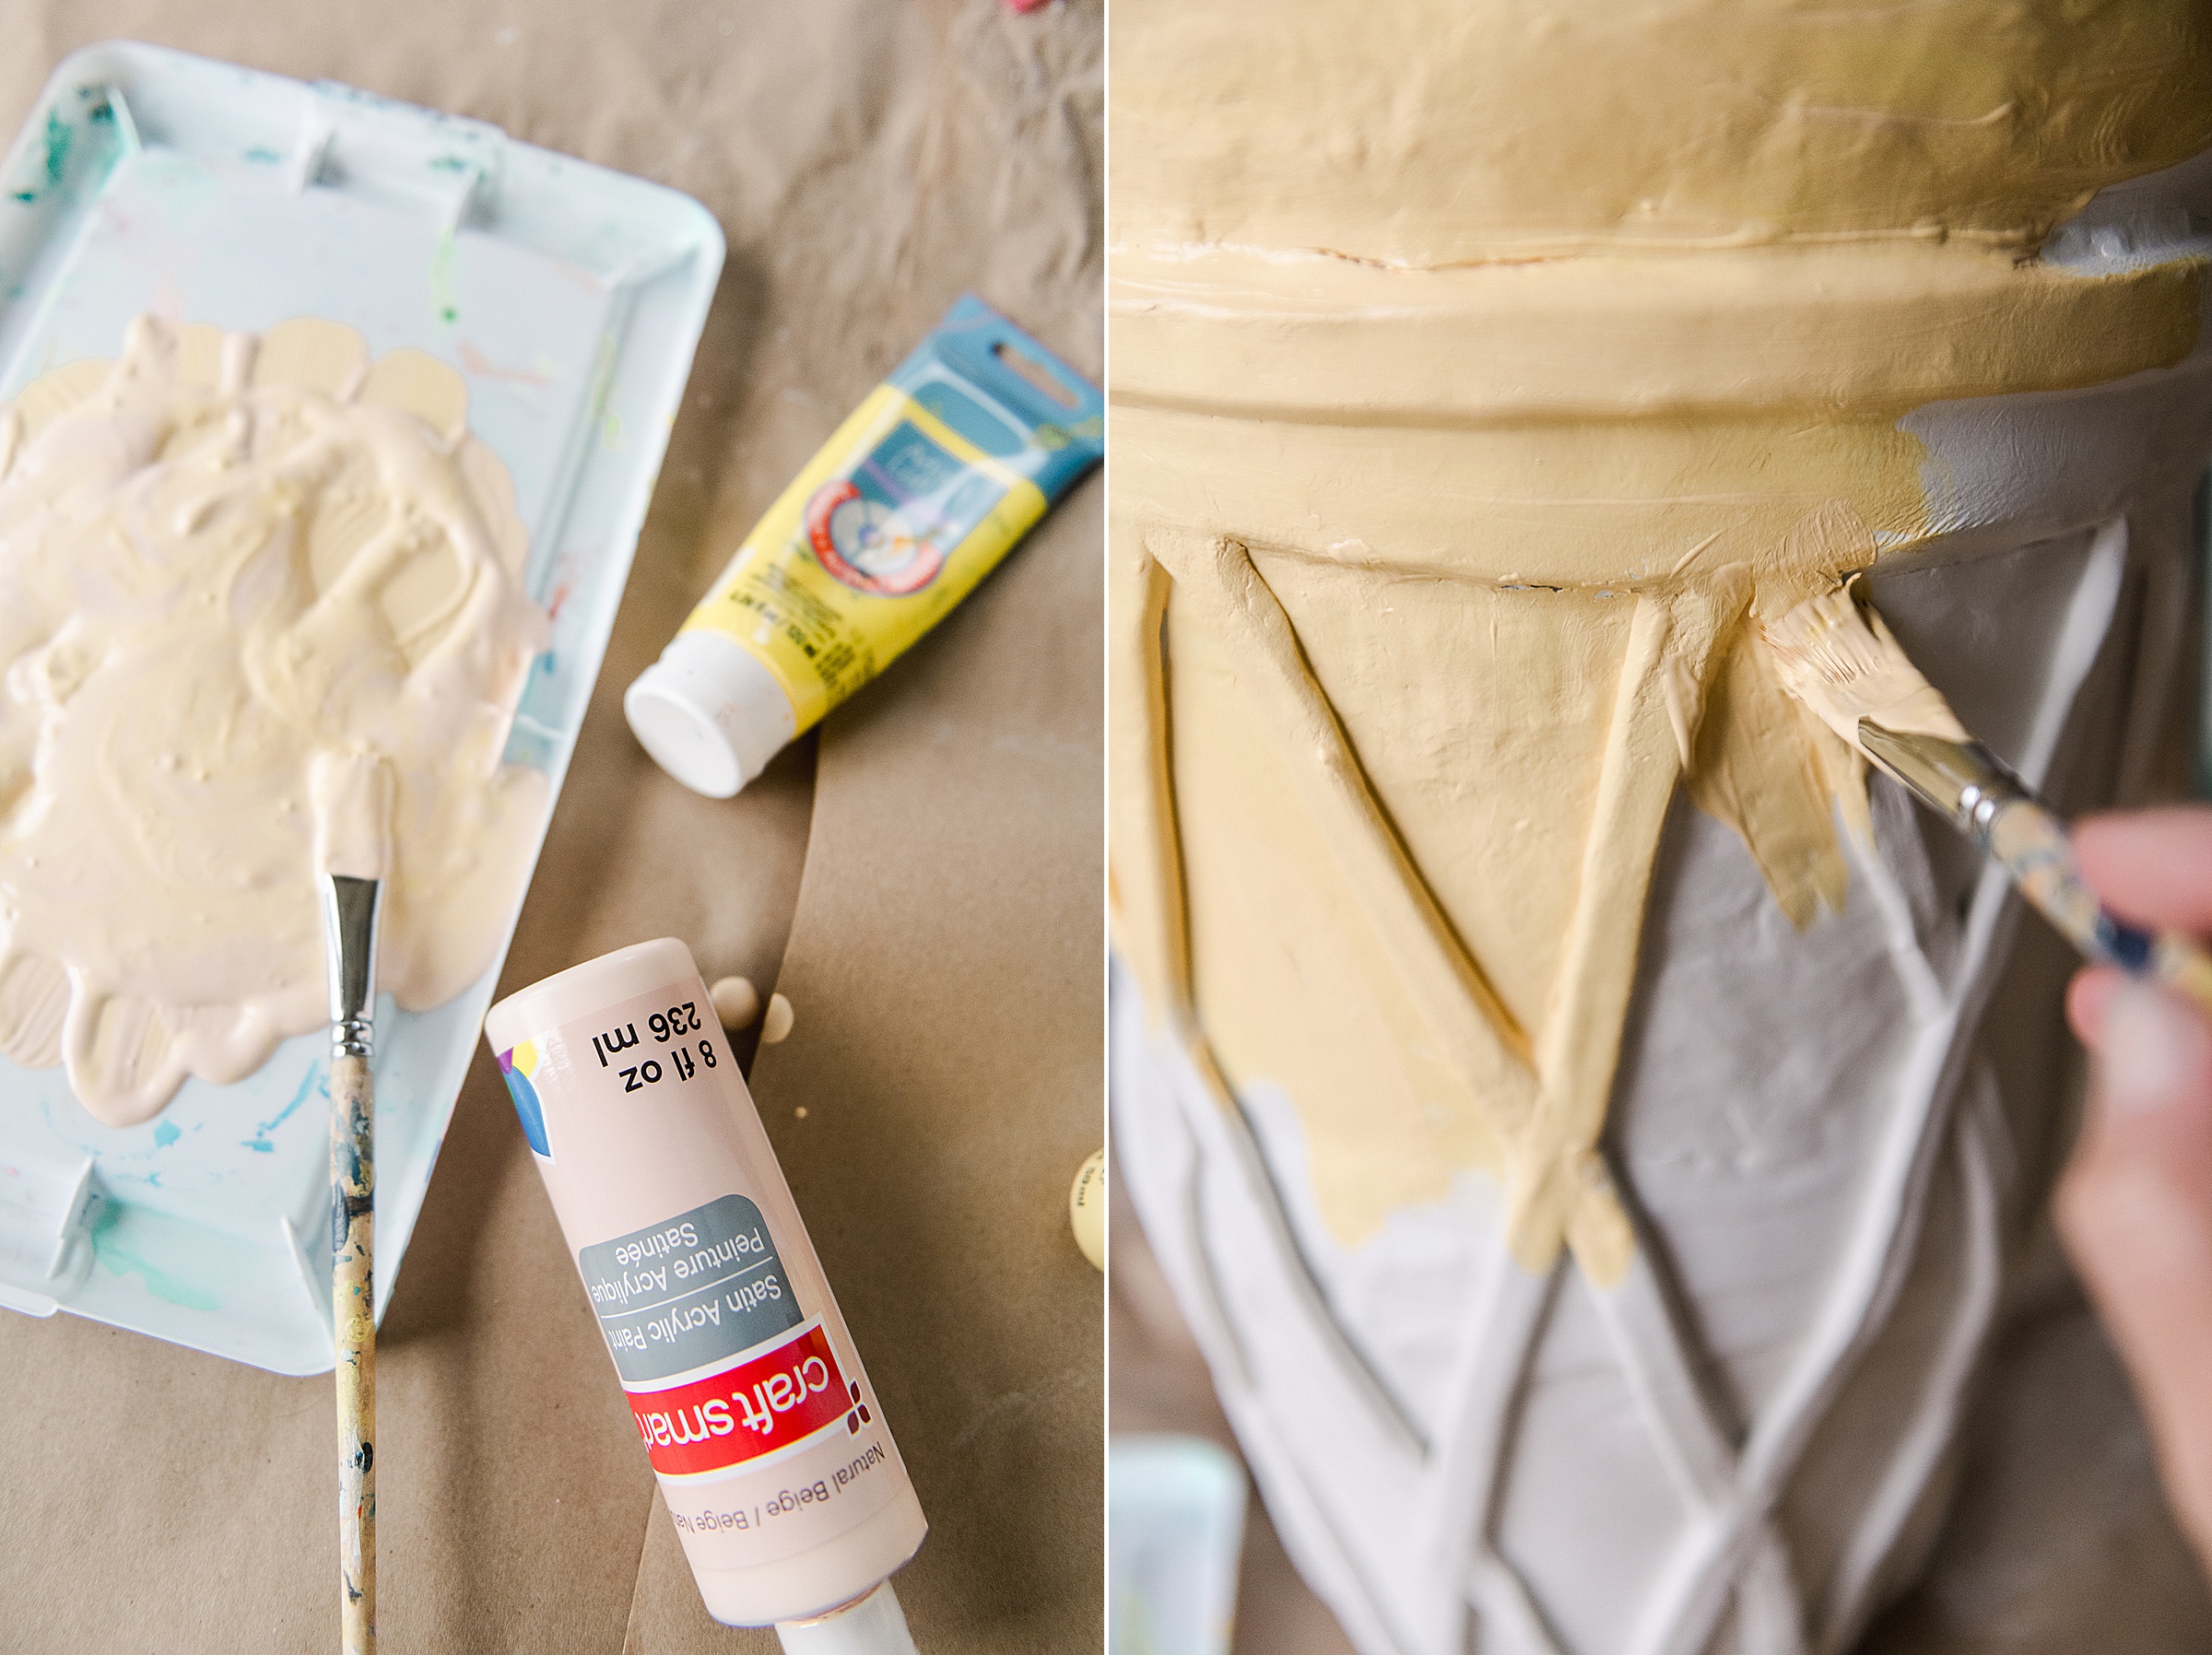
6. Now it’s time to paint! 🙂 Mix up a light-brown-tan color that represents the color of a cake ice cream cone and begin painting. I added 2 coats to be sure that everything was covered and colored nicely!
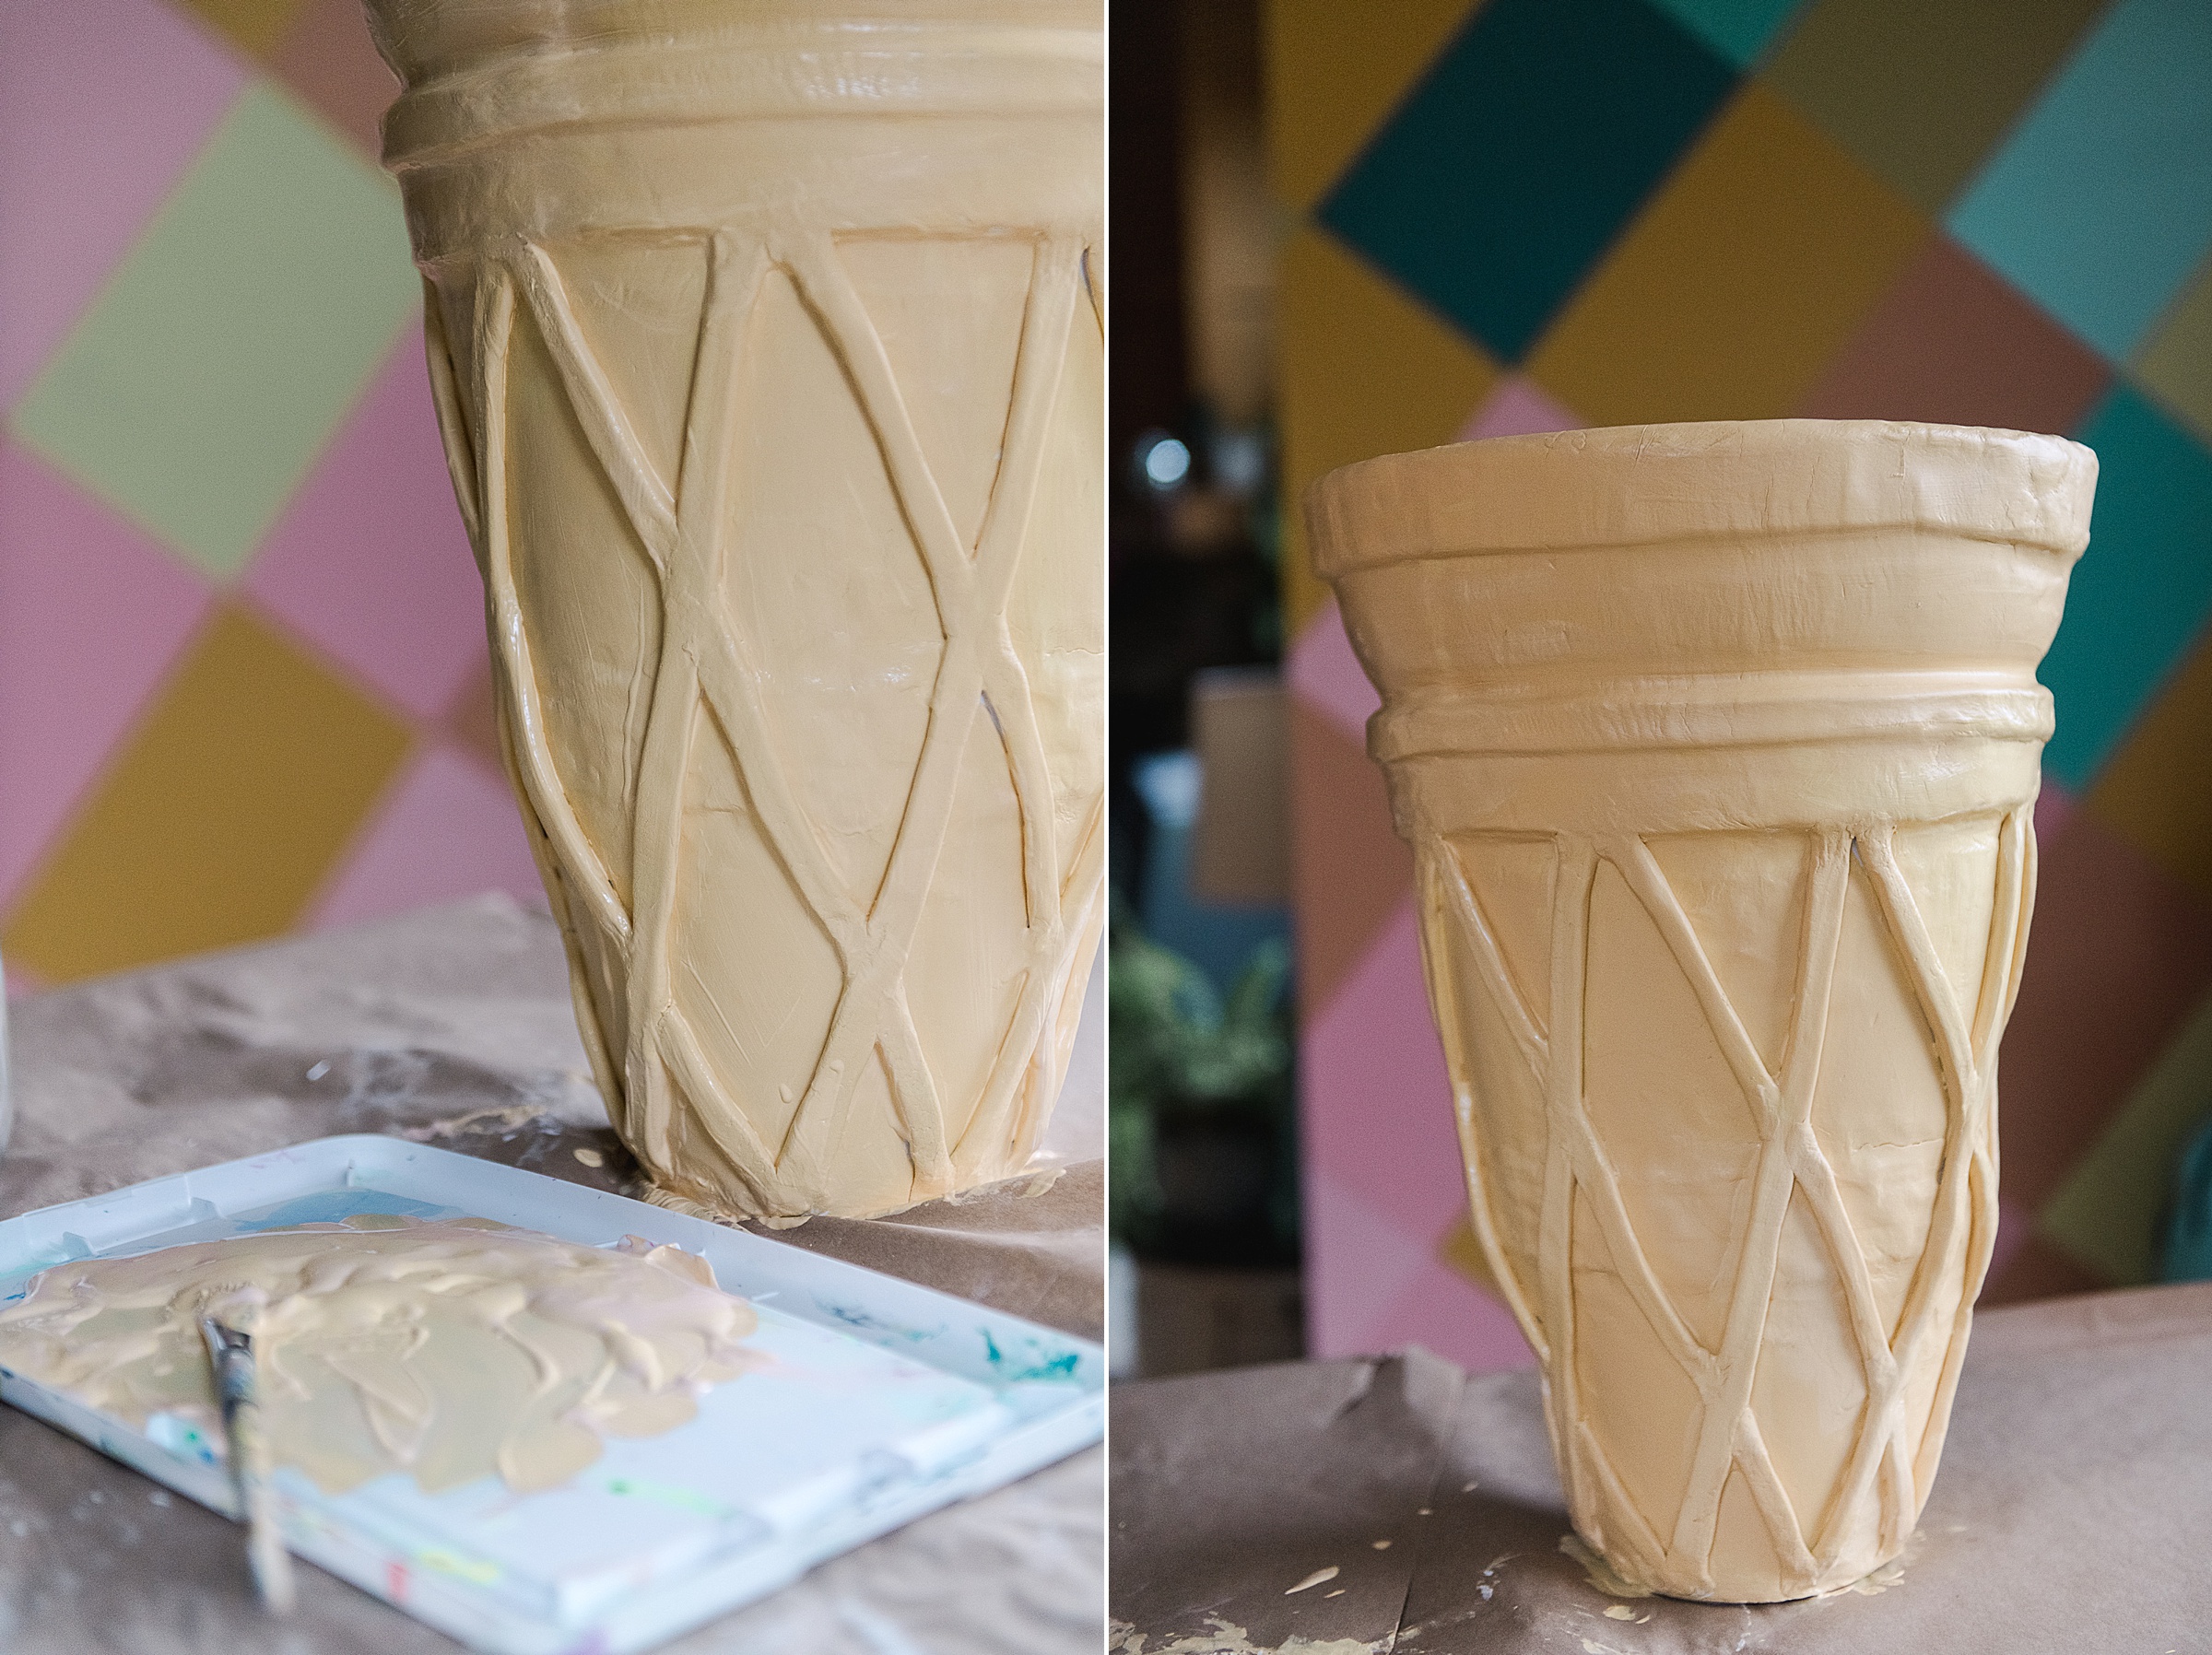
7. Add a layer of sealer if you want to – use spray or paint on sealer, whichever you prefer! 🙂