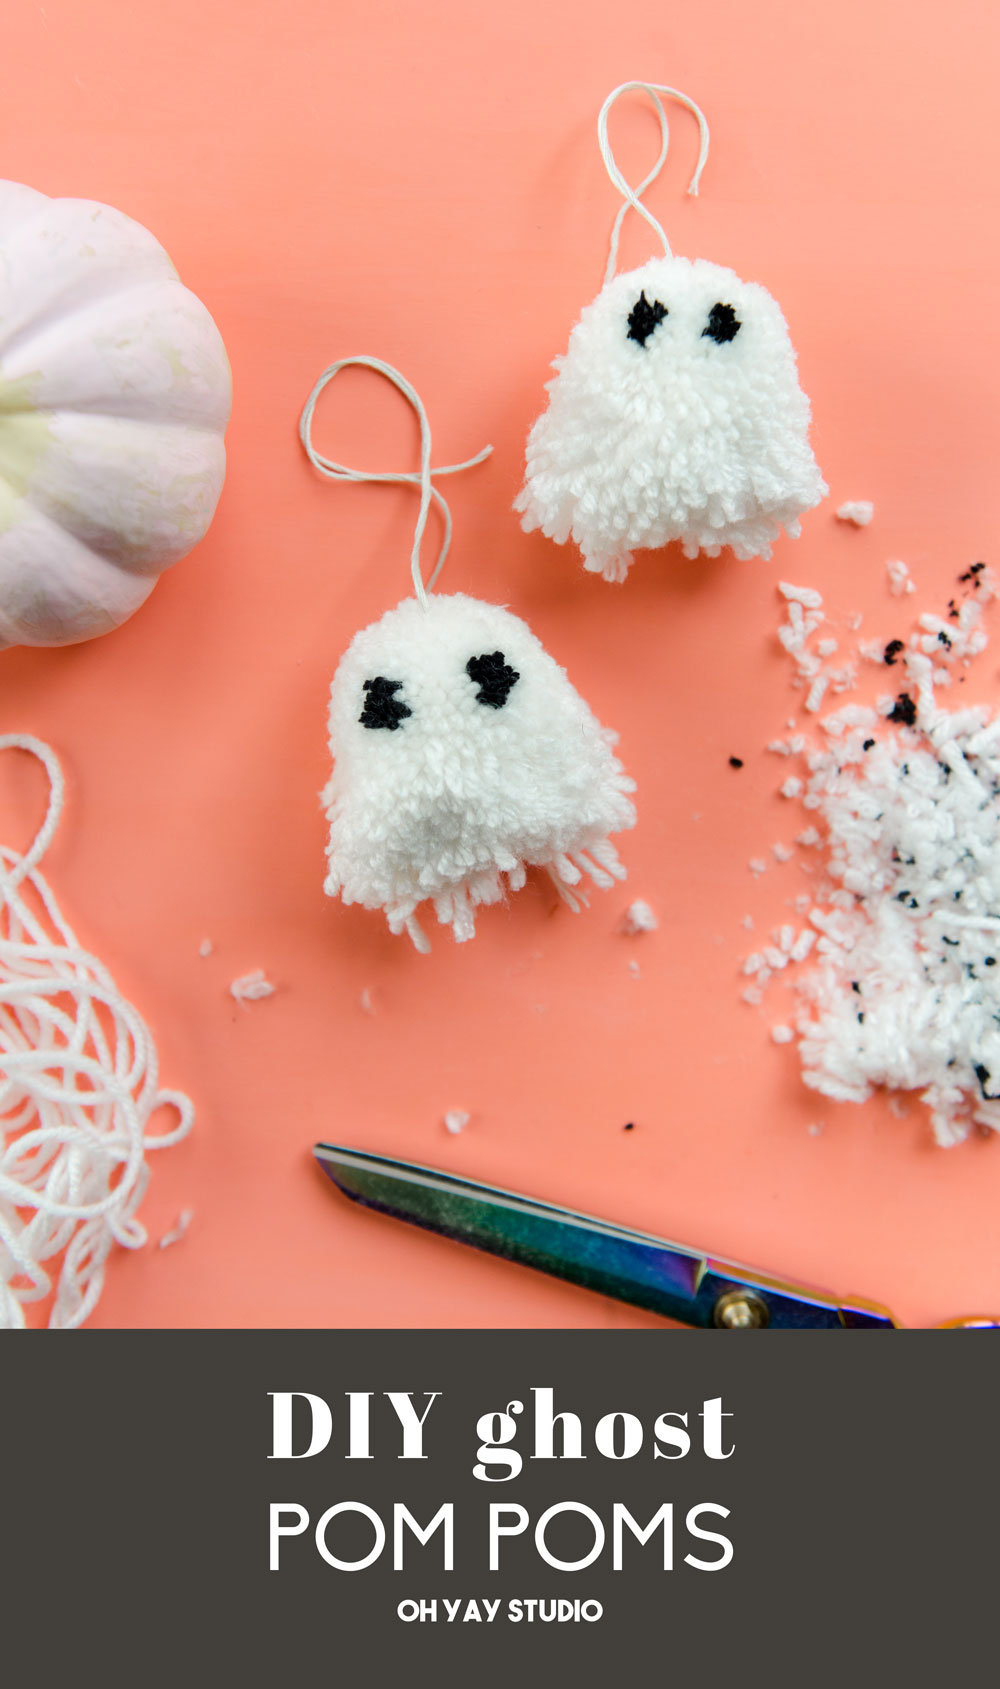
DIY ghost pom poms for Halloween!
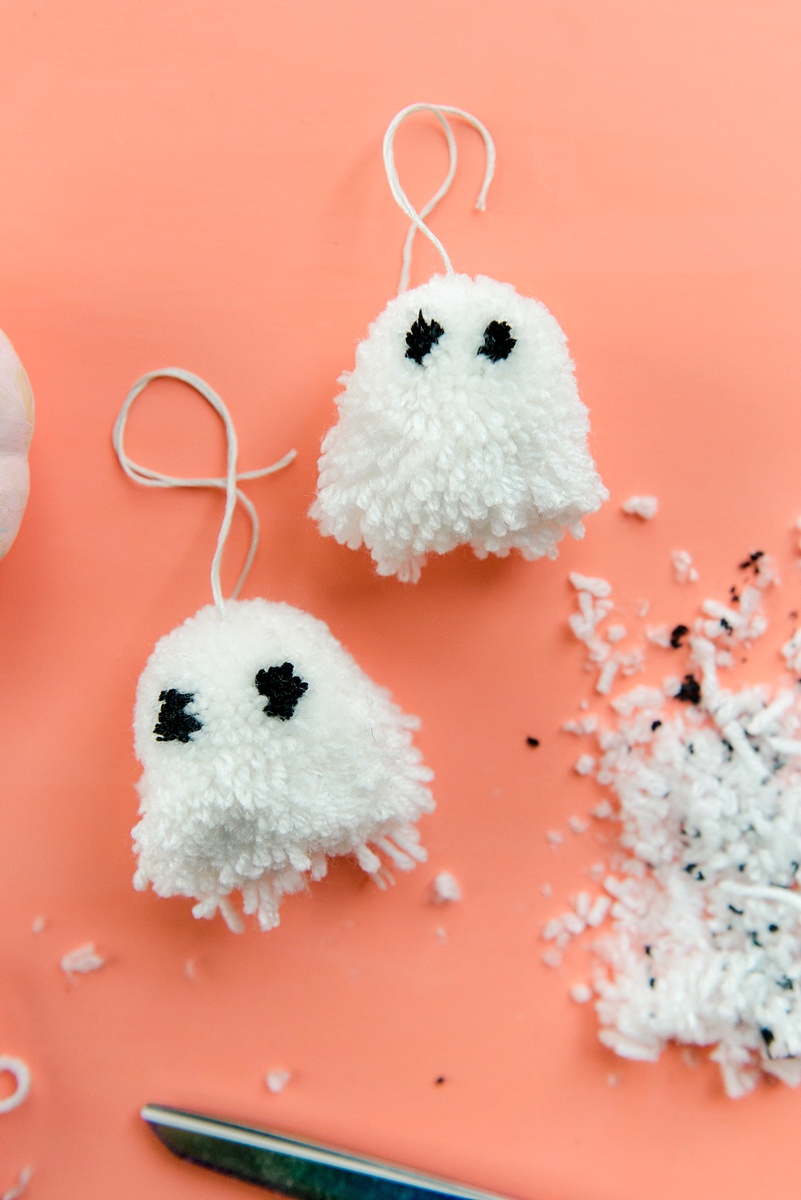
I am not really the scary or spooky type Halloween lover….instead I love the whimsical or playful Halloween! So, these DIY ghost pom poms not only fit that profile, BUT I have high expectations of making about a ZILLION of these in every color of the rainbow (because can you imagine a whole bunch of them hanging from a chandelier or in a garland for the month of October?!?!)
Check out just how easy they are to make with the full tutorial below!
The supply list is small and I can envision a ghost pom making party with your besties while watching your favorite Halloween movie too! 🙂
SUPPLIES:
- Pom maker
- white yarn for ghost body (or any color really)
- black yarn for ghost eyes
- small bit of embroidery floss or thread for tying pom
- a sharp (and I mean sharp) pair of scissors for perfect trimming
- a bowl or something to collect trimmings (the key to any good pom is the trimming)
INSTRUCTIONS:
WRAP POM
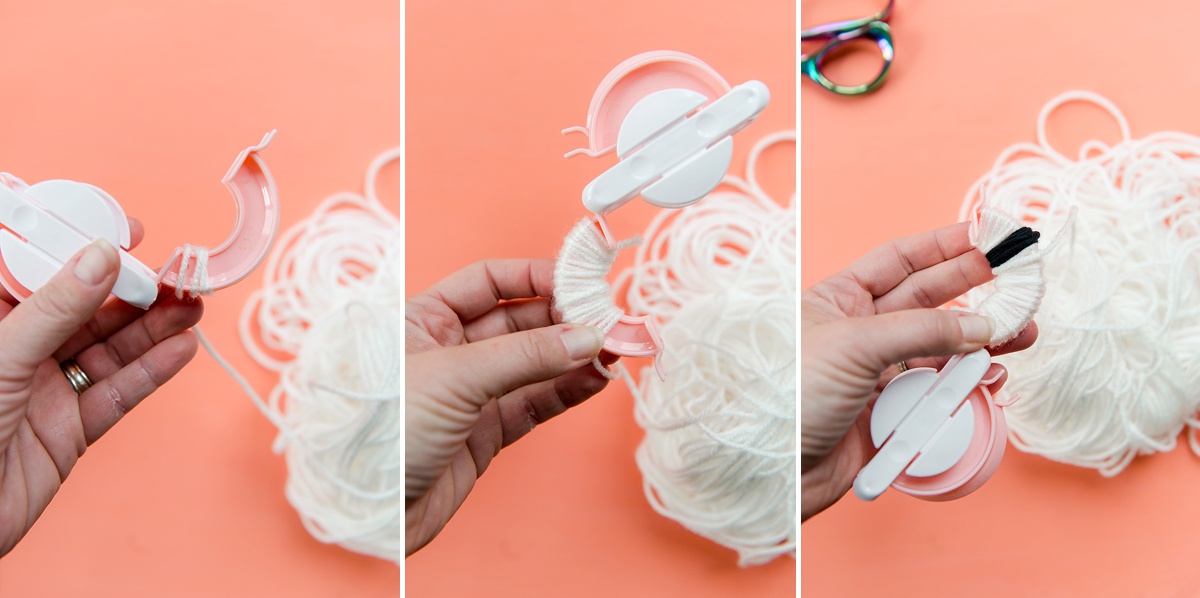
1. Open your pom maker and with one side of the maker, begin wrapping your white yarn (or main color)
2. Once your main color is wrapped with one layer, grab your black yarn (or whatever you want to use for the eyes) and about 1/4 down the length of the pom maker, wrap 10-12 wraps of the black. Cut black and set aside
3. Finish wrapping the side of your pom maker, going back and froth across the length, with your white yarn.
4. Do the same to the other side of the pom maker
**But note that when you do the eyes on the 2nd side, that the pom maker opens up the opposite way, so be sure to line up your eyes correctly (ie, put your eyes on the opposite end of the pom maker this time).
CUT + TIE TOGETHER
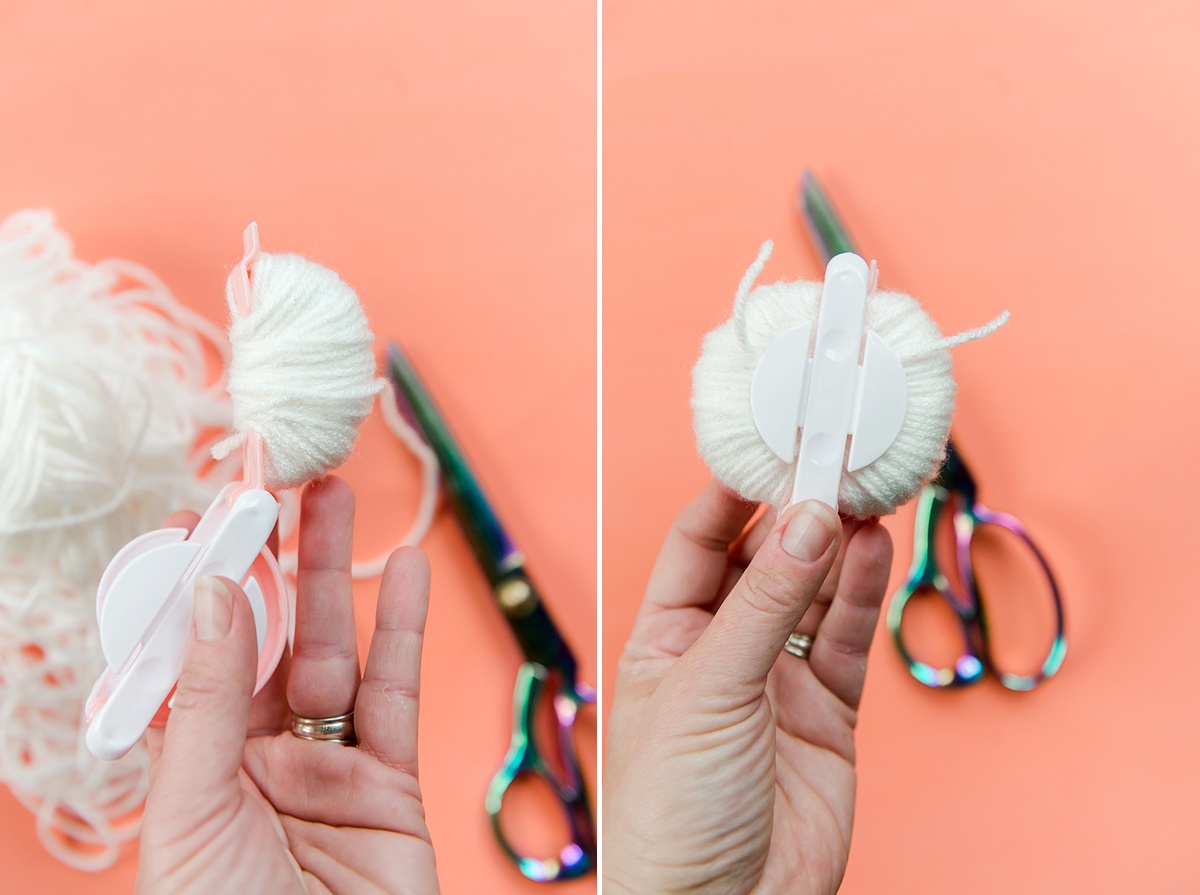
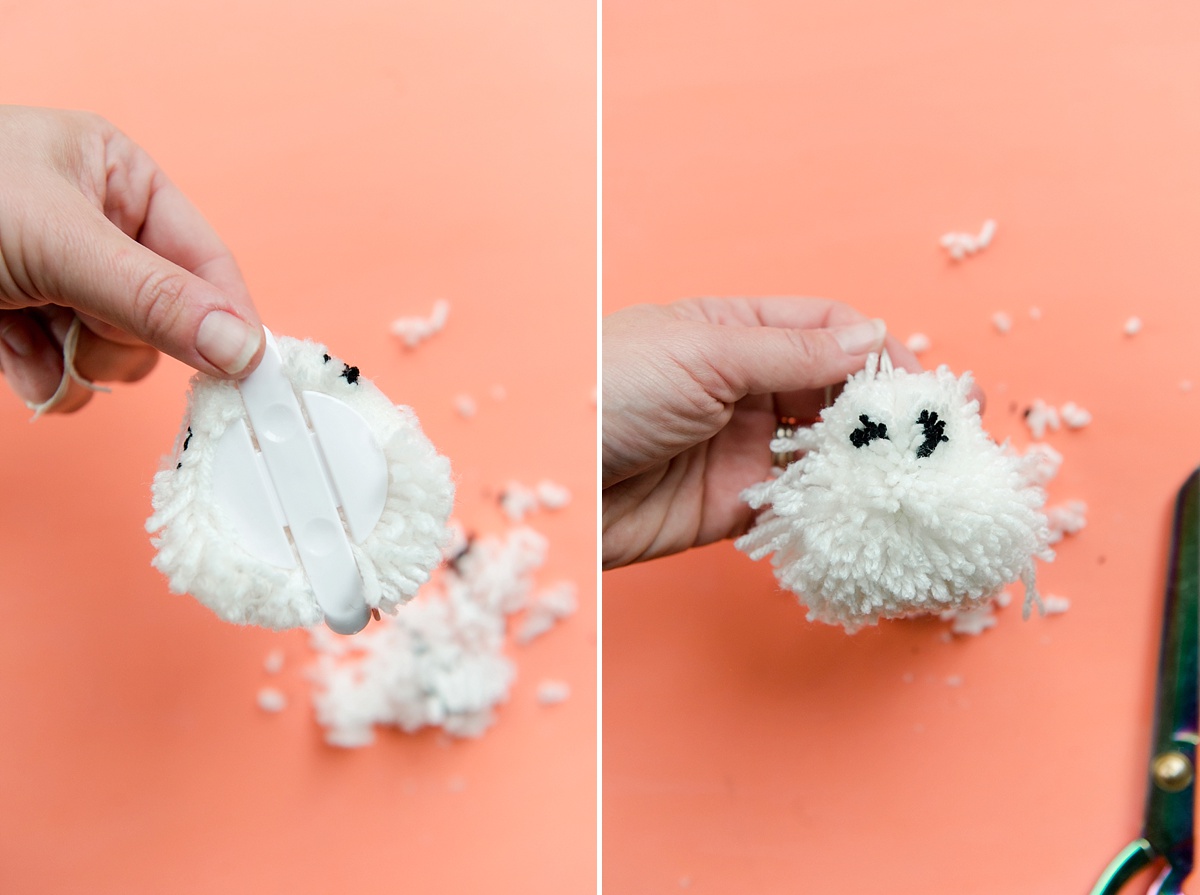
1. Make sure both sides of the pom maker are closed and then trim the center “gutter” part of the pom. Make sure all threads are clipped.
2. Cut a 12-16″ piece of embroidery floss and begin to wrap this into the gutter. I typically wrap once, and knot as tightly as I can without breaking the thread. Then I wrap to the other side and pull tightly again. Continue wrapping to opposite sides until the pom is tied tightly!
**Note: I tend to like embroidery floss for this instead of yarn because it is stronger. I have also used wax thread and butchers twine with success as well.
TRIM TRIM TRIM
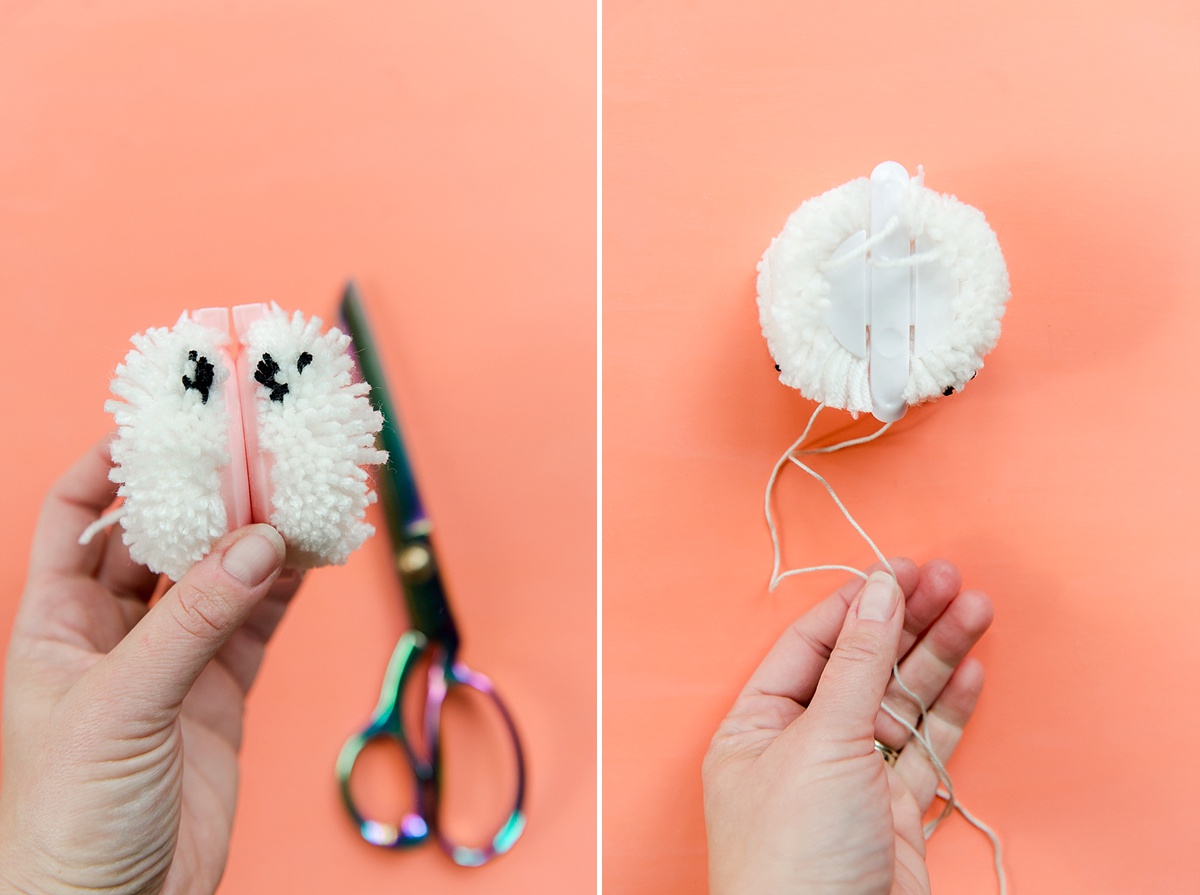
1. Before you take the pom out of the pom maker, trim the top “head” part of the pom circle. Leave the bottom shaggy and untrimmed. I tend to guide my scissors around the outside of the pom maker for a smooth, clean trimmed look.
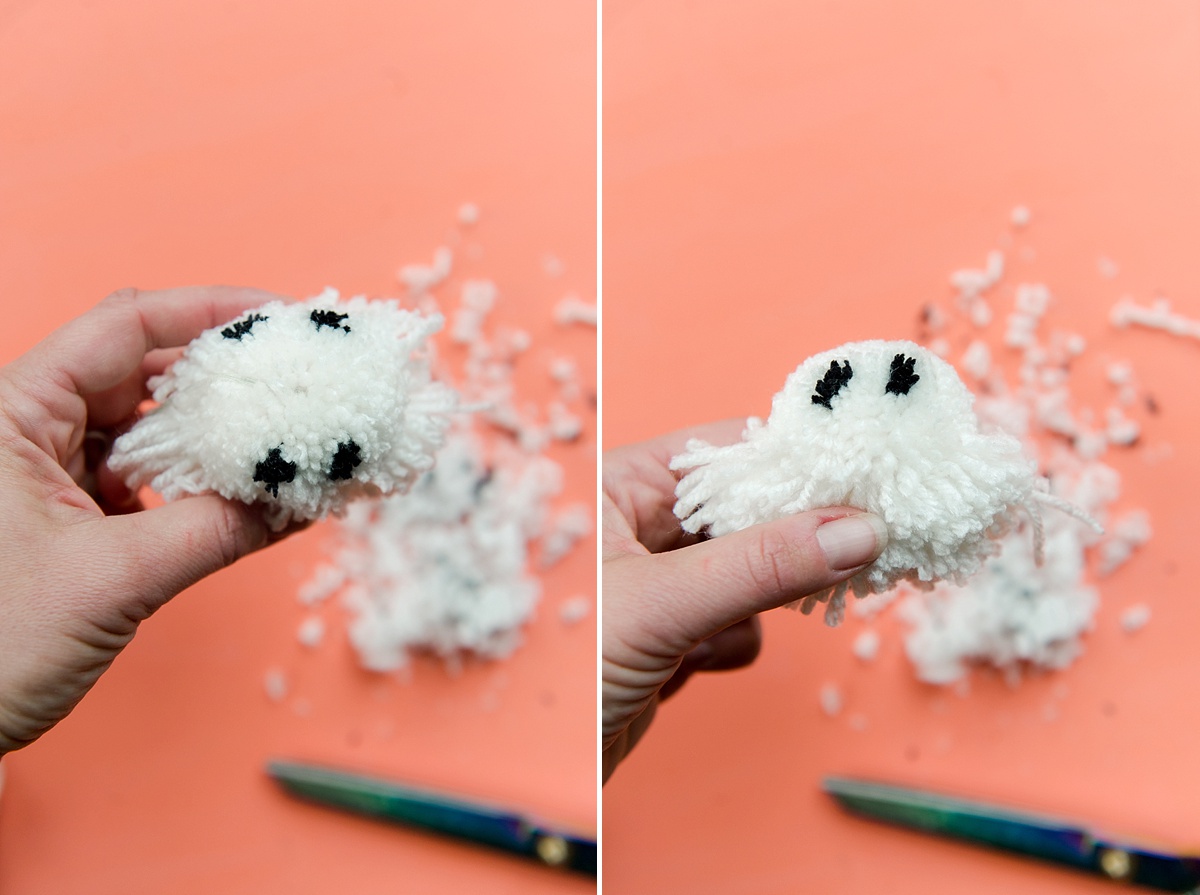
2. Remove the pom from the pom maker and begin your trimming. Be sure NOT to trim your embroidery floss. You will want the head to be circle and the sides to be “straight” or square and the bottom left shaggy. So, begin shaping your scissors and keep fluffing every once and awhile to re-fluff.
3. Keep trimming until this is exactly the shape you want!
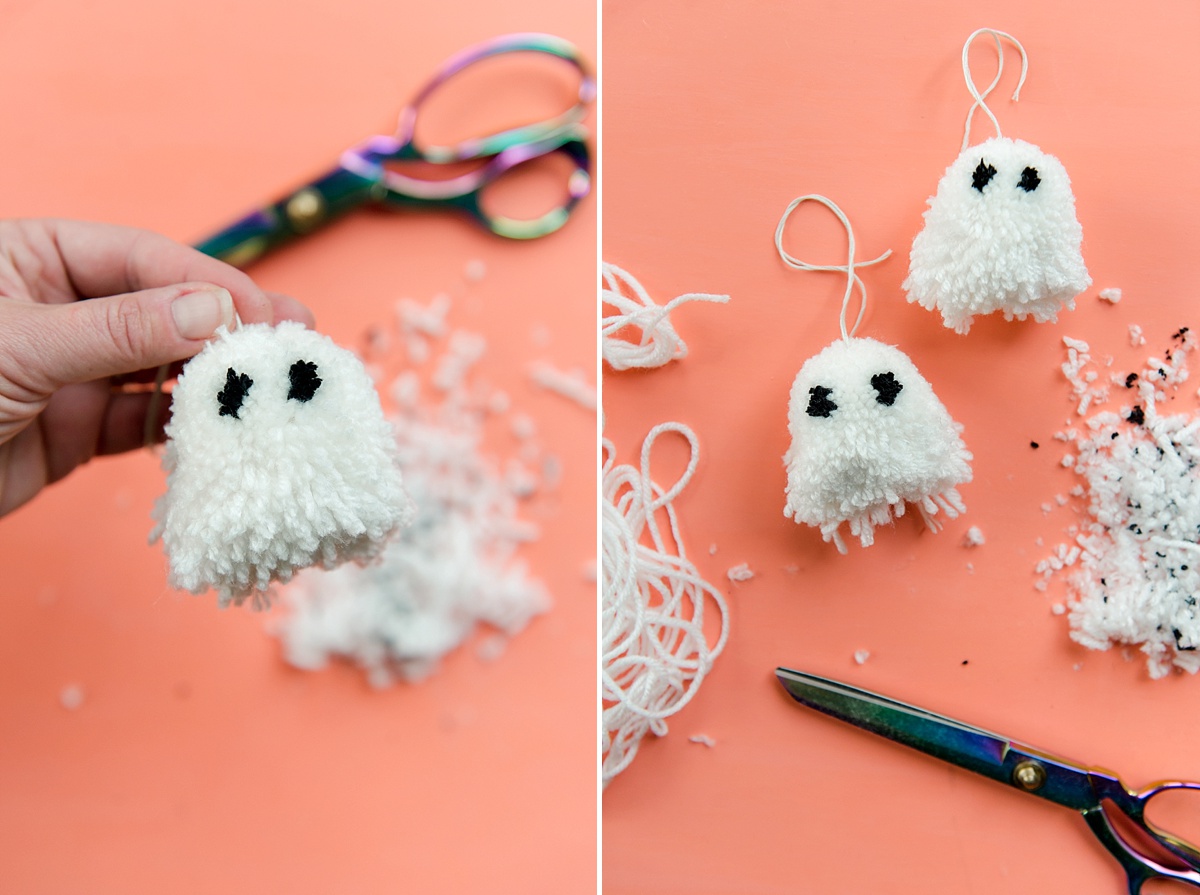
HAPPY HALLOWEEN! I can’t wait to make more of these and hang them all over my kids’ room and the house!