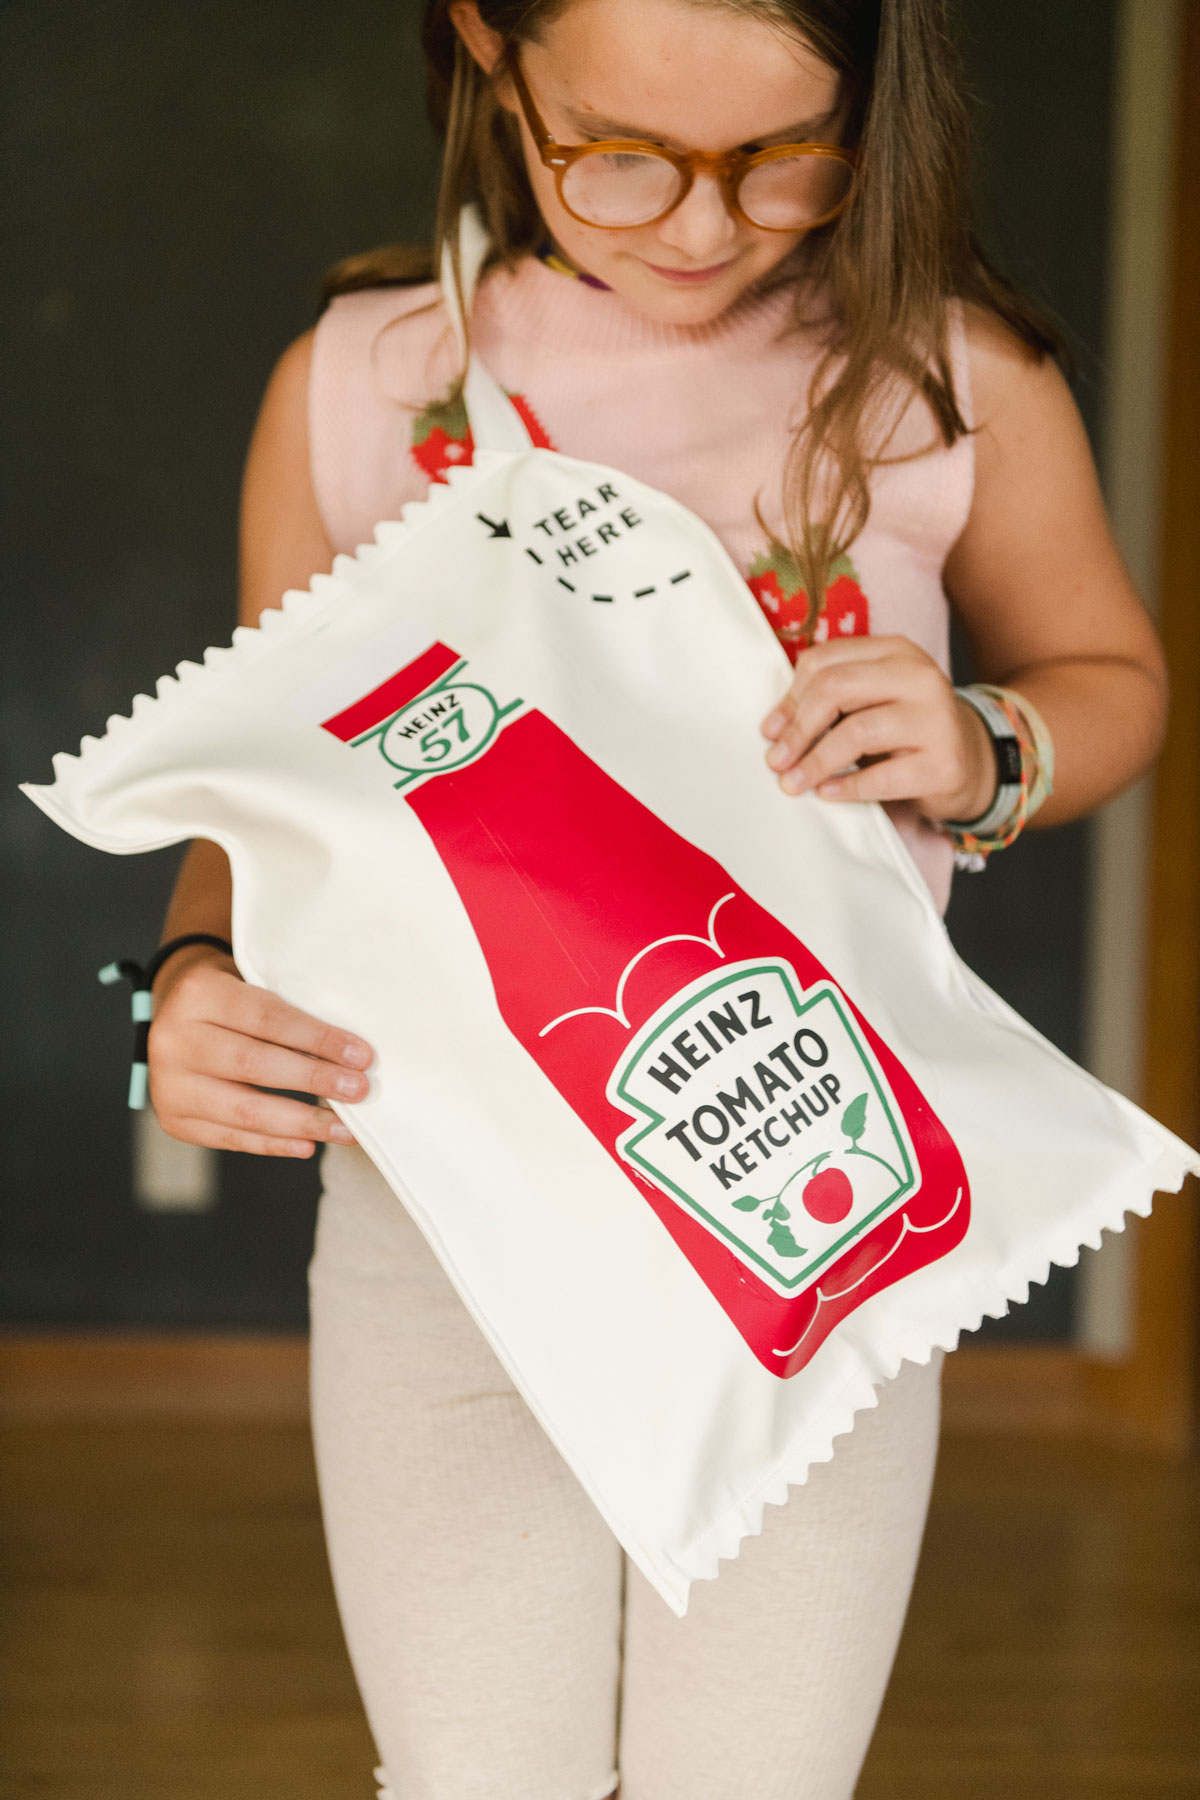
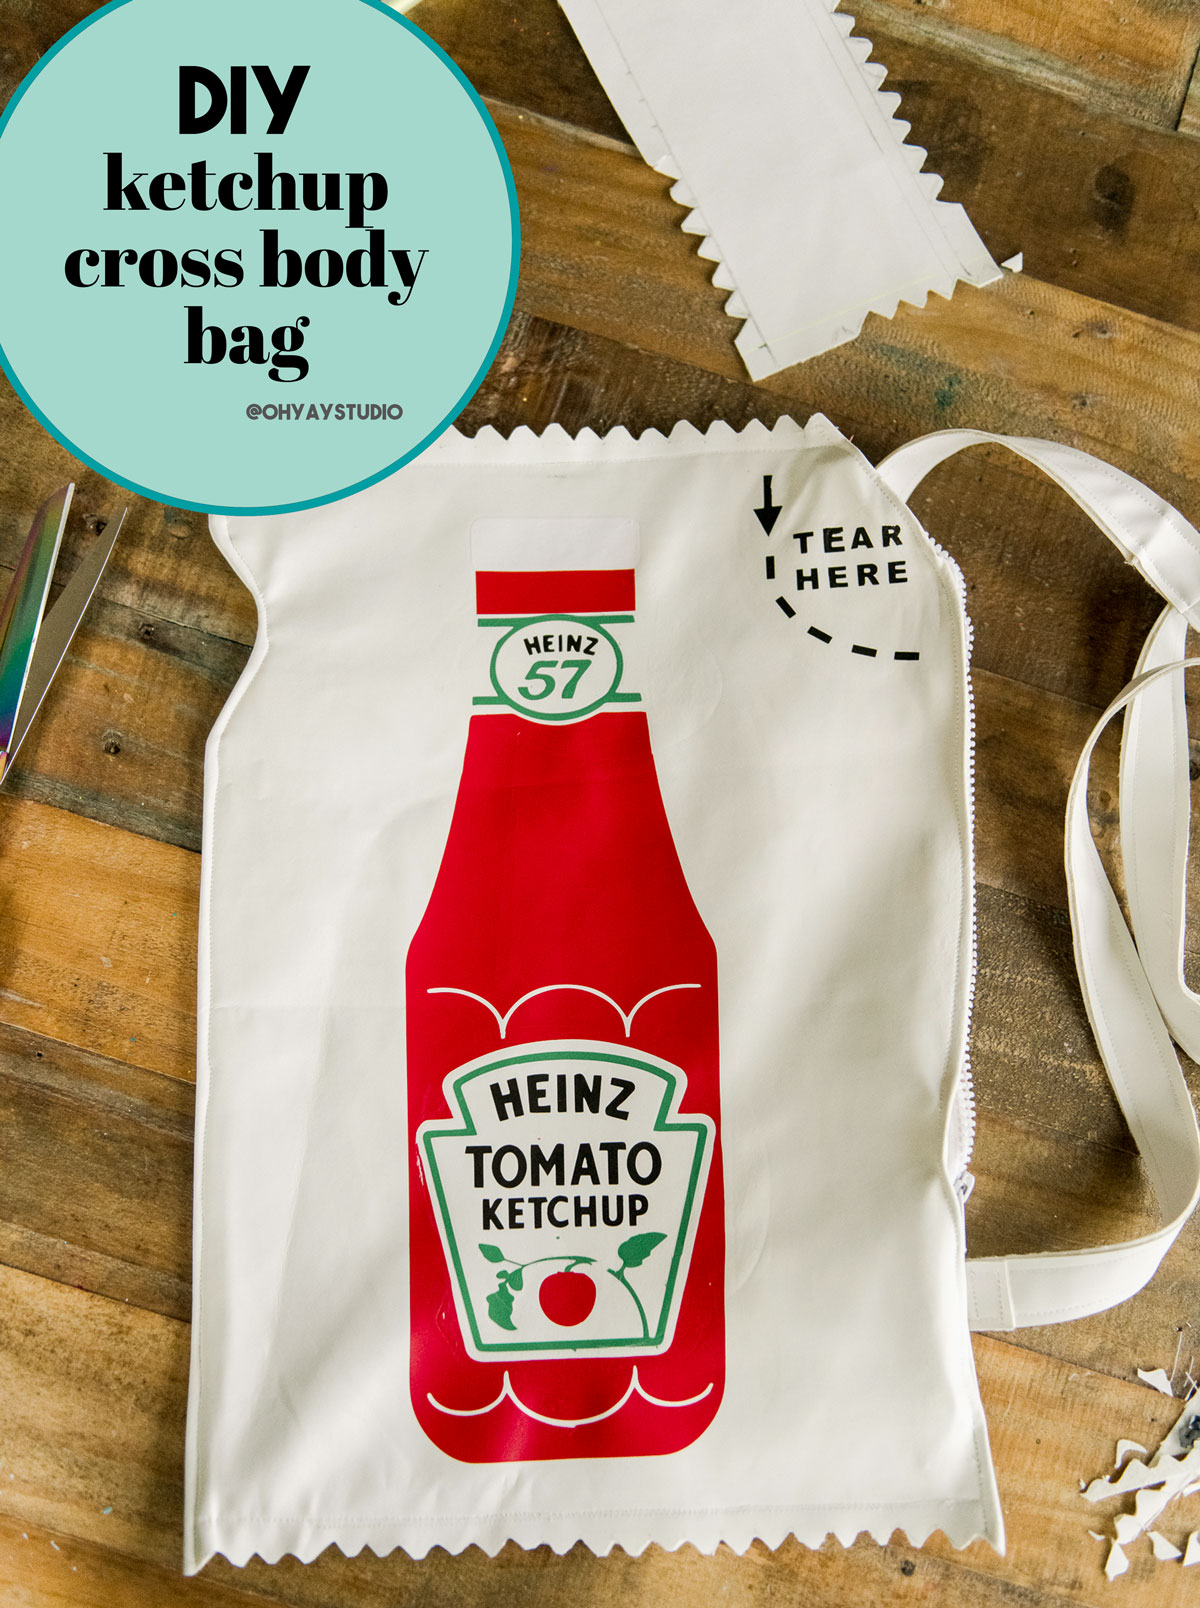
Sew a ketchup purse :)
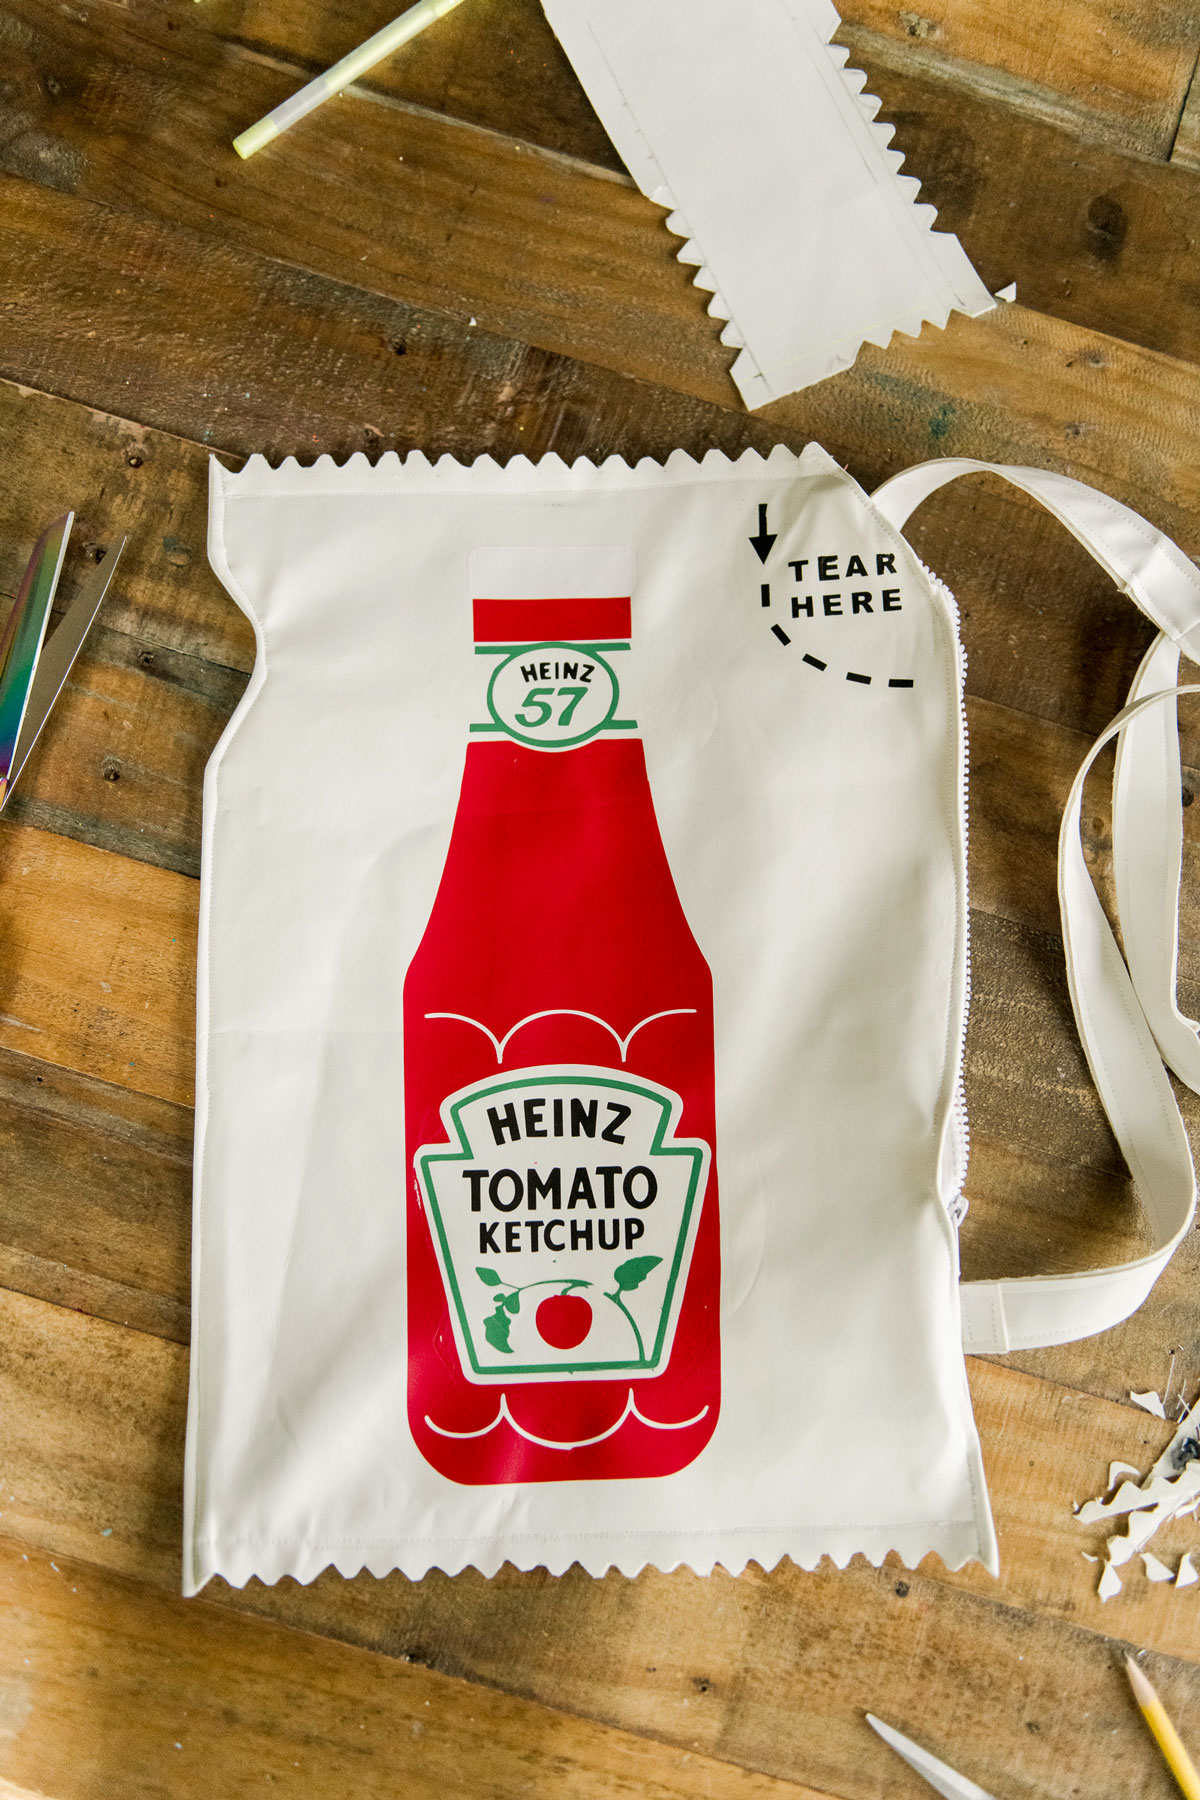
If you know my daughter in real life, then you know just how much she just LOOOOOVES (like capital “L”) ketchup! She puts it on EVERYTHING (and when I say everything, I mean EVERYTHING)….even a ketchup sandwich here and there. Yup, for sure her condiment of choice for dipping, dunking, eating with and eating alone! 🙂 SOOO when I saw that Kate Spade and Heinz collaborated for a ketchup packet cross body bag, I jumped to the website and wanted to purchase until I saw the price (ack!)…..so of course, like any good DIYer, I said “I can make my own version”…..so off to my sewing machine I went! 🙂
If you want to make a ketchup purse of your own, find my notes, pattern pieces and tips and tricks below! 🙂
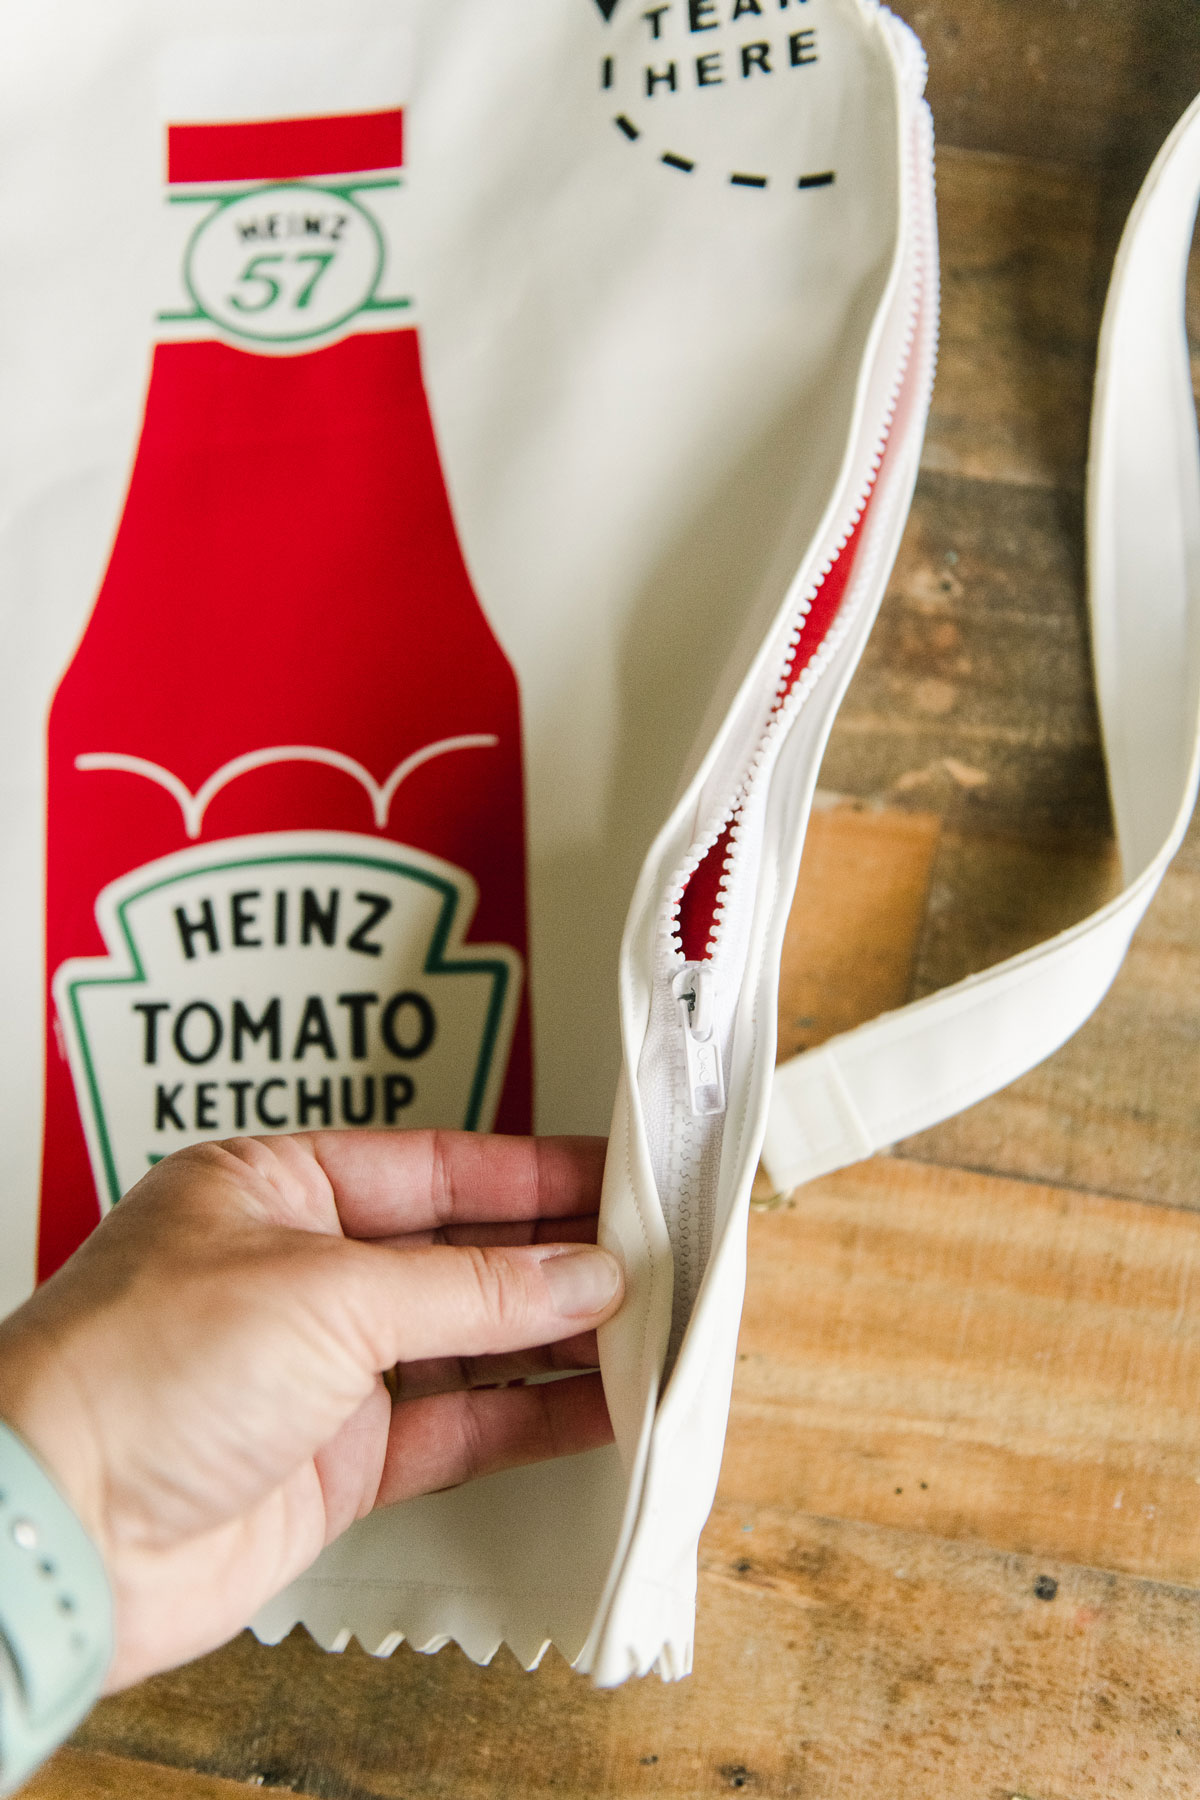
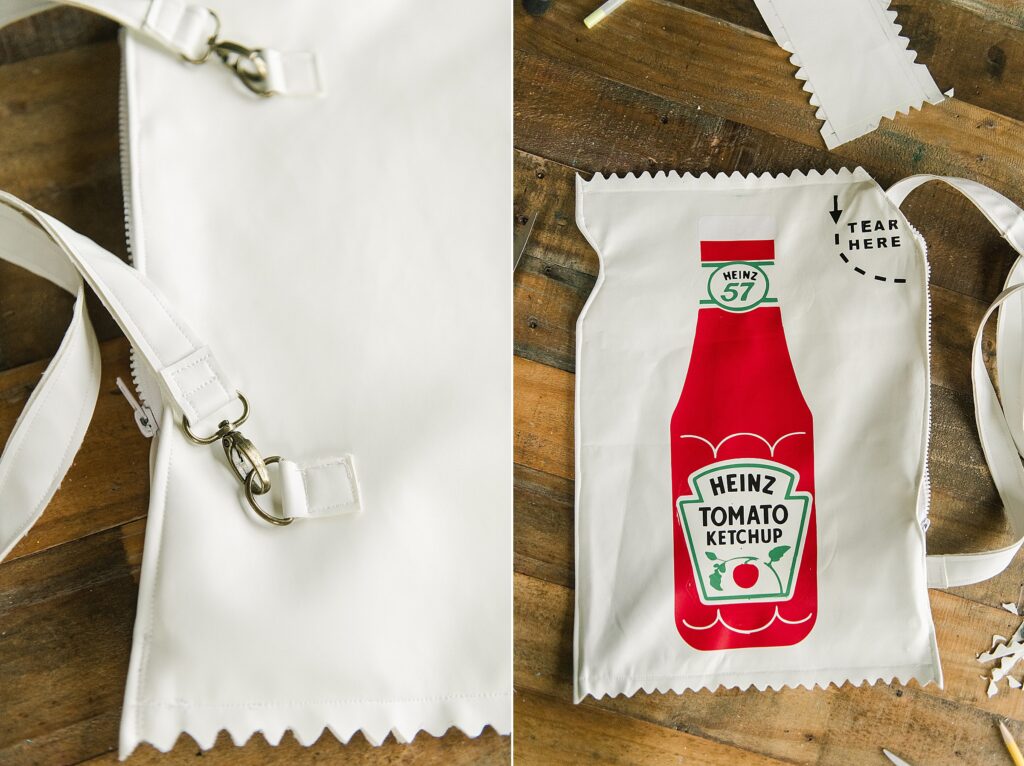
Keep in mind that the tutorial below is a bit less of a “pattern” and more of a “this is how I did this” type of thing – everything is changeable and customizable. My notes for the steps I took are below along with all of the materials and SVG files and things! 🙂 BUT please feel free to change my pattern to make things easier or more customized to your end goal of your adorable Heinz ketchup packet cross body purse! 🙂
MATERIALS:
- Your fave Janome sewing machine (I’m using the AMMMMMAAAZING Janome Memory Craft 9580 for this project)
- PDF of ketchup packet downloaded HERE
- Coordinating thread and needles for your sewing machine
- Just under a 1/2 yard of white leather, pleather, or boat upholstery fabric
- Just under a 1/2 yard of lining fabric (I used a cotton)
- a 14” sport zipper (or any zipper of choice really)
- A set of 1” D rings for the strap
- 2 Swivel hooks for the strap
- Red, black and green paint or HTV vinyl for the ketchup logo on the front
- Sharp scissors or rotary tools
- An iron 🙂
- optional pair of pinking sheers for the crinkled edges
INSTRUCTIONS:
1. Start by cutting everything out! 🙂
a. Cut 2 outside white pieces (the ketchup packet itself). You can either make a pattern out of paper for this part or roughly follow the PDF HERE 🙂
note- if you follow the PDF be sure to size accordingly – I printed mine at 80% for the size bag that I wanted. Just measure off of the 8.5×11 piece of paper and then tape all 4 together to get your printed pattern.
b. Cut 2 inside lining pieces (if using the PDF, cut clovers to the the dotted lines for the lining. You will want it to be smaller to get the look of the “stuffed” packet).
c. Cut your straps. The dimensions of these will be depending on 2 things: how long you want the straps to be and the size of the D rings you purchased.
I purchased 1” D rings, so I cut my straps juuuuuust slightly under 1” in width x approx.55” in length (for a teenager or if you want this to be an over the shoulder bag, maybe closer to 40”-45”).
d. Cut 2 pieces of your scrap white outer fabric approx.1” (size of my D ring) by 3” (Ish) for holding your D ring in place on the back of your bag.
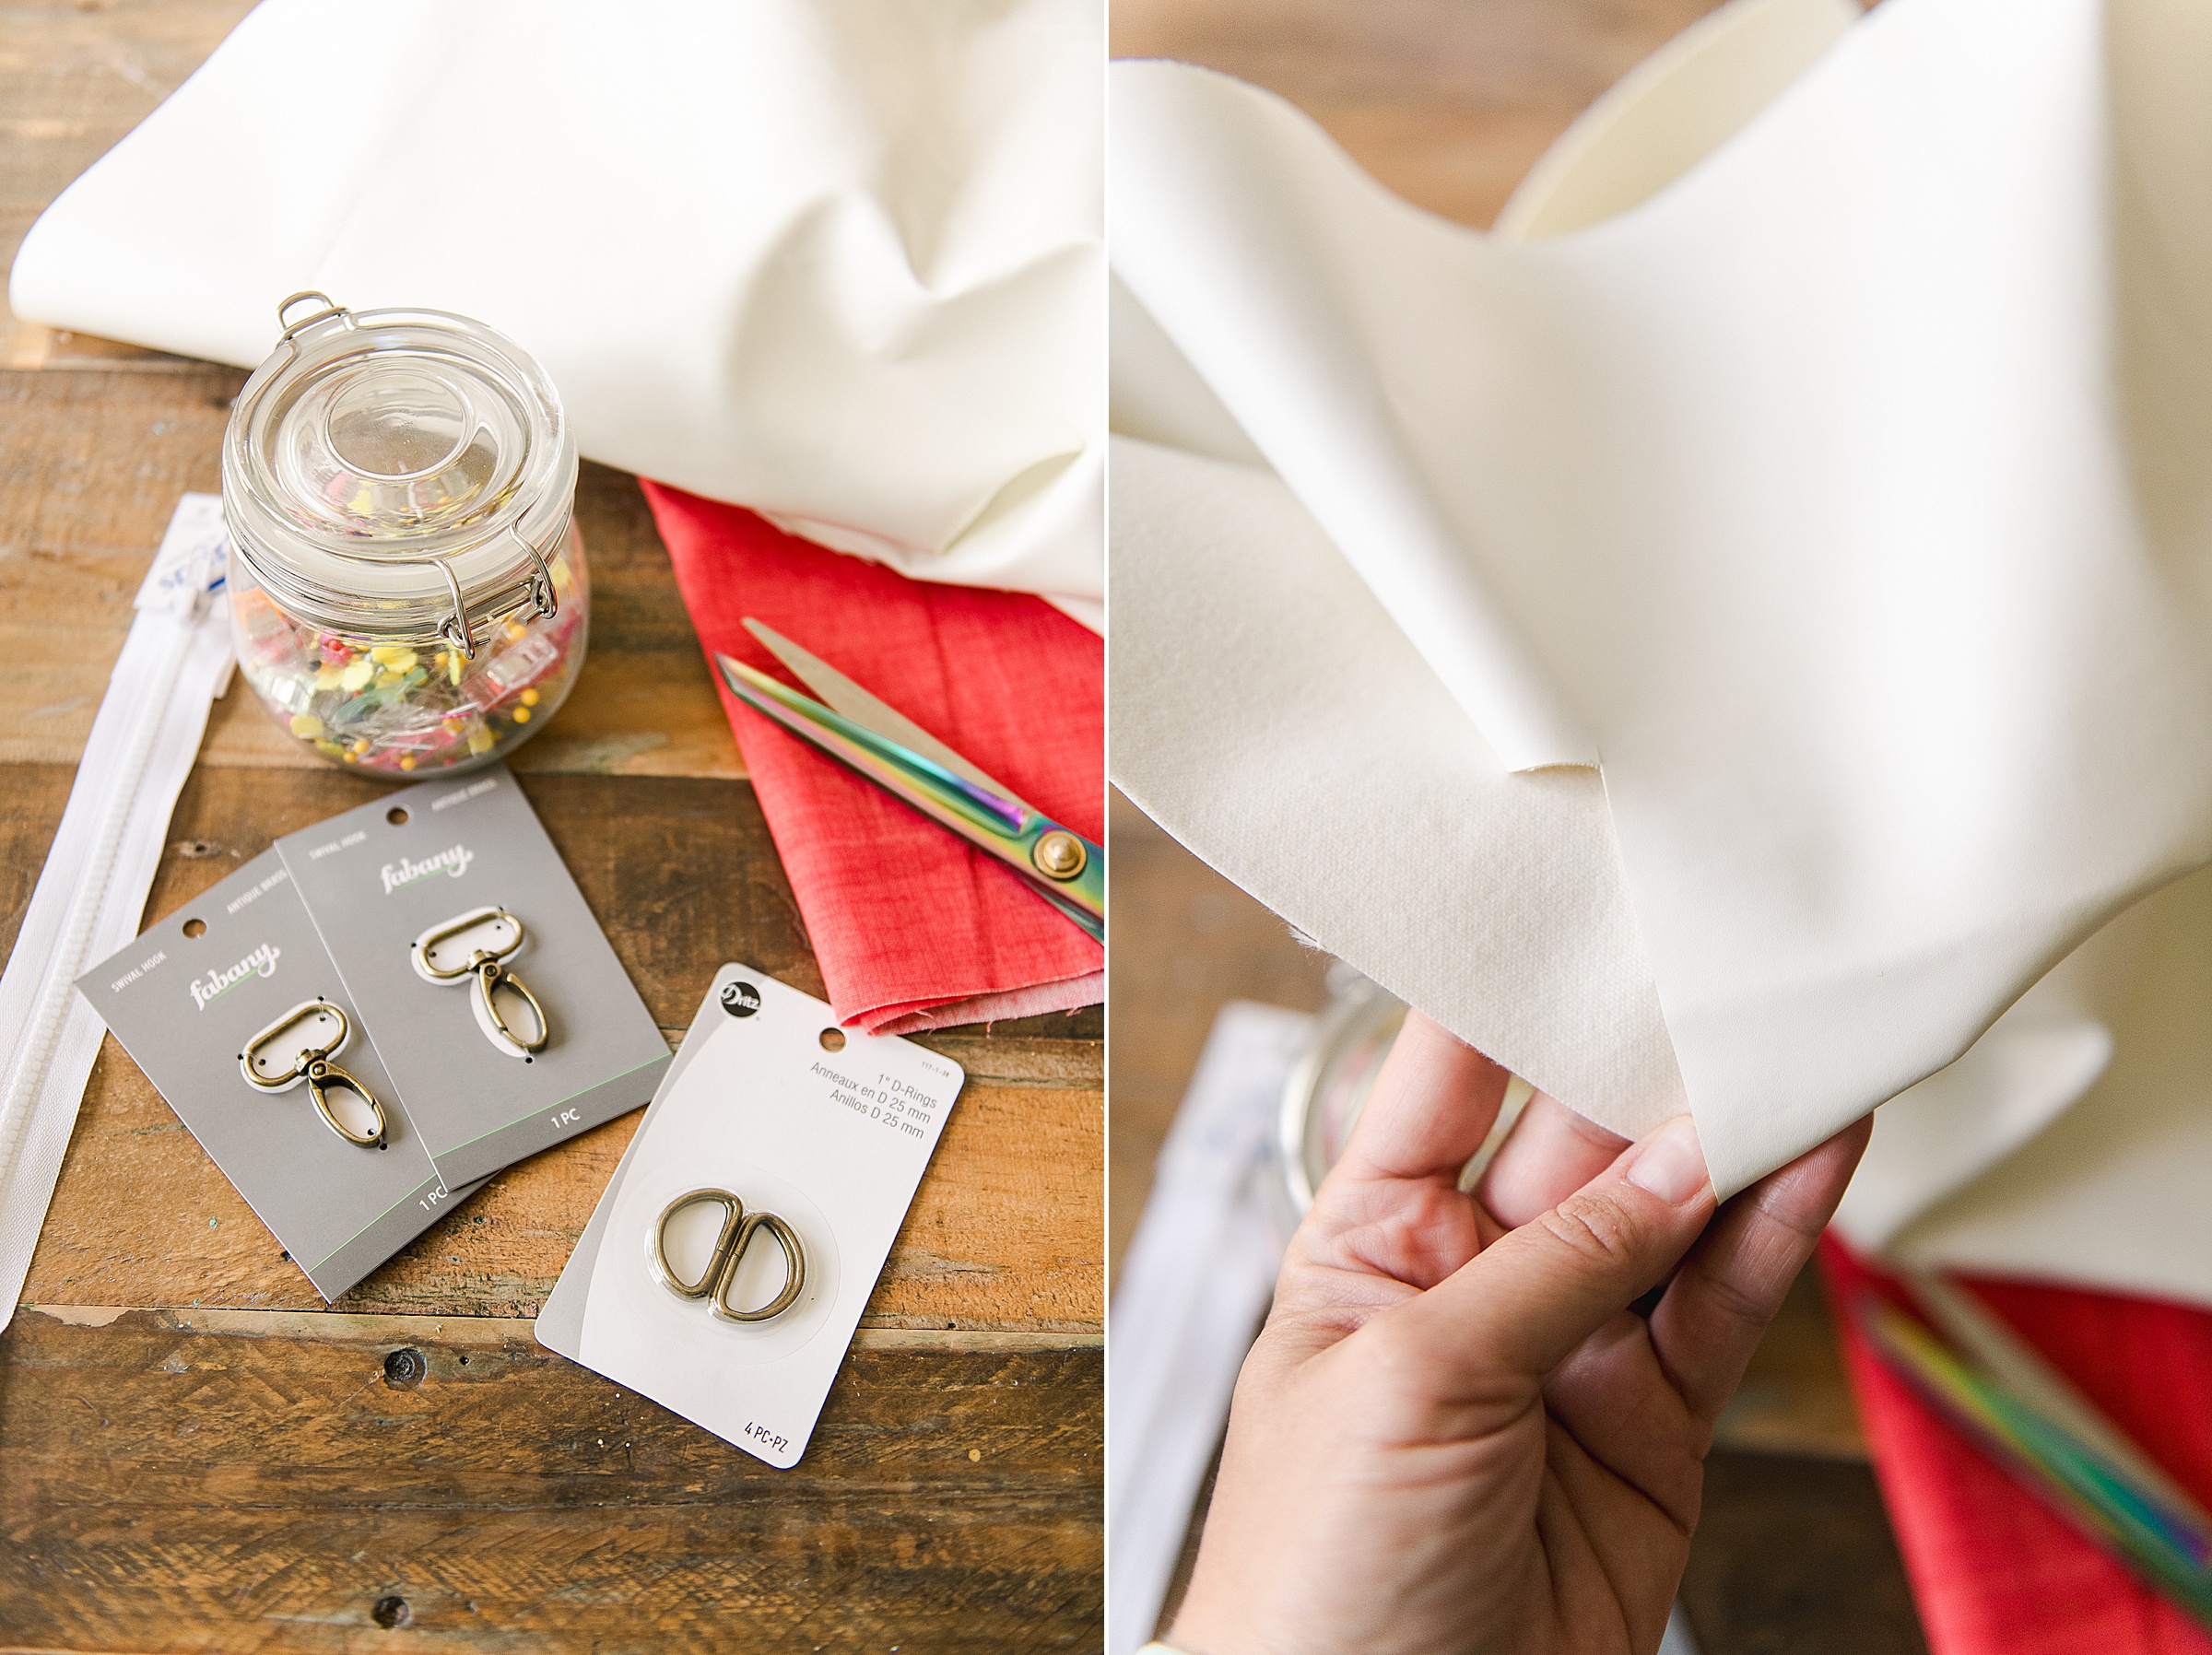
2. Assemble your strap
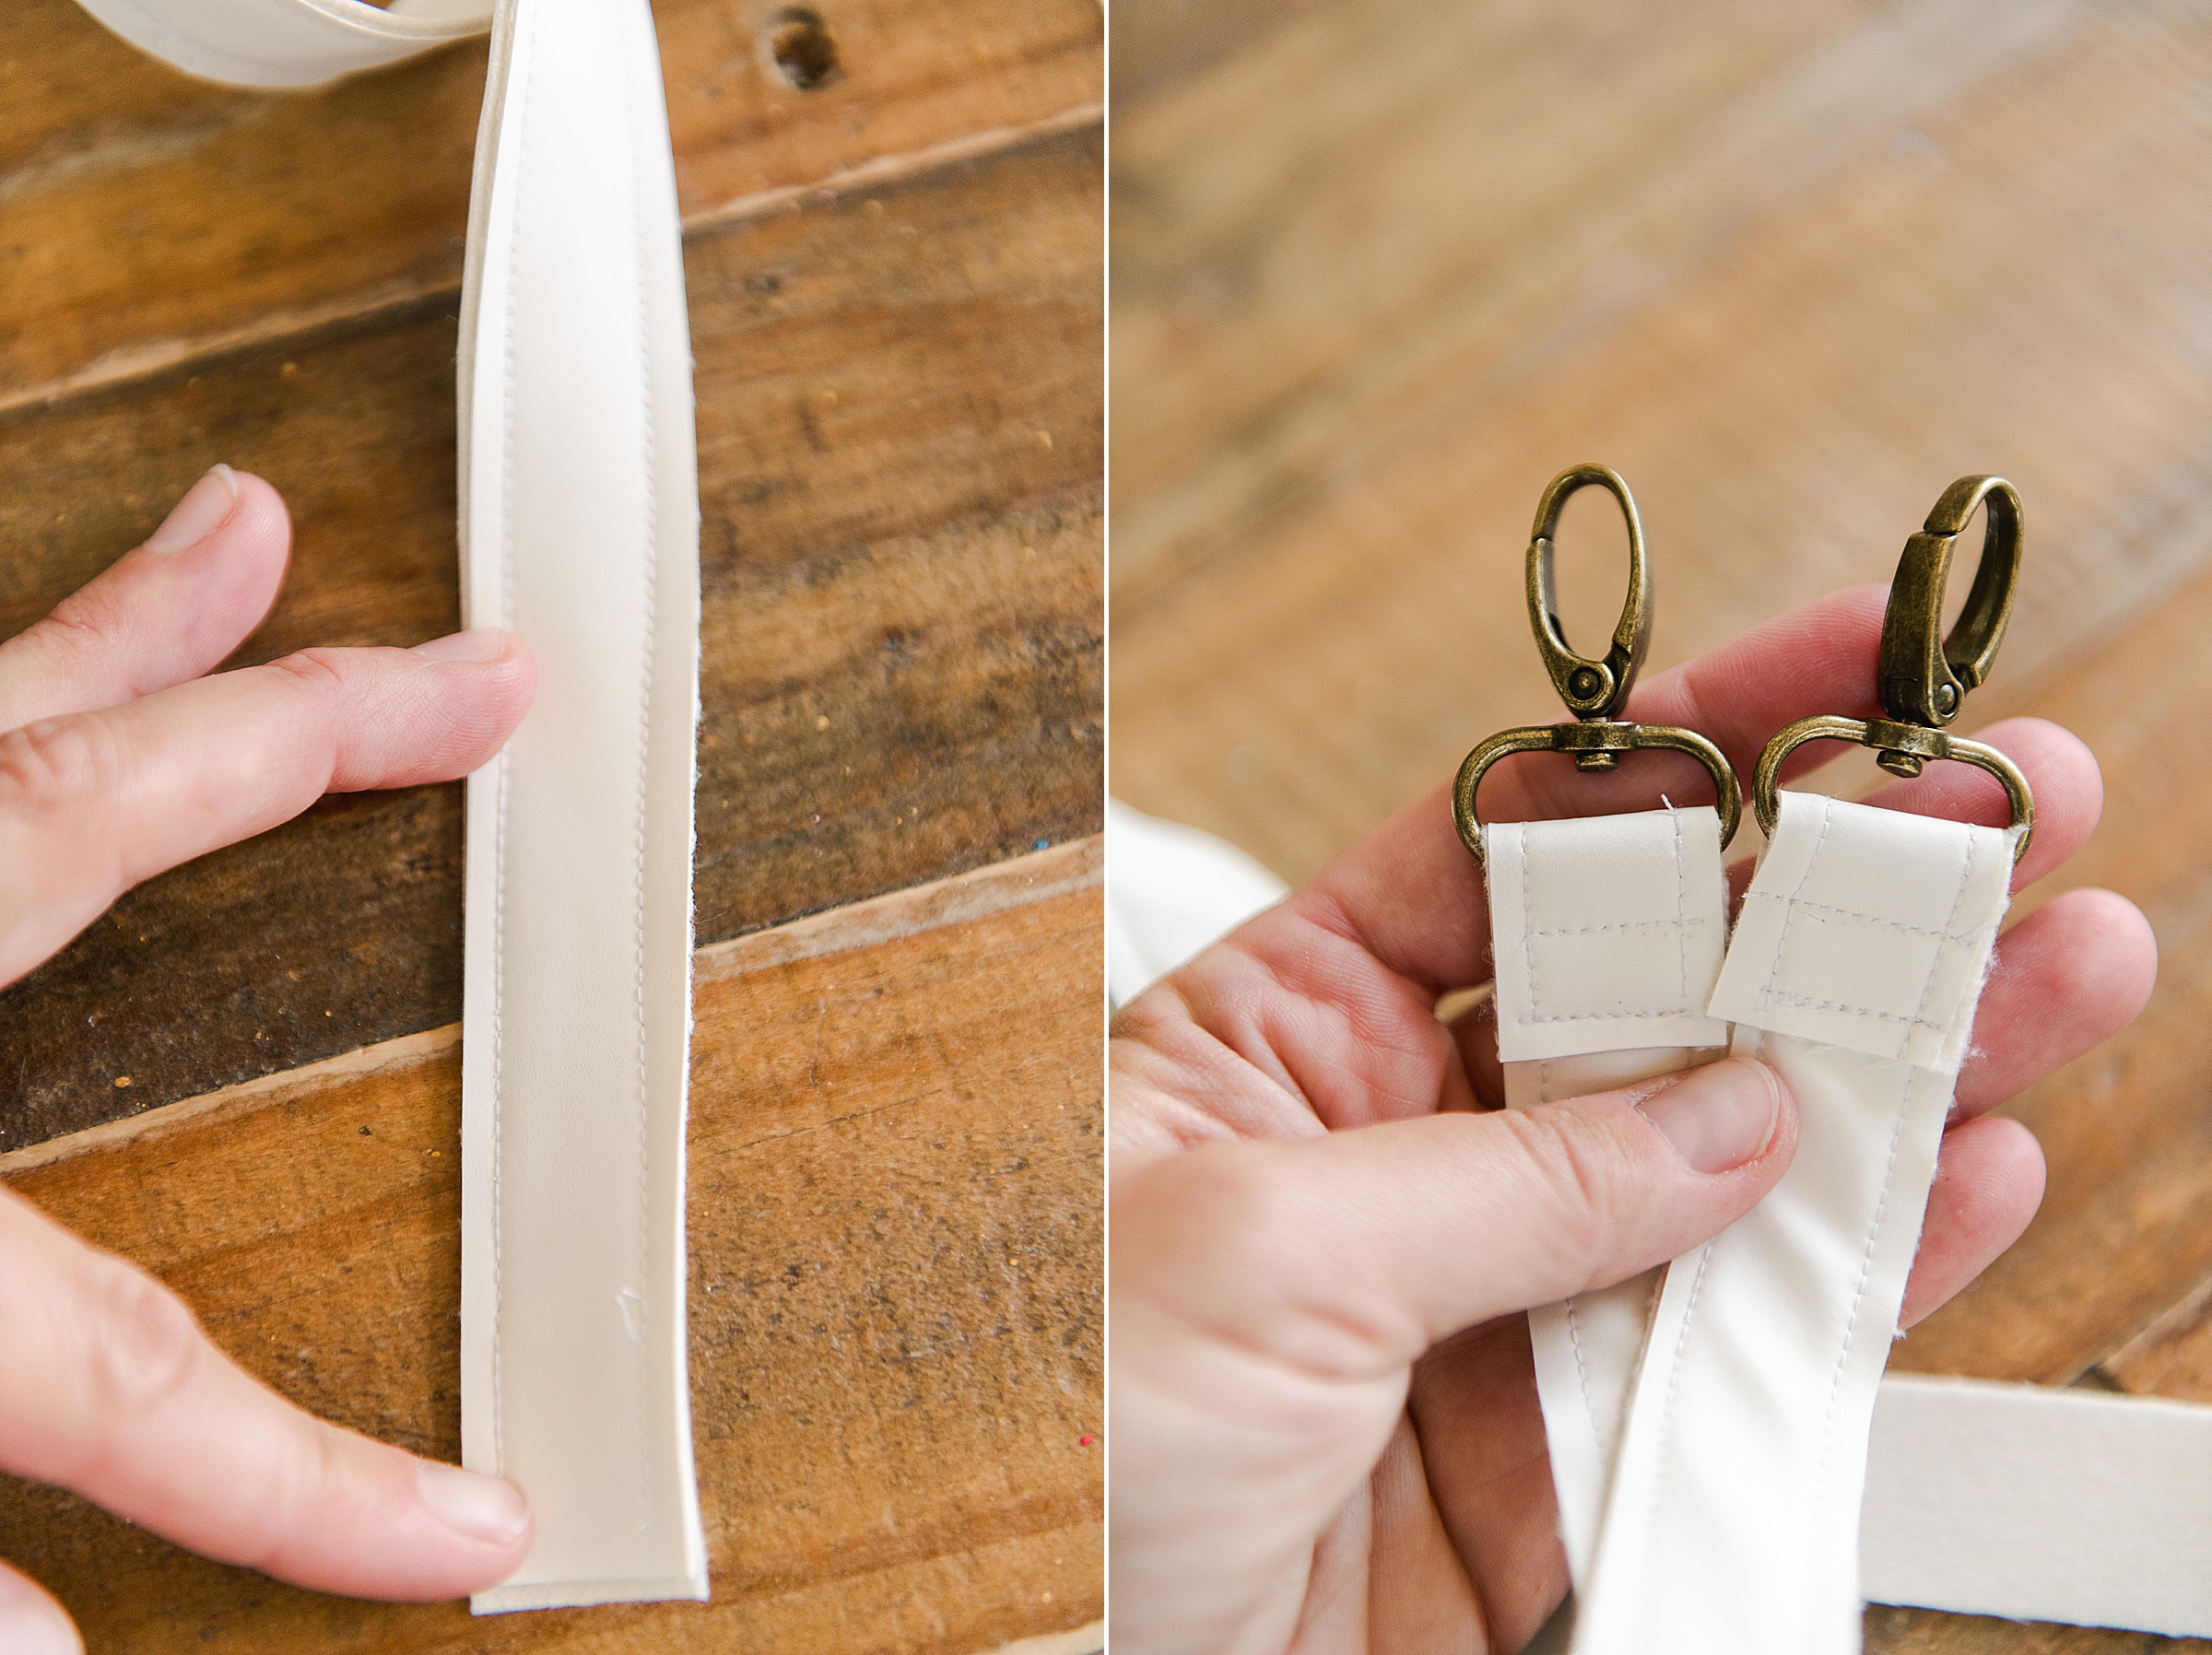
Do this by first sewing your length together if needed (I only had fabric that was 32” long, so I had to sew 2 pieces together to get my length).
I the chose to lay my straps wrong size together and top stitch them on both sides of the length
Then you will sew your swivel hooks to the ends of your strap 🙂
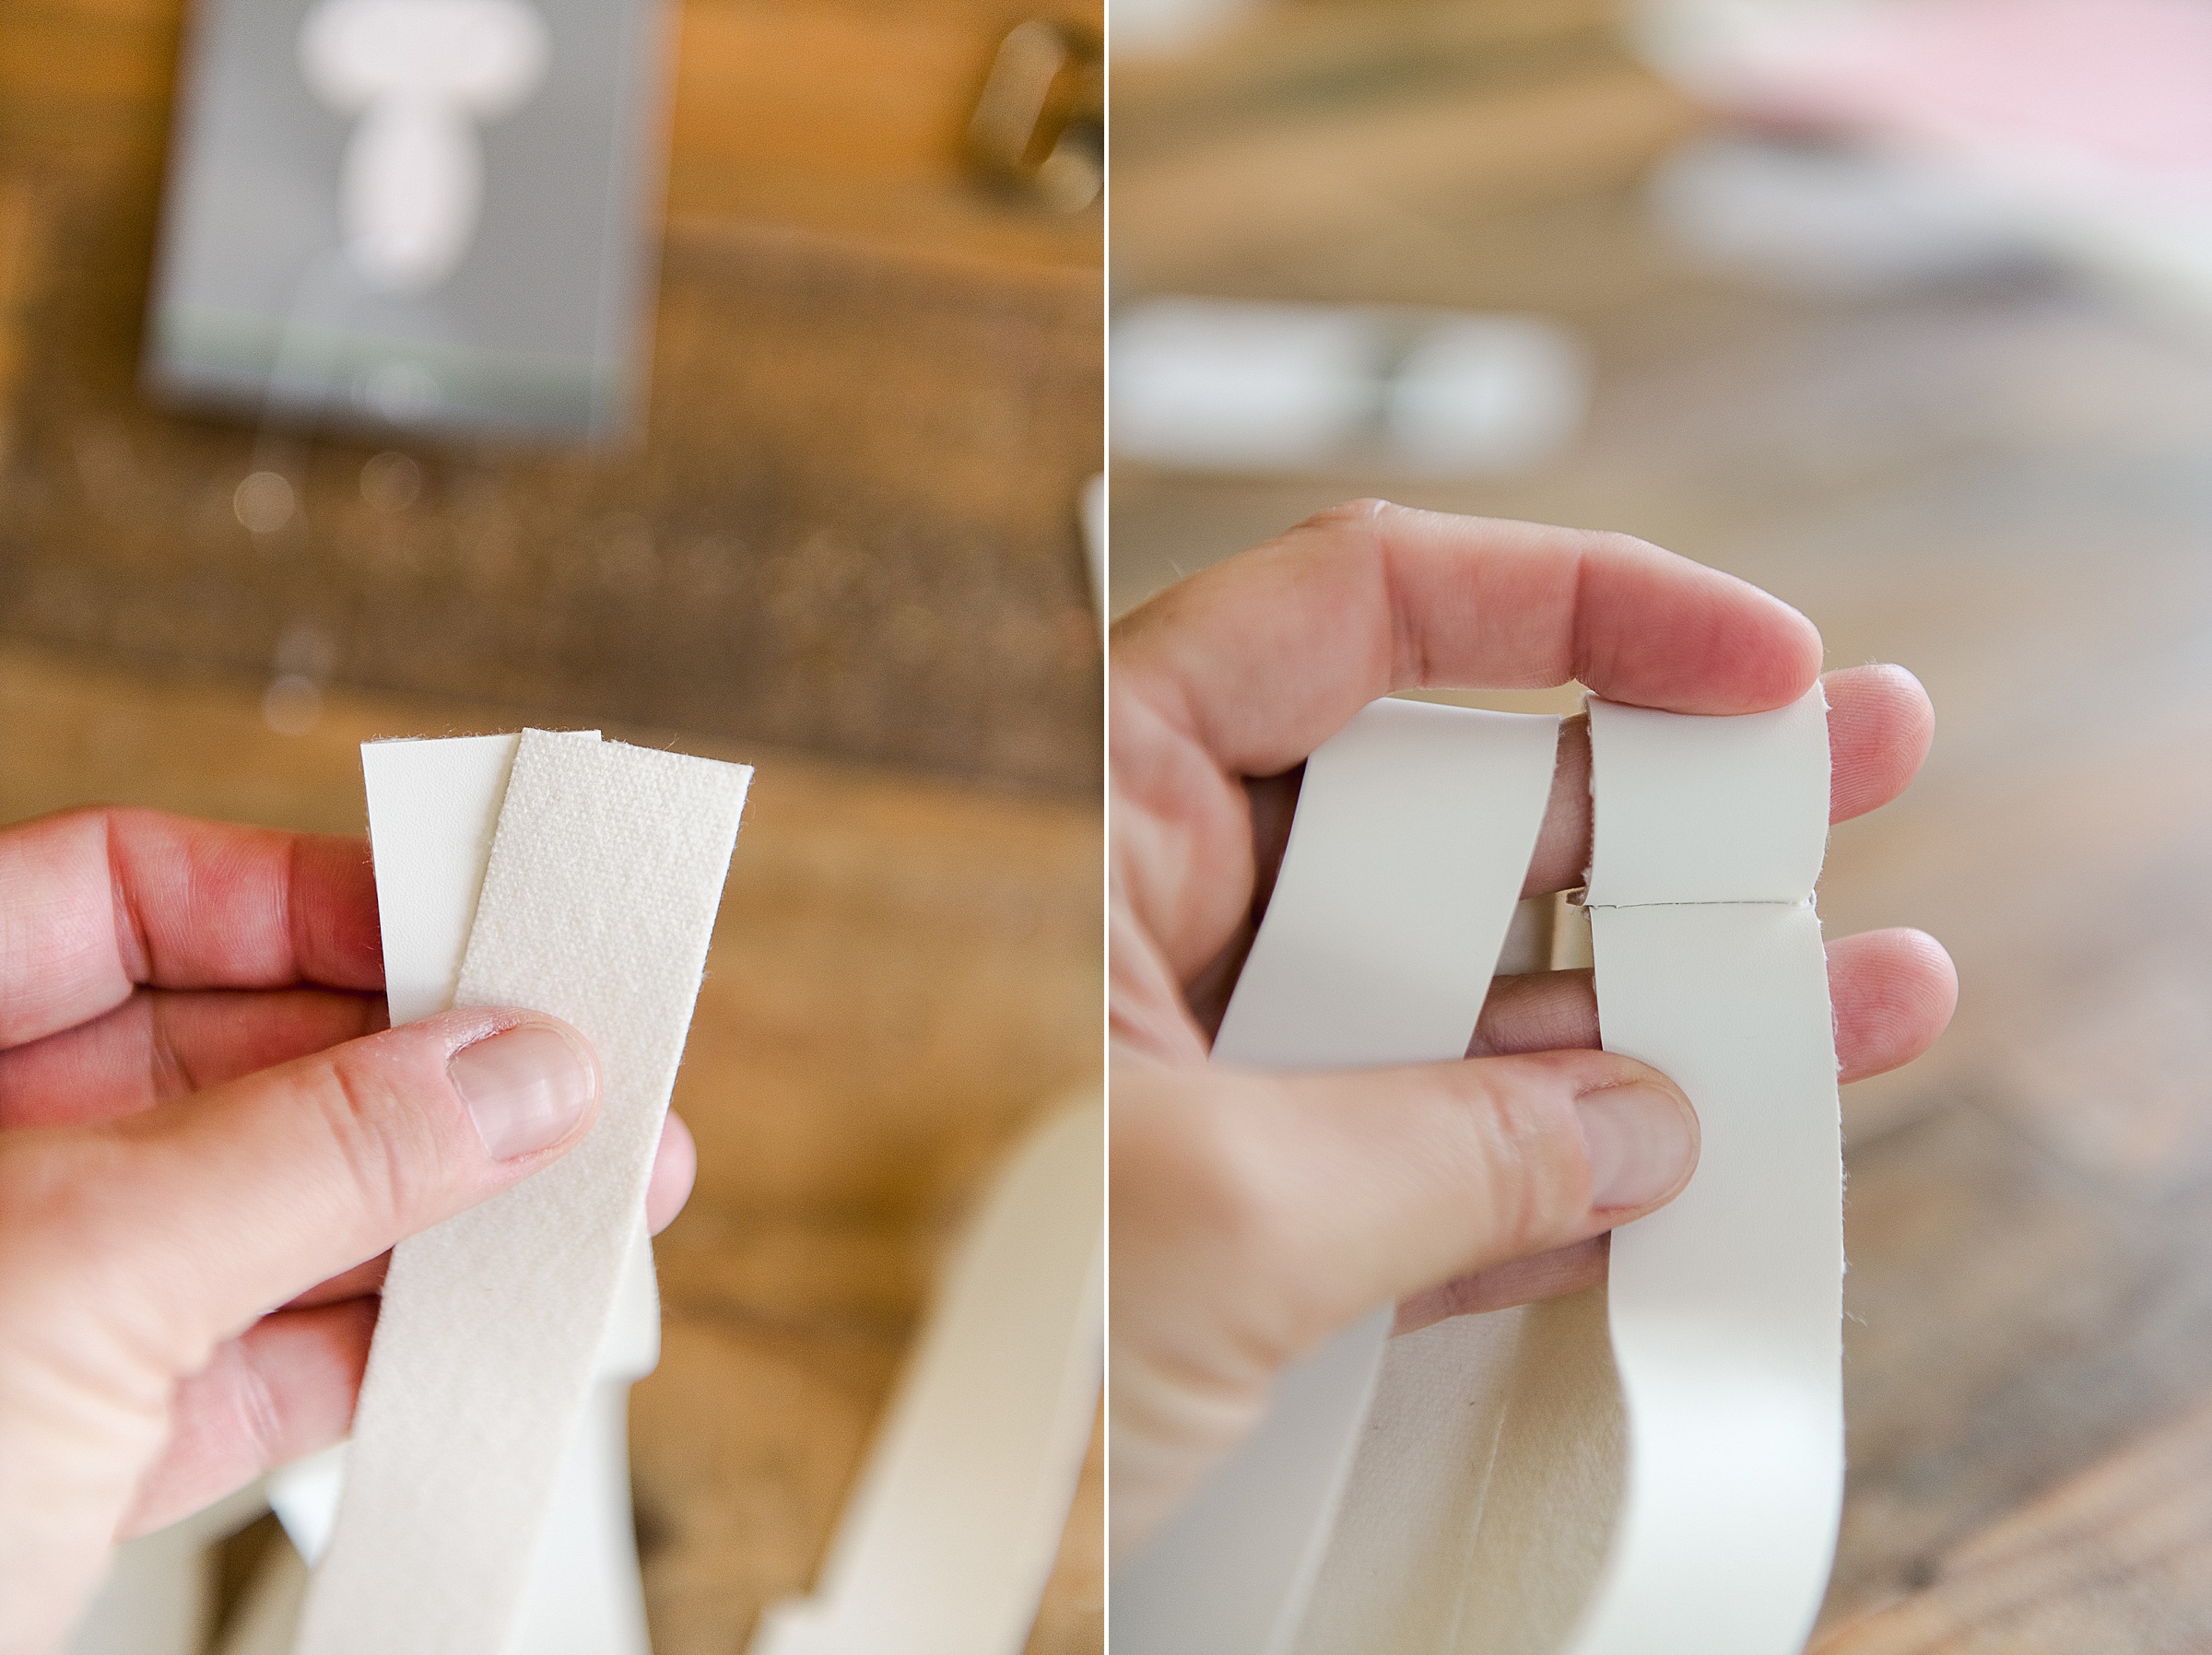
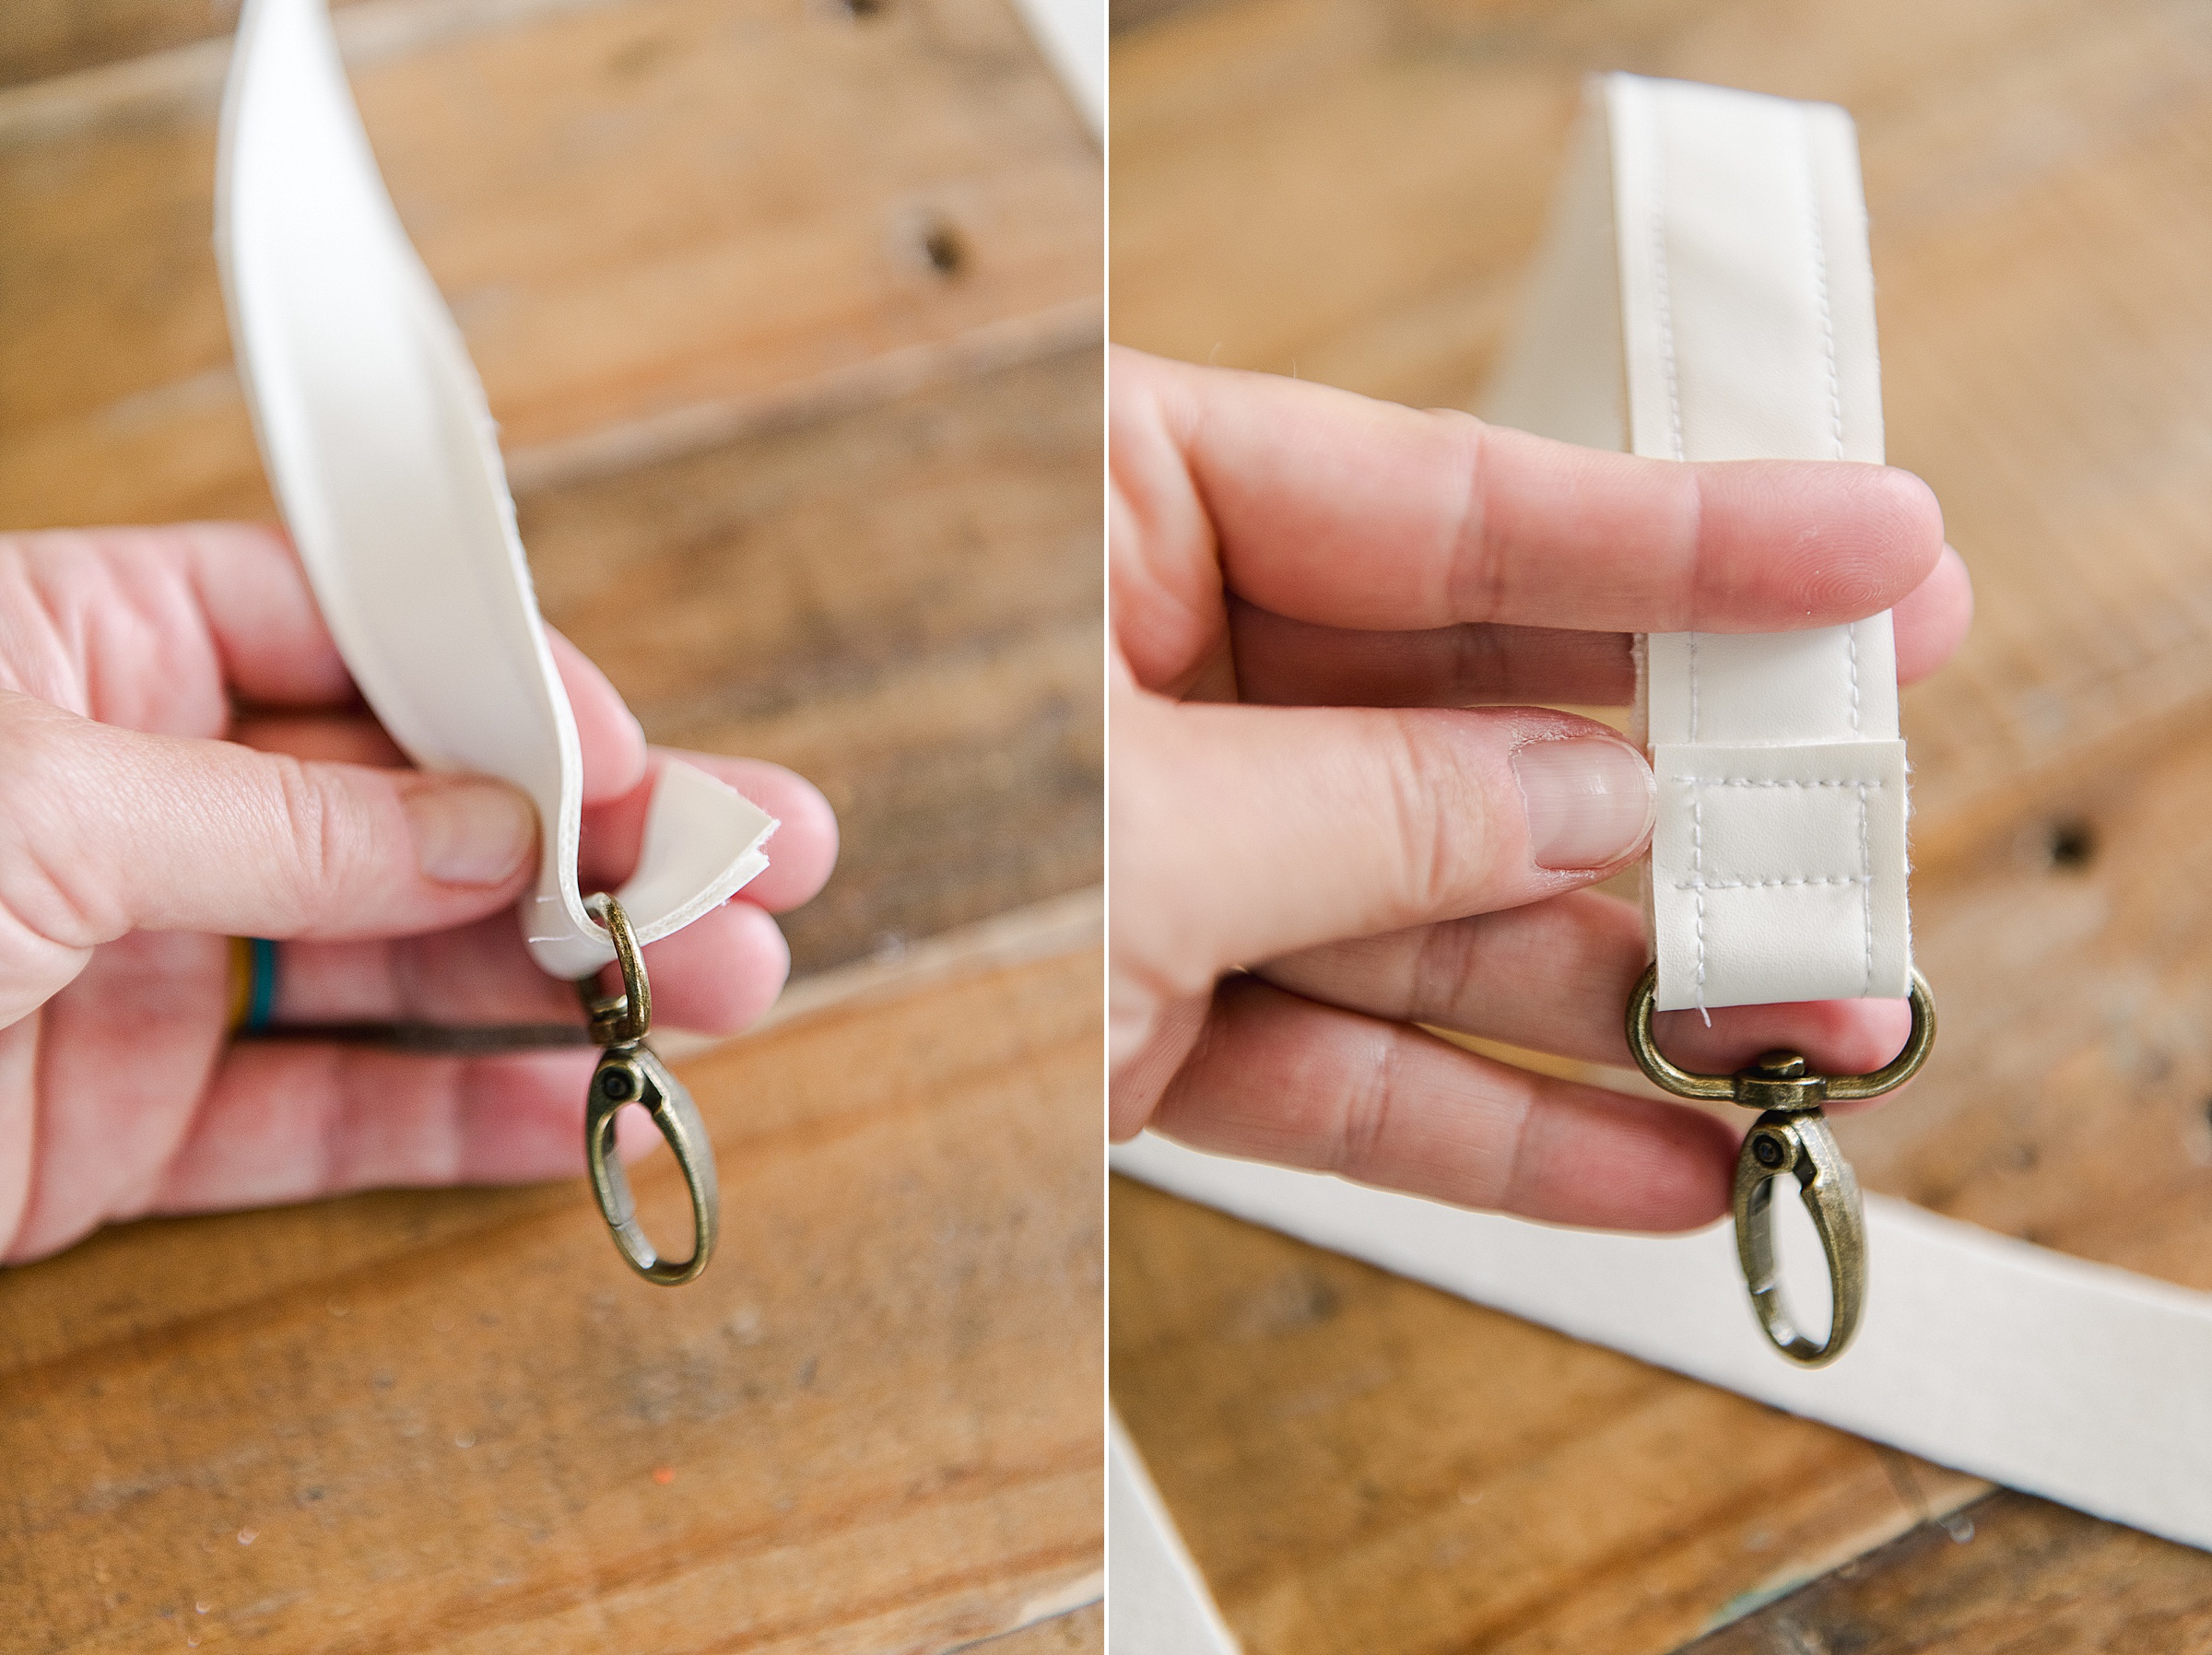
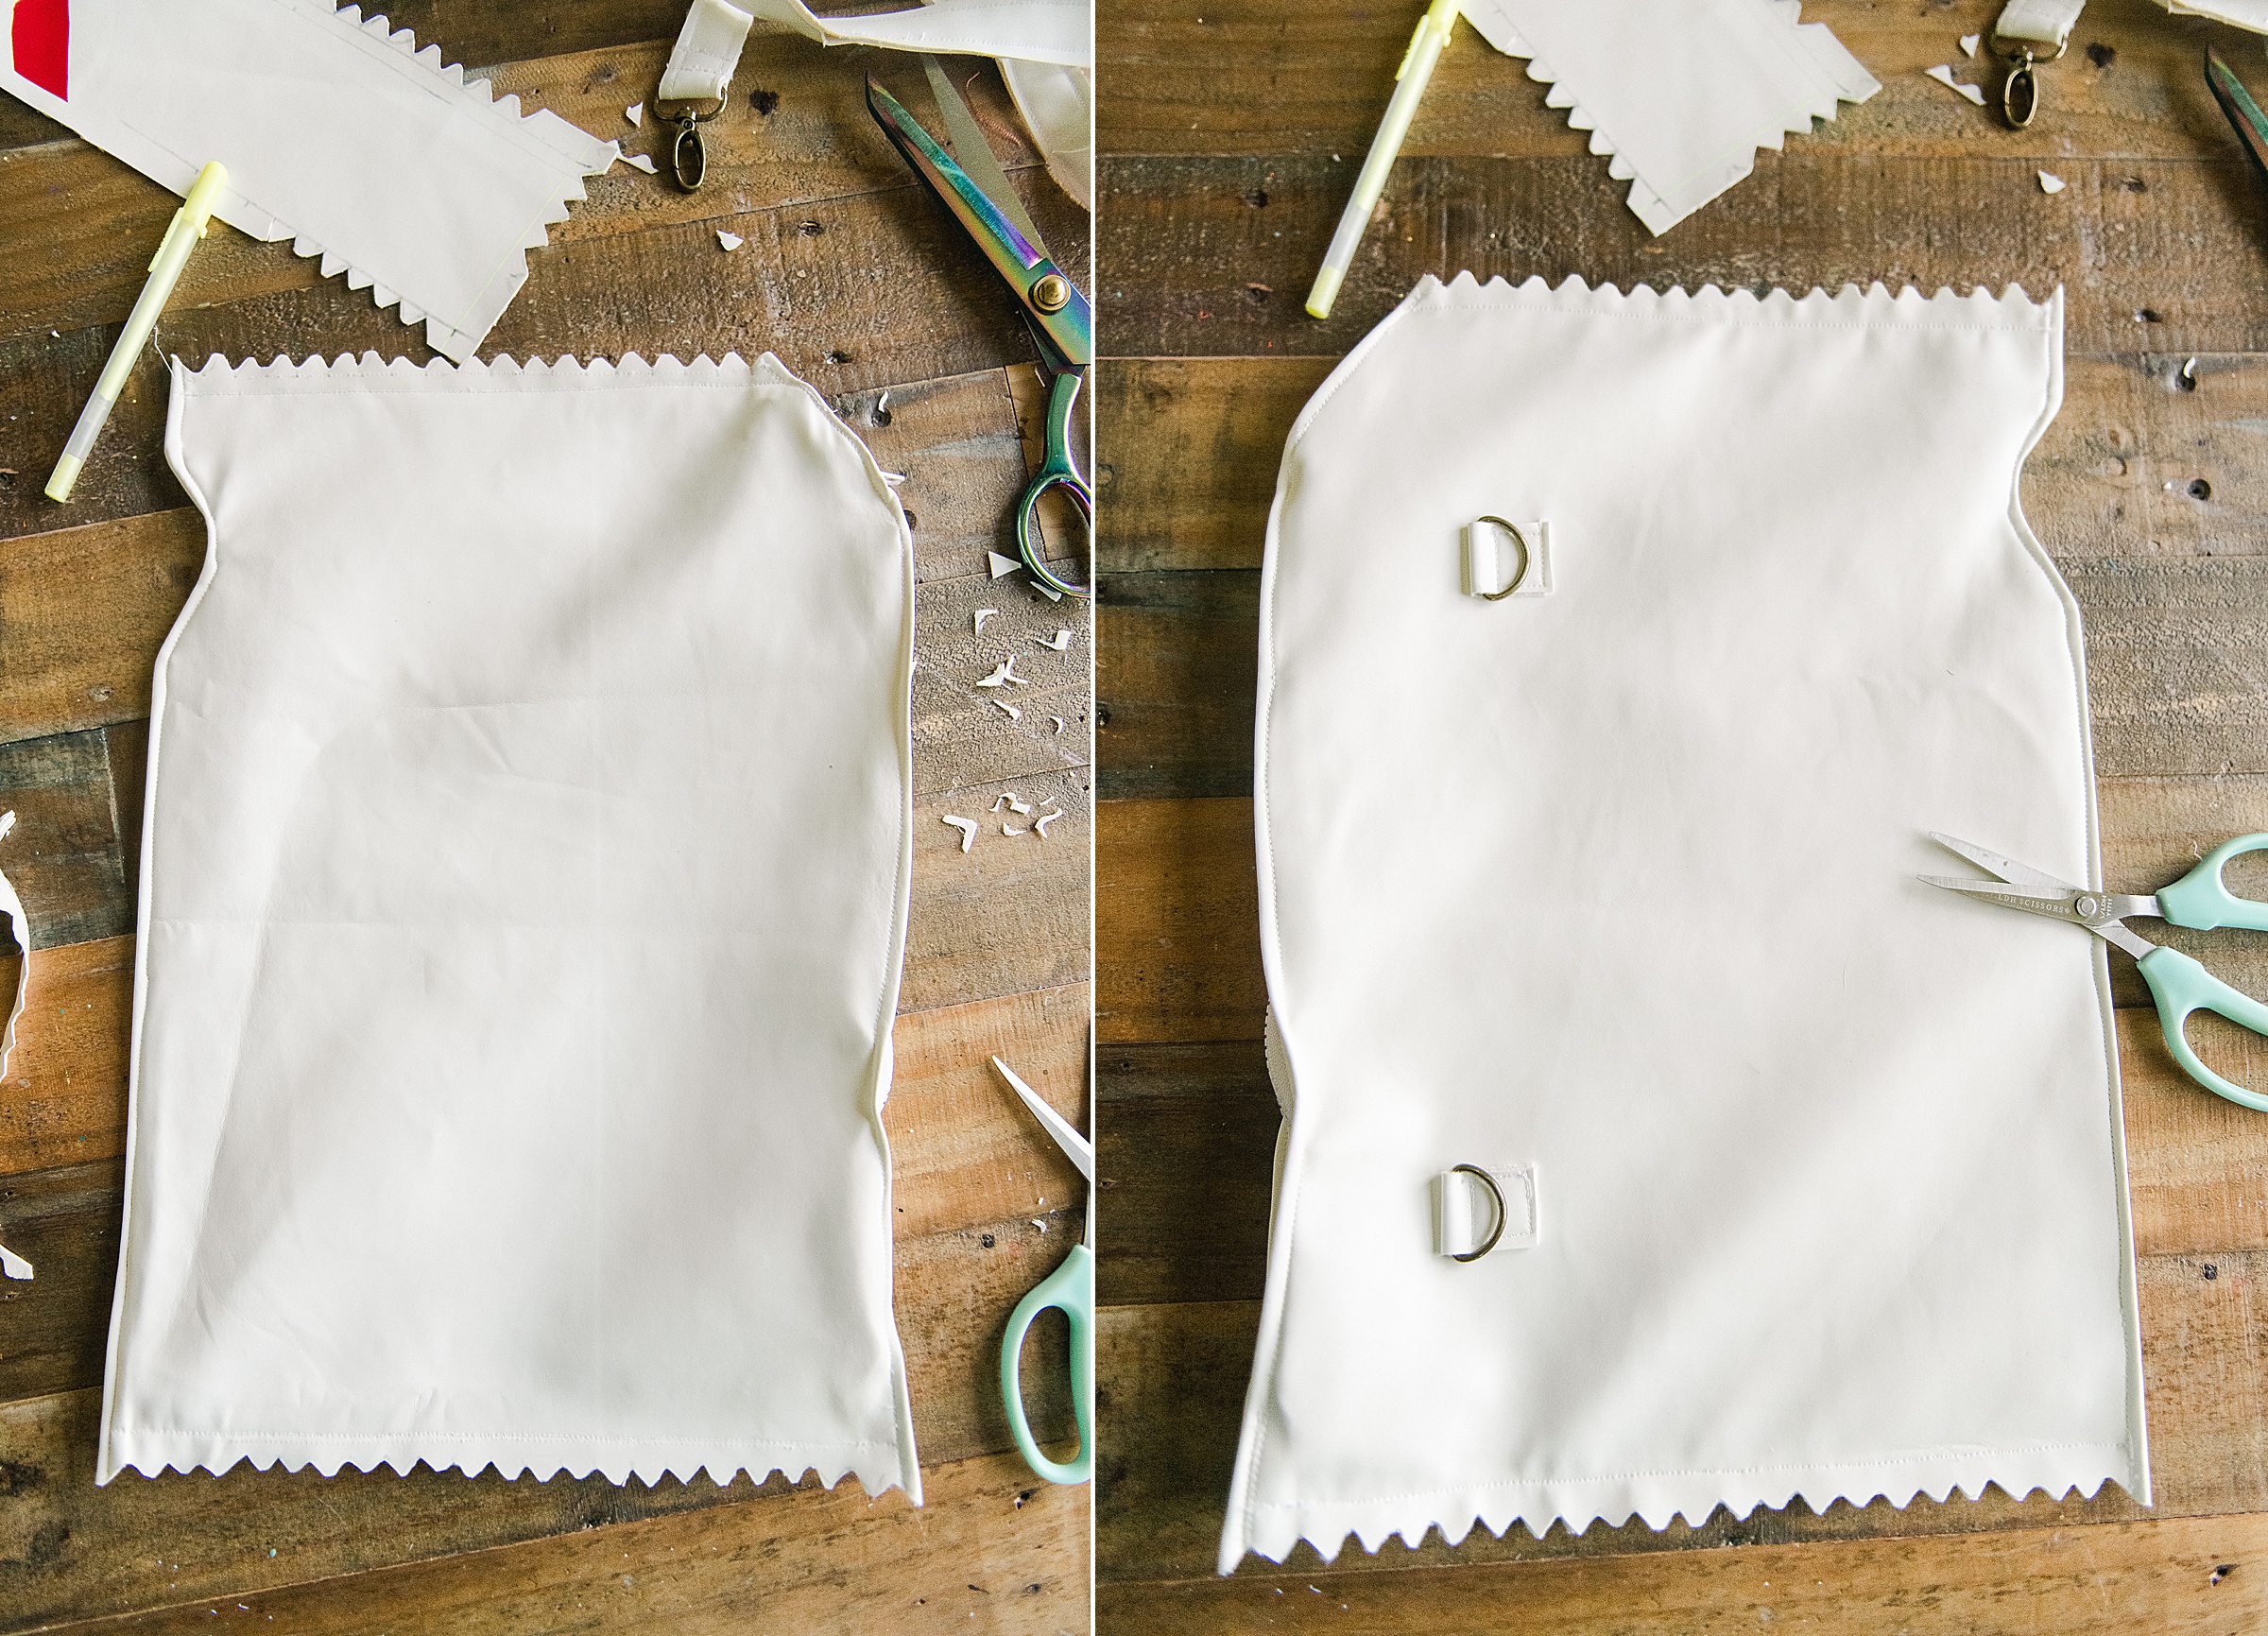
3. Add the D rings to the backside of your outer leather piece
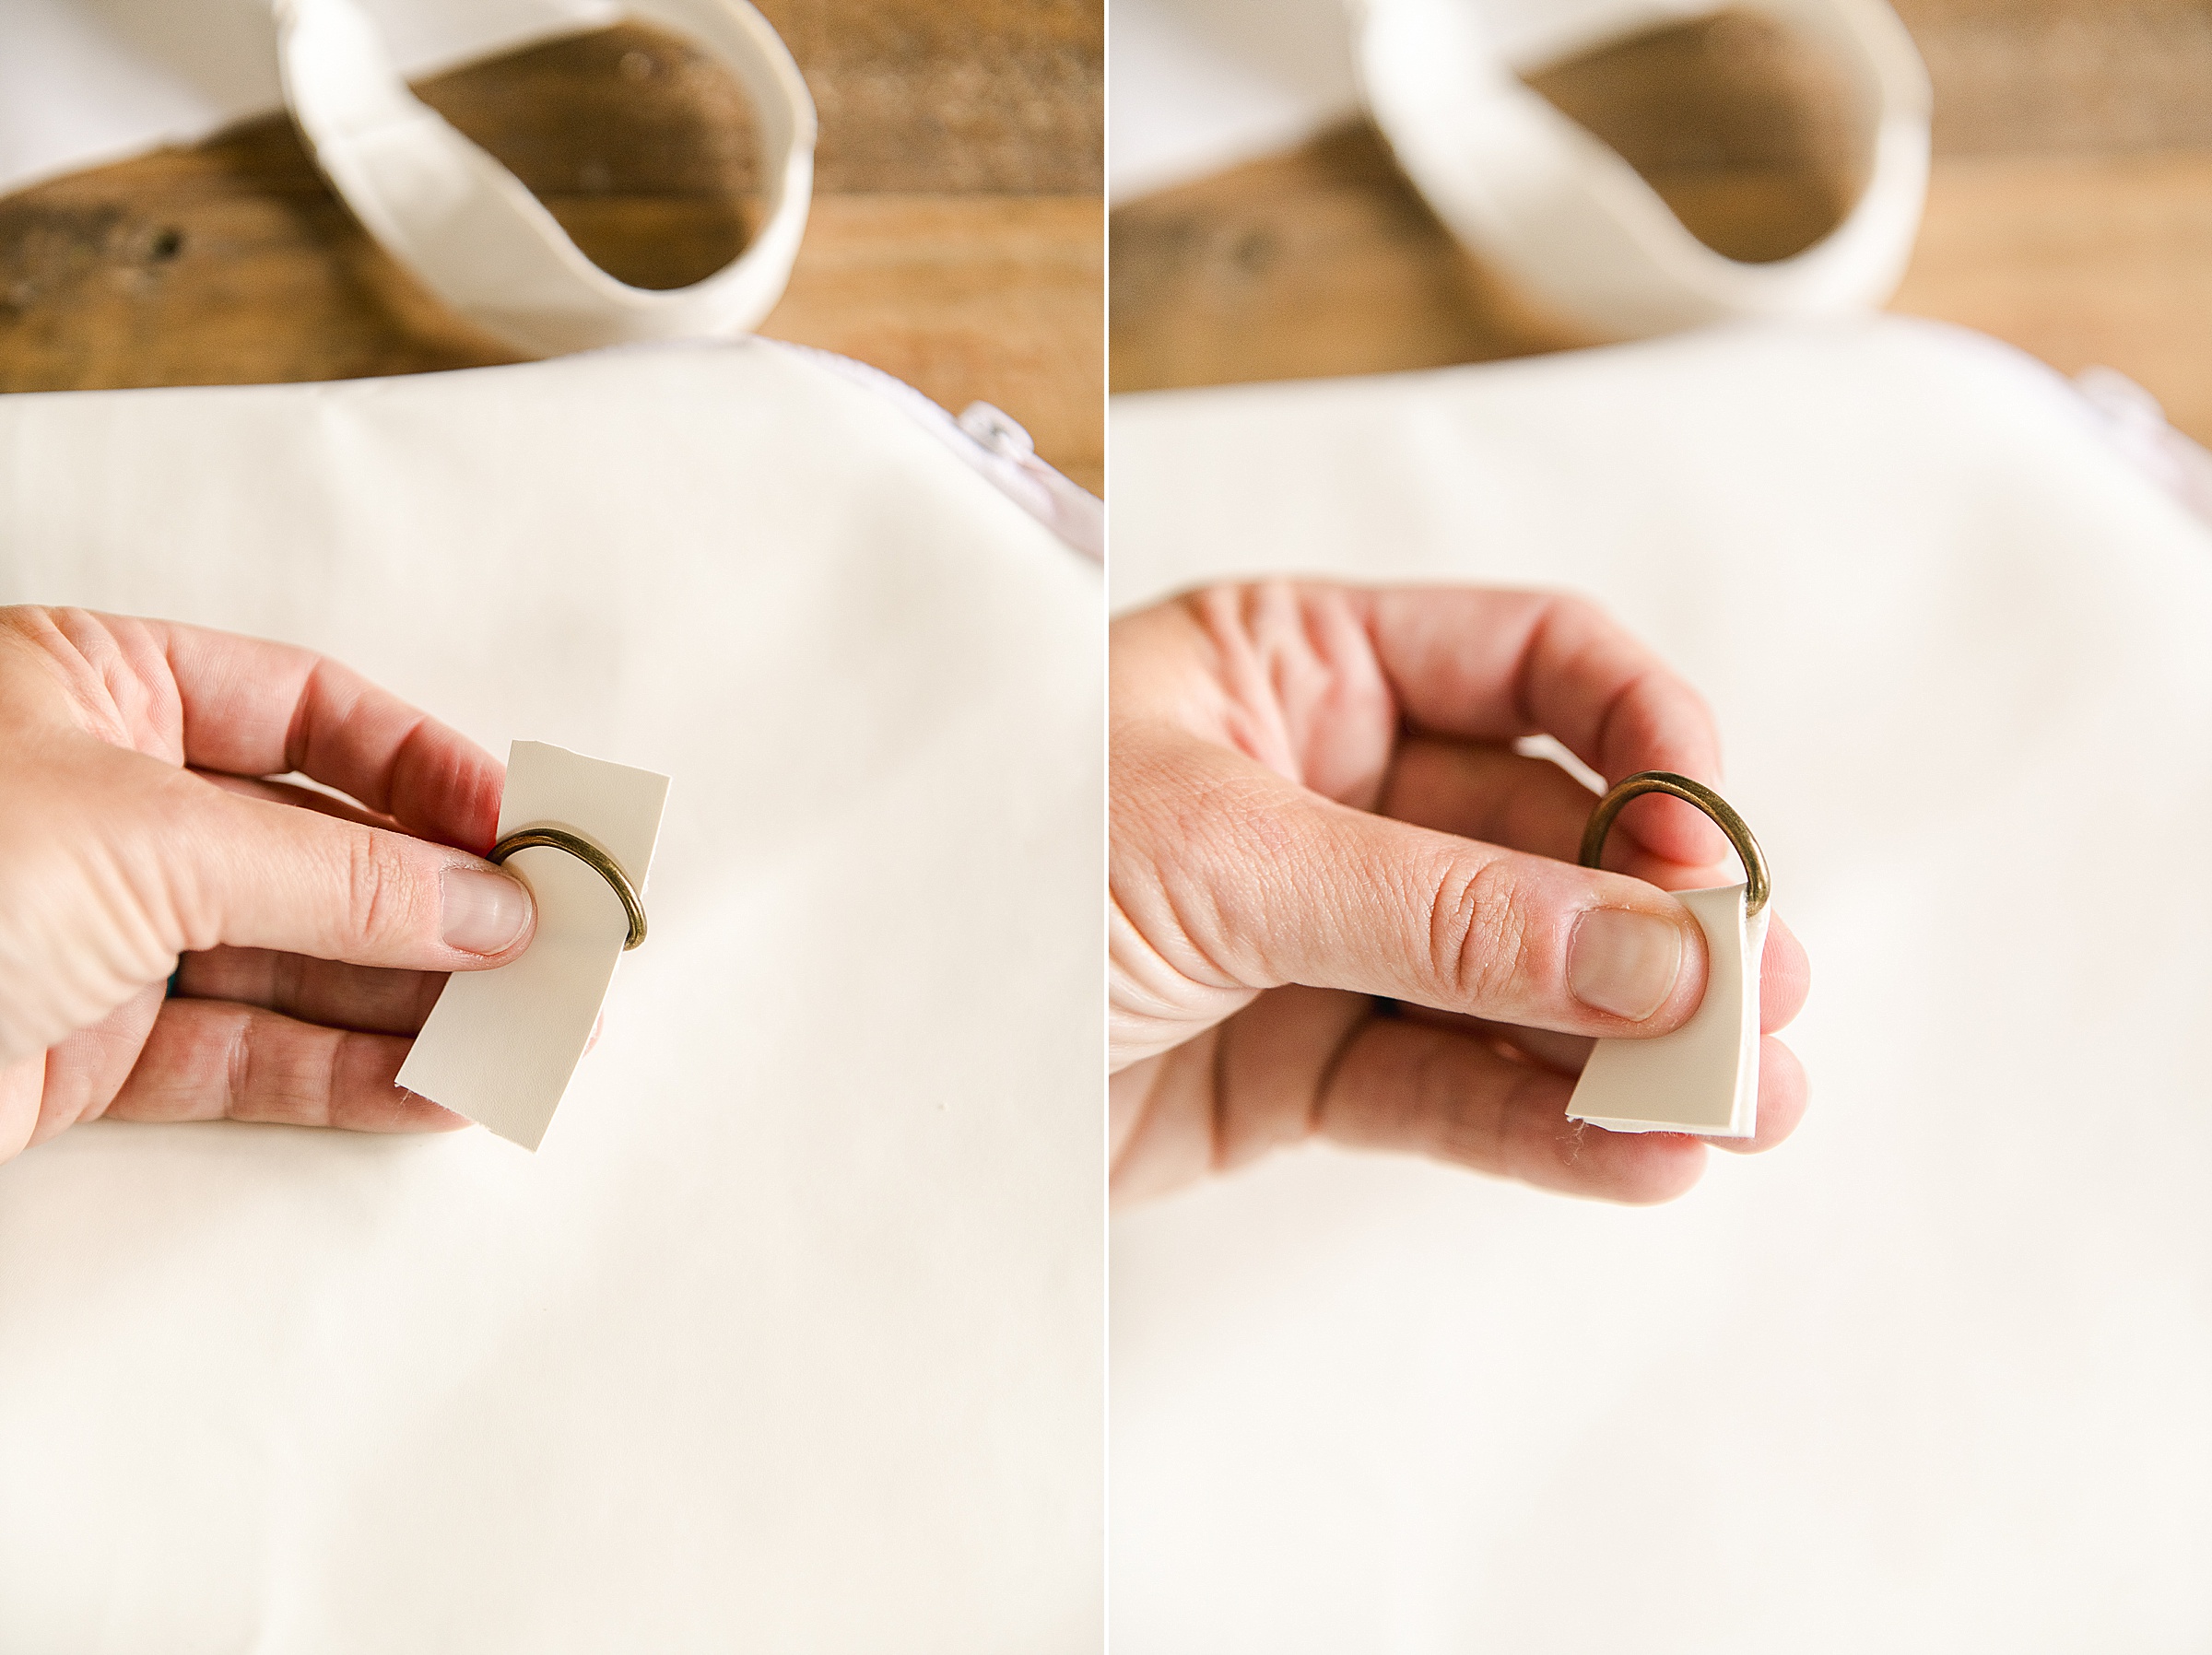
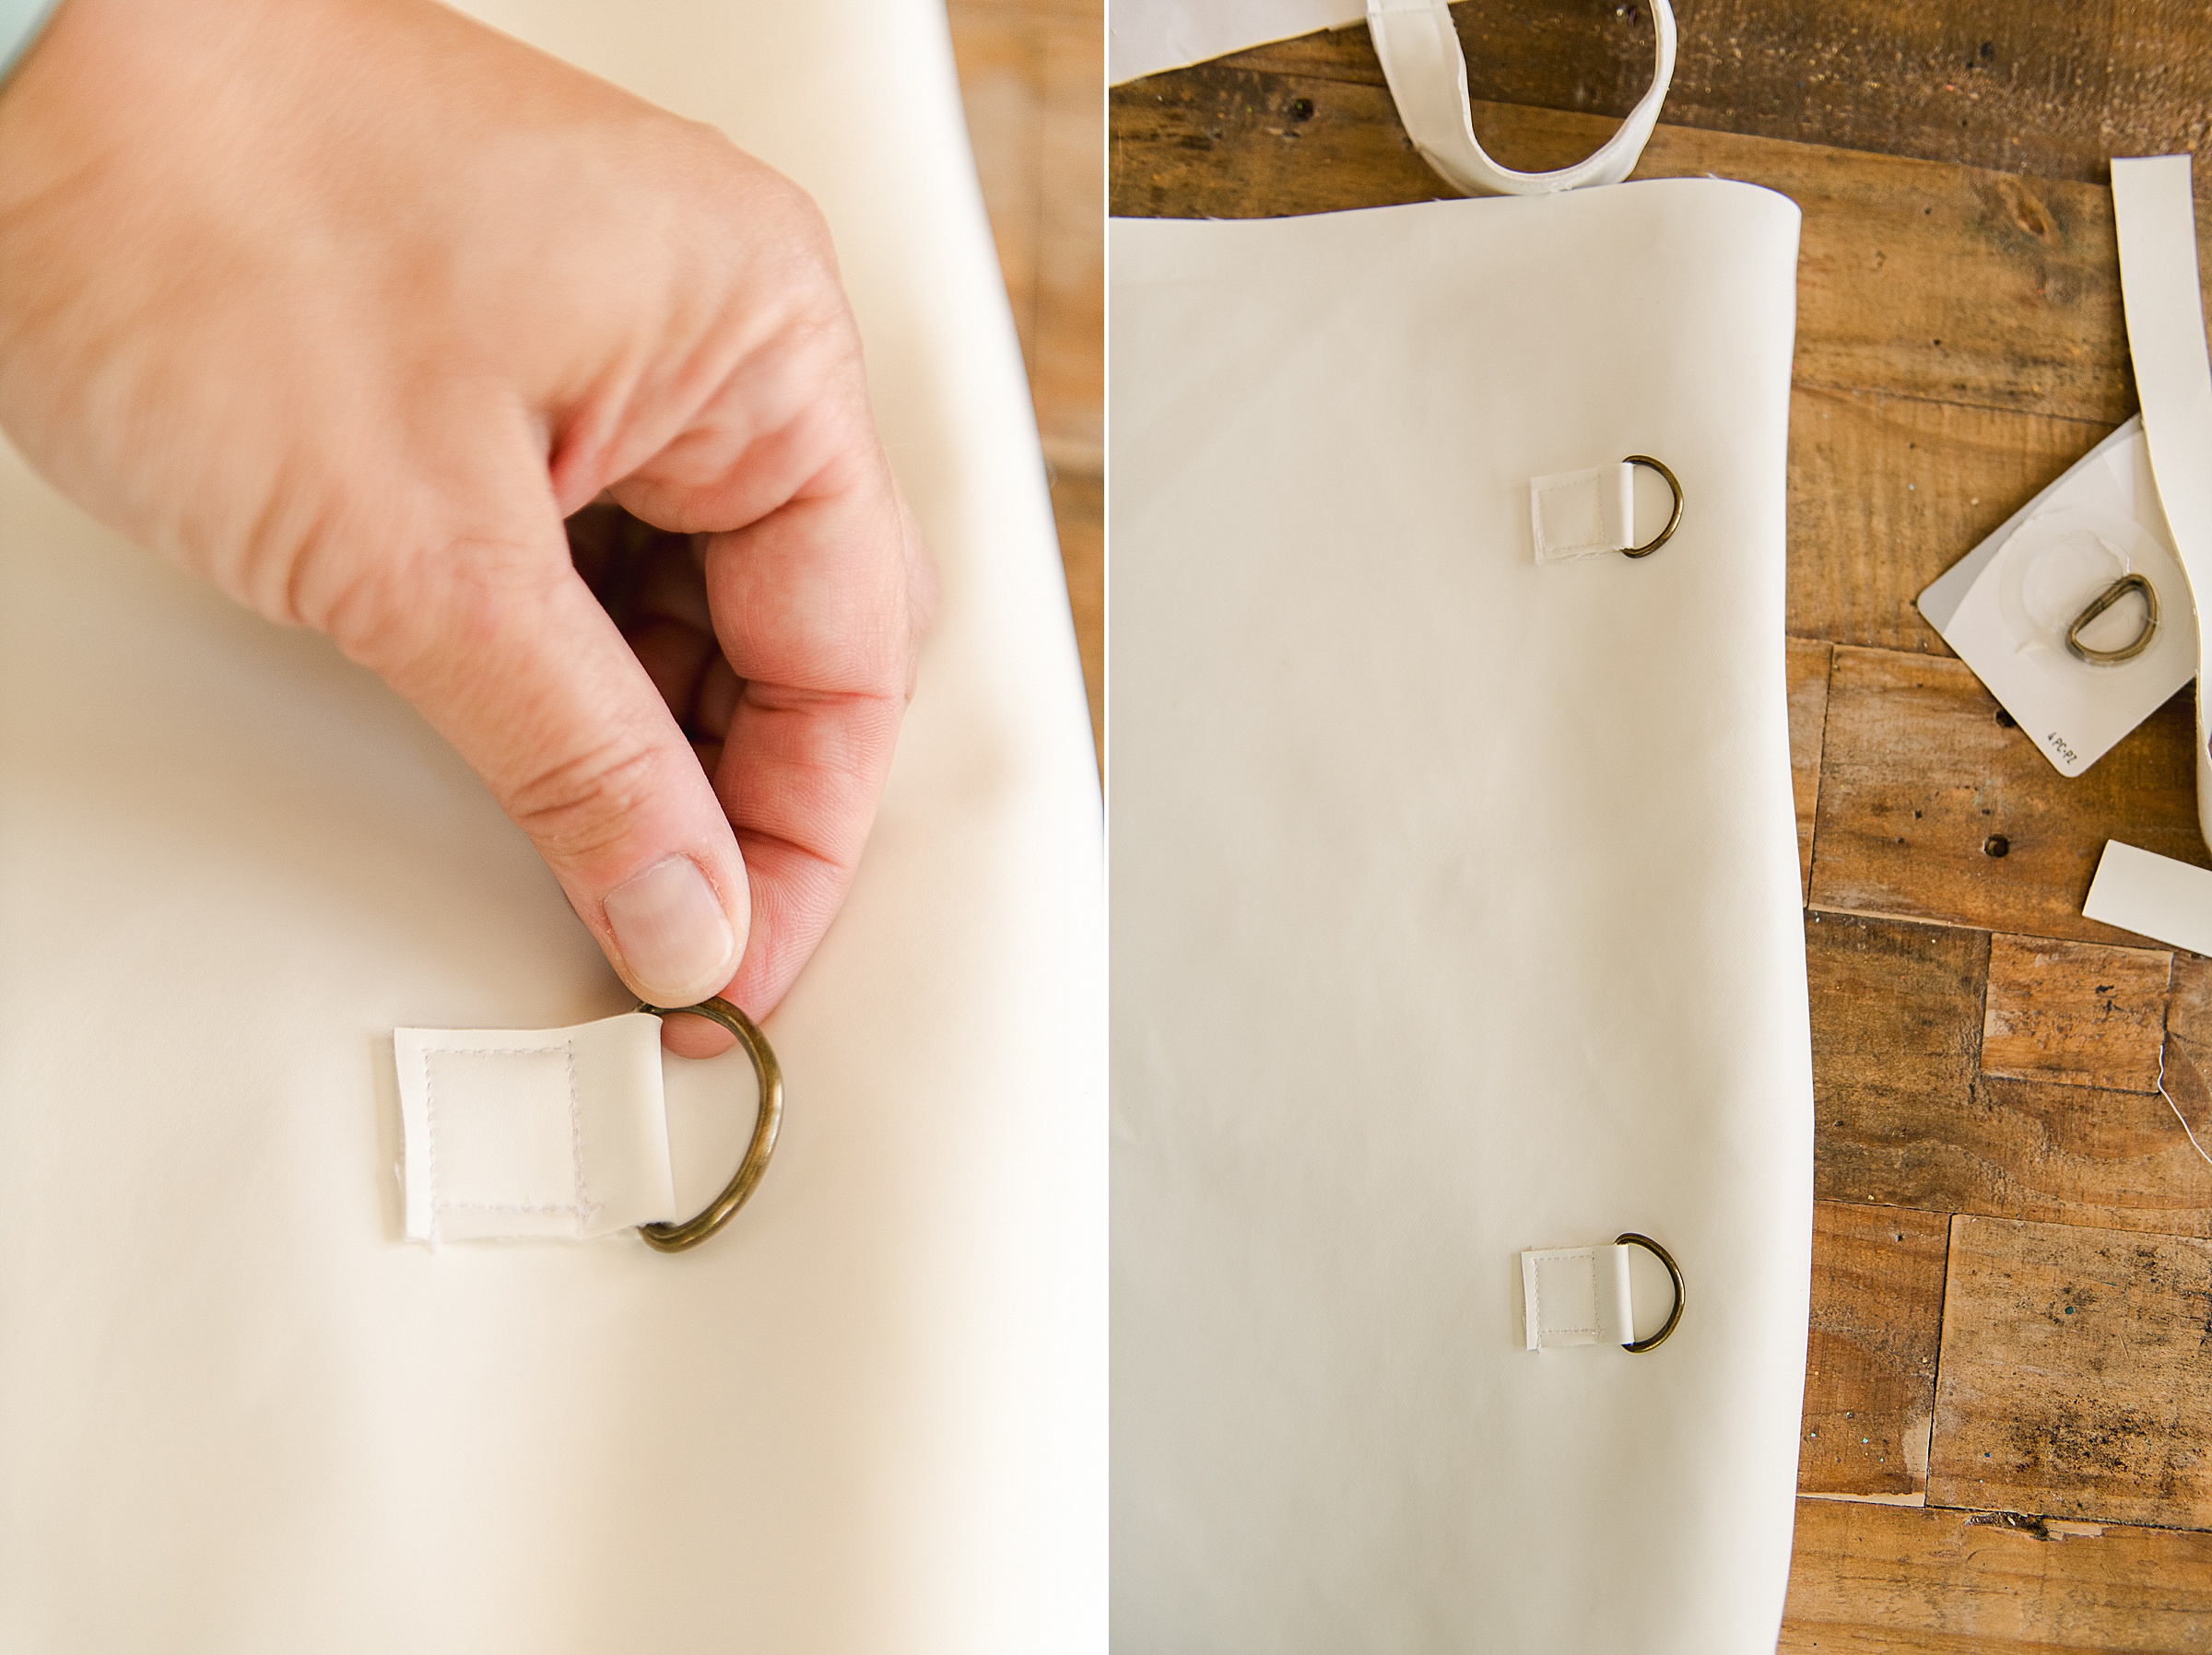
With your smaller scrap pieces of leather that you just out in step 1, you will want to fold them over through the D ring and then stitch them onto the backside of your purse. Make sure that your placement is even on both sides so that your purse lays flat.
4. Add your zipper to your ketchup
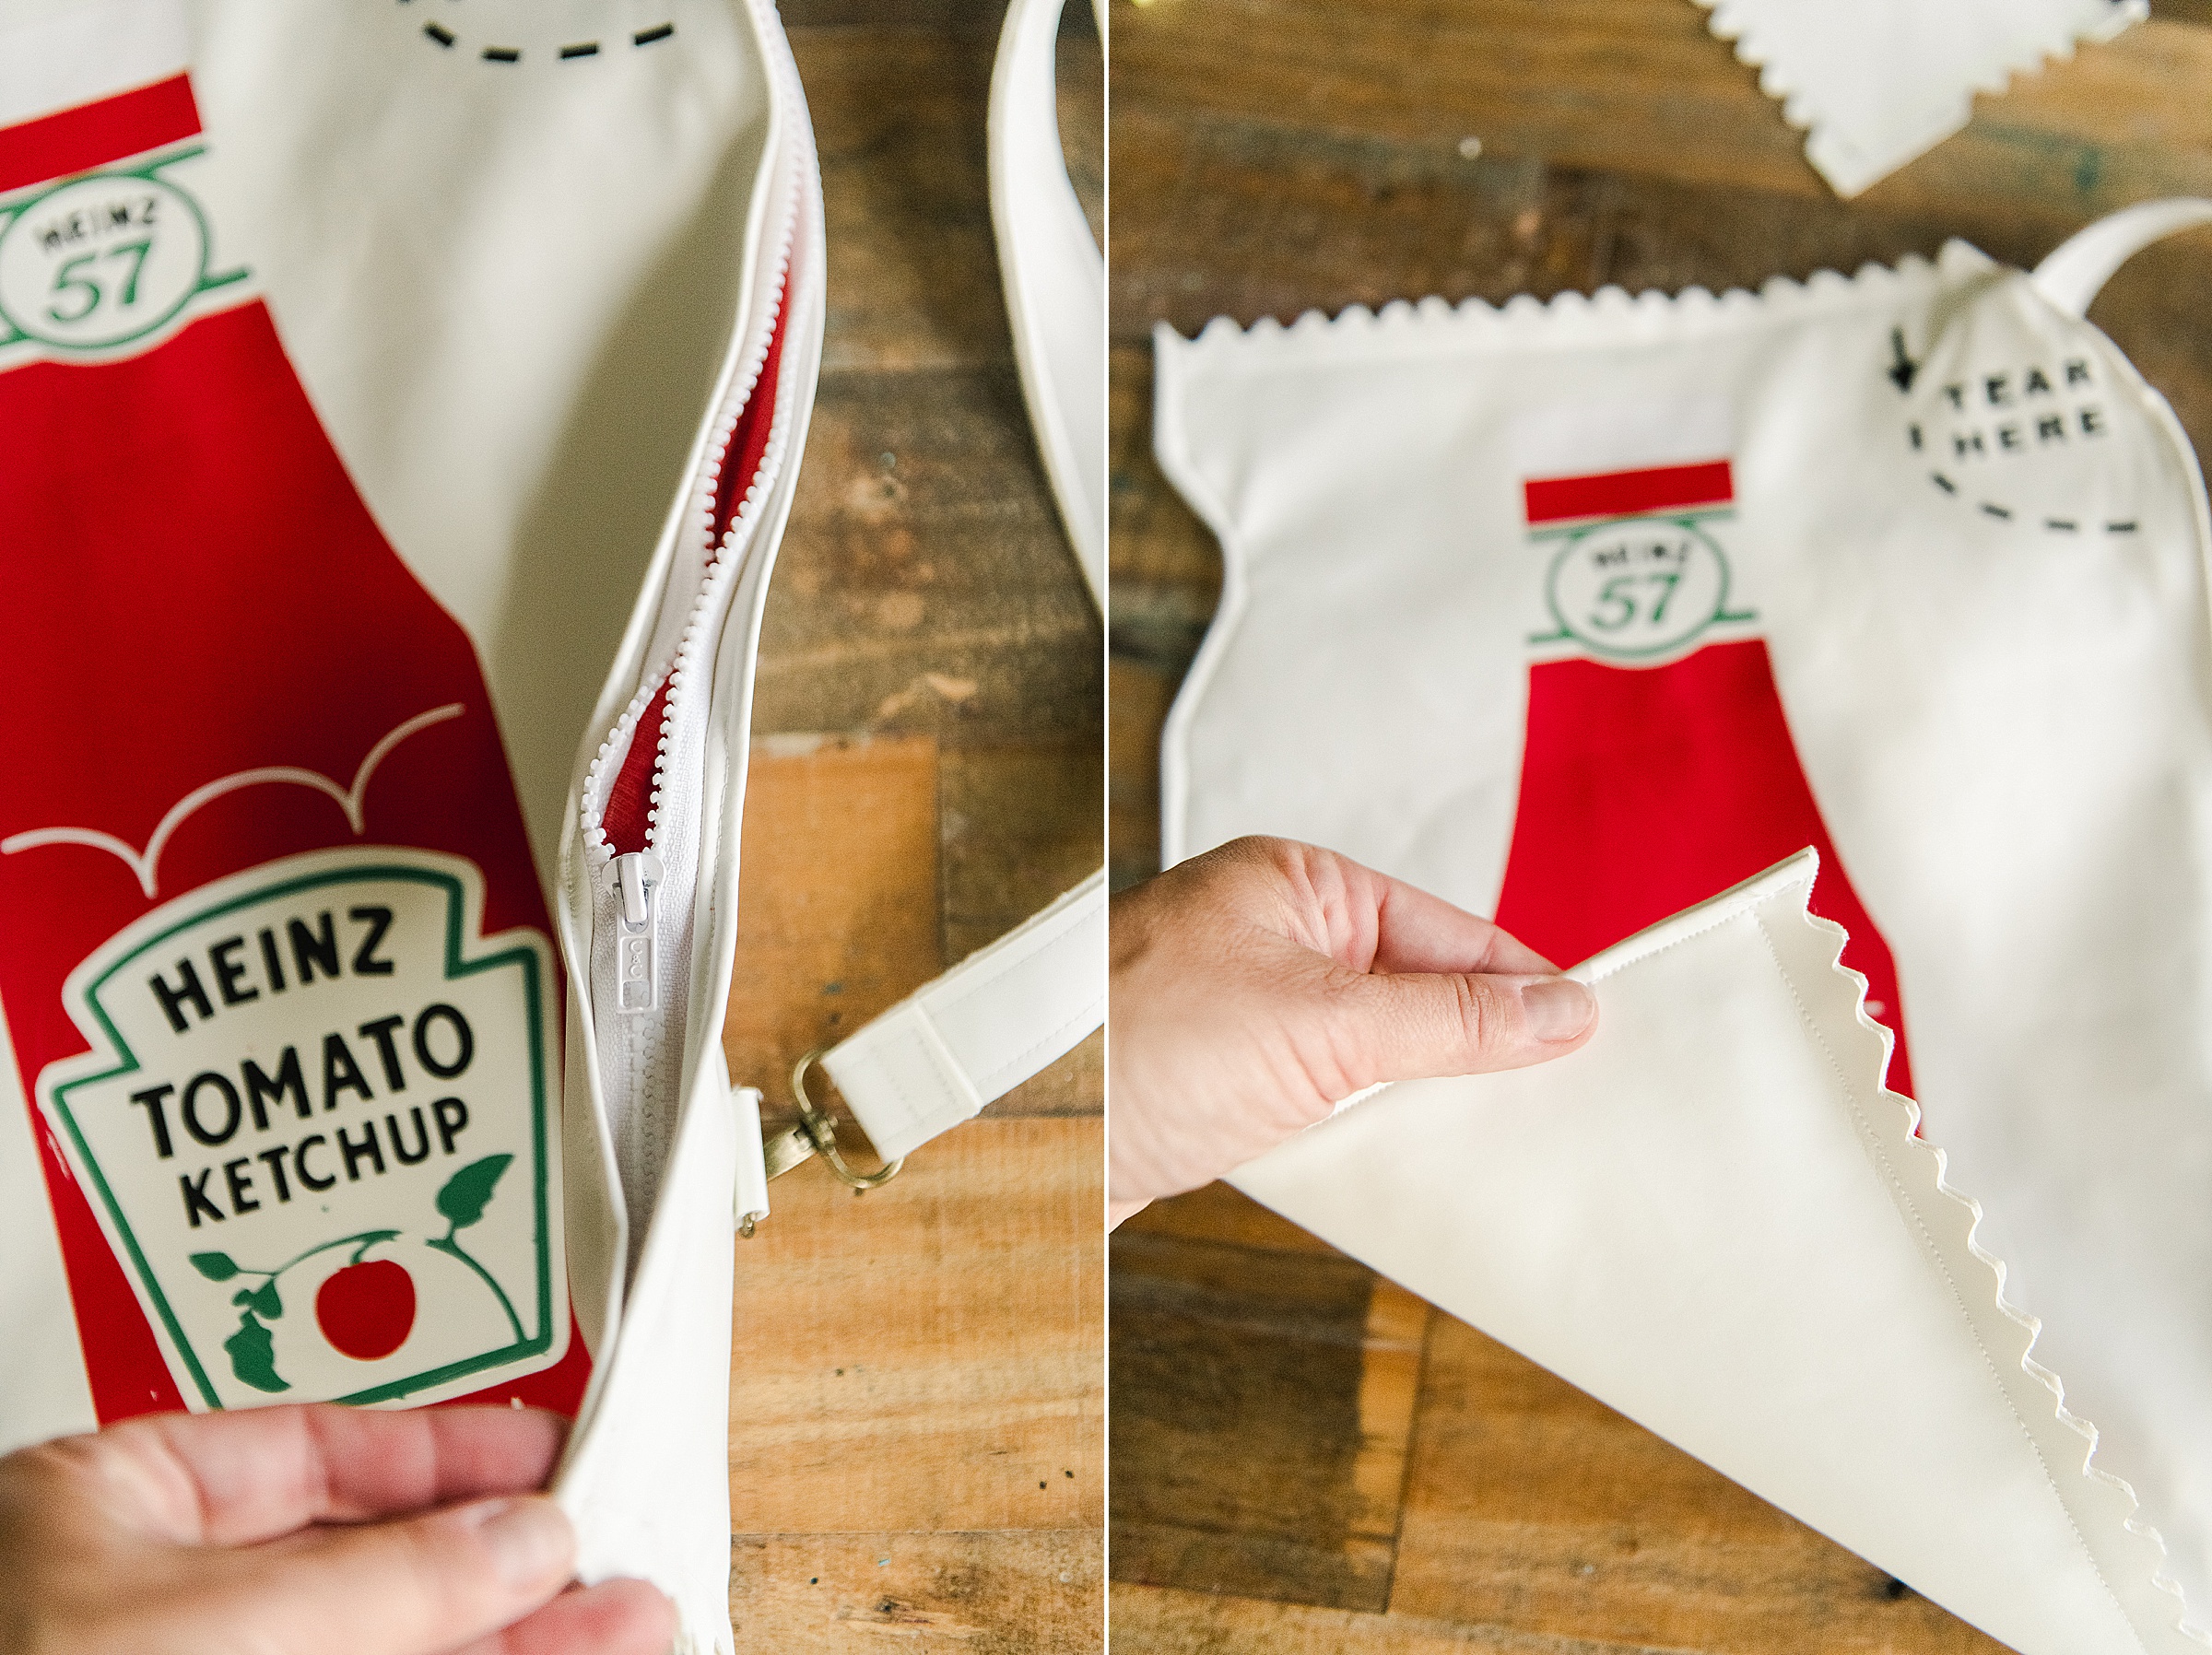
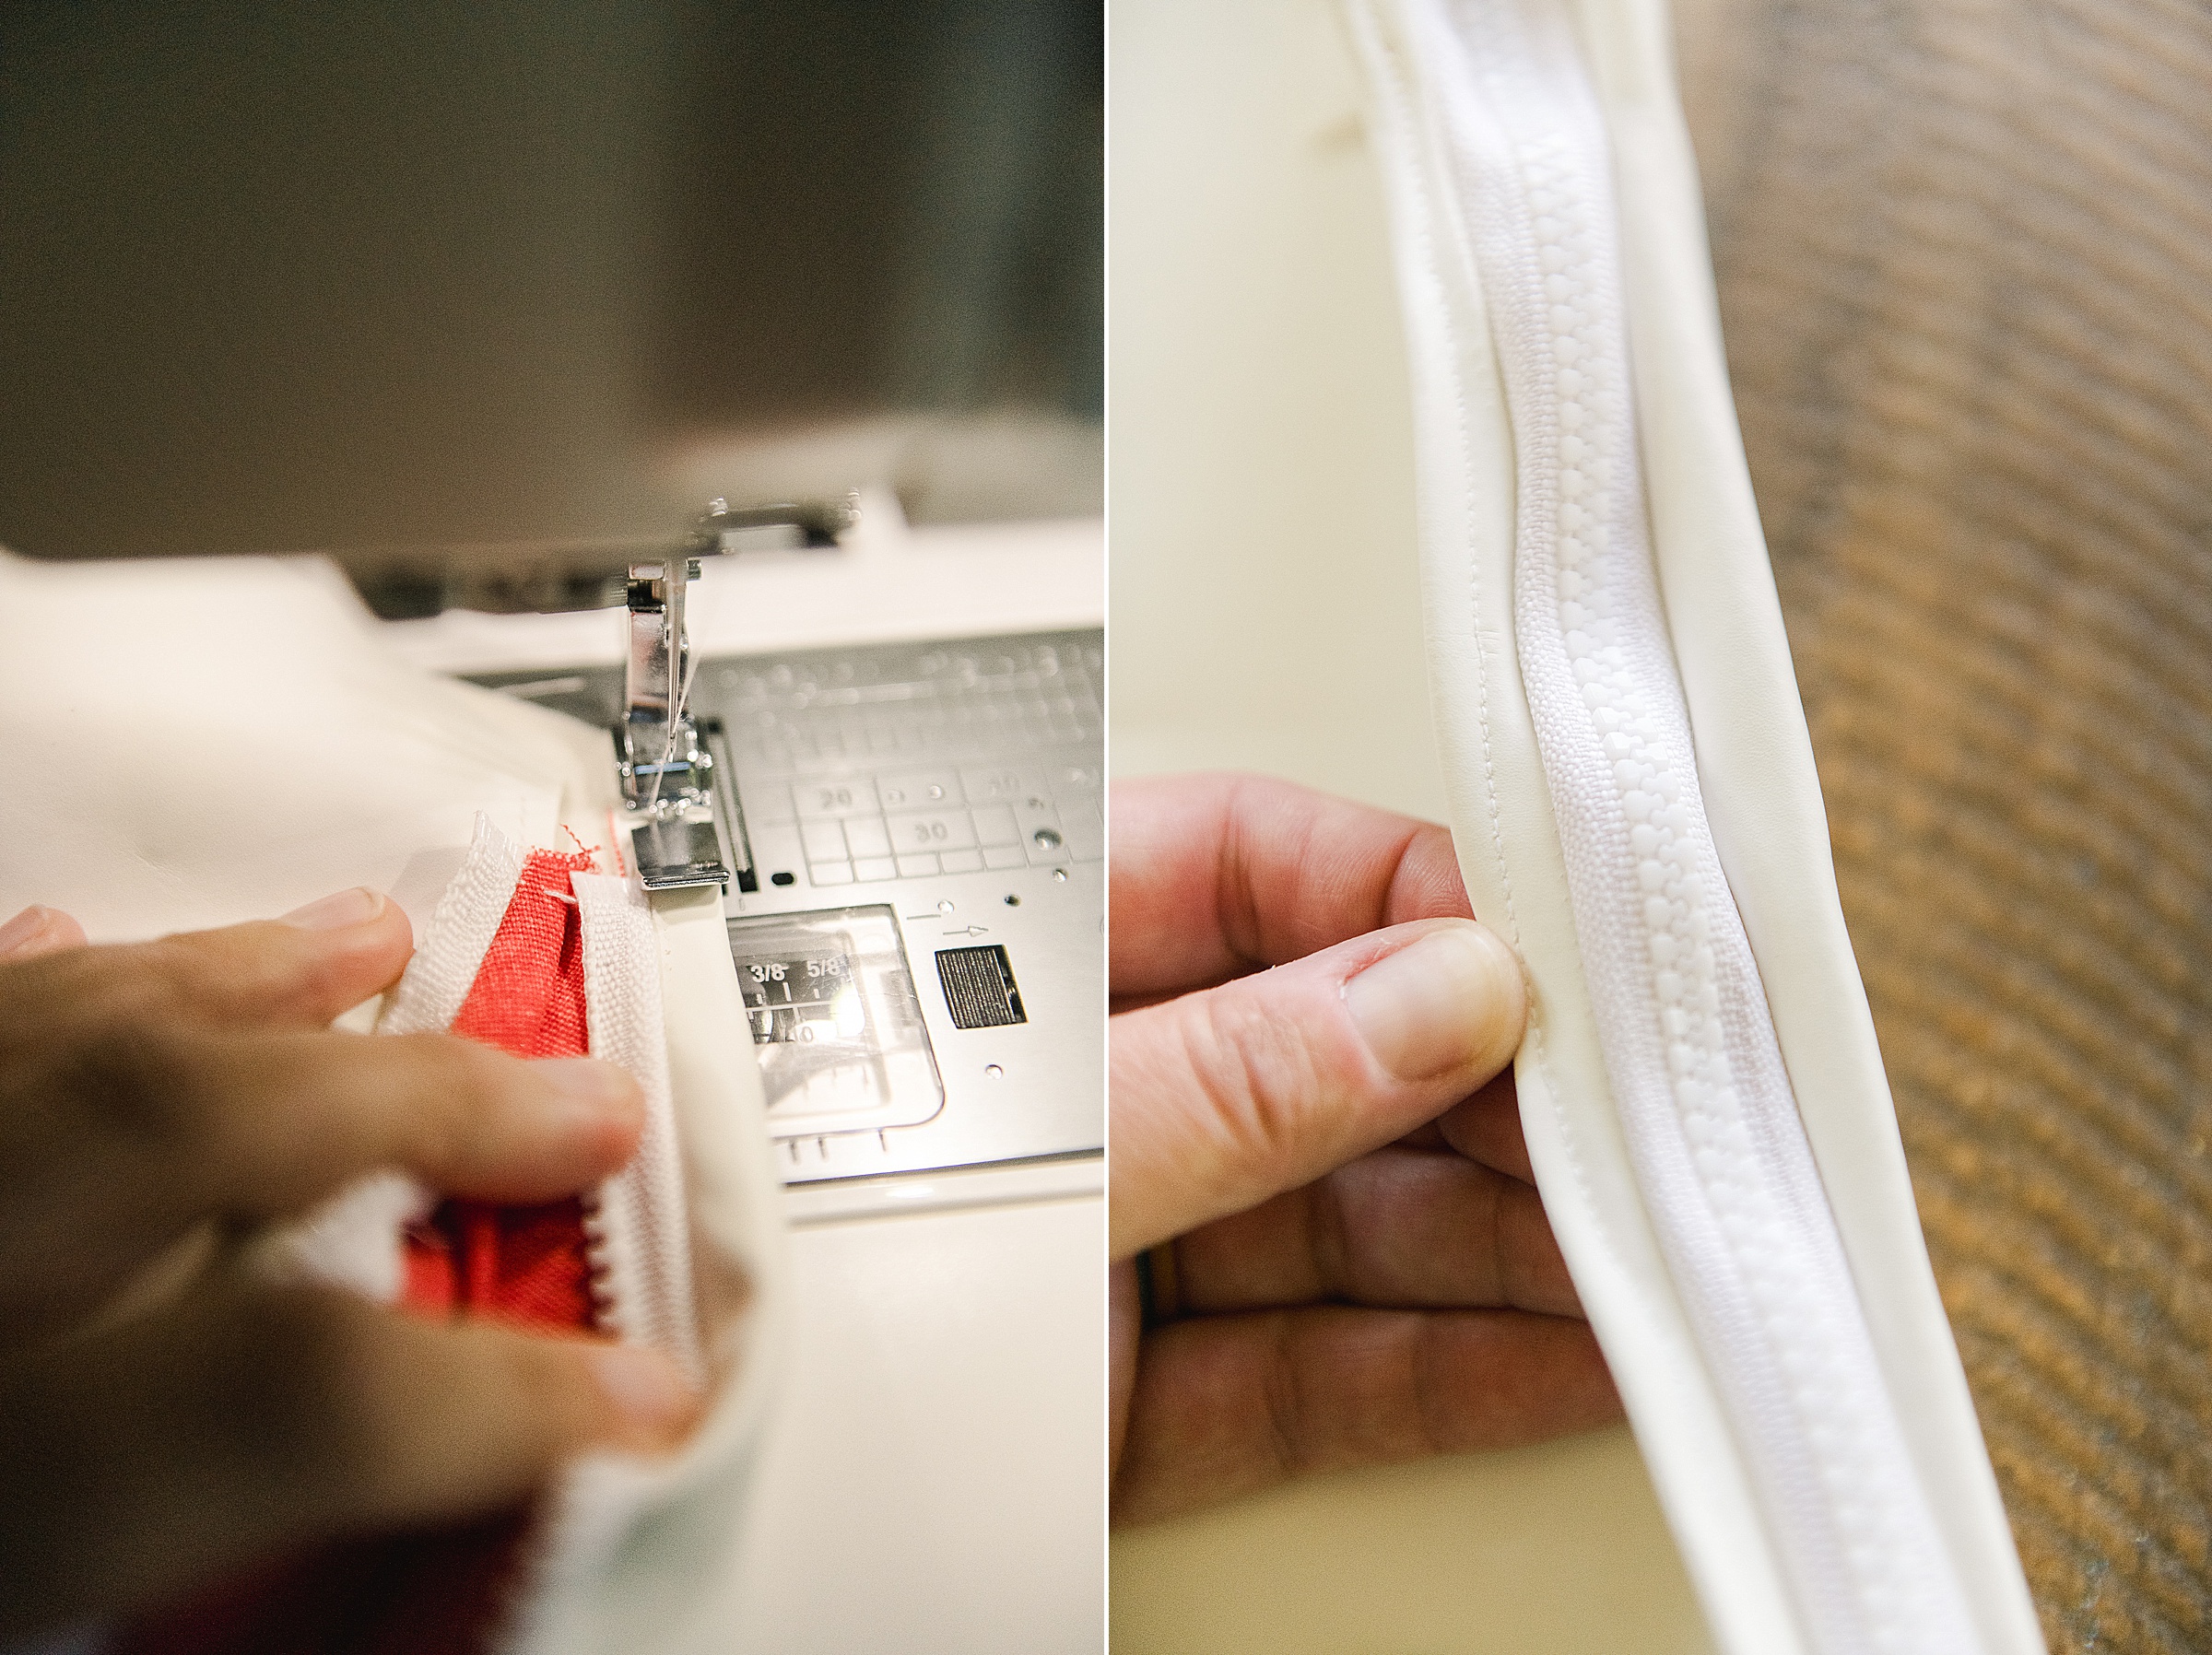
Sandwich the layers as follows: lining piece right side up, then lay the zipper and line up with the top edge, then place one of the outside leather front pieces right sides down. Clam clip in place. With your zipper foot, stitch all 3 layers together.
Repeat with the other lining piece + outer leather pieces 🙂
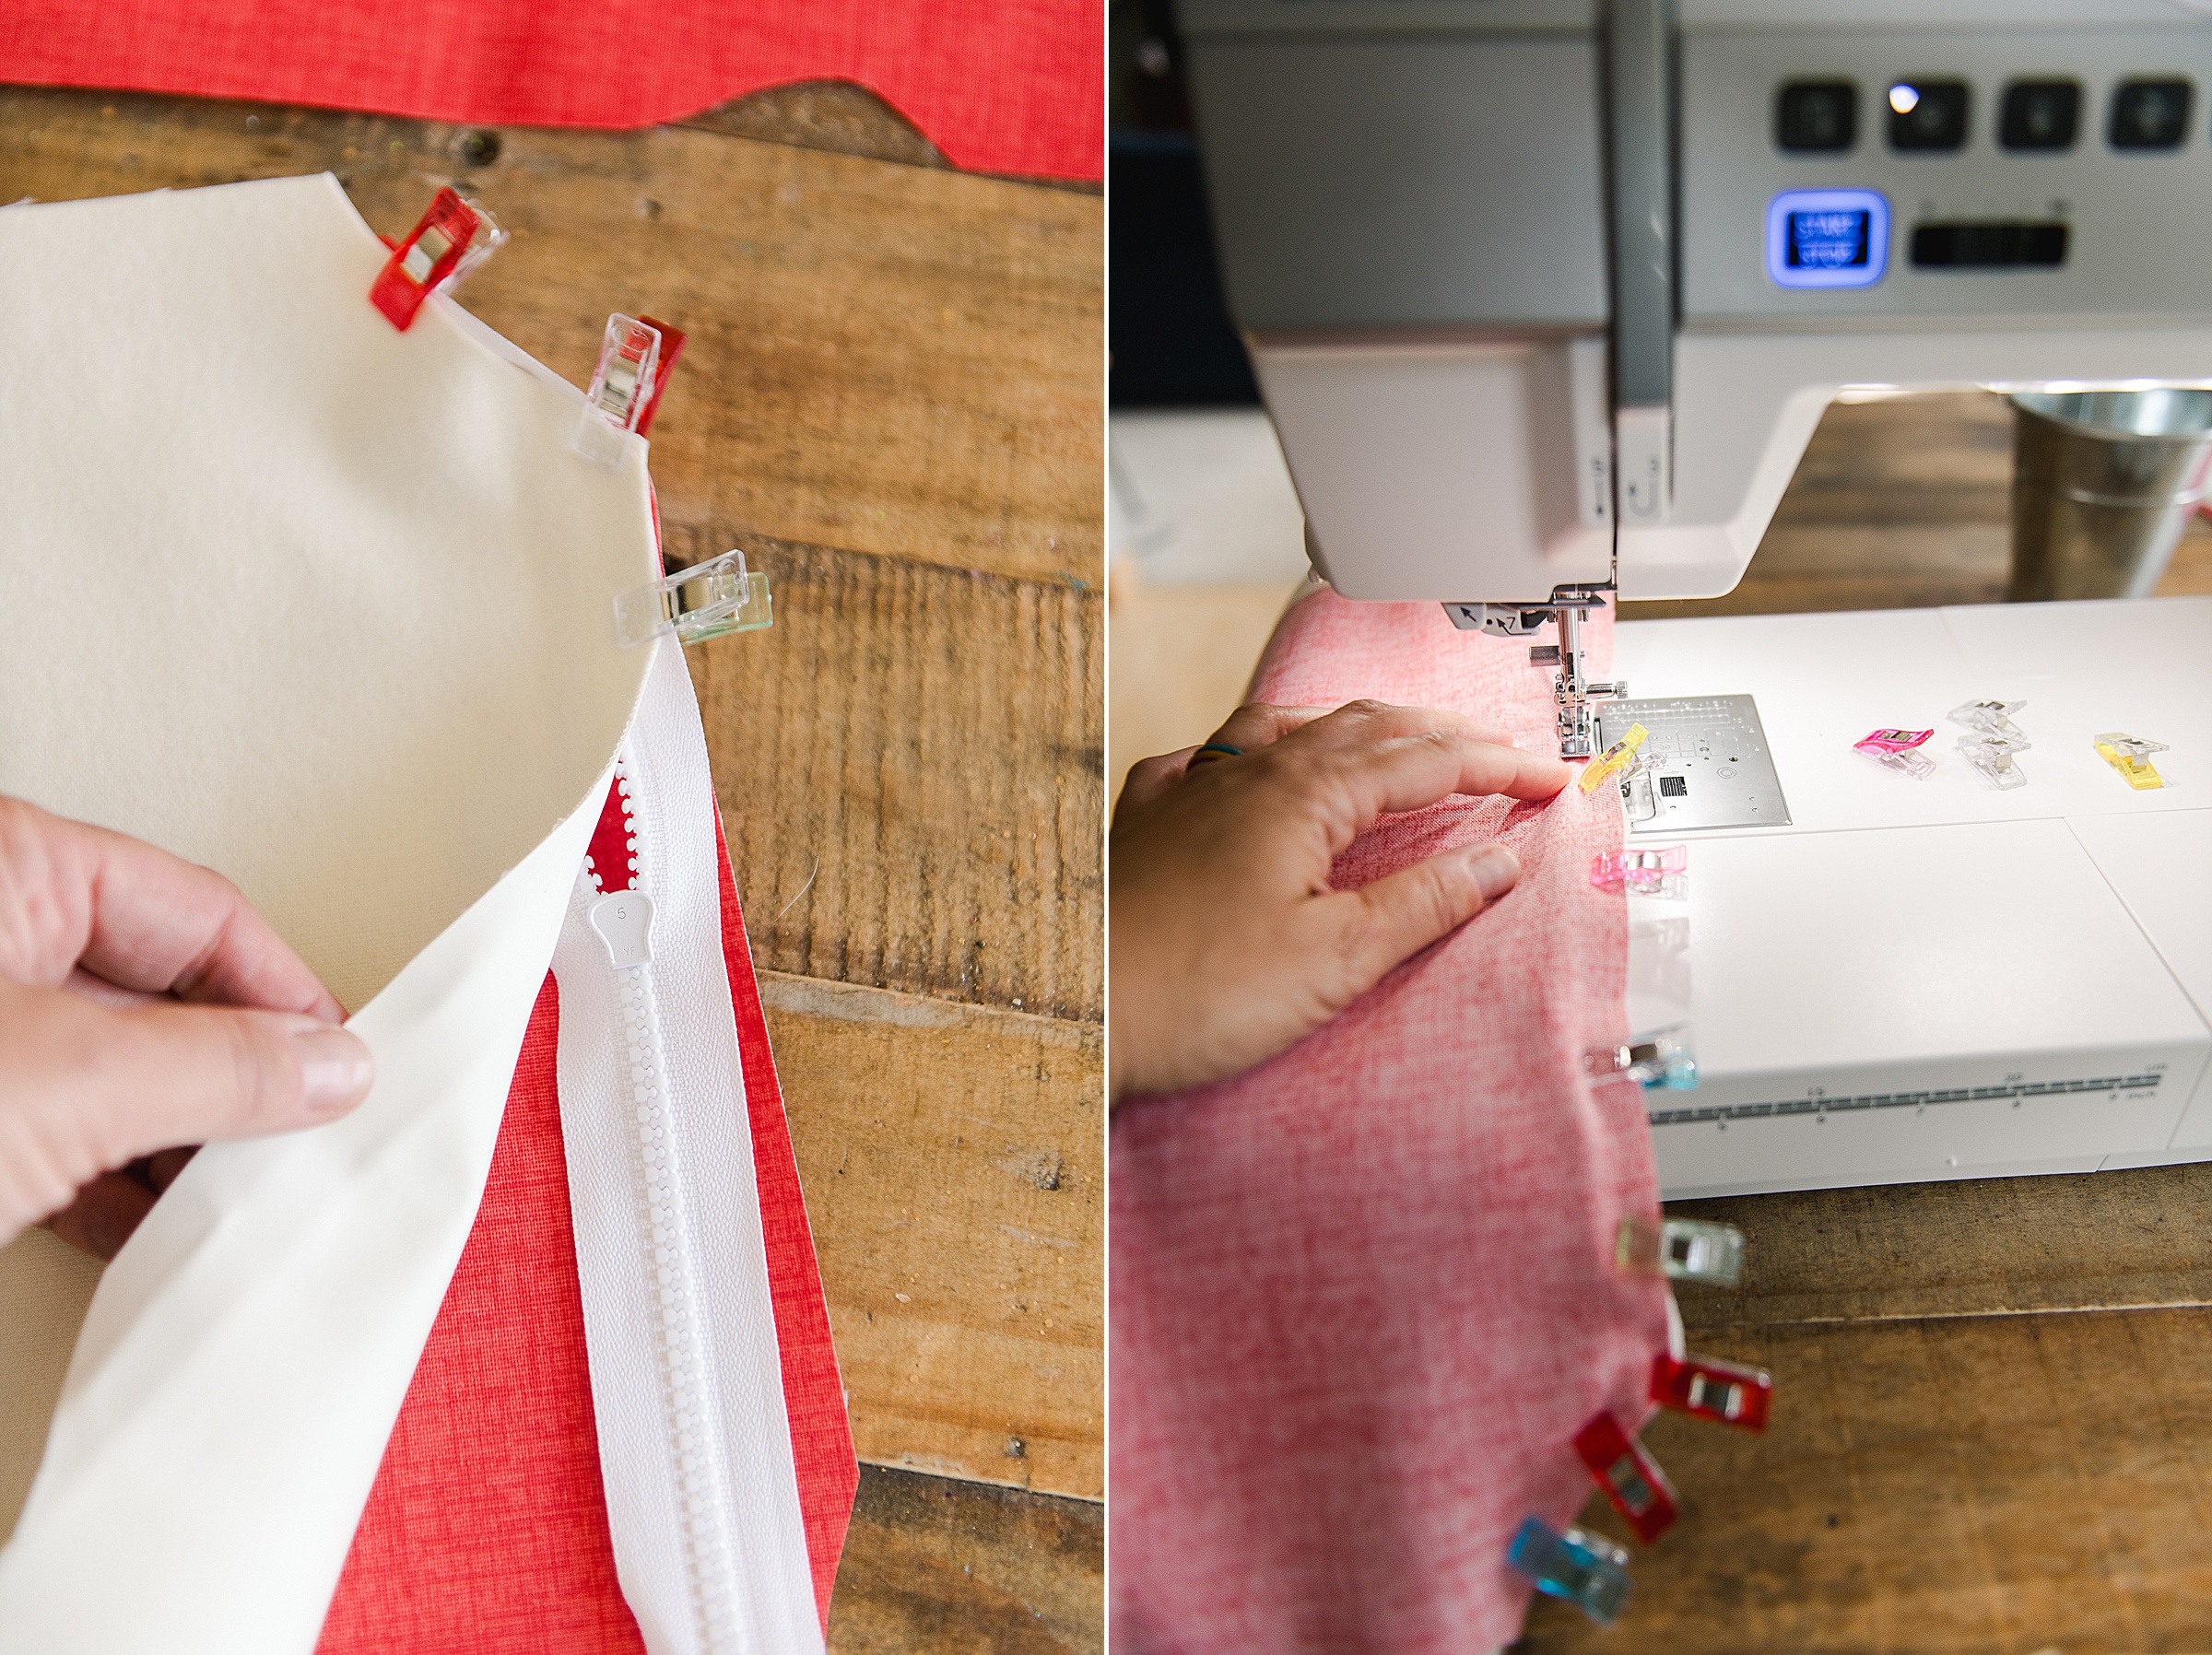
Tip: When sewing the zipper, begin the stitch with your zipper foot and then when you get to your where your pull is, put your needle down and lift your foot to move the pull out of the way. Then put your foot back down to continue sewing! 🙂 This will ensure that you will get a straight, beautiful seam without the bulk of the zipper pull getting in the way of the foot!
5. Stitch the top of your bag
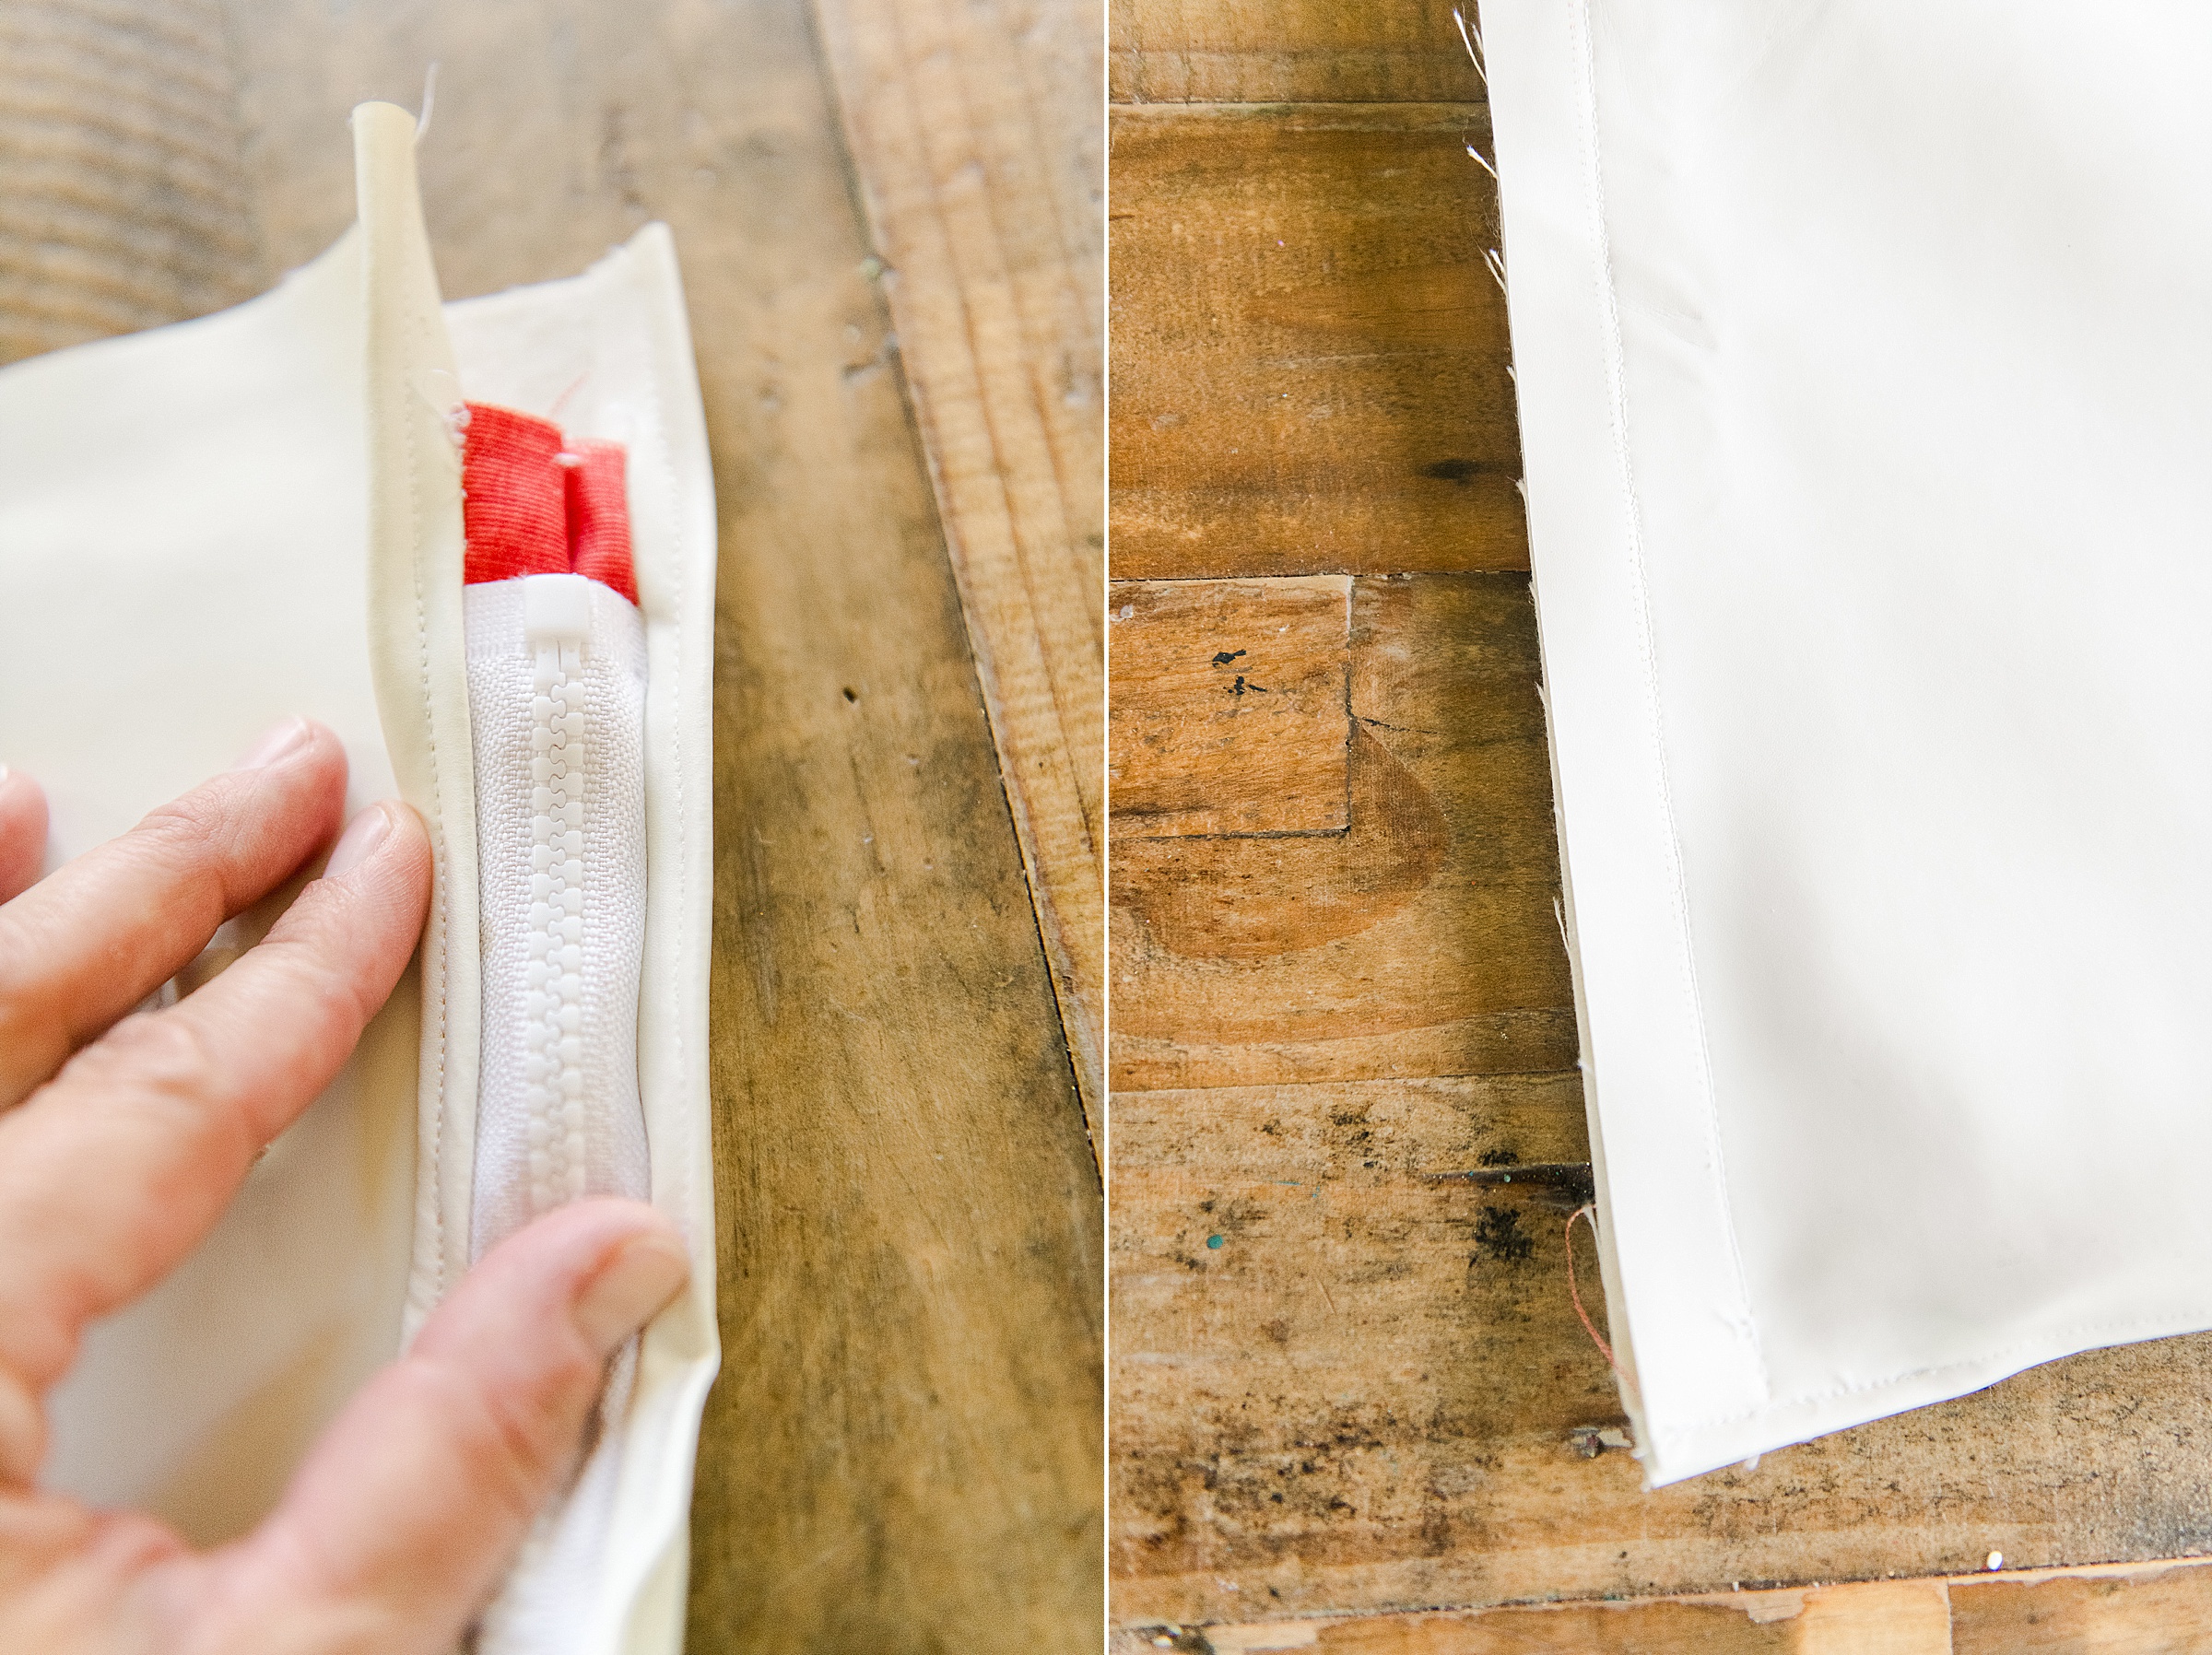
You will now want to stitch across the top of the zipper edge (this is normally where you’d do a top stitch to hold your lining and fabric away from the zipper) but I chose to “fold over” a top crease next to the zipper so that when the bag is closed, this top crease essentially “hides” the zipper and helps make this look like a ketchup packet. I kept my zipper foot on my sewing machine to do this so that I could get a precise, even stitch. I I folded over about 1/4” and then stitched into place to hide the zipper 🙂
6. Stitch the rest of your bag 🙂
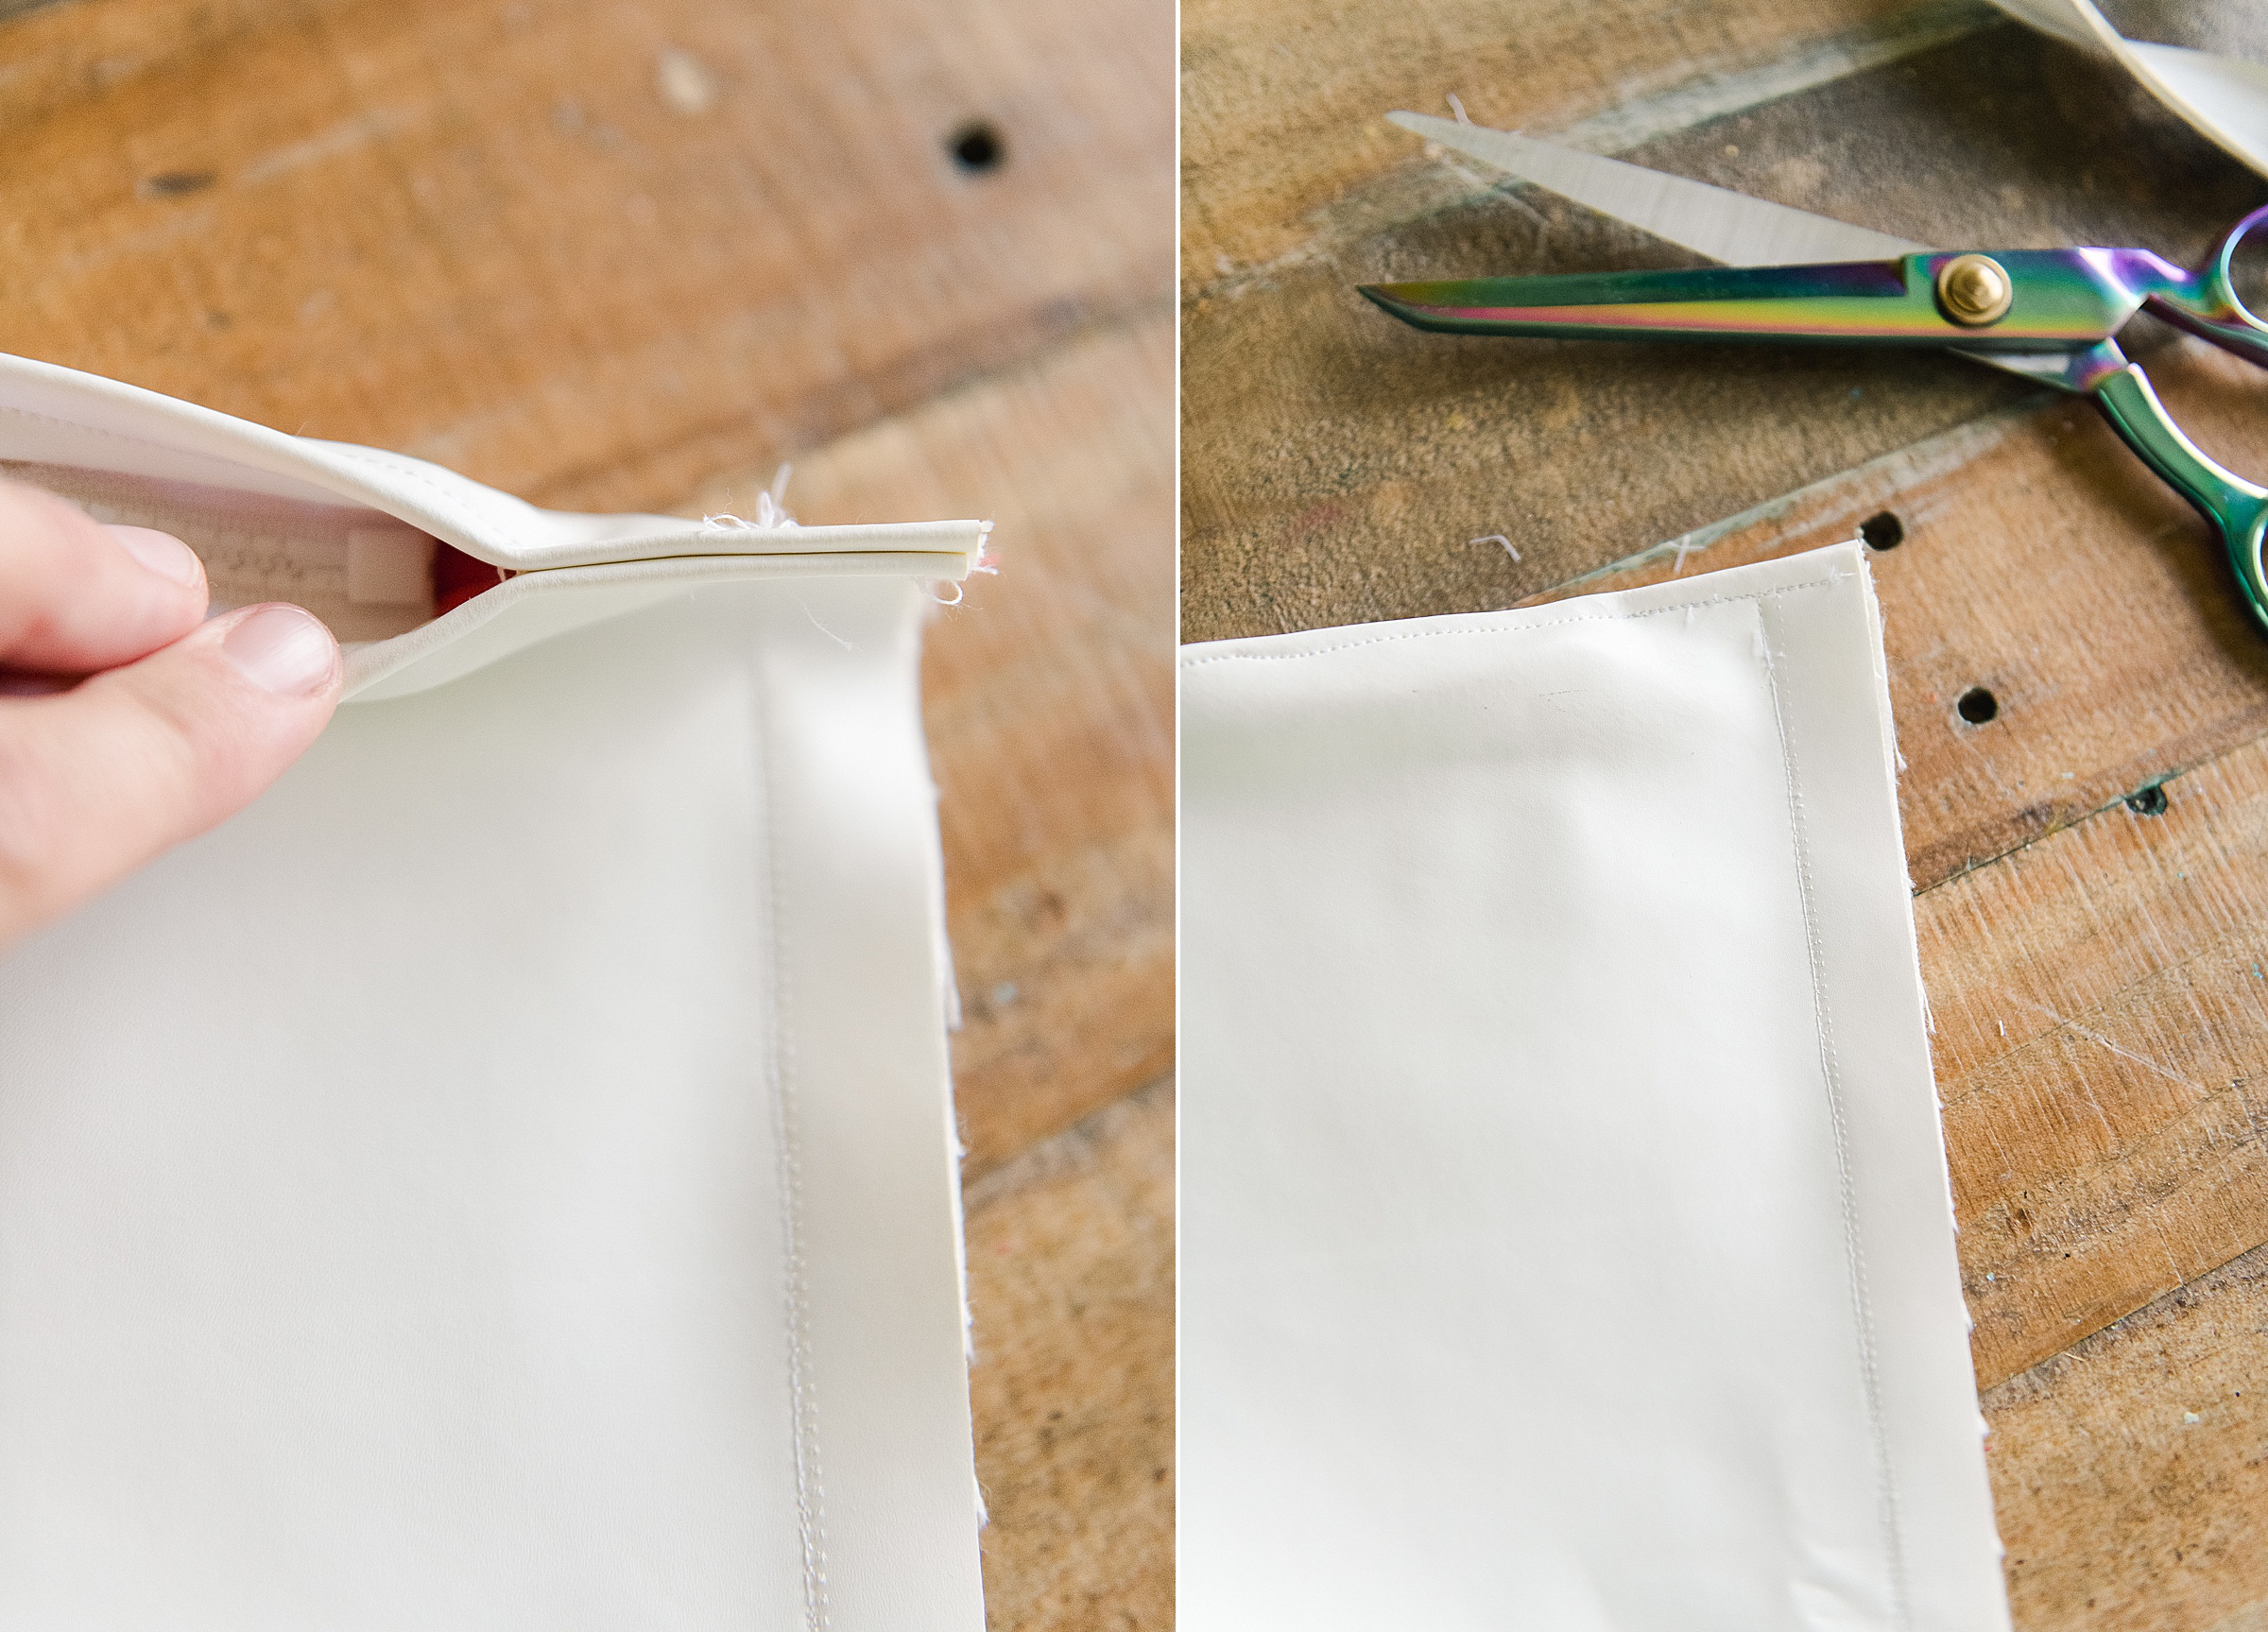
You will want to stitch the remaining 3 sides of your lining (to close up the lining). Do this right sides together with a 1/4” seam allowance.
You will also stitch the bottom edge of your ketchup packet right sides together (the other long edge perpendicular to the zippered edge – leaving the 2 short sides open).
Then flip the bag right side out and top stitch the same bottom, long edge.
Next, line up your short sides and stitch with about a 1-1 1/4” seam allowance (this seam allowance will allow for you to cut the crinkled edge)
7. Cut your crinkled edge
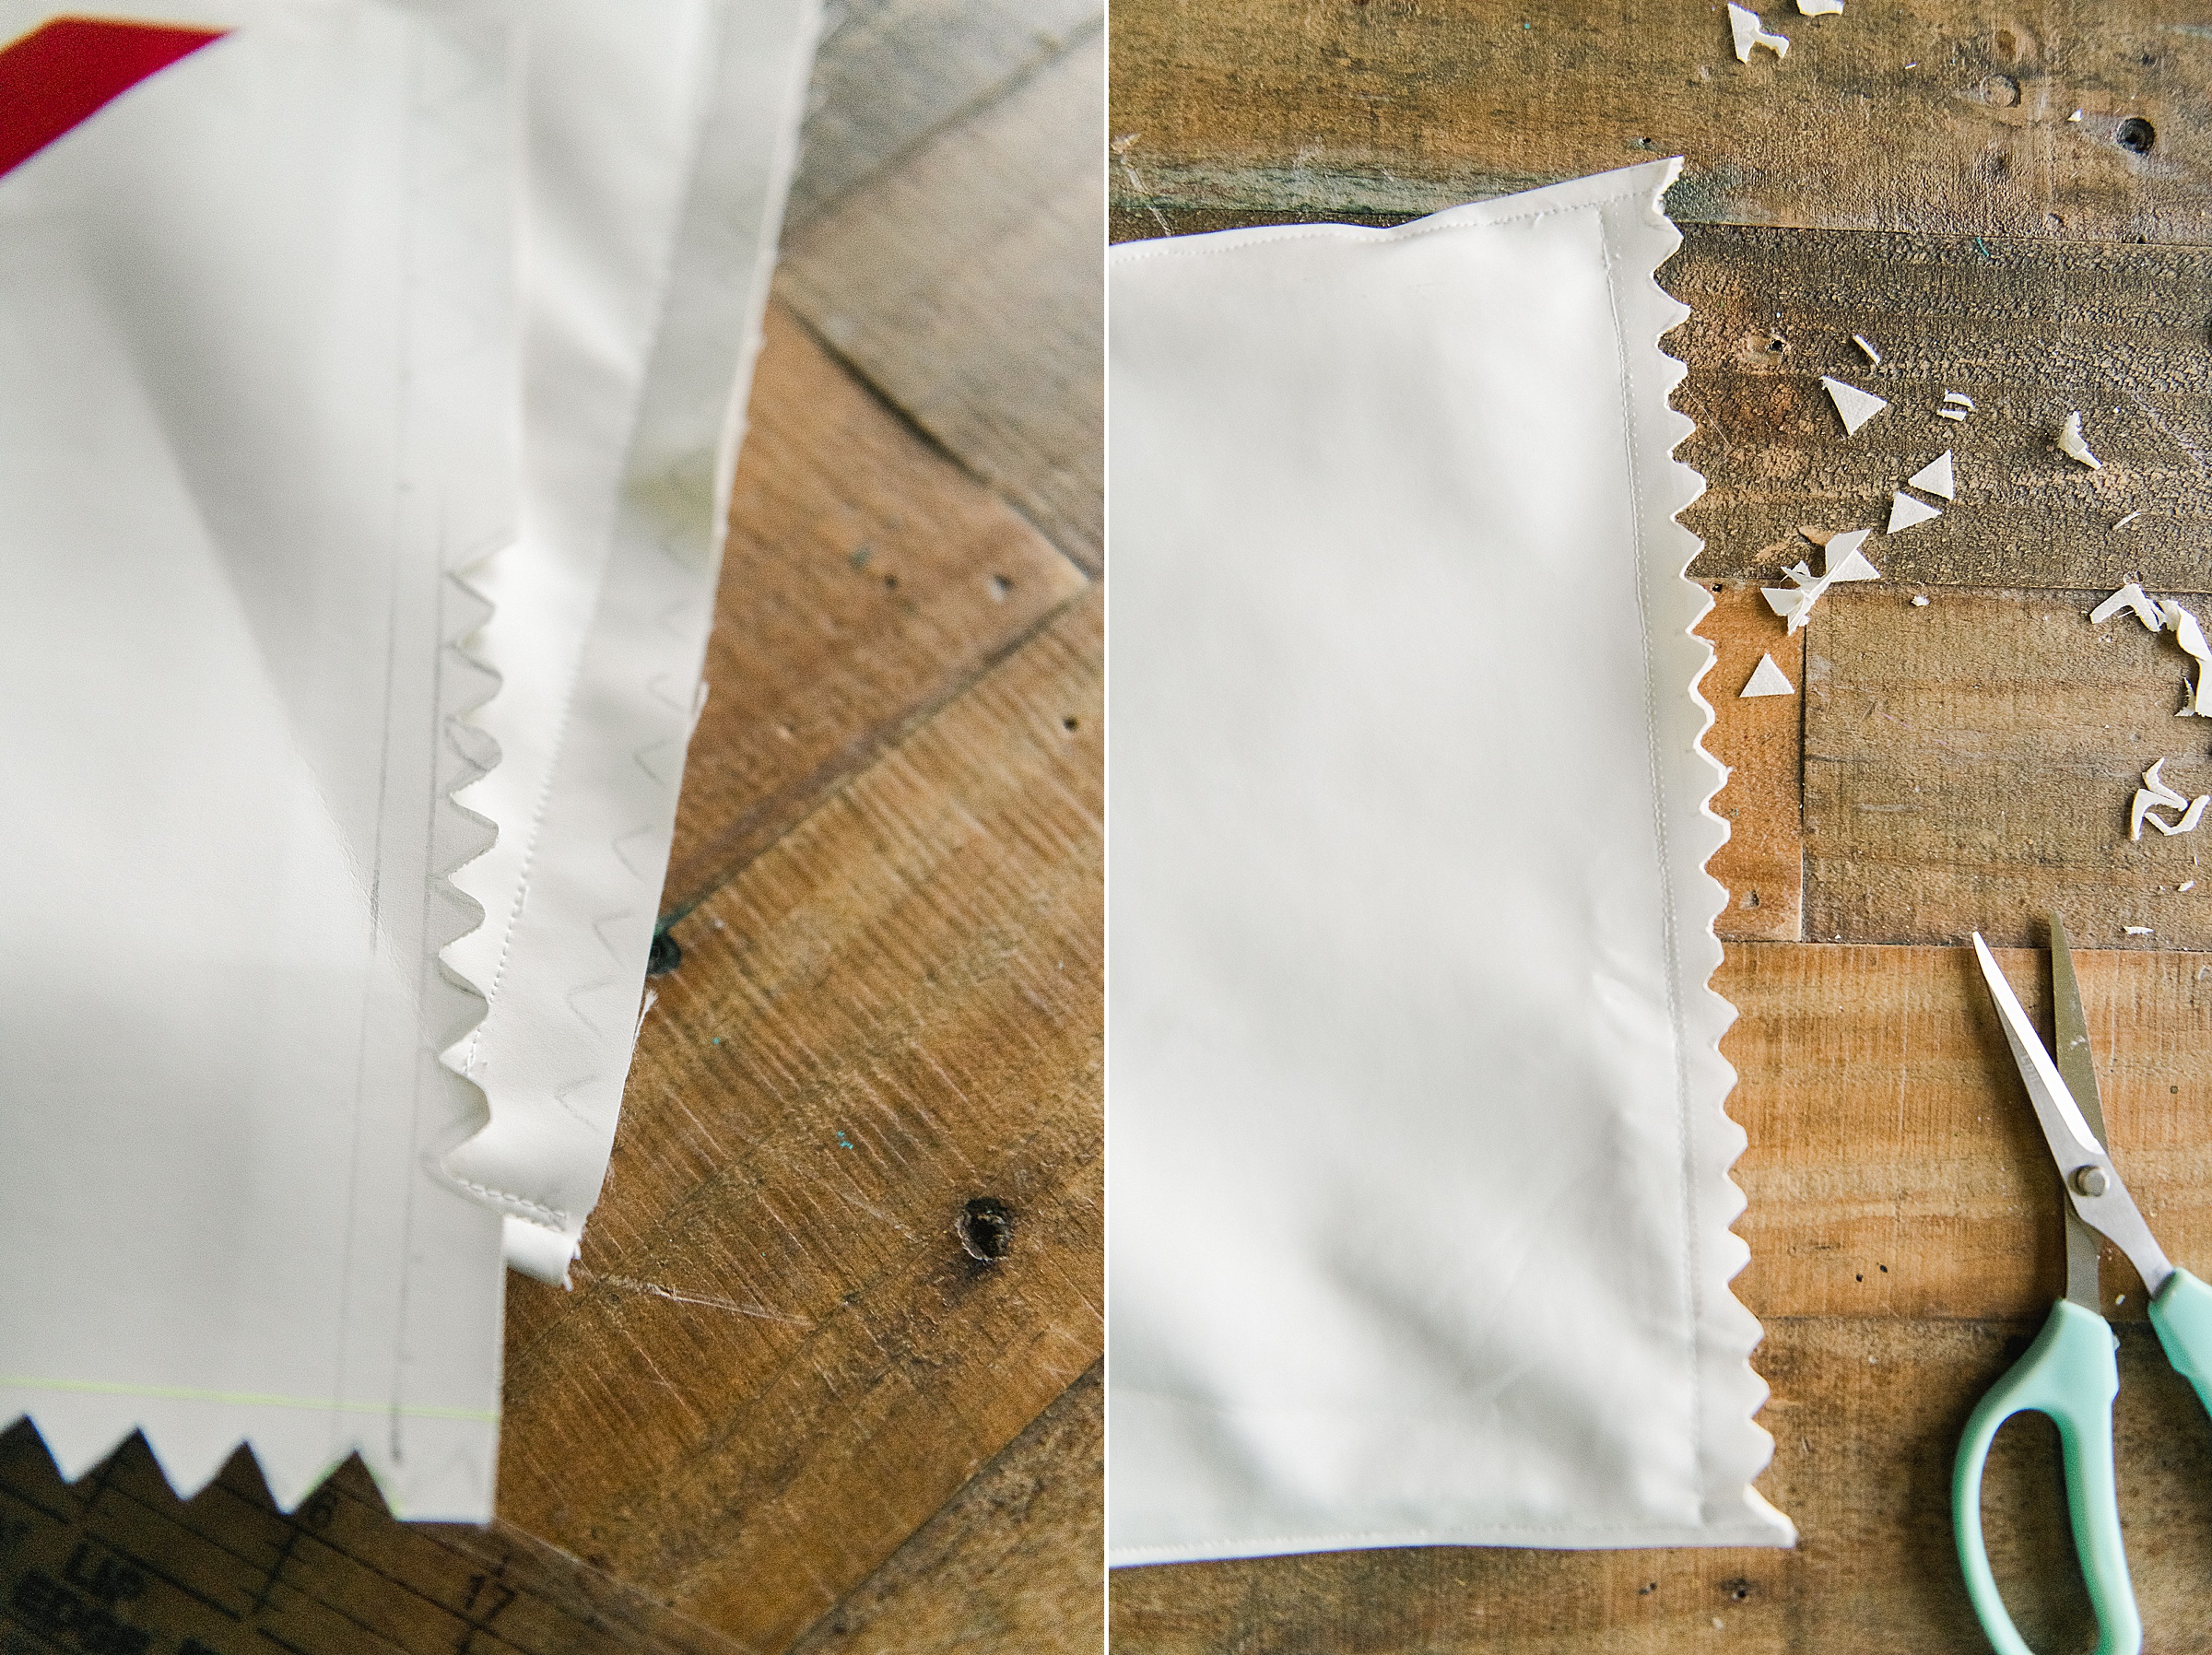
You can either using a pinking sheers (to make things WAY easier) or you can make a template and hand cut out the zig-zag side edges. I chose to make them “larger” than the pinking sheers so I cut them out by hand 🙂
8. Add your ketchup detail
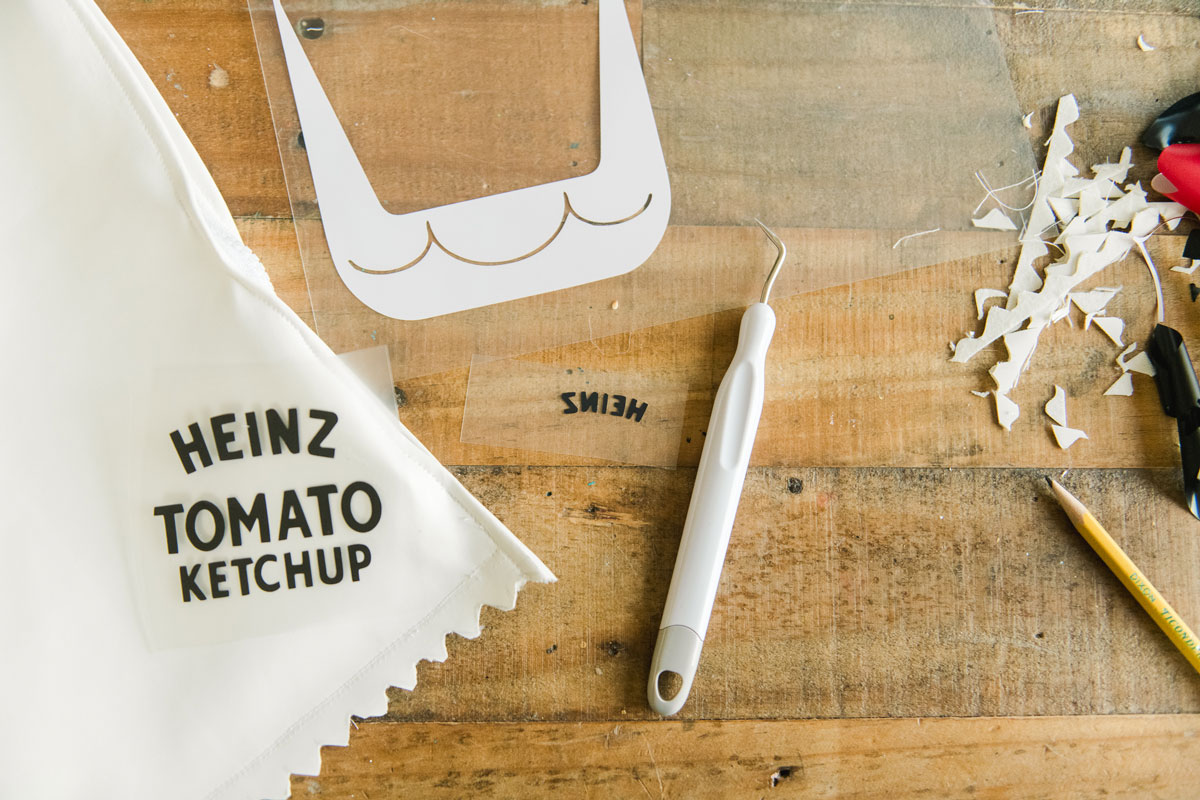
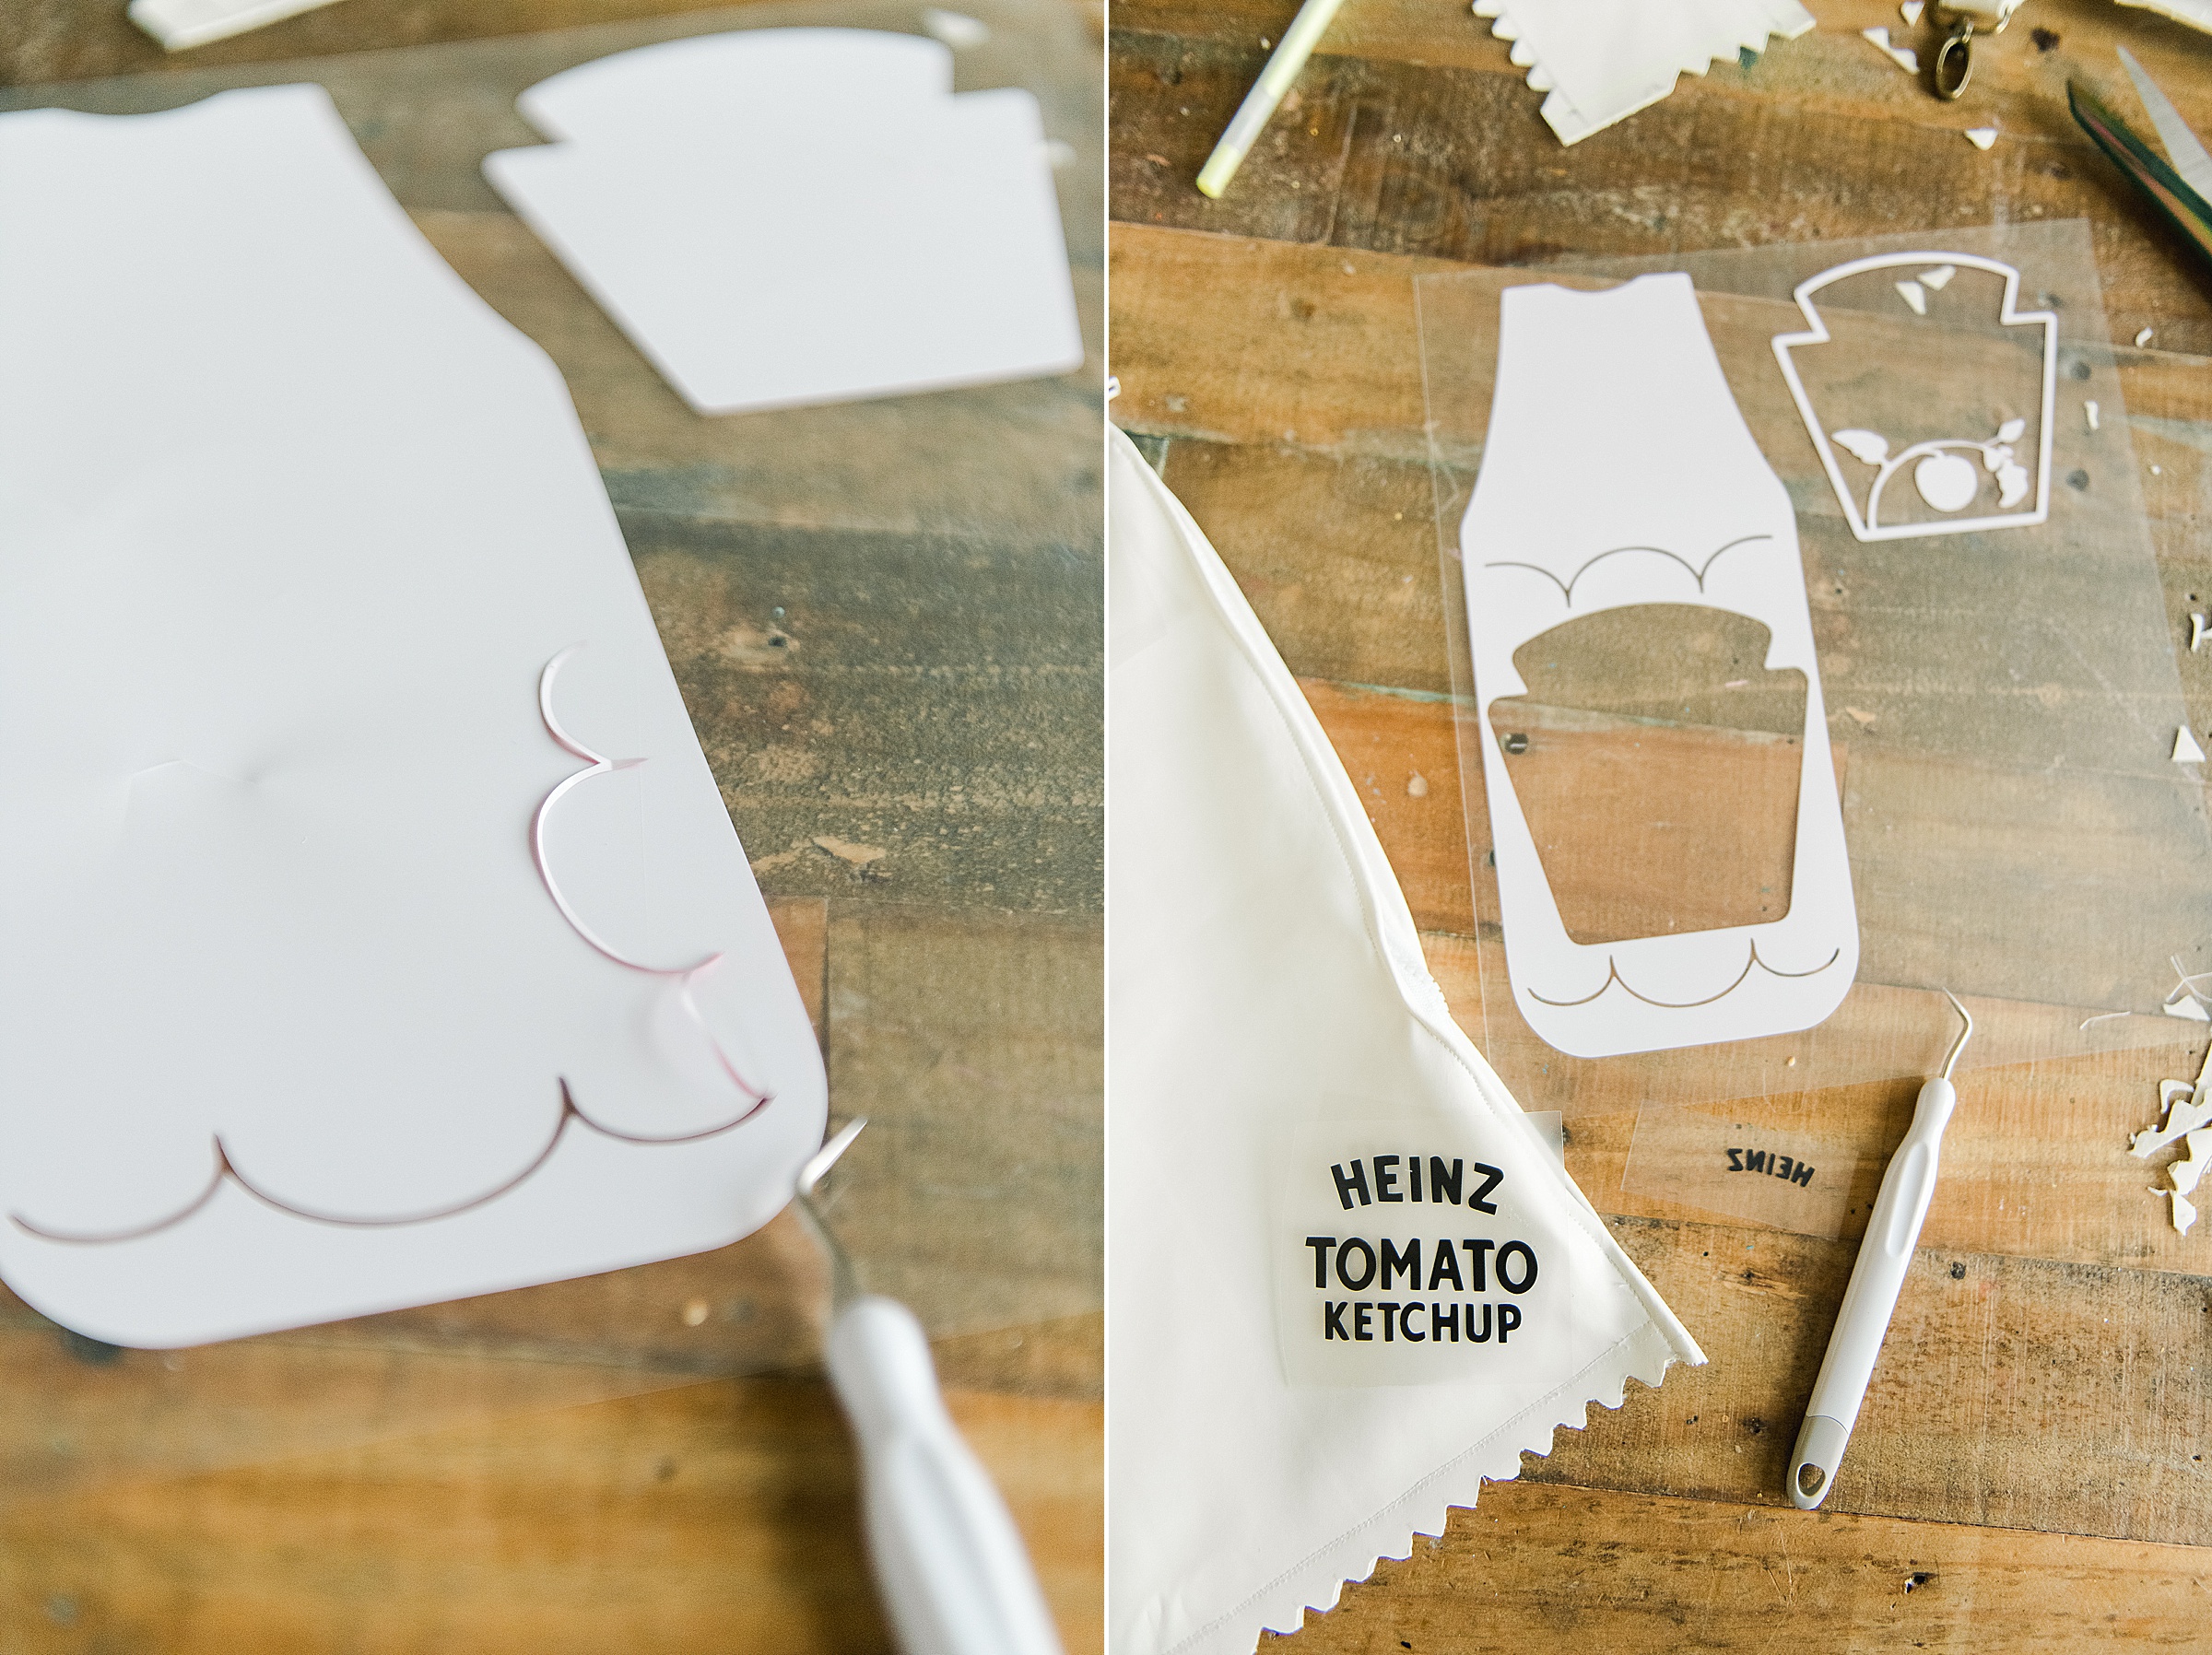
Using either your Cricut or Silhouette machine, you can cut out your Ketchup pieces by using the SVG files below. ORRRR you can always paint your details on as well 🙂 Follow any instructions that your specific SVG requires (hot peel, cold peel, etc) 🙂
Ketchup bottle SVG
other details to cut out
NOW, when everything is all done, you will attach your strap, with the clips and stylishly pose with your AMAZING new ketchup purse! 🙂
