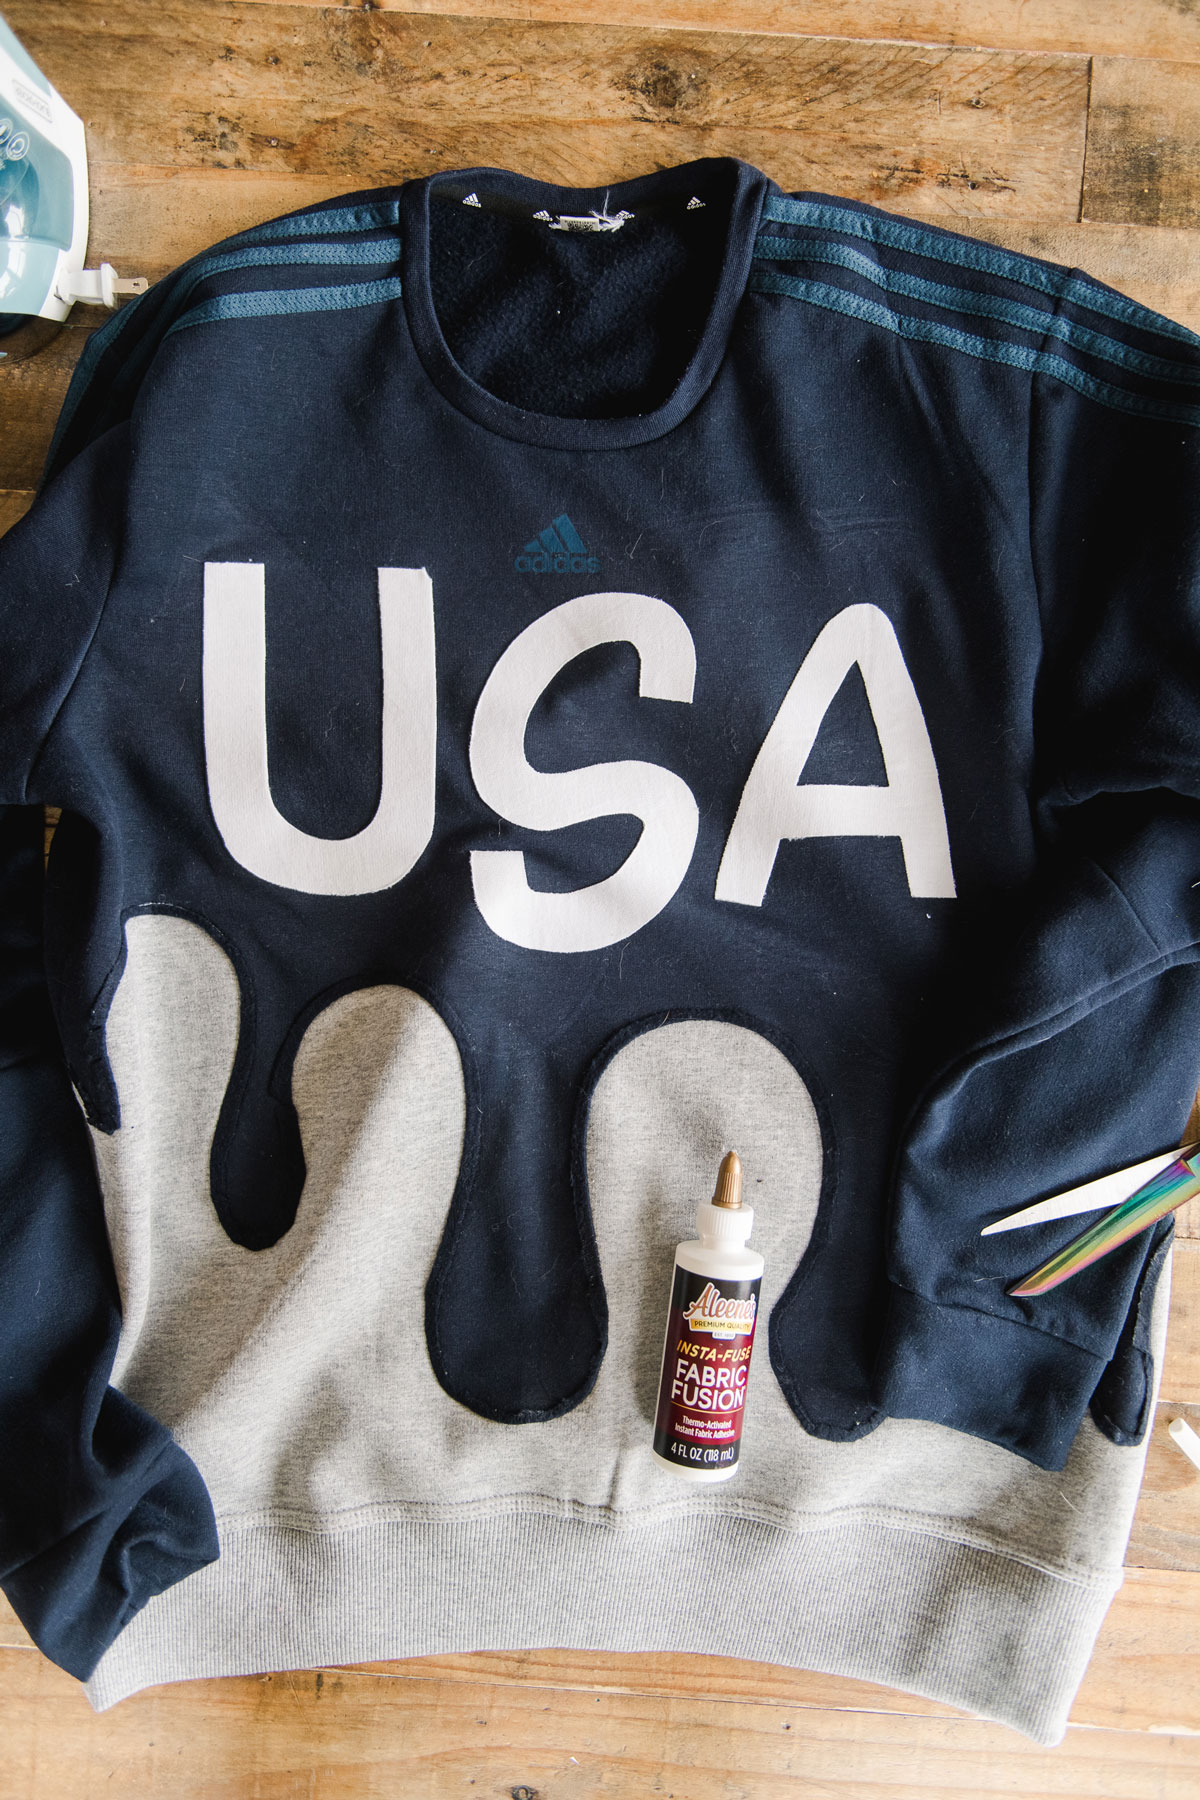
Rework sweatshirt DIY, patriotic style
I have been seeing these reworked sweatshirt all over (finished sweatshirts that take multiple other shirts and cut them up and re-work them back together to make a “collaged” or patchworked style finished garment)! Honestly, it’s SOOO creative and cute! 🙂
But if you’re not a sewer, I have a solution for you on how to make this style of shirt with some Aleene’s Fabric Fusion glue (that permanently sets with heat) along with some hand stitching (or a machine if you’d like)!
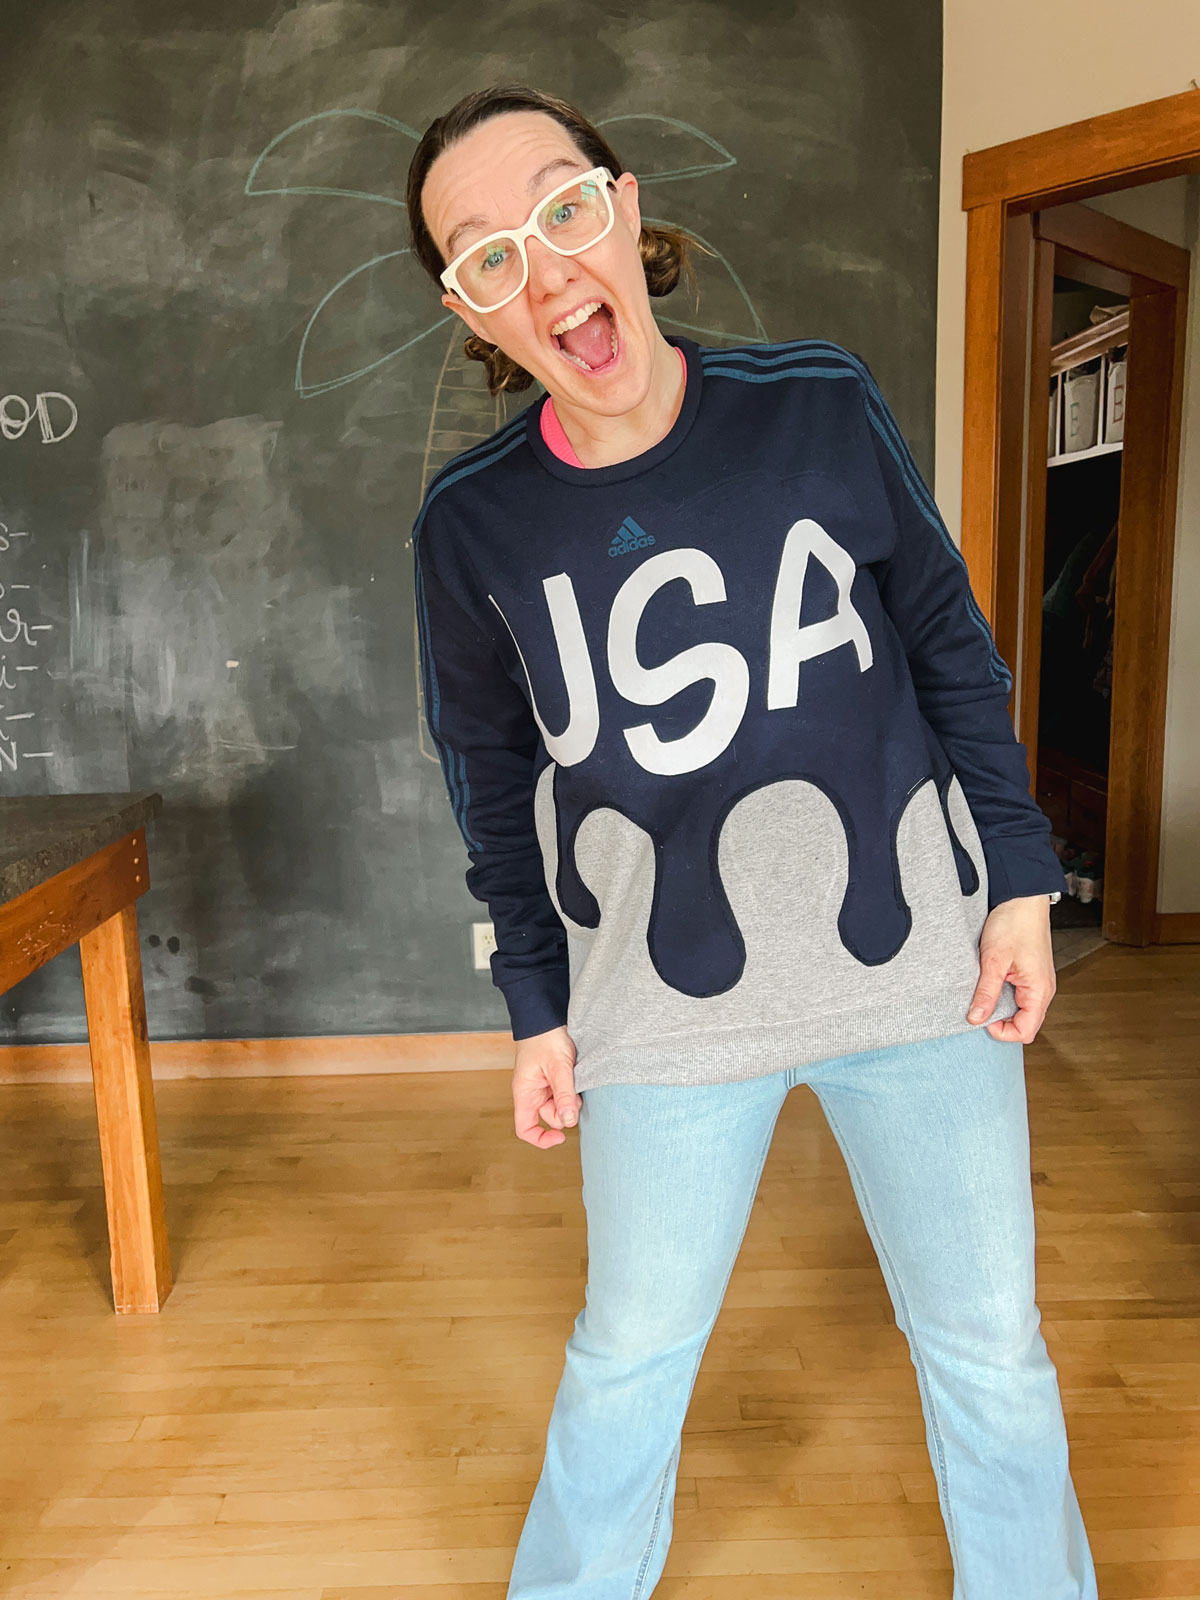
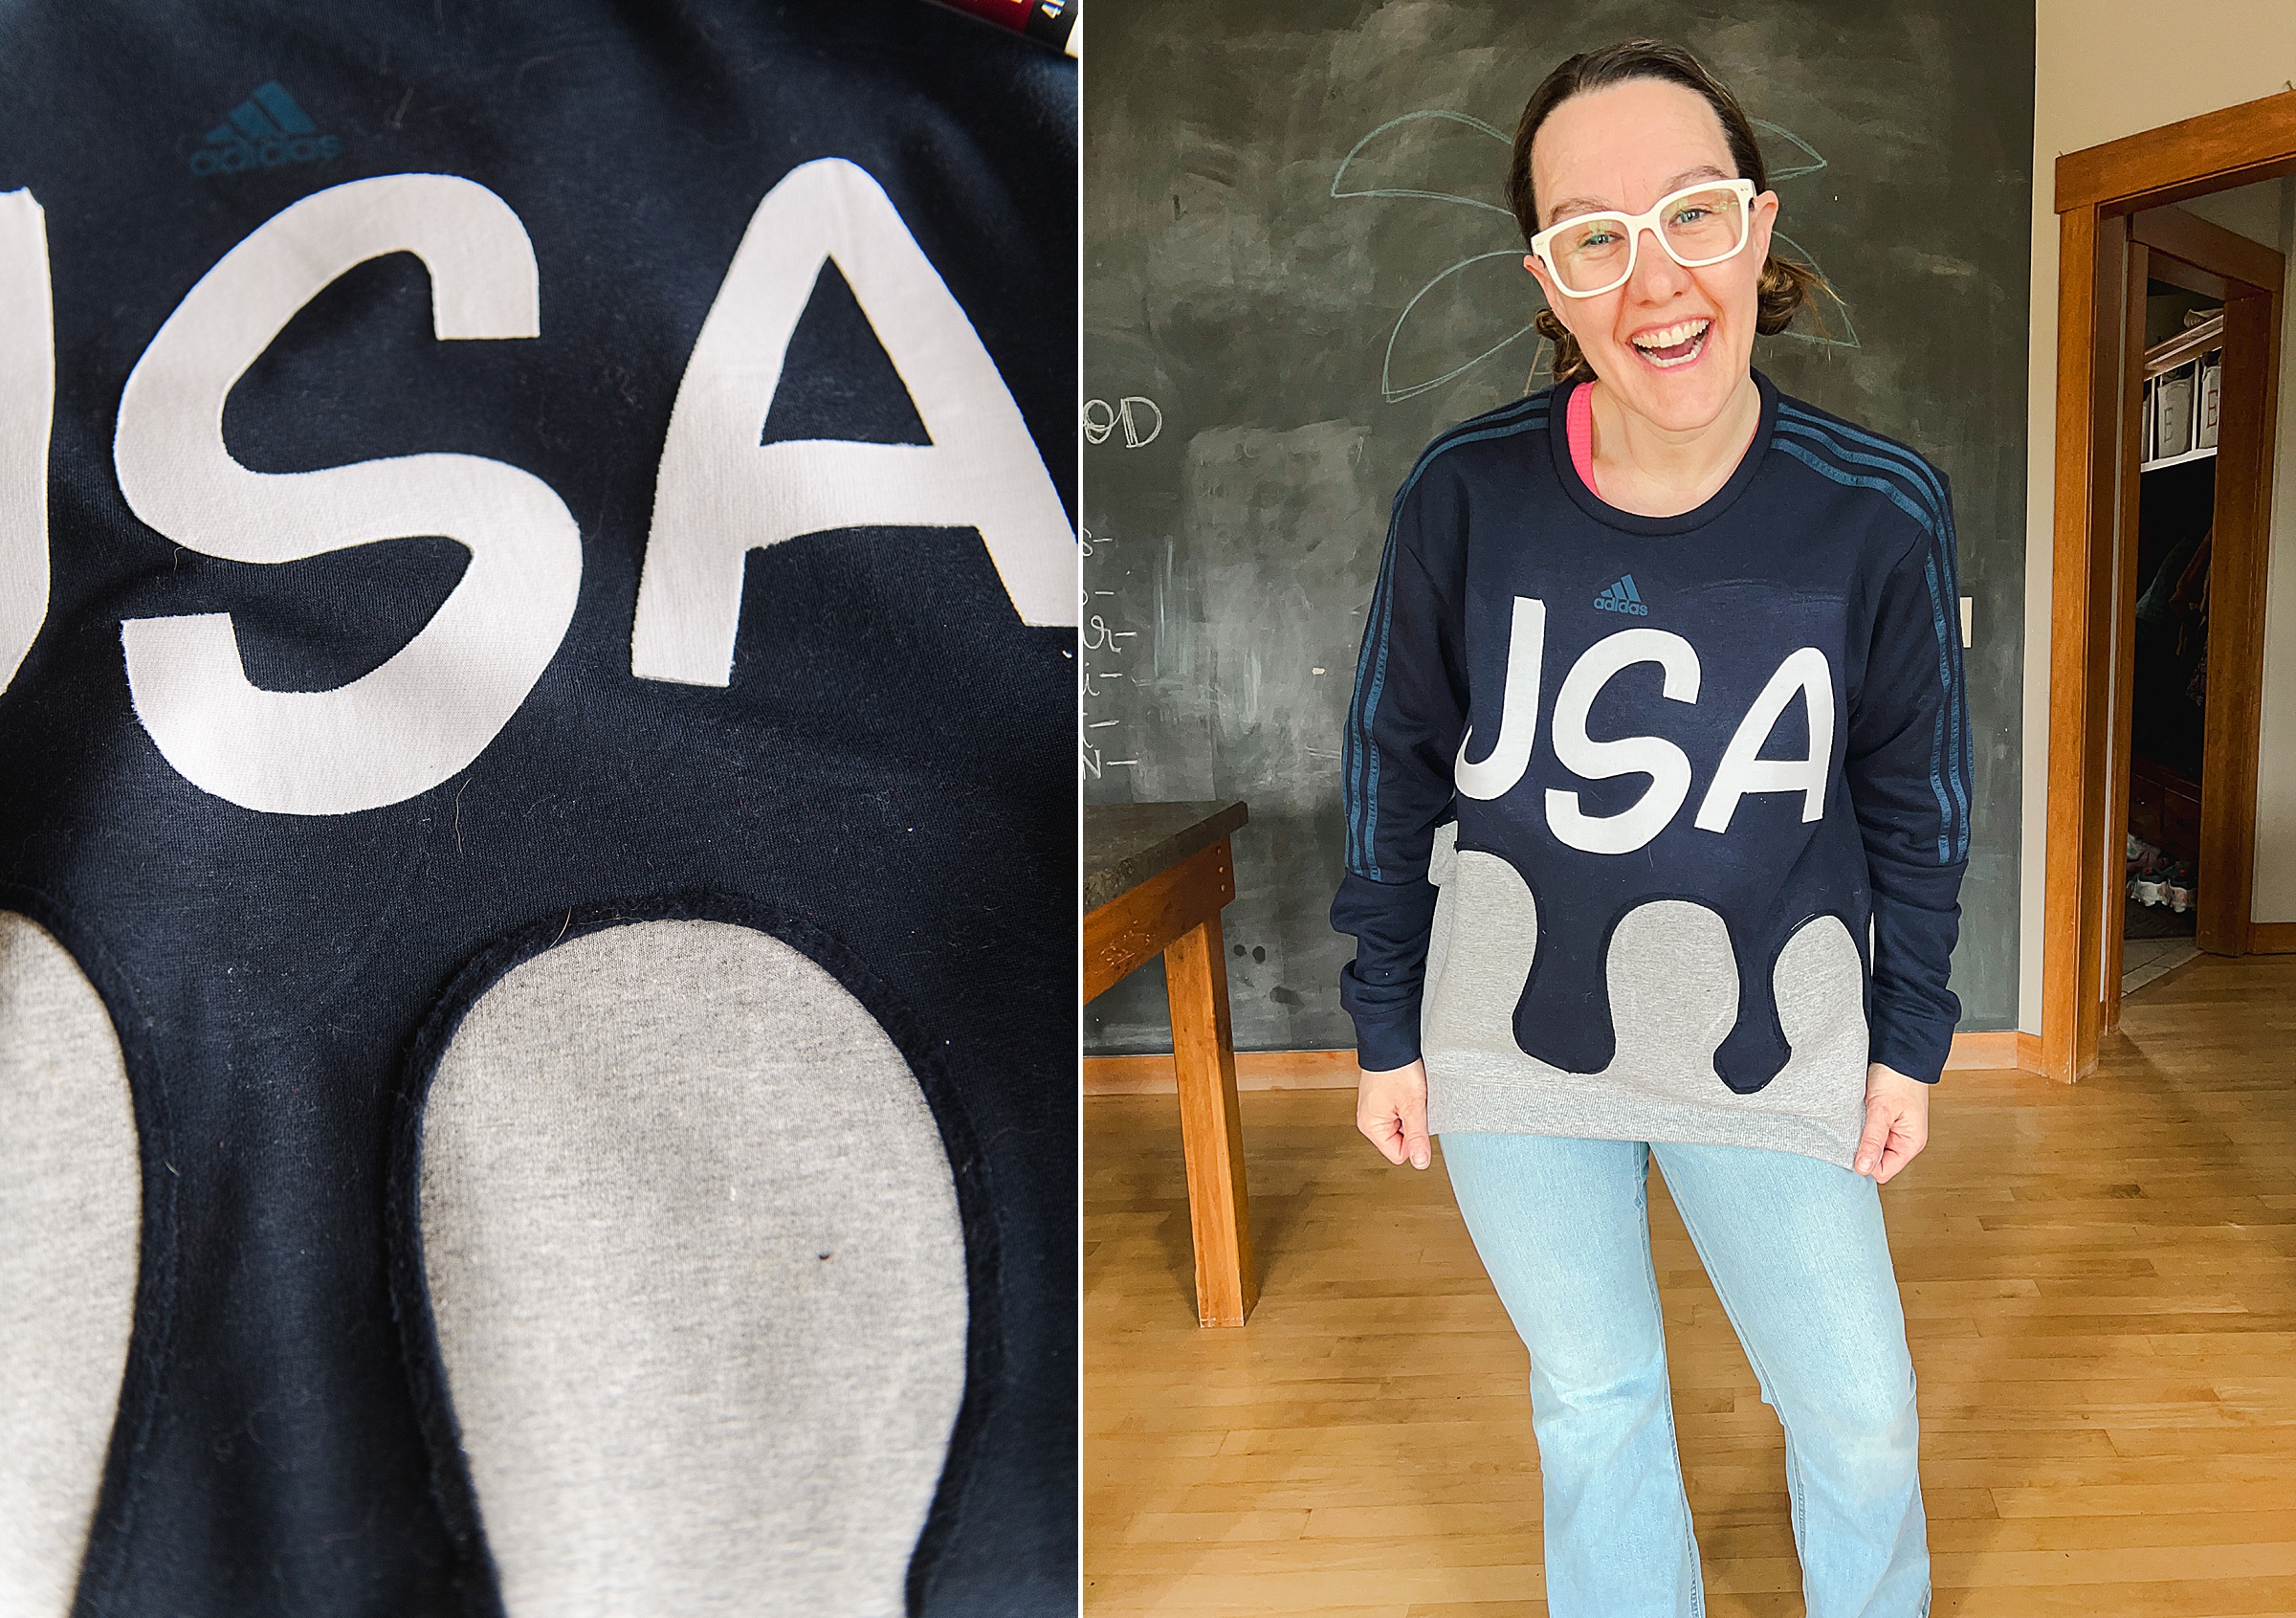
This year happens to be an Olympic year, so OF COURSE I decided to turn these 2 sweatshirts into a “USA” patriotic style shirt to cheer on Team USA from my couch! HA! 🙂
MATERIALS NEEDED:
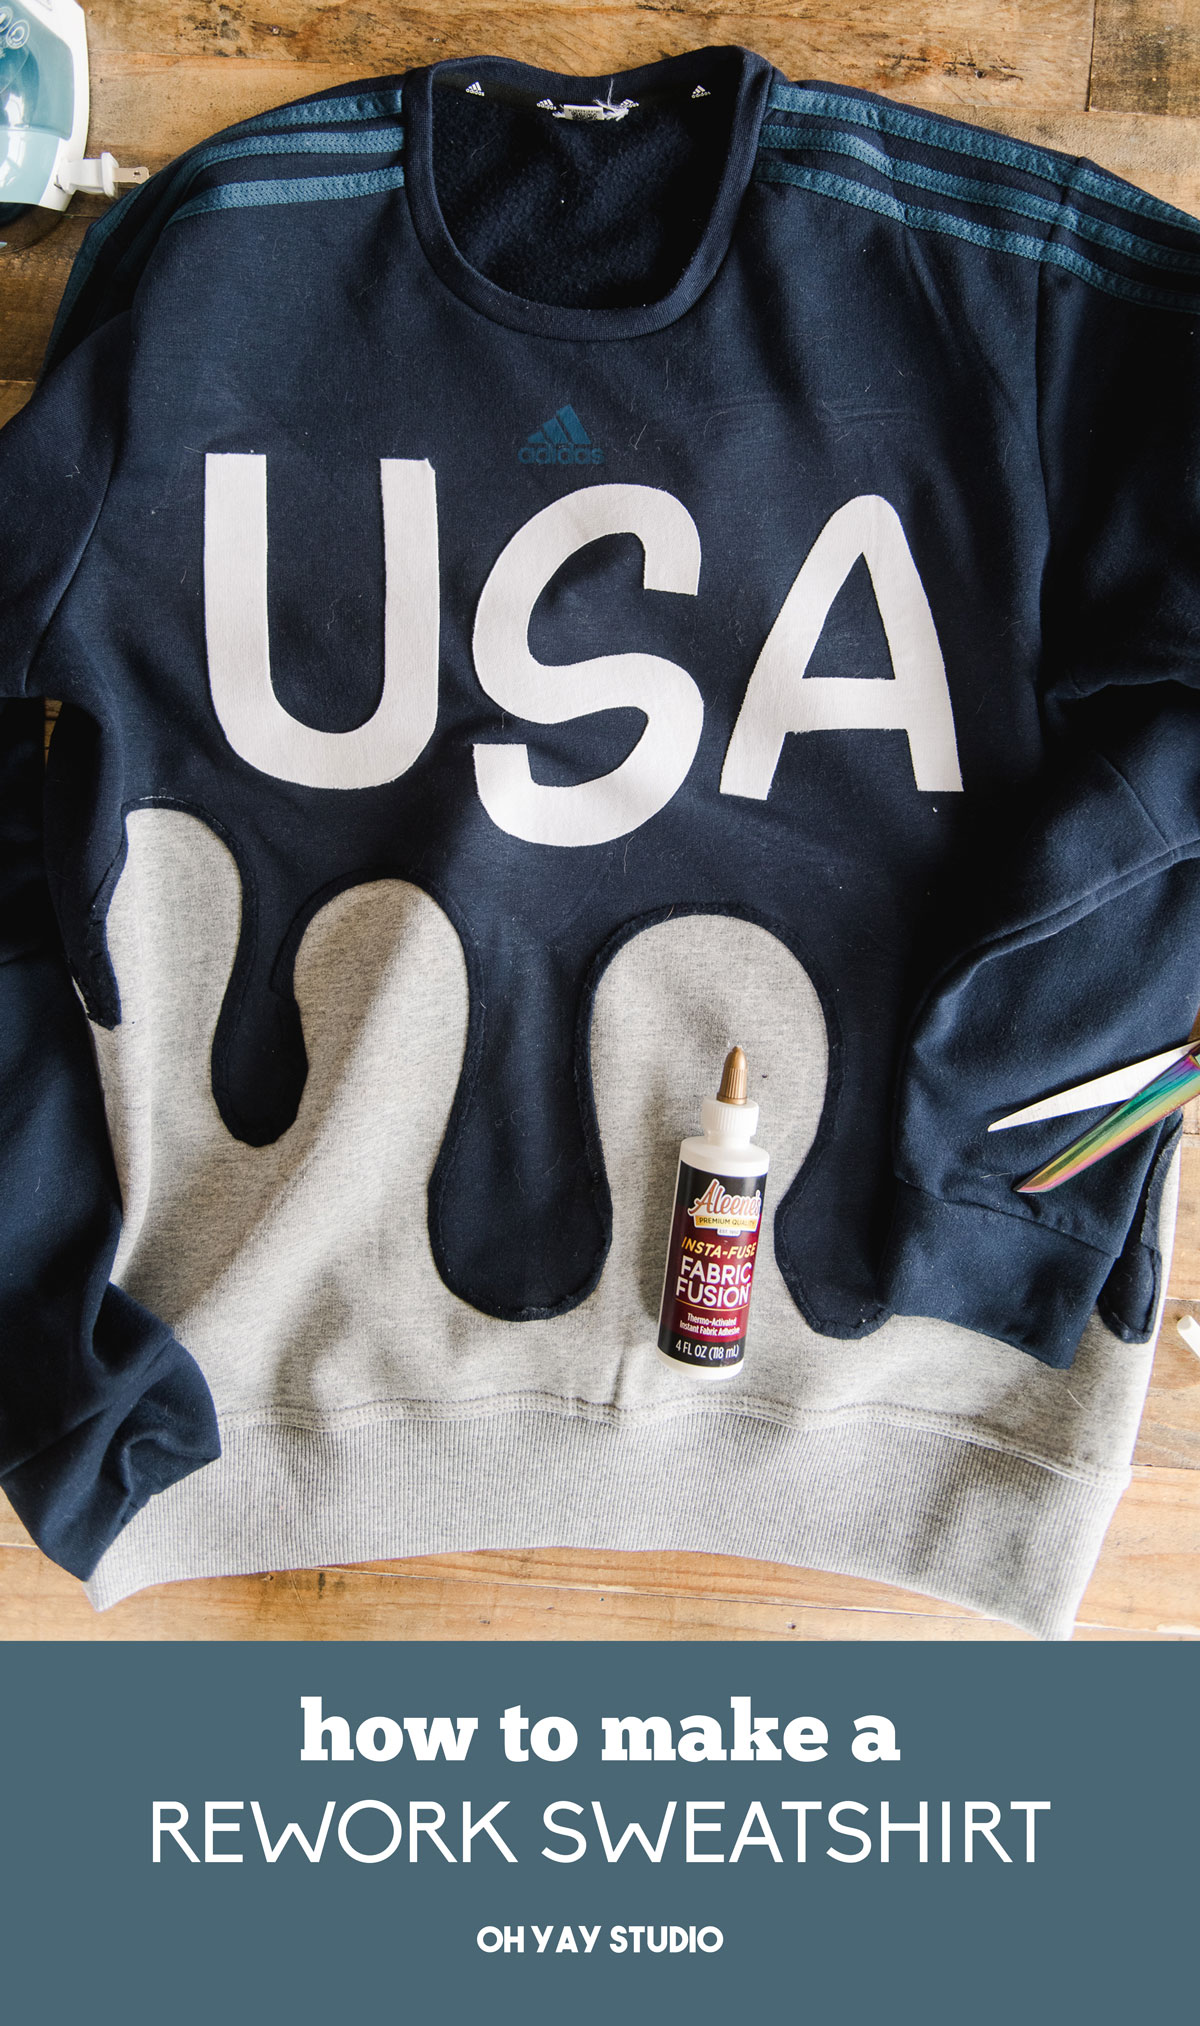
- 2 older sweatshirts that you want to rework together (or a sweatshirt and any other fabric – in this pattern the blue sweatshirt is “sweatshirt A” and the grey one is “Sweatshirt B” and the white sweatshirt is cut up from a really grimy, stained sweatshirt 🙂
- A bottle of Aleene’s Insta-Fuse Fabric Fusion
- An iron and ironing board along with another piece of cloth to use as protection when ironing
- Some straight pins
- Sewing machine (or needle and thread would work too)
- Sharp pair of scissors
- A pencil or chalk for marking your lines to cut

INSTRUCTIONS:
1. The first step is to wash your sweatshirts or garments – get them nice and clean and remove any of the “sizing” so that our glue will stick super permanently!
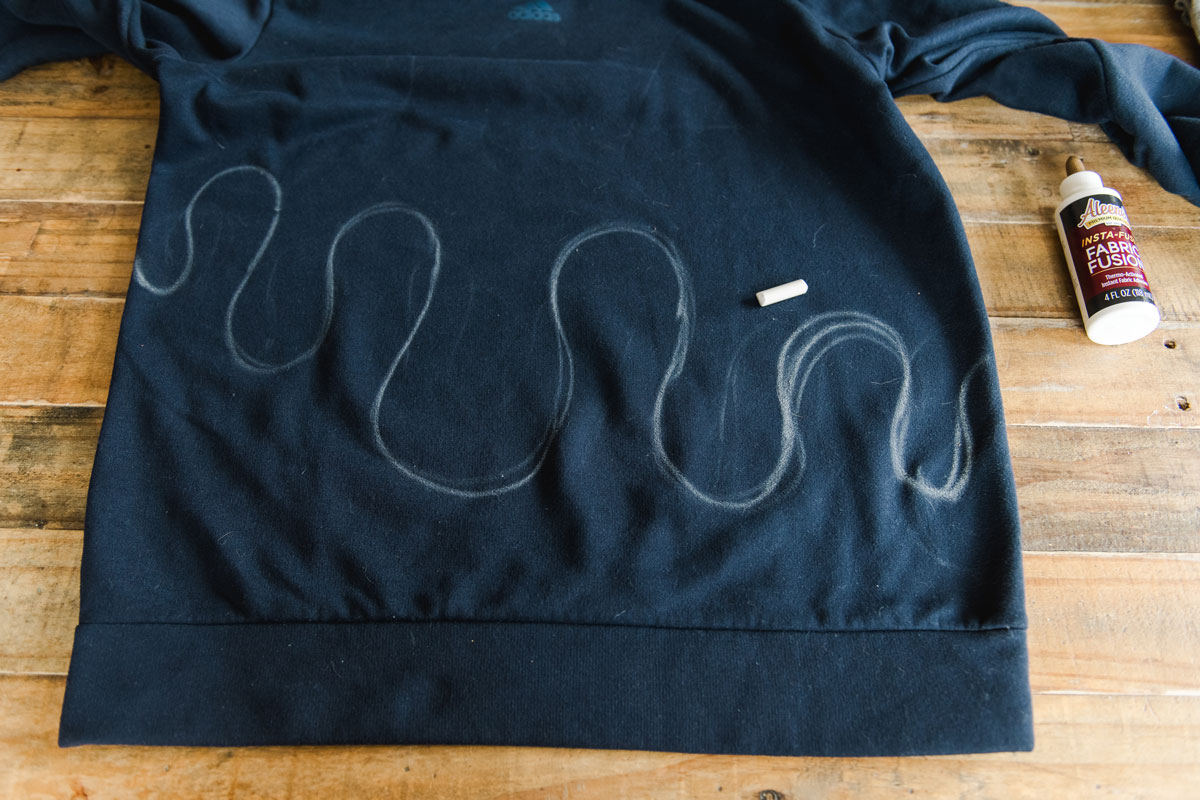
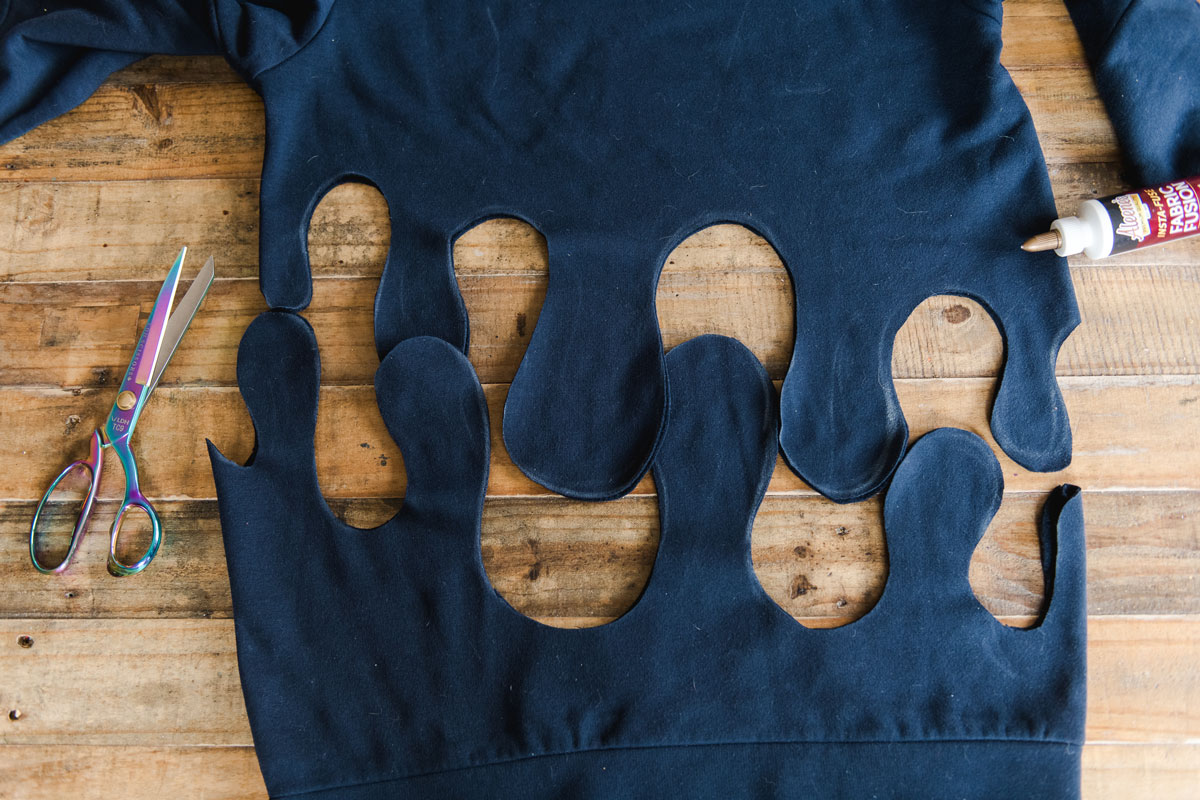
2. Once dry, mark up your sweatshirt A and decide how you want to get it cut up to rework (reference the materials for which sweatshirt is labeled which) – I sketched out a few ideas before knowing EXACTLY what I wanted for my patriotic sweatshirt! 🙂
Note: Before you cut sweatshirt A, you will want to visualize exactly how the finished sweatshirt will look – if you read ahead in the pattern, you notice that the line you cut eventually gets folded “back” and glued down for a finished seam. So just know that you will loose about 1/4” or more beyond what you are cutting in this step.
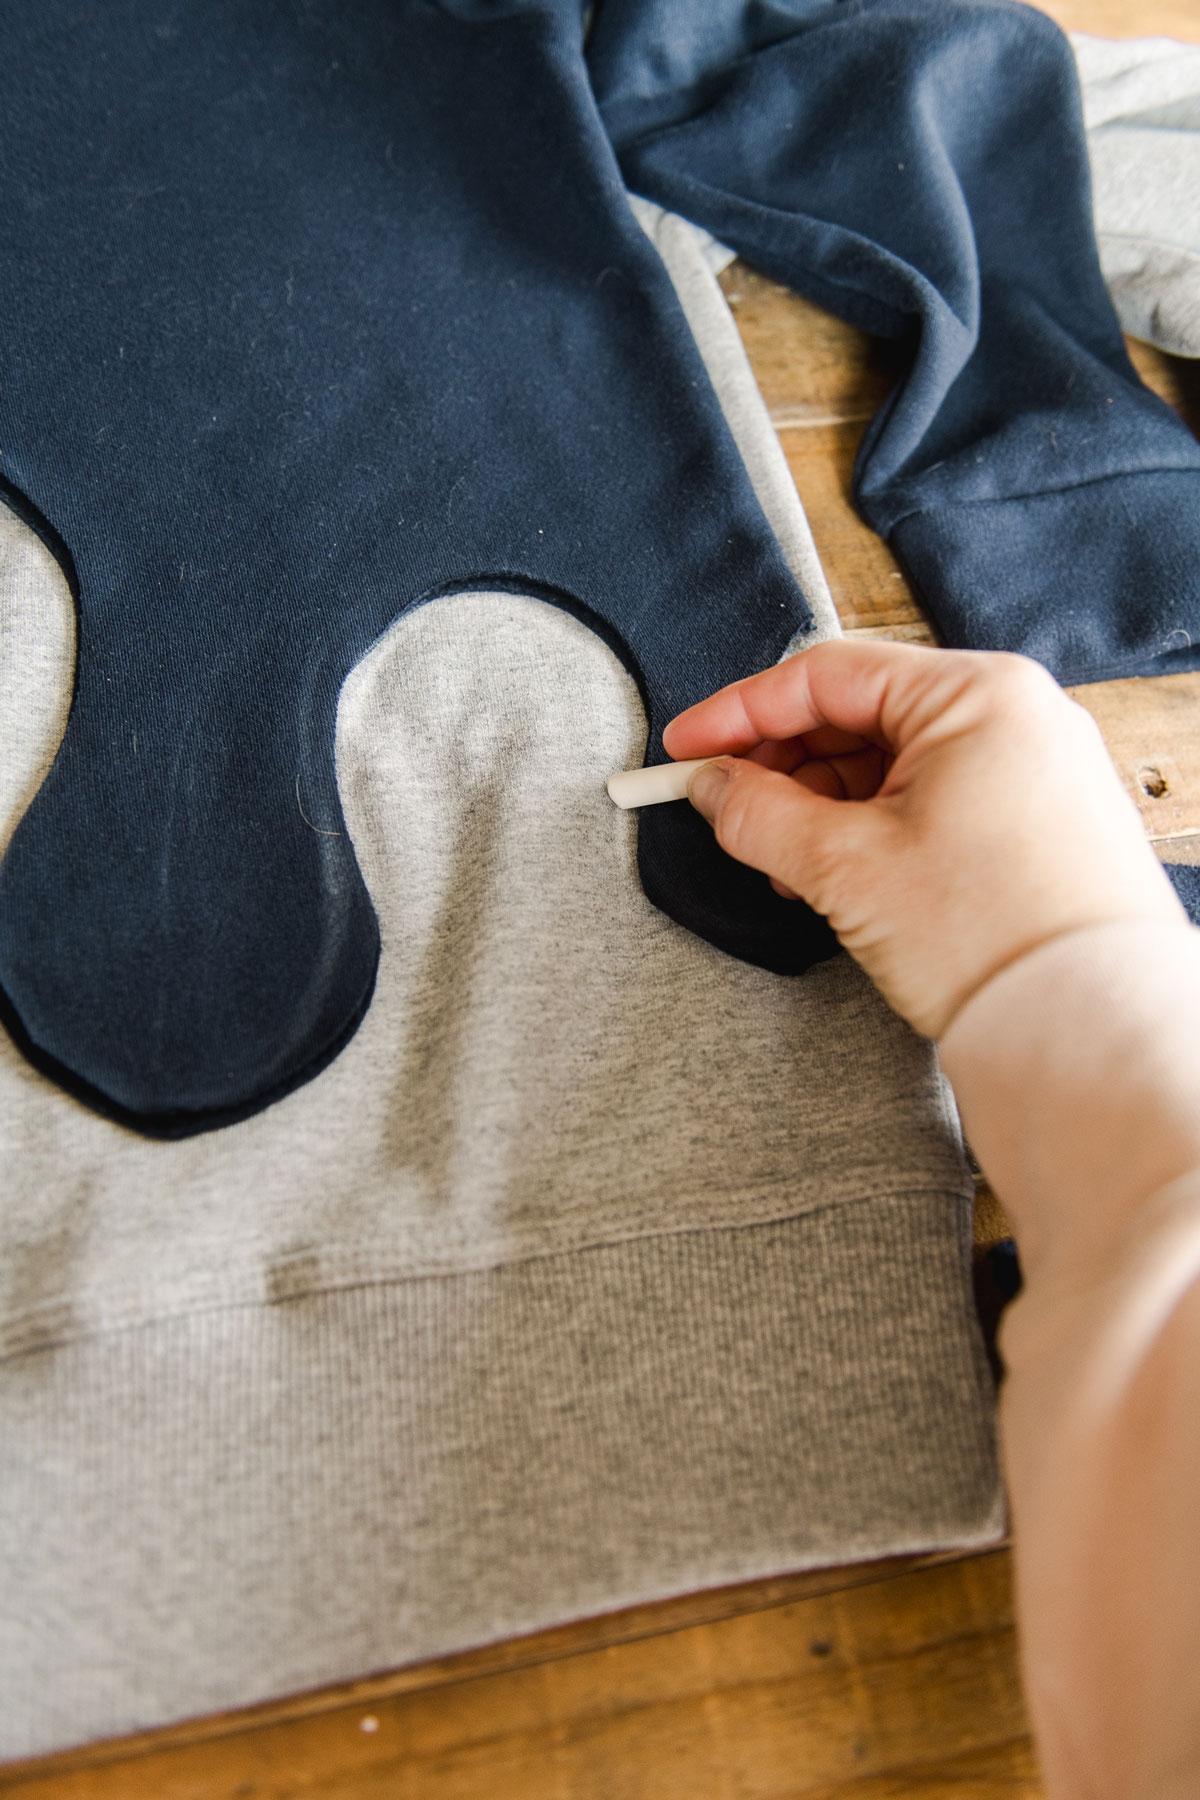
3. You will then lay out and cut up sweatshirt B. I did this by laying sweatshirt A over Sweatshirt B to get a general idea of where to cut, how it lays, etc. I used the chalk to mark a few of the high and low points of the drip onto sweatshirt B. I took away sweatshirt A, and then cut a larger than needed area for sweatshirt b (ie, don’t cut the exact drip pattern or you will make it SO hard to sew together)! 🙂
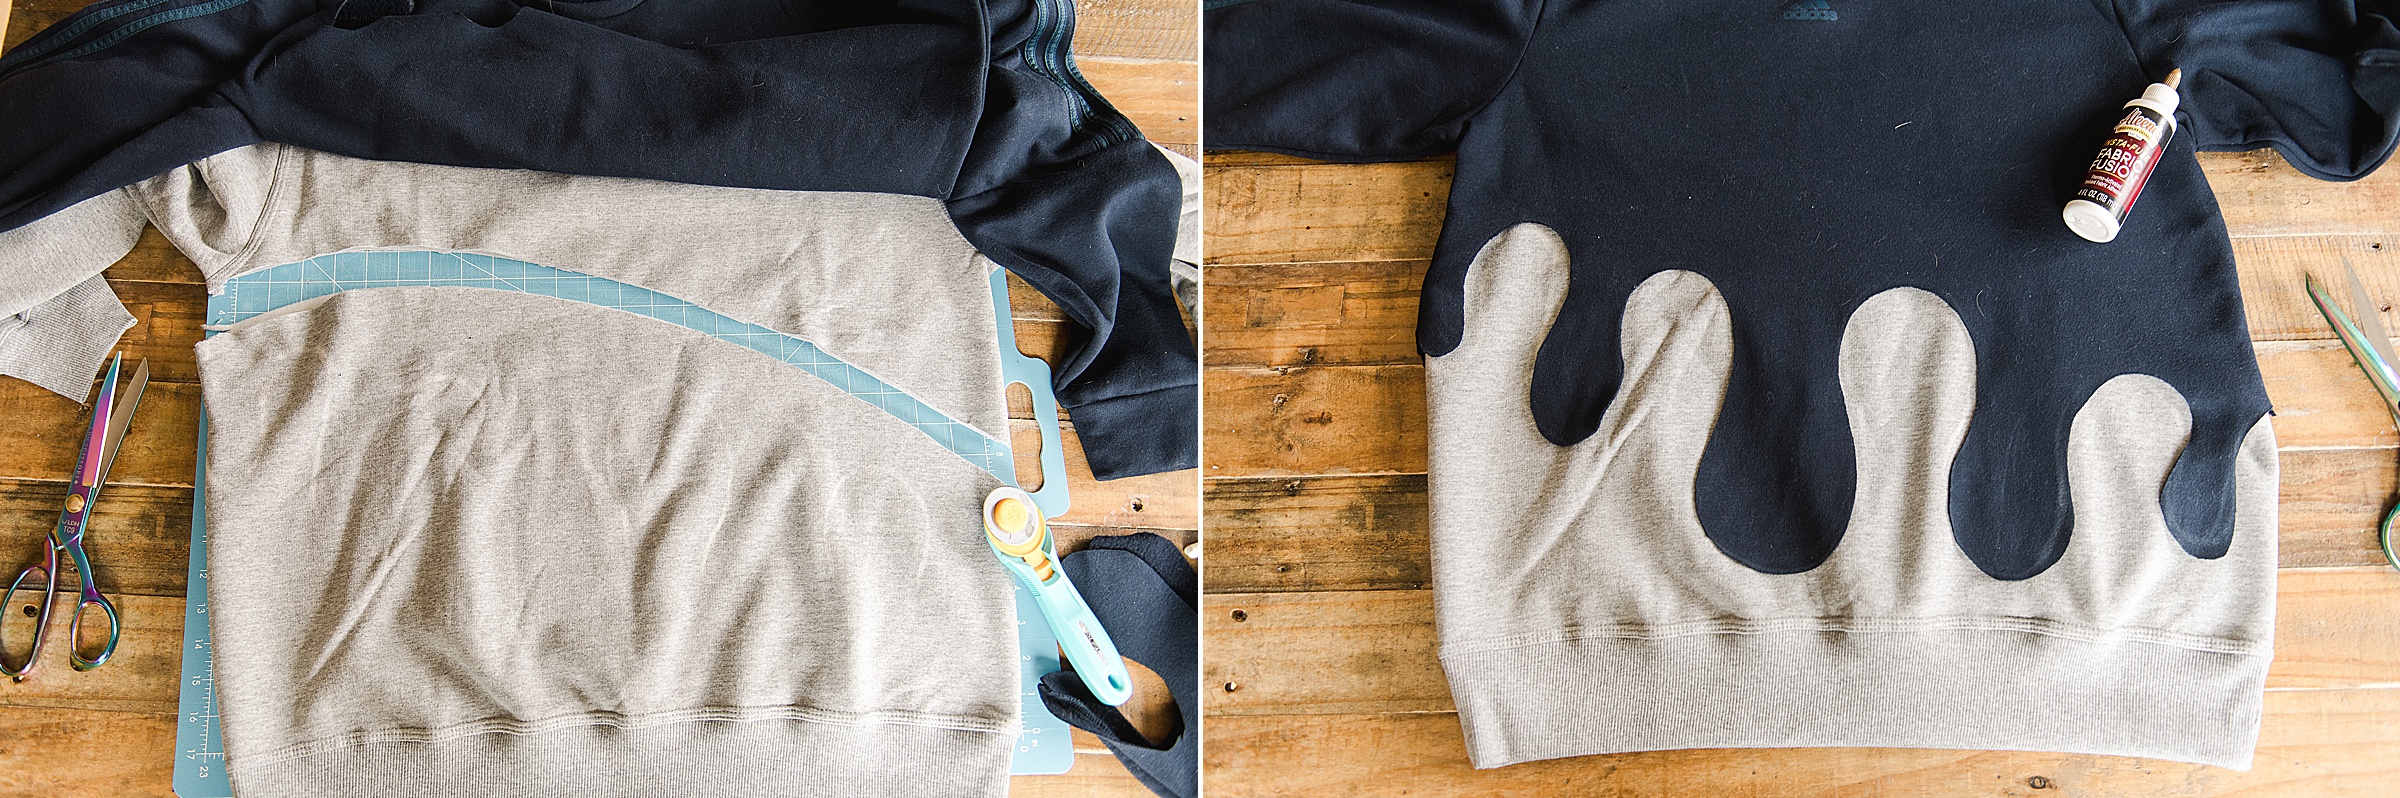
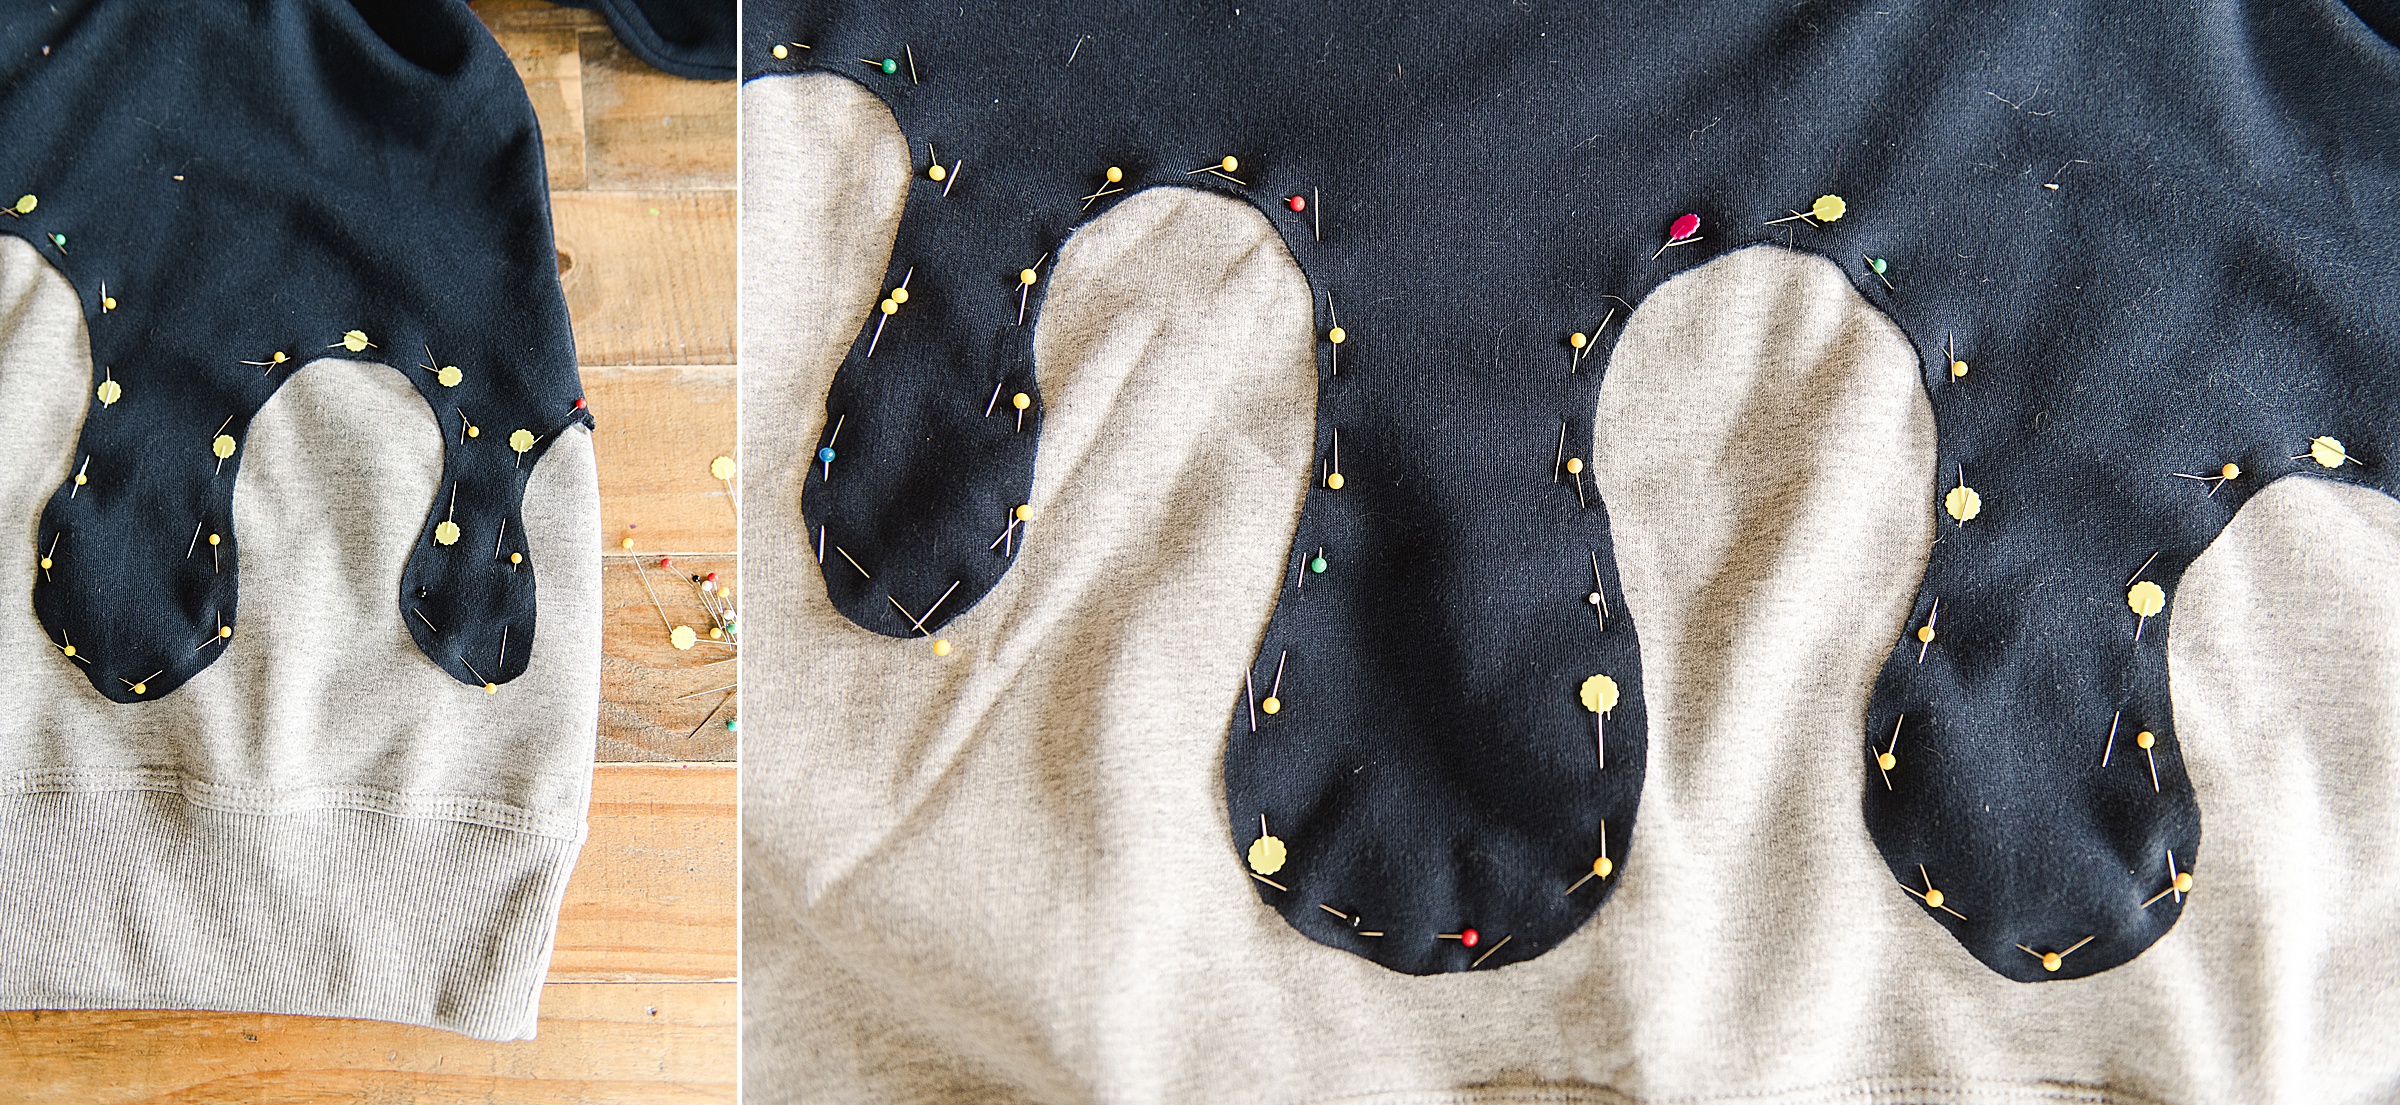
4. Now lay sweatshirt B inside of sweatshirt A (right sides facing out) and carefully and slowly begin pinning in place 🙂
Some tips for pinning: Go SLOW, Be sure to match the side seams, and be sure everything lays flat as you pin (I did this by putting one hand inside the sweatshirt and using my other hand to carefully pin, also so that I didn’t pin the front of the shirt to the back, HA)!
Be sure to pin both the front and back of the sweatshirt separately! 🙂
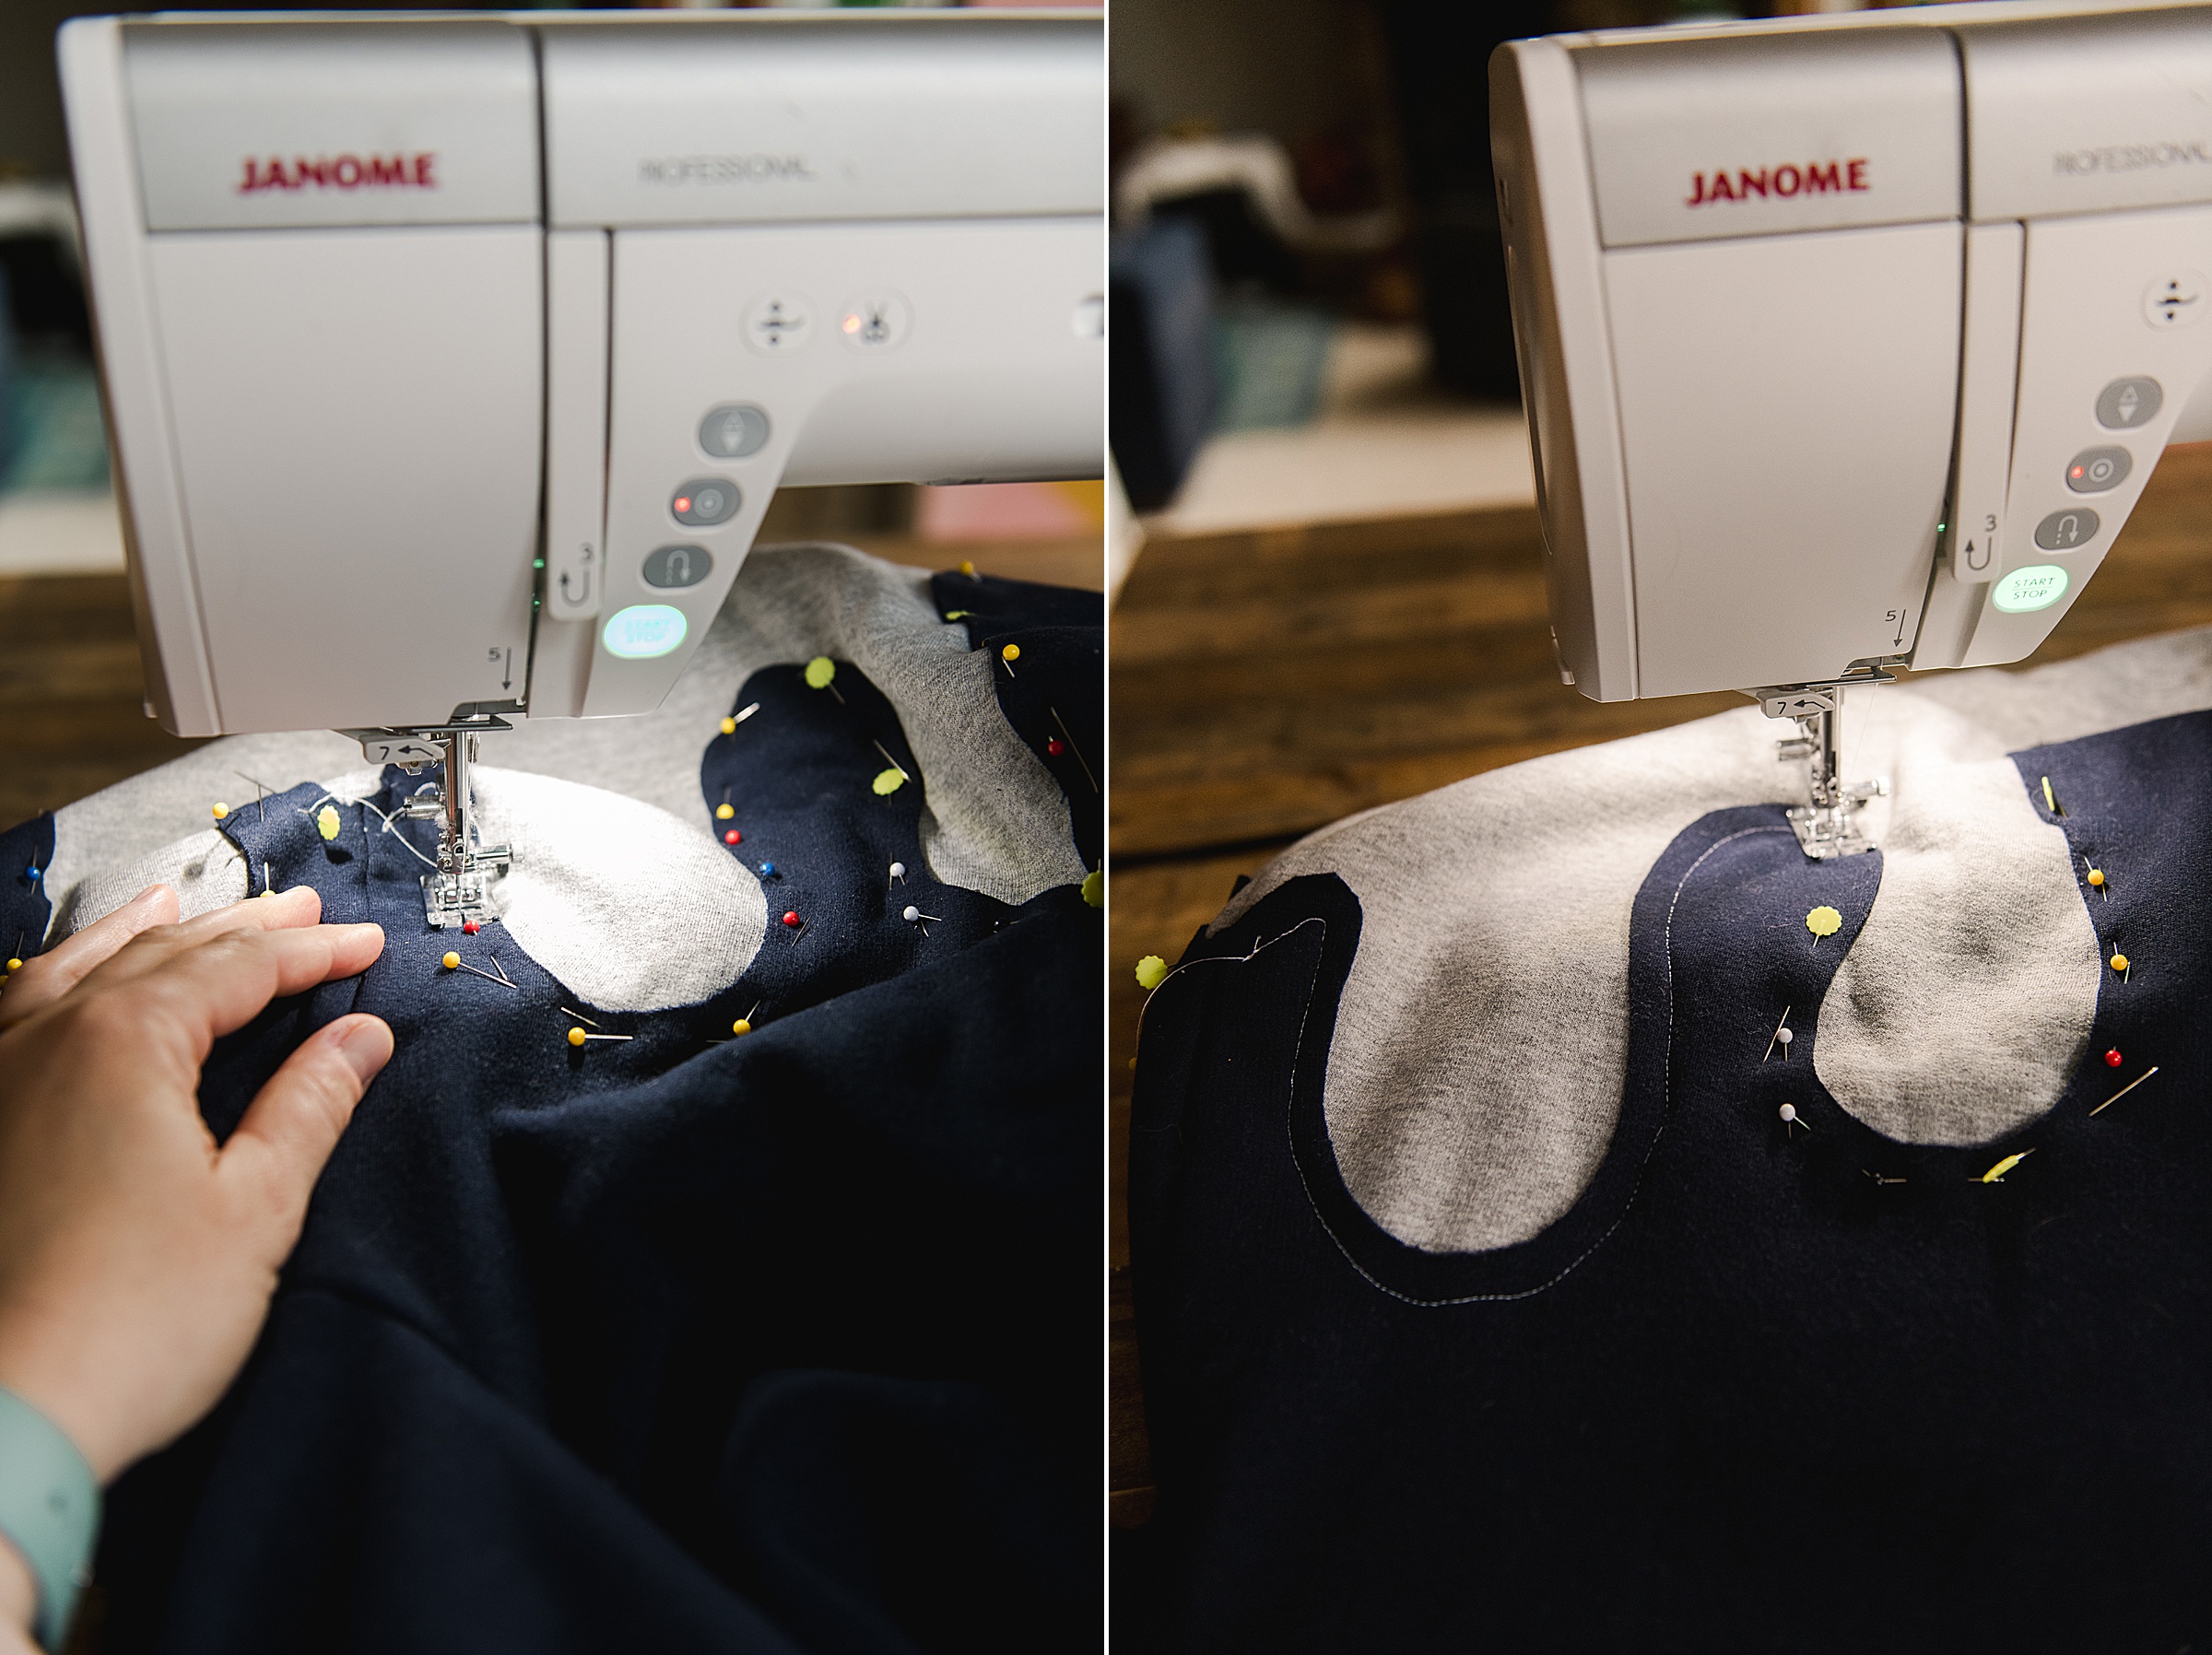
5. It’s time to sew.
You can either sew by hand or using a sewing machine ORRRR if you don’t want to sew all together, the Aleene’s Fabric fusion is an amazing alternative as well (and let me tell you, this stuff work well – through washes and ALL)!
If you choose to sew, just carefully start to sew on your machine following your cut edges. You will be sewing right sides out so you can see your seam allowance – be sure to give yourself like 1/4”+ seam allowance (I did closer to 1/2” so that you can turn your raw edges out and glue in place to give a nice finished edge)!
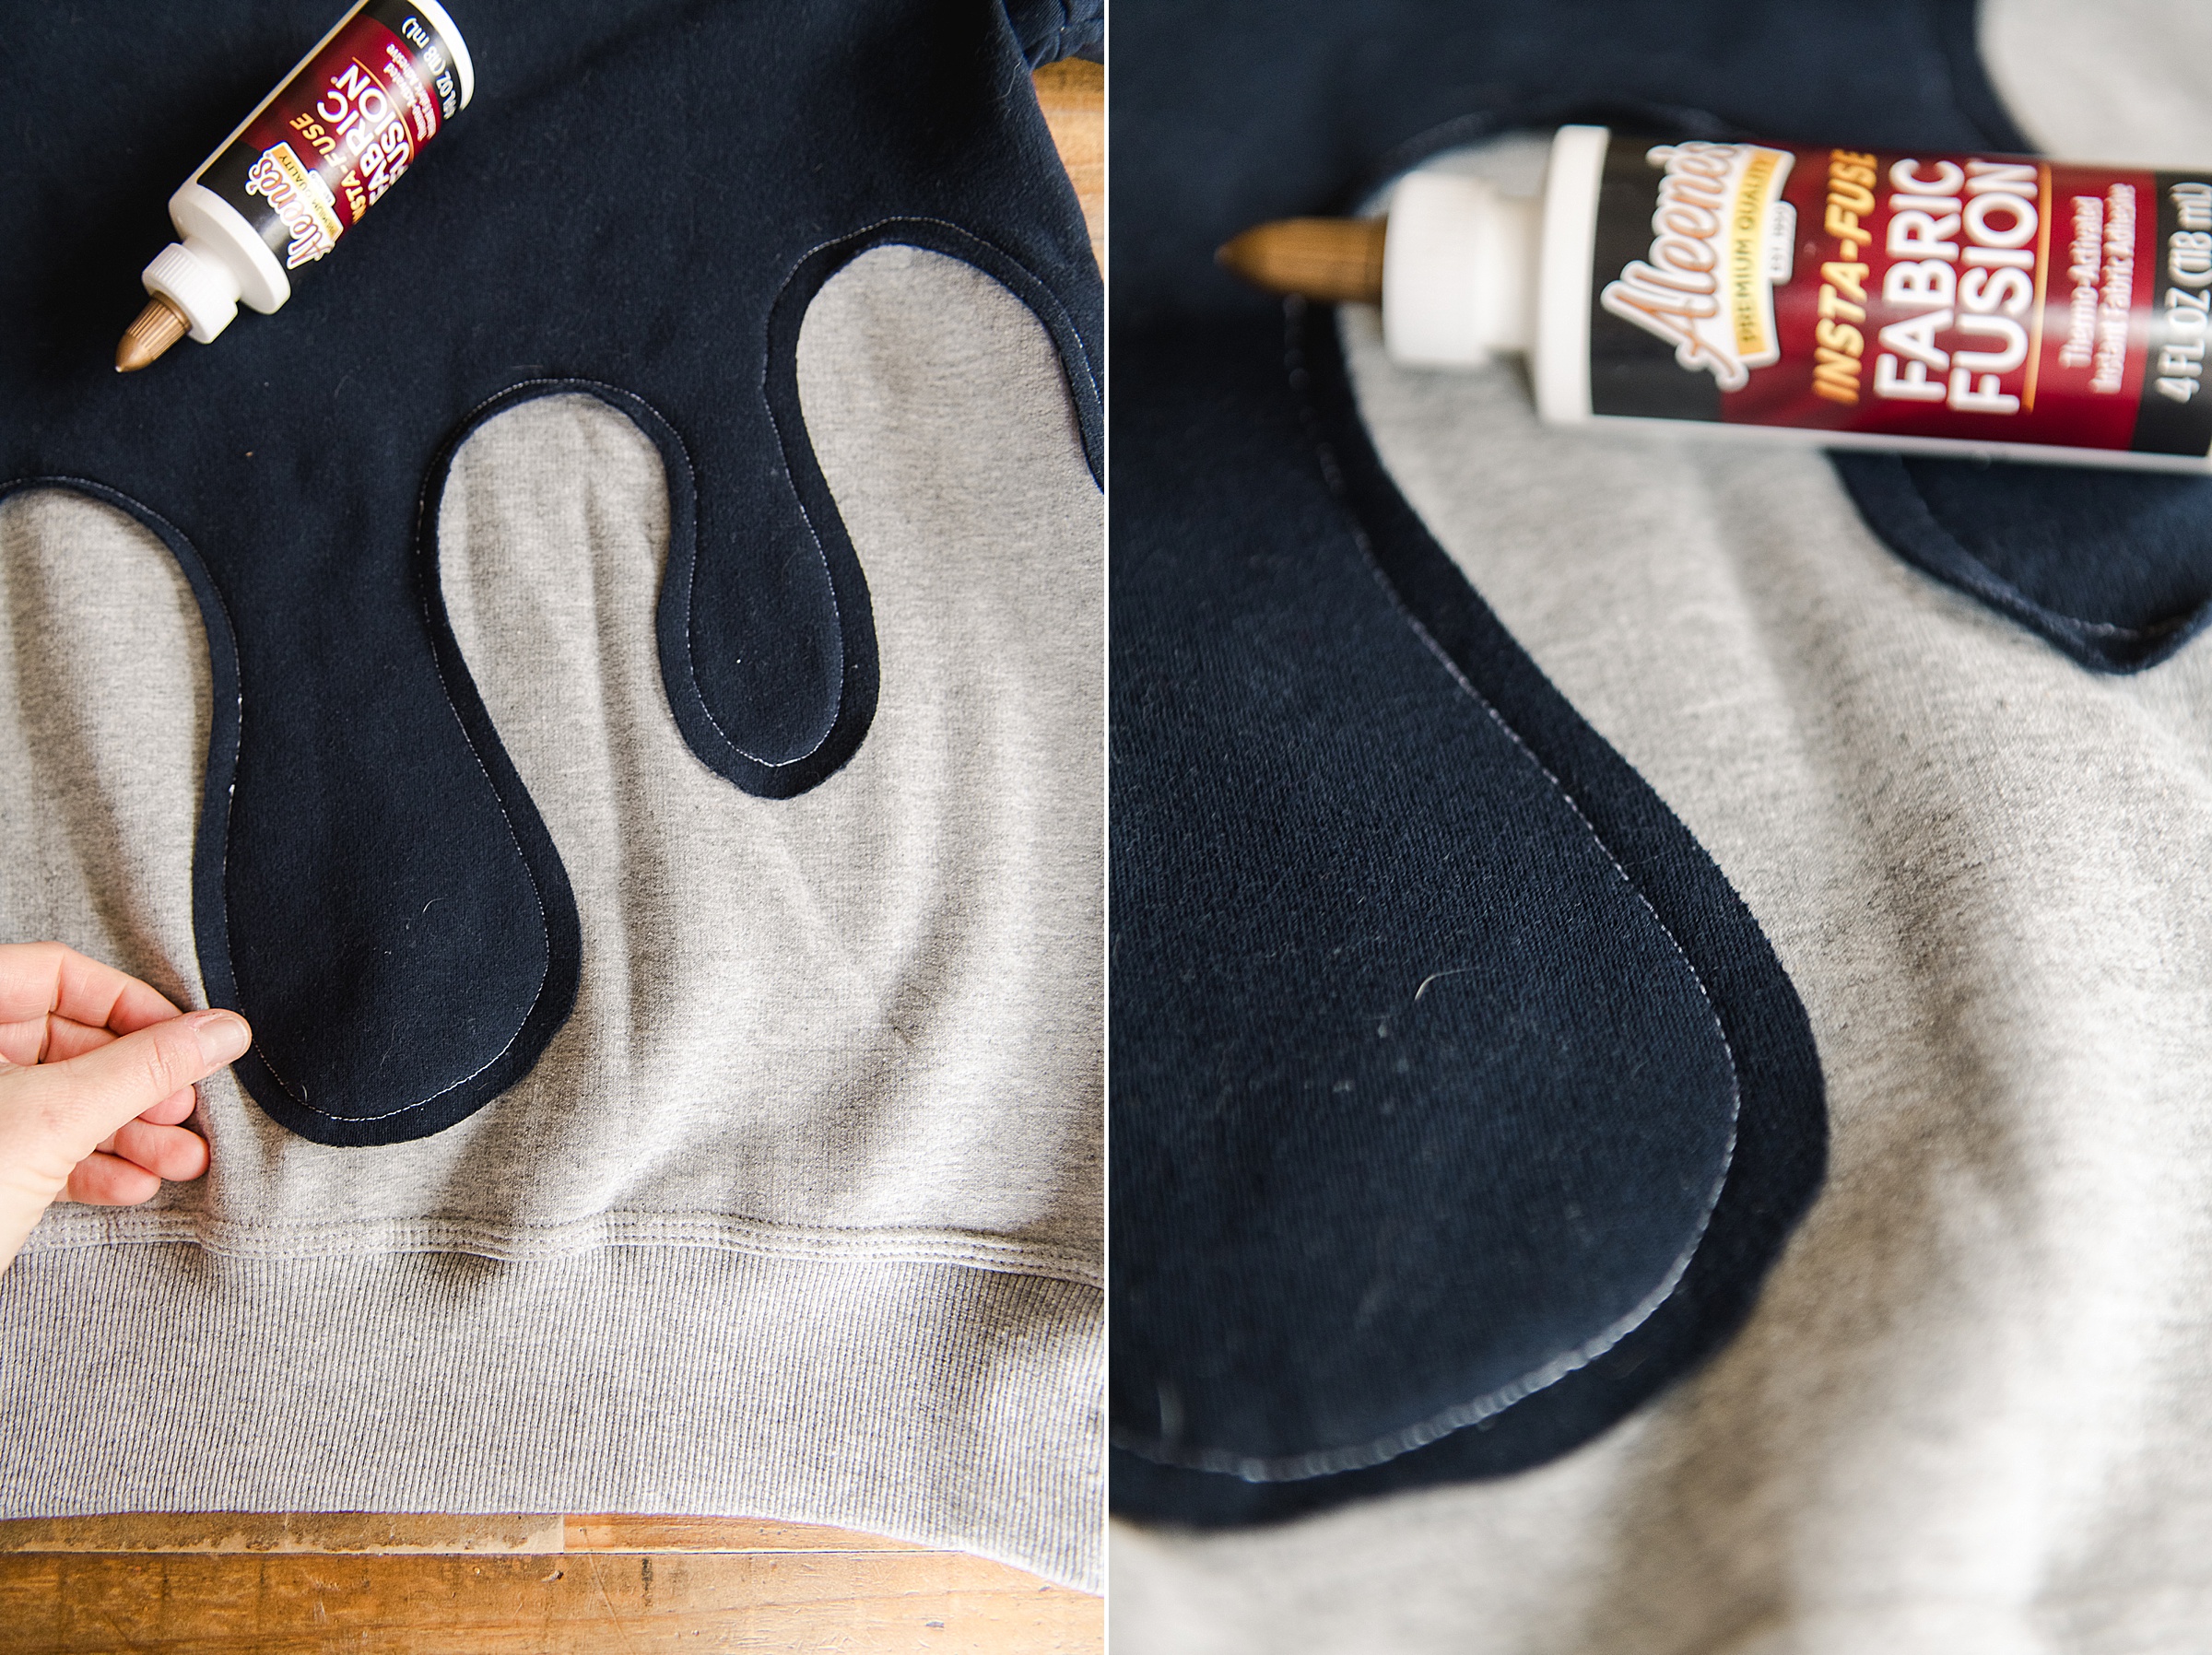
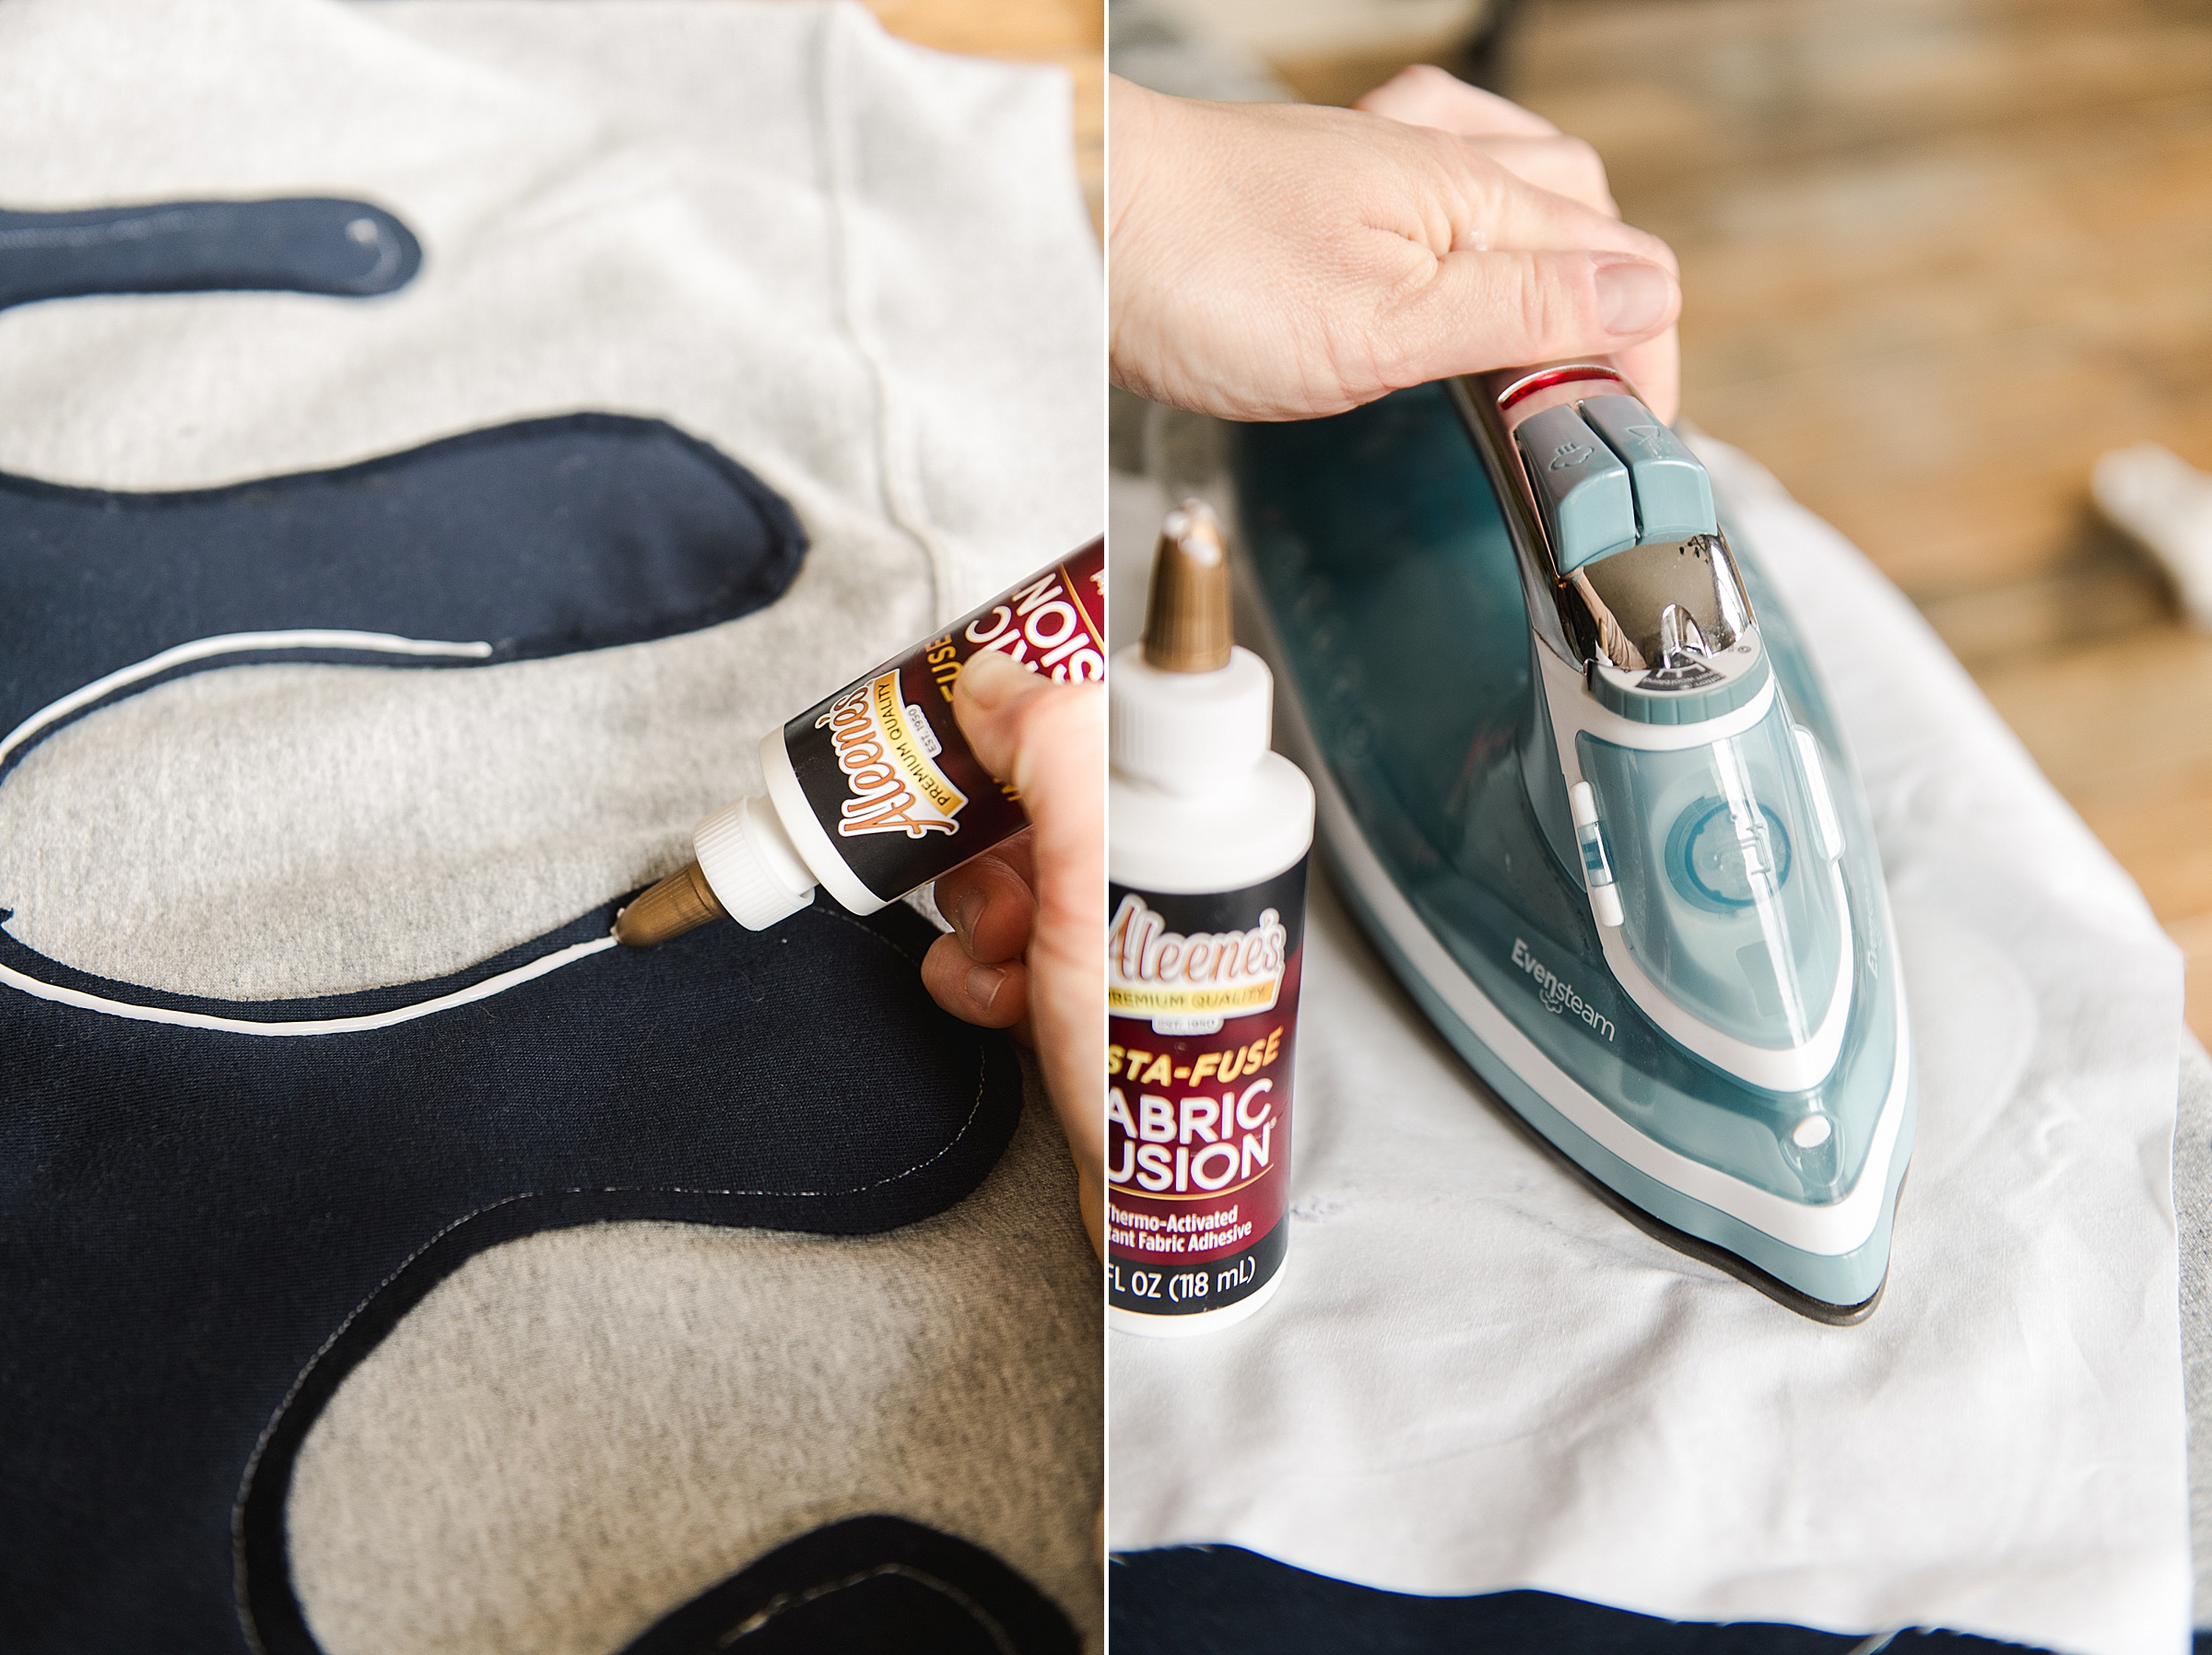
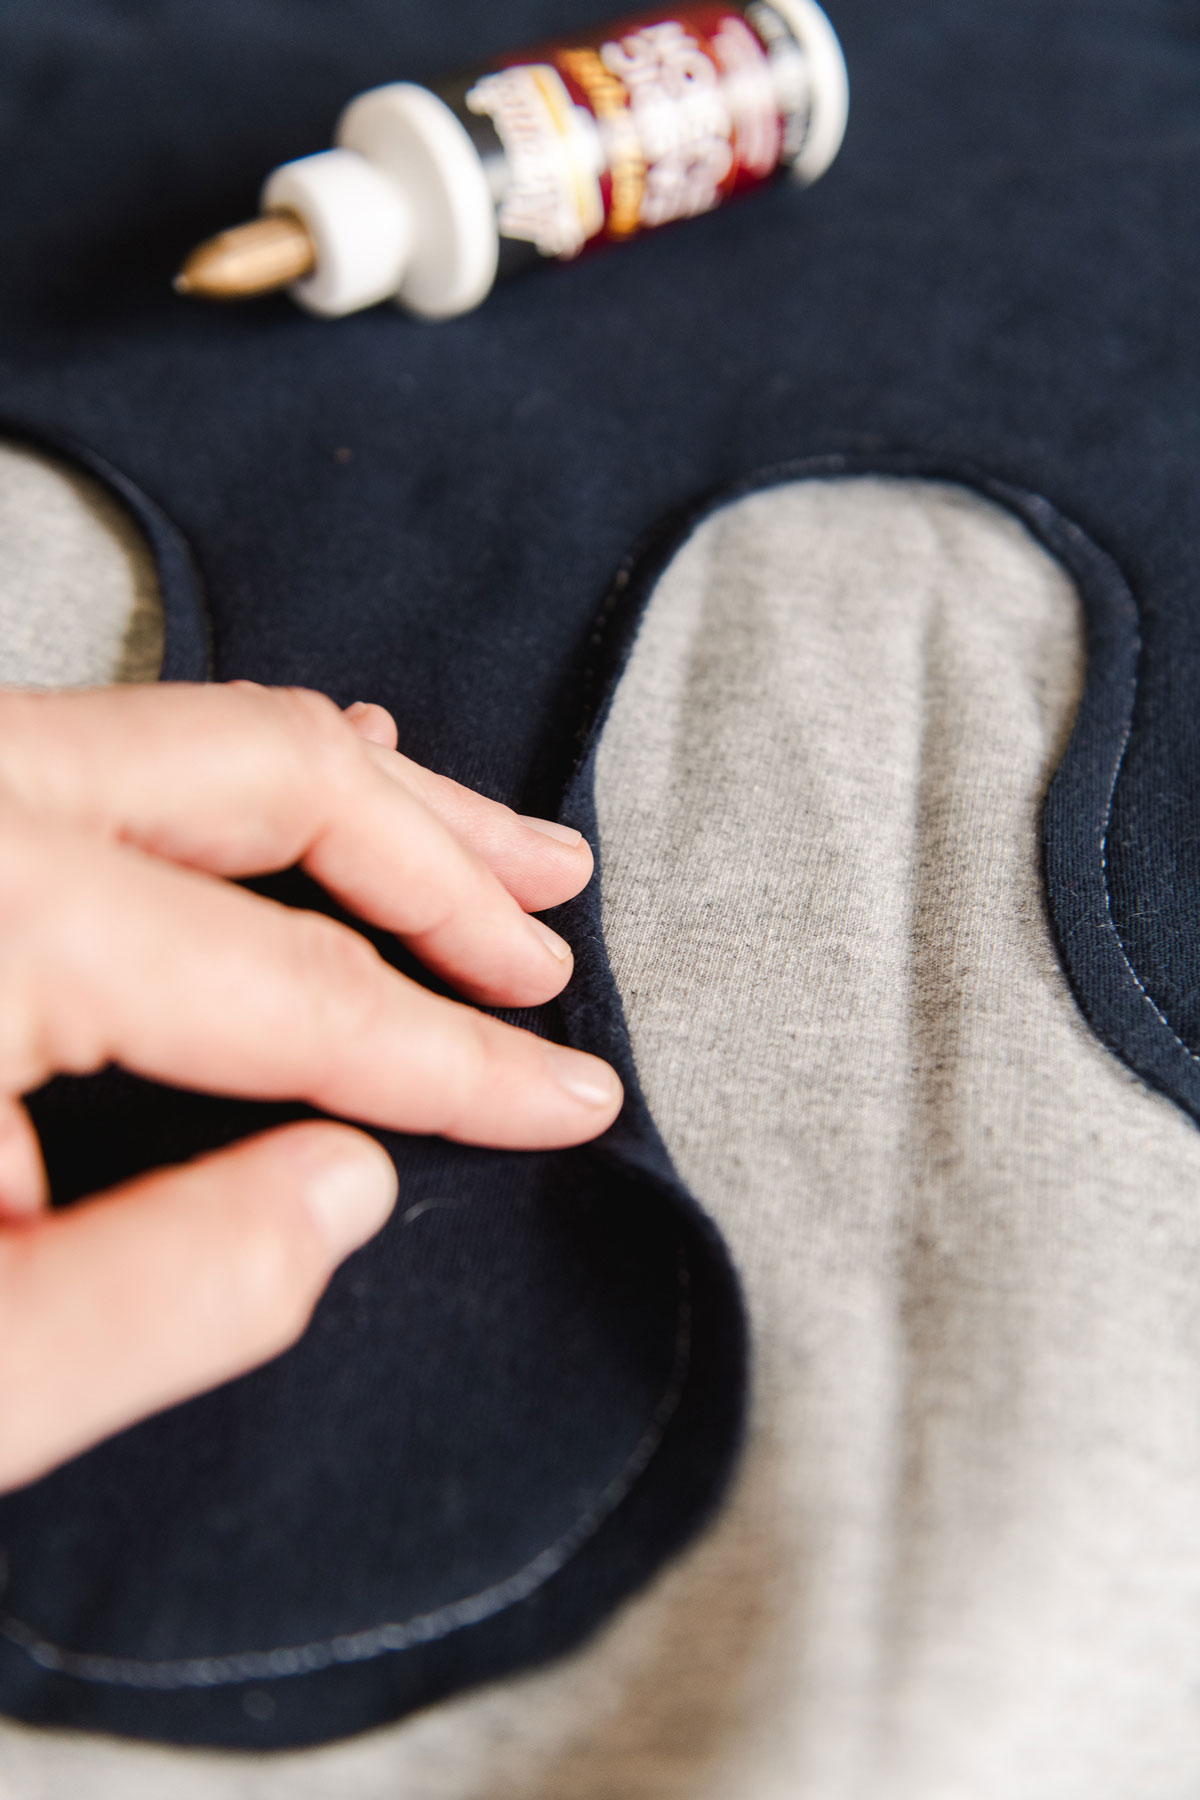
6. Now it’s time to break out your amazing Aleene’s Insta-Fuse Fabric Fusion glue to finish everything off! You will use this glue for 2 things:
- 1. To finish the edges of the cut out drips
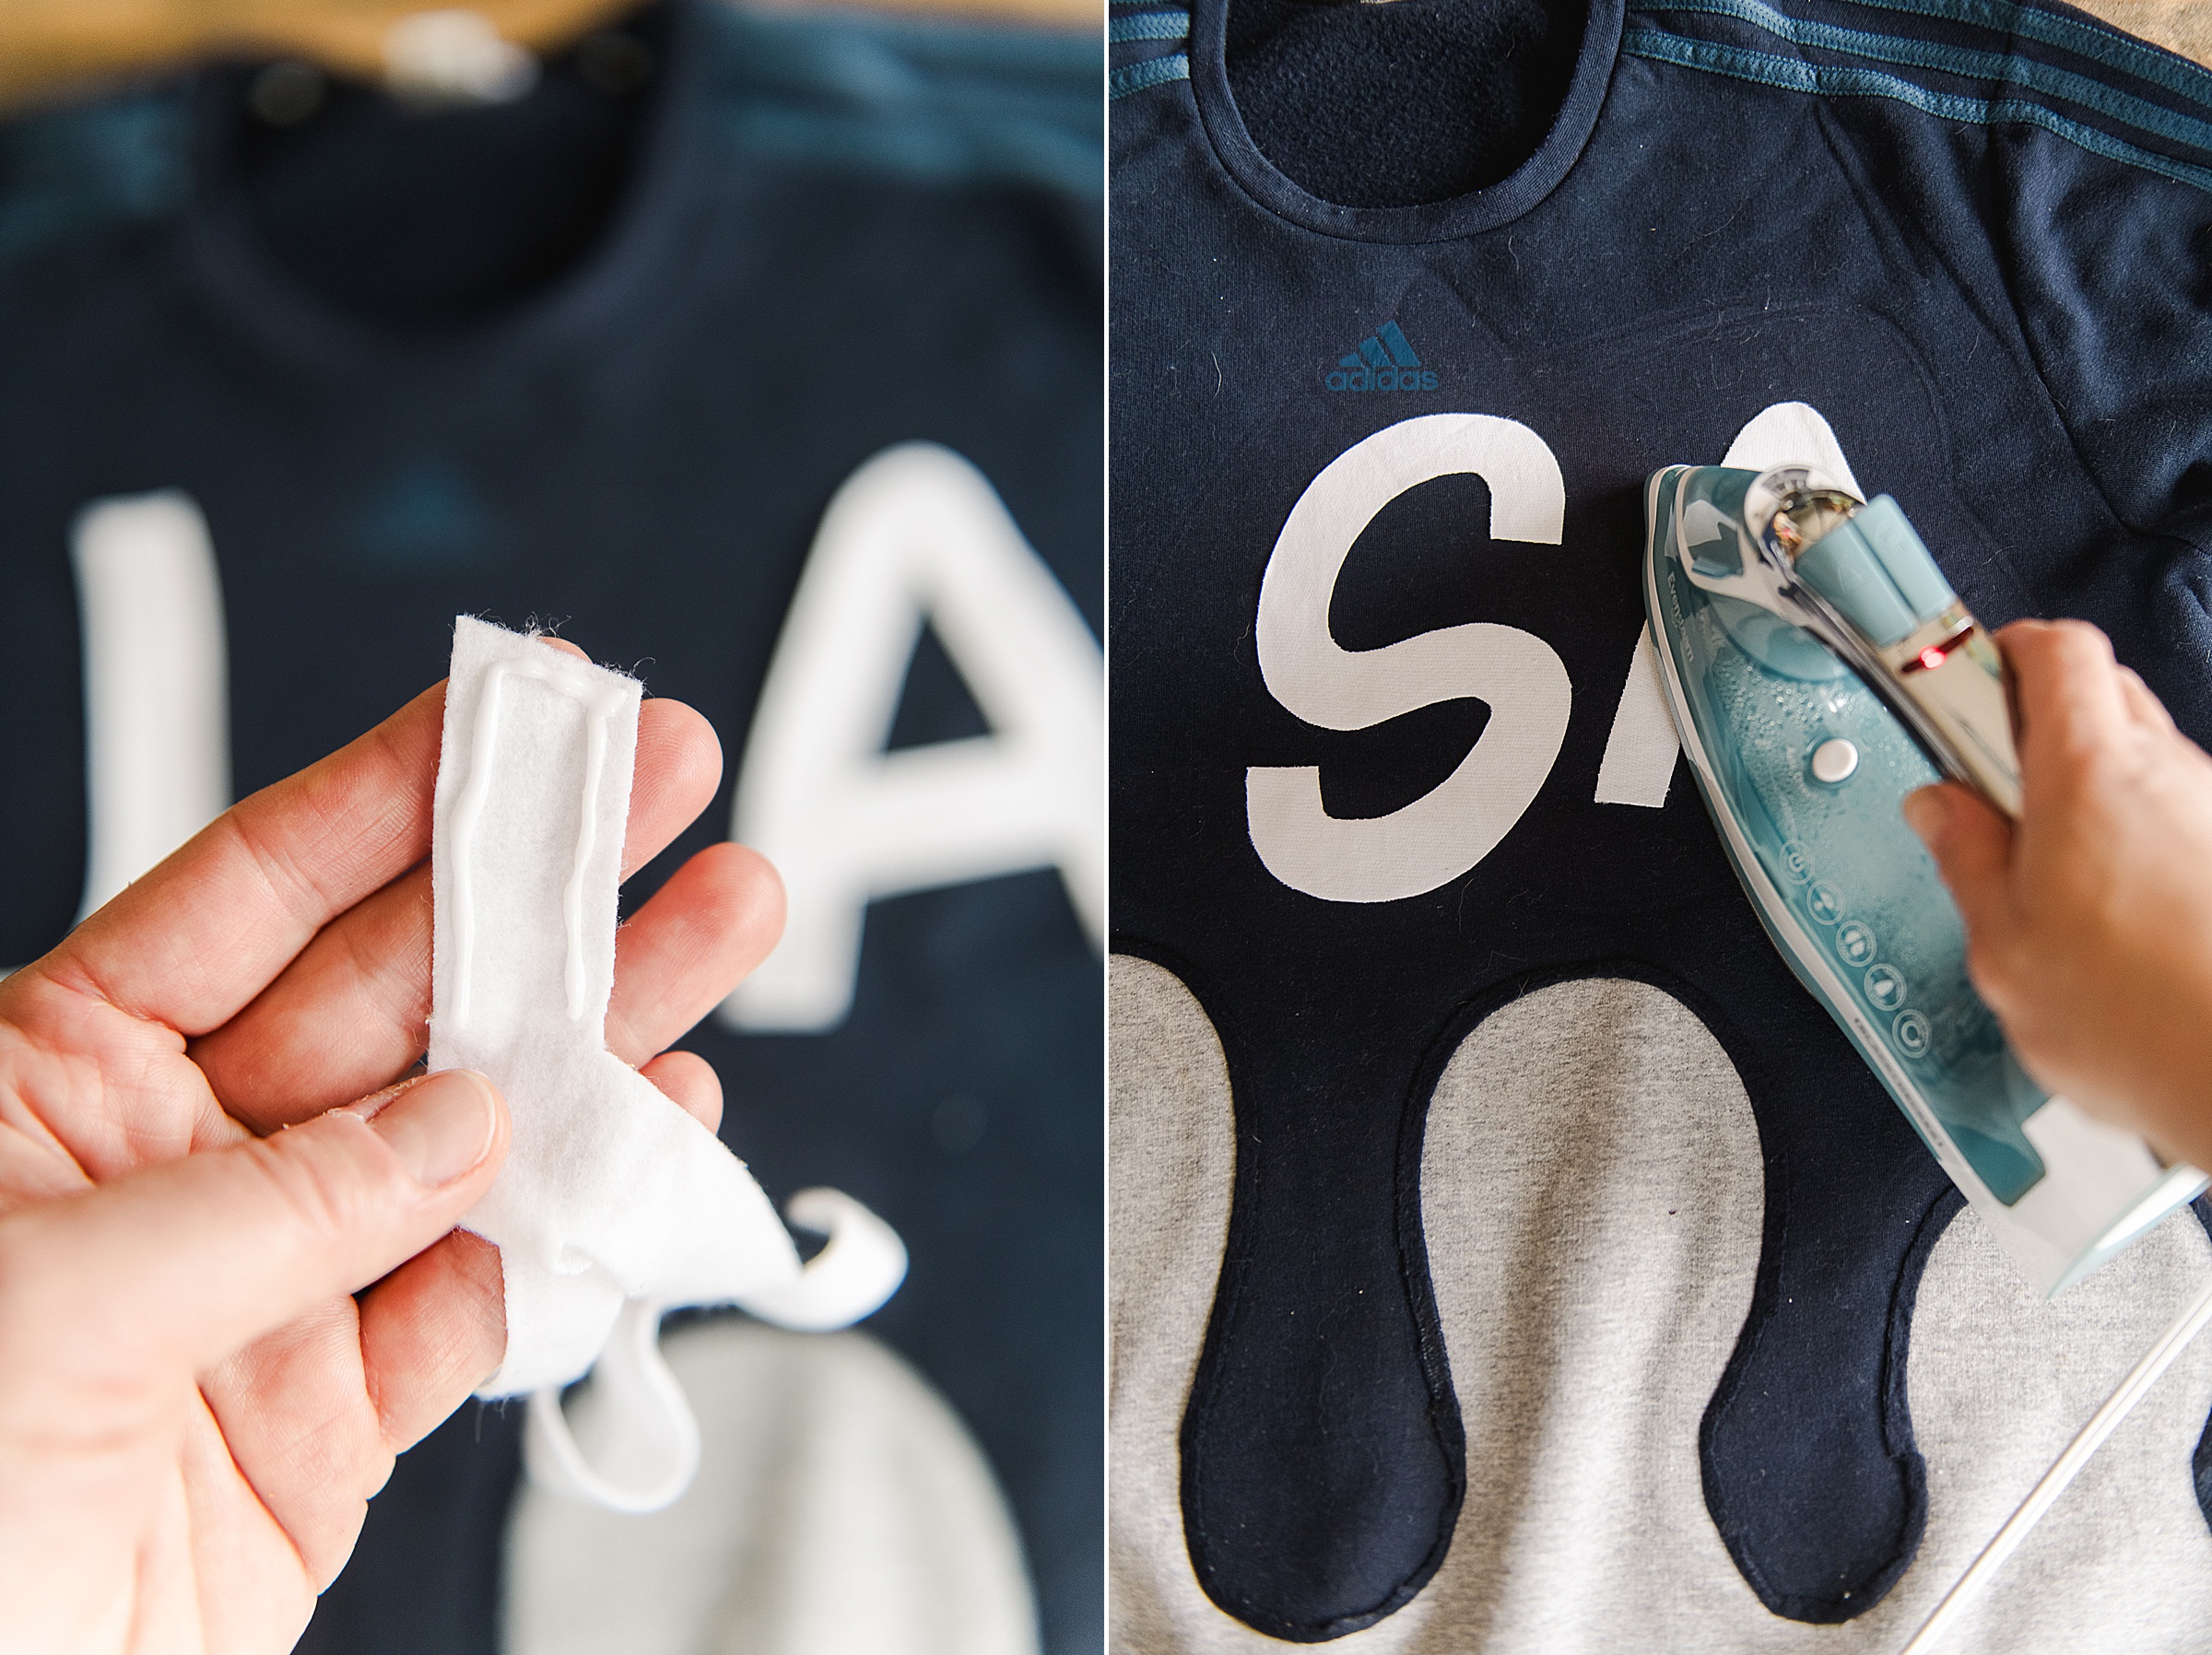
- 2. To add the “USA” in your third color to the front 🙂 – you can cut that out at any time and have it ready to apply
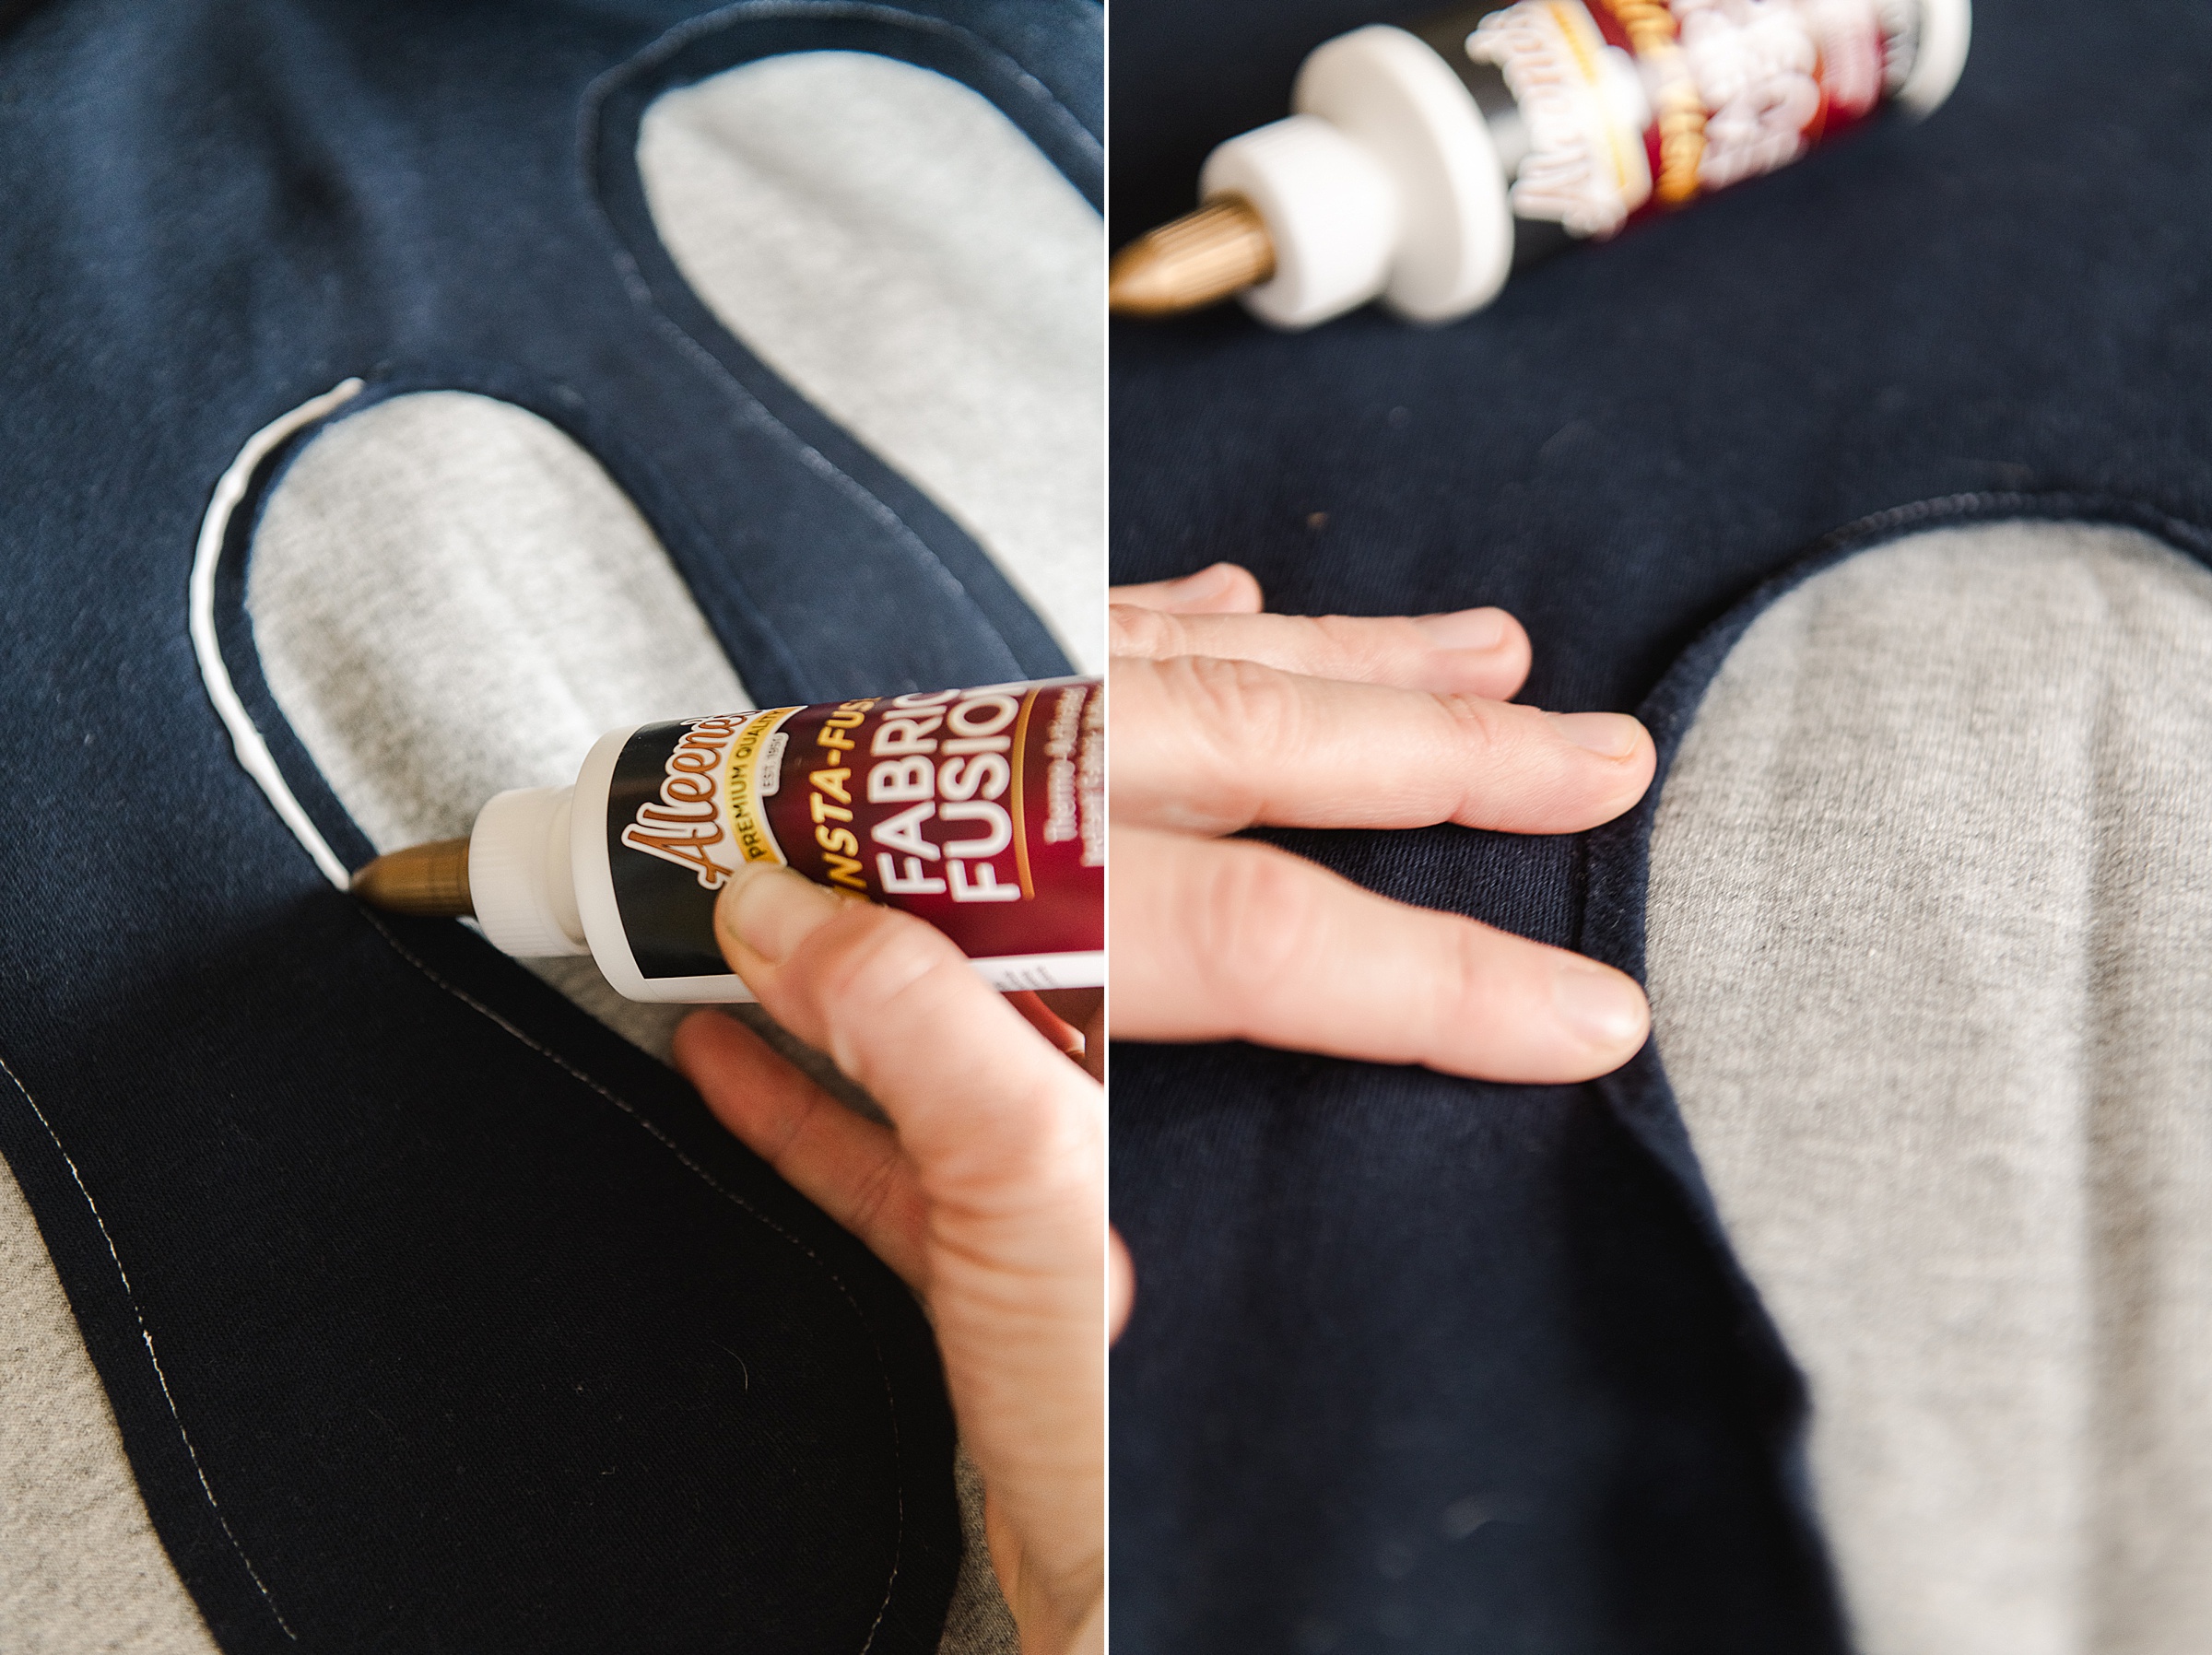
Here are some tips for using the Insta-Fuse Fabric Fusion Glue:
- To finish your seams/hide them you will apple a line of glue ON the sewn edge seam on the right side of our garment and then immediately fold over the portion of “sweatshirt A” to show the wrong side (or fluffy side). Heat with your iron immediately
- Be sure to work in sections at a time – you don’t want the glue drying before you’re about to apply heat (the heat is the ticket with this glue!)
- If you have excess glue that seeps out while applying, no biggie, just have a damp cloth handy to scrape off before heating
- Use a piece of extra fabric or cloth between the surface of the iron and the sweatshirt just to be sure that you don’t get glue on your iron that transfers to other parts of the sweatshirt
- Be sure to press with your iron for a FULL 30 seconds so that the glue works it magic!
- Allow to completely cool before picking a bit at the seam to be sure it’s all set (if not, just repeat with more glue)
- When applying your “USA”, I chose to apply glue and heat one letter at a time (start with the “S” so that you place the middle letter where you want it to make sure the three letters are spaced out to your liking
7. To finish everything off, turn your sweatshirt wrong side out and trim off your excess “sweatshirt B” from along the sewn edge. Be careful not to clip any seams or cut through to the front! 🙂
Now turn your sweatshirt right side out again and wear LOUD AND PROUD for TEAM USA! 🙂