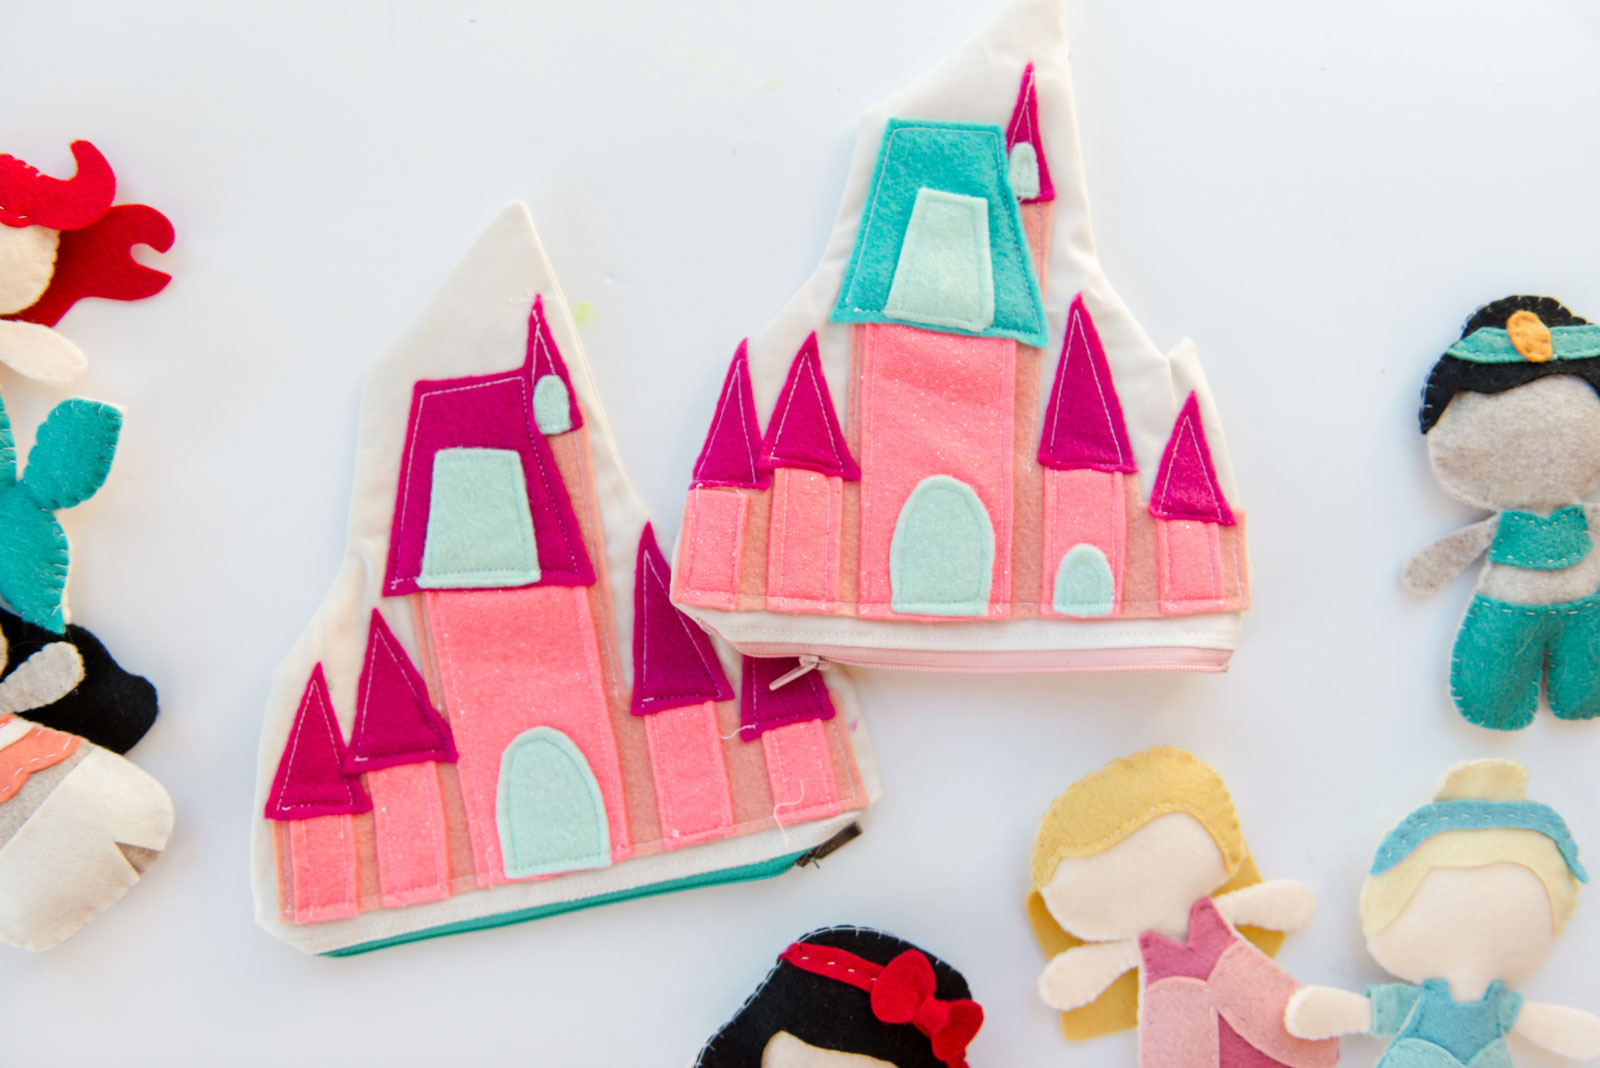
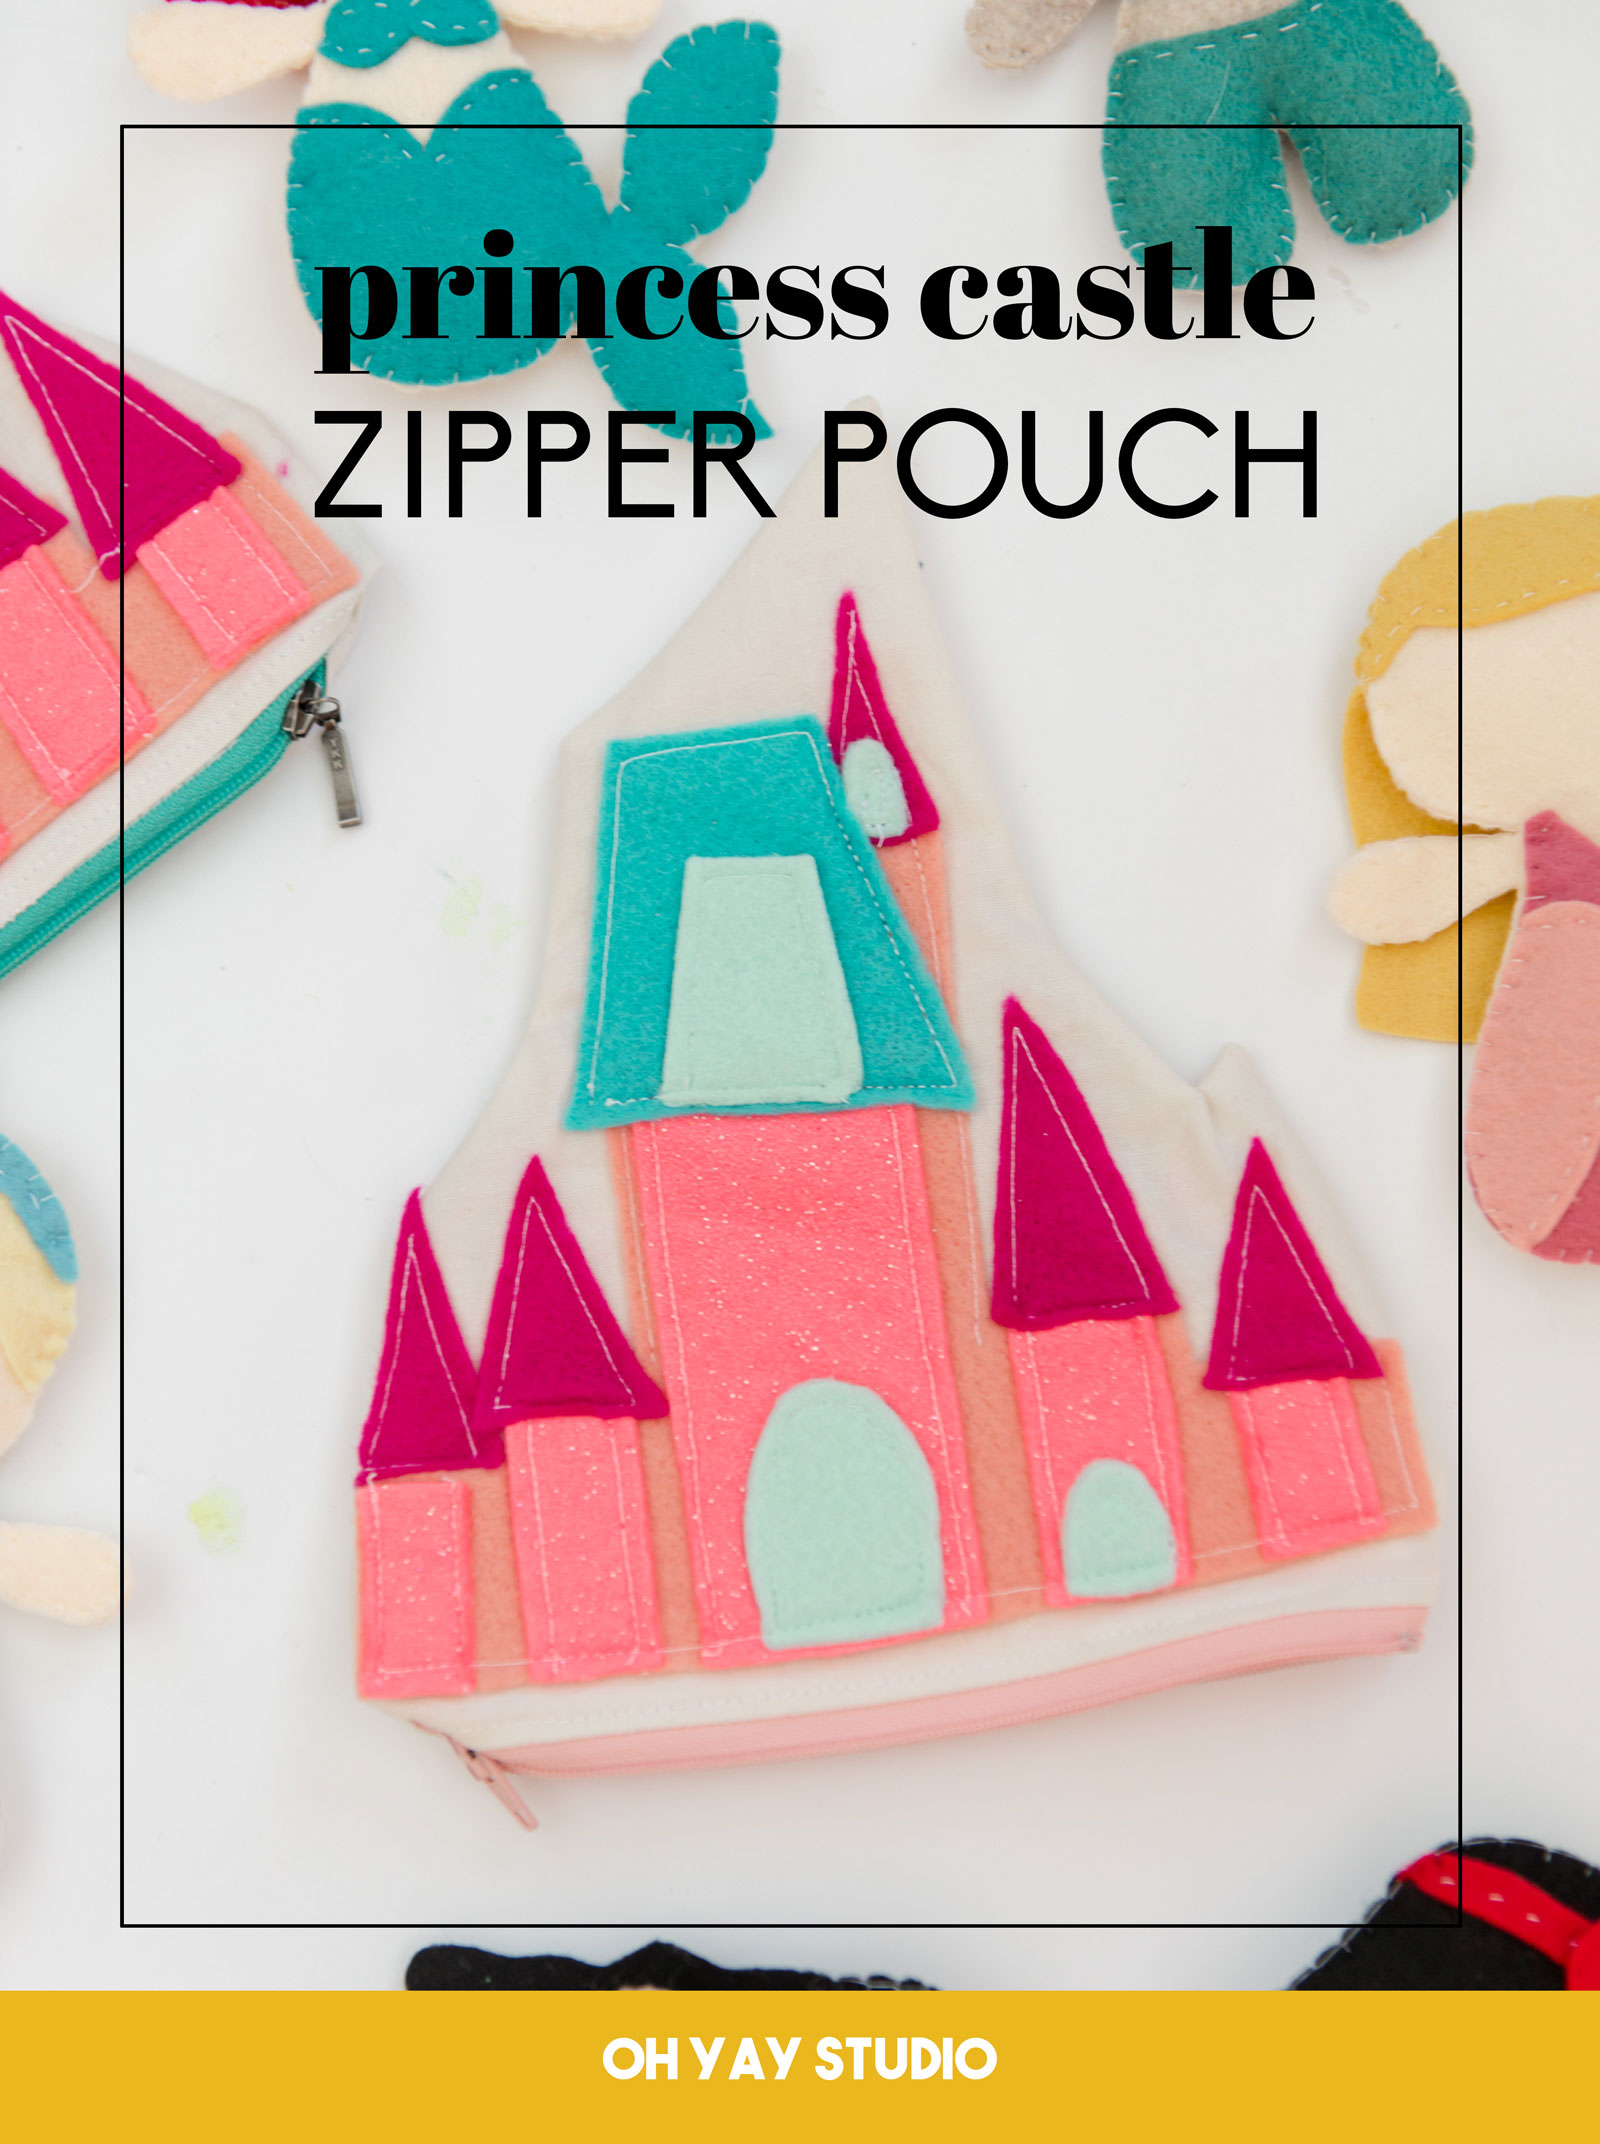
Princess castle pouch DIY! :)

I’ve learned to embrace the “MOM I HAVE TO BRING THIS SPECIAL THING ALONGGGGGGG” moments before we get ready to leave the house for church, to run errands, to head to a friends house or simply to just go for a ride in the car! 🙂 SOOOO, what every pre-schooler (and perhaps parent) needs is a gaggle of zipper pouches to keep these “collections”….well…..COLLECTED! 🙂
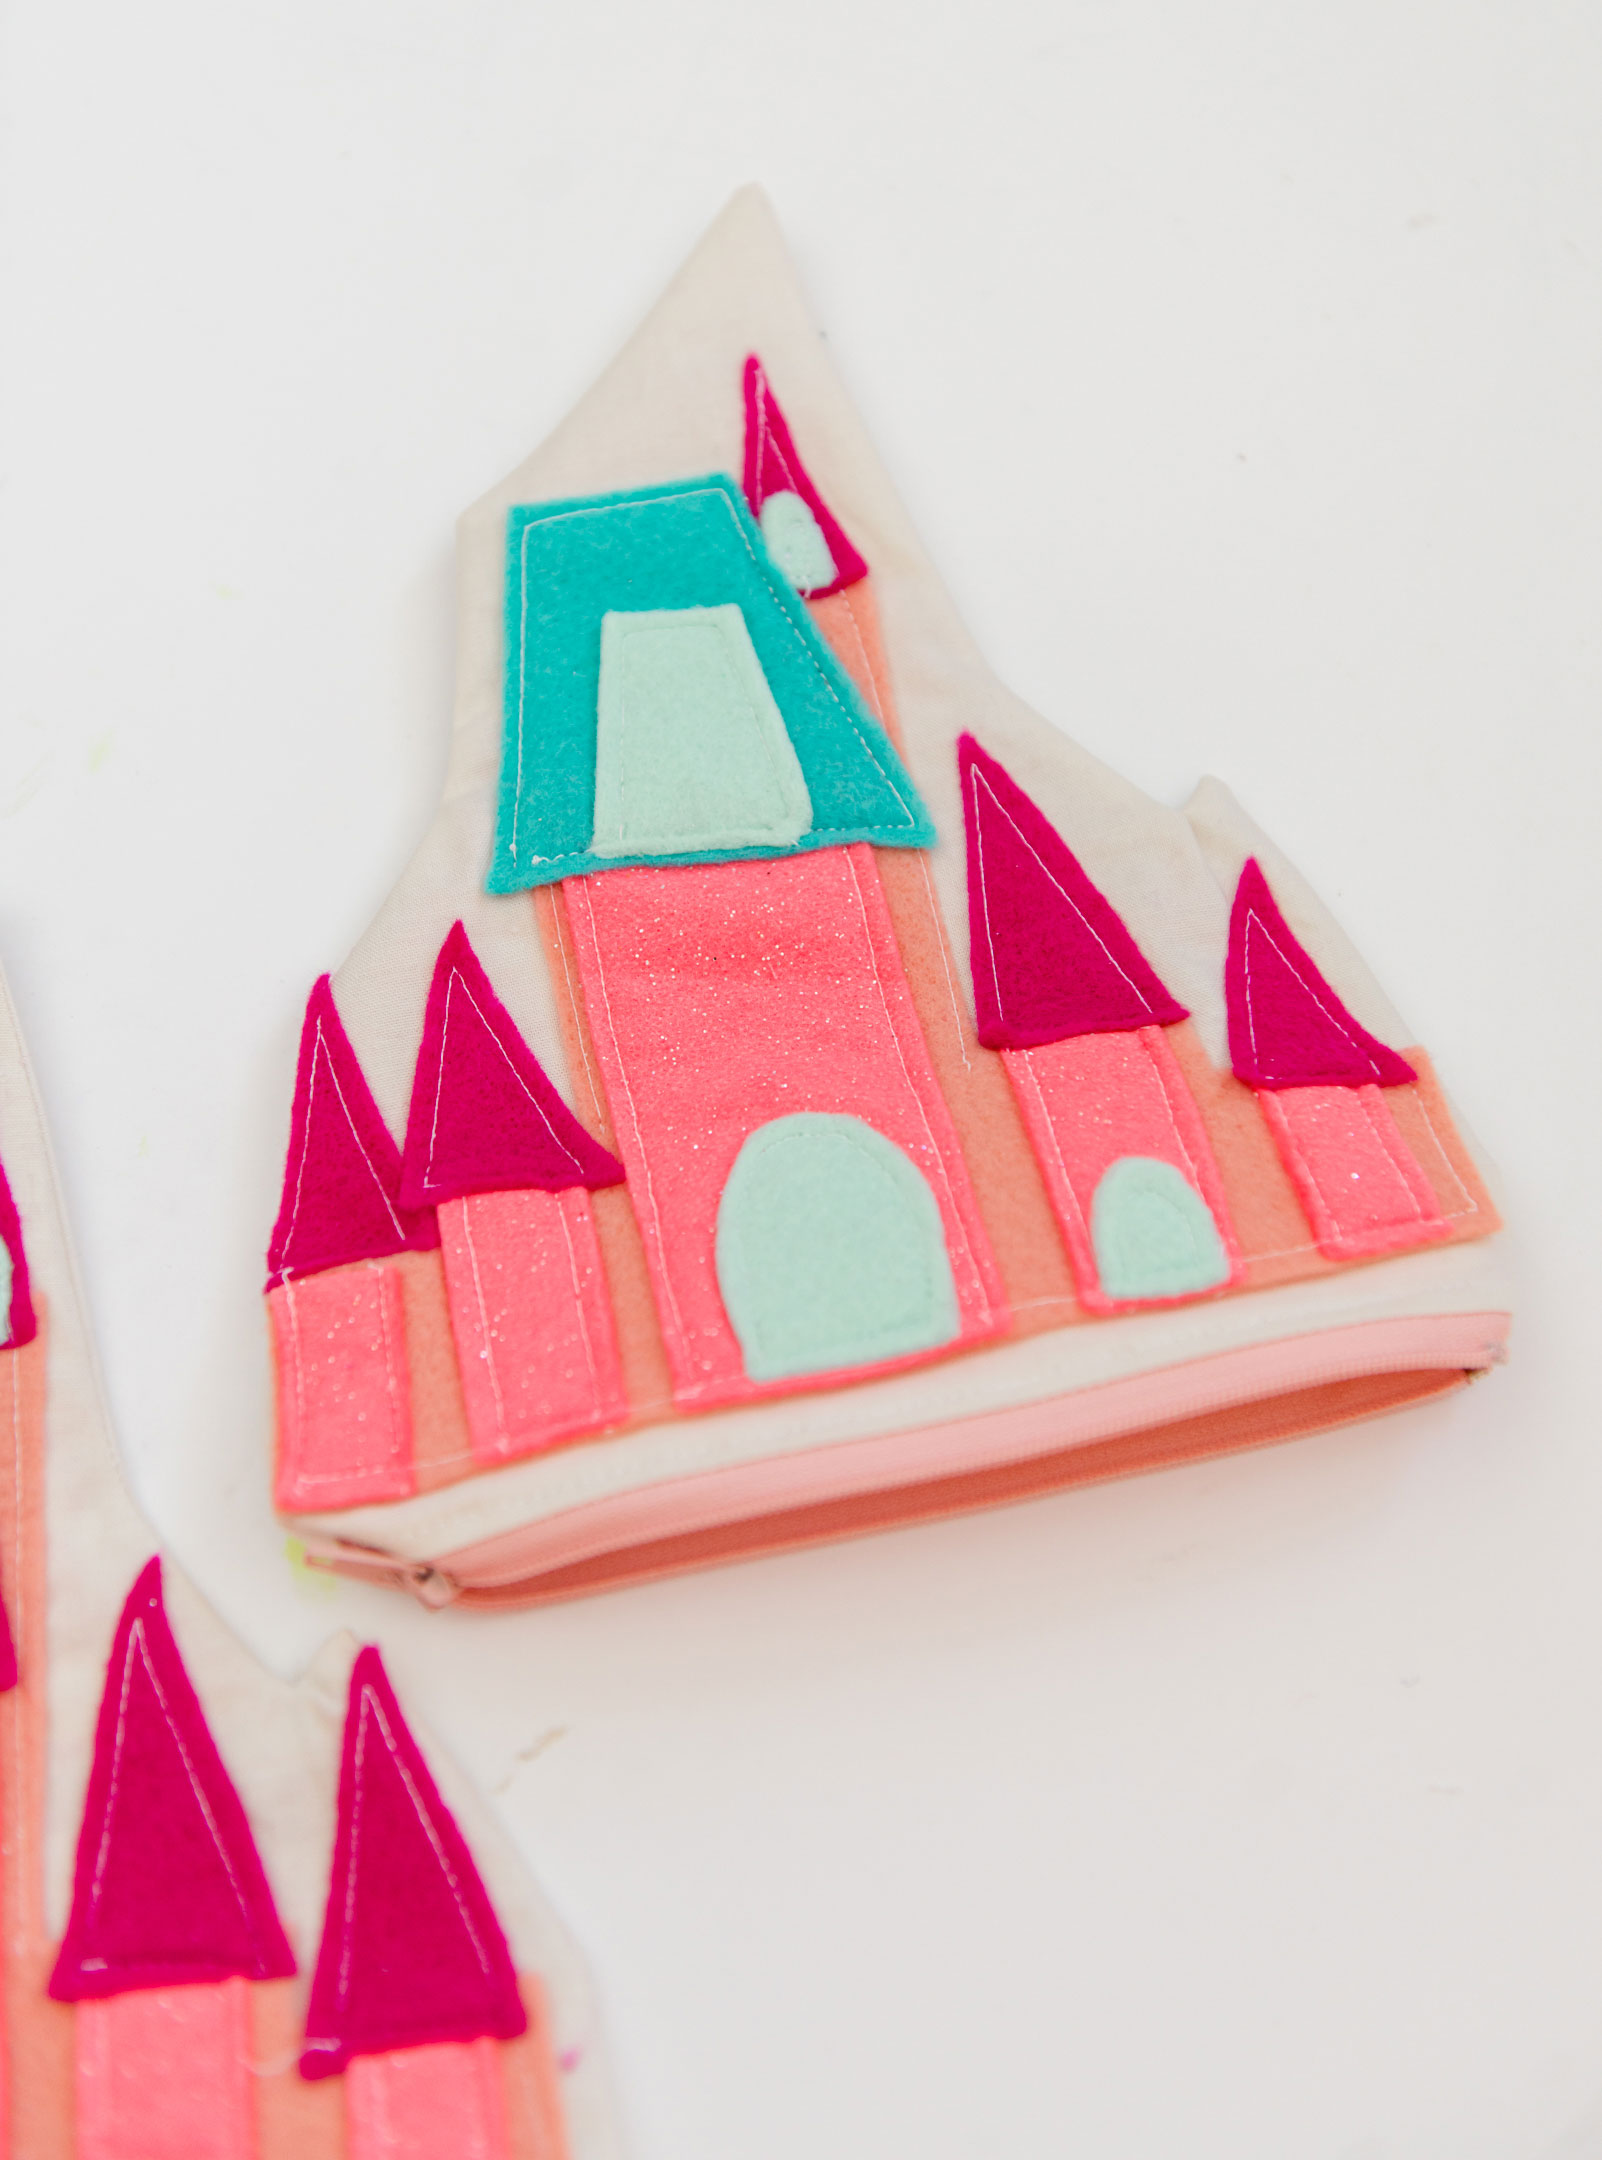
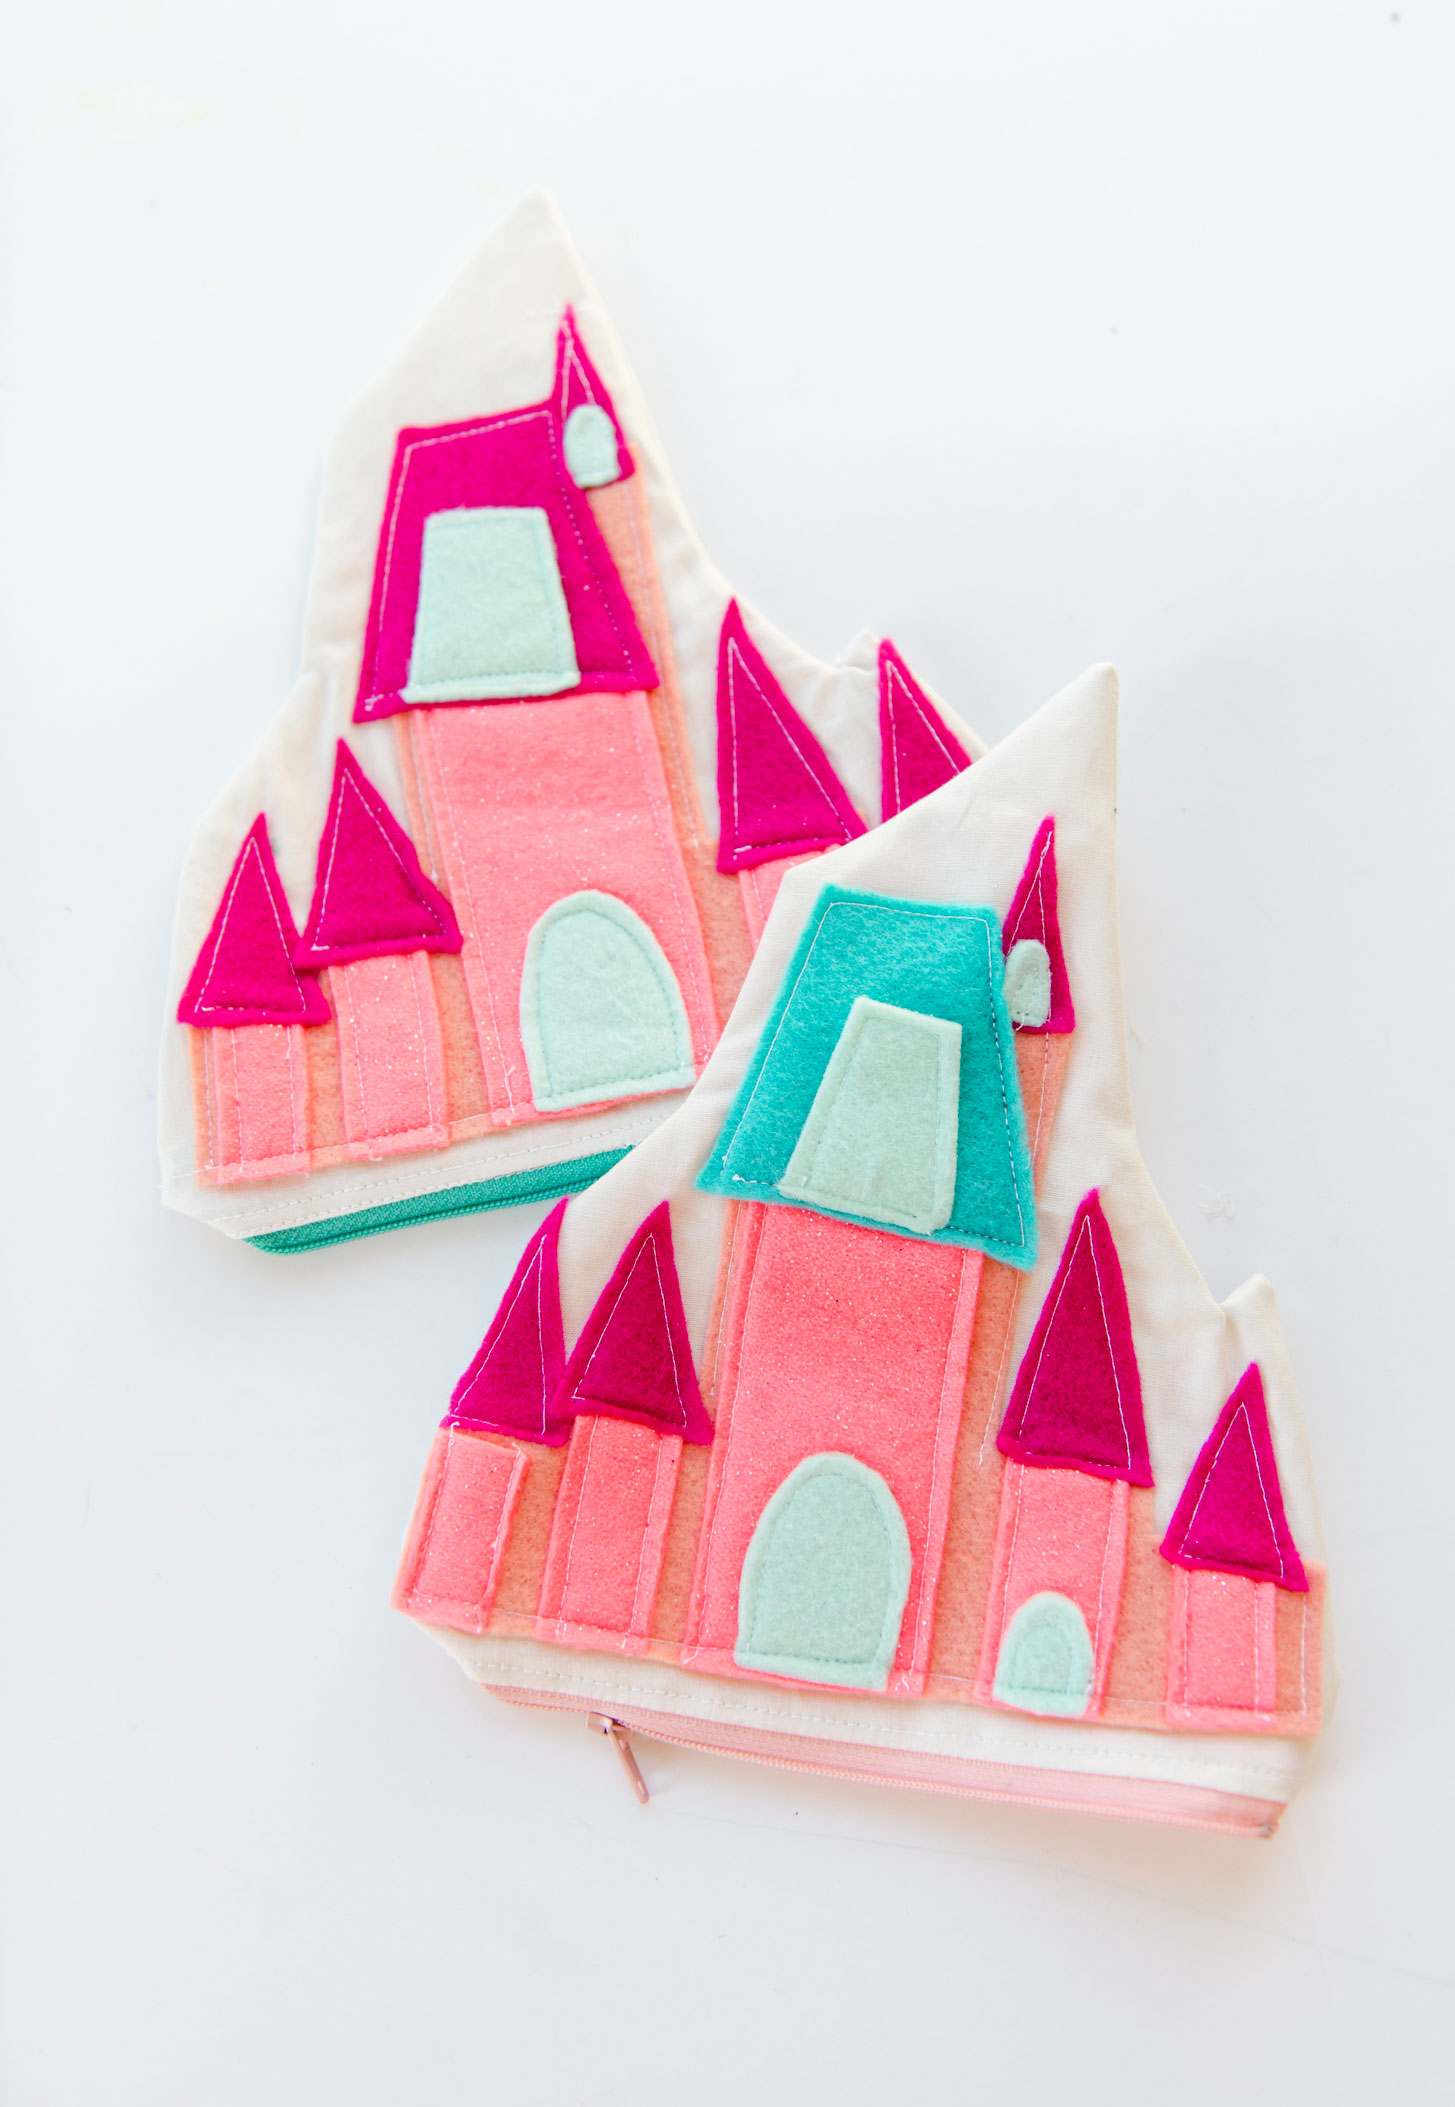
And today, I am sharing how I made this princess castle zipper pouch for both my niece and daughter. It isn’t a big pouch, bit it’s perfect for those little doll shoes, hair accessories or even the princess plush dolls that I made my niece for Christmas this year 🙂
MATERIALS
- White or cream fabric for outside of pouch (I used cotton)
- Any cotton for inside of the pouch
- Various colors of felt for the Castle on front
- Sewing Machine + coordinating thread
- coordinating zipper 9” length (or cut to length)
- PDF pattern
INSTRUCTIONS:
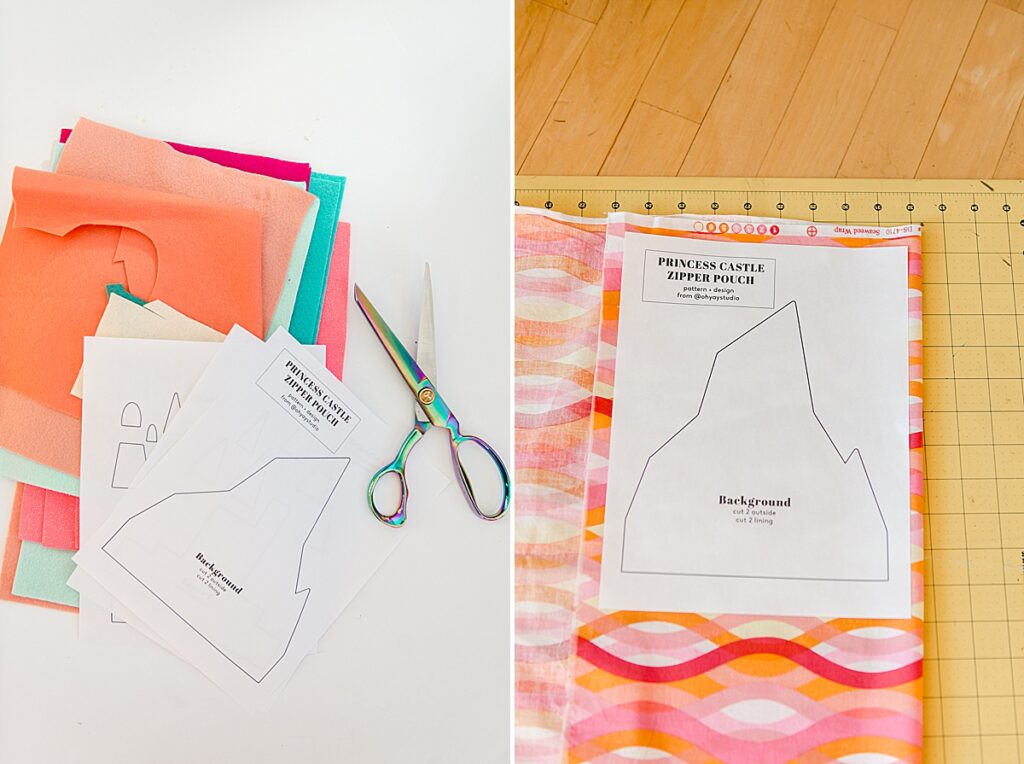
1. Cut pieces
Download the pattern HERE and then cut:
- 2 background pieces from the outer fabric (this is the background/outside to the castle)
- 2 background pieces for the lining
- All of the Castle parts from various colors of felt
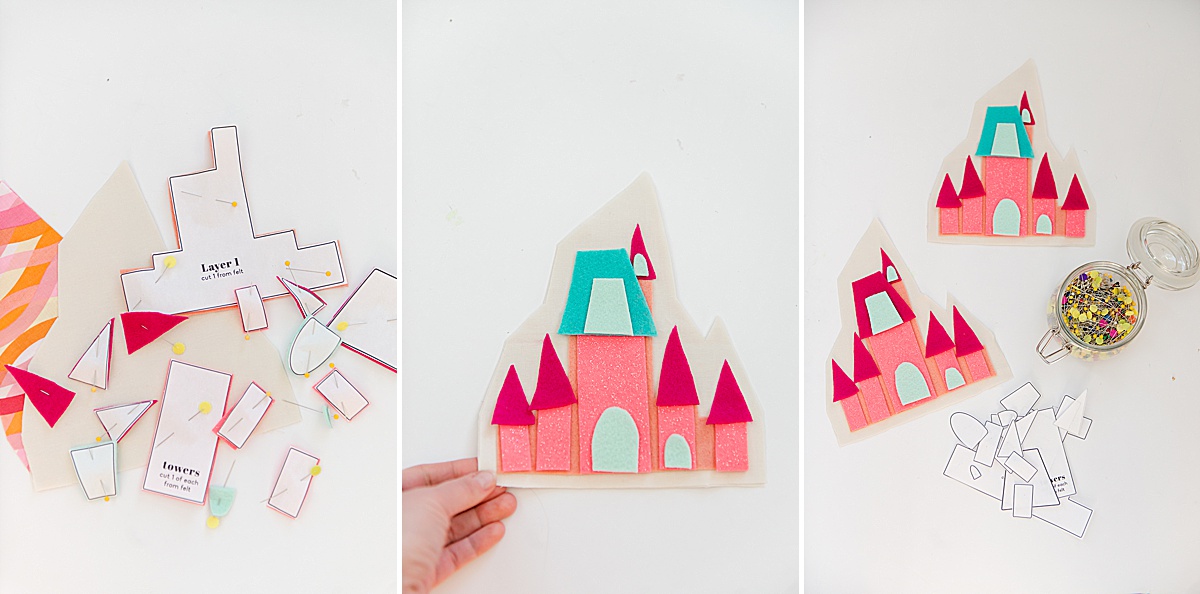
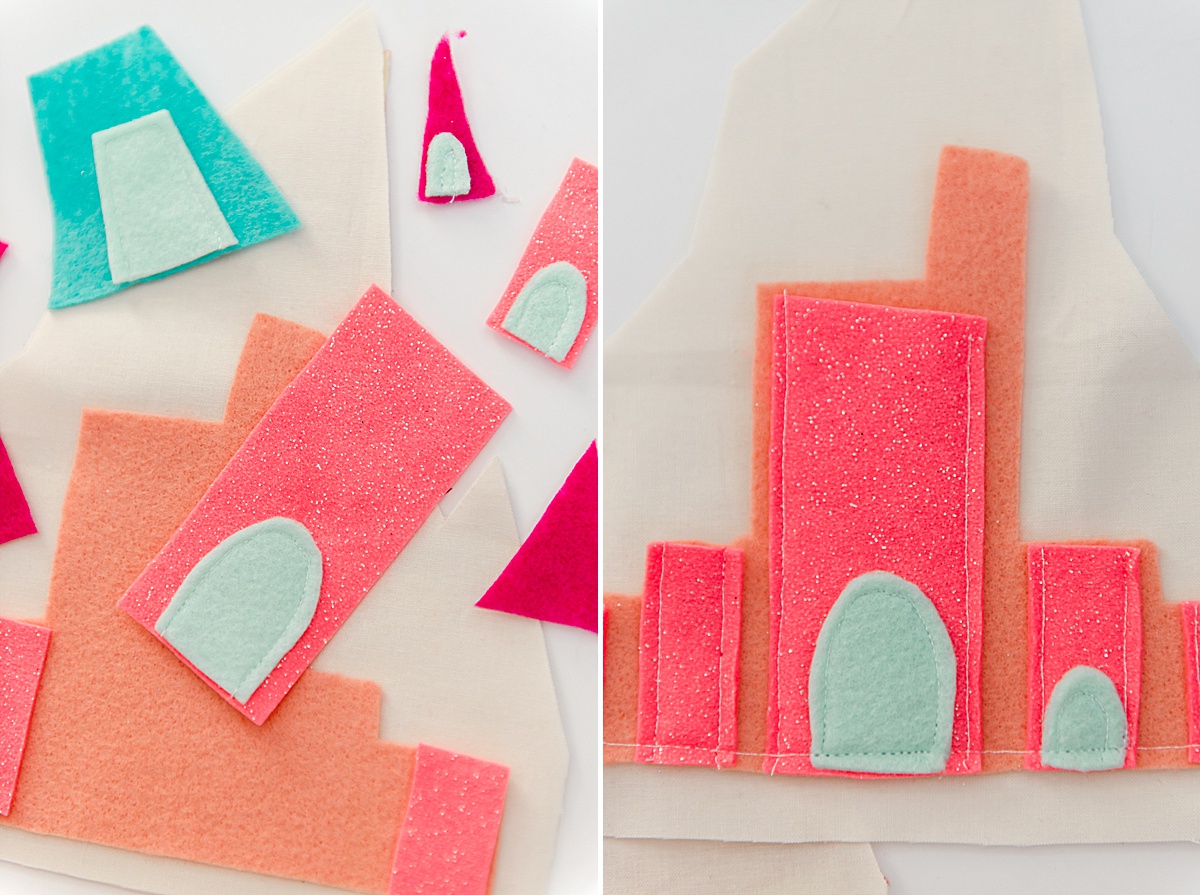
2. Lay out + sew castle
Layer the castle pieces on top of one another and arrange as desired. You can reference the photo for placement for pieces. (feel free to trim any pieces to make them fit where you want them to be).
Once you have everything where you need/want it to be, begin stitching everything together. Start with the top 2 layers (the doors onto the piece underneath) and then sew the other “posts” or rectangles onto layer 1. After that, lay down the stitched together “layer 1” onto the background and stitch in place. Then place the triangle tops, followed by the rectangular-ish shape near the top. Make sure everything is secure before moving onto step 3.
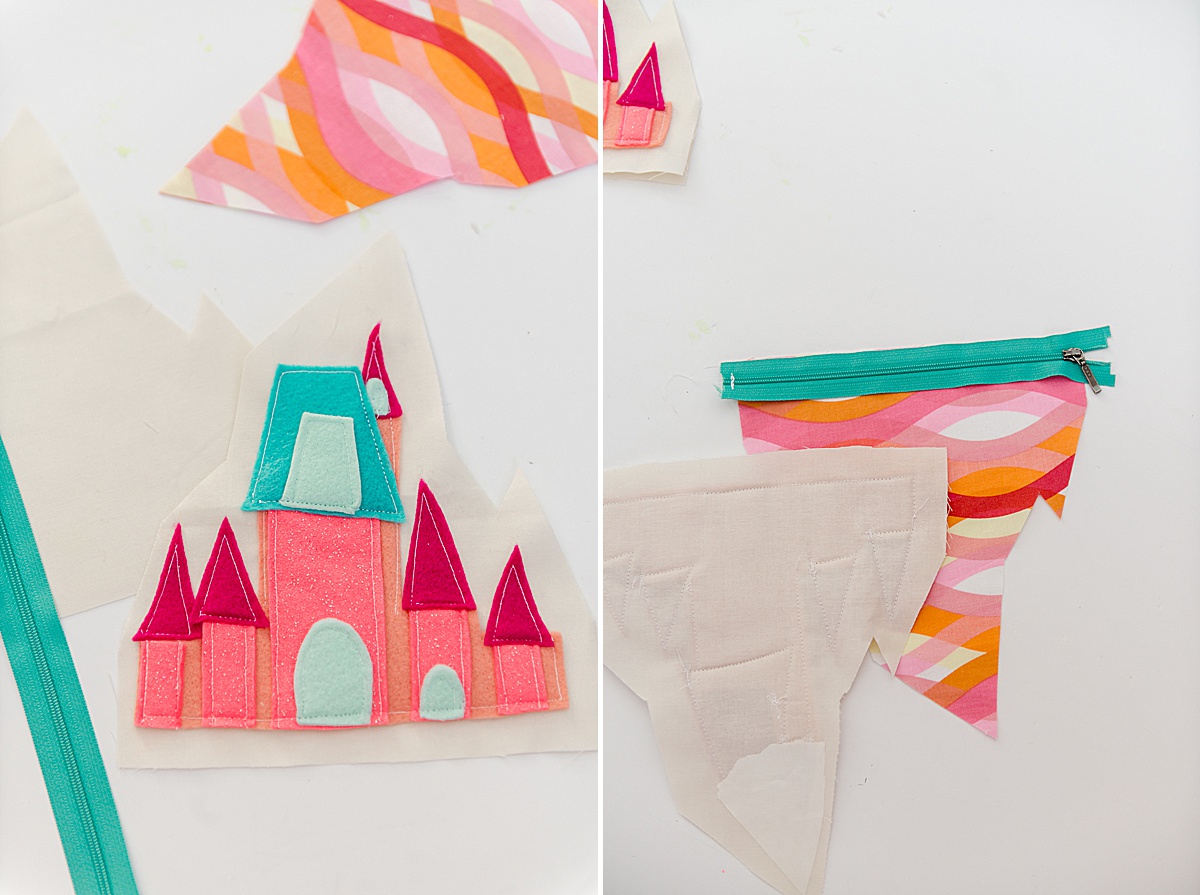
3. Sew Zipper
Layer your fabric with 1 piece of the lining fabric facing up, zipper and the Castle top facing down. Line up the edges of your zipper and make sure all 3 layers are flush and stitch your zipper in place.
*Note, trim your zipper to 9 inches before you begin sewing the zipper if necessary! 🙂
Do the same with the other background and other lining piece.
**tip when sewing zippers: be sure to stop your stitching when you come to the “pull” on the zipper, put your needle down, raise your presser foot and then zip the pull out of the way. If you don’t do this you will get a bulge or notch in your zipper stitch which will be obvious when you want the zipper to lay flat.
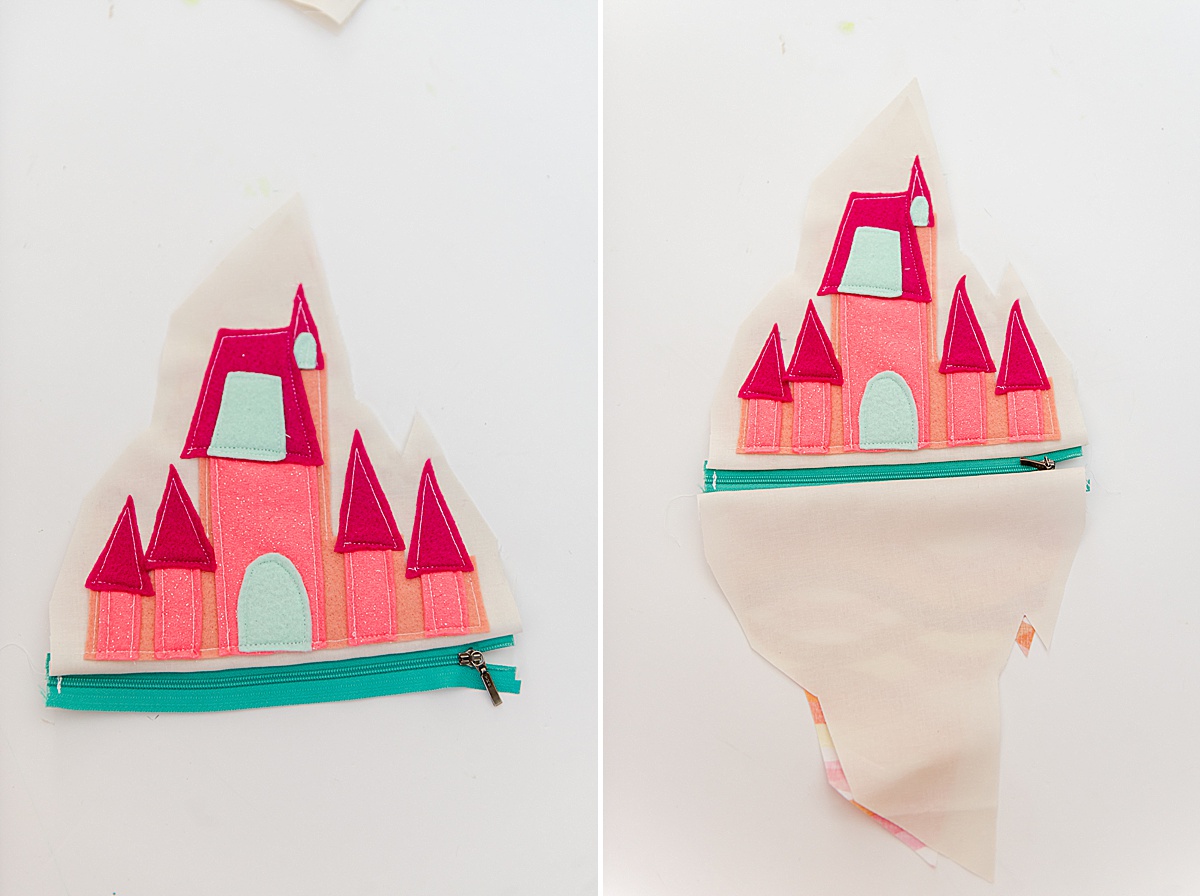
4. Iron the zipper + top stitch
With your iron, press the zipper flat (as best as possible) and pull your fabric away from the teeth of the zipper. Then top stitch along each side of the zipper to keep the fabric laying flat.
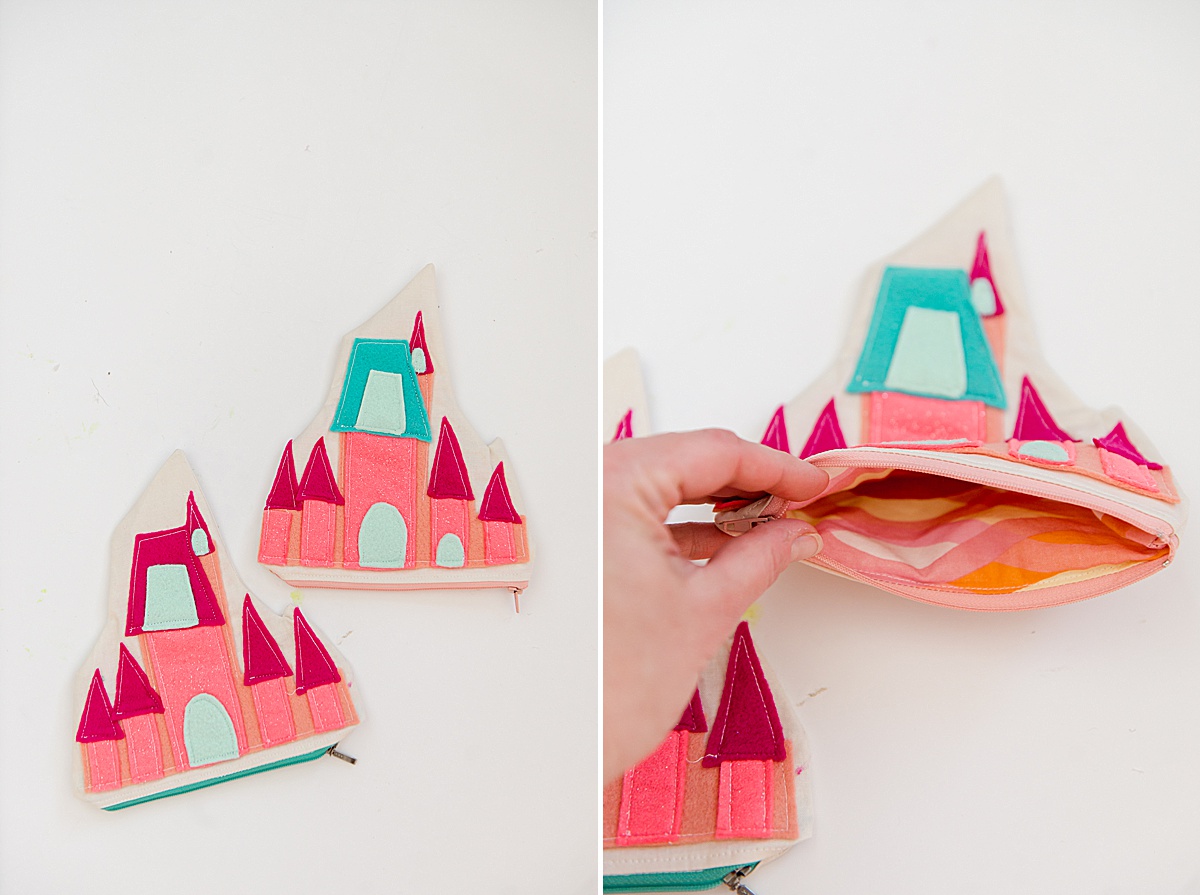
5. OPEN THE ZIPPER!
This is *SUPPPPPER* important otherwise you won’t be able to open your castle pouch! 🙂
OPEN THE ZIPPER!
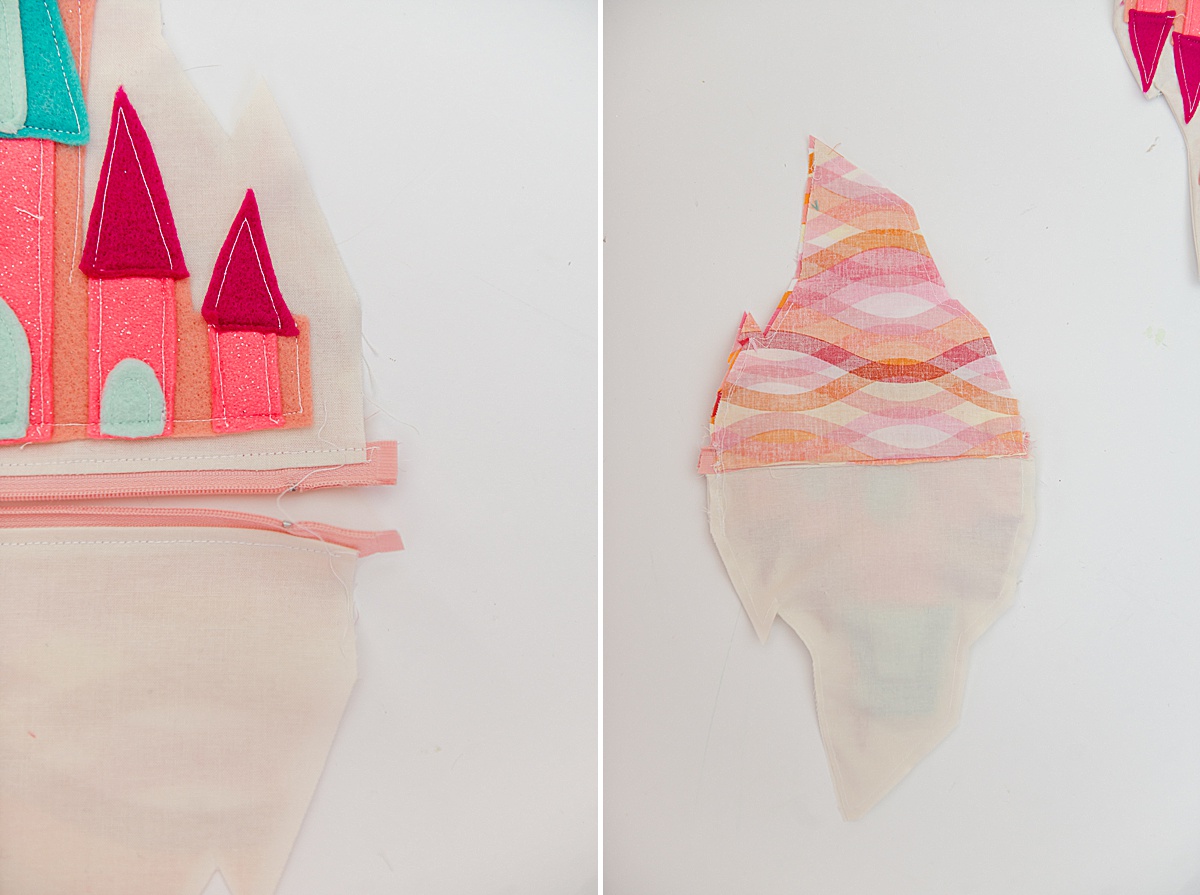
6. Stitch together
Open up your bag and then line up the 2 lining pieces with one another as well as the front background shapes with one another. Pin in place, being careful to line up the 2 areas where the zipper joins (this is important to make sure the zipper is straight across when finished).
Stitch all the way around the bag, leaving a large enough opening on the lining portion to turn the bag when done.
7. Sew closed + finish
Trim the points of the castle as well as any other bulky spots off before turning (you want this to lay as flat as possible and getting rid of this “bulk” will help)
Then turn the bag right side out and polk all of the corners and edges smooth. The turn the edges of the lining opening (where you pulled the bag through) inward to mimic a seam allowing and top stitch the lining hole closed.
Press the bag with an iron and fill with goodies for yourself or your kiddo! 🙂

I had so much fun making this pattern and it turned out so cute!! 🥰 Thank you!
OMGOSH Emily! This is making my day that you came to tell me this! 🙂 SO SO glad that you made this and loved the pattern! THANK YOU!