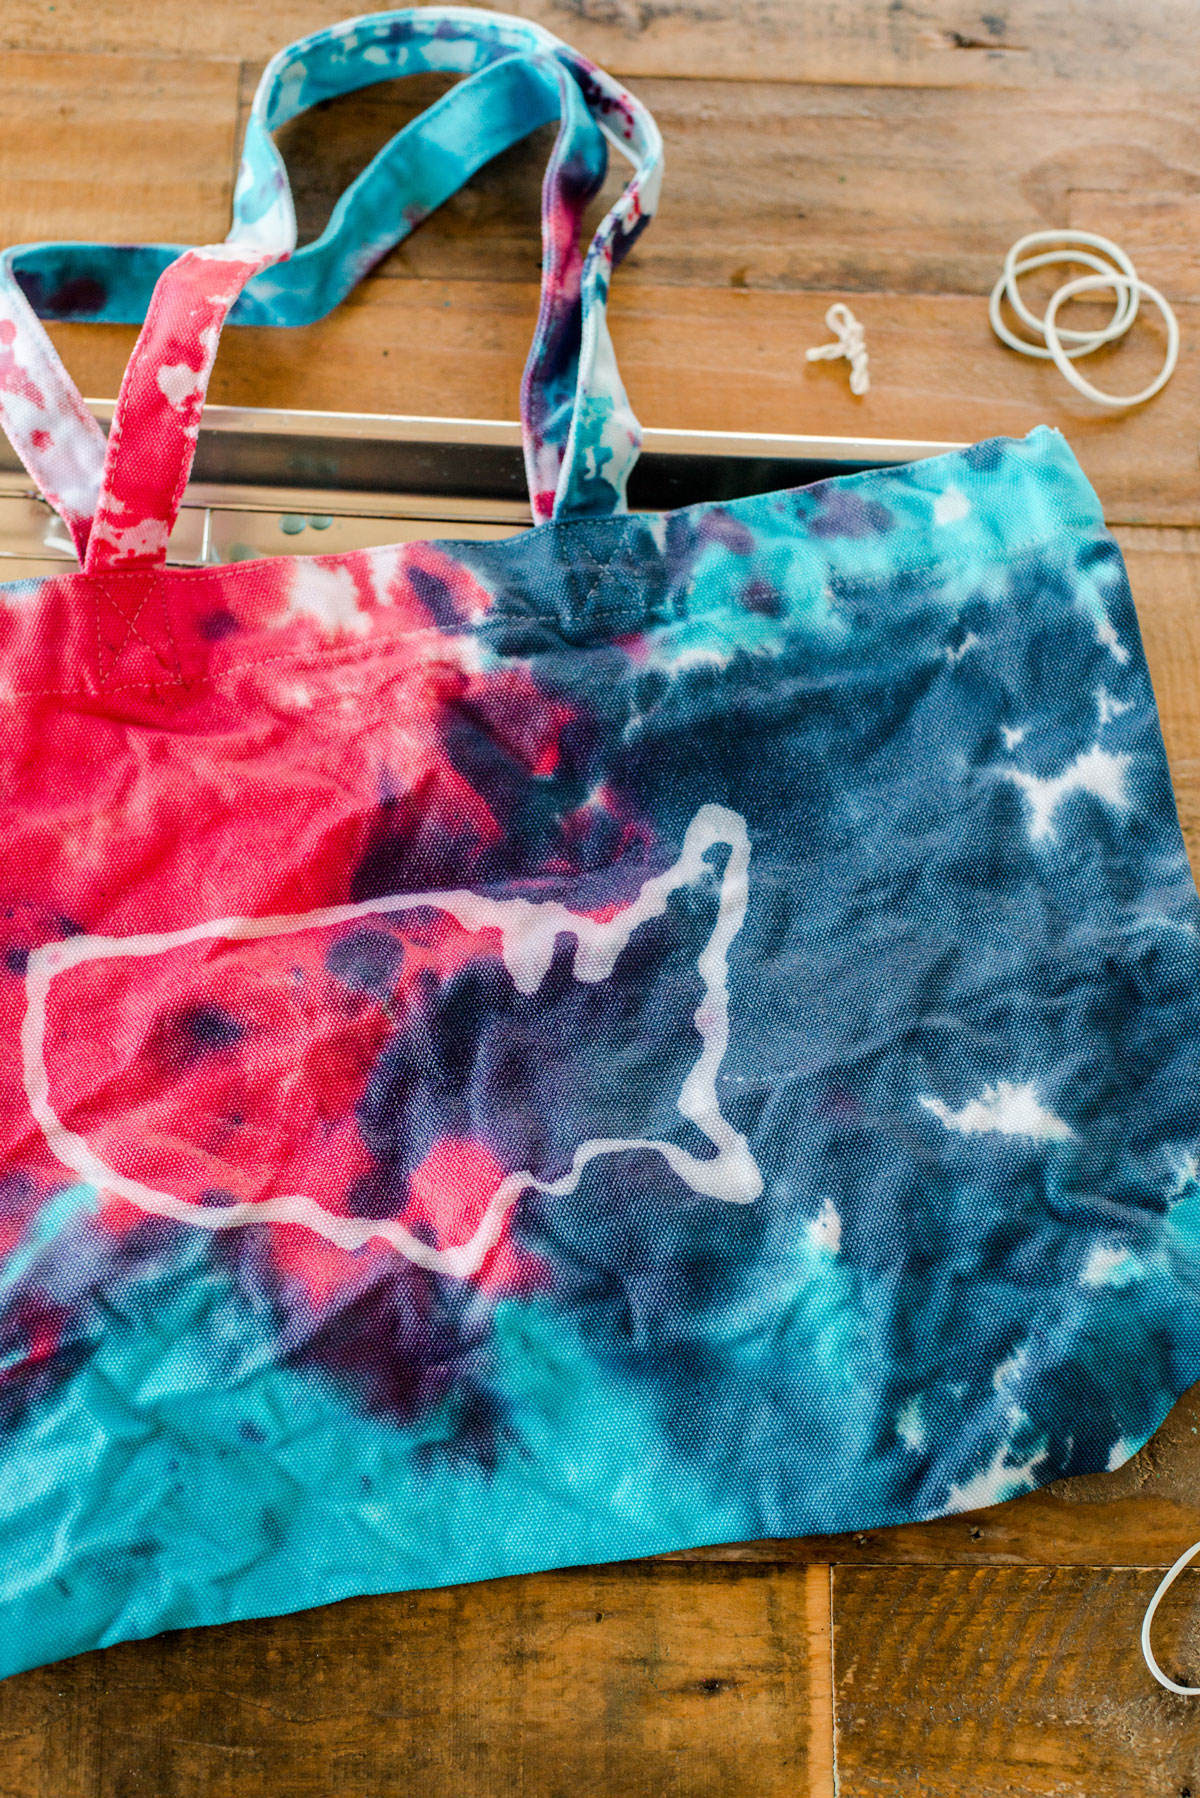
Patriotic United States resist beach bag Tie Dye technique
**Created in partnership with Create Basics
A year that contains the Olympics, HECK YES that I am going to be pulling out all of the red, white and blue DIYs! 🙂 And this one is the most amazing thing to make for this summer ANNNNND for an Olympic year!
You’ve probably seen a few other tutorials similar to this where I am using glue as a resist technique with tie dye; it really is EASY and will open up a WORLD of possibilities and ideas to draw with glue onto ALLLLL the fabrics! 🙂

MATERIALS:
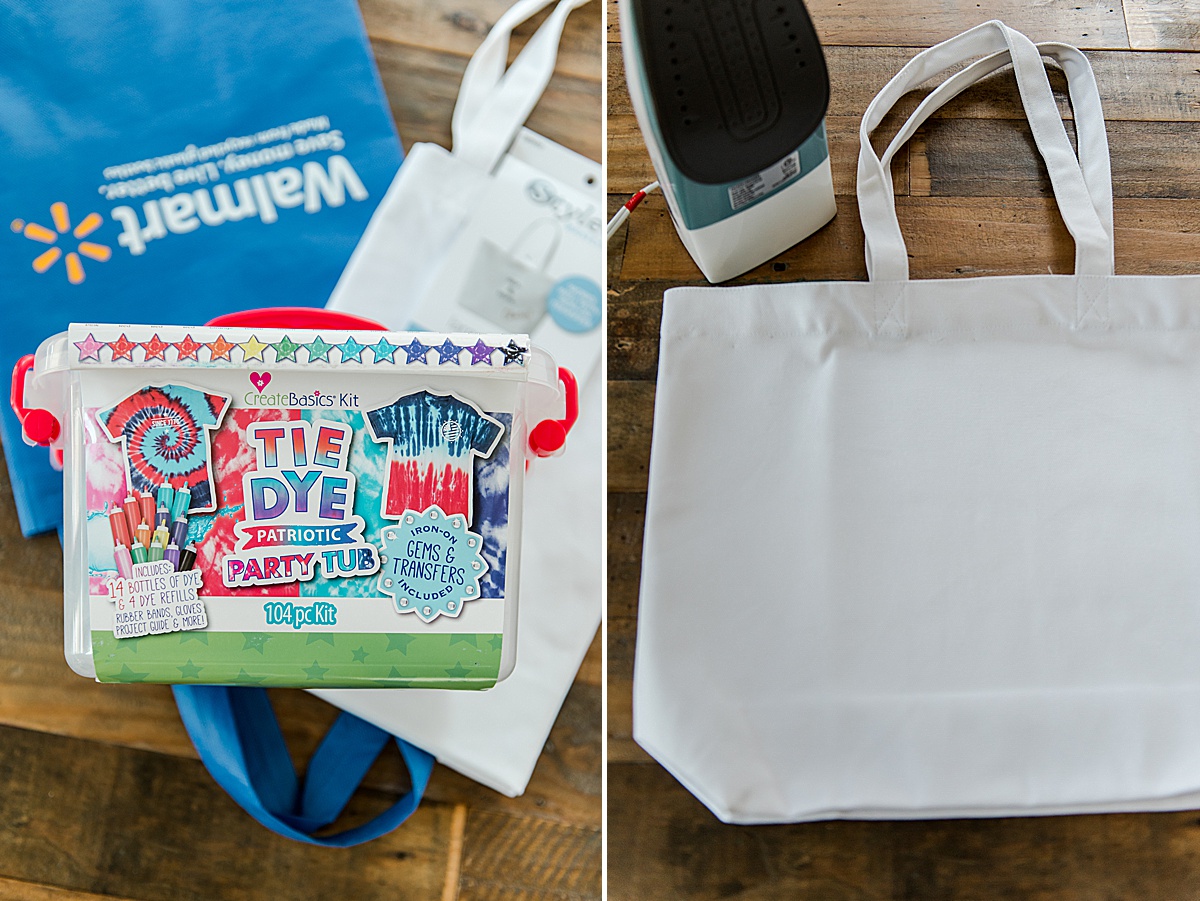
- Tie Dye Patriotic Party Tub
- Blank canvas tote (found easily at WalMart in the craft section! 🙂
- A bottle of Aleene’s Tacky glue (PVA washable glue)
- A cookie rack and tub (or tray) that is safe to lay the tie dyed product on (ie, don’t re-use this with food at a future date)
- Iron
- pencil
- plastic wrap or plastic bags (I used bags, I like to reuse as much as I can without bringing more plastic into our home)
INSTRUCTIONS:
1. Iron your tote to make sure that all of the wrinkles and creases are out. This is important so that the glue dries flat! 🙂
2. Print out the United States outline HERE and then cut out around the outer line of the USA. Trace lightly with a pencil around the template, then generously (but without too much “pooling”) trace your pencil lines with your glue. Begin by testing your “line” on a piece of paper to make sure that you have the right consistency of “squeeze” to cover the canvas in the design you’d like. Once completed, set your tote aside to dry and be sure to keep it completely flat so that the glue doesn’t run overnight while it dries! 🙂
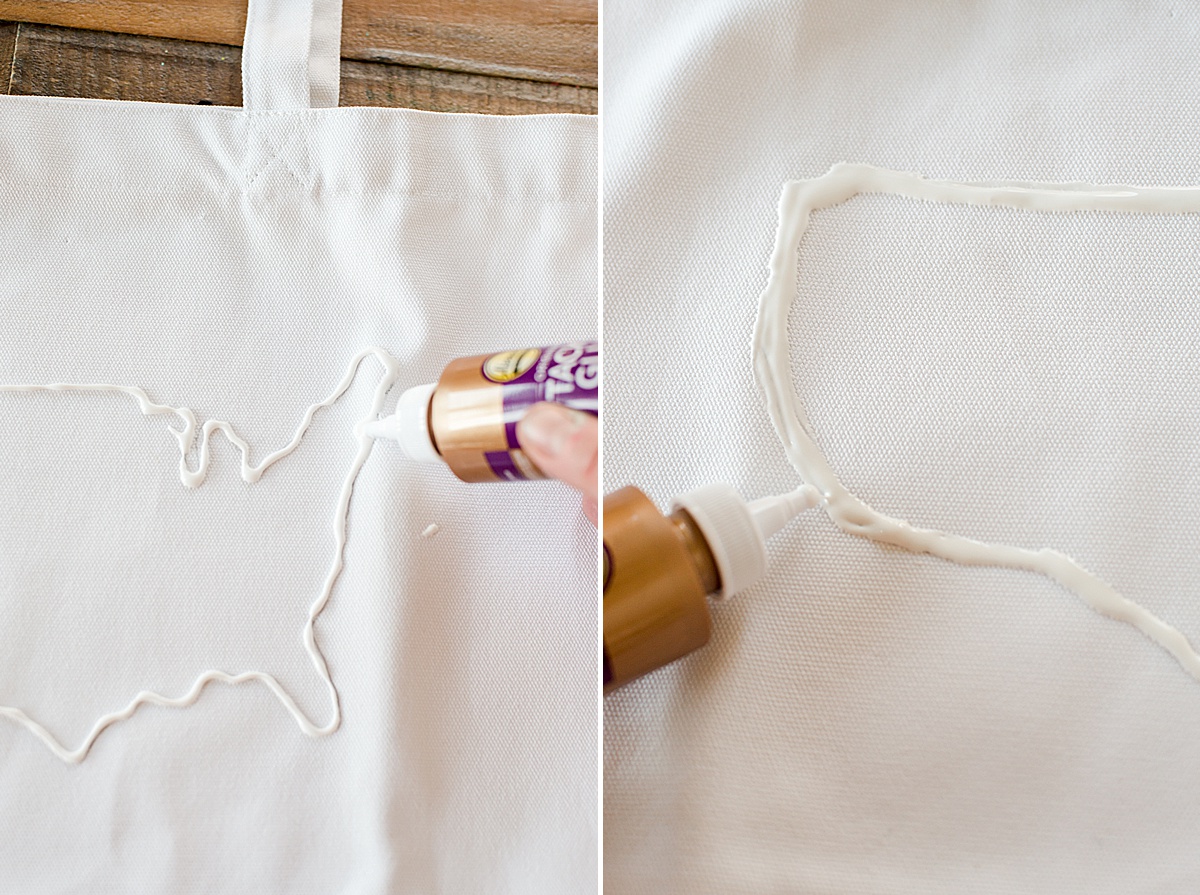
*tip – When applying the glue, look at various angles, specifically at table height to the garment or canvas tote, to be sure that you’ve covered the areas completely with enough glue to resist the dye. With this shape, I decided to go around the pencil lines two times to give the USA shape thicker 🙂
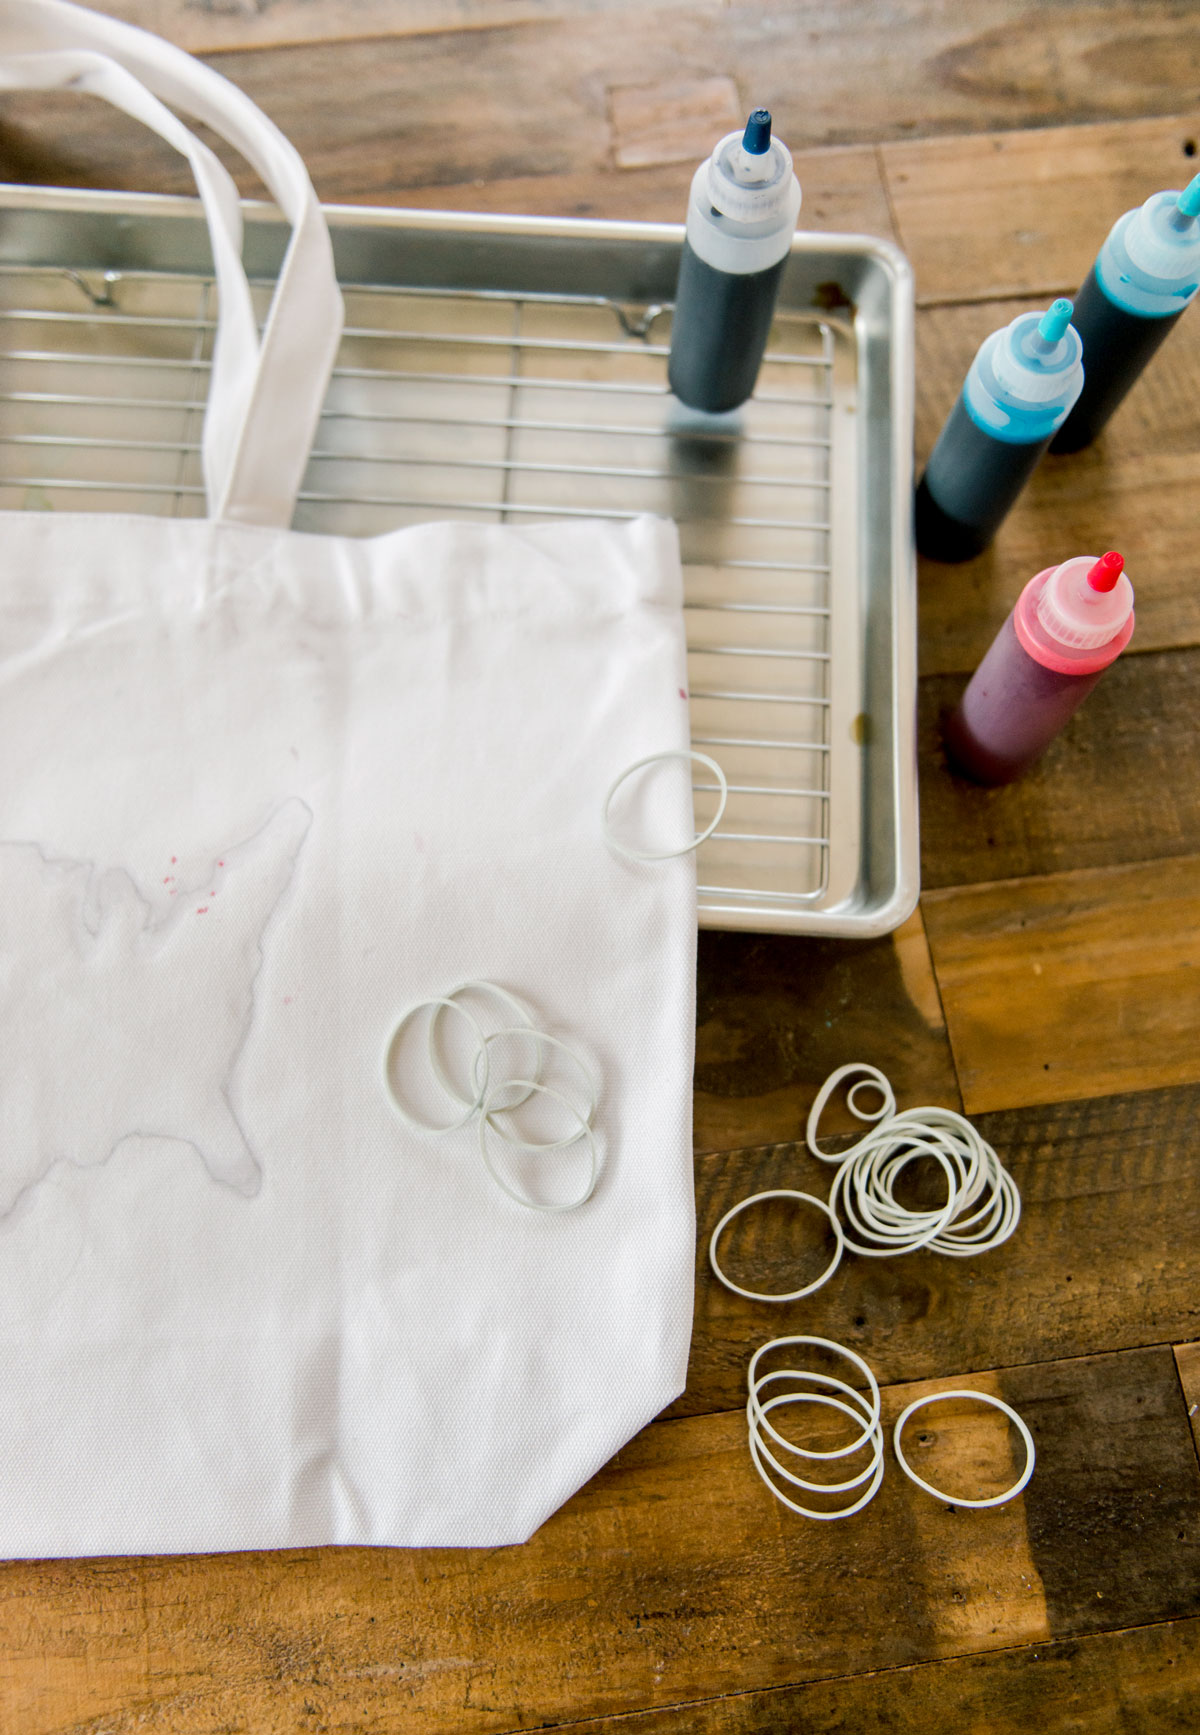
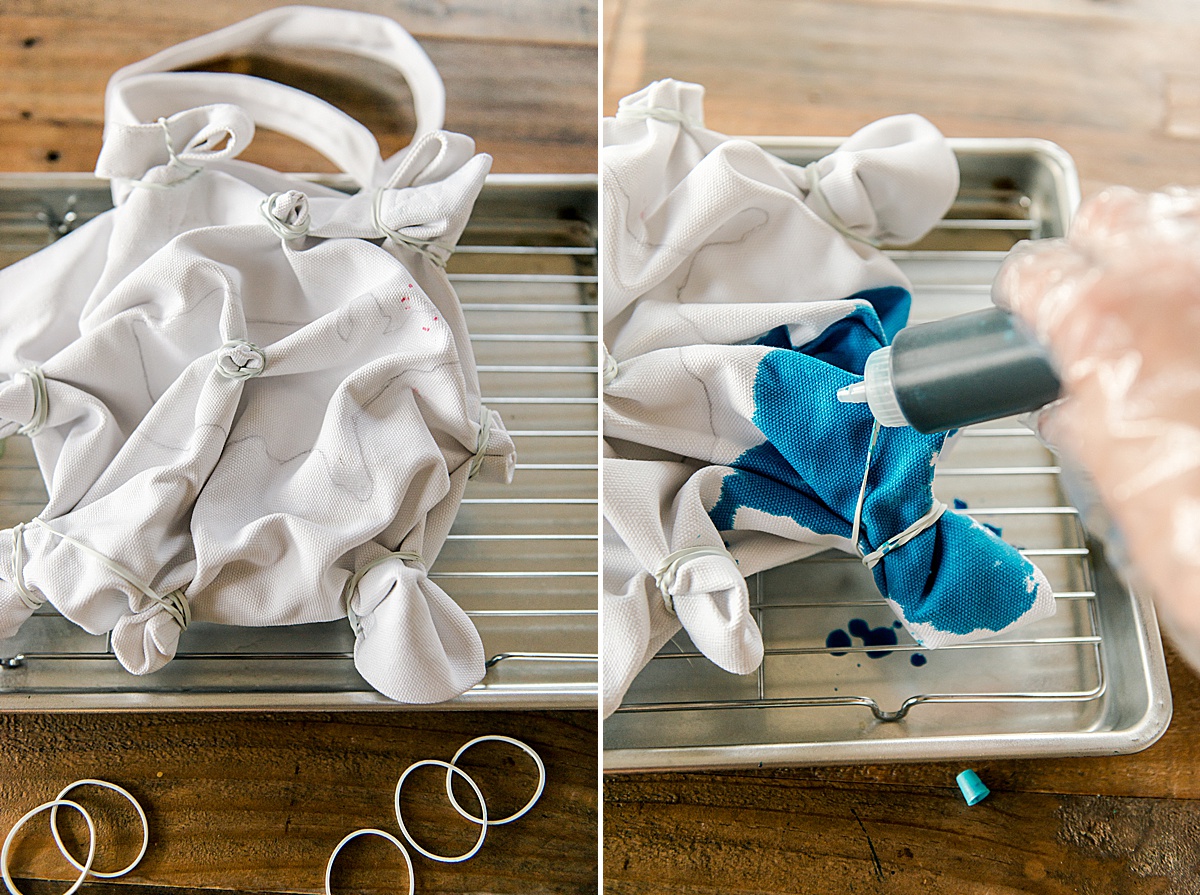
3. Prep your tote by scrunching it up (not too much) and using some rubber bands to “secure” it together in a scrunch. Go around the USA shape and do more “crunches” near the outer edge of the tote. Make sure not to scrunch too tightly as I want to the glue to do most of the “resisting” and not too many folds.
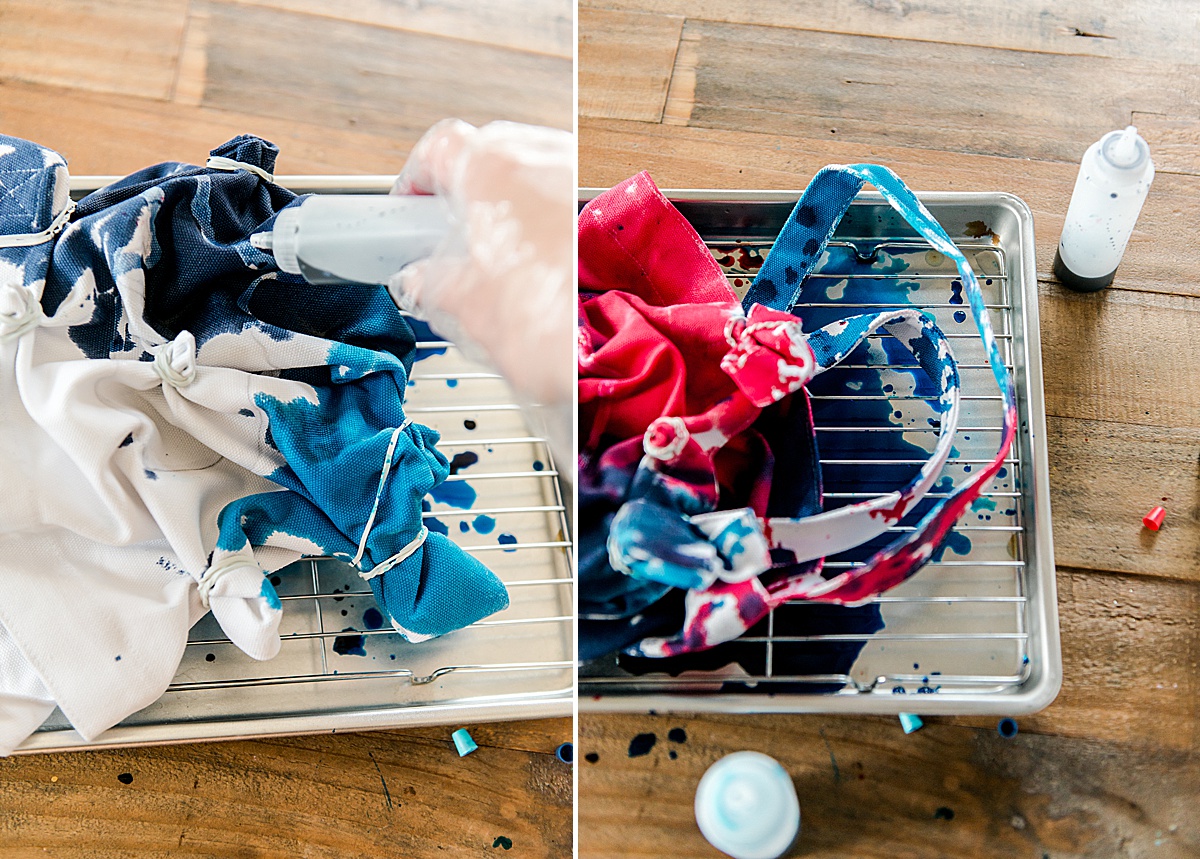
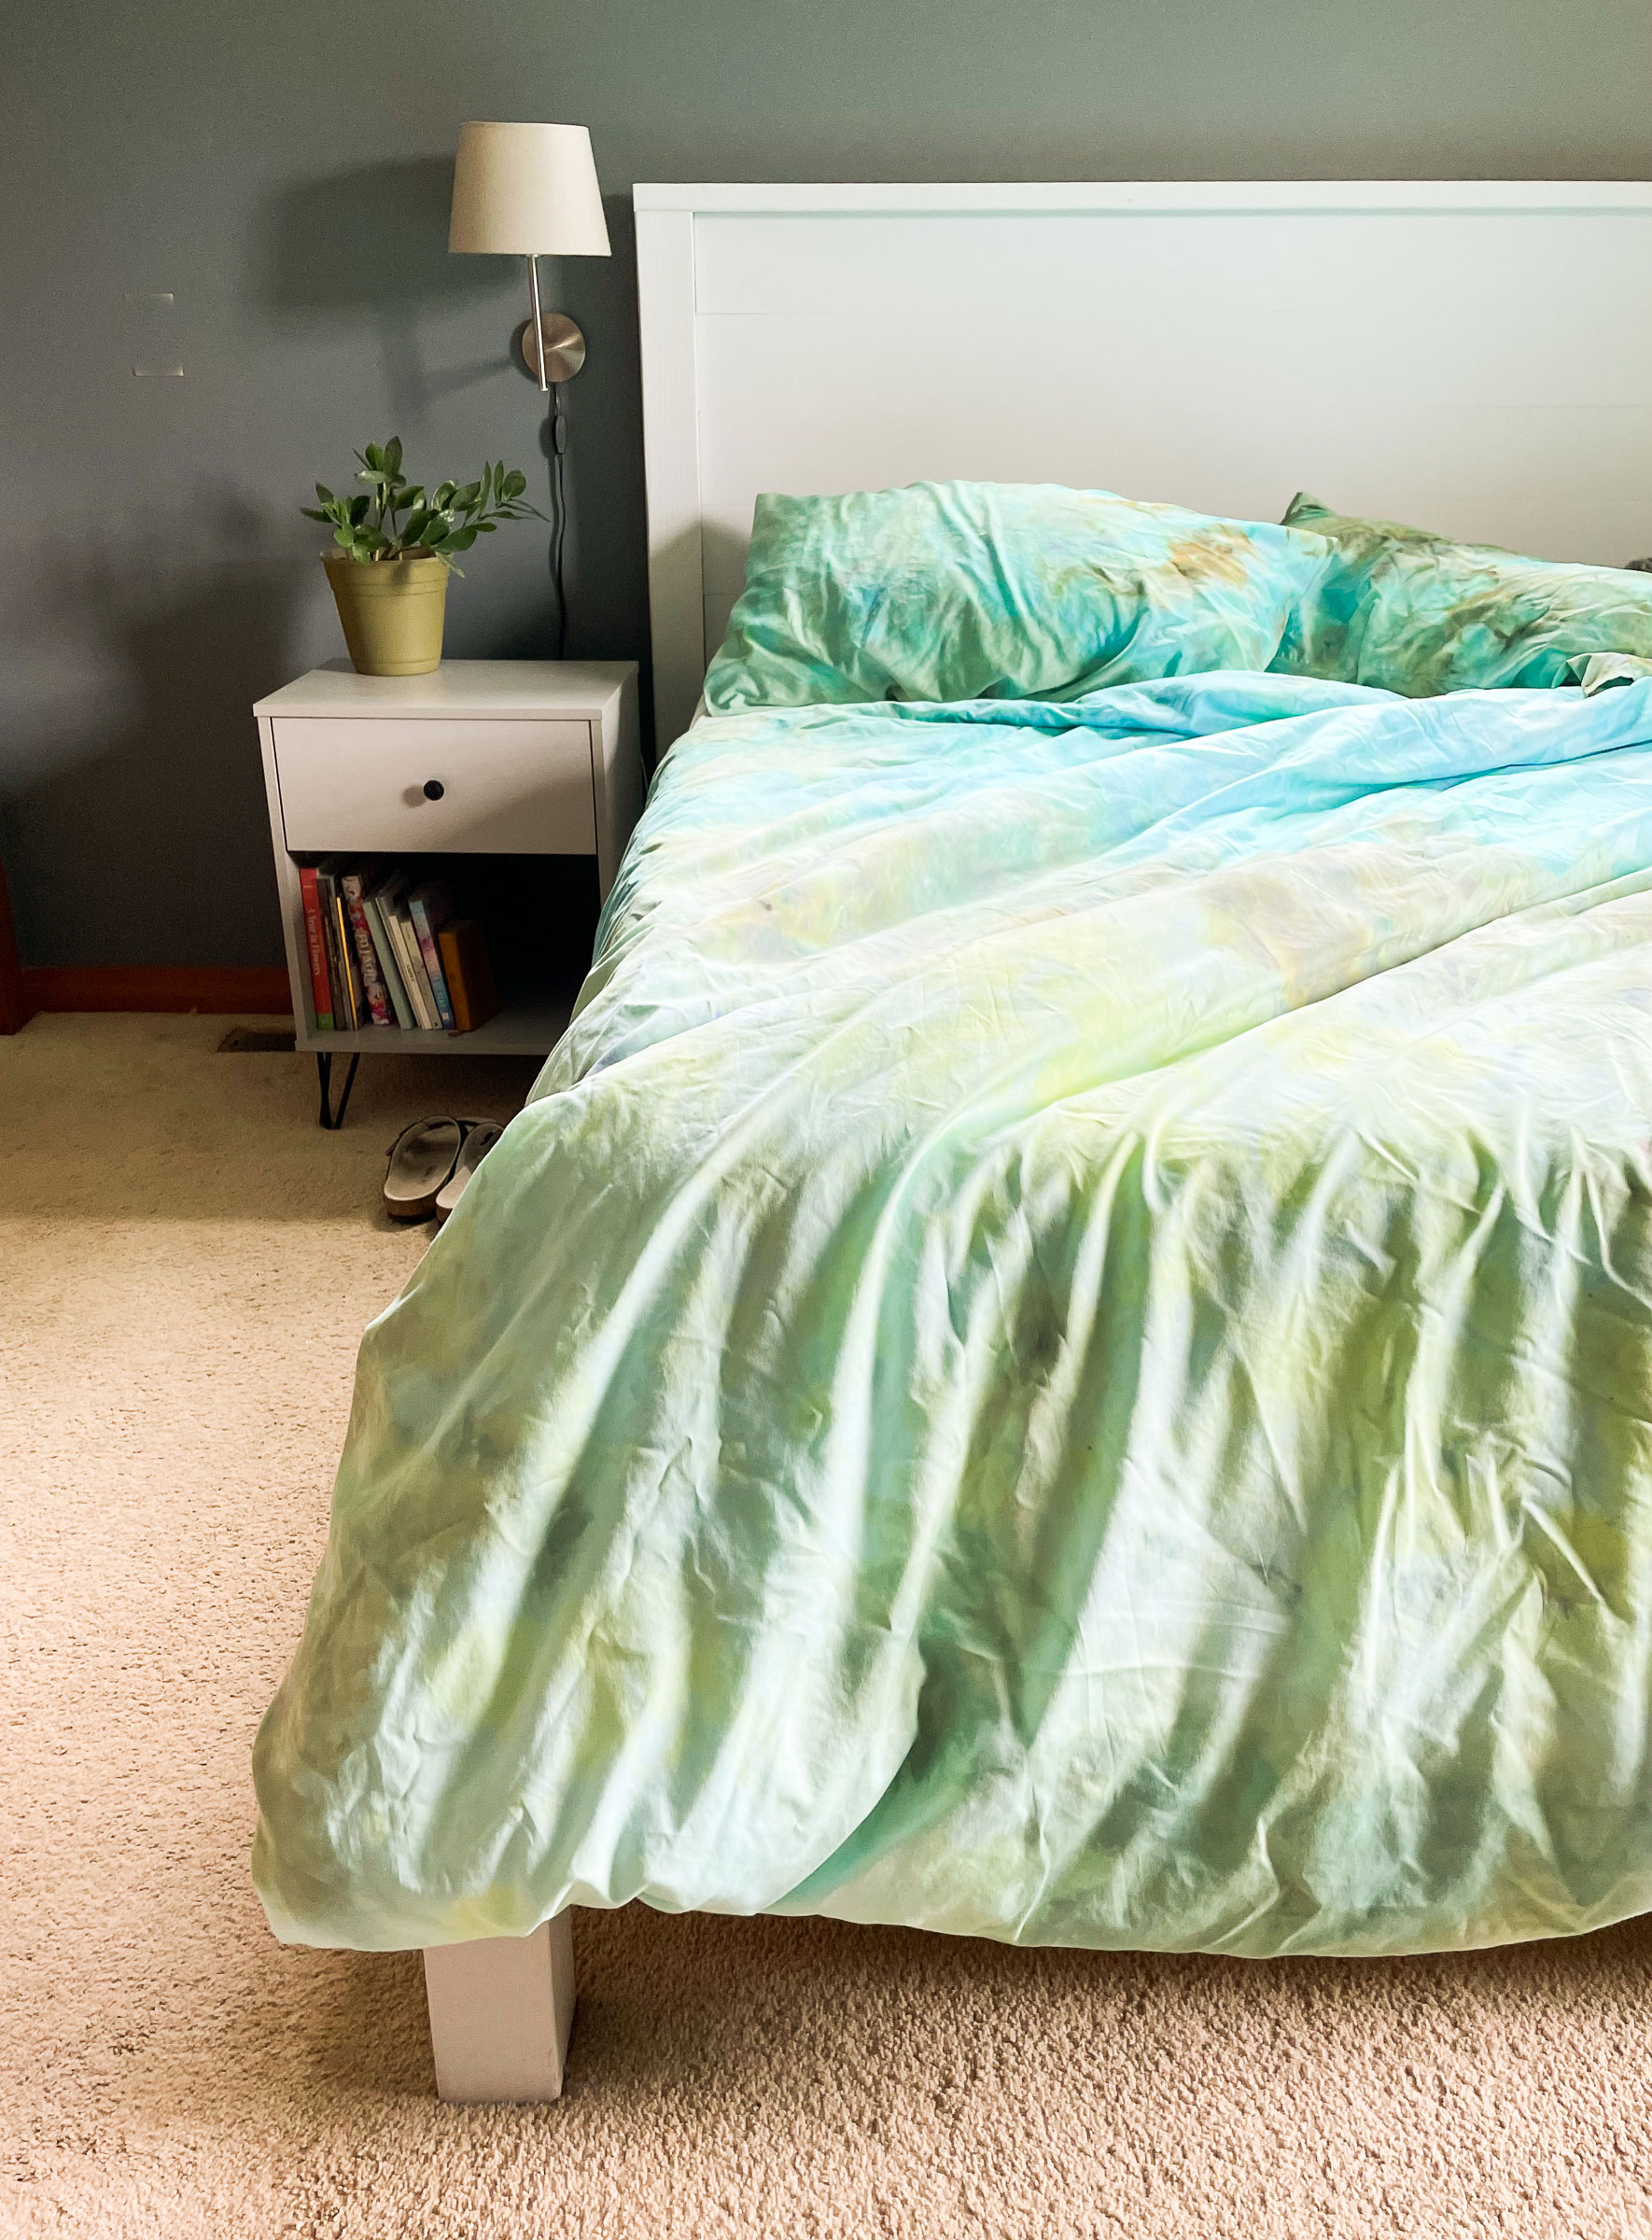
4. Prep your dye by removing the bottles from the kit and fill each bottle to the instructed level (if you want more “concentrated colors, fill only 1/2-3/4 of the way…..but be carefully that you fill enough to have plenty of die to complete the project) Carefully shake the bottles to make sure all of the dye is mixed. I used only 3 colors for this project: the red and 2 blue shades.
**tip: cover the top of the bottle with a paper towel while you shake to be sure no dye squirts out while mixing.
5. Place your scrunched up tote onto the cookie rack inside the tray (this will catch the excess dye AND make sure your blank isn’t “sitting in dye” while it cures overnight). Then with one color of dye, begin to squirt the tote, making sure to fill every crease, crevice, hole and space.
6. Once every area of your tote is covered it’s time to let it sit. Either cover your tray with plastic wrap or remove the tote and place it gently into a reusable plastic bag. Allow to sit overnight (I suggest at least 6 hours)……the longer you let it sit, the more vibrant the colors 🙂 The key here is to seal the tote so that tit doesn’t dry out while you let it sit.
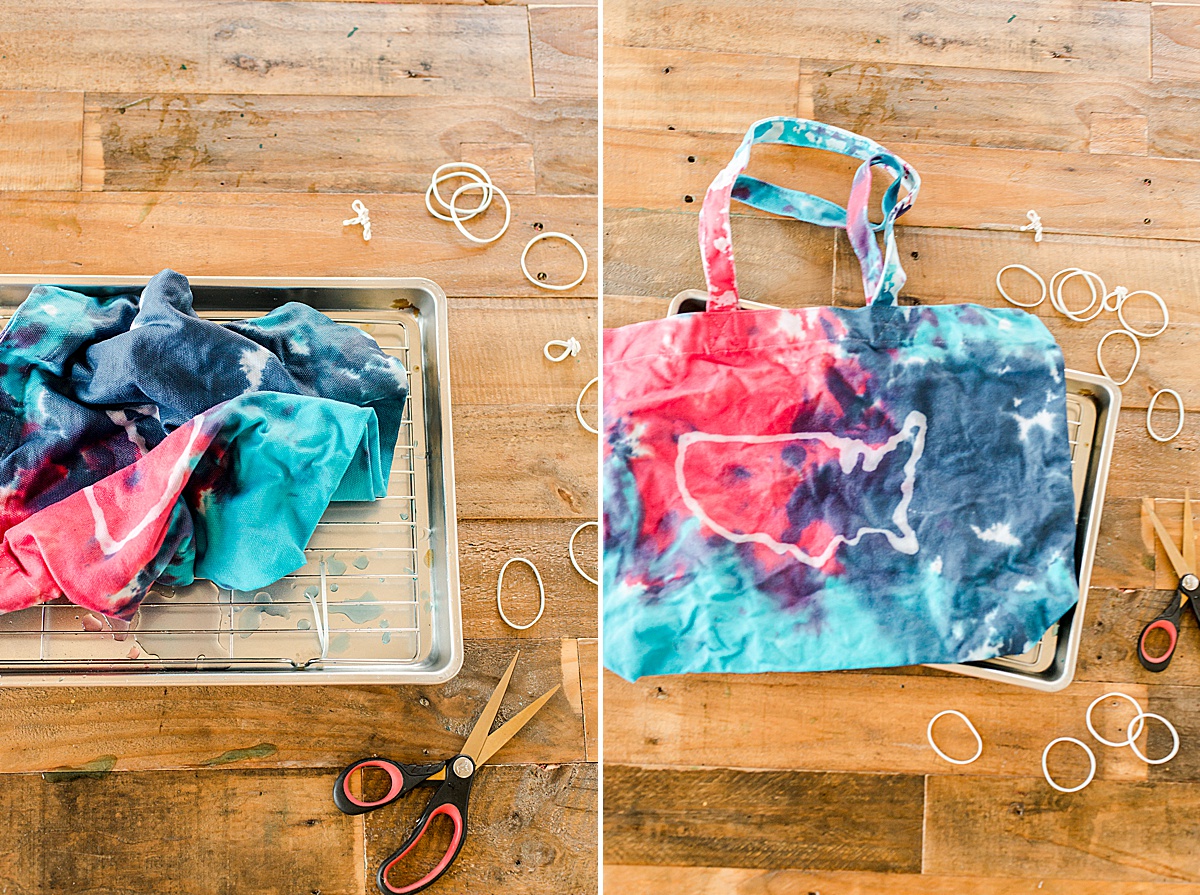
7. After you’ve removed any rubber bands, rinse off any excess dye. Then fill a non-porous sink with enough (preferably warm) water to cover the pillow cover lying flat. Place your canvas in the standing water for about 30 minutes….this will allow the glue to begin to soften and lift off. After a few minutes, you can use your fingers to begin to scrape off the glue (you will feel it kinda slimy as it is coming off the canvas).
Don’t be alarmed if you don’t see your design right away……sometimes the dye sits on top of the glue and once the glue is removed the design is revealed more 🙂
8. Repeat step 7 as many times as necessary until the water runs clear and all glue is removed 🙂
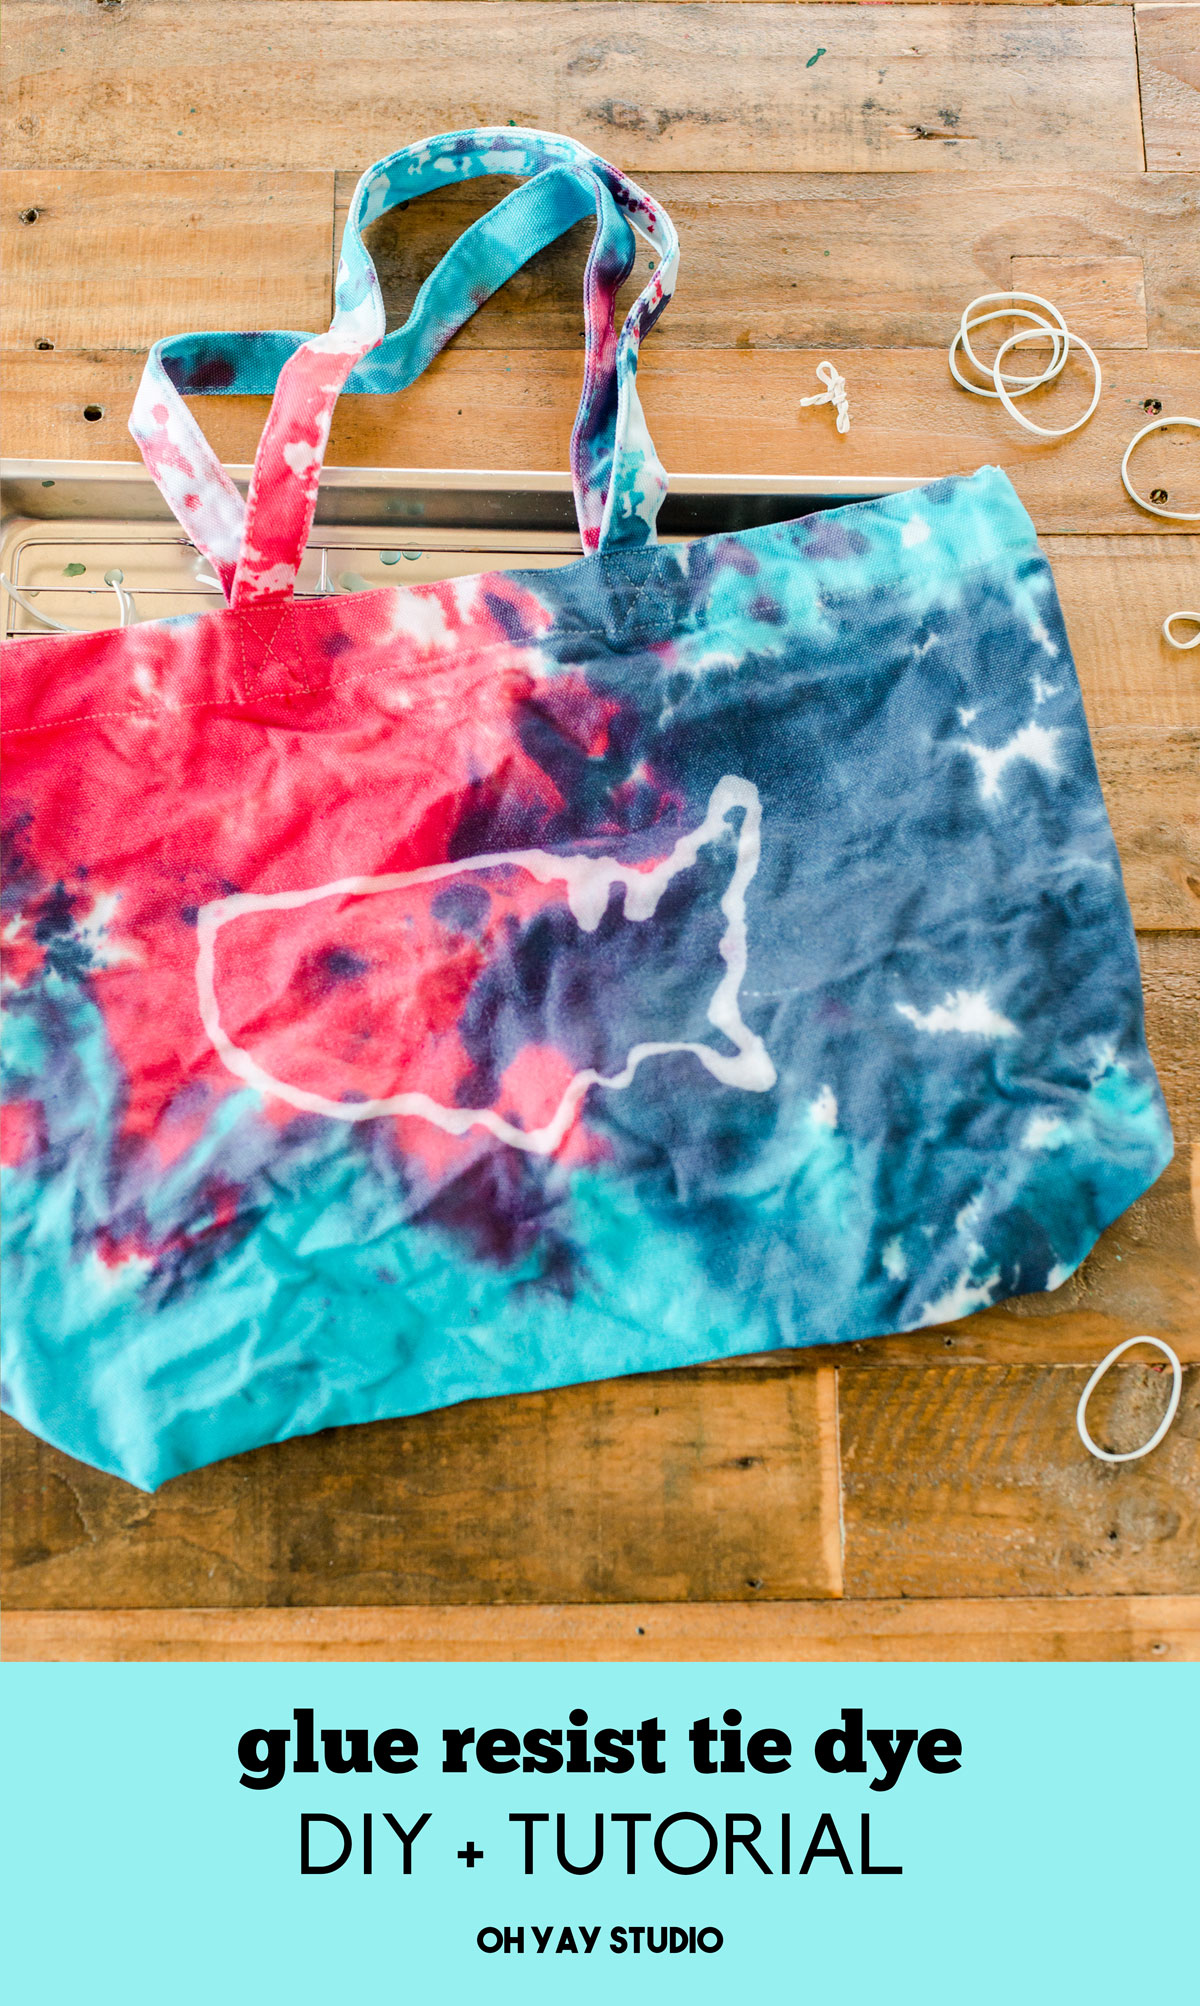
9. Wash and dry your tote (separately than other clothing) then you’re allllll ready to fill it with Olympic or 4th of July FUNNNN! 🙂

Does this technique work on other things like shirts?
Hey Laurie! I *can* work on teeshirts, it will be MUCH more faint however. I have found that the dye can soak in through the back of the shirt. So thicker fabrics tend to work better! Hope that helps!