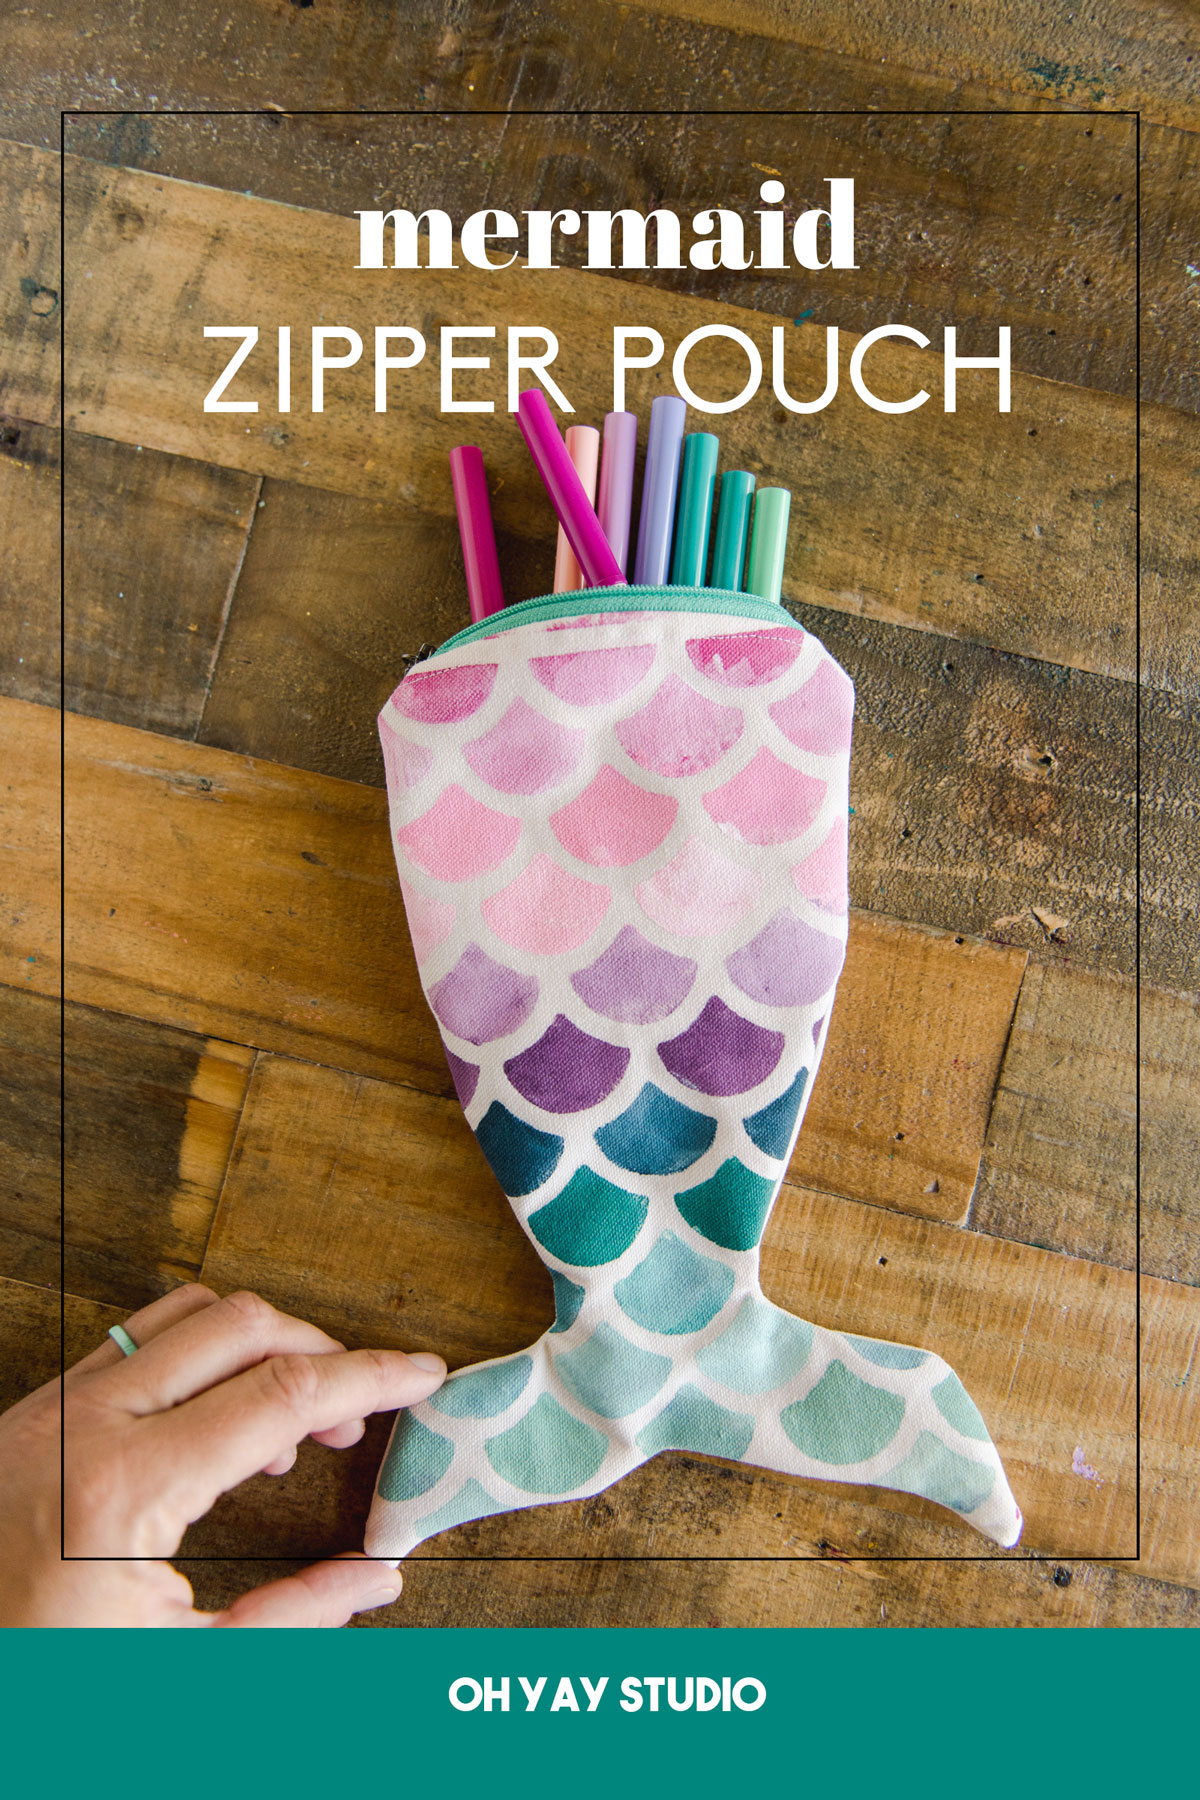
Mermaid Zipper pouch PDF + free SVG file! :)
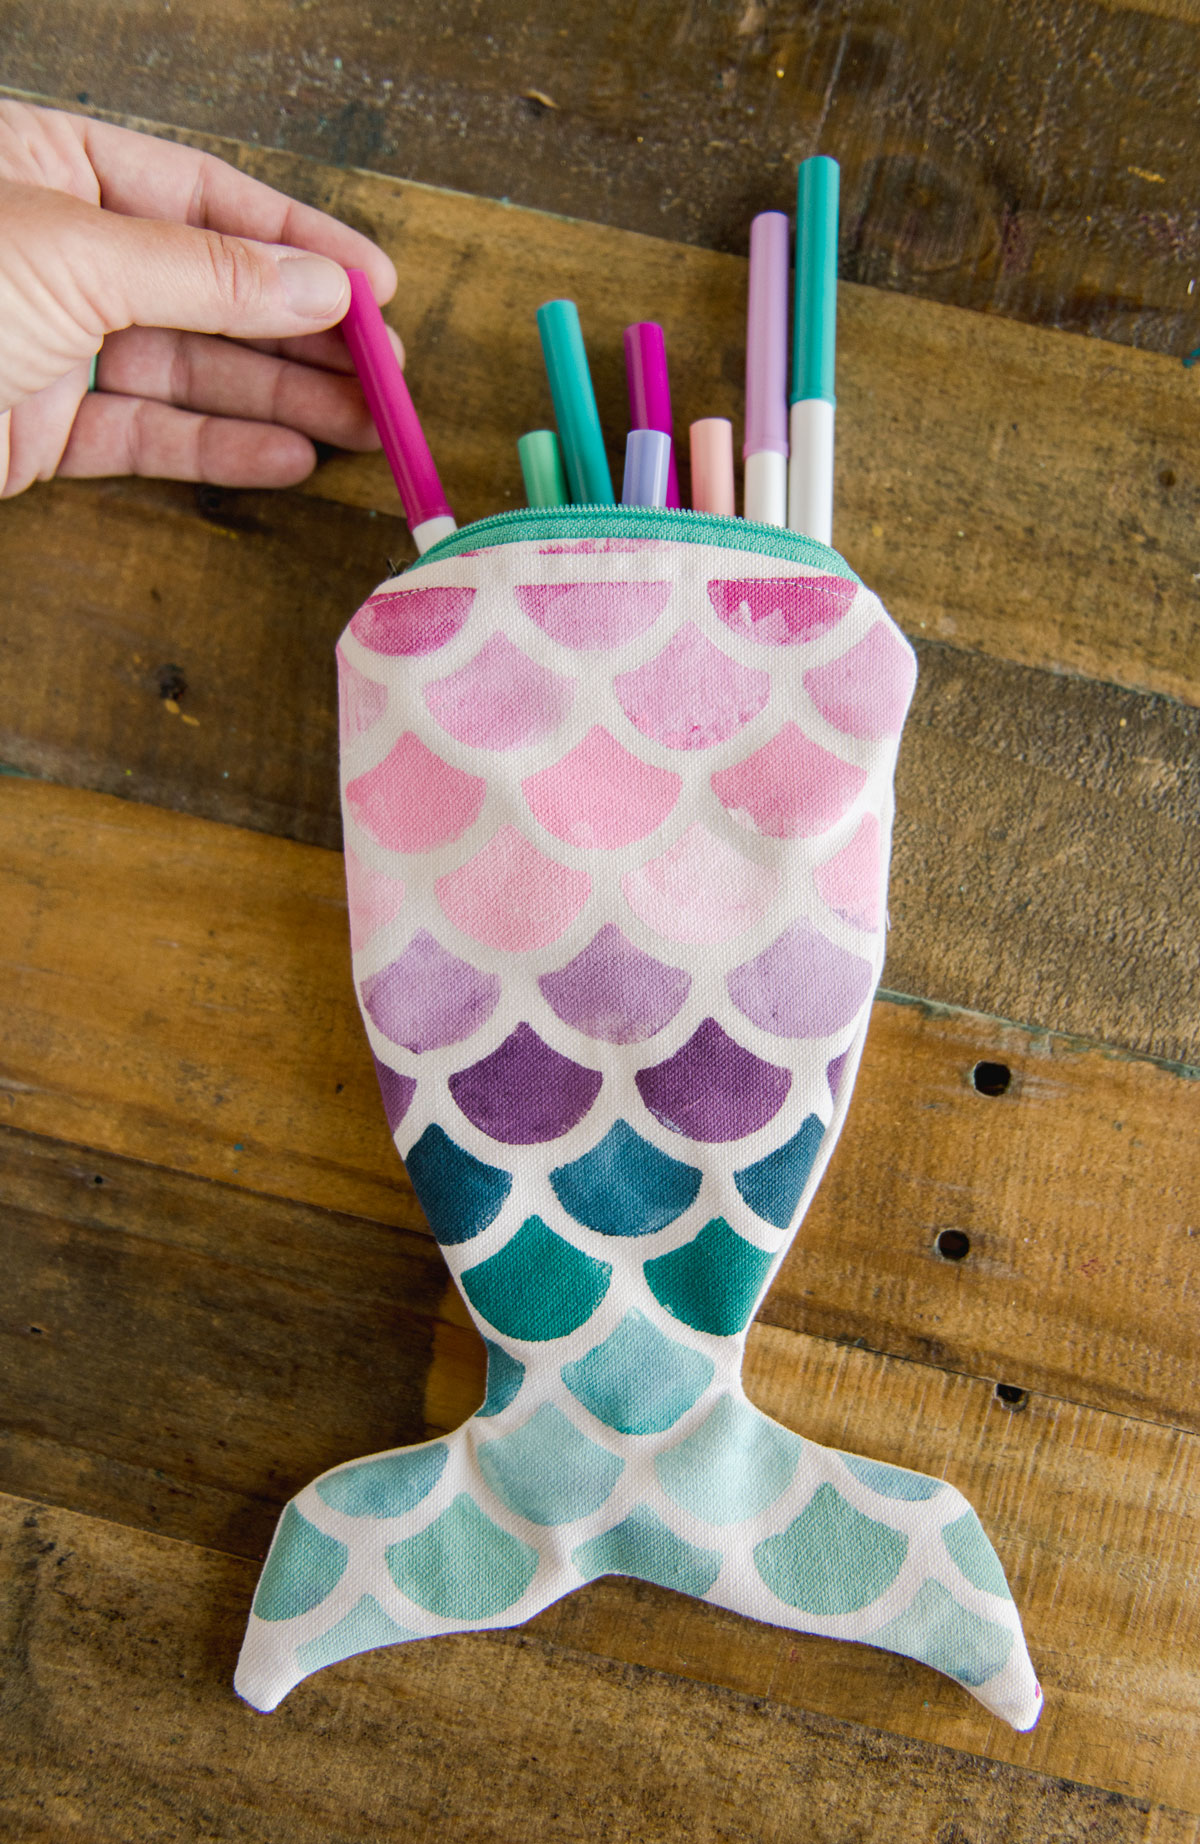
WELP! I have a little girl starting KINDERGARTEN SOON! WOAH! 🙂 So what better way than to make her a special, colorful pencil pouch that she can bring to school to remember her crafty mama!!! Orrrr it can just serve as a way to help her meet new firends as a “conversation starter” (because Kinders obvi do that, righhhht?!?!!)
Either way, grab the Free PDF and Free SVG file to make your very own Mermaid zipper pouch for school, work or even just to have around the house and store treasure! 🙂
OH—and if you’re a mermaid lover or live with one, you’ll want to scroll down to see all of the other amazing FREE SVG files that my talented designer friends have come up with!
Maybe you remember the Mermaid scale wall I painted for my niece (gold wall and scales of every mermaid-loving-girlie all over her bedroom…..you can take a peek HERE)!? WELLLL, that idea is what totally sparked this mermaid tail zipper projects. And I’d by lying if I didn’t admit that I think that cute zipper pouches are a way to *TRY* and keep my kiddos from their migrating collections across every nook and cranny of our house (so hint hint: make them in themes so that it’s easy for kiddos to tryyyy and keep their things together)! 🙂
MATERIALS:
- White or cream fabric – I used a heavier fabric, like a canvas
- Any kind of inside lining fabric of choice- I used just a patterned cotton
- Scissors
- A piece of cardboard (an old Amazon box or delivery box will do)
- Your Cricut cutting machine (YAY)
- Non permanent vinyl to make the stencil for the scales (not HTV)
- A weeding tool, cutting mat and transfer tape (optional) for your vinyl
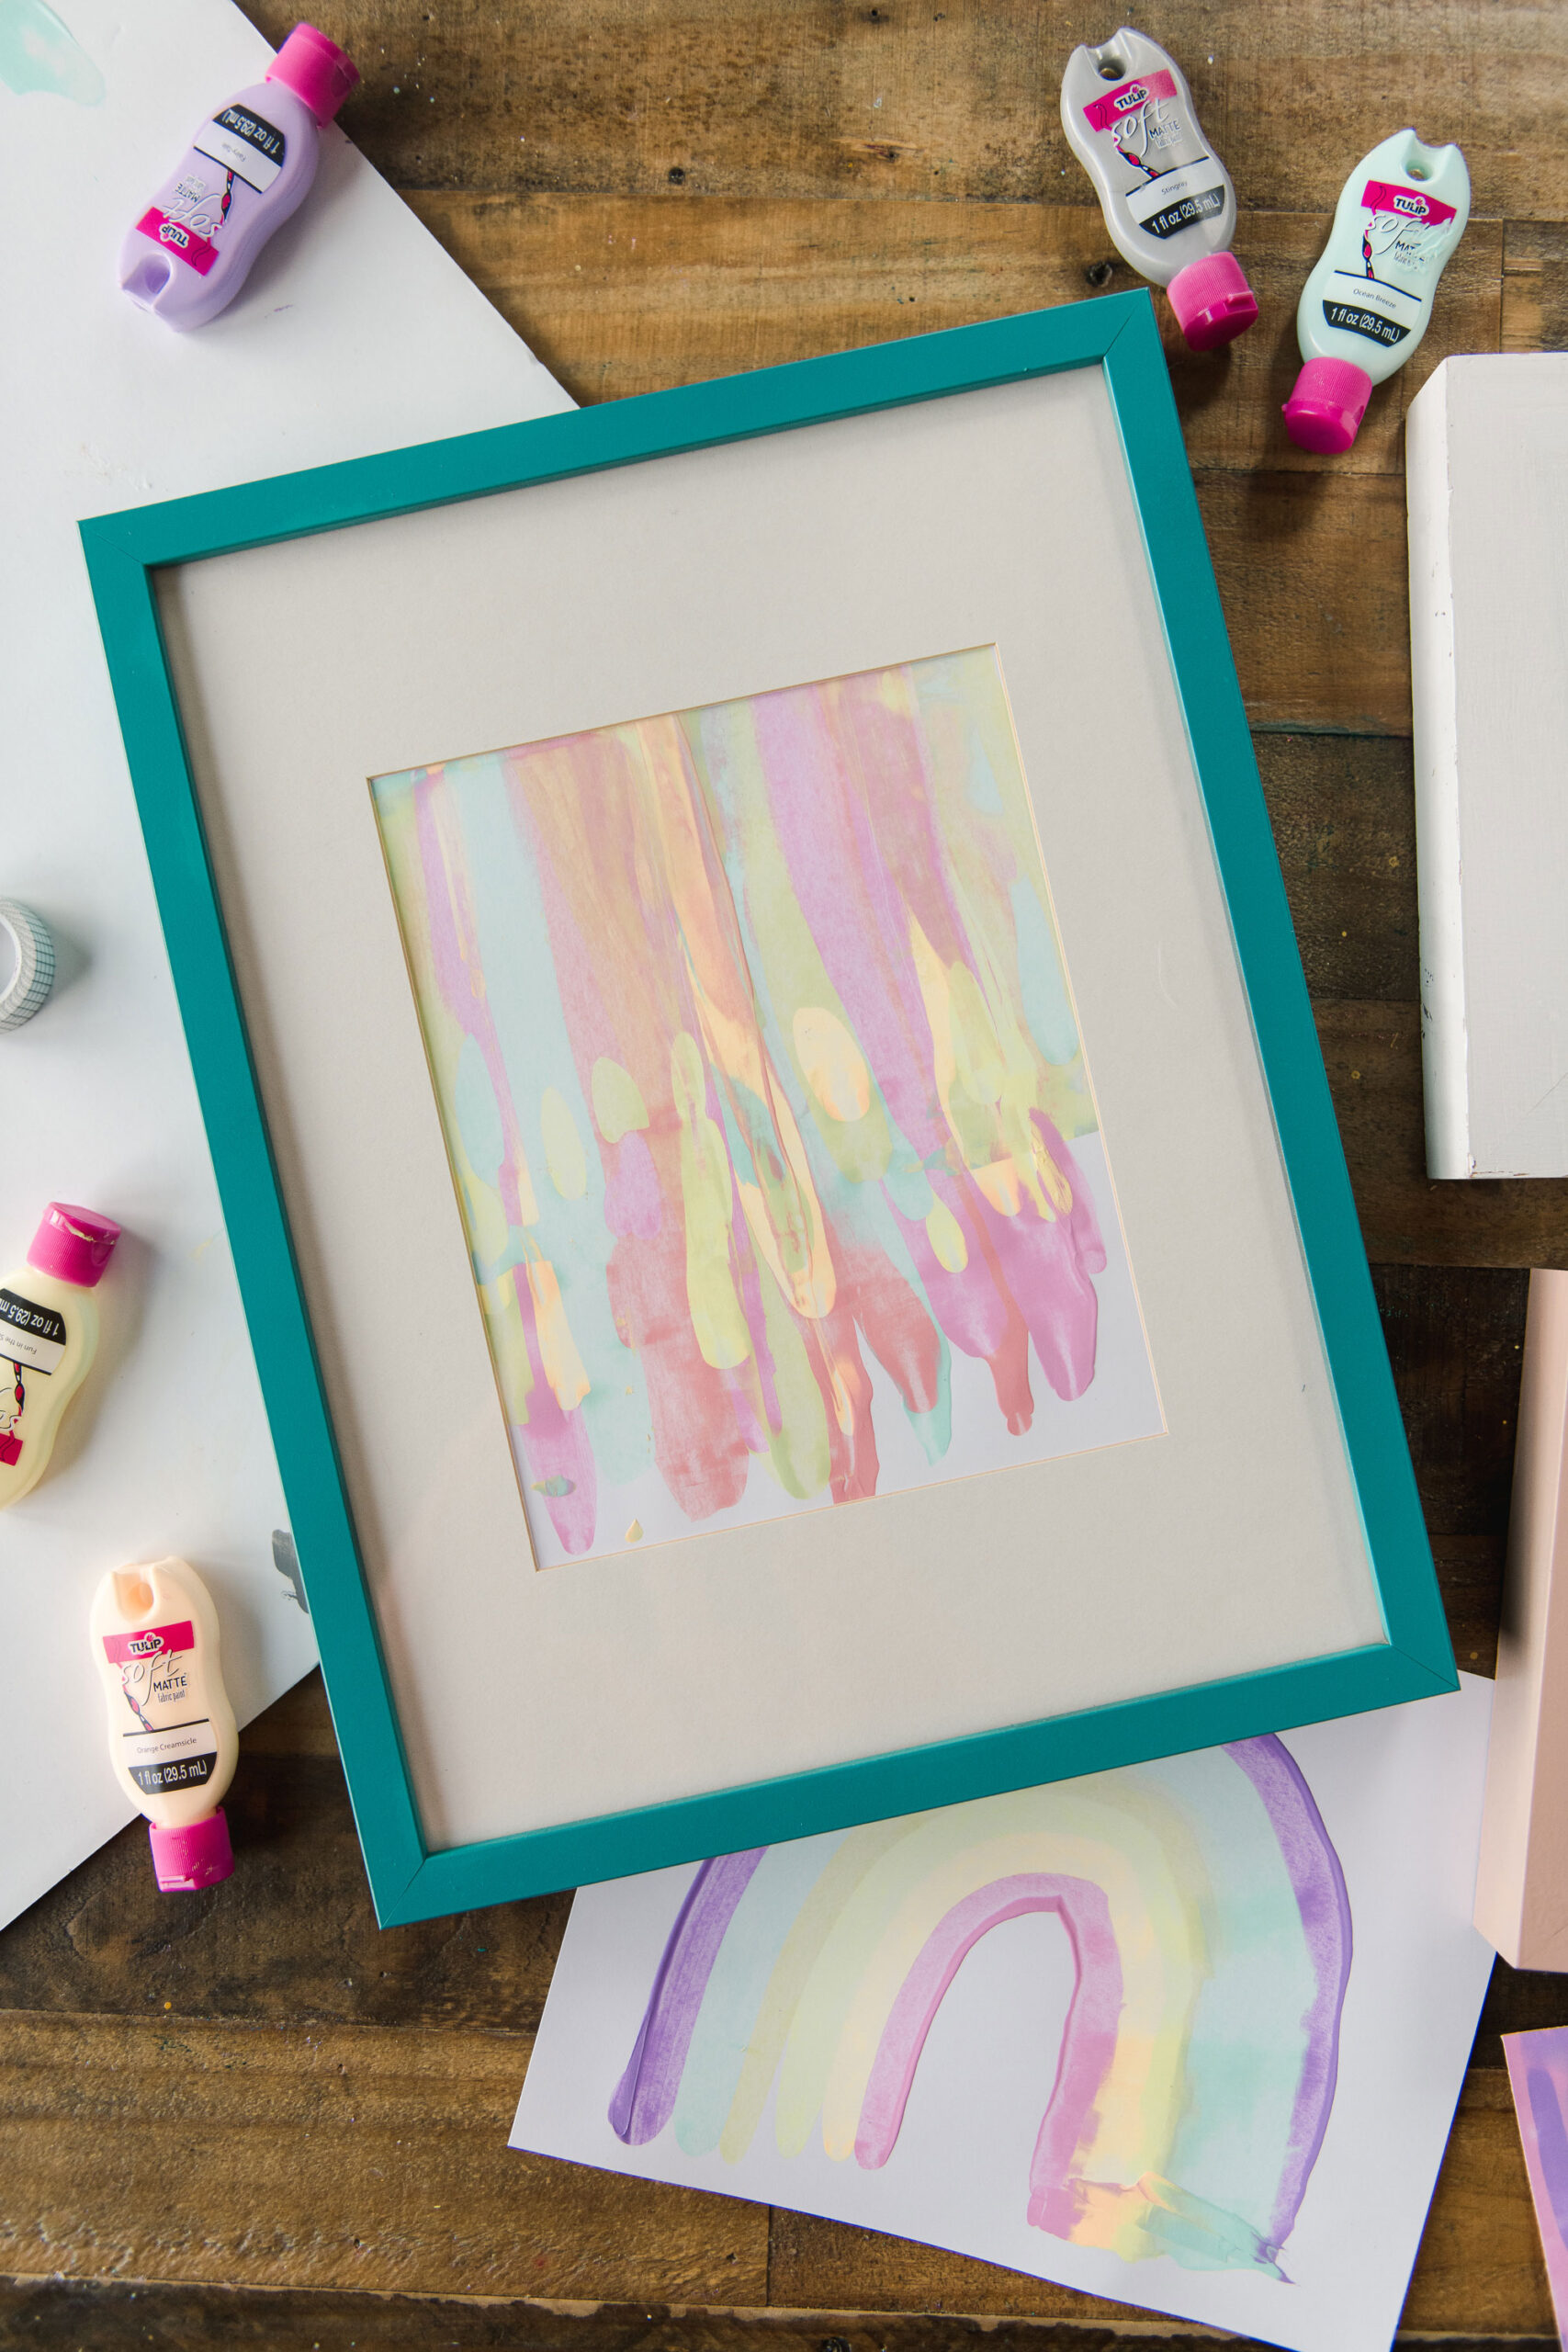
- Fuchsia, pink, purple, navy, teal mint and white acrylic paint
- Your fave paint brush 🙂
- Your favorite sewing machine – I use a Janome 9450 and it’s INCREDIBLE 🙂
- Coordinating thread
- Coordinating Zipper 6″ in length or cut to size
- PDF pattern for the sewing – download HERE
- SVG file for the scale stencil – download HERE
INSTRUCTIONS:
1. Cut pieces
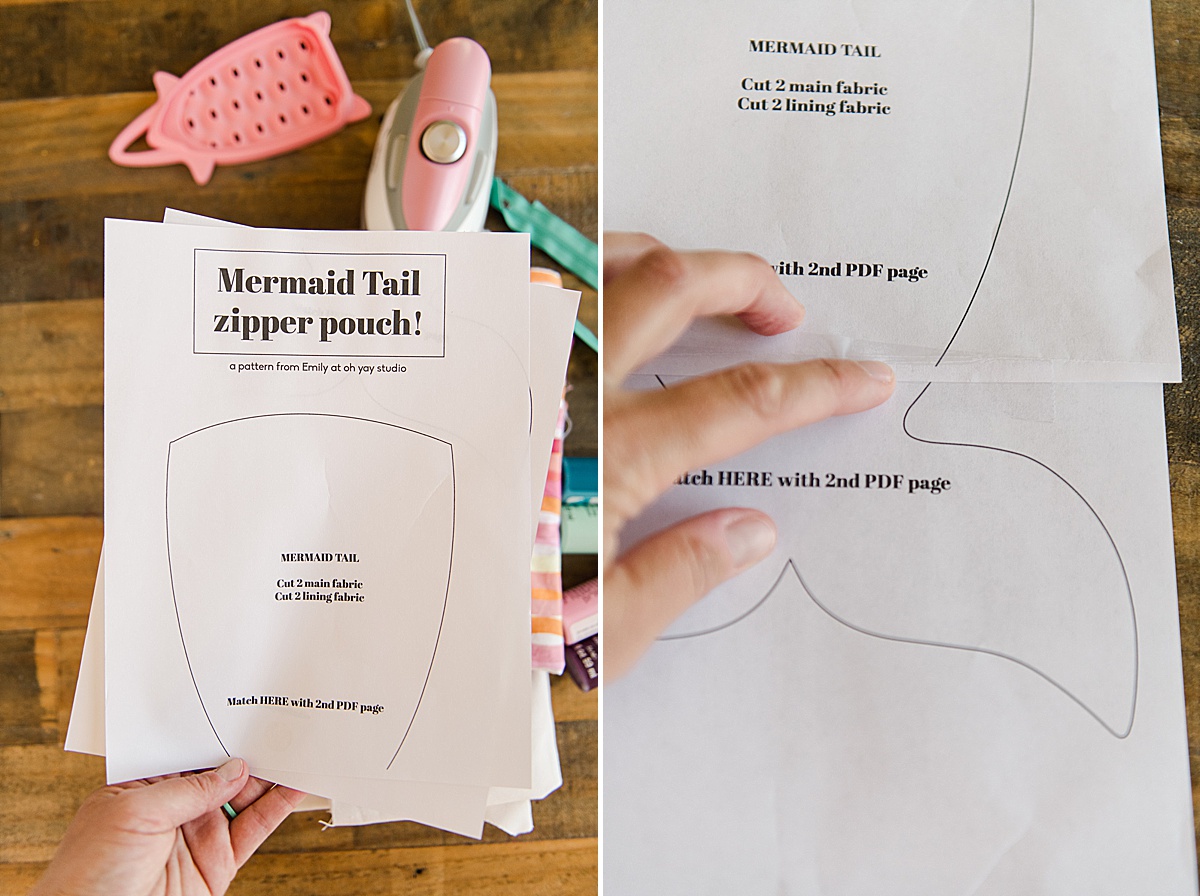
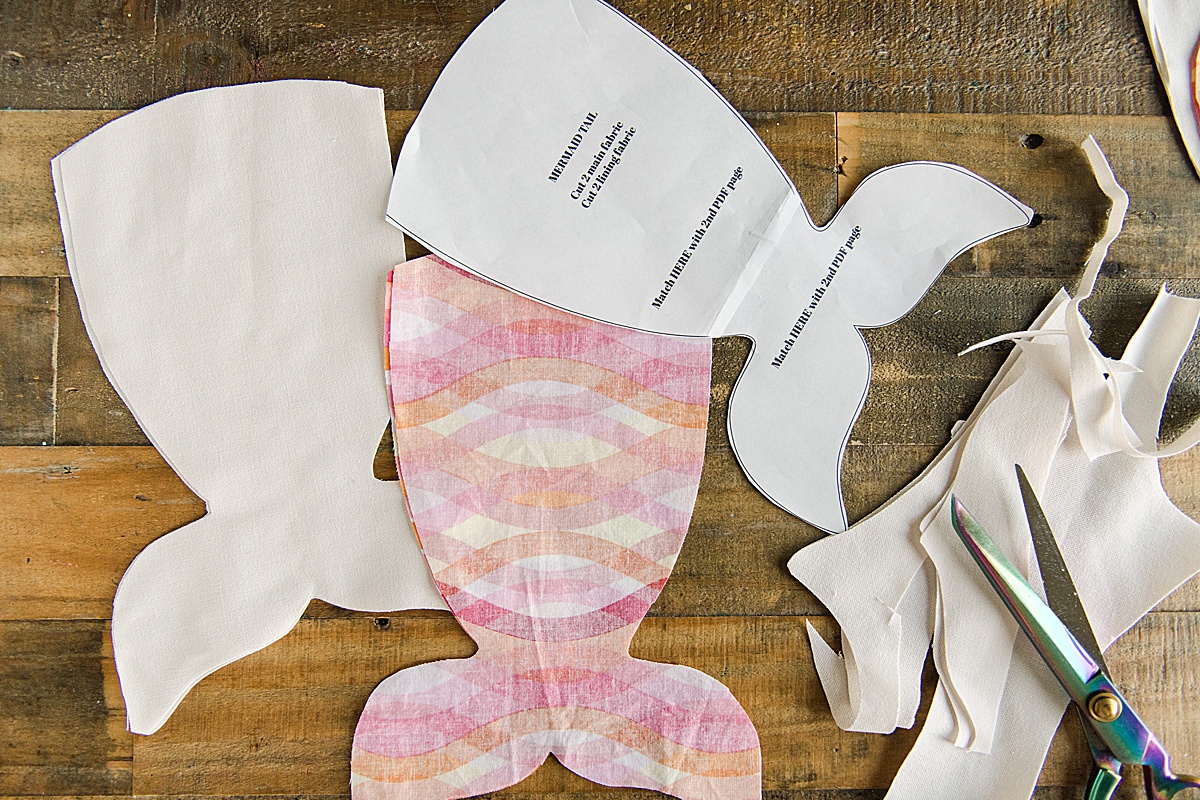
Iron your fabrics really well and then with right sides together, use the PDF pattern and cut:
DOWNLOAD THE PDF PATTERN HERE 🙂
*2 outside mermaid tail pieces from the pattern
*2 lining pieces (from the same mermaid tail pattern)
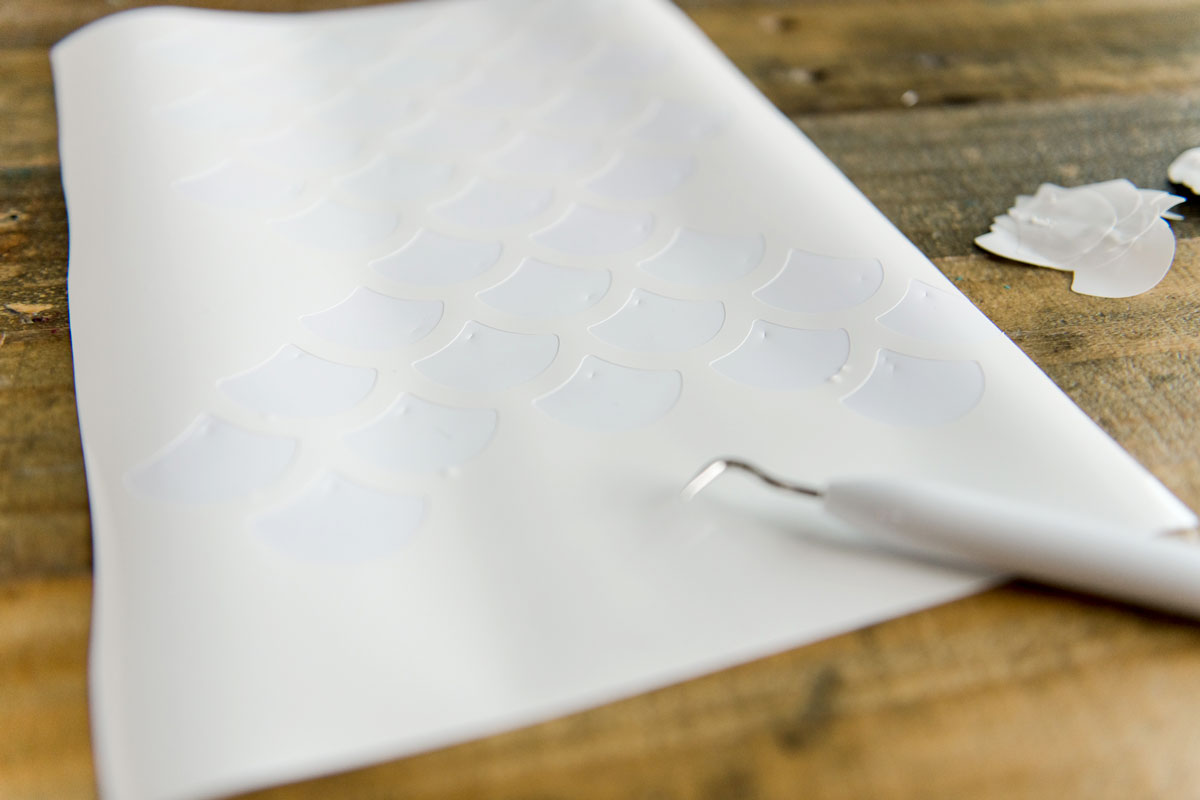
2. With your Cricut, upload the Mermaid scale SVG file into your design space and size it to at least 8.5″ wide (this will ensure that it’s large enough to fit over your Mermaid outside pieces).
Cut your mermaid scales out of non permanent vinyl (the color doesn’t matter because this is going to become a stencil for the scales). Then weed out the individual scales for the tail! 🙂
3. You can choose to use transfer tape for this step or not, its 100% up to you. I chose not to…..so I peeled away the top 1/4″ of the backing of the vinyl. Then I lined it up to the one of the tops of the outside piece of the mermaid tail. Then together, you will peel off the remainder of the backing as you lay it down and stick it to the front outside mermaid tail piece. Do this as flat and even as possible! 🙂
If you choose to use transfer tape, you will simply lay transfer tape over the vinyl, burnish it (so that everything sticks to the transfer tape well), then lay it down on one of the tops of the outside mermaid tale pieces, then peel up the transfer tape 🙂

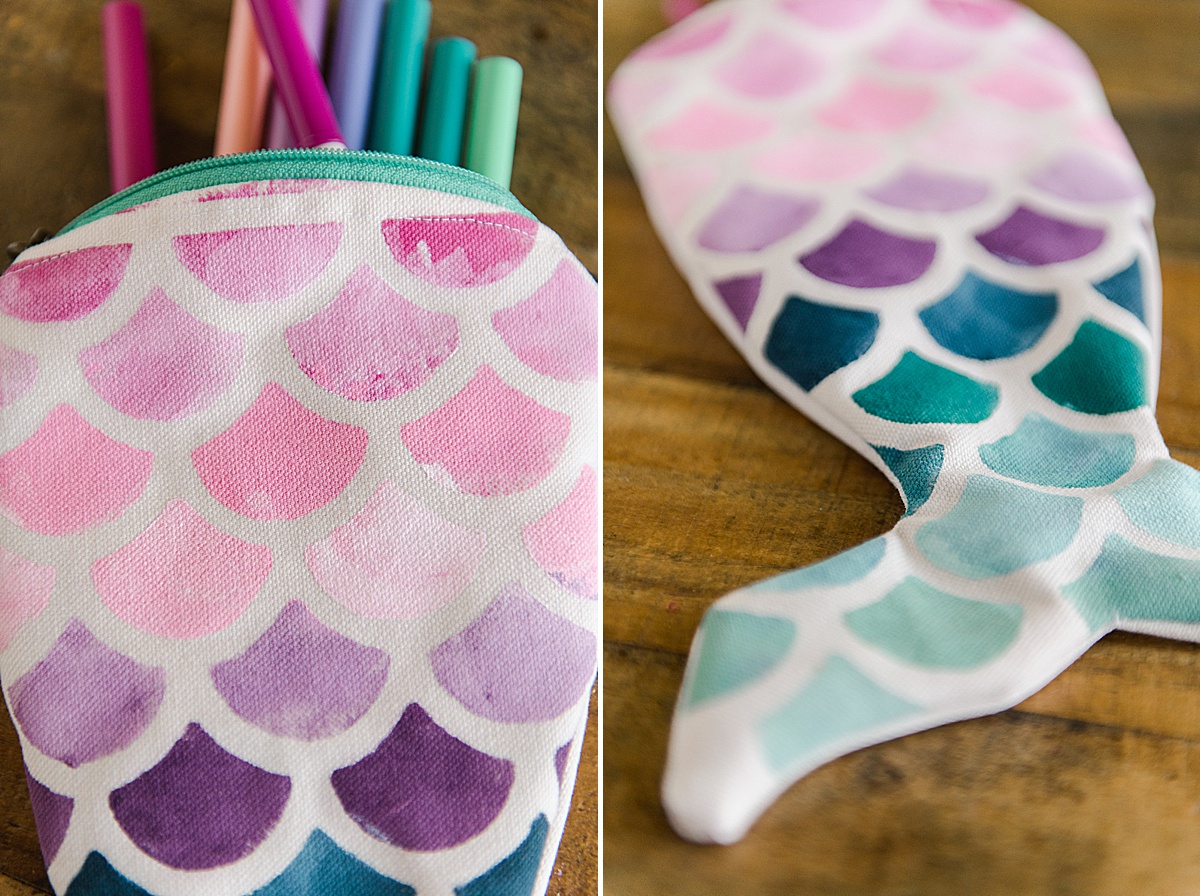
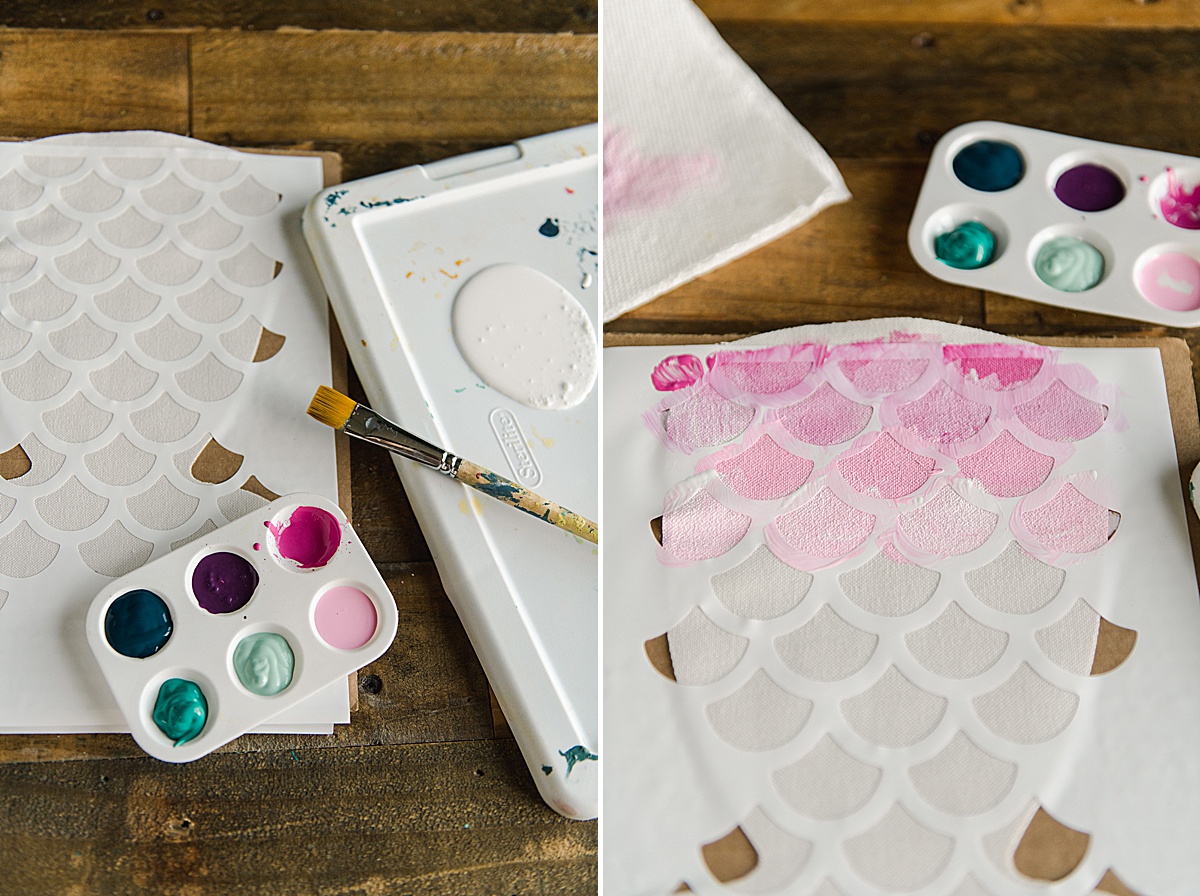
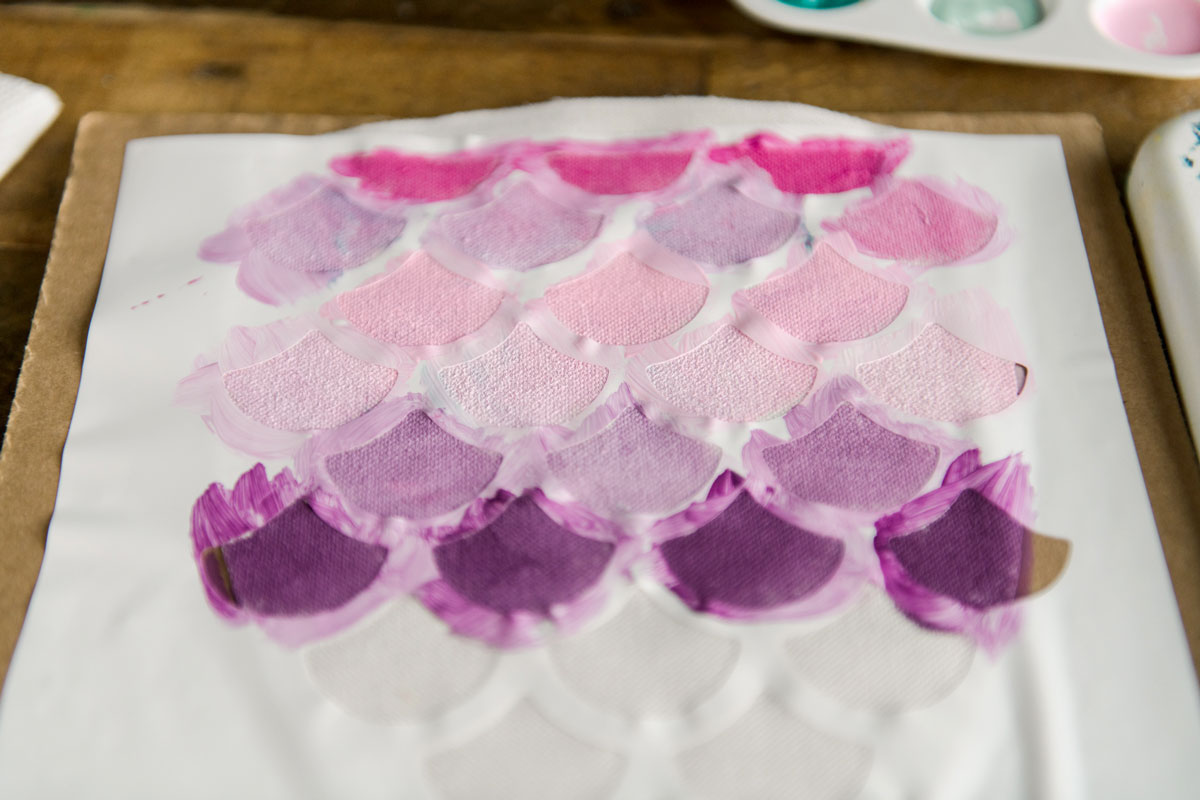
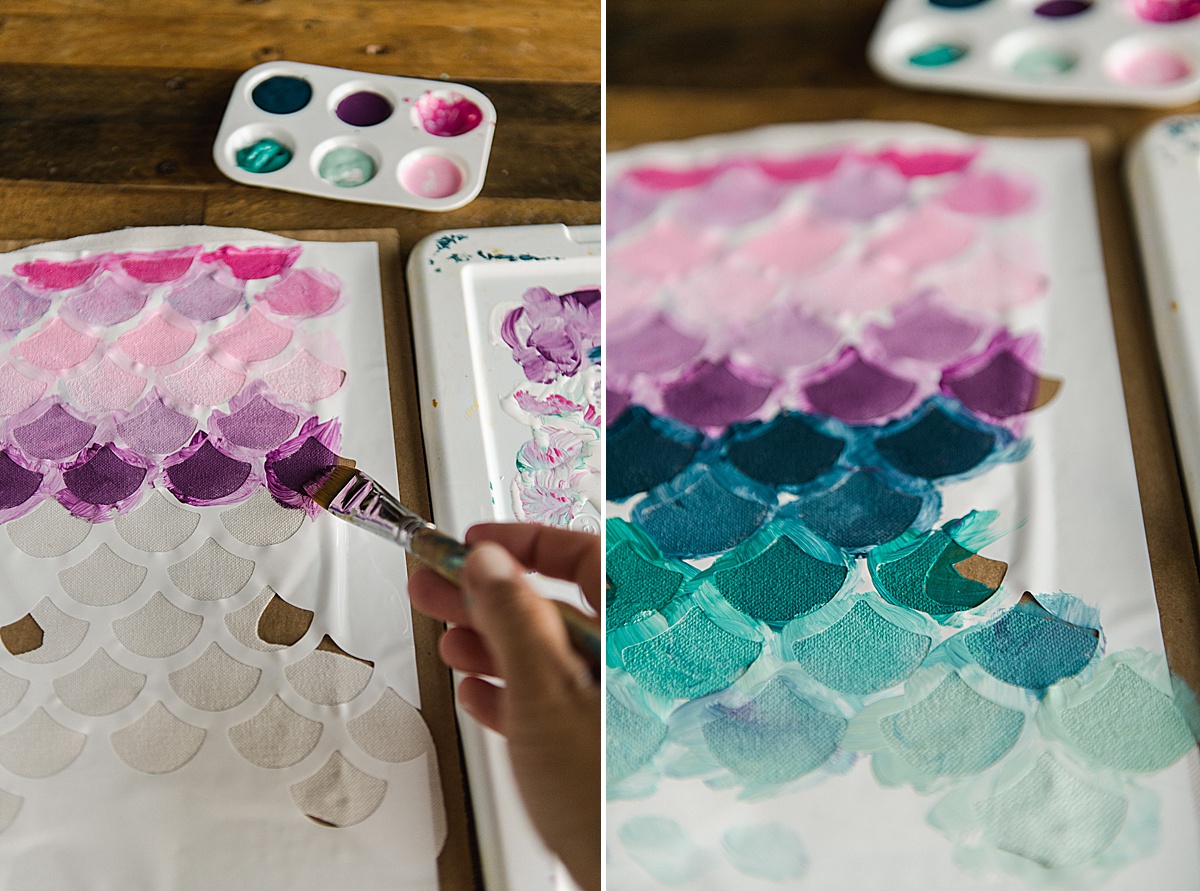
4. Prep your paint colors and pour a dab into a dish or bowl and then some white paint into a different dish or bowl. You will work your way through the colors of choice by paint each row of scales alternating the pure color and then next row painted that same color mixed with white. For instance, row 1 is all fuchsia paint and then row 2 is fuchsia mixed with white, row 3 is light pink, then row 4 is light pink mixed with white. I didn’t wash or dab out my brush at all when changing colors….I wanted the colors to blend and meld together and not be perfect. I think that this gives the effect of shine or iridescence to the scales. Just keep painting each row and don’t worry if some of the previous colors transfers to the next row of scales 🙂
Once you are done with all the rows, peel up the template before the scales dry. Peel carefully and in one big “swoop” so that the stencil doesn’t transfer any leftover paint to the white spaces 🙂
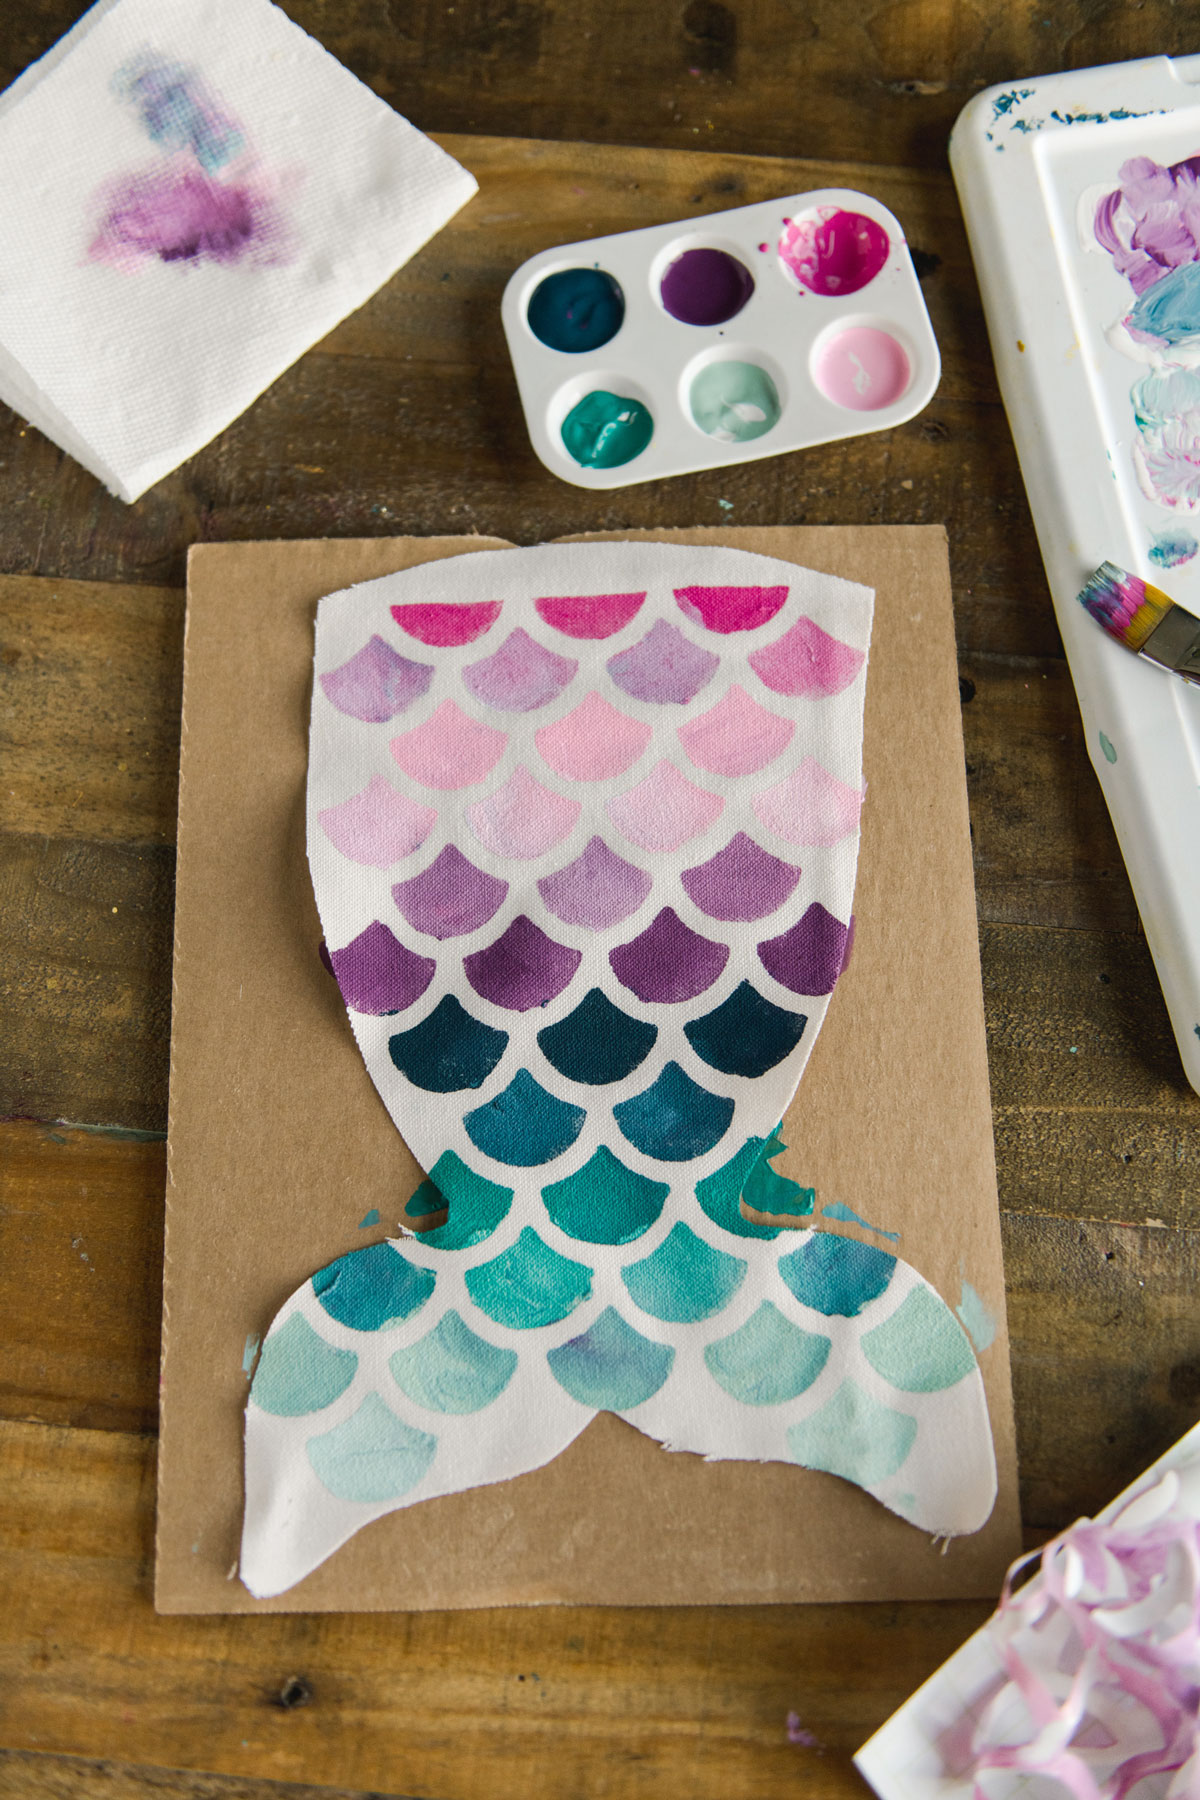
5. Allow to fully dry before sewing 🙂
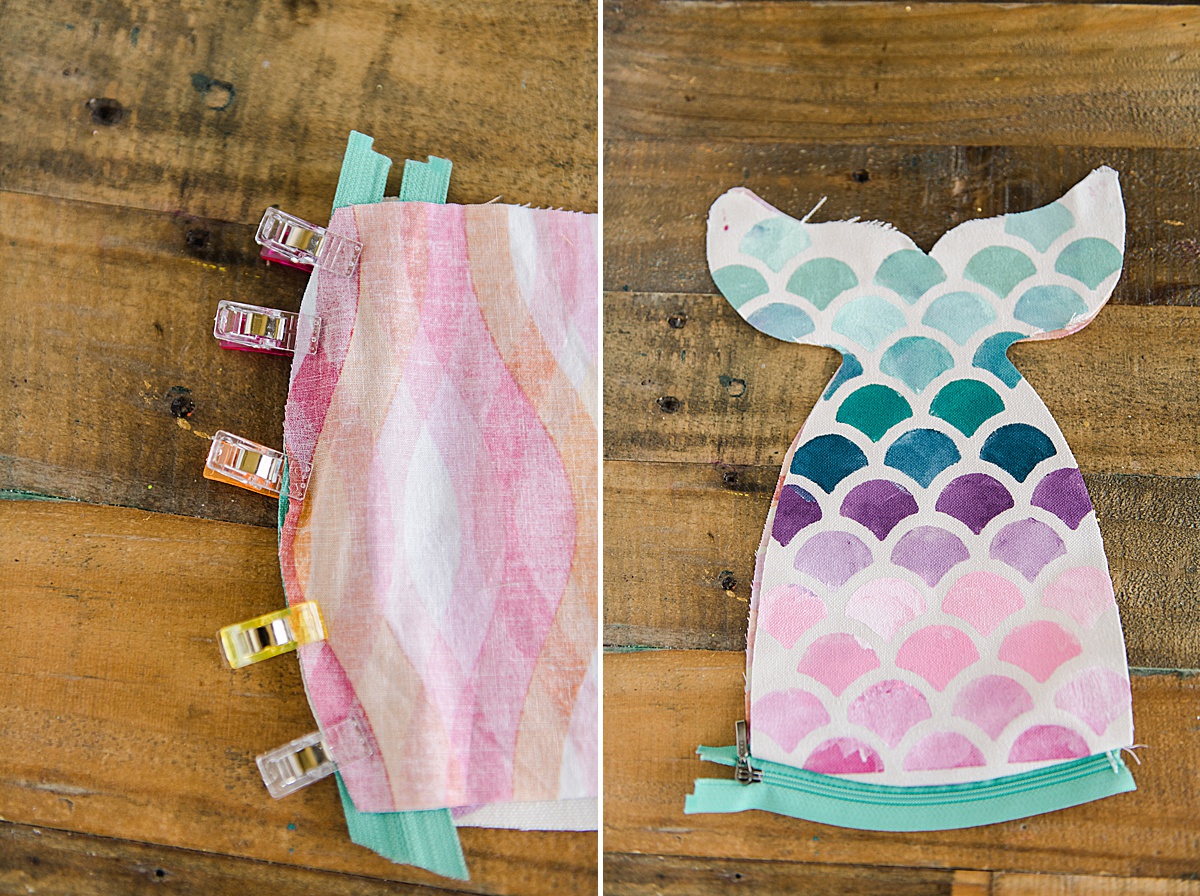
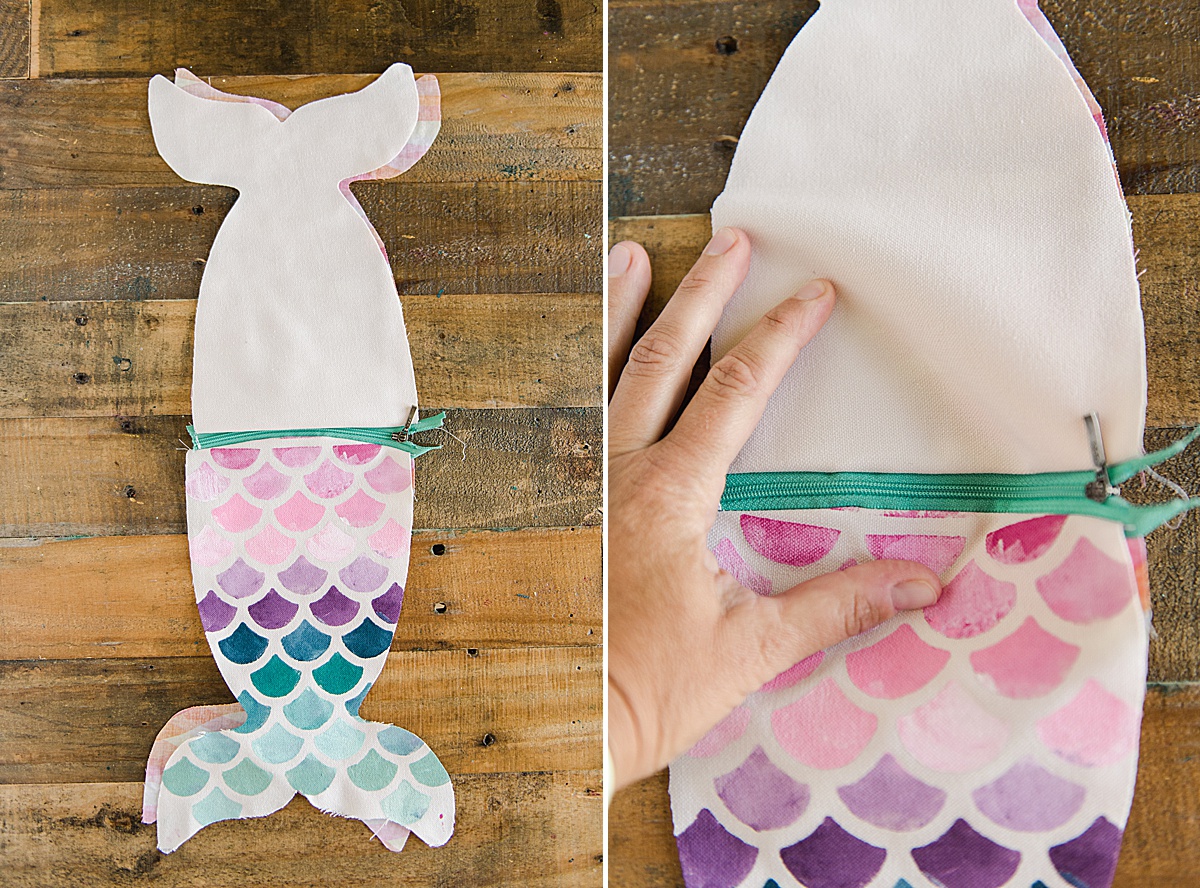
6. Sew your zipper! Do this by layering your fabric with 1 piece of the lining fabric facing up, zipper, then a mermaid tail outside facing down. Line up the edges of your zipper and make sure all 3 layers are flush. Stitch your zipper in place.
*Note, trim your zipper to 6″ (ish) inches before you begin sewing the zipper if necessary! 🙂
Do the same with the other mermaid tale back and other lining piece.
**tip when sewing zippers: be sure to stop your stitching when you come to the “pull” on the zipper, put your needle down, raise your presser foot and then zip the pull out of the way. If you don’t do this you will get a bulge or notch in your zipper stitch which will be obvious when you want the zipper to lay flat.
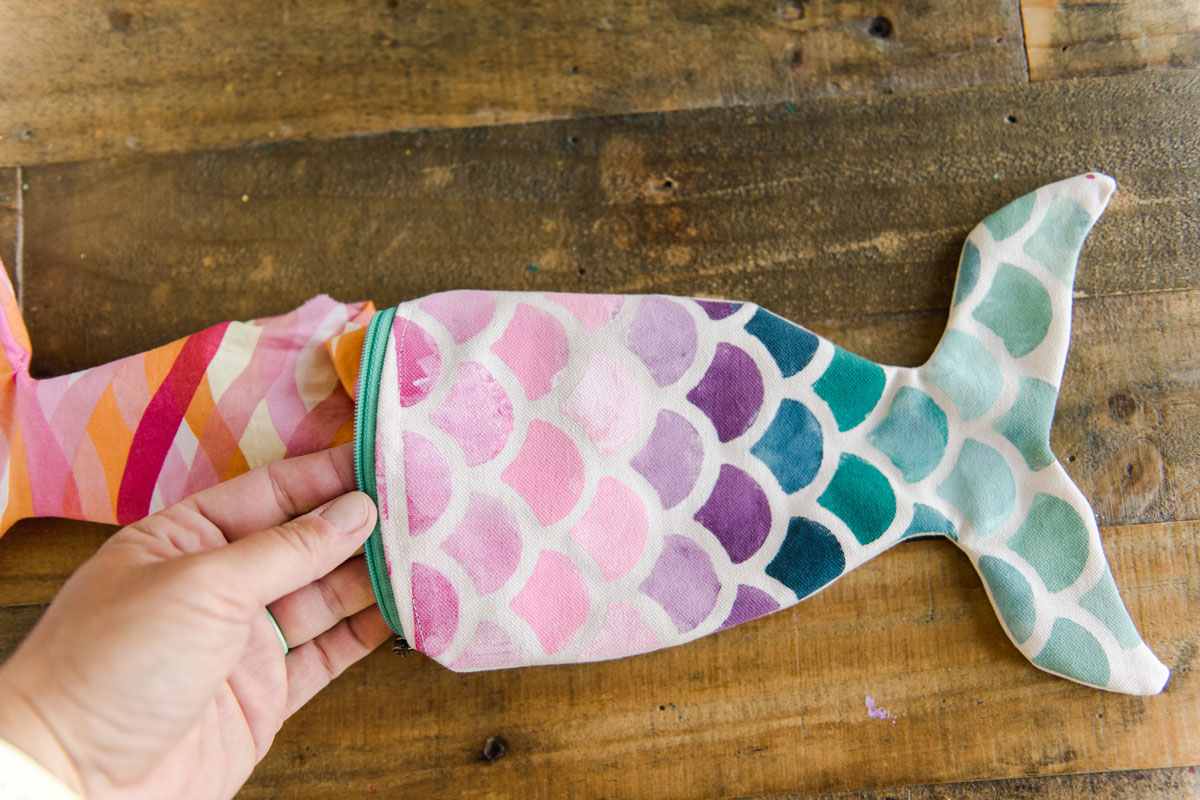
7. With your iron, press the zipper flat (as best as possible) and pull your fabric away from the teeth of the zipper. Then top stitch along each side of the zipper to keep the fabric laying flat.
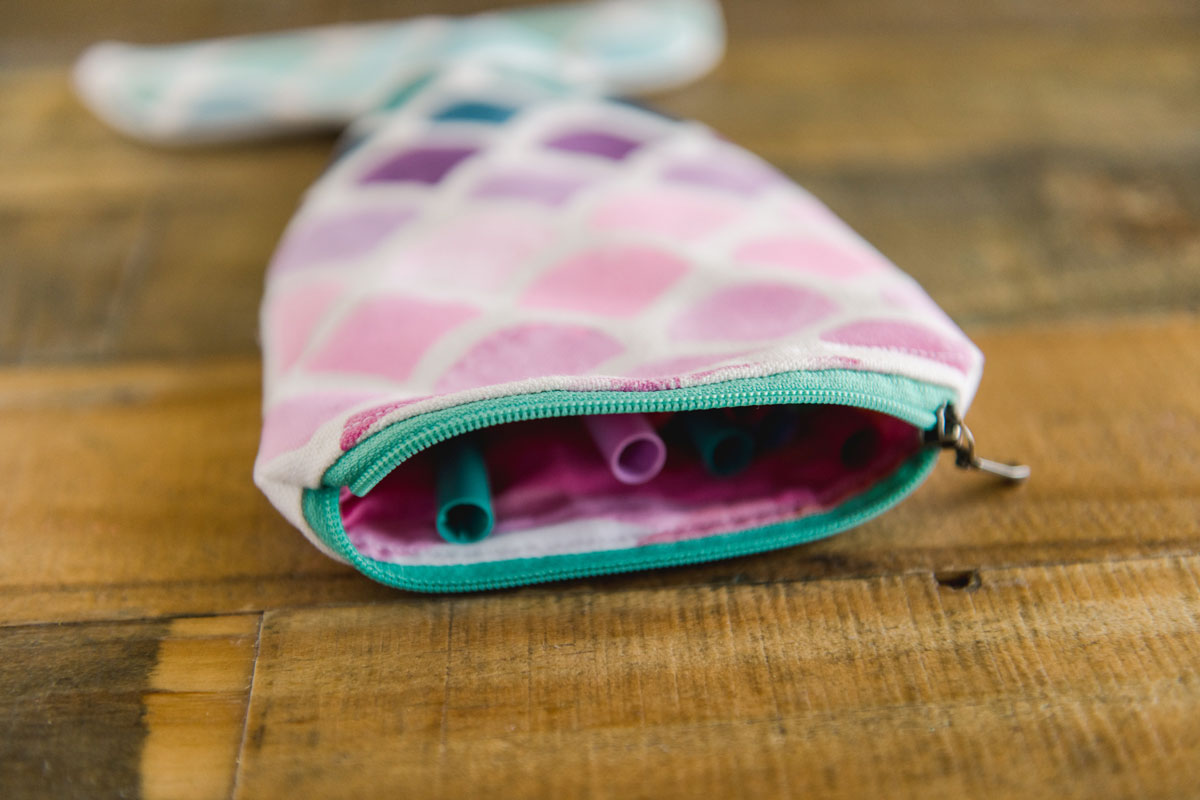
8. OPEN THE ZIPPER! This is *SUPPPPPER* important otherwise you won’t be able to open your pizza pouch! 🙂
OPEN THE ZIPPER!
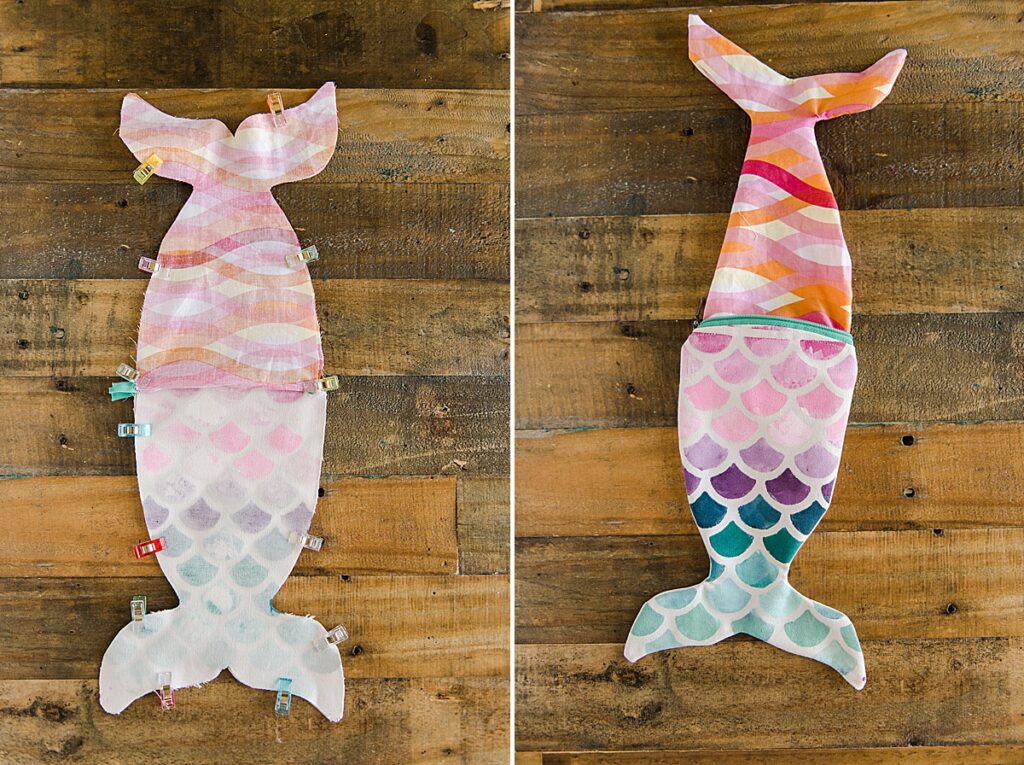
9. Open up your bag and then line up the 2 lining pieces with one another as well as the front mermaid tail pieces with one another. Pin in place, being careful to line up the 2 areas where the zipper joins (this is important to make sure the zipper is straight across when finished).
Stitch all the way around the bag, leaving a large enough opening on the lining portion to turn the bag (I left a side side portion of the inside mermaid tale open since there isn’t really a “flat” bottom) 🙂
10. Trim the very bottom side points of the mermaid tale and clip any other edges or bends before turning (you want this to lay as flat as possible and getting rid of this “bulk” will help)
Then turn the bag right side out and polk all of the corners and edges smooth. The turn the edges of the lining opening (where you pulled the bag through) inward to mimic a seam allowing and top stitch closed.
Press the bag with an iron and fill with goodies for yourself or your kiddo! 🙂
AND if you’re a mermaid loving person or have a mermaid loving kiddos, check out these other super sea-loving designs by these talented creatives:
- Tattoo Style Salty Mermaid by Persia Lou
- Print and Cut Mermaids by Amy Robinson
- Seashell Mini Pinata by Studio Xtine
- Mermaid Mode by Polka Dotted Blue Jay
- Mermaid Zipper Pouch by Oh Yay Studio
- Mermaid Scales Banner by Gina C. Creates
- Forever Mermaid Tail by Pen + Posh
- Make a Big Splash by Kayla Makes
- Salty and Sweet Mermaid by Poofy Cheeks Blog
- Mermaid Craft Container by Me and My Inklings
- Mermaid Scales Heart by Liz on Call
- Mermaid Box Cards by The Bearded Housewife
- Vintage Sunset Salty Mermaid by The Walnut Street House
- Mermaid Kisses and Starfish Wishes by Sunshine and Munchkins
- Sparkle Shine Make a Splash by Lettered by Stephanie
- Mermaid Vibes Only by Tam’s Sweet Life
- Vitamin Sea Mermaid by Spot of Tea Designs
- Mermaid Essentials by Simply Made Fun
- Free as the Ocean by Tried & True Creative
- Summer Mermaid by Polka Dotted Blue Jay
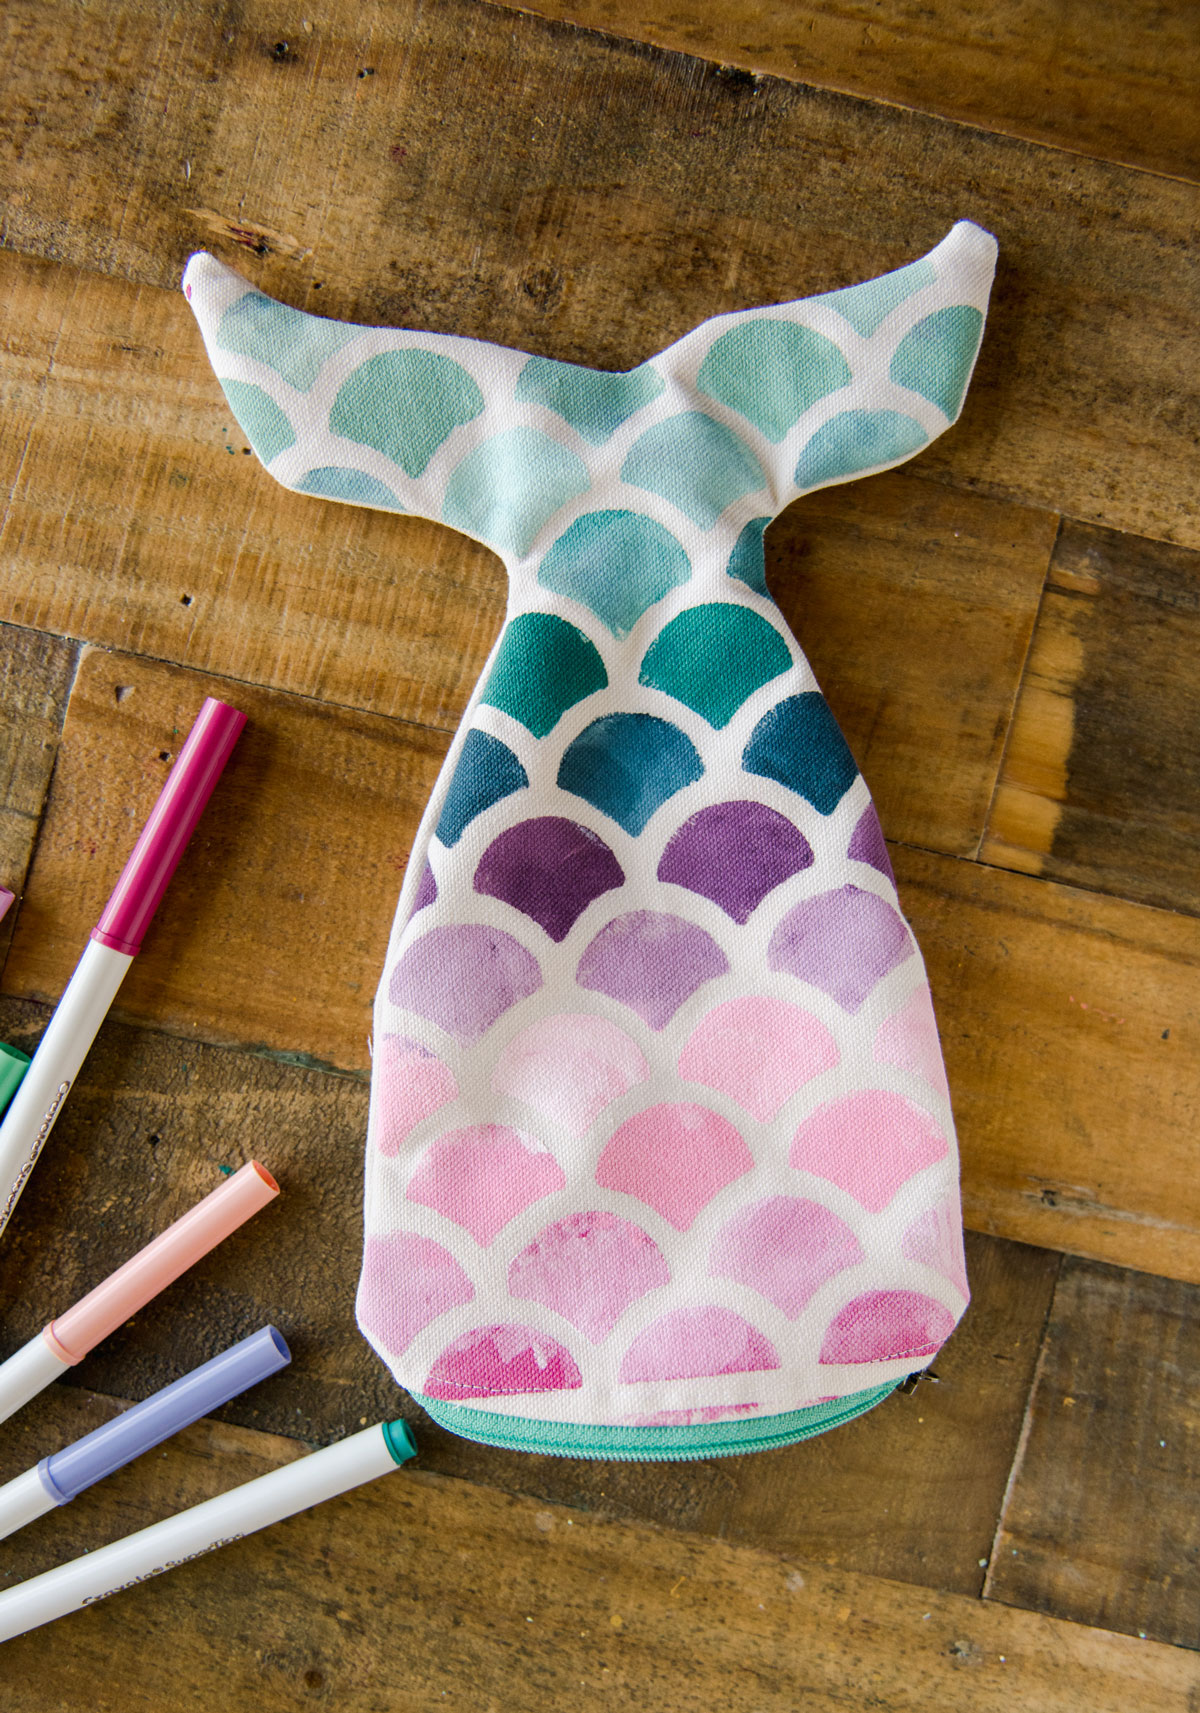
Seriously this is the coolest pouch I have EVER seen!!!
The ombre colors! The pattern! I want one tooooooo!